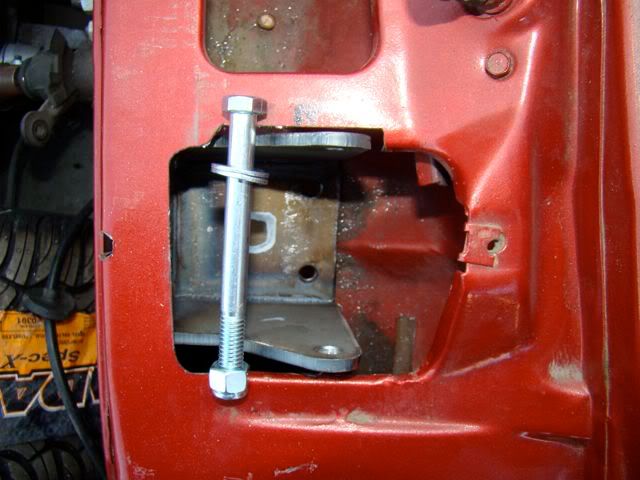
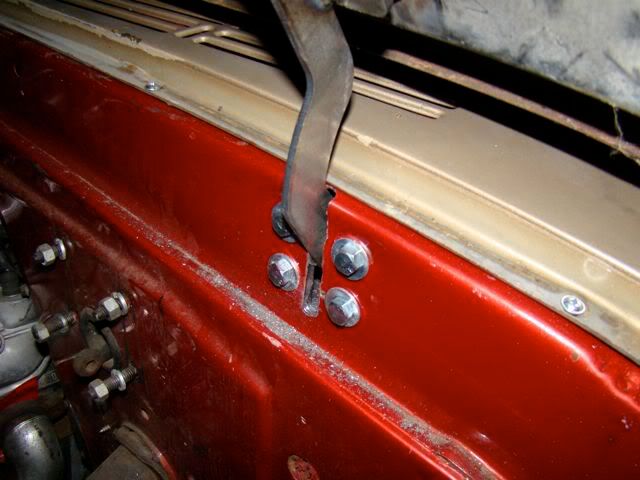
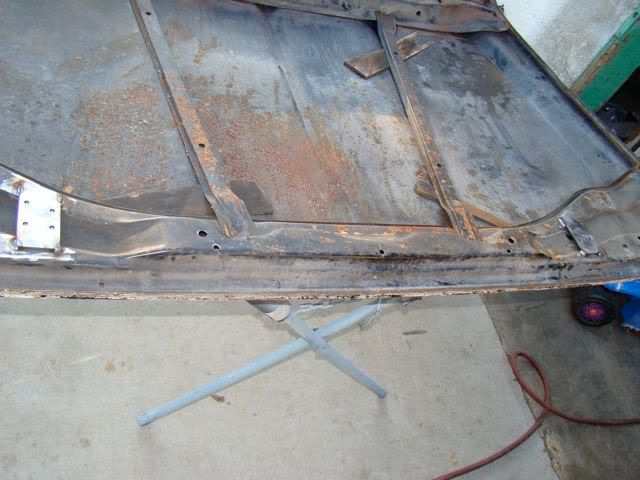
I then did the same for the drivers side but had to do a bit more trimming to get everything in place. After the face holes were drilled and the top of the cowl was cut to get the box inside I found that the holes did not line up. The box was tight against the left side of the opening in the cowl and as you can see in the pic it still has to go over a bit. So I trimmed more off the one side of the cowl until it lined up then I found I need to do a bit more for the bolt head to clear as well.
[IMG]
[/IMG]
[IMG]
[/IMG]
[IMG]
[/IMG]
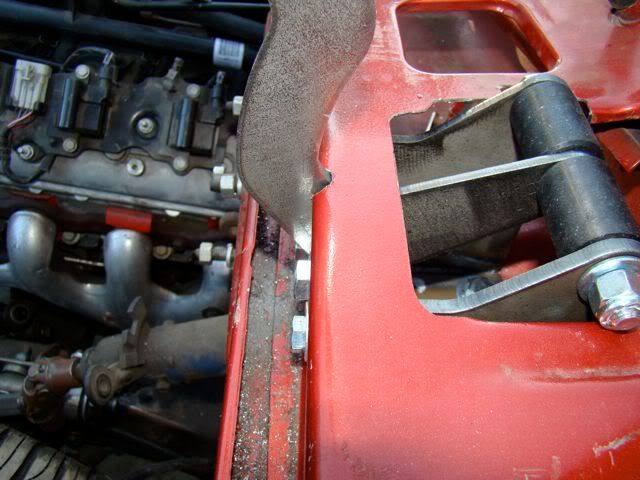
Next it was time to install the hinge arm before bolting in the boxes! If you bolt the box in first you will not be able to slide the bolts into place to hold the arms. Now their is a P and a D to the arms as well. The angle on the end of the mounting plate of the arm will slope in towards the center of the cowl. So imagine a line going from the head light to the center of the cowl and the angle in the arm will follow this same line.
Note
If you are already painted or going to be driving it for some time you will want to paint these parts and seal up the bottom bolt holes with silicone. To do this put a large amount of silicone under the box around the two holes and then put some more in the holes before inserting the bolts. Yes this is a bit messy but better that then water or rust coming through later.
So I assembled the arms on the boxes with everything setting in the cowl openings. Once the arms were bolted in I went ahead and started the 4 front bolts but before tightening them up I dropped the other 2 bolts in place going into the cabin. Then tighten them all up starting with the 4 in front and moving on to the 2 on the bottom.
Now that the boxes are tight you can set the tension on the hinge arms. What I did was tighten them up just so the arm will stay up and require a very small amount of force to lower. What this does is makes everything nice and snug and does not allow any slop in the operation of the hinges.
Next you will want to adjust the up travel of the hinge arms so they are even with each other like in the pic below.
[IMG]
[/IMG]
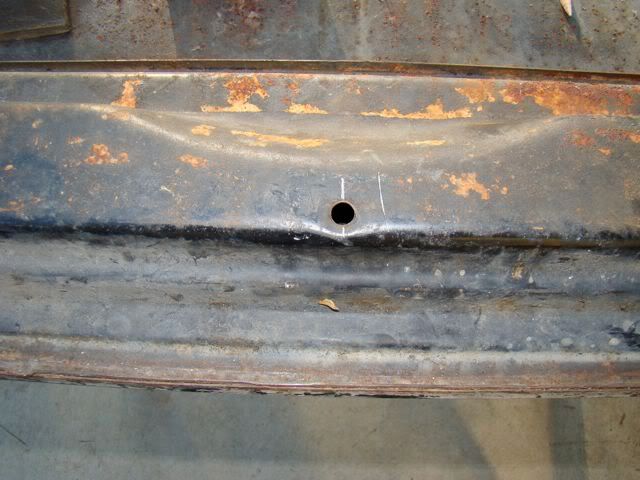
To do this you will take your die grinder or file and adjust the top of the slot so the arms will come up to the same point. You may want to sit the cowl back in place and see where the front edge is location to the top of the slot.
You do not want the slot to go into the cowl panel so make a mark at the front edge and work towards that.
[IMG]
[/IMG]
[IMG]
[/IMG]
Once you are happy with both sides you can bolt the cowl panel back in place and start on the hood.
Note
The very first thing you want to do is make sure all the bolts can be screwed all the way into the mounting plate. If you have any problems you should run a tap through the hole first. I had one that did not go and found out after it was welded in place. I have already spoke with Nate about this and he is fixing this so it will not even be a possible problem on later kits. Also note their is a passenger and a driver side to these plates as well. The angle on the plate will follow the angle on the hood brace.
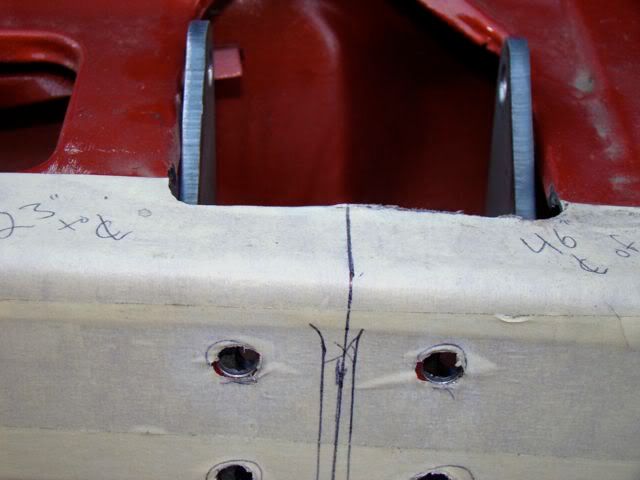
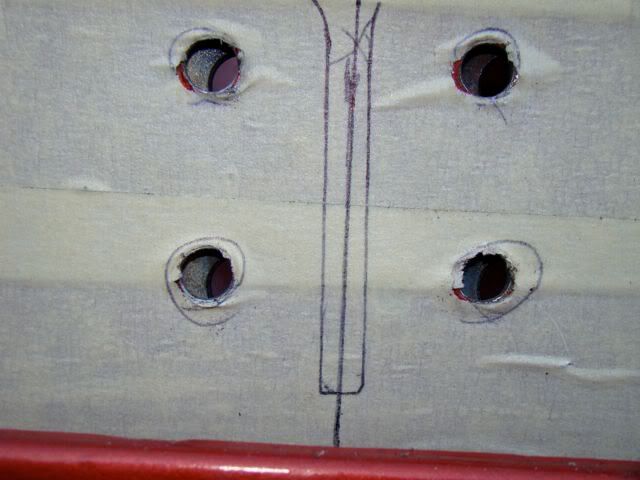
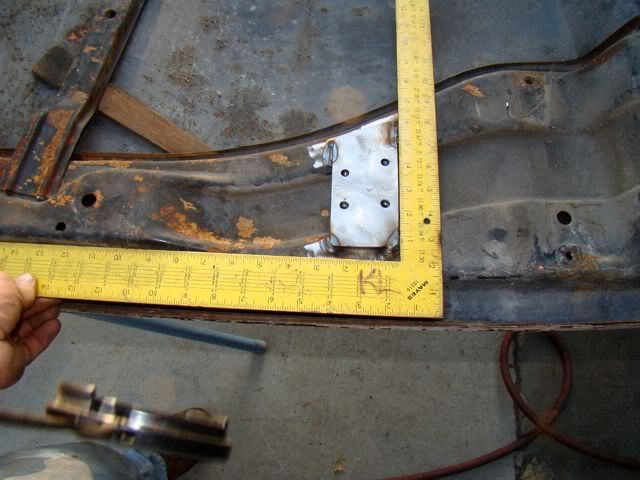
So find a good place to lay your hood up side down and grab your tape measure. You will once again want to find the center of the hood along the rear brace. Their is a factory hole that is almost exactly center but double check it before moving to the next step. Once you find center you will want to measure out 23" each way just like on the cowl. This again is the center of the hinge mounting plate but since these plates are 2 1/2" wide now measure to one side 1 1/4" so you have a good mark to line the edge of the plate up with. Put the plate down and trace around it withy a pen then remove the plate and clean all the paint off this area so you will get a good weld in a later step. Now re measure and place your marks one more time (don't forget the 1 1/4" offset line) and using a framing square you will want to make sure these plates are square with the rear of the hood and 1" in front of the back of the brace. This should also be about 2 1/2" from the very back edge of the hood. Once you have this I recommend just doing one tack weld per piece first. After both sides are tacked re-check your 46" number to make sure it is correct then finish welding. I only did about a 1" weld in each corner and I feel that is more than enough to secure the hood for good.
[IMG]
[/IMG]
[IMG]
[/IMG]
[IMG]
[/IMG]
Kevin
LFD Inc.