Thanks for the kind words Joe and Bobby
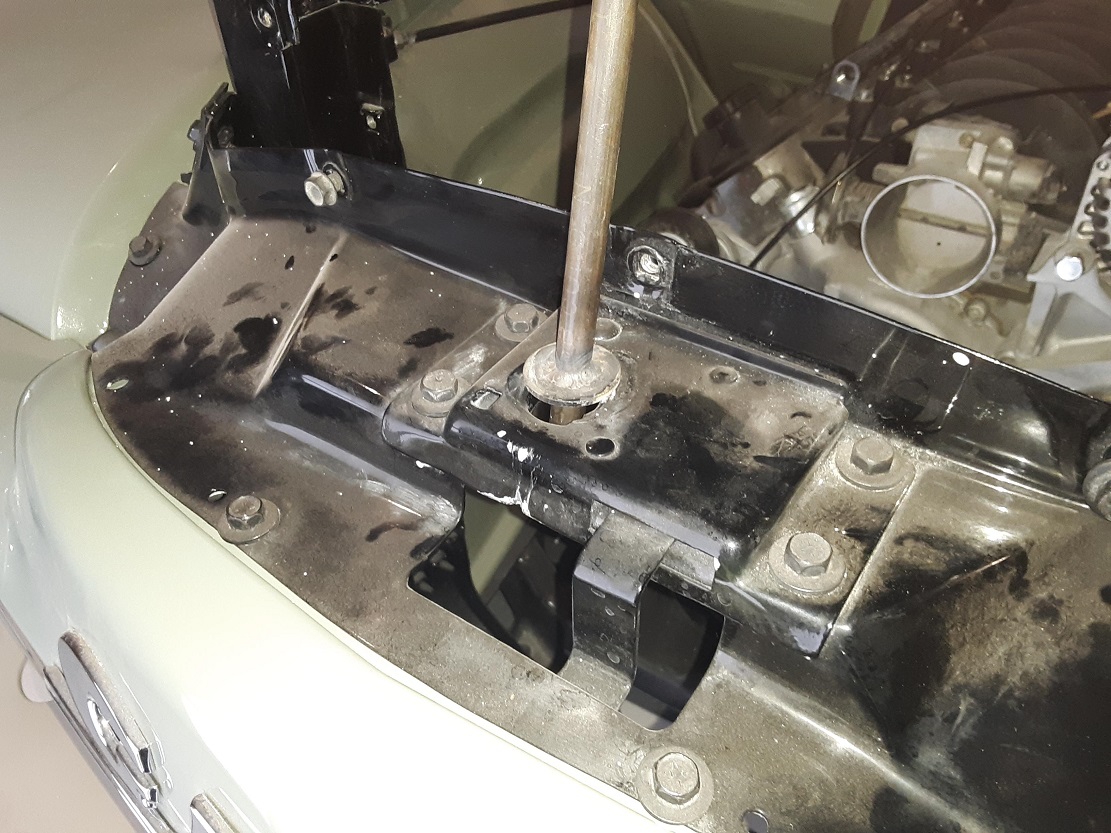
Here's something for you Joe - a hood prop, unlike a broomstick, that cant inadvertently pop out if it's hit. Here's the top of it with a cup that the spring goes into to hold it.
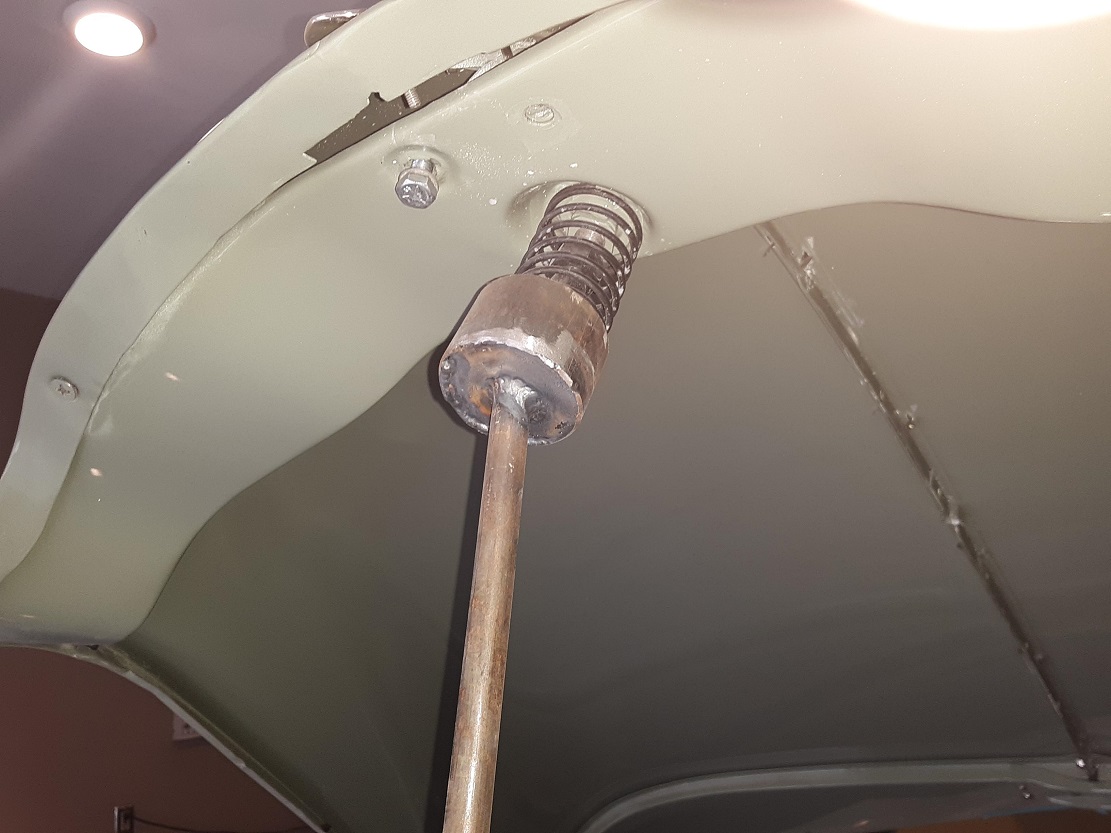
Here's the bottom, with a fender washer welded on to it to keep it from falling into the hole for the latch pin
I'm finally getting close to getting the pedals how I want them. I shortened both the clutch and the brake about 4" to bring the foot pedal to about 4-5" from the floorboard. The clutch pedal is on the floor when the actuator rod on the clutch master is at the bottom of the bore. I re-welded the short arm on the brake pedal to get the leverage ratio correct for the hydroboost too.
Here's a shot of the pedal setup.
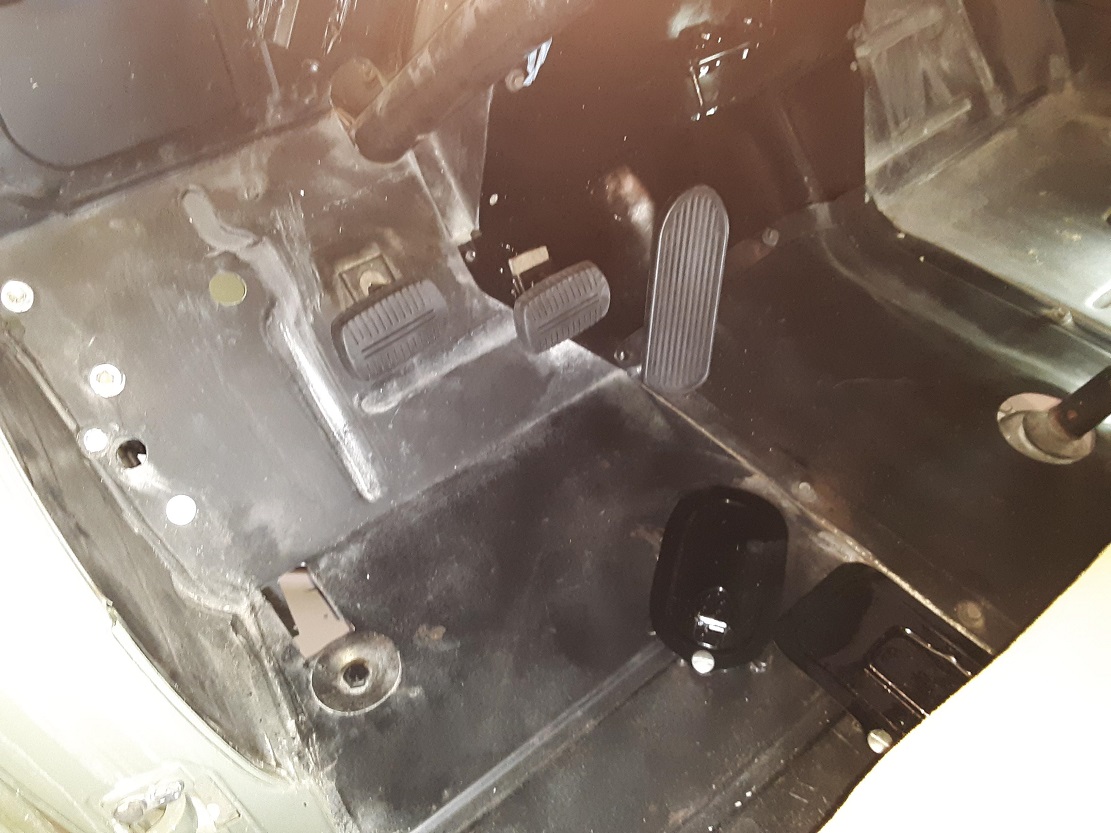
I made a actuator lever for the gas pedal so I can actuate the throttle (using a bicycle brake cable) I tried having a lever at the bottom of the gas pedal that would actuate the cable, but it hit the bellhousing (because my engine sits so far back), so I had to have the linkage visible in the cab. Oh well, it looks mostly stock. The pedal rides on a ball bearing roller wheel for a sliding-glass door I bought at ACE hardware.

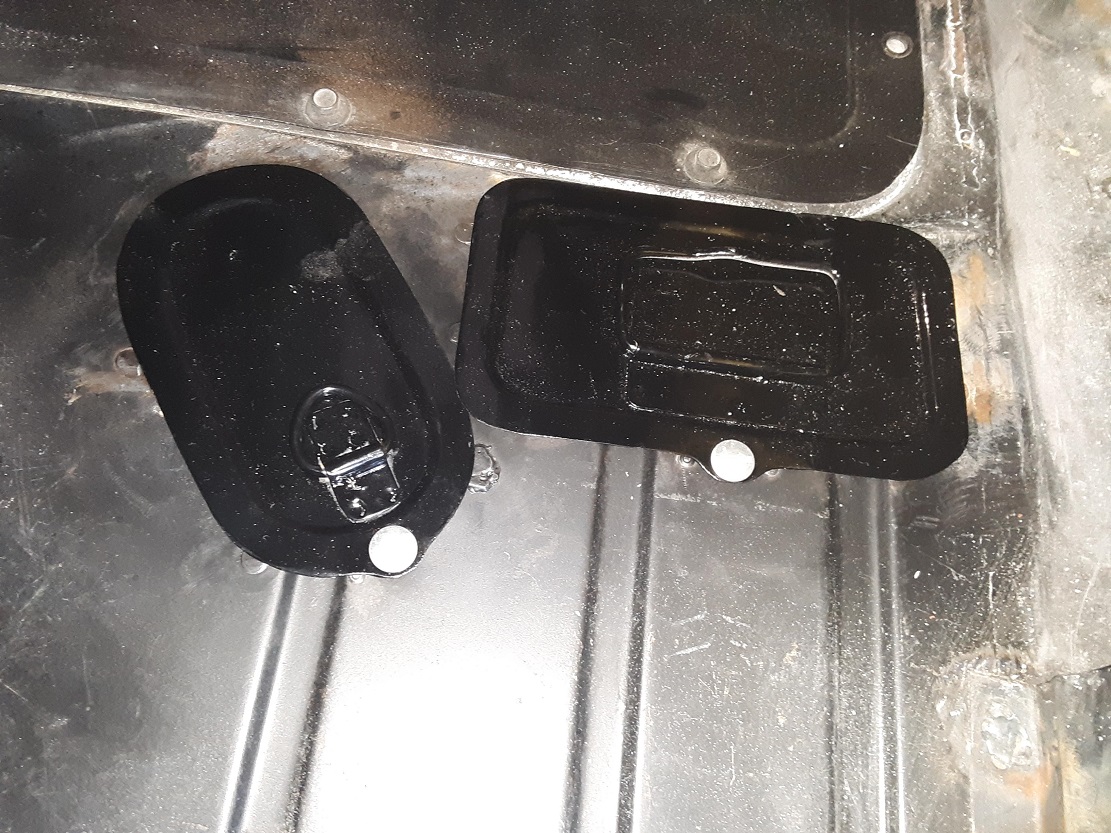
The access panels for the clutch master and the hydroboost linkage are under these access covers, secured with Dzus fasteners
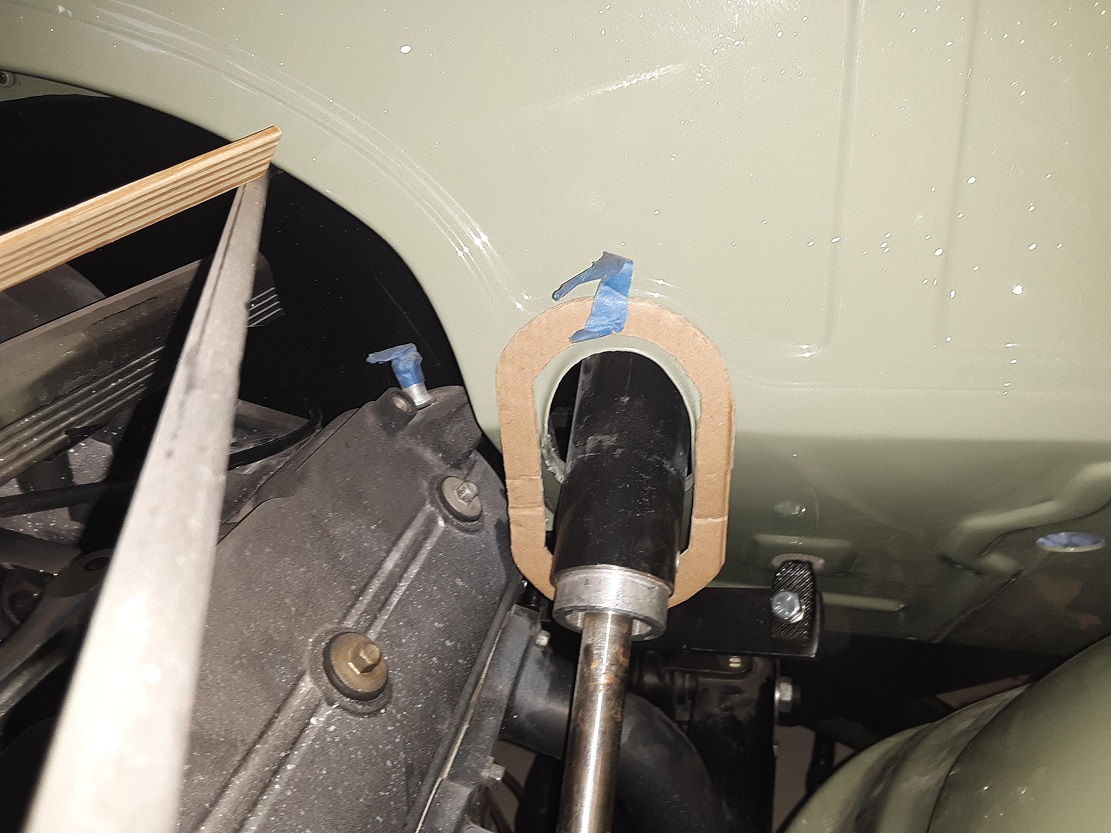
I had to modify the trailing arm for my iRS to clear the master cylinder. While I was under the truck, I also set my pinion angle at 3.5 deg up, and adjusted the engine angle down 3.5 deg so the pinion angle and engine angle are parallel. When I got them to withing 0.1 degree of each other I called it good. Here's a pick of the reworked trailing arm support (still need to clean it up a little and paint it) and the Corvette master and Astrovan hydroboost in the background.

I ordered a emergency brake cable from Control Cables for the Jag IRS. Here's a shot of the cable installed-

I was planning on using the brake handle off of a Jag XJS I'd bought at the self serve junkyard, but it is so big and clunky, I don't see how it is going to fit in nicely in the cab. I got a handle off of a forklift in the forklift junkyard (didn't even know there was such a thing till I started to look) The fork lift parking brake was kinda cool because it had a handle that could turn and take up slack/wear in the cable. Here's both handles.

I really don't like either solution. I was using a friend's Mazda a couple months ago and it had an electric parking brake, and I wondered if they were available in the aftermarket. And they are, but are a little spendy at around $450. YouTube shows a couple of DIY electric parking brakes, and it convinced me I should build one myself. Going to use an actuator like this one - 330 pounds force and a 4" stroke - about $50.
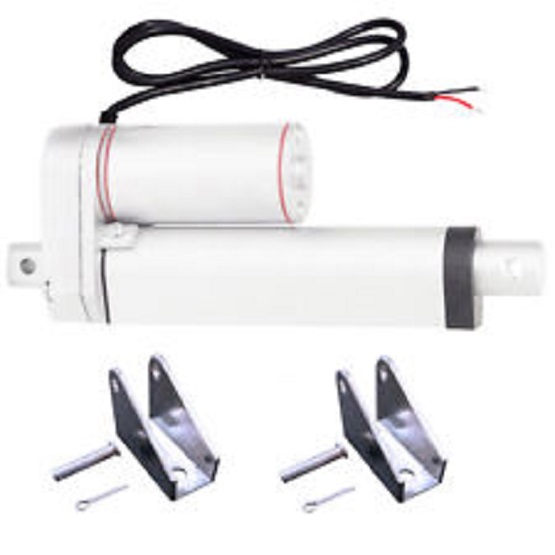
Need to put an inconspicuous DPDT switch in the cab to actuate it. It might even become part of the truck's security system
My steering column is out of a 59 or 60 Cadillac. I took it apart and had the shaft cut for a double D at the end and put in a thrust bearing. The hole in the floorboard is about twice as big as it needs to be for the Cadillac column so there's a gaping hole in the firewall to fill. I'm planning on having a leather boot (kinda like a shifter boot) to seal the cab around the column Here's a bezel I cut out of 304 stainless that will hold the boot in place against the firewall and the support to hold the column for the floorboards made from a piece of slit schedule 40 pipe and some tabs
First the mock up in cardboard of the bezel-
The bracket and trim bezel- (the bezel will get bent to conform to the firewall contour)

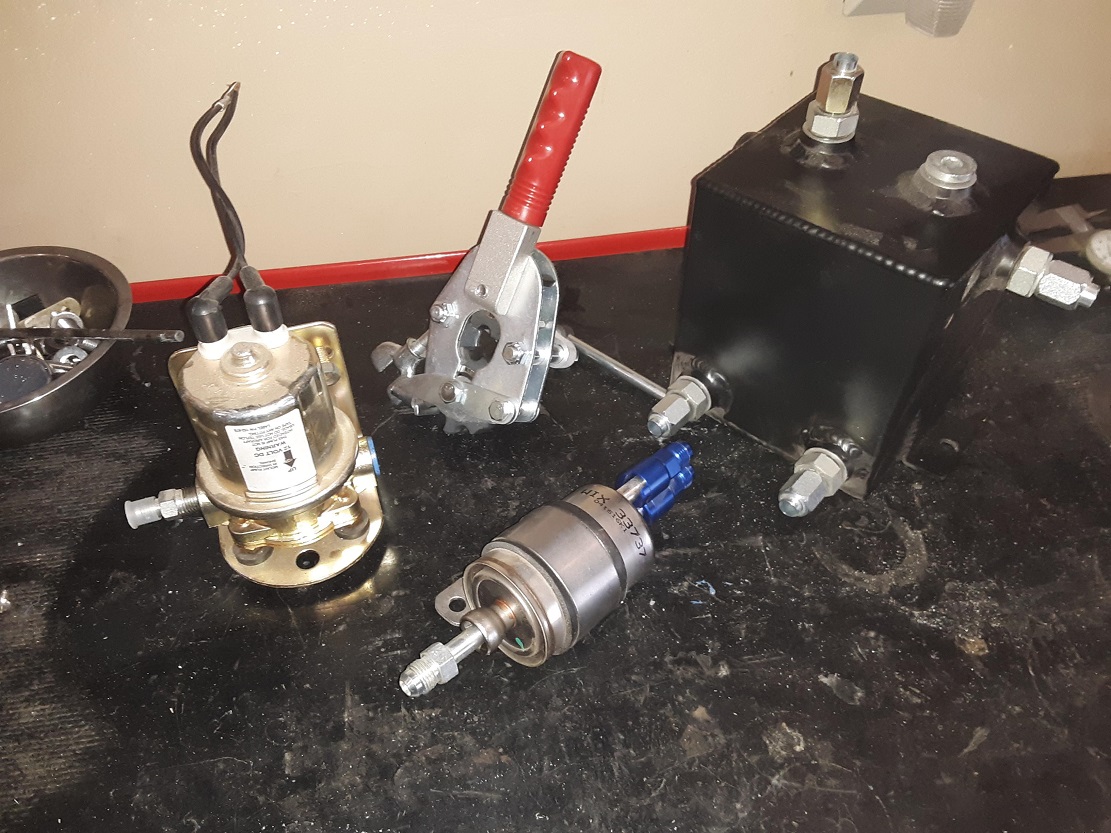
Other posters tell me I'm out of step with the best technology if I don't have an in-tank fuel pump. They are probably right, but I'm going to do it the way I've always done it and spend the same on a half a dozen parts for an external system as I would have for the in-tank pump setup.
Here's the components I plan to use - boost pump, swirl pot and Corvette regulator/filter. The 255 Walbro I had squirreled sway for this truck got used on the sandbuggy (which could have set the house on fire when I started the buggy and left it to warm up in the garage. Ethanol in the gas had eaten the pump housing and it dumped a gallon or two of gas on the floor next to a running engine while I went into the house- maybe there's a lesson there on ethanol,external pumps and fire hazard), so I'll need to buy another pump. I plan on running all AN-6 hard line for the fuel system so I bought a Parker flaring tool too.
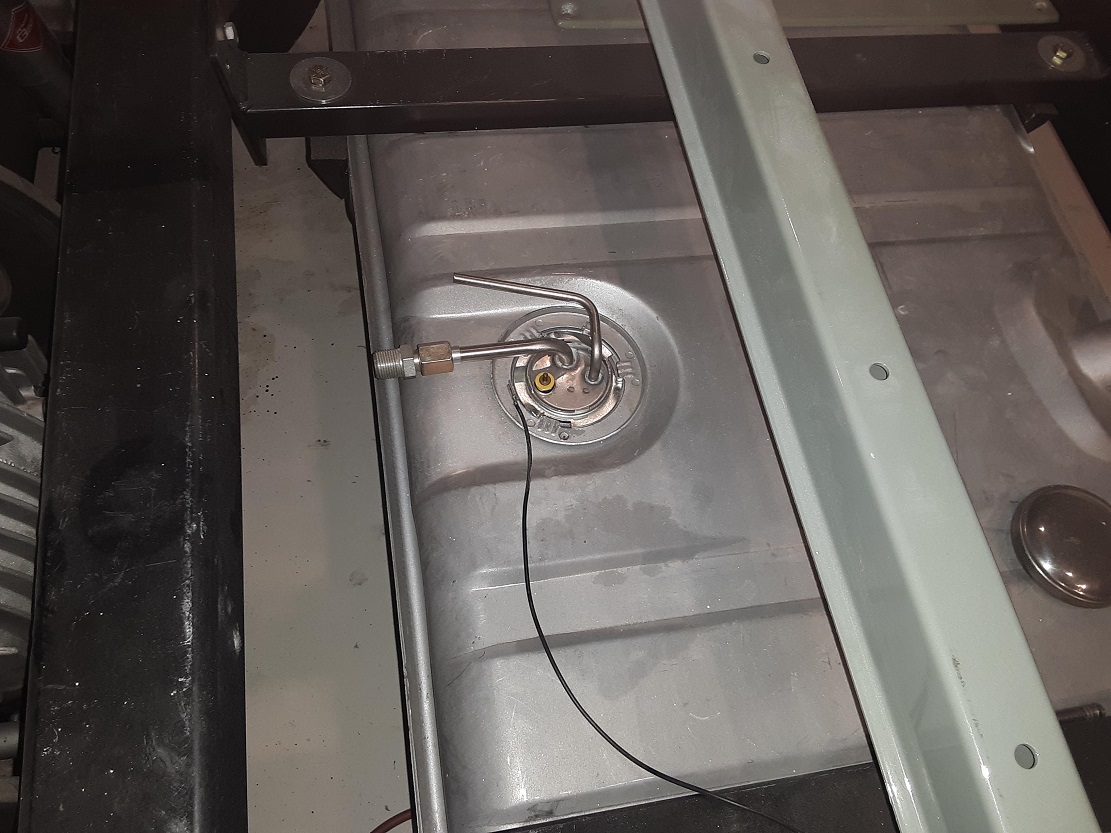
The gas tank is out of a second gen Camaro. The big block Camaro's had a fuel pickup with a suction line and a vent line, and my plan is to use the vent line as a fuel return from the swirl pot to the tank. Here's the fuel tank with the sender's 3/8" line fitted with a swagelok fitting, but I still need a swagelok for the 1/4" line. I tried just flaring the tube with the Parker tool, but the stainless line cracks so easily that the swagelok will be safer.
Well, that's about it for this update. I putz away at working on the truck several days a week, but decided that I was never going to get it done at this rate. The metal fabricator that did all my sheetmetal work and painted the truck said he'd come over on Saturdays to help. His best guess is that we can finish the truck in about three months. The to-do list is about 3 1/2 pages of single spaced typed task - I'm not so sure about three months, but it sure as hell will be faster than doing it myself.
I've been working on my wife's MG TD too. Not AD truck related but here's a pic of the engine I built for it - 1250cc and a whopping 54 HP.
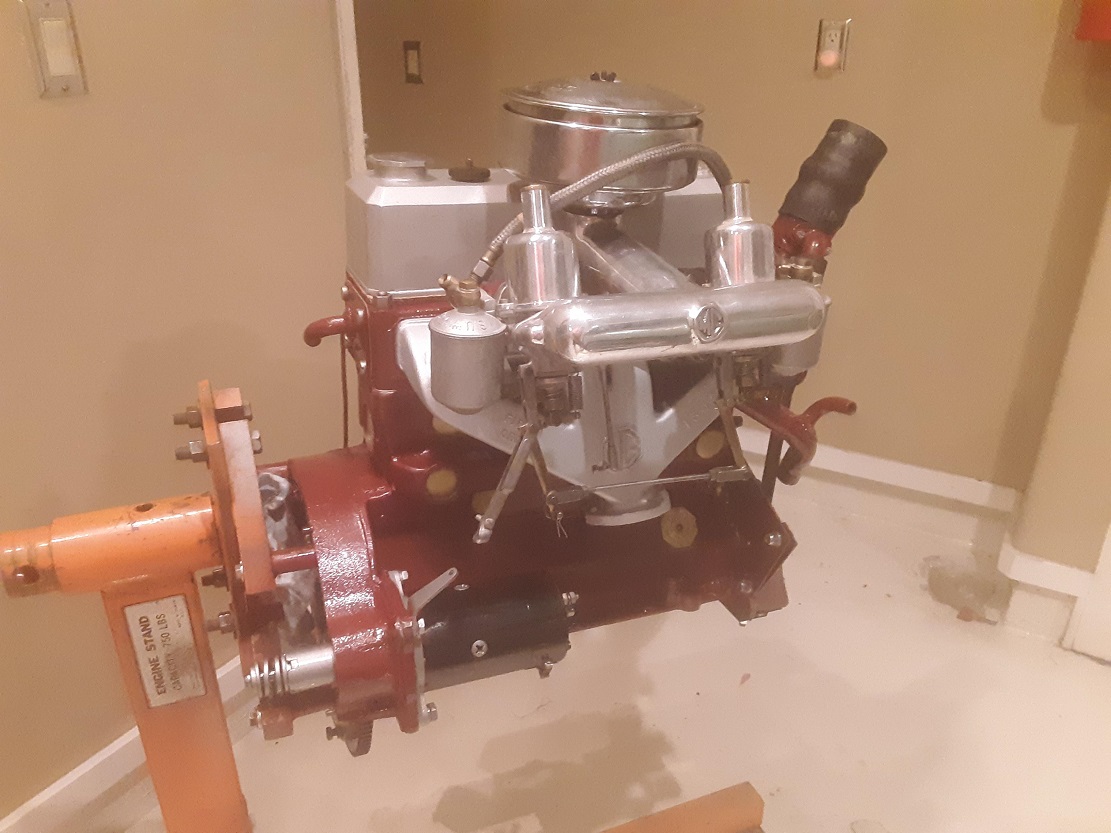
Bought this car with engine assembled but the rest of the car in boxes. On of the boxes had all the parts you'd normally replace in an engine overhaul and the seller didn't know for sure but thought the motor was fresh. It wasn't and $1500 later, here I am. At least I know what I've got now.