Transmission Overhaul Part 2
The transmission is back together. All I need to do now is finish painting it and put it back into the truck. It is now an RTO-6610. Have a look at the photos below and see if you can tell the difference.
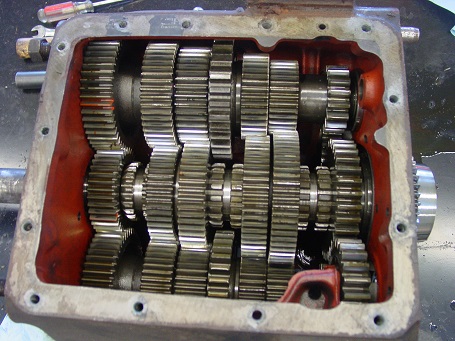
Before:
After:
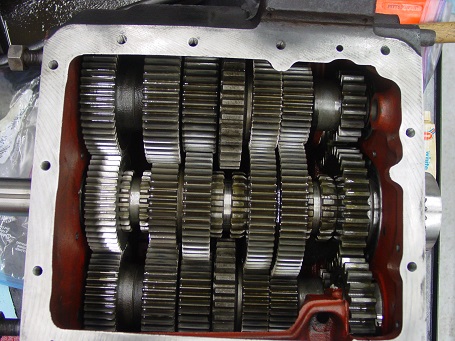
See the photo below for an explanation of the difference.
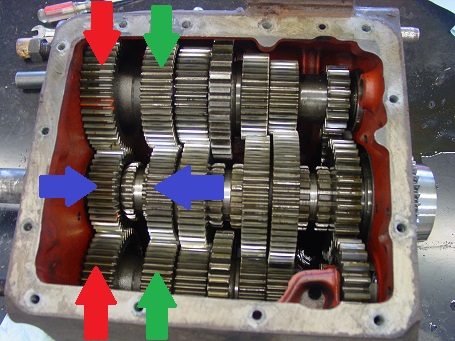
The gears with the red arrows are swapped for the ones with the green arrows & vice-versa and the gears with the blue arrows are replaced.
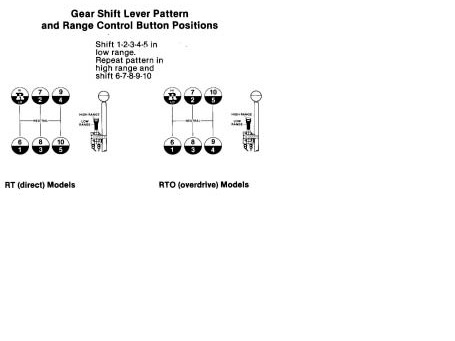
This modification converts what was 4/9 (right & up) to 5/10. See the diagram below for the change in the shift pattern:
Every time that I complete an overhaul, I learn something. Here's what I learned from this overhaul:
1. RTFM (I already knew this one; but, it's worth repeating) - Fuller has wonderful manuals on-line and they are free. The manual for this transmission is the most complete that I have ever seen.
2. Take lots of photos and bag & tag the parts (I knew this one too).
3. Expect to replace the synchronizers. There are synchronizers for the air shifted auxiliary section. New synchronizers were not included in the overhaul kit. The ones in my transmission were trashed. I had to wait a week for them to be delivered once I found that they were bad.
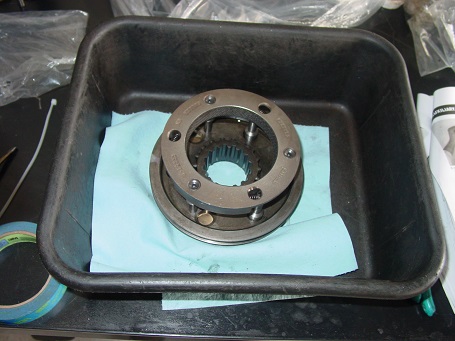
4. Assemble the synchronizers in a tub. The synchronizers have 3 very strong springs. To assemble them around the sliding clutch, they must be compressed. If you get the synchronizers slightly cocked, one of the springs will shoot out. In my case, it went 15 feet and rolled under something too heavy to move, leaving me laying on the floor with a magnet to retrieve it.
5. When installing the countershafts into the auxiliary section, slide the shafts in first, align the timing marks and then start the bearings. The instructions say to start the bearings into their registers first; but, I could not see the timing marks on the teeth with the bearings started. By sliding the shafts in first, I could see the marks through the registers.
Once I have re-installed it, I will start working on the rear support.