Part 2
Sheet metal Modifications
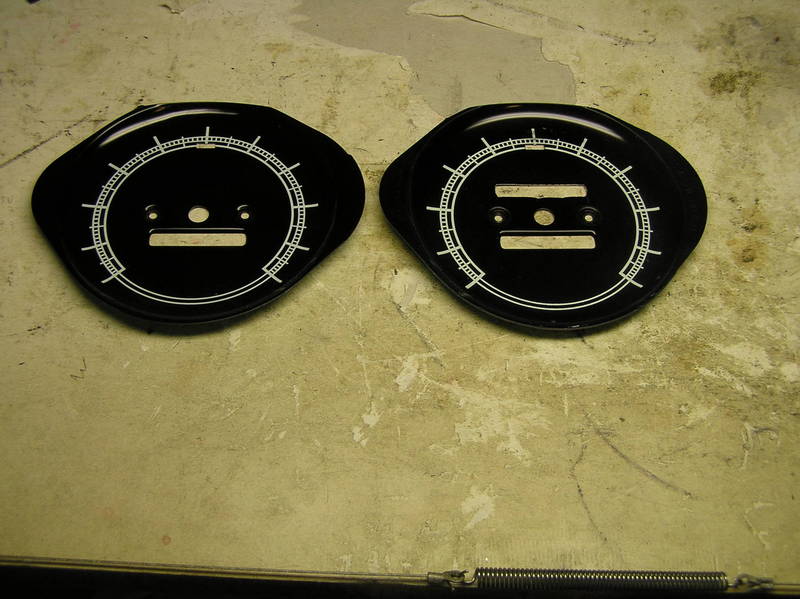
Dial Face
A new dial opening will have to be made to accommodate the relocated odometer. This opening is the same size as the stock opening, and centered the same left-to-right. The bottom edge of the new opening is 0.700" above the top edge of the stock opening. A very simple way of making this opening is to use a factory trip odometer face & attach it via the dial mounting hole with small screws & nuts on top of the truck face. Since my donor speedo did not come with a face, I used a 78-81 Firebird trip sppedo face as just described as a template for the cutout. I drilled three small holes & then filed with jeweler's files until the openings matched. After smoothing the edges, be sure to use some paint on the edges of the opening to prevent rust.
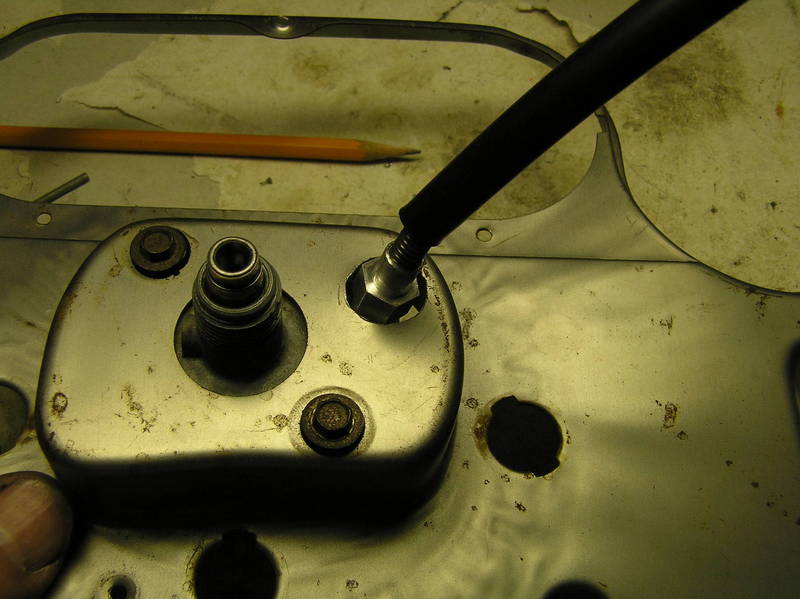
The other modification will be the back tin. You will have to drill a hole for the reset cable to come out. Use a gutted out speedo frame & drill with a small bit to locate the initial hole, then use a step bit to enlarge it to final size. Because of the angle that the cable comes out, you may have to file the opening so the cable will thread freely into the back of the speedo as shown below. You may want to make a gasket to seal around the cable after installation.
The final modification to be done is drilling the bezel for the reset knob end of the cable. The cable is held to the bezel by a 3/8"-24 threaded barrel & nut (comes with cable). Mark the location as shown below, then drill first from the back side to one size under with a step bit & final drill to snug fit from the front.
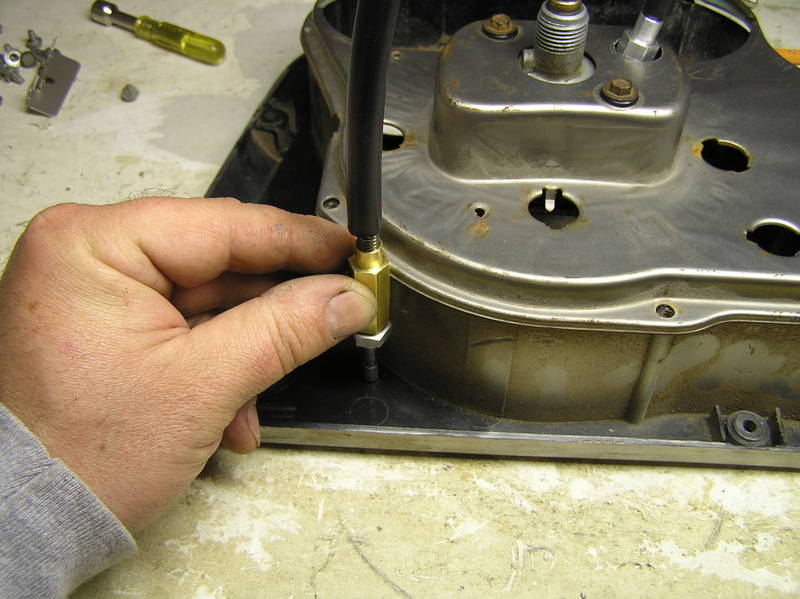
Attach the cable to bezel & put the knob on. Test the completed assembly before putting the speedo face back on as shown below.
If everything checks out to your satisfaction, your almost done.
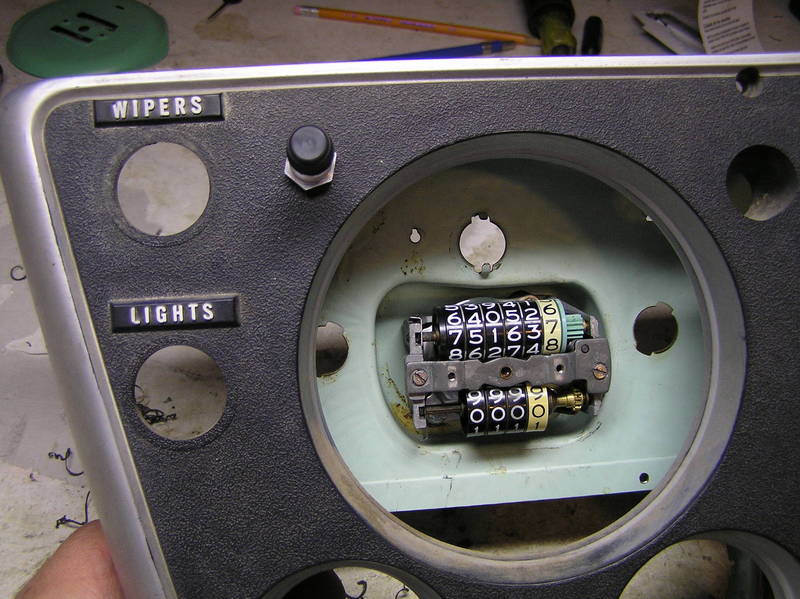
You may want to make light baffles from 1-1/2" long by 3/8" wide strips of thin metal or black-painted paper glued to the backside of the speedo face running up and down at right angles to the axis of the odometer reel. I attached mine with loctite superglue. If you don't make these baffles, the first time you drive at night you'll understand why.
Once everything is to your satisfaction, re-attach the speedo face & put the hand back on & re-assemble the complete cluster & install in the truck.
Using your trip odometer is very easy. As you might have guessed, to zero, push the knob in and turn clockwise till zeroed. You can also advance the trip odometer to any value you wish by turning it counterclockwise.
Good luck & I hope you enjoyed this project!