Back when I replaced my pitiful Zoner alternator with a real alternator, I also mentioned that I had removed my AC blower/evaporator stuff from the engine compartment as well as the stock under-dash AC crap. This is getting replaced with a system that will fit entirely under the dash. Of course, I could have bought a system from Classic Air or Vintage air, but that wouldn't have been any fun. Besides, I wasn't really happy with their stuff. That being the case, I elected to roll my own.
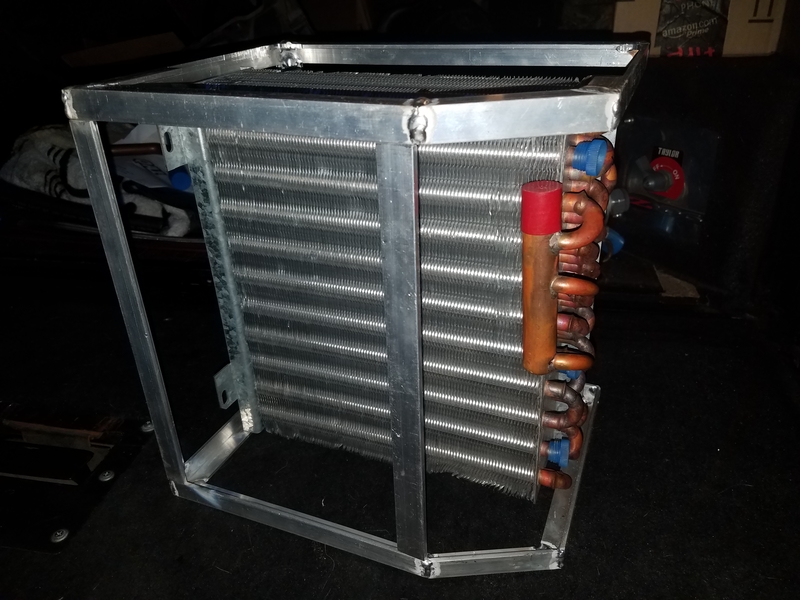
One of the things I didn't care for with the Classic and Vintage systems was the meager evaporator size of these units. I got an evaporator from a mid-2000's Navistar application that was the right size, but needed some plumbing mods. I cut off most of the suction pipe and un-brazed the distributor tubes from the core, and then after much measuring and thinking I built an aluminum skeleton for the evap housing:
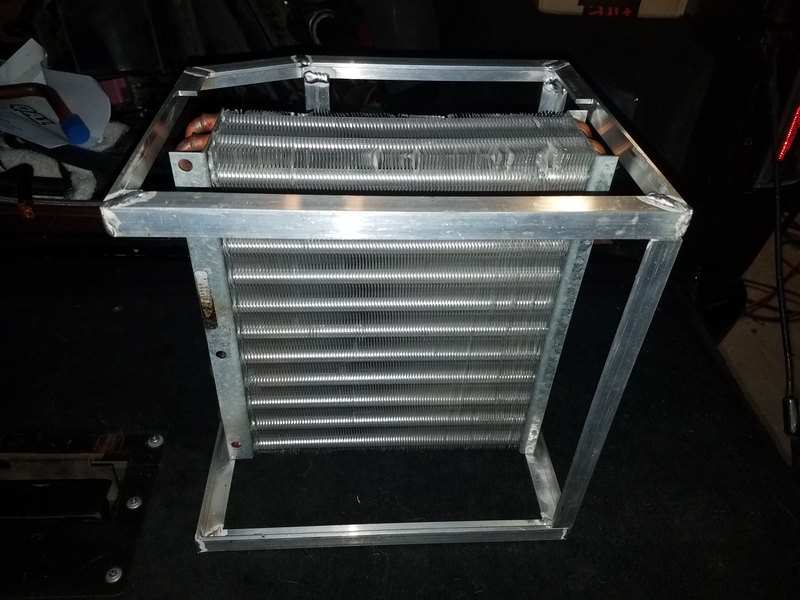
This part fits where the glove compartment resides, with the side with the beveled edge going against the firewall. It will be entirely enclosed with ABS. The blower will blow the air into the back perpendicular to the flow through the core. The air will then flow 90° through the core before changing direction 90° again and flowing out through the side. This will be easier to see once the enclosure is completed. At that point the air will enter a separate, attached enclosure that will house the heater core and the various doors and duct outlets.
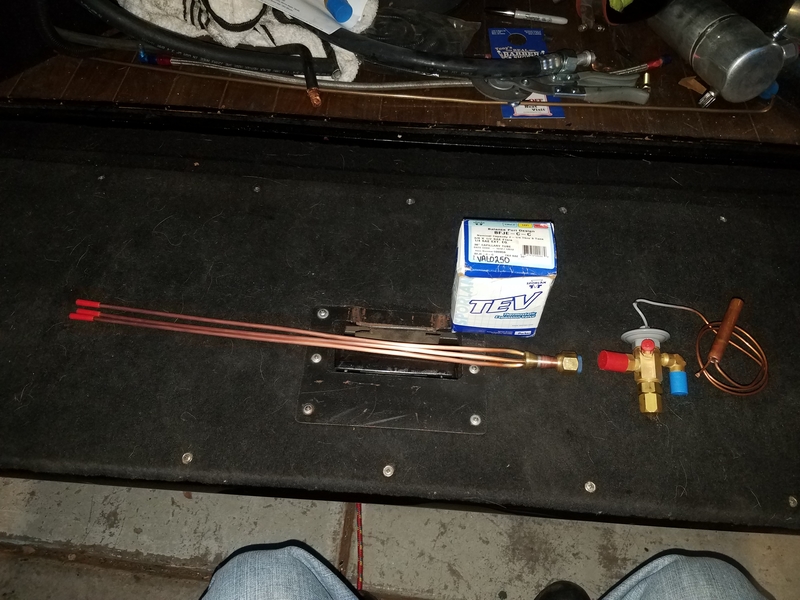
Because I wanted the engine bay as free of clutter as possible AND I wanted my AC to be as efficient as possible, I chose to use a thermal expansion valve (TXV) instead of a simple orifice tube. This eliminates the accumulator, which would have to go under the hood on the firewall, and provides actual refrigerant control. Back in the good ol' days, automotive TXV's were made by outfits like Parker and Alco, who also made TXV's for stationary AC and refrigeration. However, they were simple, rudimentary designs built to a price point. Nowandays, all automotive TXV's are made in China, and the quality and reliability has gone down. While they get the basic job done, they tend to be quite variable from sample to sample and they usually "hunt" badly at low evaporator load (i.e. when the blower is on low speed), alternating between starving and flooding the evaporator. Sometimes the flooding is severe enough that liquid refrigerant makes it back to the compressor. At high loads they often run somewhat starved, with resulting high superheat and less than stellar vent temps. Knowing this, I chose to use a real AC/refrigeration TXV from an American manufacturer.
The distributor that came on this coil was designed for an automotive TXV with an o-ring sealed output, while the Sporlan TXV I am using has SAE flare fittings. That combined with the fact that the stock distributor was in the wrong physical location for my needs and not easy to relocate is why I removed it and it;s tubes. Because there are so many different configurations of distributors they are not something that HVACR wholesalers typically stock. Fortunately, I found a seller of surplus NOS parts that had a distributor from a Rheem R-22 heat pump of a suitable size with suitable feed tubes already brazed on, and it was cheap. When I got it, it turned out that the distributor was a Sporlan branded part. Cool! The feed tubes were 3/16", which are a bit smallish for an R-134a system, but the Sporlan software tool showed the pressure drop to be acceptable for my overall system design. I went ahead and brazed a 1/2" SAE flare fitting to the distributor inlet for attachment to the valve. Here's the TXV and distributor assembly, ready to be brazed/assembled onto the evaporator once I figure out exactly where I want to put it:
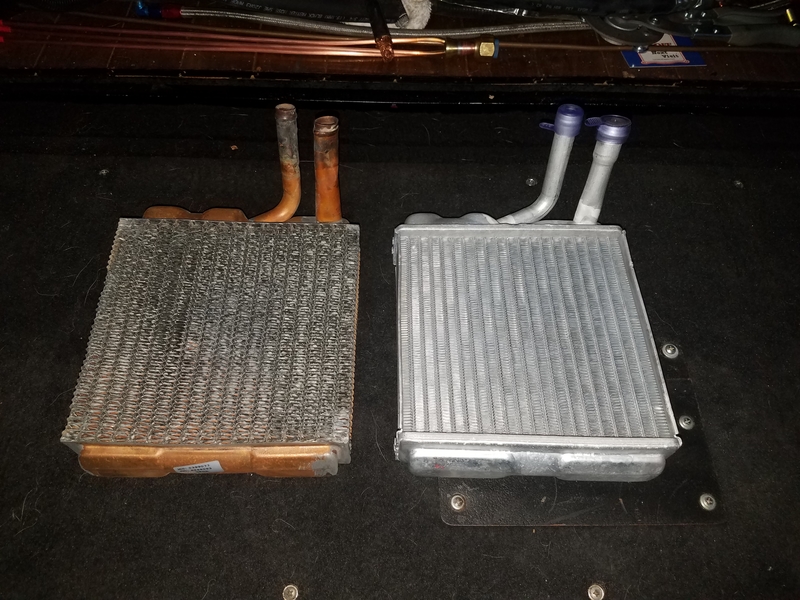
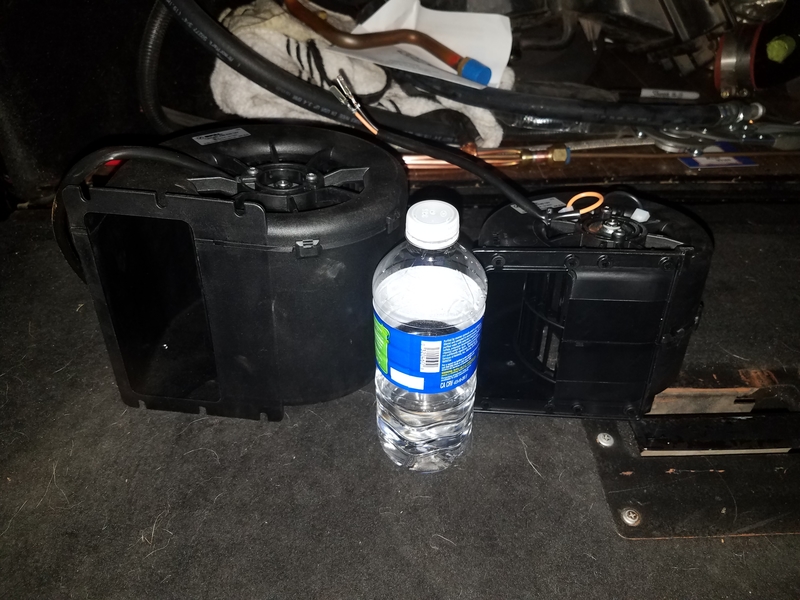
When I pulled the OE HVAC unit out of my truck I salvaged the heater core from it. I had replaced it several years ago, and because I rigorously maintain my cooling system it was still in excellent shape. Well, excellent shape other than the somewhat crushed tubes that happened while I was trying to remove the heater hoses

Still, the tubes are easy enough to straighten out if I so choose. I also got a new all-aluminum heater core. I am still undecided as to which core I want to use. The aluminum core is obviously more restrictive to airflow compared to the copper/brass unit, while the copper/brass unit has the disadvantage when it comes to transferring the Cummins' meager engine heat to the air flowing through it. If I was running a gas engine with a 195° thermostat the choice would be easy, but with the Cummins' 180° thermostat and limited waste heat production I am leaning toward the aluminum jobbie.
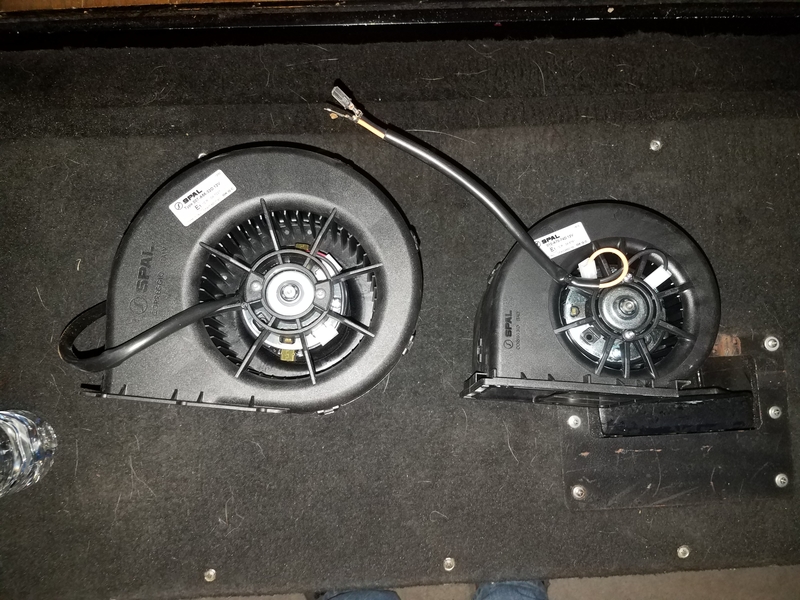
Finally, there is the blower. Here, the choice of manufacturer was easy. In the pic below you can see two blowers. The smaller one is the one that Classic and Vintage use in their units. The big sumb***h is the one I am going to use! I figure I have the space to fit it, and I can always limit the speed of the big blower whereas I can't add more speed to the small one. Plus, for a given airflow the bigger blower is quieter.
That's it for now. Stay tuned as the AC-from-scratch adventure continues!