This is a 2 person job. I wouldn't have been able to install this tank without the help of my buddy Russ. Even still it took us several days because I stoically didn't want to remove my bed after we took his off of his 81 C10...and that involved a lot of cutting
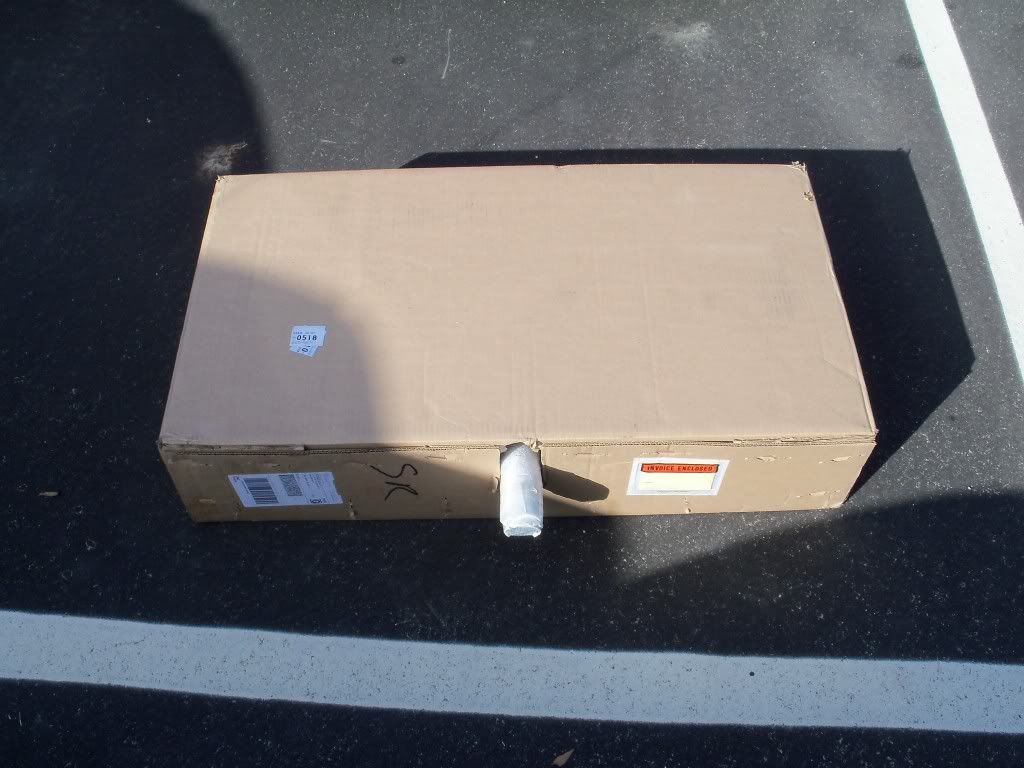
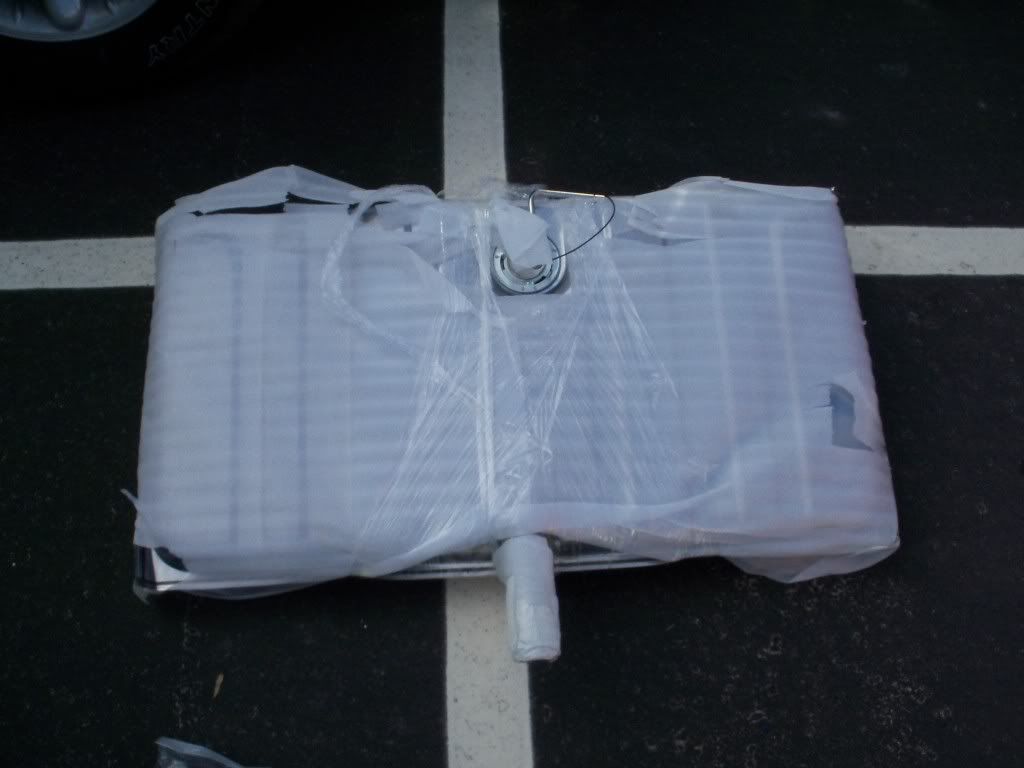
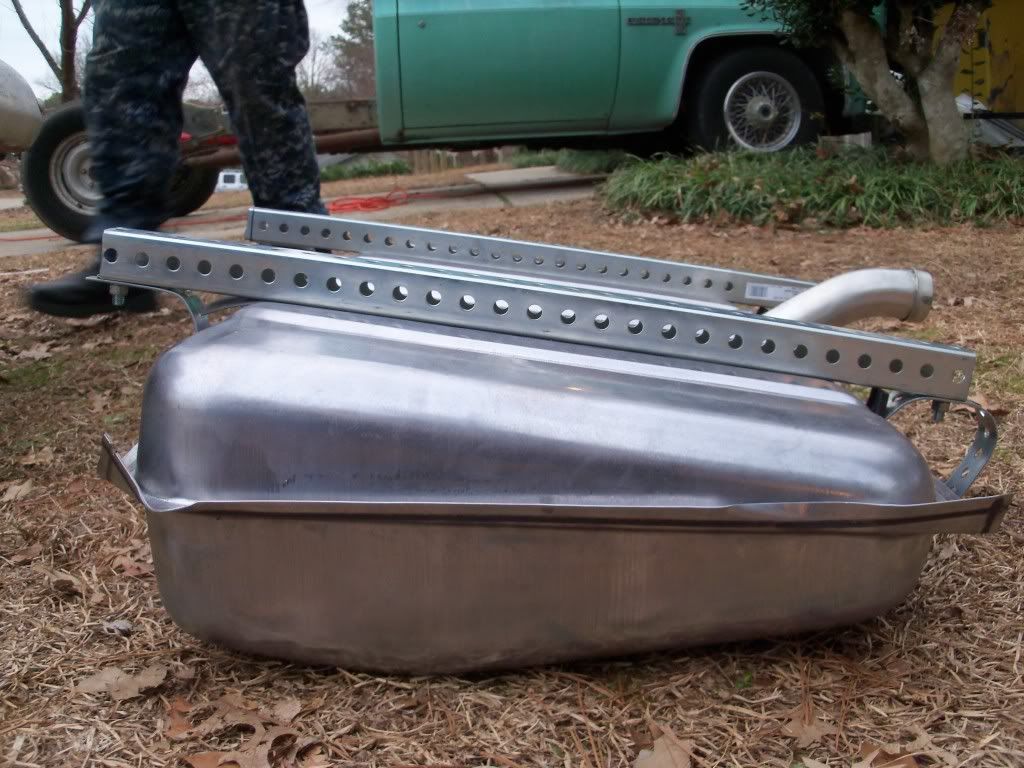
I ordered the tank from a company called Tamaraz up in Illinois. I found them on ebay, they sell the 69 Camaro tank with sending unit and tank straps as an auction. However if you call them up they'll swap the straps for the anti-squeak kit and it'll come to $170 delivered. I'm not all that impressed with their customer service since I didn't receive a shipping confirmation like they said I would, and I had to keep calling back over the course of several days to get a hold of someone. None the less my tank arrived and in good shape...albeit an odd way of packaging it. Here's how it arrived
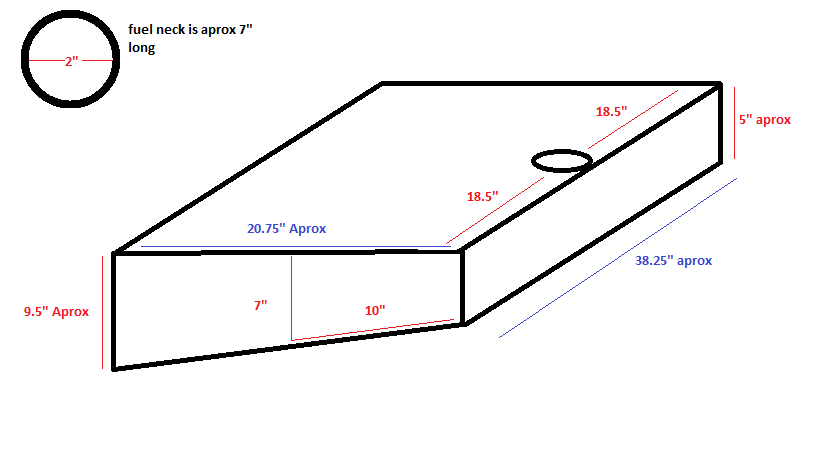
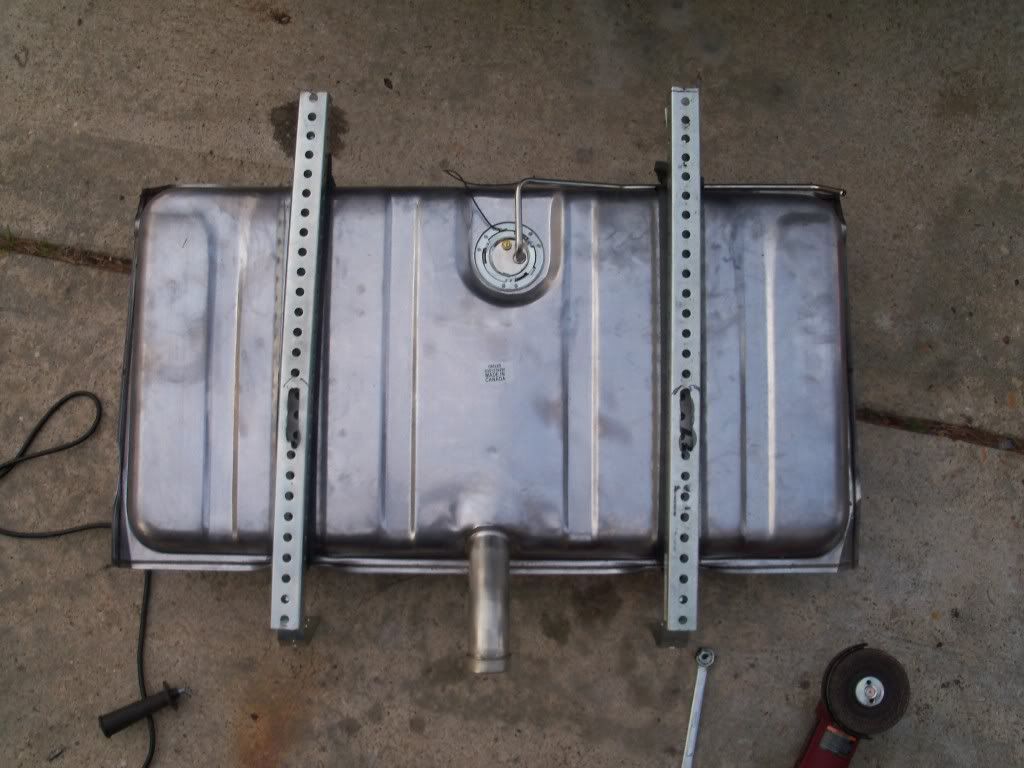
Here are the measurements of the tank
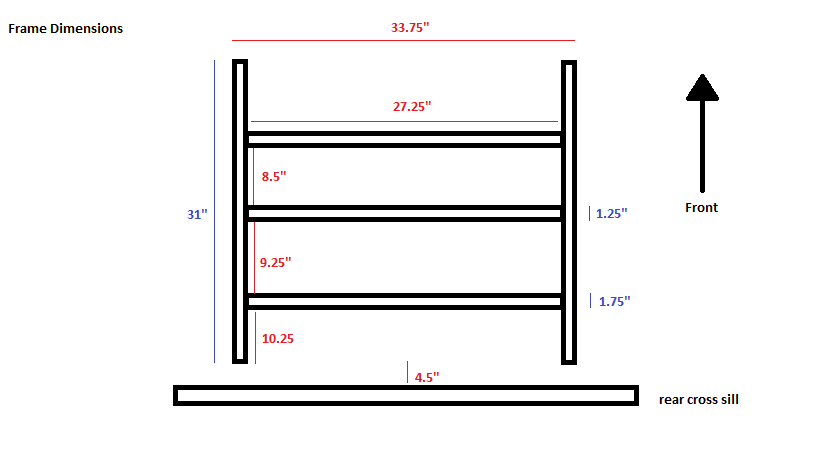
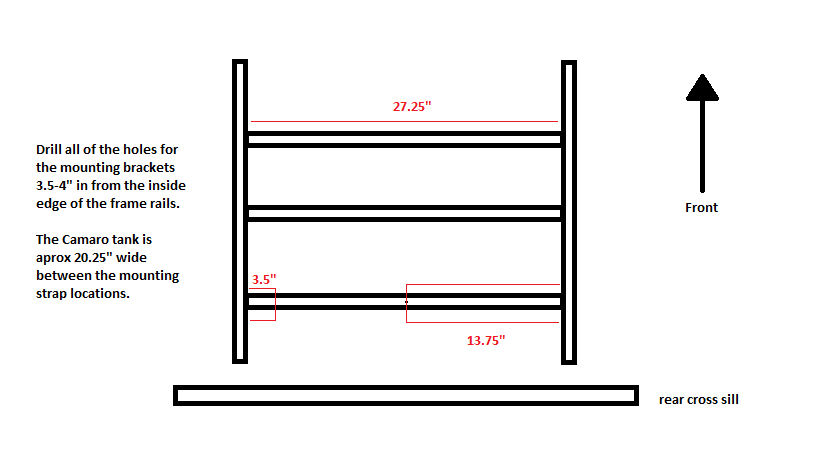
Here are the measurements of the frame
As you can see the tank will not fit between the frame rails, which in this case is a good thing. If it did fit in between the frame rails the filler neck wouldn't be in the right spot.
To solve the mounting issue I made a bracket/spacer out of some perforated steel tubing I got from Lowes. I believe I used 1.5" tubing and it came out perfect. You'll need two pieces of it. For the straps I used 14ga perforated steel straps, also from Lowes. You'll need 2 8ft pieces.
The tubing was cut with a grinder and grinding wheel to a length of 27". However you'll want to double check all of the measurements I've listed on your frame and your tank just to be safe.
Bending the straps was done by hand leaving plenty of extra on both sides just to be safe. The end result was this...I give you V1.0

However after a night of thinking about it I decided to change up a few things...namely where the bolts on the straps were. This is an 18 gallon tank, so full it will weight 144lbs. If the 14ga steel I used was able to be bent by hand 144lbs of fuel will do the same exact thing, and that would be BAD. So enter V1.5...
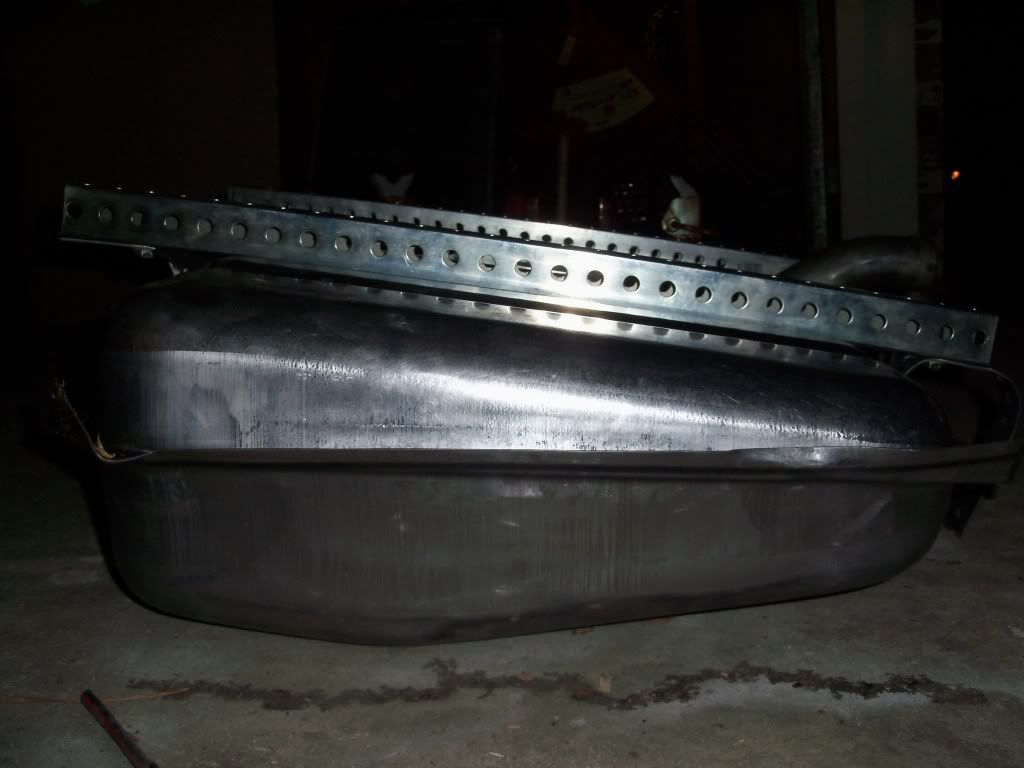
Then I realized that the fuel line was touching the metal strap, and that's a recipie for disaster if left as is. I also remembered that there was an extra piece of foam in the anti-squeak kit so after rummaging around through all the junk in my bed I found it and put it on.....I give you V2.0
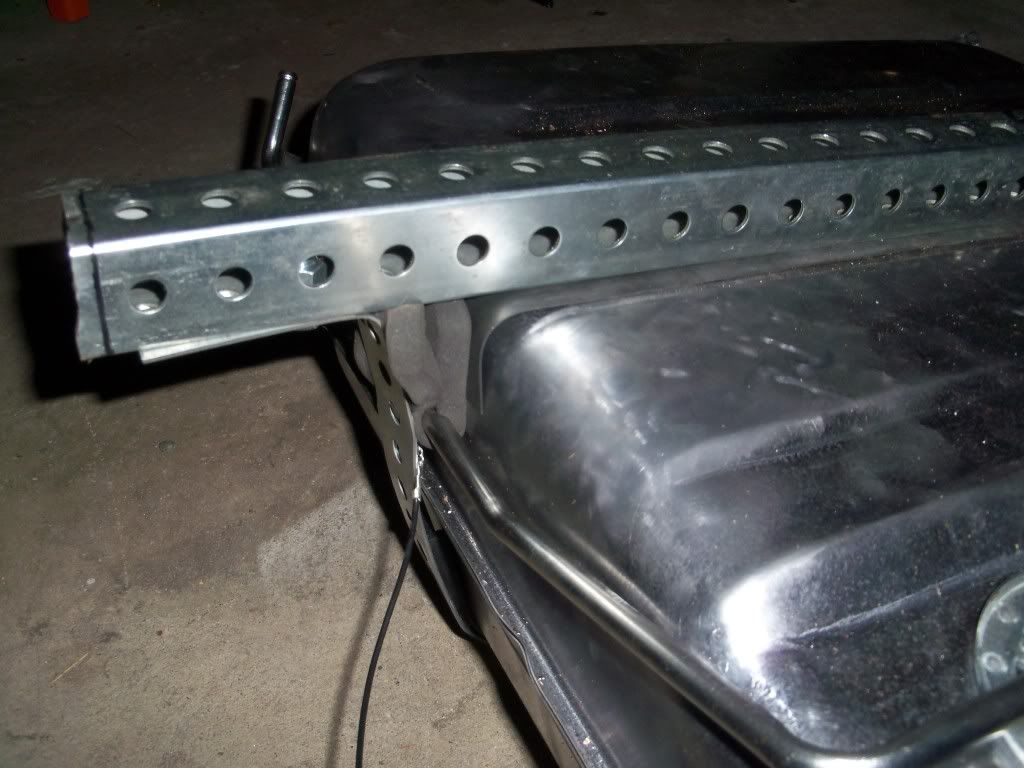
Now if you're wondering why I have the straps bent down on the filler side of the tank...it's because it made it easier to carry around. You can cut them off if you want, though they came in handy to be able to push on to get the strap where I wanted it for the bolts to go into. At this point the tank was done and just needed to be mounted up. I took measurements off of the tank and figured out where the holes needed to be drilled on the cross sills under my bed.
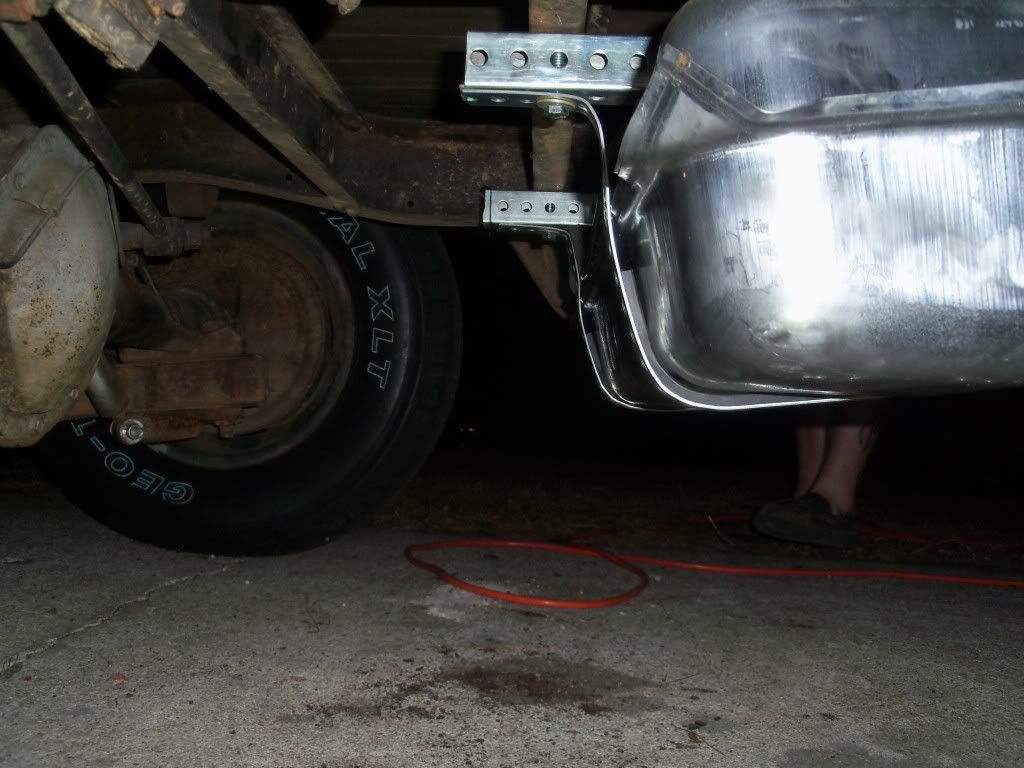
All was dandy so I tried to install the tank. But we ran into a slight problem....I couldn't get my wrench in far enough to reach where I needed the nut to go to!!! I thought for sure I was going to need to add another cross sill and have that as my front mounting point. Then the good idea fairy paid me a visit and this is what resulted...I give you v2.5
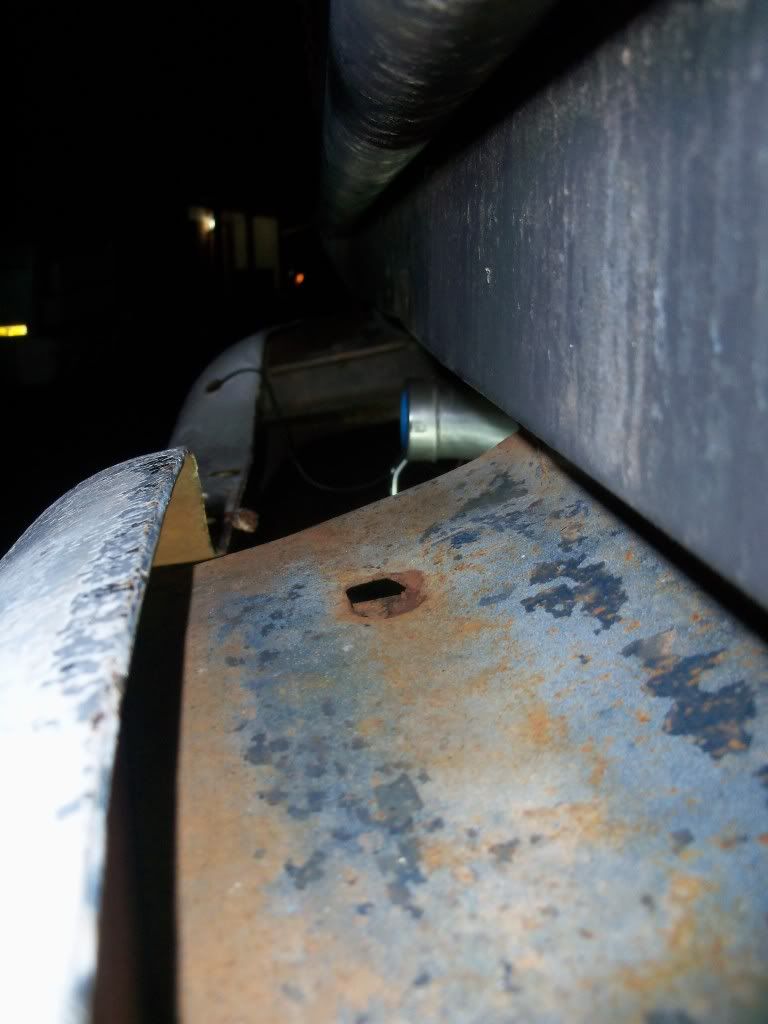
I'm no engineer but that seemed like the best spot to cut an access notch into the rail. I ended up having to enlarge it from what you see there to really be about 4 holes long instead of 3....and I did that while the tank was under the truck...very sketchy, so learn from my mistake!!! I also needed to widen the notch a bit more so I could turn my wrench in there and also so I could get it out.
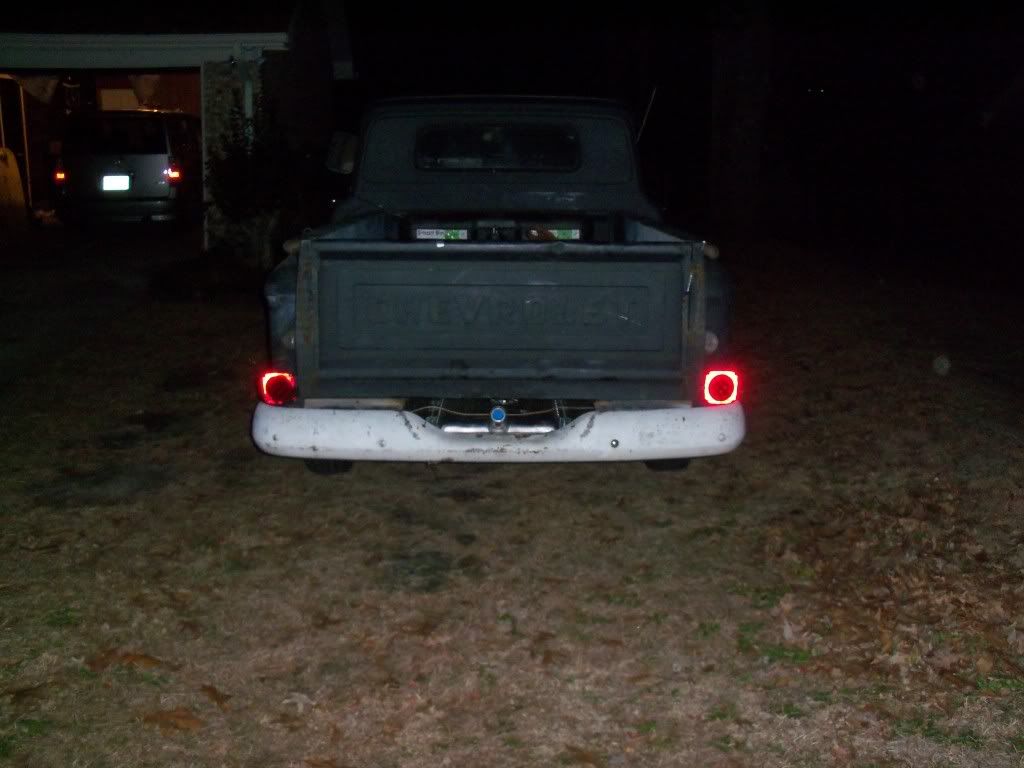
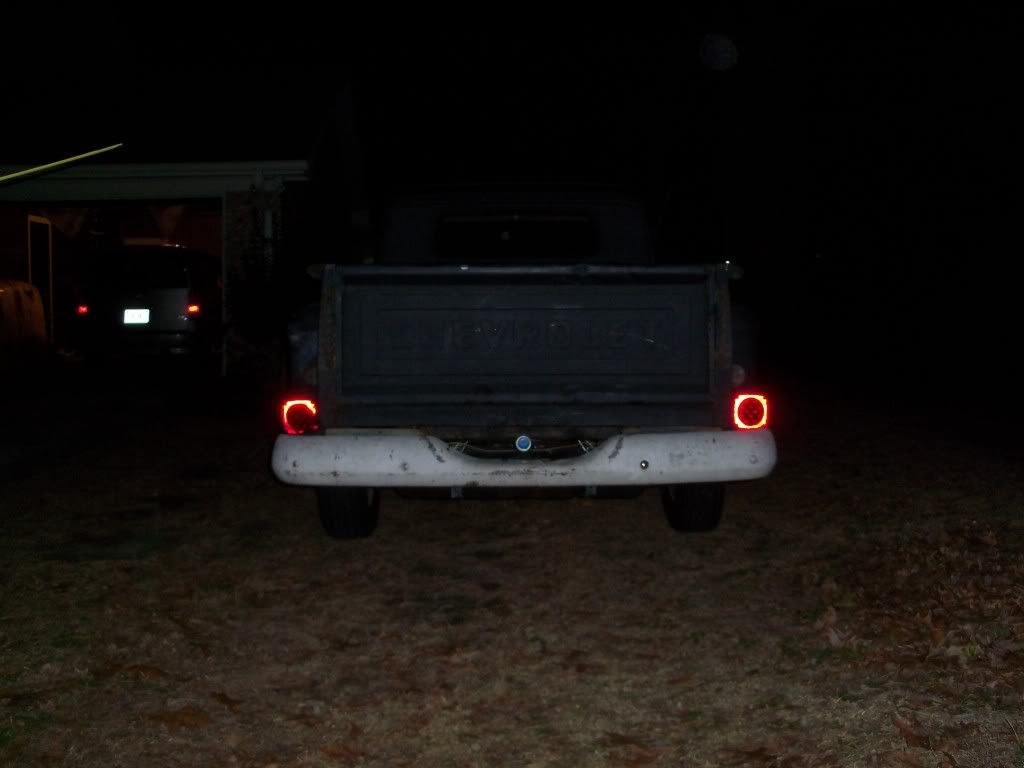
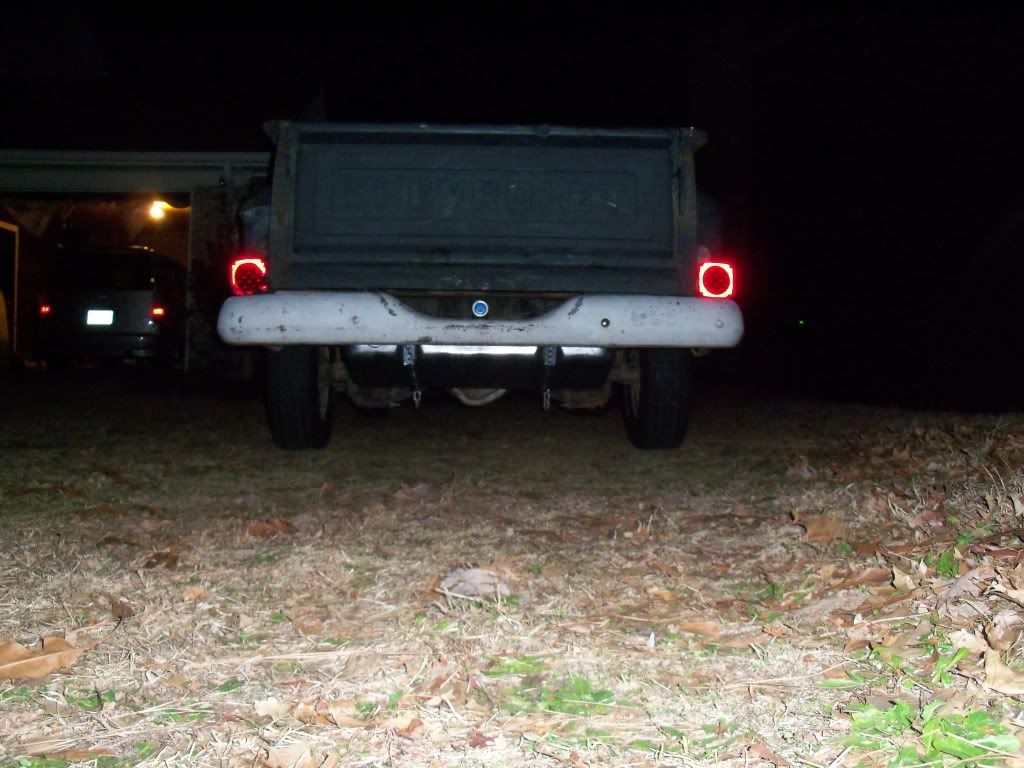
If I were to do it all over again I'd at least remove a few boards from the bed to get better access to the bolts. After several hours of swearing, cutting myself on metal, getting dirt/rust/gunk in my eyes, and breaking a finger I got the damn thing installed. Here are the pics
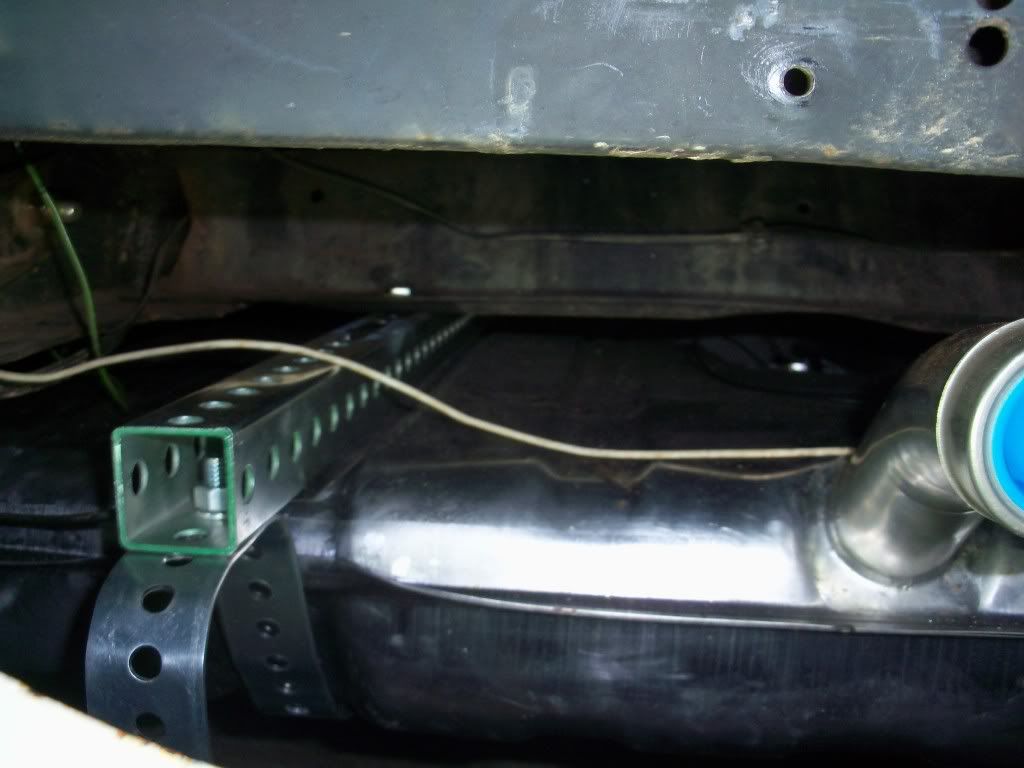
I did run into a few more problems. The biggest one was I couldn't get my wrench into the rear of the brackets to tighten the nuts...and it just so happened that they were in the same damn hole. I ended up tightening the bolt going from teh cross sill to the bracket all the way, and the one from the bracket to the tank strap is as far as it will go. There's a lock washer on the tank strap bolt so I'm not to worried about it, however the two bolt stems are touching and the tank strap bolt has a bit more thread to go to be completely tightened down. The best solution to this problem would be to use another hole...but I'm gonna try this and see how it goes. It eventually got to the point where my wrench was completely useless...so I busted out my harbor freight prybar, wedged it in there against a flat side of the nut and tightened it all the way down. Be careful when you're doing this...I punched myself in the face when the pry bar slipped off.
I have to still run the wires for the sending unit, put a resistor on said wire to convert the 90ohm sender to a 30ohm sender so it's compatible with my stock gauges, and run the fuel lines. Hopefully by the end of the week I'll have it all completely done. I'm waiting on a locking gas cap from Advance Auto Parts to get here. I also have to make my license plate bracket, and being the resourceful/cheap Polack/Chink that I am I'm going to try to reuse the scraps from the tank straps and brackets to make it. The flip down plate bracket is off of a 90's Caprice and locks into place when flipped down.
So in conclusion...it was a learning experience...some blood was shed...a lot of choice words were said...a digit was broken....and a tank was installed. On a scale of 1 to 10 in terms of difficulty I'd give this a 4, it was mostly a PITA for me since I was trying to figure out a good bit of this on the fly but with this writeup if you choose to do this it'll be pretty easy. It's even easier if you take the dang bed off or remove a board or two from the bed.
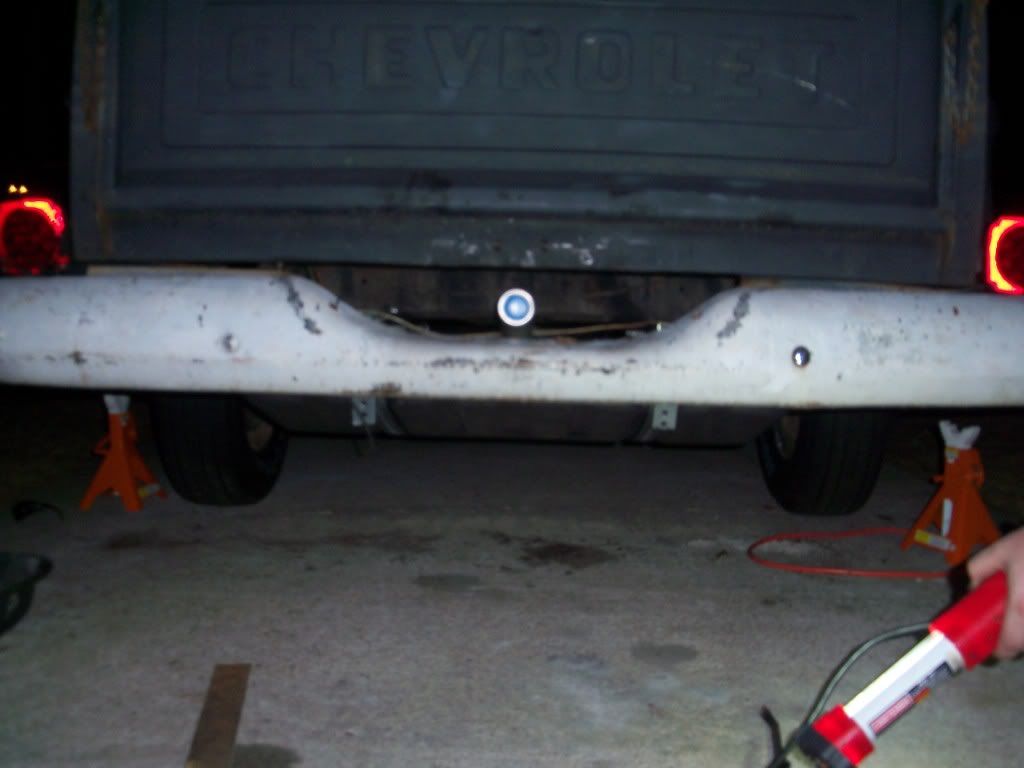
...and don't ask about those random wires in the pictures or the chains...I didn't do it, the PO did when he did his hackjob wiring the trailer tail lights to the truck. Rewiring the whole truck is a whole nother project I'll get into after I do the rust repair in the cab. The chains are from the PO's ghetto lowering job where he chained the shocks down to compress the springs. I just removed them from the bottom to make it not hurt so bad when drove the truck.