I get a lot of questions whenever I tell people about my projector headlights.
I therefor have written this guide, hopefully it will help other that consider upgrading to real HID headlights.
All the details on my build are in this topic on
http://www.hidplanet.com
its a wonderfull website with tons of info on LED and HID projectors retrofitting.
my build thread is:
http://www.hidplanet.com/forums/show...n-86-Silverado
I bought most of my parts from
http://www.theretrofitsource.com
these guys have the best support and I dont know any other store that has such a wide range of parts and at reasonable price.
I used:
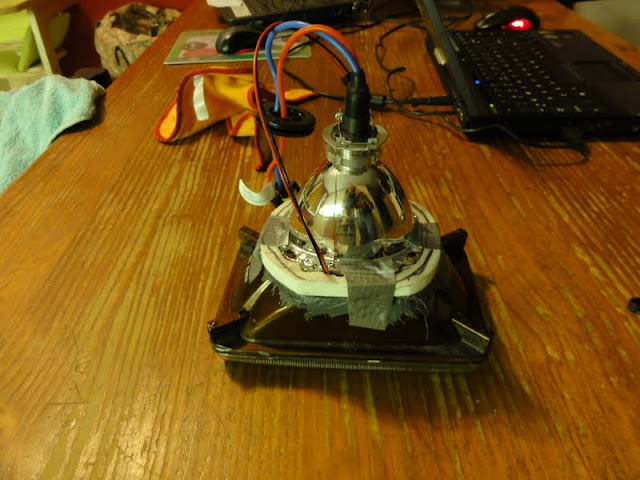
- the "Morimoto Mini H1 projectors"
- Morimoto 3Five 5000K xenon H1 bulbs
- H4 relay harnass TheRetrofitsource
- cheap $15 ballasts from Ebay
- AutoPal crystal clear healights 4x6 I had laying around
the most important pointers:
1. I used AutoPal headlights for two reasons:
A. Mine were metal house. Metal is a little harder to cut, but much stronger and wont break if you beat it or go at it a little to hard. and you can mount the projector easier on metal. I just used a load of JB Weld to glue the two together.
B. these AutoPal headlights had clear glass lenses. for the best output you would want to use thin acrylic like lenses, but glass is much stronger, wont scratch so easy and will not break so fast when removing after cooking it in the oven to open up the housing.


2. cook the headlight in the oven
check out this video
3. cut the reflector part so the projectors fits

4. I had to use a extra piece of plastic to put the projector further back, otherwise the lense would not fit back on. Other form a new lense by "vacuum forming" ...I wanted to reuse the original


!!! before you glue the stuff together, try the projectors in your car to see if they are level. search on HID planet for "aiming projector" and you'll find all kinds of tips on how to do this.
5. trim edges and glue together using JB Weld:

6. I painted the reflector because they were old and the chrome was bad. some keep the chrome. some paint the flat black...if I open them up again I will paint the flat black. make sure you use heat resistant paint like VHT or similar.


7. mount shroud and mount the lens back on using butil or some heat resistant RTV to make sure you get an airtight fit.
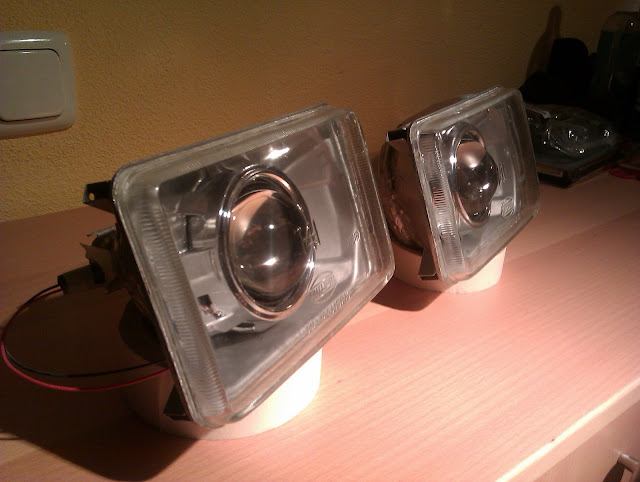


there you go


output pics:

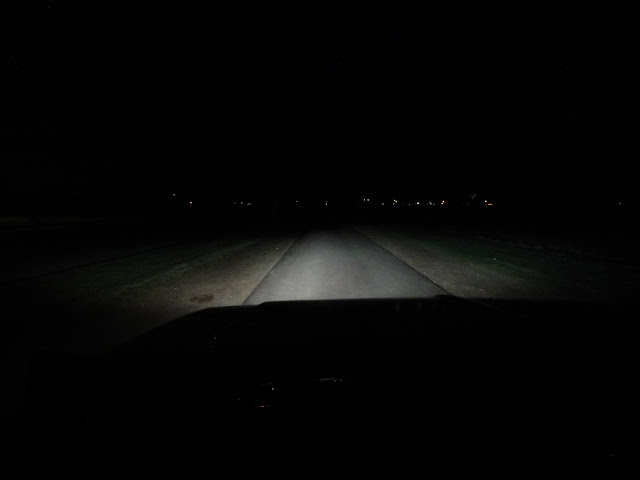
cruise video:
PM me if you have any questions.