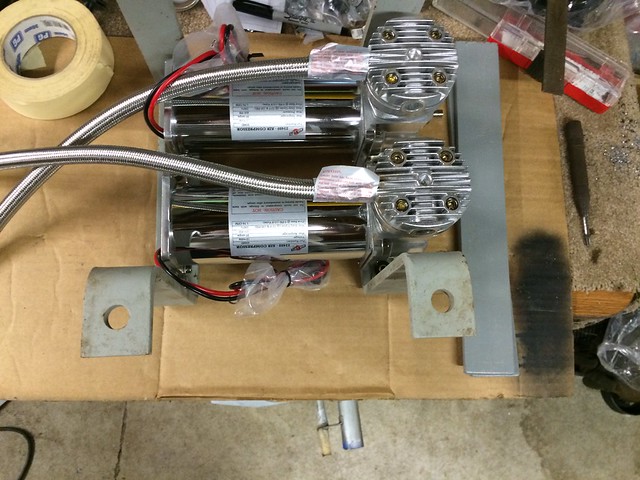
Well, even though I didn't take a lot of pictures over the weekend, I was certainly busy. My water traps came in Friday afternoon, so first thing I did was to pull the air tanks off the mounting bracket and plumb in the water traps. I decided since these are steel tanks I would add one on each inlet from the compressors, and one on the outlet side that is headed for the VU4 valve. I put it all back together and it's ready to go.
I then worked on creating a mount for the compressors to hang off the frame rail. I looked around the shop for some material and found a couple heavy duty U shaped brackets that should fit the bill. I was able to sit them side by side and mock it all up. Here is pretty much how they will look when final install is done.
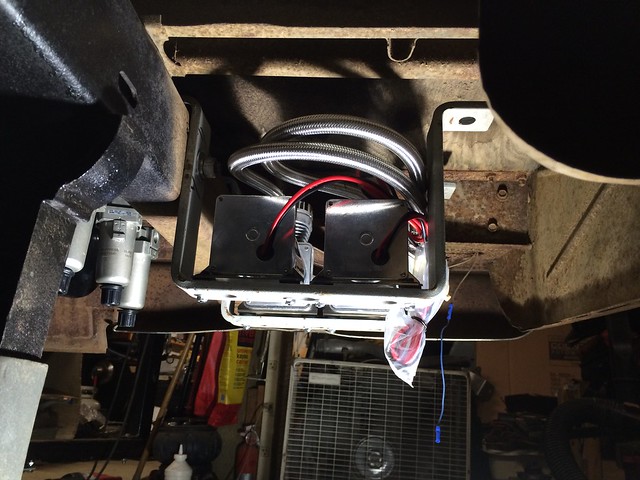
I might make a shield for the backside to block more splash or debris that comes from the rear tire. I am also going to extend the air inlets up as far as possible to keep them from drawing any water in if I happen to drive in the rain..(like we have no rain in the Northwest right)

In order to route all the air lines and wiring to where I want the valve setup, I drilled an access hole in the filler neck cover.
( I would gladly thank the board member who's post I saw this idea on, but forget who it is) Found it, it was a thread from 72Mario
http://67-72chevytrucks.com/vboard/s...light=air+ride I want to come up with a way to seal it, will have to think on that.. but for now I have a piece of hose split and wrapped around the opening to there are no sharp edges.

I began to run all the air line and ride sensor wiring, I installed and plumbed the rear bags, routed the air line for the fronts and just have to finish it with some additional loom and clamps.
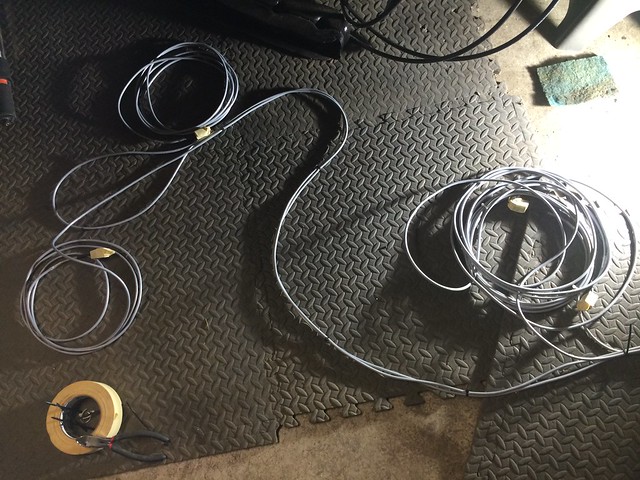
Not knowing yet exactly where my sensors will live, I left myself enough length for now, but will tidy things up as I go. Next I fabbed up a bracket/plate to hold all the Accuair components and did a test fit. looks like it will be an easy way to co-locate everything. I gave it a coat of primer but forgot to get pics..
While that was drying, I figured I would finish up the chassis cleanup..
I donned my birth control glasses long sleeve shirt, hat and mask before breaking out the scotch brite pads and brushes.. No way in hell was I going to get crap in my eyes this time!!!
Well that took a me few hours to say the least.. I shot some chassis black on everything and took a break..
I turned my attention to the rear axle, I added some friction modifier for the posi, then went about tackling the brake lines for the rear disc.
Again... my bad for not taking pics, but I have one short hard line left to bend up and it will be ready to mount.
More to come this week, I have a short list of stuff to buy, but hope I have turned the corner on the exterior from the tear-down phase to the assembly phase..
Thanks for watching
