Quote:
Originally Posted by dave`12

@ vettevet
I think I would like to go with the 12si for price and ease of installation. 94 amp.
Please see the prior post and tell me if I'm on the right track.
Thanx so much.
|
I have been watching your thread for awhile and I am puzzled that you guys find it so hard to do the conversion but I understand because when I look under the hoods of these new cars I am amazed.
I googled the CS 144s and amazon has them for between $80 and $125 and of course, you can spend $300. If you ordered a mid eighties S-10 alternator you could get a 12 SI for $100 or close to that.
You really should get a larger wire for the output from the alternator but I think the 12 gauge would get you by. Ideally you need to get a main junction to replace the soldered one that the factory used.It would make things a lot easier and you could run your fans and everything from it and fuse them as needed.
This is a good diagram of using one to tie together all the power wires you need.
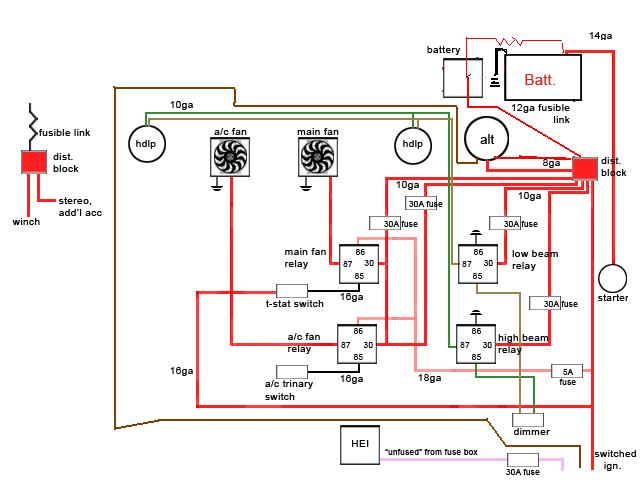
And another one that doesn't show the ammeter wires. It shows a voltmeter which is simple to install, if you didn't care about the ammeter and of course you can have both easily.
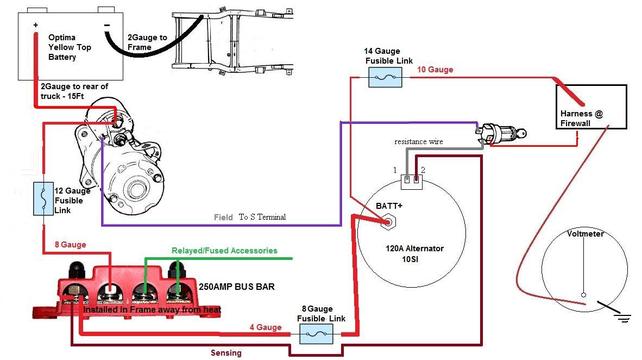
You should keep the junction on the right fender with the fusible link from the battery and the no. 1 ammeter wire connected there,
The red wire from the battery also called the SHUNT or the battery charge wire can stay the same size and just run it to the new main junction to tie into the alternator charging wire from the back of the alternator. I show it in the diagram I made below.
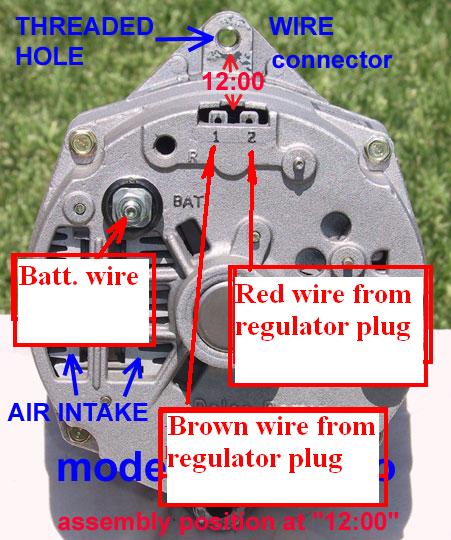
Here is another one that I like to show that is easy to wire. You will not need the wires from the old external voltage regulator plug, but you can use the brown wire and the red wire in the plug and just extend them to the new 12 SI, to terminals 1 and 2 on the 12 SI. When you read about jumping the brown /white and the red/blue wires that's all you are really doing is extending the brown and red wires to the alternator.
This is a diagram I made showing how to do that by just using the brown and red wires. All you need is the standard SI plug that Autozone sells for $5.00 and just splice the brown and red wires to it.
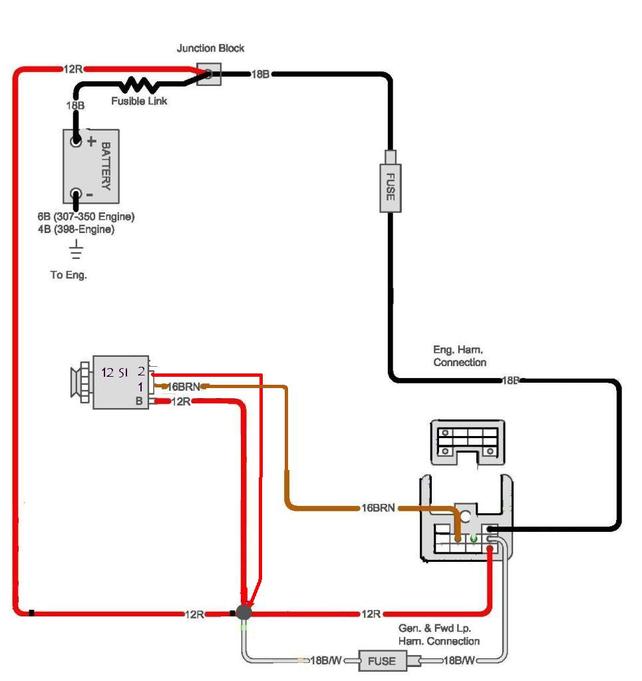
I just took the brown wire from the regulator plug and the red wire from the regulator plug and ran them to the 12 SI alternator, brown to no.1 and red to no. 2 splicing them into the alternator plug.
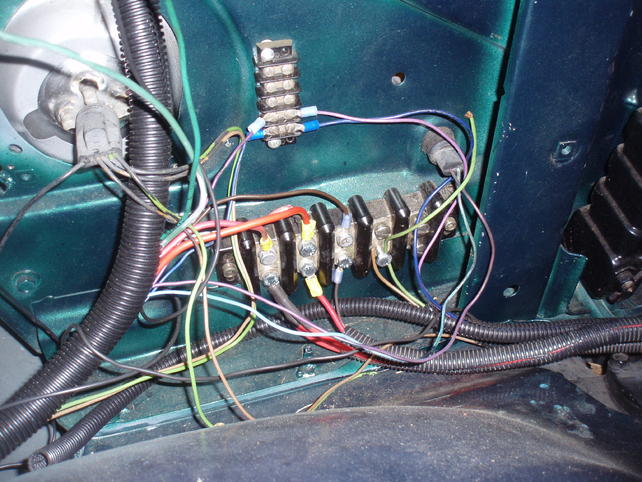
For my junction I used a terminal block and jumpered all the red wires together in place of the soldered junction that the factory used. This is the unfinished picture of it. I added the headlight relay wiring and the fan relay wiring later. I also put three circuit breakers on it for those.
Finally here is a diagram of the alternator with the wiring instructions as I explained above.