So I haven't updated in a while, and I totally failed at my goal of getting it on the road in a month, but that's mostly due to unexpected expenses (and work got more than a little crazy).
I did get some progress made.
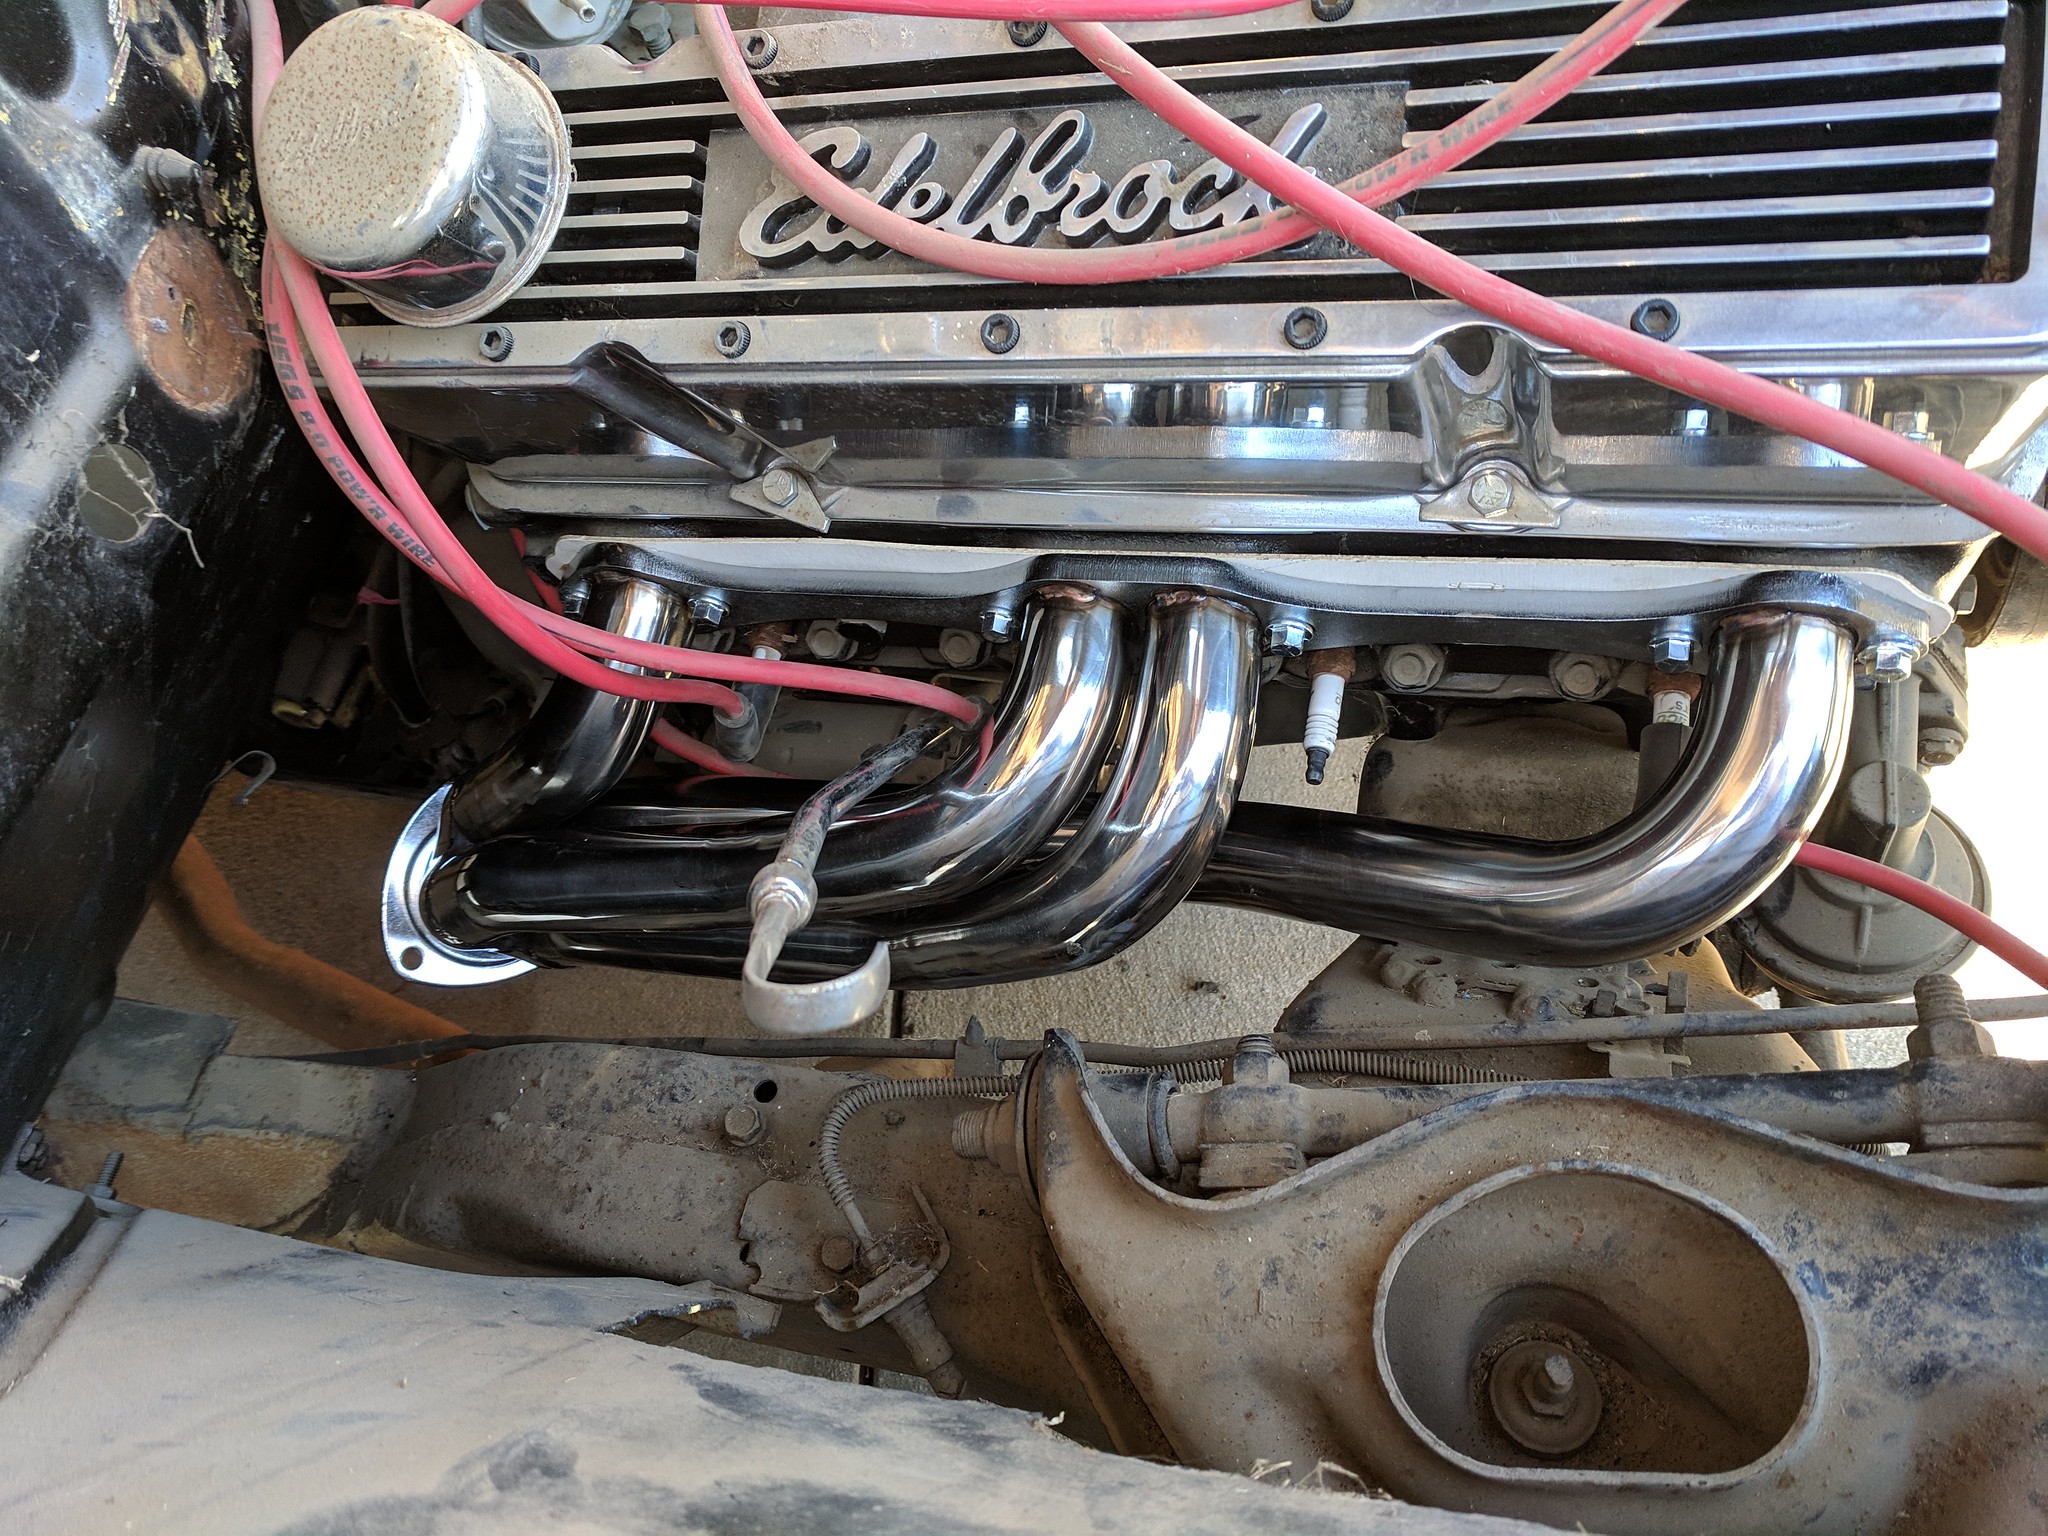
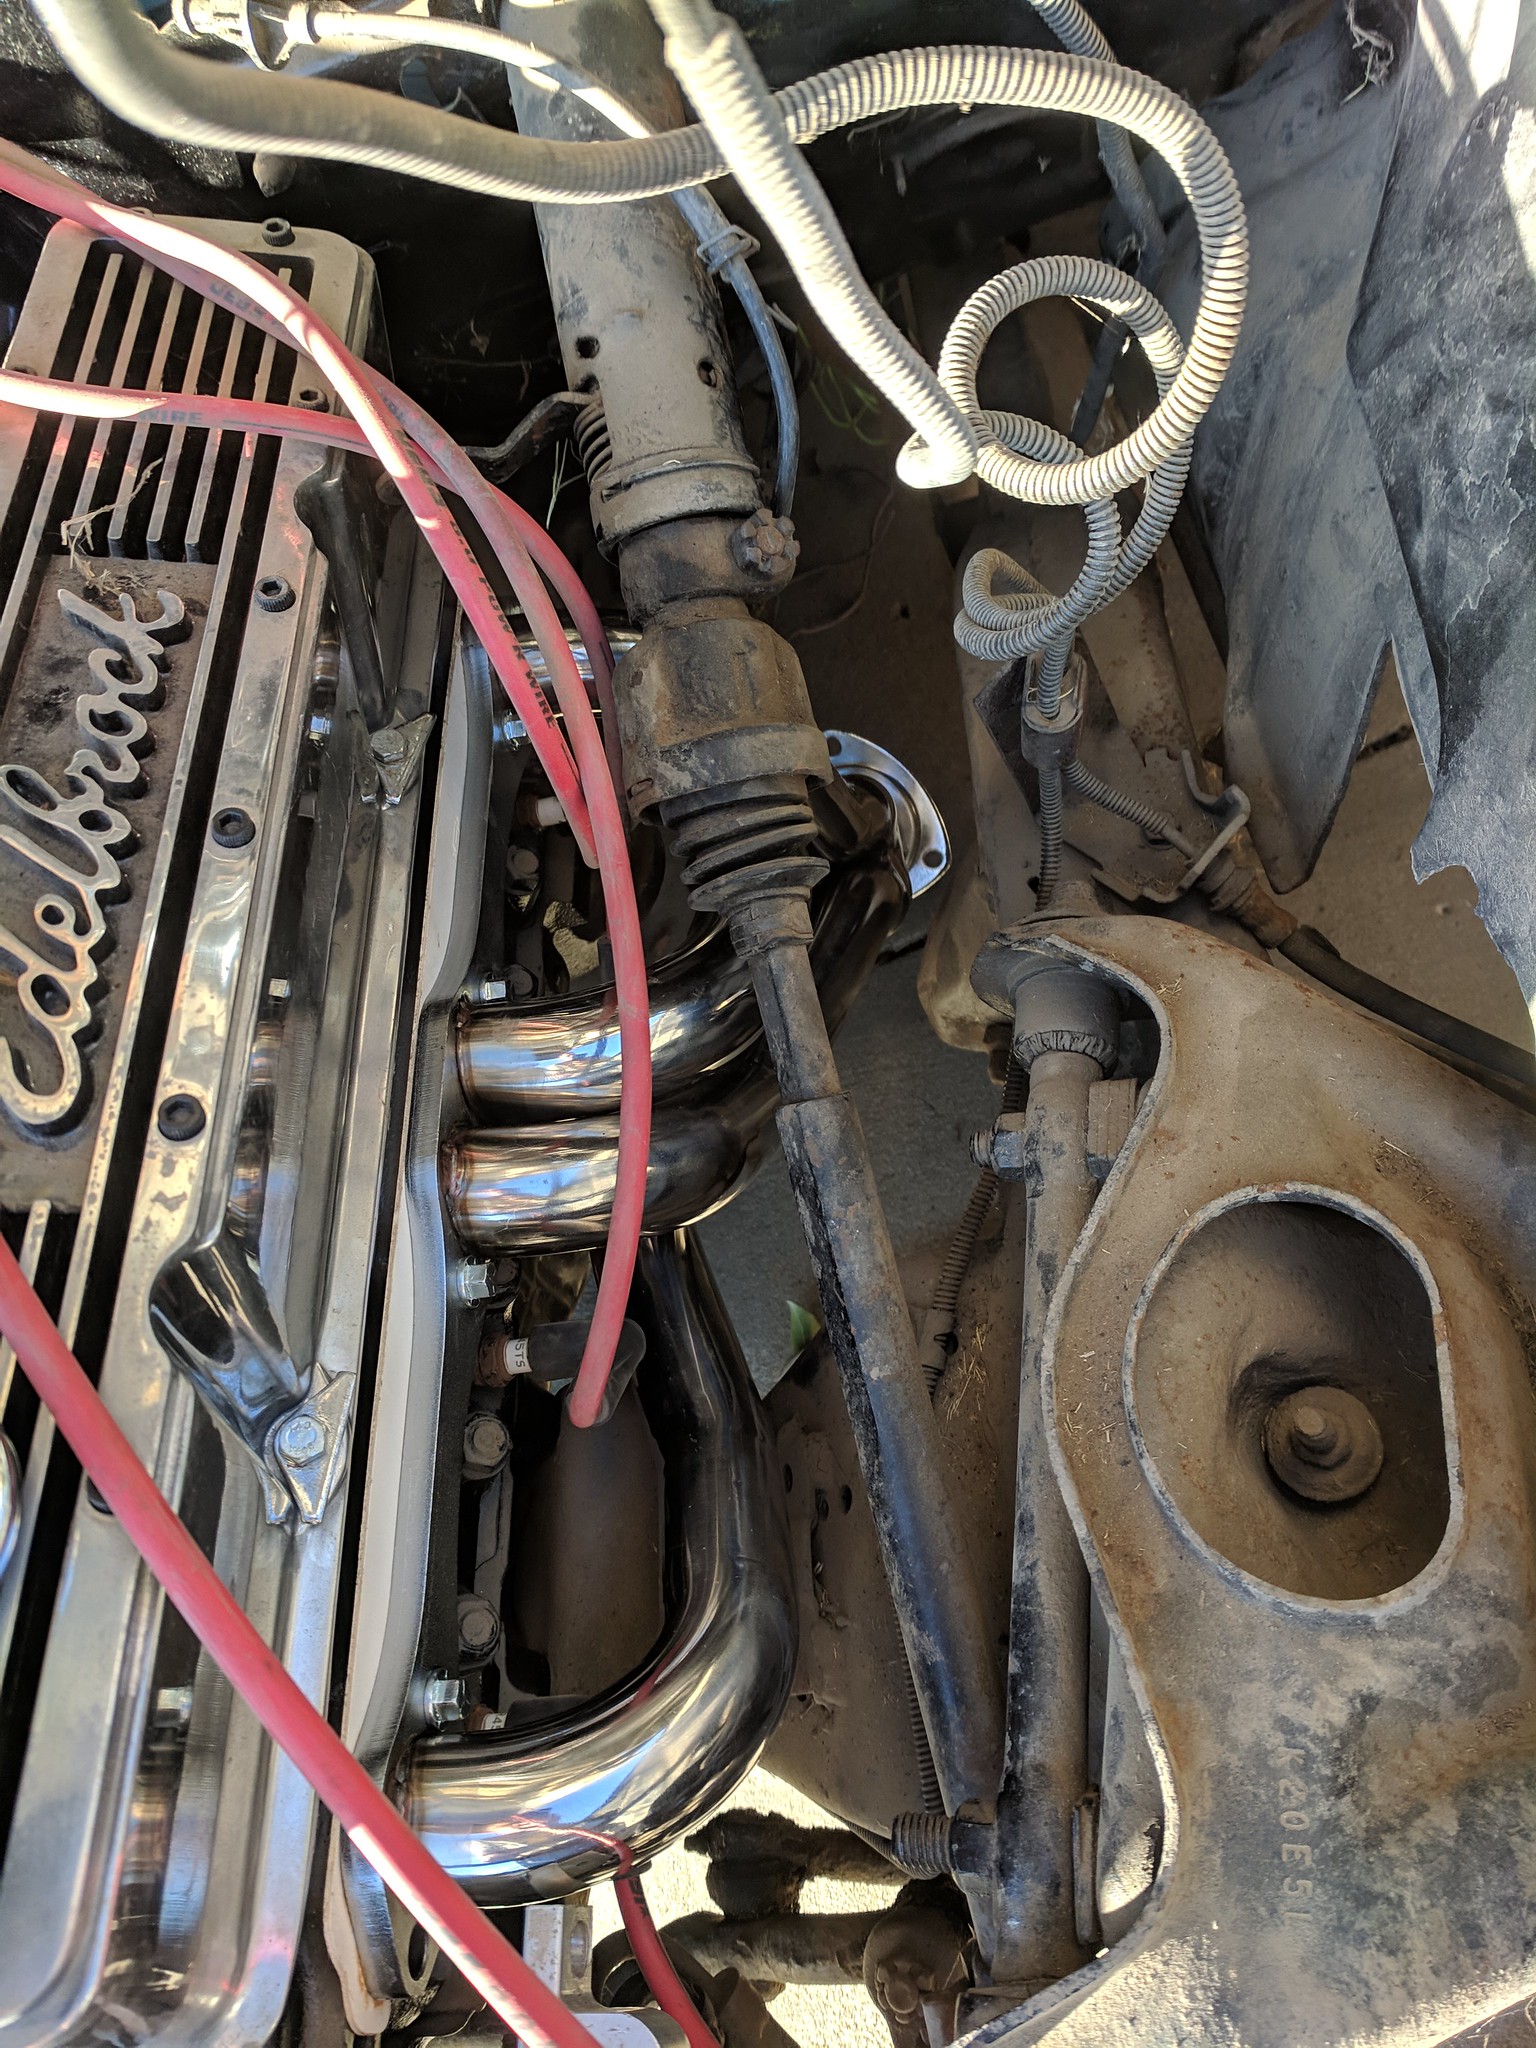
I installed the cheap eBay headers. They fit fine, the drivers side will self clearance a little, but overall not bad for $100.
 IMG_20190216_163606
by
Shawn Wallbridge, on Flickr
 IMG_20190216_163617
by
Shawn Wallbridge, on Flickr
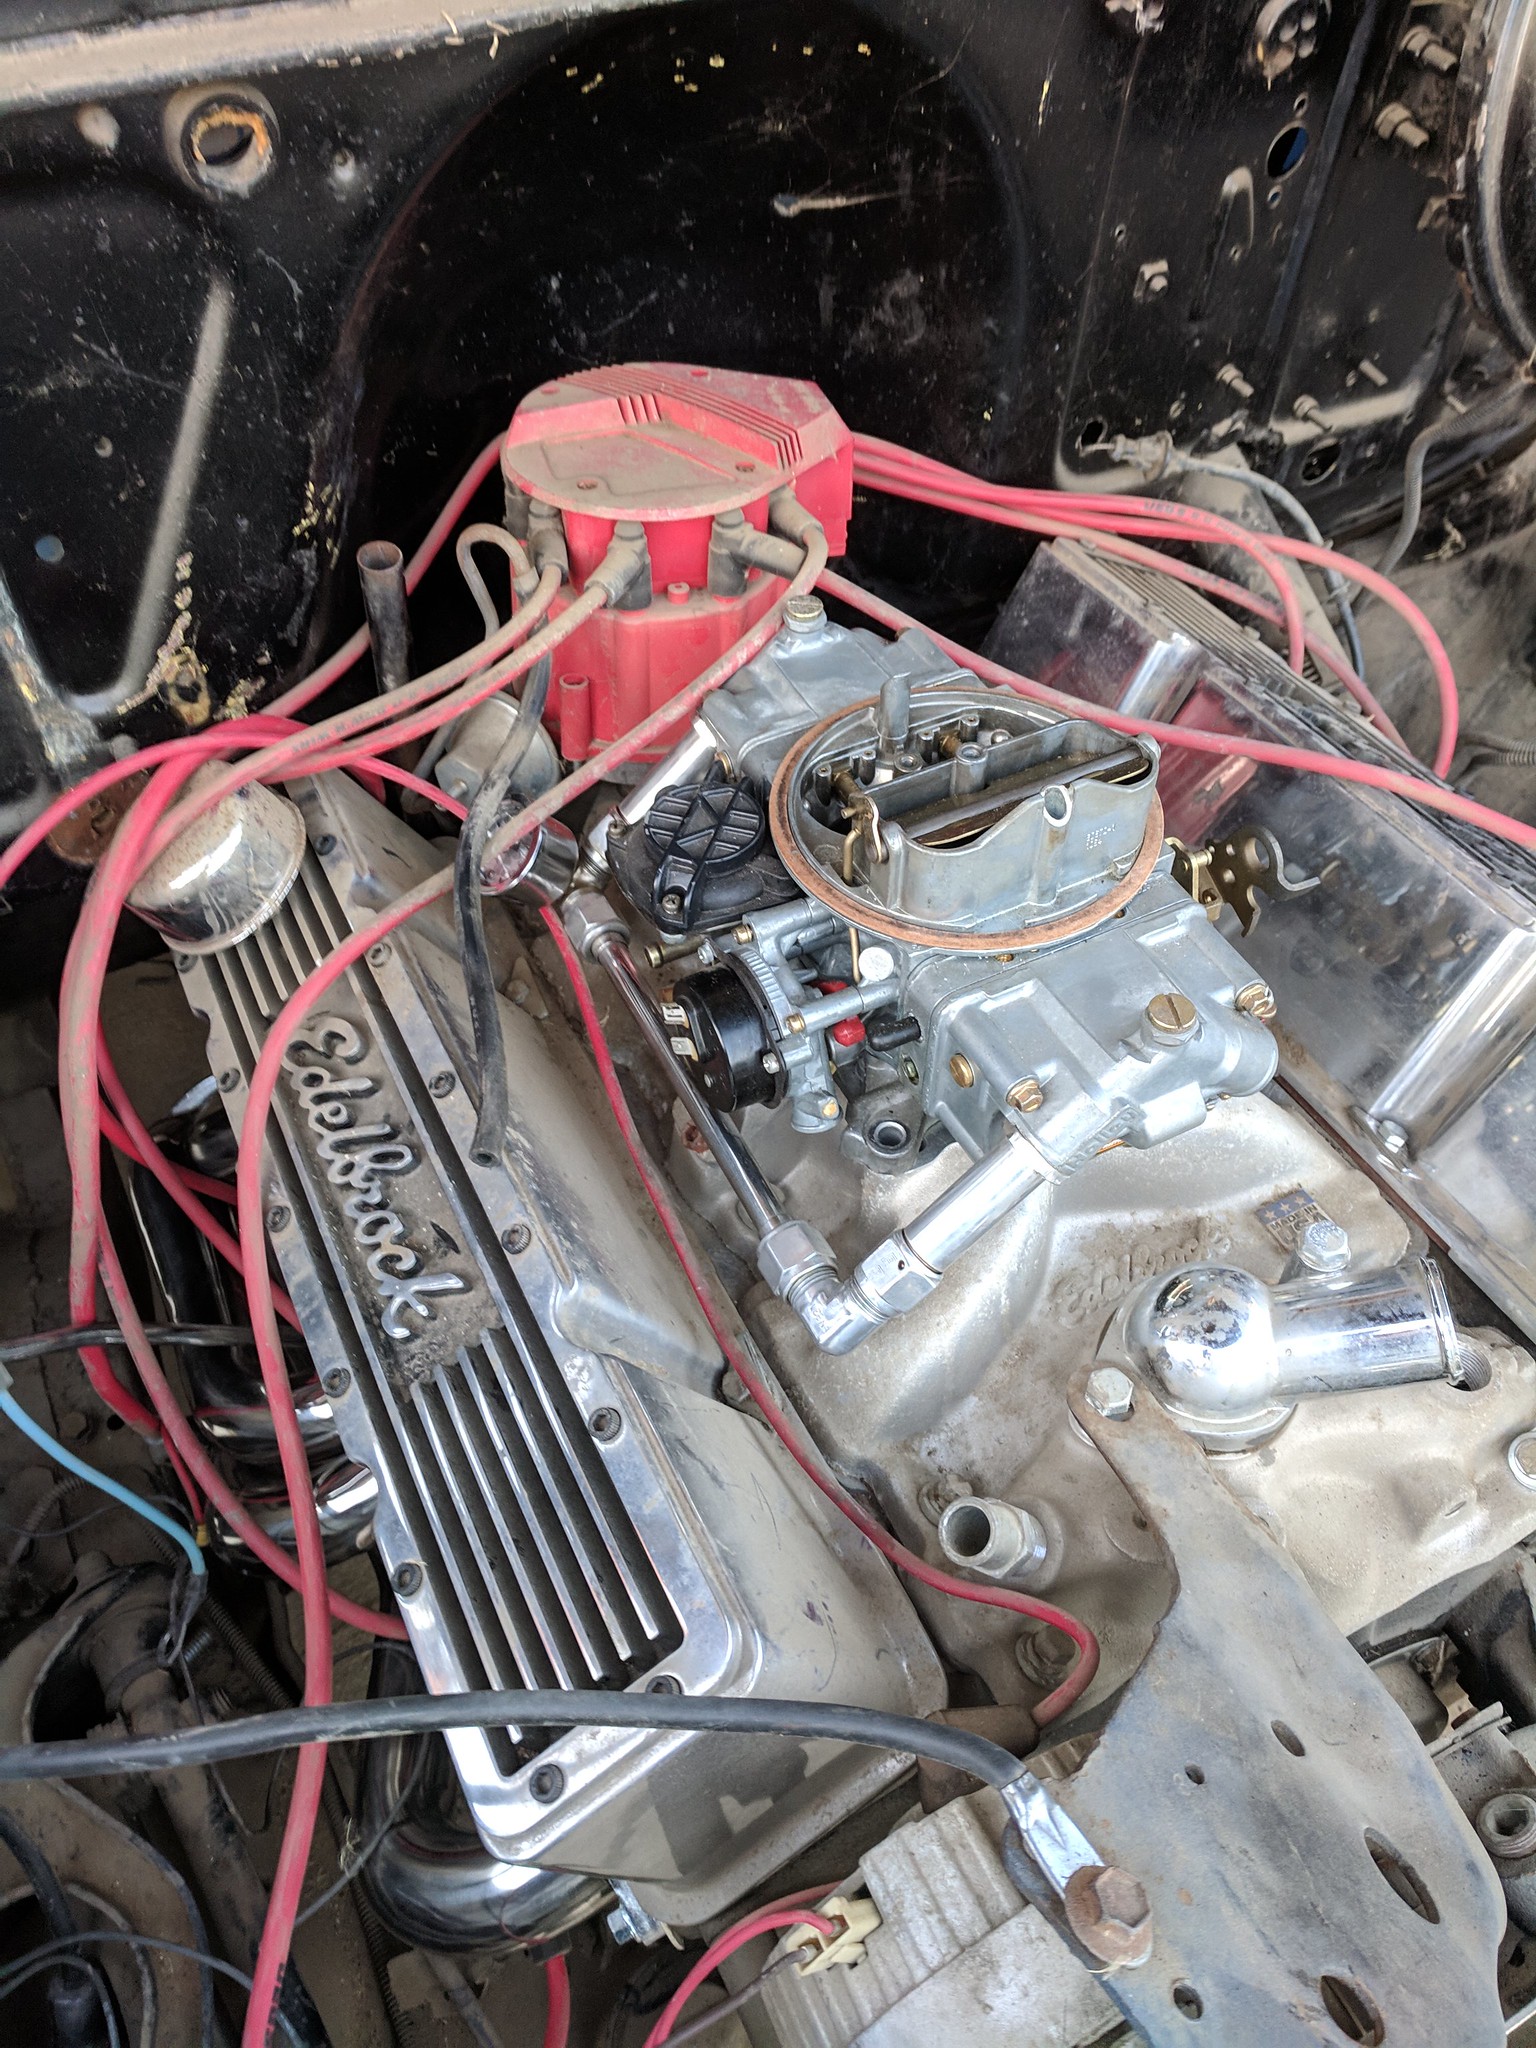
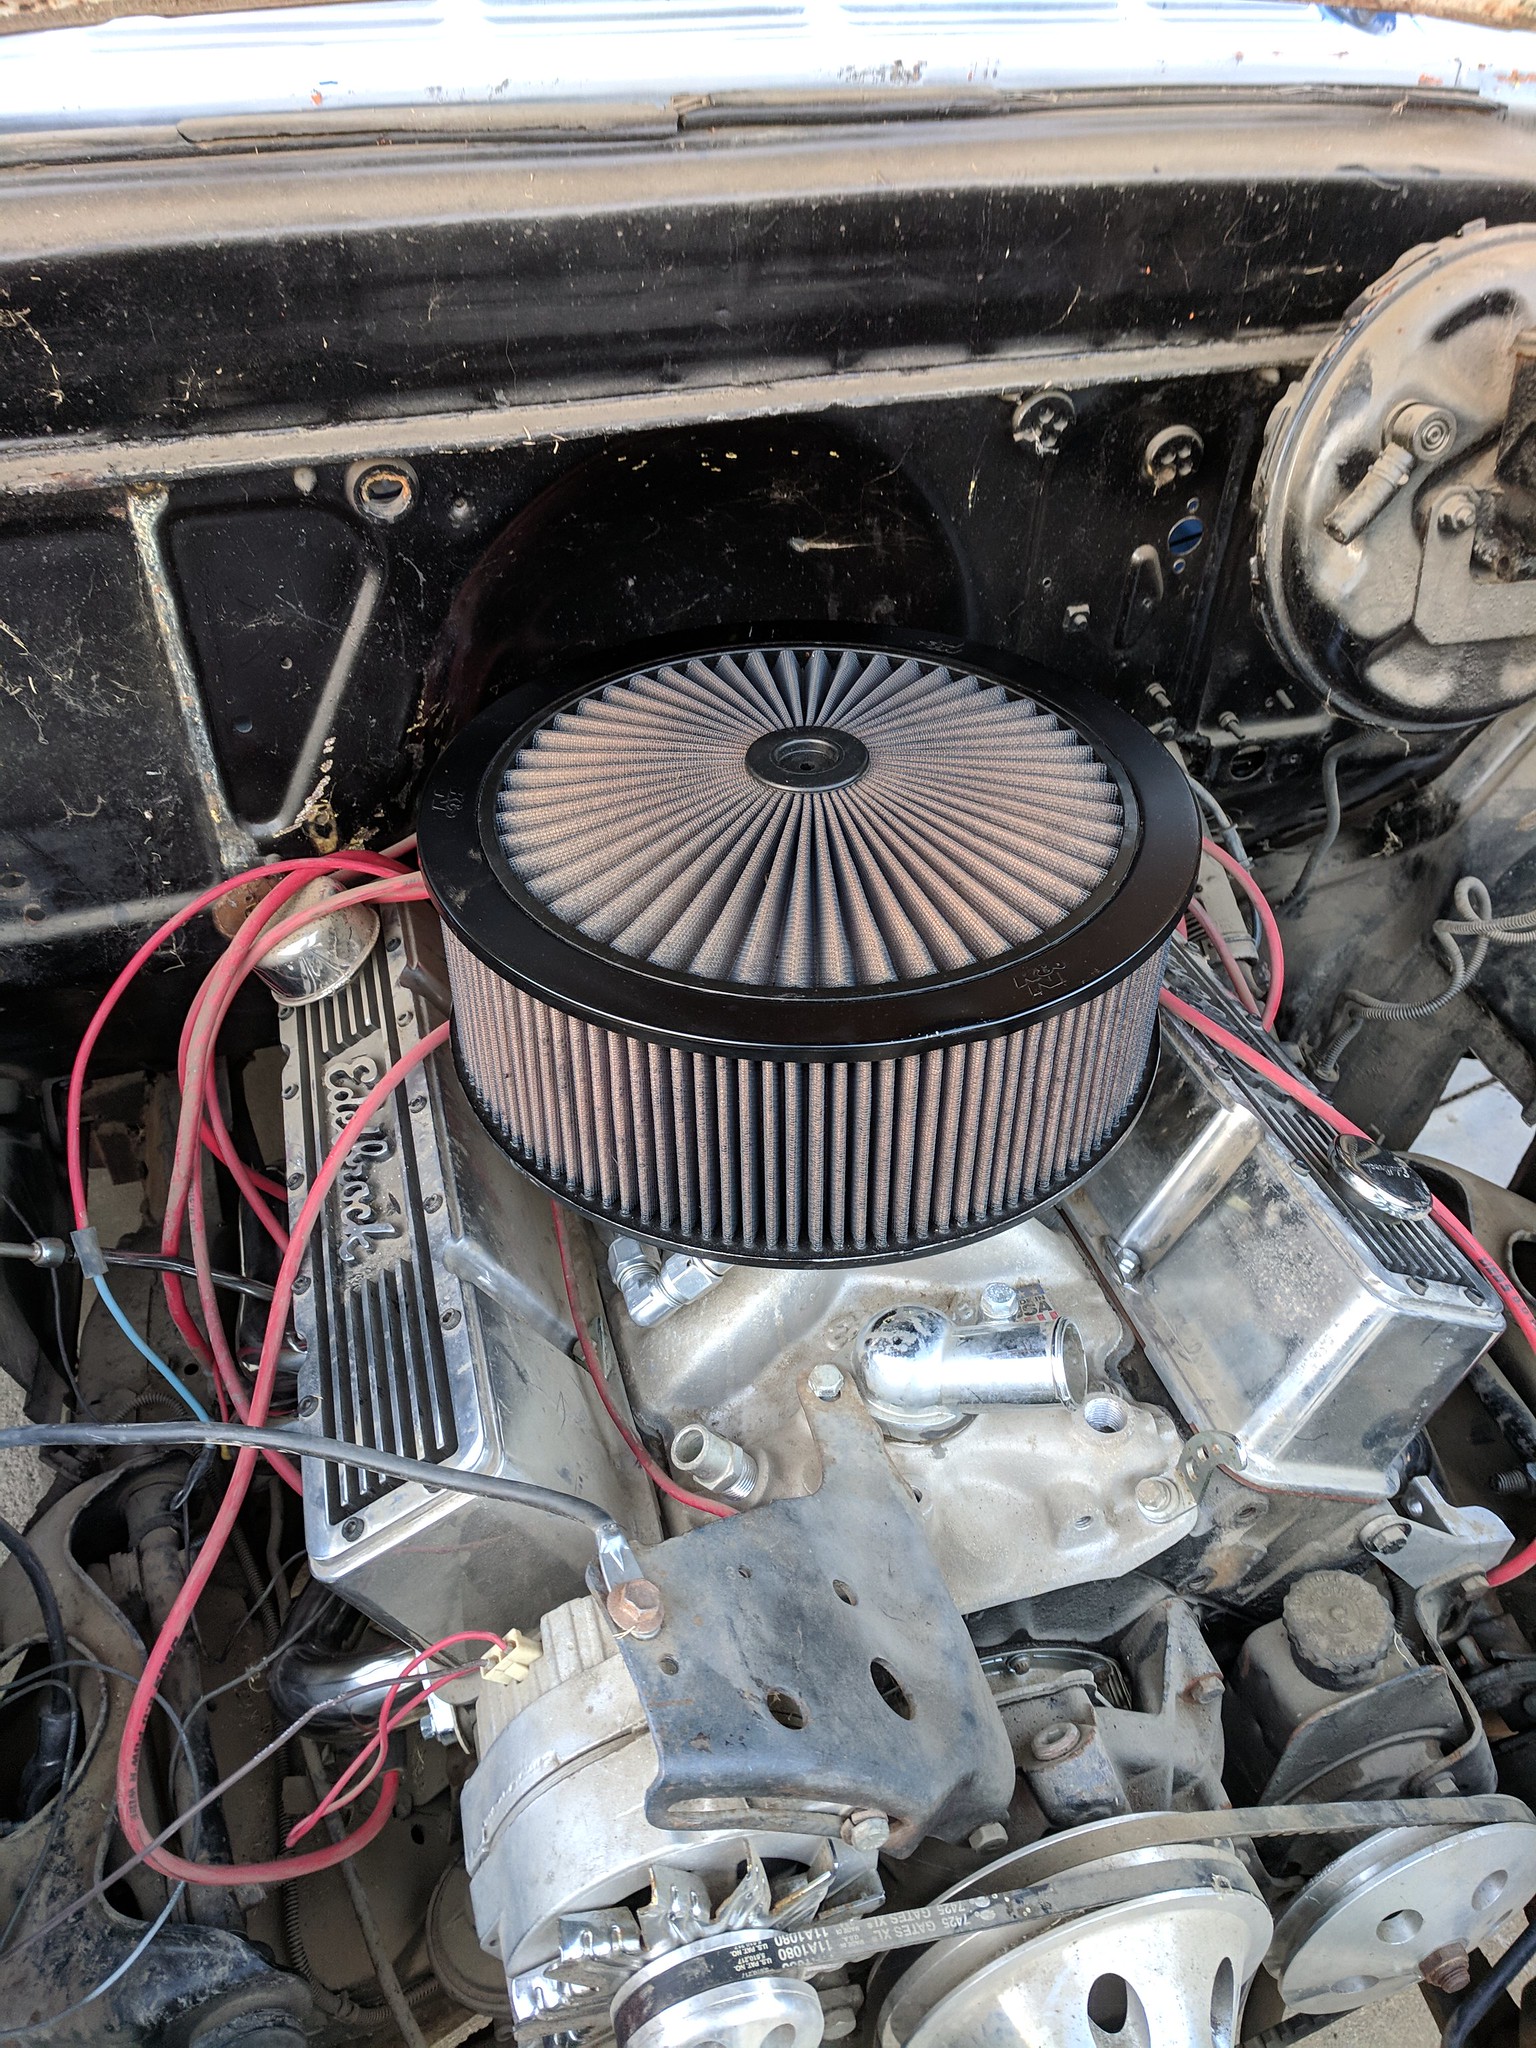
I mounted the carb, and picked up an air cleaner on eBay.
 IMG_20190216_172110
by
Shawn Wallbridge, on Flickr
 IMG_20190216_172133
by
Shawn Wallbridge, on Flickr
I pulled the entire harness out of the car, and started going through it and doing it the way I want it done. I picked up a bulkhead connector which will make it a lot cleaner, and allow me to trim a lot of the wires back.
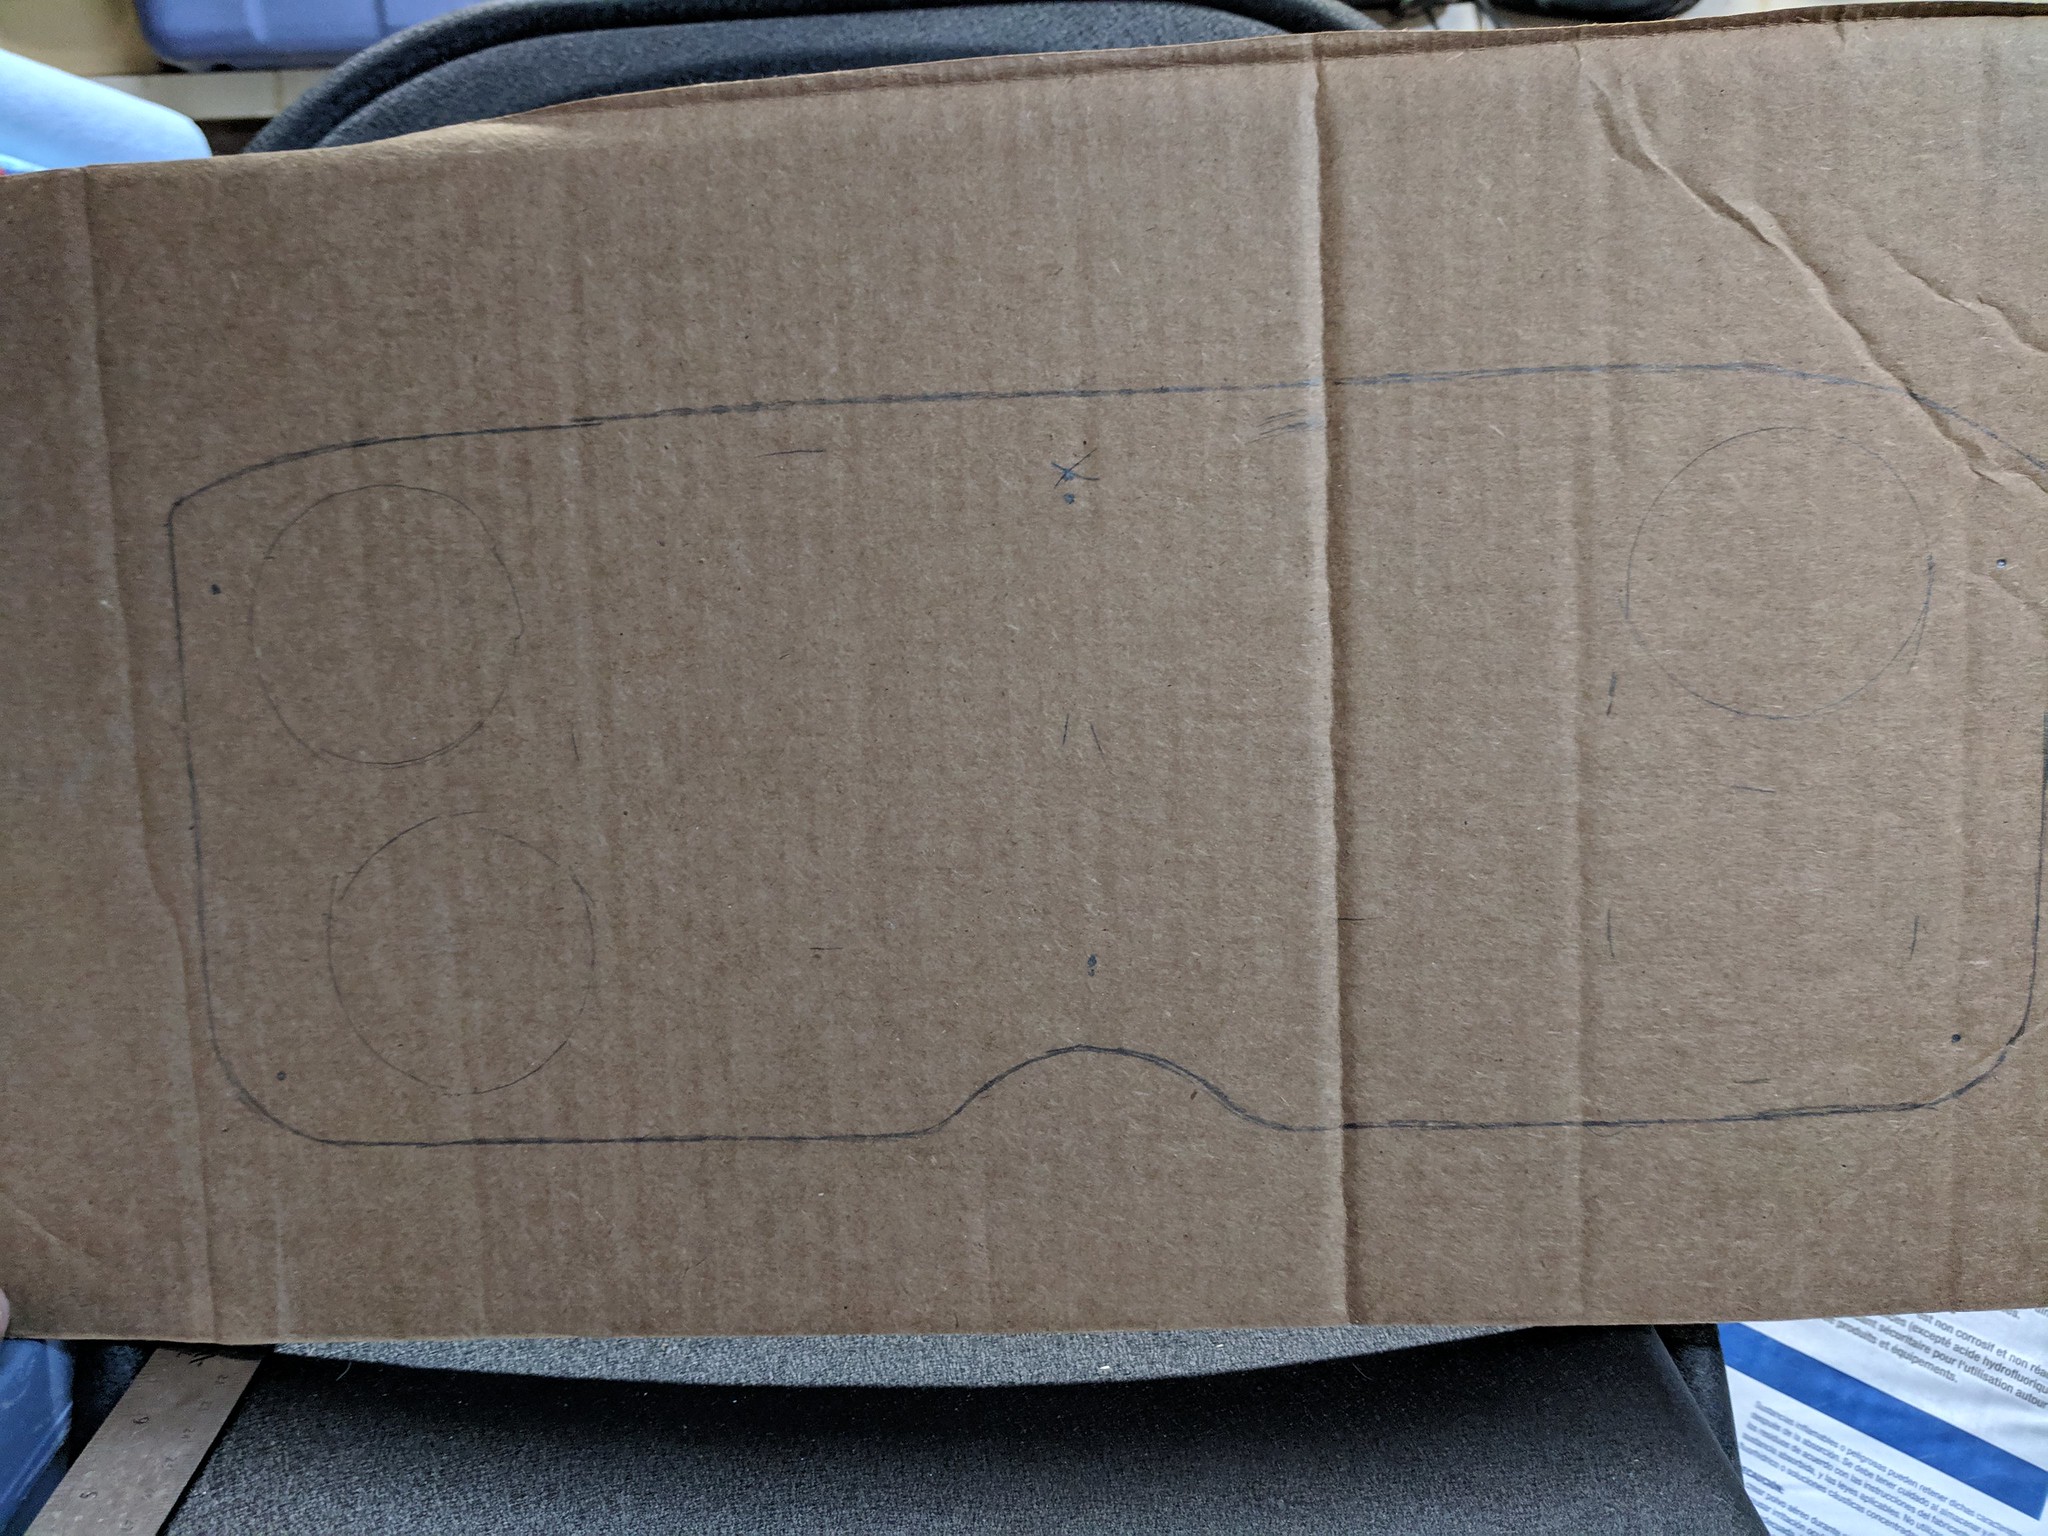
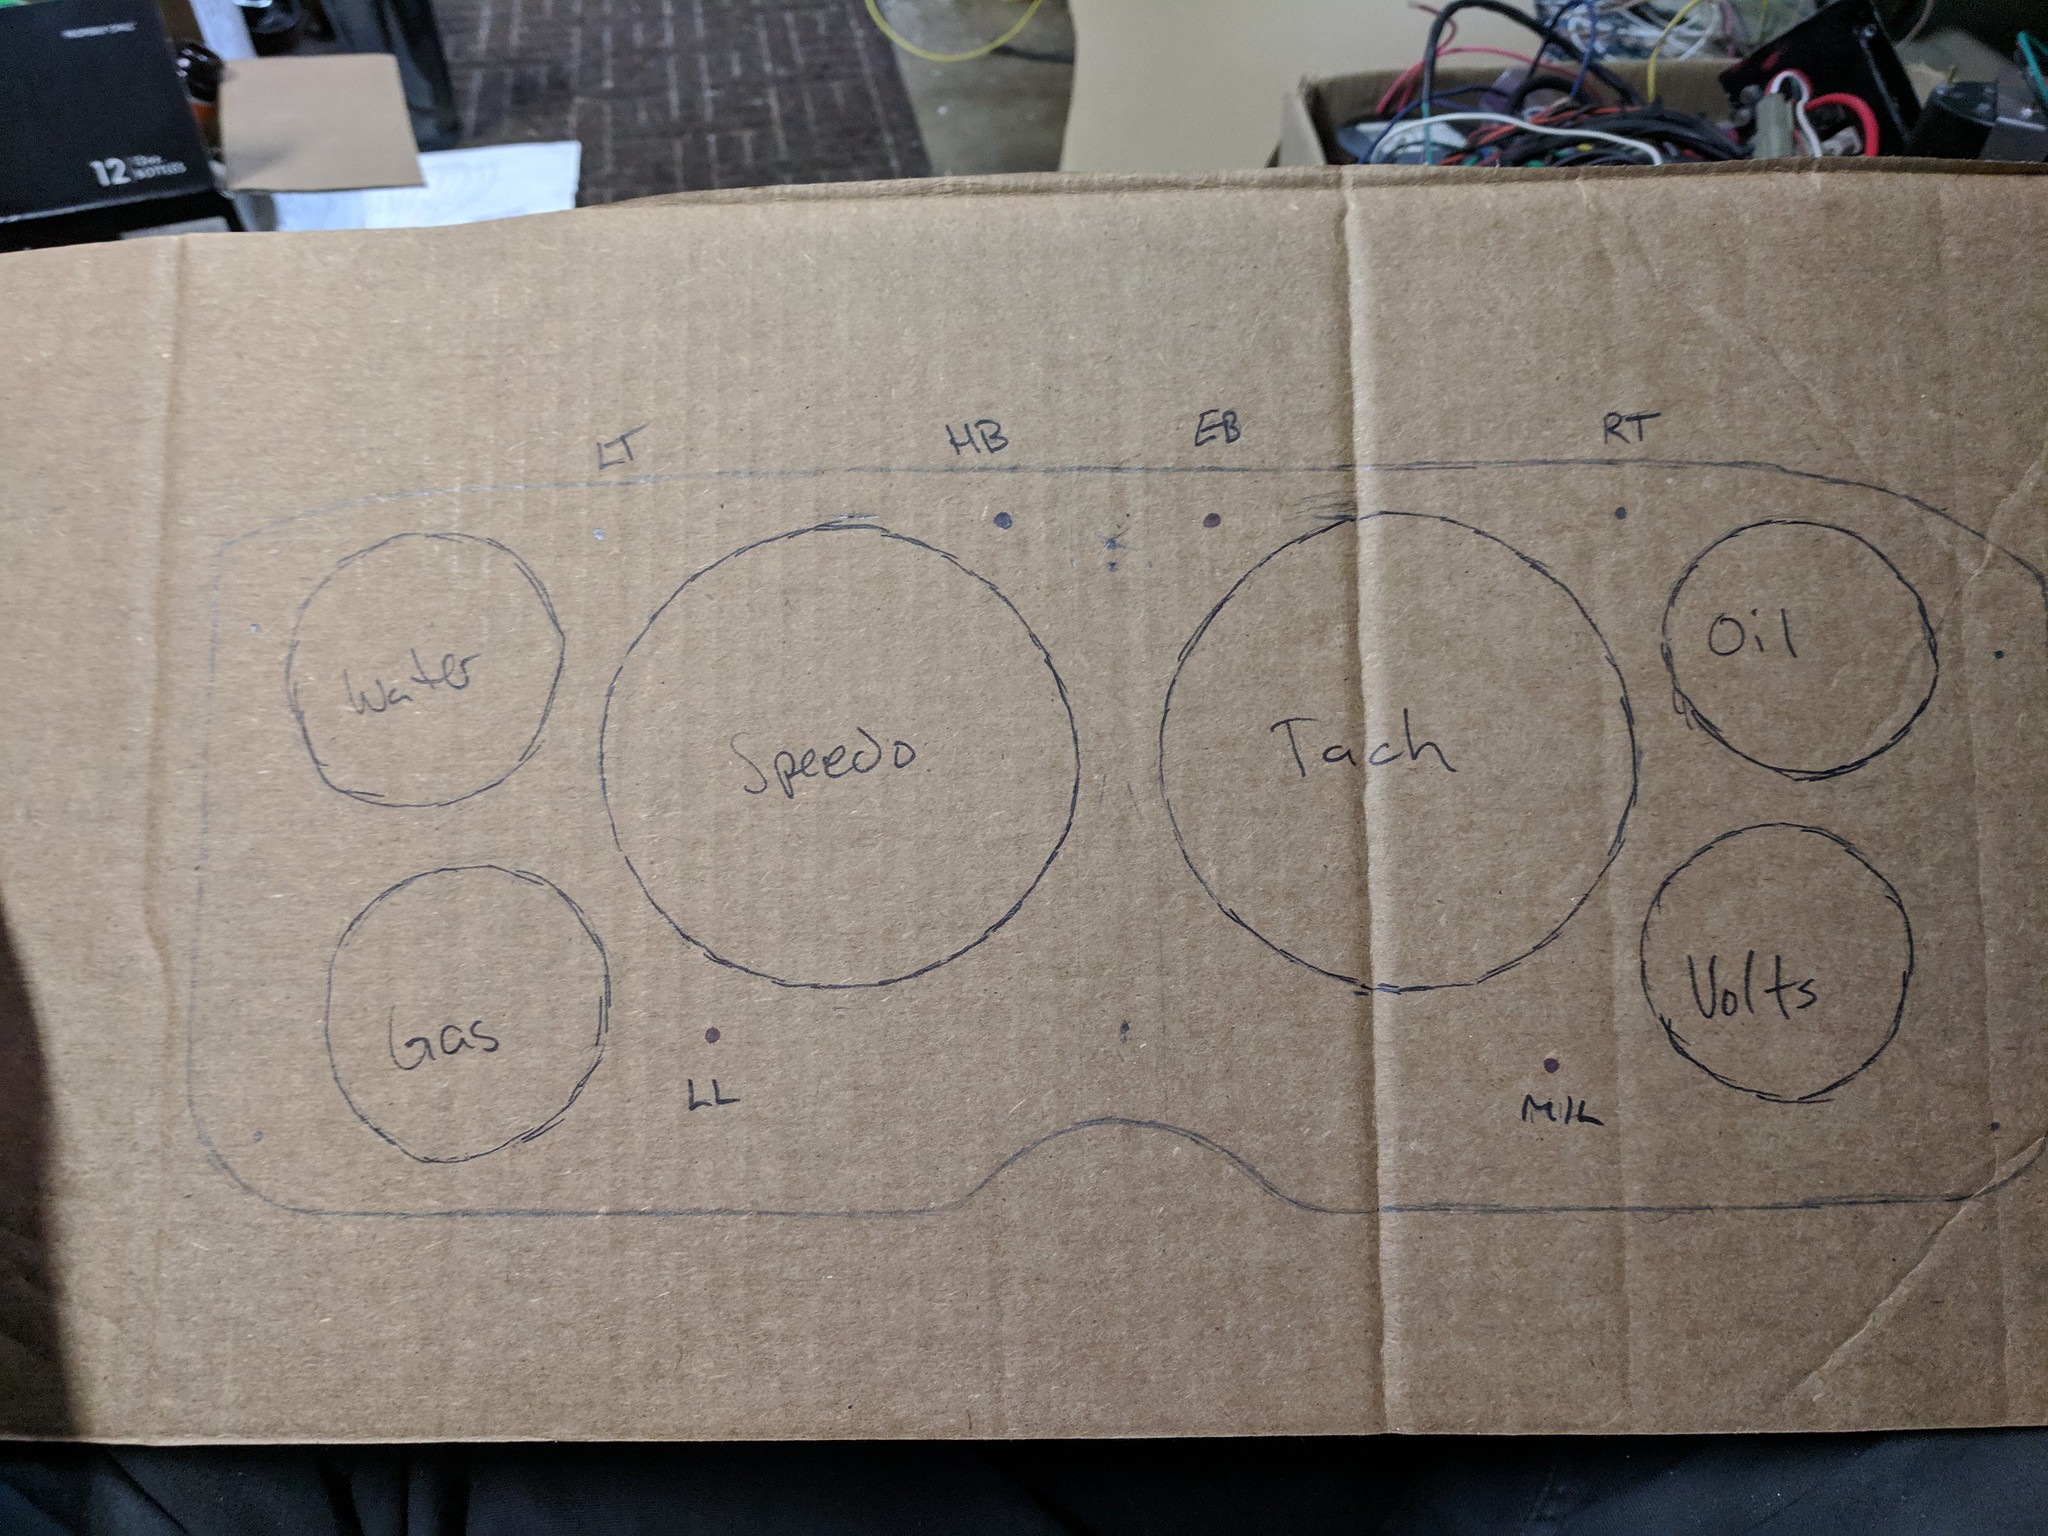
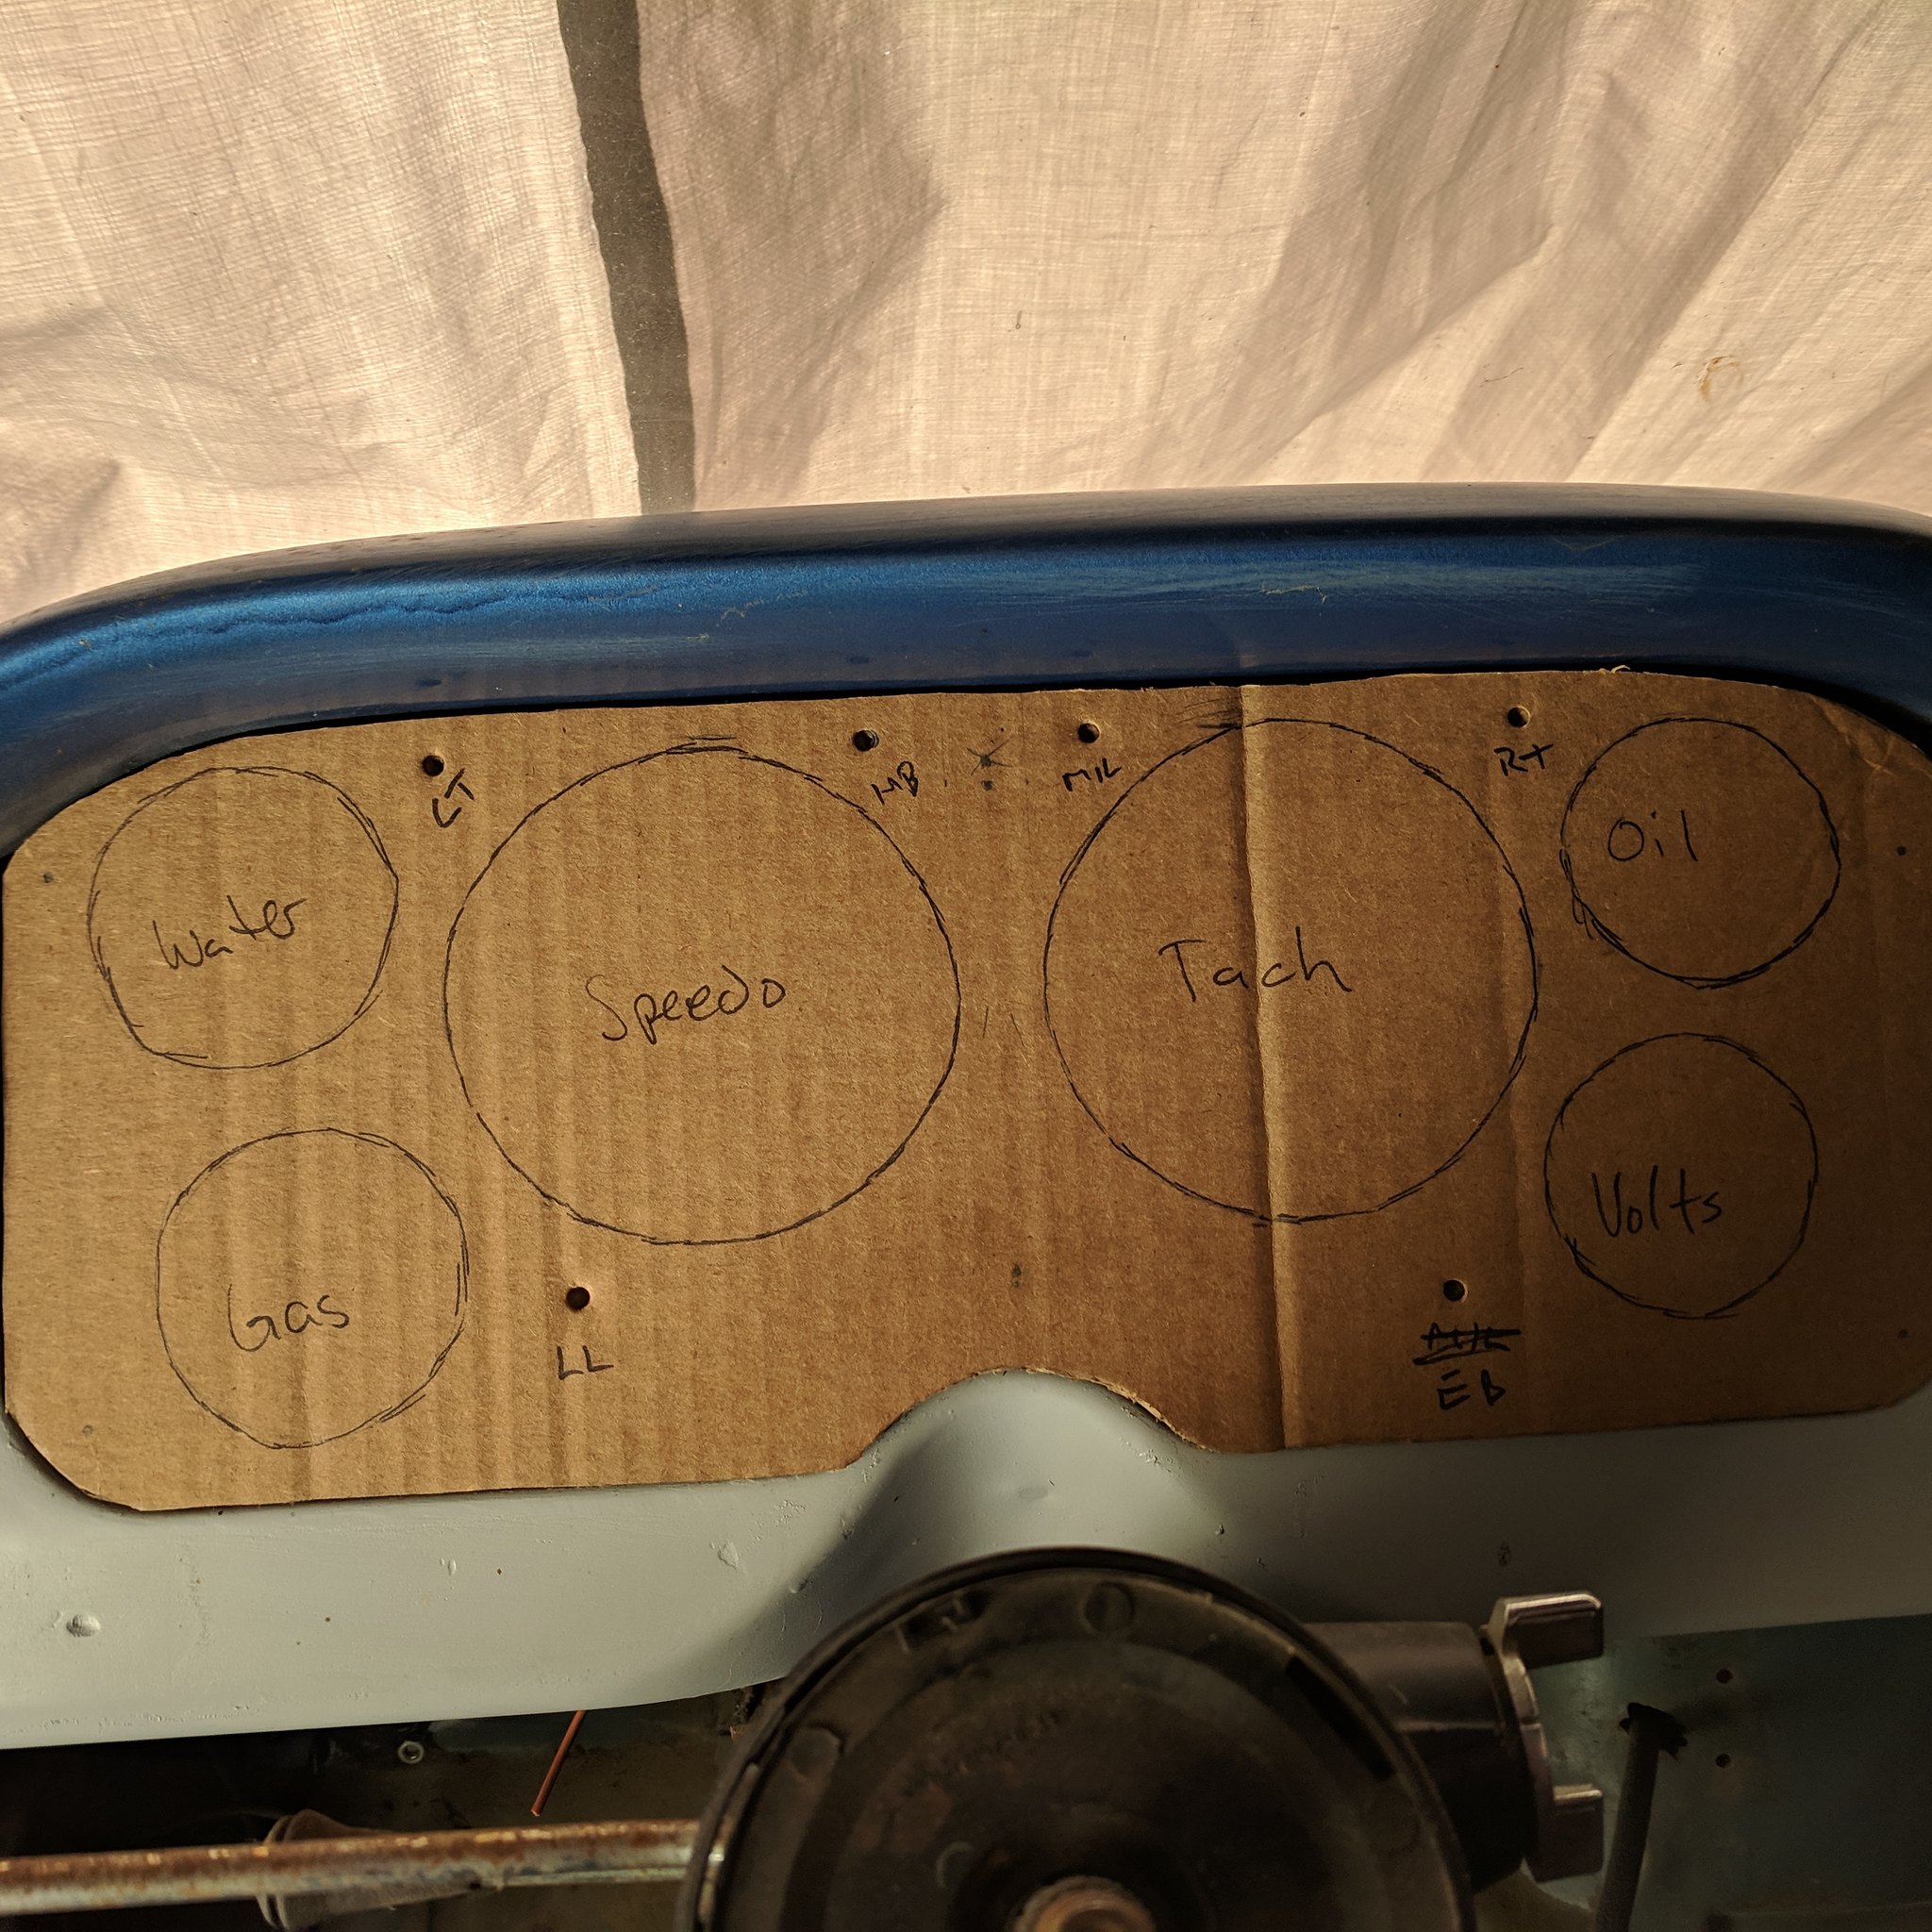
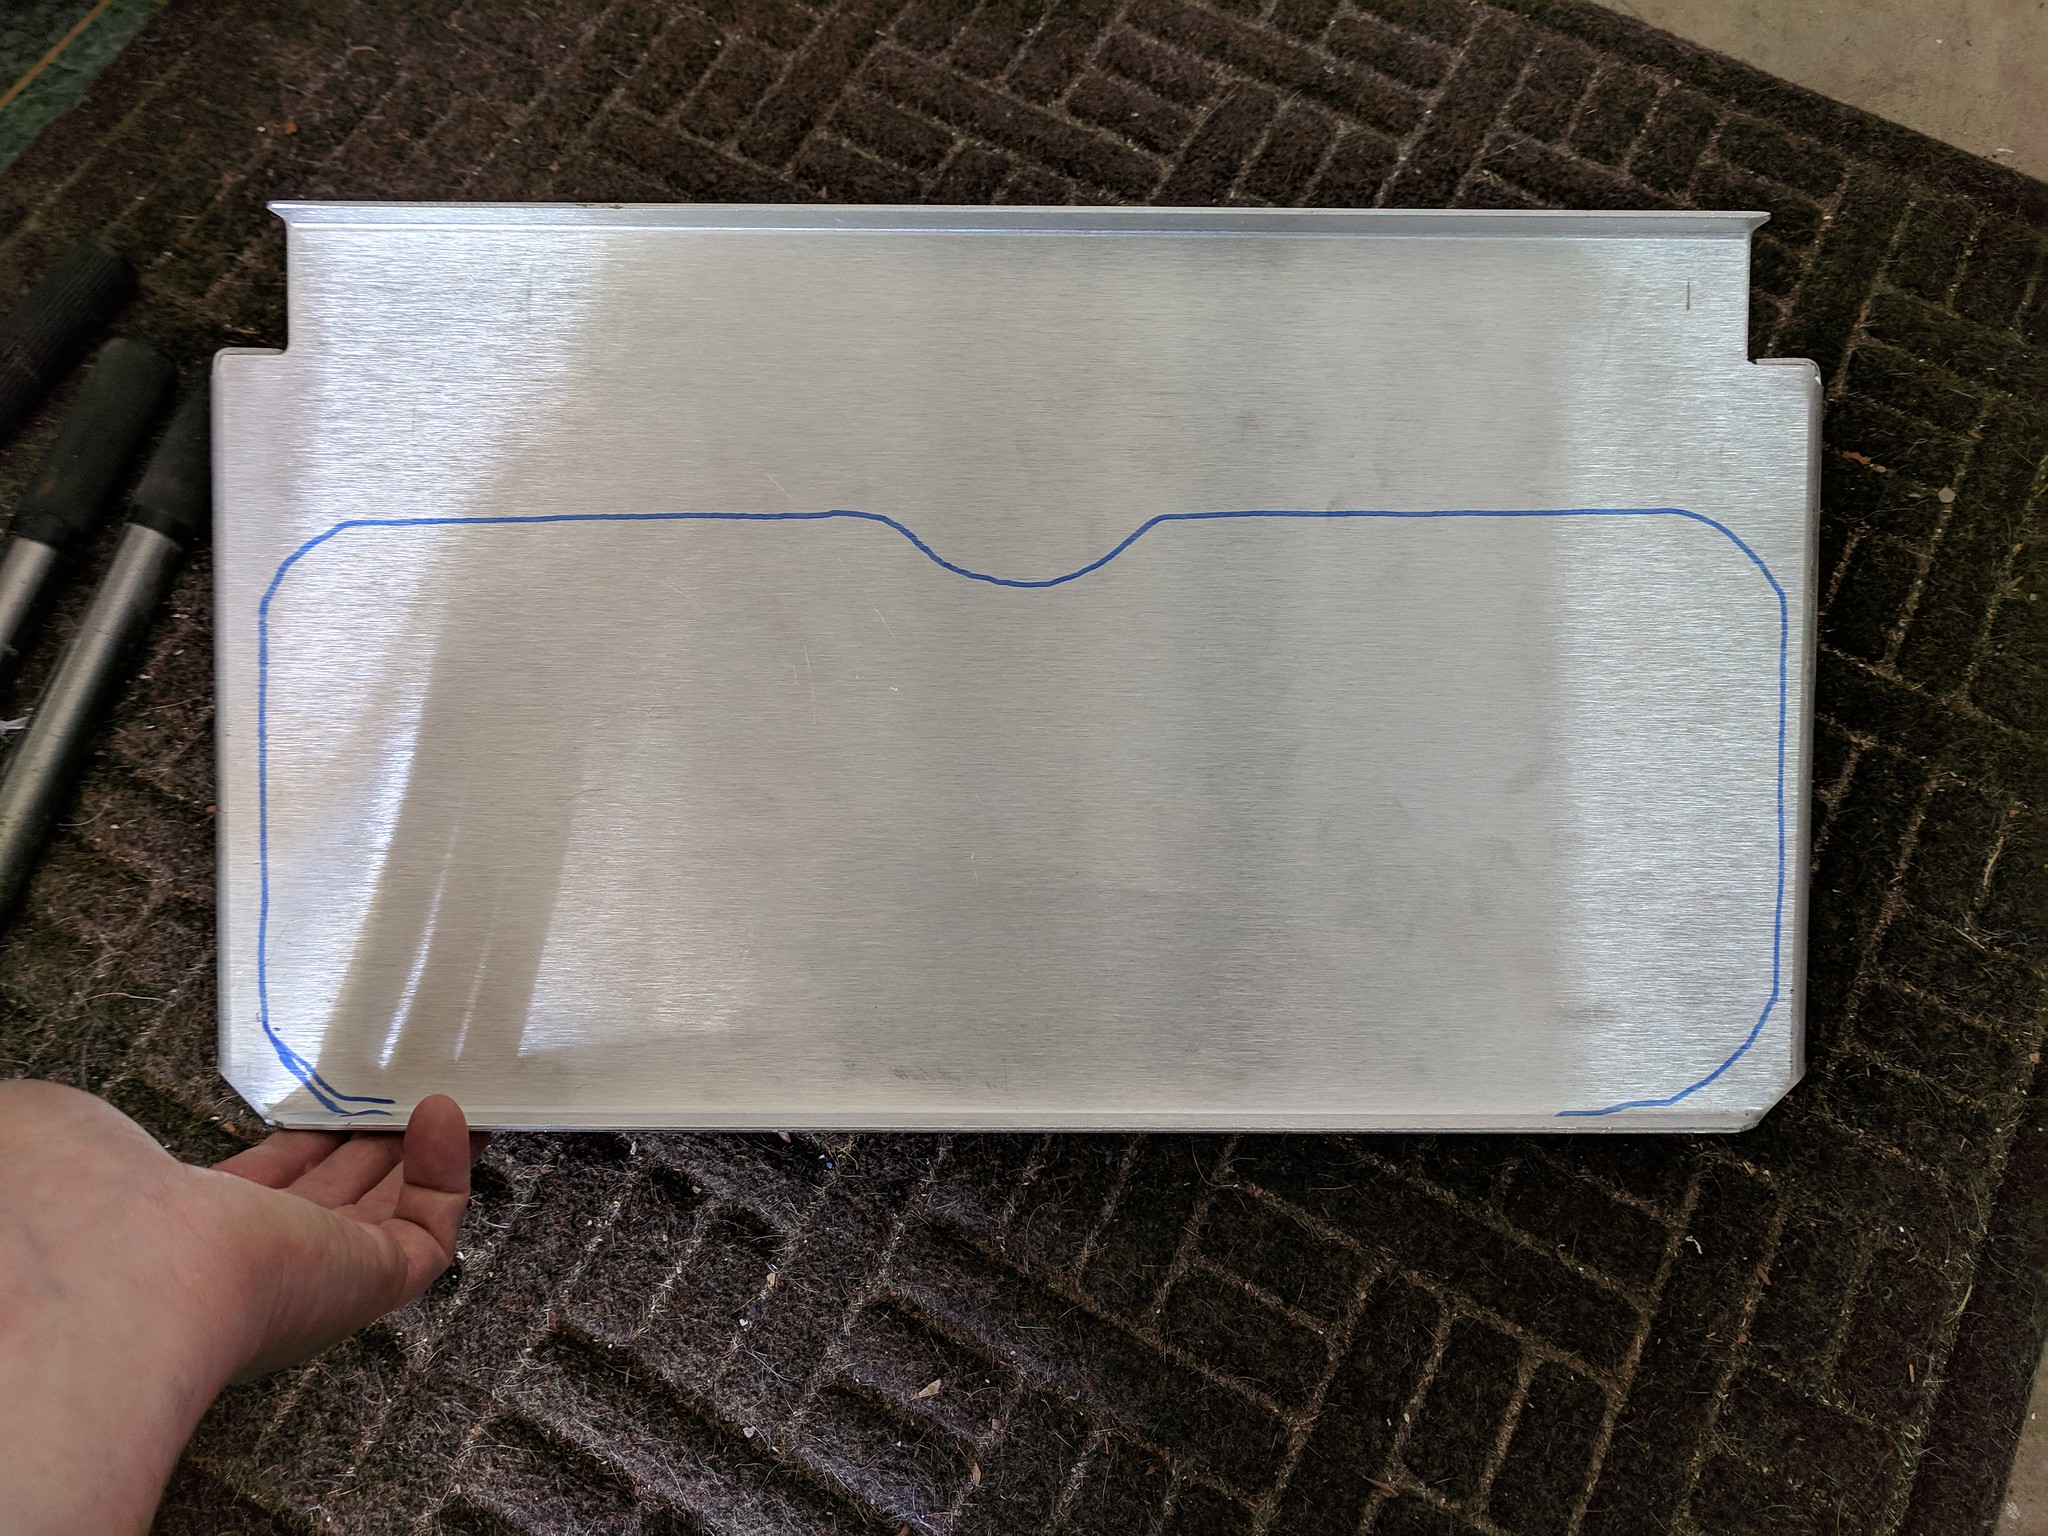
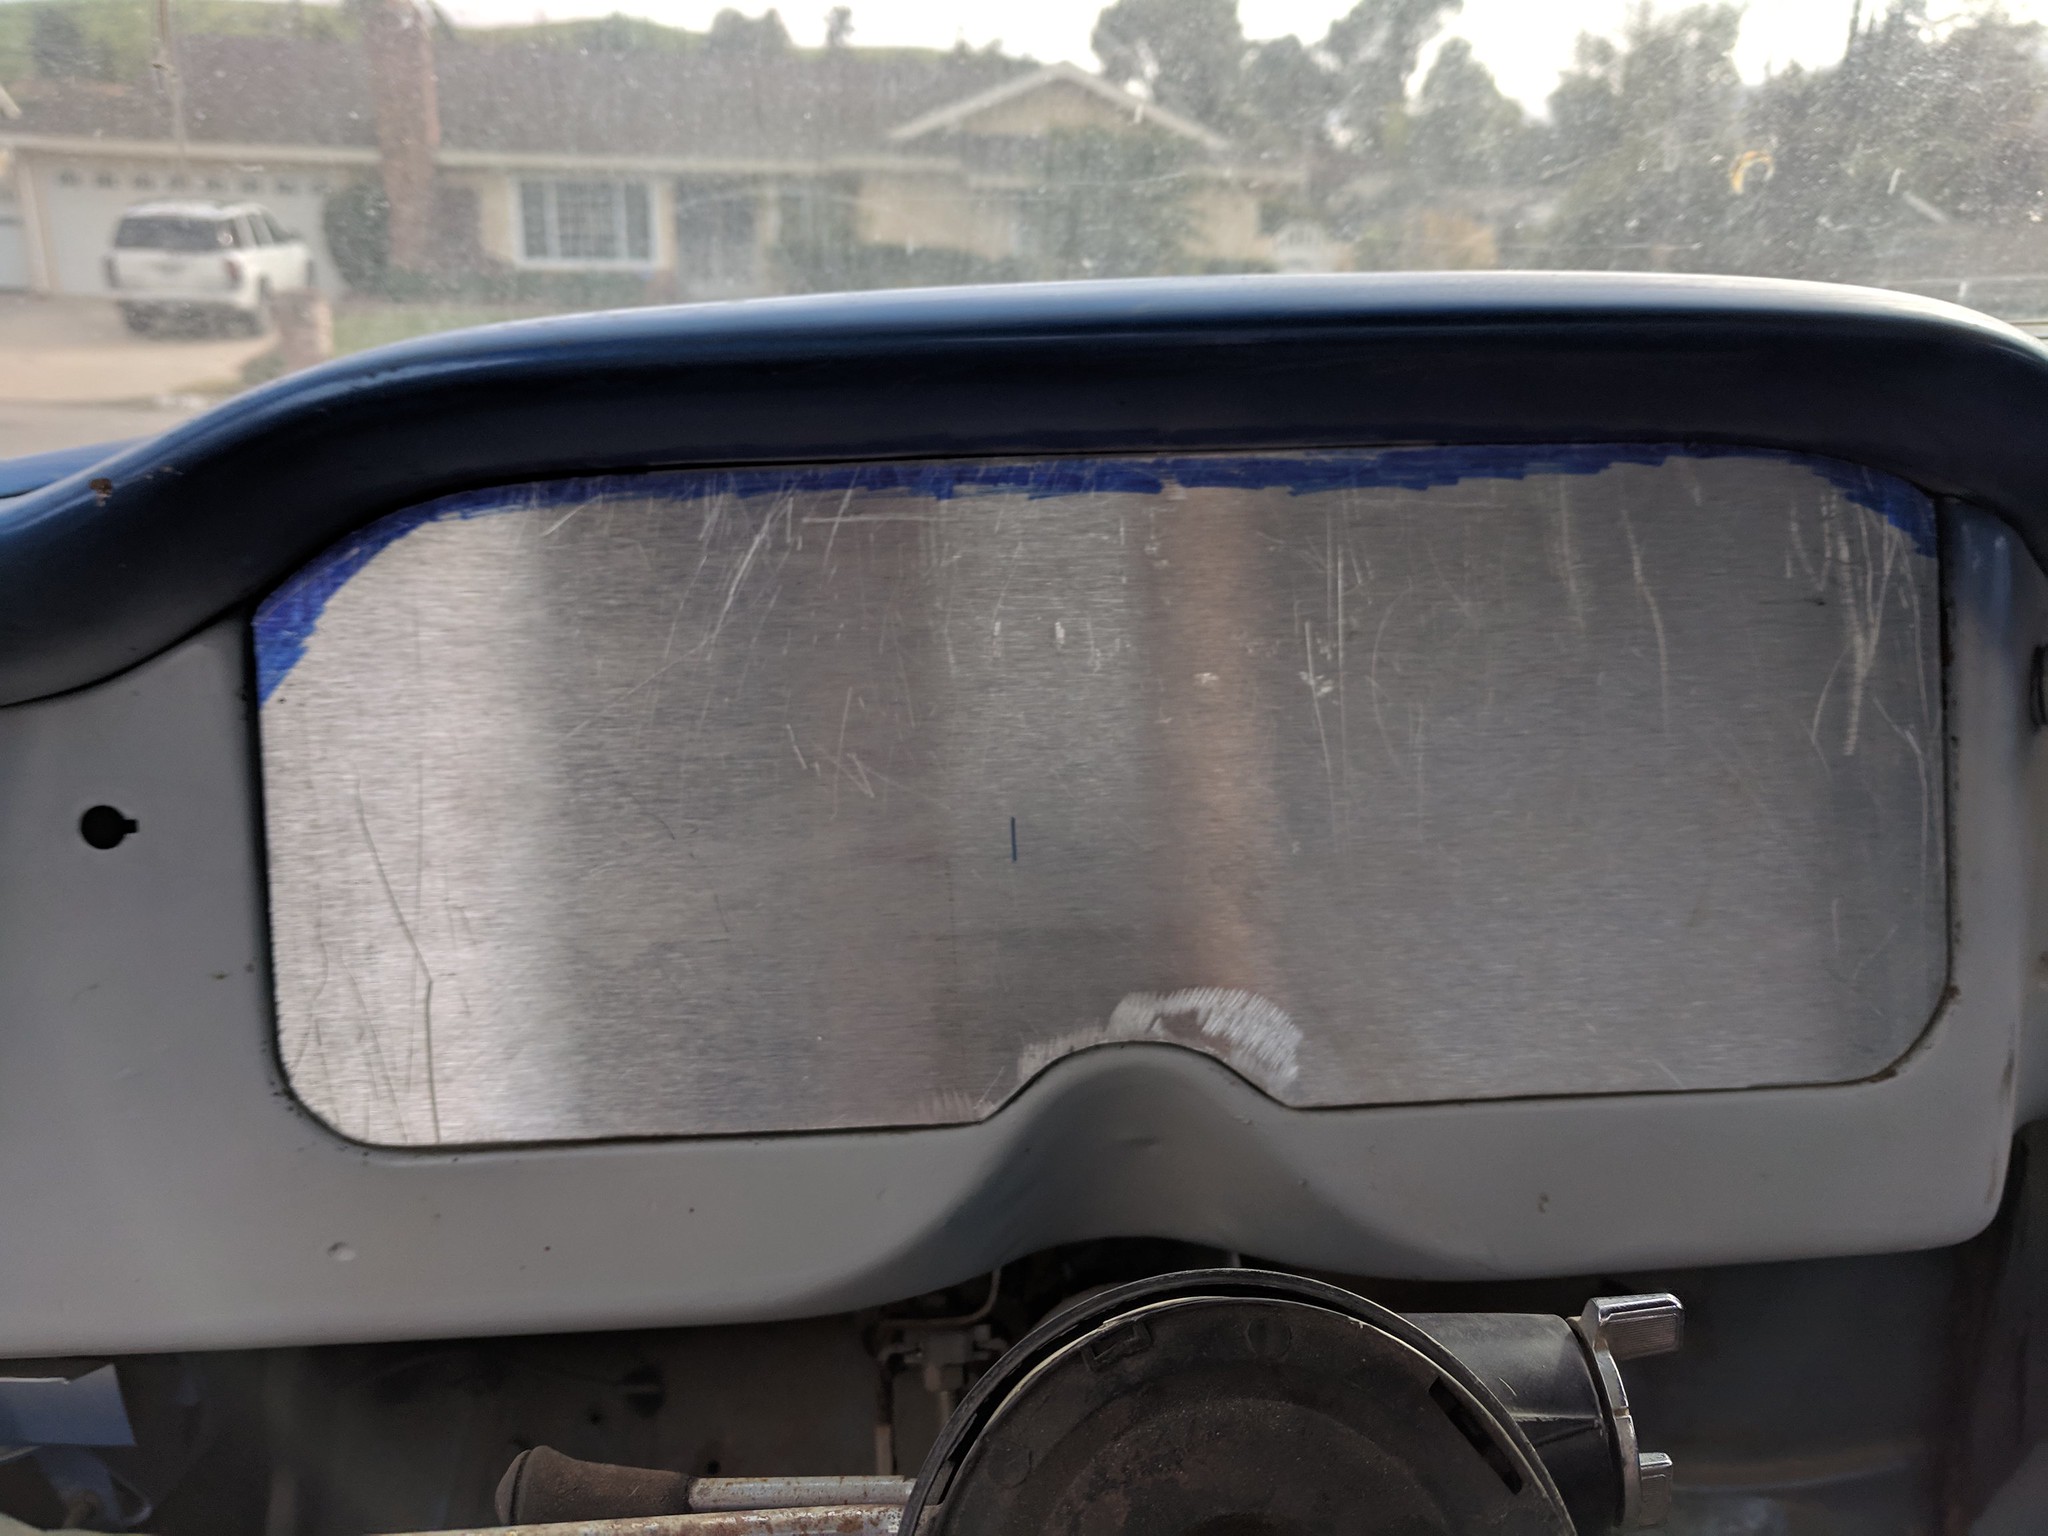
I also made a cardboard template for my new dash, mocked up the guages, and cut and fitted the piece of aluminum I will be using for the dash...
 IMG_20190302_220315
by
Shawn Wallbridge, on Flickr
 IMG_20190302_223249
by
Shawn Wallbridge, on Flickr
 IMG_20190302_220530_276
by
Shawn Wallbridge, on Flickr
 IMG_20190303_130203_292
by
Shawn Wallbridge, on Flickr
 IMG_20190303_131140
by
Shawn Wallbridge, on Flickr
Yes that is a network rack shelf, it was going to get tossed at work, and it should be plenty strong enough.
 IMG_20190303_151458
by
Shawn Wallbridge, on Flickr
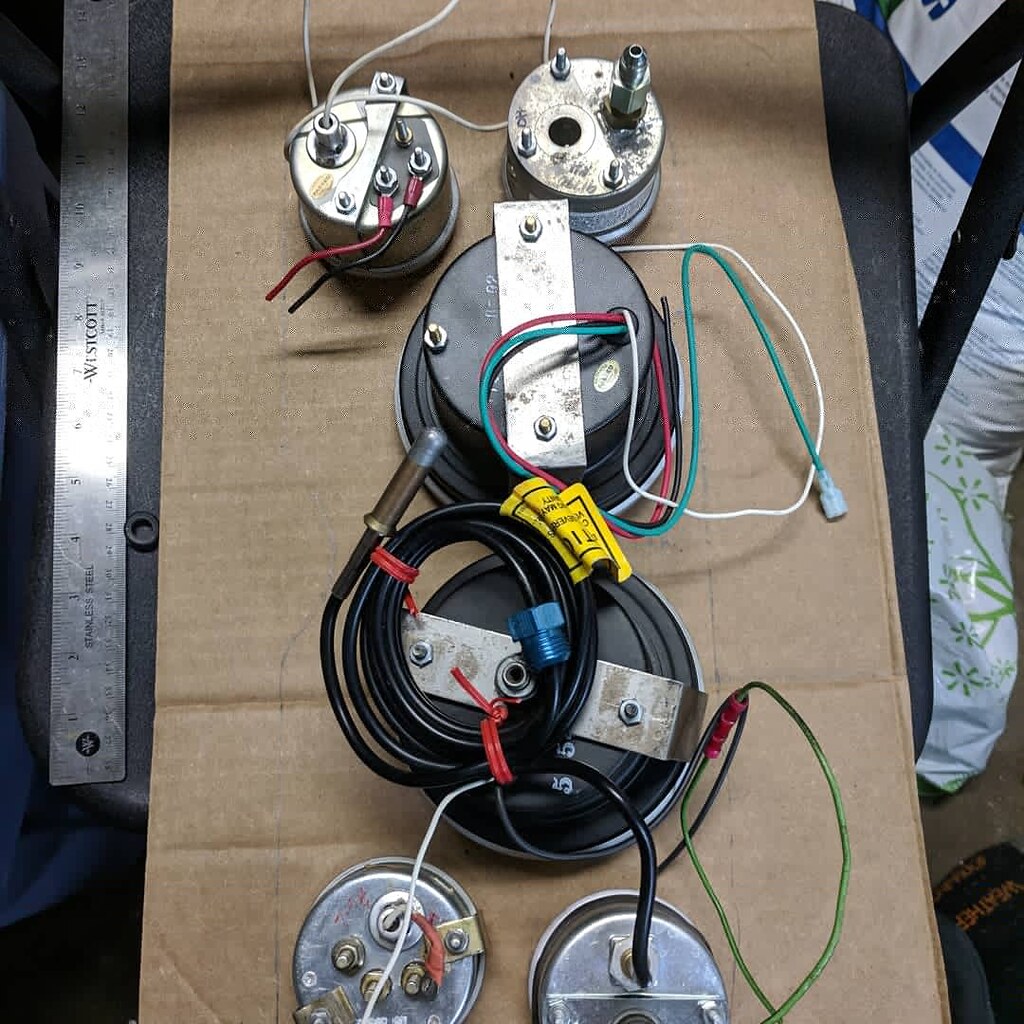
Then I started to create a sub-harness with two metri-pack 8pin connectors for all the wiring. It won't really make it much easier to remove (since I am running mechanical guages, I will have the oil pressure line, water temp, and speedometer cable), but it will be cleaner and a lot easier to wire on the bench than up under the dash.
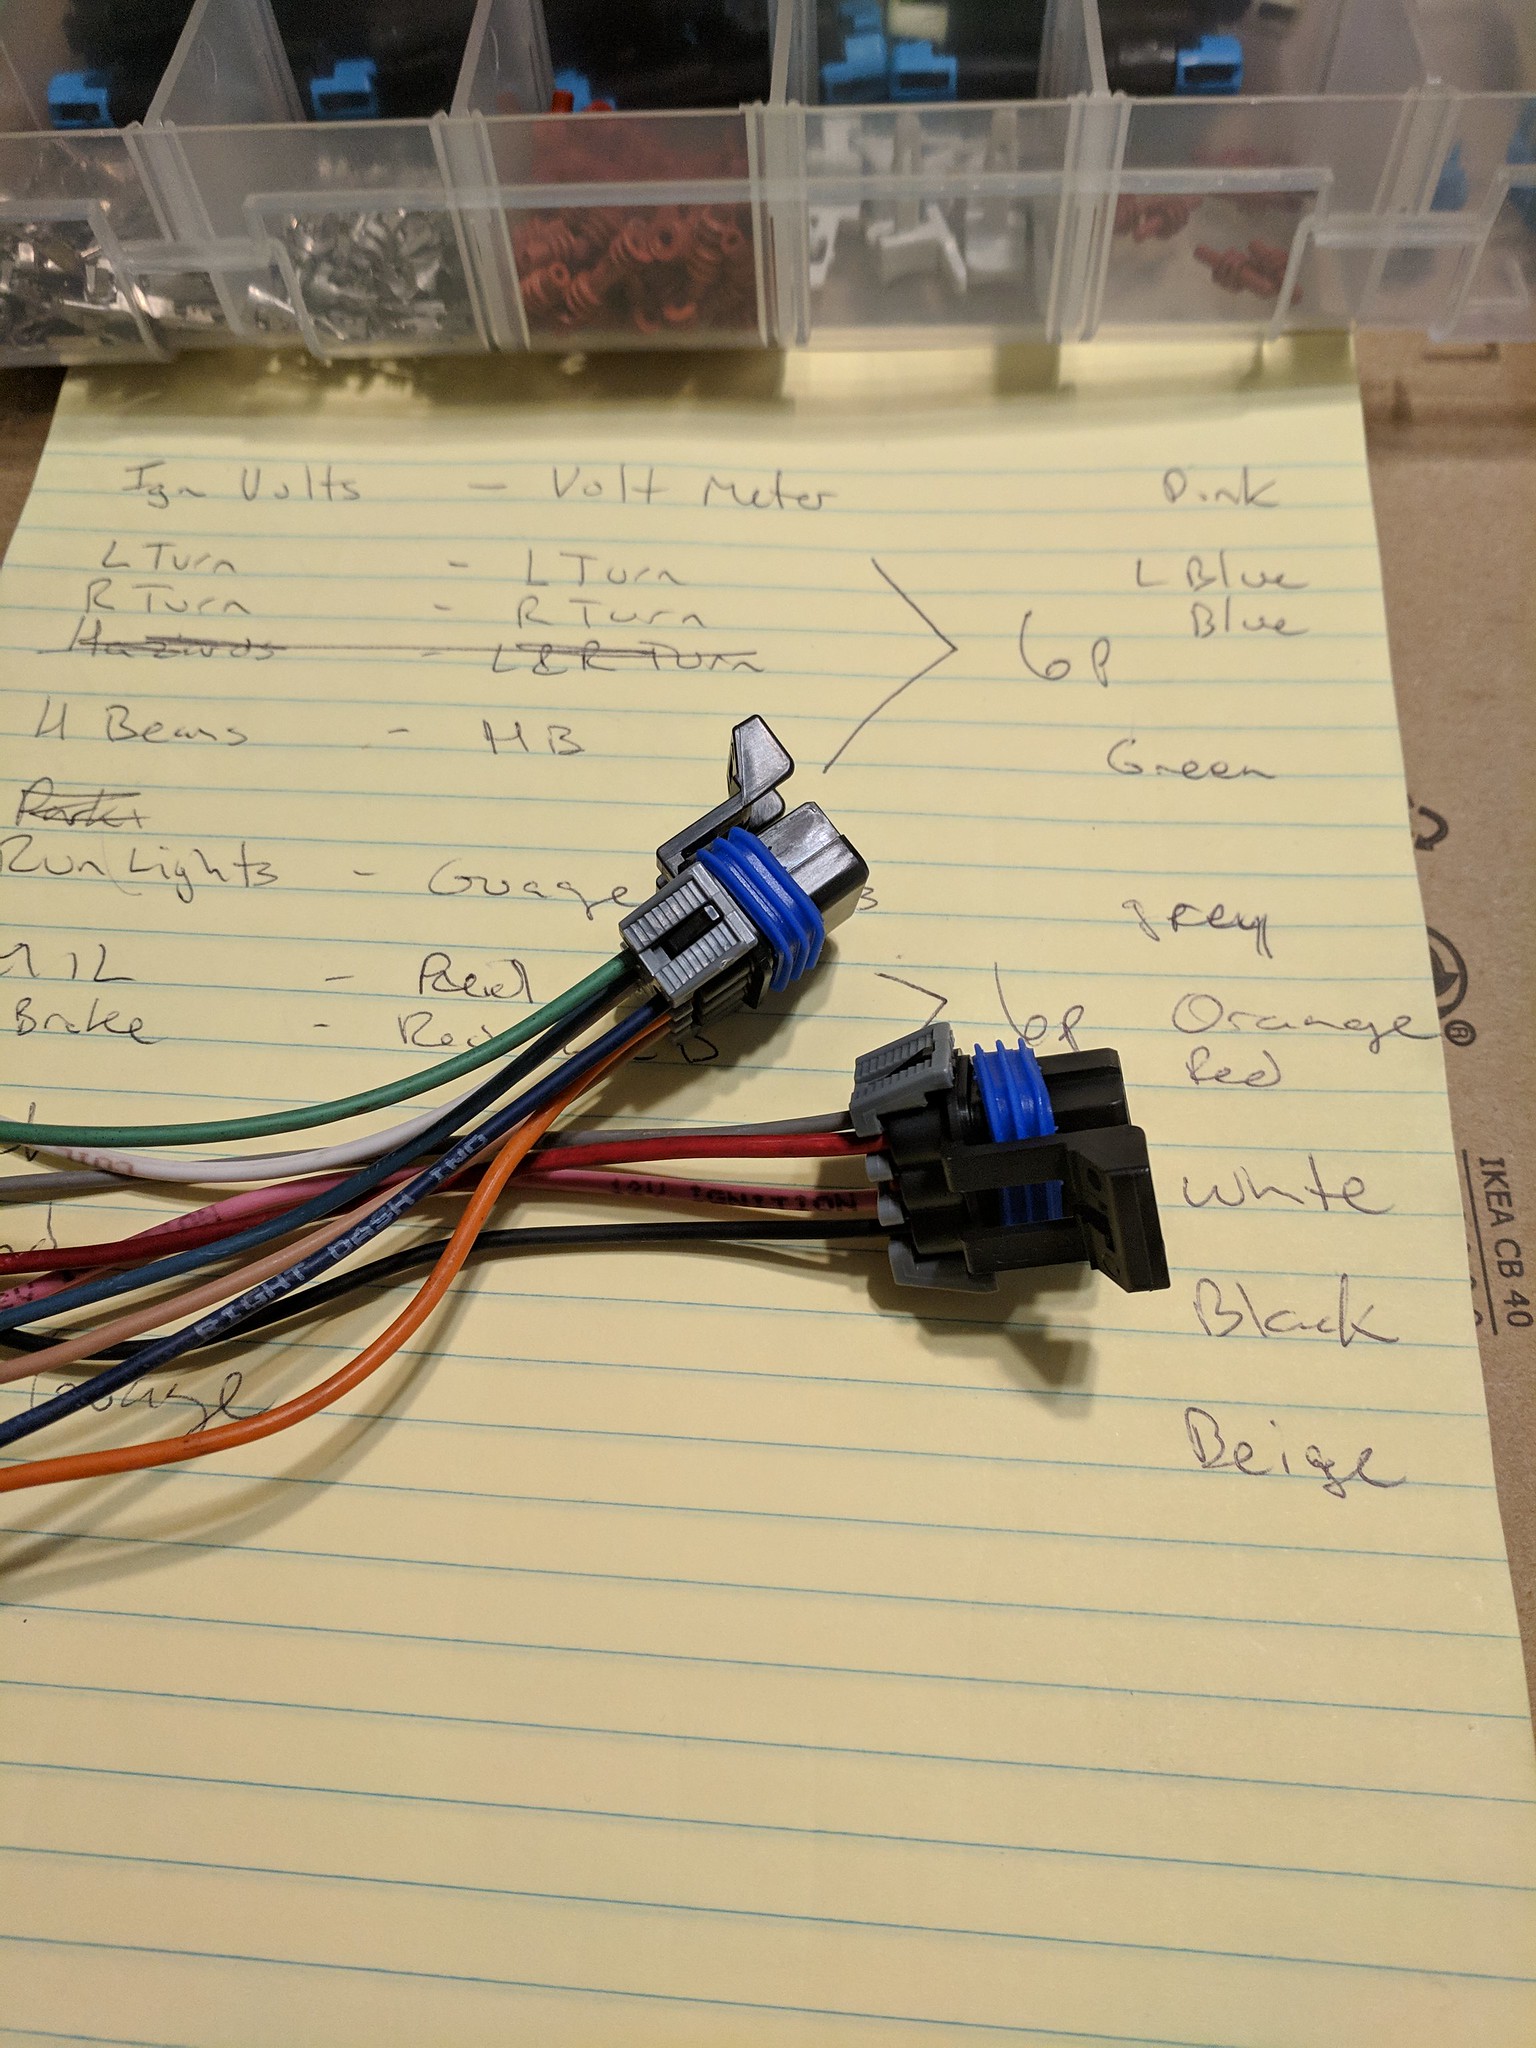 IMG_20190302_190956
by
Shawn Wallbridge, on Flickr
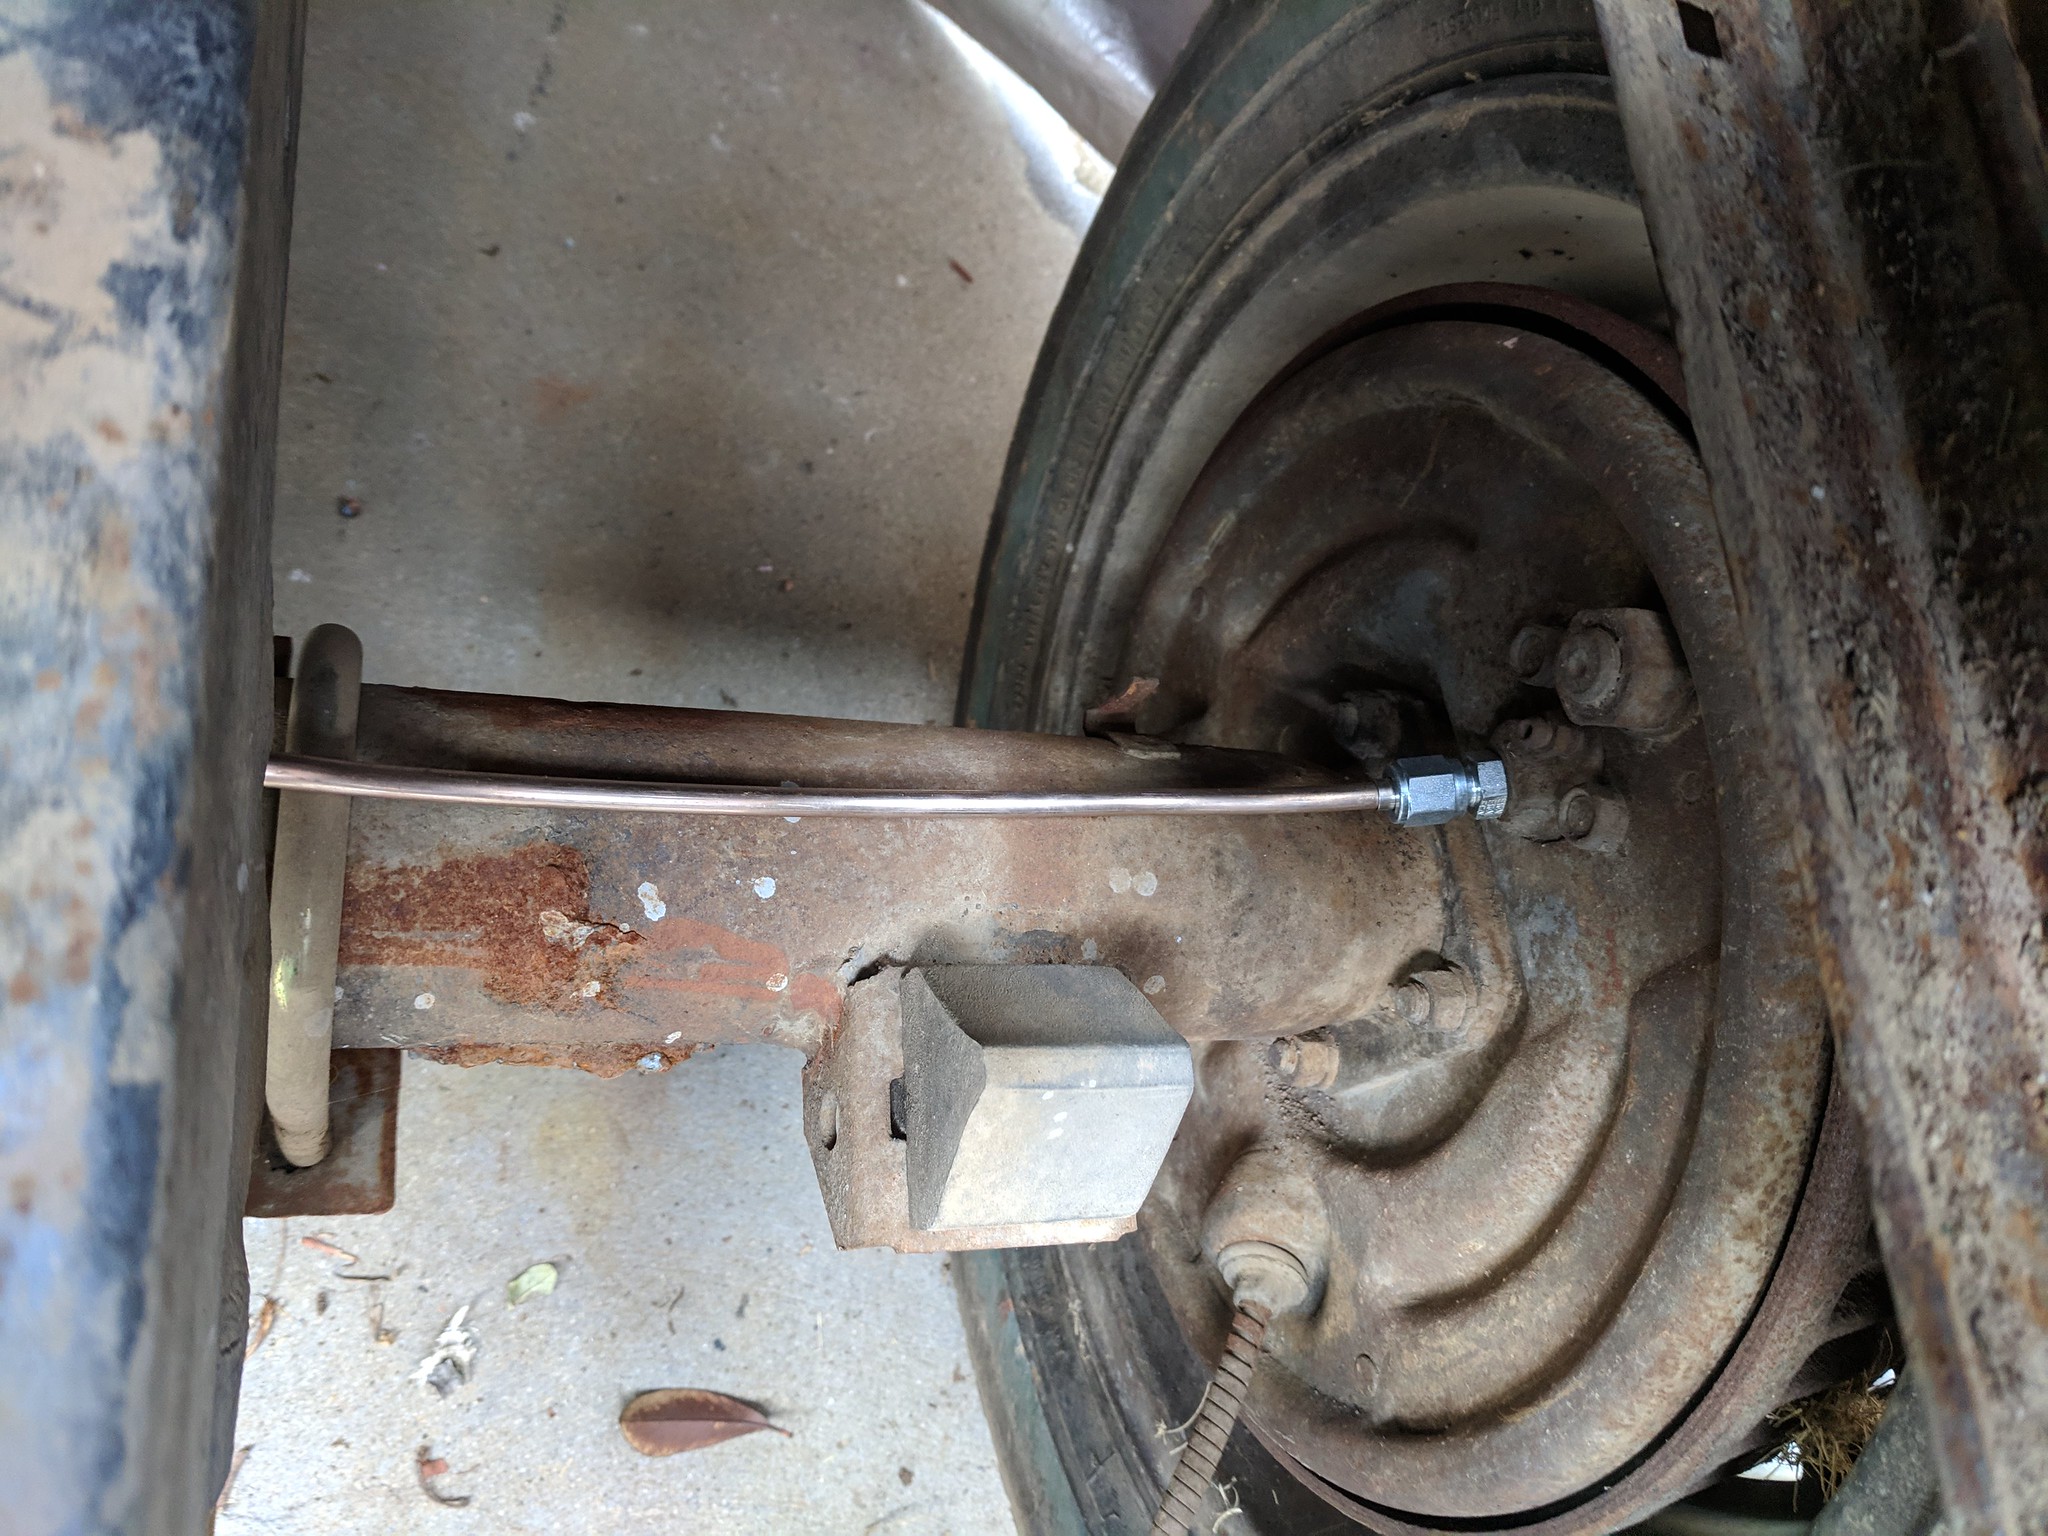
I also pulled all the brake lines. They had mounted the hard line T fitting that normally attaches to the rear axle, to the frame. So, imho, they needed to be replaced. I am using AN fitting adapters and AN fittings for everything, but I have only done the rear axle lines. Man I love the NiCopp lines. So much easier than stainless, though it kind of made my full set of Rigid tubing benders obsolete

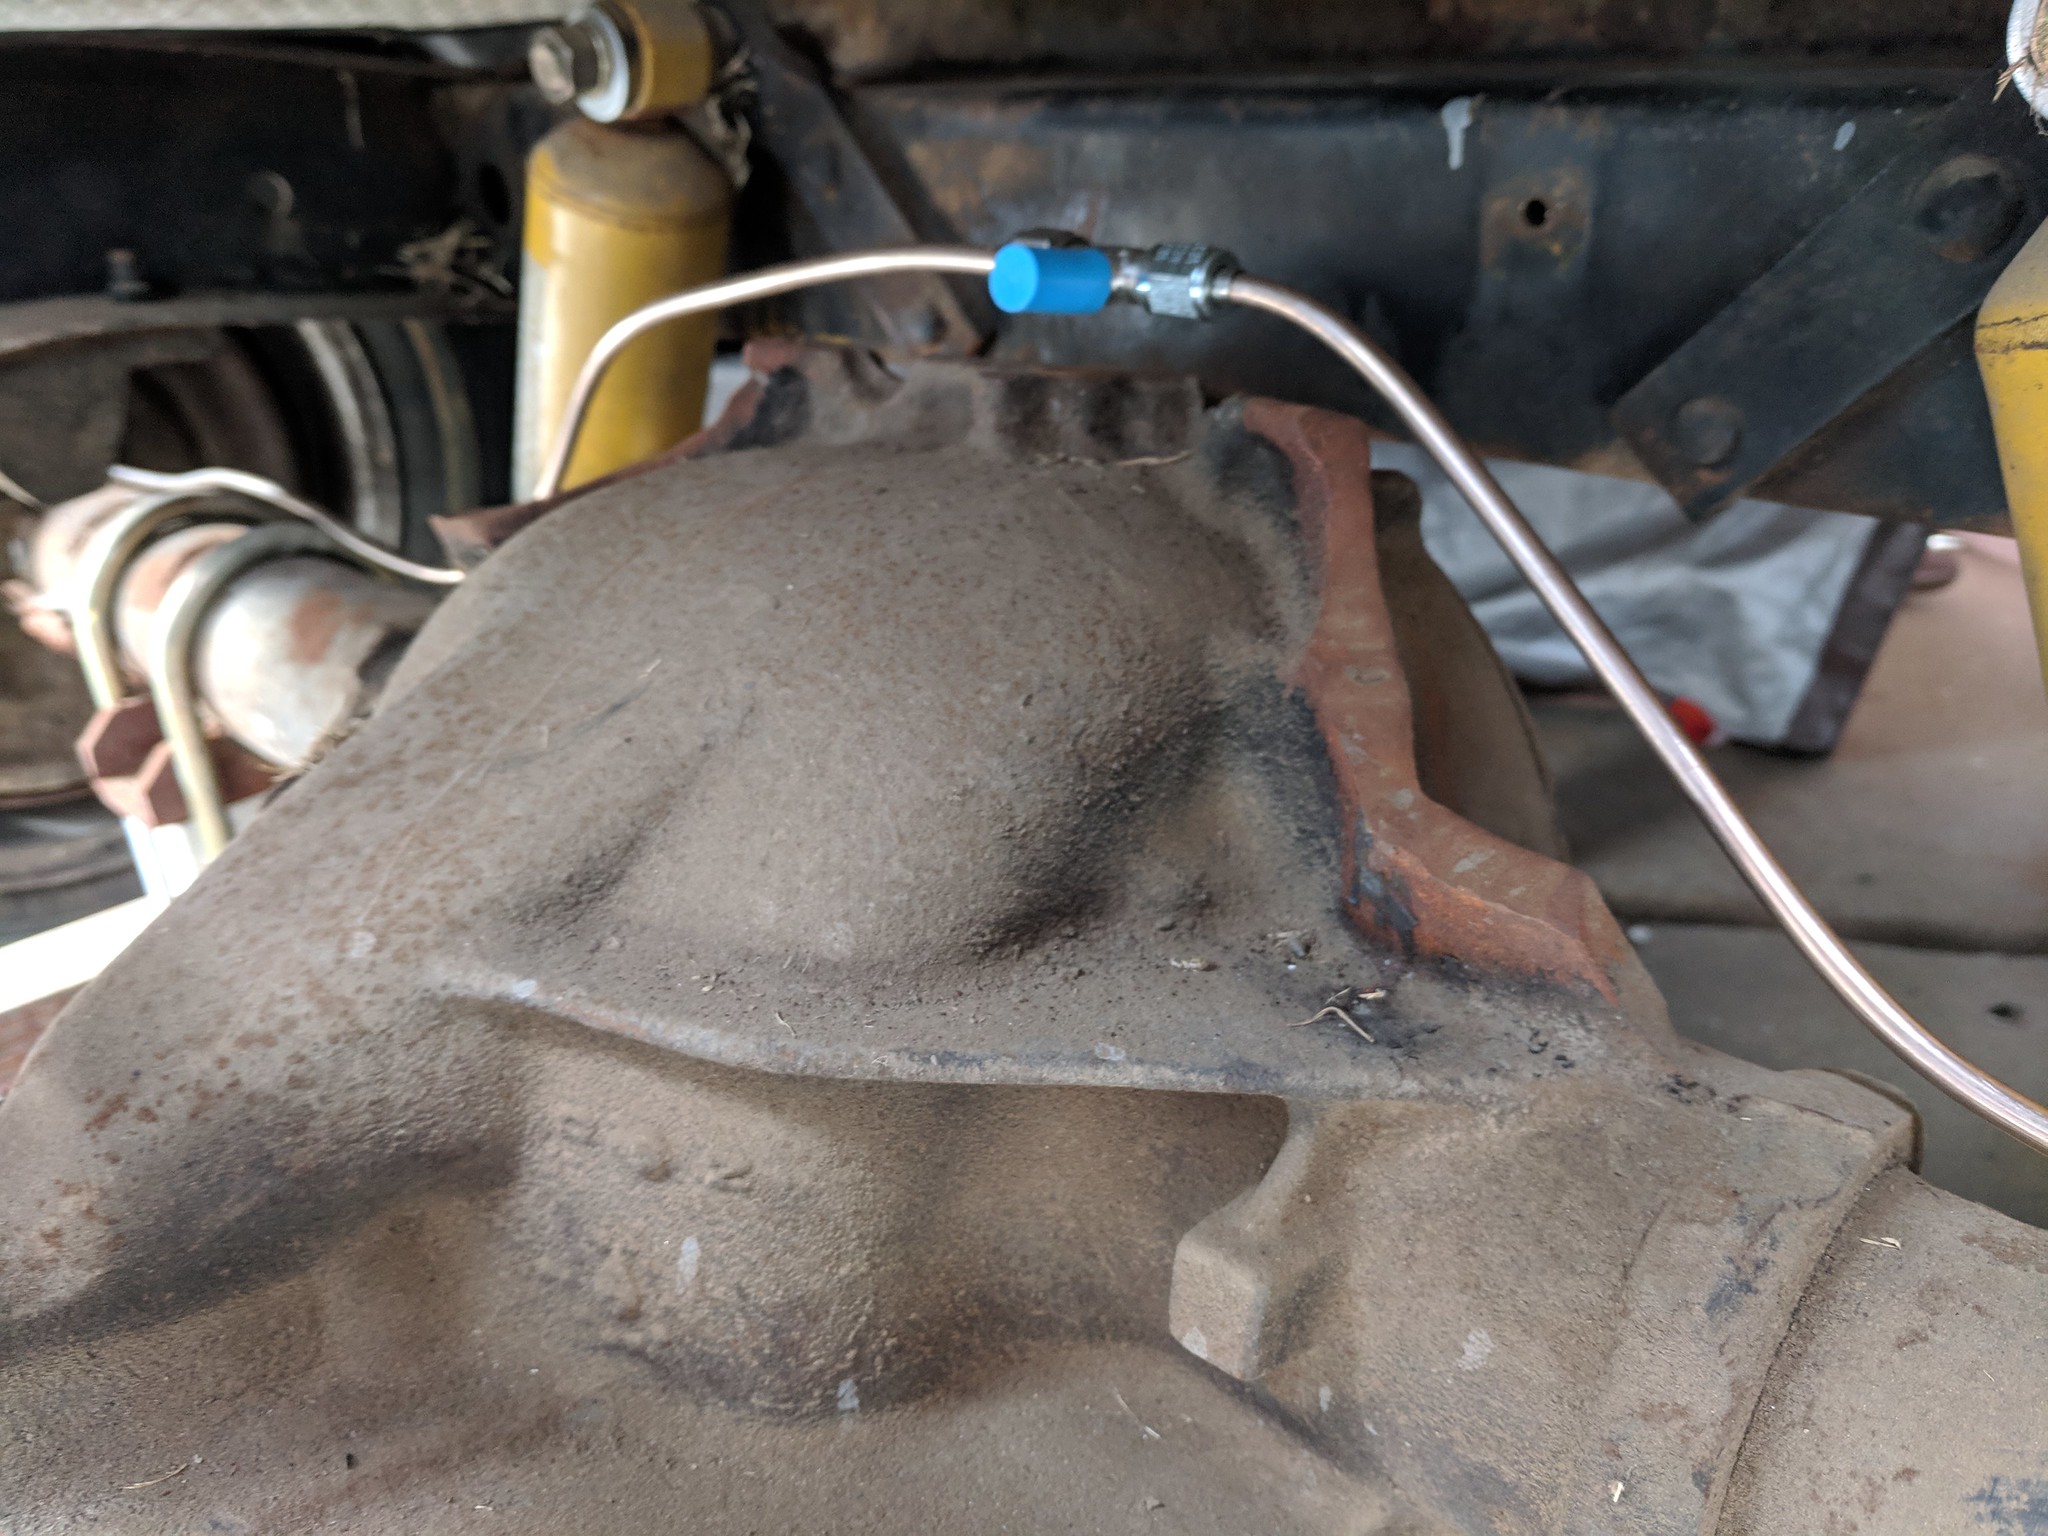 IMG_20190303_155605
by
Shawn Wallbridge, on Flickr
This isn't final, I still need to secure it to the axle.
 IMG_20190303_155600
by
Shawn Wallbridge, on Flickr
The Kevlar flexible brake lines came in, so I can secure the hard line and install the flex so I can get started on the front to rear. Though I realized I don't have a spare residual valve for my rear drums, so I ordered that. Thankfully I have plenty of AN fittings.
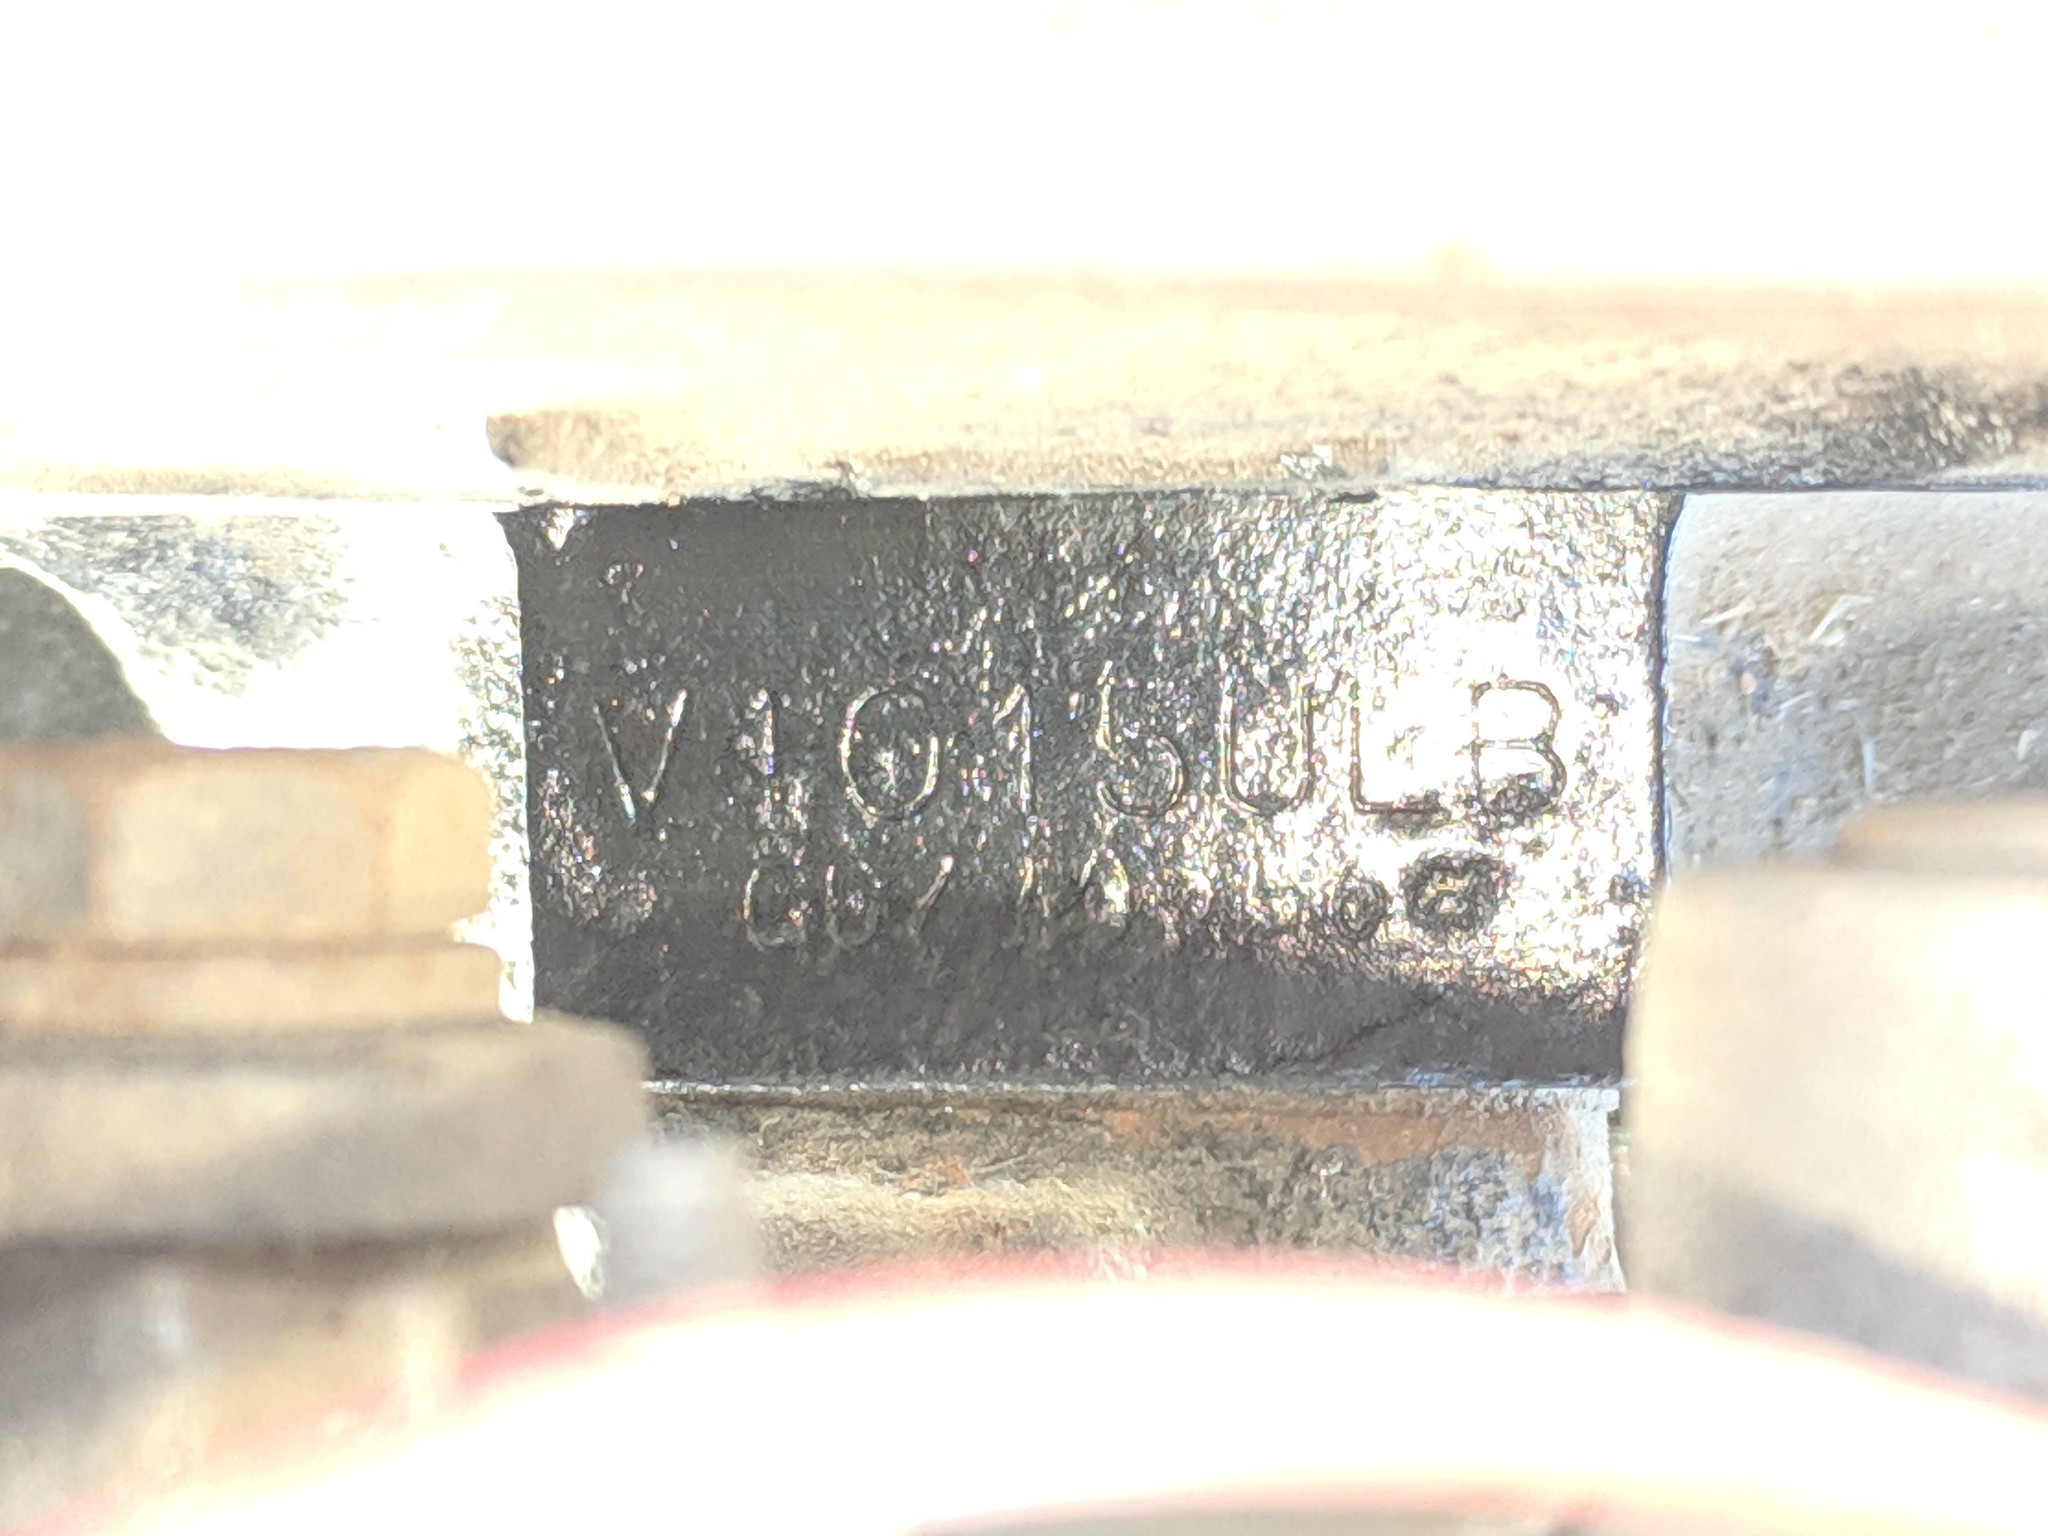
One interesting thing, is I can't find anything on the engine that is in the truck. It appears to be stamped ULB, but I can't find that stamping referenced anywhere on the internet.
 IMG_20190216_154647
by
Shawn Wallbridge, on Flickr
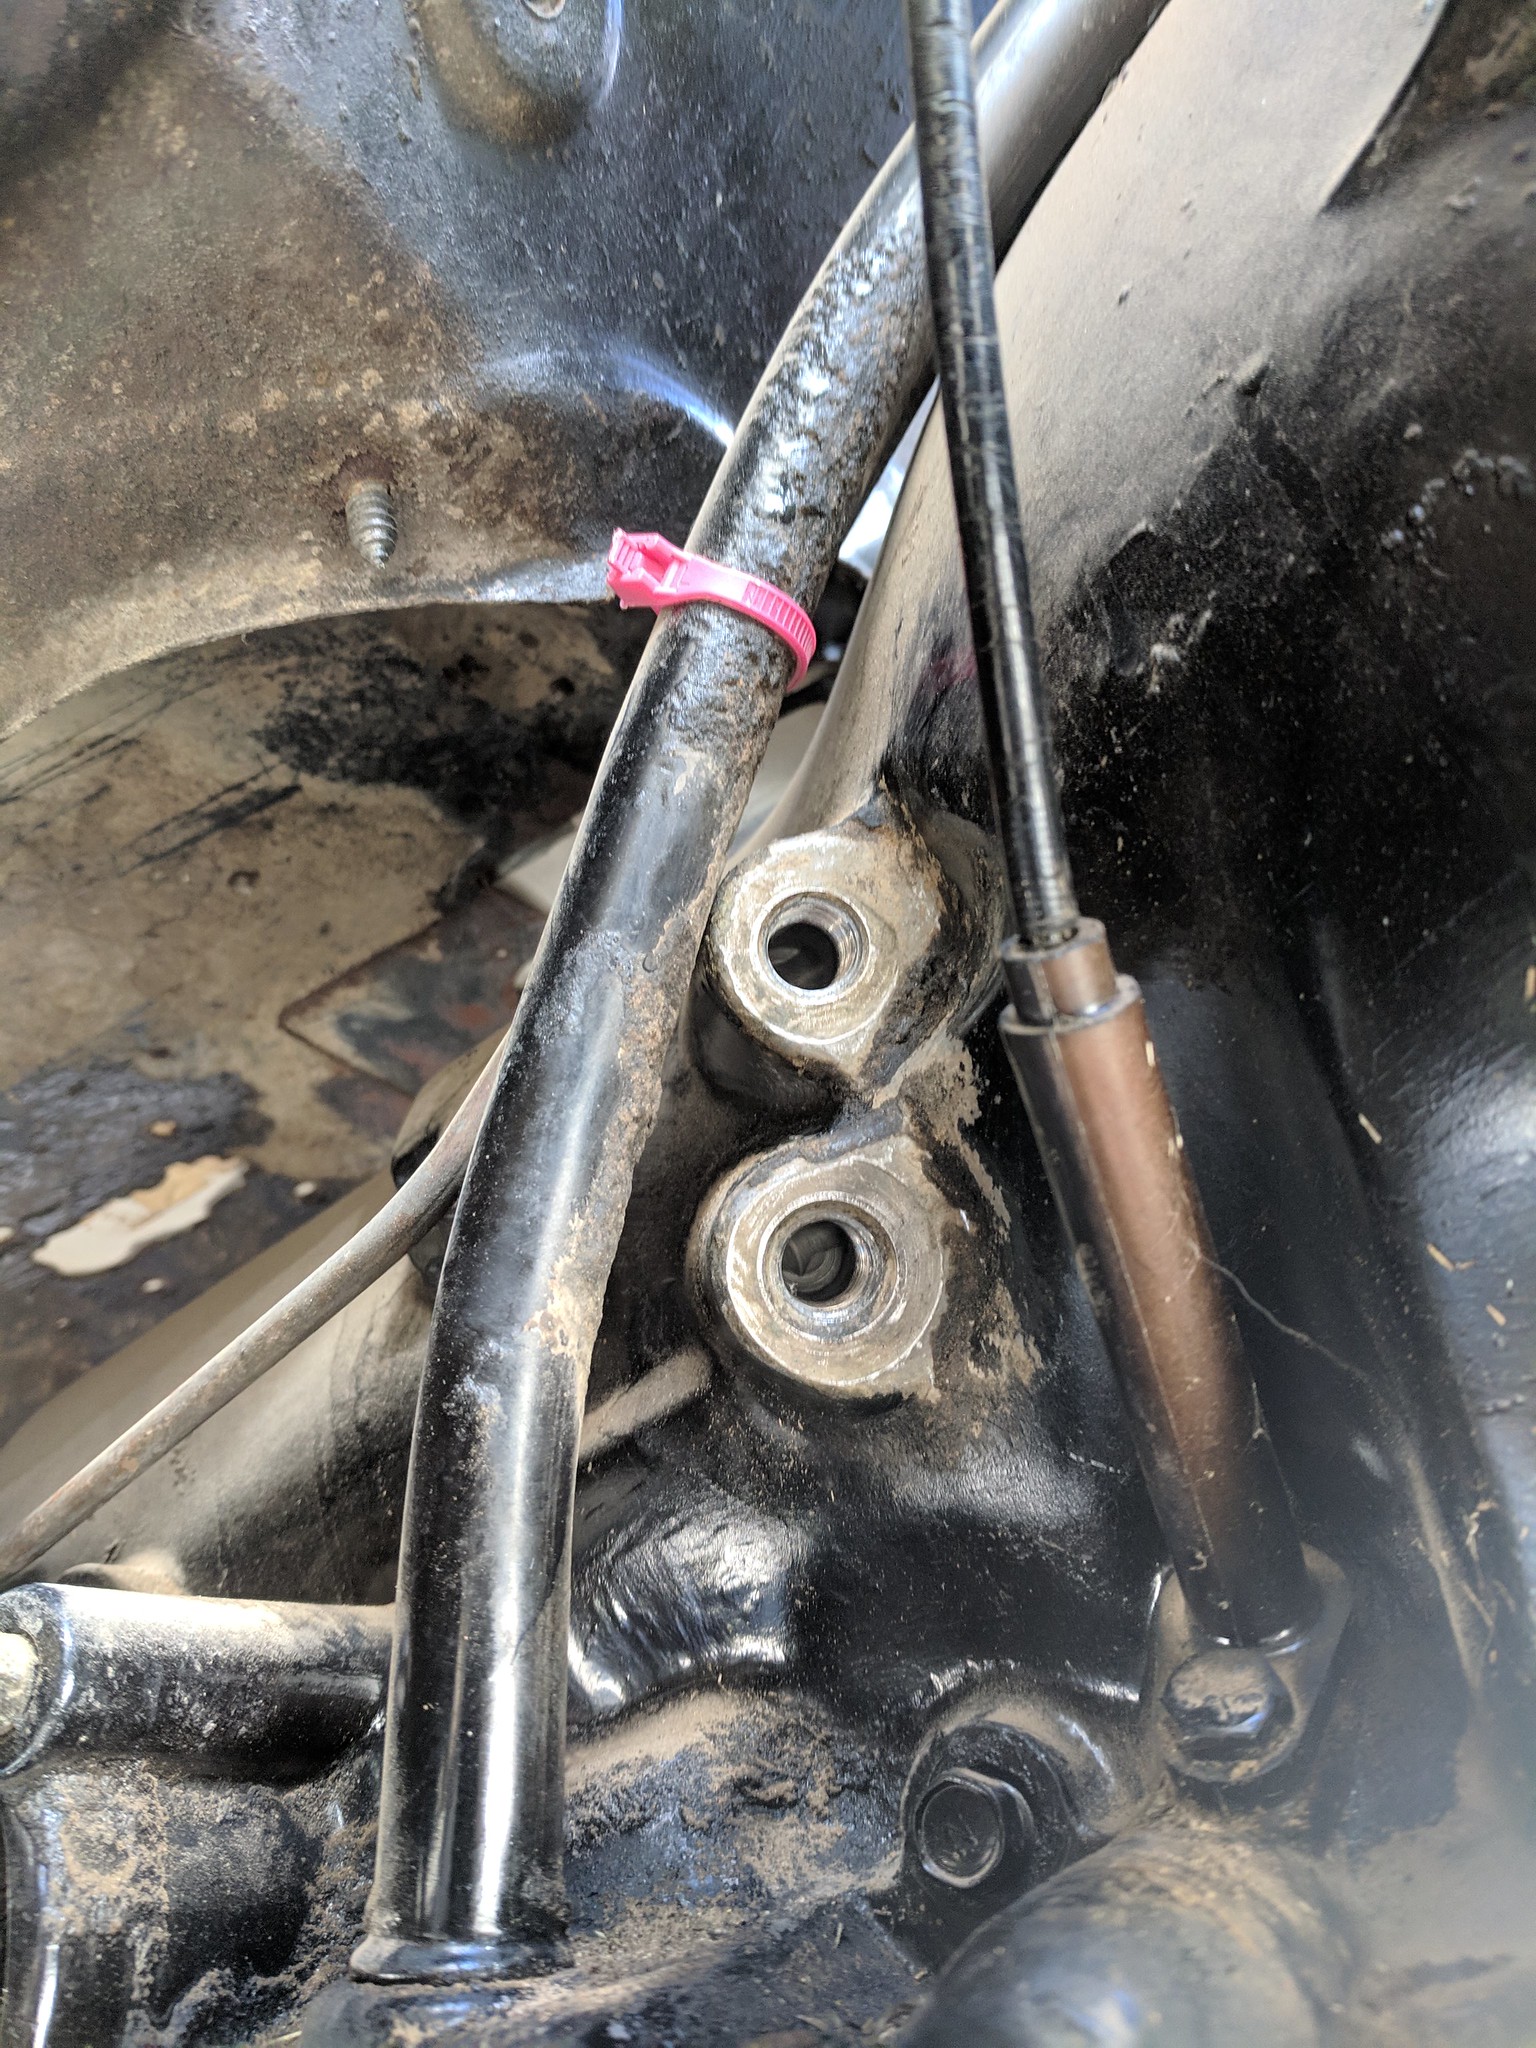
One issue I ran into, it appears that someone along the way used regular NPT fittings on the transmission, instead of the NSPT, so I will need to use the same, I just hope it doesn't leak.
 IMG_20190223_121308
by
Shawn Wallbridge, on Flickr
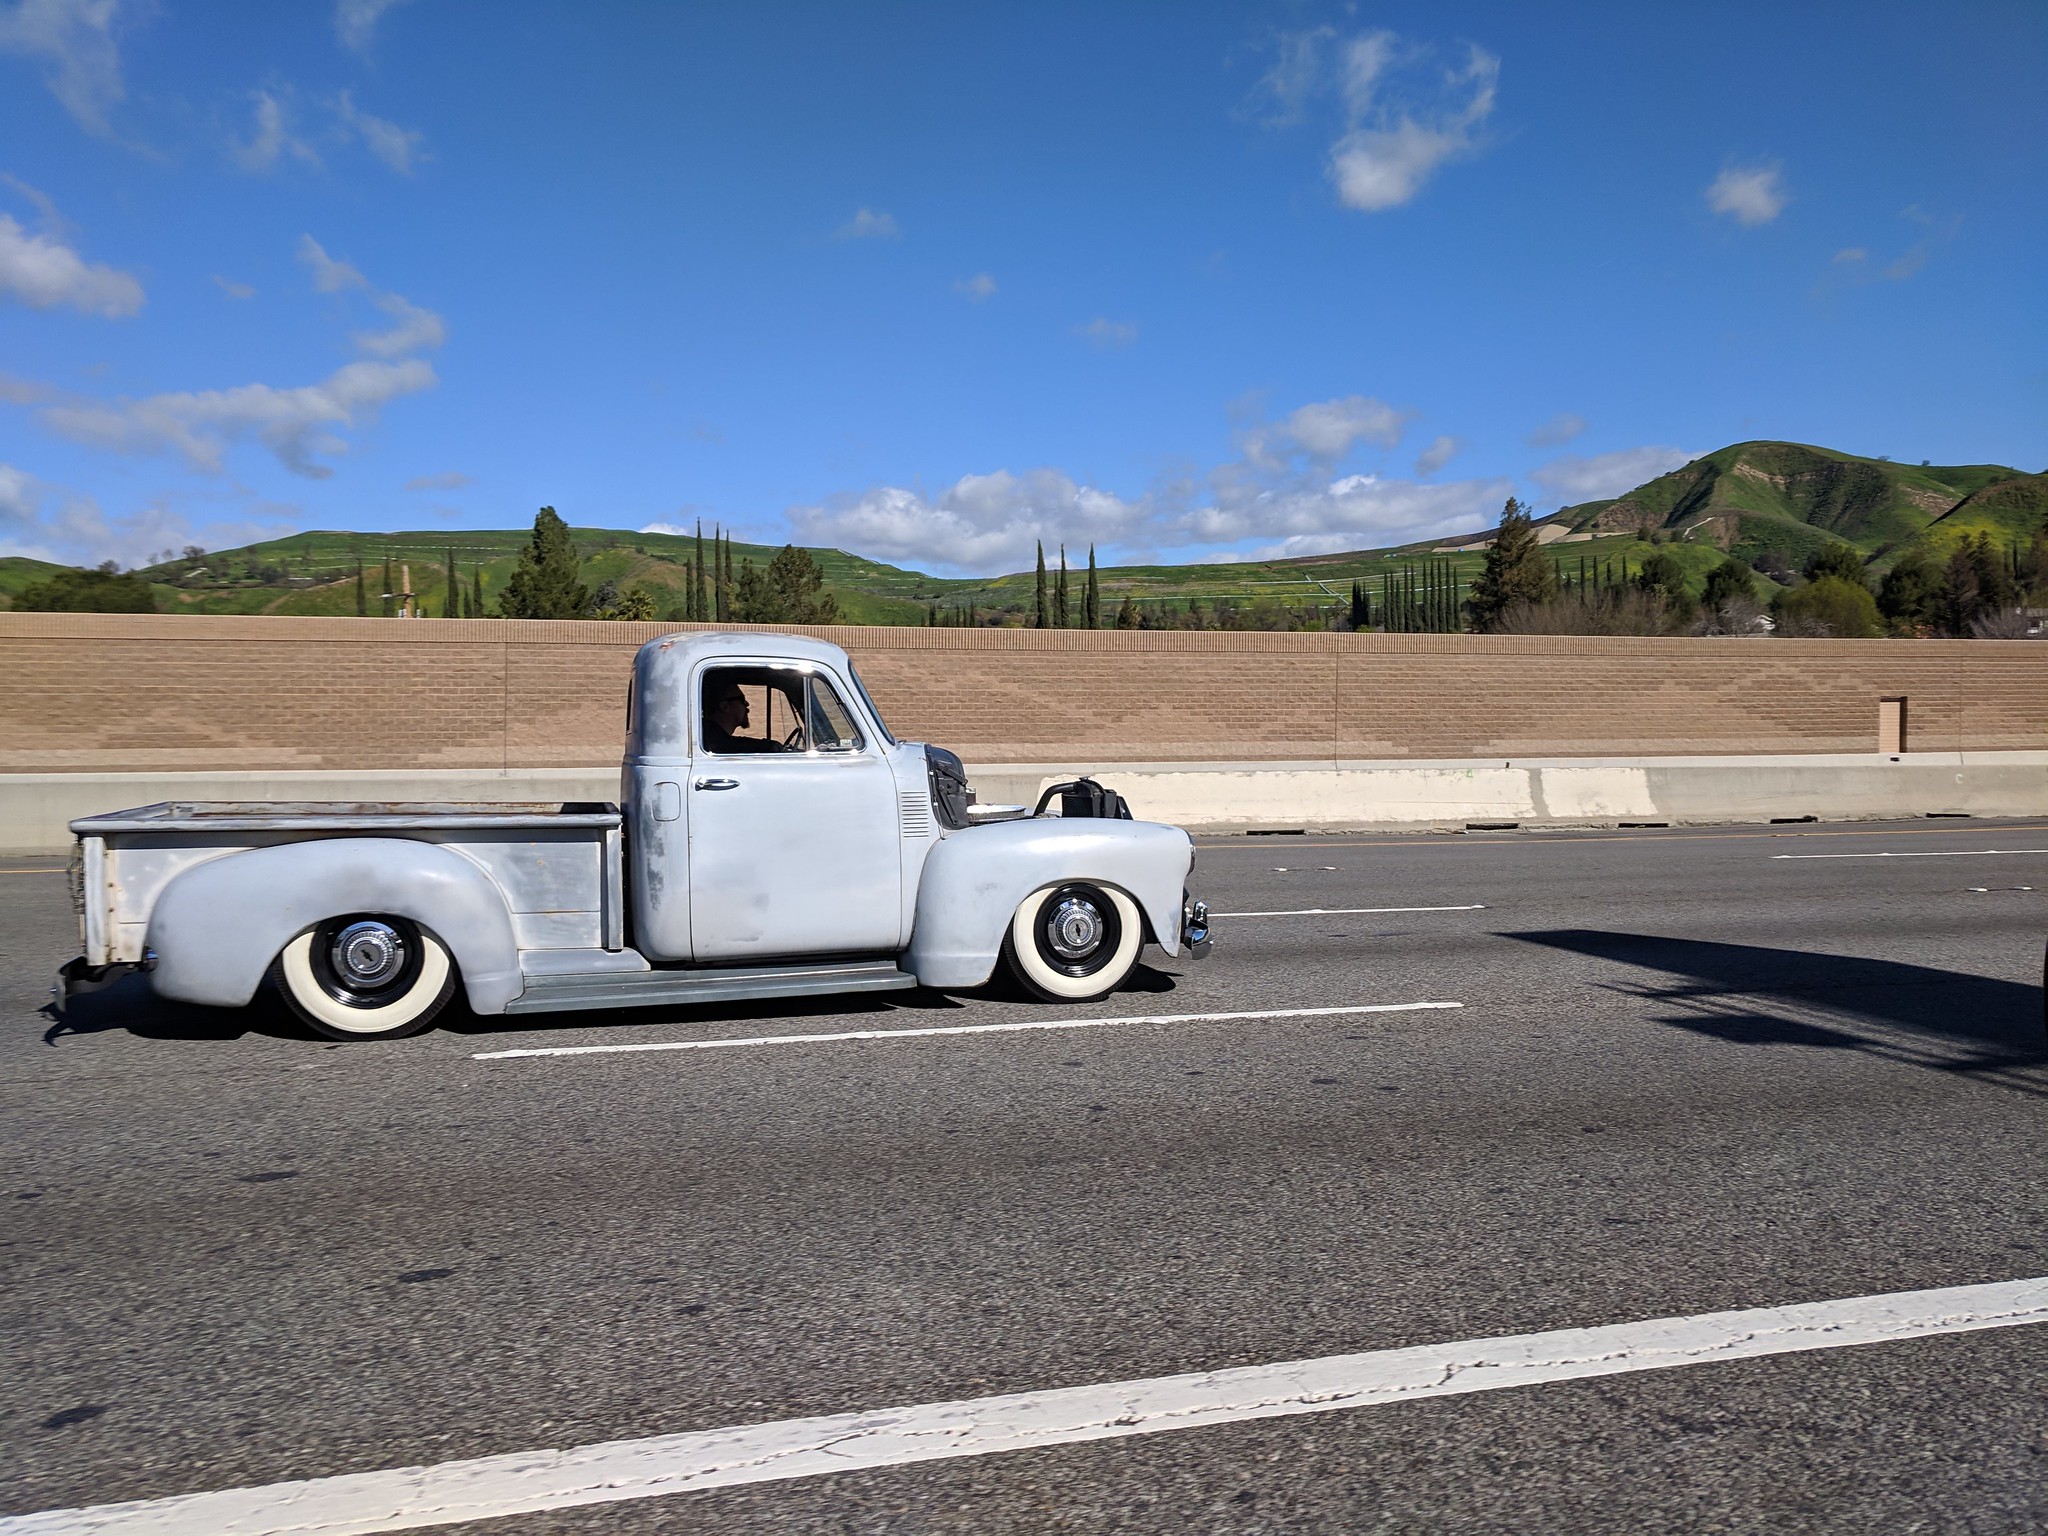
One cool thing, I saw this guy on the freeway the other day. He was on the 101 south, between the 23 and Kanan Rd one morning on my drive in, not sure if he is on here, but Hi
 IMG_20190304_094330_1
by
Shawn Wallbridge, on Flickr
Thankfully I won't get much done this weekend, even though it is a beautiful weekend, because I will be at The Race of Gentlemen in Santa Barbara tomorrow. Today was tech and a bit of a car show, and from what they had today, I can't wait to see the racing tomorrow.
This was my favourite car..
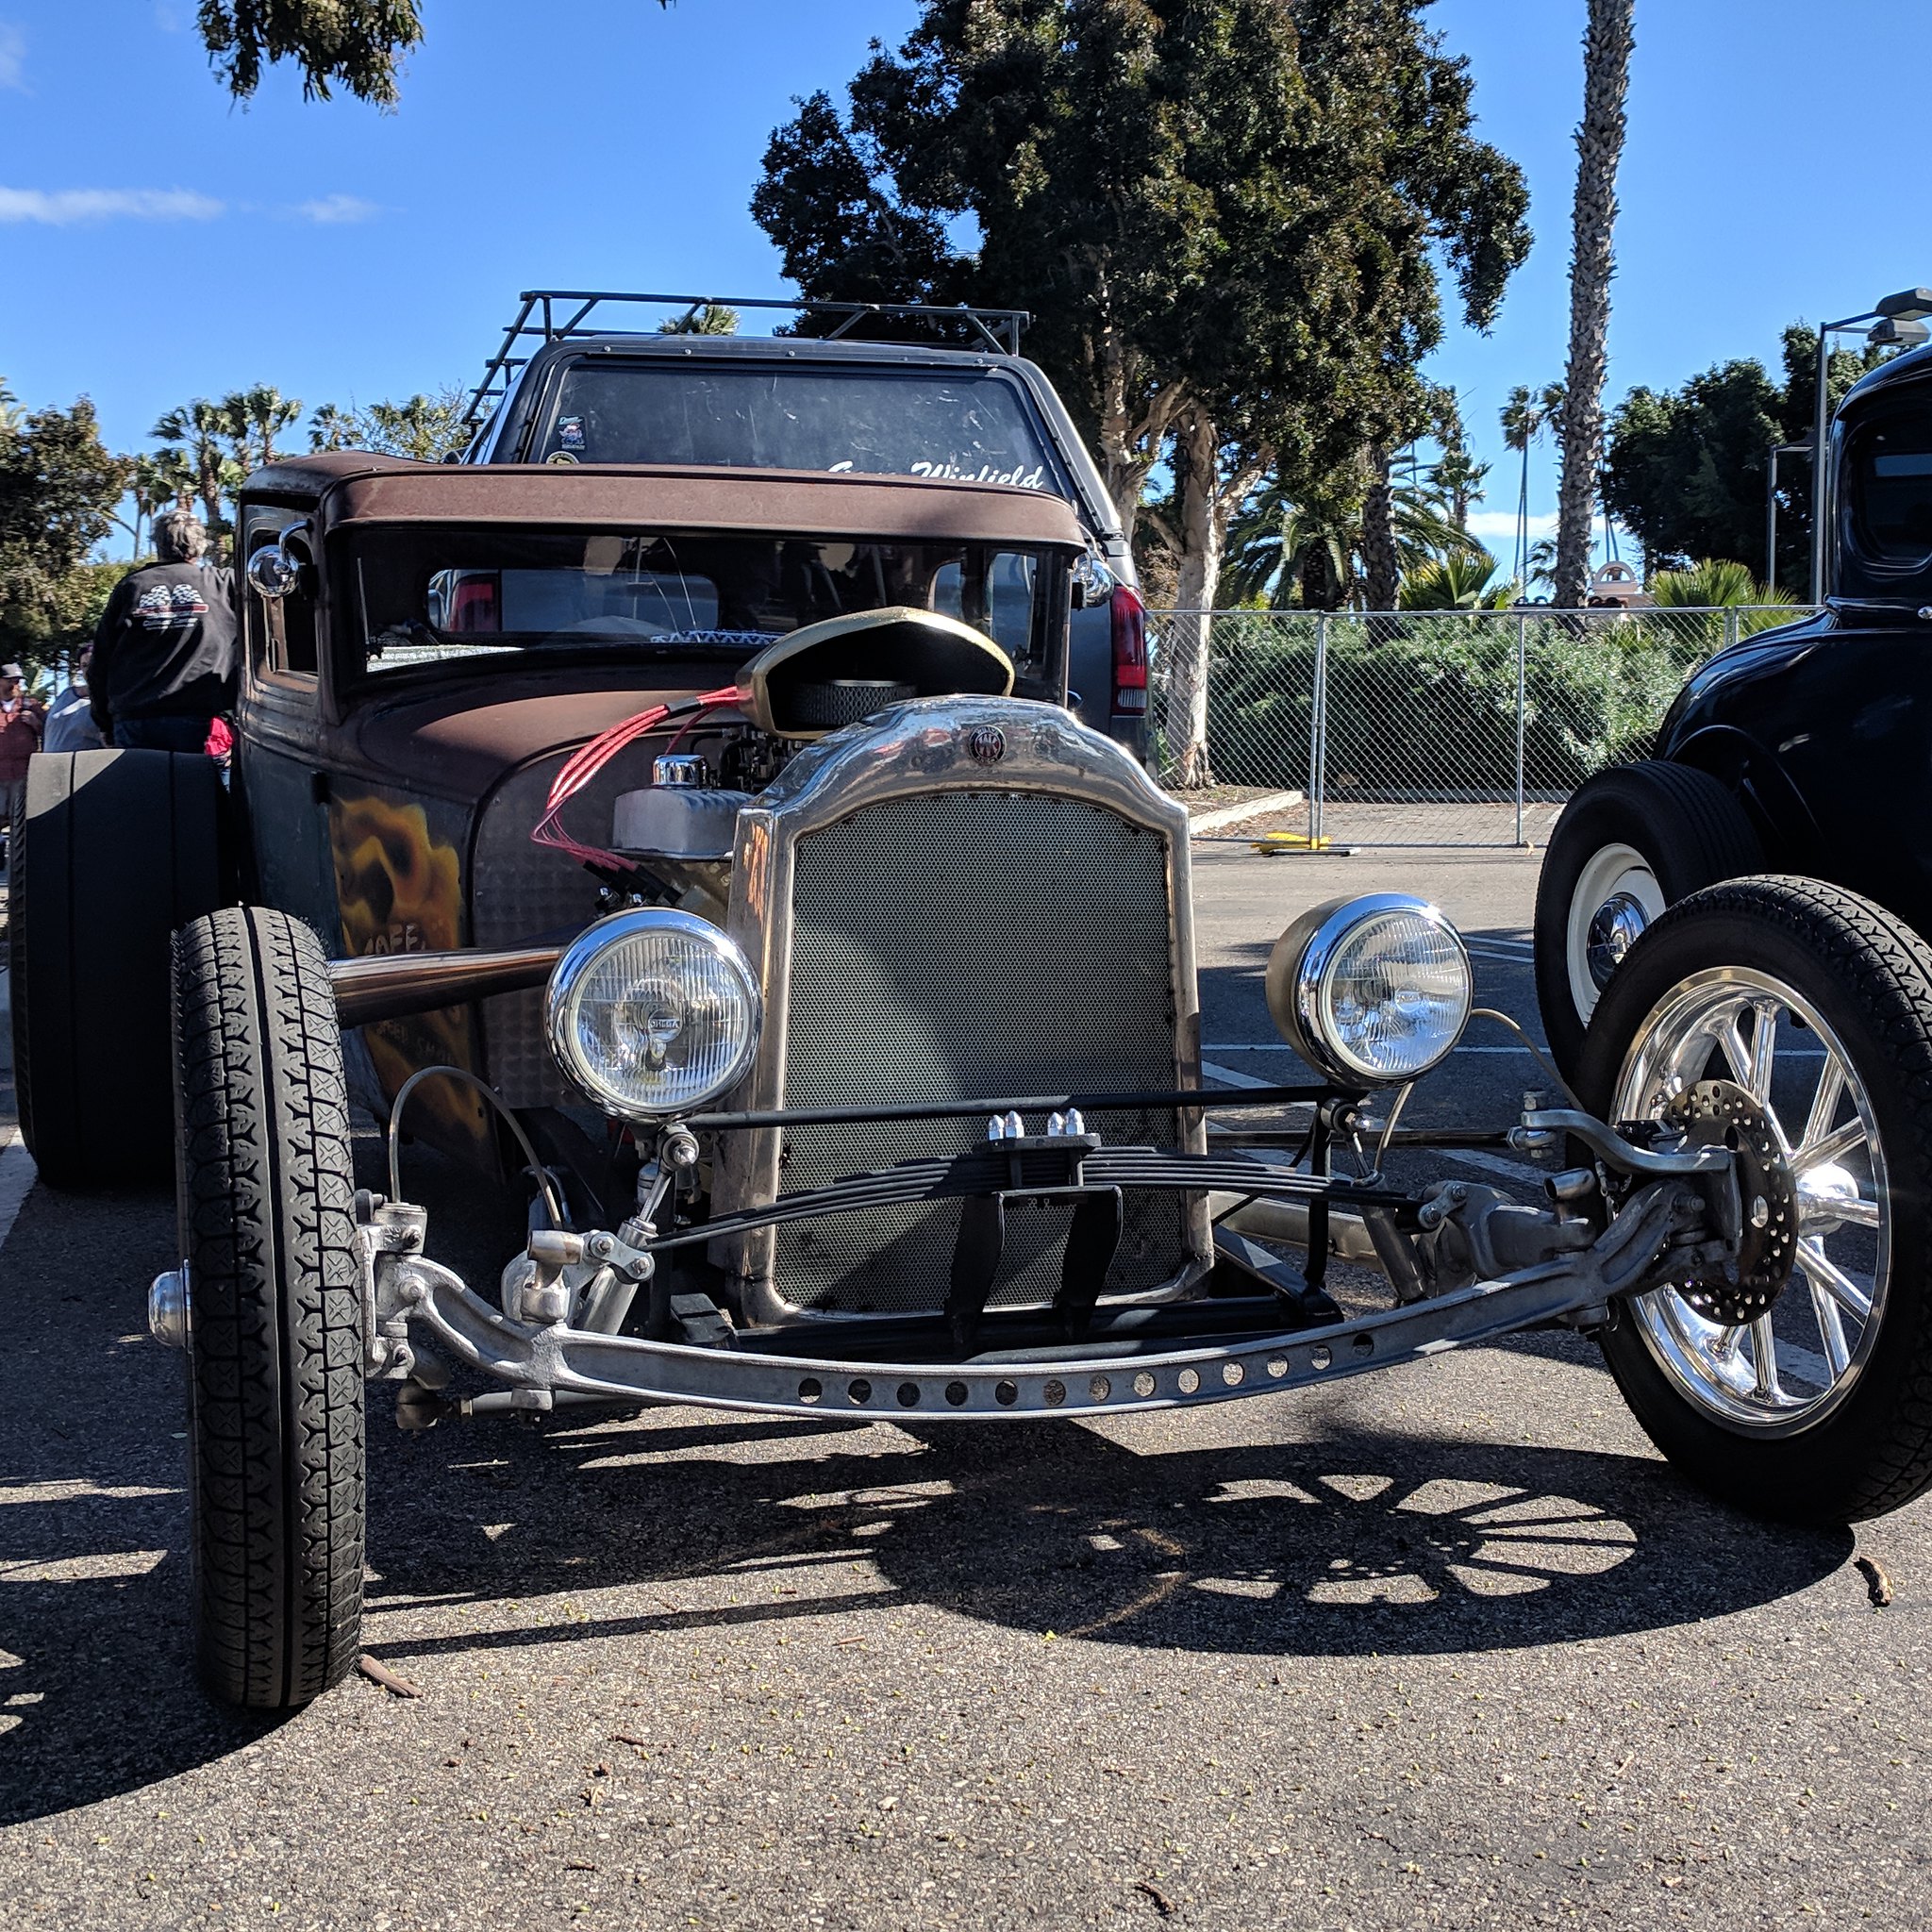 IMG_20190308_145452_789
by
Shawn Wallbridge, on Flickr