Update Early to Late Interchange Information
Having recently purchased a vintage spotlight which turned out to be cosmetically disappointing, I decided to buy an inexpensive ($25) NOS model from the 80s
and attempt to swap out the bad parts. I can now confirm later model components from a 1970s - 1980s(?) Unity spotlight will directly replace similar items on the 1940s 1960s versions. The end result will have two basic cosmetic differences from a vintage original.
1. The new handle no longer has the clamp and screws holding the wire where it exits the handle. This can be concealed by installing the handle on the driver side, so the wire is facing the floor.

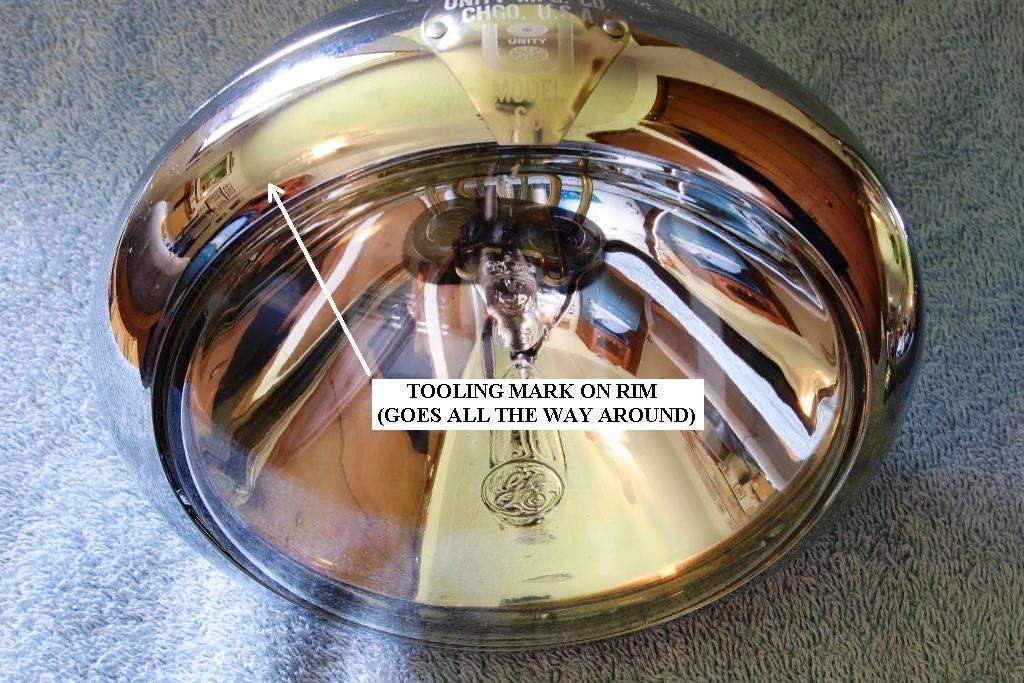
2. The newer lamp shell no longer has the manufacturer and model information stamped into the shell surrounding the crest (because the crest has also been deleted). For comparison, this is an older shell with the ornament removed, attached to a later rim.

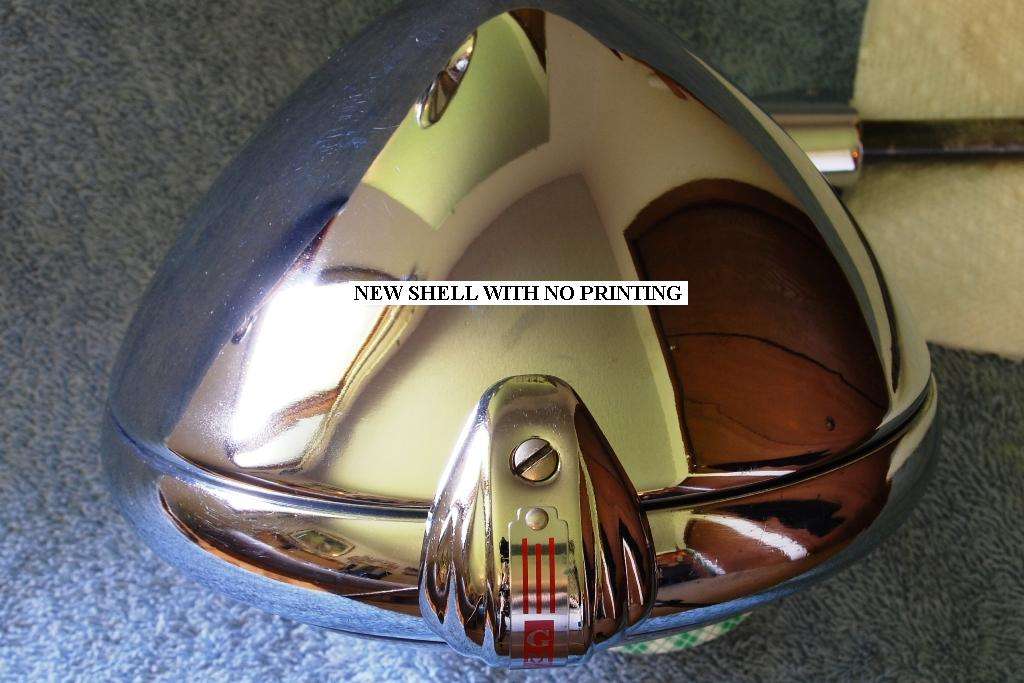
And here is the new shell, after drilling a new hole and mounting the crest. Although not original in appearance, it certainly is cleaner looking than the vintage version.
A. The following parts were kept from the vintage spotlight:
Original tube & rod assembly (needed for correct length)
Sealed beam spotlight bulb and rim (since it matches the other vintage bulb and rim)
GM crest/ornament
External slot head screws
Special short GM grip assembly
Handle wedge bolt
B. The new lamp donated the:
Lamp shell
Headpost housing assembly
Outer tube
Handle assembly
C. New parts not used:
Halogen bulb
Standard long plastic grip
New design wedge and screw
External Phillips-head screws (although easier to use, they take away from the vintage appearance).
Following the procedures outlined earlier in the thread, both lamps were disassembled. As shown in the photo above, the original outer tube was damaged at the handle end, so the outer tube from the new lamp was shortened to the correct length with an automotive tubing cutter. Combined with the new handle the lamp now parks correctly.
The new spotlight was assembled from the parts listed and installed without incident. Although the later rim was in mint condition, it wasnt used because of a manufacturing defect in many of these newer rims. There is a tooling mark around the circumference of the rim about ¼ away from the glass. Older rims do not have this defect.
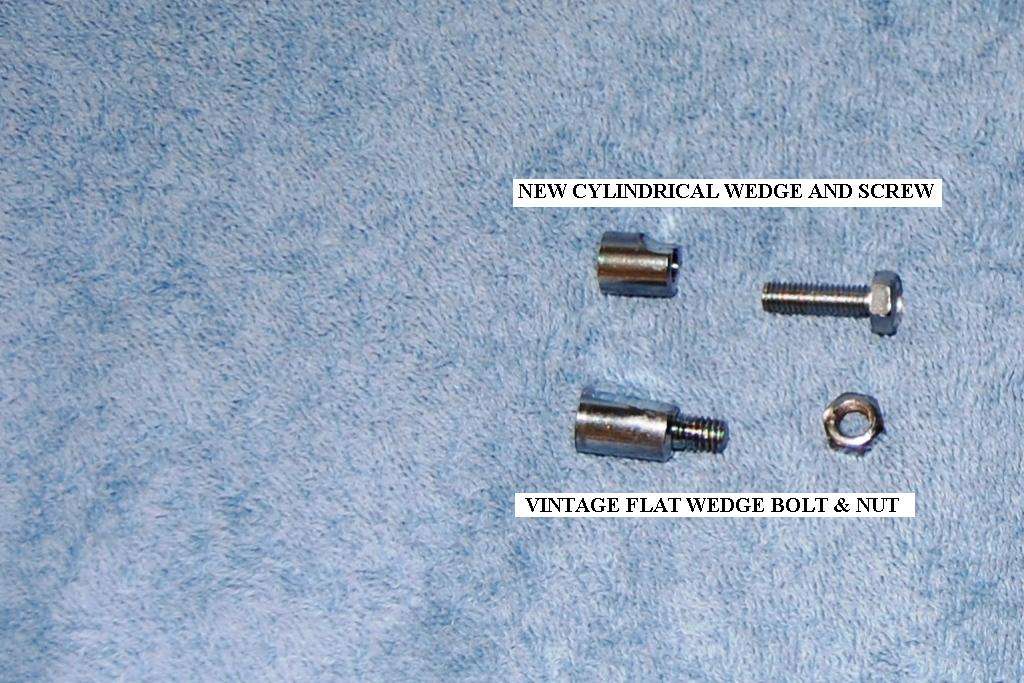
There are two versions of late style handle wedge. One has an angled flat to match the corresponding flat on the inner tube. The vintage wedge bolt fits in the same application and can be retained for a more vintage appearance. The other new style wedge has a curved surface for use on lamps where no flat is present on the inner tube.
Other points of general interest:
1. The early grip bushing is made of brass, or is brass plated, and shows as a brightly colored ring just above the handle grip. On later spotlights the bushing appears to be aluminum or pot metal, providing a dull lifeless appearance.
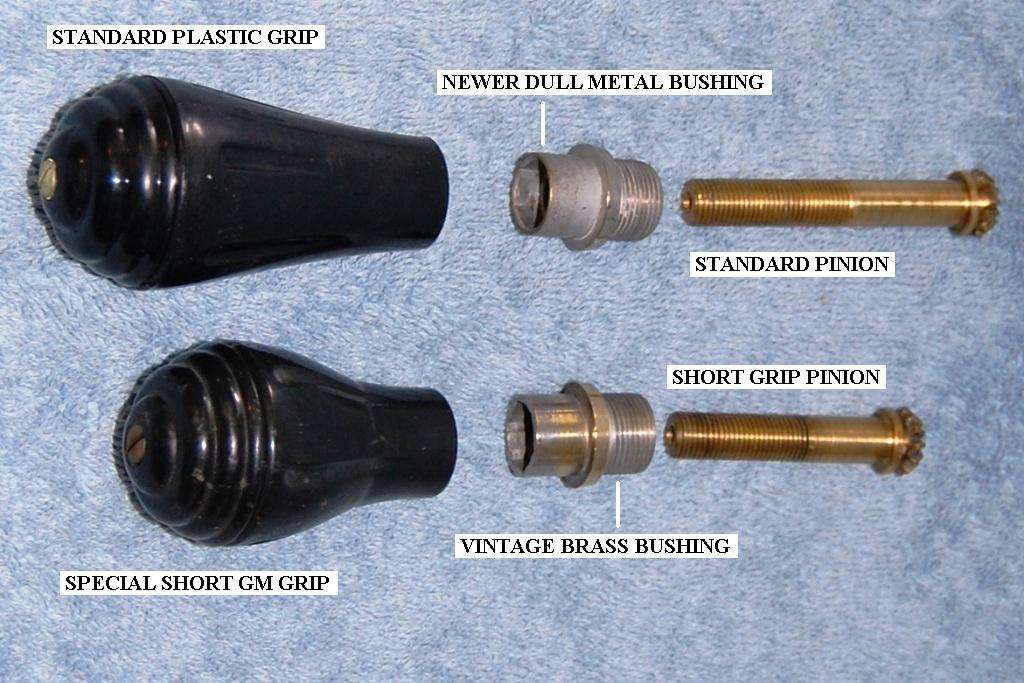
2. For anyone preferring the special short GM handle, not only is the handle grip unique, but so is the pinion. It might be possible to shorten the longer pinion, by threading more of the unthreaded shank and trimming the longer threaded portion. It is soft brass so it wouldnt take much effort to modify. To reinstall the grip to the handle assembly, insert the pinion into the bushing, and thread the bushing into the handle housing while taking care not to pinch the gears together. Attach a small gear clamp to the portion of the bushing normally hidden by the grip. Tap the bushing tight, and remove the clamp. Insert the felt washer over the pinion and thread the grip onto the pinion until it stops against the bushing. Back off ¼ turn, hold the grip with a gloved hand and snug the nut up tight with an impact wrench. This will provide the proper clearance between the handle grip and the bushing.
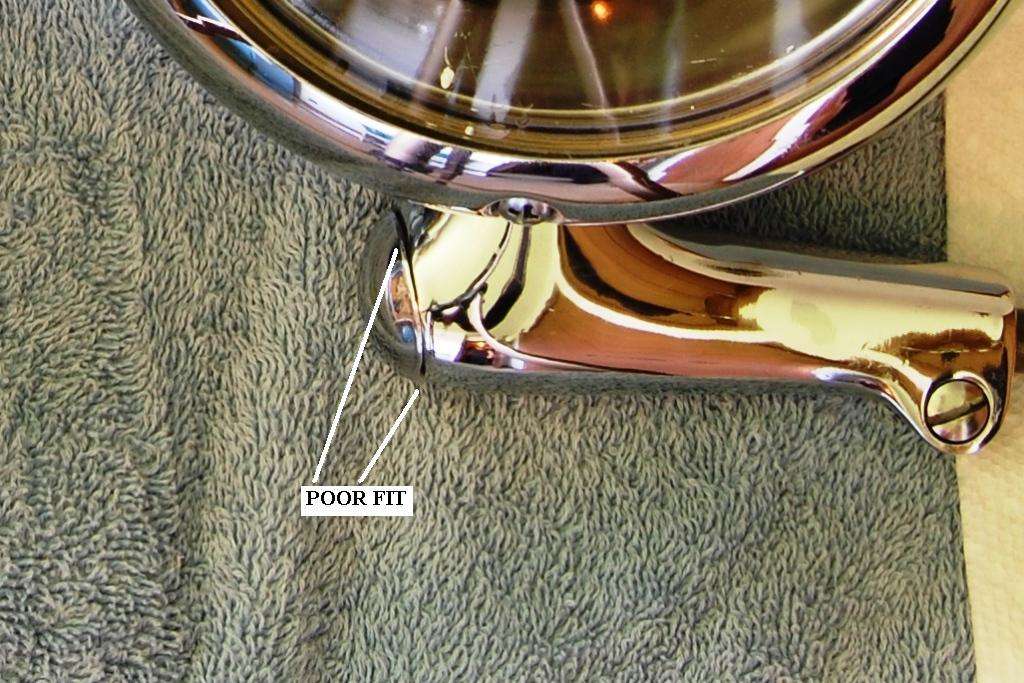
3. Early head housings were apparently hand fitted as one piece with the forward end plug. The plug and housing appears as one piece with a very fine parting line. Later housings and plugs appear to be manufactured separately, and fit together poorly as shown in the next pic. My early head housing had bad chrome, so I needed to use the new version to achieve a uniform shiny finish:
4. My NOS 1980s spotlight had a manufacturing defect in the handle housing. The inner hole must be 11/32 I.D. and mine was undersize about .002, which was just enough to prevent the handle from seating correctly. I simply bored it out to 11/32 by hand after which it installed perfectly.
There always seem to be a generous supply of these NOS spotlights available on eBay at favorable pricing. Adding the earlier crest to the newer design can provide a lamp in excellent condition at far less expense than a vintage original. It also eliminates the risk of spending a small fortune on something that is suppose to look perfect, and doesn't.