I recently reworked my factory harness to stand-alone for my '49. My PCM is in the cab and the ignition coils are remote mounted. I didn't have to extend anything, but the remote coils required a plug-and-play harness extension to reach.
I laid mine out pretty much like you have in the picture. I made a discrete wire bundle for each of the sensors coming off of the connectors to the PCM.
From the factory, the wire paths seem to lay out pretty logically - except for the grounds. They appear to be added after the harness was laid out in the factory so they jump across the discrete wire paths. To get discrete wires going to each sensor, I cut the grounds out of them where necessary and marked them so I could connect them later
When I had the harness with separate wire paths to each of the connectors, I draped the harness over the engine and mounted the PCM in the cab where I wanted it and connected everything and routed the wires where I wanted them. Where wires were too long, I coiled the excess up and taped it. Where there were branches and tees in the harness, I marked them too with tape.
Once I knew the correct lengths and where the branches were, I pulled the harness off and put it on the bench to shorten the wires where necessary and loom it.
To shorten the wires, I prefer soldering the splice and covering it with shrink wrap, but others prefer crimp connectors. Your preference.
Once I had everything to the right length, I depinned most of the red and blue connectors for the PCM to get the tangles out of the wire and shorten a few more that needed it.
De-pinning and re-pinning the PCM connector is pretty mindless work and my concentration tended to drift, so once I was done I rechecked everything against the pin-out .pdf that's posted over on LT1Swap.com. Pay special attention to the grounds and make sure they're all in place.
To loom the harness, I used harness loom from Aircraftspruce.com. When I had the harness on the bench, I measured the diameter of the wire bundles and their length and tallied up what I'd need on a spreadsheet. Aircraftspruce.com sells it by the foot and all the looming materials were about $25 for mine.
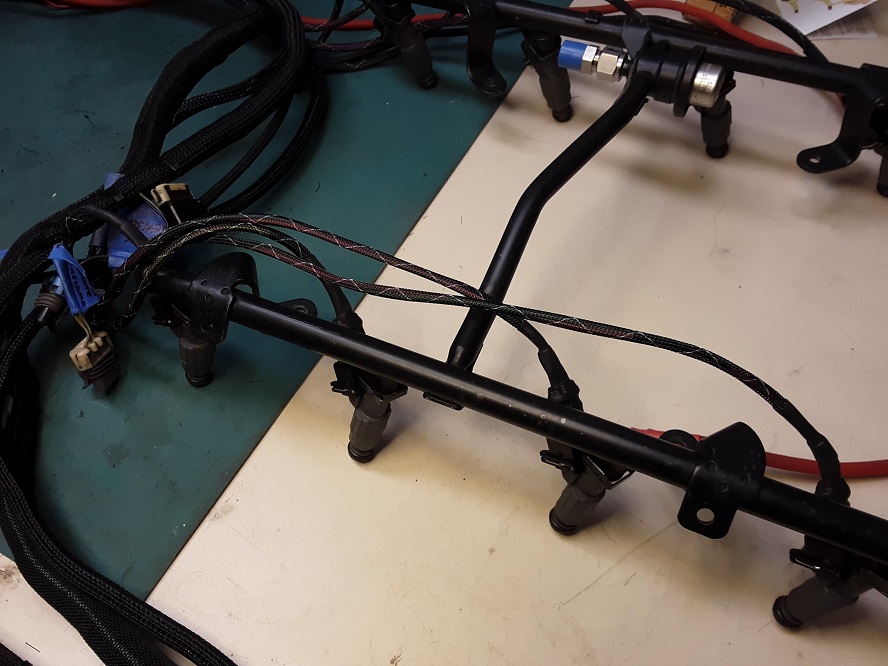
AircraftSpruce.com has two types of loom - split and closed (the chinese finger stuff). Since I had to change the injector connectors anyway, I put the closed loom on the injector leads, but the quality of their split loom is so nice, I wouldn't bother otherwise.
I think black electrical tape looks cheesy on a harness, and AircraftSpruce.com sells a silicone tape that's far superior, and I used that to close the loom at every branch.
I have my PCM set up to control my radiator fan. For a truck harness and PCM I think you have to add a wire to the harness, IIRC. I'll hook up my trinary switch so it will also ground the fan relay if the AC is on and the engine is cold - don't want high head pressures in the hot summer when you jump in the truck, need AC but the engine is cold
A few photos-
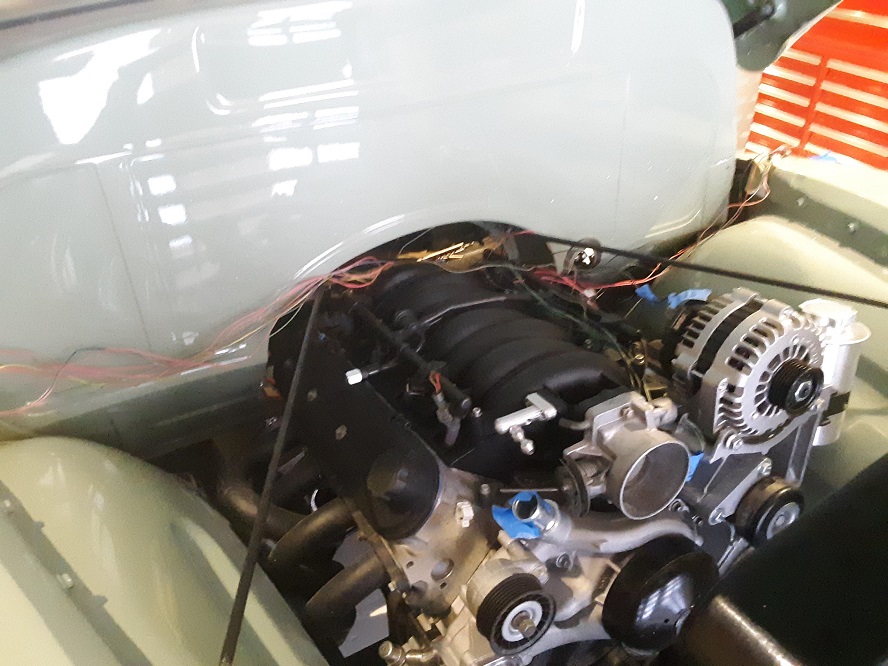
Here's the harness draped onto the motor. Some of the discrete legs had mis-matched wire lengths that I pulled into the cab to tape in coils and shorten on the bench.

Here's the firewall side with the injector leads on the top of the engine . To shorten these wires, I just cut them to length since I was replacing the connectors anyway.
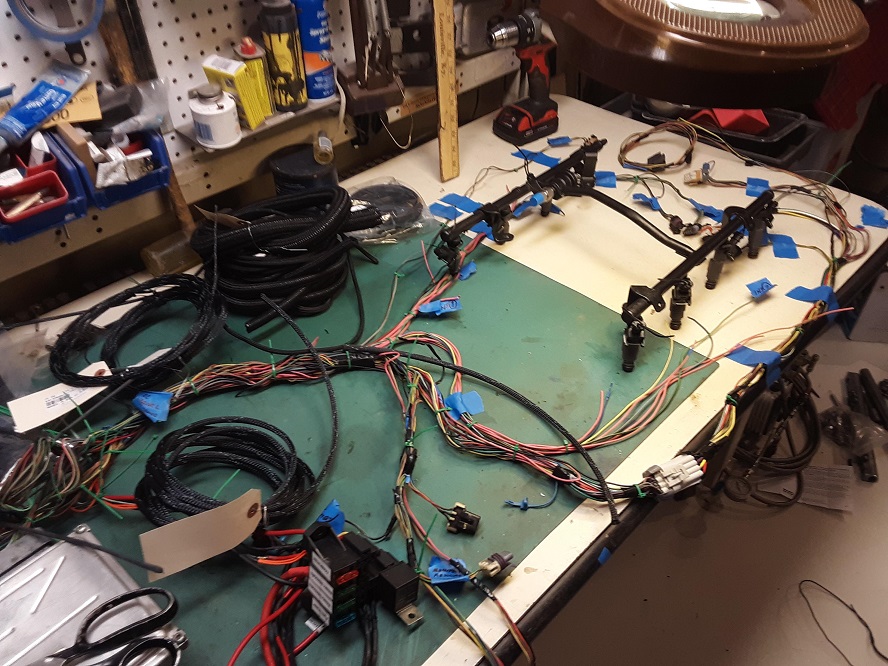
Here's the taped up harness on the bench ready to loom. I found it easier to get the wire lengths correct if I used the fuel rail as a guide.
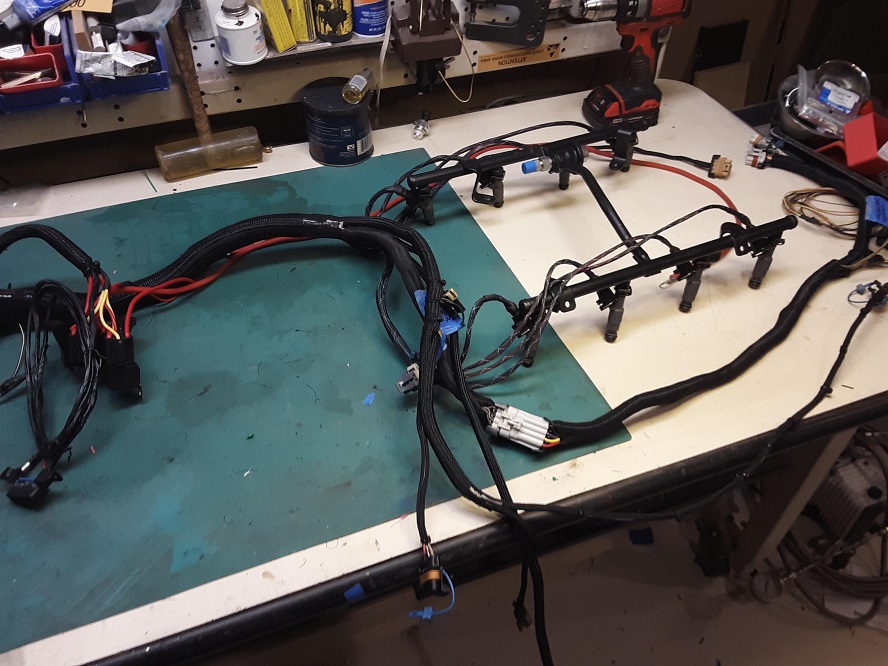
Here it is loomed up. That big connector in the leg that goes to the coils is the extender harness (hidden down in frame rail)
Here's a detail of the injector leads with the 'chinese finger' loom. There's several layers of shrink tube at the injector connector to provide strain relief. If I can figure out a nice cover for these, I should be able to pretty much hide all the wiring in my engine bay, but that's a future project.