
|
Register or Log In To remove these advertisements. |
|
|
|
|||||||
 |
|
|
Thread Tools | Display Modes |
|
|
 01-11-2011, 06:18 PM
|
#1 |
|
Certified Car Nut
Join Date: Jan 2005
Location: Inglewood, California
Posts: 3,118
|
Kabwe's aka Bam's build
For those that have been following my build thread sorry I deleted it due to me canceling my picture hosting site and all my pics disappeared. I’ve been working over the last couple weeks to put it back up and finally finished it . If I missed something that was there before let me know and I’ll put it back.
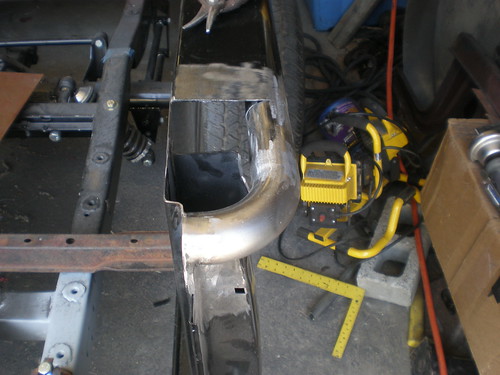
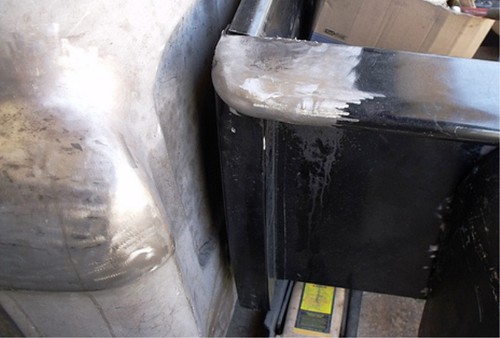
Here is what I started with. 1958 Chevy Big Window I only bought it for the cab. The guy I bought it from kept it in a trailer park.  So I’ll start with the frame I installed a Mustang II , 4 link, and c-notched the rear of the frame. 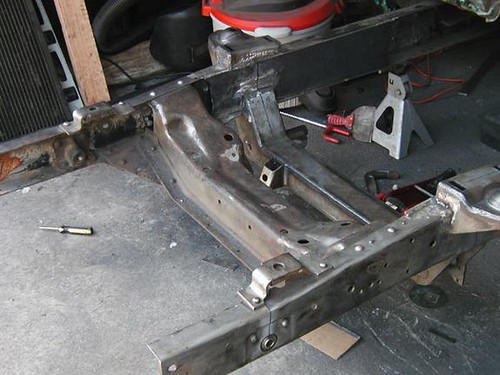 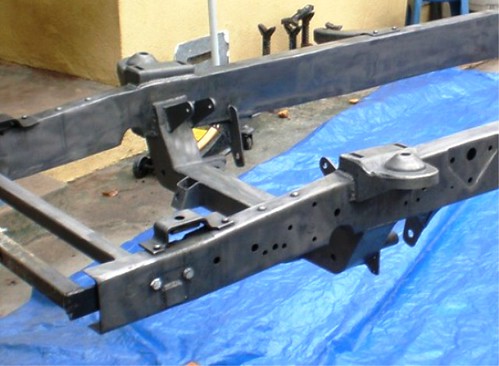   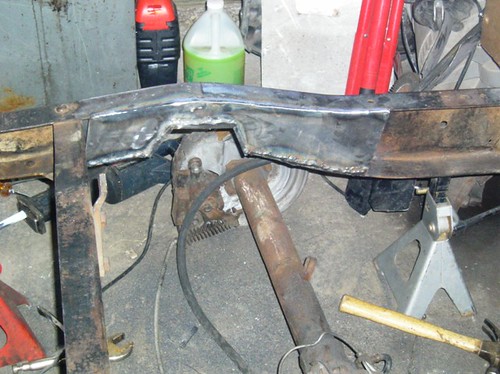 I made a frame rotisserie out of two engine stands to get the frame ready for paint. 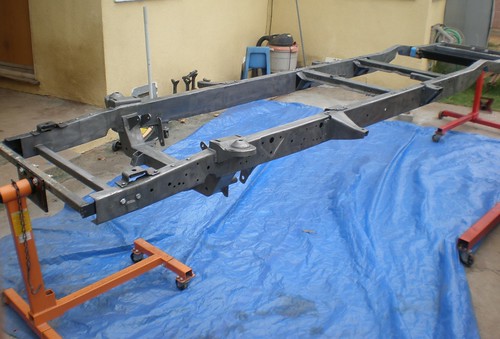  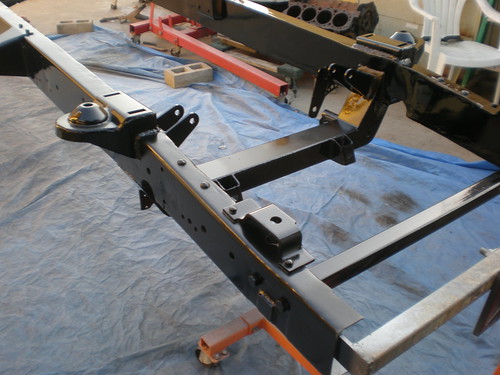    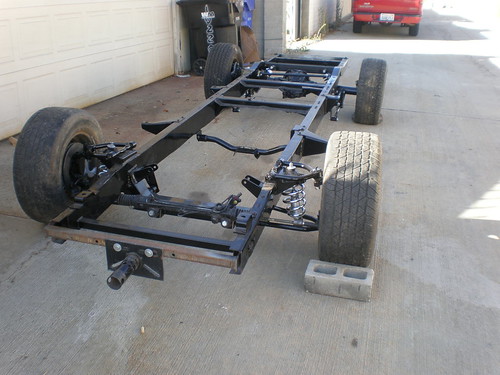
Last edited by Kabwe; 02-01-2011 at 04:20 PM. |

|

|
|
01-11-2011, 06:19 PM
|
#2 |
|
Certified Car Nut
Join Date: Jan 2005
Location: Inglewood, California
Posts: 3,118
|
Re: Kabwe's aka Bam's build
8.5 Chevy Rearend Narrowed to 58 inches (mounting point to mounting point) with moser housing ends and axles.
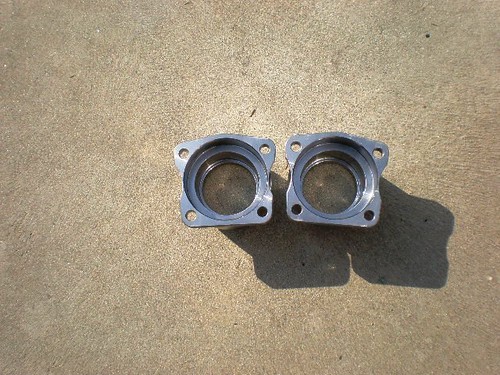 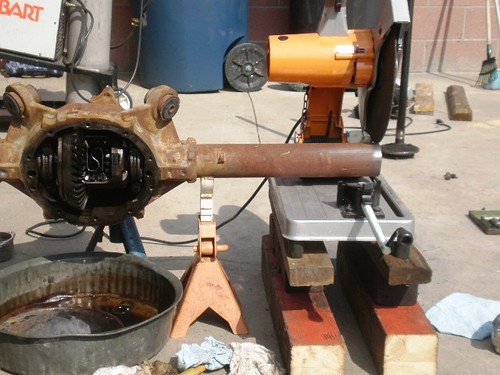  4 Link install. 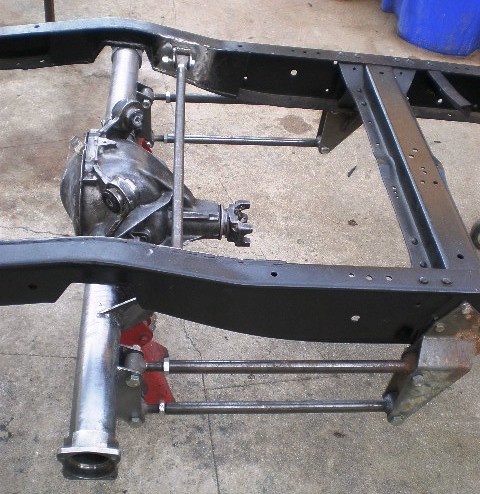  I had to modify the caliper bracket and the axles retainer to install my disc brakes. Here is what I came up with. 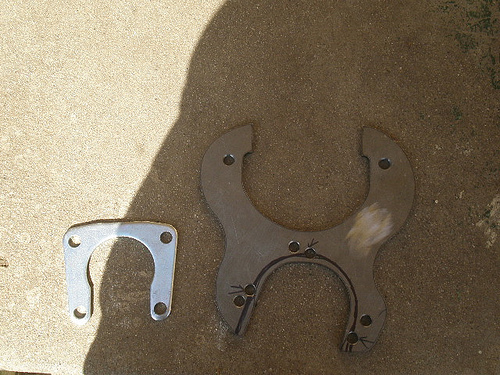  The rearend completed . With the micky mouse ears off the rearend looks cleaner, and will clear the bed floor. 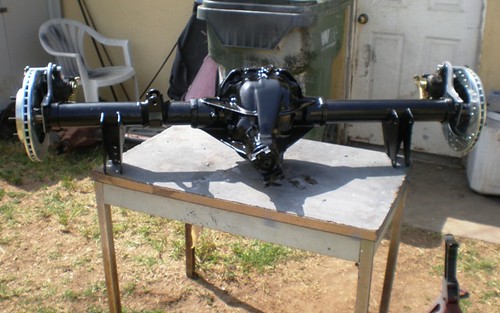
Last edited by Kabwe; 09-24-2012 at 06:50 PM. |
|
|
|
|
01-11-2011, 06:20 PM
|
#3 |
|
Certified Car Nut
Join Date: Jan 2005
Location: Inglewood, California
Posts: 3,118
|
Re: Kabwe's aka Bam's build
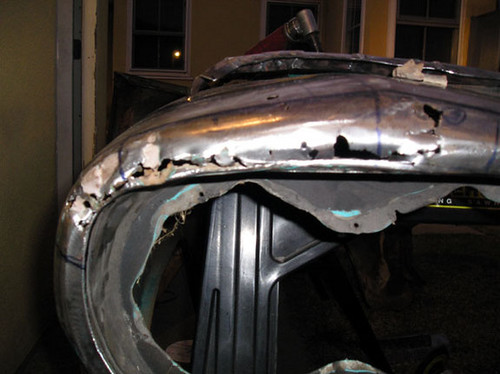
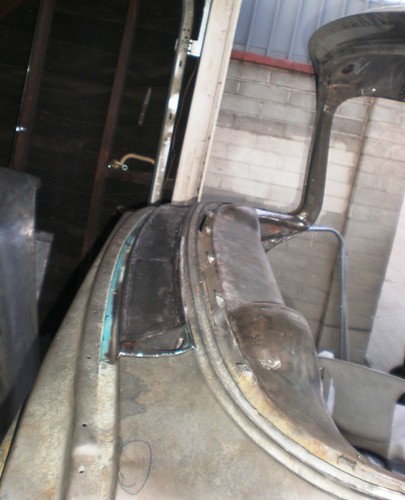
There was extensive rust damage on this cab but I wanted a big window cab and I had to have it.lol I should have waited because I ended up building a cab.lol I had to replace both cab corners, the steps and rockers, floors, and the roof.
Cab corners replaced   Steps replaced 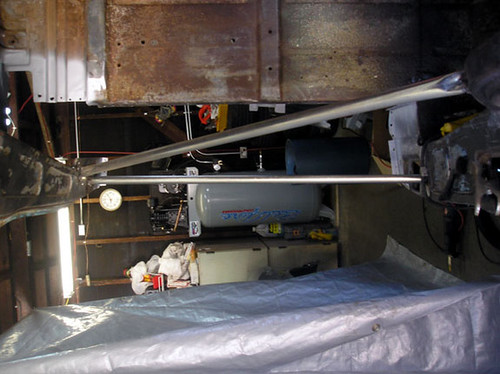   Floor replaced  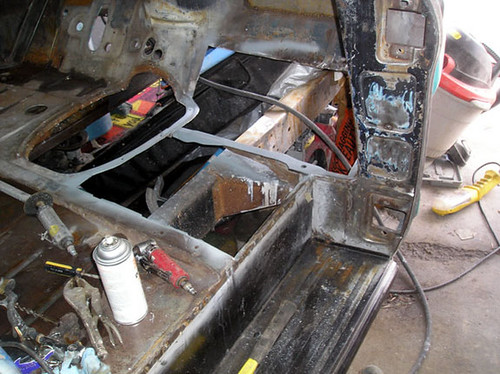 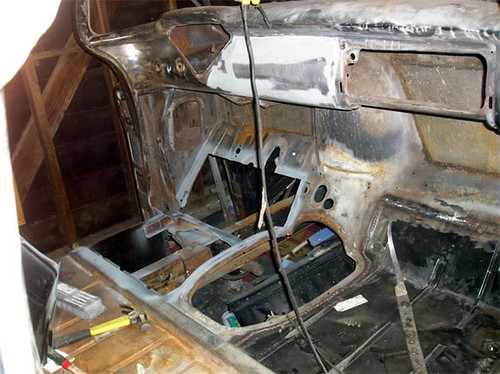 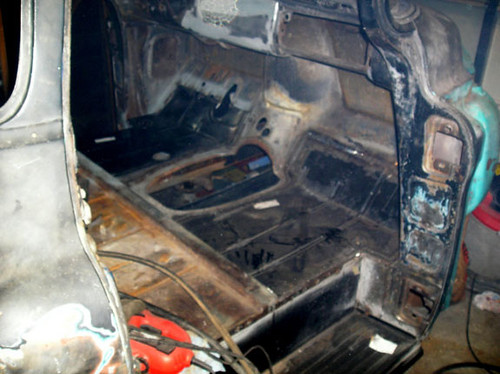
|
|
|
|
|
01-11-2011, 06:21 PM
|
#4 |
|
Certified Car Nut
Join Date: Jan 2005
Location: Inglewood, California
Posts: 3,118
|
Re: Kabwe's aka Bam's build
Roof replaced.
    Door Repair 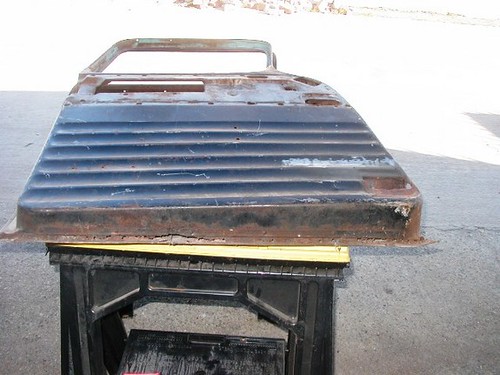 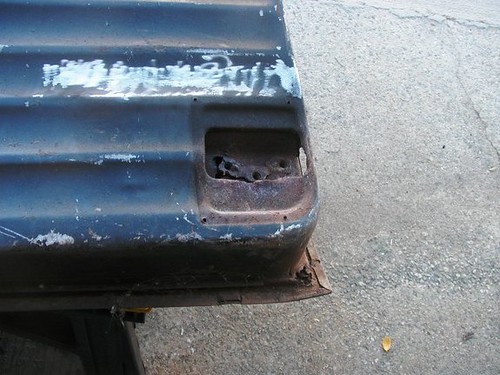 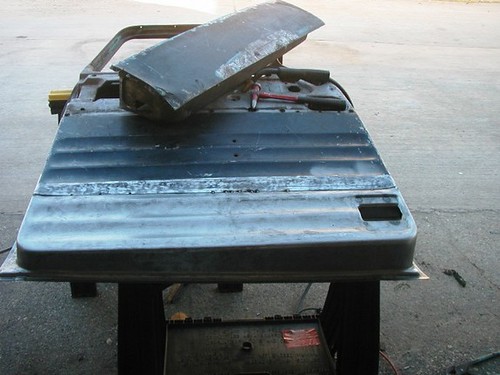  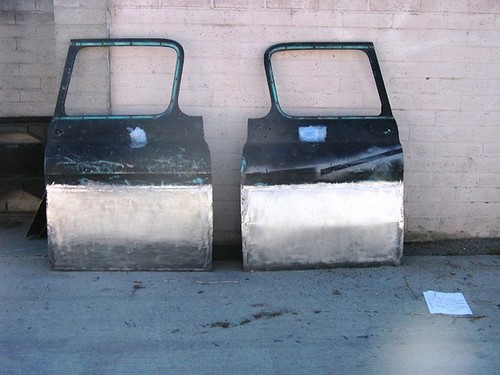
Last edited by Kabwe; 01-20-2011 at 05:42 PM. |
|
|
|
|
01-11-2011, 06:21 PM
|
#5 |
|
Certified Car Nut
Join Date: Jan 2005
Location: Inglewood, California
Posts: 3,118
|
Re: Kabwe's aka Bam's build
58 Fender repair
 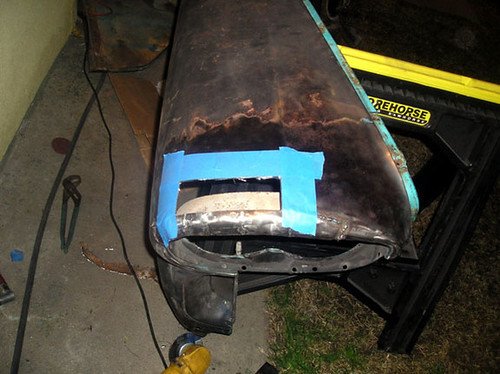  I ended up cutting the front portion out and made a better patch to get a nicer edge. You notice it in the final pic.  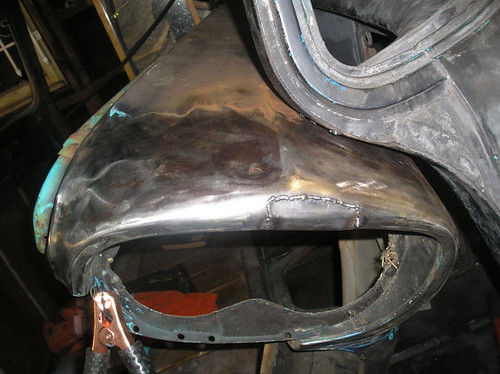 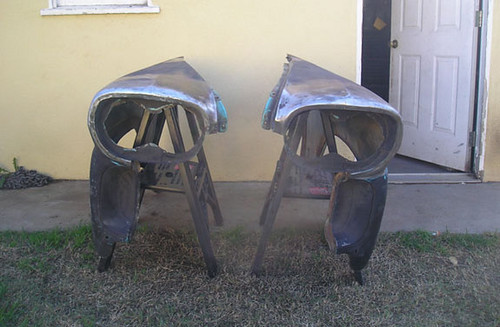
Last edited by Kabwe; 11-10-2011 at 12:47 PM. |
|
|
|
|
01-11-2011, 06:22 PM
|
#6 |
|
Certified Car Nut
Join Date: Jan 2005
Location: Inglewood, California
Posts: 3,118
|
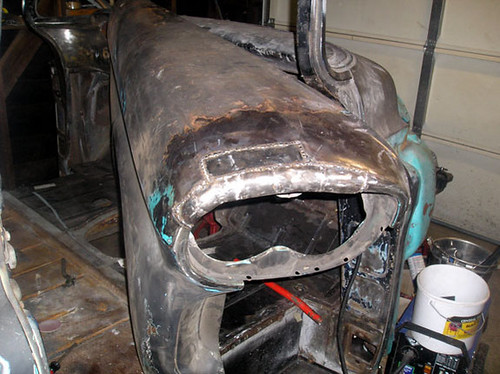
Re: Kabwe's aka Bam's build
After all this work I knew what I really wanted was a 55-56 truck. I have a 55 210 and I always wanted twins.lol
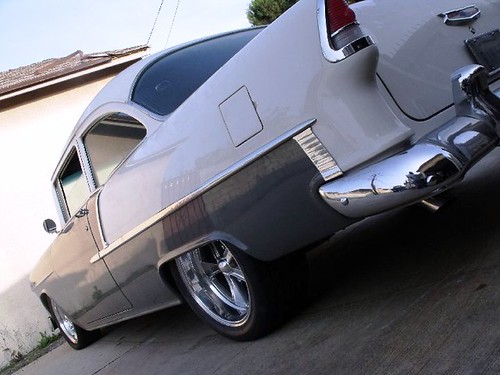 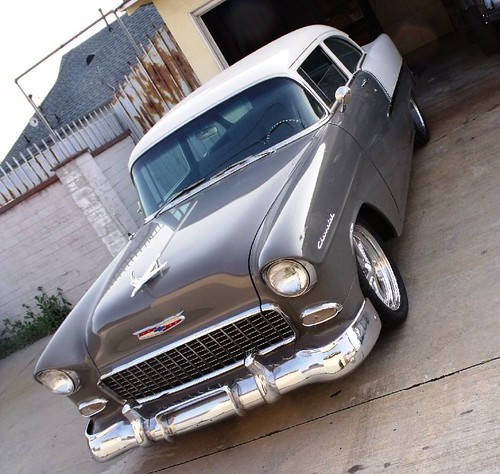 I decided to change the front clip to a 55. How it came about was a friend challenged me to fix some terrible 55 fenders and they came out nice so I said why not. 55 Fenders  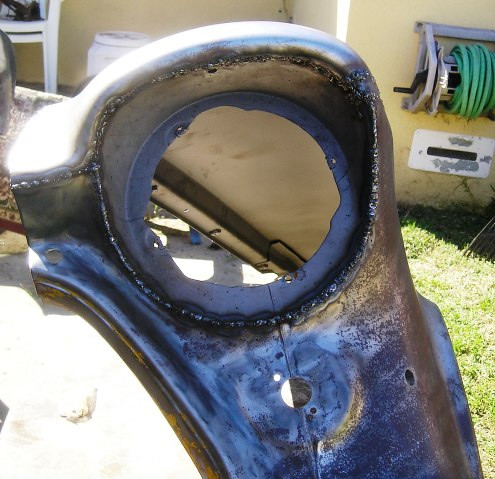  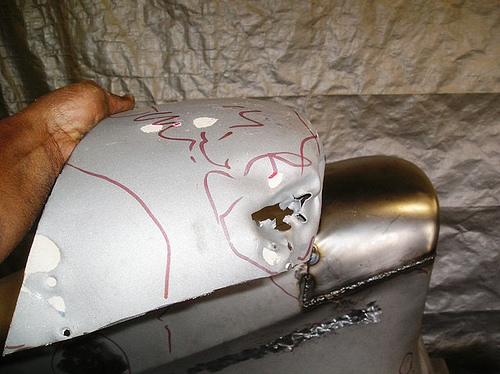 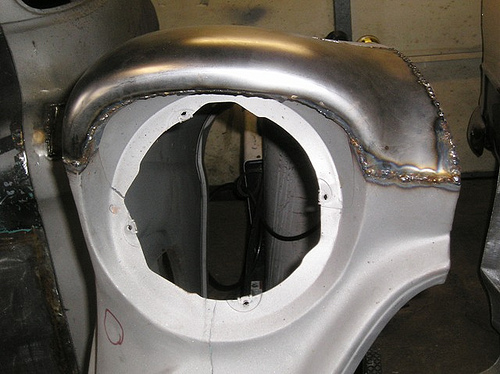 
|
|
|
|
|
03-24-2011, 01:03 AM
|
#7 |
|
Registered User
Join Date: Feb 2011
Location: Boise, Idaho
Posts: 610
|
Door Repair
[/QUOTE]Where did you get the repair panels? and would you get them from there again. Did they come with the hinge nuts in them or is that separate? thanks, looking at your build is like having an instruction manual on-line... Last edited by Rods57; 03-24-2011 at 01:09 AM. |
|
|
|
|
03-24-2011, 02:24 AM
|
#8 |
|
Registered User
Join Date: Jan 2010
Location: surprise az
Posts: 239
|
Re: Kabwe's aka Bam's build
Looking good my friend, looking real good.. as allways.
|
|
|
|
|
03-24-2011, 02:29 PM
|
#9 | ||
|
Certified Car Nut
Join Date: Jan 2005
Location: Inglewood, California
Posts: 3,118
|
Re: Kabwe's aka Bam's build
Quote:
Quote:
Last edited by Kabwe; 03-24-2011 at 02:32 PM. |
||
|
|
|
|
01-11-2011, 06:23 PM
|
#10 |
|
Certified Car Nut
Join Date: Jan 2005
Location: Inglewood, California
Posts: 3,118
|
Re: Kabwe's aka Bam's build
Okay that pretty much up to date other than the custom mods I added which are.
55 Chevy car dash   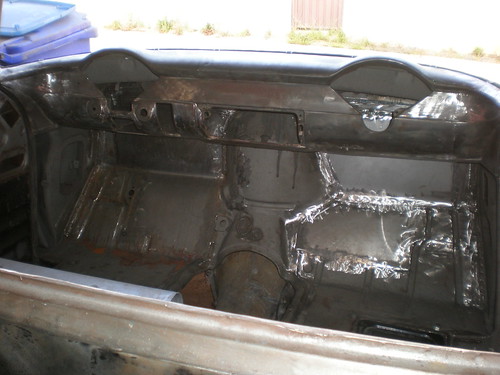 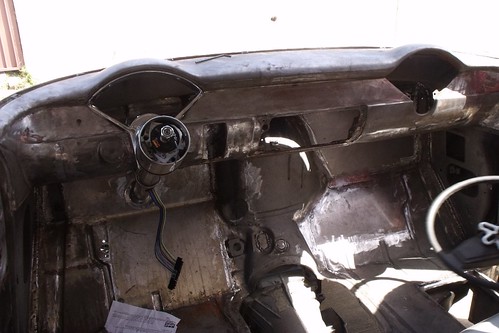 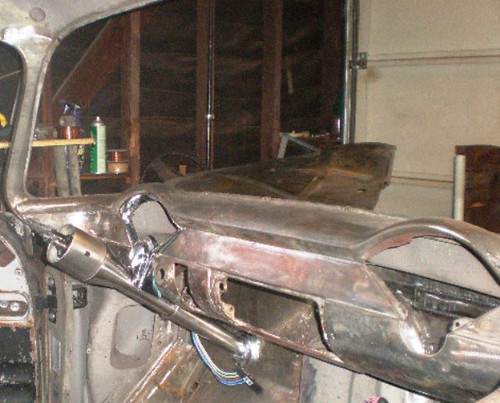 Shaved parking lights 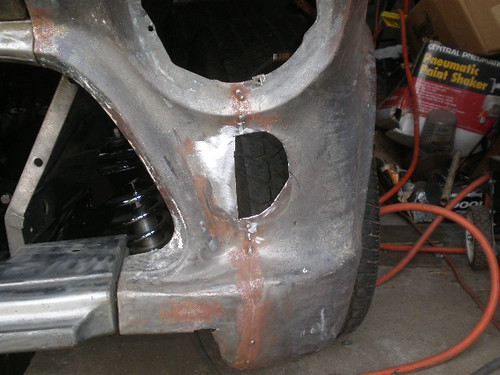 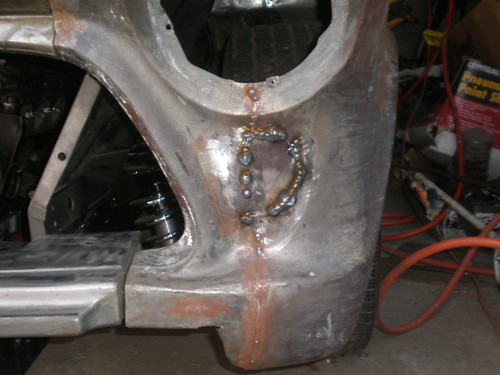 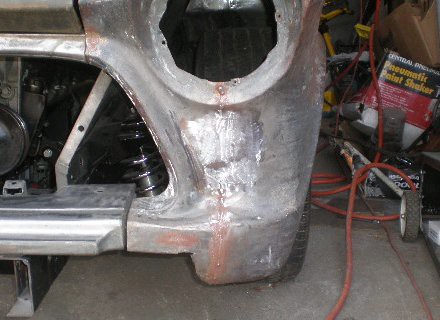 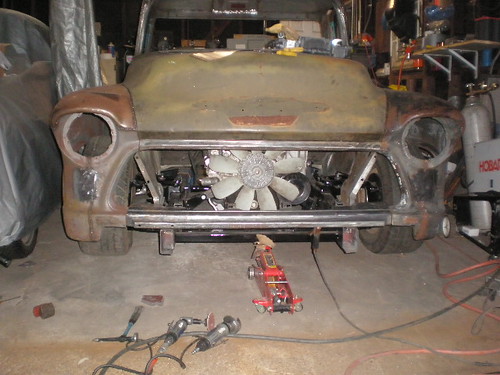 Shaved drip rails 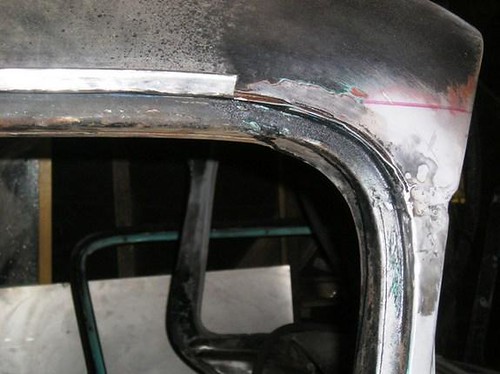 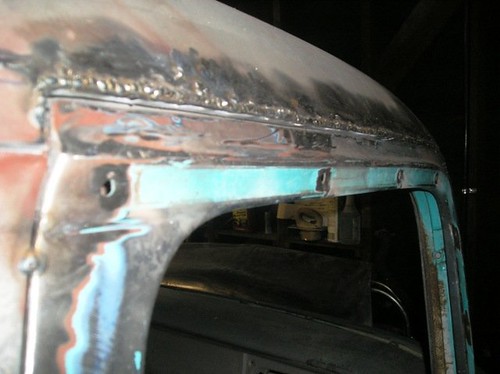 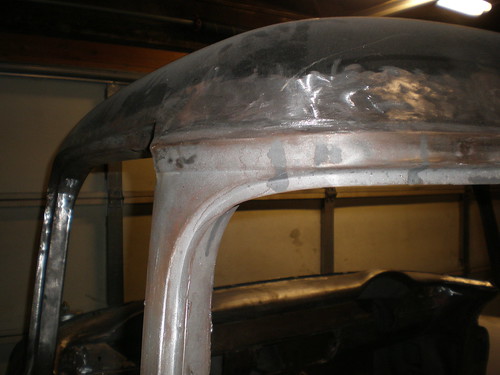 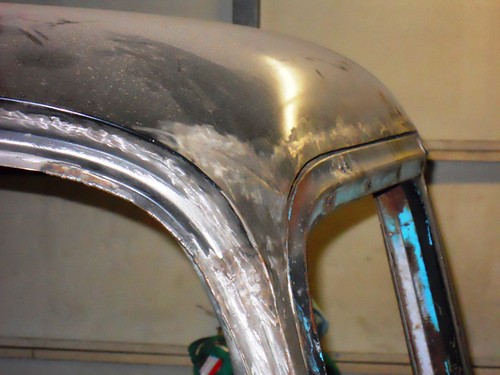 
Last edited by Kabwe; 01-24-2011 at 06:22 PM. |
|
|
|
|
01-11-2011, 06:24 PM
|
#11 |
|
Certified Car Nut
Join Date: Jan 2005
Location: Inglewood, California
Posts: 3,118
|
Re: Kabwe's aka Bam's build
Smooth the vent cover
 Shaved gas filler  Shaved firewall  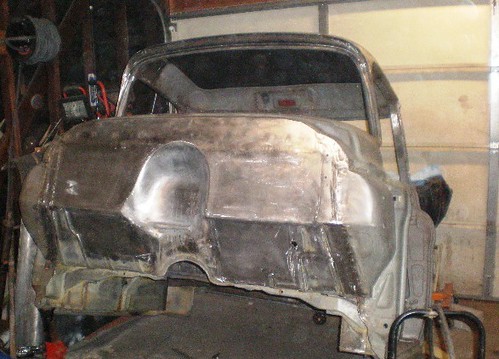 Smooth the rear section of the cab and added a 3rd brake light 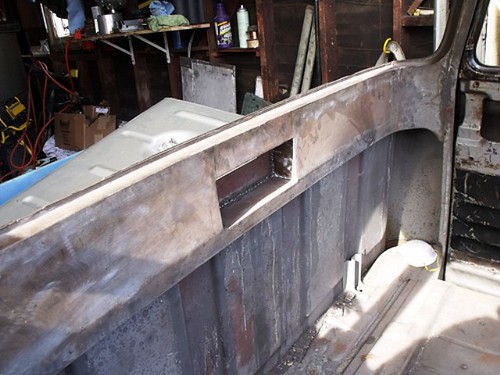 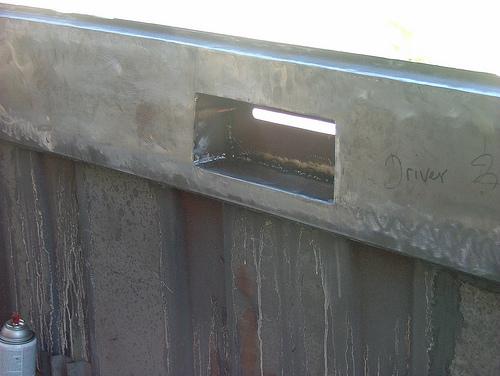 Rounded door corners 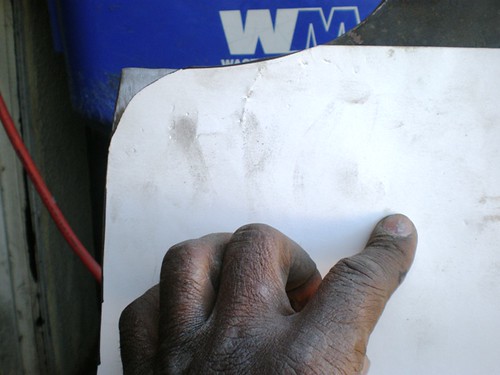 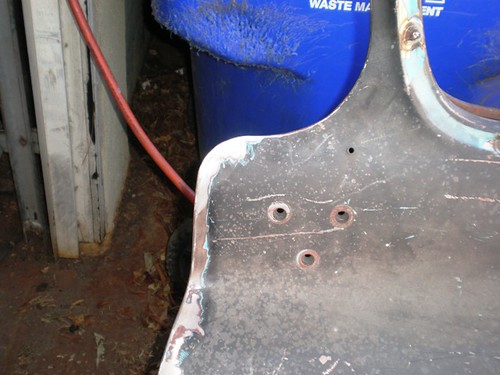  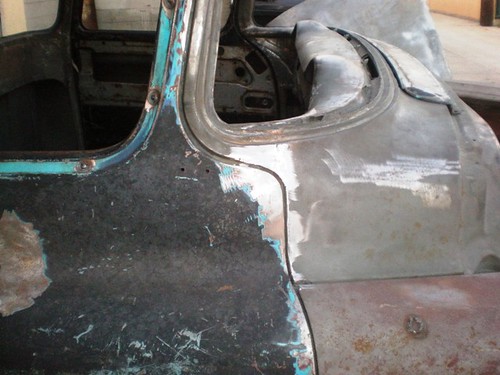 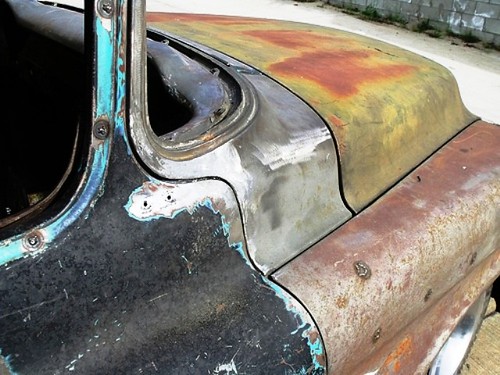
Last edited by Kabwe; 01-15-2011 at 11:09 AM. |
|
|
|
|
06-24-2013, 09:28 AM
|
#12 | |
|
'57 Rosa
 Join Date: Sep 2009
Location: Fitzgerald,GA
Posts: 162
|
Re: Kabwe's aka Bam's build
Quote:
I have a few questions about how you made your cuts on your firewall. I have attached a picture of mine. As you can see, I have been practicing welding the holes up since I was going to cut that portion out for a patch anyway. My question is did you make your cut at seam #2 and then use filler back up to seam #1 to smooth it all out? Or did you make the cut at seam #1 for the patch and then fill? I hope this make sense what I am asking?
__________________
My '57 Truck Build "Rosa" (Current Project) http://67-72chevytrucks.com/vboard/s...21#post4118721 2003 Dodge Dakota 4X4 (Daily Driver) Only two defining forces have ever died for us: CHRIST died for our salvation and VETERANS died for our freedoms. Glorify CHRIST and thank VETERANs  Dru~ USN Retired Dru~ USN Retired
|
|
|
|
|
|
07-03-2013, 01:20 PM
|
#13 |
|
Registered User
Join Date: Sep 2012
Location: Surgoinsville tn
Posts: 22
|
Re: Kabwe's aka Bam's build
BAM, Months ago you posted that you bought a Miller Diversion 180 TIG welder. You loved it then....how do you feel now? Would you buy it again?
Leon |
|
|
|
|
07-03-2013, 05:59 PM
|
#14 | |
|
Certified Car Nut
Join Date: Jan 2005
Location: Inglewood, California
Posts: 3,118
|
Re: Kabwe's aka Bam's build
Quote:
|
|
|
|
|
|
01-11-2011, 06:24 PM
|
#15 |
|
Certified Car Nut
Join Date: Jan 2005
Location: Inglewood, California
Posts: 3,118
|
Re: Kabwe's aka Bam's build
Rounded front and rear bed corners
      Mini tubs 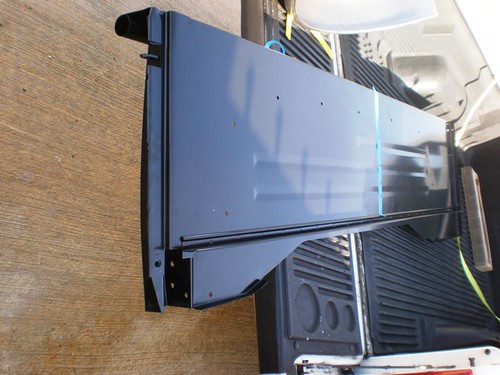  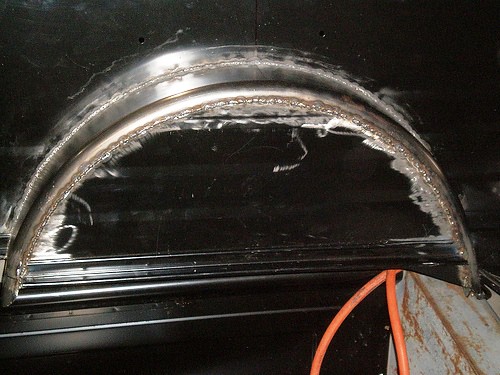 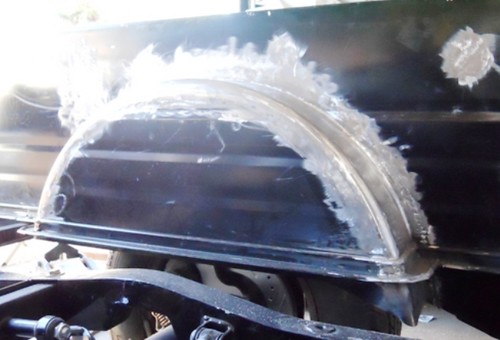 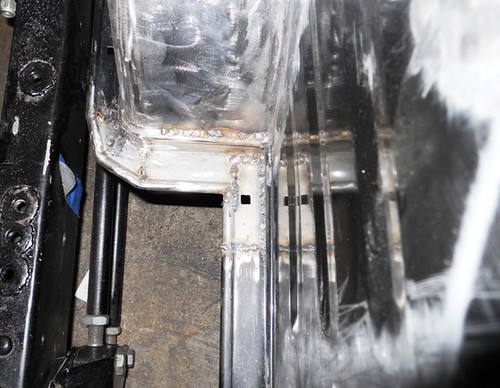 Shaved door hands and bearclaws latches installed in reverse because I want the solenoid in the cab corner instead of at the bottom of the door. 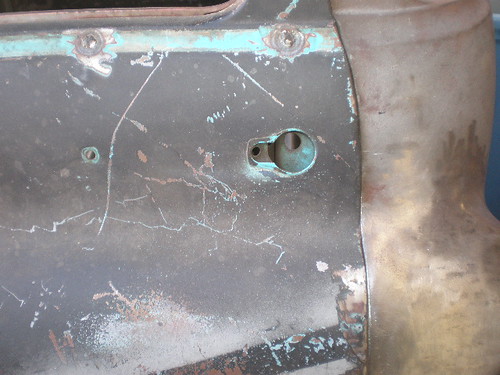 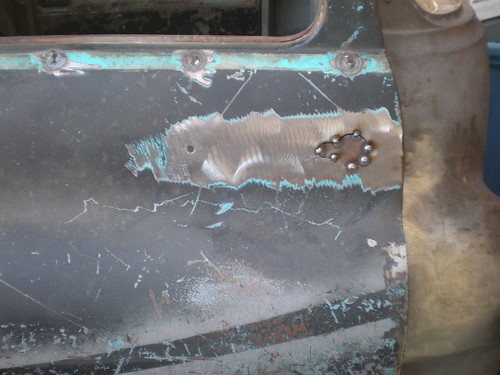 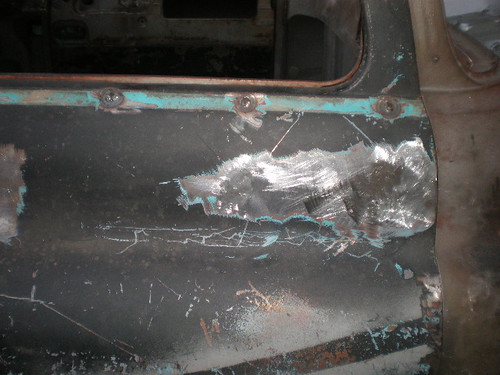 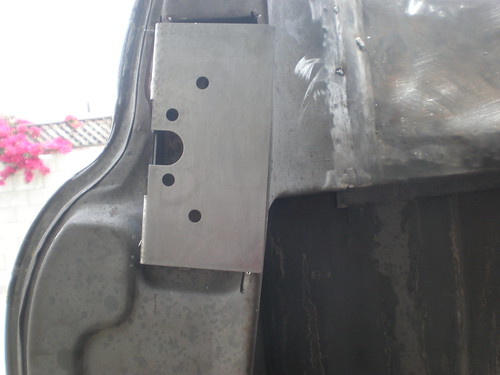 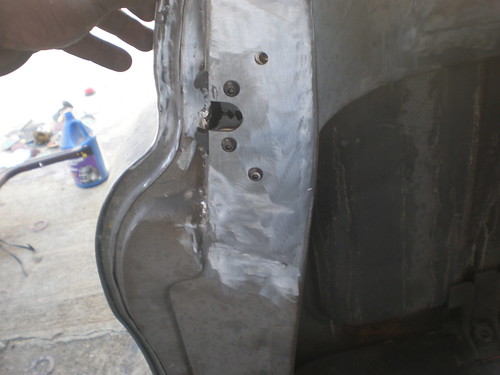 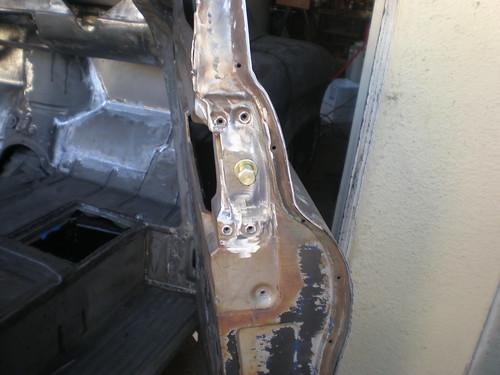
Last edited by Kabwe; 01-24-2011 at 06:01 PM. |
|
|
|
|
09-22-2011, 06:41 PM
|
#16 | |
|
Registered User
Join Date: Aug 2011
Location: North Carolina
Posts: 275
|
Re: Kabwe's aka Bam's build
Quote:
|
|
|
|
|
|
09-22-2011, 06:55 PM
|
#17 | |
|
Certified Car Nut
Join Date: Jan 2005
Location: Inglewood, California
Posts: 3,118
|
Re: Kabwe's aka Bam's build
Quote:
Sorry but I had to go there because I've seen people trying to start debates that think only one way to do things. The cool thing about this stuff is get 10 of us in a room and at least 5 of us will do things differently. I find that cool, some people do not.lol IMO there is no right and wrong with metal working just the end results. I'm still working on those end results.Thank god metal is forgiving or I'd be in trouble.lol 1. I bought a 16 gauge 1 /58 u-bend exhaust pipe from jegs. One pipe will do both rear corners. Just cut them in half to make them j-bends.lol 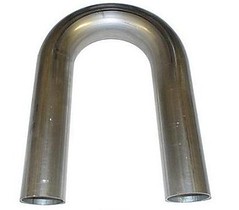 2. I used the pipe to see what material on the bed needed to be removed. 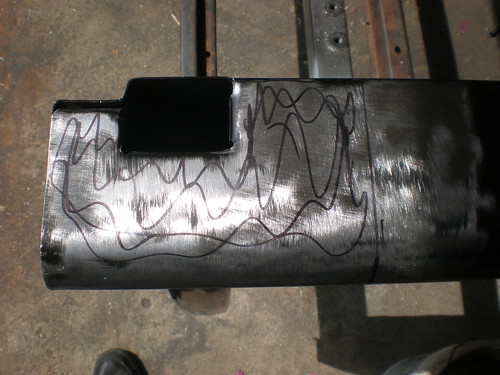 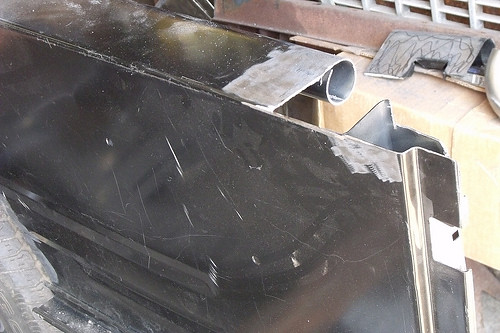 3. I cut the pipe in half and played with the fitment of the pipe until I achieved the desired fit and I tacked it in place.   4. I used a piece of cardboard to make a template of the filler piece and transferred that to 16 gauge sheetmetal and welded it in. 5. Grind the welds and its done 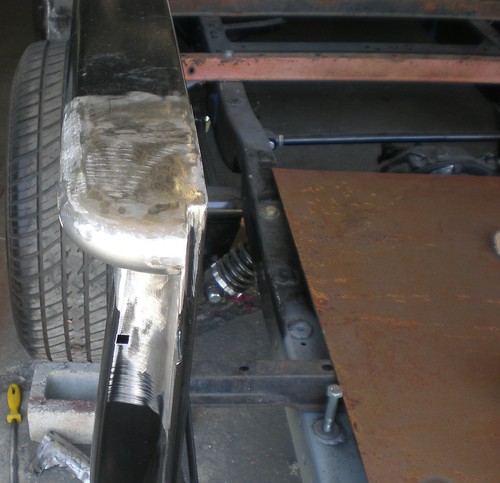
Last edited by Kabwe; 09-22-2011 at 07:49 PM. |
|
|
|
|
|
09-23-2011, 11:17 PM
|
#18 | |
|
Senior Member
  Join Date: Nov 2008
Location: Glendora, CA
Posts: 6,331
|
Re: Kabwe's aka Bam's build
Quote:
 When they can come up with a way to do a complex job relatively cheaply, make it look incredibly simple (when its definitely not) and it makes you say, "Why didn't I think of that?!" |
|
|
|
|
|
09-24-2011, 02:03 PM
|
#19 | |
|
Certified Car Nut
Join Date: Jan 2005
Location: Inglewood, California
Posts: 3,118
|
Re: Kabwe's aka Bam's build
Quote:
|
|
|
|
|
|
12-16-2011, 03:56 PM
|
#20 | |
|
Registered User
Join Date: Aug 2011
Location: Trumansburg ny
Posts: 230
|
Re: Kabwe's aka Bam's build
Quote:
|
|
|
|
|
|
01-11-2011, 06:25 PM
|
#21 |
|
Certified Car Nut
Join Date: Jan 2005
Location: Inglewood, California
Posts: 3,118
|
Re: Kabwe's aka Bam's build
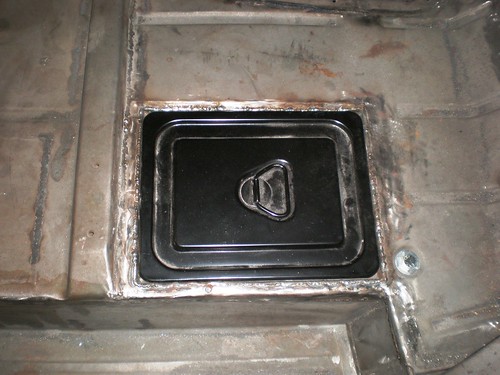
47-55 1st Series Chevy Truck Battery access door.
 Pancaked the hood. I took an inch out.  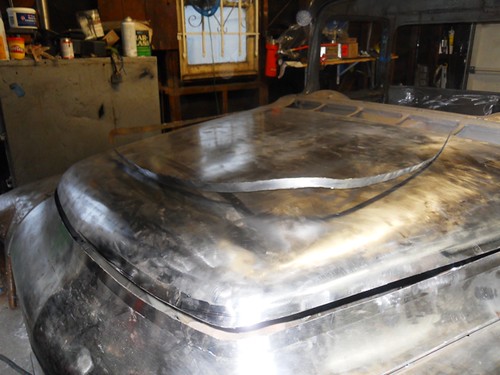 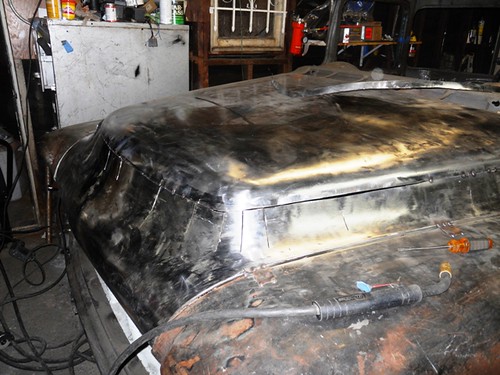 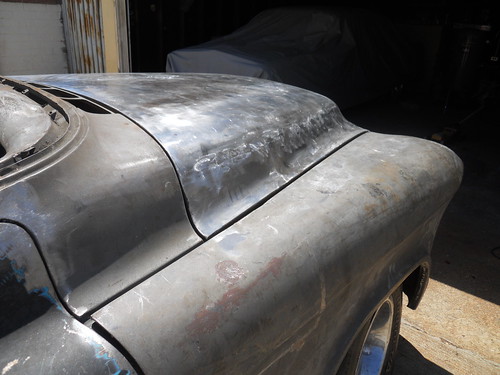 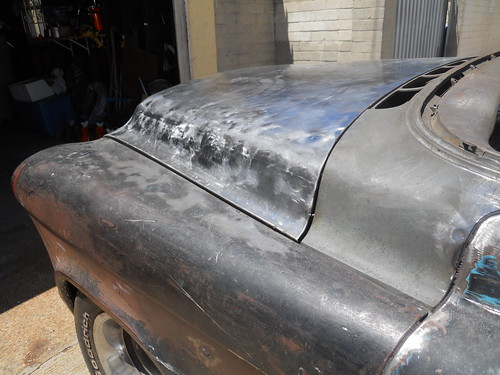 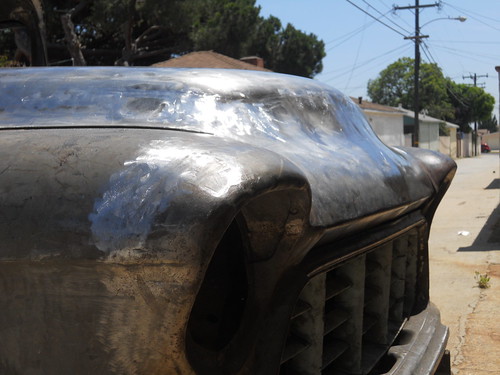 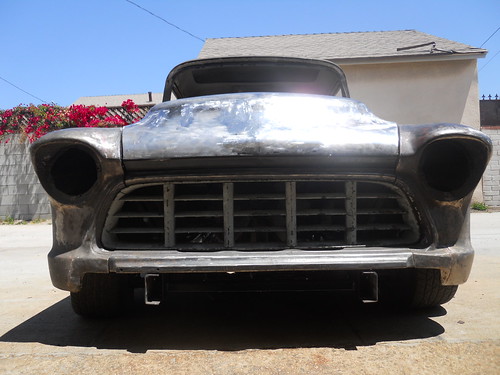 A couple of mock up pics. 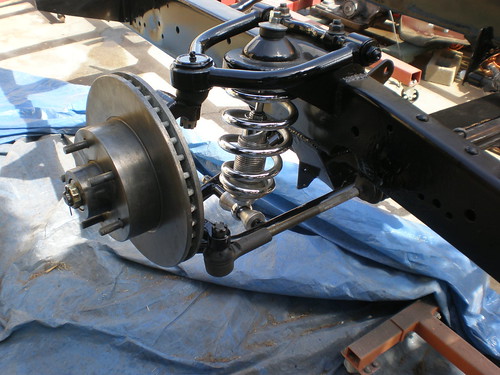 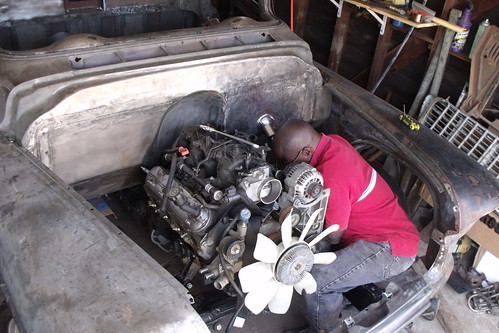 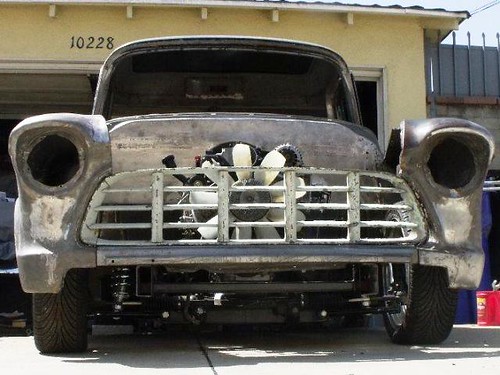   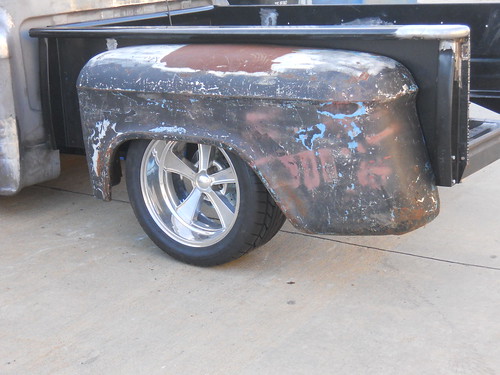 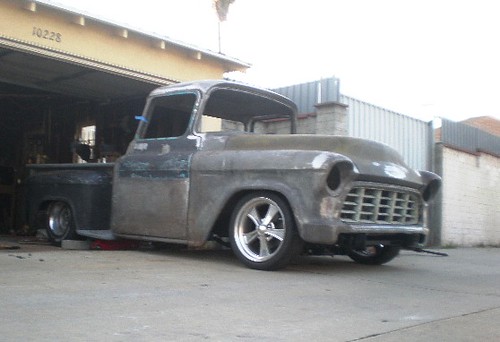 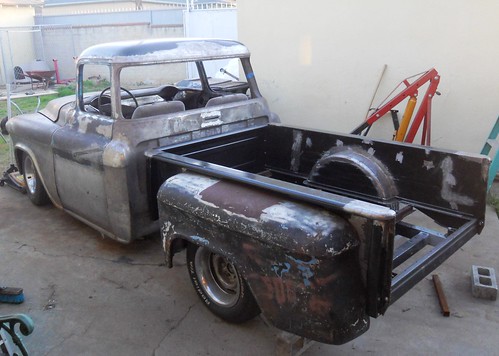
Last edited by Kabwe; 01-24-2011 at 06:16 PM. |
|
|
|
|
01-11-2011, 06:52 PM
|
#22 |
|
Registered User
Join Date: Aug 2010
Location: Asheville, NC
Posts: 291
|
Re: Kabwe's aka Bam's build
Twins are hot; your truck and car are nice too! Nice build project. Keep the pics. coming.
__________________
My build project http://67-72chevytrucks.com/vboard/s...=1#post4158671 |
|
|
|
|
01-11-2011, 07:18 PM
|
#23 |
|
Registered User
Join Date: Jul 2010
Location: memphis
Posts: 2,537
|
Re: Kabwe's aka Bam's build
i was wondering where this build went...glad to see it back up
|
|
|
|
|
01-11-2011, 07:22 PM
|
#24 |
|
Registered User
Join Date: Aug 2007
Location: Corona, California
Posts: 7,998
|
Re: Kabwe's aka Bam's build
I'm still amazed at the amount of work you've done to your truck.
Kim |
|
|
|
|
01-11-2011, 08:08 PM
|
#25 | |||
|
Certified Car Nut
Join Date: Jan 2005
Location: Inglewood, California
Posts: 3,118
|
Re: Kabwe's aka Bam's build
Quote:
Quote:
Quote:
Last edited by Kabwe; 01-13-2011 at 06:55 PM. |
|||
|
|
|
|
| Bookmarks |
| Thread Tools | |
| Display Modes | |
|
|


 Hybrid Mode
