
|
Register or Log In To remove these advertisements. |
|
|
|
|||||||
 |
|
|
Thread Tools | Display Modes |
|
|
 03-22-2009, 06:13 AM
|
#1 |
|
I had a V-8
Join Date: May 2003
Location: Phoenix AZ
Posts: 1,116
|
Re: The Story Of A Suburban (Lots Of Pics)
I have been getting several requests/demands for an update, so here it goes. I have been working on the wiring lately and it is about as exciting as watching paint drying on grass that is growing. That, and, I make very slow progress so taking pics just drags out the process, but I did take a few, so here they are:
I guess I should give a bit of background on how I wire my vehicles. I use factory terminals, connectors, crimping tools, wire (thermal cross-linked polyethylene jacketed) and the factory high-temp loom when I build a harness. When I am done I require it to have the appearance, durability, longevity, and servicability of a factory wiring harness. This is no easy feat. All of the equipment listed is expensive and most is not readily available. If I run out of loom for example, I can not run down to the local parts store and pick some up. Some terminals and even a couple connectors are available, but that is about it. I started this strange obsession years ago when I put an injected 5.7L in my '71 Nova. I wanted to replace the engine control harness due to age, but I couldn't bring myself to pay the rediculous amount of money that they cost, just to cut it up and throw most of it away. At that point I started accumulating the factory terminals and connectors. Somewhere along the way I felt rich and bought three factory crimping tools for about $125.00 each. As time went by, I found more and more terminals and now I have three bin drawers full (way over-stuffed would be a much more accurate term) of the oe terminals with several boxes of factory connectors both Weather Pack and non-sealed (56 &59 series). I have one bin drawer of typical generic terminals (mostly ring terminals) that rarely get used. When I do use them, I pull the plastic off the end, then crimp, solder and apply heat shrink to seal them. Ok, now that boredom has completely set-in, here is a few pics. I needed a different temp switch for the cold start timing advance, so I ordered one from Cummins. The switch was different than the one that I had, so it required the use of a new harness. It wasn't terribly priced (about $25.00). 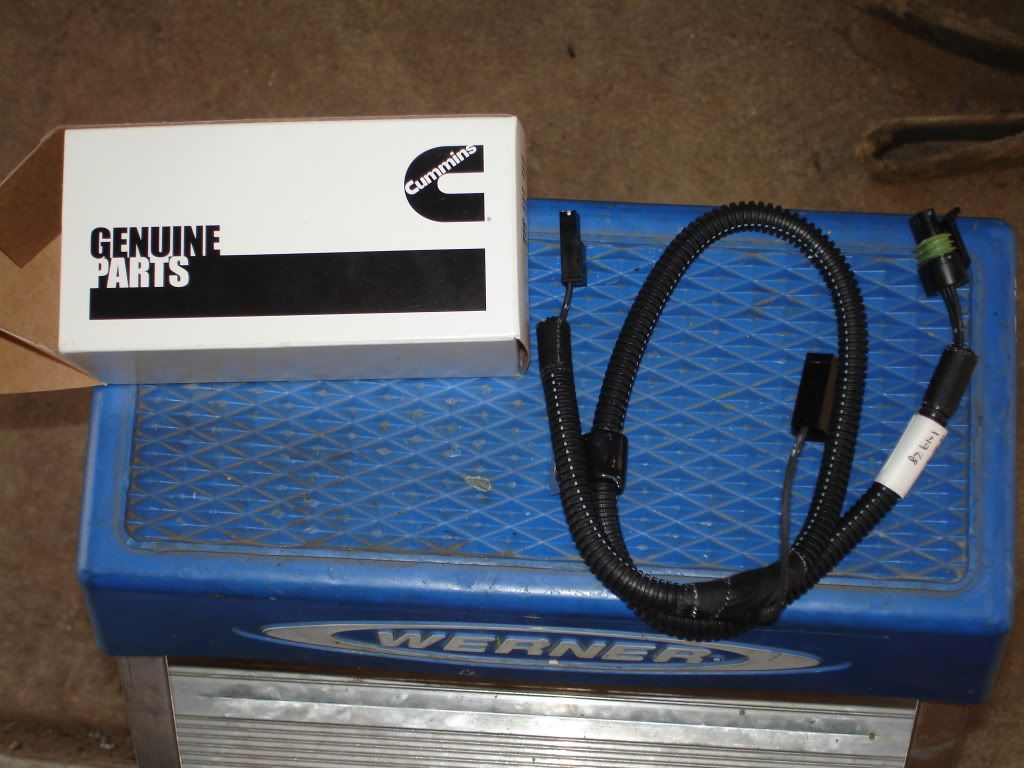 The problem is I was going to have to cut up half of it to make it work with my setup. I did some checking with my suppliers and found the correct connector body. The connector body uses pull-to-seat terminals (put the wire through the connector body, crimp the terminal on the wire then pull it back into the connector to lock the terminal in place) and I was out of this particular series (fairly common--just forgot to re-order when I used the last one). If I cut up the Cummins harness, I still needed the terminals because I do not splice wires. I remove the terminal from the connector and run my own wire into it. I got the connector body and a pack of 20 terminals for about $7.00. 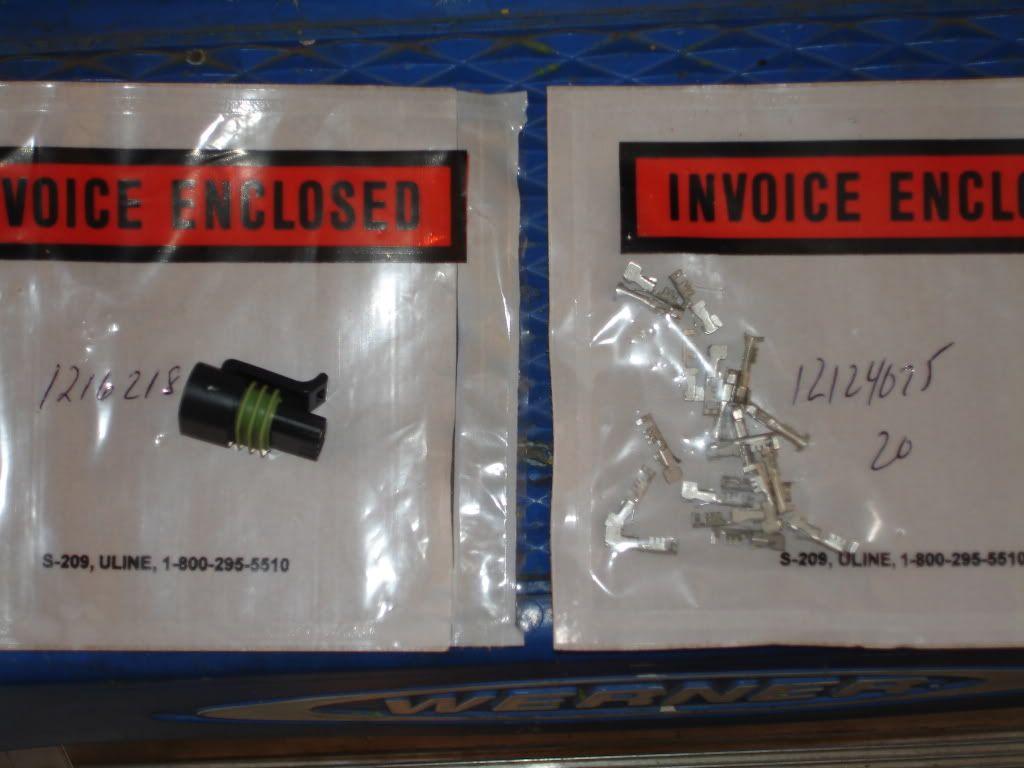 Being this motor was originally in a Dodge, there were several Dodge connectors on it. I was able to convert all but one to GM connectors. The only one that I could not convert was the connector for the fuel heater. Refusing to splice wires, I searched for and found some oe Dodge terminals. 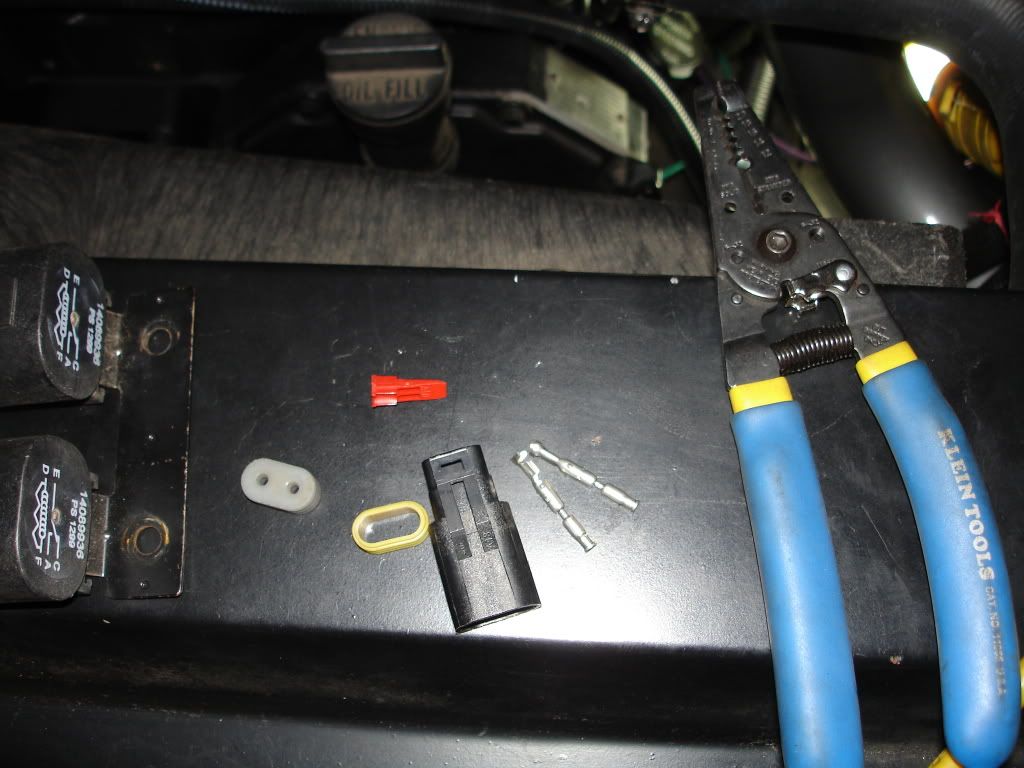 The story goes on and on, but here is a pic of the fan relays and fuses. I had a time figuring out a place to put them, so I put them on the inside of the fender next to the battery. It keeps them out of the way, but yet they can still be accessed if necessary. The jumbled mess of wire in the core support was not finished yet.  I decided to replace the lift pump with a better unit. It looks like the one off of a P-pump motor, but it is different--to the tune of double the money :eek1:. The P-pump lift pump puts out too much pressure to use on my motor. This new pump keeps pressure and volume up at high engine loads where the original design falters. 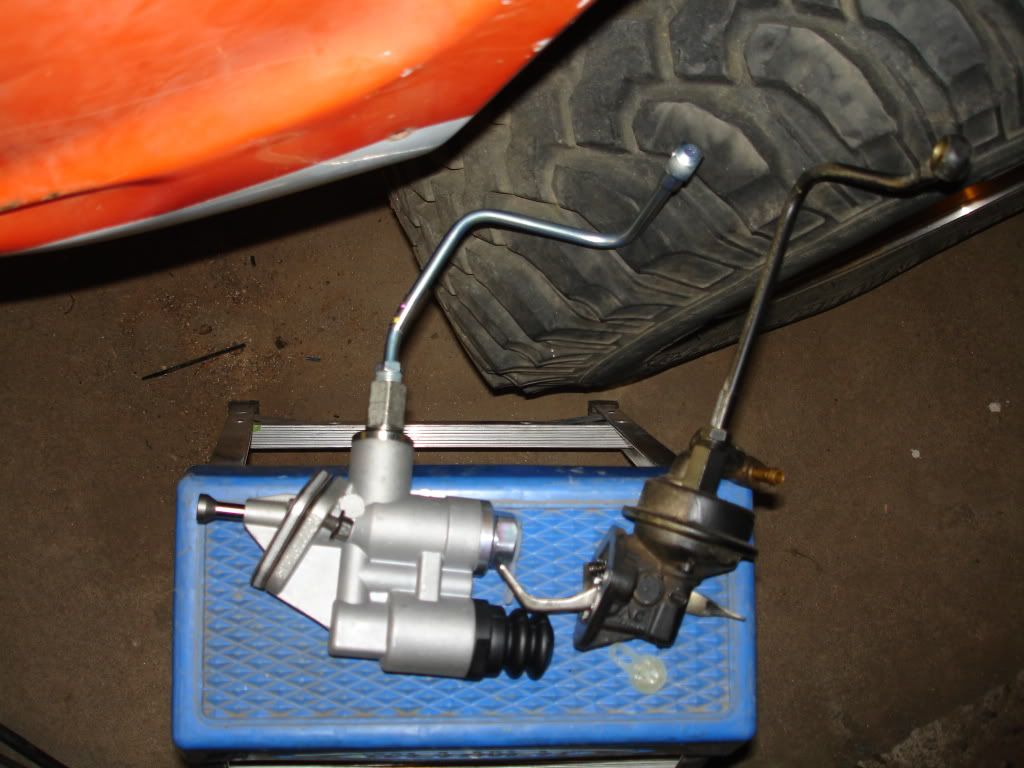 So there you have it. Not much to look at, but it sure is nice to have most of it done. I have to take a couple pics of a few things in the interior that I did. With this stuff done, I'm very close to starting functional electrical tests.
__________________
1972 K20 Suburban, 5.9L Cummins, Banks Power Pack, NV4500HD, NP205, H.A.D., D60/14FF ARB Link To Build: HERE. Last edited by mosesburb; 03-25-2009 at 04:48 AM. |

|

|
|
03-25-2009, 05:00 AM
|
#2 |
|
I had a V-8
Join Date: May 2003
Location: Phoenix AZ
Posts: 1,116
|
Re: The Story Of A Suburban (Lots Of Pics)
Since this project has taken longer than expected, I decided I had better put an A/C compressor on it now rather than wait. I am glad I decided to do it this way as I did not realize how much work it was going to take.
I went shopping through an A/C parts book and found a compressor off of a Sterling class 8 Tractor that looked like it would work great. I got it and installed it then instantly came to the realization that most of the work I spent on the accessory drive belt and lower hose was going to have to be re-done. Swell. The location of the compressor, directly under the alternator, created a situation that would have the belt coming off of the alternator and just barely glancing off of the compressor clutch. This would result in the belt screaming when the compressor engages. Not good. The problem is, there is not enough backside idler pullies in the system to re-route the belt and keep enough wrap on other vital components. I needed to add another backside idler, but there is no room to do it--none. I got an idea to try moving the compressor away from the engine. This worked rather well. It gave me some room to work with, but it also put the fittings for the compressor into the intercooler tube. I can deal with the intercooler tube later, but I need the clearance for a pulley now. I had Russ machine me up four 1.25" spacers for the compressor to make the room for the new pulley. I used the same pulley that is used on the tensioner to keep things simpler. I fabbed up a bracket to mount the pulley, but there were a couple problems with it. The major problem was the tensioner could swing down and make contact with it. First bracket fail: 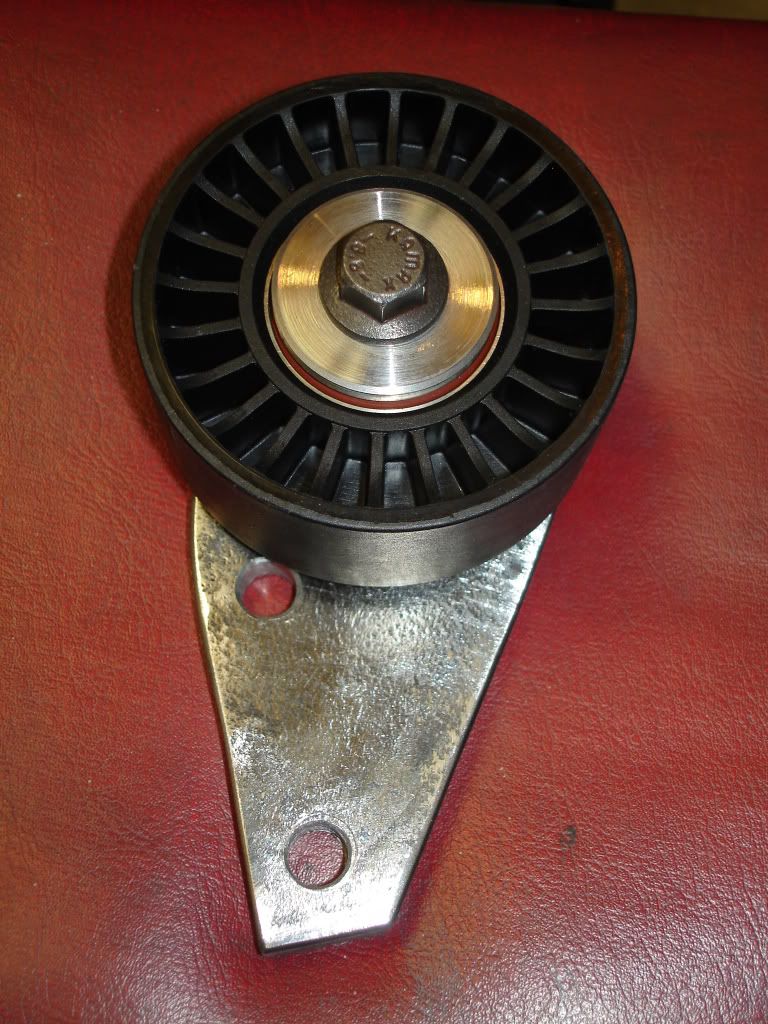 The back of the holes it mounts to can kind of be seen it this pic. They are the shiny ones on the back of the front face. The lower set of holes have bolts in them:  It kind of sucked that this did not work as it was fairly quick to make and it looked good, but oh well. So I got to messing around with pulley location and found that the pulley needs to be mounted almost directly over one the top mounting hole of my first bracket. I could use that hole to mount the pulley to but it is only 8mm 1.25. I do not want to go any smaller than 10mm 1.5. So I came up with a bracket that used the bottom hole on the upper mounting pad and the two holes on the lower mounting pad. This allowed me to put a bolt hole where I need it without having to bore out the casting. The only problem with using the upper and lower pads is that they are on two different planes. I measured them out to be off by .250". Easy enough, just weld a piece of 1/4" flat stock to the back of my idler bracket. 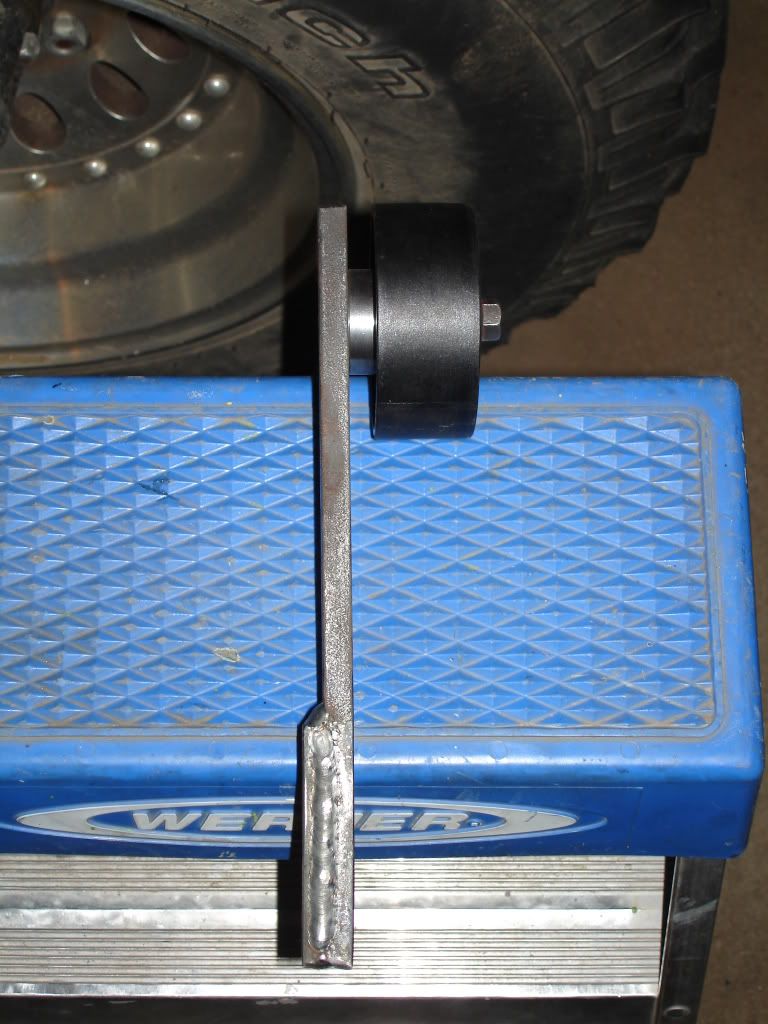 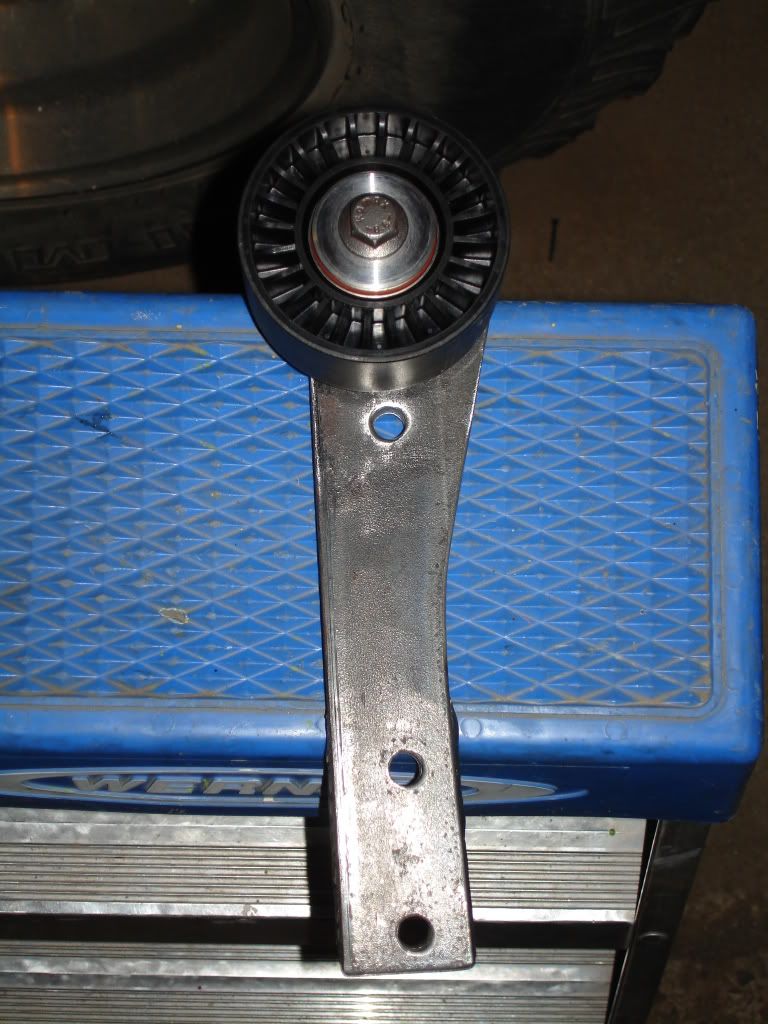 I called on Russ's 24/7 Machine Shop to make a couple pulley bushings for this. I had him basically duplicate the mounting bushing for a 4.3L (same as a 5.0L and 5.7L TBI) idler pulley, but making the base thicker so the pulley is spaced correctly for proper alignment. While he was at it I requested a "washer" for the front of the pulley. Once again, he delivered in first class style exactly what was needed. 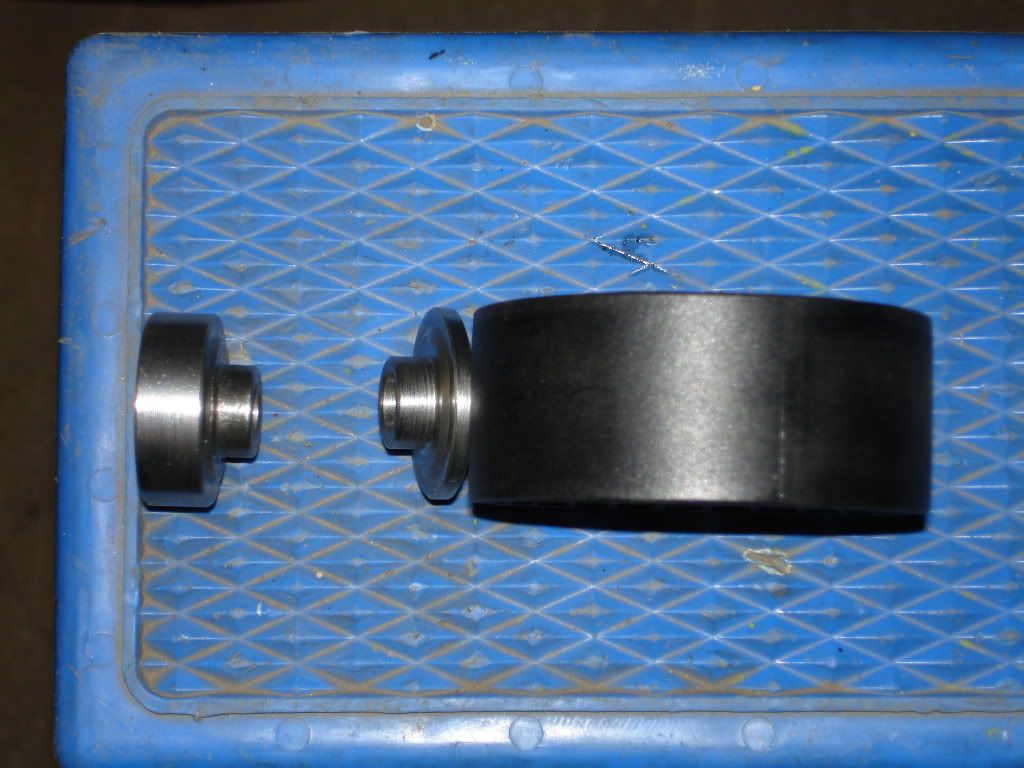 So with all of this, I was able to mount everything up and see what works. After several(!!) attempts at finding the correct belt length, I finally found one. One thing I learned through this is that changing a belt on this is an absolute royal hemorrhaging pain in the ass (putting it very mildly). That being the case, I do not want to do it again. I decided to go with one of Gates' HD serpentine belts. These are going over 100K in the new Class 8 trucks that had been cooking off standard belts in 10-30K. I figure if it will go 100K on a Class 8 with EGR, it should last forever in my truck. The only issue I have with it is its nasty color. Now mind you my favorite color is green, but this just does not do it for me. Oh well, I will deal with the ugly color to not have to deal with changing it again anytime soon. In this pic the spacers for the compressor are visible and it shows the belt wrap on the compressor (well over 180*). There should be no issues with squeal on any component now. It looks like the belt is real close to touching between the new idler and the water pump pulley, but there is actually about 3/8" clearance between them. 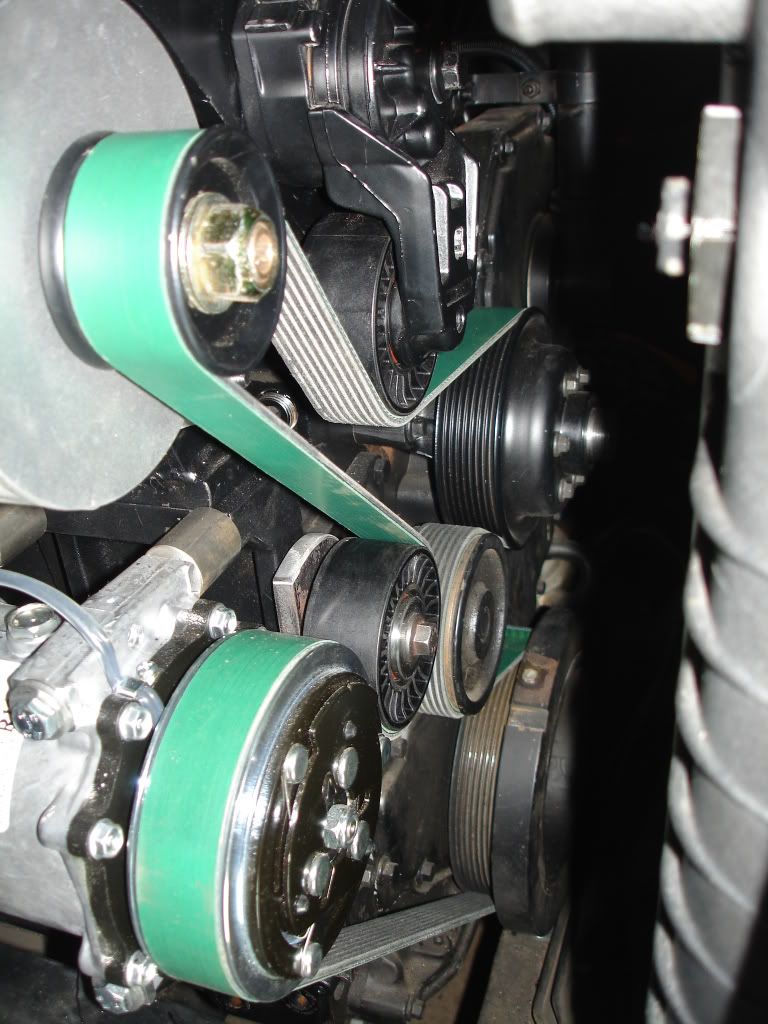 So I found a compressor for a Peterbilt application that should work good. I just have to pick it up and get everything back together. I am getting farther away, but closer.....
__________________
1972 K20 Suburban, 5.9L Cummins, Banks Power Pack, NV4500HD, NP205, H.A.D., D60/14FF ARB Link To Build: HERE. |
|
|
|
|
| Bookmarks |
|
|


 Hybrid Mode
