
|
 11-13-2011, 08:47 PM
|
#151 |
|
67cheby
 Join Date: Sep 2008
Location: siloam springs ar 72761
Posts: 17,890
|
Re: A New 68 Build Thread
LOL...that was funny...Plasma cutter !!
|

|

|
|
11-13-2011, 09:01 PM
|
#152 |
|
VA72C10
 Join Date: Mar 2008
Location: Midlothian, VA
Posts: 25,269
|
Re: A New 68 Build Thread
Nice work!!!
__________________
Looking for a 67-72 swb or blazer project in or around VA. 
|
|
|
|
|
11-13-2011, 10:07 PM
|
#153 |
|
Registered User
Join Date: Mar 2006
Location: Pittsburgh
Posts: 1,694
|
Re: A New 68 Build Thread
Nice work neighbor
 Can't believe I never seen this build until today Can't believe I never seen this build until today  Nate Nate
__________________
Nate 1967 short fleet Project Blue Goose 'If it don't bounce back... heeheehee you go hungry!" Blues Brothers |
|
|
|
|
11-13-2011, 11:18 PM
|
#154 | |
|
CCTek
Join Date: Apr 2007
Location: Rostraver, PA
Posts: 235
|
Re: A New 68 Build Thread
Quote:
__________________
Chad 68 swb Project http://67-72chevytrucks.com/vboard/s...d.php?t=262840 72 swb Project SOLD http://67-72chevytrucks.com/vboard/s...=1#post3993641 THANKS TO: Hermance Design (www.hermancedesign.com), Paradise Road Rod & Custom, Harry Opfer Welding, Tri-State Machine, Wegner Automotive Research, Nsane Hotrodz (www.nsanehotrodz.com), Clayton Machine Works, CCTek (http://www.candctek.com) |
|
|
|
|
|
12-05-2011, 08:52 PM
|
#155 |
|
CCTek
Join Date: Apr 2007
Location: Rostraver, PA
Posts: 235
|
More Pieces Going In!
We are continuing working on the cab. Before we mount the firewall for good, I thought it was a good time to build the brackets needed for some of the major components. The below pics are the mounting configuration for the Vintage Air Gen IV unit. Man this thing is big, but it should make it snow in the cab. The truck will be black with a black leather interior. We need the cooling. Next will be the brake pedal assembly and steering column brackets.
There was a ton of work just to prep this area to put the a/c unit in. We had to remove the old fan bump in the dash/kick panel area as well as fix some rust we uncovered. I think it turned out alright. Check it out. 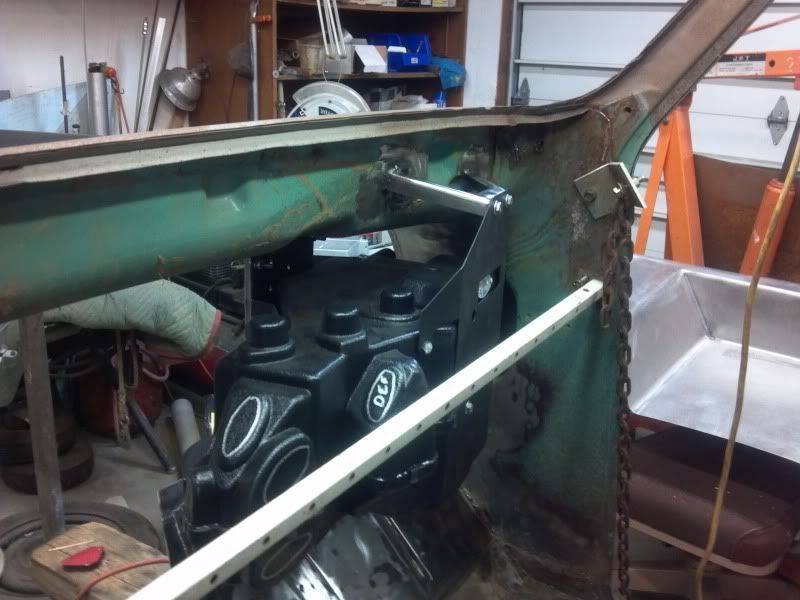 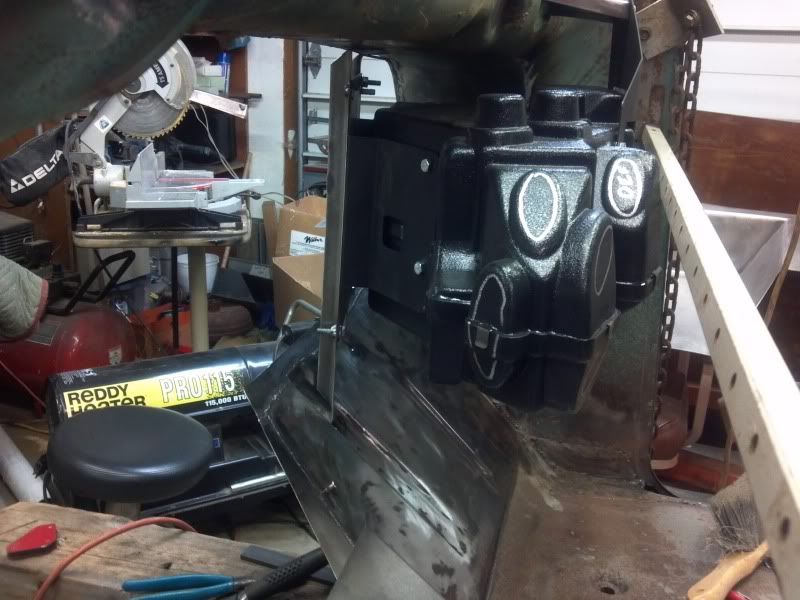 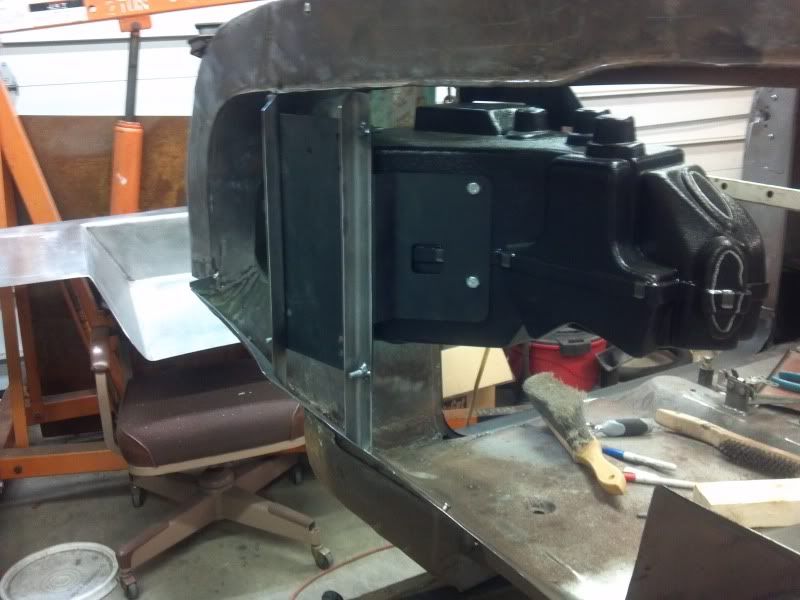 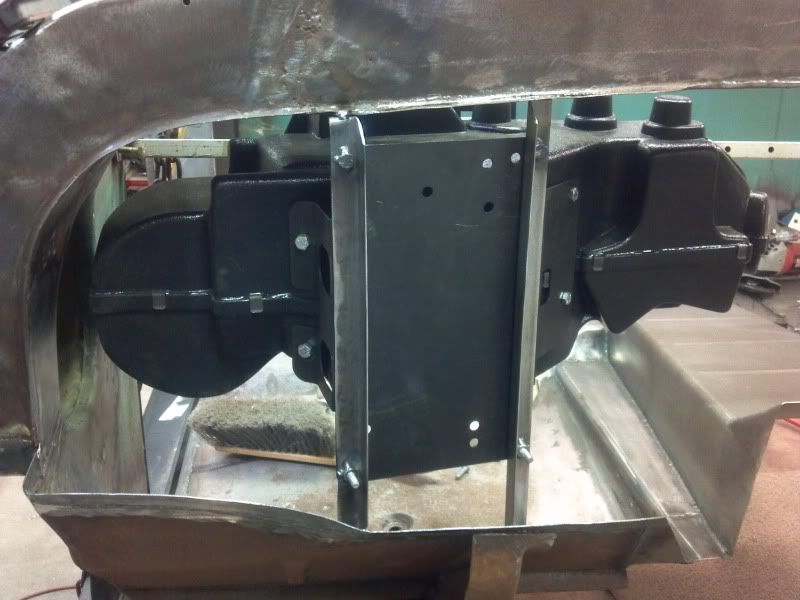 This is where we removed the stock fan pocket. 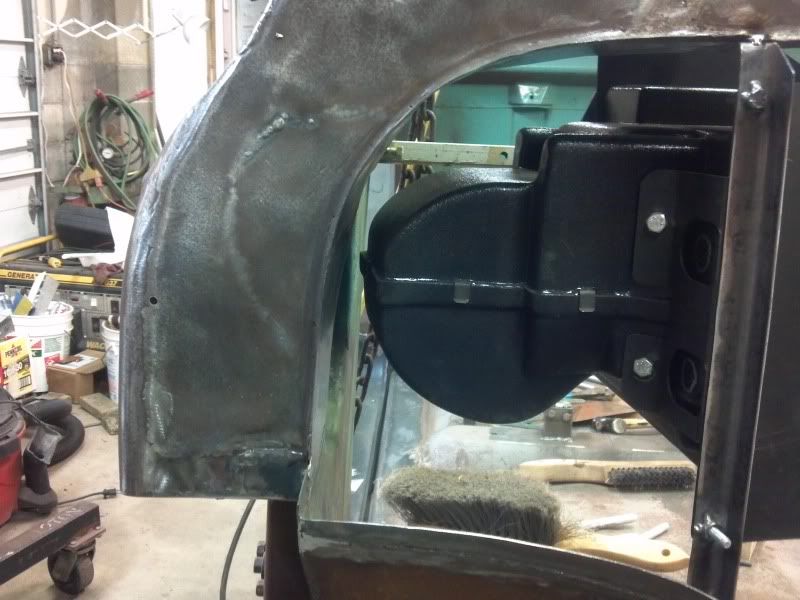 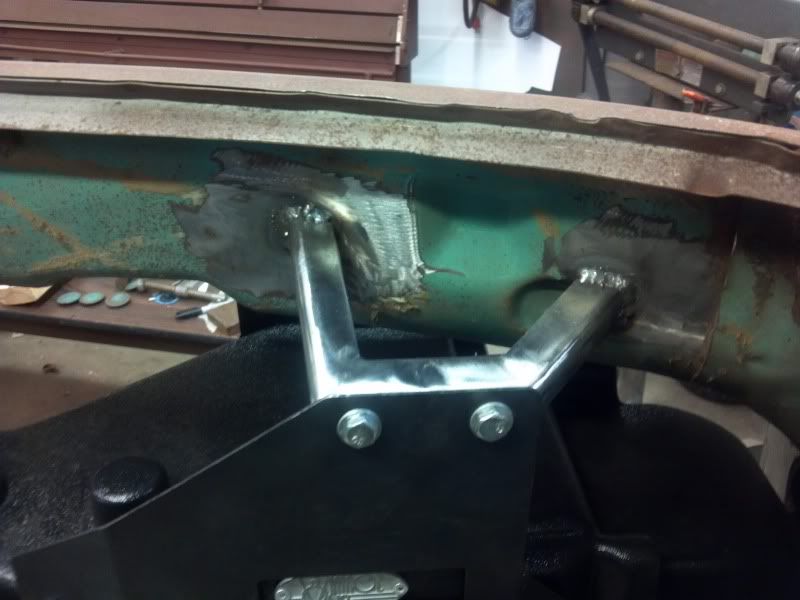 By the way, that is the vintage air mock up unit. Man is it nice to work with. Not heavy and has the actual mounting brackets on it. Thanks for looking!
__________________
Chad 68 swb Project http://67-72chevytrucks.com/vboard/s...d.php?t=262840 72 swb Project SOLD http://67-72chevytrucks.com/vboard/s...=1#post3993641 THANKS TO: Hermance Design (www.hermancedesign.com), Paradise Road Rod & Custom, Harry Opfer Welding, Tri-State Machine, Wegner Automotive Research, Nsane Hotrodz (www.nsanehotrodz.com), Clayton Machine Works, CCTek (http://www.candctek.com) |
|
|
|
|
12-06-2011, 12:02 AM
|
#156 |
|
Registered User
Join Date: Feb 2008
Location: Carson, CA
Posts: 581
|
Re: A New 68 Build Thread
Just out of curiosity would the unit fit if you pushed it as far to the passenger side as possible? Or do you just not need the extra space that would create? I have been under my dash enough to know
Posted via Mobile Device
__________________
69 C10 SWB -- Left to me by a loving father. Finishing the build we never got the chance to do together |
|
|
|
|
12-06-2011, 12:11 AM
|
#157 | |
|
CCTek
Join Date: Apr 2007
Location: Rostraver, PA
Posts: 235
|
Re: A New 68 Build Thread
Quote:
__________________
Chad 68 swb Project http://67-72chevytrucks.com/vboard/s...d.php?t=262840 72 swb Project SOLD http://67-72chevytrucks.com/vboard/s...=1#post3993641 THANKS TO: Hermance Design (www.hermancedesign.com), Paradise Road Rod & Custom, Harry Opfer Welding, Tri-State Machine, Wegner Automotive Research, Nsane Hotrodz (www.nsanehotrodz.com), Clayton Machine Works, CCTek (http://www.candctek.com) |
|
|
|
|
|
12-06-2011, 12:52 AM
|
#158 |
|
Registered User
Join Date: Feb 2008
Location: Carson, CA
Posts: 581
|
Re: A New 68 Build Thread
You answered it. At first glance it looked like you could fit the unit into the area where the factory vent in the kick panel goes.
Love the progress though! Top notch work! Posted via Mobile Device
__________________
69 C10 SWB -- Left to me by a loving father. Finishing the build we never got the chance to do together |
|
|
|
|
12-06-2011, 12:02 PM
|
#159 |
|
Registered User
Join Date: Feb 2008
Location: Arizona
Posts: 638
|
Re: A New 68 Build Thread
Awesome work! You ain't lyin that thing is HUGE.
__________________
72 Cheyenne shorty "CheyLow" 72 3/4 long 4X4 69 SWB "Prospector" 68 C/10 shorty - "Picacho" http://67-72chevytrucks.com/vboard/s...d.php?t=428379 sold to "93redsled" Have you heard about C10 Talk? C10 Talk is a podcast all about C10 Trucks, the builders, the vendors, and most importantly the C10 Community. Check us out online at www.c10talk.com
|
|
|
|
|
12-06-2011, 05:17 PM
|
#160 |
|
VA72C10
Join Date: Mar 2008
Location: Midlothian, VA
Posts: 25,269
|
Re: A New 68 Build Thread
Looking good!
__________________
Looking for a 67-72 swb or blazer project in or around VA.
|
|
|
|
|
12-06-2011, 06:01 PM
|
#161 |
|
Registered User
Join Date: Jul 2011
Location: Athens, AL
Posts: 42
|
Re: A New 68 Build Thread
This is some of the nicest sheet metal work I have ever seen. Very impressed with what you have going on here...
|
|
|
|
|
12-07-2011, 04:09 PM
|
#162 |
|
Registered User
 Join Date: Dec 2008
Location: port charlotte,florida
Posts: 384
|
Re: A New 68 Build Thread
good info, I've been on the fence about the gen iv. nice to know you got it to fit,let me know if you want to sell the mock up unit when your done w/ it.
|
|
|
|
|
12-09-2011, 02:27 PM
|
#163 | |||||
|
CCTek
Join Date: Apr 2007
Location: Rostraver, PA
Posts: 235
|
Re: A New 68 Build Thread
Quote:
Quote:
Quote:
Quote:
Quote:
__________________
Chad 68 swb Project http://67-72chevytrucks.com/vboard/s...d.php?t=262840 72 swb Project SOLD http://67-72chevytrucks.com/vboard/s...=1#post3993641 THANKS TO: Hermance Design (www.hermancedesign.com), Paradise Road Rod & Custom, Harry Opfer Welding, Tri-State Machine, Wegner Automotive Research, Nsane Hotrodz (www.nsanehotrodz.com), Clayton Machine Works, CCTek (http://www.candctek.com) |
|||||
|
|
|
|
12-09-2011, 04:35 PM
|
#164 |
|
Registered User
Join Date: Jan 2011
Location: Gilberts IL.
Posts: 2,488
|
Re: A New 68 Build Thread
Just found this build I am always amazed at the talent on this site and the different types of builds being done. Keep up the good work.
__________________
94 k2500 EXCab Long Bed 350ci New Toy 95 K2500 Suburban New PlowTruck 454ci Support our Troops @ http://anyairman.com http://www.woundedwarriorproject.org/ |
|
|
|
|
12-10-2011, 12:28 PM
|
#165 |
|
Registered User
Join Date: Dec 2008
Location: port charlotte,florida
Posts: 384
|
Re: A New 68 Build Thread
I here ya,mines black/black & in southwest fl. its gotta cool like a hurricane in Alaska,Ive put in a few VA units myself & they all seem to struggle.I got their biggest condenser & modified the core support to fit it, hopefully between that & the gen IV it'll cool it down,still worried about blower volume though.
really nice fab work so far,that trans tunnel looks sweet!! |
|
|
|
|
12-17-2011, 08:50 PM
|
#166 | |
|
CCTek
Join Date: Apr 2007
Location: Rostraver, PA
Posts: 235
|
Re: A New 68 Build Thread
Quote:
__________________
Chad 68 swb Project http://67-72chevytrucks.com/vboard/s...d.php?t=262840 72 swb Project SOLD http://67-72chevytrucks.com/vboard/s...=1#post3993641 THANKS TO: Hermance Design (www.hermancedesign.com), Paradise Road Rod & Custom, Harry Opfer Welding, Tri-State Machine, Wegner Automotive Research, Nsane Hotrodz (www.nsanehotrodz.com), Clayton Machine Works, CCTek (http://www.candctek.com) |
|
|
|
|
|
12-17-2011, 08:51 PM
|
#167 |
|
CCTek
Join Date: Apr 2007
Location: Rostraver, PA
Posts: 235
|
More Parts!
We are still trying to get as much done under the dash as we can before we weld the new firewall on. Next up is the steering column and mount for the brake pedal. After a lot of measuring, what iffing, we got the bracket built. I decided that I wanted to incorporated the pedal mount anf steering column mount into one piece that could be fixed to the cowl area. This is the area that the factory bracket was fastened too. Here is what we cam up with. A couple more gussets on the pedal mount and I'll get the bracket welded in. Here it is so far.
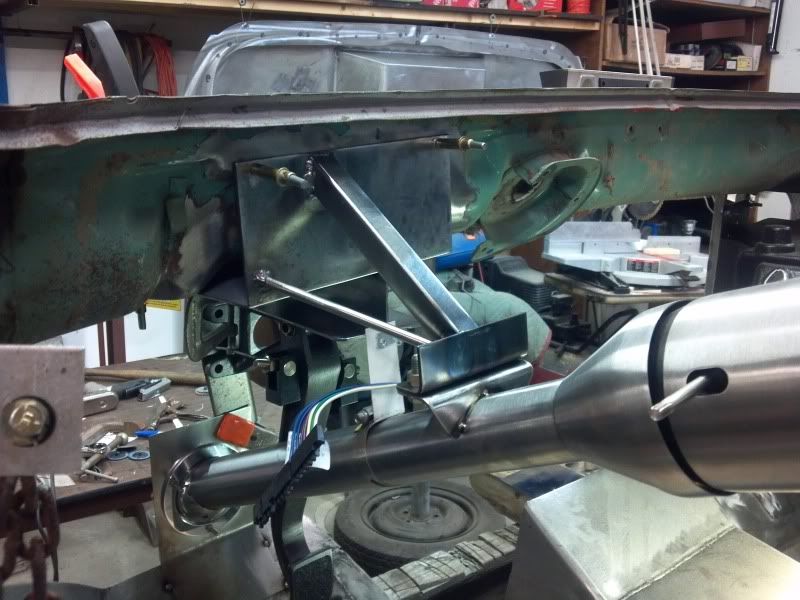 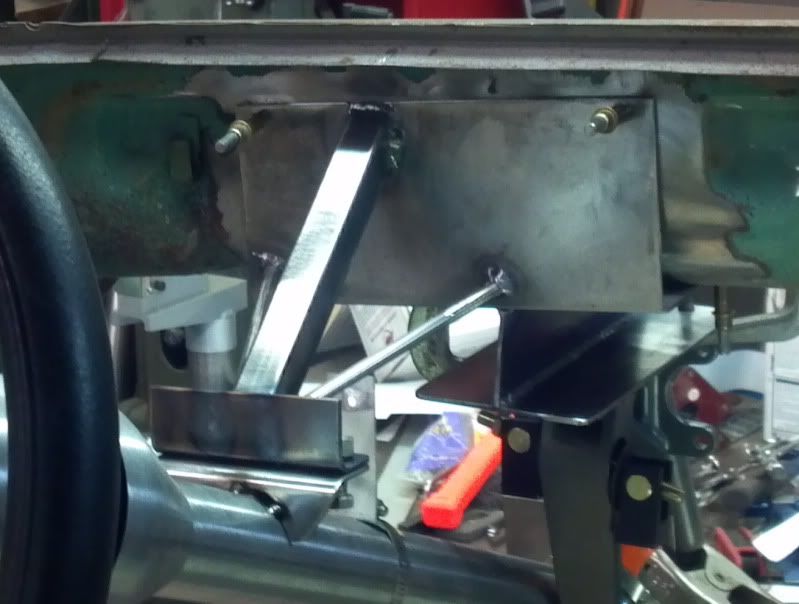  As always comments good or bad are welcome.
__________________
Chad 68 swb Project http://67-72chevytrucks.com/vboard/s...d.php?t=262840 72 swb Project SOLD http://67-72chevytrucks.com/vboard/s...=1#post3993641 THANKS TO: Hermance Design (www.hermancedesign.com), Paradise Road Rod & Custom, Harry Opfer Welding, Tri-State Machine, Wegner Automotive Research, Nsane Hotrodz (www.nsanehotrodz.com), Clayton Machine Works, CCTek (http://www.candctek.com) |
|
|
|
|
01-07-2012, 10:10 PM
|
#168 |
|
CCTek
Join Date: Apr 2007
Location: Rostraver, PA
Posts: 235
|
1 step back!
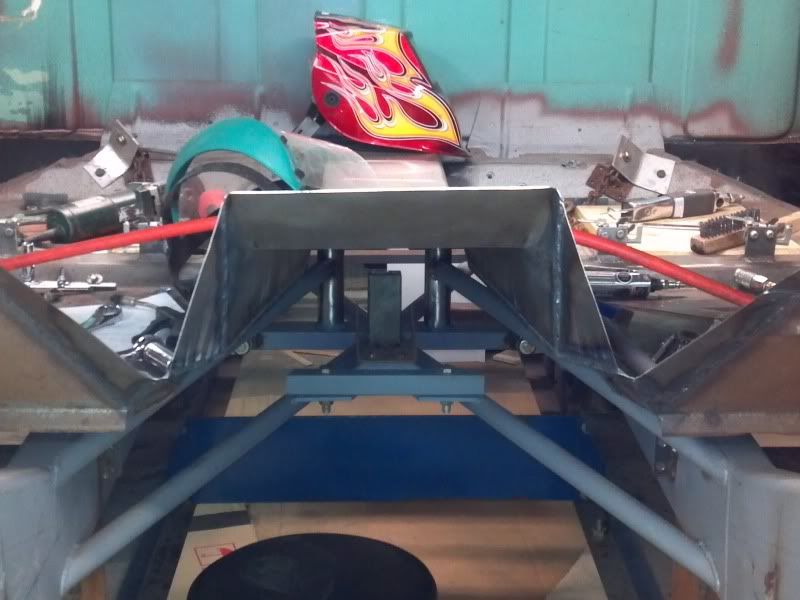
So before we do anymore work to the cab, I want to get it back on the chassis to make sure everything we have done so far works. I also want to make sure the cab is held in place on the chassis before we fit and weld the firewall in. There were a few things we wanted to do before we put the cab back on the chassis. One of the main things was to fix a missed assumption we made when building the chassis. We set the front drive shaft loop height thinking we were going to use a 3" drive shaft and making some assumptions for rear end travel. Well, it turns out after talking to Denny's drive shaft, we need a 3.5" shaft because of the length and power output. That combined with the wrong guess as to rear u-joint placement and you have an interference with the drive shaft and front drive shaft loop. Here is a close up of how it looked.
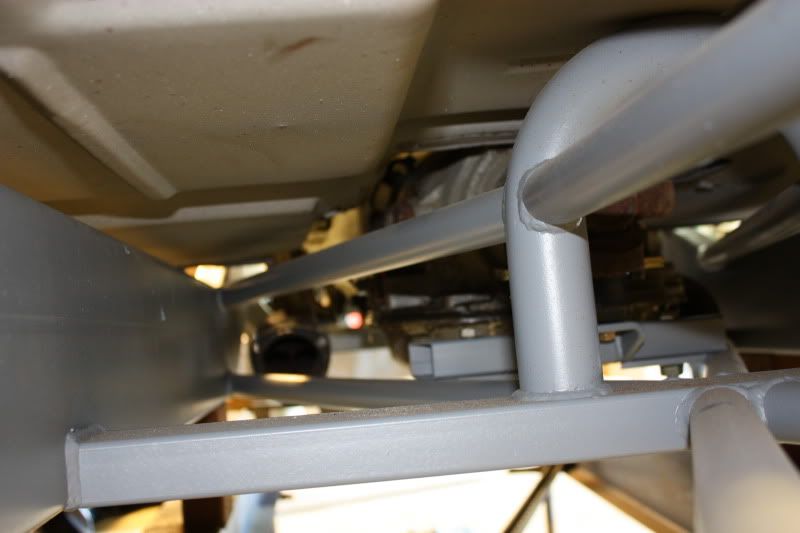 You can see it is an integral part of the X-bracing in the chassis. After some head scratching we came up with a plan to fix the issue. First it called for grabbing the plasma cutter and sawzall and getting the bulk of the original loop out. Then we wondered how to get the rest of the bars cleaned up. Here is what we came up with. The trusty tubing notcher! 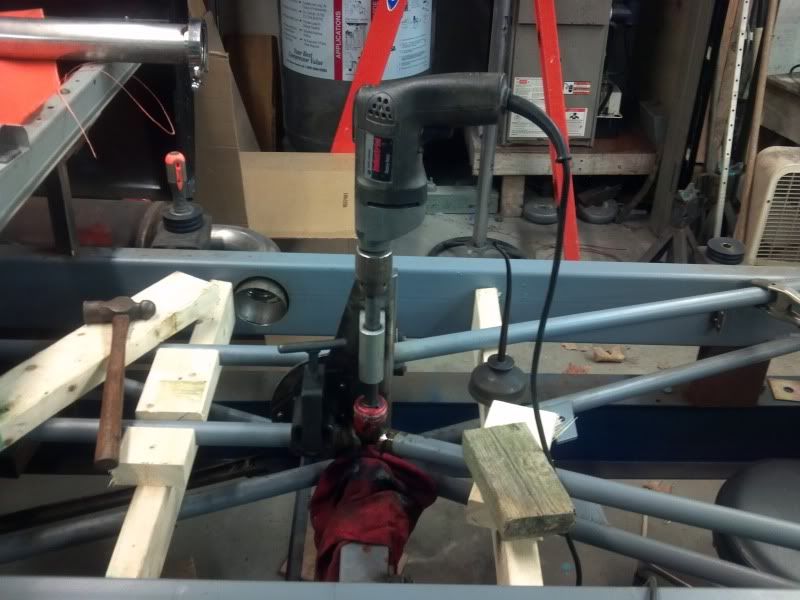 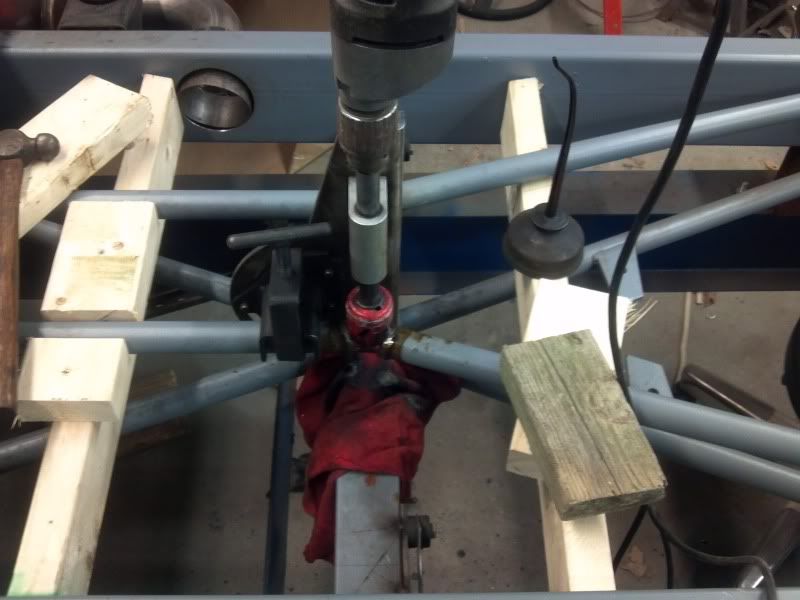 It really worked better than we had hoped. Check it out. 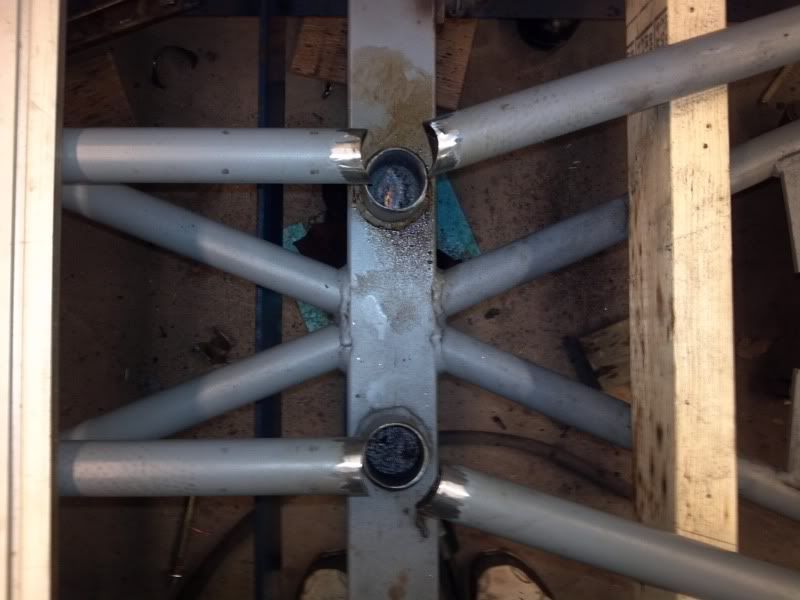 Then we made some sleeves to fit in the stubs to align the new loop. After that we cut and fit the new loop. Overall we added 2 1/2" to make sure we had enough room. There may be a trans change coming and the new one will be slightly shorter. 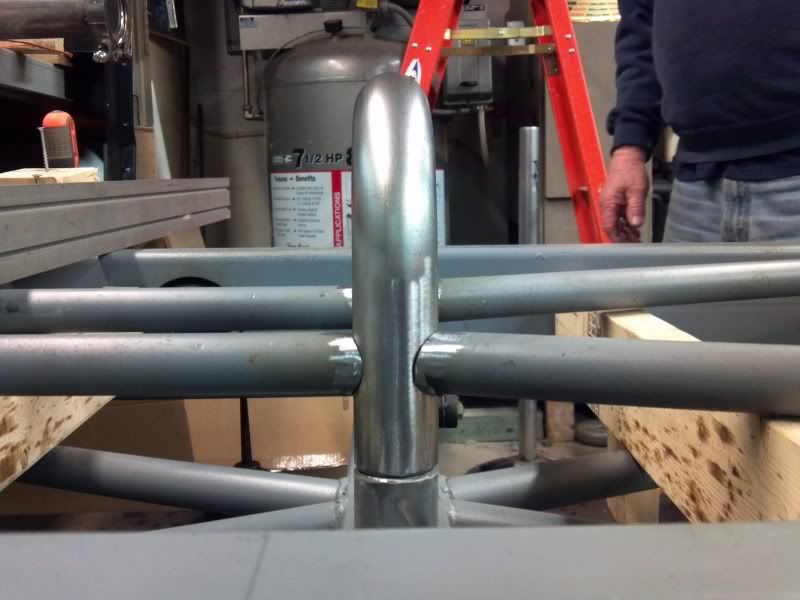 Some welding and grinding and you would never know we made the error, well except for me telling you here. Oh well, it's all part of the process! 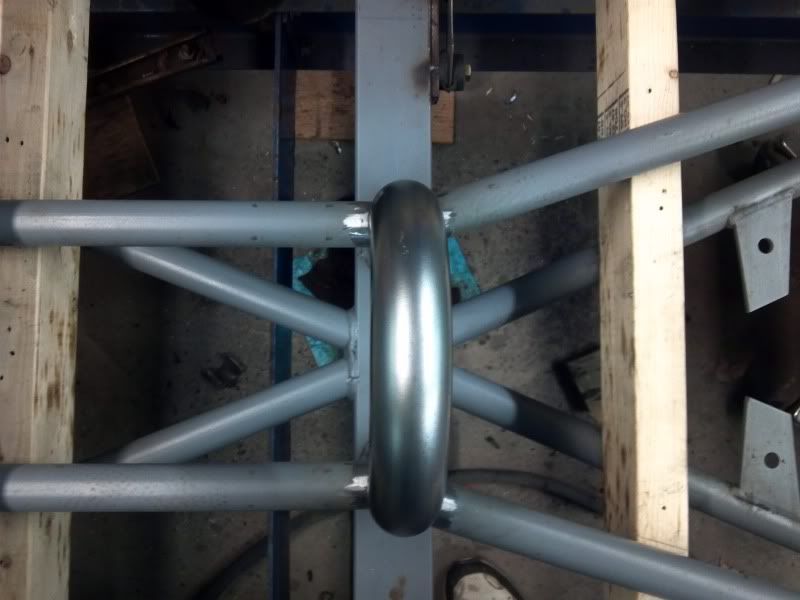 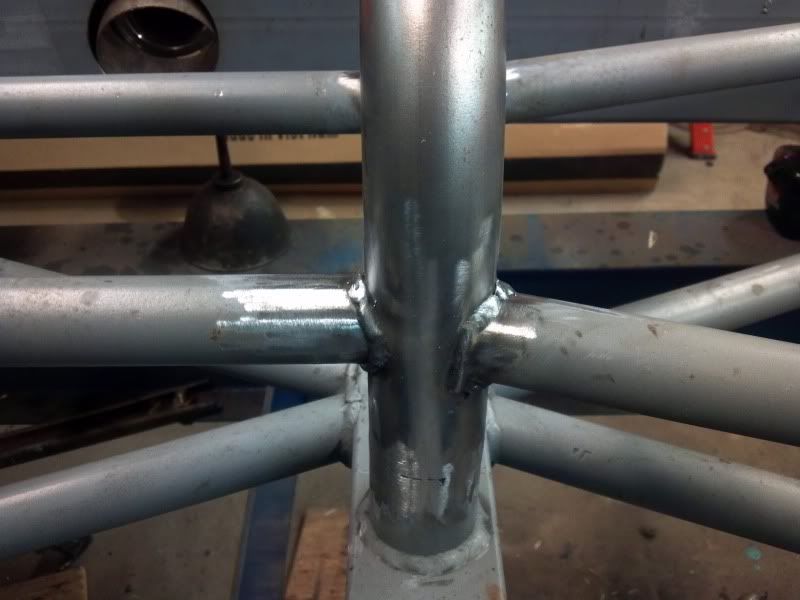 Next up is putting the cab back on the chassis and then putting the engine and trans back in. Just to make sure everything clears! Better safe than sorry. After that we go for the firewall! Thanks for looking!
__________________
Chad 68 swb Project http://67-72chevytrucks.com/vboard/s...d.php?t=262840 72 swb Project SOLD http://67-72chevytrucks.com/vboard/s...=1#post3993641 THANKS TO: Hermance Design (www.hermancedesign.com), Paradise Road Rod & Custom, Harry Opfer Welding, Tri-State Machine, Wegner Automotive Research, Nsane Hotrodz (www.nsanehotrodz.com), Clayton Machine Works, CCTek (http://www.candctek.com) |
|
|
|
|
01-07-2012, 10:34 PM
|
#169 |
|
VA72C10
Join Date: Mar 2008
Location: Midlothian, VA
Posts: 25,269
|
Re: A New 68 Build Thread
Nice work!!!
__________________
Looking for a 67-72 swb or blazer project in or around VA.
|
|
|
|
|
01-23-2012, 11:22 PM
|
#170 |
|
CCTek
Join Date: Apr 2007
Location: Rostraver, PA
Posts: 235
|
Moving On!
Let's see where were we? Well the cab is now back on the chassis and the new drive shaft loop fits nice. The driveshaft will now fit as well. All good things! Now that the cab is bolted back on the chassis it is time to continue with the fitting of the firewall. Well, until you get side tracked. More on that in a minute. We set the engine in the chassis to verify that all the work we did on the trans tunnel was correct. It was, however we decided we wanted more room around the bell housing. So we added some pieces to make some room. All in all it didn't take anything away from the interior and it will be much easier to work on the drive train. Here is what we did.
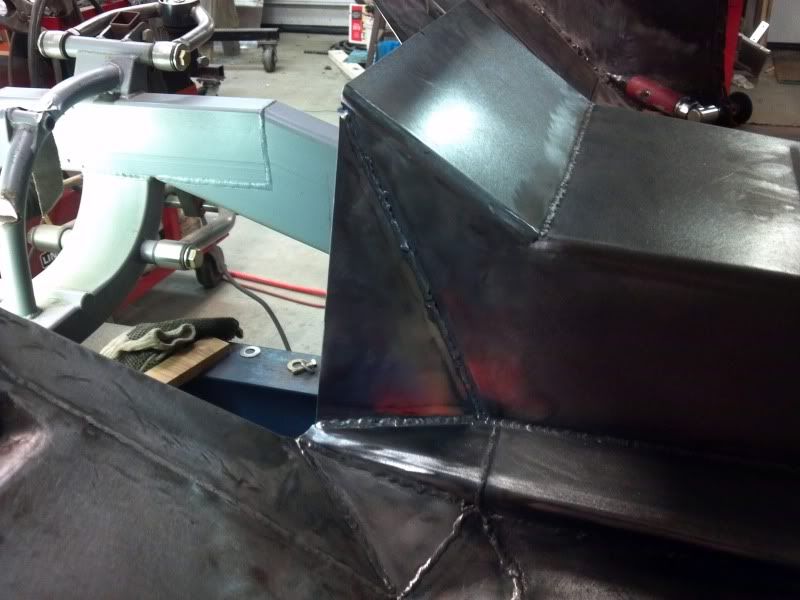 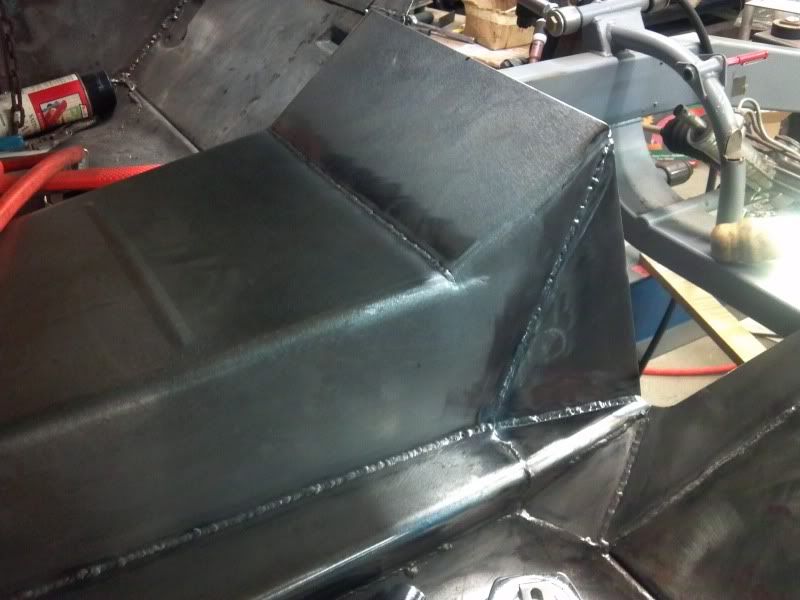  Once this was complete I went ahead and welded in the steering column/brake pedal mount. I coated the cowl area with Eastwood's Por-15 product before welding it in. Here it is. 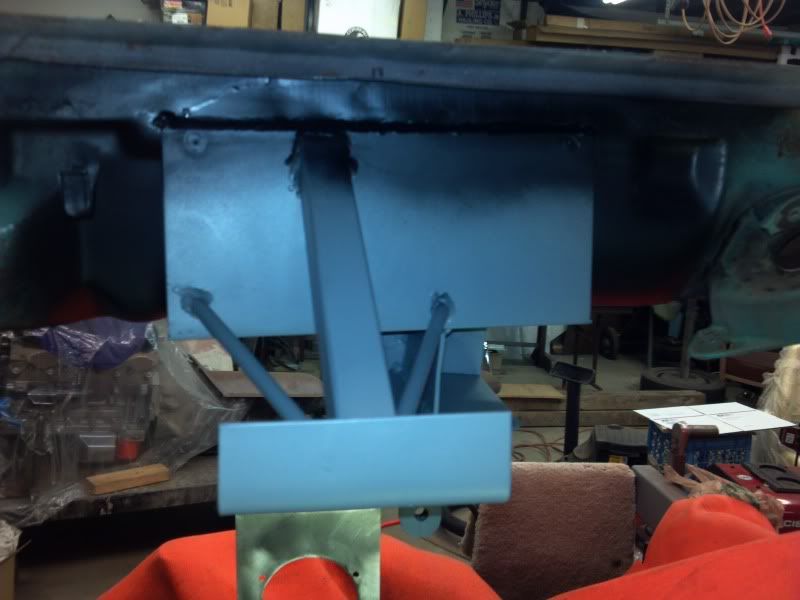 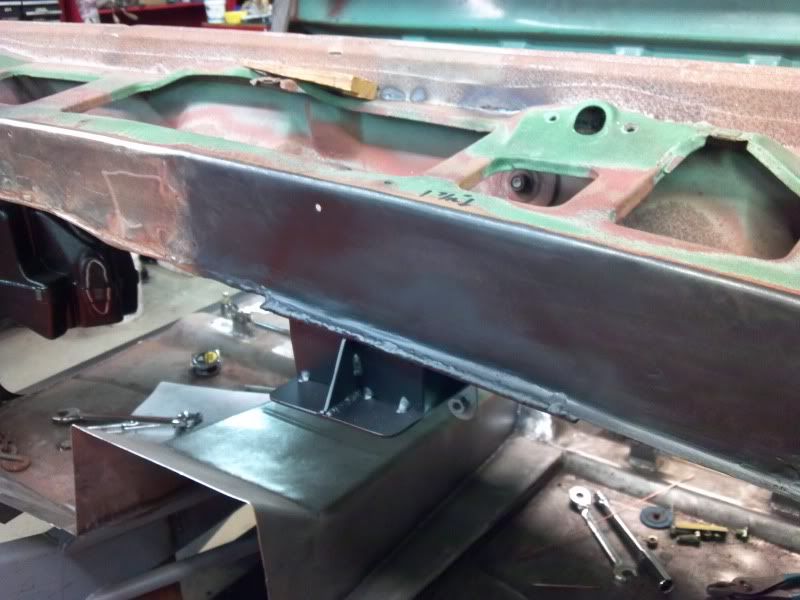 Now here is where we got side tracked a bit. As we were taking the motor in and out, we realized we hated our original design for the motor mounts on the chassis. If you look in the back ground in the first and second second pictures above you will see what they looked like. They didn't fit the LS engine as well as we would like since they were put in with the Big Block. They were also tight to the oil pan rail of the LS. You can see the notches we were contemplating. (Looks Like A Mistake Too) They also made us stand the engine and trans up at a severe angle to get the assembly in place. Are you getting where I'm going here? We need to get this truck done, we are running out of cut off wheels!  Out they came and a new design was developed. Check it out: Out they came and a new design was developed. Check it out:Old Vs. New 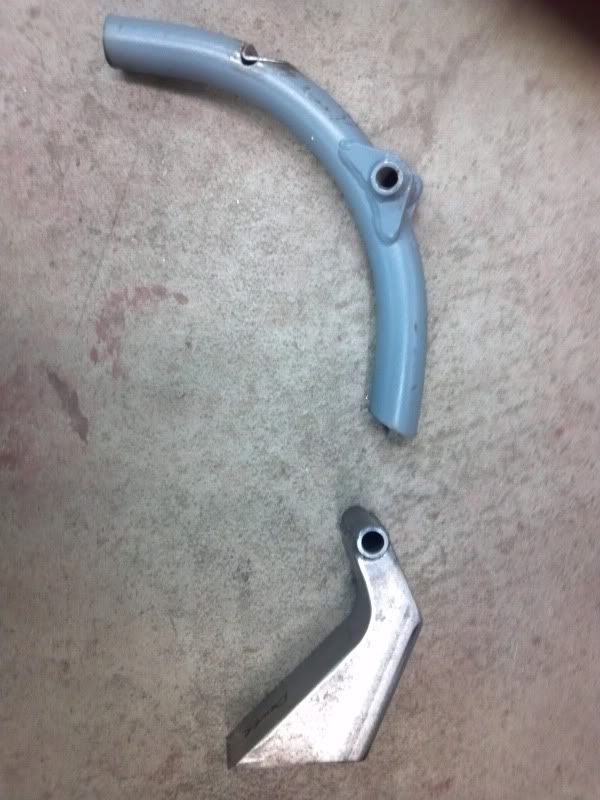 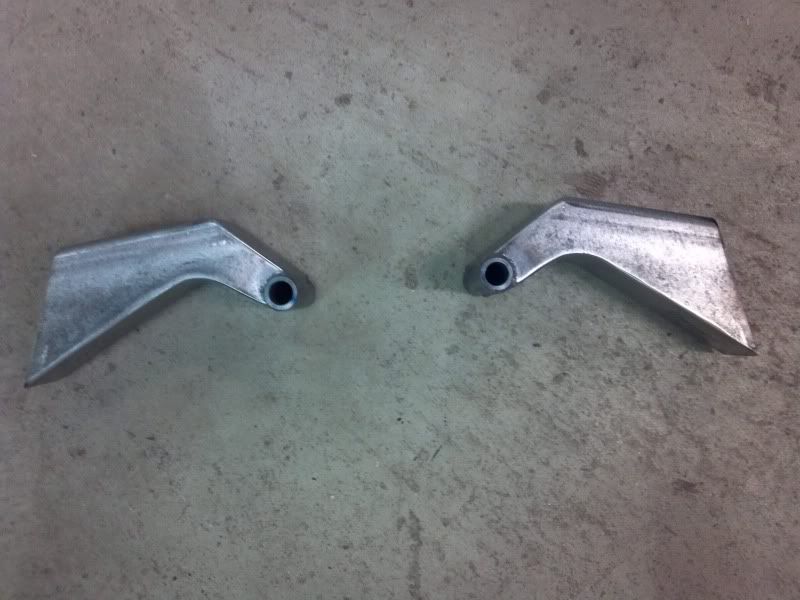 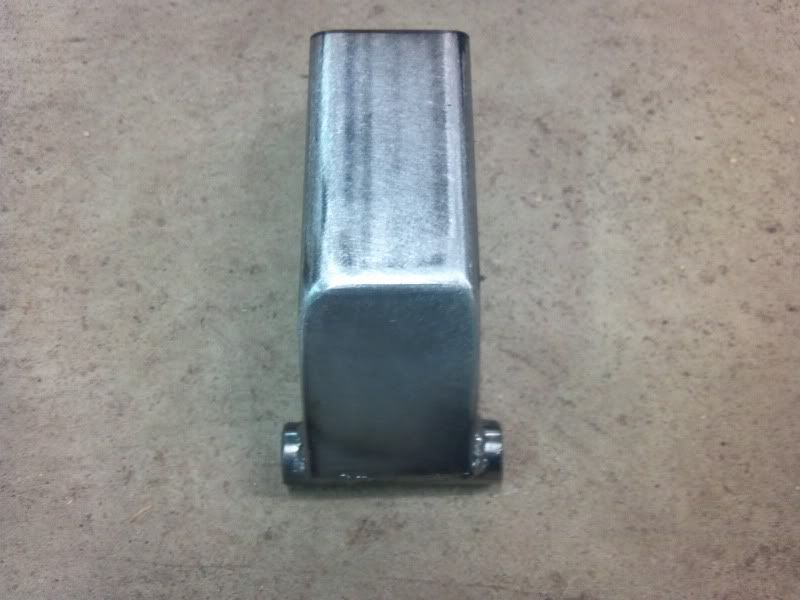 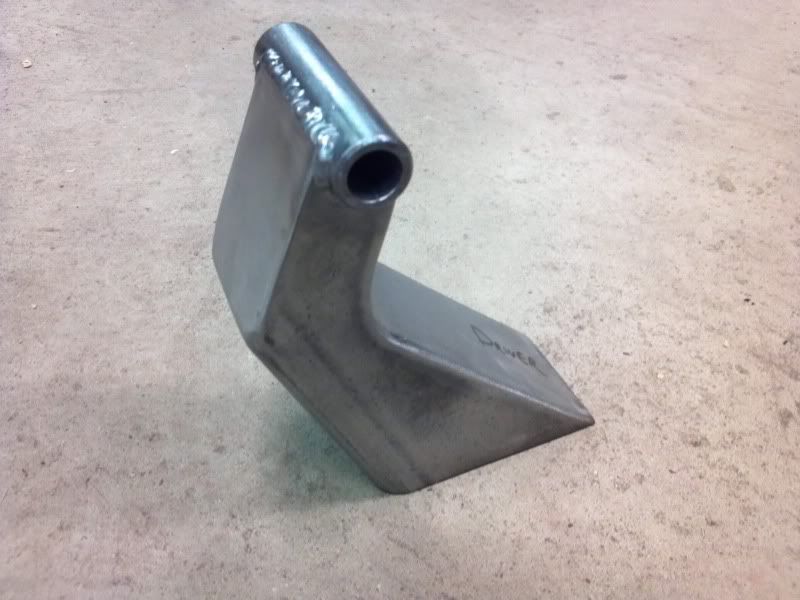 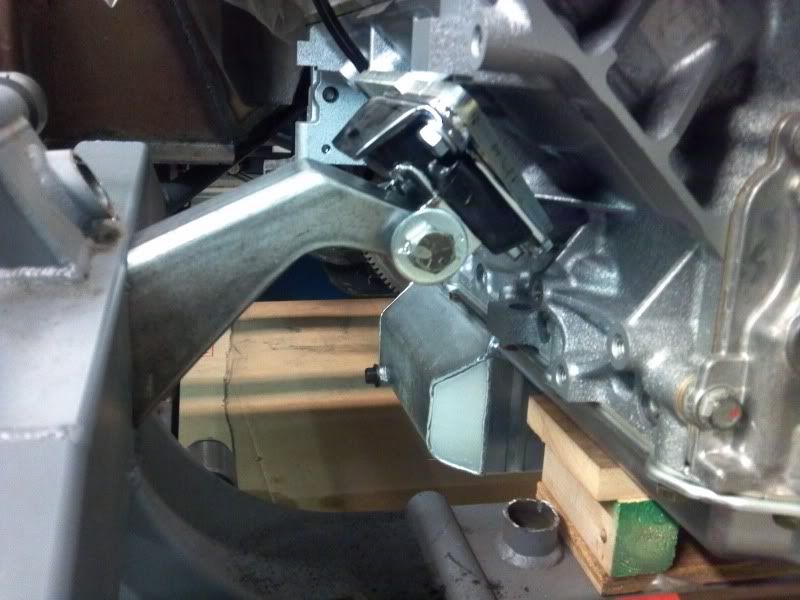 These will allow the engine to slide back between the mounts. Previously the kick outs on the Champ Pan required us to go over and in the set the engine and trans. in. I think these look much better in general. The other thing this allowed us to do was lower the front of the engine 3/4". We couldn't do that with the rack and Big Block. I know it was the so called 2 steps forward one step back, but we will be better off in the end. Once we get the mounts stitched in, we will be off the side-track and back to getting that fire wall put in for good! Thanks for looking and sorry for the long post, but it is progress!
__________________
Chad 68 swb Project http://67-72chevytrucks.com/vboard/s...d.php?t=262840 72 swb Project SOLD http://67-72chevytrucks.com/vboard/s...=1#post3993641 THANKS TO: Hermance Design (www.hermancedesign.com), Paradise Road Rod & Custom, Harry Opfer Welding, Tri-State Machine, Wegner Automotive Research, Nsane Hotrodz (www.nsanehotrodz.com), Clayton Machine Works, CCTek (http://www.candctek.com) |
|
|
|
|
01-23-2012, 11:42 PM
|
#171 | |
|
Registered User
Join Date: Apr 2007
Location: dequincy la.
Posts: 1,465
|
Re: Moving On!
Quote:
 .....................jim (yes I am paying attention!!) .....................jim (yes I am paying attention!!)
__________________
Build thread at http://67-72chevytrucks.com/vboard/s...d.php?t=475791 |
|
|
|
|
|
01-23-2012, 11:55 PM
|
#172 | |
|
CCTek
Join Date: Apr 2007
Location: Rostraver, PA
Posts: 235
|
Re: Moving On!
Quote:

__________________
Chad 68 swb Project http://67-72chevytrucks.com/vboard/s...d.php?t=262840 72 swb Project SOLD http://67-72chevytrucks.com/vboard/s...=1#post3993641 THANKS TO: Hermance Design (www.hermancedesign.com), Paradise Road Rod & Custom, Harry Opfer Welding, Tri-State Machine, Wegner Automotive Research, Nsane Hotrodz (www.nsanehotrodz.com), Clayton Machine Works, CCTek (http://www.candctek.com) |
|
|
|
|
|
01-24-2012, 11:43 AM
|
#173 |
|
Senior Member
Join Date: Feb 2010
Location: bennington, vt
Posts: 1,620
|
Re: A New 68 Build Thread
just found this, looks great!
__________________
website https://www.villagegarage.com/ truck guy in the whiskey world https://www.instagram.com/c10glen/?hl=en https://www.hemmings.com/stories/car...e-perfect-day/ |
|
|
|
|
02-01-2012, 01:58 PM
|
#174 |
|
CCTek
Join Date: Apr 2007
Location: Rostraver, PA
Posts: 235
|
Major Milestone! (To Us)
It seems we started this project forever ago. We have been trying to get the new firewall in the truck. Every time we thought we were ready to put it in we found something else that should be done before we put it in. All in all I'm glad we did it right the first time. Every thing fit just as it should. Here are some pics to show how we went about it.
This is the empty hole. The floor and trans tunnel are all finished. We then went around the face of the cowl area in the dark with a light and welded up any pin holes in welds from the rust repair. The new firewall has a mounting flange that covers this area, so I don't want any moisture to get between those panels and into the cab. After all the holes were taken care of, I coated the area with Eastwood's rust encapsulator. This was to help curb any development of rust from factory seams we did not take a part. 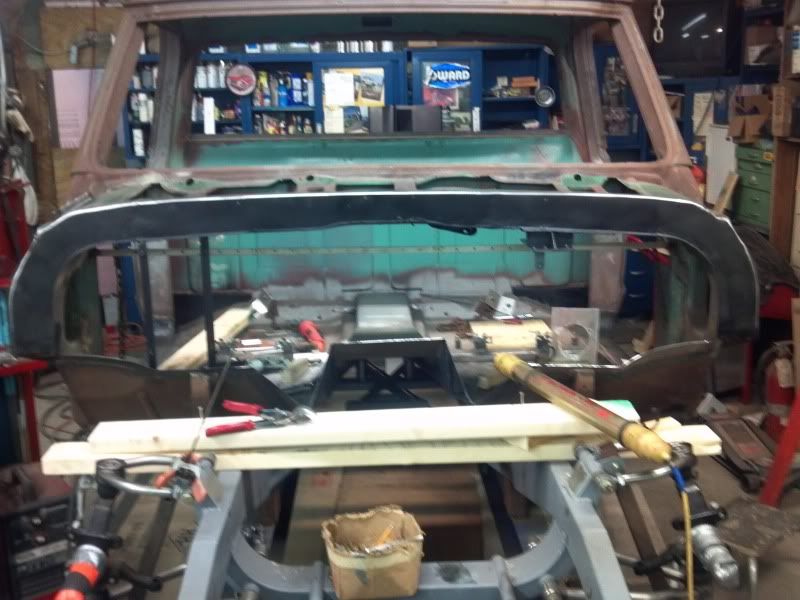 Before mounting the piece, we applied a bead of seam sealer to the mating face of the cowl. This is mostly to eliminate any potential vibration between the 2 sheet metal panels. We also sealed the bottom weld seam. This will be done on the inside of the wiper tray before paint as well. 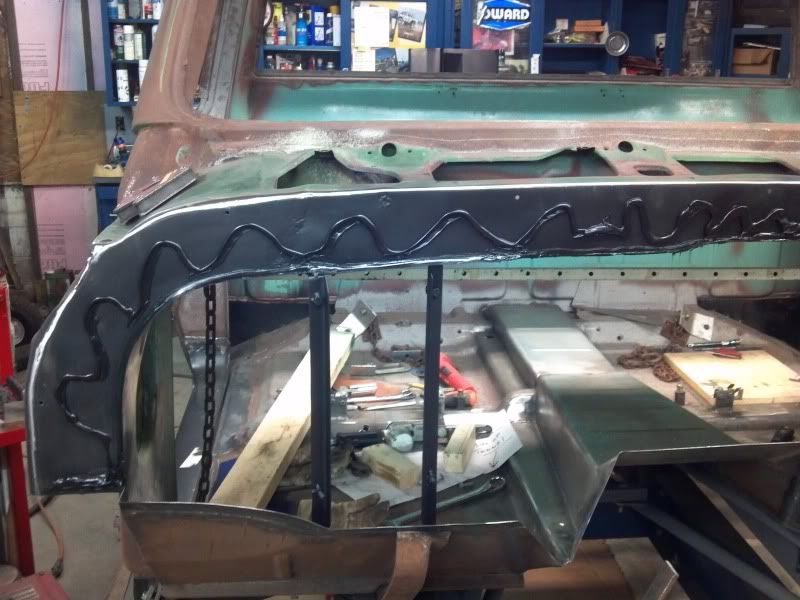 I also coated the back of the firewall mounting flange with self etching weld through primer for an added level of protection. 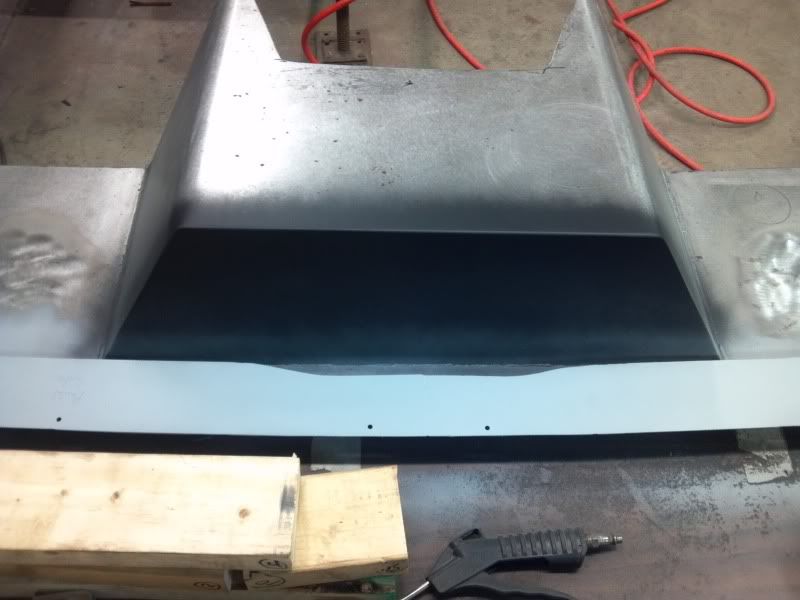 We then used cleco's to hold the firewall on and braced it to hold everything flat for alignment while tacking. 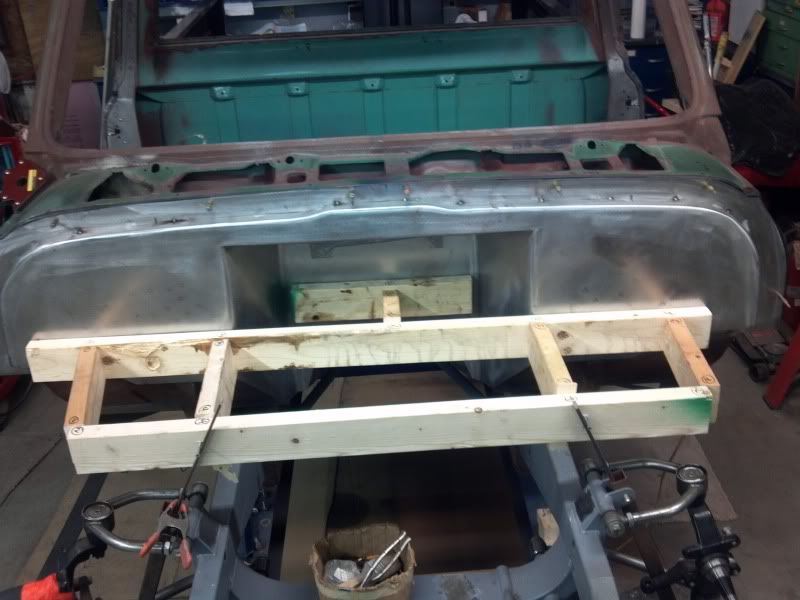 And FINALLY, here it is all tacked in. The fit to all the mating panels is excellent. Now it's time for me to try to weld it in and finish it with out screwing up all our hard work! 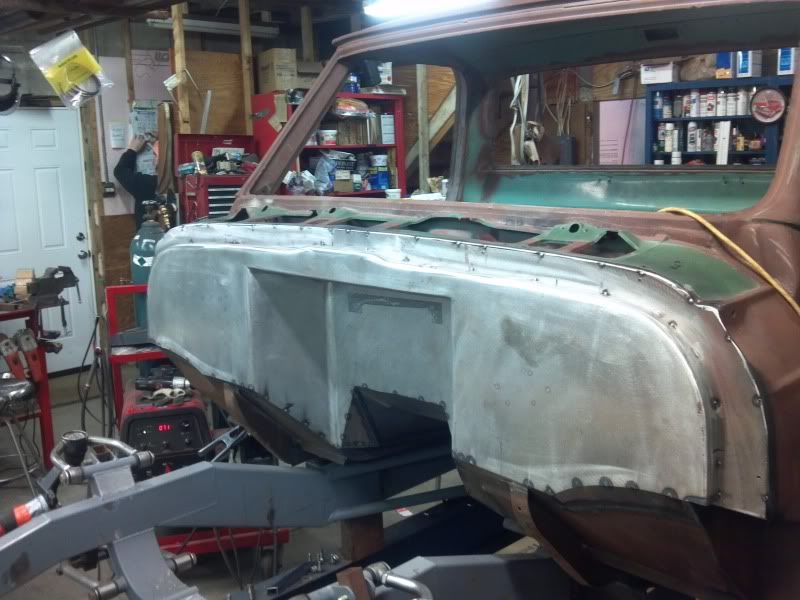 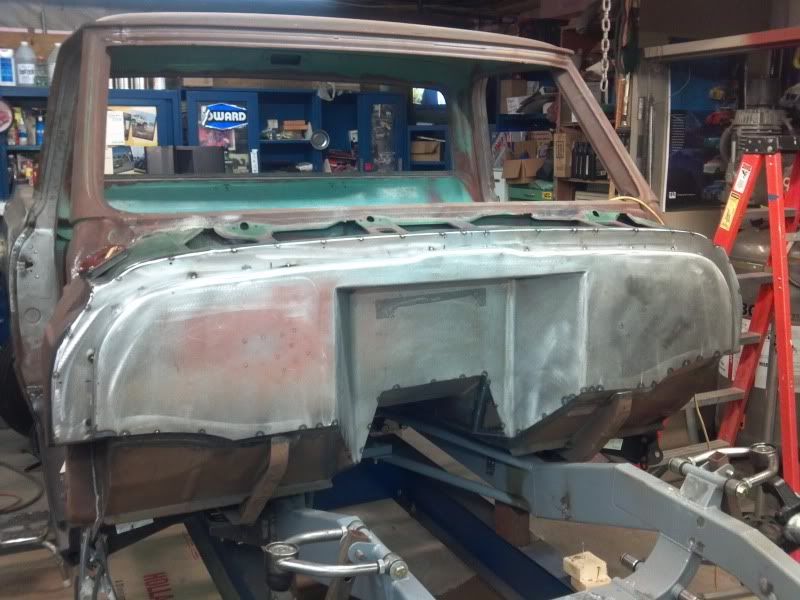 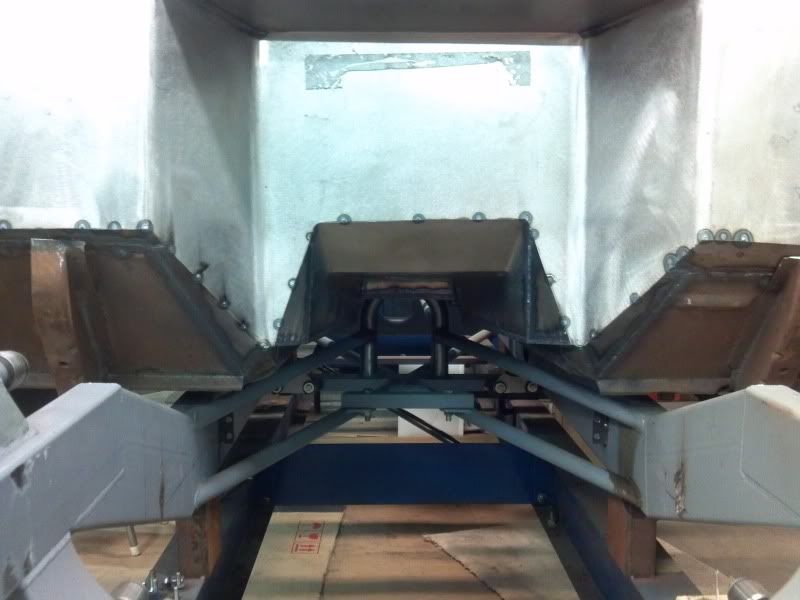 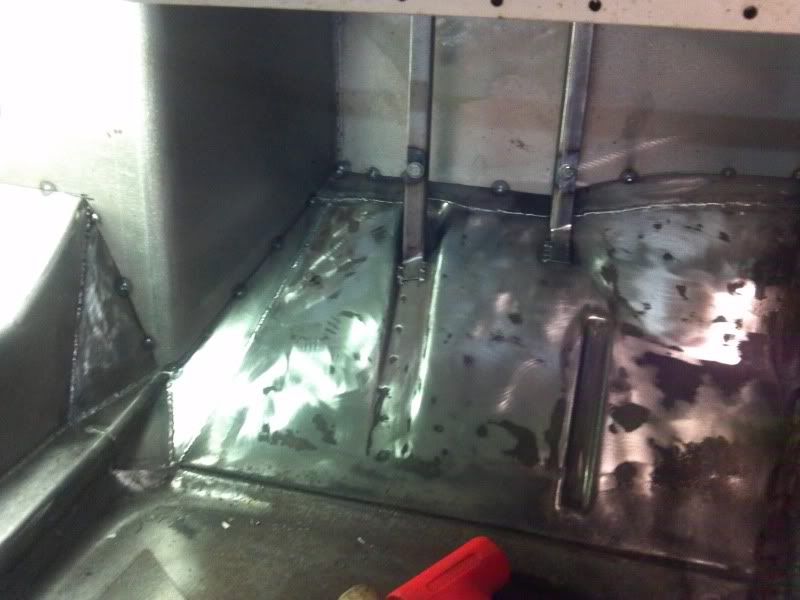 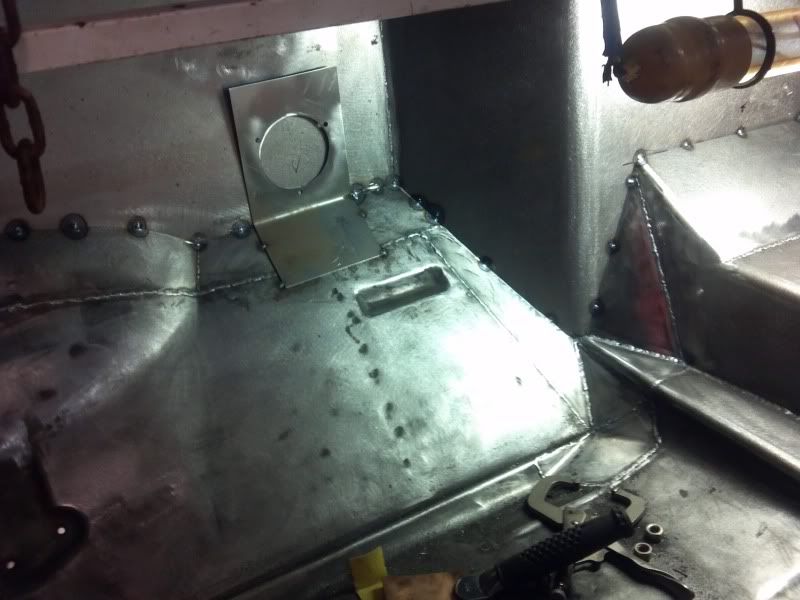 Thanks for looking!
__________________
Chad 68 swb Project http://67-72chevytrucks.com/vboard/s...d.php?t=262840 72 swb Project SOLD http://67-72chevytrucks.com/vboard/s...=1#post3993641 THANKS TO: Hermance Design (www.hermancedesign.com), Paradise Road Rod & Custom, Harry Opfer Welding, Tri-State Machine, Wegner Automotive Research, Nsane Hotrodz (www.nsanehotrodz.com), Clayton Machine Works, CCTek (http://www.candctek.com) |
|
|
|
|
02-01-2012, 02:33 PM
|
#175 |
|
67cheby
Join Date: Sep 2008
Location: siloam springs ar 72761
Posts: 17,890
|
Re: A New 68 Build Thread
Clean !
|
|
|
|
 |
| Bookmarks |
|
|


 Linear Mode

