
|
 12-11-2012, 12:09 PM
|
#476 |
|
"Where were you in '62?"
 Join Date: Jul 2004
Location: Cleveland County, North Cackalacky
Posts: 5,013
|
This is what I am running Mark.
555-15913 - JEGS Performance Products 15913 - JEGS Street/Performance/Race Electric Fuel Pumps Electric Fuel Pump Street 95 GPH Gasoline Only Pre-set to approximately 6.5 psi $69.99 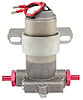 555-15172 - JEGS Performance Products 15172 - JEG'S Fuel Filters Street Fuel Filter 2.45" diameter x 5.25" high $24.99 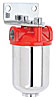 555-10564 - JEGS Performance Products 10564 - JEGS Fuel Pump Harness and Relay Kit Single Fuel Pump Harness and Relay Kit $24.99 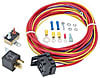 Also there is Fuel Pump & Regulator Install Kit. JEGS Performance Products 100804 - JEGS Fuel Pump & Regulator Install Kit JEGS Performance Products #555-100804 Fuel Pump & Regulator Install Kit 130 GPH Fuel Pump (555-15915) Fuel Pressure Regulator (555-15912) Filter, Fittings, Line, Line Clamps & Pressure Gauge $359.99 http://www.jegs.com/i/JEGS+Performan...00804/10002/-1 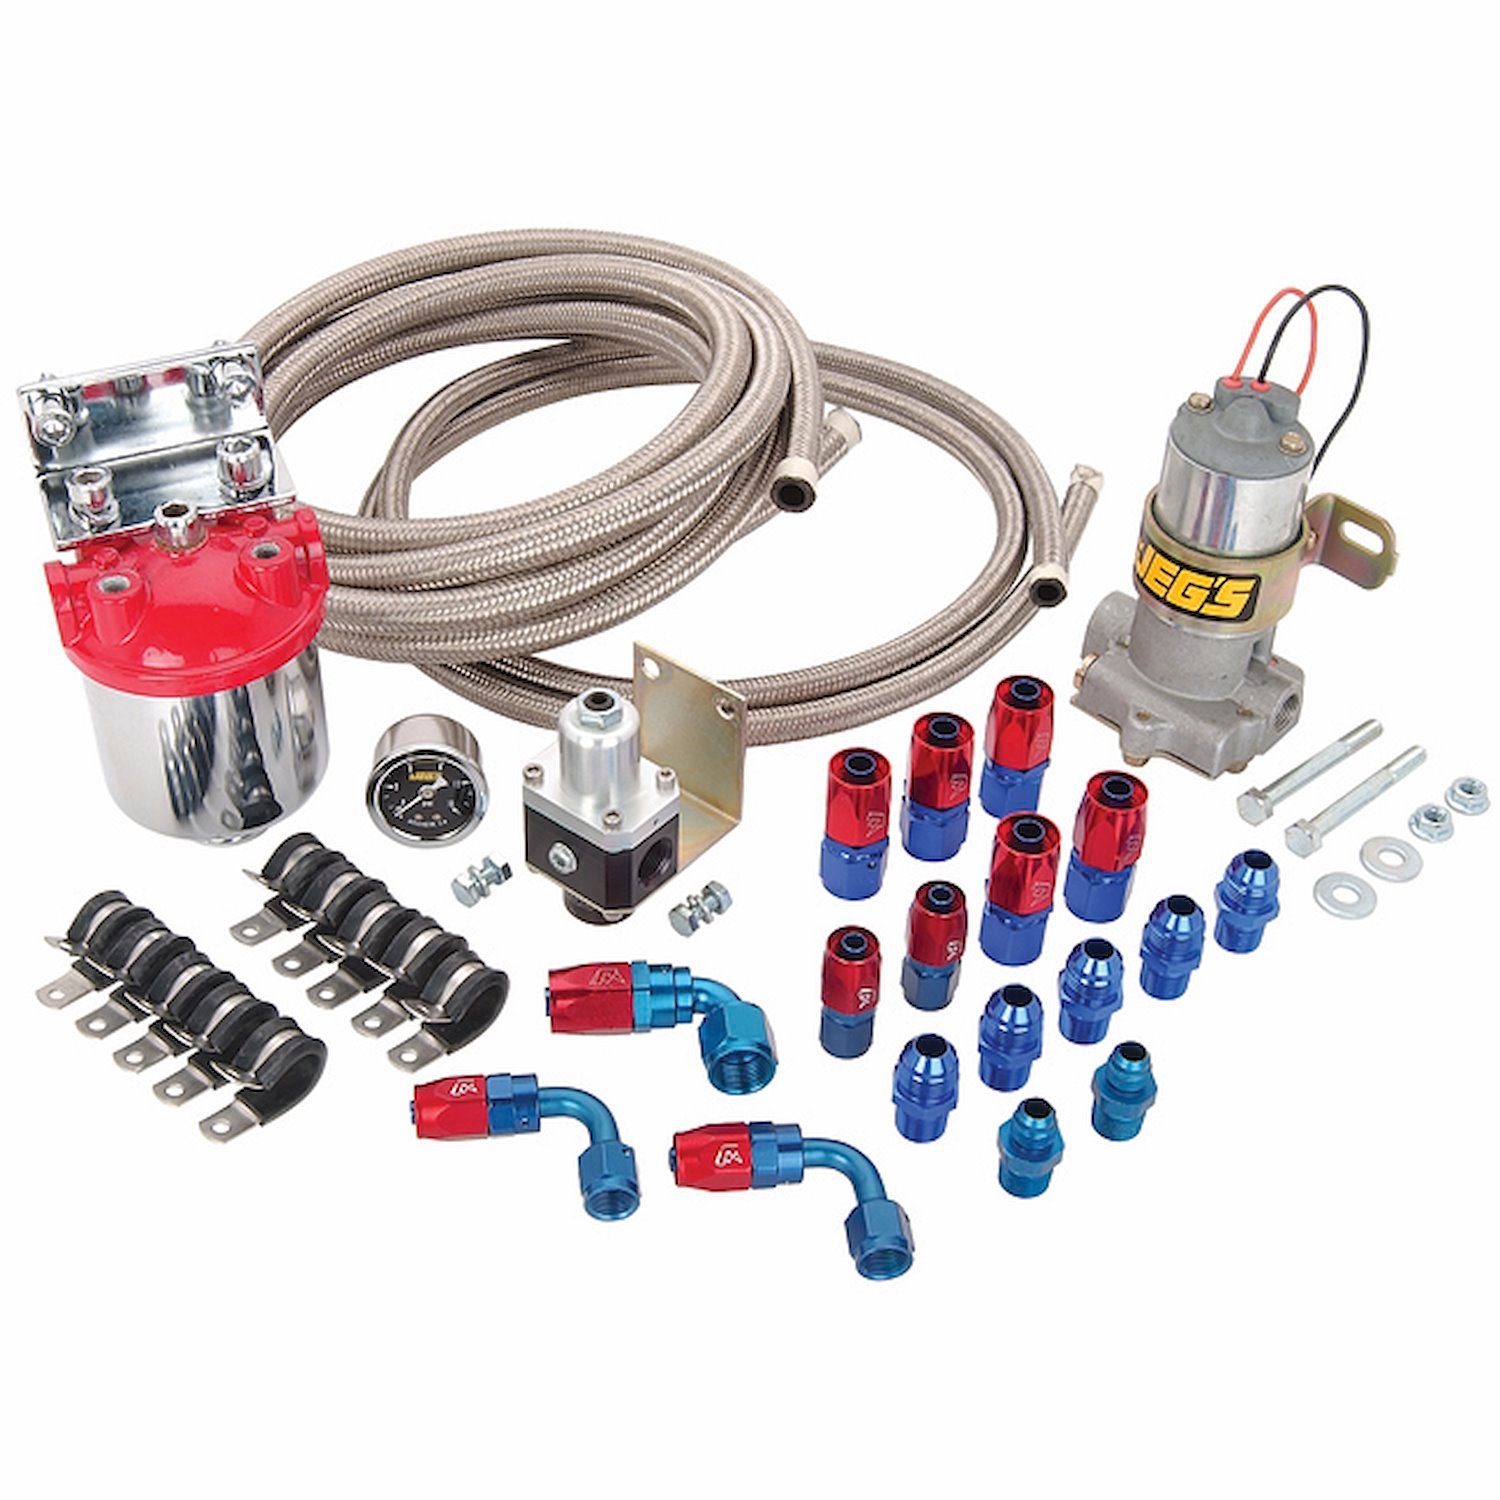
__________________
PROJECT: "FULL METAL YELLOW JACKET" 1962 Chevy C-10 Stepside Shortbed Nostalgia Pro/Street Pickup Truck PROJECT: "FULL METAL YELLOW JACKET Build Thread What Are You Workin' On? - 1Bad62ChevyPickup PROJECT: "TYRANNORAMBLER REX" 1969 AMC Rambler American Nostalgia Pro/Street Youtube Channel: Father Son Projects Youtube Channel: 2TIMOTHY2FITHTEEN  "North and South Carolina Folks Click Here!" (((( ~ I have Parts For Sale & Miscellaneous Stuff ~ )))) "Well being as there's no other place around the place, I reckon this must be the place, I reckon...Nyuk Nyuk Nyuk" -Curly Howard Ph.D. |

|

|
|
12-16-2012, 11:56 PM
|
#477 |
|
Senior Enthusiast
Join Date: Feb 2007
Location: Spokane Valley, WA
Posts: 8,356
|
Re: Markeb01 Build Thread
Thanks for the input, that looks like a nice setup. I took a slightly different direction since my truck isnt so race oriented and too old school for A/N fittings and braided hose.
I started sourcing parts on the 10th and some took longer than others to find. I decided to go with a Carter P4070 electric pump, and selected an Aeromotive 12316 filter as it was the cheapest 100 micron filter I could find. Also on the list was a Carter M3120 mechanical fuel pump to replace the aging original 67-81 sealed style engine driven pump. I figured while I was at it I might as well clean up the connections to the mechanical pump, and form a new hard line to the carburetor with fewer bends. To achieve that goal, I picked up a 90 degree elbow for the intake manifold heater connection. The new hard line will no longer require the arch over the heater hose: Heres how it used to look with a straight hose fitting:  And heres a terrible photo of how the hump in the pipe is no longer needed with the hose pointing forward:  Much to my disbelief the hardest part to find was a simple momentary toggle switch with a metal handle to match all the others in my truck. The local car parts stores only carry plastic handle versions, and the electronics and hardware stores dont carry momentary switches at all. I finally discovered the switch I wanted at a local industrial supply house Grainger. Long ago I bought tons of stuff from them for work, but never realized they also sold retail. It was a nice learning experience and Ill be using them again. After a great deal of lying on my back under the truck, I finally figured out where to mount the pump. My first choice was between the tank and where the fuel line enters the frame. In this position I could simply remove the line from the tank to the union, and attach the pump:  Unfortunately, it turned out the pump would be within collision distance of the panhard rod/axle bracket. So it had to move forward behind the spring, and in front of the axle:  The bracket required trimming to clear the triangular shaped brackets which attach the muffler crossmember. The upside being the pump is now located mid-depth of the tank, which is the manufacturers preferred location. Heres a shot showing axle clearance from the bottom up:  The pump is now in front of the hard line connection I wanted to use but fortunately theres another union about two feet forward of the pump:  Since the connections to the pump are required to be done in rubber, it allowed me to complete the hard lines without hooking anything up, since slight variations can be corrected by the flexible hoses. This will connect the pump outlet to the forward union:  The hard line shown in this photo from the forward union to the front of the tank will be removed:  And this line and filter will connect the tank to the pump inlet:  On straight tubing which will terminate with a rubber hose, I create a simple hose barb by only performing ¼ of the normal process. Rather than fully crimping the first step of an inverted flare, I only squish the tube one half of what is required. Rather than removing the forming die and finishing the piece, I just leave it as is. Its easy to slide a hose over and gives the hose/clamp something to resist slippage.  For electrical power I repurposed the fog light relay circuit. I had not removed anything from the truck when the lights were deleted, except for the power wire from the relay. So I ran a new one piece 10 gauge wire down through the forward portion of the frame all the way to the pump. The only electrical item left to install is the momentary switch which needs to be relocated under the middle safety cover on the dash. Tomorrow Im going to attempt pulling the hard line from the tank and adding a piece of plugged tubing to the inverted flare fitting. This will allow me to work on all the rest of the lines and only have to deal with the residual gasoline in the lines. I wont open the lines without my squeeze standing by on the fire extinguisher, since there could be as much as 25-30 gallons of gas in the tank and Im not sure how much might spill out before I can get it capped. The bummer is that the garage is about 45 degrees without the propane space heater (which brings the temp up to about 58 degrees. Once the lines are open, everything else has to be completed in the cold since I will no longer run the heater.
__________________
My Build Thread: http://67-72chevytrucks.com/vboard/s...d.php?t=444502 |
|
|
|
|
12-17-2012, 12:13 AM
|
#478 |
|
The 60-66 GMC/Pontiac guy....
Join Date: Oct 2010
Location: Apache Junction, Arizona
Posts: 1,306
|
Re: Markeb01 Build Thread
Very nice explination Mark...
 Love the pictorial...  
__________________
Building Genuine Pontiac Firepowered cars and trucks for several decades.  Why Pontiac?? That's just me daring to be different.  Projects.. 63 C10 Short Wheel Base fleetside (The Pro-Street) currently under reconstruction. 440CID 2X4 Pontiac 
|
|
|
|
|
12-17-2012, 12:23 AM
|
#479 |
|
Senior Enthusiast
Join Date: Feb 2007
Location: Spokane Valley, WA
Posts: 8,356
|
Re: Markeb01 Build Thread
Thanks Chris. It's your fault I'm even doing this project!

__________________
My Build Thread: http://67-72chevytrucks.com/vboard/s...d.php?t=444502 |
|
|
|
|
12-17-2012, 10:22 AM
|
#480 |
|
The 60-66 GMC/Pontiac guy....
Join Date: Oct 2010
Location: Apache Junction, Arizona
Posts: 1,306
|
Re: Markeb01 Build Thread
That is the pump I have.. at least it looks exactly like the one I have.
I mounted mine the other way around with the motor for the pump above the fuel lines but otherwise it is pretty muck how I mounted mine. I thought your truck was a 63 for some reason Mark, but I see by the frame it is a 62 or older... 
__________________
Building Genuine Pontiac Firepowered cars and trucks for several decades. Why Pontiac?? That's just me daring to be different. Projects.. 63 C10 Short Wheel Base fleetside (The Pro-Street) currently under reconstruction. 440CID 2X4 Pontiac
|
|
|
|
|
12-17-2012, 02:34 PM
|
#481 | |
|
Registered User
Join Date: Sep 2011
Location: Tacoma, WA
Posts: 2,425
|
Re: Markeb01 Build Thread
Quote:
__________________
Michael McMurphy My 66 Stepside My 64 Tow Truck My 66 Tempest Table Of Contents Added to Page1 |
|
|
|
|
|
12-17-2012, 05:07 PM
|
#482 |
|
Senior Enthusiast
Join Date: Feb 2007
Location: Spokane Valley, WA
Posts: 8,356
|
Re: Markeb01 Build Thread
It heads into the cab and connects to the vacuum gauge. Thanks for asking.
__________________
My Build Thread: http://67-72chevytrucks.com/vboard/s...d.php?t=444502 |
|
|
|
|
12-17-2012, 11:02 PM
|
#483 | |
|
Registered User
Join Date: Sep 2011
Location: Tacoma, WA
Posts: 2,425
|
Re: Markeb01 Build Thread
Quote:
I have not set up the vacuum lines on mine yet, and was admiring how clean yours turned out, then was like.... where the heck is that one going ?? Thanks Mark 
__________________
Michael McMurphy My 66 Stepside My 64 Tow Truck My 66 Tempest Table Of Contents Added to Page1 |
|
|
|
|
|
12-17-2012, 11:20 PM
|
#484 |
|
Senior Member
Join Date: Aug 2009
Location: San Leandro, Ca 94577
Posts: 854
|
Re: Markeb01 Build Thread
Great job with the lines ! Looks very clean, I like the attention to detail , keep up the good work !
|
|
|
|
|
12-17-2012, 11:24 PM
|
#485 |
|
Senior Enthusiast
Join Date: Feb 2007
Location: Spokane Valley, WA
Posts: 8,356
|
Re: Markeb01 Build Thread
It took my little propane heater 4 hours to bring the garage temperature up from 42 degrees to 54. Figuring that was as good as it was going to get the heater was shut down and removed from the garage. I jacked the rear of the truck even higher, removed the wheels I had the tires sitting on, and placed stands under the axle. This allowed removal of the right rear wheel so I could access the hard line to the tank from the side instead of directly underneath. I have this thing about gasoline pouring right in my face.
The old line came apart easily, but I had a problem getting the plug into the fitting because I made it too short and the rubber hose/gear clamp kept bumping into the crossmember throwing off my alignment.  My head was outside the fender so I couldnt see what I was doing, but it only took a couple of minutes to stop the flow. In spite of the difficulties what spilled was probably less than a pint or so and was quickly cleaned up. The old hard line was removed from the tank up to a union about 10 behind the factory frame mounted canister style fuel filter. The forward 3/8 hard line was connected and clamped to the frame about 6 in front of the rubber hose coming from the pump:  New hose was installed on both sides of the pump, and the filter & hard line to the tank were attached to the hose. The tank connection will happen tomorrow after I finish up with the mechanical pump, which got delivered this evening after I had already cleaned up and quit for the day. Ive included enough hose on the pump side of the filter for it to mount at the same height as the previous hard line, so there wont be any interference with the panhard bracket. Ive had a lot of fun working on this, but Im looking forward to it being done and enjoying the benefit of being able to start the truck whenever I want. The weather is cold and miserable which diminishes the thrill of dragging my old carcass around on concrete. It was a tad warmer today (high 30s), but 50+ mph winds all day made it nice and drafty and the forecasted daily high is below freezing for the next few days. It might have been wiser to wait until the summer, but I am thankful to have something to do in the garage! Hopefully one more day should wrap it up.
__________________
My Build Thread: http://67-72chevytrucks.com/vboard/s...d.php?t=444502 |
|
|
|
|
12-17-2012, 11:40 PM
|
#486 |
|
Registered User
Join Date: Sep 2011
Location: Tacoma, WA
Posts: 2,425
|
Re: Markeb01 Build Thread
[whisper on] Mark it is 40 below zero here...scooting around on the concrete in the garage is seriously not an option! No matter how old you are !!
 [/whisper off] [/whisper off]Seriously I cannot wait to be back down there in the PNW !! It is just stupid cold up here ! By the way thanks for the photos with the arrows and stuff, they really help!
__________________
Michael McMurphy My 66 Stepside My 64 Tow Truck My 66 Tempest Table Of Contents Added to Page1 |
|
|
|
|
12-17-2012, 11:51 PM
|
#487 |
|
Active Member
Join Date: Aug 2011
Location: Salem, Oregon
Posts: 112
|
Excellent documentation as usual Mark. I like how you researched and mapped it all out. I bet you can't wait to see how much better it starts!
I need to do this to my '58. It's a hard starter as well with the tank mounted behind the rear axle. Thanks for the inspiration.
__________________
Fleet '66 ***************** '66 C-10 SWB 350 w/3 spd OD 4:11's - driver/project...future T-5 trans upgrade '64 C-10 LWB BBW near future project - "The Wife's Ride" '58 "Apache"Stepside BBW w/'75 K-10 4x4 conversion 331 w/350TH and NP 205 transfer 3:73's - occasional driver/ show |
|
|
|
|
12-18-2012, 12:05 AM
|
#488 | |
|
Senior Enthusiast
Join Date: Feb 2007
Location: Spokane Valley, WA
Posts: 8,356
|
Re: Markeb01 Build Thread
Quote:
Truth is I never found any 60-66 at any price I was willling to buy. Most were just too beat up or rusty no matter the asking price. Then I found this 2nd owner, 1 family 1960 GMC with torsion bars and a boat anchor V6 - and bought it on the spot! So much for conviction!
__________________
My Build Thread: http://67-72chevytrucks.com/vboard/s...d.php?t=444502 |
|
|
|
|
|
12-18-2012, 12:36 AM
|
#489 | ||
|
Senior Enthusiast
Join Date: Feb 2007
Location: Spokane Valley, WA
Posts: 8,356
|
Re: Markeb01 Build Thread
Quote:
 Quote:
__________________
My Build Thread: http://67-72chevytrucks.com/vboard/s...d.php?t=444502 |
||
|
|
|
|
12-18-2012, 12:41 AM
|
#490 |
|
Registered User
Join Date: Apr 2011
Location: .
Posts: 3,104
|
Re: Markeb01 Build Thread
Got the fuel pump info locked away in the file. Thanks for all the detailed info.
|
|
|
|
|
12-18-2012, 09:38 AM
|
#491 |
|
Senior Member
Join Date: Mar 2011
Location: Tucson, Arizona
Posts: 2,059
|
Re: Markeb01 Build Thread
Thanks once again, Mark, for the great info. I've been back and forth as to what type fuel pump I'm going to use and now it's solved.
|
|
|
|
|
12-19-2012, 02:22 AM
|
#492 |
|
Senior Enthusiast
Join Date: Feb 2007
Location: Spokane Valley, WA
Posts: 8,356
|
Re: Markeb01 Build Thread
Spent most of the day out in the garage again getting everything buttoned up on the fuel system project. First thing up was pulling the old mechanical fuel pump.
Here’s a time saving tip for anyone that has ever spent hours trying to install a new mechanical fuel pump on a 1st generation small block Chevy. Try as you might to hold the fuel pump push rod in the up position with your finger, grease, hacksaw blade, or whatever, it inevitably falls down just as you try to insert the pump arm into the engine block opening. Here’s the easy method. The upper passenger side motor mount boss for the old 1955 engine mounts is open to the crankcase, and in direct alignment with the fuel pump push rod. Remove the factory 3/8x16, ¾” long bolt and set it aside for reinstallation after the pump is changed. Obtain a 3/8x16 bolt that is 1.5” long. Clean the threads until they look like new, or run the bolt through a die. It’s important the threads are clean so they will easily turn in the block with just finger pressure. Run the bolt into the hole until it bottoms out on the push rod. Run it up tight with finger pressure. Avoid using a wrench or over tightening as this may ding or score the push rod. That’s all there is too it. Now you can go about removing and installing the pump with absolutely no interference from the push rod. Once the new pump is in place simply remove the long bolt and reinstall the original. Here’s the factory bolt on the left, and a 1.5” version I threaded for the job:  Here’s a photo showing the long bolt holding the pushrod in the up position:  The new mechanical pump had to be re-clocked as the inlet/outlets were completely different than what was shown in the listing photo. After I set the new position, I checked the action on the pump and thought something might be wrong because I could easily cycle the lever by hand. It’s been a long time since I’ve held a bare fuel pump in my hands, but I didn’t think I’d gotten that much stronger with age. Sure enough when I removed the old pump, I could only cycle the lever by pressing it against the bench, which immediately made me suspect something might be wrong with the new pump. Nevertheless I went forward with the installation. The new mechanical pump was mounted and new hard lines formed and connected. The last step was removing the plug in the tank and hooking up the hard line to the filter and electric pump. The last step was changing the fog light toggle switch to a momentary model and installing it in the dash. The first starting test was not a roaring success. The good news – no fuel leaks in any of the lines or connections, and the engine started right up. The bad news – idling the engine in the driveway the engine quit running after 2-3 minutes, something it’s never done before. A quick shot with the electric pump and the engine fired right back up, and quit a few minutes later. I can only assume my worries were well founded and the new mechanical pump is defective. So tomorrow I’ll pull it off and retest with the old pump which was working perfectly. It’s always something!
__________________
My Build Thread: http://67-72chevytrucks.com/vboard/s...d.php?t=444502 Last edited by markeb01; 12-24-2012 at 11:43 PM. Reason: Added photos - Imageshack offline earlier |
|
|
|
|
12-19-2012, 10:18 AM
|
#493 |
|
The 60-66 GMC/Pontiac guy....
Join Date: Oct 2010
Location: Apache Junction, Arizona
Posts: 1,306
|
Re: Markeb01 Build Thread
Dang Mark, you probably broke the new pump with that super human strength you have acquired with age... I thought you knew about "Old Dude power"
__________________
Building Genuine Pontiac Firepowered cars and trucks for several decades. Why Pontiac?? That's just me daring to be different. Projects.. 63 C10 Short Wheel Base fleetside (The Pro-Street) currently under reconstruction. 440CID 2X4 Pontiac
|
|
|
|
|
12-19-2012, 10:26 AM
|
#494 | |
|
The 60-66 GMC/Pontiac guy....
Join Date: Oct 2010
Location: Apache Junction, Arizona
Posts: 1,306
|
Re: Markeb01 Build Thread
Quote:
The torsion front suspension may be right in it's heals bit I haven't decided on that yet.
__________________
Building Genuine Pontiac Firepowered cars and trucks for several decades. Why Pontiac?? That's just me daring to be different. Projects.. 63 C10 Short Wheel Base fleetside (The Pro-Street) currently under reconstruction. 440CID 2X4 Pontiac
|
|
|
|
|
|
12-20-2012, 12:37 AM
|
#495 |
|
Senior Enthusiast
Join Date: Feb 2007
Location: Spokane Valley, WA
Posts: 8,356
|
Re: Markeb01 Build Thread
This morning I ran over to OReilly Auto Parts and picked up a stock replacement 69-81 Chevy fuel pump as a replacement for the one that has served well for the last 20 years. I pulled the brand new pump and sure enough the lever/actuator is doing nothing at all and will be returned.
The new sealed (non-clockable) pump was mounted in a few minutes and new hard lines fitted again, since the fittings were different than the new pump it replaced. No leaks were found anywhere in the system and the truck fired right up and ran just fine. Mission accomplished! Oh wait, yep everything worked fine, except the new mechanical pump is putting out so much pressure my AFB/Edelbrock 1405 is receiving way too much pressure and leaking all over the intake manifold. So I got back online and ordered a Holley regulator and gauge which should be here in a day or two. That should give me time to figure out how and where Id like to mount it. Im kind of bummed I have to go with a regulator, since I drove the truck for 20 years with the identical pump and carburetor with no flooding issues, but obviously the new pumps are no longer manufactured to the same specifications as 20 years ago. My original mechanical pump is AC Delco branded and I thought about going to a GM dealer and paying twice as much money for an AC pump, but looking at several AC Delco fuel pumps online I couldnt help but notice their disclaimer that said in effect: The AC fuel pump you receive may be manufactured by AC Delco, or by one of their approved suppliers. The pump you receive may not look exactly like the image pictured. To me that meant I could pay twice as much money at GM, for the same off brand part I can buy locally for half the price, with no assurance it would work any better. I did go to the trouble to seek out and obtain a Precision branded pump. Its the same outfit that produced my windshield gasket, so Im hoping I have the same good luck with the pump because the windshield seal was perfect. The saga continues .
__________________
My Build Thread: http://67-72chevytrucks.com/vboard/s...d.php?t=444502 |
|
|
|
|
12-21-2012, 11:38 AM
|
#496 |
|
Registered User
Join Date: Dec 2012
Location: Rochester, KENT
Posts: 10,478
|
Re: Markeb01 Build Thread
Inspirational thread Mark.
It also happens to be the first '60 thread I read on here. Thanks for posting a lot of pics and details. |
|
|
|
|
12-21-2012, 07:25 PM
|
#497 |
|
Senior Enthusiast
Join Date: Feb 2007
Location: Spokane Valley, WA
Posts: 8,356
|
Re: Markeb01 Build Thread
Thanks for the comments Grizz.
While I was waiting for the pressure regulator to show up (due today) I pulled the new/defective pump apart last night to see what was wrong with it. Sure enough, whatever connects the actuating arm to the diaphragm plunger is either broken or missing. They connect above a rubber seal which cannot be removed for closer inspection, but safe to say it will never pump anything with the linkage disconnected. Would have been a nice time saver had I taken the time to figure that out before going to all the trouble of installing it. This is the first time Ive ever had to access the returns feature of Amazon.com. What a delight. Fill out the entries, select the refund option, print the no charge return labels and send it back. Of course with the luck Im currently having - it wouldnt fit through the drop box door, and the nearest UPS store folded up shop and closed the doors! I might have to wait until after Christmas to send it back. Im still trying to decide where to put the regulator. Ive got at least three choices. Inline just in front of the carb, on the firewall to the left of the engine, or down on the frame near the fuel pump where it wont prominently show. All 3 locations have advantages and disadvantages. On the firewall it will never pass NHRA tech. Of course it probably wouldnt anyway and I have no intention of racing it. On the engine the heat and vibration might potentially shorten the life of the regulator, the gauge, or both. And on the frame its more likely to get pretty cruddy, which probably wouldnt make any difference in performance. It will be a lot easier to decide once the parts are in hand.
__________________
My Build Thread: http://67-72chevytrucks.com/vboard/s...d.php?t=444502 |
|
|
|
|
12-22-2012, 02:34 AM
|
#498 |
|
Senior Enthusiast
Join Date: Feb 2007
Location: Spokane Valley, WA
Posts: 8,356
|
Re: Markeb01 Build Thread
The Holley 12-803 fuel pressure regular and Aeromotive 15 psi fuel gauge showed up at 5 pm this evening, and the installation was completed by 8:15. The first hour and a half were spent trying to figure out the best place to install it. I finally decided to mount it on the hard line running from the mechanical fuel pump to the carburetor. That way rubber hoses were not required and routing was the easiest. I thought it would look stupid there, but with the regulator canted about 15 degrees, everything fits nicely and is solid as a rock.
  If the carb doesnt flood anymore Ill just have to find happiness with the appearance. Im still going to attach a stabilizing strap to the right front carb stud for extra vibration resistance. Im waiting until tomorrow morning to fire it up. Ill have my wife run the electric pump while I watch the pressure gauge to see how far it needs to be adjusted. From what Ive read Edelbrock carbs like 5 - 5.5 psi. The regulator comes pre-set at 7 psi, so I backed it down one full turn. Unfortunately I have no idea where that sets the pressure without running the system and getting a reading. I may also pick up a 90 degree fitting to turn the gauge towards the camera. It would be easier to read and probably minimize crud build up on the face.
__________________
My Build Thread: http://67-72chevytrucks.com/vboard/s...d.php?t=444502 |
|
|
|
|
12-22-2012, 10:46 AM
|
#499 |
|
Registered User
Join Date: Apr 2012
Location: Searcy, AR
Posts: 4,203
|
Re: Markeb01 Build Thread
Great documentation as usual, Thank You! Anxiously anticipating follow up today... Merry CHRISTmas!!!
Posted via Mobile Device
__________________
DON Proverbs 27:17  US Air Force Retarded errr Retired My '65 Stepper Build:http://67-72chevytrucks.com/vboard/s...d.php?t=533920 My '60 Rusty Patina Build:http://67-72chevytrucks.com/vboard/s...66#post7402266 My '72 http://67-72chevytrucks.com/vboard/s...59#post7204359 SOLD |
|
|
|
|
12-22-2012, 07:42 PM
|
#500 |
|
Senior Enthusiast
Join Date: Feb 2007
Location: Spokane Valley, WA
Posts: 8,356
|
Re: Markeb01 Build Thread
Thanks Don, and Merry Christmas to you & your family and the rest of the forum as well!
Since the fuel system was empty above the fuel pump, it seemed like a good idea to run down to the custom hose store and pick up a couple of elbows for the pressure gauge. I bought both a 45 and 90 degree fitting, and ended up going with the 45 degree version. Five minutes later it was much easier to read:  My wife engaged the electric pump and the reading was five psi, exactly where I wanted it. So for the many forum members that have asked how many turns equal a pressure change, one full turn out reduced the factory 7 psi to 5 psi, or ½ turn per pound. I wouldn’t use this as an absolute figure, it just happened to be what my regulator provided. But if you don’t have a gauge, it might get you in the ballpark. The bad news being, even at 5 psi the carburetor was clearly leaking from numerous sources indicating the floats were stuck open. So after a quick break, the carb was on the bench getting torn down. Everything was thoroughly hosed out with carb cleaner and compressed air. The floats were inspected and the level and drop checked and both remained perfect. Surprisingly however, there was quite a bit of crud in the bottom of one of the bowls. I was a little concerned because I hadn’t really found anything wrong, but there was enough crap in the bowl to have potentially caused the needles to stick. Easily reassembled it was back on the engine and all the attachments buttoned up. After charging the carb with the electric pump, the engine fired right up and ran beautifully – and NO MORE LEAKS! The last task was to fabricate and install a support arm from the bottom of the regulator to the nearest carb stud. I thought about it all last night envisioning some kind of a flat strap link with holes on both ends. I knew I’d seen something like that in my mind, that would work perfectly but I just couldn’t figure out was it was. Maybe something from a bicycle? Or maybe a piece of fence hardware, or a sewing machine or firearm part? I even searched online and couldn’t come up with anything. So this morning I gave up and started digging through the junk metal drawer figuring I’d just have to fabricate something. Digging to the bottom, there was the piece I was envisioning! It was the bent and worn arm from one of my original door checks! I quickly remembered I had a nearly new door check left over after I replaced them both with NOS units. It was quickly disassembled and bent it to the proper angle. Unfortunately the carburetor end needed to be drilled out to 5/16”. The problem being the link itself is file hardness, the same as a drill bit, so the hole couldn’t be drilled or filed bigger. But there’s always a way, so I hogged out the hole with a Dremel tool grinder bit. I put a lot of pressure on it which both opened up the hole and also made the end of the link blistering hot. When nearly the right size and as hot as I thought I could get it, I shoved a 5/16” step drill through the hole which sized it correctly and also cleaned up the wallowed out grinding mess. Here’s what it looks like in position.   With this in place the regulator and fuel lines are completely immovable so everything should stay nice and tight for years to come. I’m looking forward to having the next few days away from the constant smell of gasoline! Merry Christmas everybody!
__________________
My Build Thread: http://67-72chevytrucks.com/vboard/s...d.php?t=444502 |
|
|
|
 |
| Bookmarks |
|
|


 Linear Mode

