
|
 01-08-2010, 12:00 AM
|
#1 |
|
Registered User
Join Date: Aug 2007
Location: Mountain View, Alberta, Canada
Posts: 415
|
what i've been up to
Its been a while since I have posted but I have been visiting the site on a regular basis to see what everyone is up to. I have tried to attach some photos of where I am at with my truck so we will see how it all works.
To refresh your memories this is my 56 chevy shortbox stepside with big back window. I am the 2nd & 4th owner of this truck first purchasing it in about 1976 as a running V8 truck from the original owner and buying it back a couple of years ago pretty much in boxes. I have the 56 body sitting on a 1980 short box frame, plan on 350 ci with mild cam, Turbo 400 and making it a driver - pleasure driving mostly. So far I am doing all the work myself and have sanded down the entire truck using a combination of soda blasting, chemical stripper and good old fashion sanding. I am pretty happy with the results and have only some rust in the usual places. My shop now has a concrete floor but no heat and it has been real cold up here so my air tools do not work real well. At least I am out of the wind and snow but it is hard to get much done. The photos I have tried to add show what I have done but I have a couple of comments/questions for the pros. You will notice that the body is sitting a bit high and I do plan on dropping the suspension to make it look a bit better. Something like a 2/4 or 3/5 drop should get it sitting about right. What you see is exactly how a 56 body sits on an 80 frame with no adjustments yet made. I adapted the original 56 front cab mounts by adding about 4 inches in height and am using the rear mounts with no adjustments required. My first question is do you guys think the front wheel is sitting correctly in the wheel well? Does it need to be moved forward/backward at all? Moving it back would cause some problems with the steering box but forward a bit would be no problem. You can see that the rear wheel is not sitting proper in the rear wheel well and I am exploring a number of options to fix this. I am probably going to drive it like this for a bit but plan on new rear suspension (i.e. air bag, 4 link, etc.). I do not want to cut the frame. I have some pieces to lengthen the box but do not think I am going to go that route. I think the easiest is going to be in moving the rear suspension forward somewhere between 2 to 4 inches. I am currently working on putting new steps and rear cab corners on but they are taking a while with no air and no experience with body work. So far things are working out pretty good. I do have some experience with Mig welders from a few years of working in an exhaust/muffler shop years ago. I plan on practicing on scrap before I start any welding and so far have been using sheet metal screws to hold things in place. The door bottoms need some work and the right front headlight eyebrow also needs some. That is about it for the body work. As soon as my parts get here I will be test fitting/installing all cab mounts and then completing my rad support fabrication. Then the body comes off again and finish cleaning up and painting my frame. I plan on using POR 15 on the frame, under the cab, wheel wells and maybe the front inner fenders as well. Please also note that most of this sheet metal has been stripped down to metal for at least a year. Despite being a bit dusty there is not that much flash rusting up here. Any advise would be appreciated. Hope the attachments work. If so I plan on taking some more pictures. 56hotrodred (Barry) Last edited by 56hotrodred; 01-08-2010 at 12:03 AM. |

|

|
|
01-08-2010, 01:05 AM
|
#2 |
|
Registered User
Join Date: Mar 2009
Location: Concord, NC
Posts: 531
|
Re: what i've been up to
Nice progress, but you posted in the classifeds instead of the other forum, lol. Your truck looks great though, wish mine was as nice.

__________________
"I never apologize. I'm sorry, but that's just the way I am." - Homer J. Simpson 1955 2nd Series Chevy "King Of Trucks" |
|
|
|
|
01-08-2010, 09:01 AM
|
#3 |
|
Registered User
Join Date: Jan 2009
Location: Omaha, Arkansas
Posts: 929
|
Re: what i've been up to
Hello, mine is on a 77 4x4 frame. Your front looks close. On the back I just took the spring center bolt out of the hole and moved it where I needed it and tighten the heck out of the U-bolts. It's stayed put for the last 6 years with no problem.
__________________
'57 Chevy Pickup '56 GMC LCF Cummins '38 Chrysler Royal '57 2wd change http://67-72chevytrucks.com/vboard/s...light=speedway |
|
|
|
|
01-08-2010, 02:44 PM
|
#4 |
|
Everything is work in progress
 Join Date: Apr 2006
Location: Denver Colorado
Posts: 326
|
Re: what i've been up to
Sounds scary black. You know with 1" of lift you can move an axle safely using leaf springs an 1" or and 1-1/2" using ORD zero rate blocks. Or you can re-drill your springs, or drill the perches on the axle, but pin them somehow!!!
__________________
Good luck with your truck! How much?! It's just an old truck part!! 49 International on a 80 GMC 3/4ton 4x4 chassis 48 International KB-5 2 ton dump bed 04 Honda CRF "500" 09 Honda CRF450 fuel injected rocket 03 Suzuki hayabusa carbonfiber wheeled monster. 02 Ford diesel stretch van (toy hauler) 01 38' Monaco diesel pusher motorhome |
|
|
|
|
01-08-2010, 02:51 PM
|
#5 |
|
Registered User
Join Date: Jun 2006
Location: Idaho
Posts: 8,800
|
Re: what i've been up to
Front looks ok to me, I'd move the rear end forward per the last post by relocating the perch and pin.
__________________
1959 Chevy Short Fleetside w/ 74 4WD drive train (current project) OrrieG Build Thread 1964 Chevelle Malibu w/ 355-350TH (daily driver) Helpful AD and TF Manual Site Old Car Manual Project Last edited by OrrieG; 01-08-2010 at 02:52 PM. |
|
|
|
|
01-08-2010, 03:27 PM
|
#6 |
|
Registered User
Join Date: Feb 2007
Location: TN
Posts: 164
|
Re: what i've been up to
Be very careful with the POR. It must be used with their primer (a thick gooey hard to apply primer). If you apply it to bare metal it will peel off in big sheets like flakes off my wife's incredible biscuits!
|
|
|
|
|
01-08-2010, 03:28 PM
|
#7 |
|
Registered User
Join Date: Jan 2009
Location: Omaha, Arkansas
Posts: 929
|
Re: what i've been up to
O. it's pined, when I had the lift blocks under it, the center pin was in the opening in the back of the block. When I lowered it back to stock height I had to drill a 1/2 hole in the spring pearch on the rearend. I guess I should have said that. You couldn't just have the spring center bolt setting on the alxe pearch.
__________________
'57 Chevy Pickup '56 GMC LCF Cummins '38 Chrysler Royal '57 2wd change http://67-72chevytrucks.com/vboard/s...light=speedway |
|
|
|
|
01-08-2010, 03:33 PM
|
#8 |
|
Registered User
Join Date: Apr 2007
Location: Callander Ont.
Posts: 387
|
Re: what i've been up to
Nice to see somebody else is doing the same thing I'm doing and I'm not the only one.
My 89 Chevy short box had a wheel base of 117.75 I needed 114" for my 57 panel van. I torched the rivets off the rear leaf mounts and shackle mounts and moved them forward 3.75 into the preexisting holes. I couldn't have been more lucky So no worry of dog tracking For your application maybe somebody can give you a wheel base measurement of a stock 56 to compare with yours to see how close you are. BTW your truck is lookin awesome your shop is too. 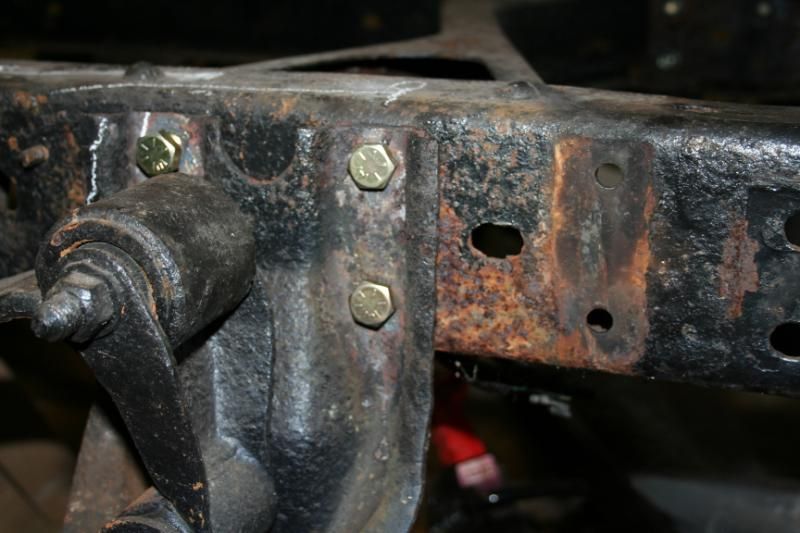
__________________
--Glenn-- http://67-72chevytrucks.com/vboard/s...d.php?t=345975 http://67-72chevytrucks.com/vboard/s...d.php?t=564403 Last edited by 57ToyBox; 01-08-2010 at 03:36 PM. |
|
|
|
|
01-08-2010, 08:34 PM
|
#9 |
|
Registered User
Join Date: Aug 2007
Location: Mountain View, Alberta, Canada
Posts: 415
|
Re: what i've been up to
Thanks all for the advise. I like the idea of of simply relocating the perch & pin. I am also thinking of cutting of an inch or so of the rear frame rails to get the box closer to the cab as it is now about 2 inches away. It actually does not bother me where it is now sitting but if it gets me closer to 57ToyBox's measurements that looks way to easy. Like I said I am probably going to change the entire rear suspension at some point so will have to cut the rivets off anyway.
Hey 57ToyBox thanKs for the comments on the shop. I have been trying to put some money into my shop which is actually inside a barn built in 1949. It has been one of my pet projects for almost the entire 20 years we have been living here - to fix the barn up unfortunately the wife does not place it as quit a high priority as I do - lol. I have added a tractor shed onto the east end which makes the building 98 feet long in total. Last year I got concrete poured in the center section - where my truck is sitting now - and that made all the difference in the world. The less gravel in the barn the better as the darn cats think it is all their litter box. None of it is insulated yet but that may start with the tractor shed next year and then the centre section. I will then be in heaven. I have attached a few picture that show the tractor shed attached to the barn. The 1 1/2 ton chevy I bought for the cab and rest of the front end. I have to give the frame and hoist back. It was a pretty good deal for a few hundred bucks I thought and came from my neighbour. I really needed the drivers door so I hooked onto it with my tractor and pulled it home. By the way hotrodsbyray I have been collecting information on POR 15 and although I did not see information on the primer as being essential for my application there is certainly a specific treatment required - don't have the info in front of me - for the bare metal prior to painting with POR. If not followed the result is peeling as you say. Because I have to do this in stages I like the do-it-yourself POR treatment rather than powder coating. I can fix things as I go. I will check into it further before I get after it. I hope to be on the frame next summer. Orie I love your build and manage to get down into northern Montana and Idaho a fair bit as I really like the country and it is pretty close. I live right above Glacier Nation Park and just east of Waterton Park in Canada. Every time I am down in northern Idaho I seem to see lots of old Chevys either parked or driving around. Again thanks guys this is a great site and after trying many others I spend most of time on this one. 56hotrodred |
|
|
|
|
01-09-2010, 12:02 AM
|
#10 |
|
Registered User
Join Date: Apr 2007
Location: Callander Ont.
Posts: 387
|
Re: what i've been up to
Nice pictures Barry
I like that 1.5 ton Chev outside. I would be all over that to get restored, but that just me LOL Dreaming of a diesel and sum nice polished aluminum rims. That is a huge building now !!! 98 ft Dam !!! You could have a garage inside a shed LOL Just think how easy that would be to heat LOL
__________________
--Glenn-- http://67-72chevytrucks.com/vboard/s...d.php?t=345975 http://67-72chevytrucks.com/vboard/s...d.php?t=564403 |
|
|
|
|
01-09-2010, 12:24 AM
|
#11 | |
|
Registered User
Join Date: Aug 2007
Location: Mountain View, Alberta, Canada
Posts: 415
|
Re: what i've been up to
Quote:
The barn/shop is huge but I live in very windy country and need to get out of the wind to work on stuff. It has a small garage door on the west end that I can also drive a truck into as well as the east side that you see in the photos. The heating will be expensive and a combination of wood and/or natural gas in the tractor shed to keep or at least get the tractor warm with natural gas/radiant heat in the lower floor of the main barn section where the 56 is now being worked on. I will not heat the upper portion of the barn as it being used for storage of stuff for my wife's store and extra truck parts. I would like to heat the south side with the big windows by the 1 1/2 ton as it is just a nice space to work in with a great view of the mountains. 56hotrodred (Barry) |
|
|
|
|
|
03-04-2010, 05:39 AM
|
#12 |
|
Registered User
Join Date: Aug 2007
Location: Mountain View, Alberta, Canada
Posts: 415
|
Re: what i've been up to
Well the weather warmed up and I have been picking away at a few small but critical components of my build. Not much money right now but a little time so we make due with what we have.
The photos show my modified front cab/body mounts - for 56 body on 80 frame if you forgot, new brake booster with reinforced structure under dash and pedal from International Chassis now plumbed for mock up into stock residual valve. The stock 1980 chevy brake lines from master only needed one new fitting to hook it up. I eventually will get all new stainless steel brake lines to fit the stock frame & brake system. I have also pretty much settled on my rad core support mounting design but am waiting for some final rubber bushings & spacers for proper final fitting with inner & outer fenders and hood in place. All the parts for this so far have come from stuff I had laying around here off of a 79 4x4 and a 66 1/2 ton. No radiator or steering column yet but they should be pretty straightforward - expensive but straightforward. I also just got some .023 wire for my Mig and have been practicing as much as possible on old metal I have cut off my truck. I am now finishing my modifications to the inner fenders and welding up all holes. If all goes well - meaning if my welding improves - I hope to move onto the gazillion holes in the firewall. Then maybe weld on those rear cab corners and finish the steps/rockers. Last but not least some work on the eyebrows needs to be done. It will be a long time before my welding gets good enough to move onto outer body panels. My grinding skills however are excellent!!! Hopefully this spring/summer after I get front end body sitting right all comes off the frame and finish blasting the frame, painting and then all new Energy Suspension components with rear sway bar and as mentioned the brake lines. If we have a busy summer I might be looking at new engine & transmission sitting in frame by winter. 56hotrodred |
|
|
|
|
03-04-2010, 04:03 PM
|
#13 |
|
CLASSIX Truck Club
Join Date: Oct 2009
Location: Lodi Ca
Posts: 318
|
Re: what i've been up to
Your truck is looking real good so far. Keep the pics coming.
|
|
|
|
|
03-07-2010, 12:11 AM
|
#14 |
|
Registered User
Join Date: Aug 2007
Location: Mountain View, Alberta, Canada
Posts: 415
|
Re: what i've been up to
Hey thanks. Is is real slow going with no heat in the shop but it has been warming up here and I keep picking away at small things.
56hotrodred |
|
|
|
|
03-07-2010, 12:52 AM
|
#15 | |
|
Insane In The Membrane
Join Date: Jan 2010
Location: Orcutt, CA
Posts: 446
|
Re: what i've been up to
Quote:
|
|
|
|
|
|
03-07-2010, 12:55 AM
|
#16 |
|
Insane In The Membrane
Join Date: Jan 2010
Location: Orcutt, CA
Posts: 446
|
Re: what i've been up to
Pictures are worth a thousand words, like this:
Spring Perch:  Spring Plate: 
|
|
|
|
|
03-07-2010, 12:56 AM
|
#17 |
|
Insane In The Membrane
Join Date: Jan 2010
Location: Orcutt, CA
Posts: 446
|
Re: what i've been up to
They also make longer spring perches, made for anti-wrap. This could help you in getting to the 3" range.
https://catalog.foothilloffroad.com/...f6b60b87203320 Last edited by addicted2dunes; 03-07-2010 at 12:59 AM. |
|
|
|
|
03-07-2010, 12:59 AM
|
#18 |
|
Registered User
Join Date: Aug 2007
Location: Mountain View, Alberta, Canada
Posts: 415
|
Re: what i've been up to
You know I never took a measurement last time I had the box on but 1 1/2 inches would get me real close and leave a gap of maybe 2 inches between cab and front of box. I could maybe live with that.
Thanks for the pictures - that really helps. 56hotrodred (Barry) |
|
|
|
|
03-07-2010, 01:06 AM
|
#19 | |
|
Registered User
Join Date: Aug 2007
Location: Mountain View, Alberta, Canada
Posts: 415
|
Re: what i've been up to
Quote:
Again thanks very much. 56hotrodred (Barry) |
|
|
|
|
|
03-07-2010, 01:36 AM
|
#20 | |
|
Insane In The Membrane
Join Date: Jan 2010
Location: Orcutt, CA
Posts: 446
|
Re: what i've been up to
Quote:
|
|
|
|
|
|
04-22-2010, 01:02 PM
|
#21 |
|
Registered User
Join Date: Aug 2007
Location: Mountain View, Alberta, Canada
Posts: 415
|
Re: what i've been up to
I have made a little more progress on the inner fender(s) modifications to accommodate newer front A-arm suspension on later frame, grille is now getting close just a few more dents to work out with upper and lower grille supports pretty much done. Hood is also nearing completion - for clean-up anyway!
I am about to order steering column, column drop and swivel floor support that I want to set up before the cab comes off again to fill in the million or so holes in firewall. I will then also be working on the frame for the rest of the summer. This will include welding cab body and front radiator support to frame, finishing cleaning the entire frame and painting and then all new energy suspension bushings and sway bar upgrades to front and rear. 56hotrodred Last edited by 56hotrodred; 04-22-2010 at 01:10 PM. |
|
|
|
|
04-22-2010, 01:15 PM
|
#22 |
|
Registered User
Join Date: Aug 2007
Location: Mountain View, Alberta, Canada
Posts: 415
|
Re: what i've been up to
For some reason the photos did not upload. I will try again. Hope they don't all load all of a sudden as i tried several times!
56hotrodred |
|
|
|
 |
| Bookmarks |
|
|


 Linear Mode

