
|
 03-03-2013, 06:01 PM
|
#1 |
|
Registered User
Join Date: Mar 2004
Location: Hoytsville, Utah
Posts: 3,365
|
Heater rebuild
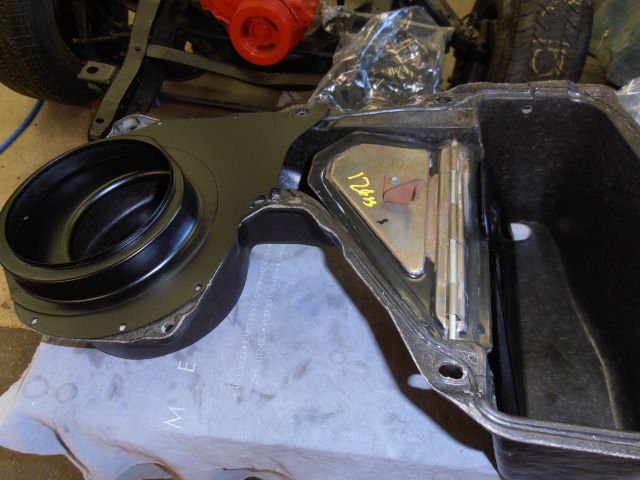
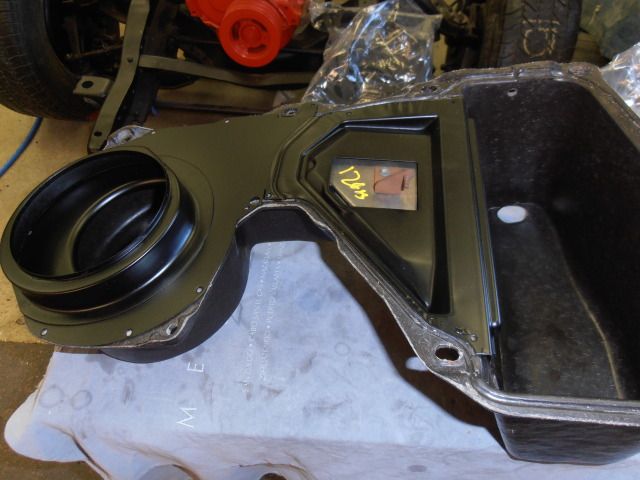
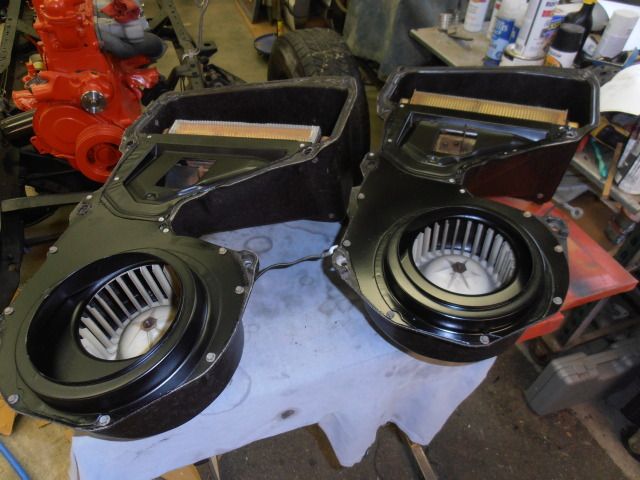
The heater in my green '68 barely works. I'm sure it's a combination of a bunch of crap like leaves and stuff plugging off the air flow and the heater core getting plugged off tubes. So I have been rebuilding a heater for it, and for good measure, one for my Panel project as well. I had most of 6 or 8 heaters laying around, so I started the process of finding the best ones. Most of the outer shells had that one corner broken off-the one that you can't get to the bolt for the fender being in the way. I made my decisions and went with this one and another that looked about the same:
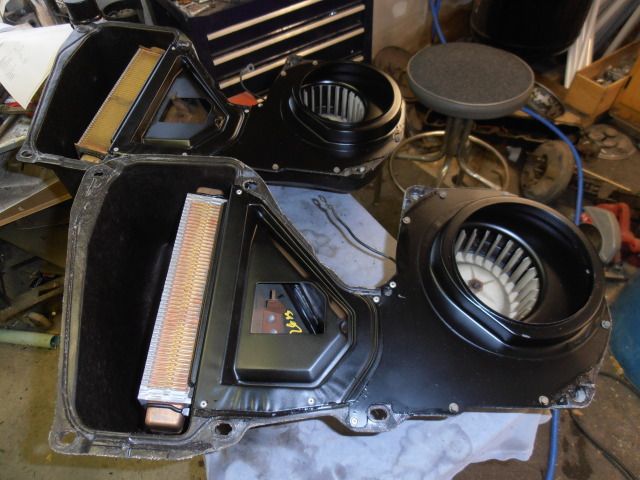
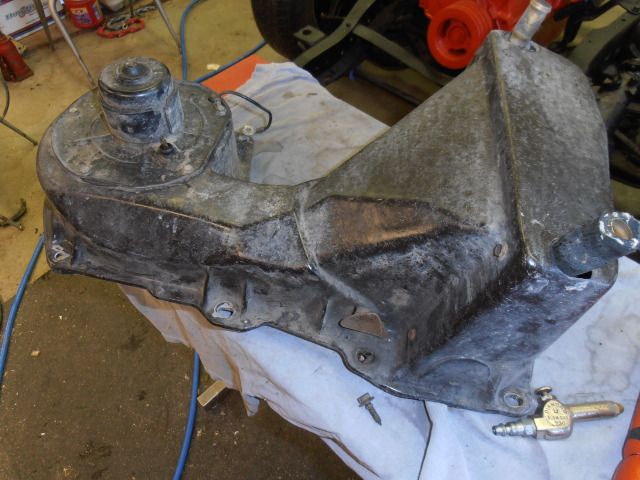 After stripping everything off and a good scrubbing, I'll start with this: 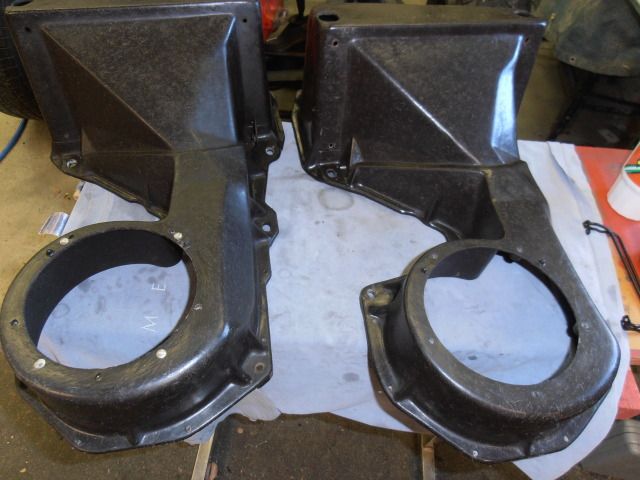 There seems to be two different types of these. I think they changed at a year, but I don't know when. One has a metal ring inside that the fan attaches to, and the other has fiberglass nubs to take the screws. The one with the metal ring has the for pop rivets holding it on. 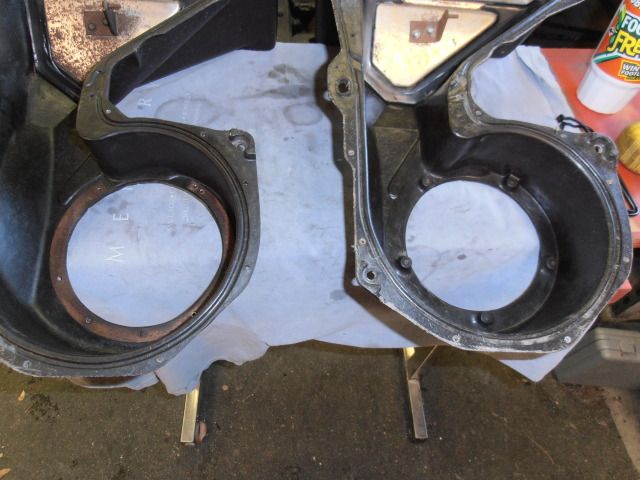 I say that the one with the metal ring is better. More on this later, but the other thing is, the later one, without the ring, has this blemish. A screw in the mold. 4 of the 6 I had had this. Good enough for O'l Green, but not for my Panel: 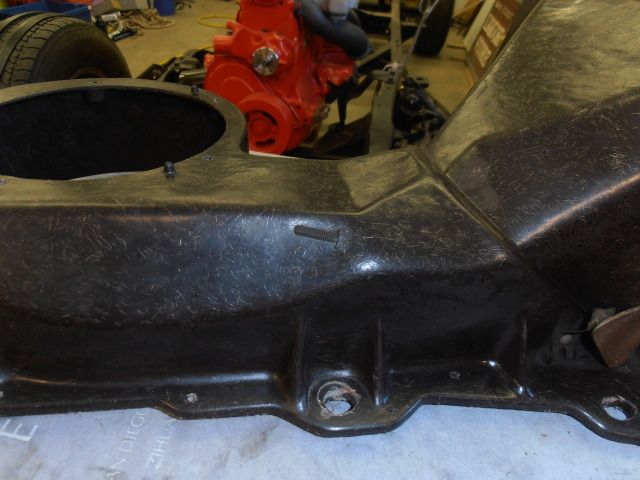
__________________
'68 Panel Project Boogie Chillin' '68 C-10 Ol' Green |

|

|
|
03-03-2013, 06:07 PM
|
#2 | ||||
|
"I ain't nobody, dork."
Join Date: Sep 2007
Location: Whidbey Island, Washington
Posts: 8,921
|
Re: Heater rebuild
I've never seen anything like that (bolt in the mold). It's on the bottom part so no one will probably notice.
When I rebuilt the heater and core in my 1972 GMC, it had the metal ring in the housing. Gary
__________________
'cuz chicks dig scars... My 1972 GMC 1500 Super Custom (Creeping Death) "long term" build thread. The Rebuild of Creeping Death after the wreck Quote:
Quote:
Quote:
Quote:
|
||||
|
|
|
|
03-03-2013, 06:11 PM
|
#3 |
|
Registered User
Join Date: Mar 2004
Location: Hoytsville, Utah
Posts: 3,365
|
Re: Heater rebuild
After a little sandblasting and paint for the tin parts, reassembly:
  These tin pieces are held on with 7 screws and 5 pop rivets. The rivets are aluminum and drill out easily. These screws have blunt ends, as they poke through on the outer side. I used some RTV silicon to seal the tin. Next, work on cores. I had 4 decent cores, 3 of them re-pops: 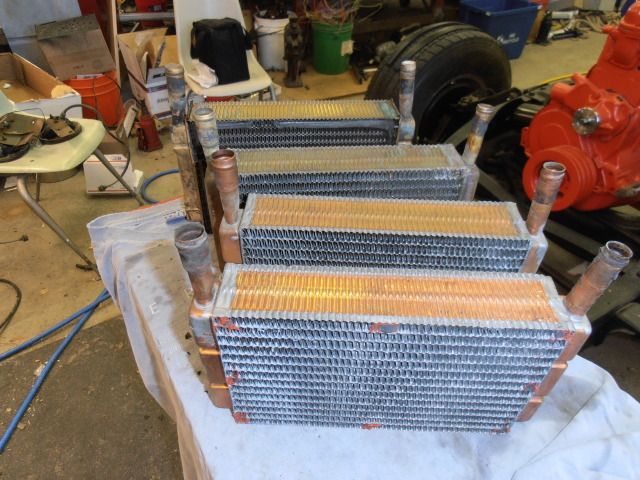 I came up with this back yard cleaning system-a bucket, swamp cooler pump, some heater hose and harsh chemicals: 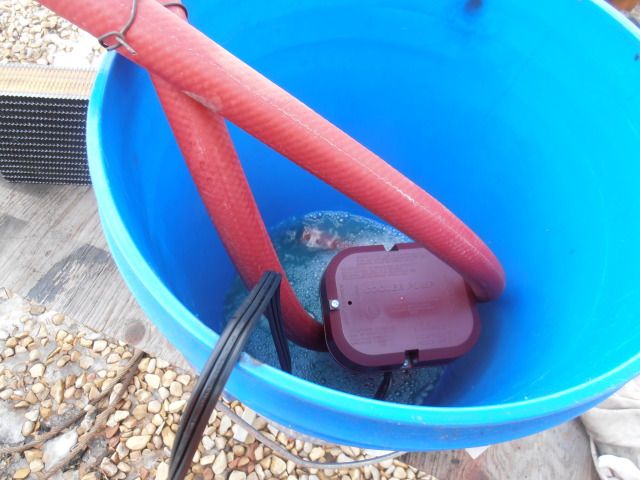 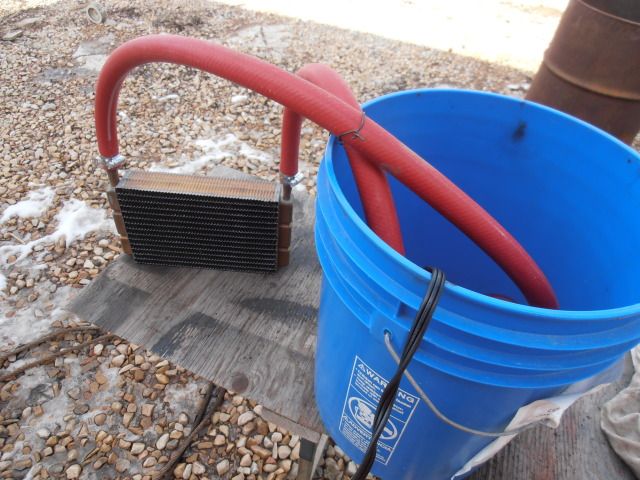 I ran this for 4 or 5 hours on the re-pops and a full 10 on the original. I think they came out pretty clean: 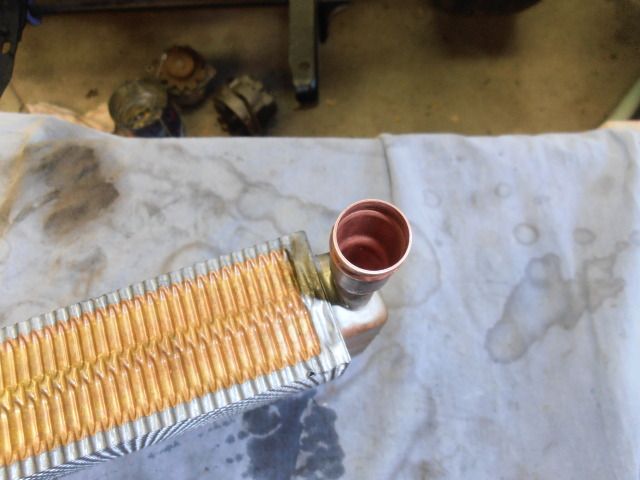
__________________
'68 Panel Project Boogie Chillin' '68 C-10 Ol' Green |
|
|
|
|
03-03-2013, 06:26 PM
|
#4 |
|
Registered User
Join Date: Jul 2008
Location: Eastern Oregon
Posts: 2,262
|
Re: Heater rebuild
What are you cleaning with ?
Posted via Mobile Device
__________________
71 C-20 07 Magnum RT AWD |
|
|
|
|
03-03-2013, 06:26 PM
|
#5 |
|
Registered User
Join Date: Mar 2004
Location: Hoytsville, Utah
Posts: 3,365
|
Re: Heater rebuild
One of the trickiest parts is putting the cores in. I bought 2 gasket sets and I dab a little RTV on in a few places to hold the core gasket on.
  That particular core was only in use for about one winter, so I didn't think it needed cleaned. The orange RTV was from last time. The little clips that hold them in only go one way-I think this is the reason some struggle with this part:  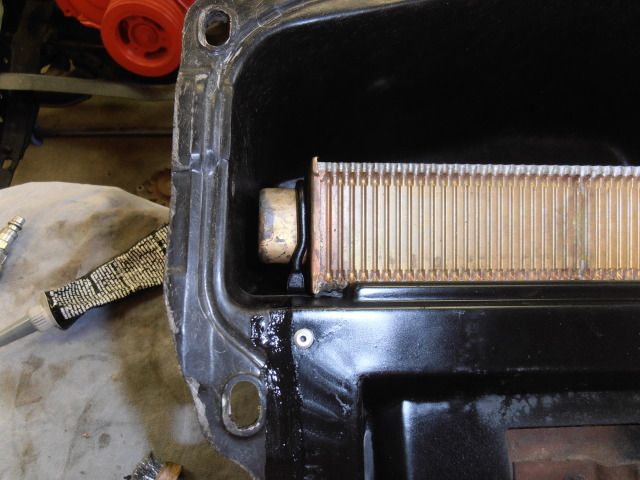 I start the top screws, then reach in and hold the core tight to the housing and attemp to start the bottom screws. These are the tough ones, but after a few tries, it's not to bad. On one of them, I had to use a longer screw to line up the hole. Don't run it in to far or it may hit the core. Now, the fan motors. I had 3 originals and 3 repops. After testing them all, I decided that the originals run wayyy faster and stronger than the repops. I picked the best 2 and cleaned and painted them. Remember the fiberglass nubs for the screws? These WILL strip out easy if your not careful! 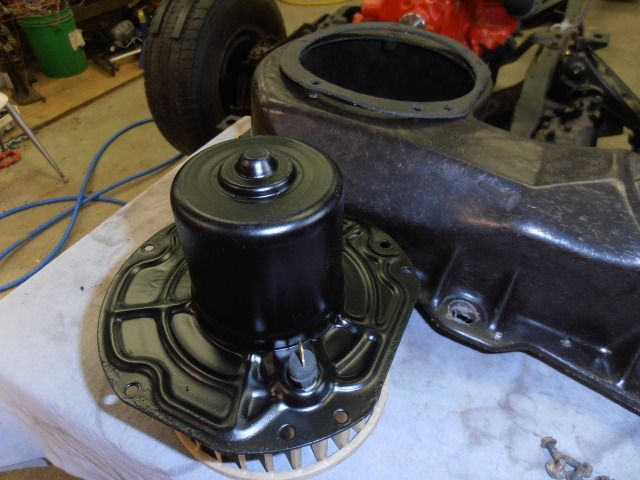 Remember to insure a good ground on the ground wire.
__________________
'68 Panel Project Boogie Chillin' '68 C-10 Ol' Green |
|
|
|
|
03-03-2013, 06:29 PM
|
#6 |
|
Registered User
Join Date: Mar 2004
Location: Hoytsville, Utah
Posts: 3,365
|
Re: Heater rebuild
Finished. 2 just like new:
   One last thing I'll do is get a very small paintbrush and paint all the screws and the little heat door tensioner thing. Next time there is decent weather forecast for all weekend, I'll install the one for Ol' Green.
__________________
'68 Panel Project Boogie Chillin' '68 C-10 Ol' Green |
|
|
|
|
03-03-2013, 06:35 PM
|
#7 | |
|
Registered User
Join Date: Mar 2004
Location: Hoytsville, Utah
Posts: 3,365
|
Re: Heater rebuild
Quote:
__________________
'68 Panel Project Boogie Chillin' '68 C-10 Ol' Green |
|
|
|
|
|
03-20-2013, 06:21 PM
|
#8 |
|
Registered User
Join Date: May 2007
Location: Mooresville NC/Gainesville GA
Posts: 499
|
Re: Heater rebuild
Looks Great! Thanks for the write up.
__________________
Eric Evans Queen City Shop Truck http://67-72chevytrucks.com/vboard/s...34#post6139834 66 GMC http://67-72chevytrucks.com/vboard/s...d.php?t=543110 |
|
|
|
|
10-01-2013, 11:45 PM
|
#9 |
|
Registered User
Join Date: Sep 2013
Location: Farmersville, TX
Posts: 238
|
Re: Heater rebuild
+1 Huge help.
Need to do this before it gets cold.
__________________
Grunt: 1971 C20 Custom Camper. Runs/Drives/Kinda stops. 350Ci, TH350. 4.10:1 D60. Eight Lug LWB is more better. Hell no its not fast! Donkey: 93 Nissan D21, the farm truck. My 1/2 ton SWB. The Indomitable Datsun. 1st BN 3rd MAR. '00-'04 
|
|
|
|
|
10-04-2013, 07:14 PM
|
#10 |
|
Registered User
Join Date: Dec 2012
Location: Virginia
Posts: 233
|
Re: Heater rebuild
Awsome thanks for documenting that.
Can you tell me what adhesive you used to secure the rubber boot that attaches to the the fan motor discharge and seals to the firewall? I used 3M spray adhesive and it didnt work very well. Thanks nice work!!!! |
|
|
|
|
10-16-2013, 03:36 PM
|
#11 |
|
Registered User
Join Date: Apr 2003
Location: NB
Posts: 3,367
|
Re: Heater rebuild
Please show the install. How many hood bolts are you taking out? I am concerned my hood will not line up again if I take it off. I spent 5-6 hours lining it up all ready.
__________________
1968 Chevy C10 307 3ott fleetside 1967 Chevy C/10 V8, 3spd, fleetside lwb.Sold 1967 Chev C/10 step, 383, M21. SOLD |
|
|
|
|
10-16-2013, 09:37 PM
|
#12 | |
|
Registered User
Join Date: May 2013
Location: Central NC
Posts: 830
|
Re: Heater rebuild
Quote:
Here's the thread: http://67-72chevytrucks.com/vboard/s...d.php?t=600448 Wish I had seen this one before I did mine...lots of good info here.
__________________
1972 Cheyene C-10 "Ole Green" My Grandfathers truck (early 70's to 1983) My first vehicle (1983) Original 350 (3 rebuilds) 700R4 from Bowtie Overdrives 
|
|
|
|
|
|
08-02-2016, 05:39 PM
|
#13 |
|
Registered User
Join Date: Jun 2013
Location: West Virginia
Posts: 6,421
|
Re: Heater rebuild
Can the thing be reassembled WITHOUT the rectangular gasket that attaches to the heater core itself?
Mine seems like it prefers not to have that. Is there a danger without that gasket being used? |
|
|
|
|
08-02-2016, 10:00 PM
|
#14 |
|
Registered User
Join Date: Jun 2013
Location: Somewhere
Posts: 3,052
|
Re: Heater rebuild
I read that the squarebody motor bolts in and runs way faster. The 67-72 originals were a mite slow...
|
|
|
|
 |
| Bookmarks |
|
|


 Linear Mode

