
|
 01-04-2014, 07:21 AM
|
#101 |
|
It's alsways something.....
 Join Date: Nov 2008
Location: Douglasville GA
Posts: 1,171
|
Re: 55 Wagon Progress
Thanks for the generosity of your time to share these methods. Awesome!
__________________
1968 RS Camaro 'Vert Matching number 327 and M21 Muncie 1968 C10 Black with red interior and orig paint. 5.3 / 4l60e,3:73 POSI 17" Torq Thrusts 1968 CST 514 Red with black interior. Buddy Buckets, Factory A/C, PS, PB- 20" AR custom shop TT, 5.3 and 4l60e |

|

|
|
01-05-2014, 07:43 PM
|
#102 |
|
Registered User
Join Date: Jan 2013
Location: Leonardtown, MD
Posts: 1,633
|
Re: 55 Wagon Progress
Bomp, still learning myself
 Was in the middle of media blasting the innards of the lift gate and noticed the threads for these nut plates didn't look too "full" A test with a 10-24 screw showed that some of the holes were so bad that they had a "slip" fit. 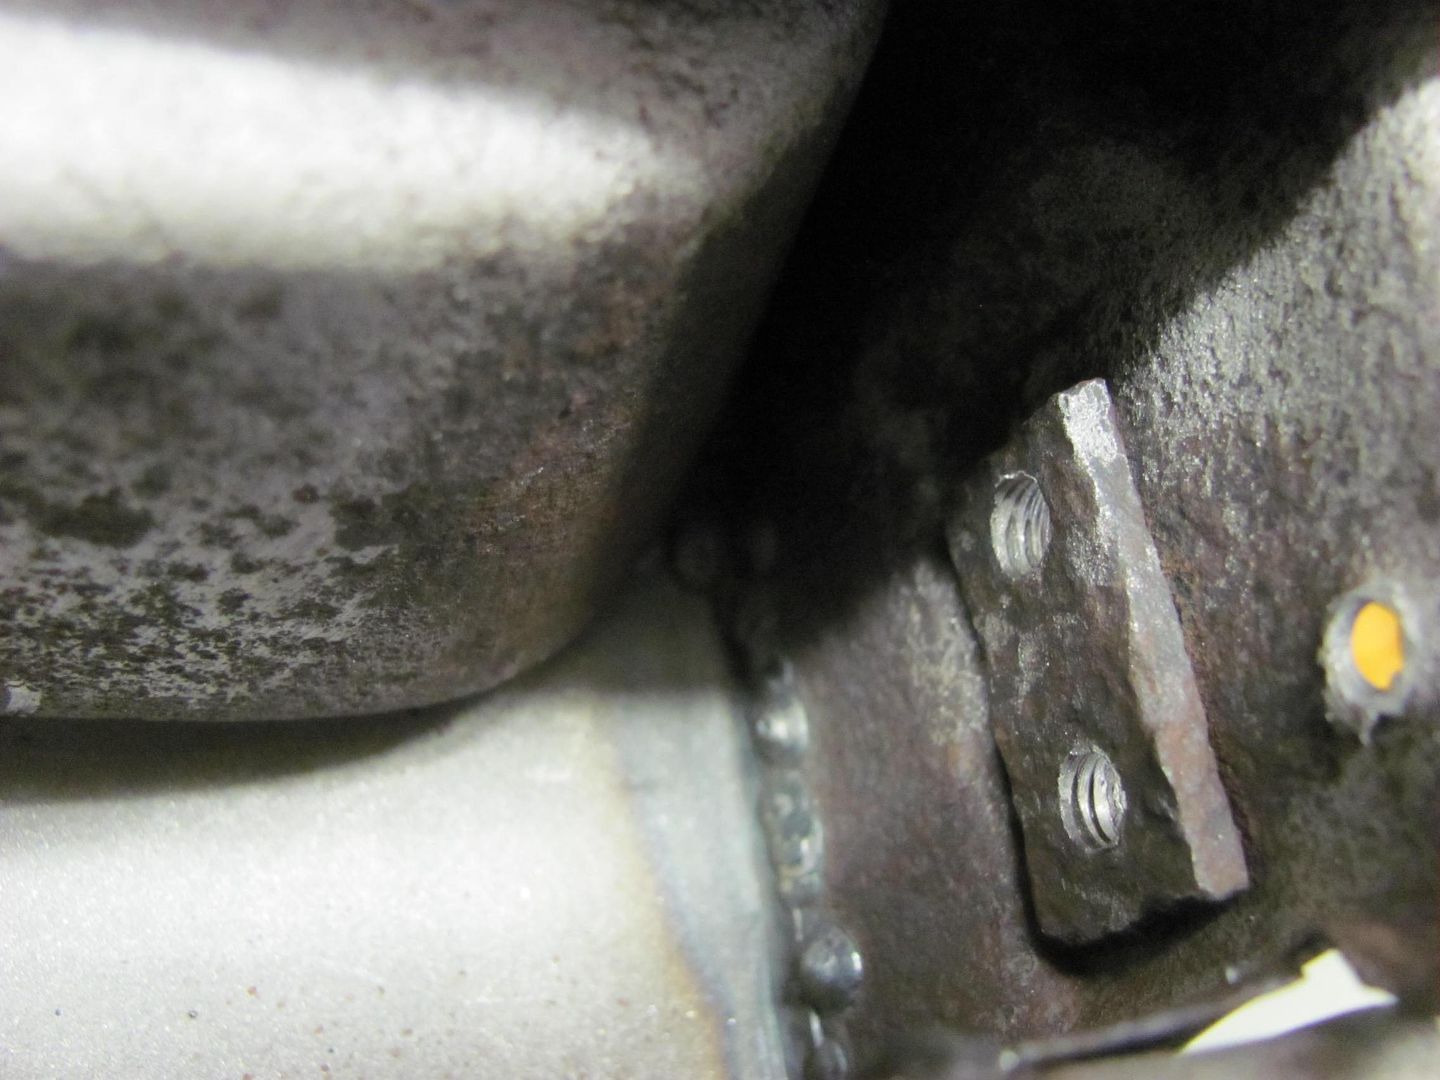 These hold the rubber bumpers on the bottom inside edge of the lift gate. The spot welds are drilled to release the nut plate..  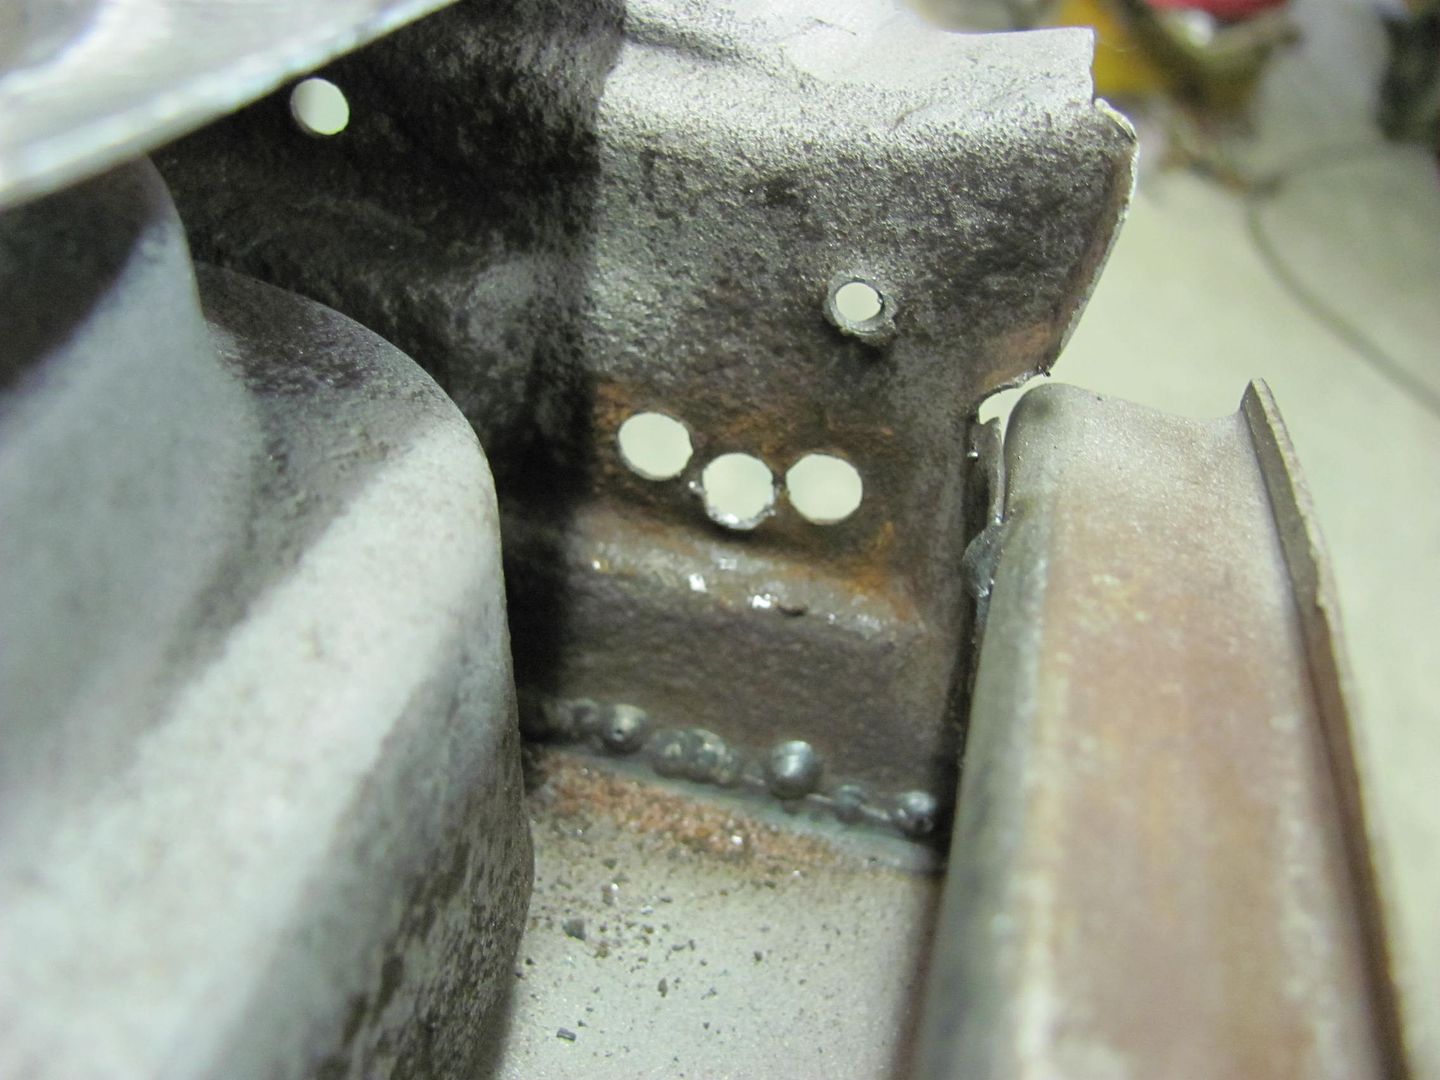 The new ones are cut out of some 10ga steel, holes drilled and tapped.  yeah, these threads look much better.... 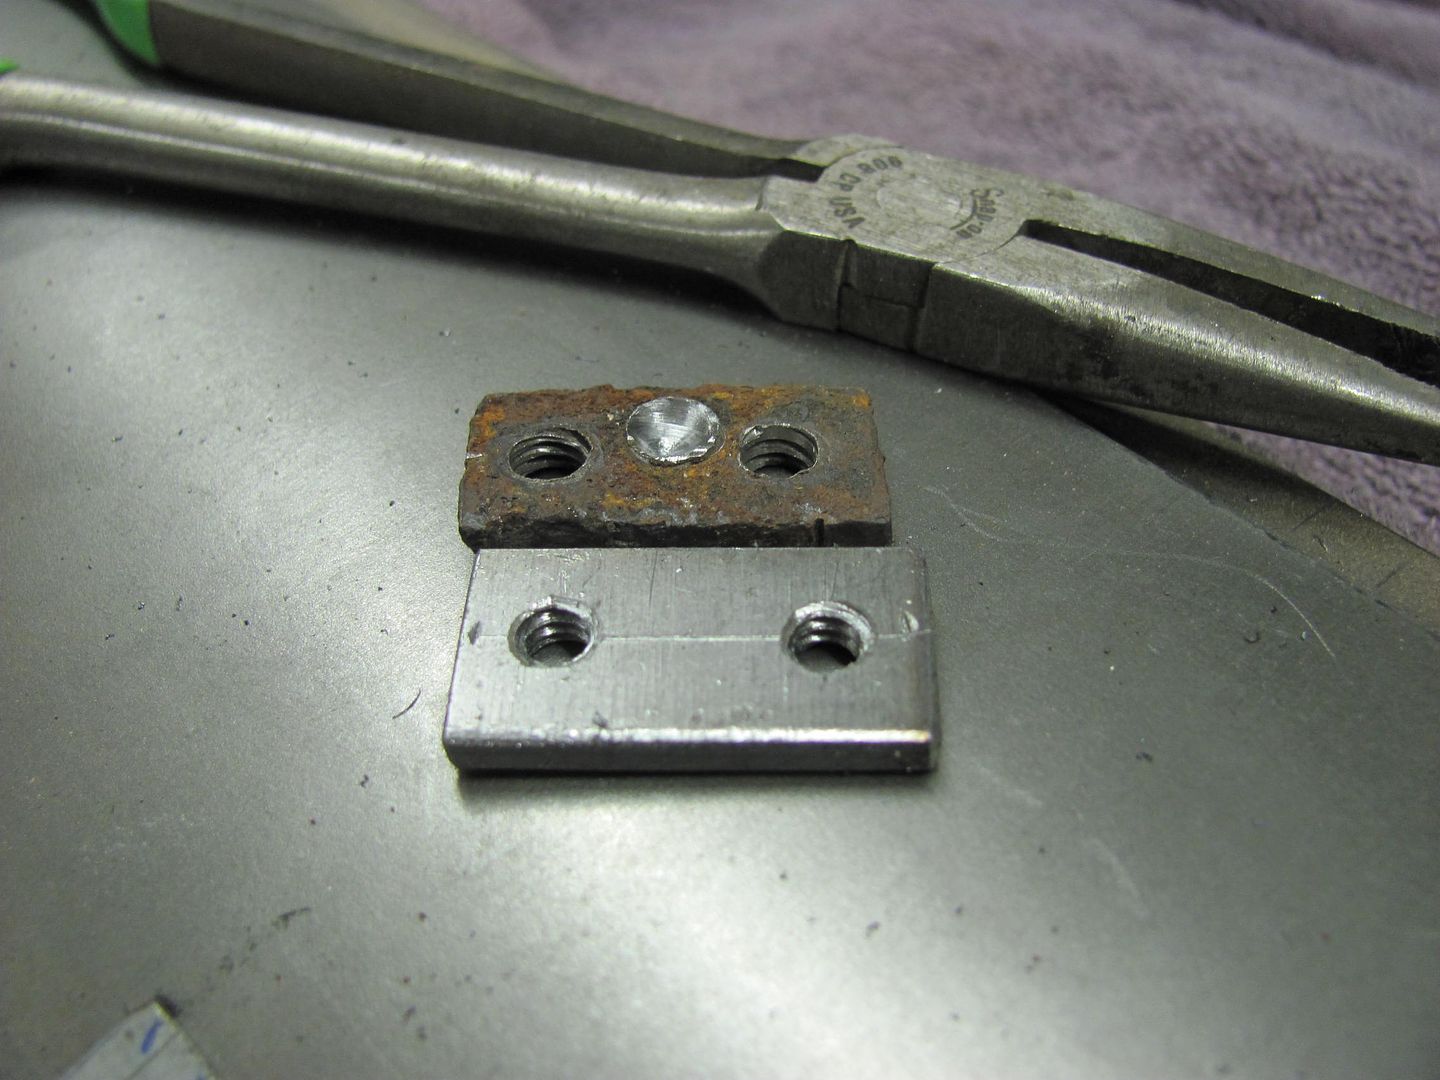 Where I normally use a couple screws to hold nut plates in place for welding, with the close proximity of the plug weld hole the screw heads would obscure some of the hole, and we would undoubtedly be welding in the screw heads for difficult removal. For this case, we'll use some brass tubing as a spacer. Since the tubing I picked up passes though the screw holes, a sacrificial lock washer is used for it's minimal diameter. 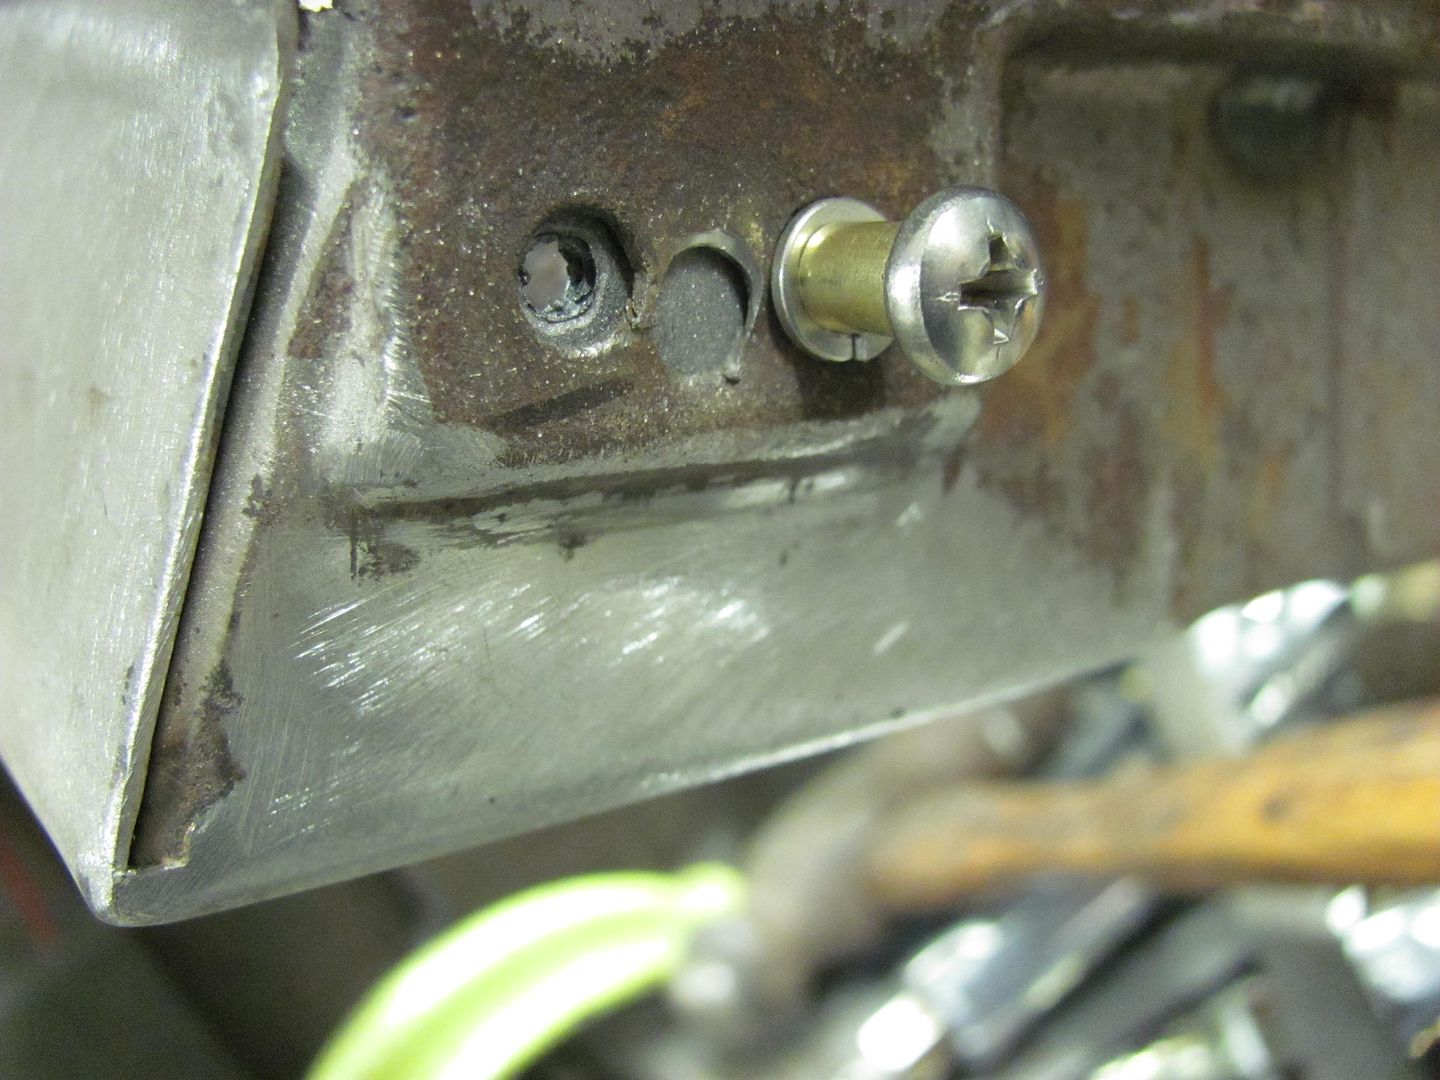 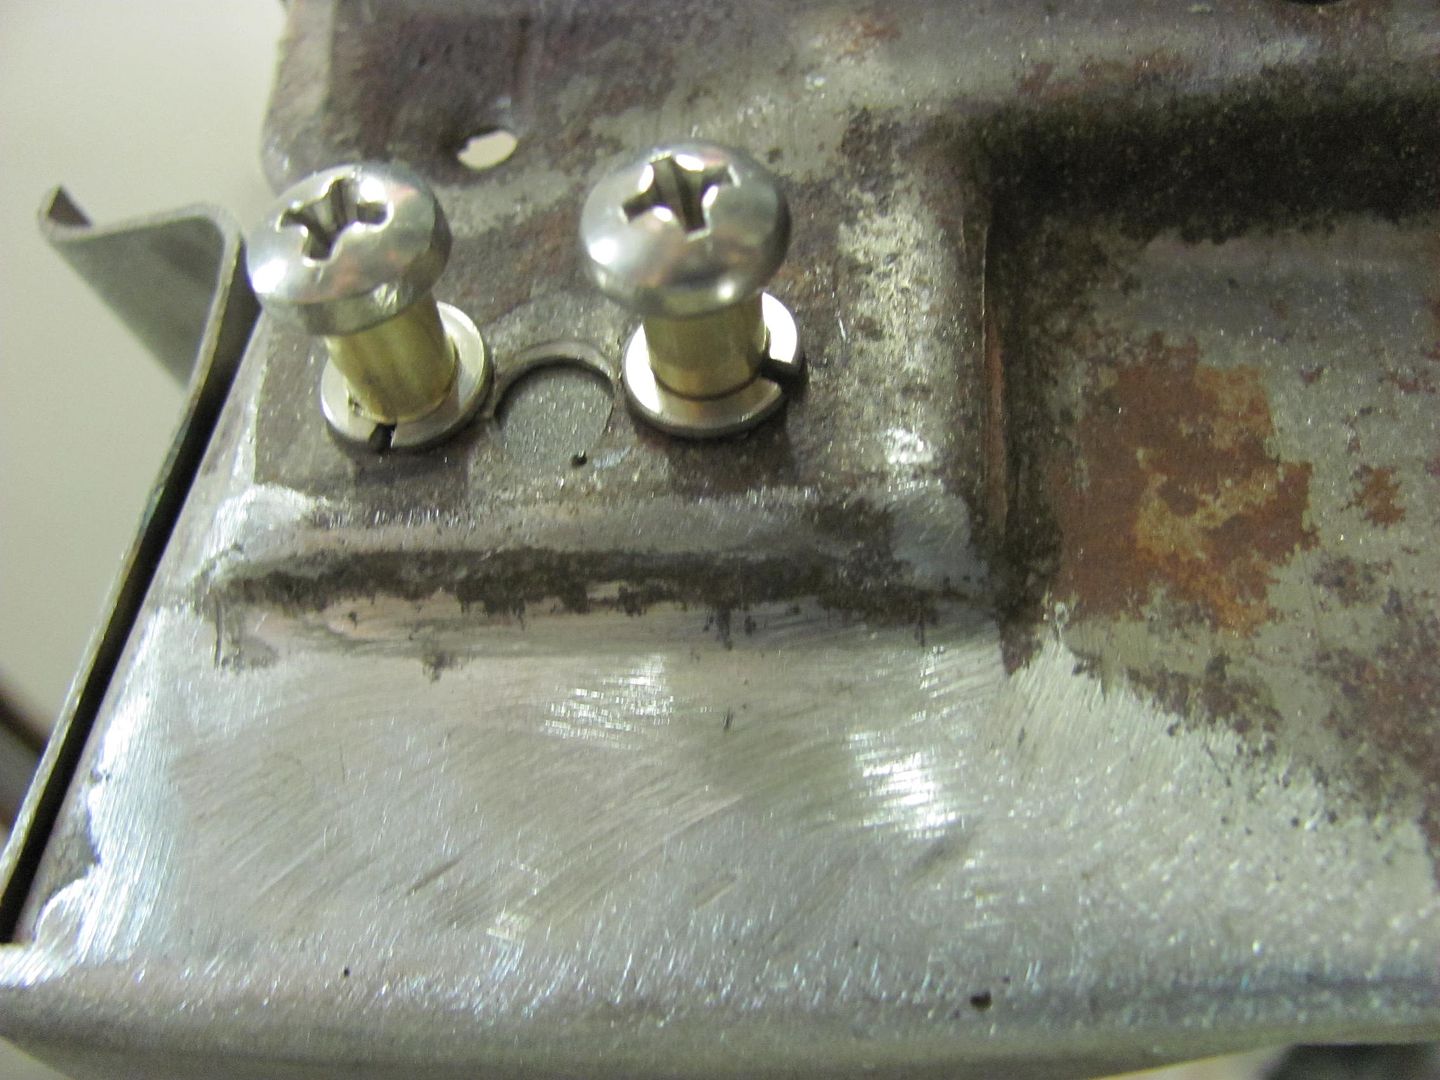 A dab of anti sieze is placed on the screw threads to insure they don't get welded in place from arcing across the threads.. Plug welded, and screws removed.  Lock washers removed and plug welds ground flush.... 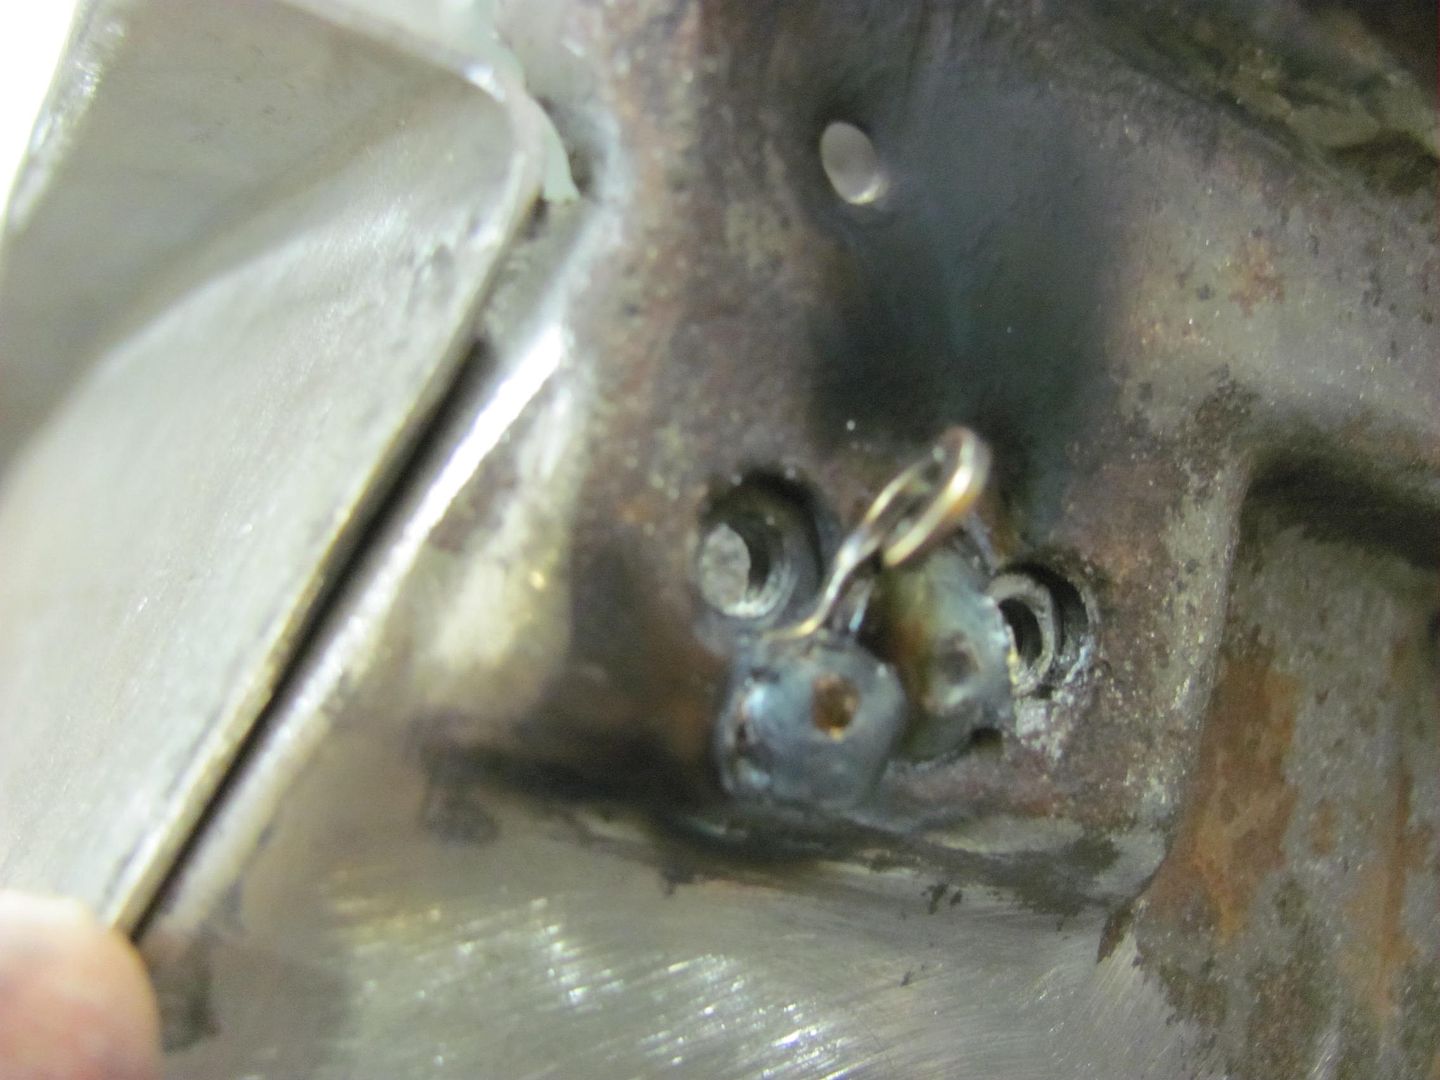  And now we can finish up the media blasting....  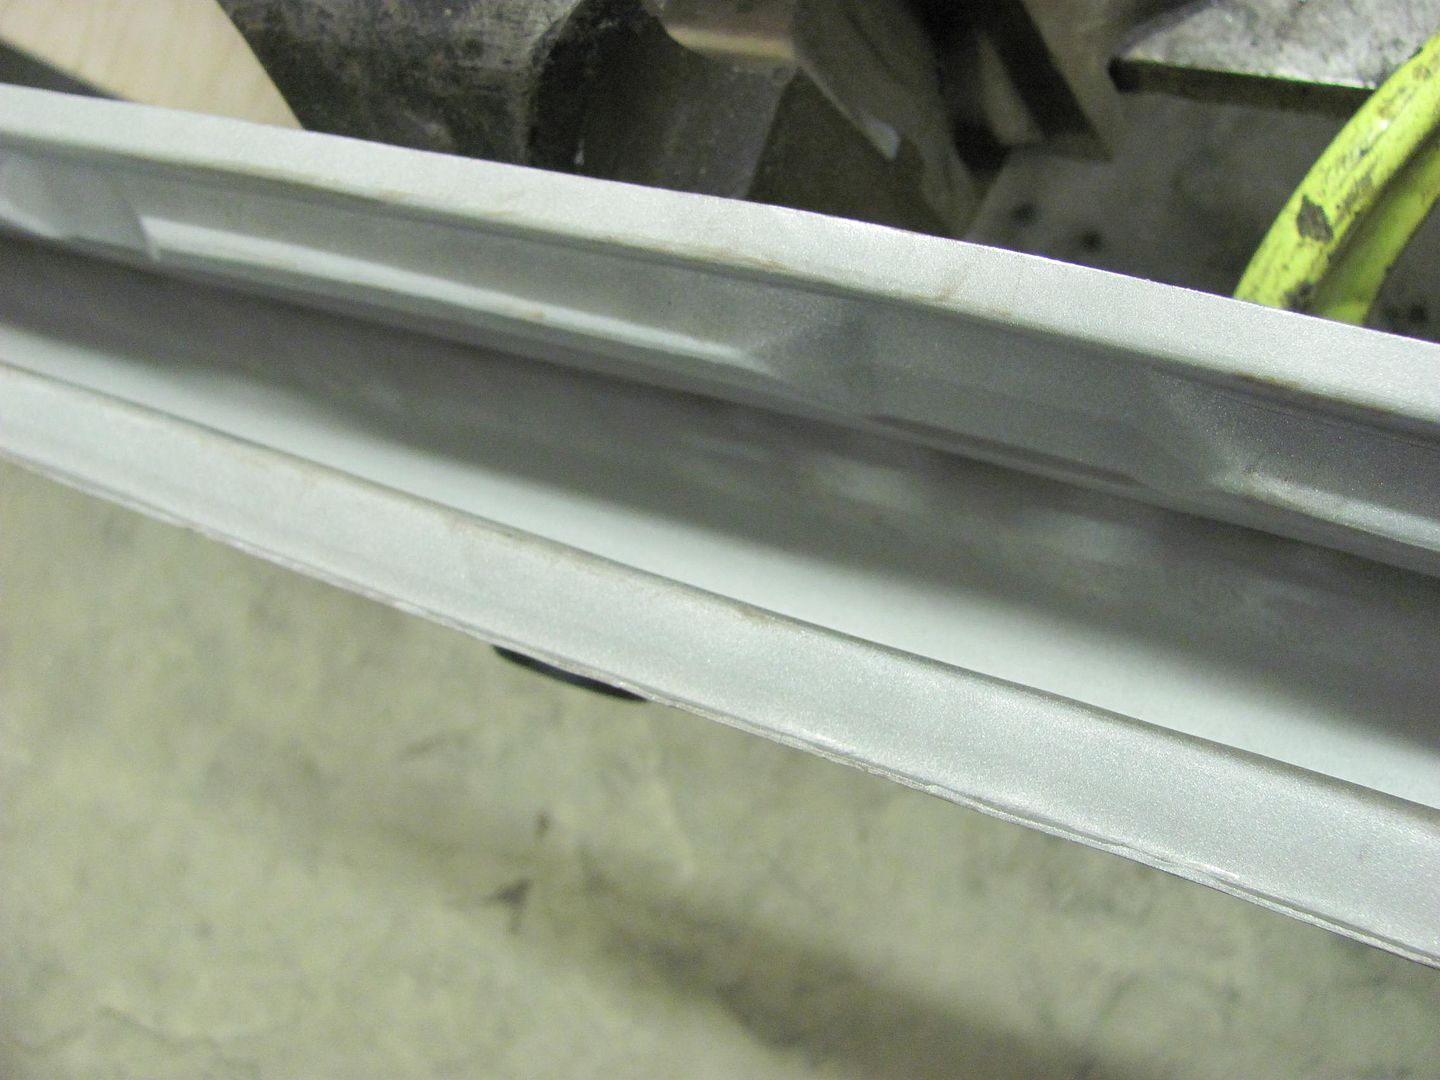
__________________
Robert |
|
|
|
|
01-05-2014, 08:34 PM
|
#103 |
|
Registered User
Join Date: May 2007
Location: Deale Md
Posts: 4,663
|
Re: 55 Wagon Progress
And if all looks good after your super micro inspection it's time for some primer.
__________________
James 63 GMC V6 4speed carryall 65 chevy swb bbw V8 auto 68 K20 327/4 speed, buddy buckets 2002 GMC CC Dually Duramax 64 GMC lwb 3/4 V6 4speed SOLD 66 GMC swb bbw buddy buckets SOLD IG duallyjams The only thing that stays the same is constant change! |
|
|
|
|
01-05-2014, 09:08 PM
|
#104 |
|
Registered User
Join Date: Mar 2008
Location: Waukee, Iowa
Posts: 1,608
|
Re: 55 Wagon Progress
Can you post more details on the cutoff wheels you use? Brand, where to get them, how much longer they last than a "standard" Norton one? Thanks!
__________________
build threads: 86 Suburban 88 Jeep 6.0 swap 49 Chevy truck 54 Chevy wagon 86 Suburban lowered 4/6 54 Chevy wagon 49 Chevy/s10 mix 88 Jeep Wrangler rockcrawler |
|
|
|
|
01-05-2014, 10:14 PM
|
#105 | ||
|
Registered User
Join Date: Jan 2013
Location: Leonardtown, MD
Posts: 1,633
|
Re: 55 Wagon Progress
Quote:
You got it! All ready for some epoxy inside! Quote:
I think if you find ones rated for stainless steel, you'll find them to last longer and to put much less of a brown cloud in the air for you to breathe. I use these by Sait: 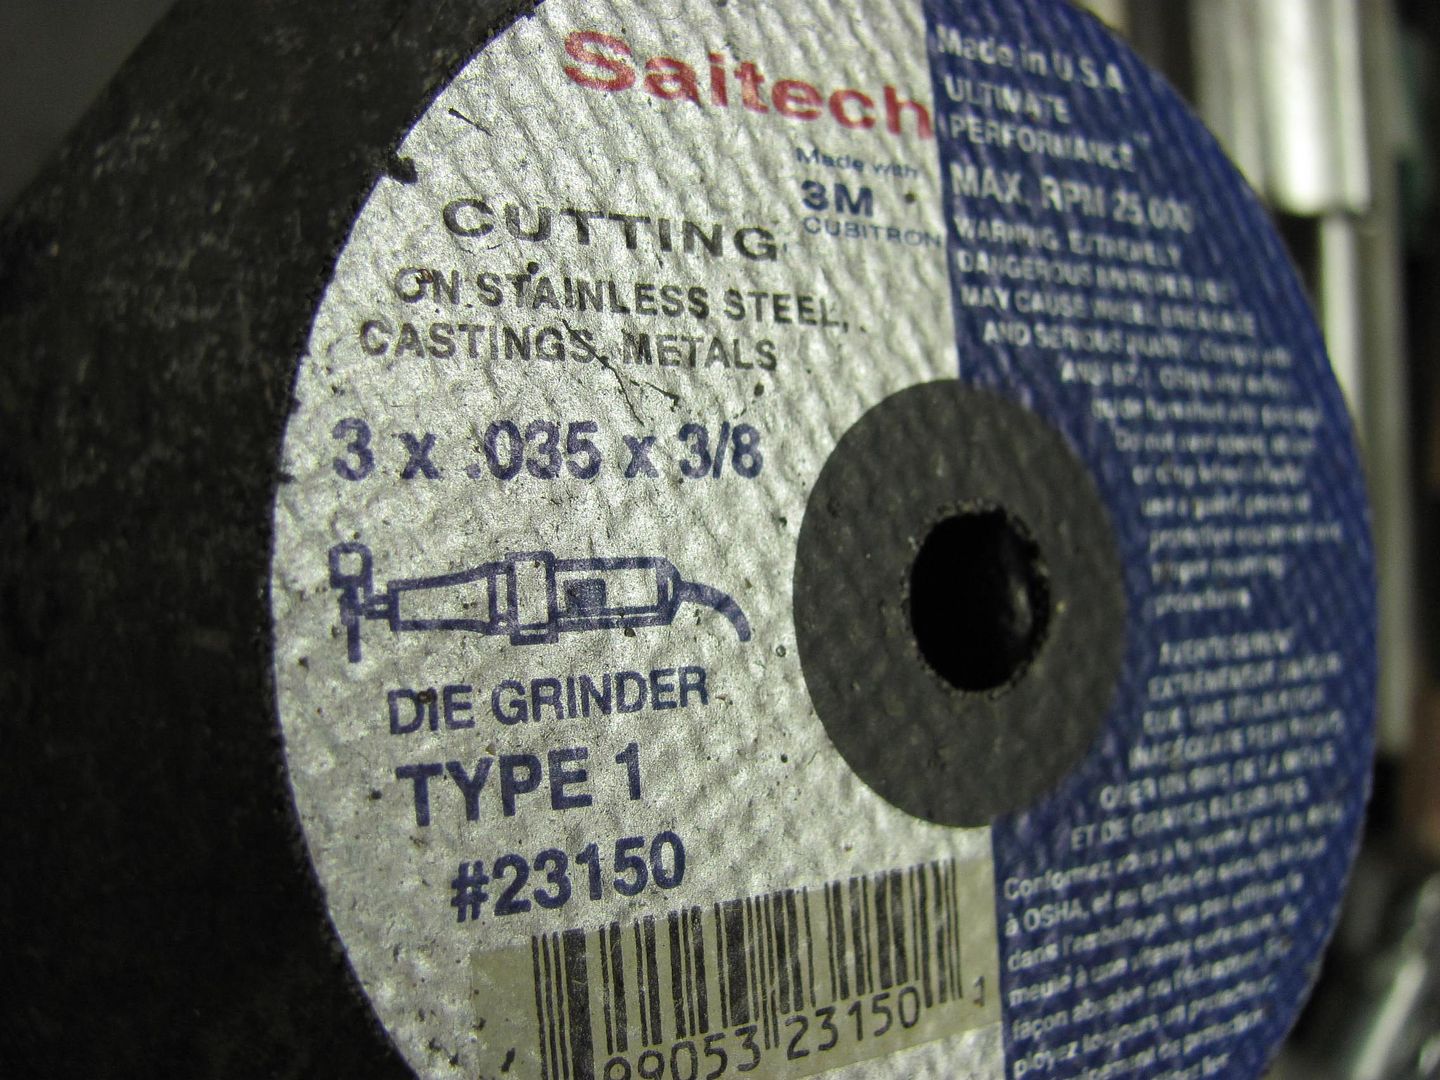 I get them from my local welding supply, Three Mules Welding Supply. Your local welding supply or even online sources should be able to help out. Unsure of the time frame on how long they last, but I've sure slowed down in changing them out since using the stainless rated wheels.
__________________
Robert |
||
|
|
|
|
01-07-2014, 11:20 AM
|
#106 |
|
Registered User
Join Date: Apr 2003
Location: Indep, MO
Posts: 5,893
|
Re: 55 Wagon Progress
3M Green Corps 4" discs are the BOMB! NOT cheap, but they last like iron. Unless your dumb ass drops them off the bench onto the floor. I use 'em on my air cutoff wheel. I got some pretty good ones at .035 thk for the 4 1/2" electric, name escapes me.
Beeeutiful work, as always.
__________________
Boppa's Old Yeller Truck Build, Old Yeller's New Heart! Project Buzz Bomb Flyin' Low! |
|
|
|
|
01-08-2014, 11:49 PM
|
#107 |
|
Registered User
Join Date: Jan 2013
Location: Leonardtown, MD
Posts: 1,633
|
Re: 55 Wagon Progress
Yeah, I think we all have done the drop, crack, cuss!
Had a couple hours to spend in the shop this evening, so I decided to mark out the roof for re-repairing. 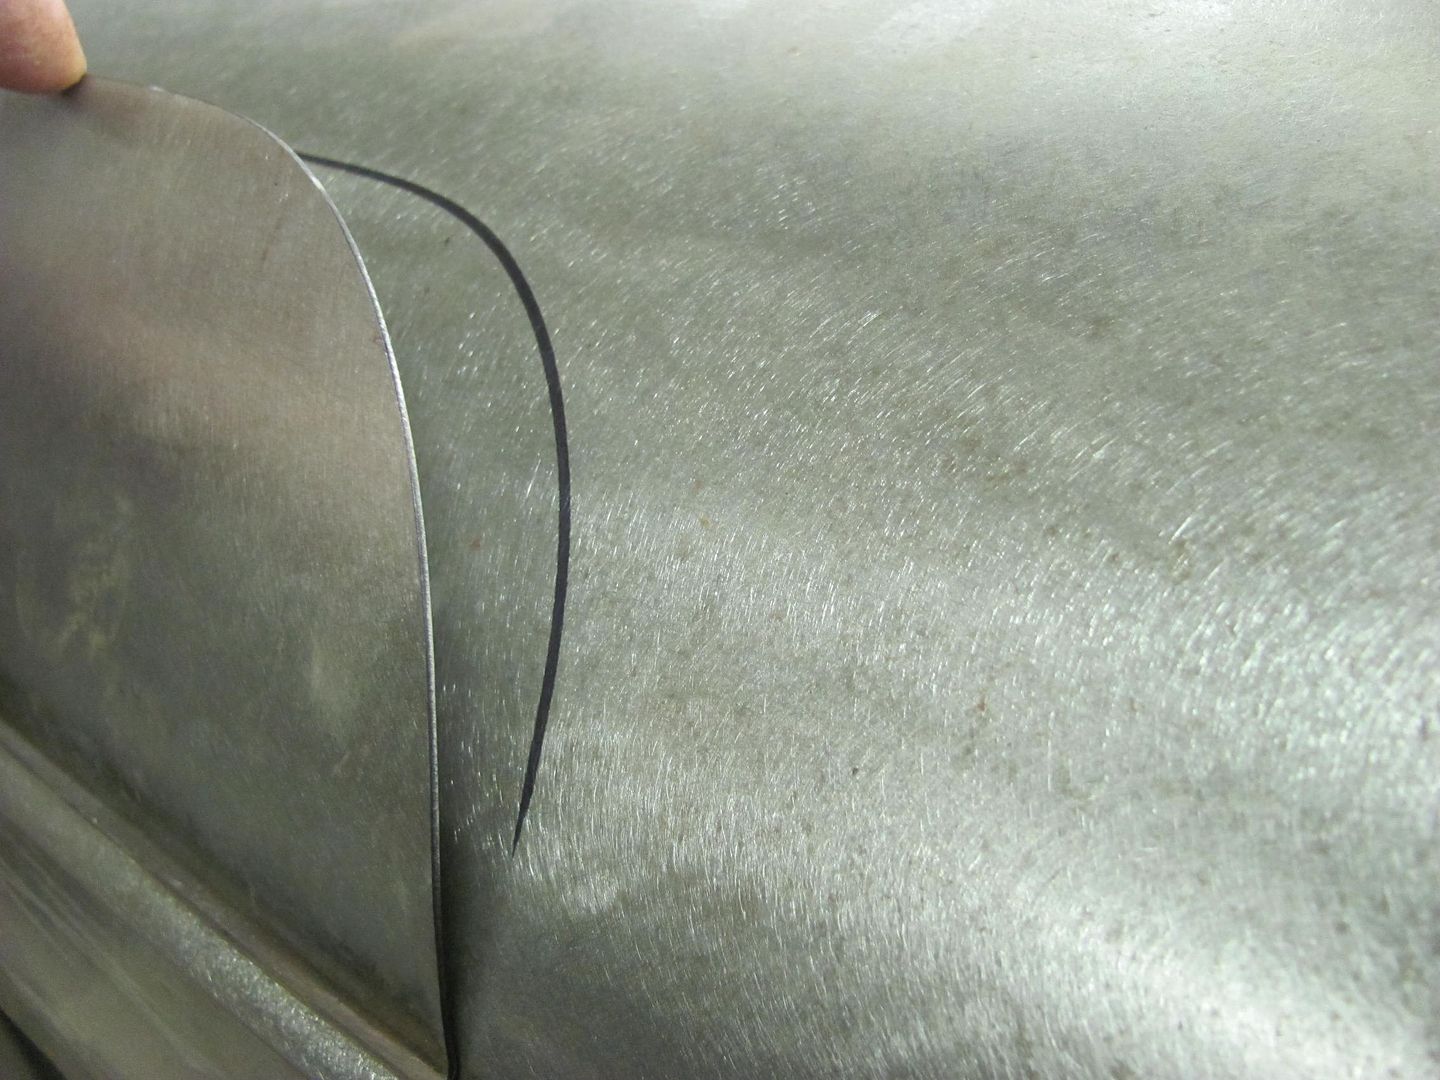 Then another line was dropped down about 1/4" to be used for the "rough cut". A cutoff wheel was used and then trimmed with the snips. The lower section was trimmed about 1/2" above the drip rail.. 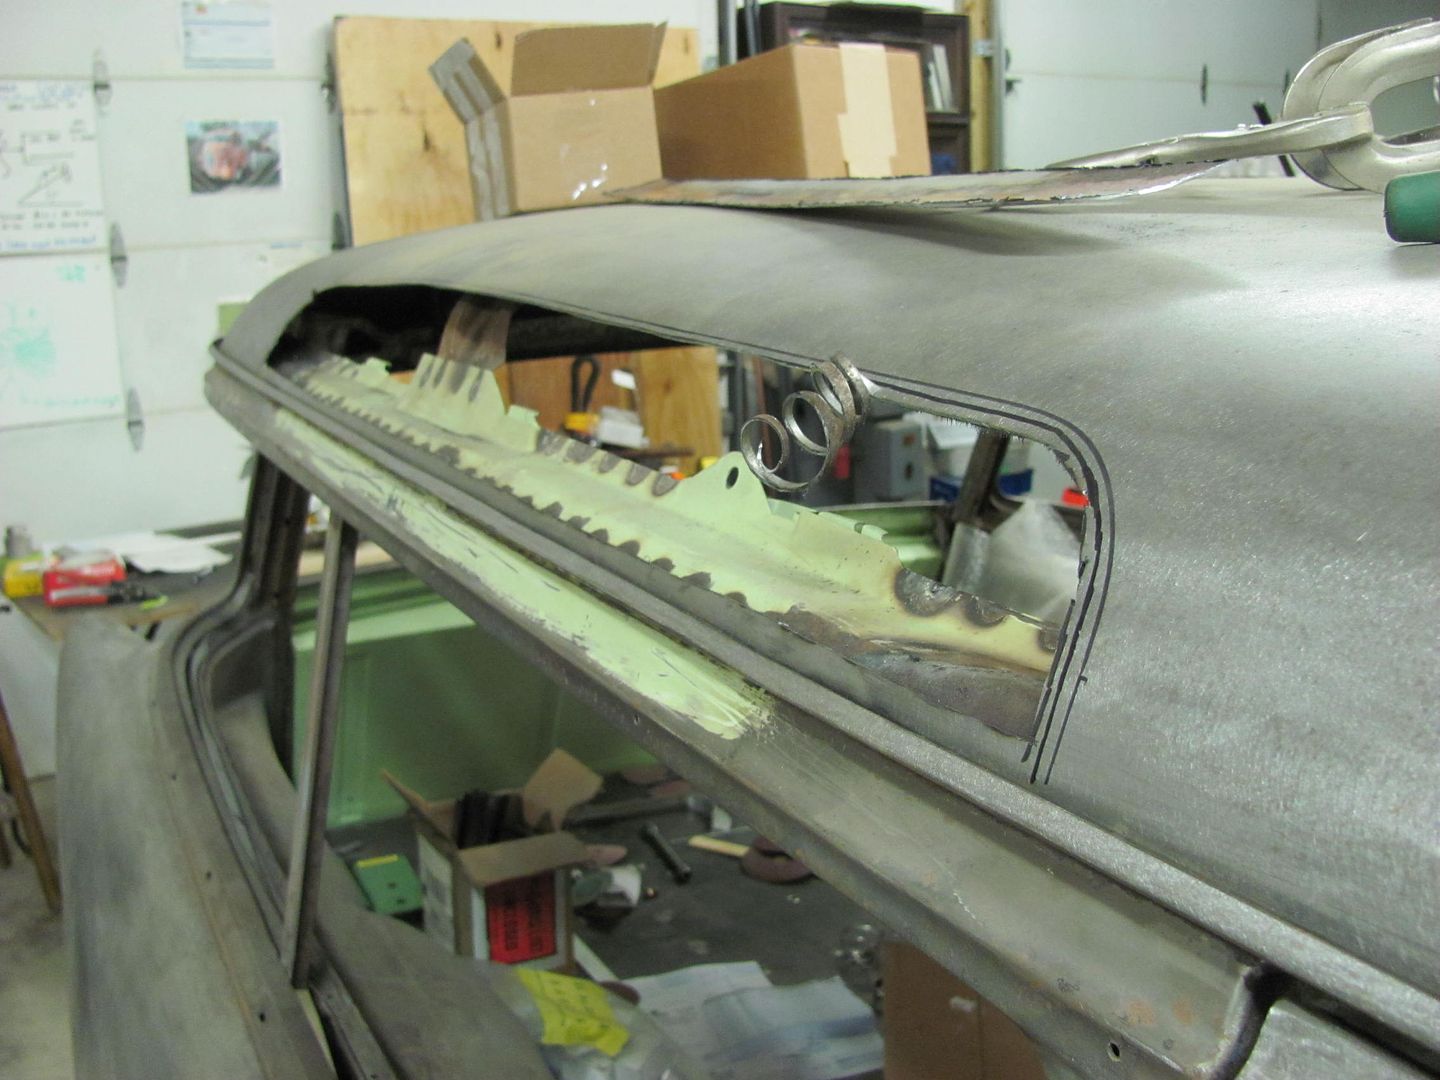 To start, a section was marked off just wider than my sheet metal pliers. Then the spot welds, which were visible from the top, were drilled. A cutoff wheel was used to grind through the end(s) of the section being removed. Then the sheet metal pliers used to rock the panel back and forth to break the spot welds loose. 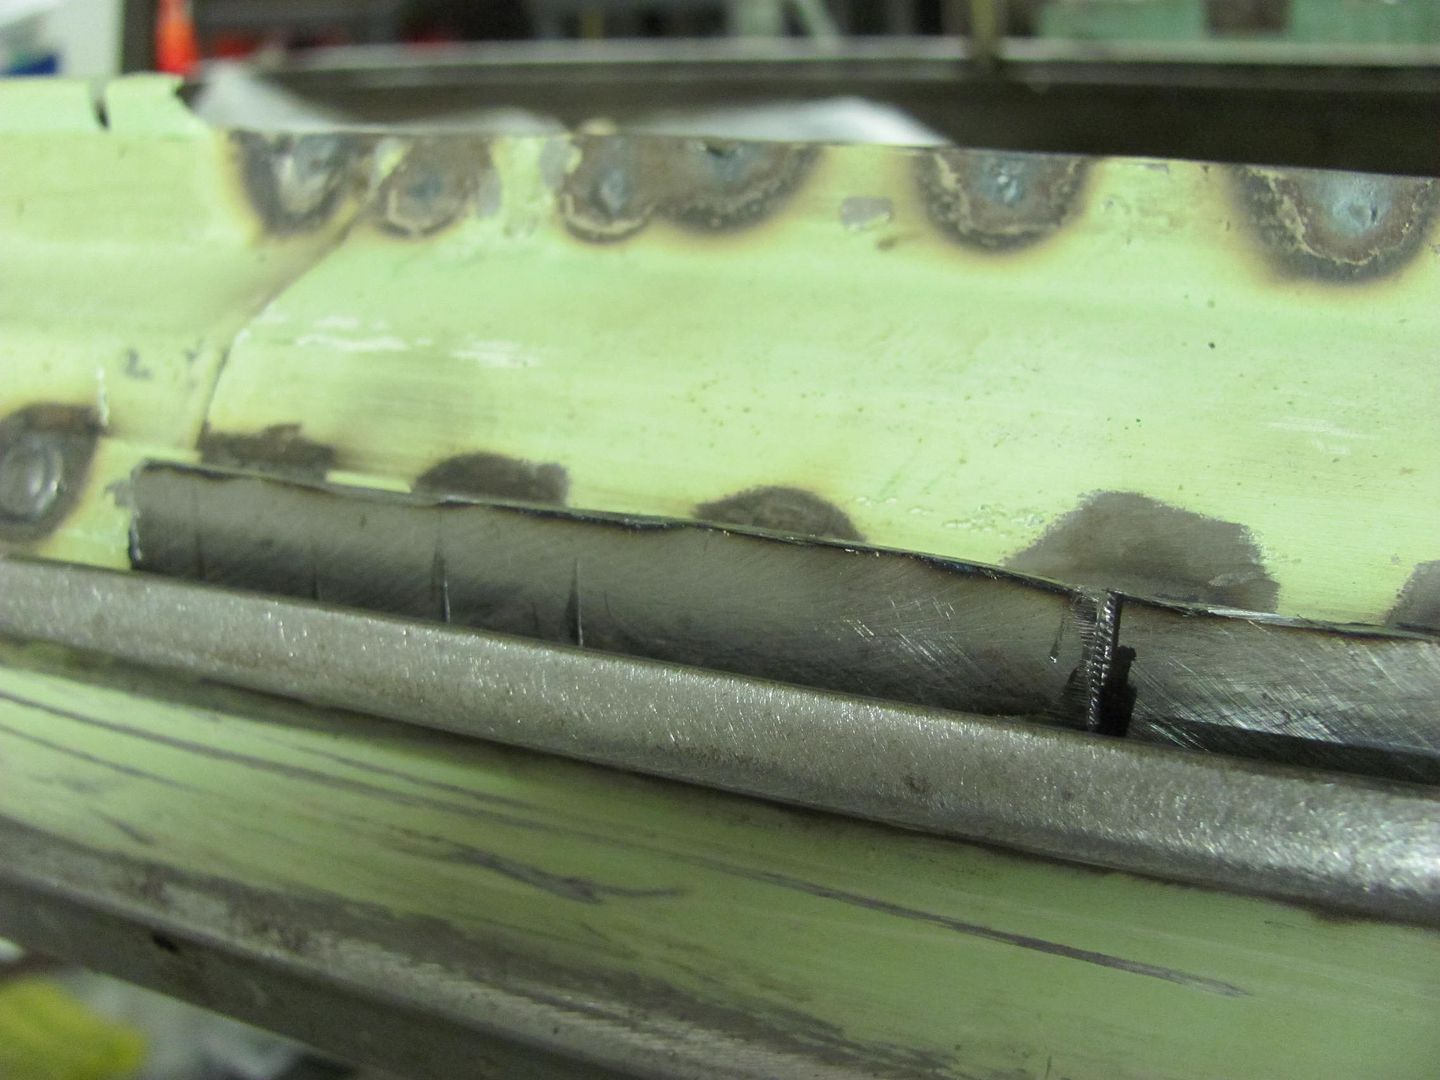 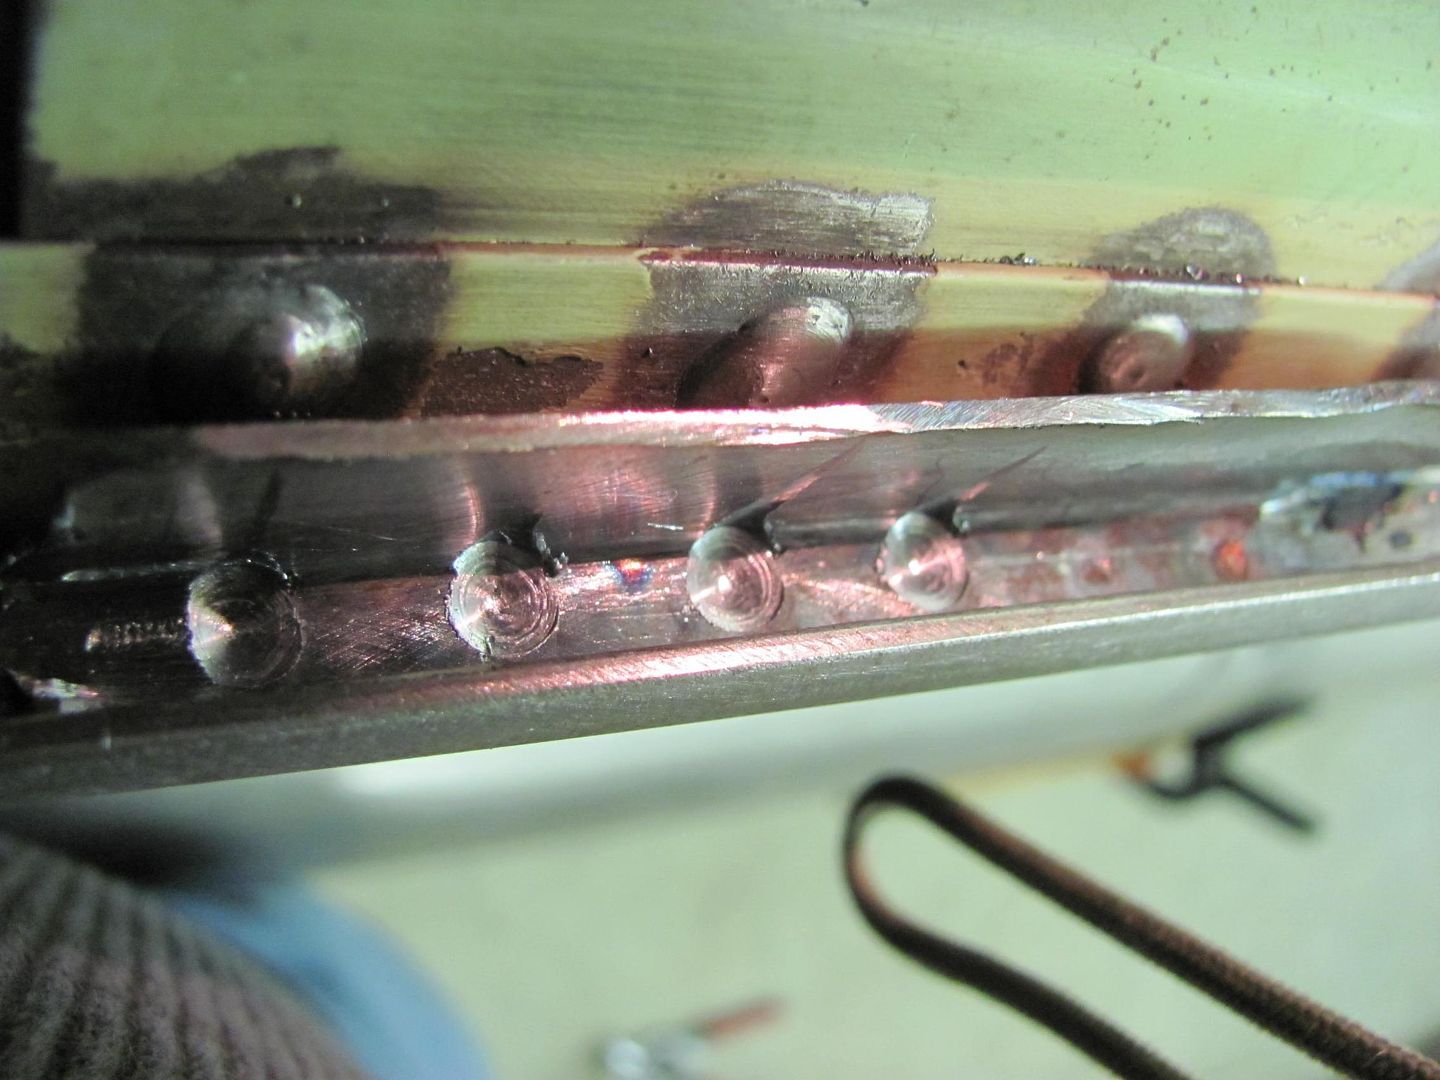 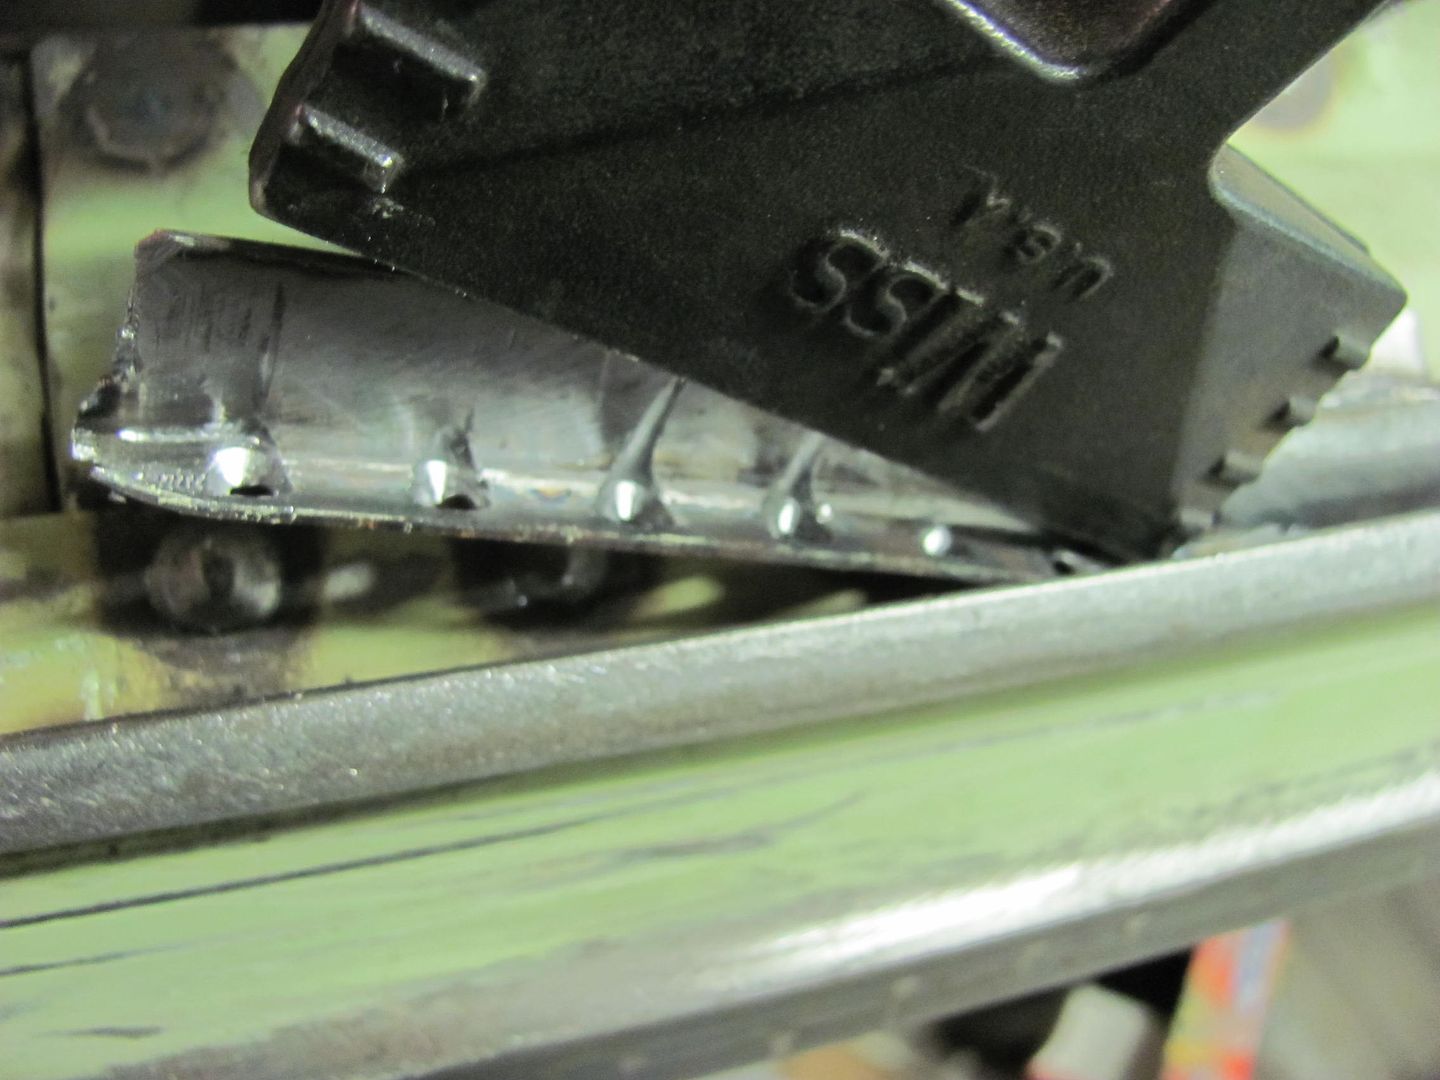 Got about half of it removed, we'll save the rest for later so I can get some primer on the inside of some of the lift gate parts and the roof skin patch. 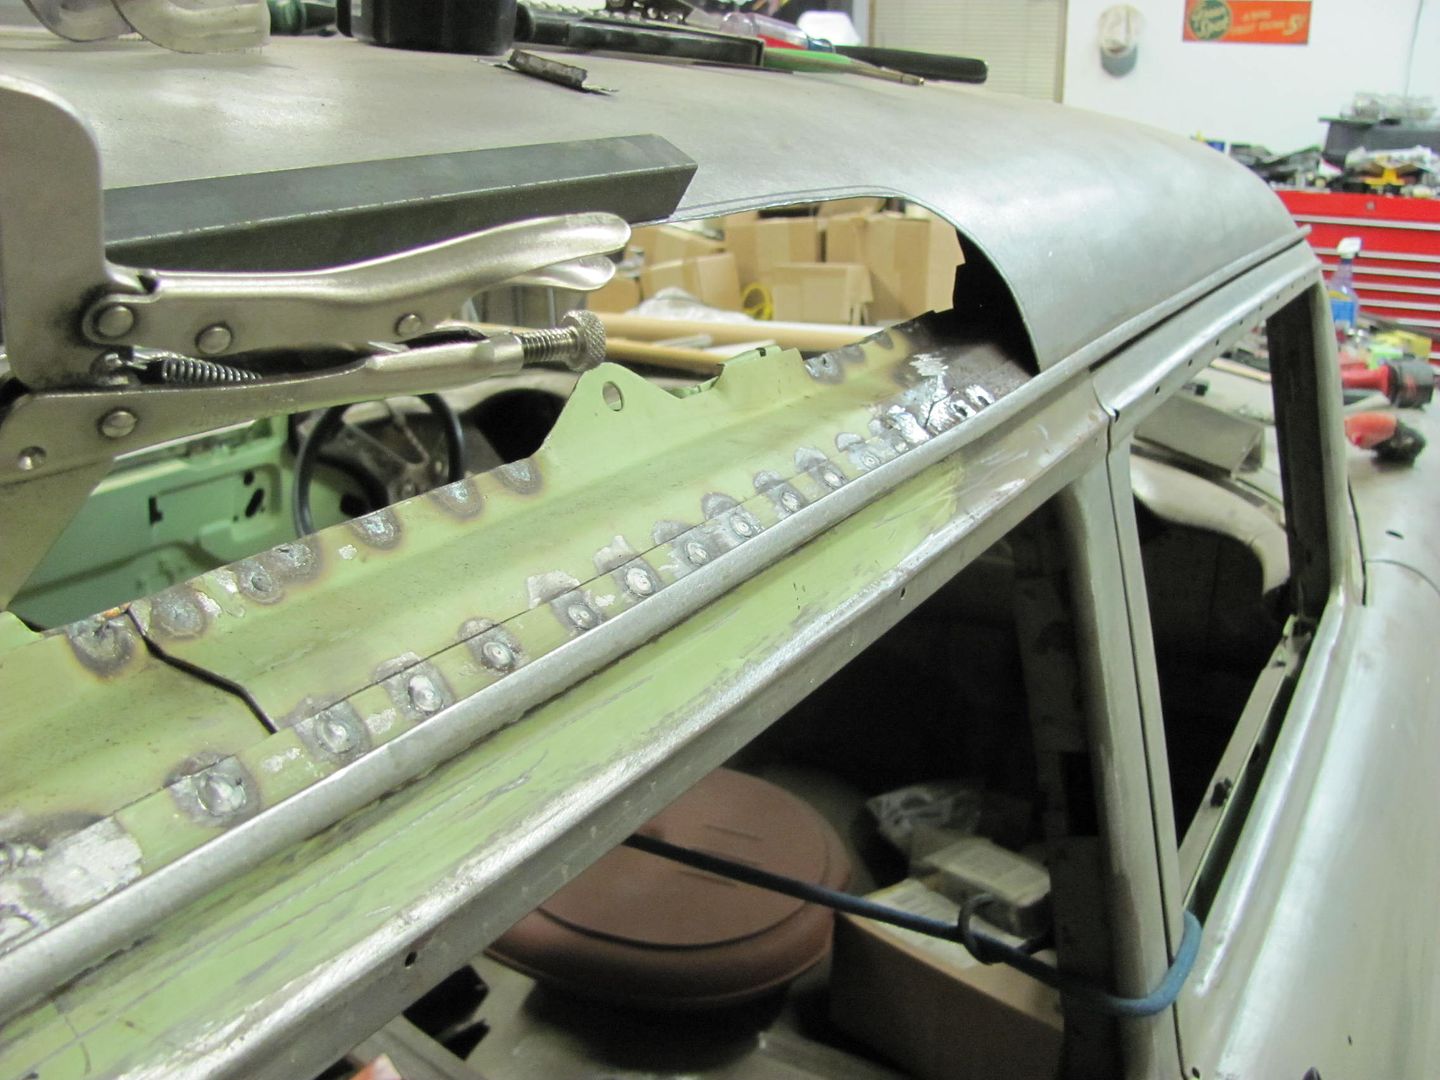 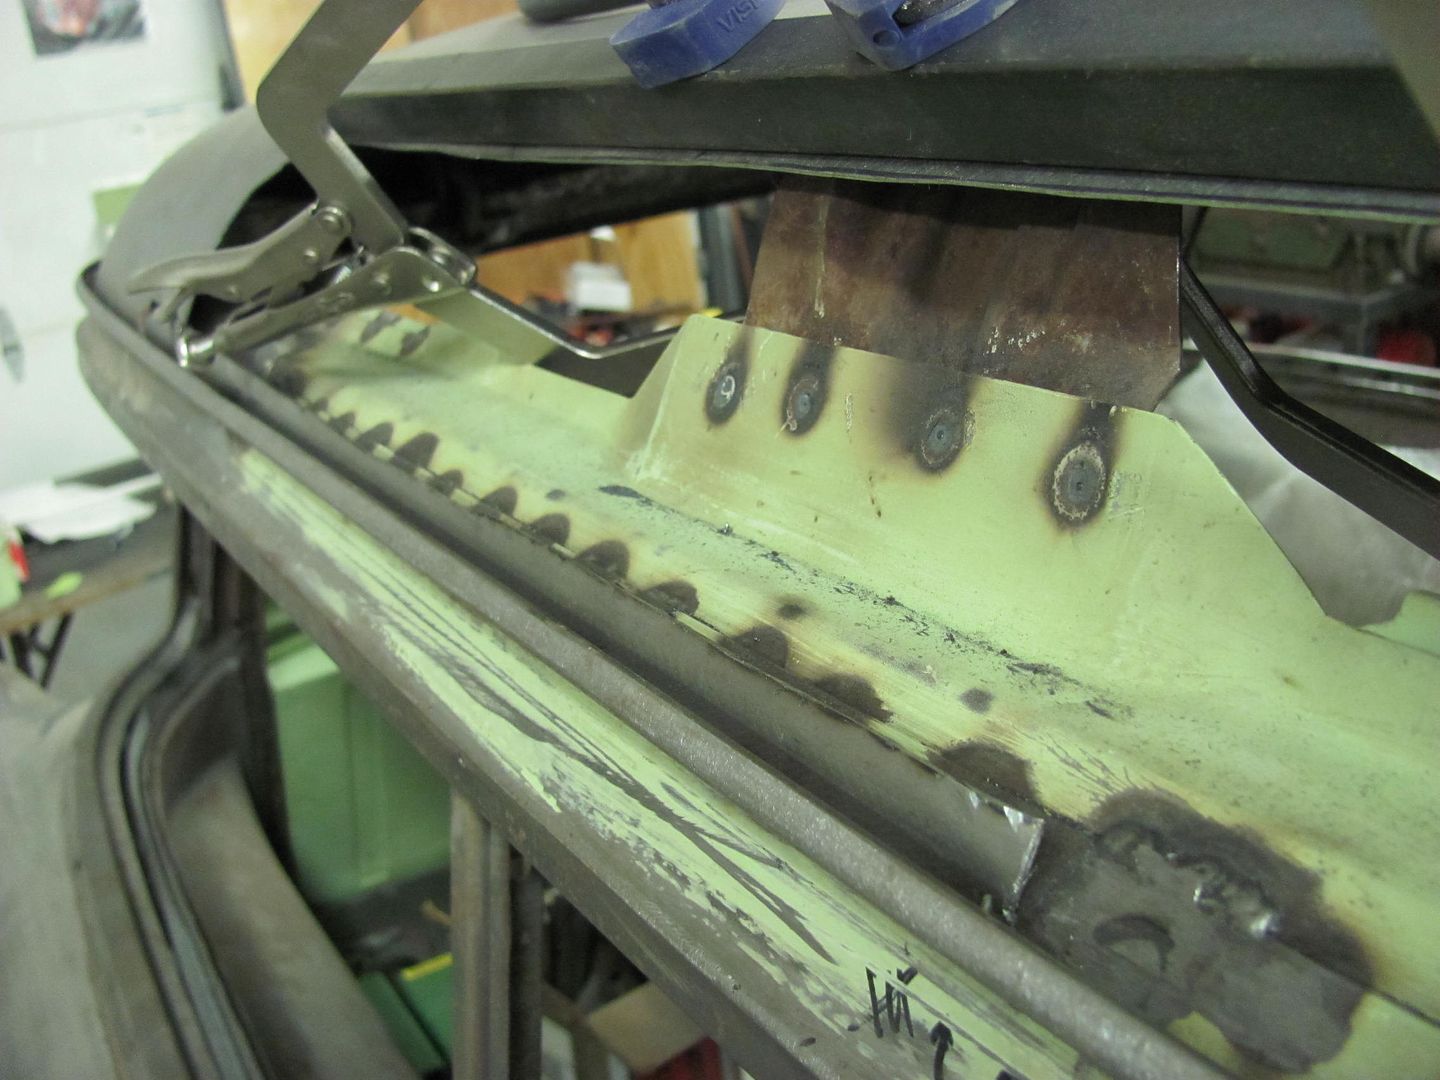  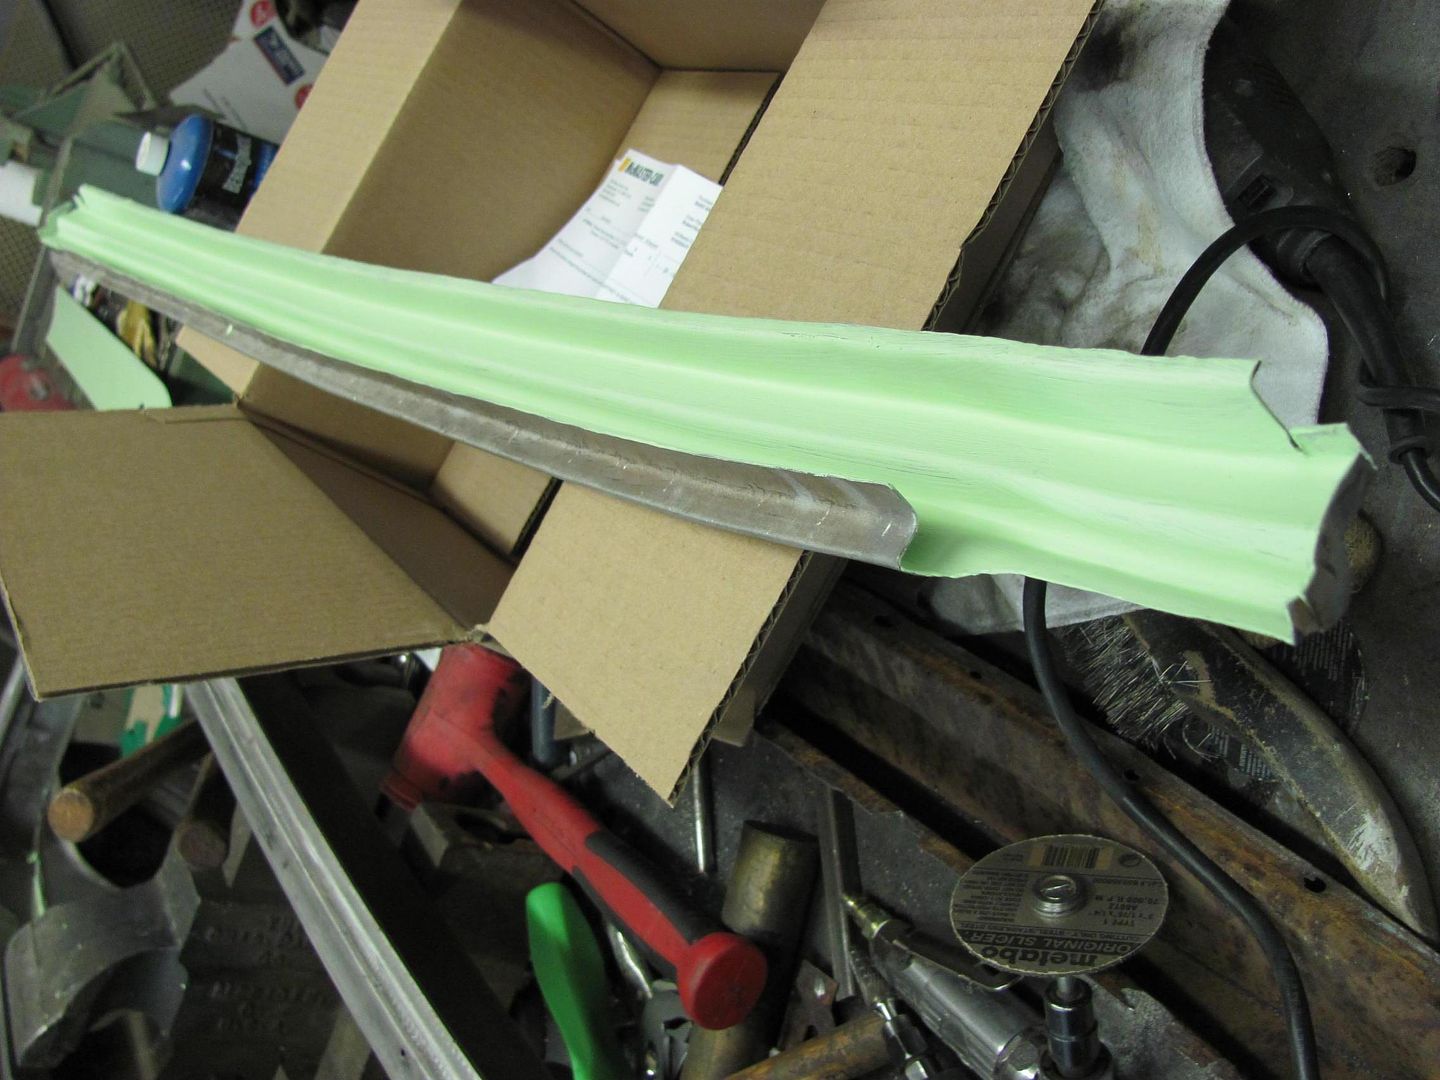 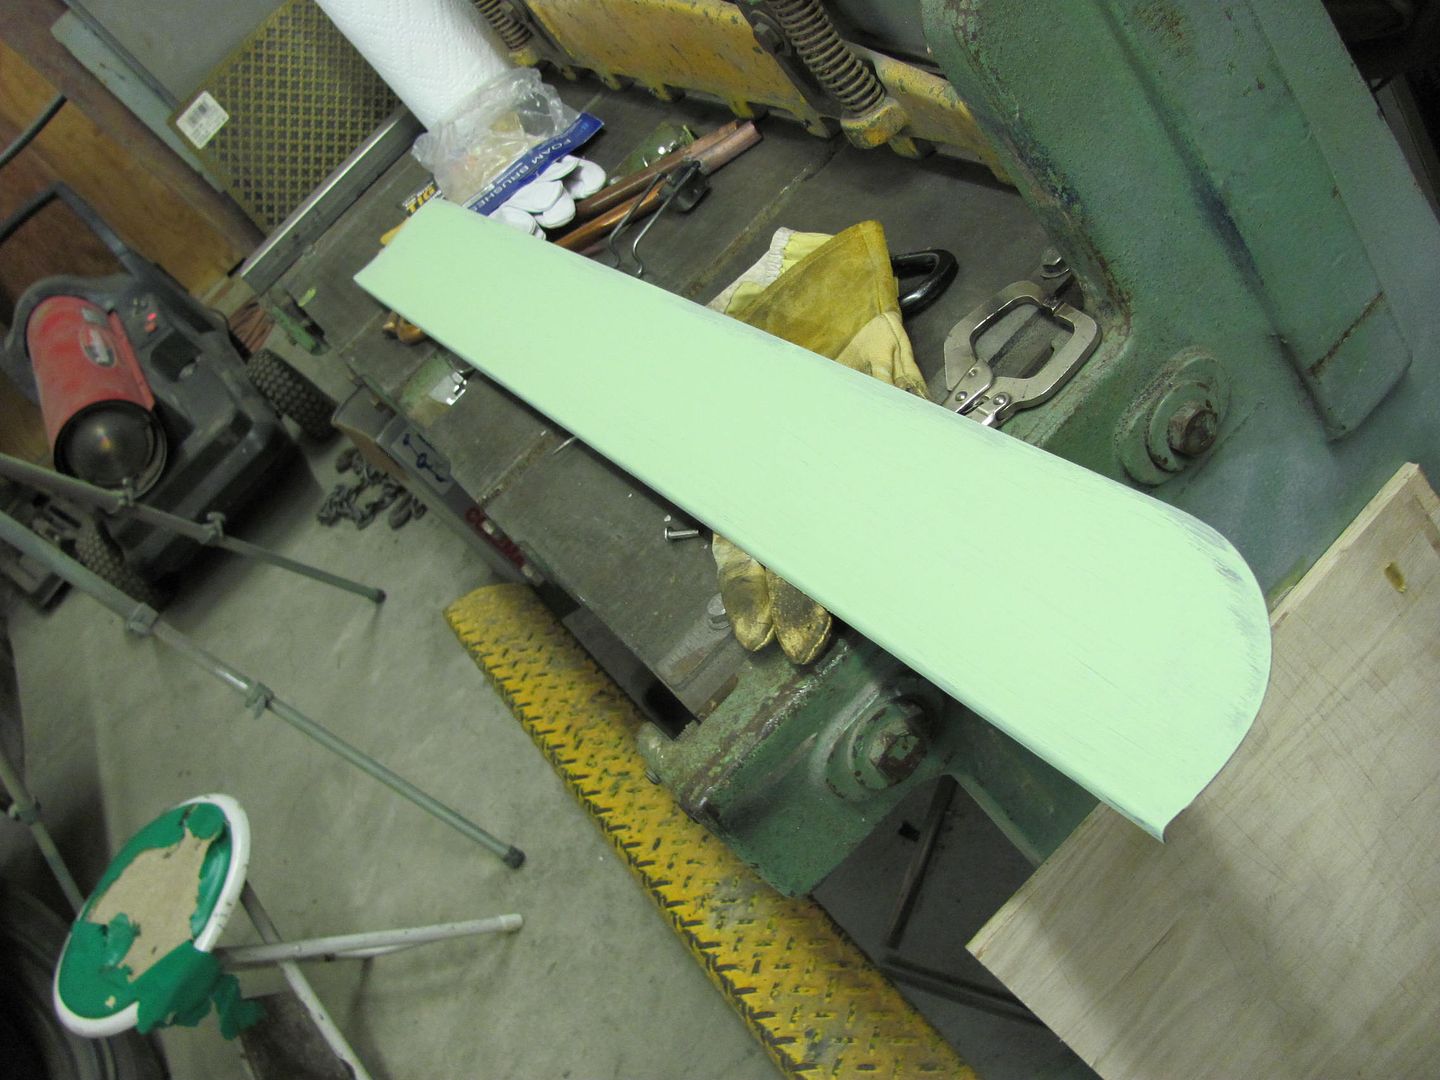
__________________
Robert |
|
|
|
|
01-11-2014, 06:25 PM
|
#108 |
|
Registered User
Join Date: Jan 2013
Location: Leonardtown, MD
Posts: 1,633
|
Re: 55 Wagon Progress
Continuing with the dissecting of the roof.....
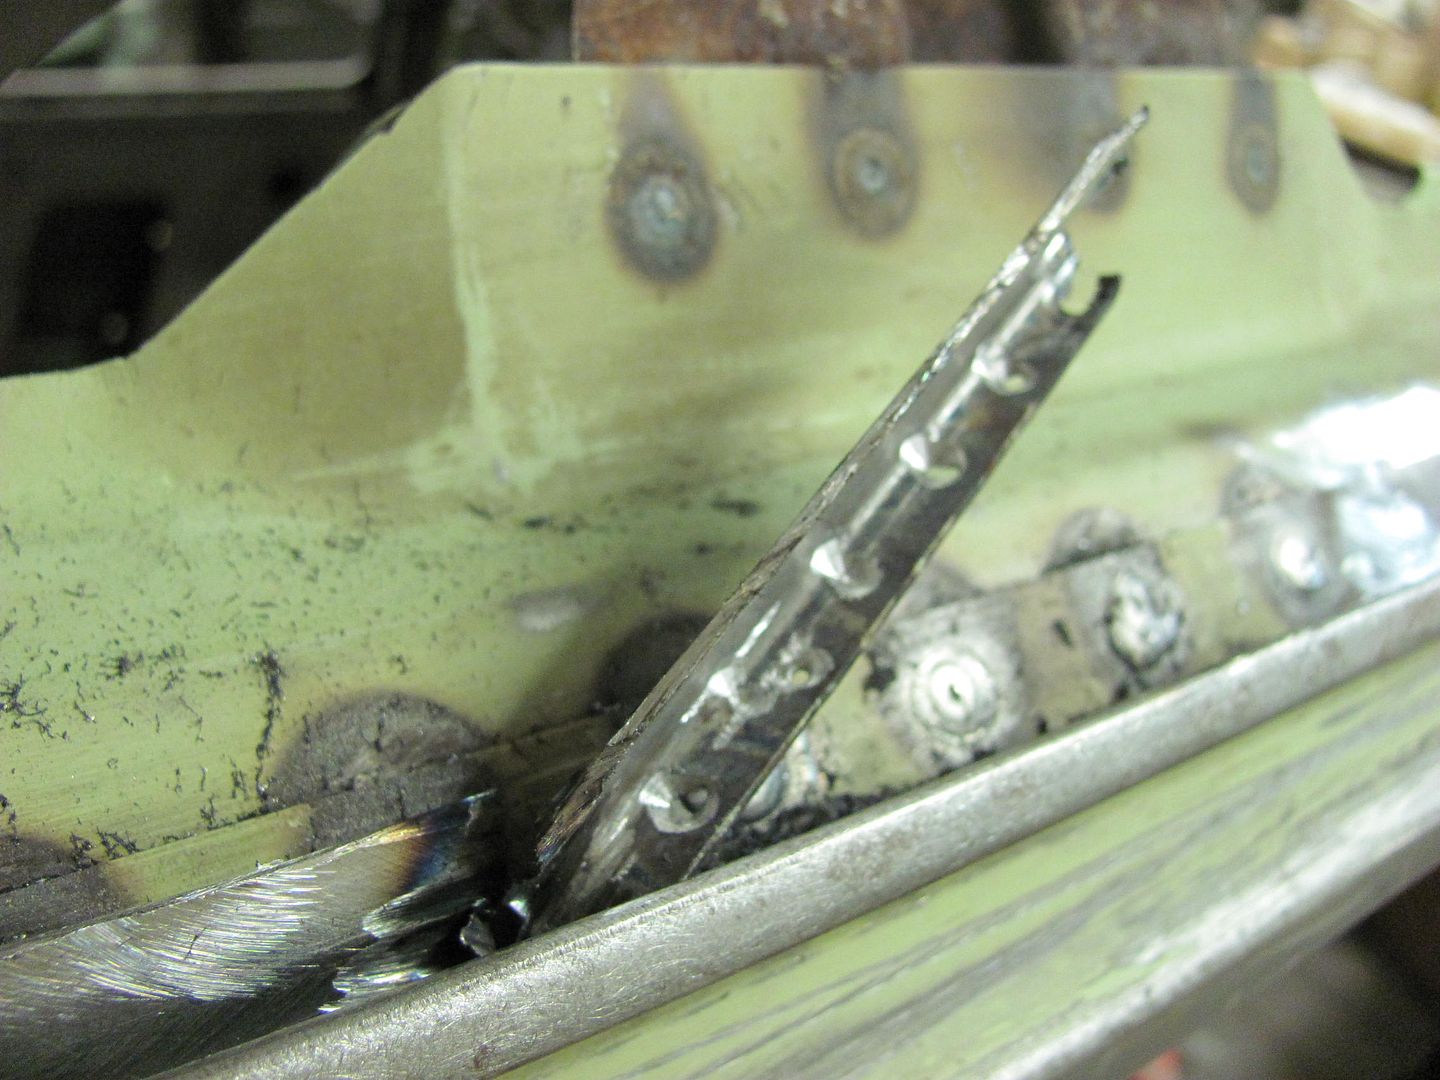 When I got into the section with the old roof, it was difficult to see the spot welds (for drilling) down inside the drip rail. The underside was more accommodating, so the face of the drip rail was marked with the sharpie to use as a reference while drilling... 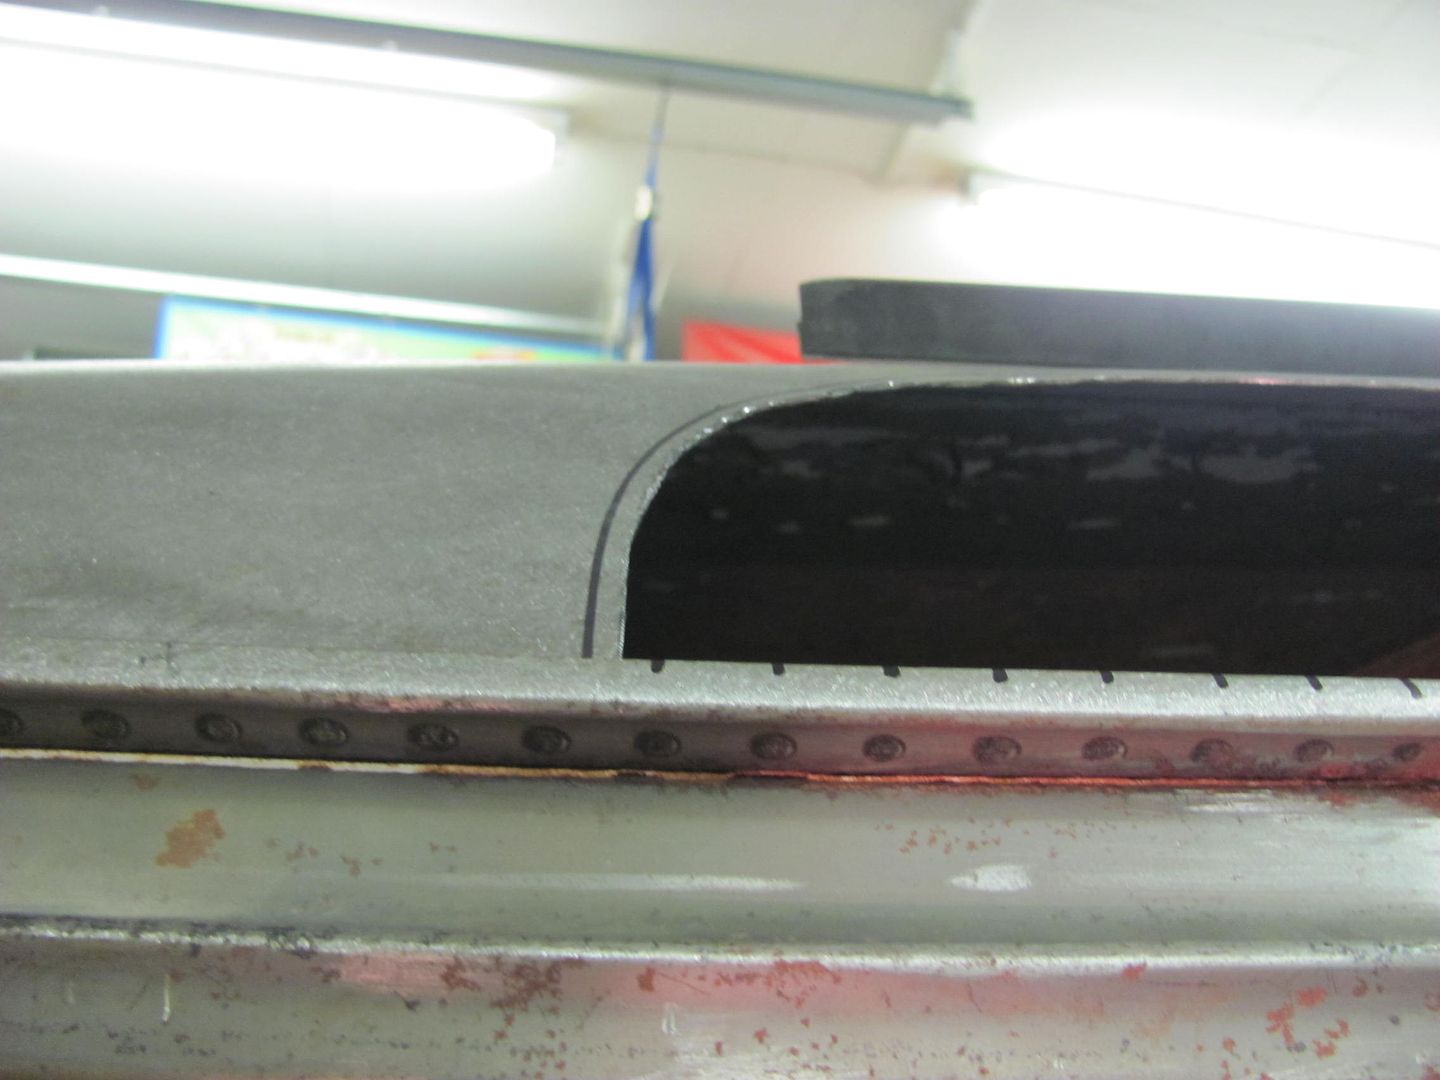 The lower corners of the opening were trimmed to size so that the roof patch could be clamped down into the drip rail. This will help to get more accurate markings on the roof skin for trimming the rest of the opening. 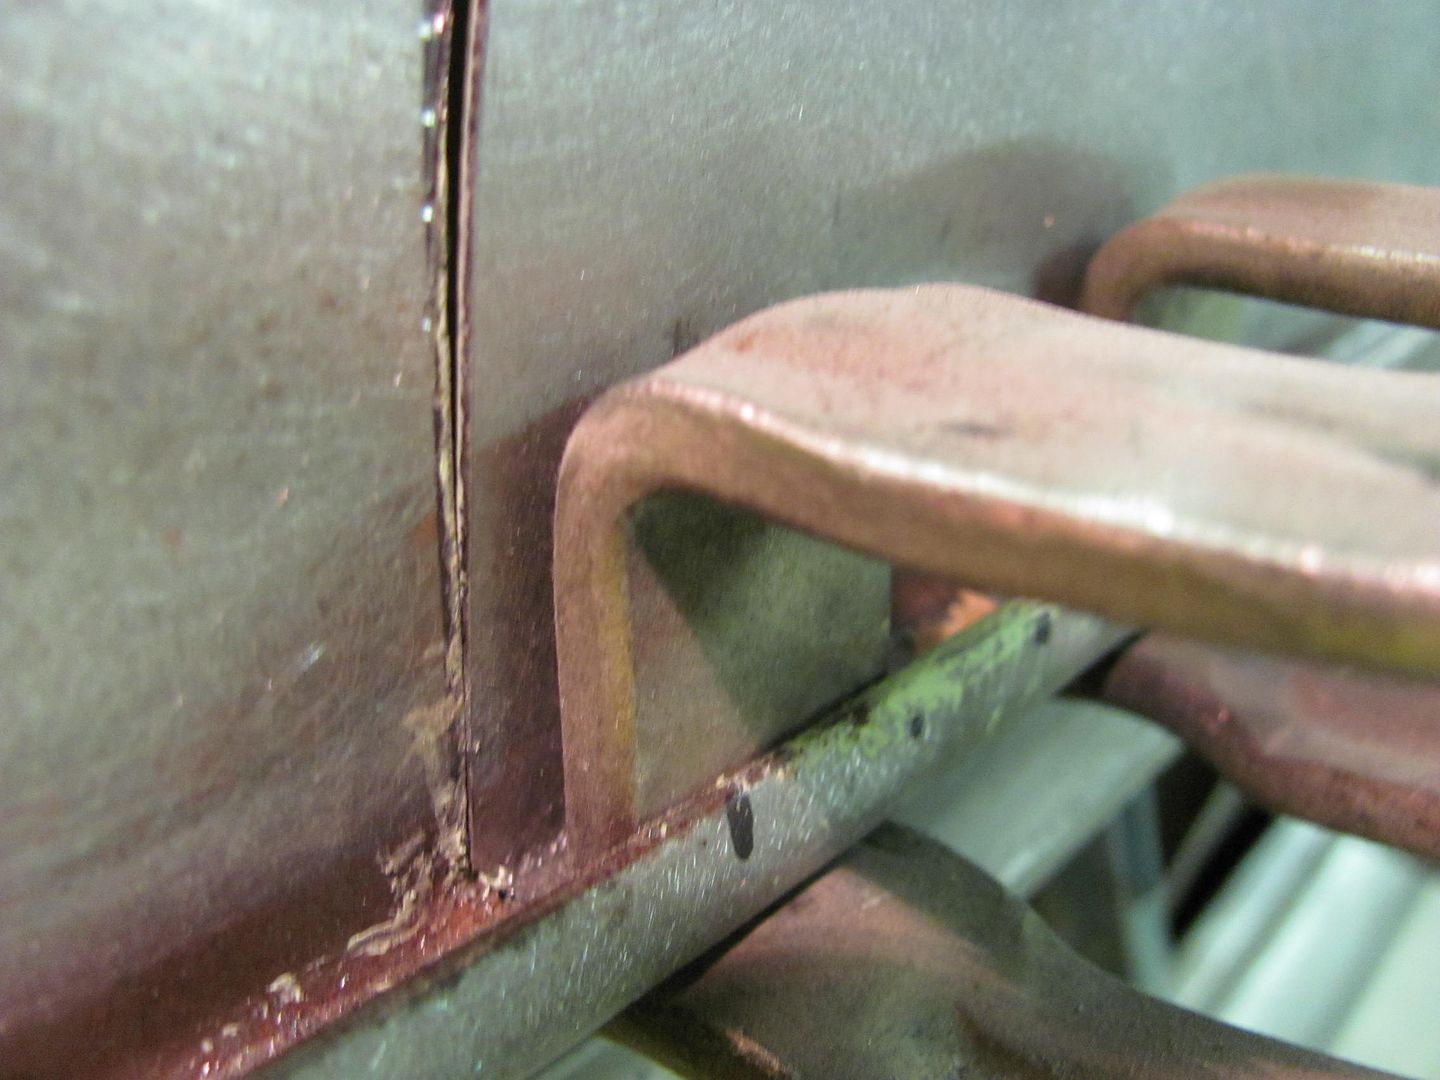  C-Clamp vise grips added to secure the overlapped panels for marking, then a straightedge used to read the crown of the roof to insure there were no dips or puckers along the top of the joint.... 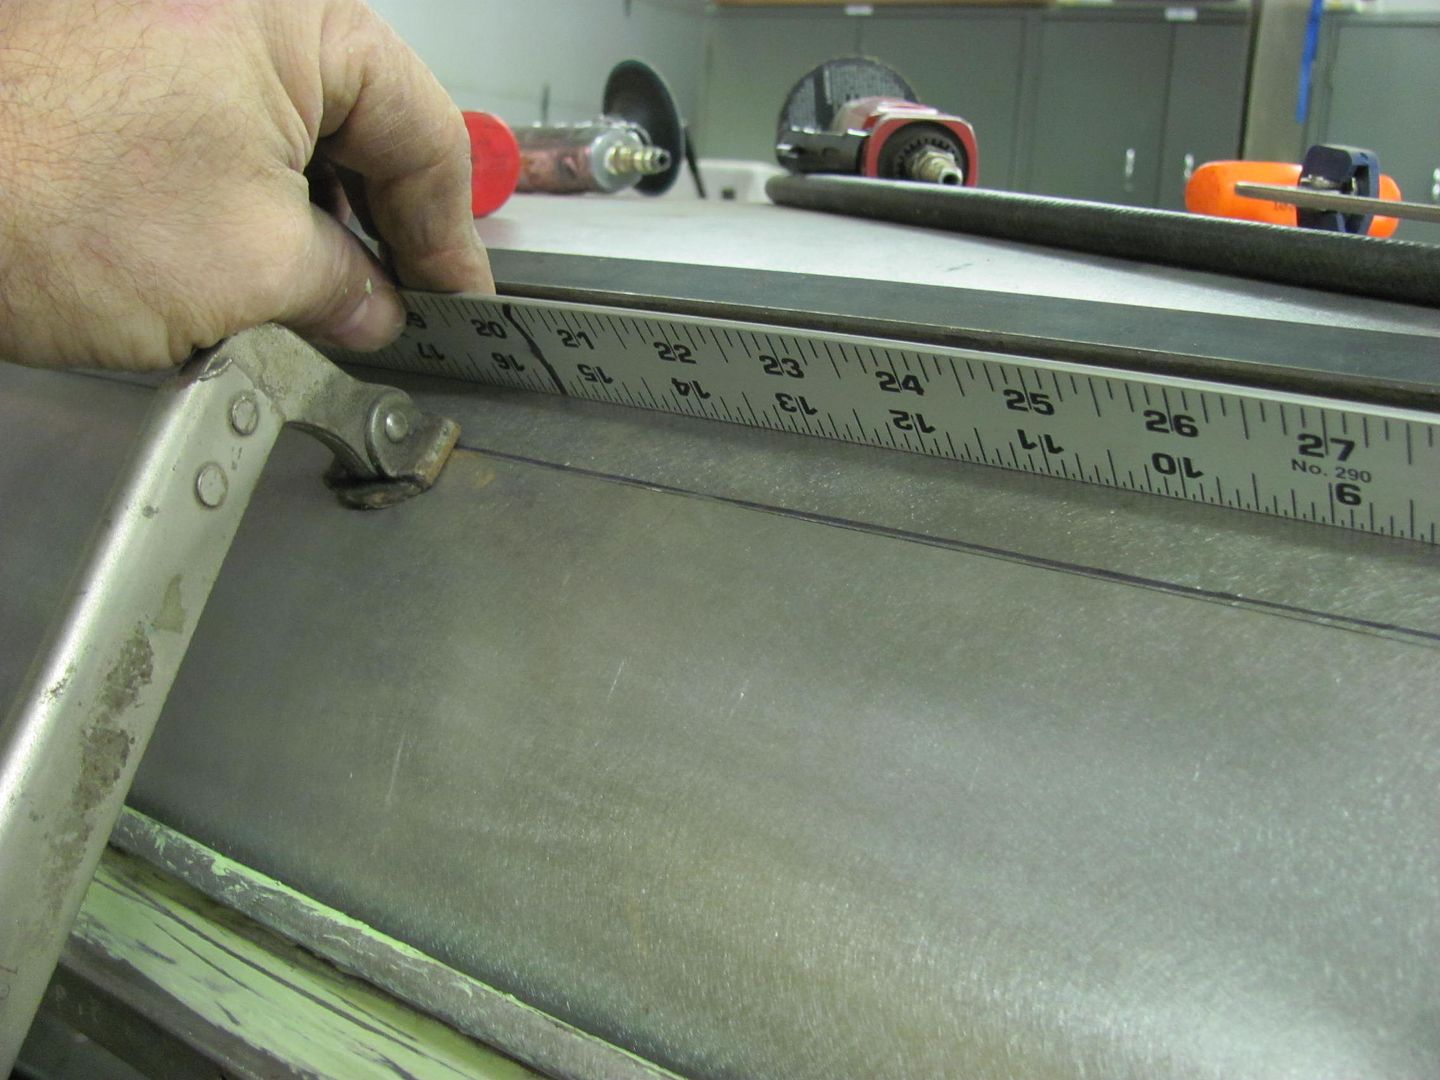 My favorite scribe, a local auction purchase... 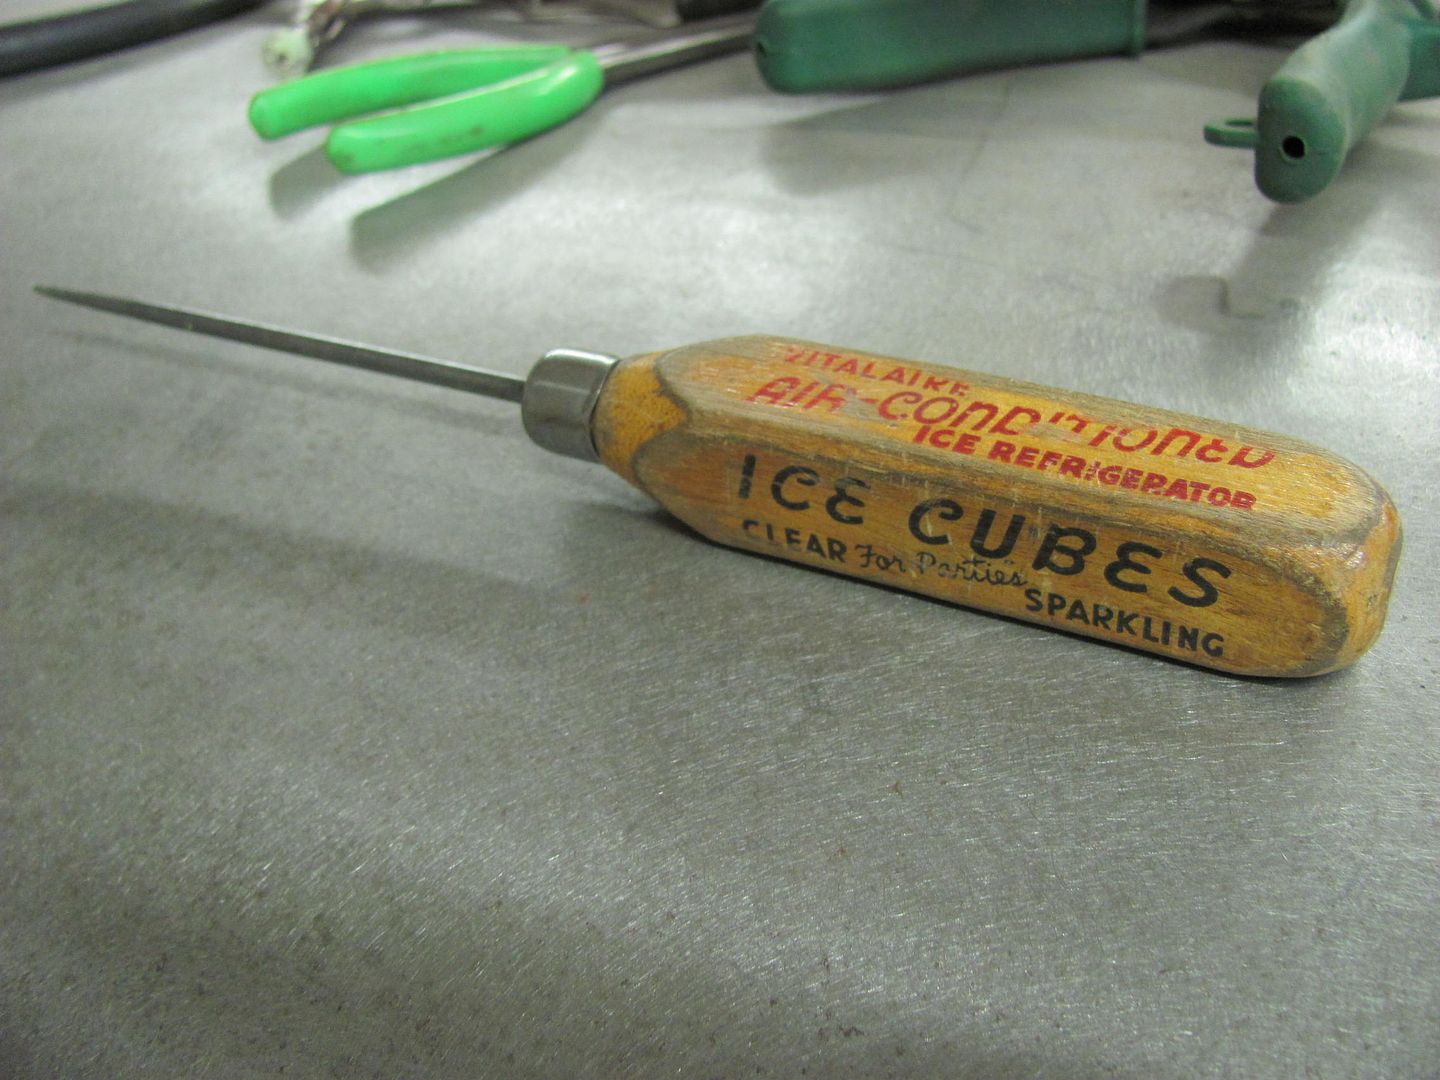 Scribing the roof panel 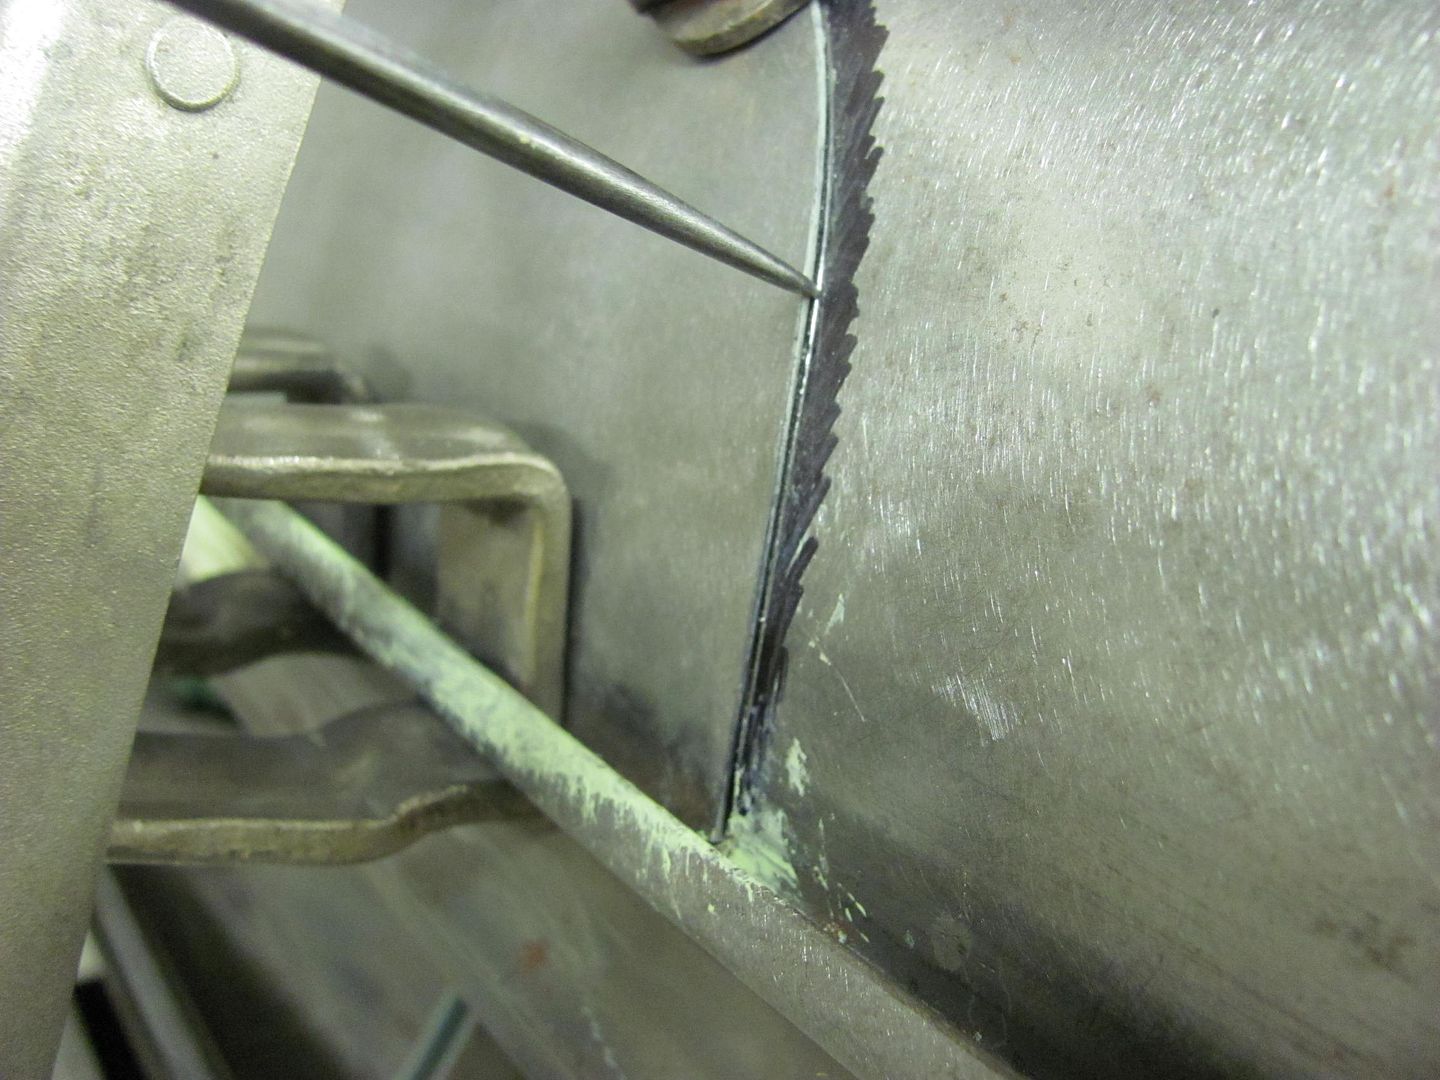 Not much to spare! Trimmed the opening with some offset snips... 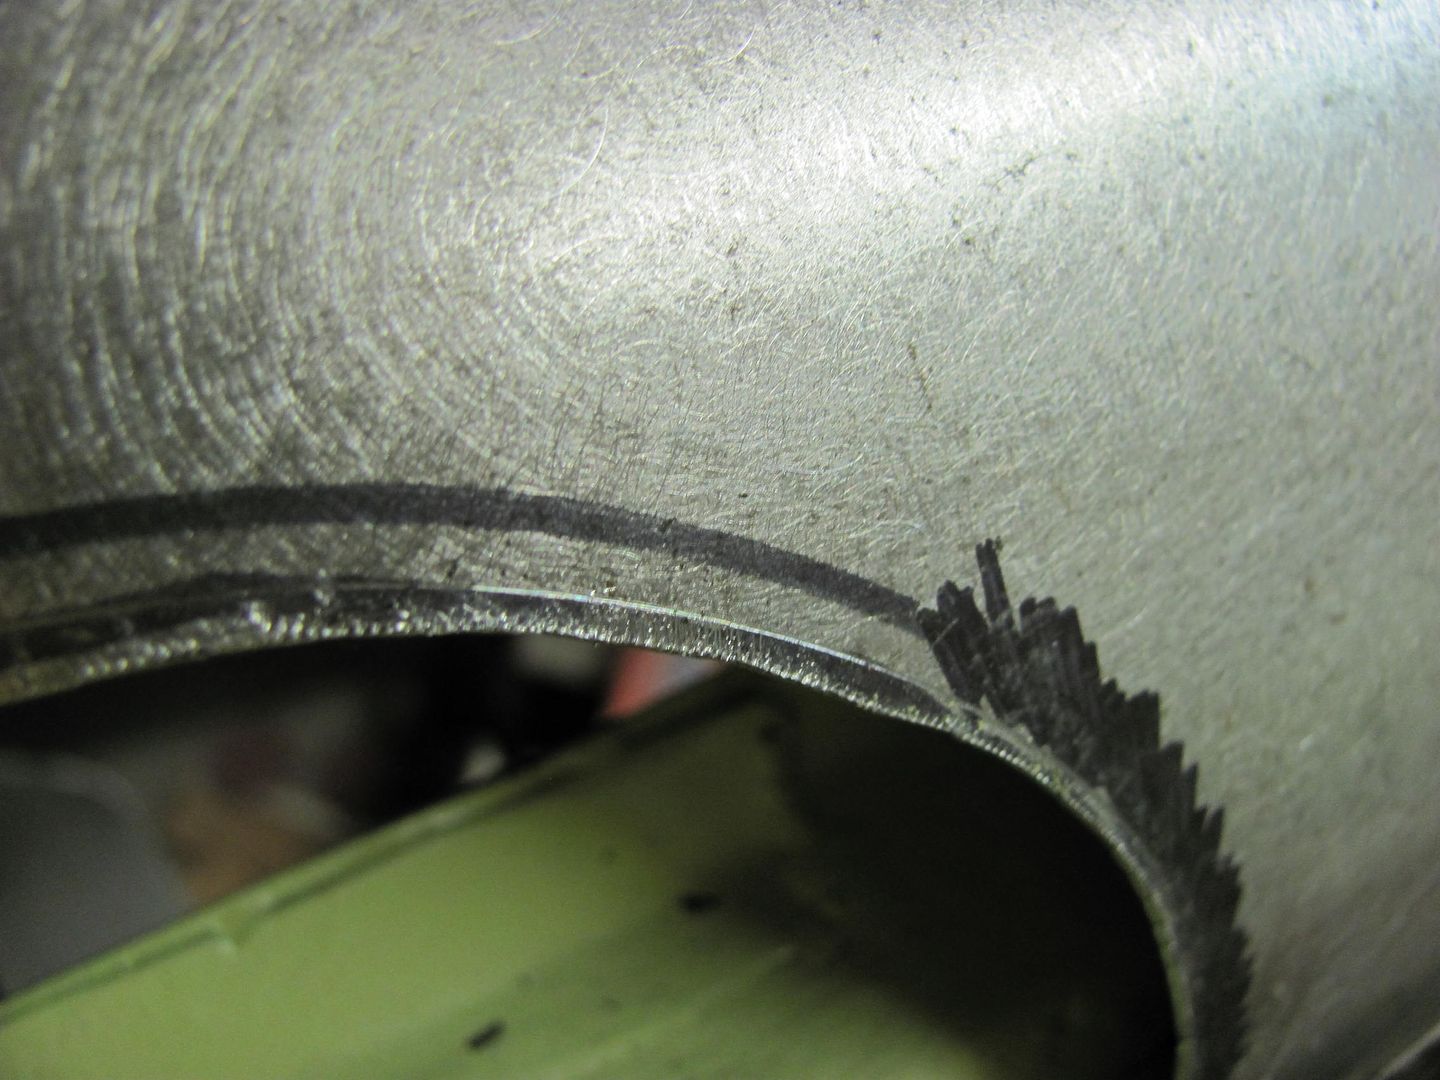 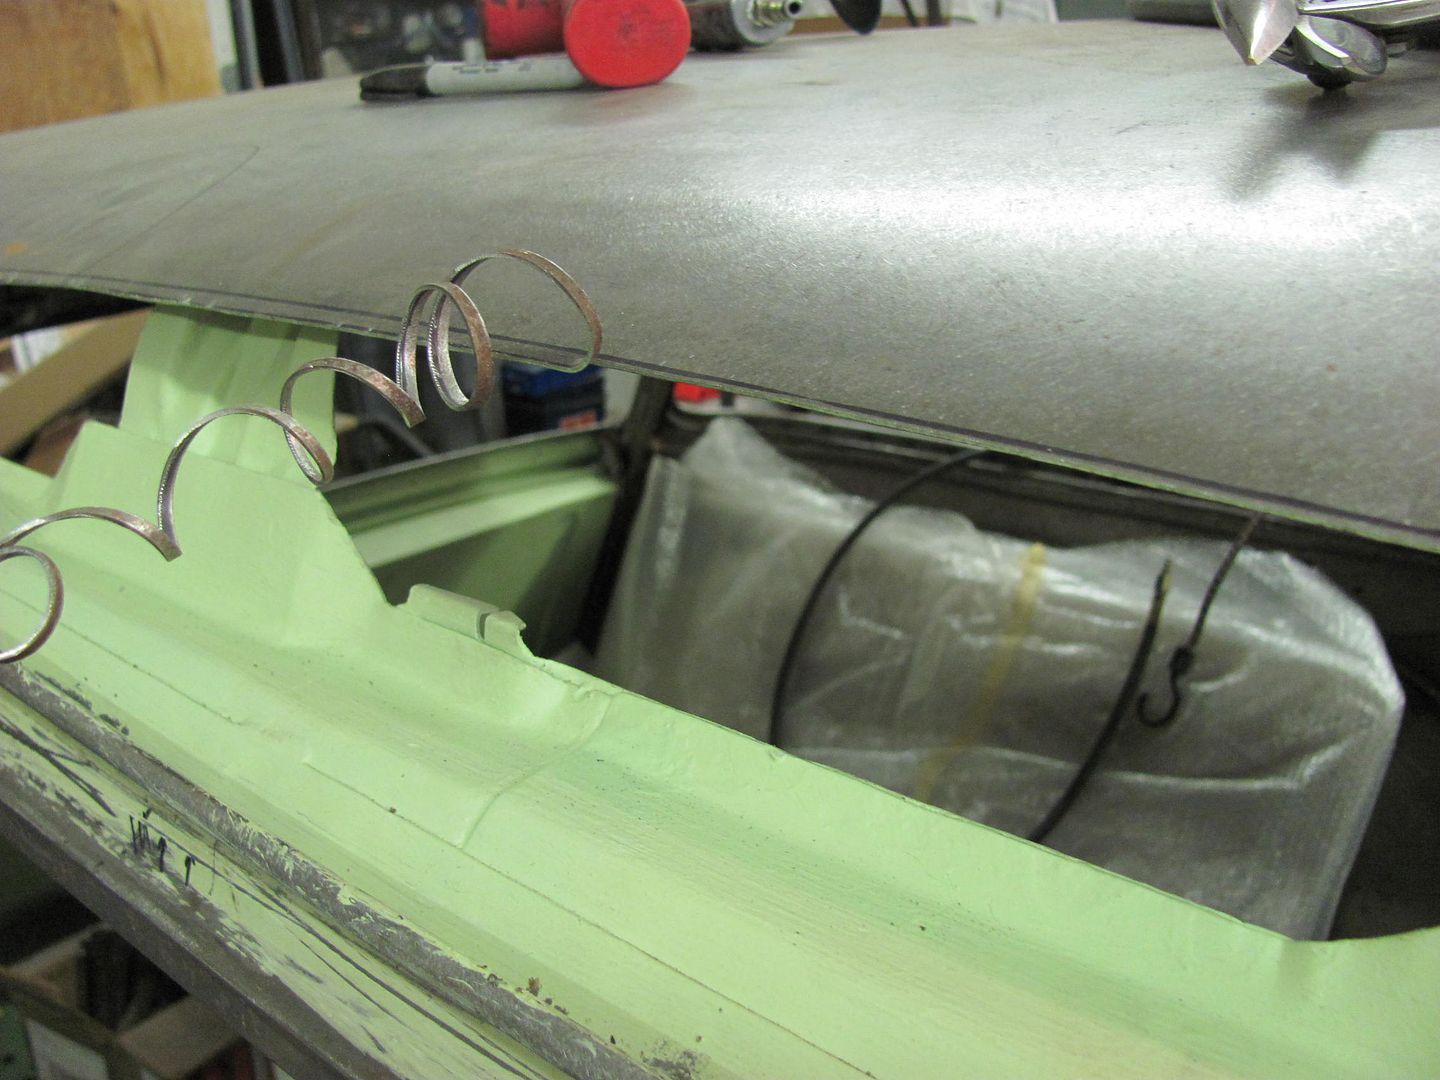 Corners touched up with a 1-1/2" drum sander 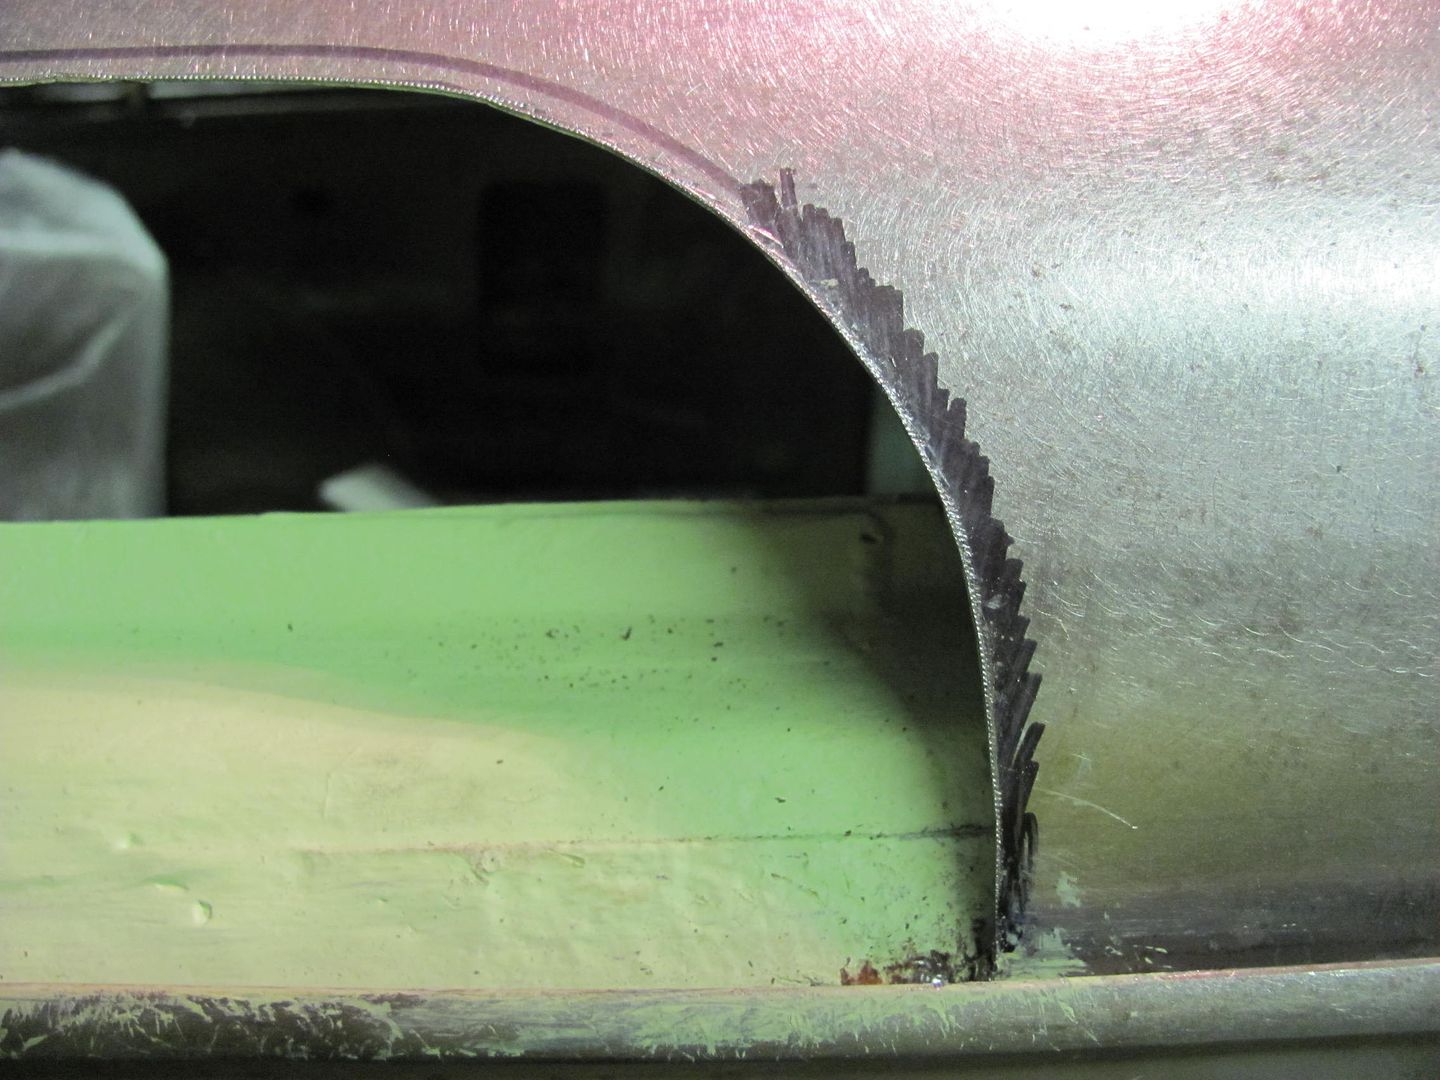 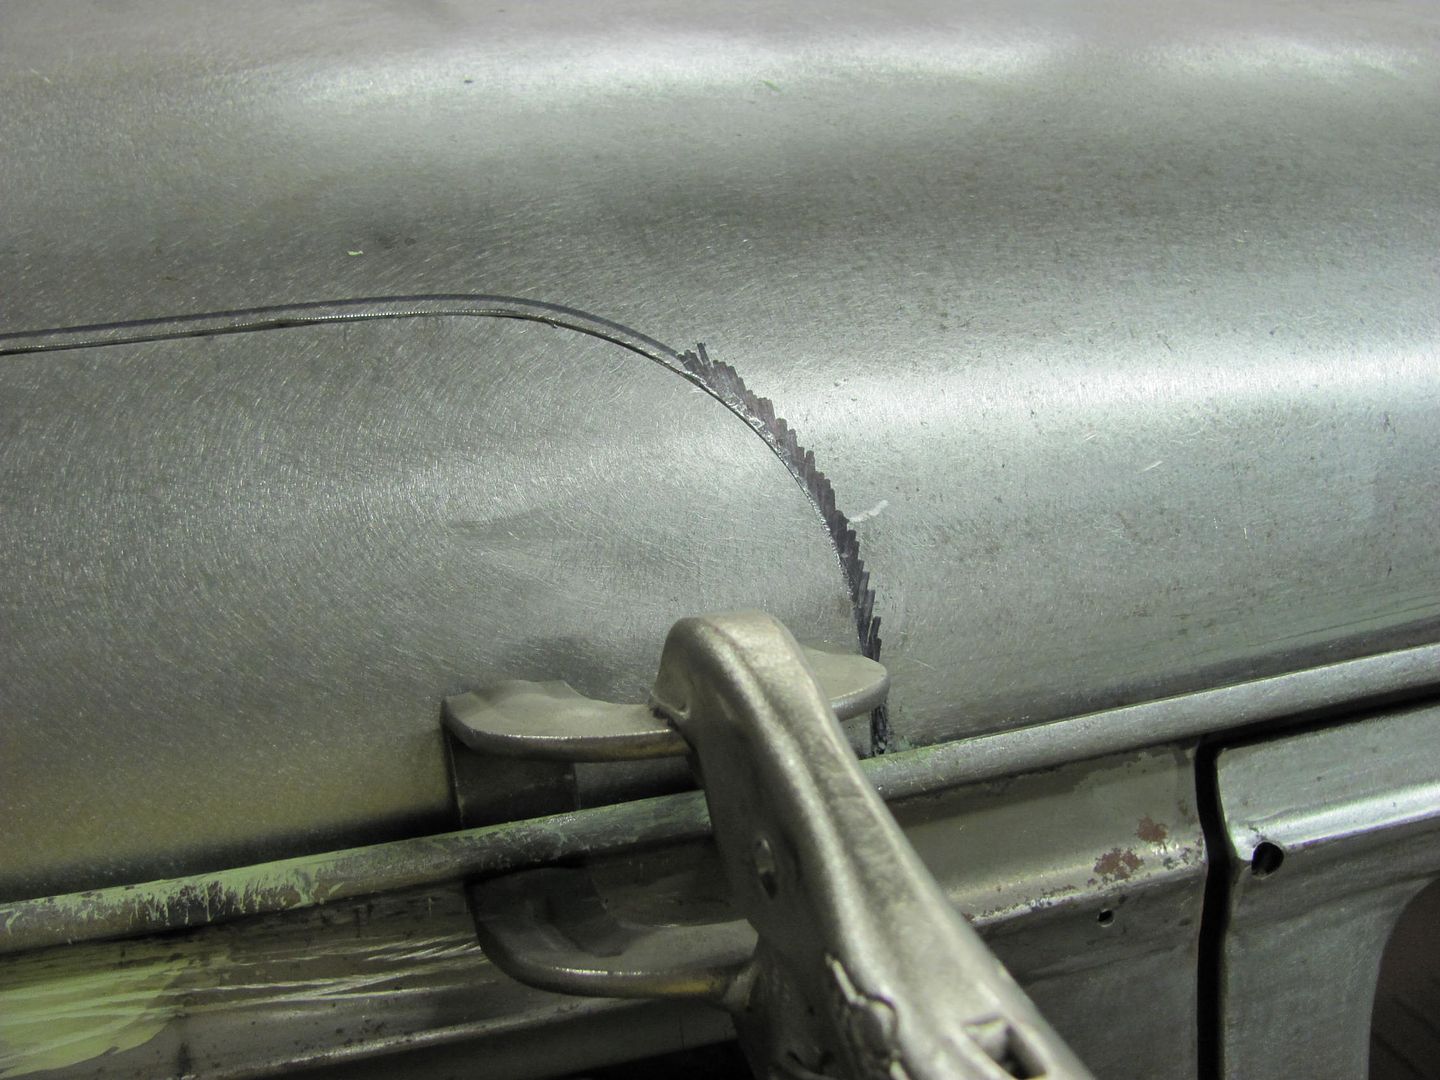 Clamped in place to hold the shape while we wait for the .023 ER70S-7 to come in. Note the butt weld clamps will be removed at welding for a tight fit-up. 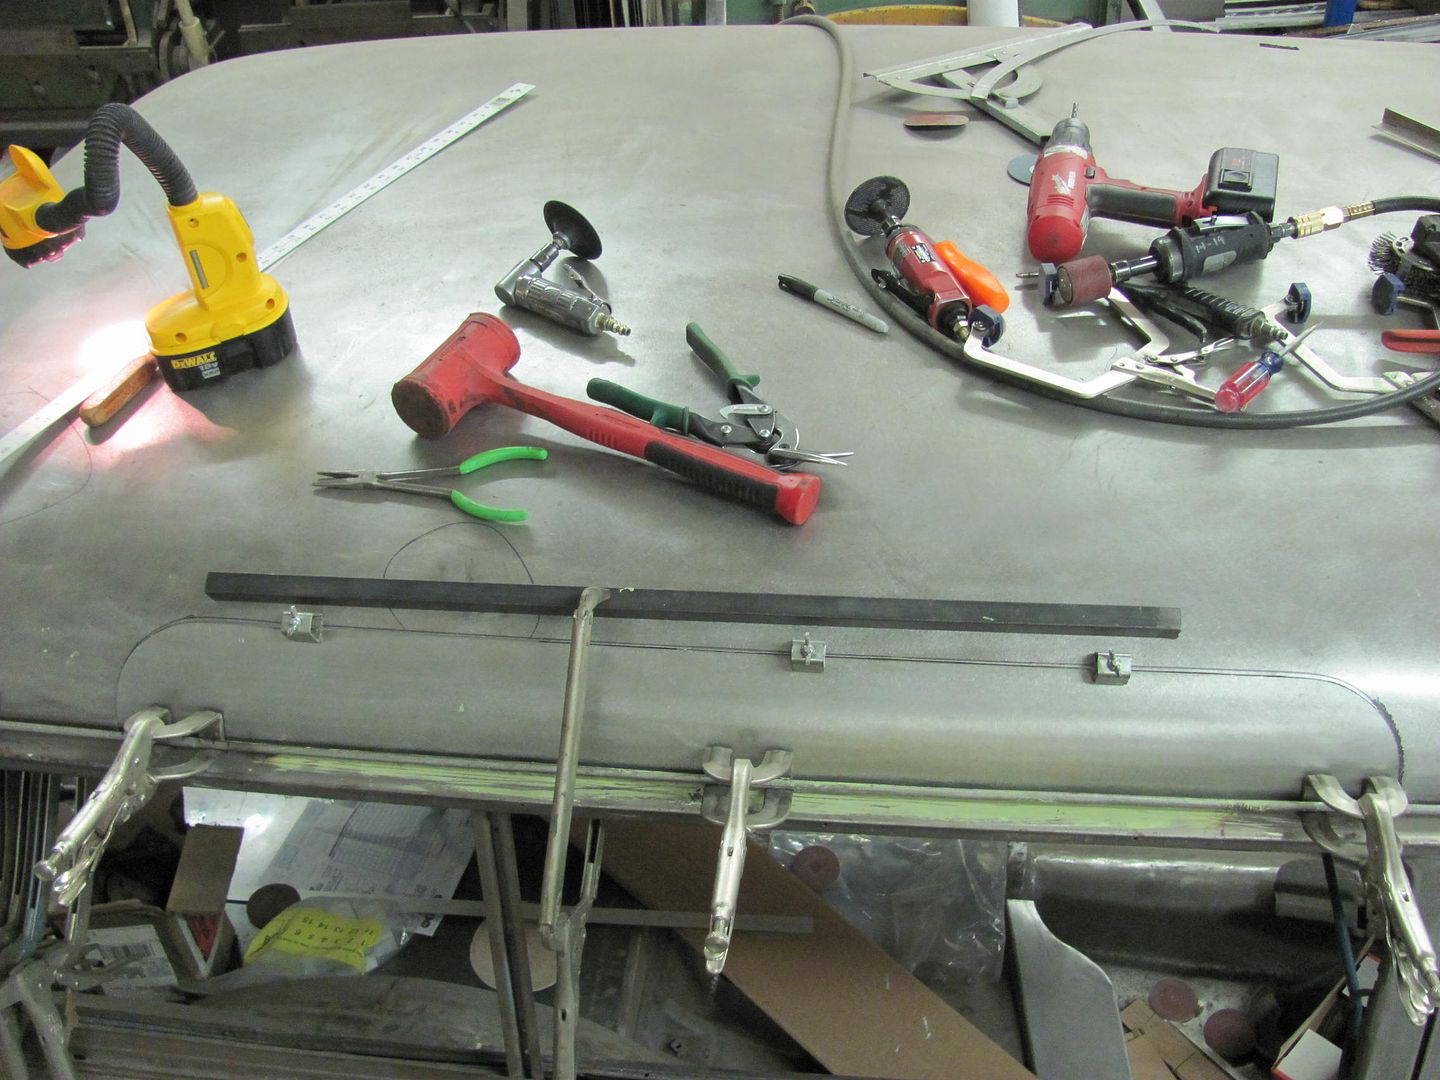 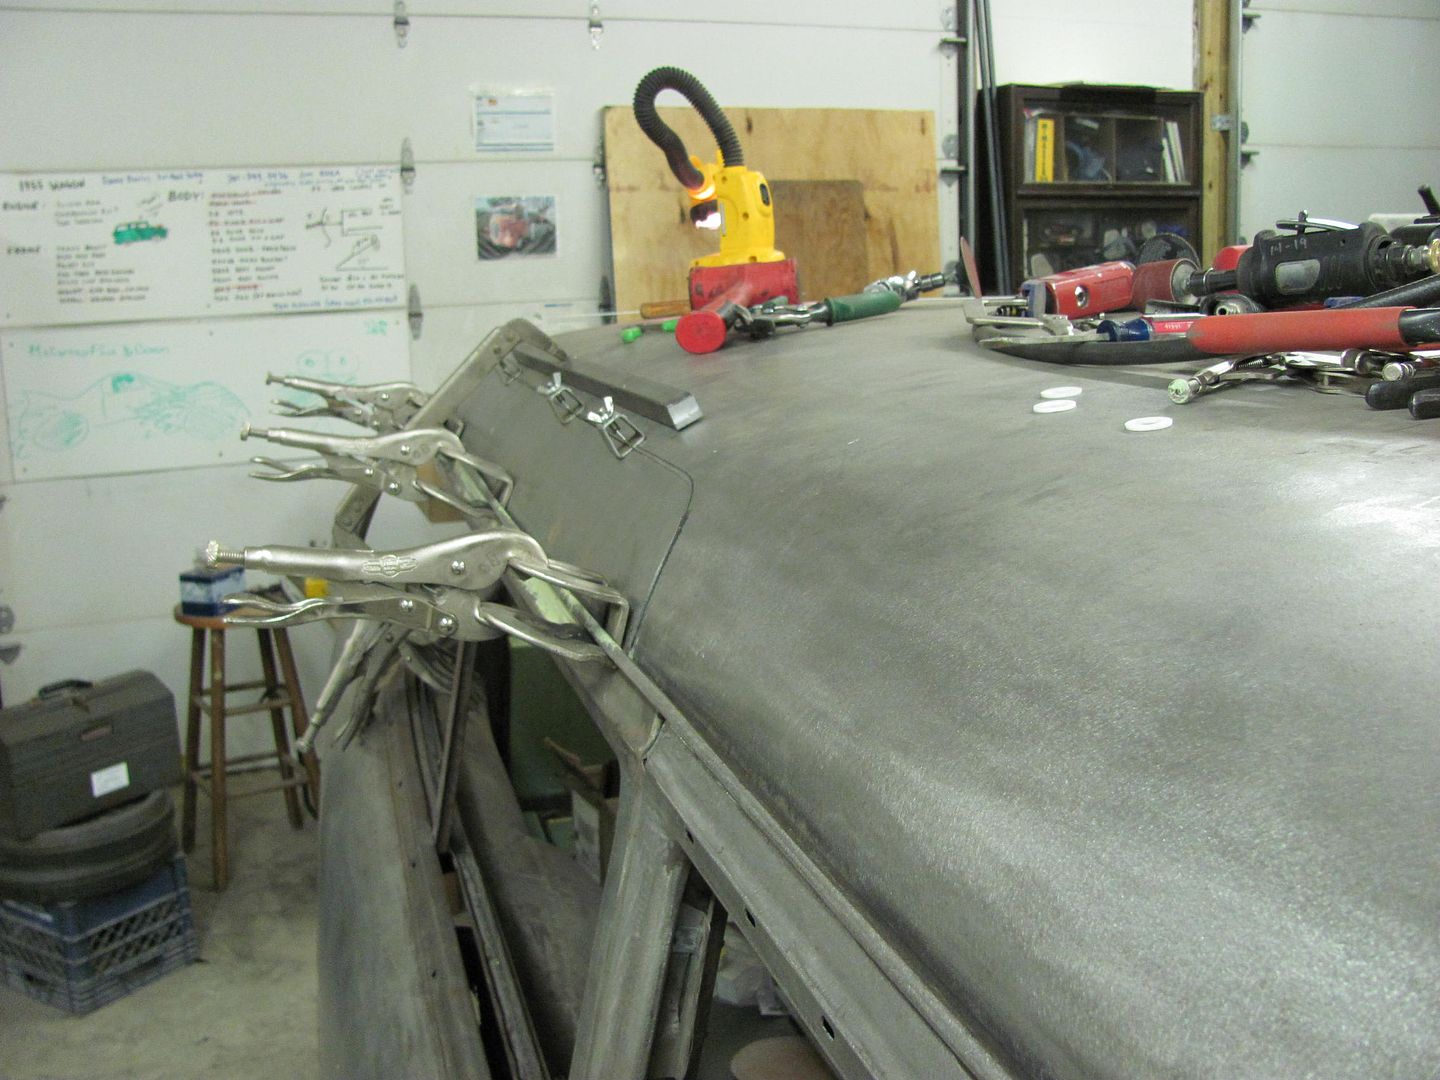
__________________
Robert |
|
|
|
|
01-11-2014, 06:42 PM
|
#109 |
|
Registered User
Join Date: May 2007
Location: Deale Md
Posts: 4,663
|
Re: 55 Wagon Progress
How many vise grips do you have.
__________________
James 63 GMC V6 4speed carryall 65 chevy swb bbw V8 auto 68 K20 327/4 speed, buddy buckets 2002 GMC CC Dually Duramax 64 GMC lwb 3/4 V6 4speed SOLD 66 GMC swb bbw buddy buckets SOLD IG duallyjams The only thing that stays the same is constant change! |
|
|
|
|
01-11-2014, 06:55 PM
|
#110 |
|
Registered User
Join Date: Jan 2013
Location: Leonardtown, MD
Posts: 1,633
|
Re: 55 Wagon Progress
Somewhere around 75 pair... when you get welding you need clamps!
__________________
Robert |
|
|
|
|
01-14-2014, 12:30 AM
|
#111 |
|
Registered User
Join Date: Apr 2012
Location: Searcy, AR
Posts: 4,203
|
Re: 55 Wagon Progress
BOMP pointed meto this thread
and I am in debt to him! Thank you very much for sharing your work, it is

__________________
DON Proverbs 27:17  US Air Force Retarded errr Retired My '65 Stepper Build:http://67-72chevytrucks.com/vboard/s...d.php?t=533920 My '60 Rusty Patina Build:http://67-72chevytrucks.com/vboard/s...66#post7402266 My '72 http://67-72chevytrucks.com/vboard/s...59#post7204359 SOLD |
|
|
|
|
01-14-2014, 01:49 PM
|
#112 |
|
Registered User
Join Date: Apr 2003
Location: Indep, MO
Posts: 5,893
|
Re: 55 Wagon Progress
Nice fitup!
__________________
Boppa's Old Yeller Truck Build, Old Yeller's New Heart! Project Buzz Bomb Flyin' Low! |
|
|
|
|
01-14-2014, 02:00 PM
|
#113 | |
|
Registered User
Join Date: Jan 2013
Location: Leonardtown, MD
Posts: 1,633
|
Re: 55 Wagon Progress
Thanks for the comments guys..
Quote:
__________________
Robert |
|
|
|
|
|
02-07-2014, 12:05 AM
|
#114 |
|
Registered User
Join Date: Jan 2013
Location: Leonardtown, MD
Posts: 1,633
|
Re: 55 Wagon Progress
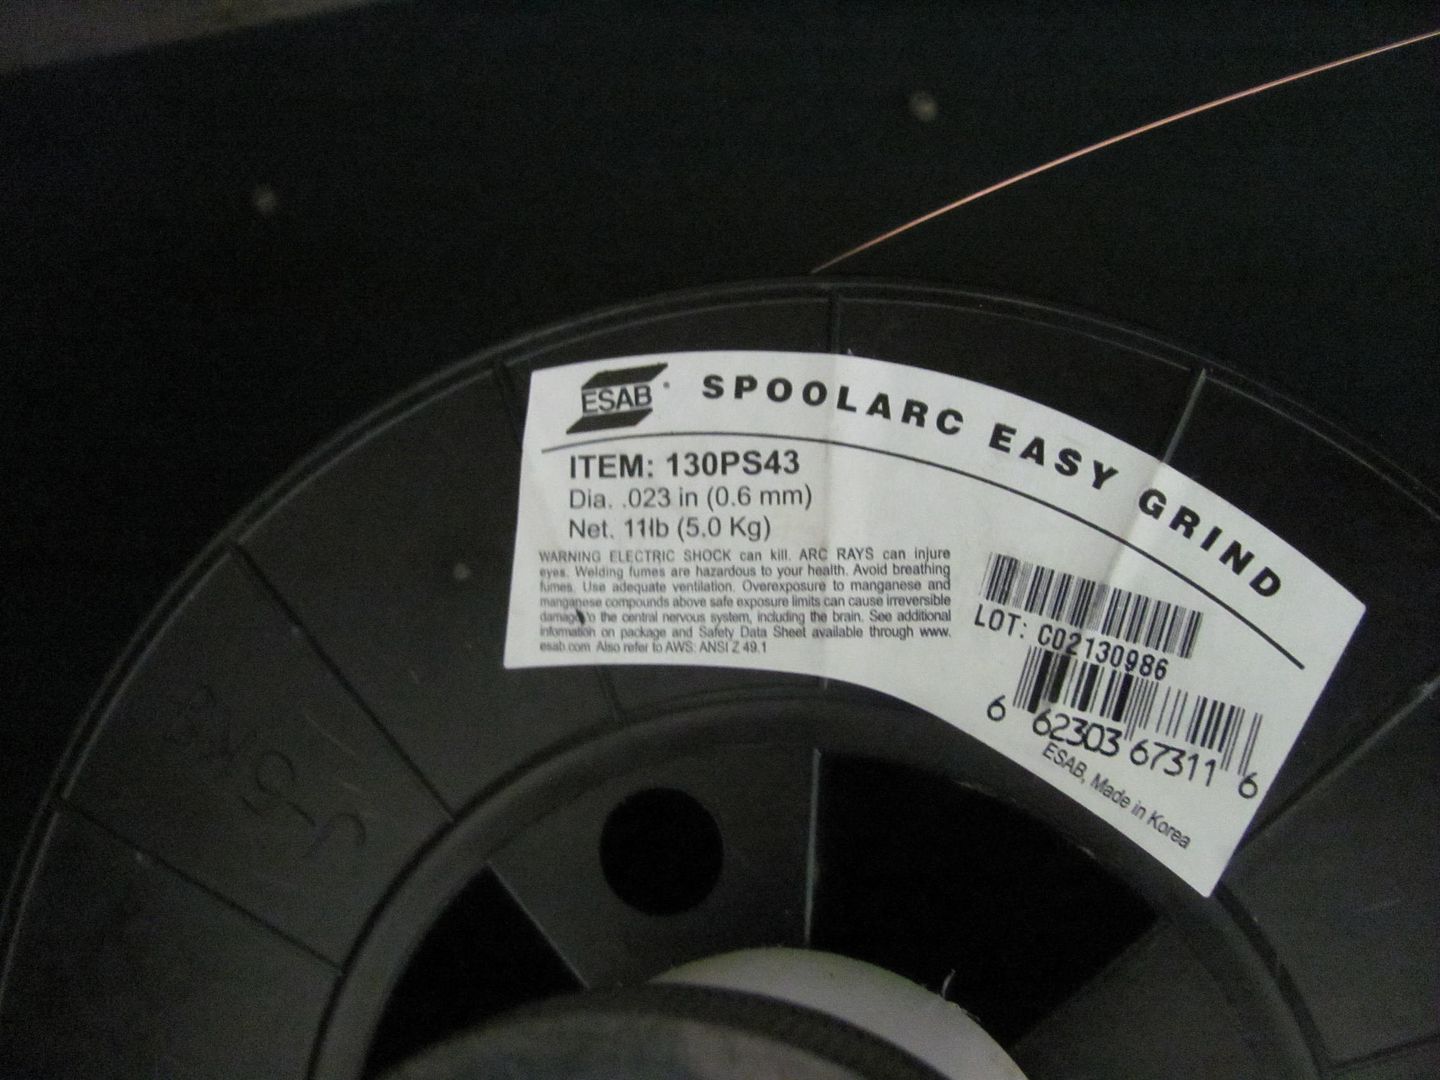
Well today I had a phone call from 3 Mules to tell me the .023 welding wire was in. I had ordered .023 ER70S-7, but what actually showed up was EZ Grind. I guess I was destined to try this stuff out...
 After about 45 minutes of changing wire, rollers, and trying different settings on the machine, we found dialing it in for 3/16 thick steel and using 1/2 second weld "application" showed about the best results.. Seems odd as the metal was 19 ga, or about .038 thick.. 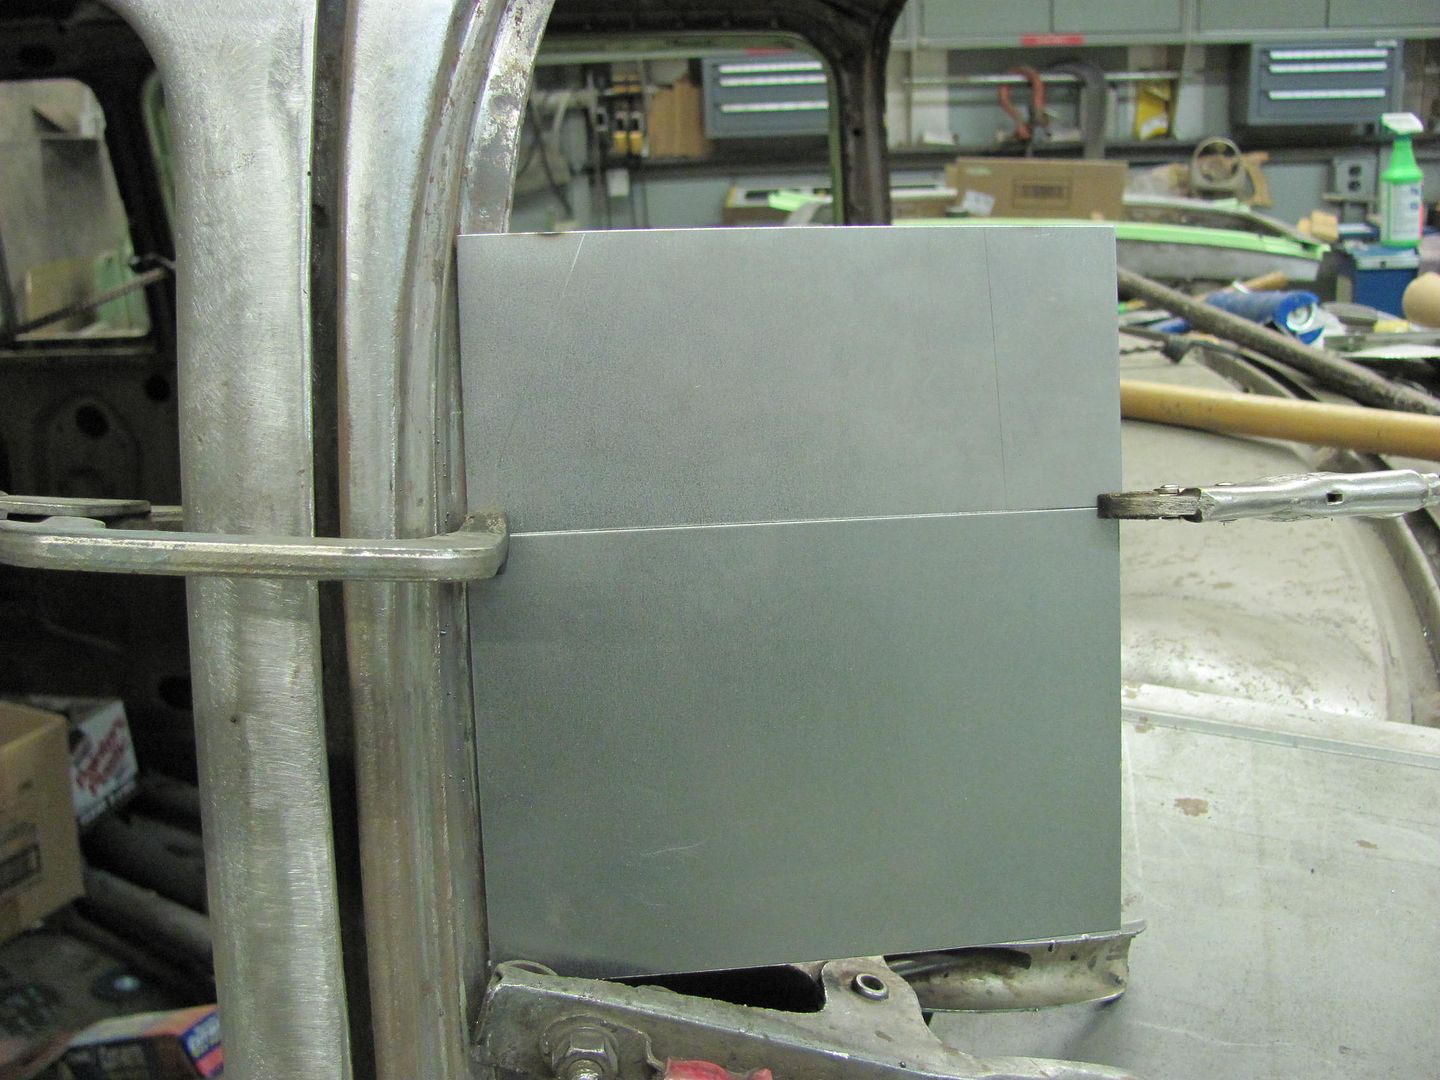 front: 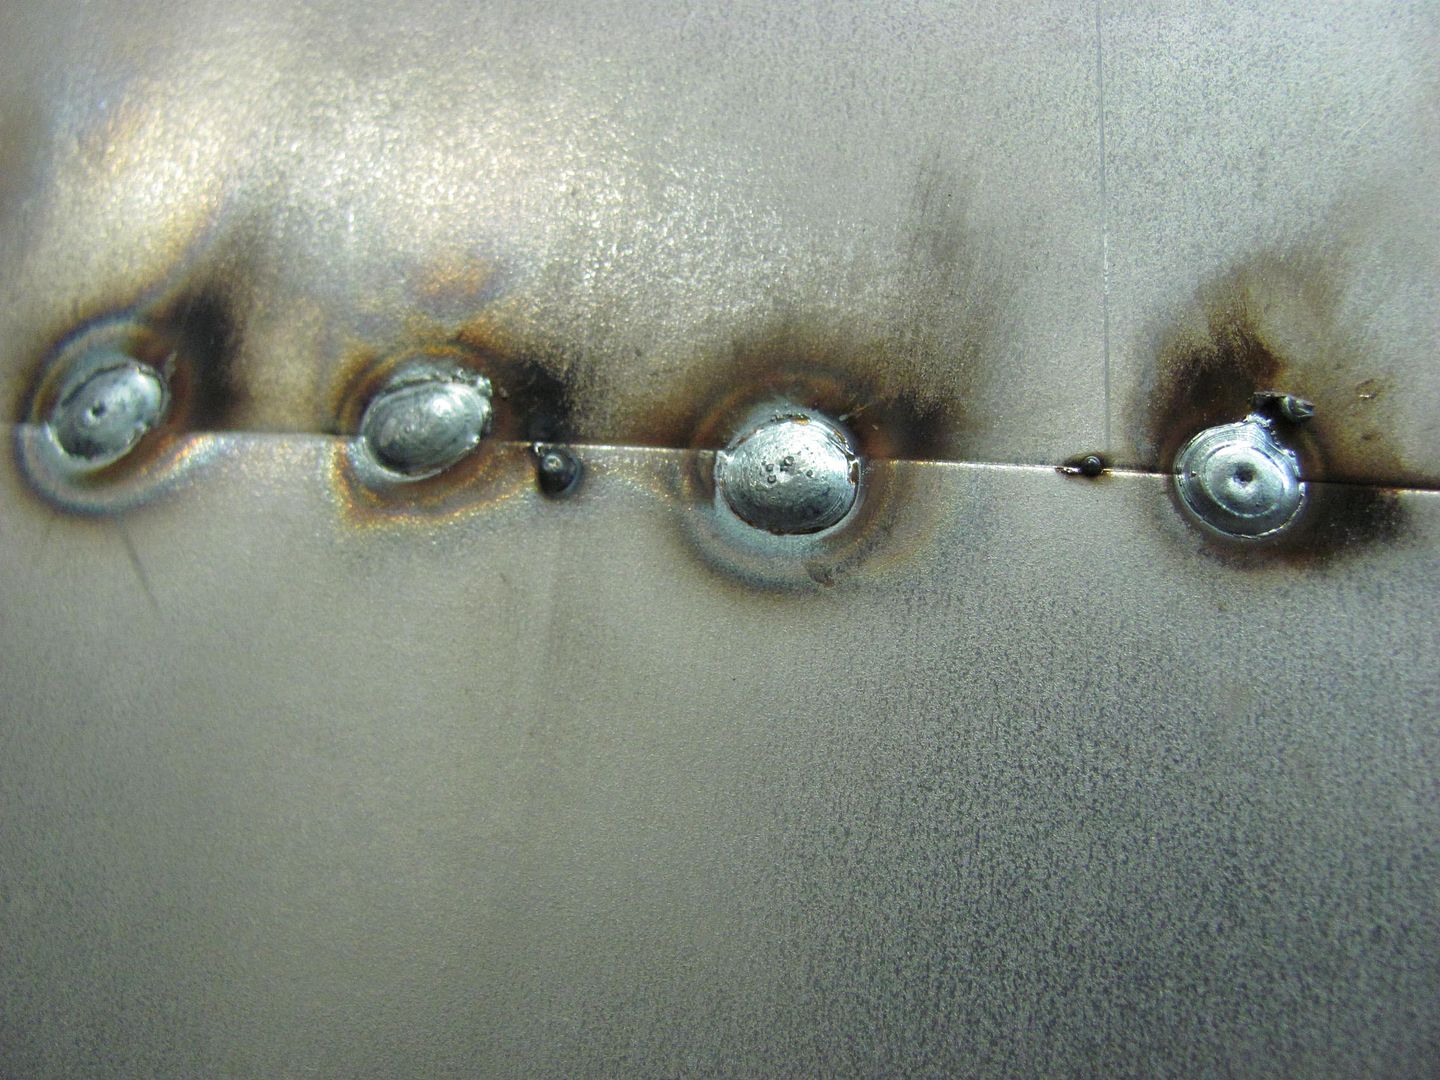 rear: 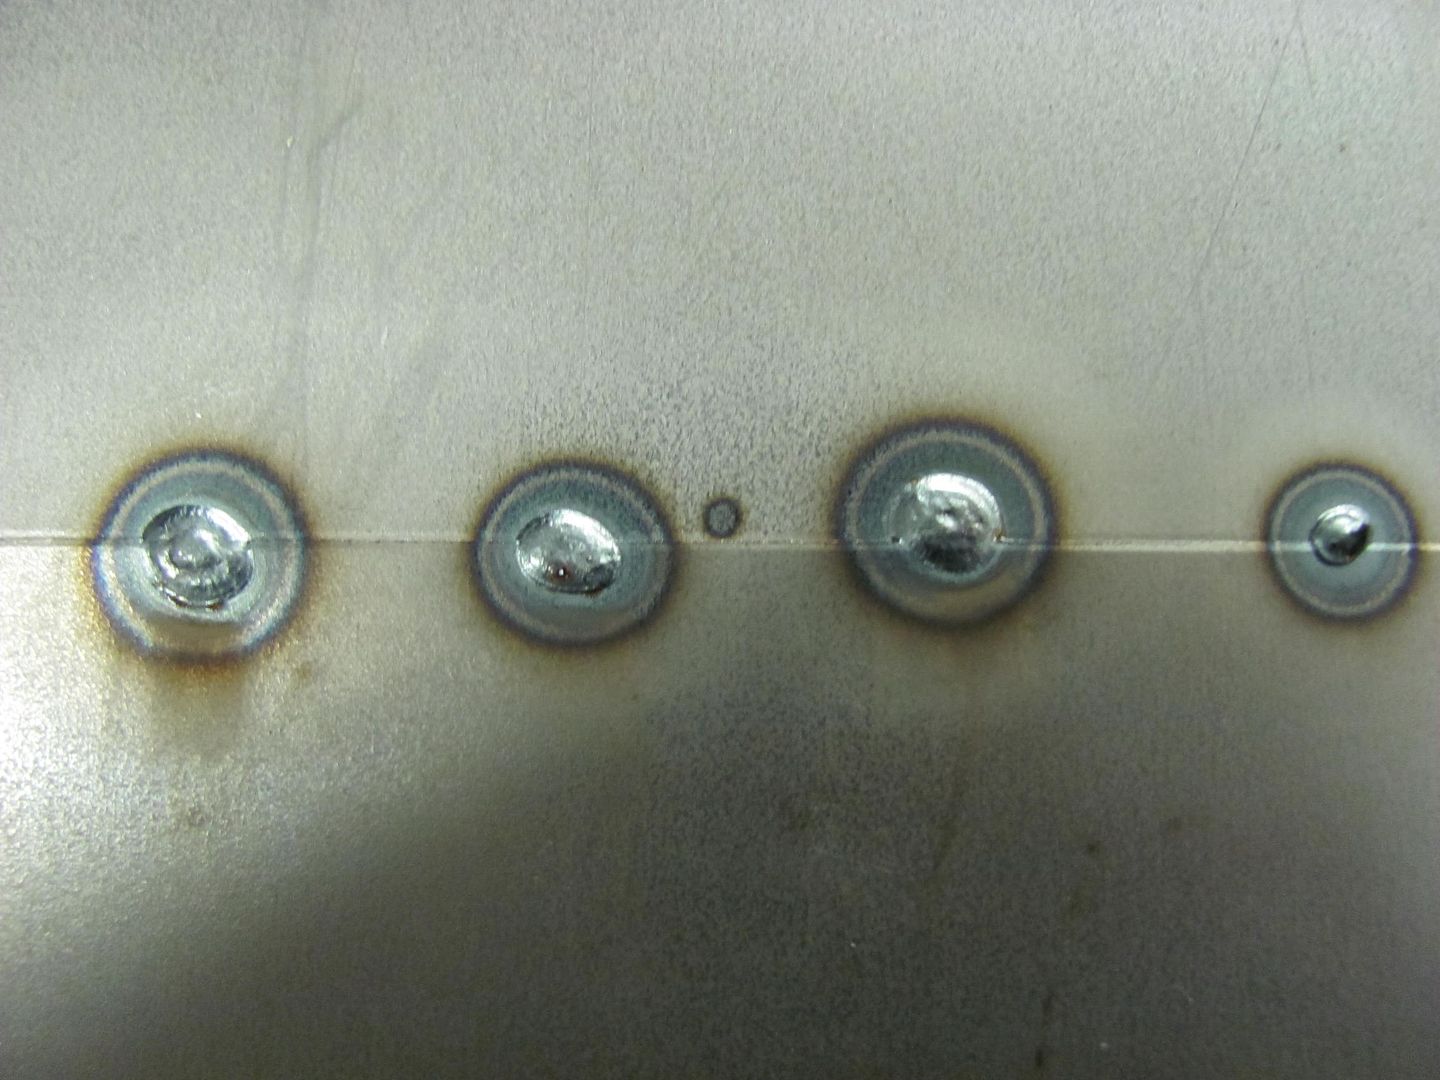 Comparative size of the weld proud. 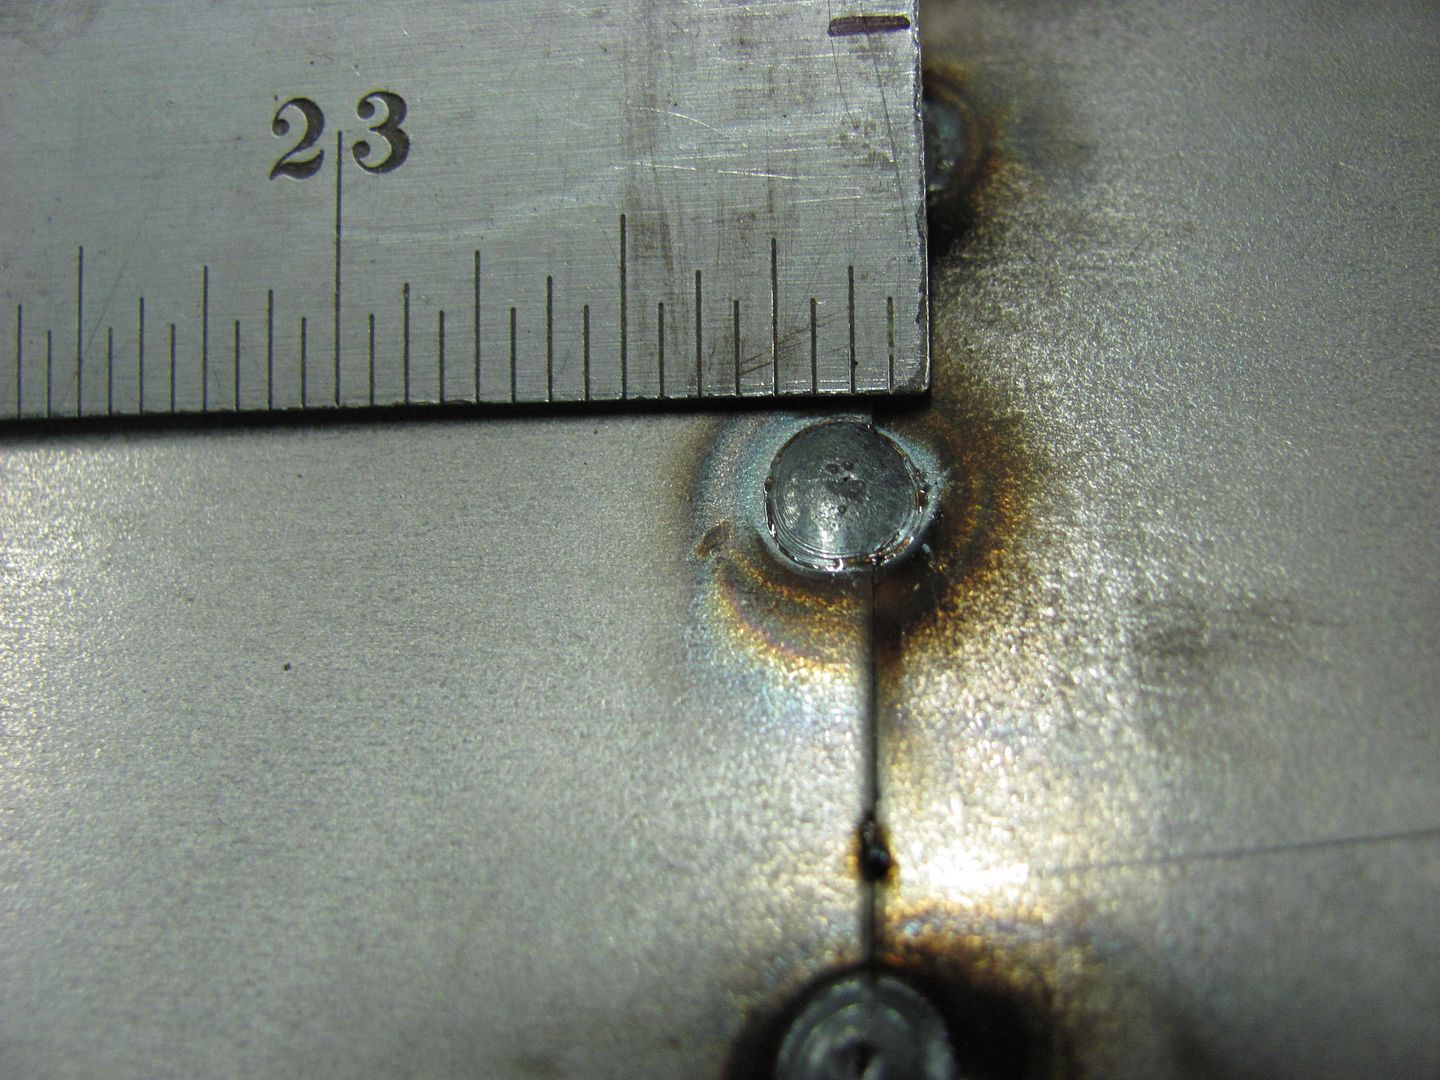 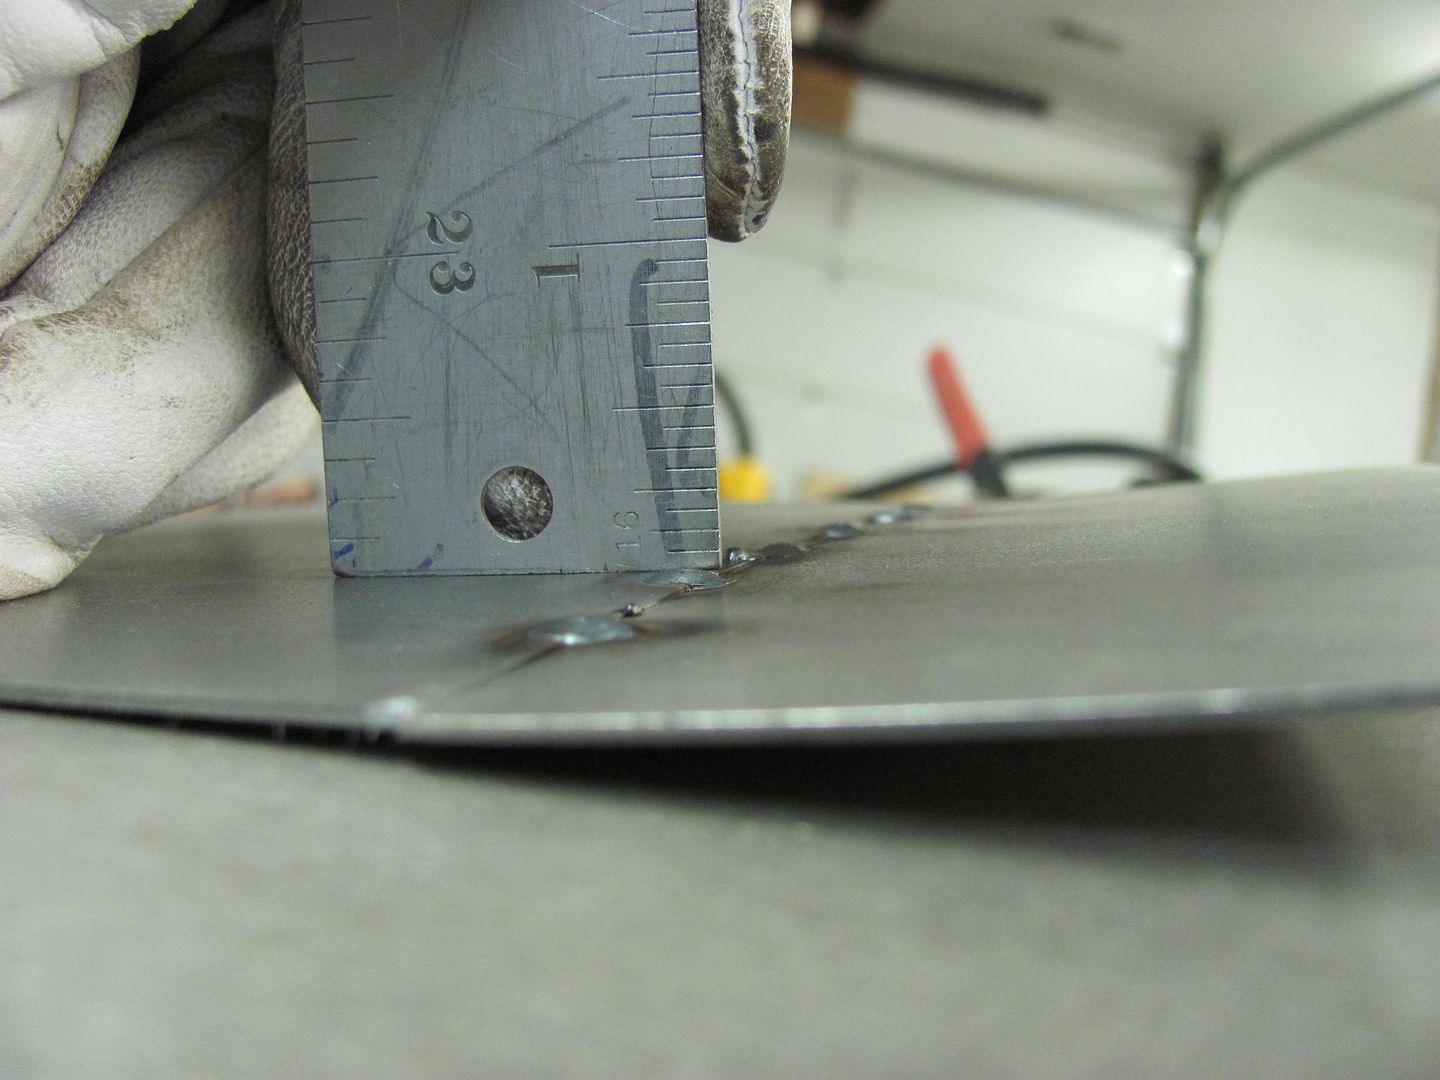 The special made tongs had returned from Houston, so we did the spot welds first to insure the panel was pulled down into the drip rail tightly.. 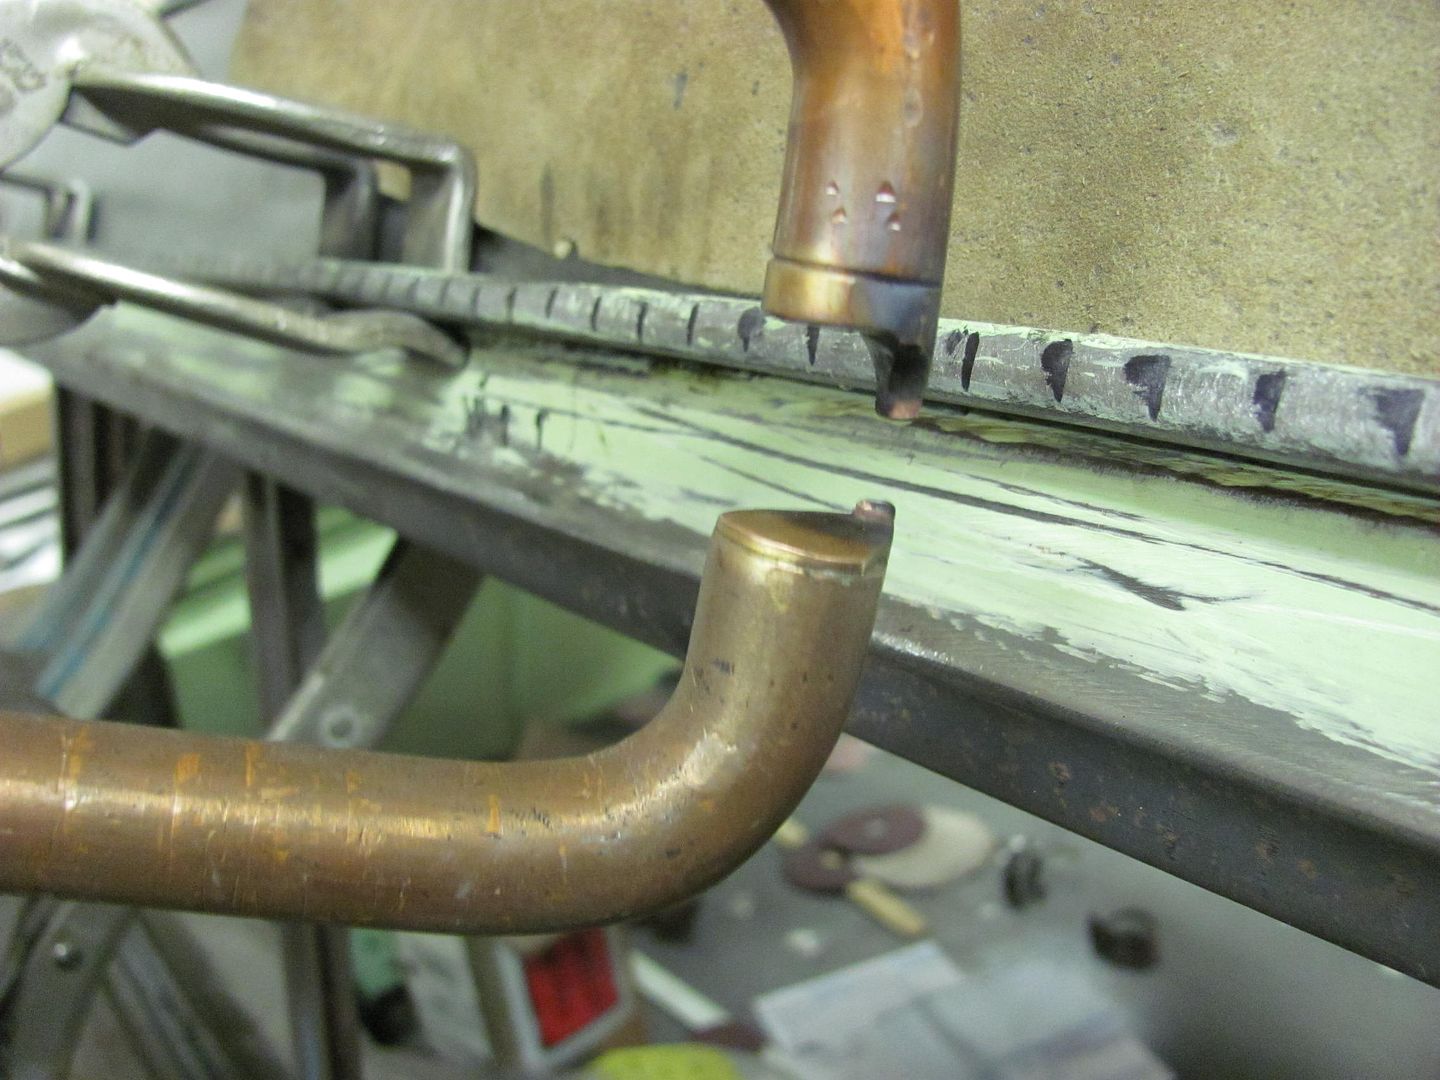  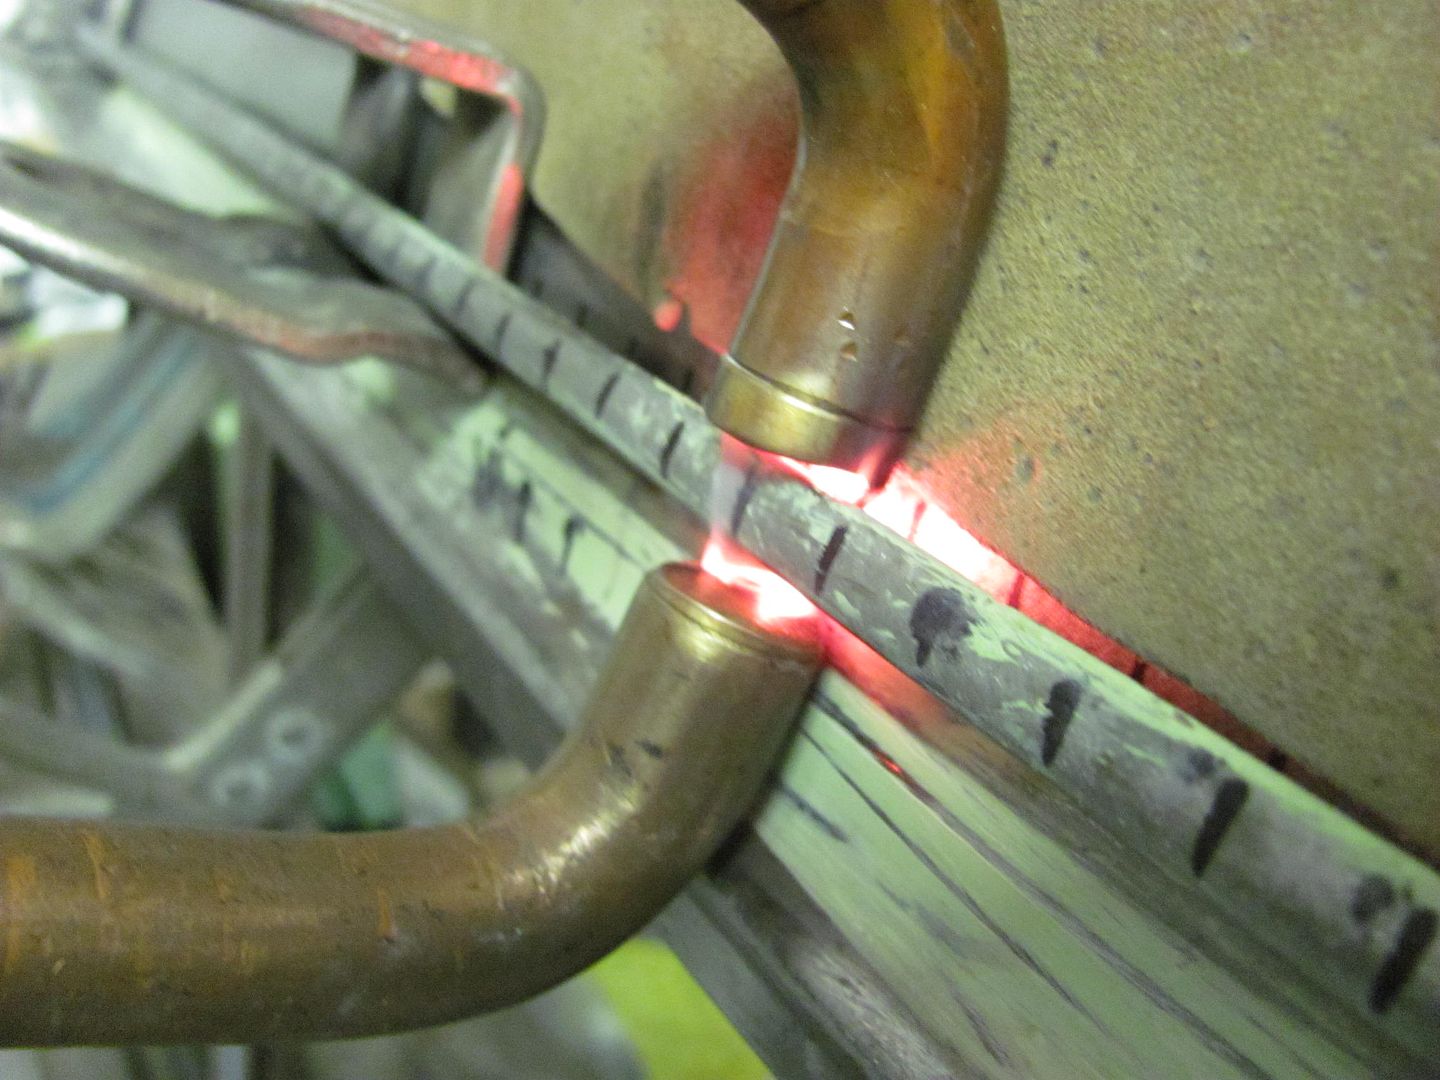 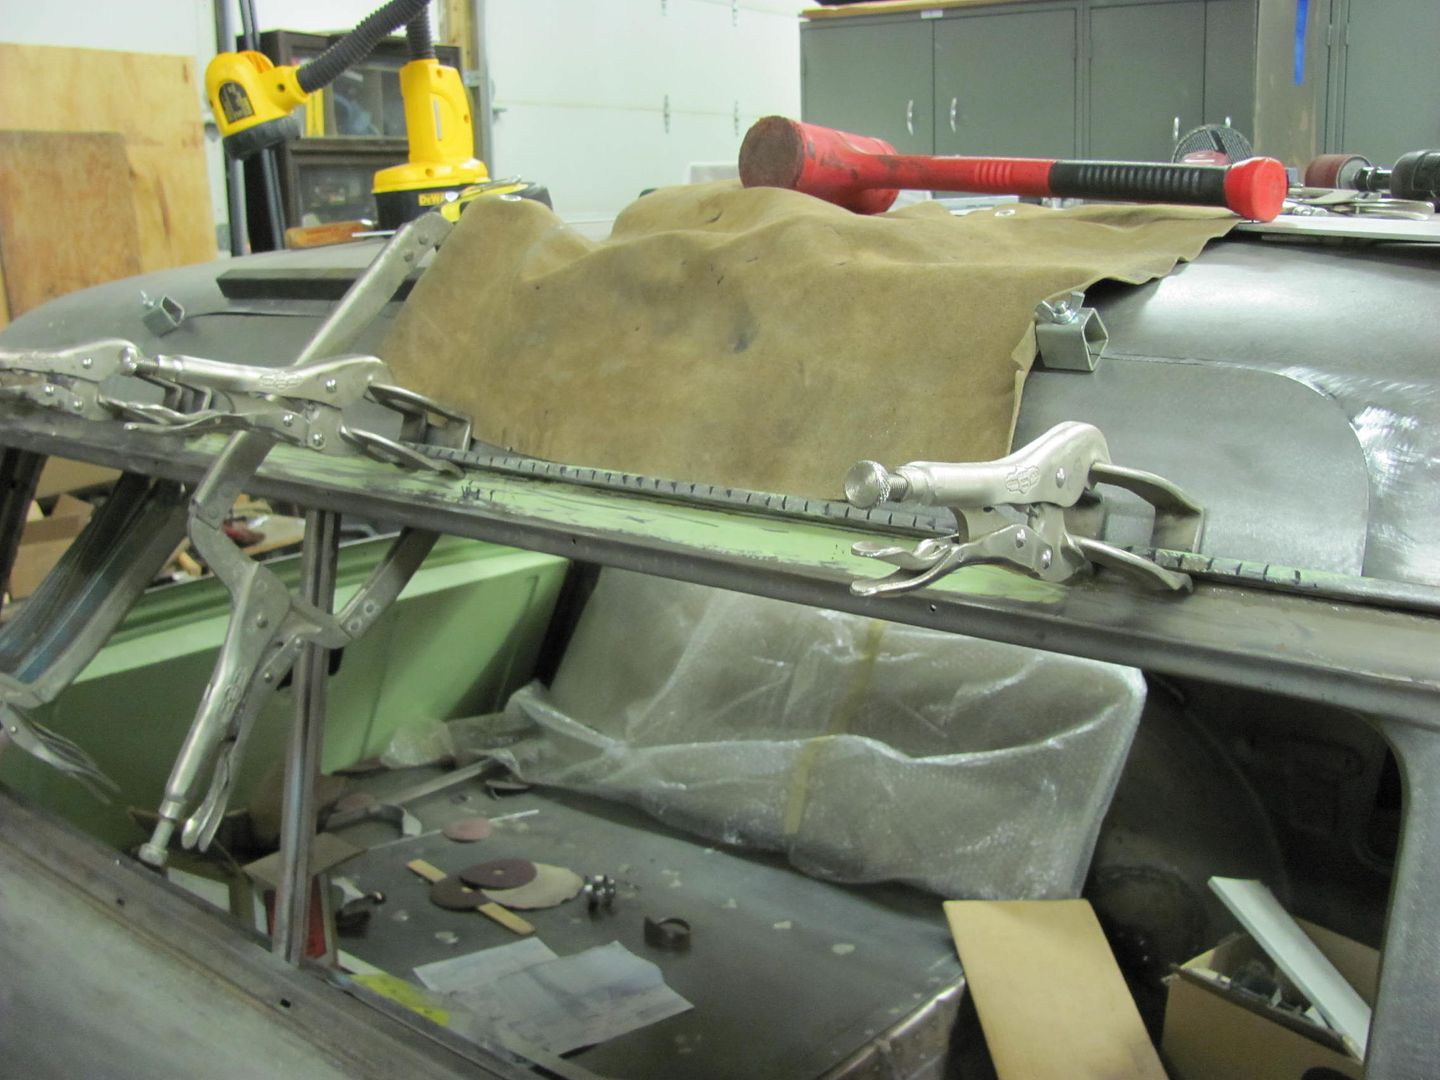 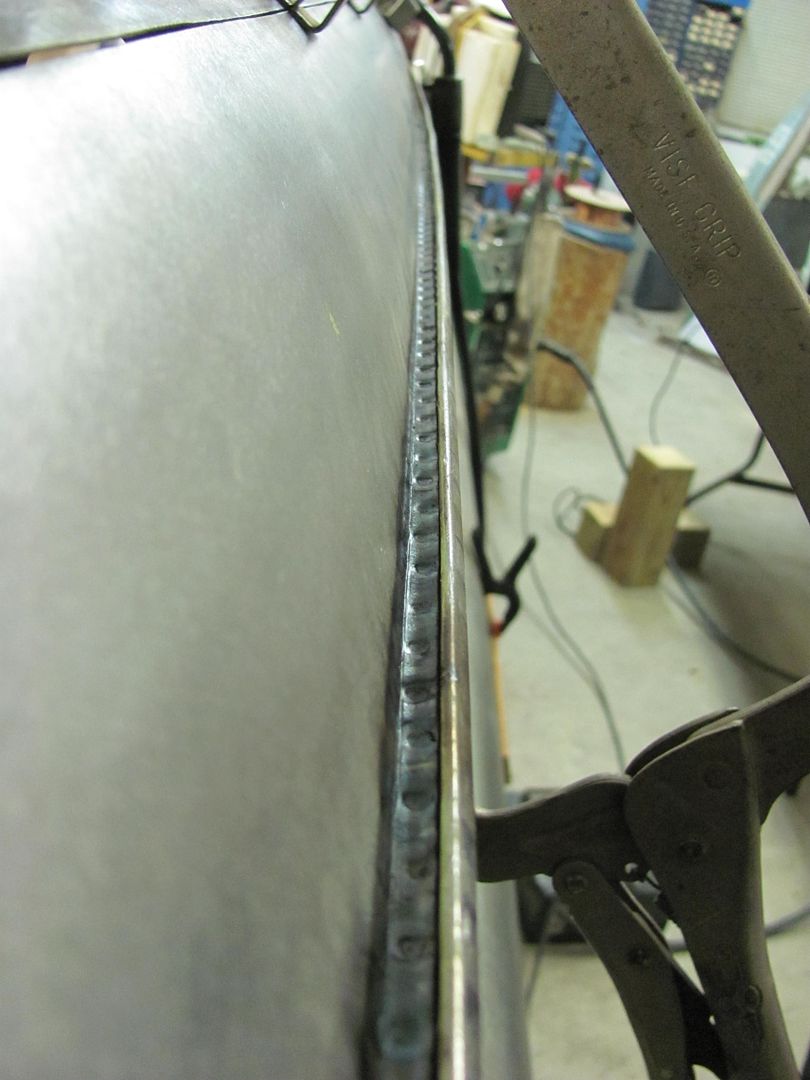 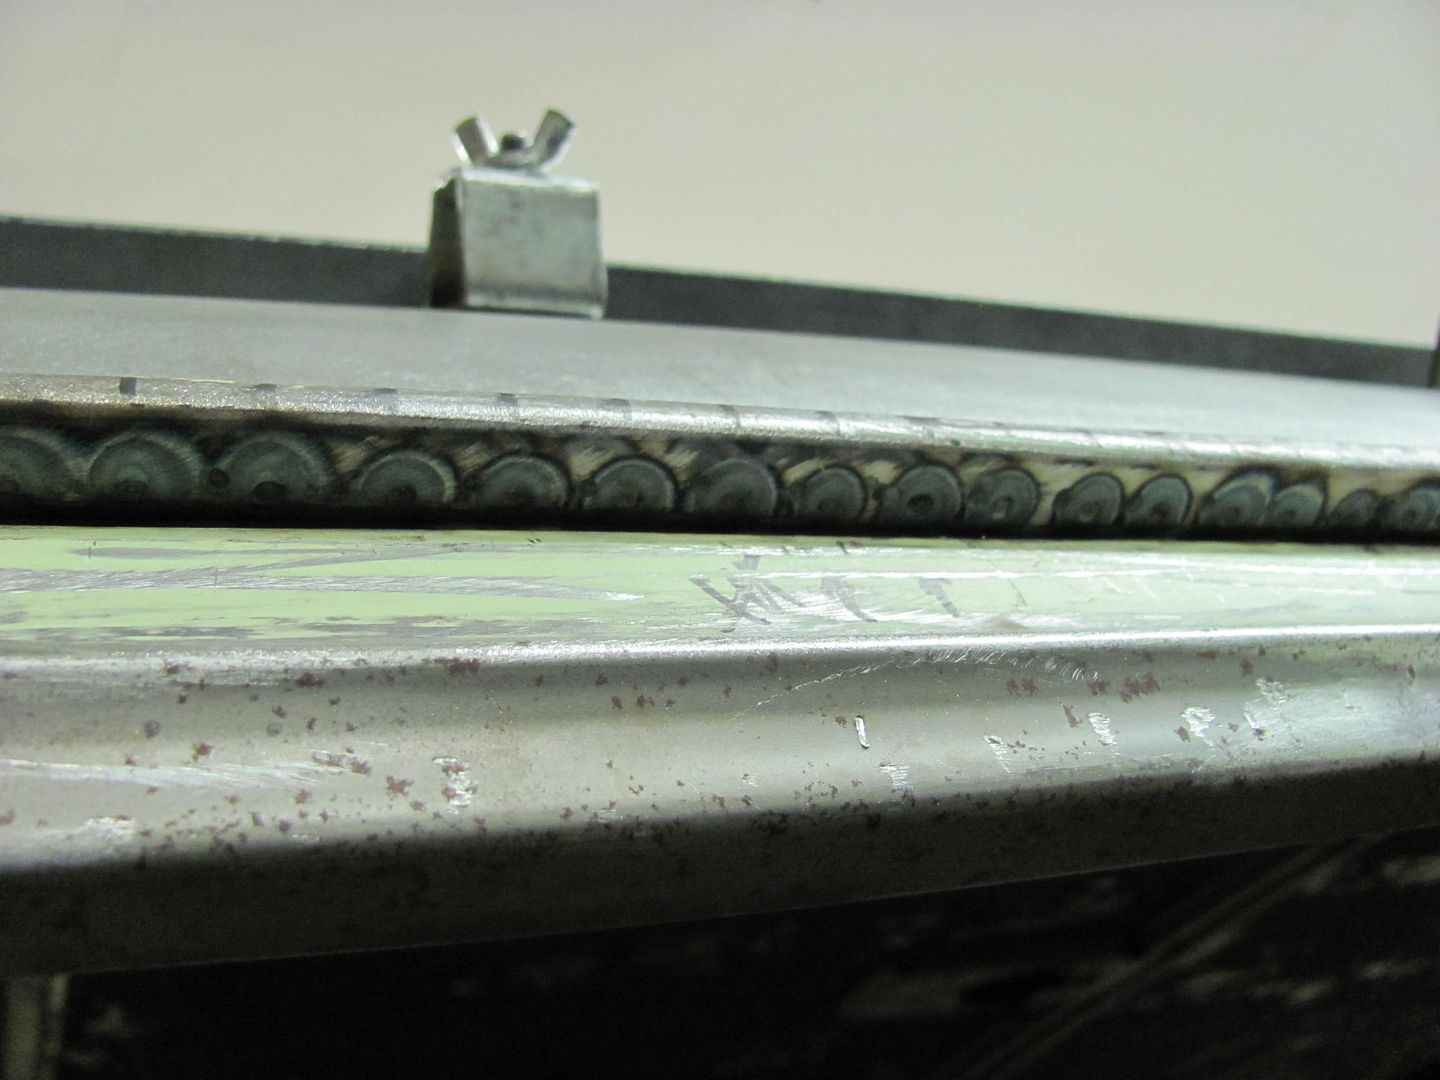 Then the panels were aligned and tacked, starting at the rear and working toward the front... 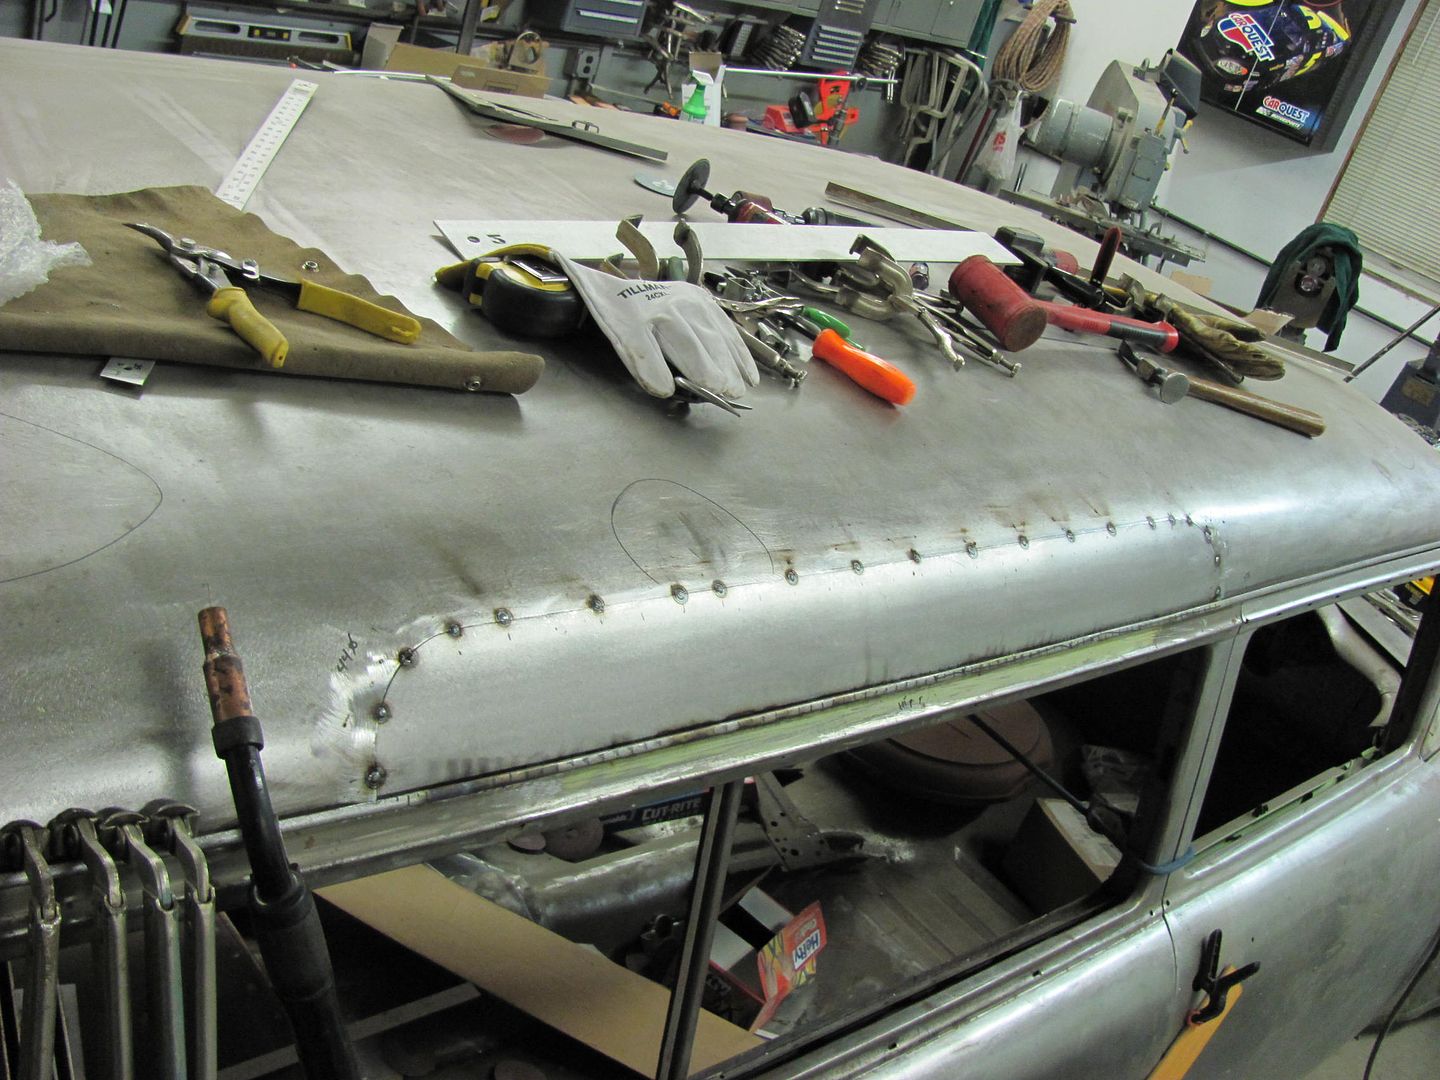 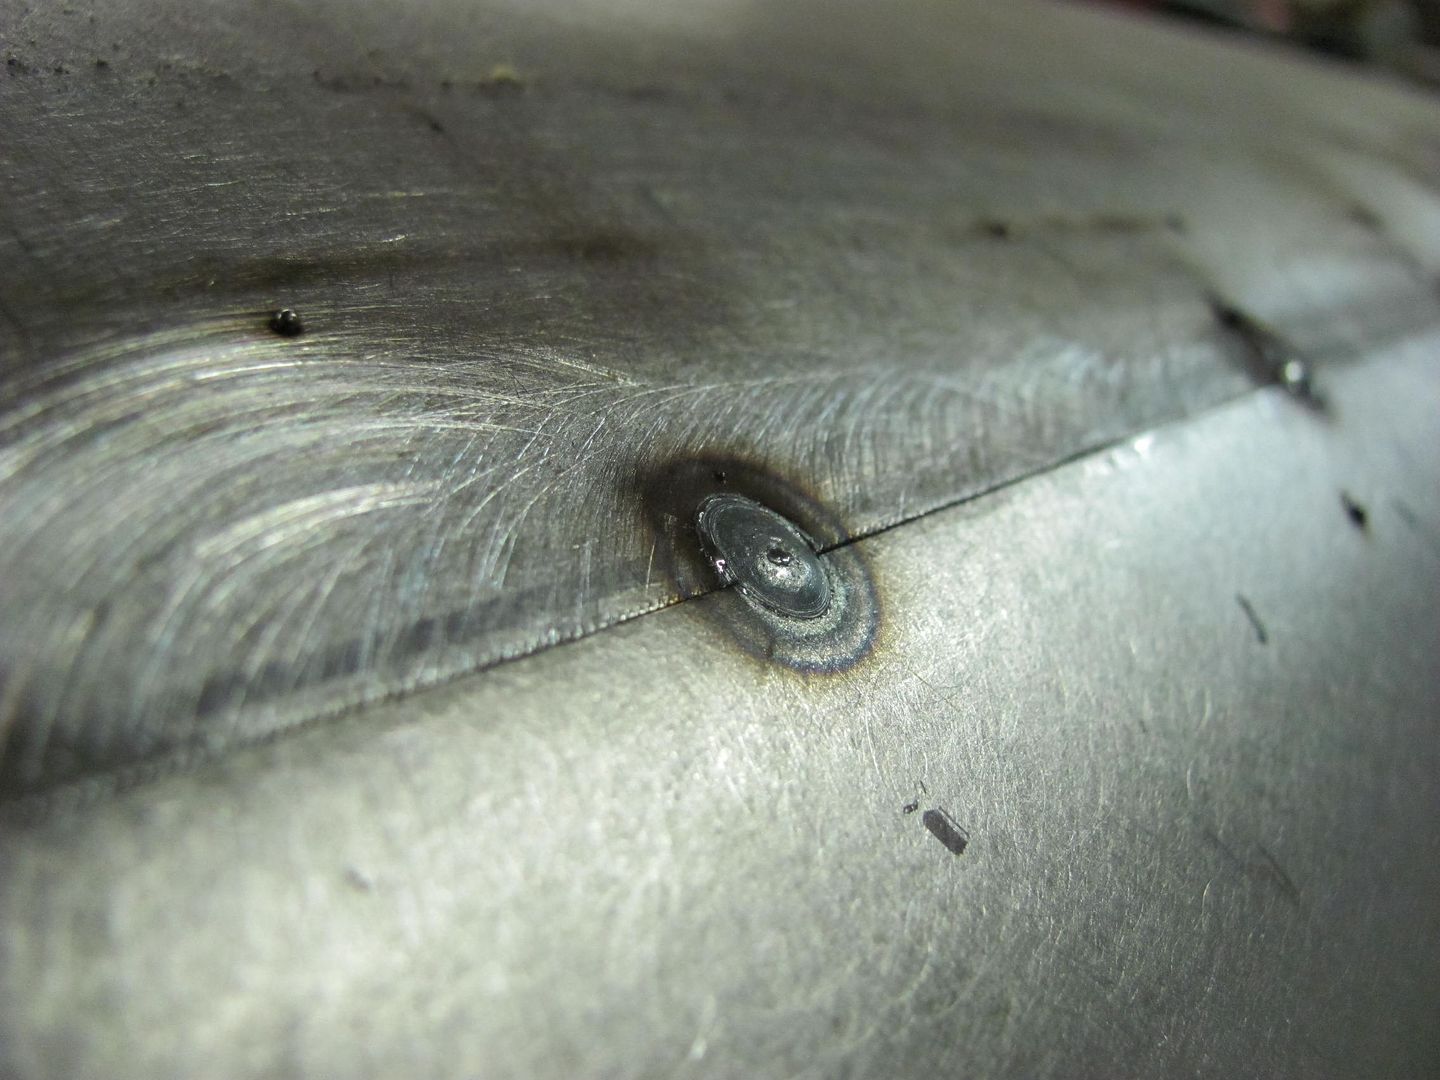 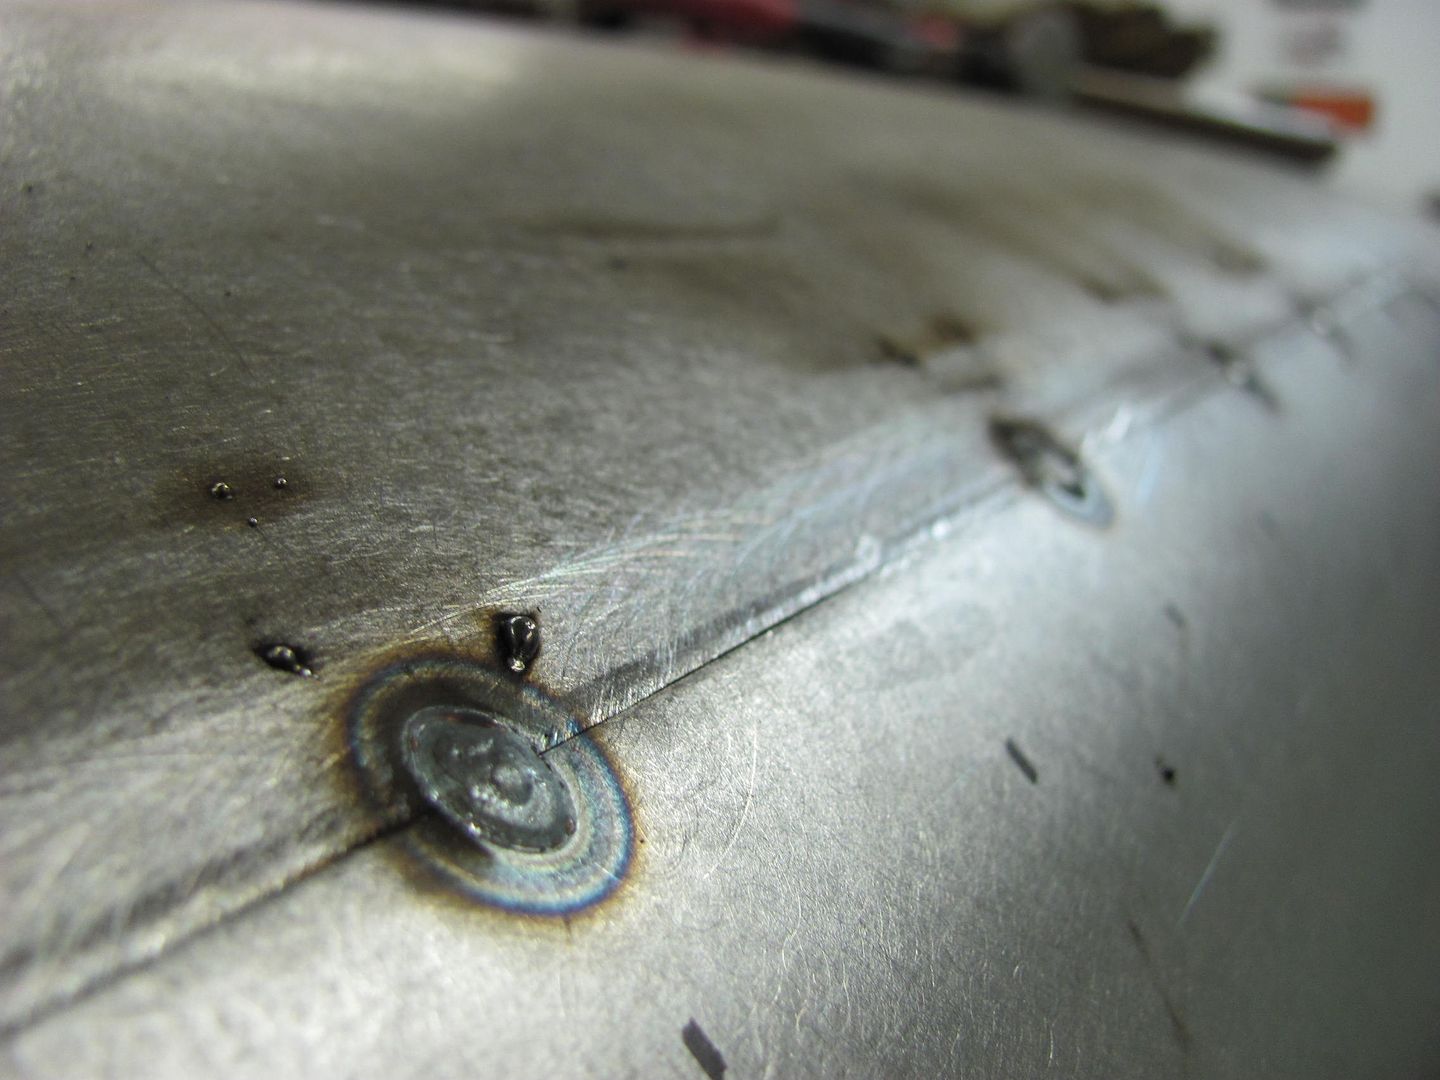 Full penetration welds....  The patch should be well high enough for planishing this time... 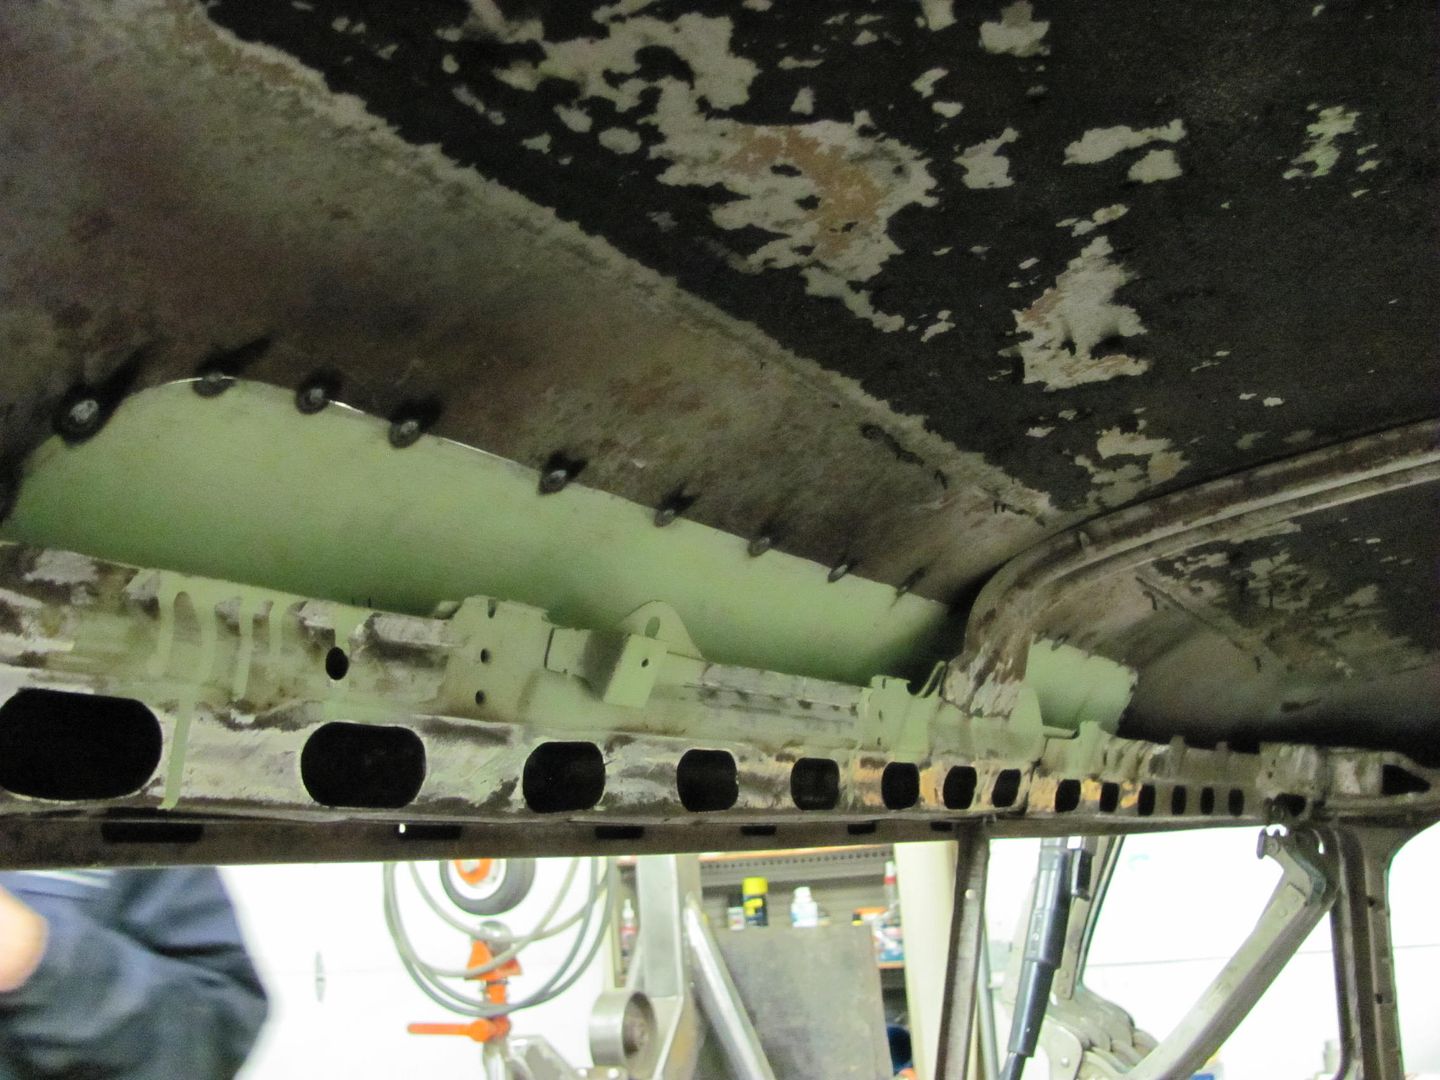 Here's where we left off..... 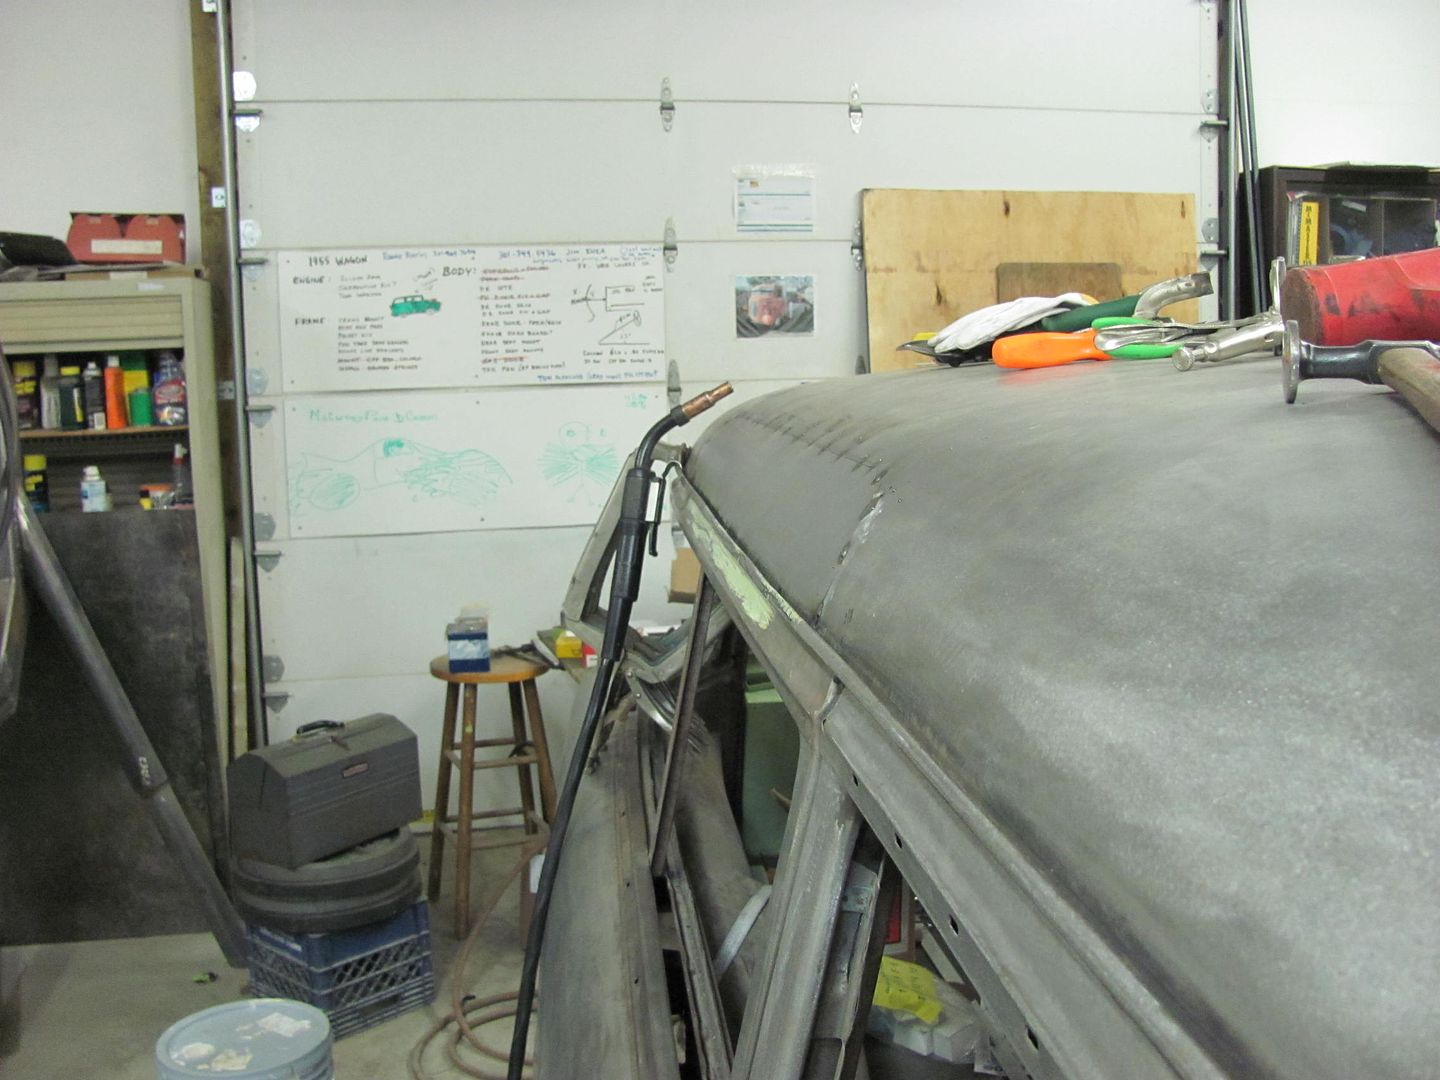 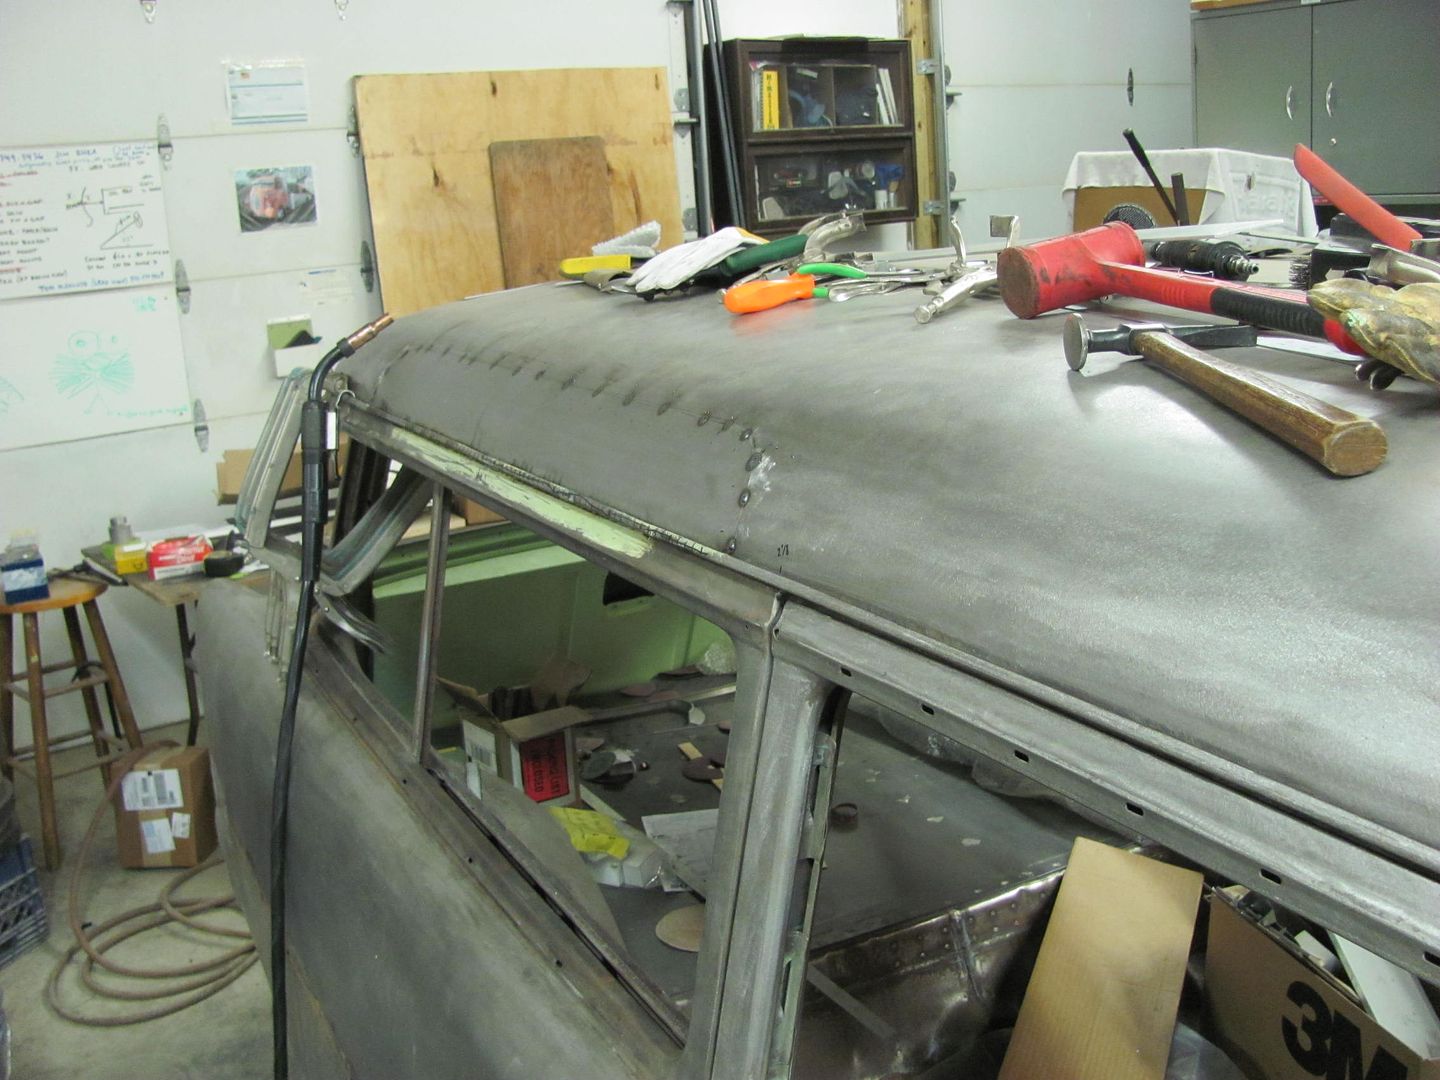
__________________
Robert |
|
|
|
|
02-07-2014, 01:07 AM
|
#115 |
|
Registered User
Join Date: Apr 2011
Location: .
Posts: 3,104
|
Re: 55 Wagon Progress
Thank you for showing all the precision craftsmanship.
|
|
|
|
|
02-07-2014, 10:43 AM
|
#116 |
|
Registered User
Join Date: Jan 2012
Location: Eastern Ontario, Canada
Posts: 1,041
|
Re: 55 Wagon Progress
MP&C. Nice job. Are you using a different nozzle on your mig gun?
__________________
1952 Canadian Chevy 1300 C4 IFS & D44 IRS 5.3 HO L33 My Build: http://67-72chevytrucks.com/vboard/s...d.php?t=632938 
|
|
|
|
|
02-07-2014, 10:50 AM
|
#117 |
|
Registered User
Join Date: Jan 2013
Location: Leonardtown, MD
Posts: 1,633
|
Re: 55 Wagon Progress
oops...double post
__________________
Robert Last edited by MP&C; 02-07-2014 at 11:10 AM. |
|
|
|
|
02-07-2014, 10:51 AM
|
#118 |
|
Registered User
Join Date: Jan 2013
Location: Leonardtown, MD
Posts: 1,633
|
Re: 55 Wagon Progress
The gun does have a screw in tip that is sized to the wire to keep it center, so I did change that out when I changed to the .023. Other than that, everything was the same...
__________________
Robert |
|
|
|
|
02-07-2014, 11:02 AM
|
#119 |
|
Registered User
Join Date: Jan 2012
Location: Eastern Ontario, Canada
Posts: 1,041
|
Re: 55 Wagon Progress
I understand the thread in tip is sized for 0.023 wire but what I meant was the outer nozzle. It looks like it has a step down in it like ones you can get for tig torches.
Thanks!
__________________
1952 Canadian Chevy 1300 C4 IFS & D44 IRS 5.3 HO L33 My Build: http://67-72chevytrucks.com/vboard/s...d.php?t=632938
|
|
|
|
|
02-07-2014, 11:12 AM
|
#120 |
|
Registered User
Join Date: Jan 2013
Location: Leonardtown, MD
Posts: 1,633
|
Re: 55 Wagon Progress
It does have a step down feature, but that's the same and only nozzle that came with the machine over 20 years ago...
__________________
Robert |
|
|
|
|
02-07-2014, 11:39 AM
|
#121 |
|
Registered User
Join Date: Jan 2012
Location: Eastern Ontario, Canada
Posts: 1,041
|
Re: 55 Wagon Progress
Cool! Never seen one like that before. Now on to the hunt for spoolarc easy grind locally.
__________________
1952 Canadian Chevy 1300 C4 IFS & D44 IRS 5.3 HO L33 My Build: http://67-72chevytrucks.com/vboard/s...d.php?t=632938
|
|
|
|
|
02-07-2014, 12:37 PM
|
#122 |
|
Registered User
Join Date: Jan 2013
Location: Leonardtown, MD
Posts: 1,633
|
Re: 55 Wagon Progress
If it's easier to find the -7, actually now that I've used the EZ grind, I prefer the -7. Both have nice flat welds, but the EZ tends to leave a patch of soot around the weld, and is more prone to splatter. I just think the -7 was cleaner. In planishing, comparing last night's roof repair to the earlier fender shaves using .035 -7 wire, to me the -7 appears to planish easier.. So if I had the choice, I would choose -7. If availability is an issue, either should be better than the harder welds of the -6 wire..
__________________
Robert |
|
|
|
|
02-07-2014, 12:56 PM
|
#123 |
|
Registered User
Join Date: Jan 2012
Location: Eastern Ontario, Canada
Posts: 1,041
|
Re: 55 Wagon Progress
Thanks! All I can find is the -6 stuff and that is what I'm using. 0.023. Suppliers all say "all we have is over there on the shelf".
__________________
1952 Canadian Chevy 1300 C4 IFS & D44 IRS 5.3 HO L33 My Build: http://67-72chevytrucks.com/vboard/s...d.php?t=632938
|
|
|
|
|
02-07-2014, 12:59 PM
|
#124 |
|
Registered User
Join Date: Jan 2013
Location: Leonardtown, MD
Posts: 1,633
|
Re: 55 Wagon Progress
I've had to order mine, but if your supplier doesn't seem willing there's always online...
__________________
Robert |
|
|
|
|
02-11-2014, 11:20 AM
|
#125 |
|
Registered User
Join Date: Apr 2003
Location: Indep, MO
Posts: 5,893
|
Re: 55 Wagon Progress
Good to hear a straight comparison. I really liked the EZ grind, especially vs. -6. It takes a bit of adjustment!
I bought my 2# spool off Amazon.
__________________
Boppa's Old Yeller Truck Build, Old Yeller's New Heart! Project Buzz Bomb Flyin' Low! |
|
|
|
 |
| Bookmarks |
|
|


 Linear Mode

