
|
 05-08-2014, 03:15 PM
|
#176 | ||
|
Registered User
Join Date: Jan 2013
Location: Leonardtown, MD
Posts: 1,633
|
Re: 55 Wagon Progress
Quote:
Where are you located? Peter Tommasini is going to be giving some workshops later this year.. Quote:
Gator normally announces his meets on either Metalmeet or Allmetalshaping...
__________________
Robert |
||

|

|
|
05-08-2014, 05:18 PM
|
#177 |
|
Registered User
Join Date: Oct 2007
Location: Spanaway
Posts: 8,451
|
Re: 55 Wagon Progress
Washington state. I hear its pretty pricy too.. I'll google the Metalmeet or Allmetalshaping sites.
__________________
Mike. Swamp Rat build thread : http://67-72chevytrucks.com/vboard/s...d.php?t=595019 72 3/4T 4X4 4" BDS Lift 33" BFG's |
|
|
|
|
05-24-2014, 04:27 PM
|
#178 |
|
Registered User
Join Date: Jan 2013
Location: Leonardtown, MD
Posts: 1,633
|
Re: 55 Wagon Progress
Swamprat, Larry at West Coast Metalshapers was asking if anyone was interested in a PNW metalshaping meet. Check it out....
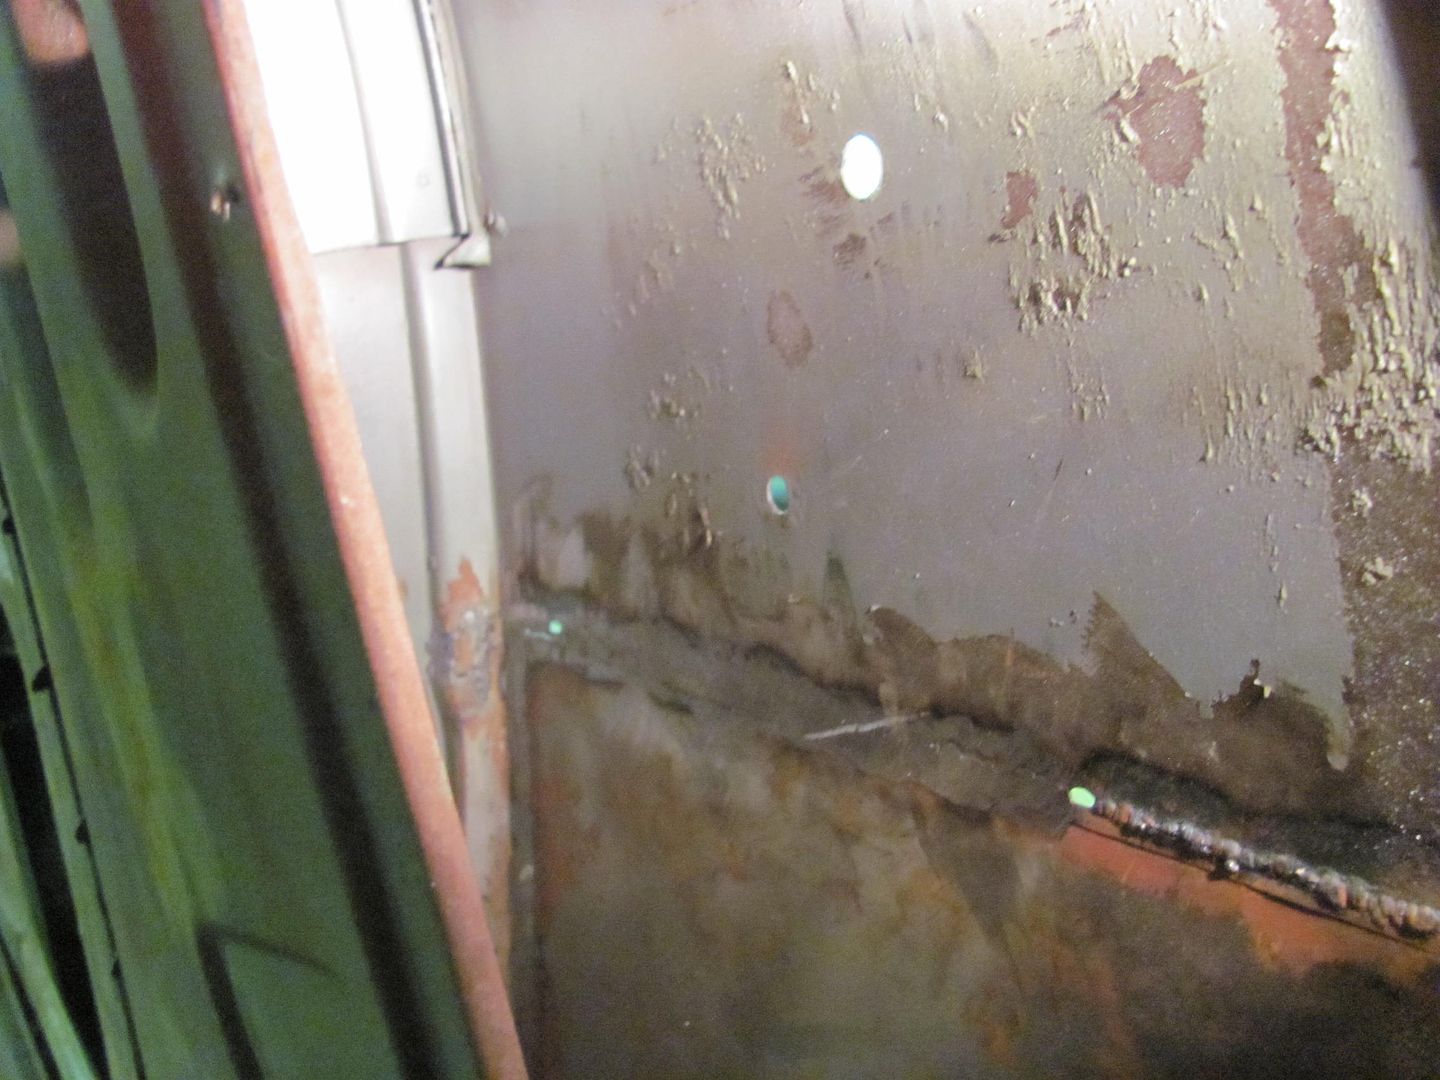
http://westcoastmetalshapers.com/for...ead.php?t=7015 Another item to get crossed off the list, there was a questionable spot on the drip rail above the lift gate. 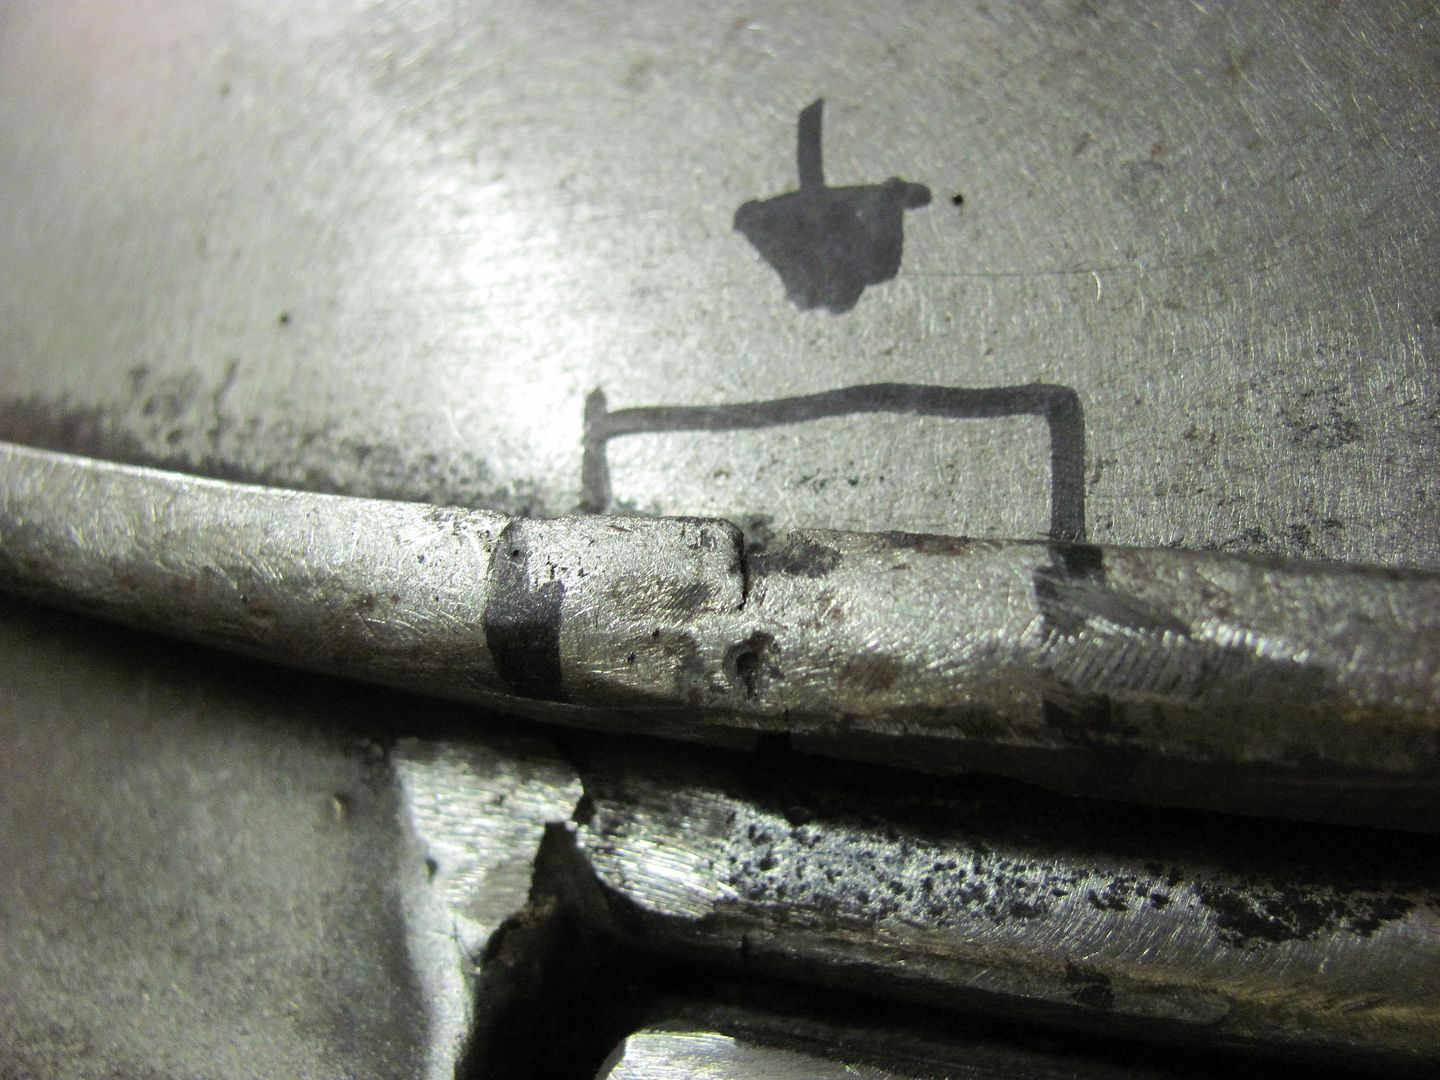  After cutting it out, this appears to be the factory seam for joining two sections. 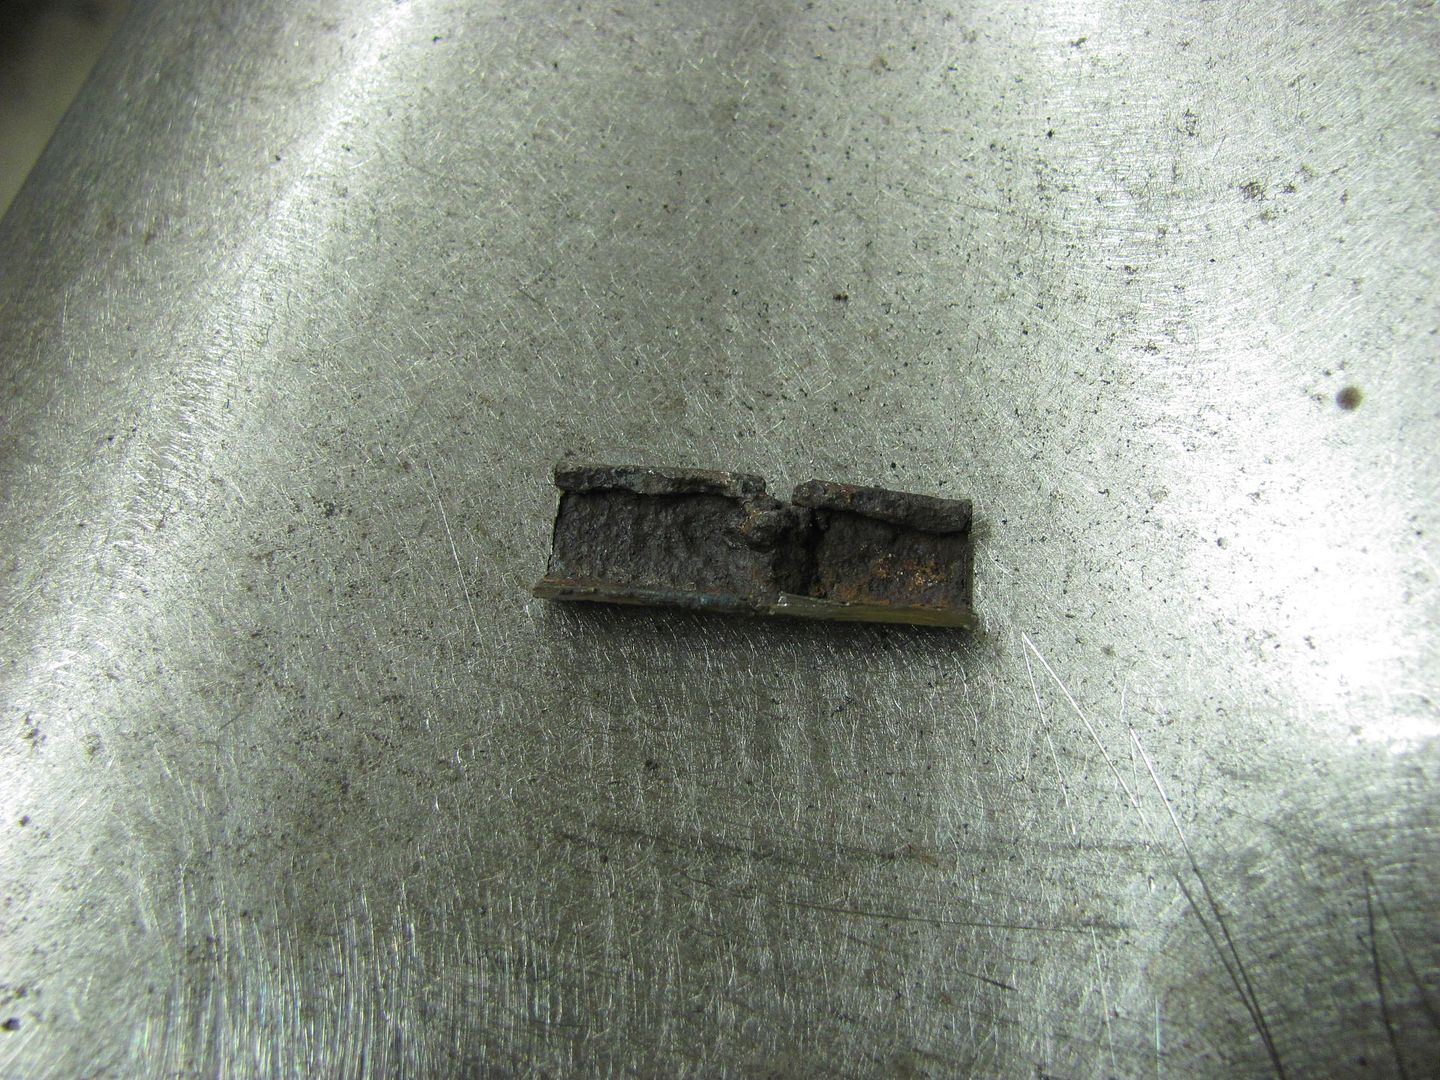 Looking at the profile, we'll add the top hem first... 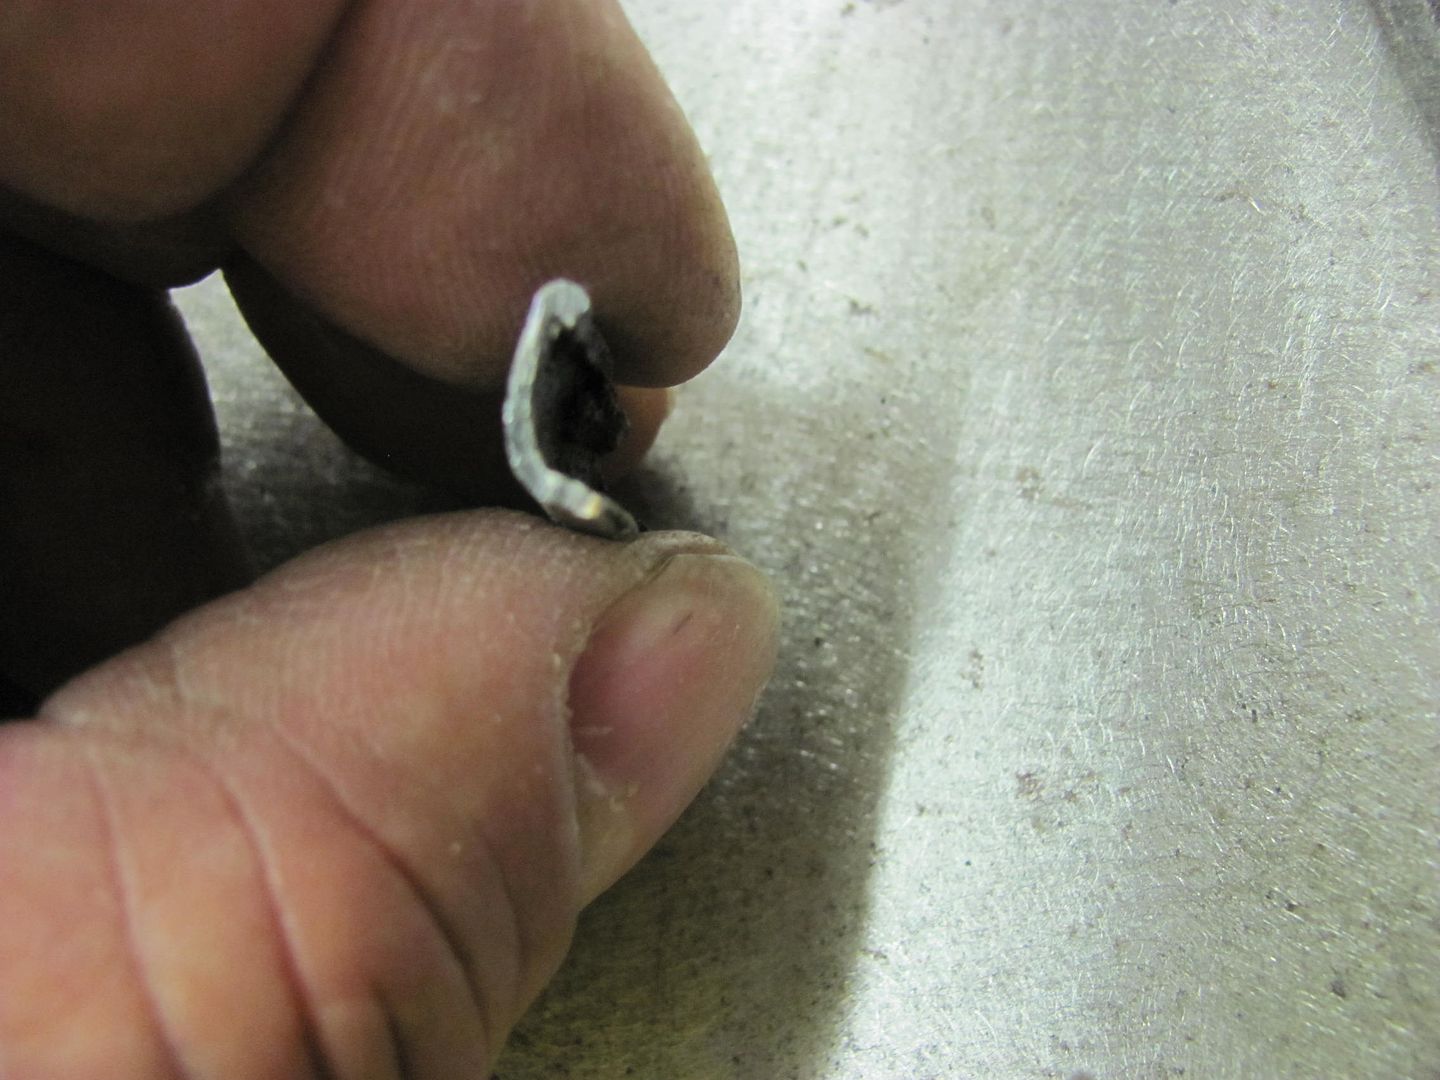 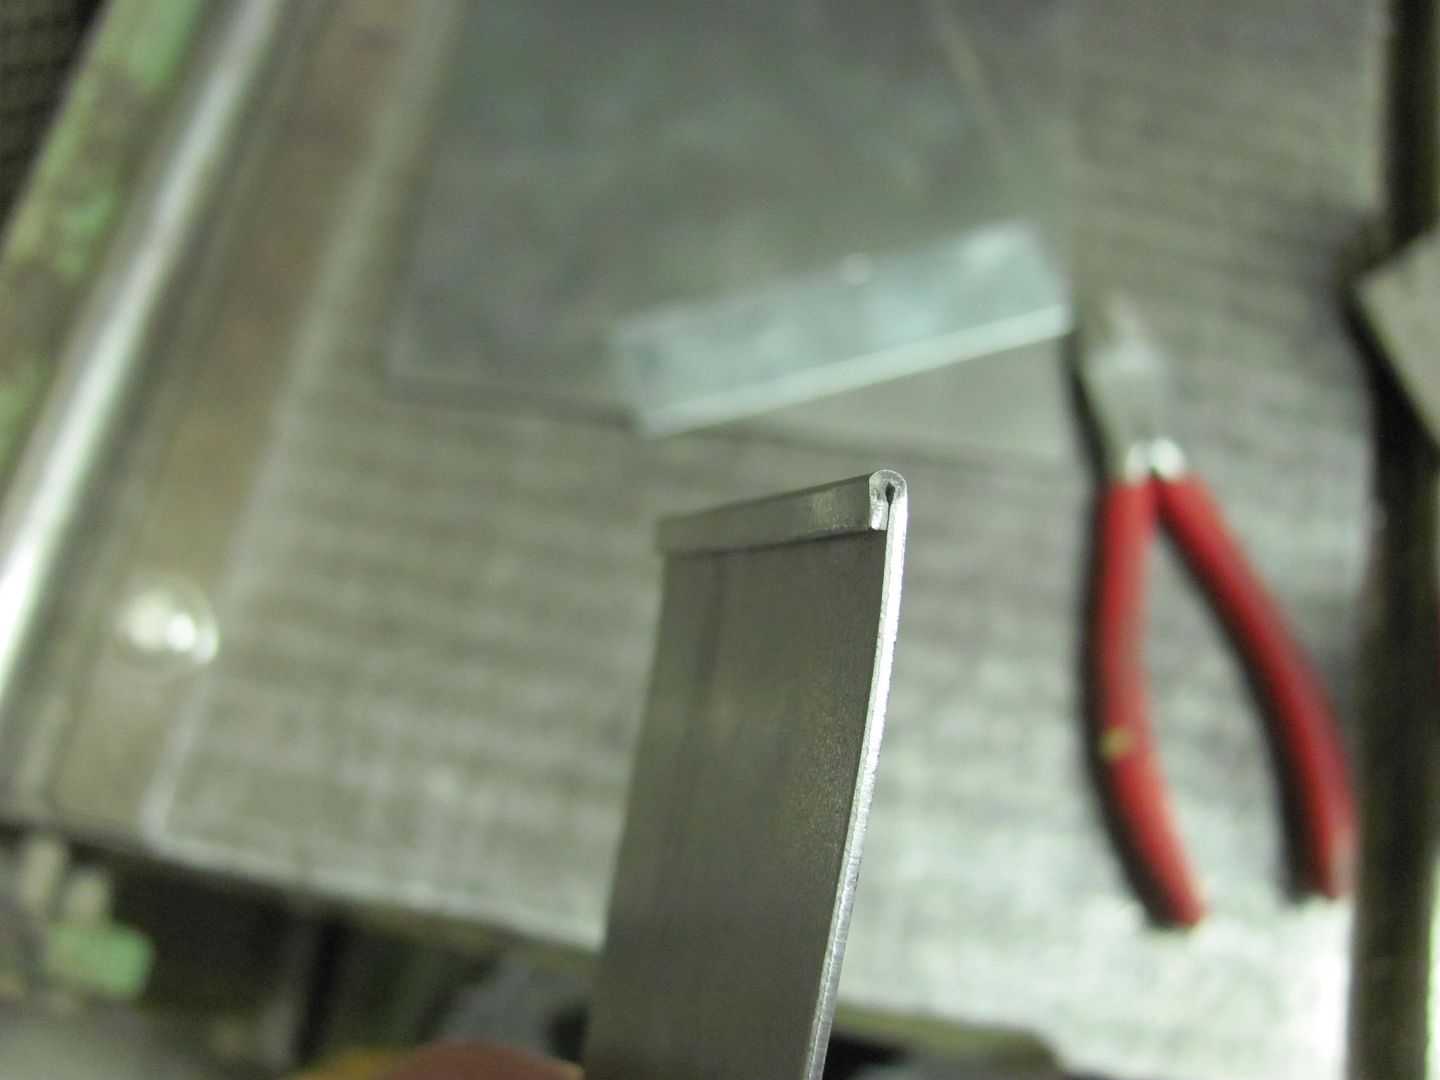 Then a radius die and the skateboard wheel in the bead roller was used to add the profile to the replacement... 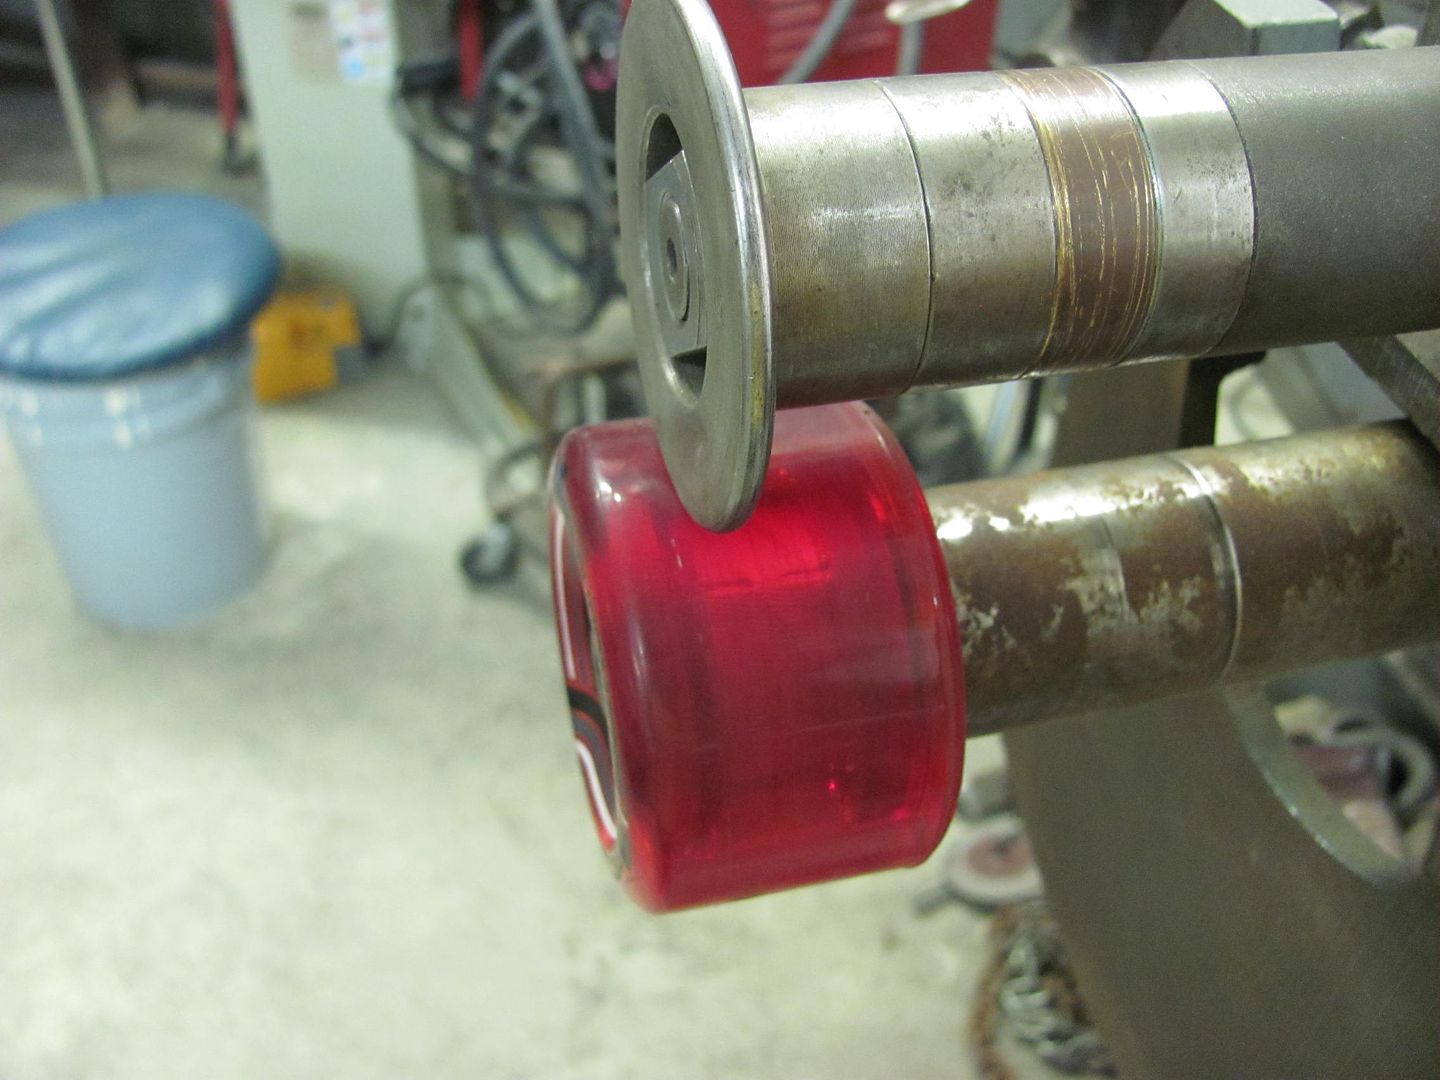 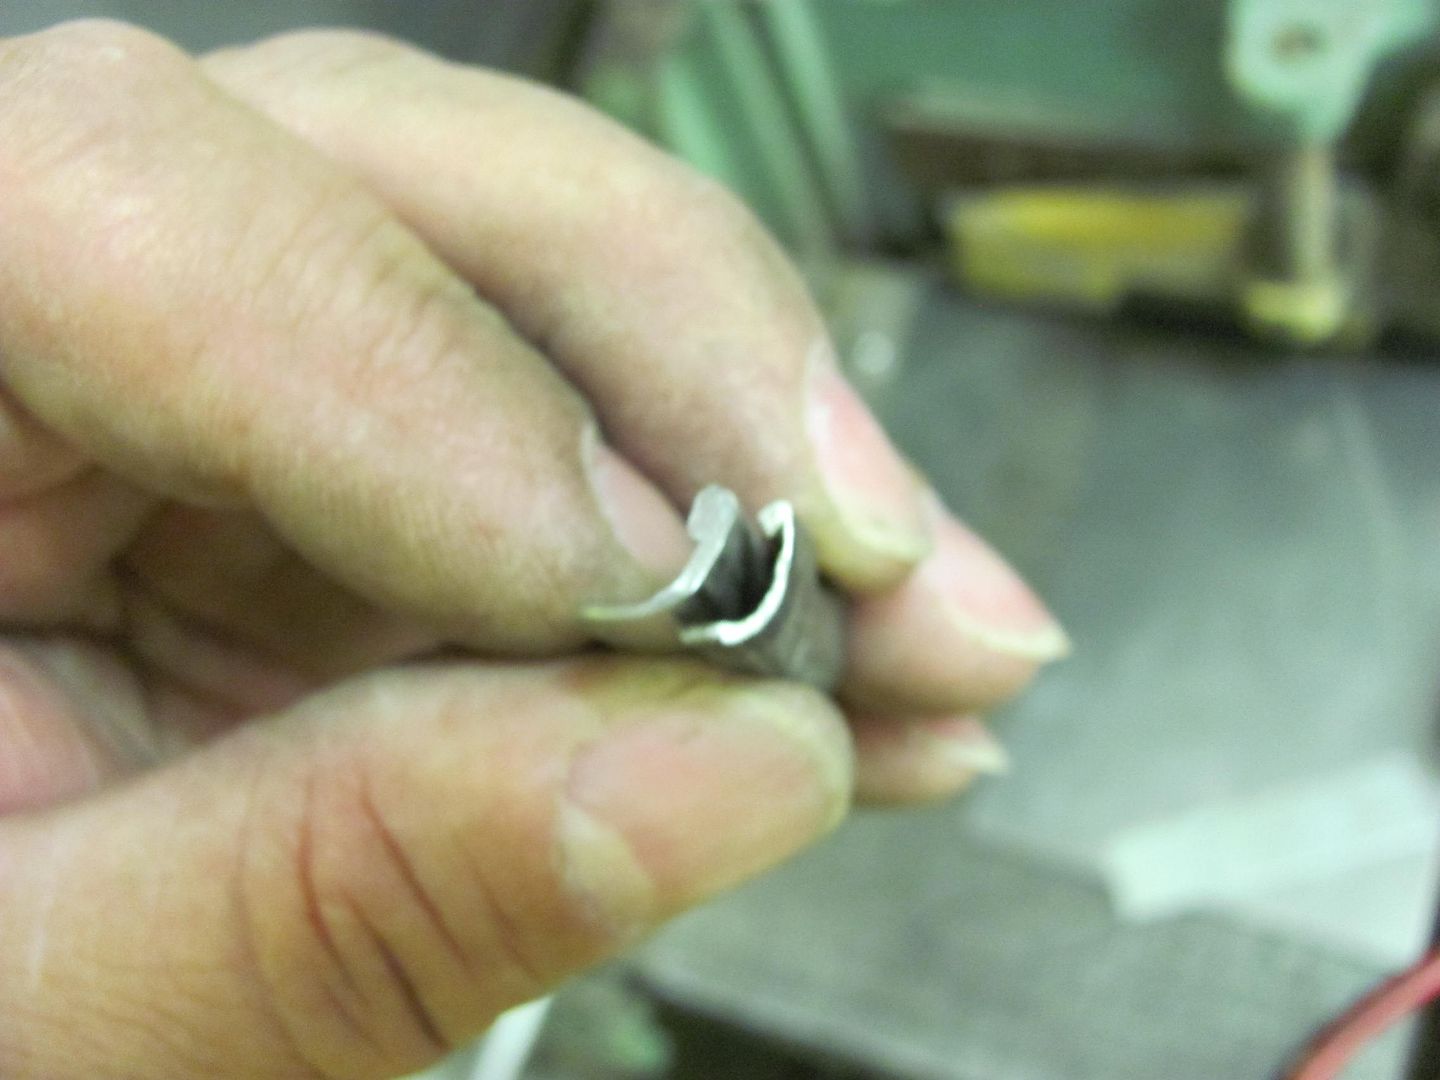 The area where the hem adds another thickness is chamfered to insure good weld penetration... 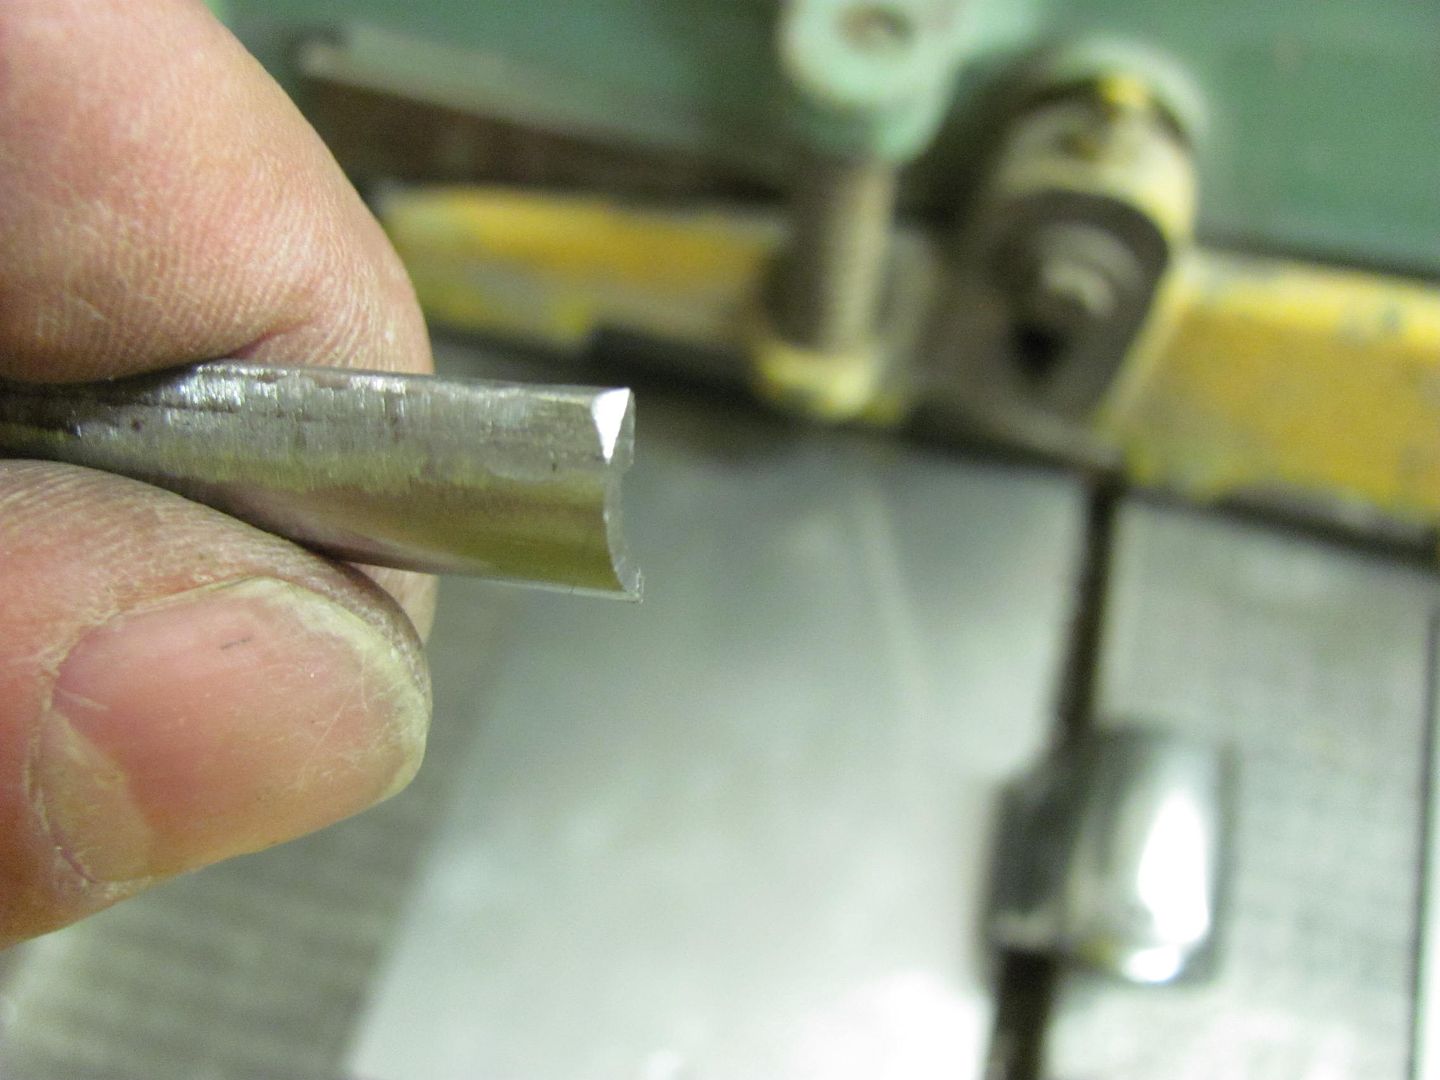 All welded in place and welds dressed... 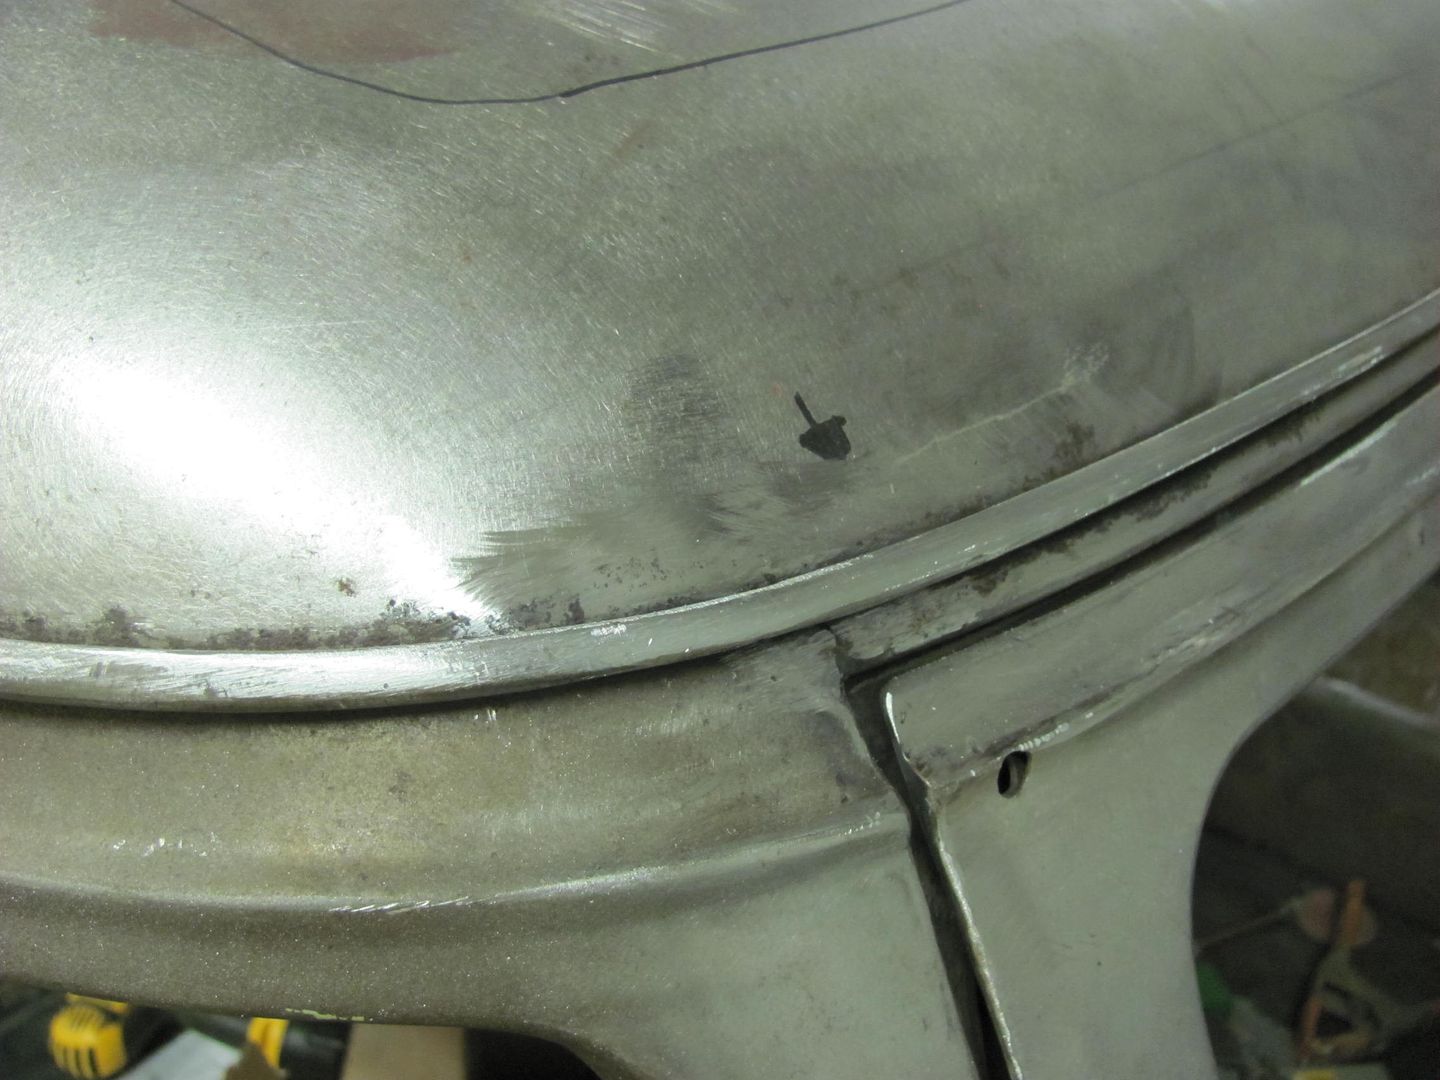 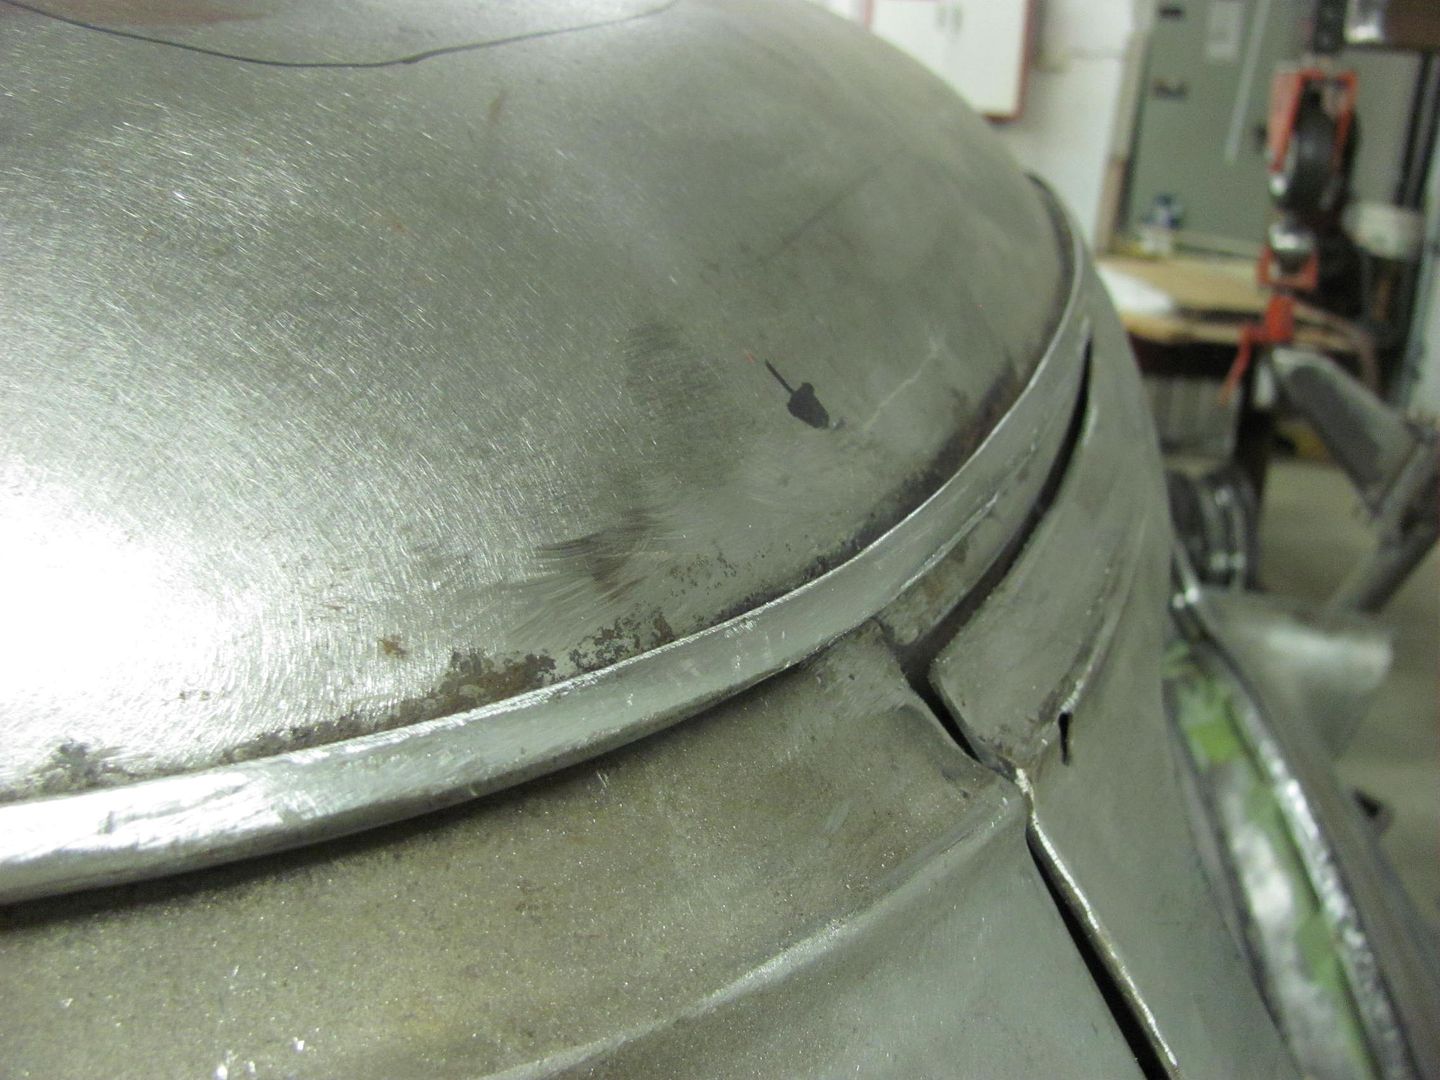 Much better!
__________________
Robert |
|
|
|
|
06-08-2014, 11:36 PM
|
#179 |
|
Registered User
Join Date: Jan 2013
Location: Leonardtown, MD
Posts: 1,633
|
Re: 55 Wagon Progress
A few months ago, I had bought a 60" Starrett rule.
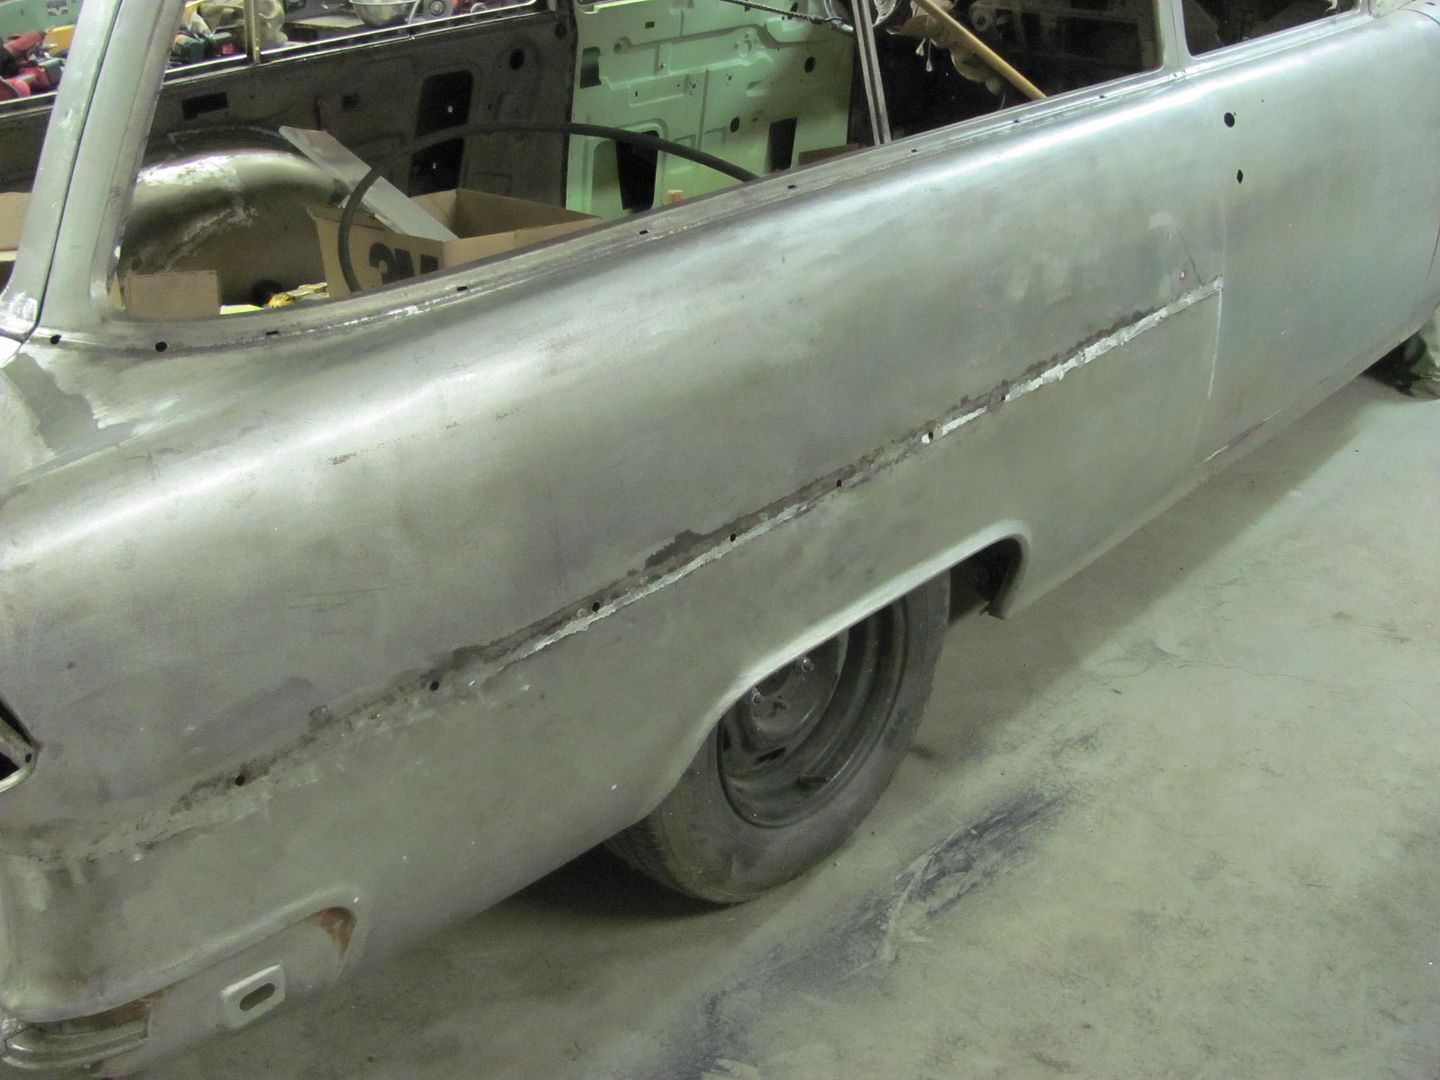
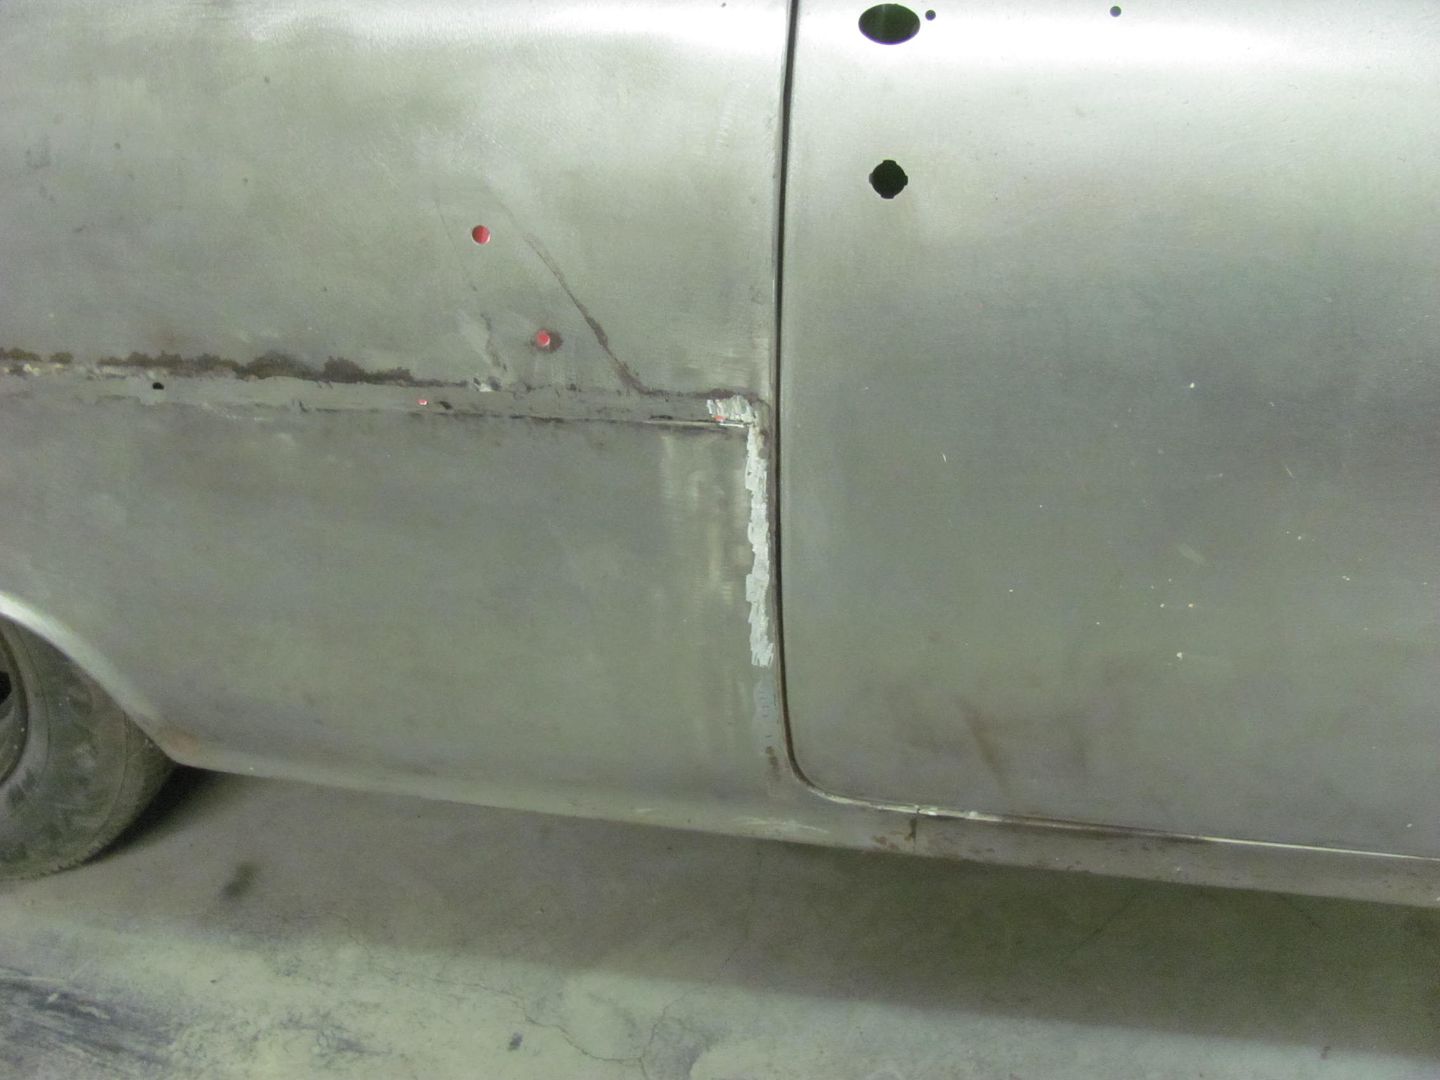
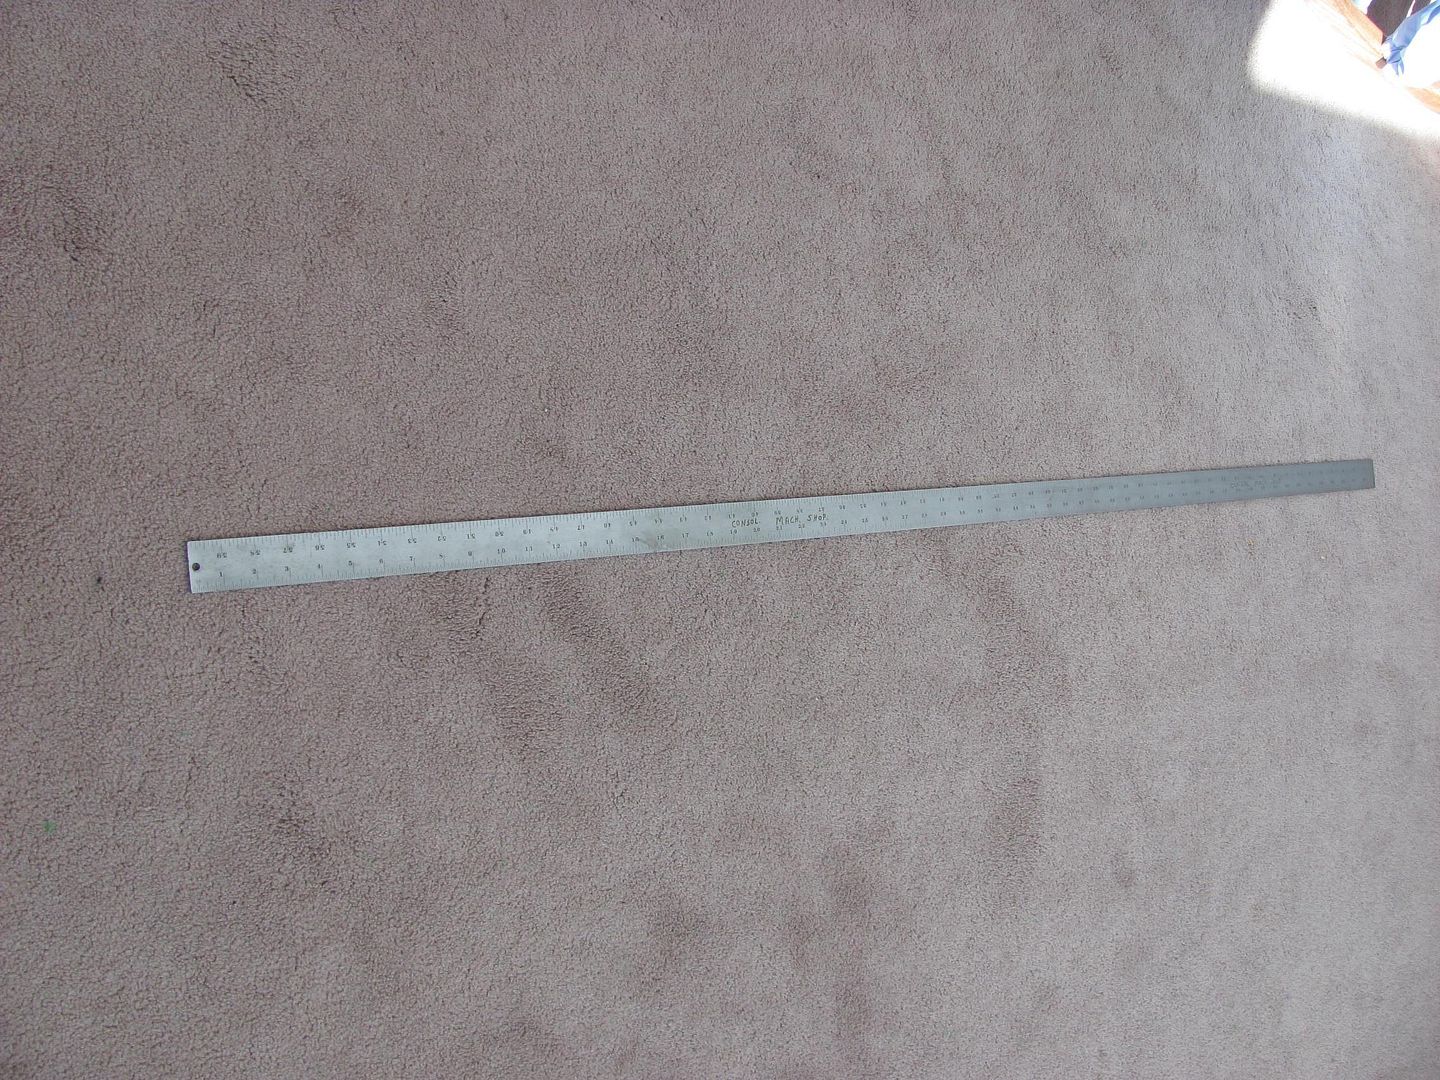 One of the first things I checked with it was the vertical weld that joined the 4 door NOS quarter on the drivers side of the 55. Previous to this the largest rule I had was a 24", which did not show the deflection as well. When the 60" rule spanned the joint, it showed a pronounced high spot at the vertical weld instead of the gradual crown that the panel should have. I'm not one to overload something with bondo to cover up something like this, so the vertical weld as well as part of the horizontal was sliced open to re-adjust the panel and get the correct contour. After the slicing was complete, despite the panels coming together slightly, the gap was slightly wider than the first time welded. The butt weld clamps did not work all that well in keeping the panels where they needed to be, and after about the third time of the square peg falling out of the hole, I made a slight modification to better keep the peg from falling out. About one third the way down, the peg was punched on all four sides to keep from falling out. 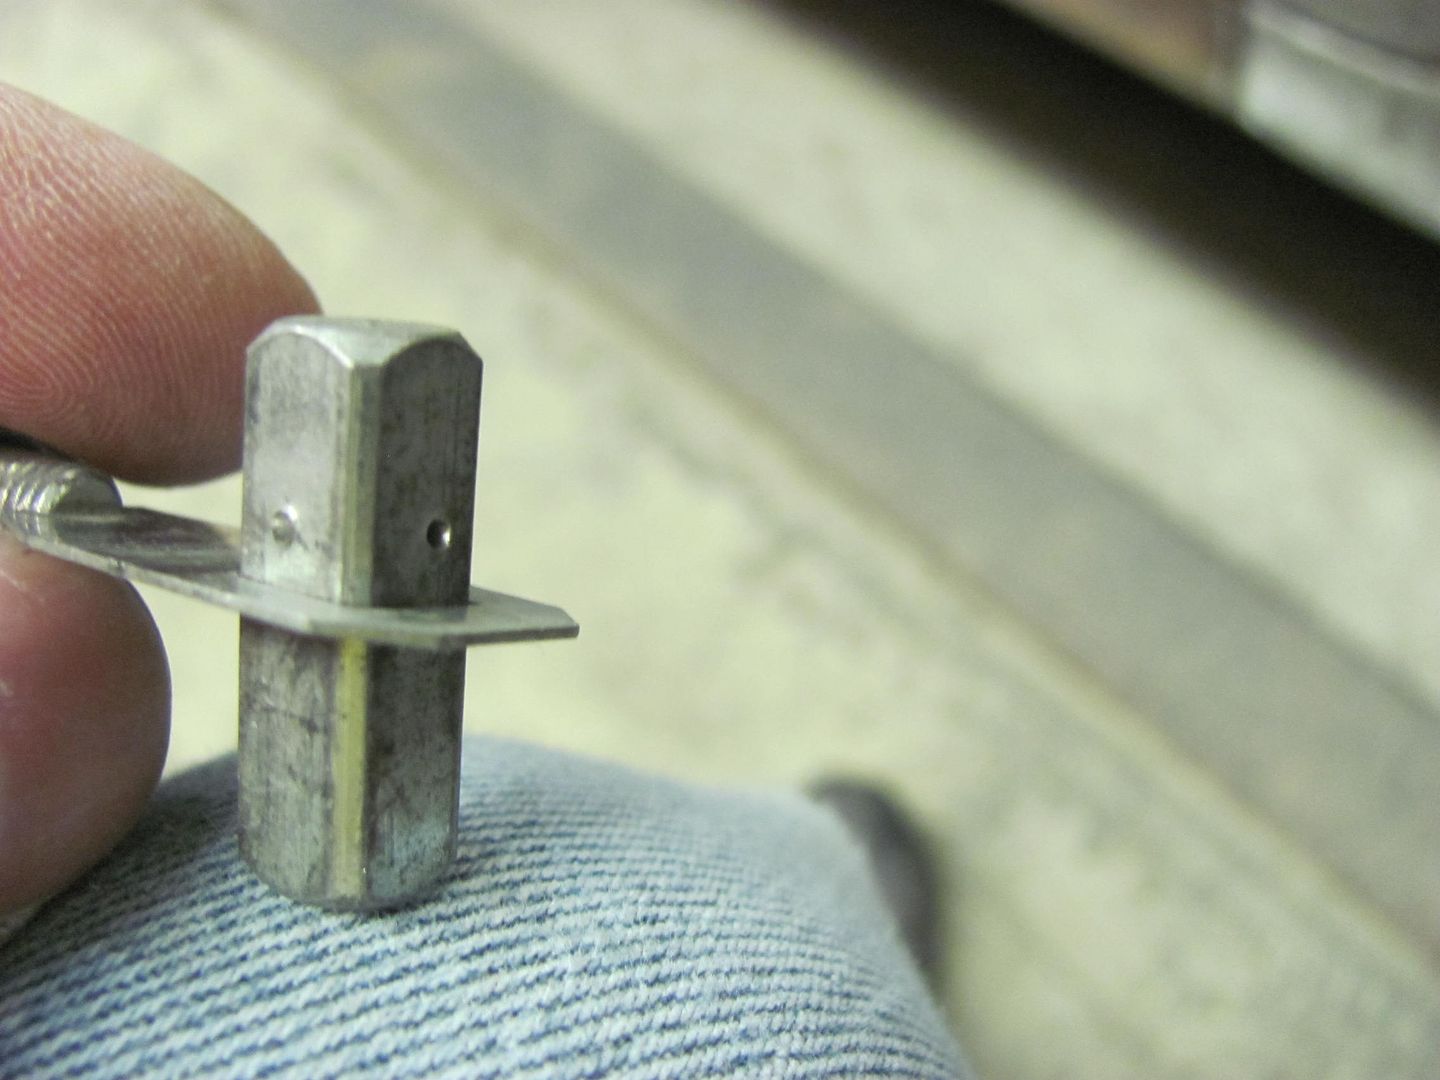 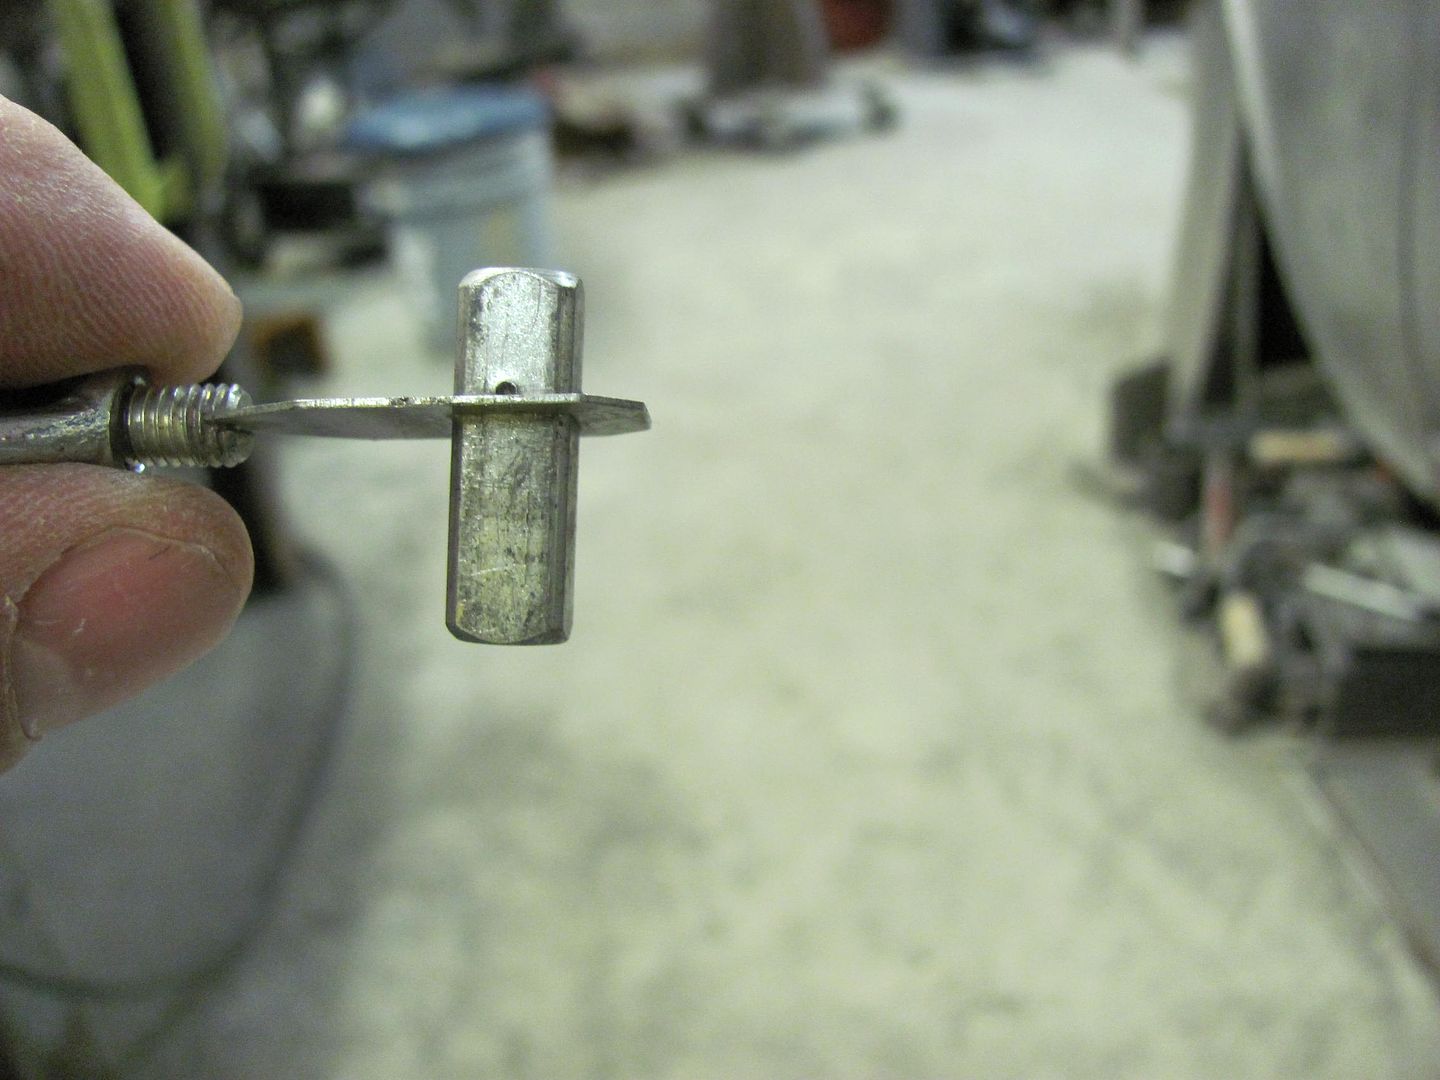 Although I didn't get pictures of this part, the modified clamp worked especially well in gapping the horizontal weld joint to better fit the profile template for the crown of the panel. Basically with the peg no longer falling out, the portion of the butt weld clamp shown above was used to pull out on the panel until it filled the profile template, then the panels were tacked at that point. Move another couple inches, repeat. This got the vertical crown back where it should be. This was process was repeated for the vertical weld to correct the horizontal crown along the length of the quarter, checking across the vertical seam with the 60" rule. This picture was taken afterwards with the smaller rule so I could hold all the components and the camera, but gives an idea how the "partial clamp" was used to get the panel's crown correct. 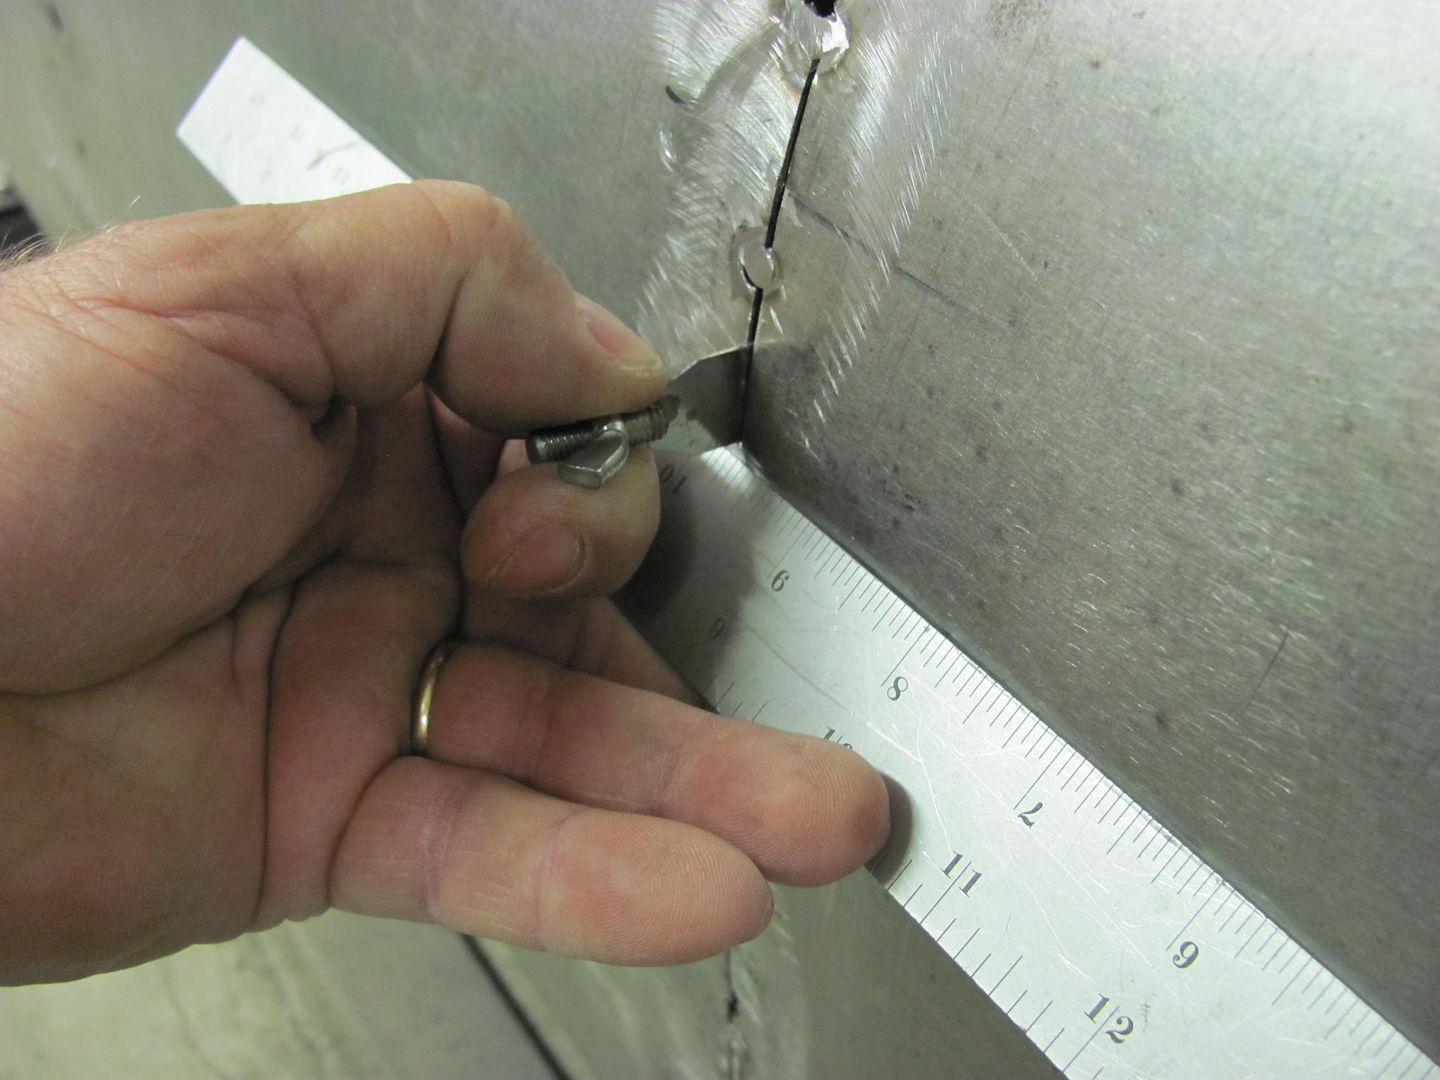 I don't typically used gaps in welding panels, was kinda forced into this to get the crown corrected, so I needed to make a copper backing tool. I had some rare earth magnets so I used one along with some flattened copper pipe. Note the magnet is ever so slightly raised to insure the copper is pulled good and snug to the panel.. 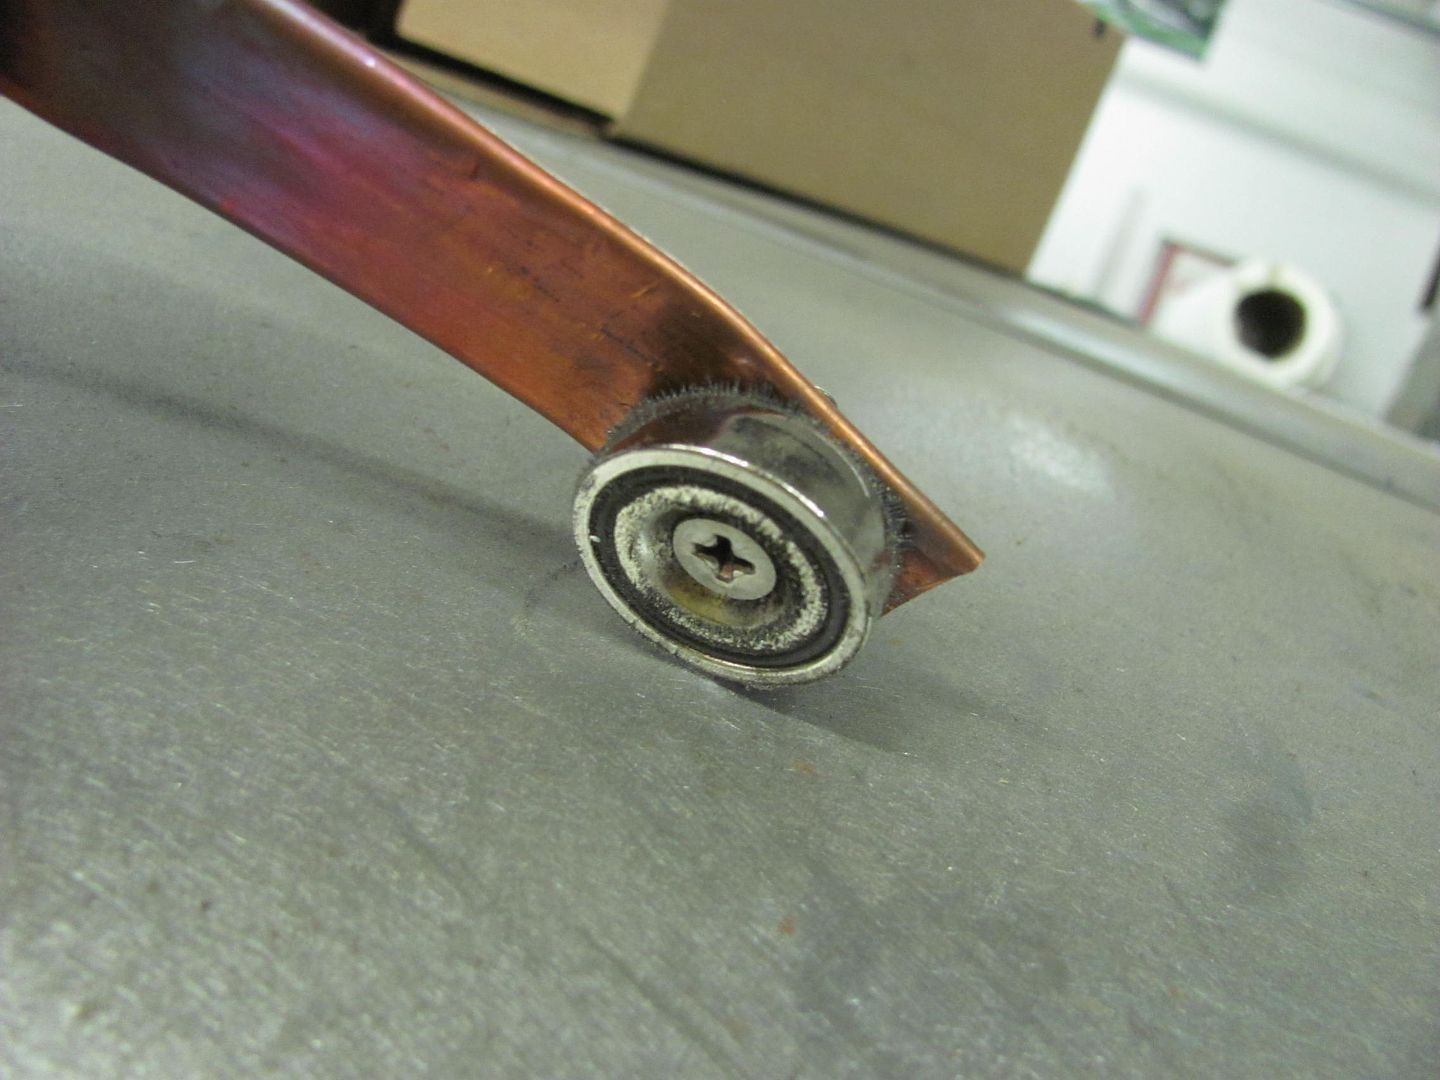 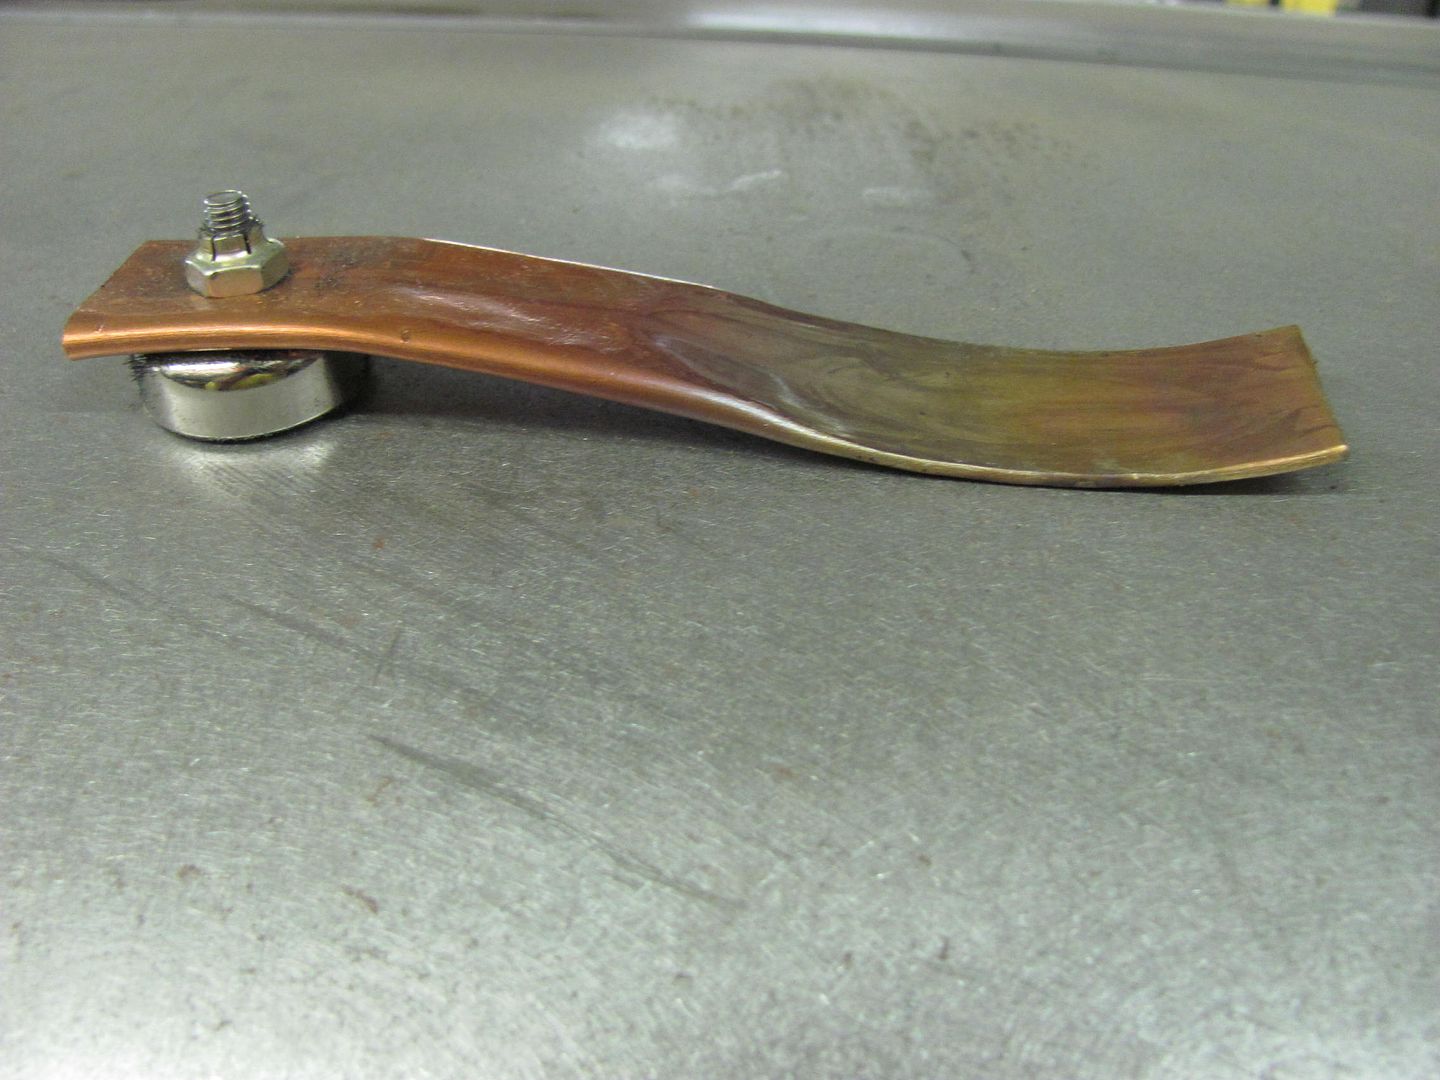 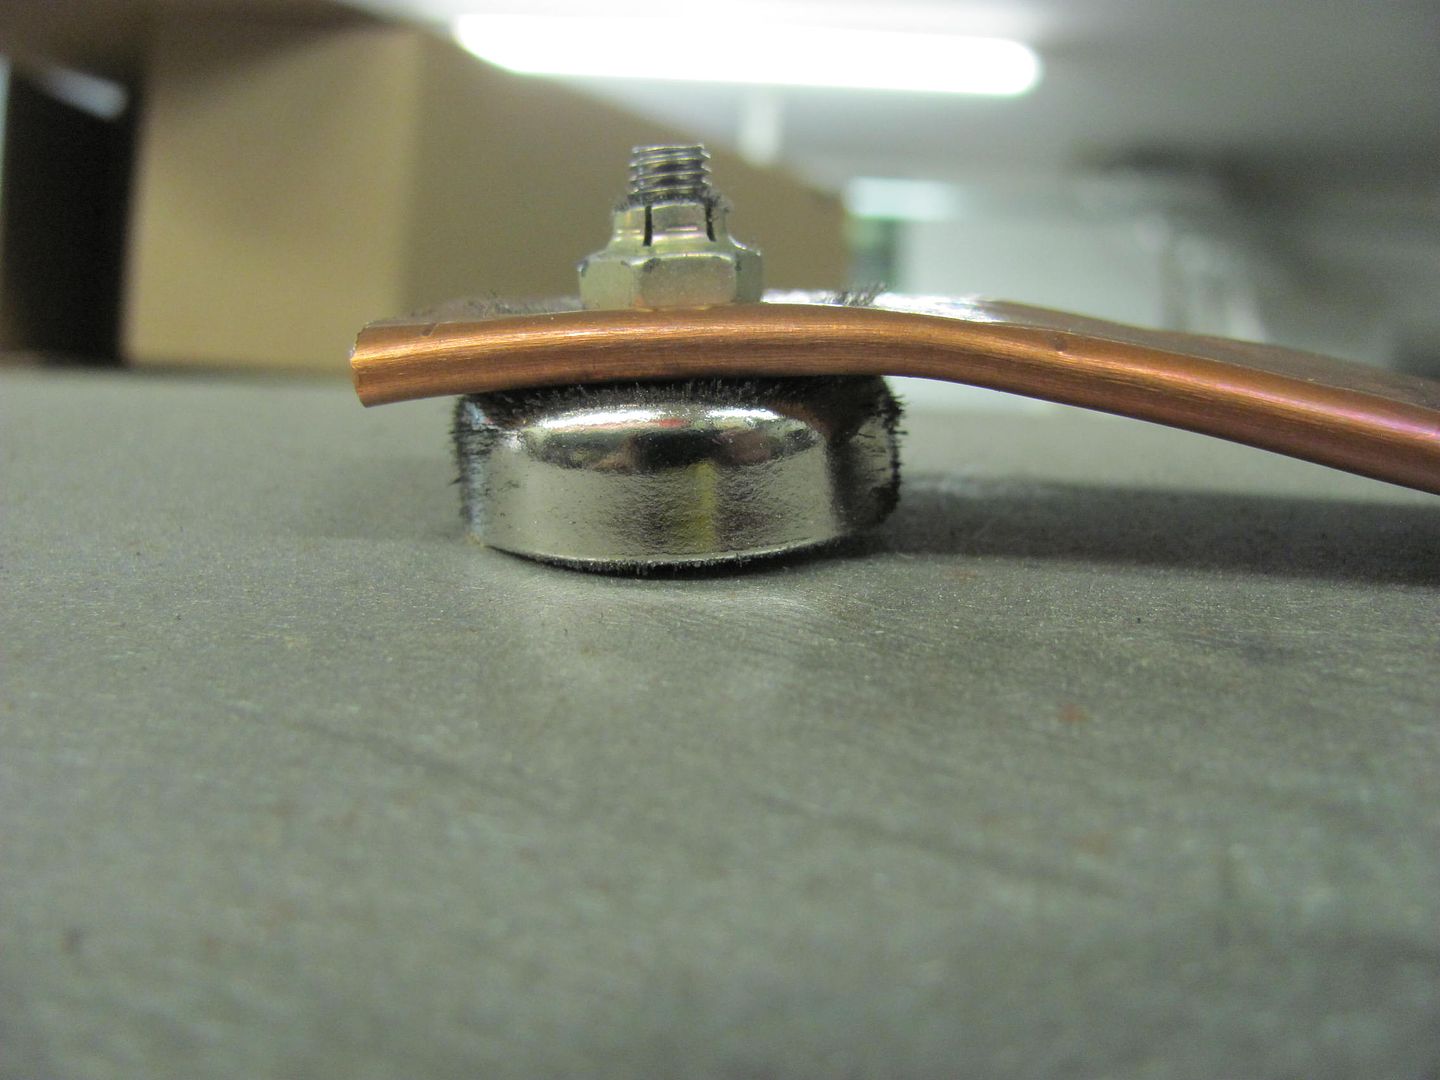 Each use will tend to leave the copper soot covered, so I used a welding brush to clean the copper between each weld. 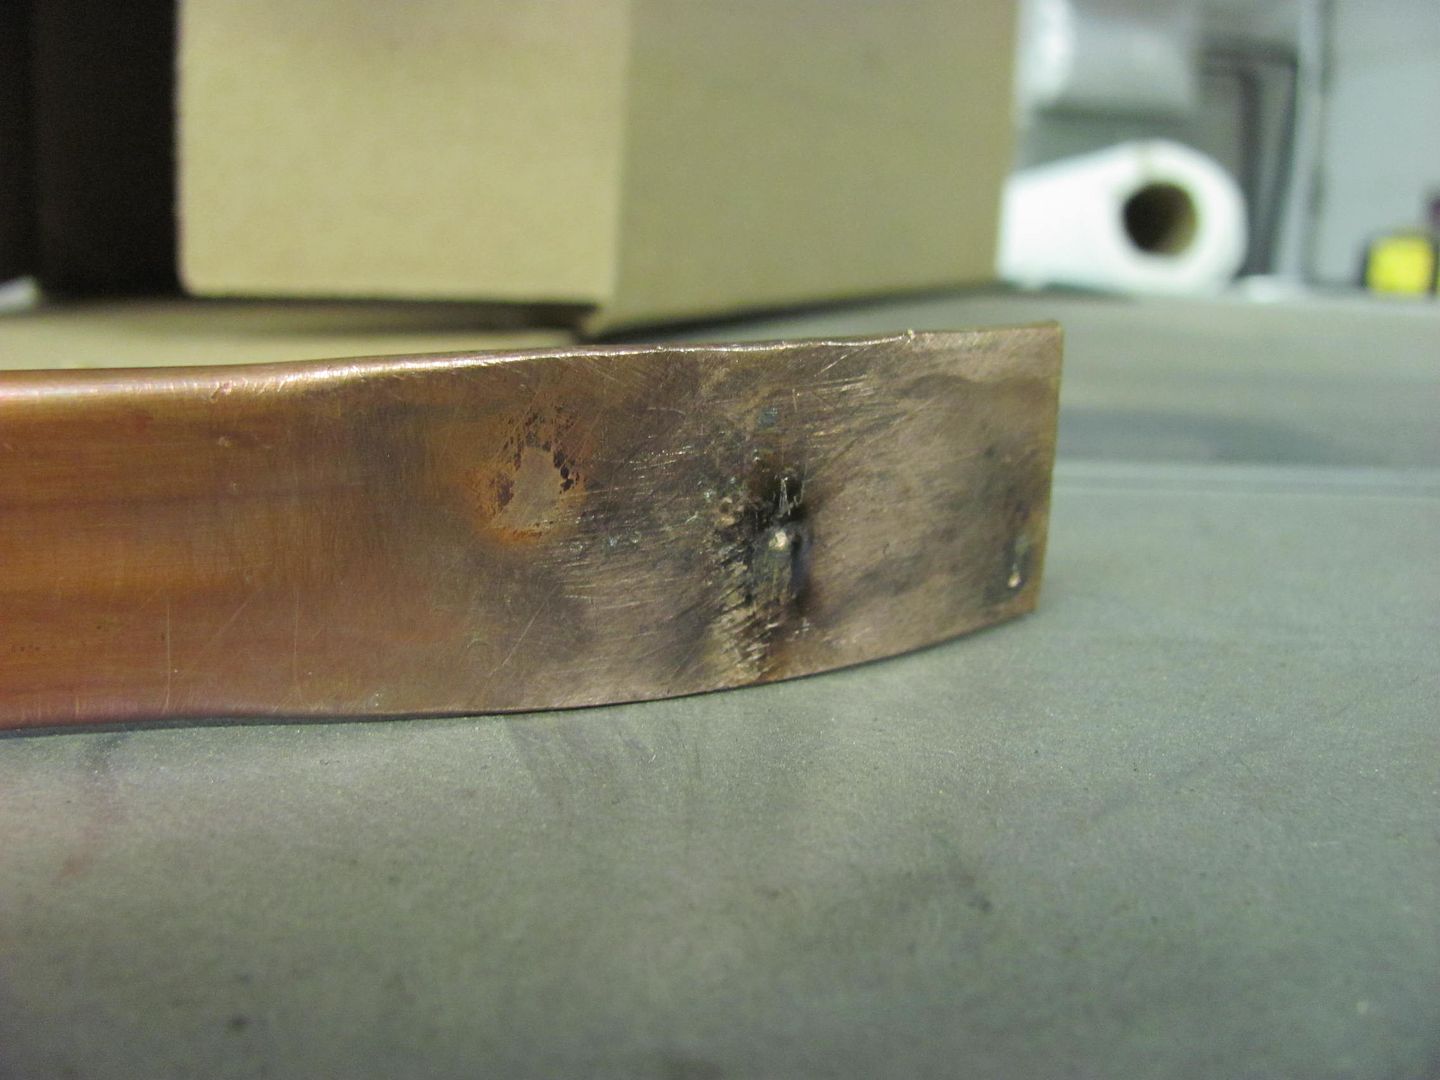 Welds all complete, just a few left to planish and dress, then some panel bumping and we should have one more thing crossed off the list.. 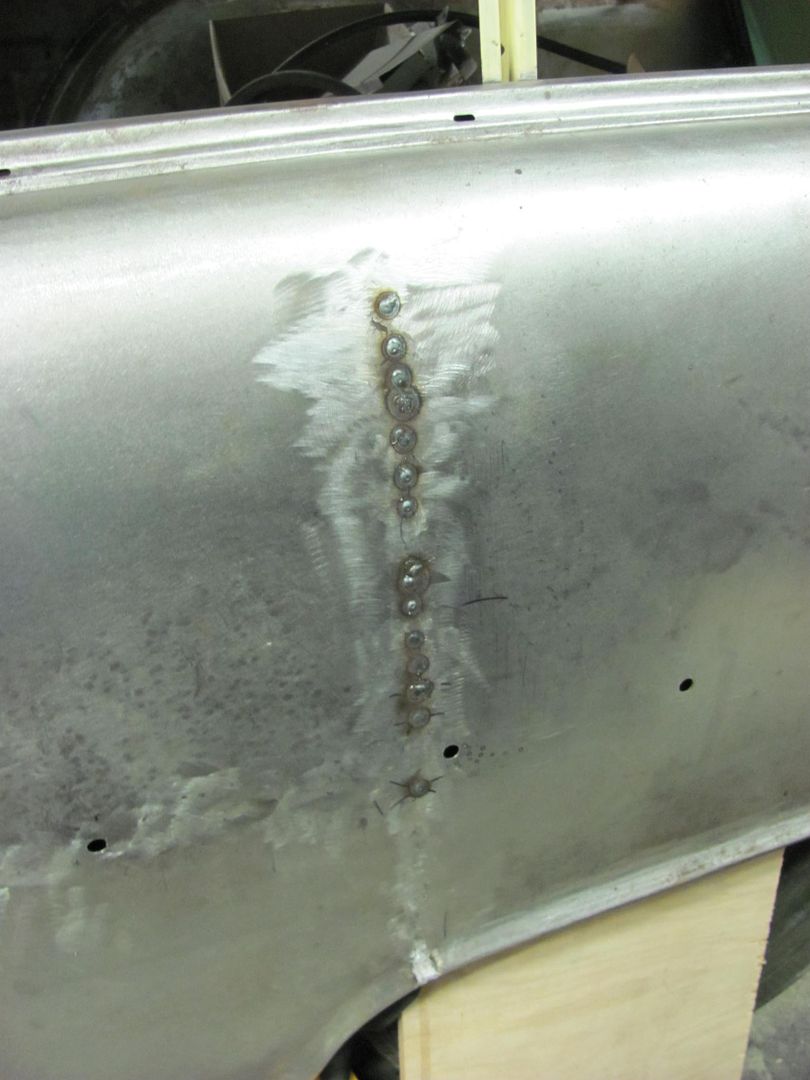 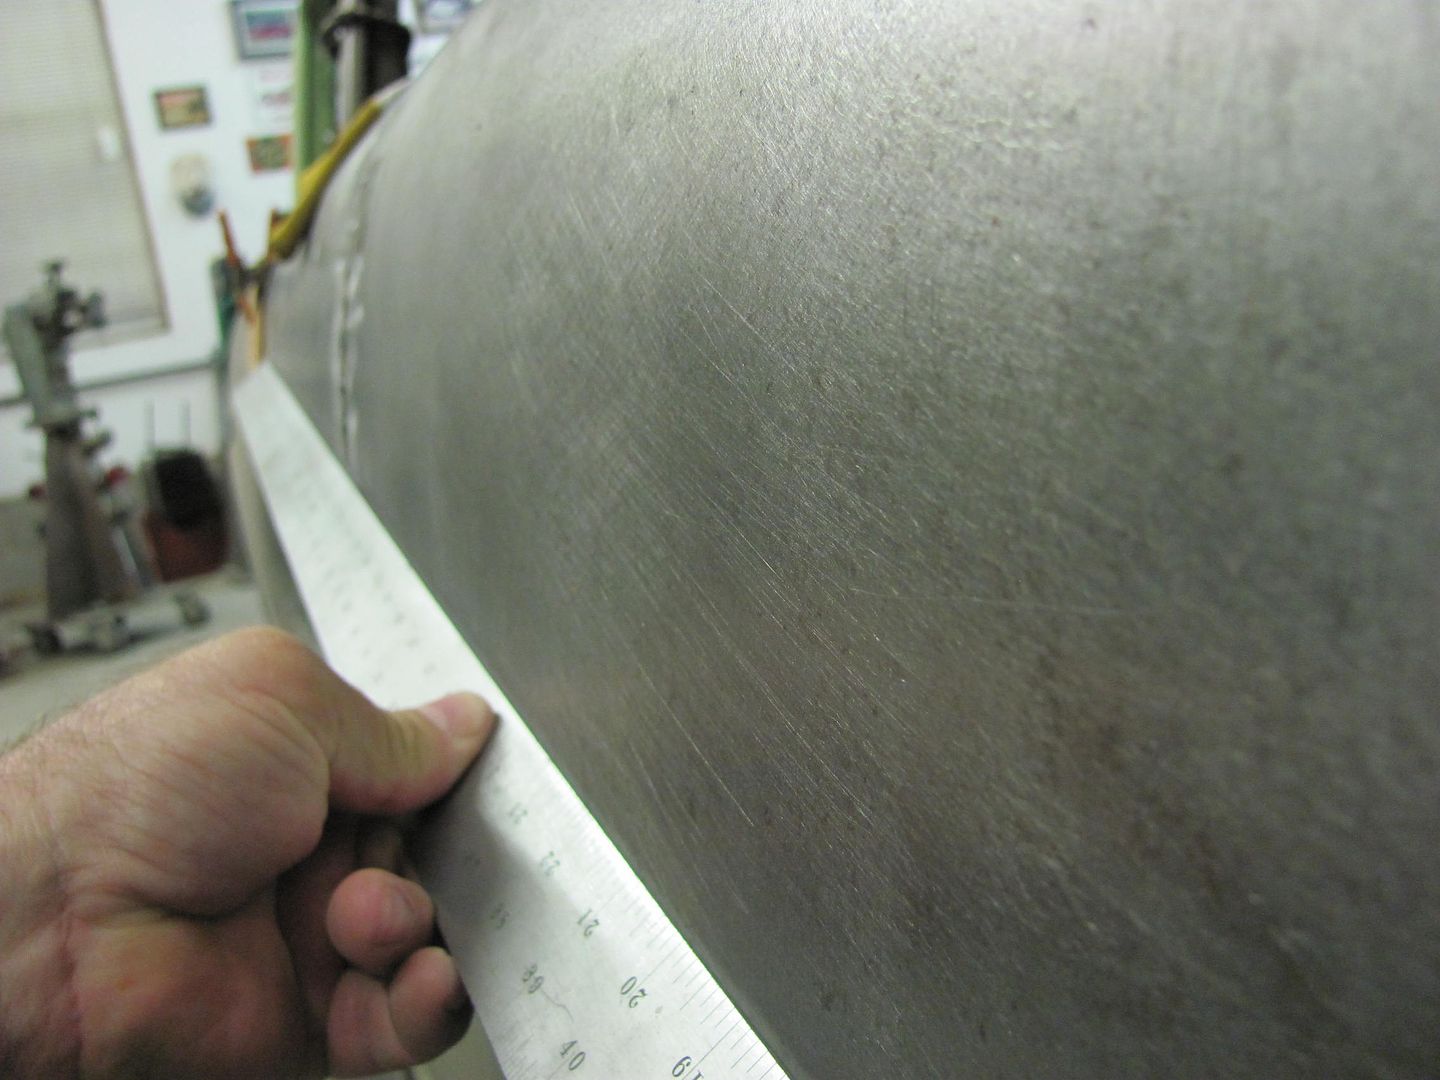
__________________
Robert |
|
|
|
|
06-09-2014, 01:04 AM
|
#180 |
|
Registered User
Join Date: Oct 2007
Location: Spanaway
Posts: 8,451
|
Re: 55 Wagon Progress
Nice trick on the clamps and as usual nice work!
__________________
Mike. Swamp Rat build thread : http://67-72chevytrucks.com/vboard/s...d.php?t=595019 72 3/4T 4X4 4" BDS Lift 33" BFG's |
|
|
|
|
06-09-2014, 06:37 AM
|
#181 |
|
Registered User
Join Date: Dec 2011
Location: Mobile, Alabama
Posts: 996
|
Re: 55 Wagon Progress
Great suggestion on the Peg modification. I will spend the 5 minutes it takes to modify mine to avoid future frustration. dug
__________________
My Build - http://67-72chevytrucks.com/vboard/s...d.php?t=515876 |
|
|
|
|
06-09-2014, 12:04 PM
|
#182 |
|
Registered User
Join Date: Feb 2007
Location: Marana, Arizona
Posts: 3,416
|
Re: 55 Wagon Progress
Just curious how you went about pulling the clamps?
As in what tool/tools did you use? Slide hammer? This is fun to watch.
__________________
"I feel the need for speed!"... as soon as I am done with my nap. |
|
|
|
|
06-09-2014, 12:18 PM
|
#183 |
|
Registered User
Join Date: Jan 2013
Location: Leonardtown, MD
Posts: 1,633
|
Re: 55 Wagon Progress
Originally the seams were butted tight and welded. I cut through the middle of that seam and dressed each side as best I could, and the panels had a tendency to cave in, especially now given the gap, so I needed them to pull out slightly. I started with the horizontal weld that goes from behind the door on the lower patch. A profile template was made based on the profile just behind the door. As the template was moved rearward, the clamp innards (only what is shown in the pic) was hooked behind the two panels, and pulled out grasping onto the threads until the panels matched the profile template. Then while maintaining the tension, the template was set aside, grabbed the Mig torch and tacked. Checked again with the template, planishing as needed. Moved about an inch or so and repeat. Once the horizontal weld met up with the vertical weld seam, the same process was used on the vertical seam, using the 60" rule as a profile gauge across the weld seam. By holding the rule at an angle to the panel, it relaxes and gravity helps it conform to the crown of the panel. Using the clamp innards again, pulled the two panels until the crown looked consistent across the rule.. then tacked, verified, and planished each.
So it was just finger powered tool, pulling and maintaining tension while the two halves aligned.
__________________
Robert |
|
|
|
|
06-09-2014, 12:29 PM
|
#184 | |
|
Registered User
Join Date: Feb 2007
Location: Marana, Arizona
Posts: 3,416
|
Re: 55 Wagon Progress
Quote:
Tendancy to overthink things. lol
__________________
"I feel the need for speed!"... as soon as I am done with my nap. |
|
|
|
|
|
06-13-2014, 07:25 AM
|
#185 | |
|
Registered User
Join Date: Jan 2013
Location: Leonardtown, MD
Posts: 1,633
|
Re: 55 Wagon Progress
Quote:
 Back to some finish work on the driver's quarter, we do have a few low spots to address. 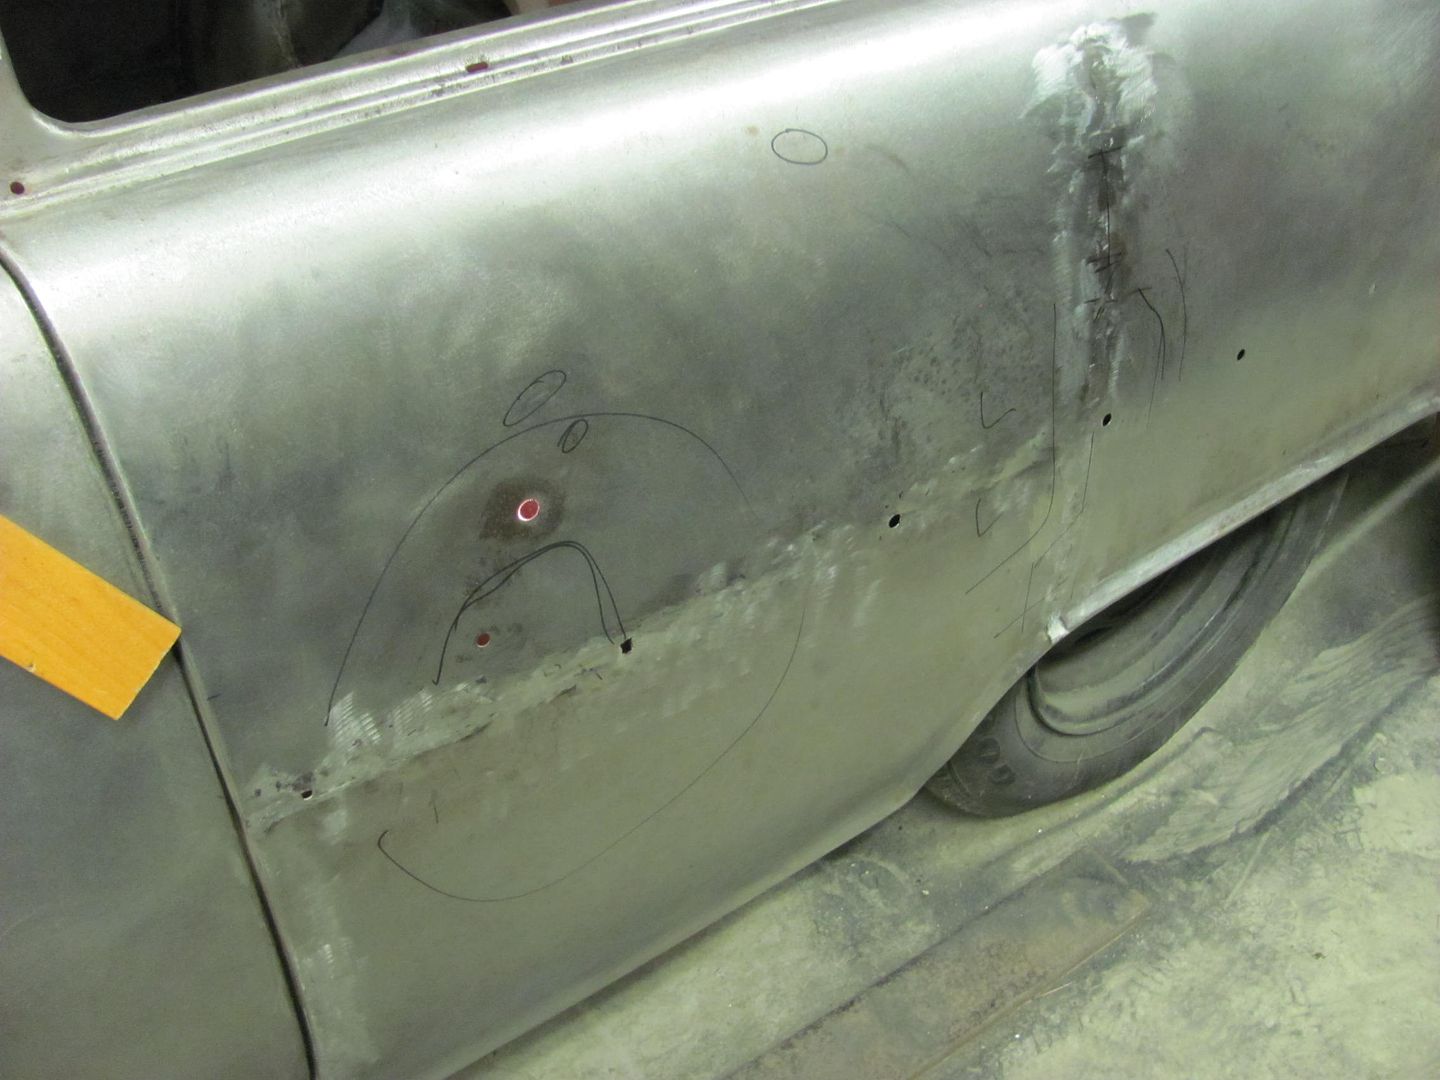 Where the wheelwell and rearward offers quite spacious accommodation for hammer work within the quarter, the window area forward of the rear wheel does not fall in the same category. So as much as it pains me, one of the Snap On body hammers was given a top chop.. 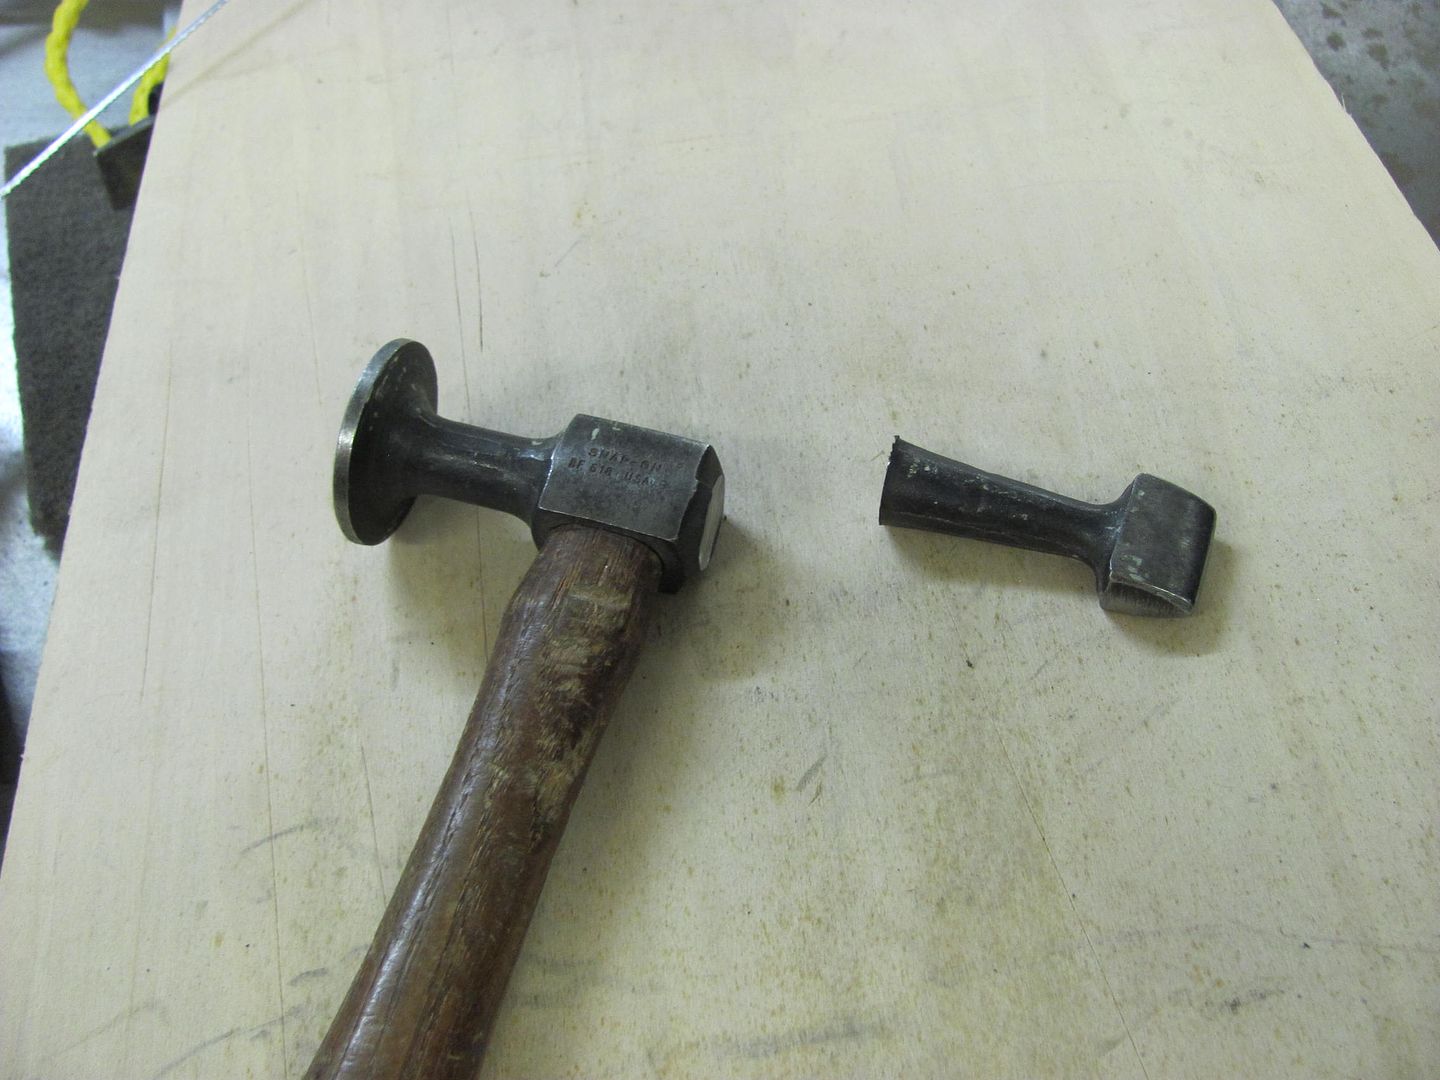 Yeah, this will do the trick... 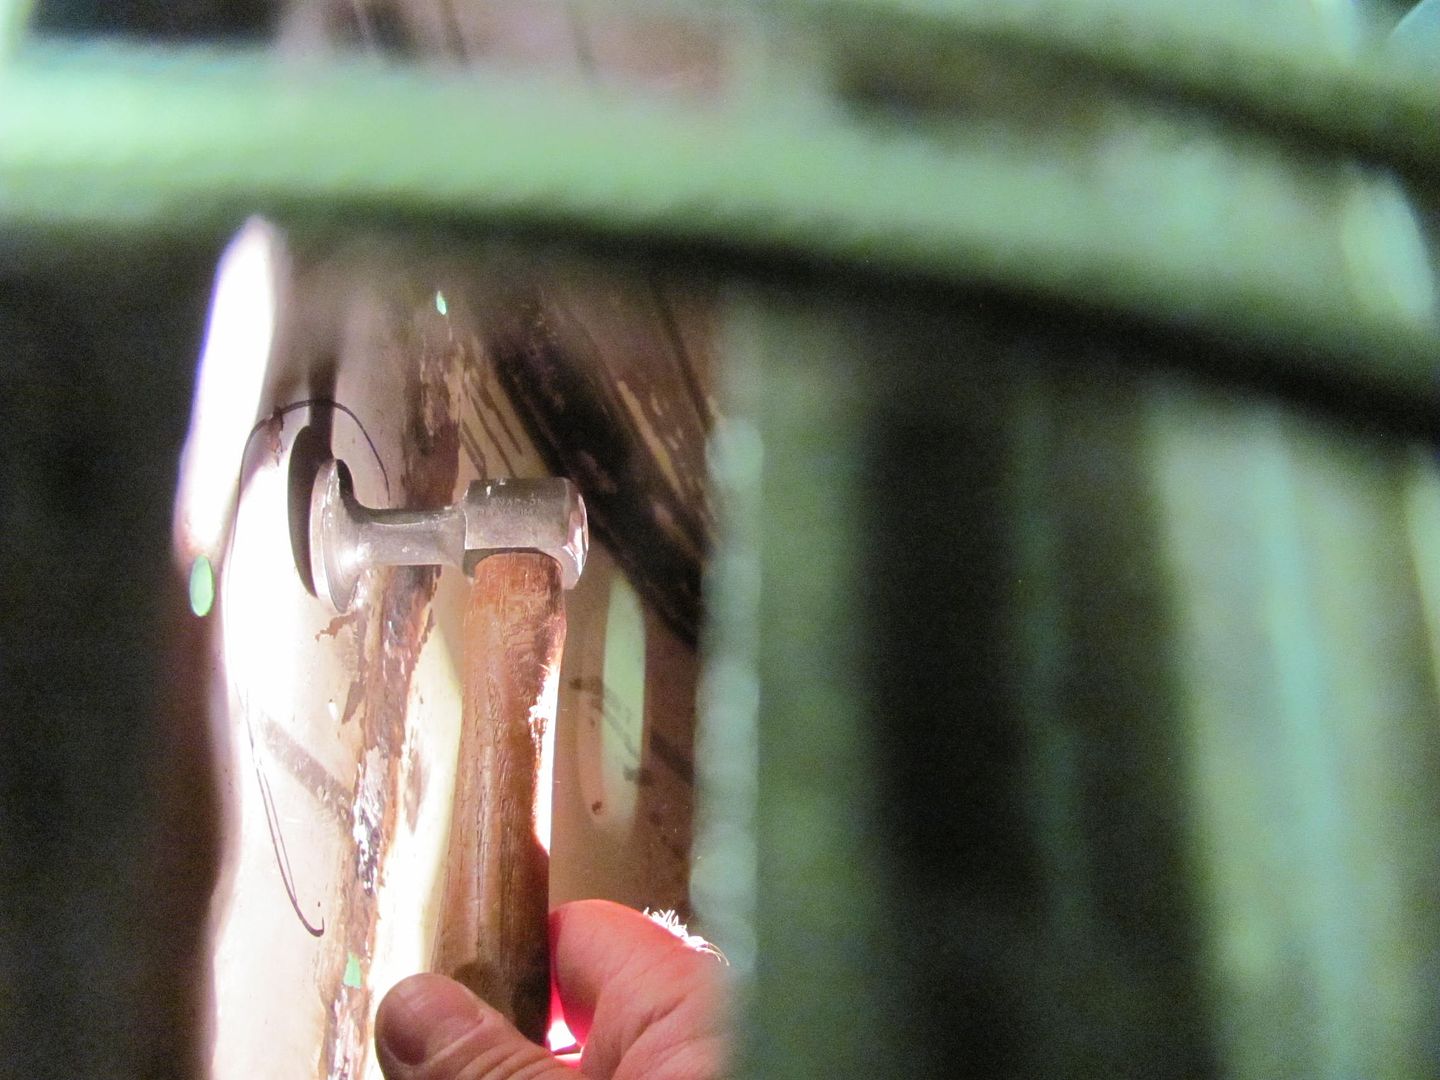 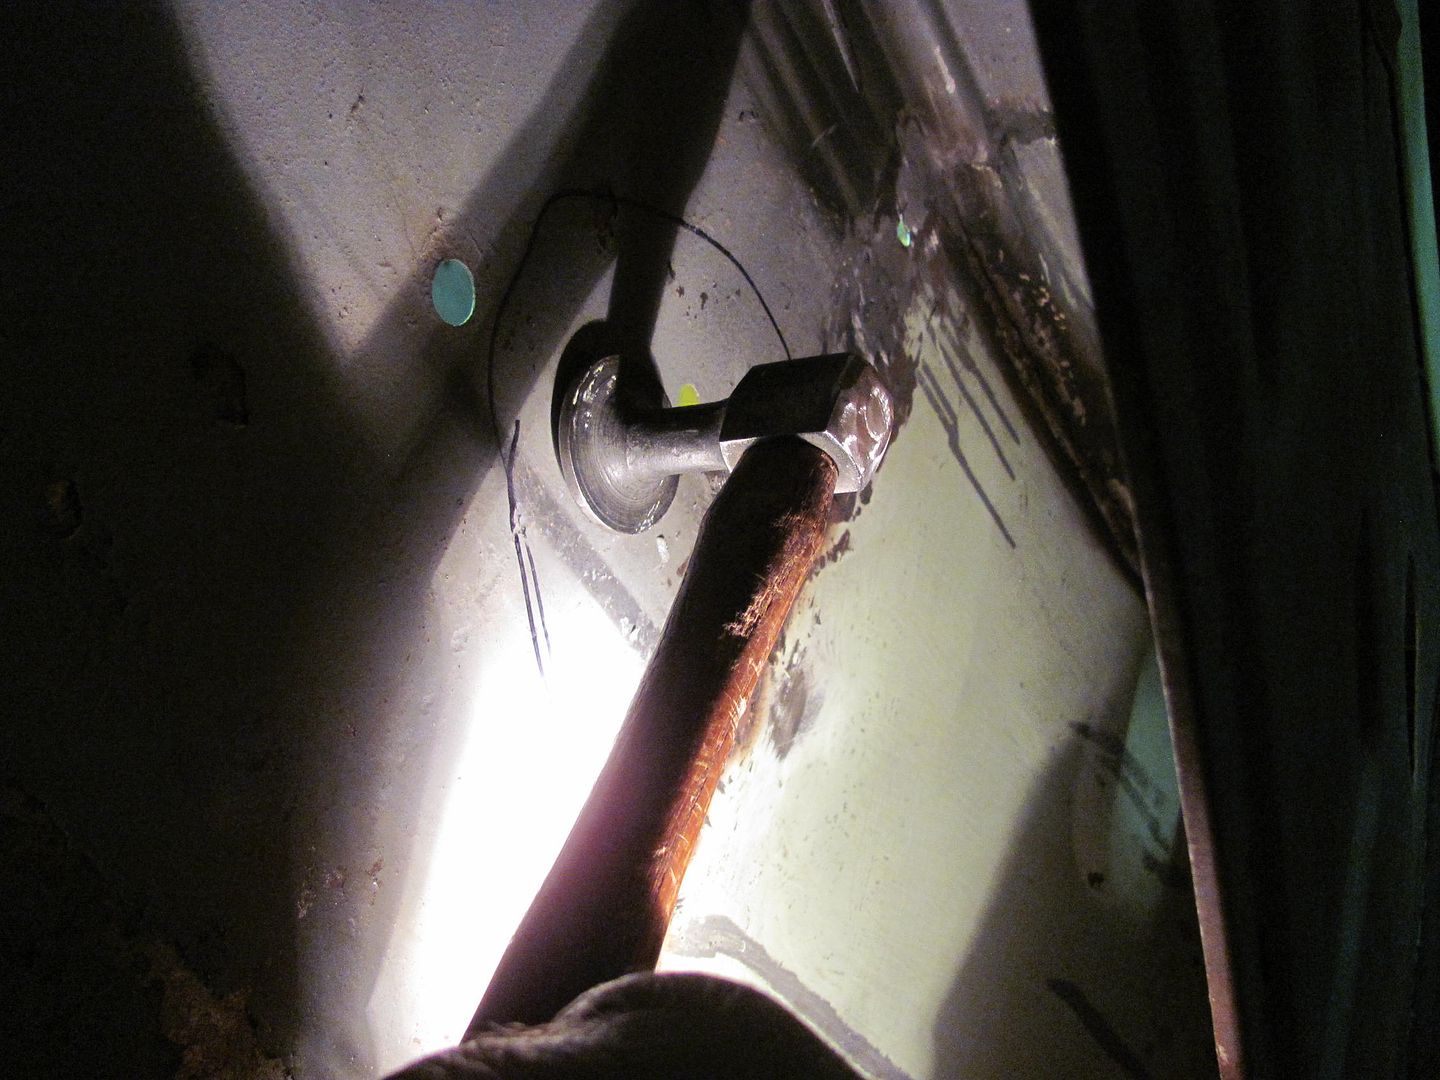 For a dolly on the outside, the small shot bag is used to promote small, controllable stretches. 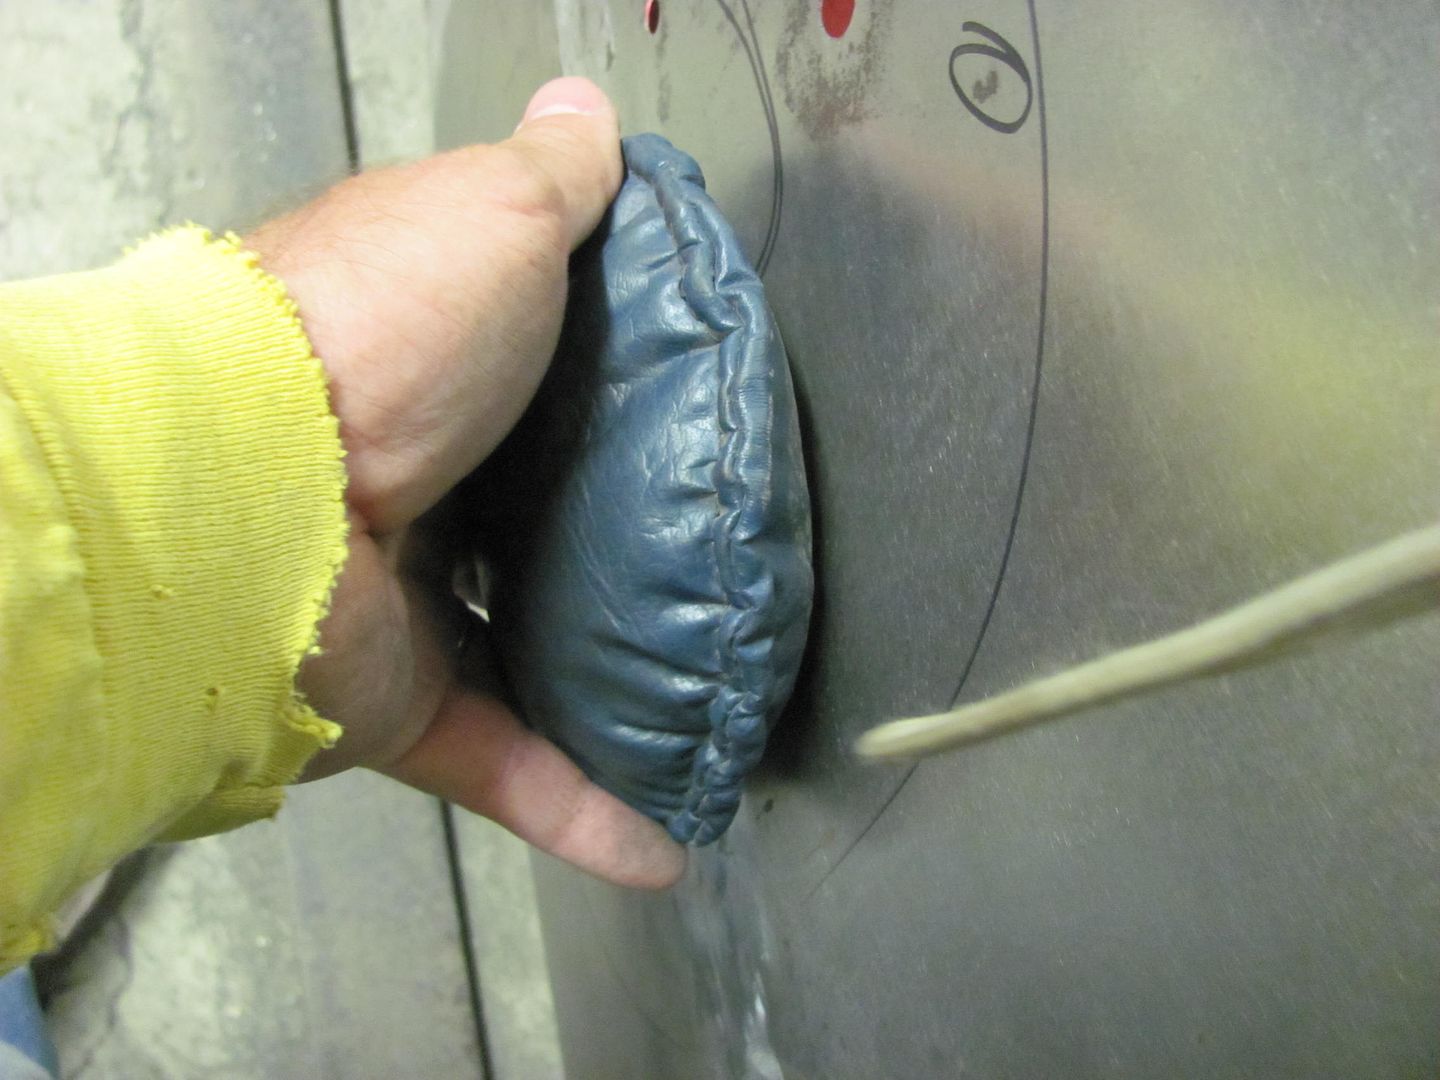 After the hammer work, placing the rule at a slight angle across the seam to use as a profile gauge, the area is much better than before. 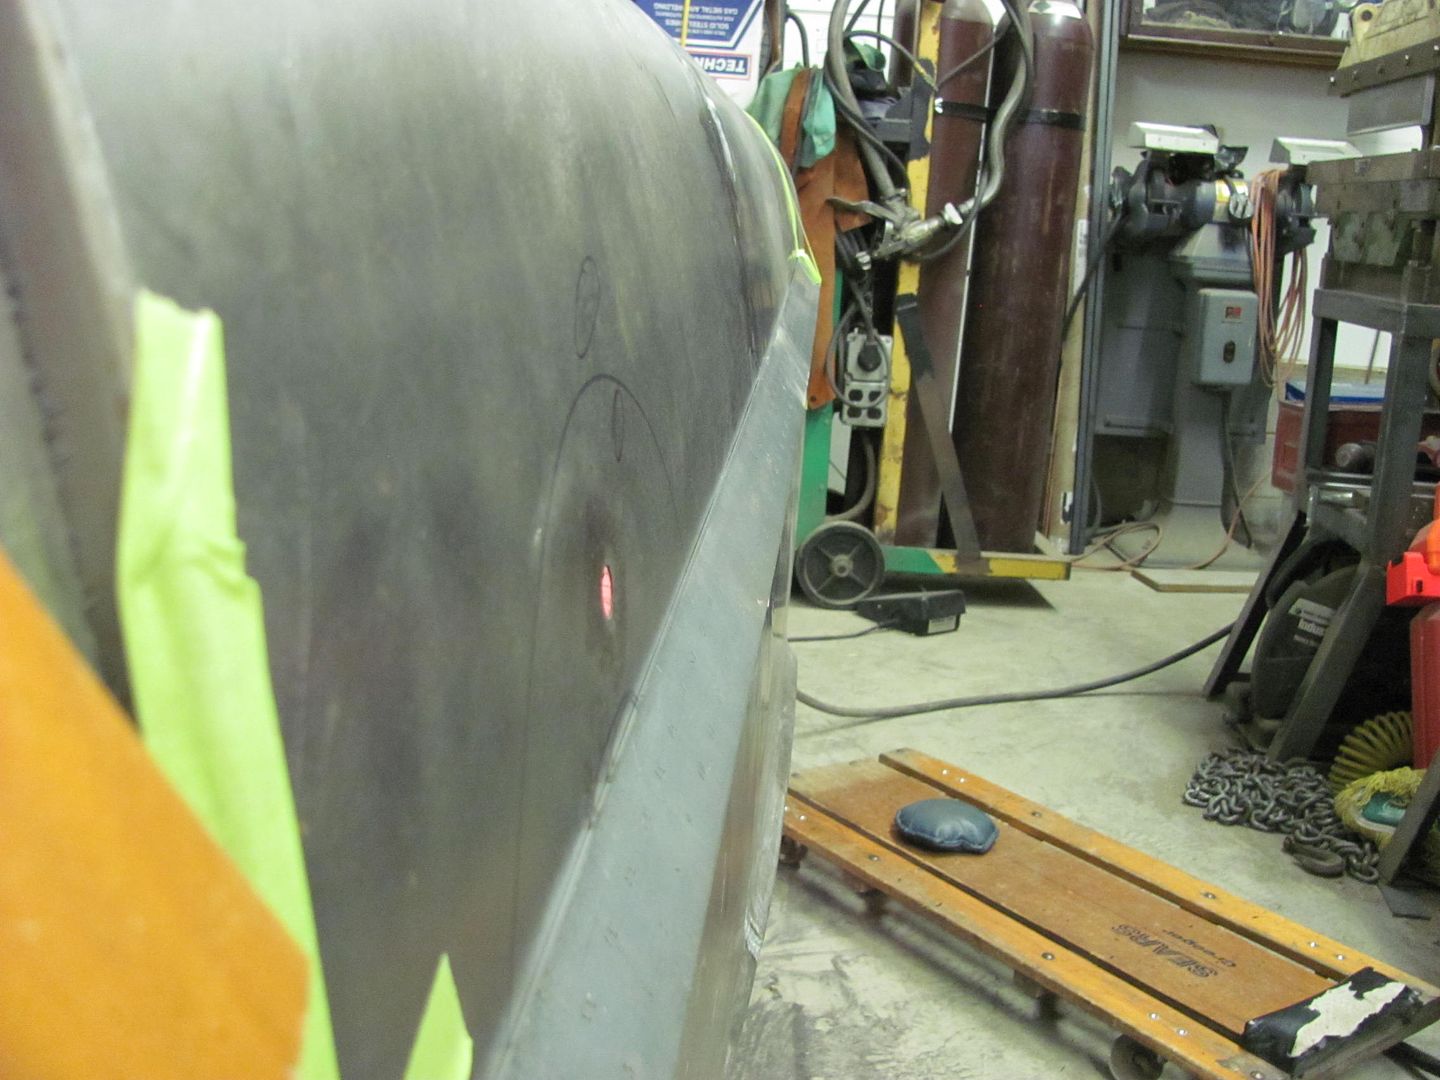 This should hold this spot until paint. For now, another item checked off the list... 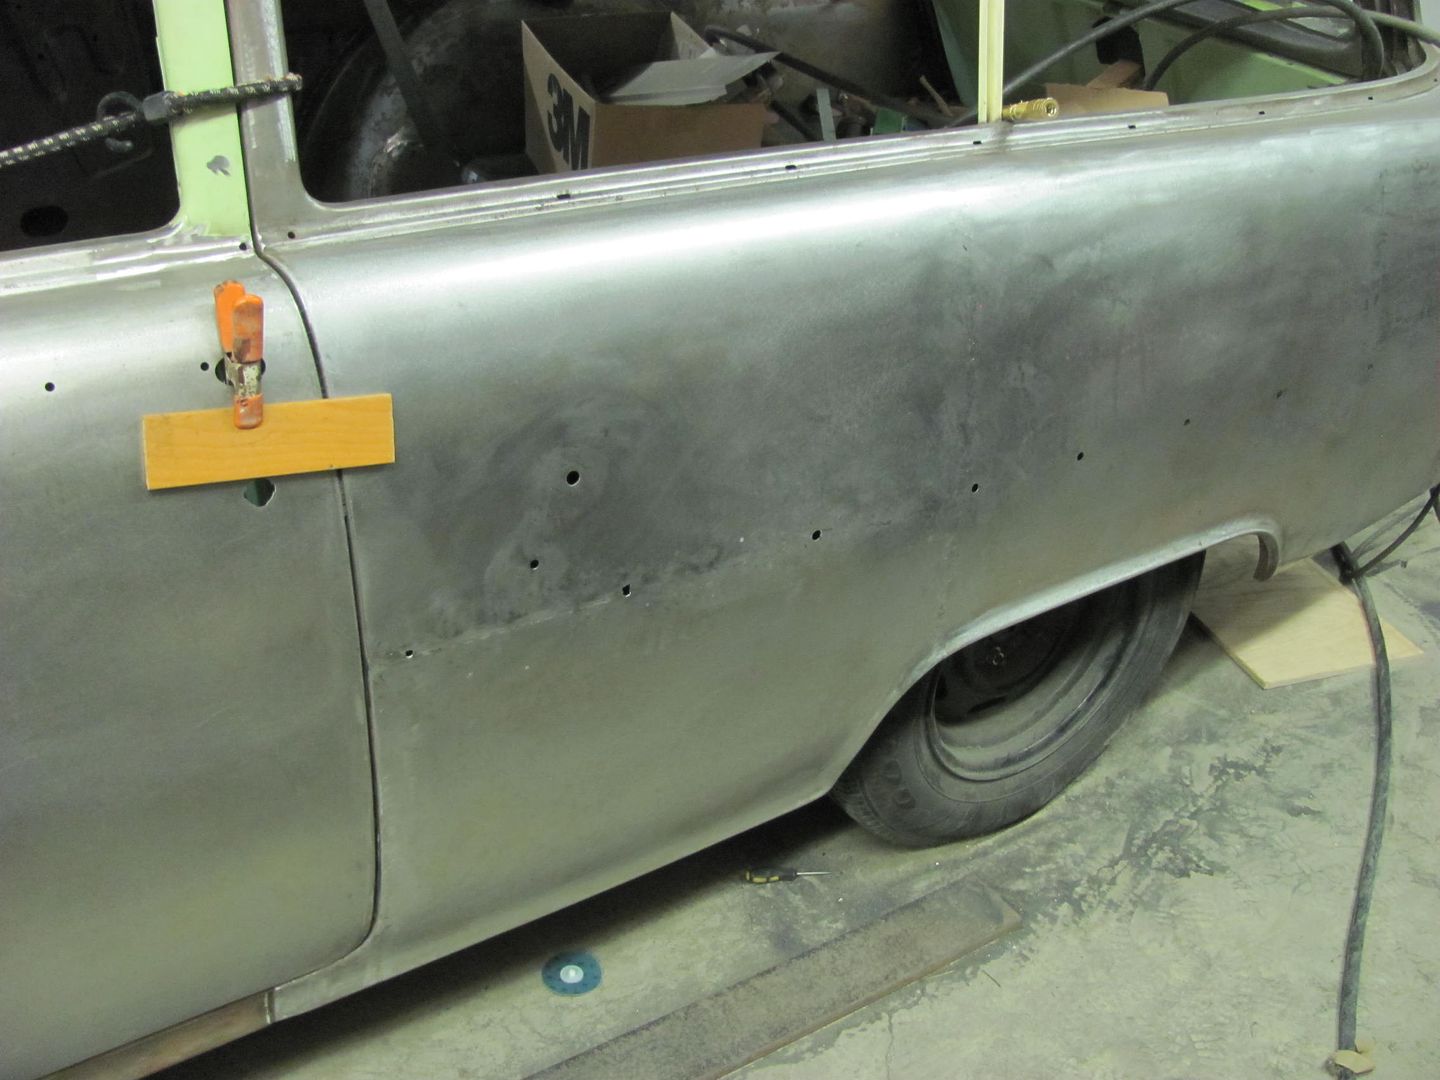 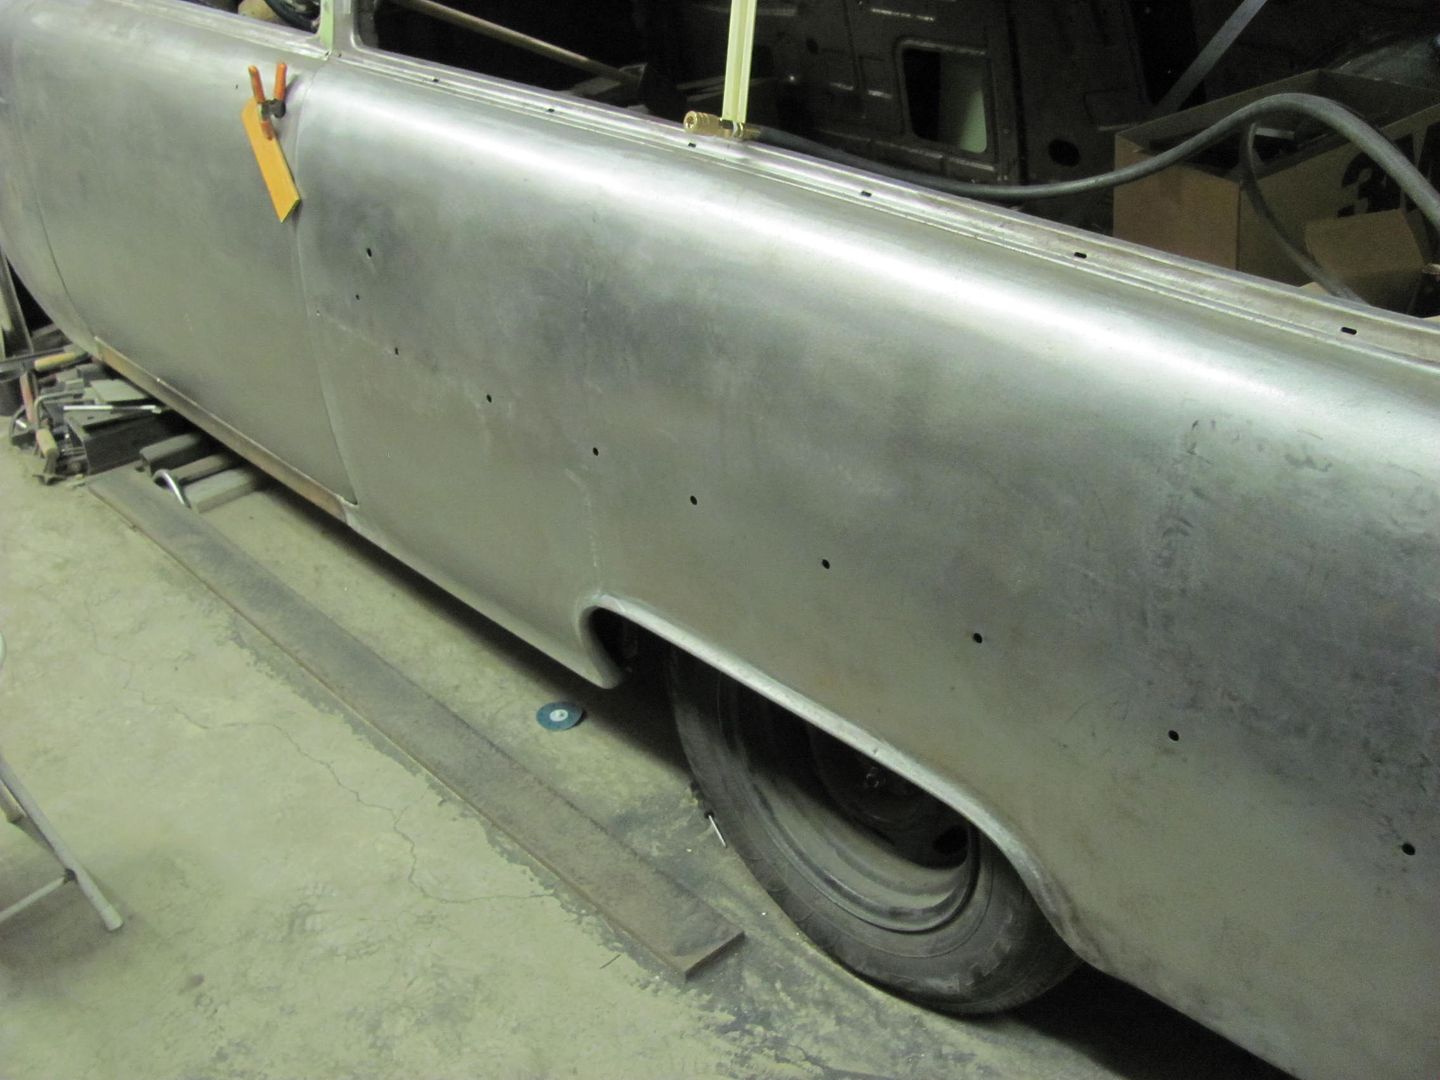 Moving to the other side, got about half of the quarter's weld seam ground flush on the outside, more to come. 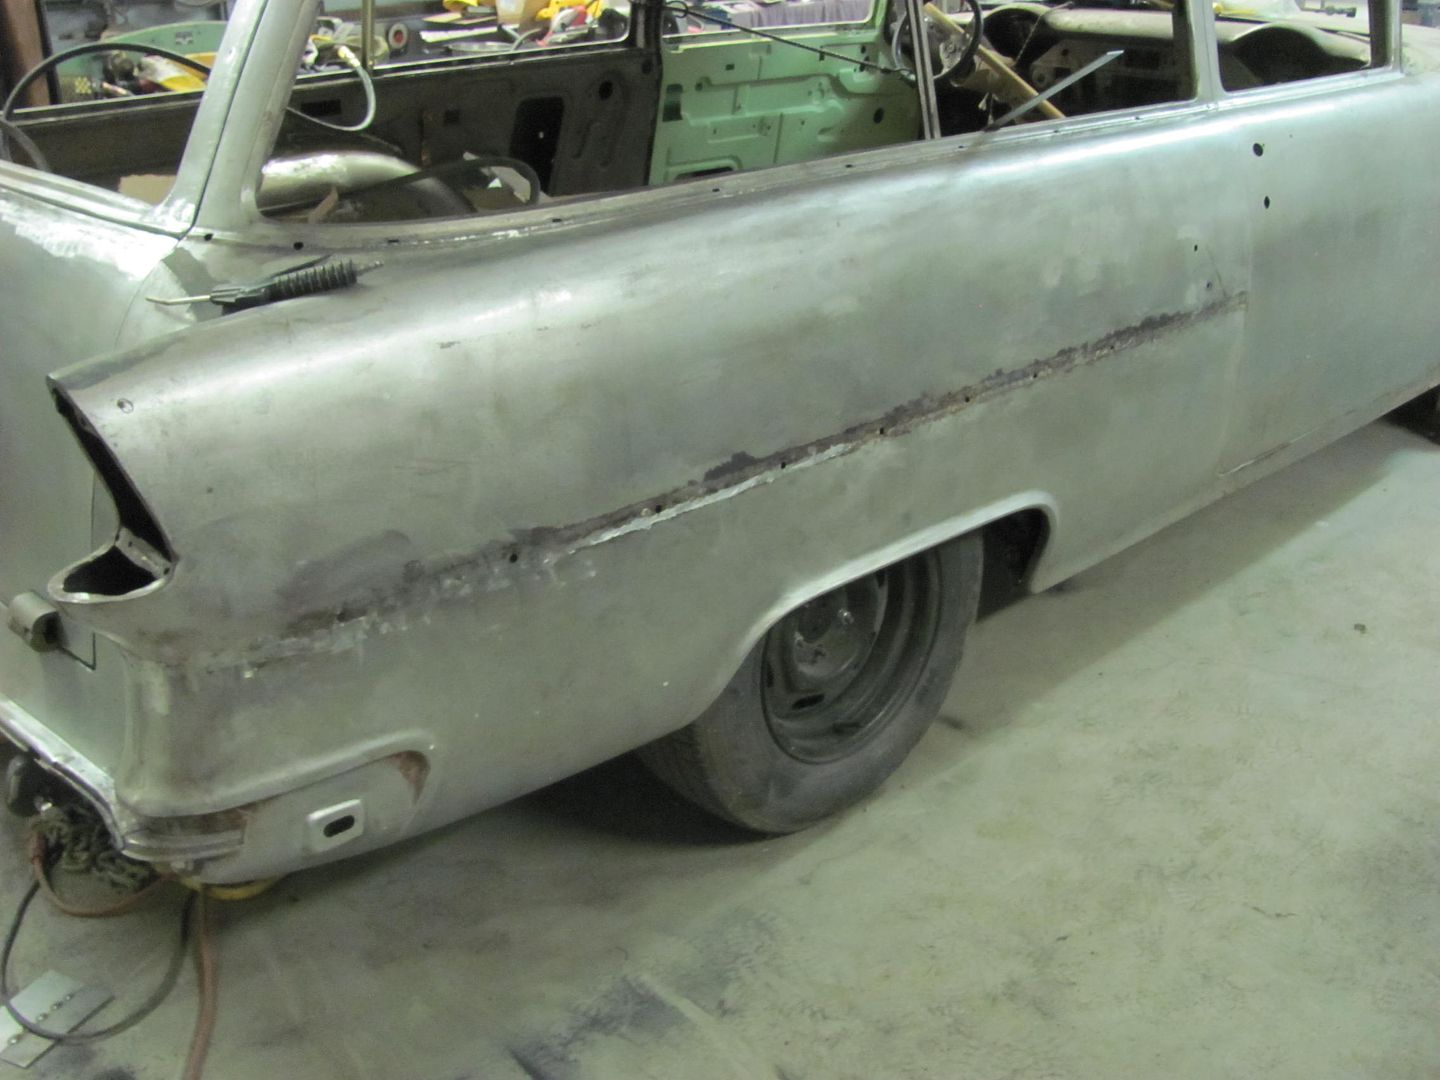
__________________
Robert |
|
|
|
|
|
06-19-2014, 08:17 AM
|
#186 |
|
Registered User
Join Date: Jan 2013
Location: Leonardtown, MD
Posts: 1,633
|
Re: 55 Wagon Progress
Doesn't look like much progress but got more grinding done on the quarter panel seams, a little over 6' of weld length done. Here's where the stainless rated cutoff wheels work so well. When I was using the cheap discs (the brown cloud makers) this much weld would have taken well over two discs to grind. One stainless rated disc did this amount, and diameter went from 3" to 2-1/2, so still have quite a bit left in it..
   new disc  after tonight's grinding 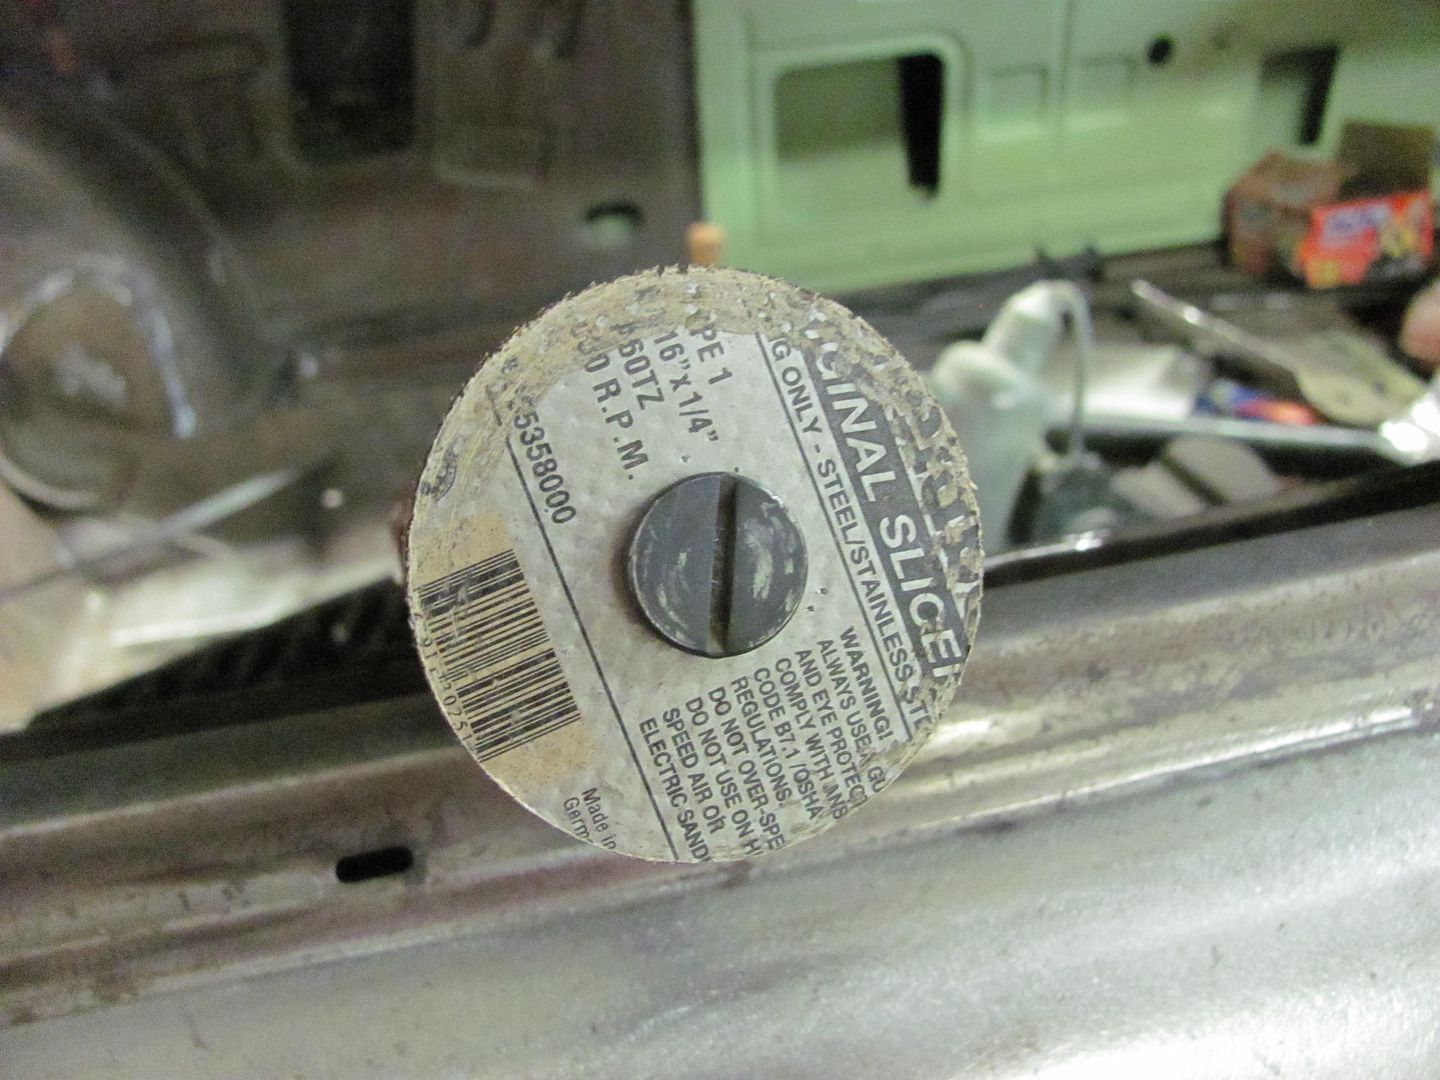
__________________
Robert |
|
|
|
|
06-19-2014, 08:30 AM
|
#187 |
|
Registered User
Join Date: Jan 2012
Location: Eastern Ontario, Canada
Posts: 1,041
|
Re: 55 Wagon Progress
I noticed that too Robert with those 3" cut off wheels. Biggest difference too is the cheap cutting wheels. I don't buy the cheap ones anymore.
__________________
1952 Canadian Chevy 1300 C4 IFS & D44 IRS 5.3 HO L33 My Build: http://67-72chevytrucks.com/vboard/s...d.php?t=632938 
|
|
|
|
|
06-19-2014, 09:00 PM
|
#188 |
|
Registered User
Join Date: Oct 2007
Location: Spanaway
Posts: 8,451
|
Re: 55 Wagon Progress
Thanks for the tip on the cutoff wheels!
__________________
Mike. Swamp Rat build thread : http://67-72chevytrucks.com/vboard/s...d.php?t=595019 72 3/4T 4X4 4" BDS Lift 33" BFG's |
|
|
|
|
08-14-2014, 07:06 AM
|
#189 |
|
Registered User
Join Date: Jan 2013
Location: Leonardtown, MD
Posts: 1,633
|
Re: 55 Wagon Progress
My buddy Dan was doing some mechanical work on a 59(?) Vette that needed some under hood help..
Epoxy....  Hot Rod black.... 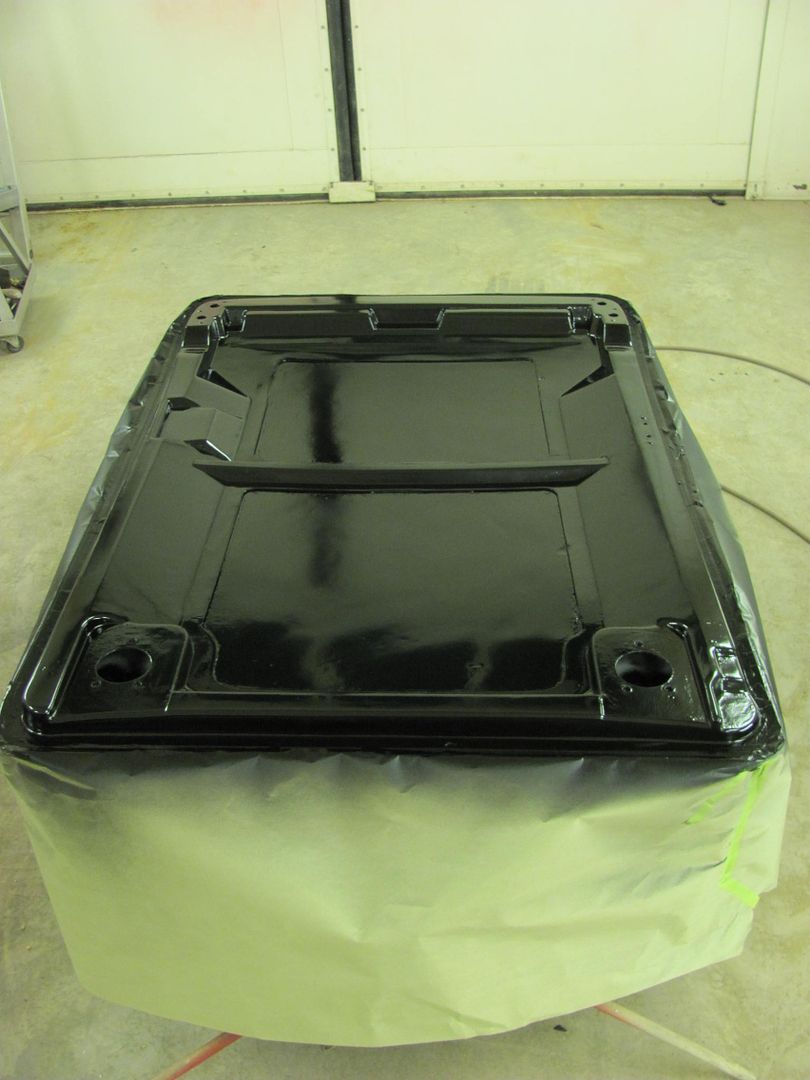 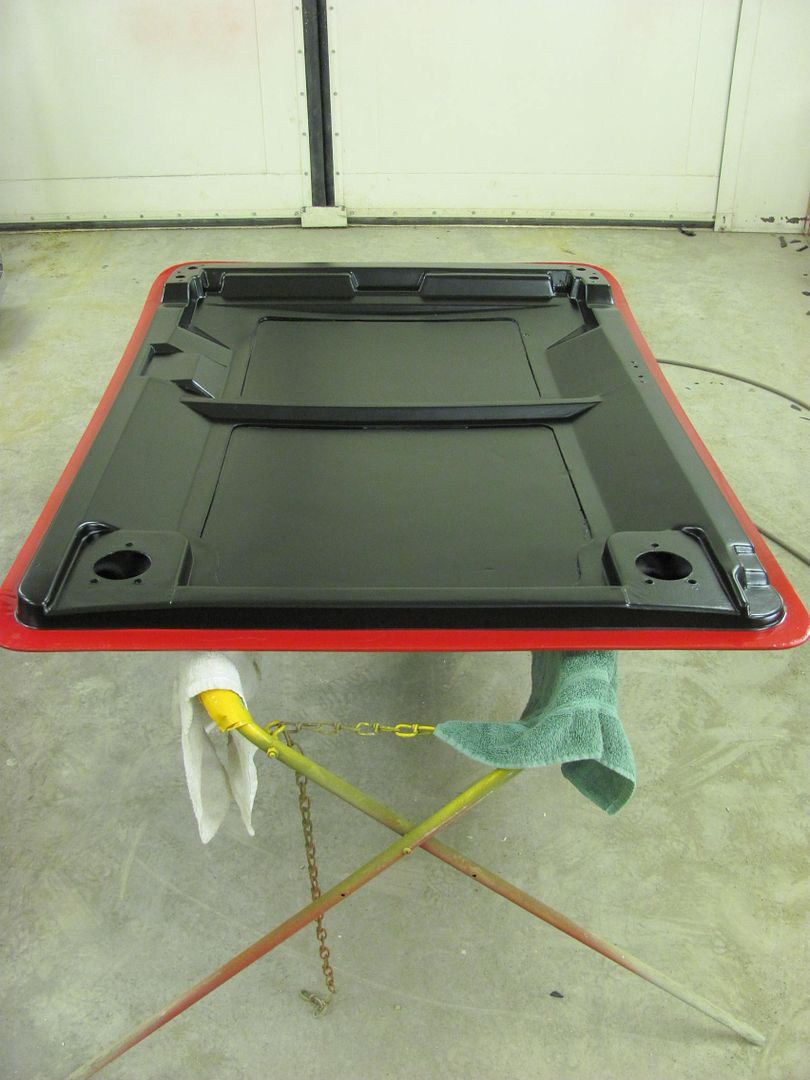 He said the worst thing about me painting this was it made the hood hinges look like crap, so he had to strip them and get out the Krylon silver  Got some more done on the wagon last night. I had picked up a few cans of Dykem real cheap at the local Habitat store, so I thought I'd give that a try for guide coating. It seemed to work well, and the translucent properties of the Dykem showed up darker in the low areas after sanding/highlighting (especially after more than one coat) to better show the lows. 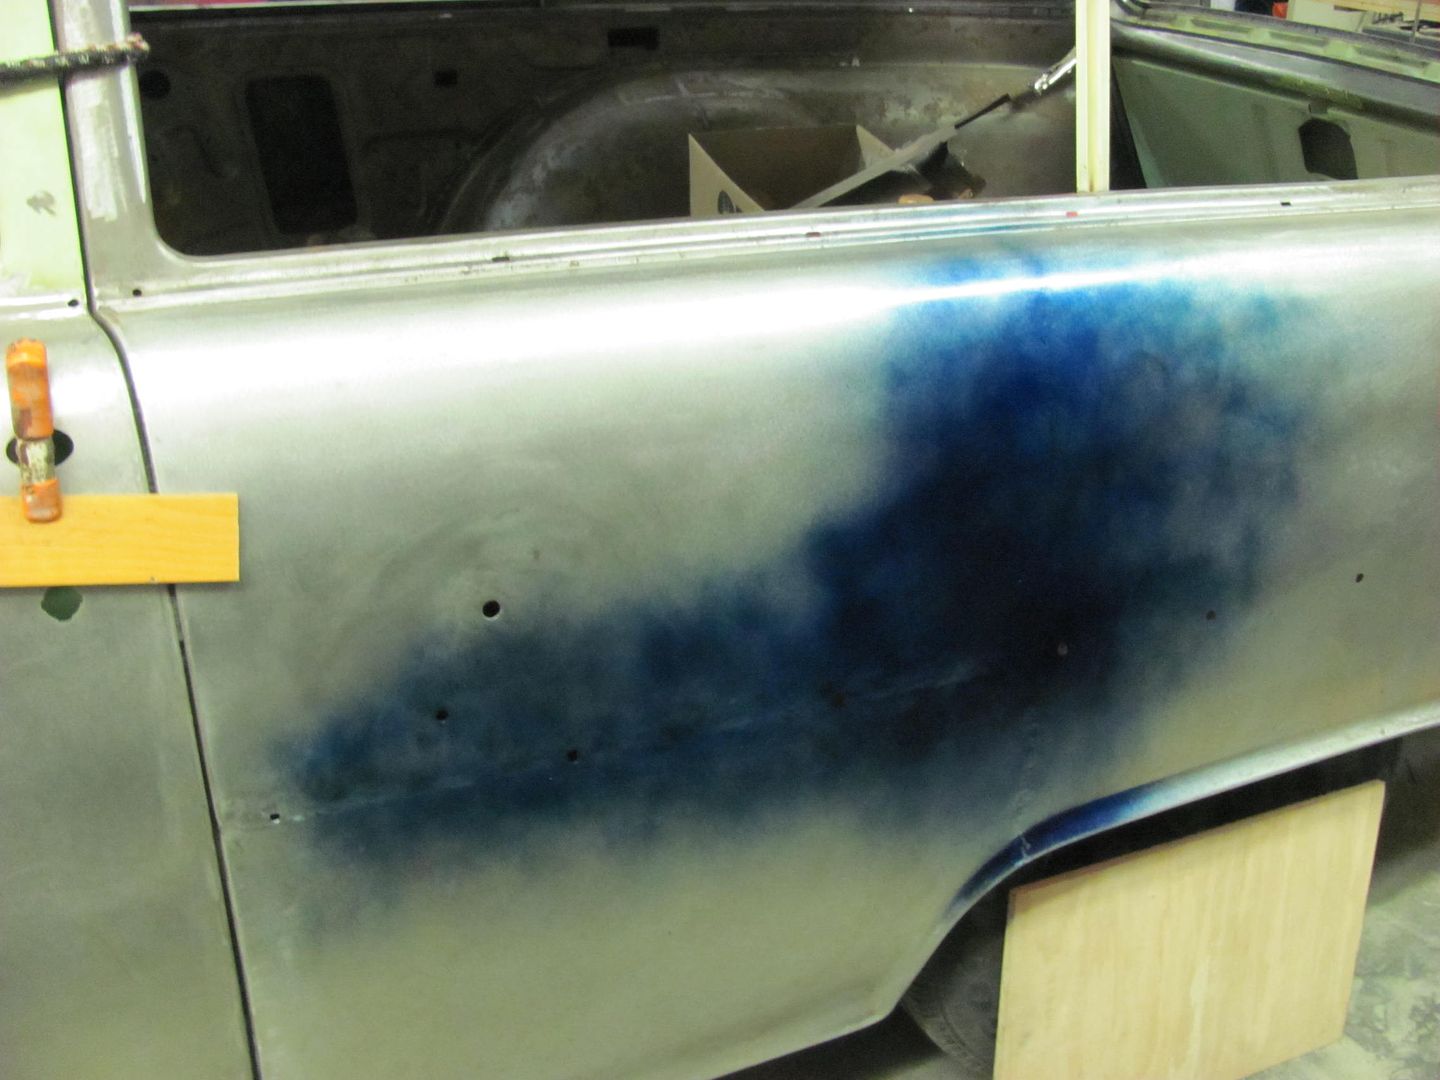 Used the AFS sander and some 400 grit to highlight the defects... 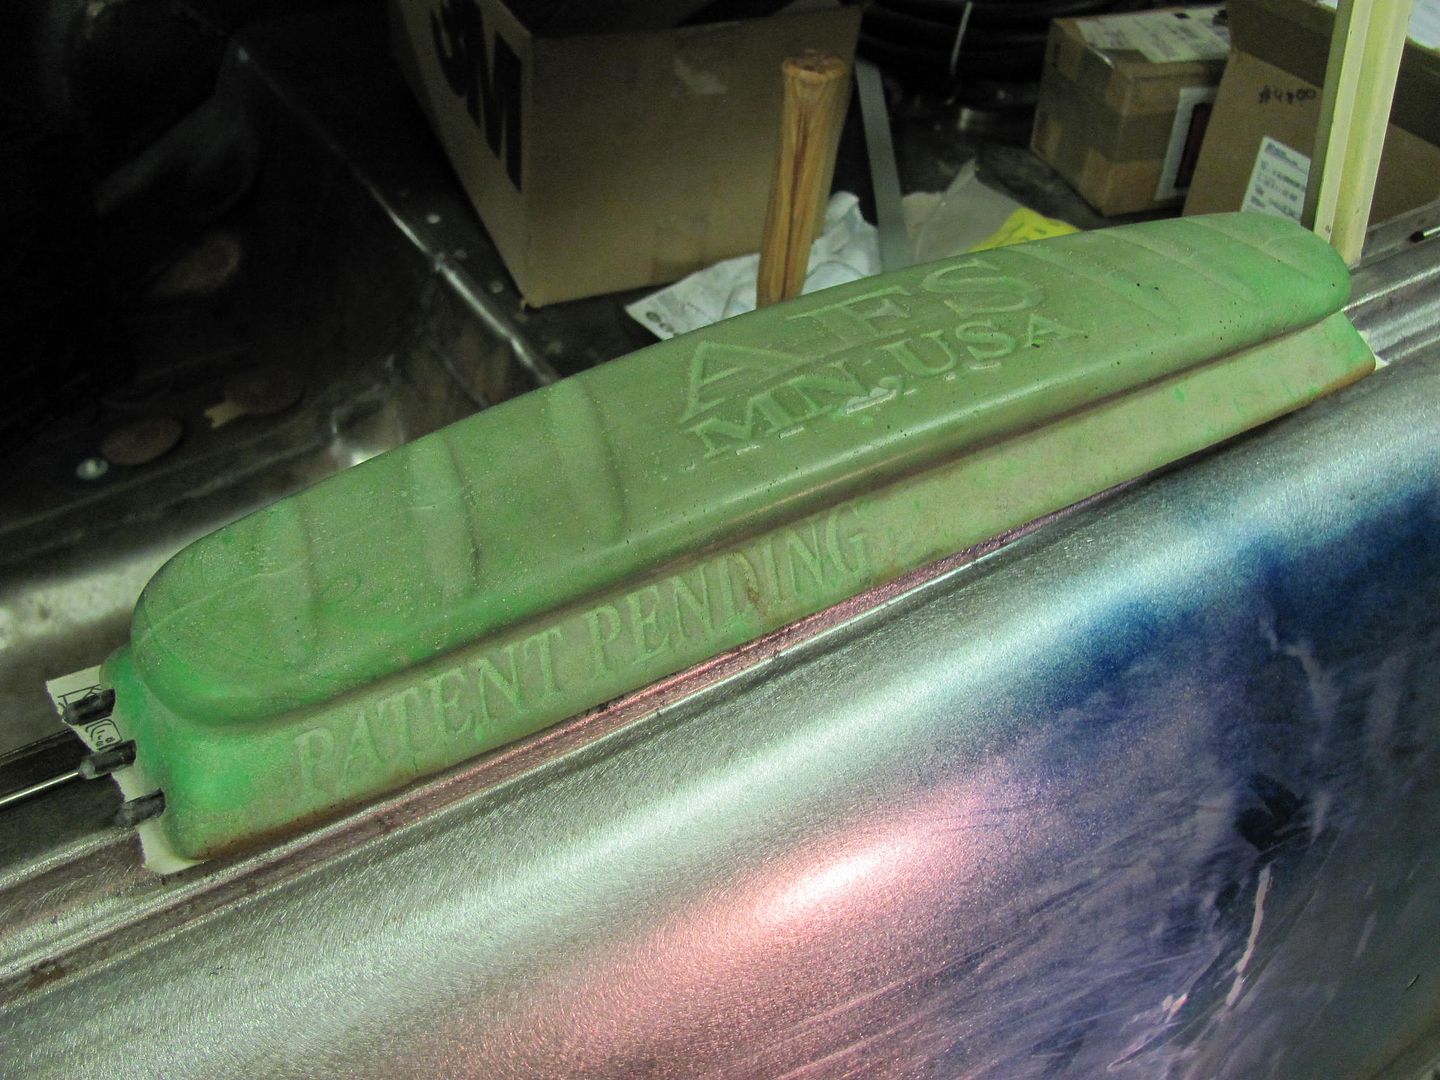 High's and lows 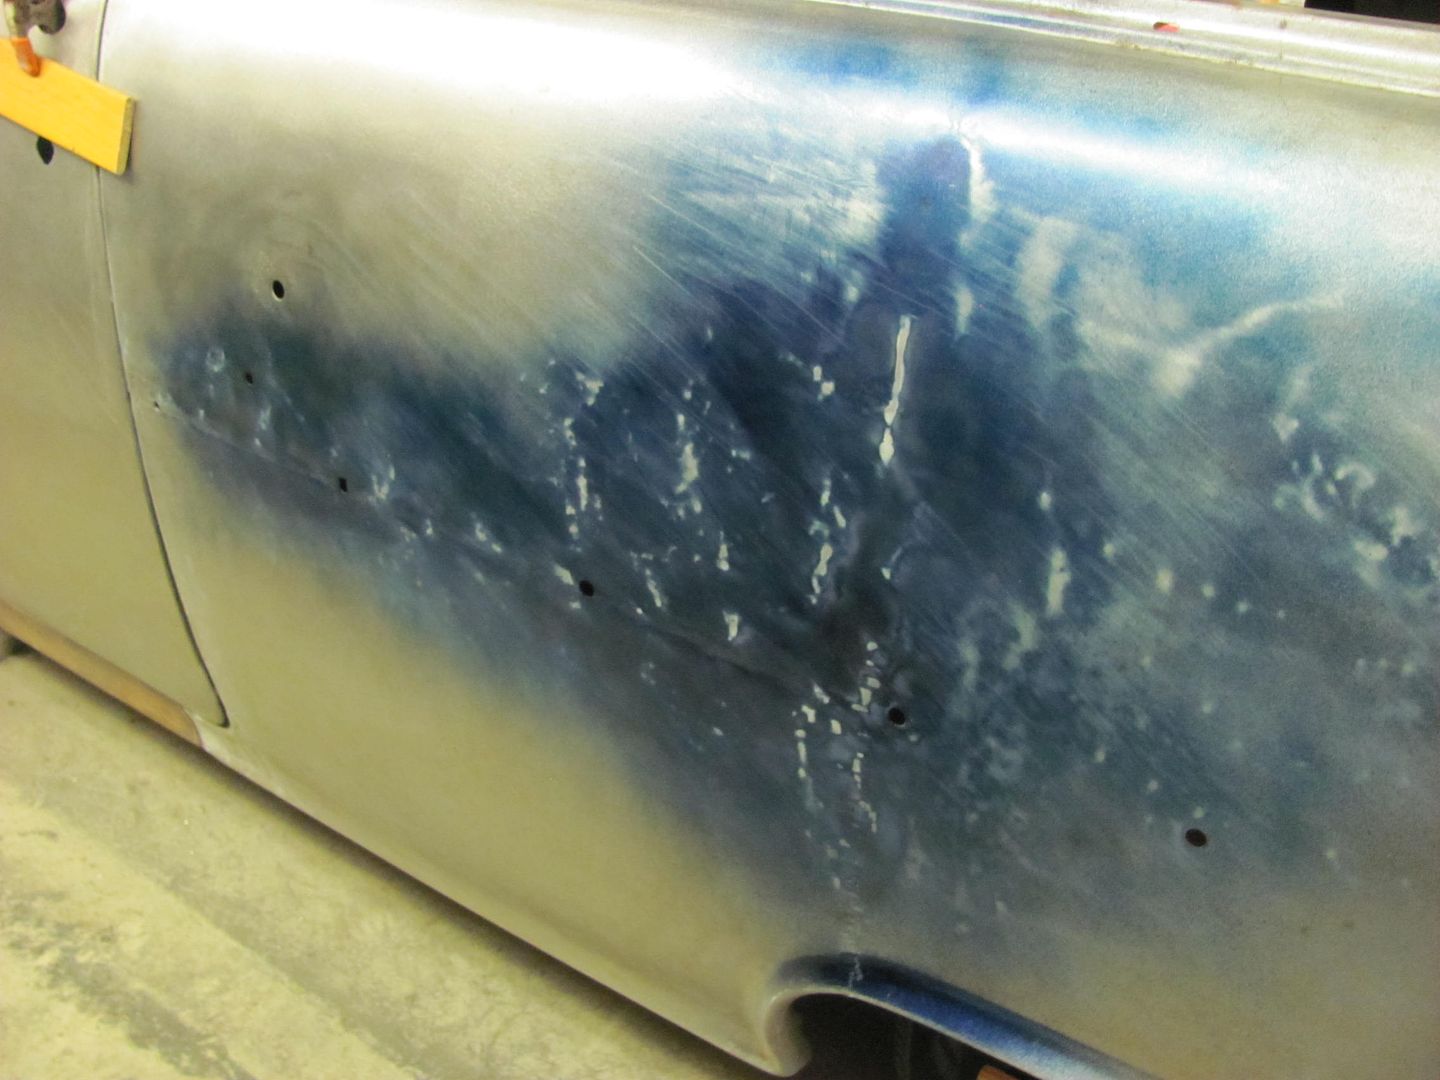 Here's the tools used this evening, including the creeper  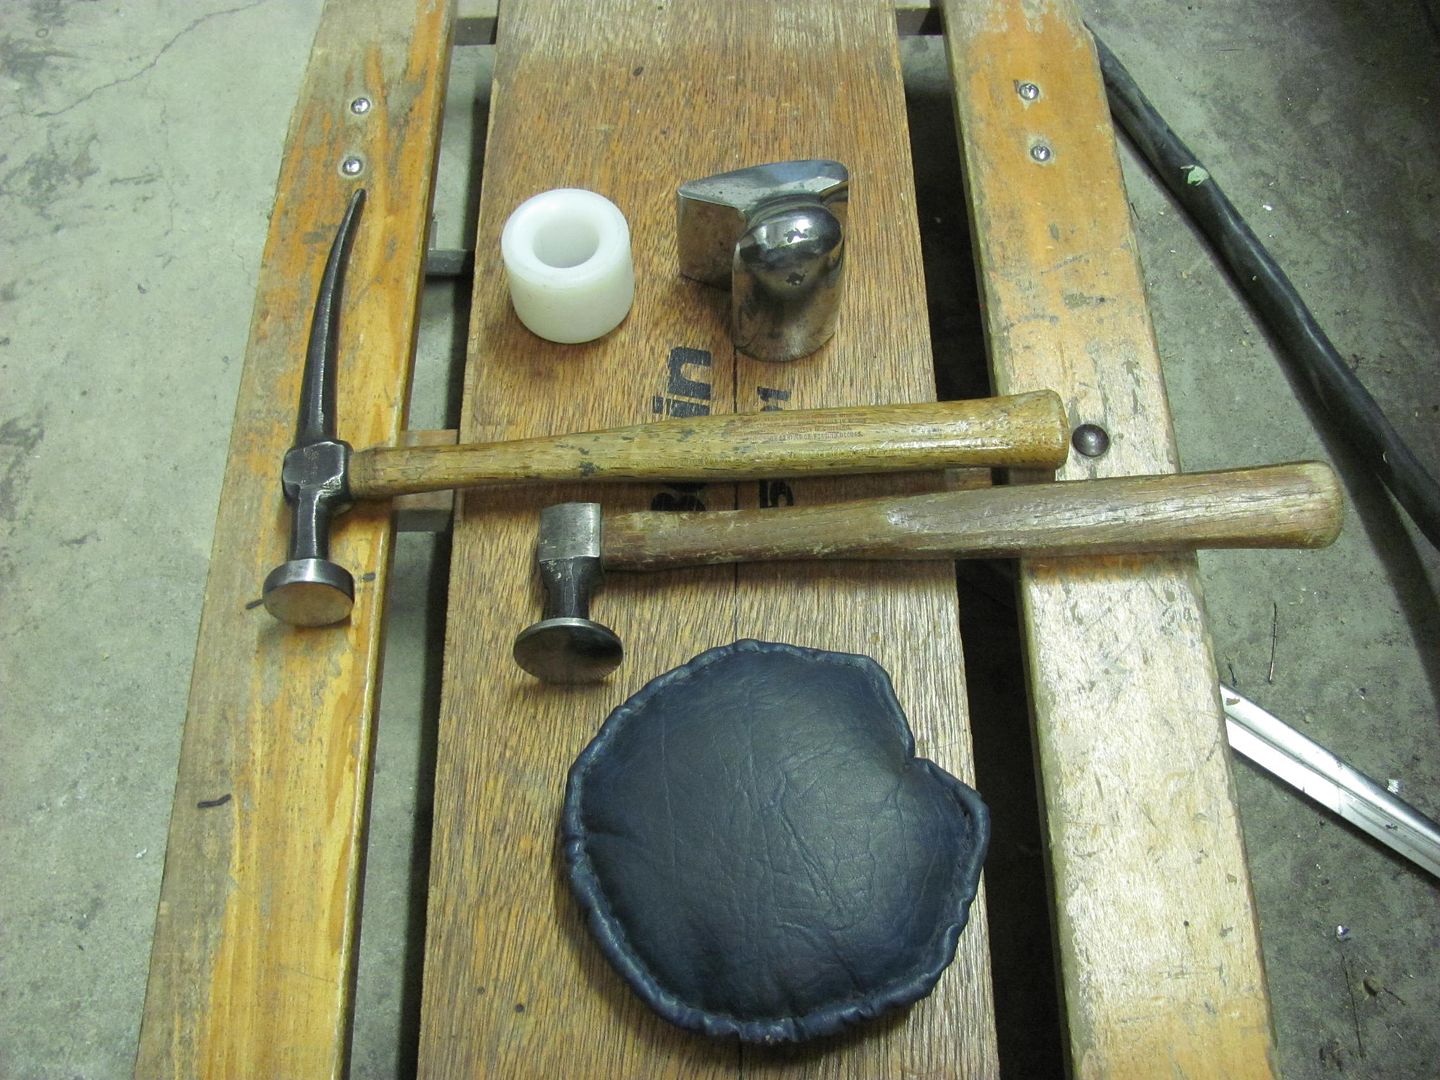 Got a couple hours of metal bumping left to do, will post results next time around...
__________________
Robert |
|
|
|
|
08-14-2014, 08:27 AM
|
#190 |
|
Registered User
 Join Date: May 2007
Location: Deale Md
Posts: 4,663
|
Re: 55 Wagon Progress
A wooden creeper looks like a sled with wheels
__________________
James 63 GMC V6 4speed carryall 65 chevy swb bbw V8 auto 68 K20 327/4 speed, buddy buckets 2002 GMC CC Dually Duramax 64 GMC lwb 3/4 V6 4speed SOLD 66 GMC swb bbw buddy buckets SOLD IG duallyjams The only thing that stays the same is constant change! |
|
|
|
|
08-14-2014, 11:40 PM
|
#191 |
|
Registered User
Join Date: Apr 2011
Location: .
Posts: 3,104
|
Re: 55 Wagon Progress
My biggest obstacle is getting too much stretch.
Can you give some how to's or what to watch for so you don't get too much to stretch and info on shrinking when stretching has occurred? Been practicing what your teachin All tuned in here. |
|
|
|
|
08-15-2014, 10:25 PM
|
#192 | |
|
Registered User
Join Date: Jan 2013
Location: Leonardtown, MD
Posts: 1,633
|
Re: 55 Wagon Progress
Quote:
As I'm planishing some weld seams, I take for granted that's what you are referring to. The problem with me giving a fixed number of hammer strikes to planish each weld dot is that some people may strike with more force, some may have larger weld dots, etc. What I would suggest is to use a "test subject" to help you see the effects of shrinking and how the planishing counteracts those effects, so you can better understand how the panel reacts to heat (shrinking) and how the weld dots react to planishing (stretching). This is not intended to be the end all-be all of how much, but it should get you in the ballpark of a measured amount to keep the panel in relatively good shape with minimal warping effects during the initial planishing efforts while welding. For your planishing test subject, use two sheet metal strips about 3/4" wide by about 15" long. These will be tacked together on the long edge, and works best if you can cut it with a shear, as you can cut a piece 1-1/2" x 15 and then shear it through the middle for a perfect seam. For you to see the effects of the shrinking and then the planishing, it needs to be a perfect cut through the middle for best results. So by using a shear to make this center cut, it will help tremendously. Next, the process and specifically amount of planishing needed is going to be directly related to weld dot size and/or wire type/softness, etc. So this is where consistency will help out, as your weld dots should be consistent in size. Now that you have a fresh cut test piece, take your two pieces and align together TIGHTLY along the long sheared cuts and tack the seam at about one inch in from one end.  DO NOT PLANISH at this point. Go another 1/2" and add another tack. Is there any change in panels positioning? Go another 1/2" and add another tack. What we are trying to do with this process is to monitor how much shrink is occurring. The first tack should "anchor" the two panels together at the end. With the panels tight together, each subsequent tack, and the shrinking effects realized once cooling takes place, will start to pull the panels even closer together and also to shrink the length along the seam we are welding. Pulling together and shortening the length along the weld seam will eventually show that the two separate pieces will start to overlap each other. So If you haven't seen this happen, keep welding dots at 1/2" spacing until it does happen. Now that you see these panels overlapping, the next phase is to see how much planishing it takes to "undo" the overlap. Start at your anchor tack, and hammer and dolly once.  Go to each subsequent dot and apply the same hammer and dolly in the same approximate force. The flat should be similar in size, but I'd gauge your effort more on using the same hammer force than size of the flats. When you get to the end, check the overlap to see if it still interferes with adjacent panel fitment at the un-tacked end. If so, start at the beginning, repeating one dot at a time, monitoring overlap. When your panel overlap issue has been resolved, your weld dot planishing effort for similar welds should be the number of hammer strikes it took per weld dot to resolve the overlap, using approximately same striking force. This assumes your weld dots don't mysteriously grow in size to add the need for more planishing, so again the importance of OCD consistency. This planishing effort will not be the end of the metal bumping to your panel, it is merely the minimum needed to relieve the shrinking effects so the differing forces will relax a bit. After this initial planishing, any remaining planishing needed will be based on what the panel looks and feels like, high spots, low spots, etc. after all the welding, initial planishing, weld dot grinding, and panel reading is completed.
__________________
Robert |
|
|
|
|
|
08-16-2014, 11:03 AM
|
#193 |
|
Registered User
Join Date: Apr 2011
Location: .
Posts: 3,104
|
Re: 55 Wagon Progress
Thank you for explaining the step by step.
Now I understand what Im looking at. I have a door skin to finish and NOW I feel comfident to start on it. Thanks a Ton |
|
|
|
|
08-28-2014, 08:42 AM
|
#194 |
|
Registered User
Join Date: Jan 2013
Location: Leonardtown, MD
Posts: 1,633
|
Re: 55 Wagon Progress
The shop's new apprentice started last night, so hopefully we can post project updates a bit more frequently
We did some more metal bumping on the roof repair. We had some high spots to address, so Kyle held the shot bag on the inside while I used the body hammer on the outside. 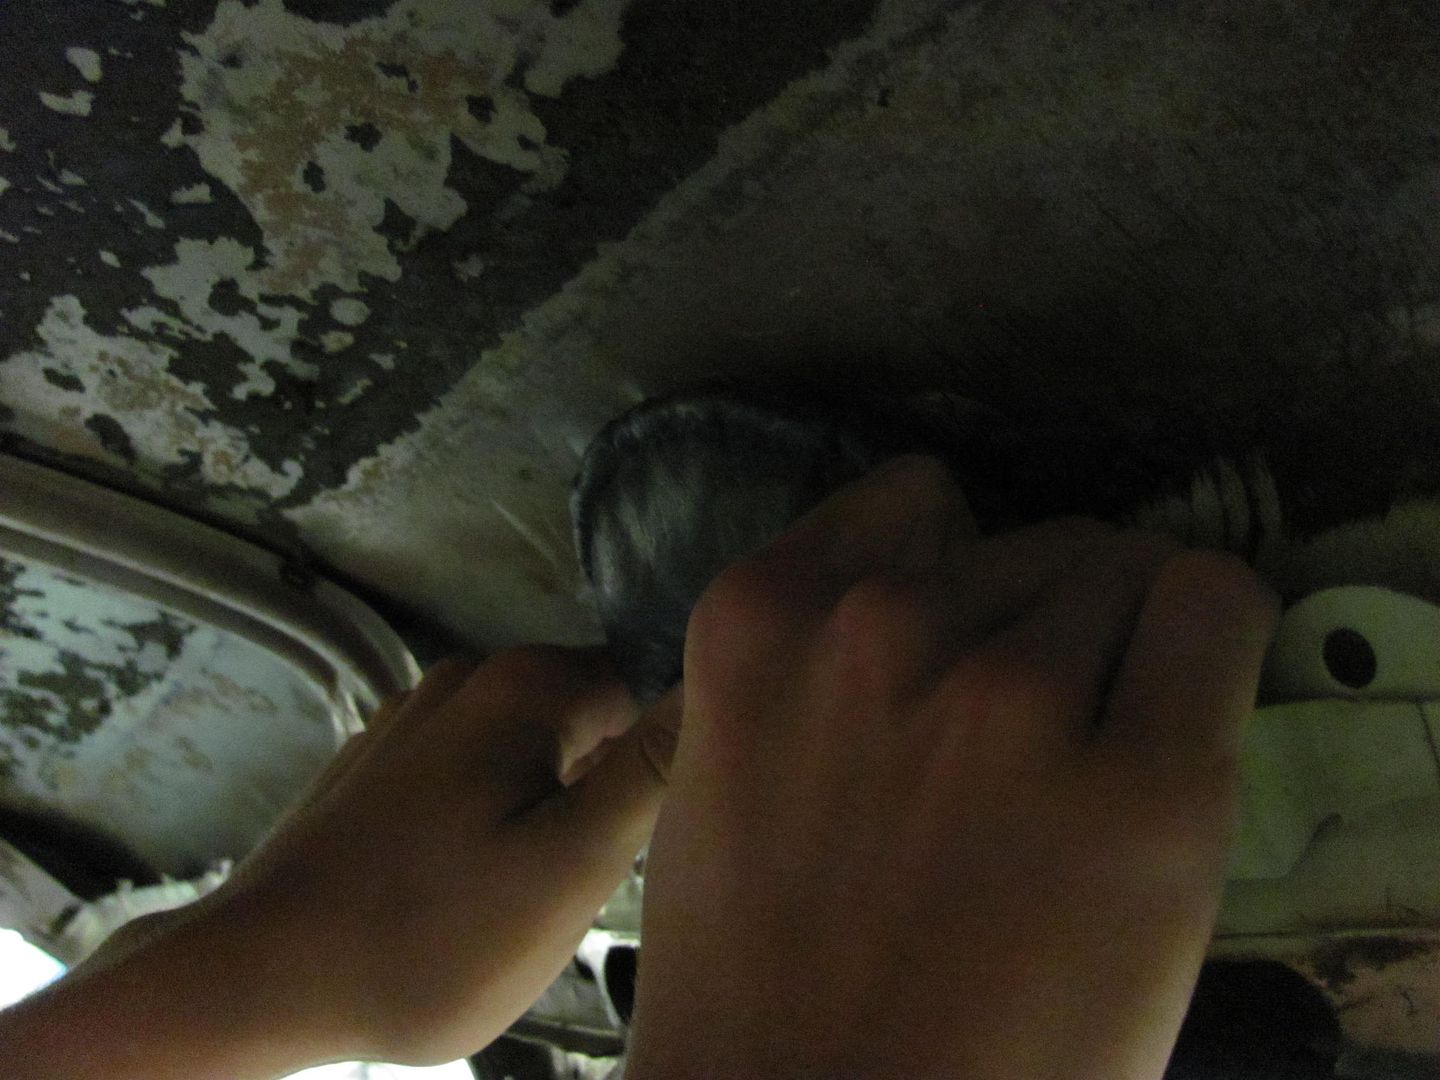 I used the blunted pick end of this hammer to address the narrow high spots. I've found it helps to more precisely locate your "strike area" by laying a guide finger next to it. Tap down the area, move to the next.... 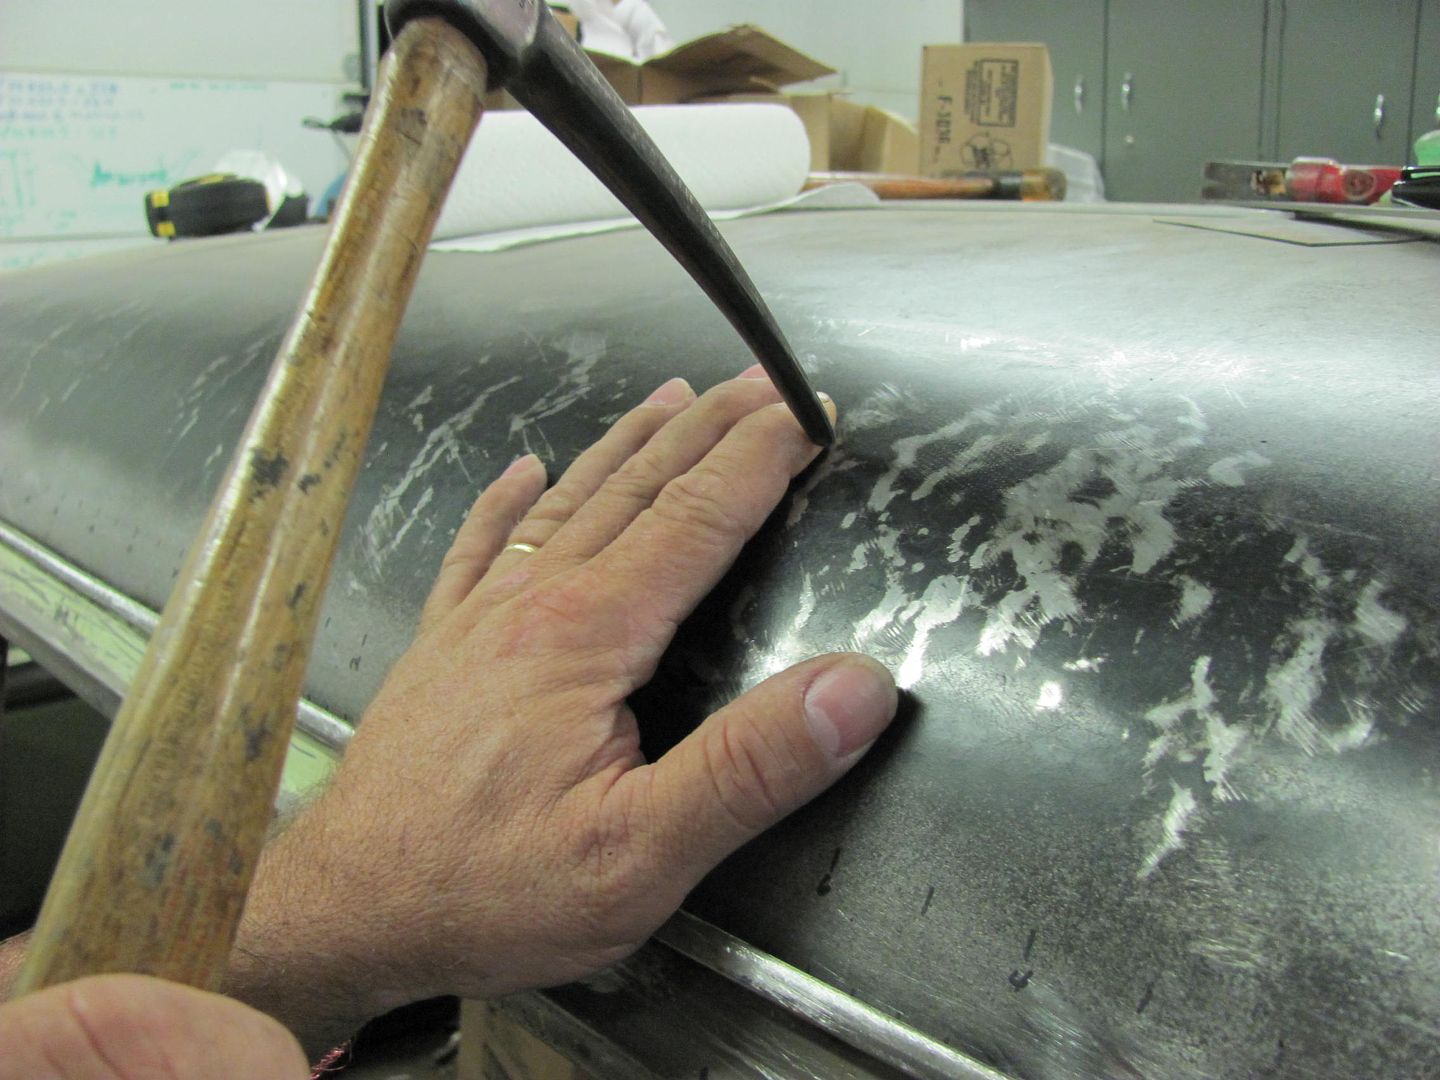 We did have a larger high spot that made use of the hammer face, and on the bottom side Kyle held the donut dolly in place. This made short work of bringing down the high spots.. 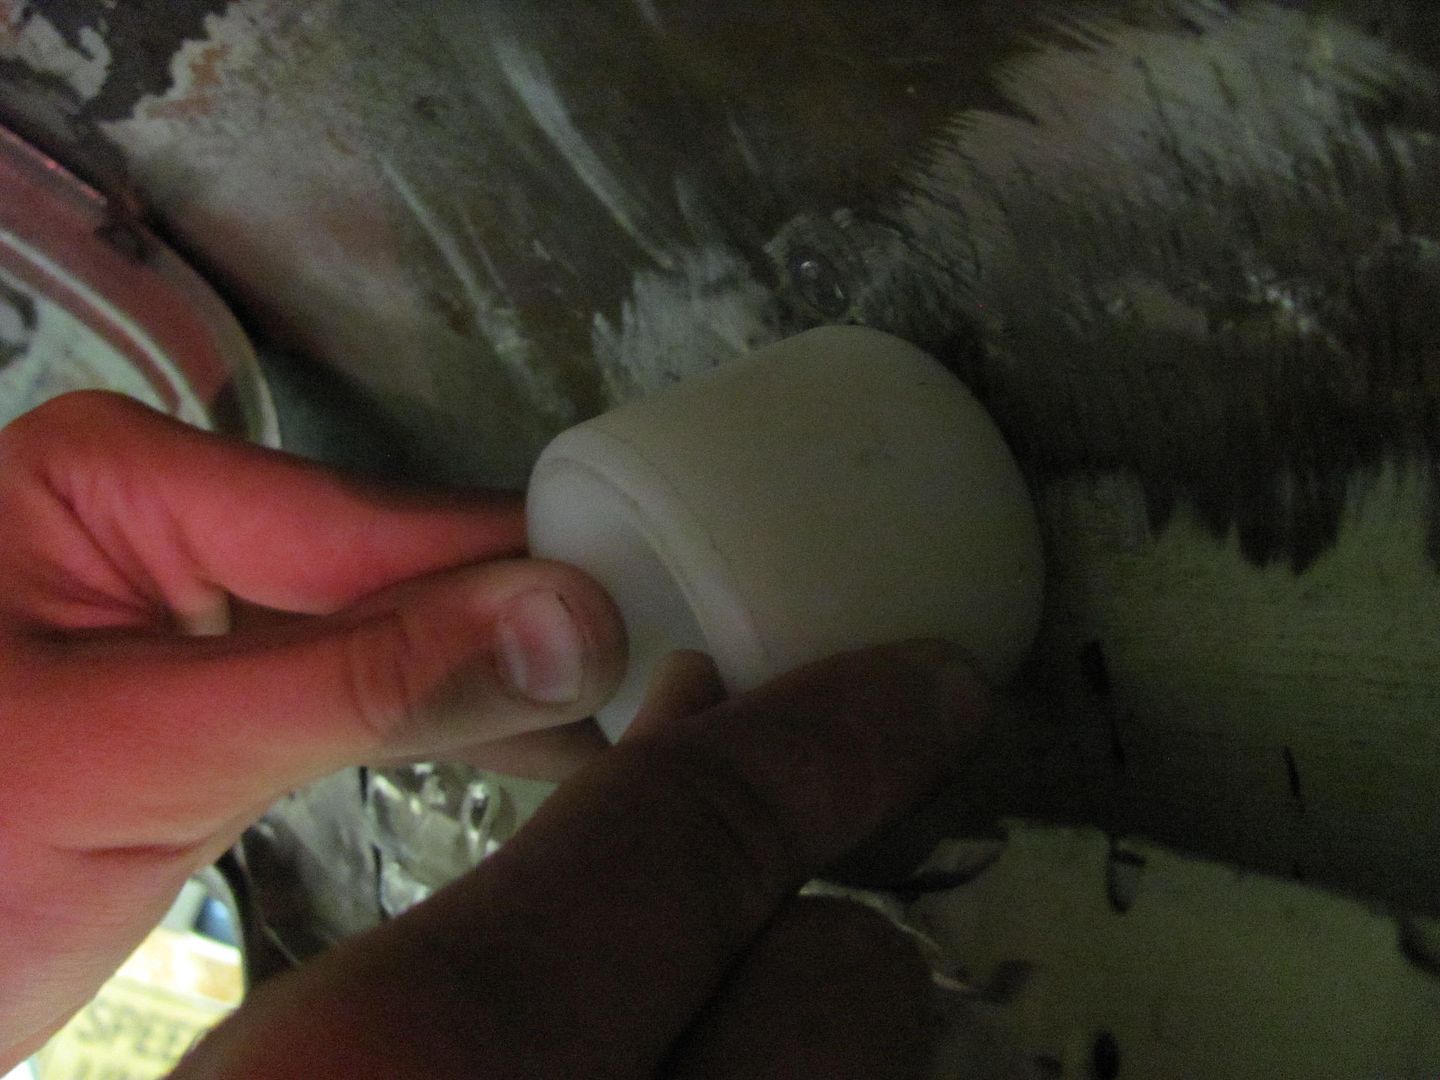 Note the "graduated" markings on the roof are also on the inside to keep inside guy and outside guy on the same page with hammer and dolly alignment.
__________________
Robert |
|
|
|
|
08-30-2014, 05:51 PM
|
#195 |
|
Registered User
Join Date: Jan 2013
Location: Leonardtown, MD
Posts: 1,633
|
Re: 55 Wagon Progress
Today we worked on tying up some loose ends. We had a slight mis-alignment at the front corner of the passenger door..
 The lower hinge had already been adjusted as far as the floating nut would let it...  So the door was removed, and since we have no milling machine, we went through about 8 of these 60 grit sanding discs.. 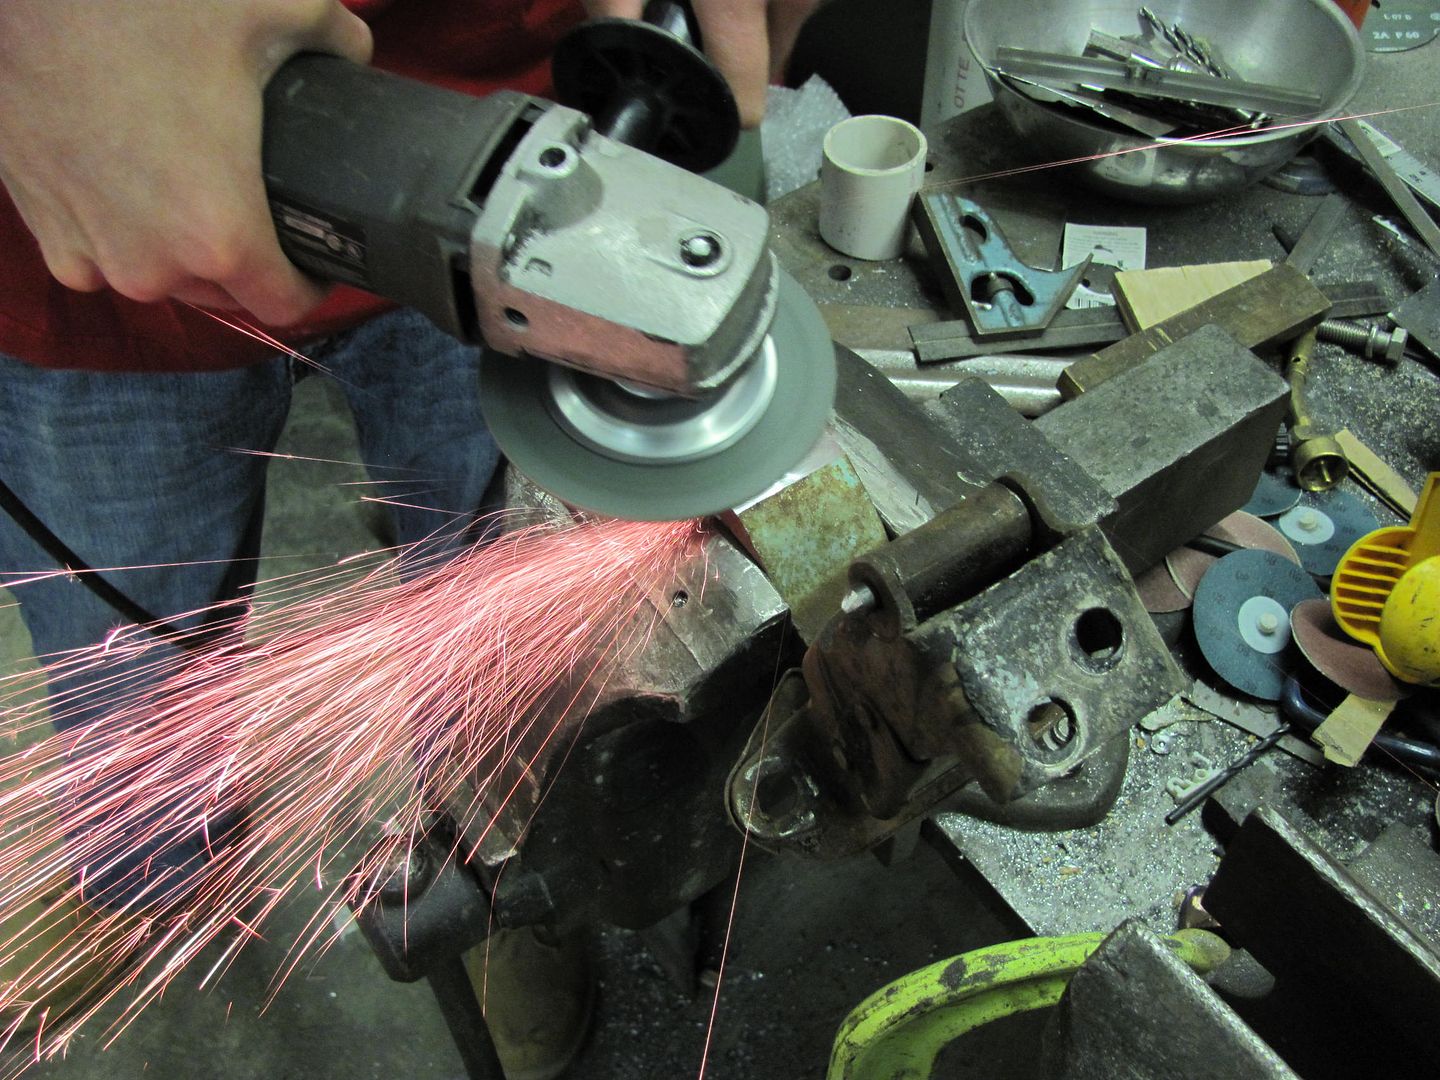 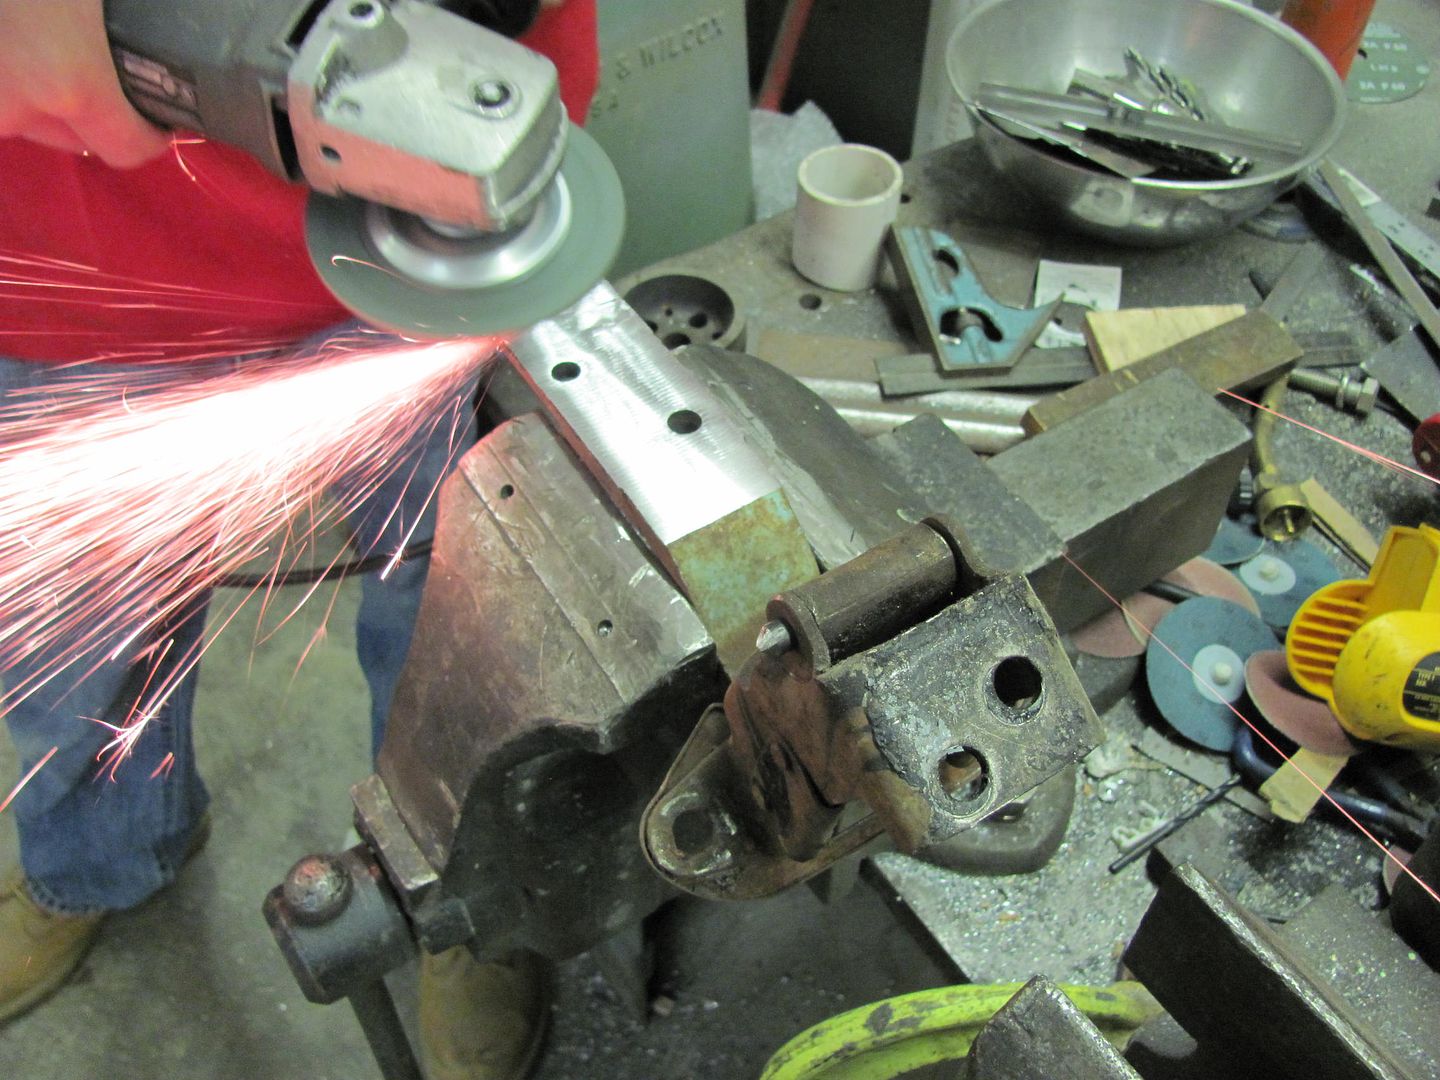 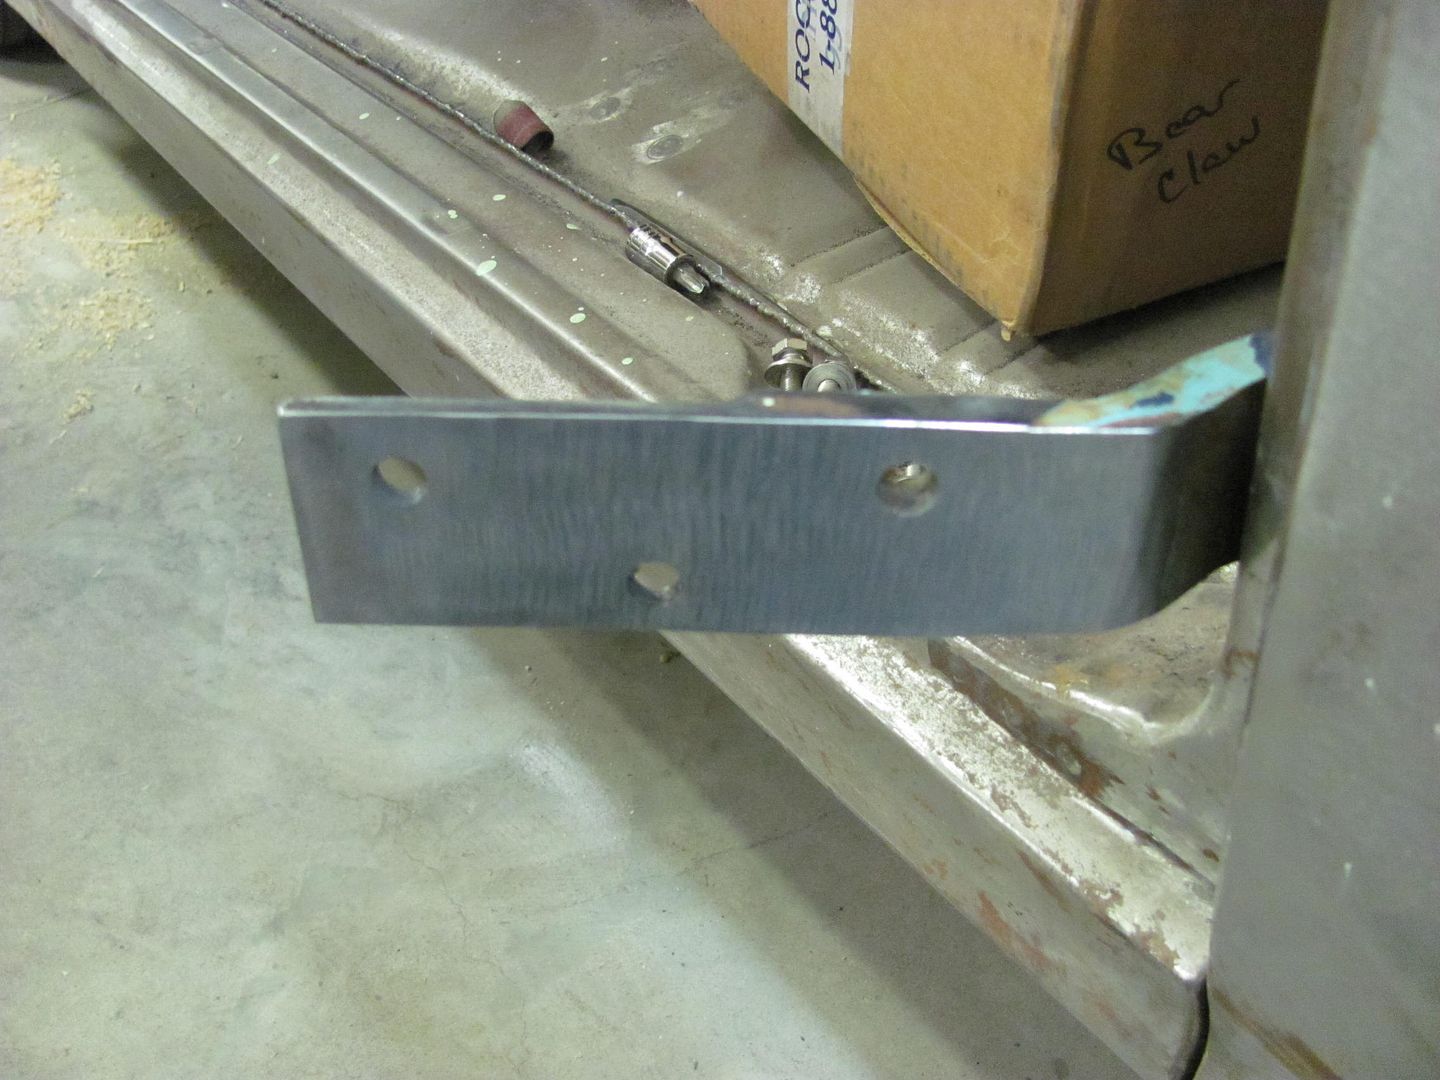 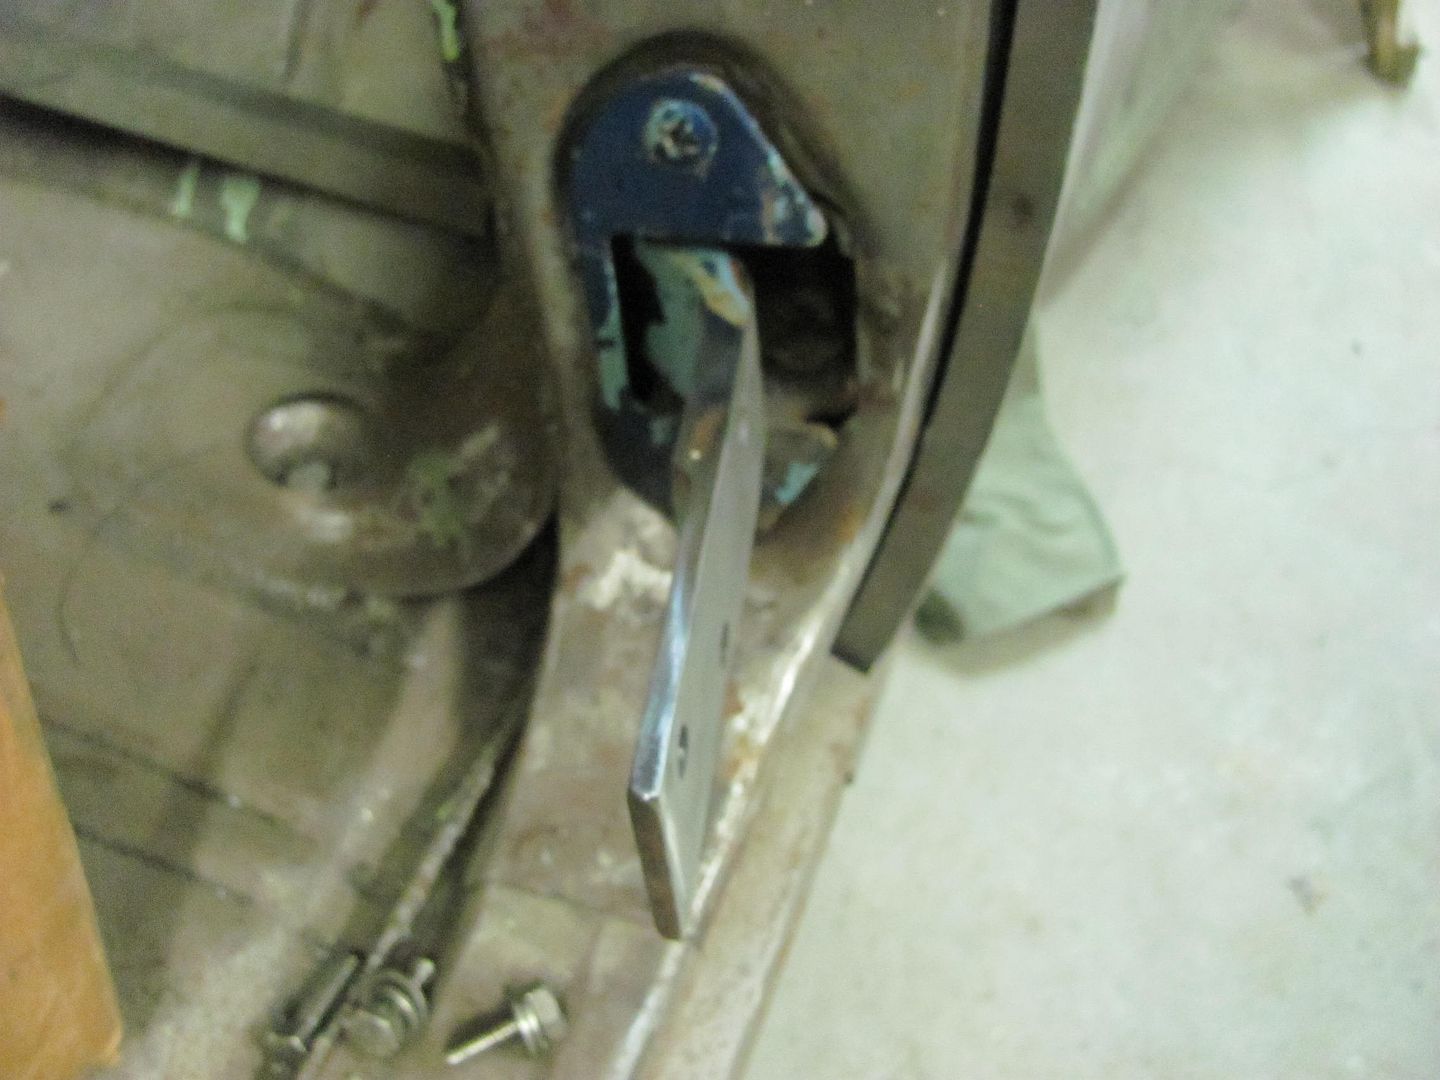 For a better comparison, here's the before again... After 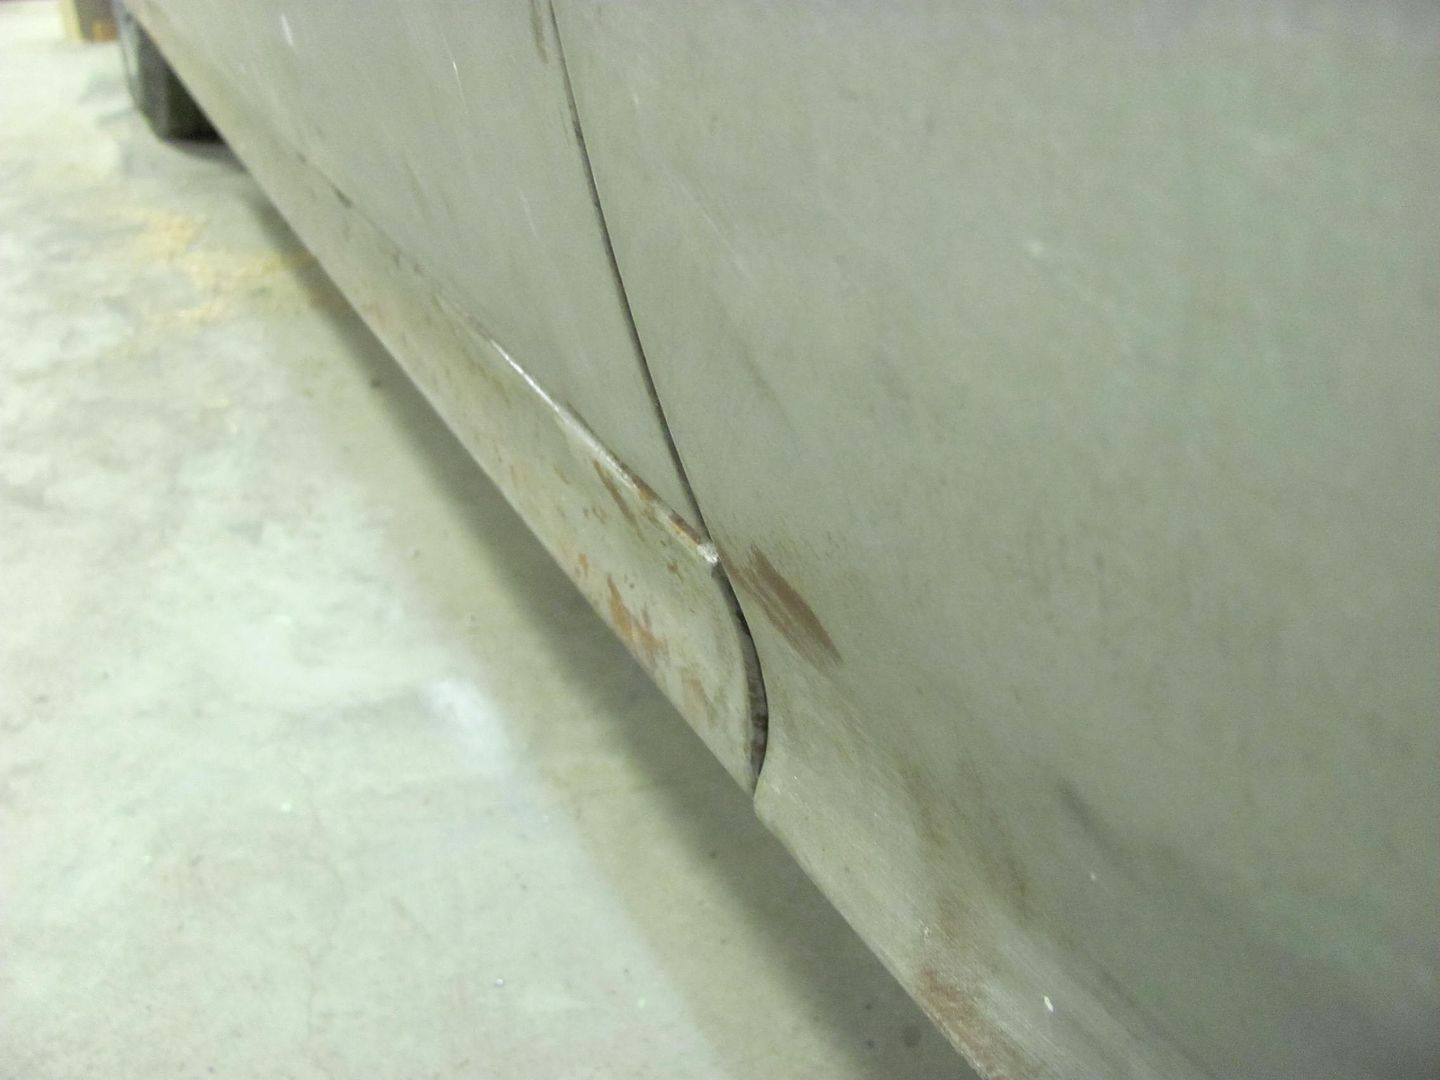
__________________
Robert |
|
|
|
|
09-03-2014, 10:29 PM
|
#196 |
|
Registered User
Join Date: Jan 2013
Location: Leonardtown, MD
Posts: 1,633
|
Re: 55 Wagon Progress
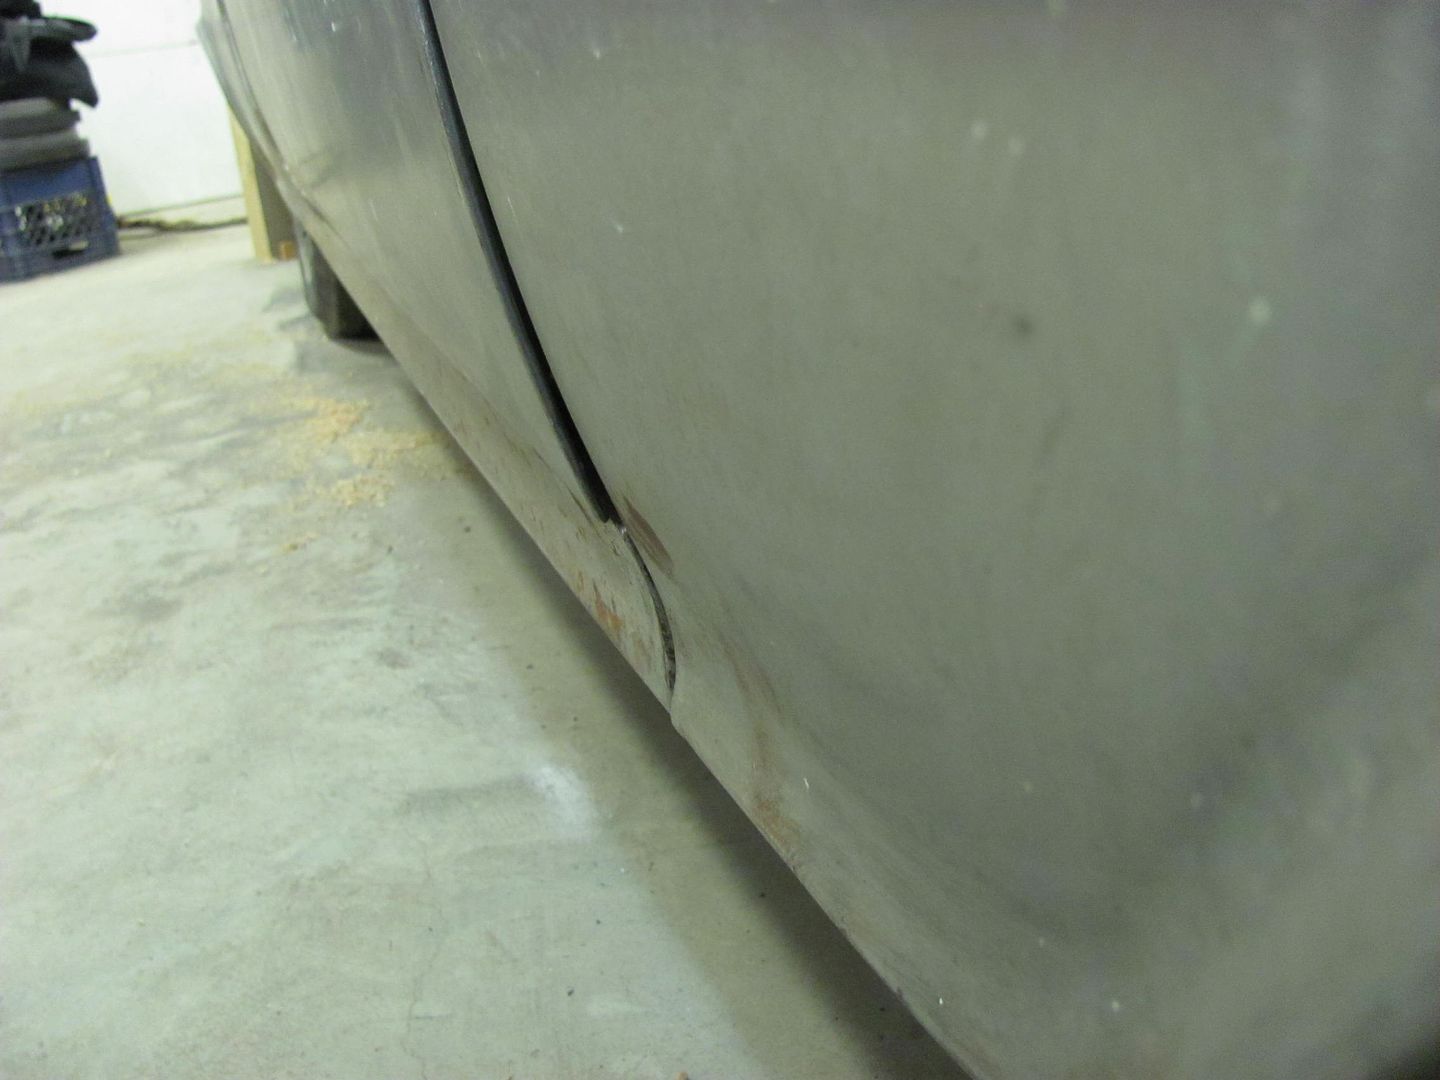
With the lower corner of the door fitting better, it becomes all the more obvious how poor of a reproduction these outer rocker panels are. The "concave" radius does not match the fender to the front or the quarter to the rear of the rocker. This would have been a good fix using the Wheeling machine with a Go Kart slick, had it been noticed before installation.
Matching the lower anvils of the Wheeling machine to the radius on the quarter, this one fits the best. Also notice how it doesn't fit as well in the rocker panel.. 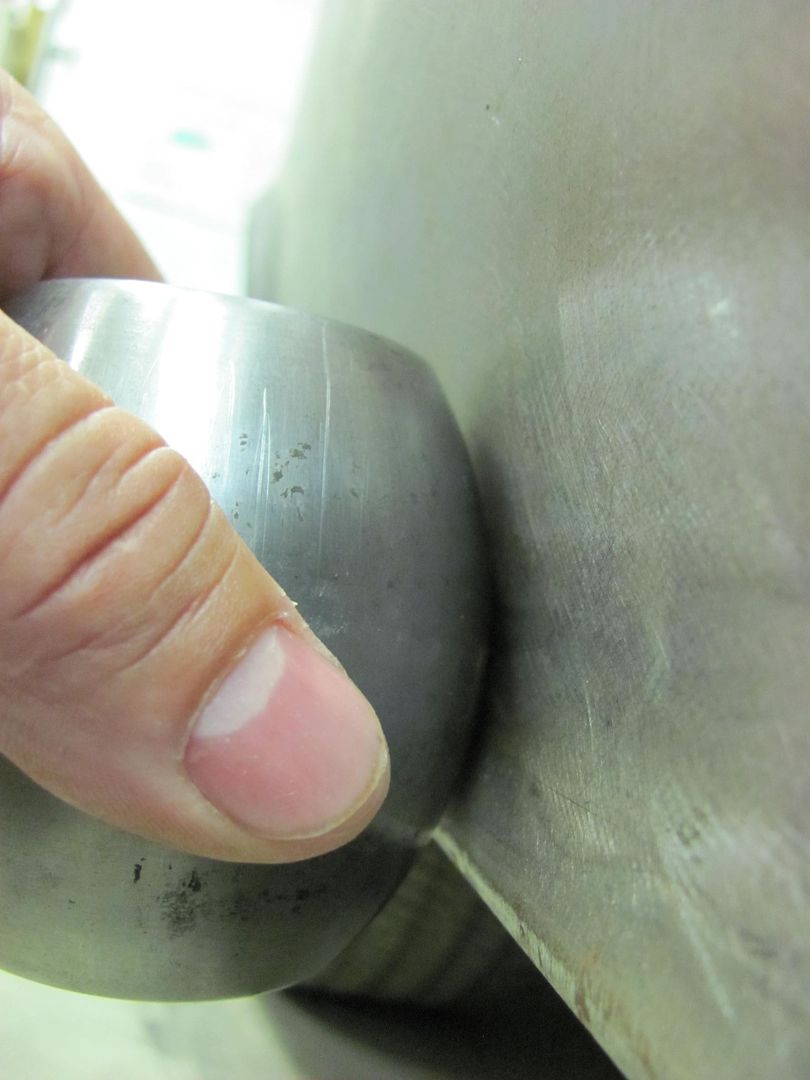 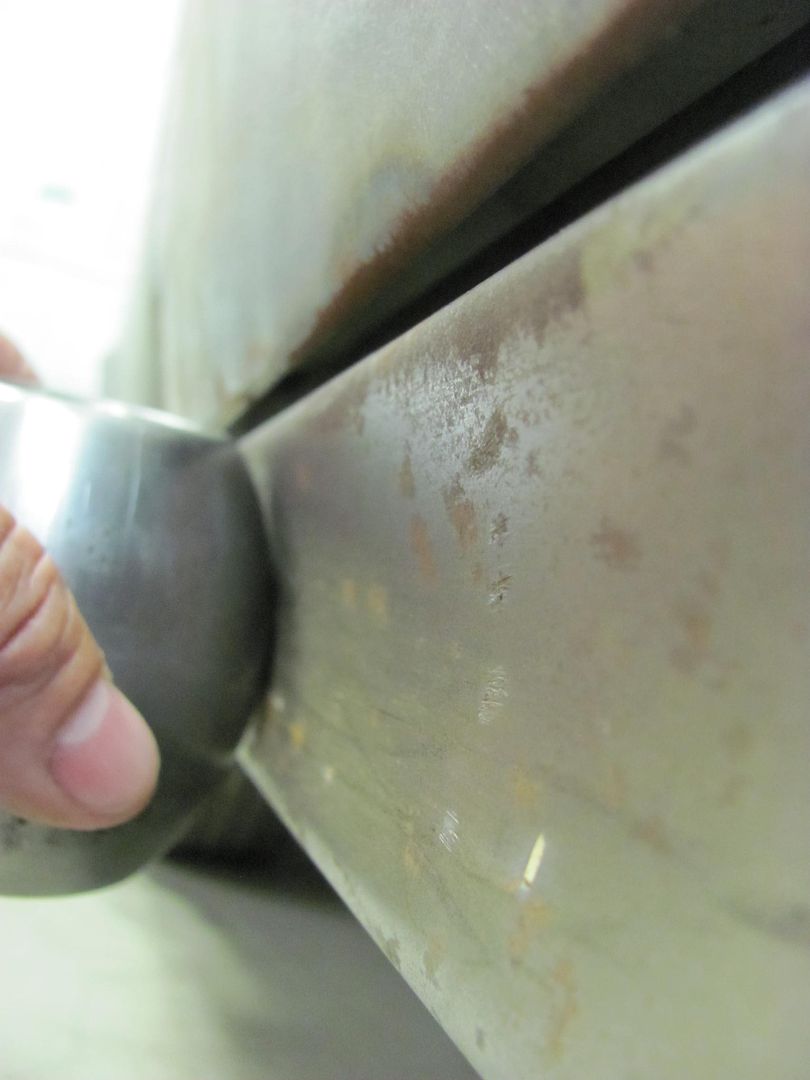 At this point I thought I'd try a "portable" version of the Wheeling machine to add a bit more radius to the rocker panel.  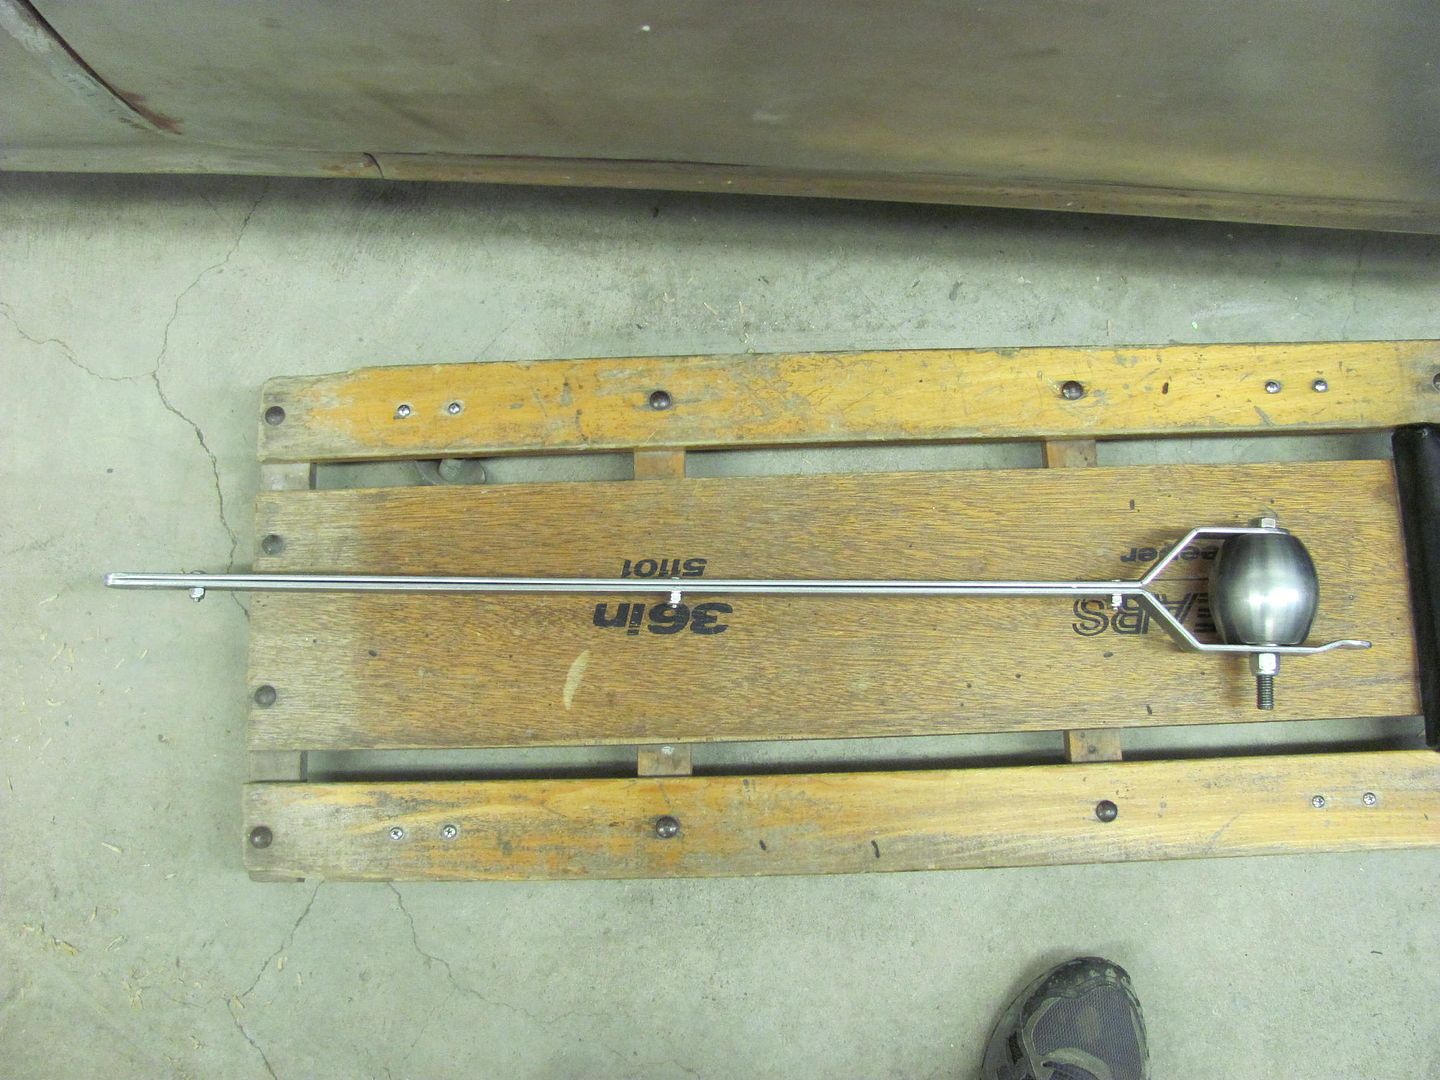 Built in guide...... 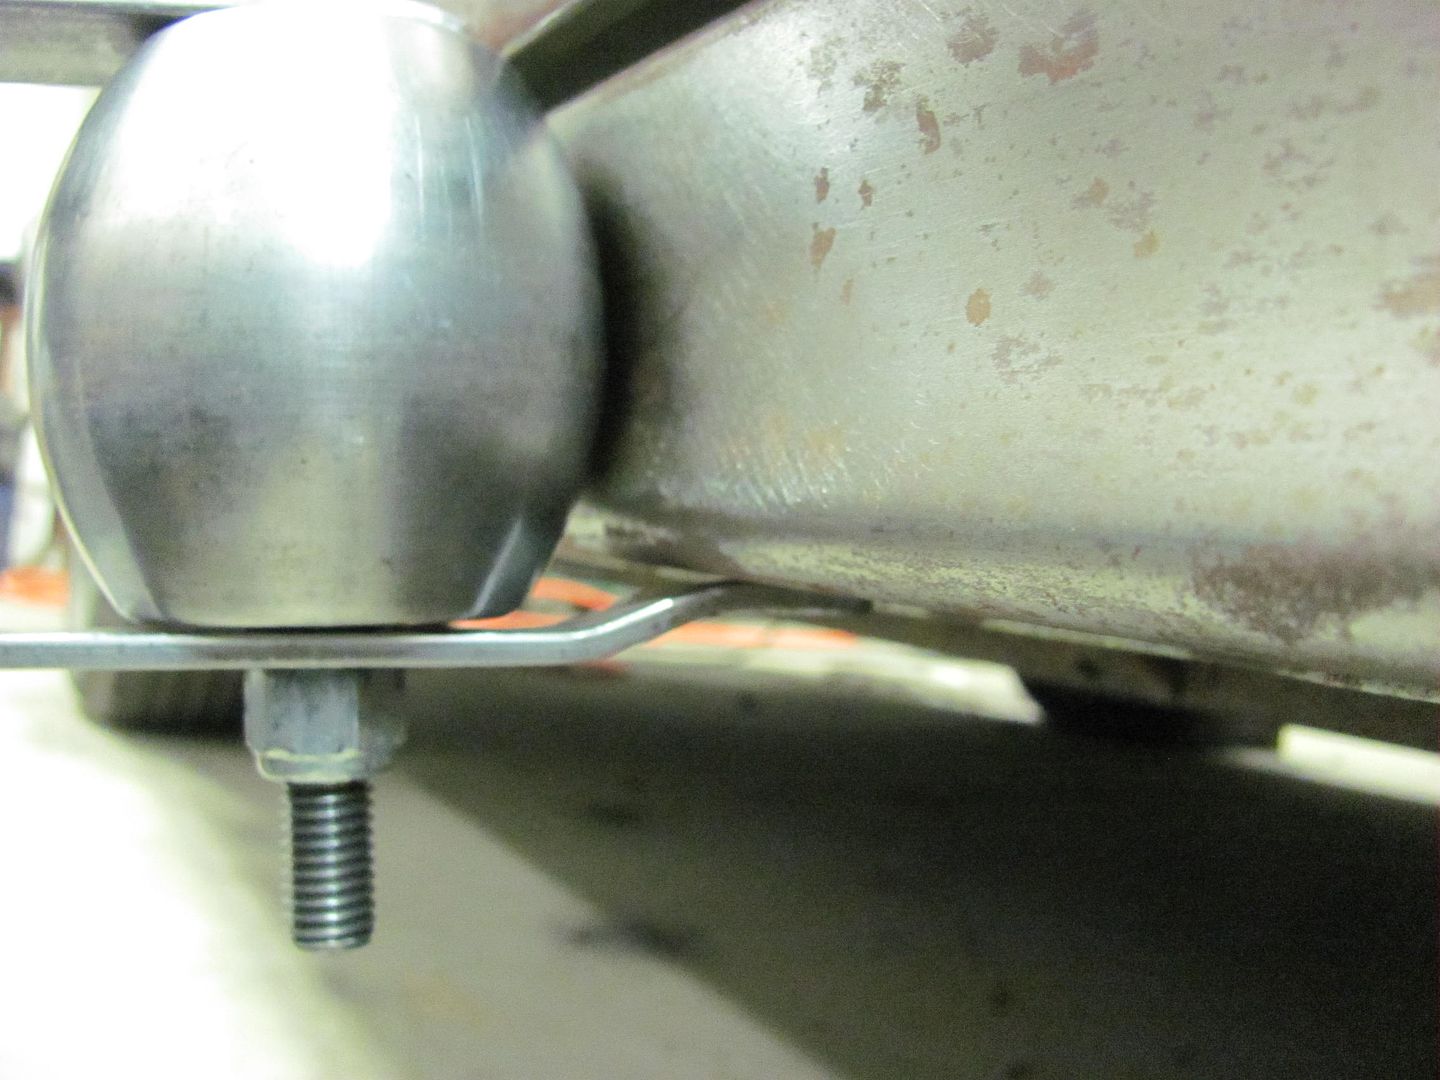 After some "wheeling", and some bumping of the leading edge with a door skin hammer: Just to show the comparison, before After: 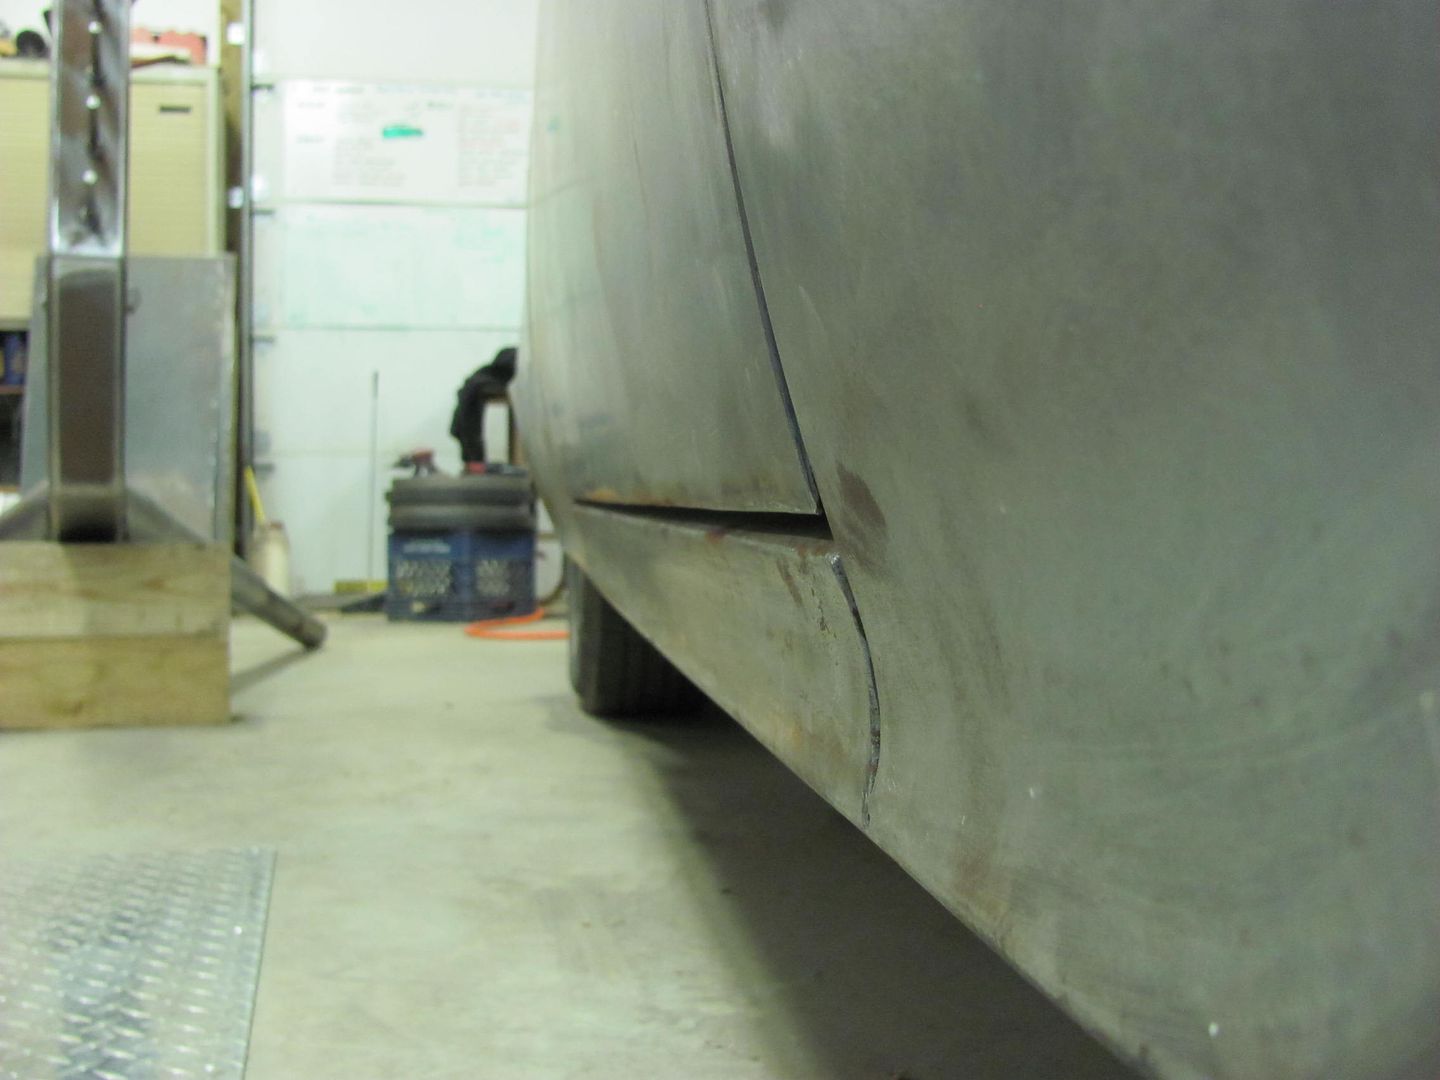 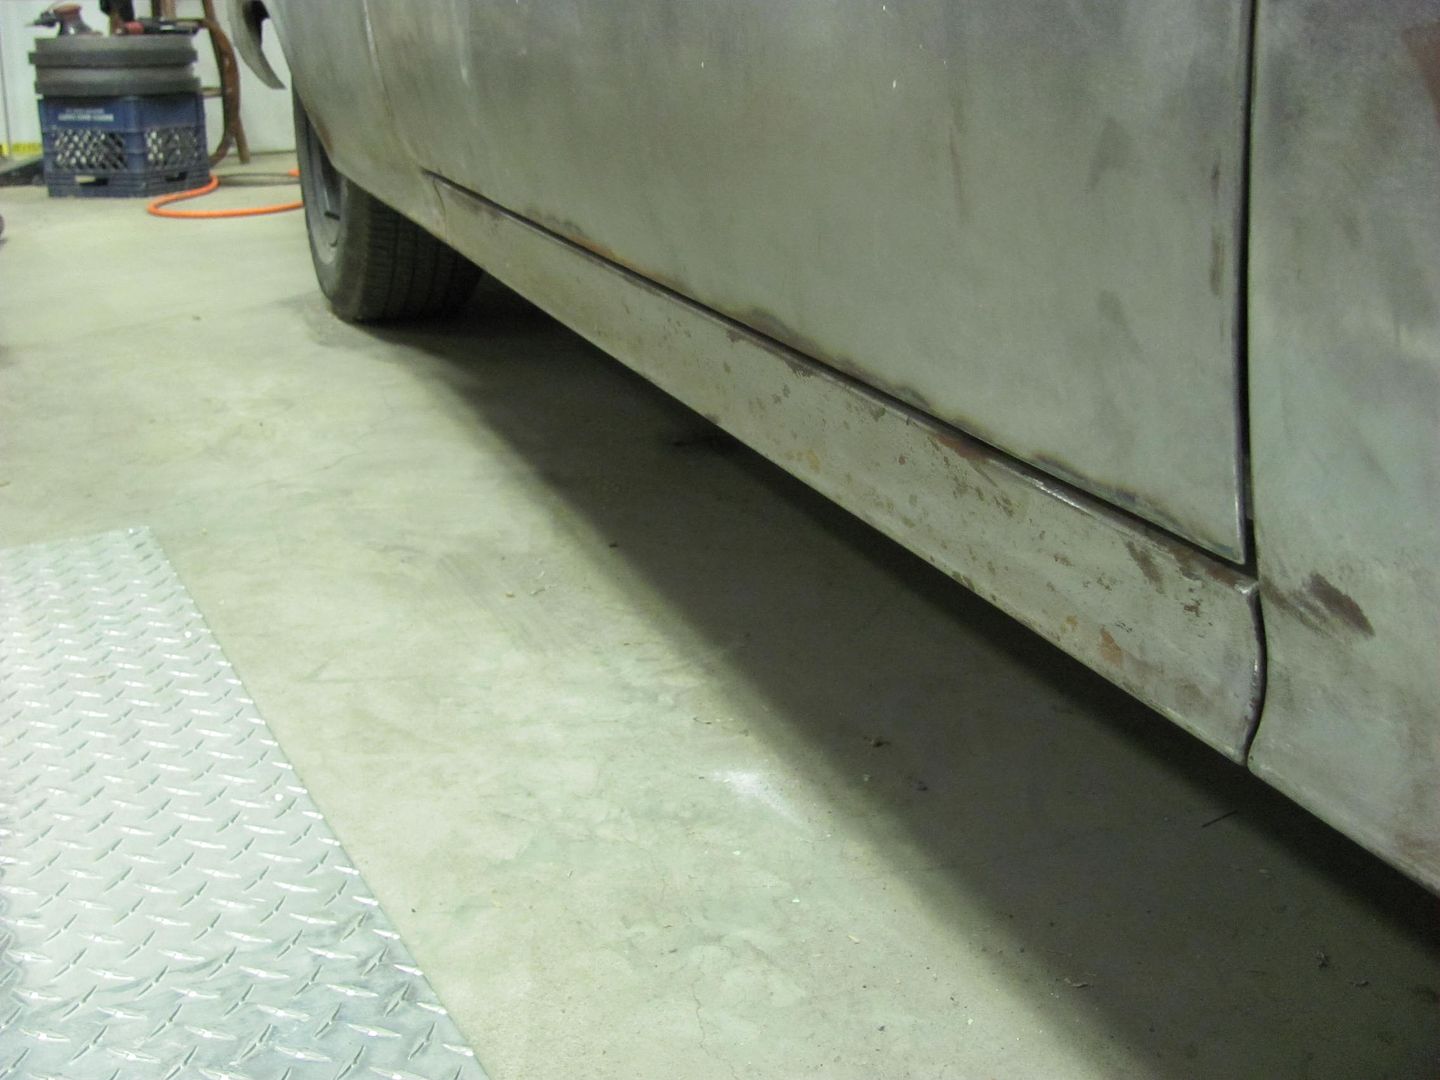 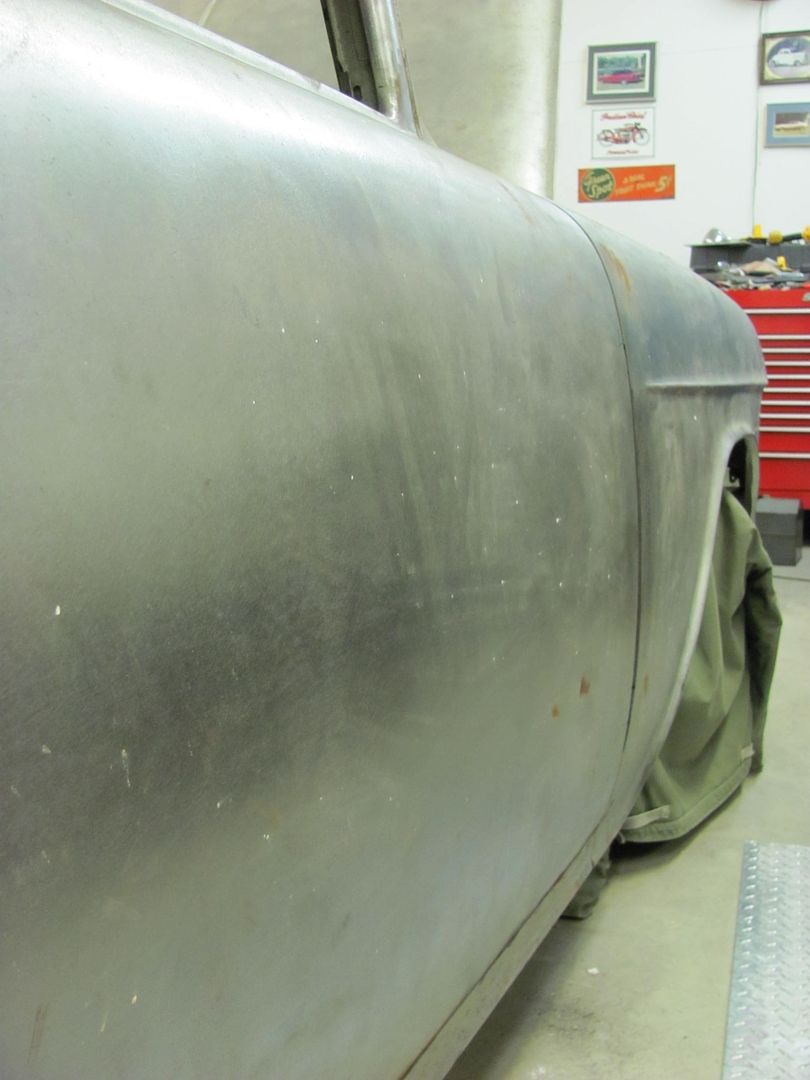 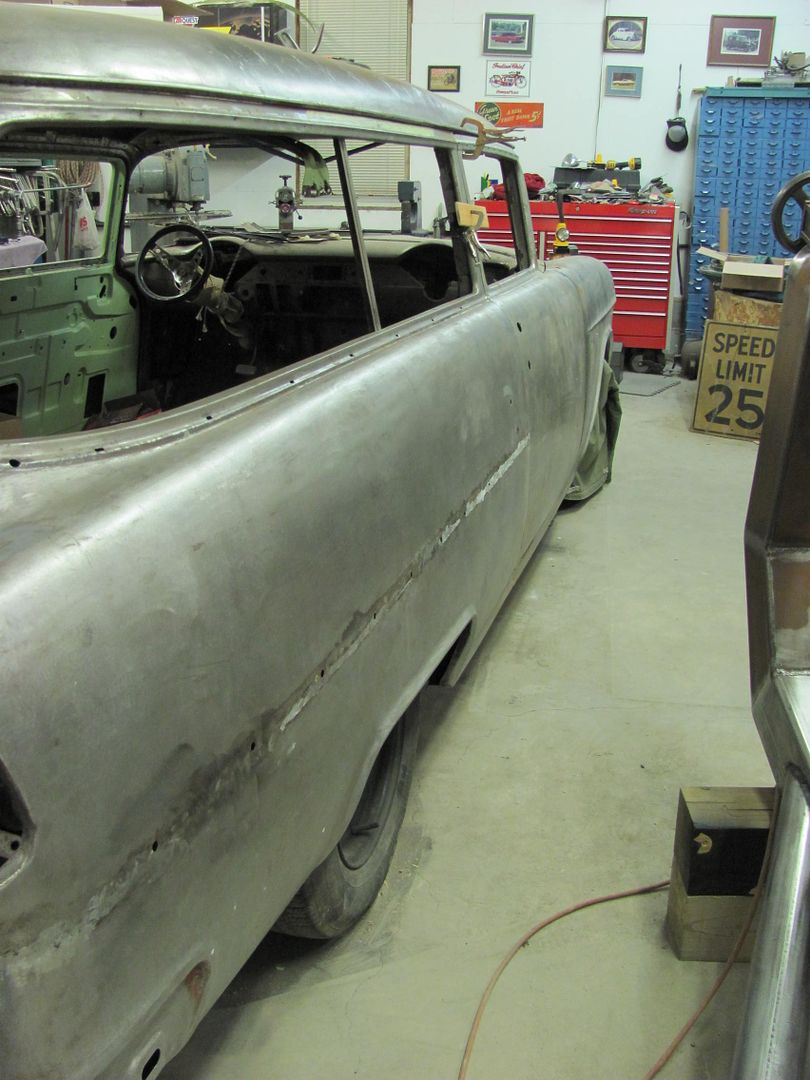
__________________
Robert |
|
|
|
|
09-04-2014, 11:42 AM
|
#197 |
|
Registered Cruiser
Join Date: Mar 2010
Location: Mesa, AZ
Posts: 918
|
Re: 55 Wagon Progress
Amazing work!
__________________
77' Chevy SB Dropmembered Front and Rear 5.3/4l60e combo |
|
|
|
|
09-04-2014, 04:59 PM
|
#198 |
|
KEEP ON TRUCKIN'
Join Date: Jun 2005
Location: Sterling, Va.
Posts: 5,731
|
Re: 55 Wagon Progress
Better than new. I wish that was my truck cab you were working on. Great work Robert.
__________________
JIM '97 GMC Sierra K1500 '95 Chevy Silverado C1500 '71 Cheyenne Z71 / LT1 & 4-Speed SWB K/10  Father/Son Project Father/Son Projecthttp://www.youtube.com/watch?v=4l689JKXPnA http://67-72chevytrucks.com/vboard/payments.php "LIVIN' FREE FOREVER" 
|
|
|
|
|
09-04-2014, 10:45 PM
|
#199 |
|
Registered User
Join Date: Apr 2011
Location: .
Posts: 3,104
|
Re: 55 Wagon Progress
Not to sound redundant but I learn something new every time you post.
Thanks, You totally rock! |
|
|
|
|
09-05-2014, 09:51 AM
|
#200 |
|
Registered User
Join Date: May 2010
Location: Lawrenceville, Ga
Posts: 2,640
|
Re: 55 Wagon Progress
I like these teaching threads. Thanks to you guys who are willing to share your skills and tricks.
|
|
|
|
 |
| Bookmarks |
|
|


 Linear Mode

