
|
Register or Log In To remove these advertisements. |
|
|
|
|||||||
 |
|
|
Thread Tools | Display Modes |
 02-21-2011, 08:42 PM
|
#1 |
|
Registered User
Join Date: Nov 2010
Location: Fayetteville NC
Posts: 752
|
How-to....69 Camaro tank retrofit
Just finished mounting up and installing a 69 Camaro tank on my longbed 66 C10. Stay tuned for the complete write up....it's dinner time and I made a big ole batch of homemade chili.
I will say this...it's possible to do this install without removing anything from your truck. I left my bumper and bed on and managed to get it bolted up. That said...it's a PITA. If I removed my bed floor I would have been done with this 2 days ago! If you want some progress pics check out my build thread here... http://67-72chevytrucks.com/vboard/s...d.php?t=445201 |

|

|
|
02-22-2011, 12:26 AM
|
#2 |
|
Registered User
Join Date: Nov 2010
Location: Fayetteville NC
Posts: 752
|
Re: How-to....69 Camaro tank retrofit
This is a 2 person job. I wouldn't have been able to install this tank without the help of my buddy Russ. Even still it took us several days because I stoically didn't want to remove my bed after we took his off of his 81 C10...and that involved a lot of cutting
I ordered the tank from a company called Tamaraz up in Illinois. I found them on ebay, they sell the 69 Camaro tank with sending unit and tank straps as an auction. However if you call them up they'll swap the straps for the anti-squeak kit and it'll come to $170 delivered. I'm not all that impressed with their customer service since I didn't receive a shipping confirmation like they said I would, and I had to keep calling back over the course of several days to get a hold of someone. None the less my tank arrived and in good shape...albeit an odd way of packaging it. Here's how it arrived 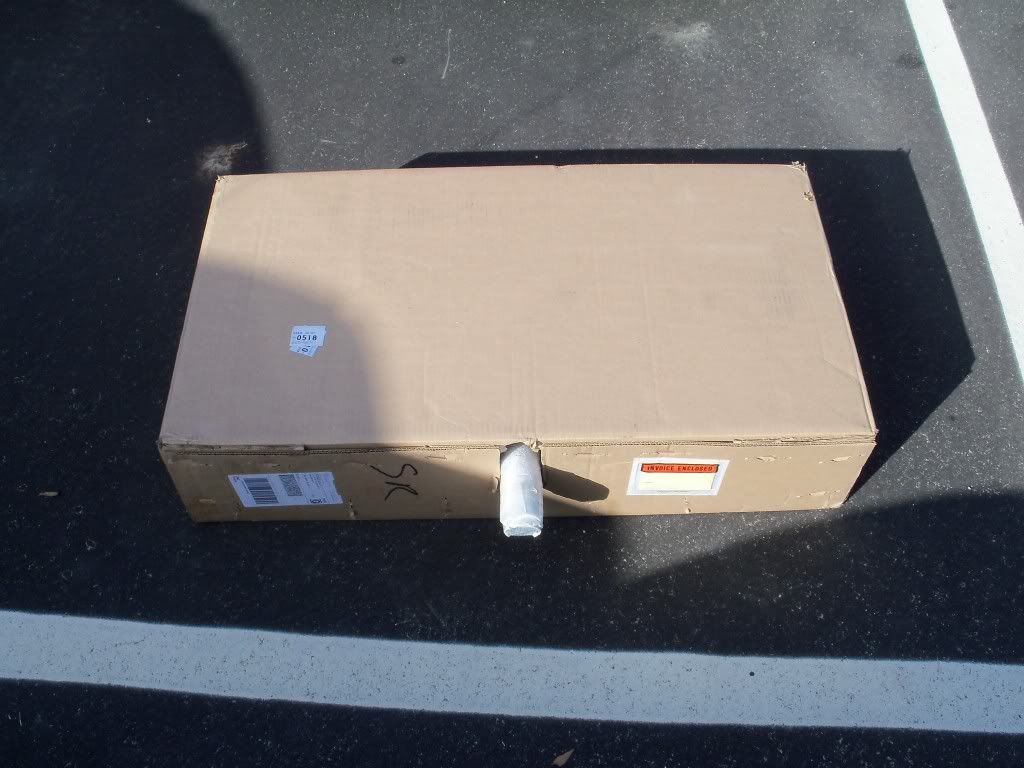 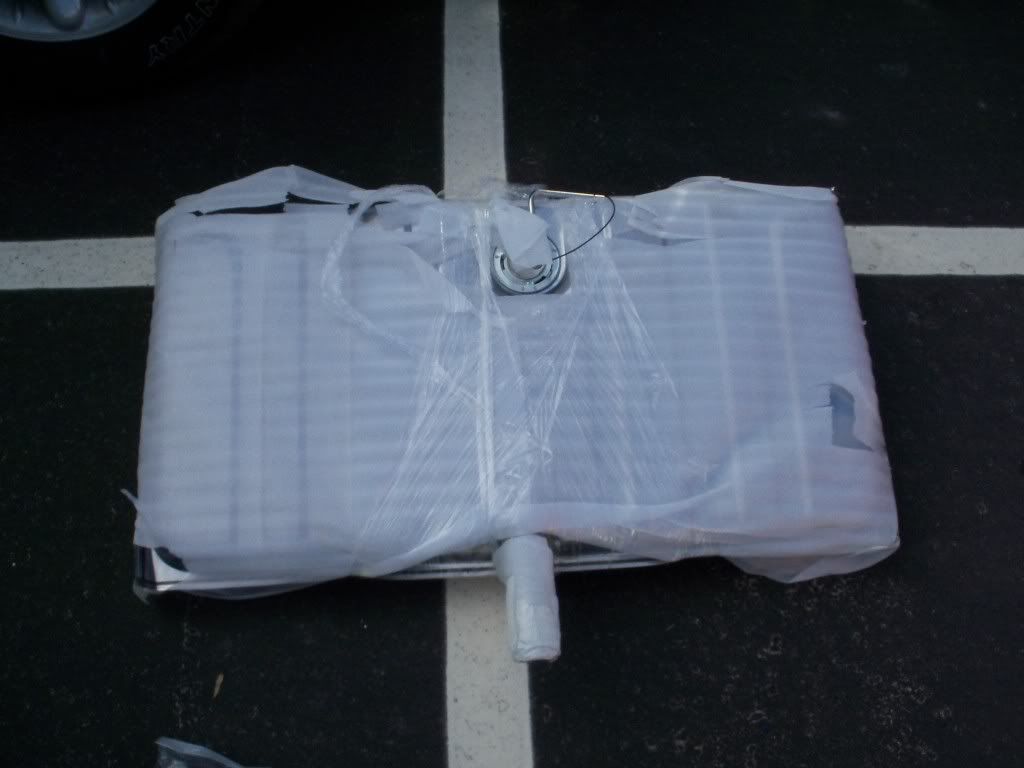 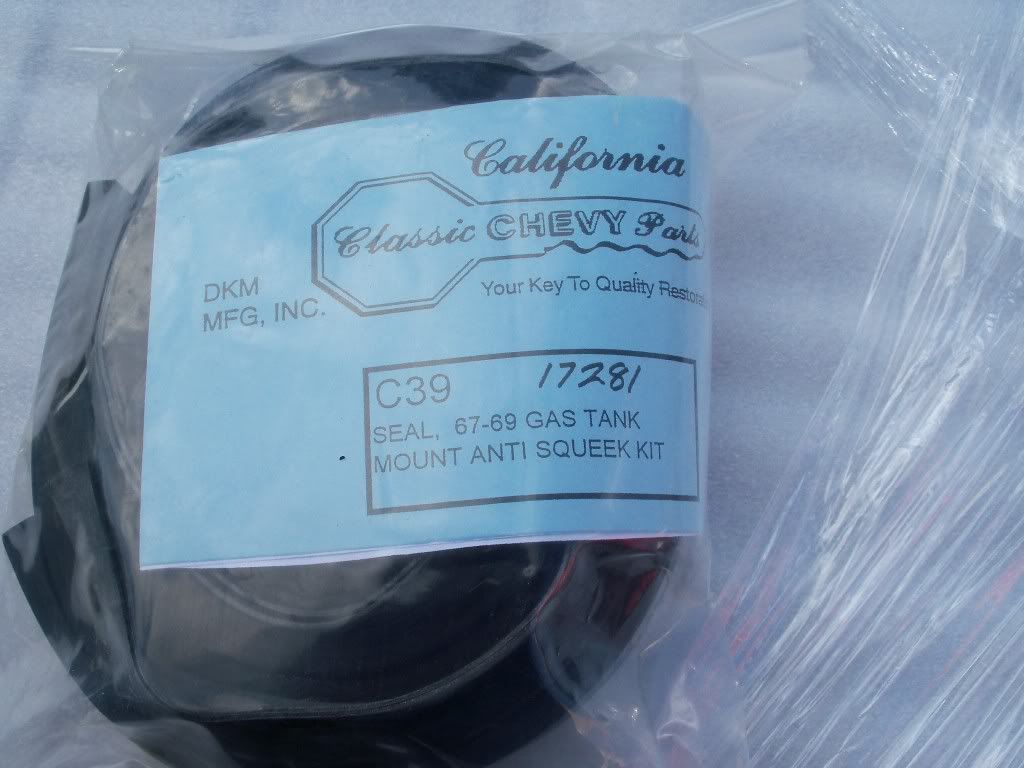 Here are the measurements of the tank 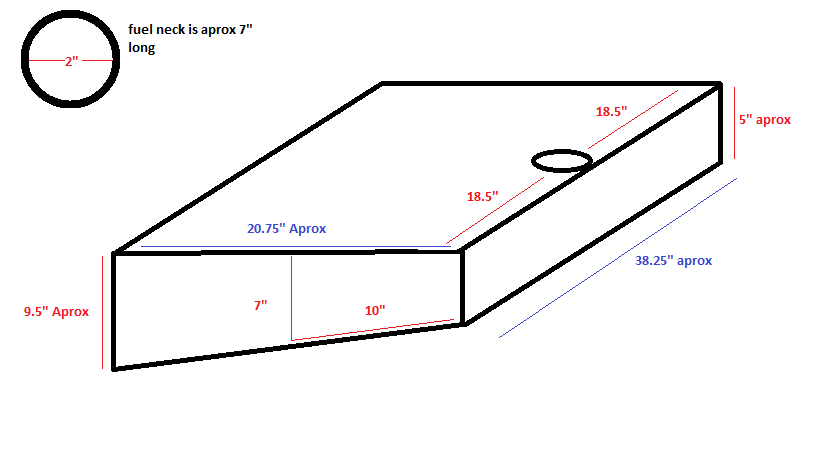 Here are the measurements of the frame 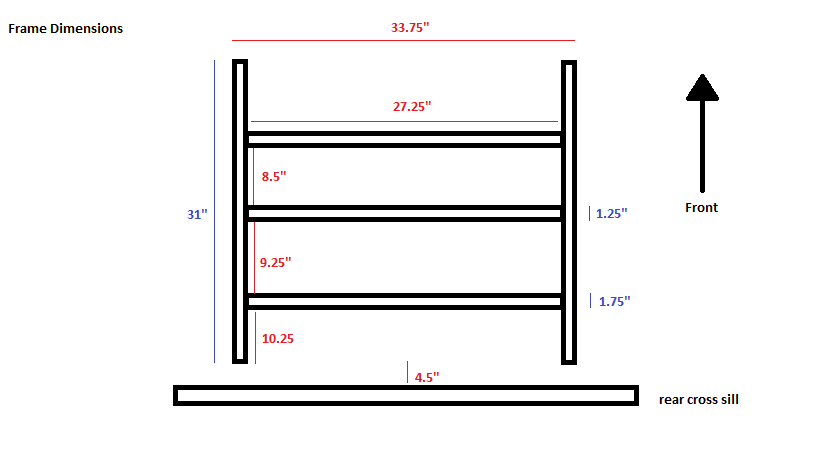 As you can see the tank will not fit between the frame rails, which in this case is a good thing. If it did fit in between the frame rails the filler neck wouldn't be in the right spot. To solve the mounting issue I made a bracket/spacer out of some perforated steel tubing I got from Lowes. I believe I used 1.5" tubing and it came out perfect. You'll need two pieces of it. For the straps I used 14ga perforated steel straps, also from Lowes. You'll need 2 8ft pieces. The tubing was cut with a grinder and grinding wheel to a length of 27". However you'll want to double check all of the measurements I've listed on your frame and your tank just to be safe. Bending the straps was done by hand leaving plenty of extra on both sides just to be safe. The end result was this...I give you V1.0 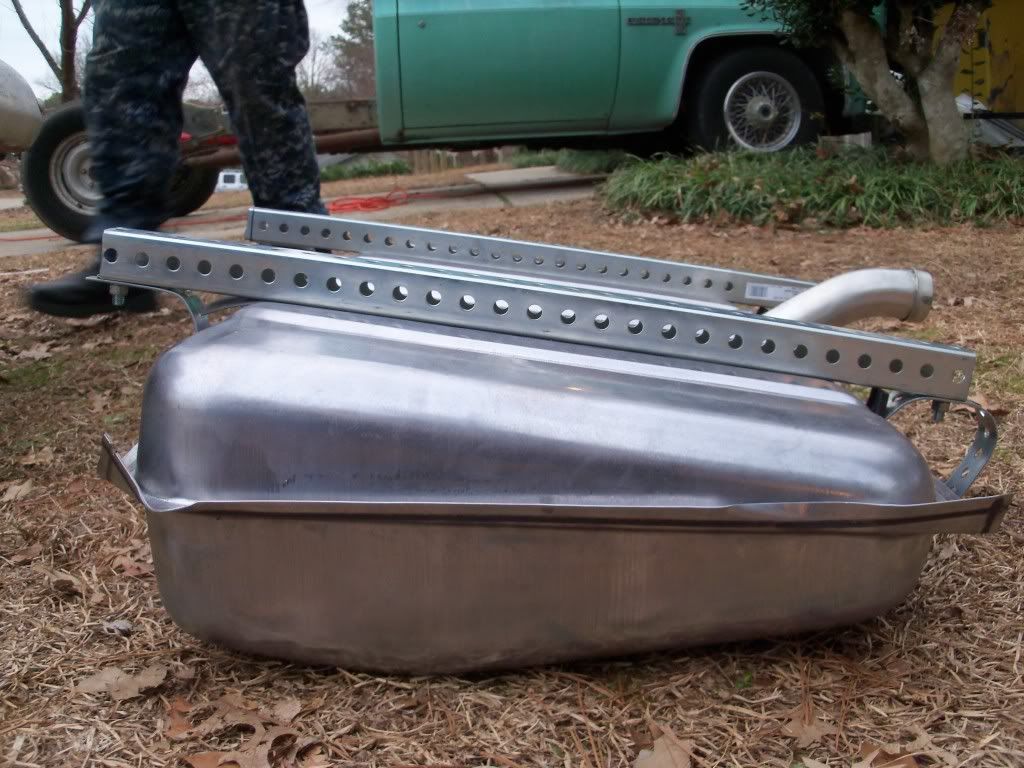  However after a night of thinking about it I decided to change up a few things...namely where the bolts on the straps were. This is an 18 gallon tank, so full it will weight 144lbs. If the 14ga steel I used was able to be bent by hand 144lbs of fuel will do the same exact thing, and that would be BAD. So enter V1.5... 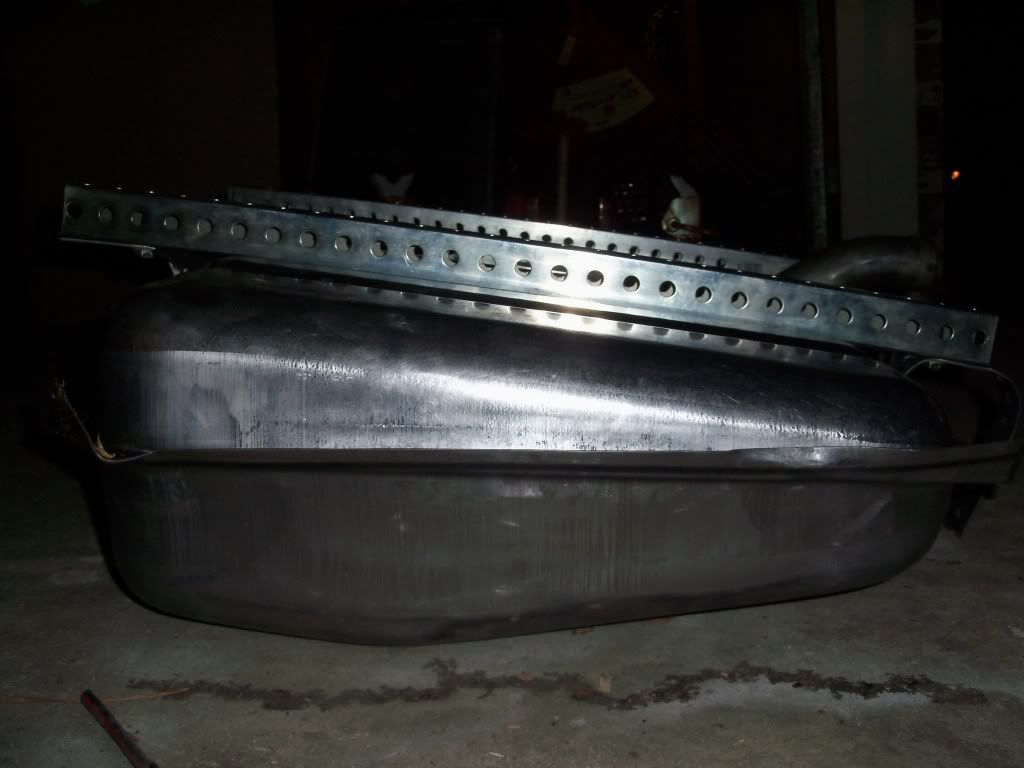 Then I realized that the fuel line was touching the metal strap, and that's a recipie for disaster if left as is. I also remembered that there was an extra piece of foam in the anti-squeak kit so after rummaging around through all the junk in my bed I found it and put it on.....I give you V2.0 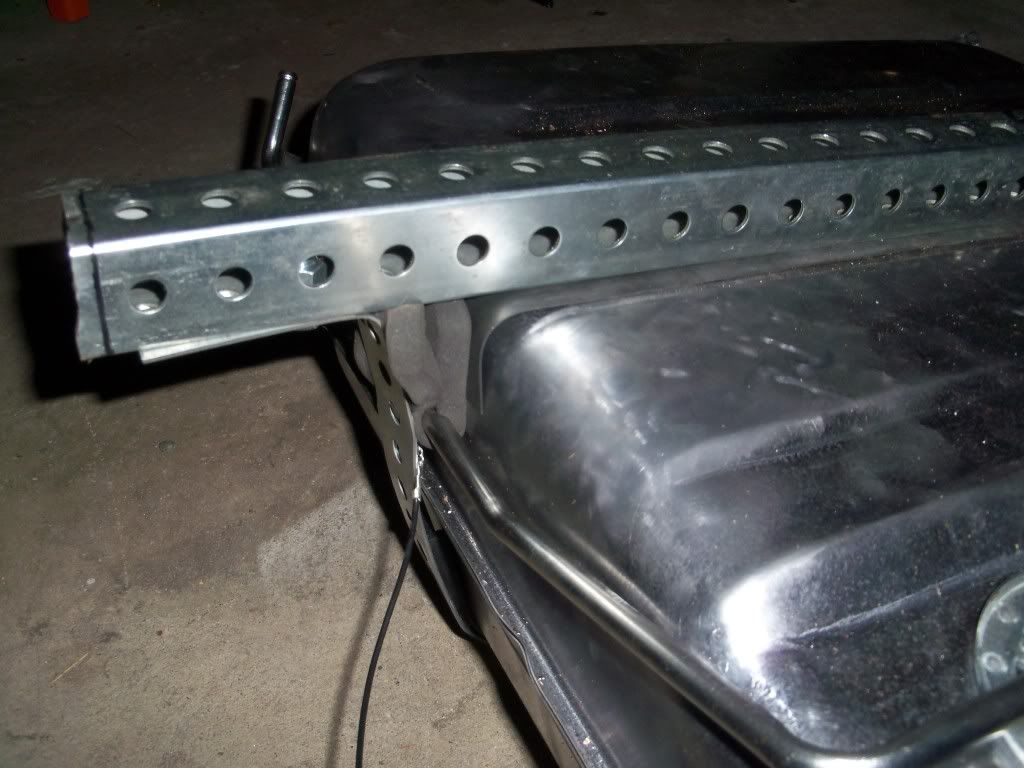 Now if you're wondering why I have the straps bent down on the filler side of the tank...it's because it made it easier to carry around. You can cut them off if you want, though they came in handy to be able to push on to get the strap where I wanted it for the bolts to go into. At this point the tank was done and just needed to be mounted up. I took measurements off of the tank and figured out where the holes needed to be drilled on the cross sills under my bed. 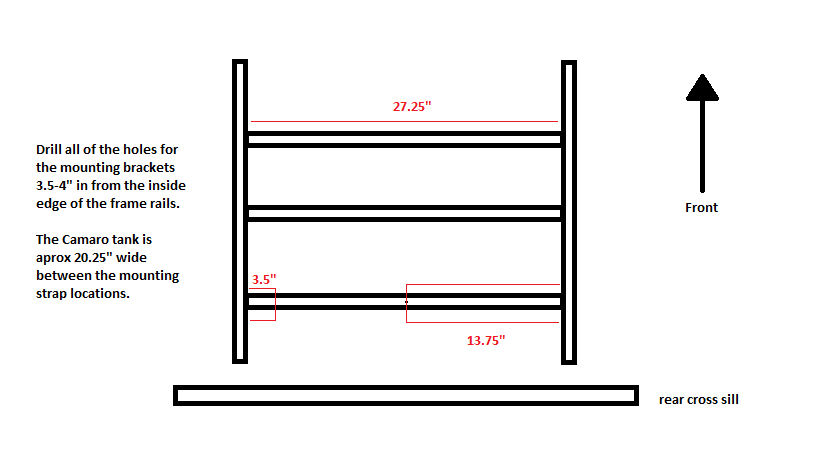 All was dandy so I tried to install the tank. But we ran into a slight problem....I couldn't get my wrench in far enough to reach where I needed the nut to go to!!! I thought for sure I was going to need to add another cross sill and have that as my front mounting point. Then the good idea fairy paid me a visit and this is what resulted...I give you v2.5 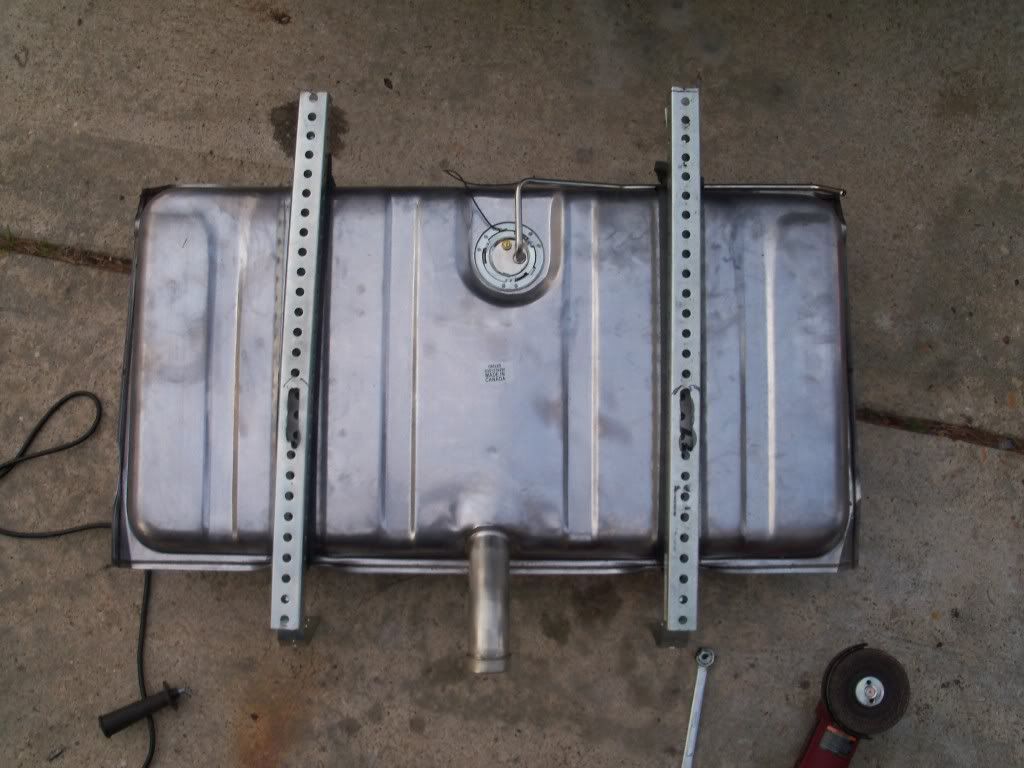 I'm no engineer but that seemed like the best spot to cut an access notch into the rail. I ended up having to enlarge it from what you see there to really be about 4 holes long instead of 3....and I did that while the tank was under the truck...very sketchy, so learn from my mistake!!! I also needed to widen the notch a bit more so I could turn my wrench in there and also so I could get it out. If I were to do it all over again I'd at least remove a few boards from the bed to get better access to the bolts. After several hours of swearing, cutting myself on metal, getting dirt/rust/gunk in my eyes, and breaking a finger I got the damn thing installed. Here are the pics 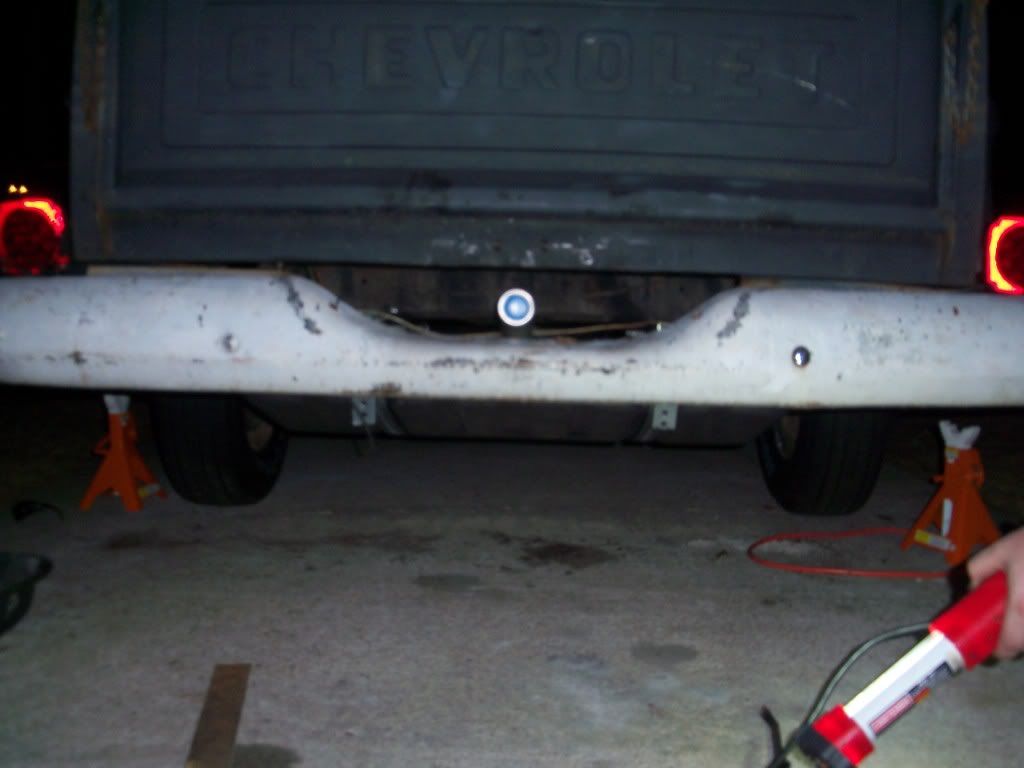 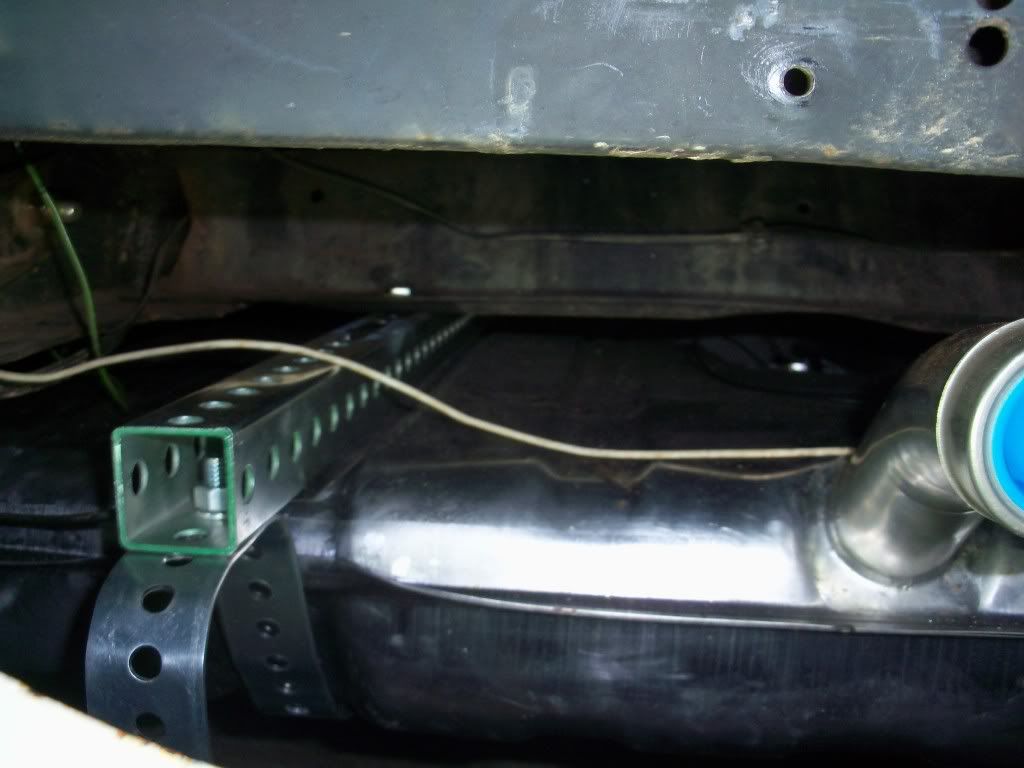 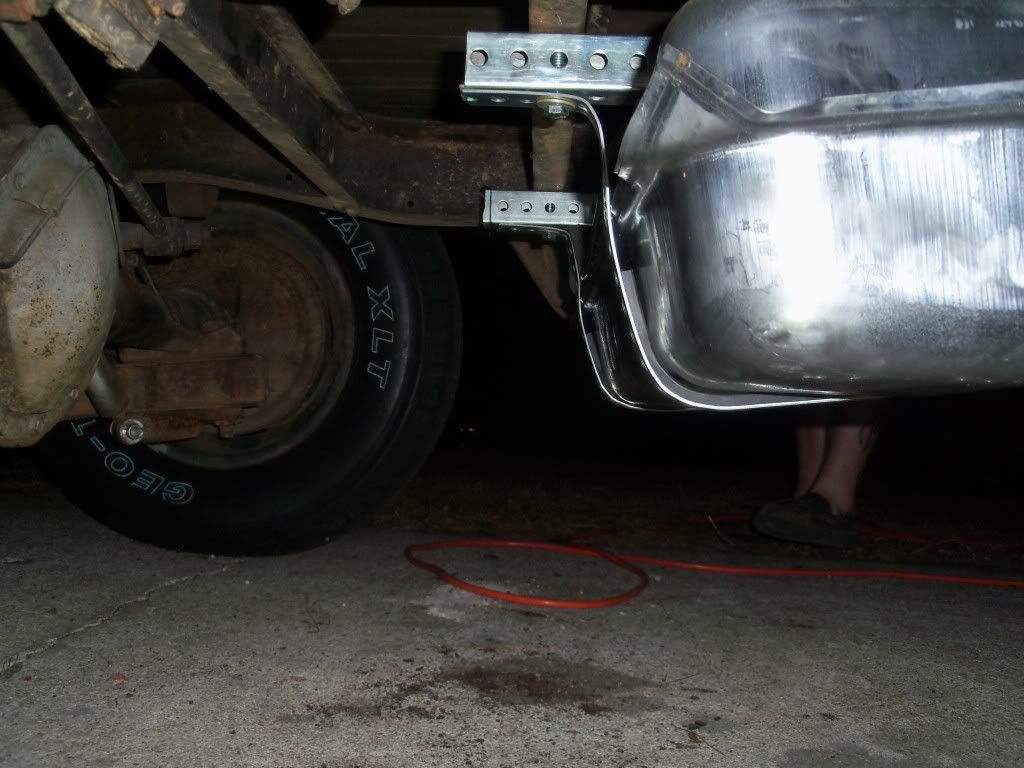 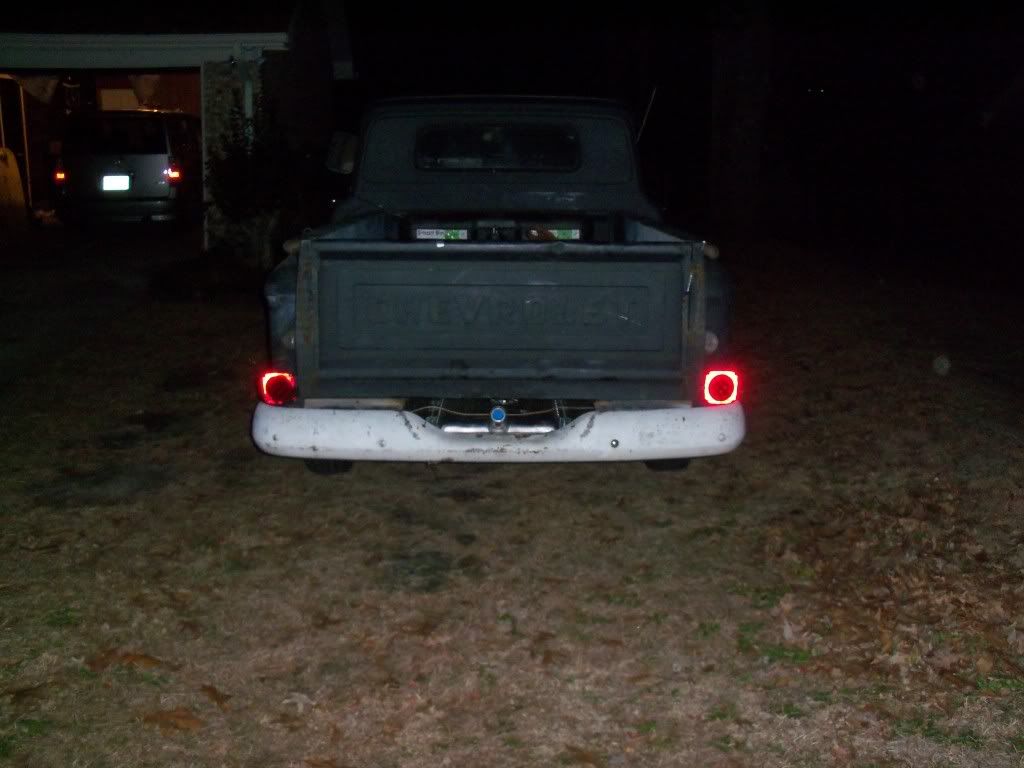 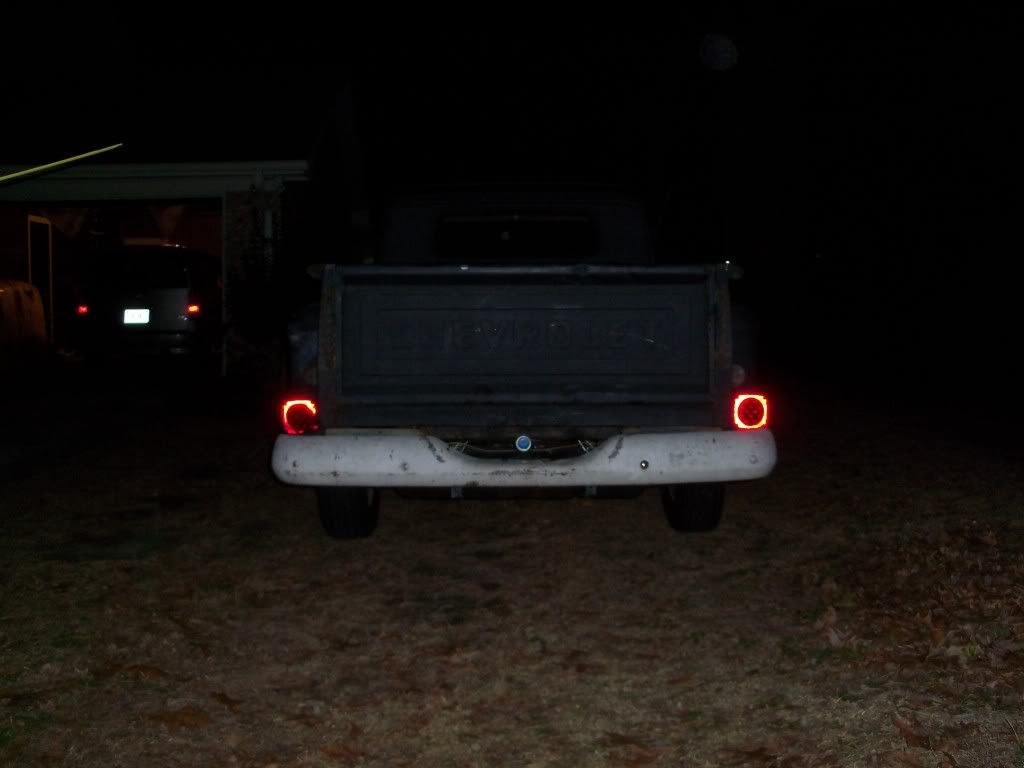 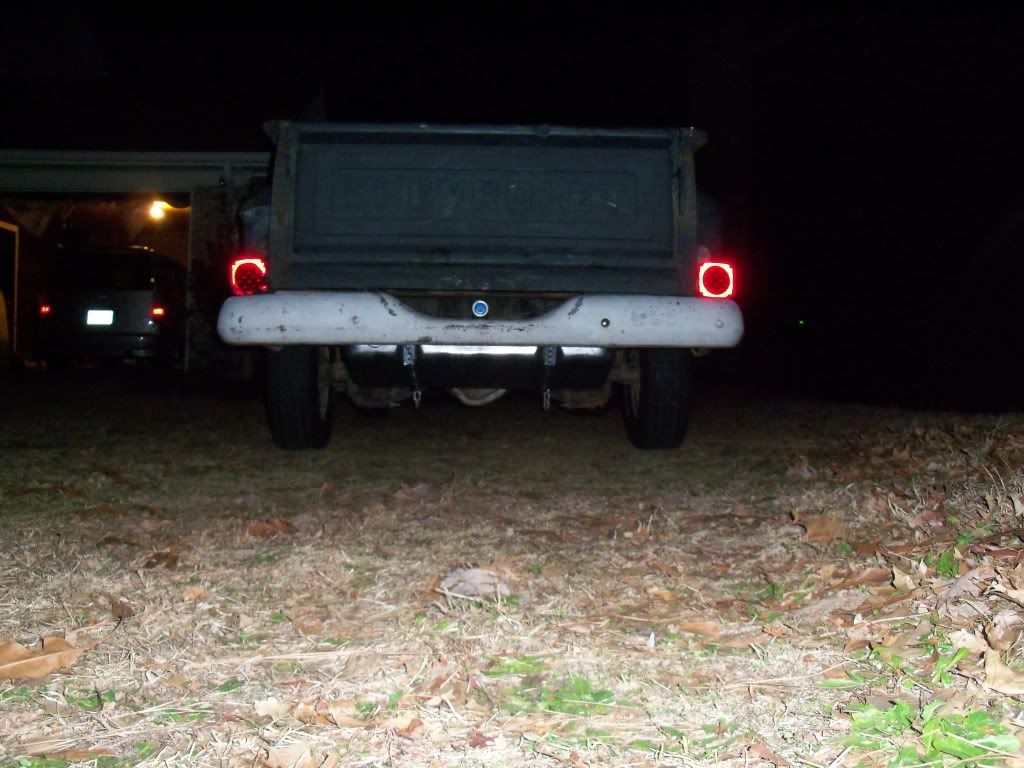 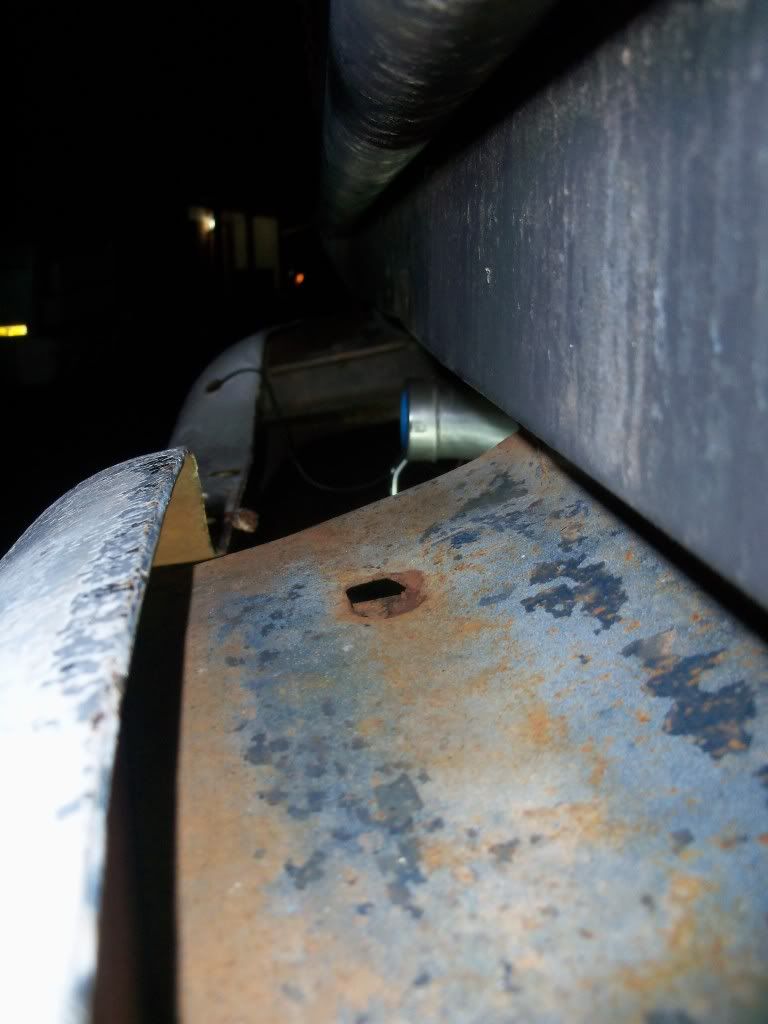 I did run into a few more problems. The biggest one was I couldn't get my wrench into the rear of the brackets to tighten the nuts...and it just so happened that they were in the same damn hole. I ended up tightening the bolt going from teh cross sill to the bracket all the way, and the one from the bracket to the tank strap is as far as it will go. There's a lock washer on the tank strap bolt so I'm not to worried about it, however the two bolt stems are touching and the tank strap bolt has a bit more thread to go to be completely tightened down. The best solution to this problem would be to use another hole...but I'm gonna try this and see how it goes. It eventually got to the point where my wrench was completely useless...so I busted out my harbor freight prybar, wedged it in there against a flat side of the nut and tightened it all the way down. Be careful when you're doing this...I punched myself in the face when the pry bar slipped off. I have to still run the wires for the sending unit, put a resistor on said wire to convert the 90ohm sender to a 30ohm sender so it's compatible with my stock gauges, and run the fuel lines. Hopefully by the end of the week I'll have it all completely done. I'm waiting on a locking gas cap from Advance Auto Parts to get here. I also have to make my license plate bracket, and being the resourceful/cheap Polack/Chink that I am I'm going to try to reuse the scraps from the tank straps and brackets to make it. The flip down plate bracket is off of a 90's Caprice and locks into place when flipped down. So in conclusion...it was a learning experience...some blood was shed...a lot of choice words were said...a digit was broken....and a tank was installed. On a scale of 1 to 10 in terms of difficulty I'd give this a 4, it was mostly a PITA for me since I was trying to figure out a good bit of this on the fly but with this writeup if you choose to do this it'll be pretty easy. It's even easier if you take the dang bed off or remove a board or two from the bed. ...and don't ask about those random wires in the pictures or the chains...I didn't do it, the PO did when he did his hackjob wiring the trailer tail lights to the truck. Rewiring the whole truck is a whole nother project I'll get into after I do the rust repair in the cab. The chains are from the PO's ghetto lowering job where he chained the shocks down to compress the springs. I just removed them from the bottom to make it not hurt so bad when drove the truck. Last edited by k1rodeoboater; 02-23-2011 at 03:00 PM. |
|
|
|
|
02-22-2011, 12:36 AM
|
#3 |
|
Registered User
Join Date: Nov 2010
Location: Fayetteville NC
Posts: 752
|
Re: How-to....69 Camaro tank retrofit
Oh yeah...and ground clearance since I'm sure someone will ask about it...As far as I know I'm at stock height
7" to the bottom of the pumpkin 11" to the bottom of the tank If you're dropped subtract your amount of drop from what I've listed above and it may or may not be correct. I'm not sure if my springs have been heated, how much they've sagged, or if it'll change when I replace my worn out shocks. And just in case someone missed it the tank capacity is 18 gallons. The tank comes with a 90 OHM sending unit, so you'll need to add a resistor or pot to your wiring to "convert" it to work with your stock gauges. If you've got aftermarket or are going to aftermarket gauges just get a 0-90 ohm gauge and be done with it. I'm still trying to figure out how I'm going to do the wiring and keep it waterproof. I'll be adding pics and diagrams of the wiring and running of the fuel lines. If you went to my build thread you'll see I'm working on a very limited budget with very limited resources. If you had a welder you could weld the nuts to the bracket and call it a day. If I had a welder I'd also weld on some square tubing across the bottom of the frame rails to protect the tank from a rear end collision. Mine is exposed right now, but the only way to hit it is to go under the bumper and in about a foot and change. The only tools I used were... -tape measure -sharpie -cardboard -floor jack -wrenches -ratchet and sockets -prybar Wear gloves when doing this. I sliced my hands open pretty good a few times on the edges of the tank, they're razor sharp. I also busted my knuckles a few times on the frame/tank, punched myself in the face, and broke a finger when the grinder caught and locked up crushing my finger between it and the metal. Wear eyepro while cutting, sparks will fly and they burn...so also wear long sleeves, pants, and a hat. I've got the burns on my arms to prove you should. Ear pro is also a good idea, I didn't wear any because I'm an idiot, so don't be an idiot like me, but I consciously remember at several points saying I wish I had some ear pro. ....and no animals were hurt during the install....except me....zeh plangium...kluk-e-joy-yey Last edited by k1rodeoboater; 02-22-2011 at 12:39 AM. |
|
|
|
|
02-22-2011, 12:46 AM
|
#4 |
|
1961 crewcab
Join Date: Dec 2007
Location: missoula, mt
Posts: 6,164
|
Re: How-to....69 Camaro tank retrofit
neat , that might be the solution that I need for my 50 chev convert, w/ its shaved gas door...
__________________
60 build: http://67-72chevytrucks.com/vboard/s...d.php?t=280904 61 crew build: http://67-72chevytrucks.com/vboard/s...d.php?t=646830 63 build: http://67-72chevytrucks.com/vboard/s...d.php?t=336537 64 'burb build: http://67-72chevytrucks.com/vboard/s...d.php?t=448681 65 'burb build: http://67-72chevytrucks.com/vboard/s...d.php?t=590715 65 build: http://67-72chevytrucks.com/vboard/s...d.php?t=281955 |
|
|
|
|
02-22-2011, 12:50 AM
|
#5 |
|
Registered User
Join Date: Nov 2010
Location: Fayetteville NC
Posts: 752
|
Re: How-to....69 Camaro tank retrofit
Final thought...and then I'm going to bed...maybe...
Lakeroadster's install is honestly a much cleaner install as it goes in between the frame rails and virtually drops right in...however I didn't want to cut a hole in the side of my bed/frame to run the tank. I thought about doing an in bed fill, but I couldn't find any that had the filler in the middle (I know there are some out there now though, I found them after I bought the tank), and I also didn't really want to have the filler in my bed wood. My dad gave me the idea for the rear fill tank, and upon googling the idea it had been done before http://67-72chevytrucks.com/vboard/s...d.php?t=403321 Thanks for paving the way 63GENIII. Had you not done this already I'd probably be up a rather putrid creek without a propulsion device Last edited by k1rodeoboater; 02-22-2011 at 12:52 AM. |
|
|
|
|
02-22-2011, 11:09 AM
|
#6 |
|
Account Suspended
Join Date: Sep 2009
Location: High Plains of Colorado
Posts: 2,485
|
Re: How-to....69 Camaro tank retrofit
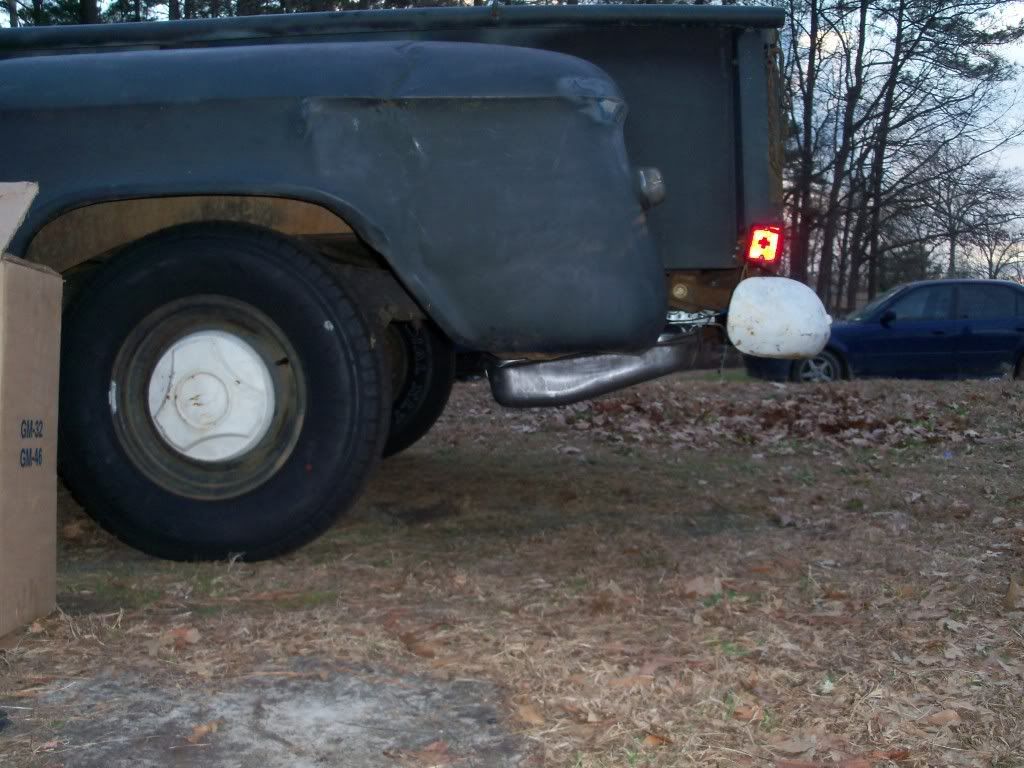
Looks like you pulled an "all nighter". How about a photo from the side?
Thanks for taking the time to do the write up. I lightened up the one photo to see how the tank looks in the light of day. |
|
|
|
|
02-22-2011, 11:54 AM
|
#7 |
|
Happy to be here
 Join Date: Mar 2000
Location: Cypress, TX
Posts: 39,023
|
Re: How-to....69 Camaro tank retrofit
Looks like a future FAQ to me...

__________________
Follow me on Facebook and Instagram @N2trux.com Articles- "Jake" the 84 to 74 crewcab "Elwood" the77_Remix 85 GMC Sierra "Scarlett" "Refining Sierra" |
|
|
|
|
02-22-2011, 12:08 PM
|
#8 | |
|
Registered User
Join Date: Nov 2010
Location: Fayetteville NC
Posts: 752
|
Re: How-to....69 Camaro tank retrofit
Quote:
I'll get a side profile shot the next time I go over to my buddy's place, that's where I left the truck. This tank install is a good idea for those who don't want to permanently modify their frames, don't want a bed fill or side fill, and don't want to remove their beds (although I recommend at least removing a board from the bed for better access angles). If you want a side fill, your tank idea is honesty the way to go. |
|
|
|
|
|
02-22-2011, 12:10 PM
|
#9 | |
|
Registered User
Join Date: Nov 2010
Location: Fayetteville NC
Posts: 752
|
Re: How-to....69 Camaro tank retrofit
Quote:
|
|
|
|
|
|
02-22-2011, 10:38 PM
|
#10 |
|
Registered User
Join Date: Nov 2010
Location: Fayetteville NC
Posts: 752
|
Re: How-to....69 Camaro tank retrofit
Daylight pictures and a side profile shot
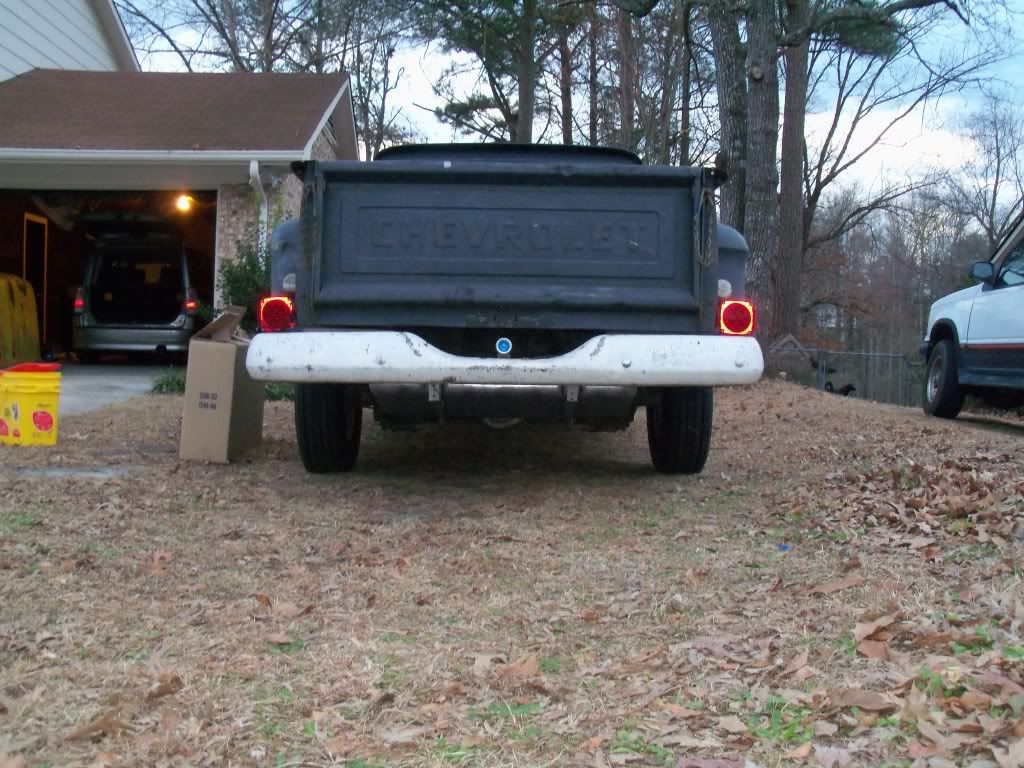 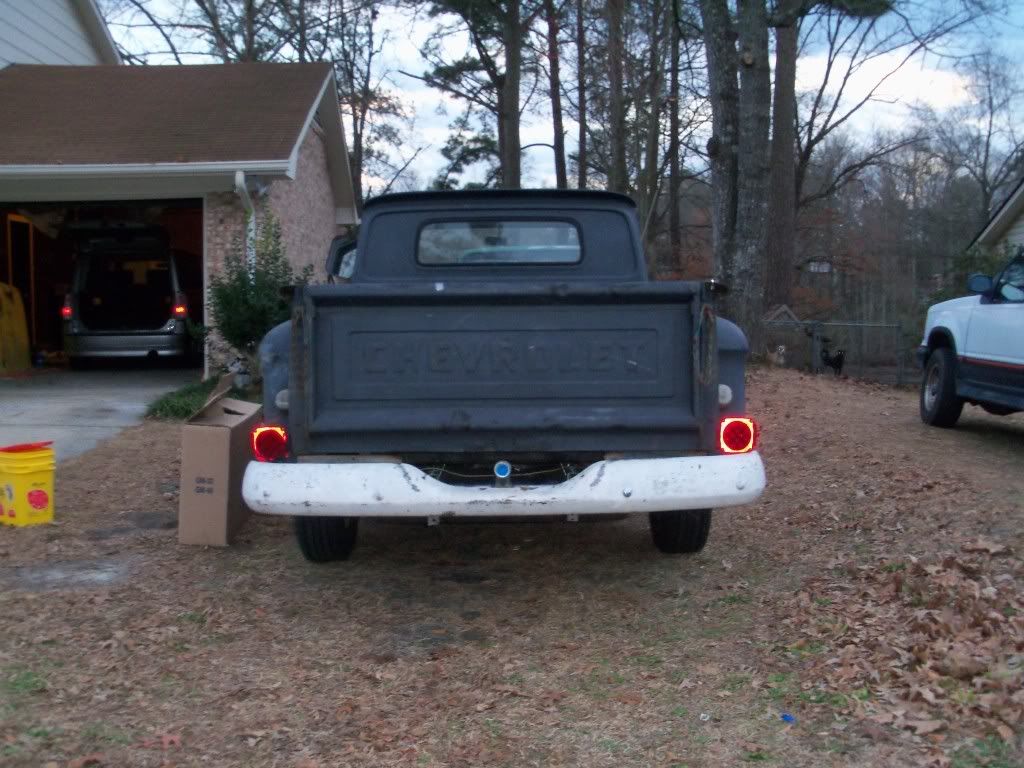 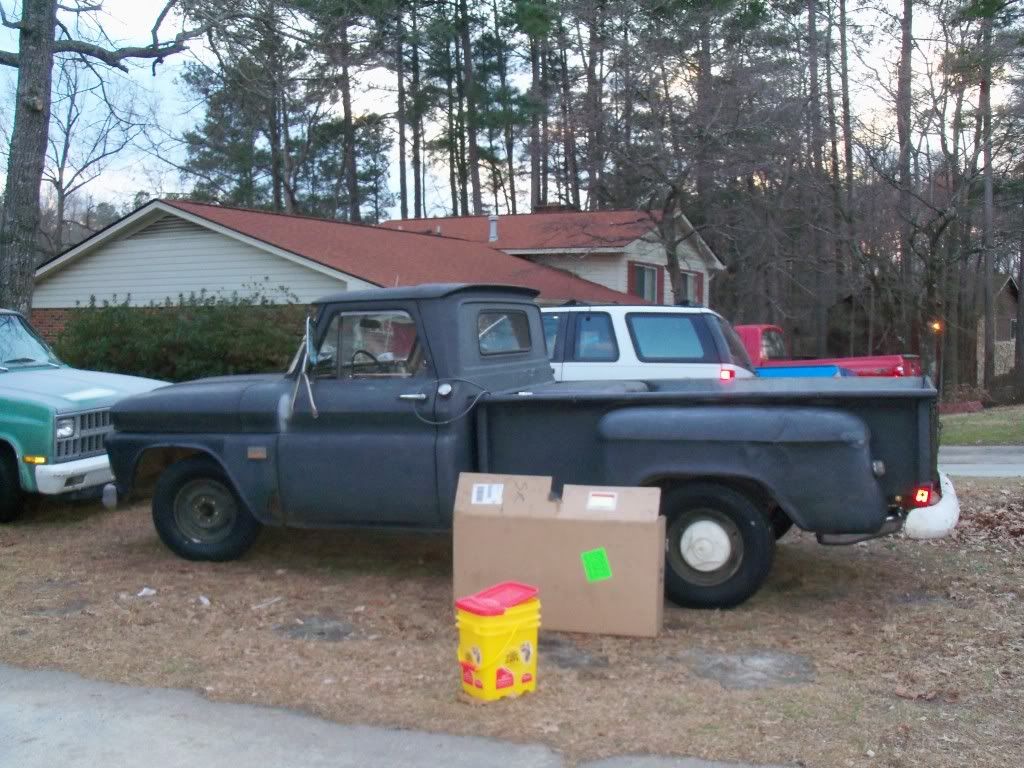  I also got my locking gas cap today, so I'll be trying to hook the tank up this weekend. |
|
|
|
|
02-24-2011, 10:15 PM
|
#11 |
|
Registered User
Join Date: Dec 2010
Location: sanford nc
Posts: 499
|
Re: How-to....69 Camaro tank retrofit
your tank install looks good. You really got me wondering if I can mount my old 69 chevelle tank under my 64 C10 now. I think ill go out tomorrow and hold it up to the bottom of my frame and do some measuring.
__________________
  69 chevelle malibu, 64 C-10 shortbed 69 chevelle malibu, 64 C-10 shortbed
|
|
|
|
|
02-25-2011, 12:01 AM
|
#12 | |
|
Registered User
Join Date: Nov 2010
Location: Fayetteville NC
Posts: 752
|
Re: How-to....69 Camaro tank retrofit
Quote:
Though to be honest I'd be leery about doing this install on a truck you plan on lowering. I've got 4in clearance from the pumpkin on a stock setup (with worn shocks and probably sagging springs) and the pumpkin is 7in from the ground with my truck on 235/75 R15's. |
|
|
|
|
|
04-19-2011, 02:04 PM
|
#13 |
|
Registered User
Join Date: Apr 2011
Location: Detroit
Posts: 432
|
Re: How-to....69 Camaro tank retrofit
I used to own a Fiero and I thought of the remote door latch for its gas door.
All you'd need to do is attach a latch to the licence holder, run a cable to a lever mounded somewhere in the cab, maybe on the floor by the driver's side. You won't need a locking cap then. |
|
|
|
|
08-03-2011, 12:48 AM
|
#14 |
|
Registered User
Join Date: Nov 2010
Location: Fayetteville NC
Posts: 752
|
Re: How-to....69 Camaro tank retrofit
And a long overdue update...
The tank is now hooked up and runs perfectly. Still haven't hooked up the sending unit yet, mostly because crawling under the truck and contorting is a recipe for an ass load of pain since I just had back surgery on 3 herniated discs. And also some pics of the plate mount...didn't have my license plate mounting screws with me so here it is without anything on it, but it's enough to give the general idea. Up...  Down...  I don't know what the dimensions are...to be honest I just eyeballed it and went to town on it without a plan. In the end it's just about perfect, and looks really damn good considering I made the bend in the metal by hammering it over a piece of square tubing on a rickety sawhorse. It started out as a piece of 16ga or 18ga steel, and took me about 2.5 hours to get it bent, cut, and the holes drilled. For lighting I'm going to use a light that bolts up between the upper bolts. It's ghetto but about the only thing that I can think of that will work. I'd eventually like to come up with something a little cleaner mounted on the bumper but that's another project for another day down the road. For now this is good enough.
__________________
1966 C10 Long step build on a budget http://67-72chevytrucks.com/vboard/s...d.php?t=445201 no garage, no shop, limited storage space and tools....no problem. |
|
|
|
|
08-17-2011, 10:54 AM
|
#15 |
|
Registered User
Join Date: Mar 2011
Location: South Jersey
Posts: 234
|
Re: How-to....69 Camaro tank retrofit
K1, how much of a pain in the *ss is it to get the nozzle into that filler neck at the gas station? Looks like it may be somewhat difficult.
__________________
_____________________________________________ Ray All my life, I've been told I'm a "Bad Influence" |
|
|
|
|
08-17-2011, 01:27 PM
|
#16 |
|
Registered User
Join Date: Nov 2010
Location: Fayetteville NC
Posts: 752
|
Re: How-to....69 Camaro tank retrofit
Nozzle has to go in upside down or sideways. It's much harder from a 5 gal can which I keep in the truck for the emergency OH CRAP im out of gas moments
Posted via Mobile Device
__________________
1966 C10 Long step build on a budget http://67-72chevytrucks.com/vboard/s...d.php?t=445201 no garage, no shop, limited storage space and tools....no problem. |
|
|
|
|
| Bookmarks |
|
|


 Linear Mode

