
|
 02-25-2014, 05:13 PM
|
#1301 |
|
Senior Enthusiast
Join Date: Feb 2007
Location: Spokane Valley, WA
Posts: 8,356
|
Re: Markeb01 Build Thread
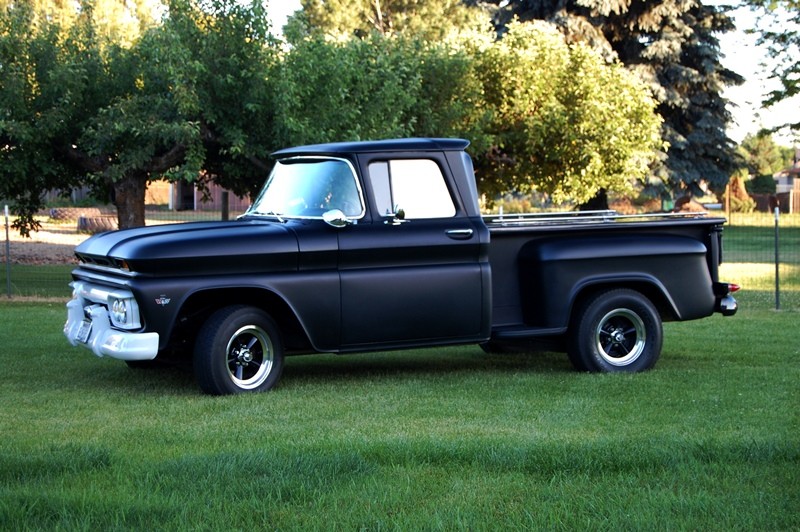
Heres one last photoshop effort showing the whole truck, without and with portholes:
__________________
My Build Thread: http://67-72chevytrucks.com/vboard/s...d.php?t=444502 |

|

|
|
02-25-2014, 11:18 PM
|
#1302 |
|
Registered User
Join Date: Apr 2012
Location: Searcy, AR
Posts: 4,203
|
Re: Markeb01 Build Thread
I can see it now
Mark at a car show spinning a yarn about the long lost hood found at a corvette facility...
 and someone swallowing it Hook, Line & Sinker... and someone swallowing it Hook, Line & Sinker...
__________________
DON Proverbs 27:17  US Air Force Retarded errr Retired My '65 Stepper Build:http://67-72chevytrucks.com/vboard/s...d.php?t=533920 My '60 Rusty Patina Build:http://67-72chevytrucks.com/vboard/s...66#post7402266 My '72 http://67-72chevytrucks.com/vboard/s...59#post7204359 SOLD |
|
|
|
|
02-26-2014, 03:37 AM
|
#1303 |
|
Senior Enthusiast
Join Date: Feb 2007
Location: Spokane Valley, WA
Posts: 8,356
|
Re: Markeb01 Build Thread
Years ago we pulled in to a gas station in a tiny town in Oregon where you're not allowed to pump your own gas. The kid pumping the gas was convincing his girlfriend how he could always tell the exact year of a truck like mine because of my stock tail lights. The truck was wearing four 59 Caddy tail lights, but that didn't slow down or divert his story in the least! His girlfriend and I were both convinced they were stock by the time we left!

__________________
My Build Thread: http://67-72chevytrucks.com/vboard/s...d.php?t=444502 |
|
|
|
|
02-26-2014, 08:04 AM
|
#1304 |
|
Registered User
Join Date: Apr 2008
Location: Md
Posts: 2,451
|
Re: Markeb01 Build Thread
Hey Mark Truck looks Great ......54 Buick Port Holes look wicked. The lights look cool but IMO don't fit the theme of your truck.
|
|
|
|
|
02-26-2014, 11:08 AM
|
#1305 |
|
Senior Enthusiast
Join Date: Feb 2007
Location: Spokane Valley, WA
Posts: 8,356
|
Re: Markeb01 Build Thread
Thanks for the input. I agree with your comment the lights don't fit the theme, that's part of what I'm struggling with.
__________________
My Build Thread: http://67-72chevytrucks.com/vboard/s...d.php?t=444502 |
|
|
|
|
02-28-2014, 12:11 AM
|
#1306 | |
|
Senior Enthusiast
Join Date: Feb 2007
Location: Spokane Valley, WA
Posts: 8,356
|
Re: Markeb01 Build Thread
Quote:
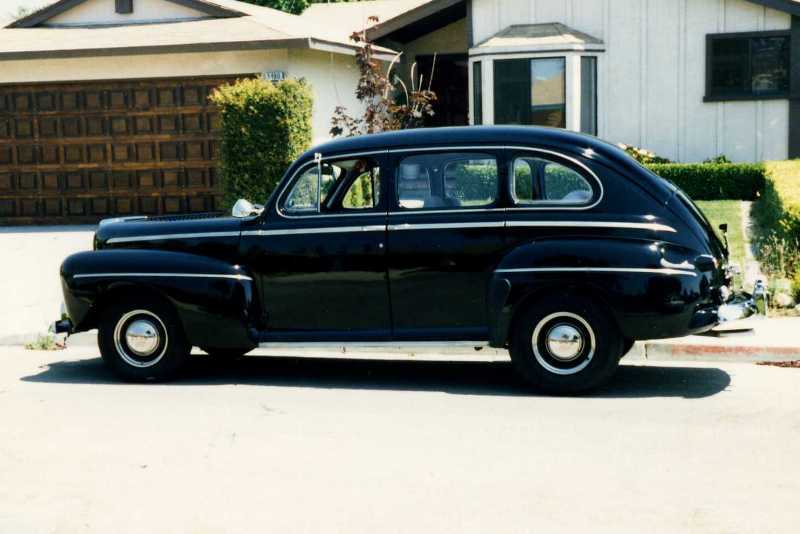 In my office a picture of a 46 Ford Tudor hung behind my head, very similar to this car: 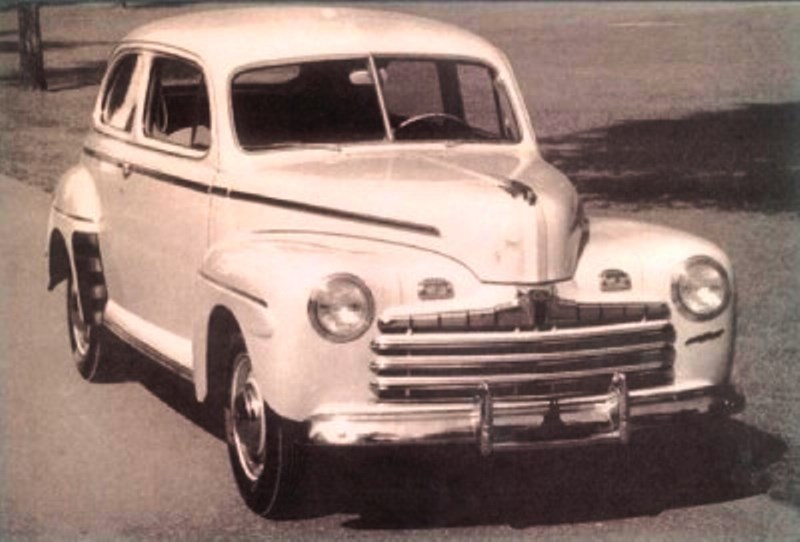 In fact it was probably the same factory photo car, but it was a side shot with two female models standing next to it wearing the latest 1940’s fashions. At least once a week someone would come into my office and ask “Is that your car”? And every time I answered “yes, that was taken when it was brand new”. Then I’d turn slightly and point toward the picture and follow up with “and that’s my mother and her sister” – or whatever else popped in my head. I tried to make every answer more creative than the last one. The next time it might be the next door neighbor’s niece, or a couple of ladies that lived across the street, the original owners I bought the car from, etc. This went on for three years before someone finally piped up and said “wait a minute, didn’t you tell me last time that was your mother, etc, etc”. Until then, nobody ever questioned the stories, or paid attention enough to notice the car in the photo was a two door, and mine was a four door! • After years of dragging my feet, yesterday I finally tested my wife’s oven and determined the heat sensor was shot. We ordered a new one that was due at noon today. When the phone rang about that time I picked up expecting the appliance parts guy. To my delight it was the chrome guy advising my glove box emblem was ready for pickup. So in spite of the snowy roads and snow/rain mix falling, we took the truck just to show it off. The emblem turned out absolutely beautiful. All of the pits are gone and they got way down into the “V” areas and even did nice work inside the G and C. I was going to paint the stippled area, but with immaculate chrome all over, it looks like a piece of jewelry on the dash. Unless I get tired of it in the future, this is how it will remain: 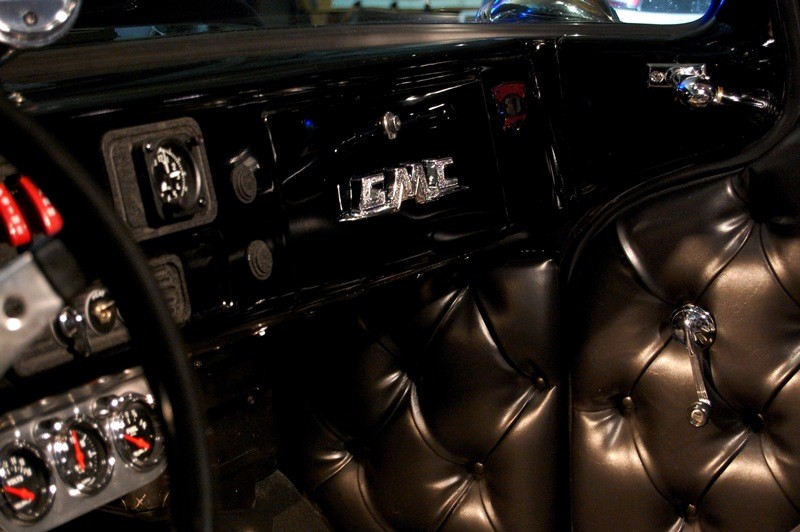 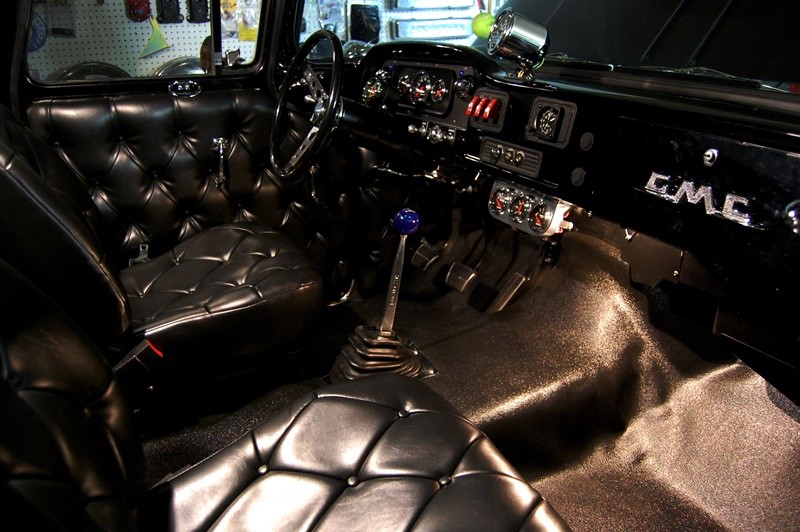 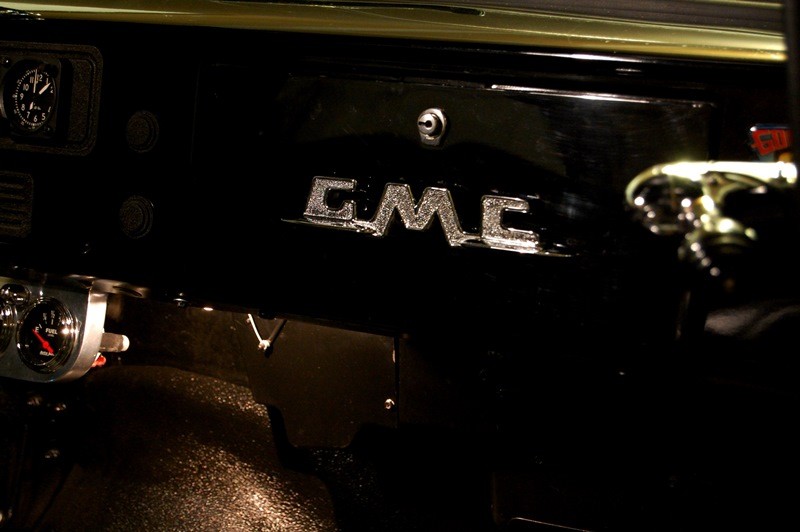 The pictures don’t do it justice. In real life it looks like the stippled area is covered in diamond chips. It really sparkles. And all the light spots around the edges that look like chips are actually reflections of the chrome showing up in the gloss lacquer paint: 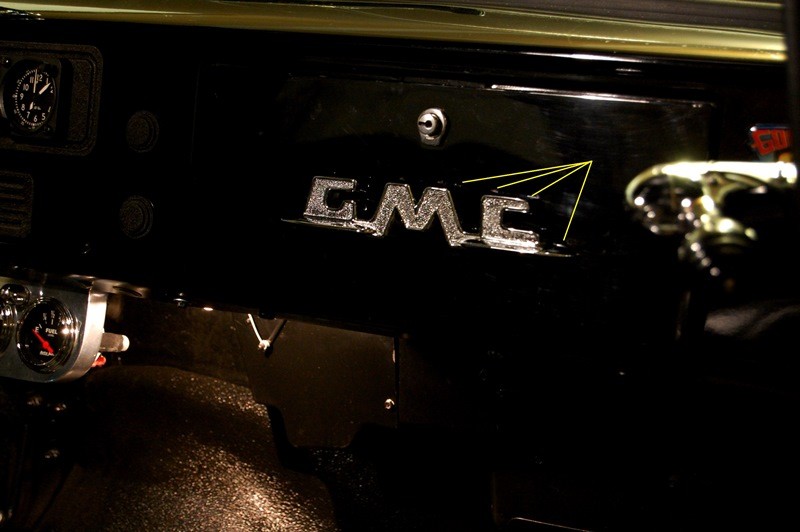 With my truck parked right in front of the window, I thought it would be a good time to ask for an estimate to chrome the grille (since I have a mint/perfect example hanging in my basement). With no damage at all, he speculated $500 for the grill including the headlight rims. I thought that was pretty reasonable as I’ve seen others pay up to or over $1,000 for the grille alone. $500 for the bumper, another $150 each for the bumper guards, and goodness knows what for the Buick grille bar as it is very rough under the paint. So maybe around $1500 for the entire front end. I could be done much cheaper buying new bumpers and guards, but the production chrome would look so far off it probably wouldn’t look very nice compared to the show chrome on the grille. If I ever get flush I may have the grille done, just because it’s going to cost so much more in the future. At this time I have very little interest in chroming the front end, but it’s nice to have a ballpark cost that’s about a thousand dollars less than what I was estimating. Oh yes, and the stove is up and running perfectly!
__________________
My Build Thread: http://67-72chevytrucks.com/vboard/s...d.php?t=444502 Last edited by markeb01; 02-28-2014 at 12:21 AM. |
|
|
|
|
|
02-28-2014, 12:29 AM
|
#1307 |
|
Registered User
Join Date: Apr 2012
Location: Searcy, AR
Posts: 4,203
|
Re: Markeb01 Build Thread
Great Story...
 and the Emblem turned out... and the Emblem turned out... Well Done Sir! Well Done Sir!
__________________
DON Proverbs 27:17 US Air Force Retarded errr Retired My '65 Stepper Build:http://67-72chevytrucks.com/vboard/s...d.php?t=533920 My '60 Rusty Patina Build:http://67-72chevytrucks.com/vboard/s...66#post7402266 My '72 http://67-72chevytrucks.com/vboard/s...59#post7204359 SOLD |
|
|
|
|
02-28-2014, 01:12 AM
|
#1308 |
|
Rollin' Old Skool
Join Date: Jun 2007
Location: Hattiesburg, MS
Posts: 5,371
|
Re: Markeb01 Build Thread
The emblem turned out great!
__________________
_____________________________________________ Phillip My Build threads: 1966 Chevy C-10 "Black Betty" shortbed, fleetside, BBW, 327 V8/ Powerglide (under construction) http://67-72chevytrucks.com/vboard/s...ighlight=betty 1997 Chevy Tahoe, 2dr/2wd, mild custom (Daily driver) http://67-72chevytrucks.com/vboard/s...d.php?t=601142 Pics: '66 C-10 https://flic.kr/s/aHsjHWD4h9 '97 Tahoe https://flic.kr/s/aHsjGZ7wKP '93 C-1500 https://flic.kr/s/aHskxdpdnQ '88 S-10 Blazer https://flic.kr/s/aHsjYGx4Md Previous Rides: 1993 Chevy S-10 ext. cab, 4.3L, 4/5 drop (Sold) 1993 Chevy C-1500 short/step Retro-Rod (Sold) 1988 S-10 Blazer 2dr/2wd mild custom (Sold) |
|
|
|
|
02-28-2014, 07:00 PM
|
#1309 |
|
Registered User
Join Date: Jun 2012
Location: Selkirk Ontario Canada
Posts: 1,141
|
Re: Markeb01 Build Thread
they did a hell of a job on it
__________________
My 63 GMC Panel Slow Build http://67-72chevytrucks.com/vboard/s...=1#post5457281 63 
|
|
|
|
|
03-02-2014, 09:25 PM
|
#1310 |
|
Senior Enthusiast
Join Date: Feb 2007
Location: Spokane Valley, WA
Posts: 8,356
|
Re: Markeb01 Build Thread
I was very impressed how nice the emblem turned out. Up front the owner took the time to explain how much work was going to be involved. First they had to “cut” the top and face surfaces because it had so many tiny pits. I was surprised how pitted it was as it was never previously chromed and rusted. It was a painted piece with decent paint all over. He explained it was because it had been a painted piece, they never polished the bare metal in the first place and those pits had been there since it was new.
He was concerned about cutting the edges around the face because it bumps up against the “wings” at the bottom. So when I got the piece that was the first place I looked and it’s perfect! It still needed 2-3 coats of copper and they did a lot more work in the tiny areas than he committed to. New business: I sat up and looked around this morning, and realized there’s every indication that I’m moving forward with the illuminated porthole project after all. Here’s a summary of what’s been accomplished so far: A few days ago I ordered and received the first sample 1954 Buick porthole and looked it over. In some of the hidden areas the chrome is only driver quality, but the main portion that shows looks great: 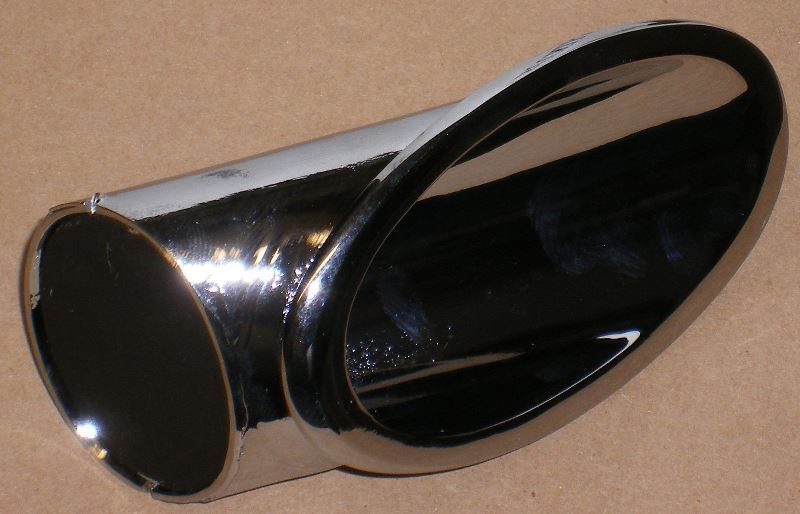 Close inspection revealed the end cap is simply staked in place. A sharp poke with a finger popped it off. 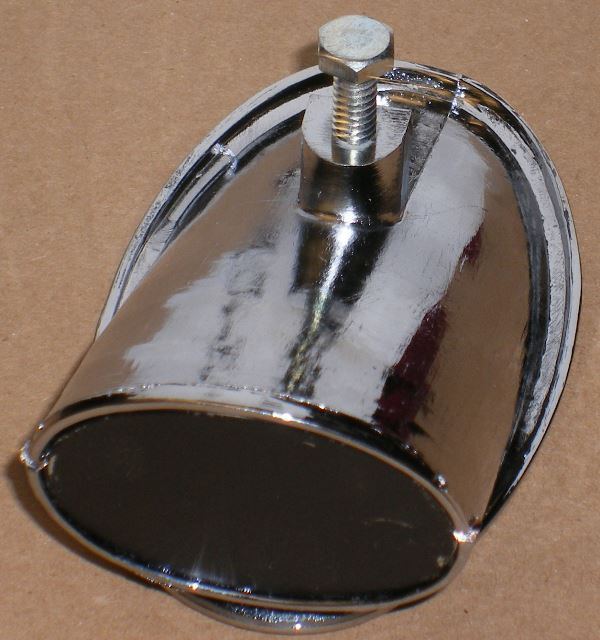 This end cap will become the mounting plate for the LED lights. I took some close up photos in order to create exact size photos, needed to confirm fit and proportions on the truck: 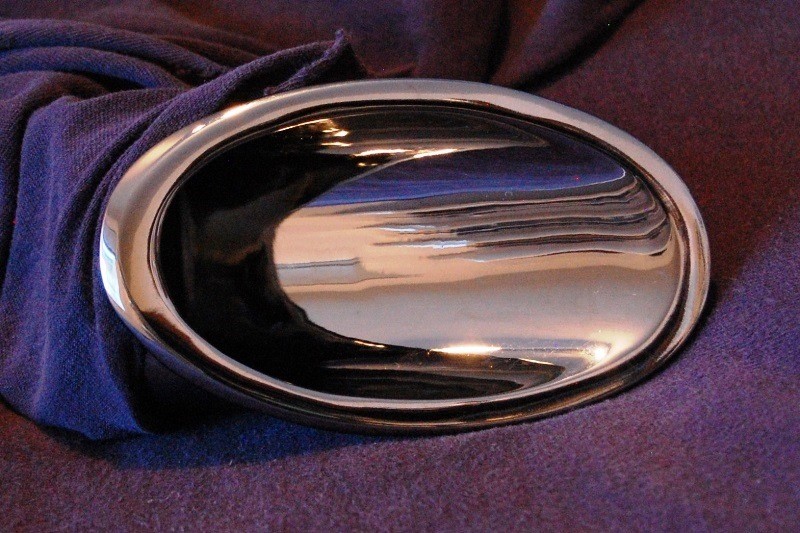 The exact dimensions of the real porthole as seen on the face of the fender are 4 7/16” long and 2 9/16” high. Four photos were printed up to these dimensions and attached to a piece of black poster board, which was turned into a “refrigerator magnet”. Here it is stuck to the hood, for comparison to the earlier photo I created digitally. The only defect being the shadows are upside down. (These pictures would have been more appropriate for the driver side of the truck, but we’ve had so much snow recently it isn’t practical to pull the truck outside for photos on that side): 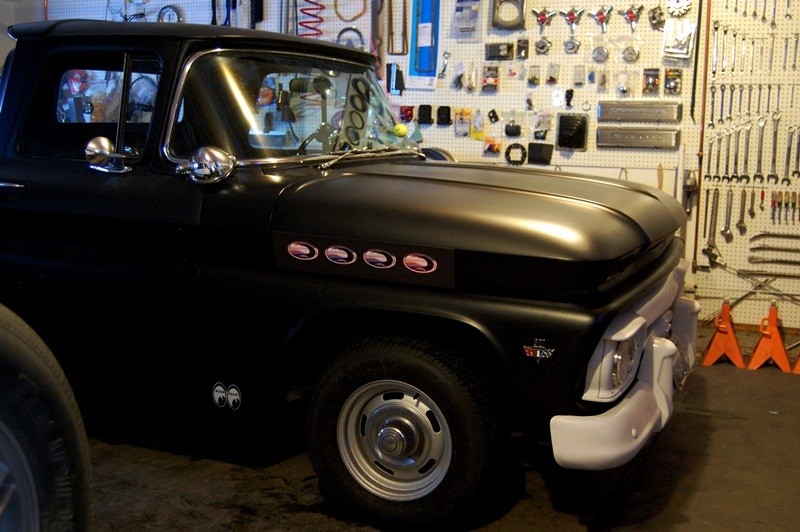  If the wheels were pointed straight ahead in both pictures, the portholes would look to be roughly the same size and position on the hood. Recently I discovered Oznium.com and their LED Bolts on a motorcycle web site. http://www.oznium.com/led-bolt I bought a variety of these LED’s to test various reflective patterns inside the porthole housing. I made a few end plates out of styrene sheet, and tested several different layouts, before deciding on this as the final layout: 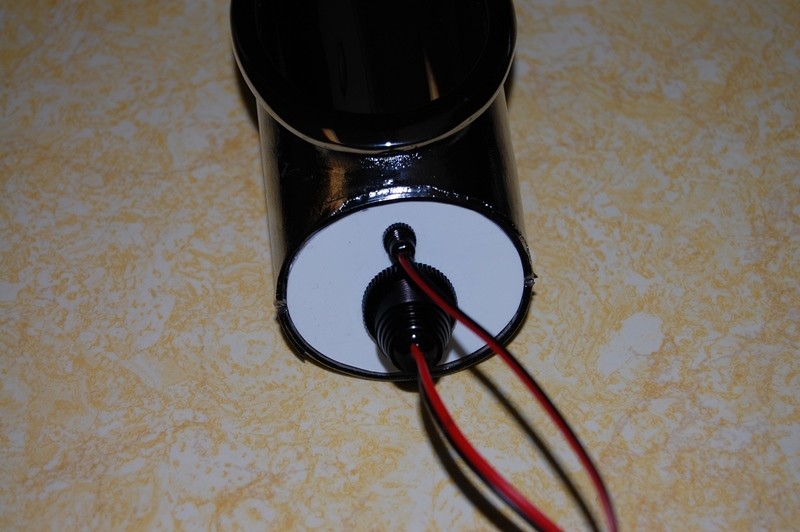 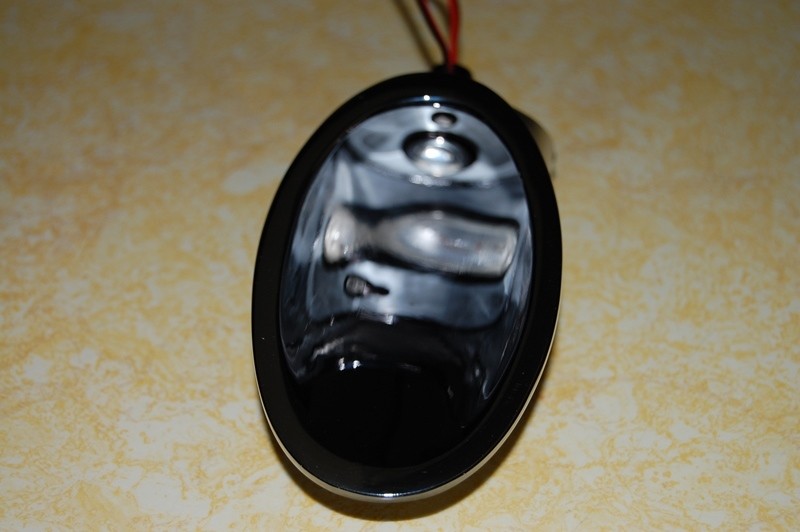 The little lamp will act as the parking light, and being twice as bright the large unit will become the blinker. I couldn’t get the camera to focus inside due to the highly reflective surface, but still shows the general idea. The white plastic was just for testing. In the permanent installation the original metal plates will be used. There are a number of sources for sequential blinker modules, but most only support a maximum of 3 lamps. Then I discovered that Web Electric Products recently released a universal sequential turn signal kit for 4 lamps: Part Number STS-4. It does both sides of the car for only $79. http://www.webelectricproducts.com/products.htm One of these kits is on the way and will be used to cause the blinkers to flash in sequence from front to rear. Now I’m thankful I never completed the parking light/hood harness. More than enough wires from the Ron Francis kit are hanging in a bag on the garage wall to build a complete new parking light harness, including the connections for the portholes. I won’t need to touch the fuse panel or the turn signal switch/steering column. All I have to do is wire up the hood and plug the new harness into the firewall connector. On a somewhat related note - I thought it was interesting in going through numbers of threads related to Buick portholes, I learned once upon a time JC Whitney offered a Buick port light kit. I couldn’t believe it when I actually found a picture of the kit: 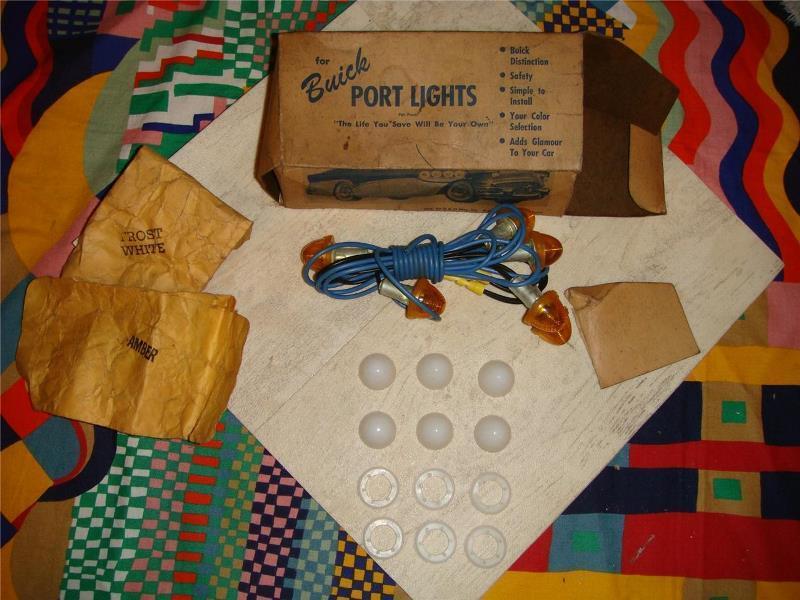 Next I taped up the chrome face surfaces and fitted the porthole inside the hood bracket at the rear, to make sure I could access the mounting area once the holes are cut. Since the balance of the portholes are due to arrive within the next day or two, I whipped up a drilling/cutting template. The cardboard piece will locate the centers for cutting out the end holes. Rather than cutting out the entire cardboard template, the blue plastic piece will be used to scribe each outline directly on the hood. The cardboard may deteriorate and change shape by the eighth hole, but the plastic won’t. 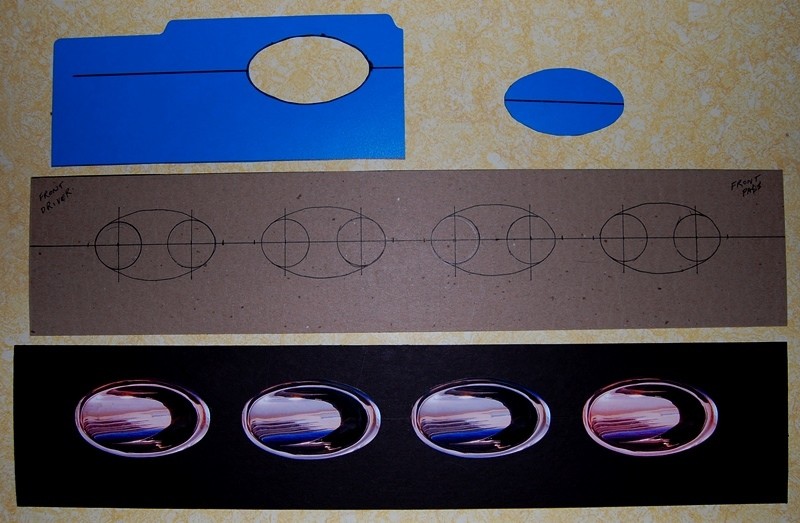 I still have to fabricate clamps and obtain studs for every porthole. I’m thinking of using half of a pipe, perhaps an inch wide for each of the porthole fasteners. I could use old dash gauge brackets, but I want something longer (front to rear) to prevent distorting the hood sheet metal when the portholes clamp up. The studs will be necessary for mounting the rear two on each side, and just easier (compared to bolts) for the forward units. That’s about all I’ve come up with at this point. Not much left to do now except avoid making mistakes cutting 16 holes and 16 slices in the hood!
__________________
My Build Thread: http://67-72chevytrucks.com/vboard/s...d.php?t=444502 |
|
|
|
|
03-02-2014, 09:41 PM
|
#1311 |
|
Registered User
Join Date: Apr 2012
Location: Searcy, AR
Posts: 4,203
|
Re: Markeb01 Build Thread
You will do great! I always enjoy tuning in to the Mark's Truck Show!
__________________
DON Proverbs 27:17 US Air Force Retarded errr Retired My '65 Stepper Build:http://67-72chevytrucks.com/vboard/s...d.php?t=533920 My '60 Rusty Patina Build:http://67-72chevytrucks.com/vboard/s...66#post7402266 My '72 http://67-72chevytrucks.com/vboard/s...59#post7204359 SOLD |
|
|
|
|
03-03-2014, 10:09 AM
|
#1312 |
|
Registered User
Join Date: Jun 2012
Location: Selkirk Ontario Canada
Posts: 1,141
|
Re: Markeb01 Build Thread
this going to be cool ..what color of light will you be using
__________________
My 63 GMC Panel Slow Build http://67-72chevytrucks.com/vboard/s...=1#post5457281 63
|
|
|
|
|
03-03-2014, 11:16 AM
|
#1313 |
|
Registered User
Join Date: Nov 2011
Location: fayetteville nc
Posts: 10,338
|
Re: Markeb01 Build Thread
Too cool....cant wait to see this.
__________________
1963 Short bed step side SBW 427 big block and borg warner T-16 HD 3 speed manual http://67-72chevytrucks.com/vboard/s...d.php?t=519869 1963 Short bed fleetside BBW 348 1st gen big block w/Powerglide http://67-72chevytrucks.com/vboard/s...d.php?t=619024 1964 Short bed trailer |
|
|
|
|
03-03-2014, 11:38 AM
|
#1314 | |
|
Senior Enthusiast
Join Date: Feb 2007
Location: Spokane Valley, WA
Posts: 8,356
|
Re: Markeb01 Build Thread
Quote:
__________________
My Build Thread: http://67-72chevytrucks.com/vboard/s...d.php?t=444502 |
|
|
|
|
|
03-03-2014, 11:28 PM
|
#1315 |
|
Senior Enthusiast
Join Date: Feb 2007
Location: Spokane Valley, WA
Posts: 8,356
|
Re: Markeb01 Build Thread
Made a bit more progress today. The rest of the 7 portholes arrived this afternoon, and were quickly relieved of their end plates. Heres the full set of 8:
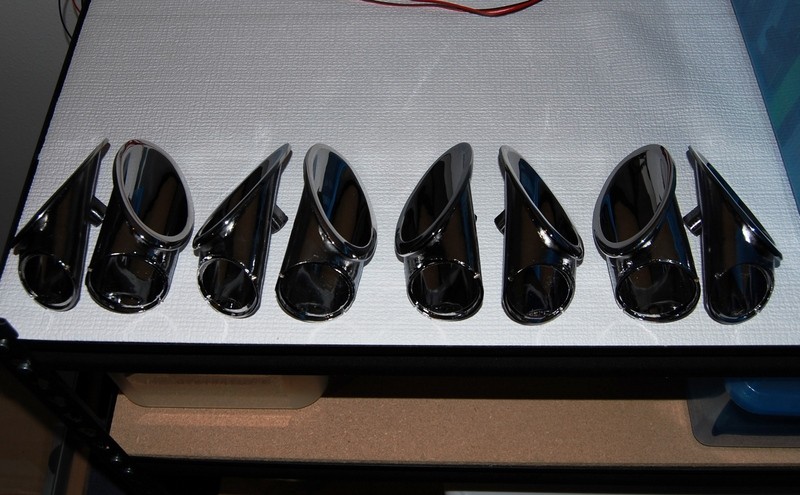 Earlier this morning I made up a template for precisely indicating the holes for the LEDs. I was going to build something in wood and route a recess so I could do all the marking and drilling in a contained cavity, but decided it was too much work. So I made up this paper arrangement on a clipboard, and placed a good sized chunk of refrigerator magnet underneath: 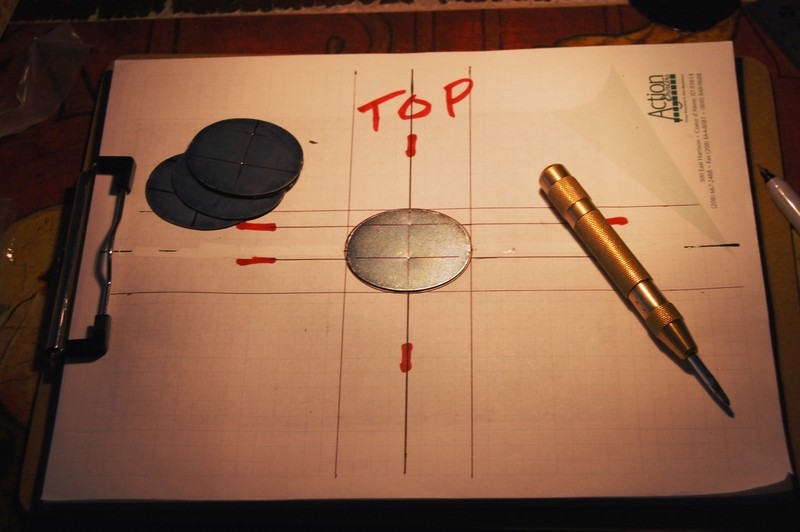 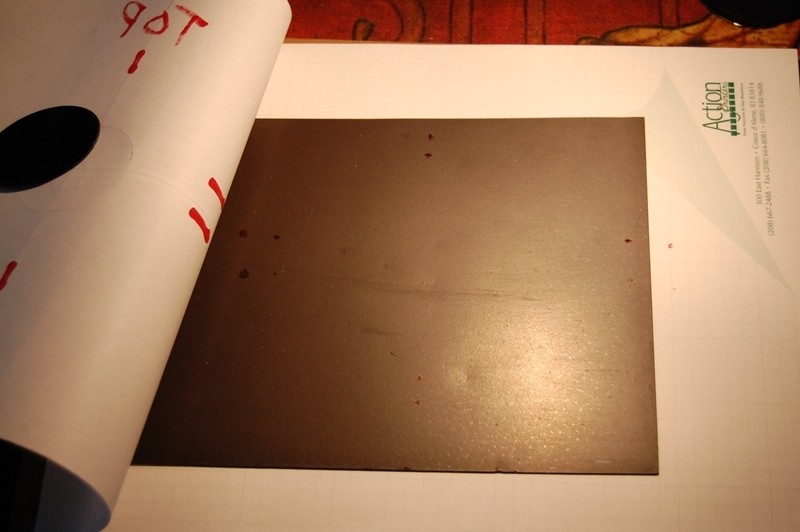 The magnet made it difficult to move the plate around, and once in perfect alignment the end plate stayed exactly where needed to mark both drill points with a spring punch. A couple of hours later I had all the plates drilled, sanded on both sides, and washed down with wax and grease remover. The best paint I had available for the task was Blitz Black in a spray can, so thats what is covering one side: 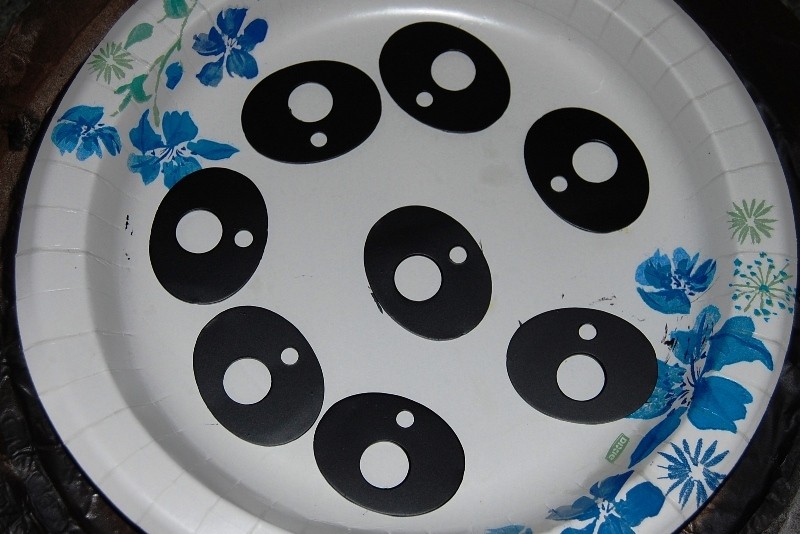 Tomorrow Ill flip them over and shoot the back sides. Once both sides are dry the plates will be permanently sealed in the porthole castings. The next step is designing whatever Im going to use for clamps to hold them in the hood. The repop manufacturer didnt provide any type of attaching clamps. I think this may be because the original 54 Buick porthole clamps might have been part of the fender, permanently formed into the porthole opening. Once the clamps are fabricated, Ill be ready to start cutting the hood. As for the electronics, the sequencer kit shipped today, and might arrive by the weekend. The lights shipped earlier and are due to arrive this Thursday. Daily high temps over the last couple of days have been in the low 20s, but tomorrow and the rest of the week are supposed to be in the low to high 40s. If everything goes well and the weather warms up that much I may be able to complete this project in the next week or so.
__________________
My Build Thread: http://67-72chevytrucks.com/vboard/s...d.php?t=444502 |
|
|
|
|
03-05-2014, 03:29 AM
|
#1316 |
|
Senior Enthusiast
Join Date: Feb 2007
Location: Spokane Valley, WA
Posts: 8,356
|
Re: Markeb01 Build Thread
Accomplished quite a bit of tedious progress today. The attaching bolts for the portholes turned out to be 1/4x20 rather than metric. Apparently the supplied bolts were foreign sourced and didnt really match up with either 1/4x20 or 16mm metric well. A little gentle clean up with a tap fixed up the fit on each casting to where 1/4x20s work perfectly now.
Scrounging through my stash I found five of the 1 socket head 1/4x20 studs I previously used for valve cover fasteners. A thorough search failed to turn up the other missing three. Looking for suitable black ABS pipe to make the clamps from, I discovered the existence of correctly sized pipe on the internet. Unfortunately my local Lowes doesnt carry that size, so I went through the bits and pieces and found that 2 ABS 90 degree elbows should work just fine: 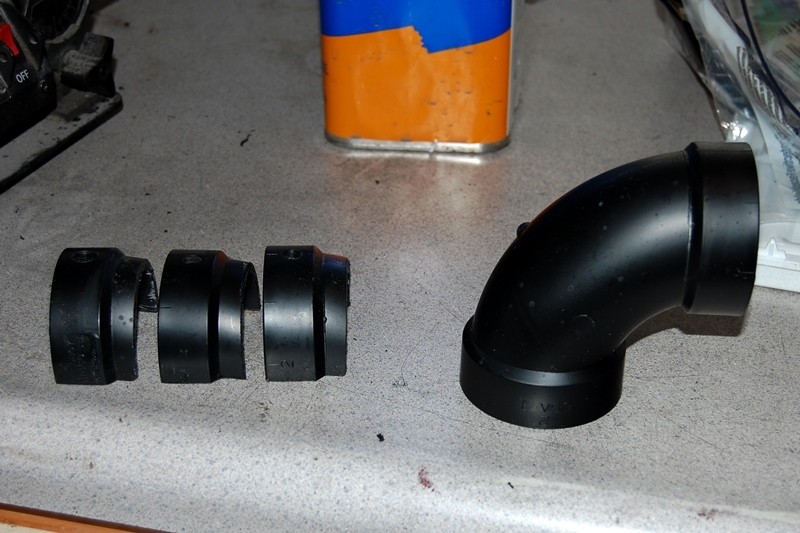 My first experiment was cutting the ends in half to see if I could make four clamps out of 1 elbow, and it didnt work. At 50% diameter the legs turned out about 1/8 too short to clamp tightly against the hood. So I ended up cutting the ends about ¼ below center and achieved a perfect fit. Unfortunately I needed a couple more elbows to finish the job, but at $1.95 each that was probably the cheapest part of this project. I left some extra length (front to rear) so there would be more surface area touching the sheet metal. I neednt have worried about strength. Im pretty sure I could stand on these things without deflection. Heres how they look from both ends: 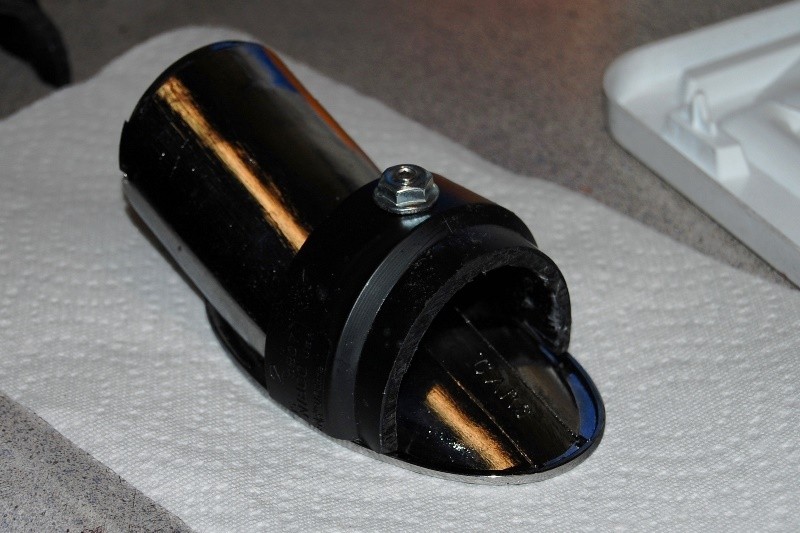 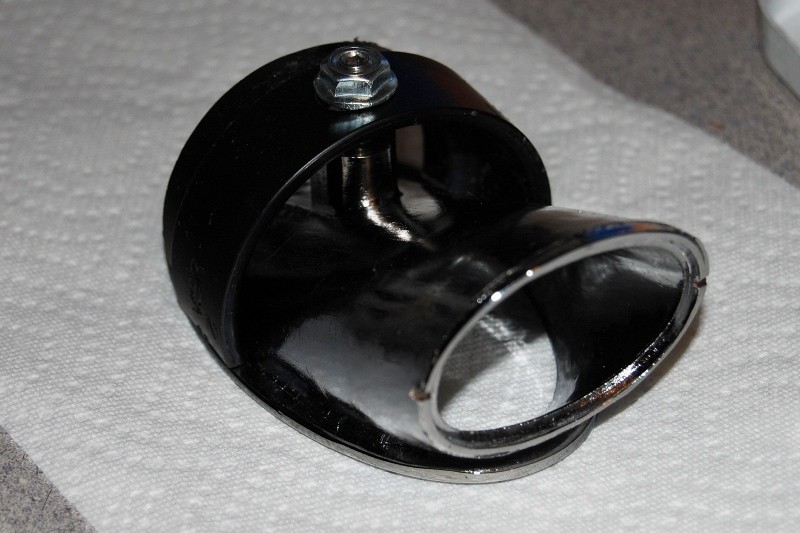 Once those were all cut, drilled, and deburred, I turned my attention back to the castings. First thing I did was slather them with two heavy coats of wax, knowing theyll probably never receive that kind of attention again: 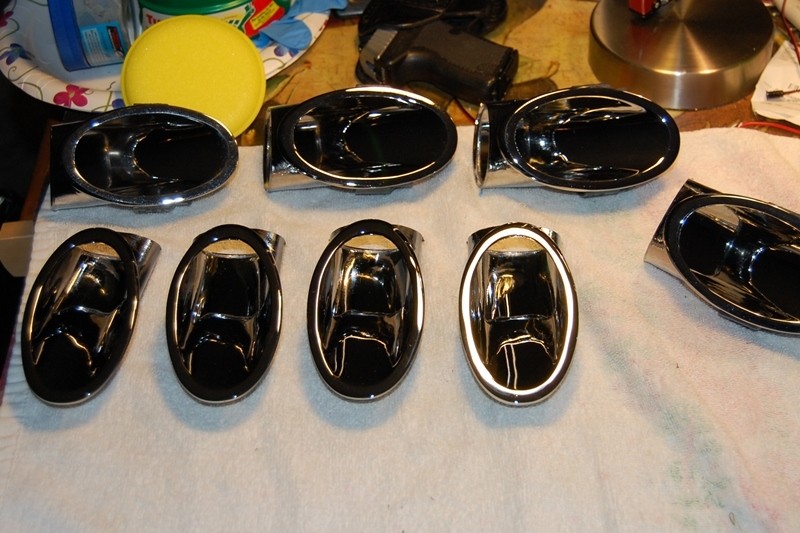 The next step was reattaching all the end plates. (I painted the second side of the plates last night). Using the original stake marks I snapped them back in place. Once that was done each was treated to a generous amount of Krazy Glue around the perimeter for extra security: 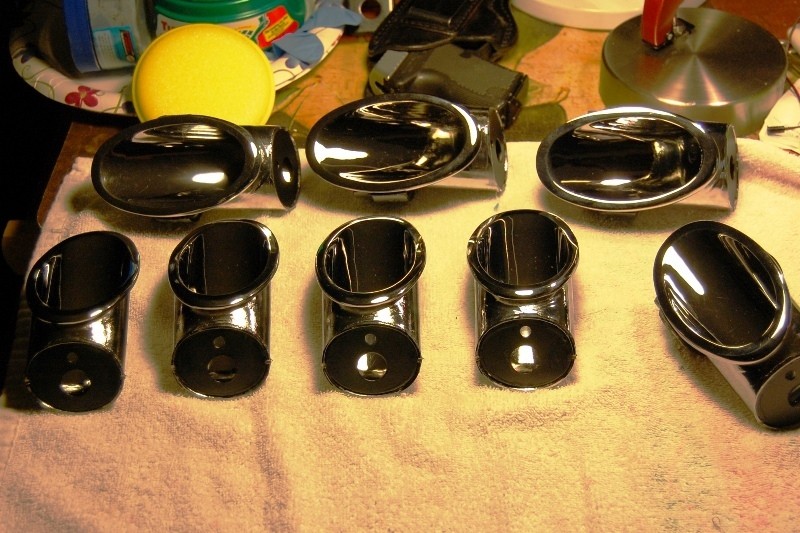 A shallow cavity is formed with the end plates installed. This was filled flush with Permatex Adhesive Sealant. I discovered a while back (by accident) this isnt the regular gasket maker, this stuff really sticks and is difficult to remove later. So Im figuring the lights and mounts should be solid for years to come. 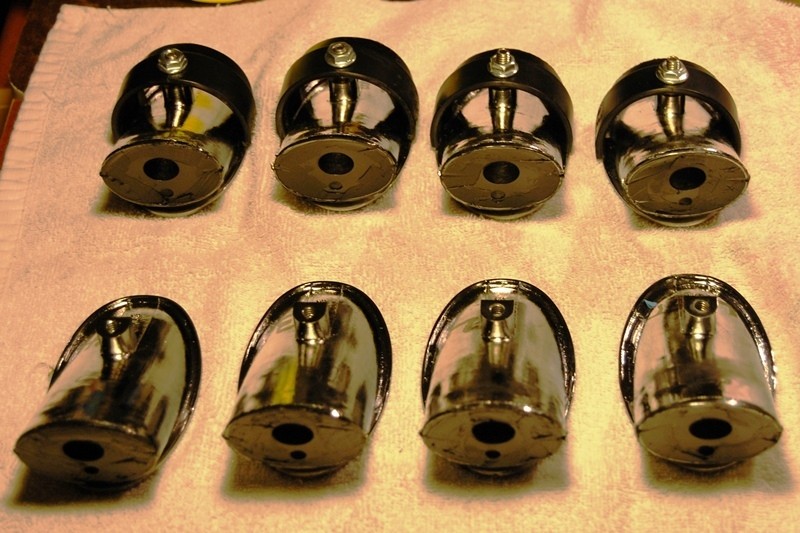 Thats about it for tonight. Tomorrow I get the rest of the studs and then take some time off until the lamps and sequencers show up. If everything goes well I should be able to start cutting/mounting Saturday.
__________________
My Build Thread: http://67-72chevytrucks.com/vboard/s...d.php?t=444502 |
|
|
|
|
03-06-2014, 03:48 PM
|
#1317 |
|
Registered User
Join Date: Nov 2011
Location: fayetteville nc
Posts: 10,338
|
Re: Markeb01 Build Thread
looking good.....
__________________
1963 Short bed step side SBW 427 big block and borg warner T-16 HD 3 speed manual http://67-72chevytrucks.com/vboard/s...d.php?t=519869 1963 Short bed fleetside BBW 348 1st gen big block w/Powerglide http://67-72chevytrucks.com/vboard/s...d.php?t=619024 1964 Short bed trailer |
|
|
|
|
03-06-2014, 08:21 PM
|
#1318 |
|
Senior Enthusiast
Join Date: Feb 2007
Location: Spokane Valley, WA
Posts: 8,356
|
Re: Markeb01 Build Thread
Yesterday was both exciting and challenging. The mailman showed up with both the LED bulbs and the sequencing kit a couple days ahead of schedule! It took a while to install all the bulbs. I discovered the holes for the larger bulbs (the blinkers) were too tight, and I couldnt turn the corner inside the casting to insert the bulbs in the end plates. So I had to hand hold each casting and bore out the hole a bit bigger, without hitting the inside curve of the chrome with the drill bit. It took about an hour to get them all resized, with no damage to anything! All the big bulbs went in easily after that, and each was tested after installation.
The little bulbs (parking lights) went right in with no extra effort, although I did snap the rim off of one. I thought it seemed loose and it wasnt so I over tightened it and broke the rim. Another small bulb was DOA in the package, so that one will go back for replacement. Thankfully I bought a couple of spares just in case. With all the lights tested, I set everything up on the clean bench and proceeded to wire it all up for a quick test. That started in the early afternoon and ended near midnight, when I just gave up out of frustration. I figure Im as smart as the next guy, but the directions make very little sense, at least for what Im trying to do. There was also a wiring diagram for a switch, but it showed how the switch was set to produce a result, but didnt include any information about which wires went to any of the actual terminals. After trying just about every combination of connections imaginable, I eventually discovered the green control wires needed to join with the red module wire, along with the #1 lamp power wire, and those three need to connect to the turn signal wire. Once that was sorted out the sequencer started working perfectly. I quickly wrote down my own instructions so I can repeat the process once everything is installed in the hood. I took a short video to show them running. This is the second attempt, which turned out much clearer than the first. The earlier attempt just showed a big streak of light that looked more like a continuous strobe light! http://www.youtube.com/watch?v=9fiI0...ature=youtu.be Its actually 54 degrees outside today and nearly 60 in the garage with no heat, so Ill be double checking final fit this afternoon. Cutting will start either tonight or tomorrow morning. Ive got the harness routing all sorted out. If I dont run into any surprises, I should be able to wrap this up in one or two days depending on how long it takes to cut the holes. Also the new black metalflake gear shift knob showed up today. Unfortunately it isnt pretty enough to make the cut, so it will be added to the gear shift knob collection and the blue knob will remain in the truck:  The color isnt black enough, its more of a dark gray, and it just doesnt pop being completely opaque. There is no transparency at all so it just doesnt have the luster of the blue ones or the red knob my son has. Im not all that disappointed as you never know what theyll look like until they show up. As they advertise, no two are alike. Besides, a grown man just cant have too many shift knobs!
__________________
My Build Thread: http://67-72chevytrucks.com/vboard/s...d.php?t=444502 |
|
|
|
|
03-06-2014, 10:22 PM
|
#1319 |
|
Registered User
Join Date: Apr 2012
Location: Searcy, AR
Posts: 4,203
|
Re: Markeb01 Build Thread
Lights sequenced...
__________________
DON Proverbs 27:17 US Air Force Retarded errr Retired My '65 Stepper Build:http://67-72chevytrucks.com/vboard/s...d.php?t=533920 My '60 Rusty Patina Build:http://67-72chevytrucks.com/vboard/s...66#post7402266 My '72 http://67-72chevytrucks.com/vboard/s...59#post7204359 SOLD |
|
|
|
|
03-07-2014, 12:09 AM
|
#1320 |
|
Registered User
Join Date: Sep 2011
Location: Tacoma, WA
Posts: 2,425
|
Re: Markeb01 Build Thread
How much you want for that knob old man ???
LoL, but seriously.... you want to unload it?
__________________
Michael McMurphy My 66 Stepside My 64 Tow Truck My 66 Tempest Table Of Contents Added to Page1 |
|
|
|
|
03-07-2014, 01:51 AM
|
#1321 | |
|
Rollin' Old Skool
Join Date: Jun 2007
Location: Hattiesburg, MS
Posts: 5,371
|
Re: Markeb01 Build Thread
Quote:
__________________
_____________________________________________ Phillip My Build threads: 1966 Chevy C-10 "Black Betty" shortbed, fleetside, BBW, 327 V8/ Powerglide (under construction) http://67-72chevytrucks.com/vboard/s...ighlight=betty 1997 Chevy Tahoe, 2dr/2wd, mild custom (Daily driver) http://67-72chevytrucks.com/vboard/s...d.php?t=601142 Pics: '66 C-10 https://flic.kr/s/aHsjHWD4h9 '97 Tahoe https://flic.kr/s/aHsjGZ7wKP '93 C-1500 https://flic.kr/s/aHskxdpdnQ '88 S-10 Blazer https://flic.kr/s/aHsjYGx4Md Previous Rides: 1993 Chevy S-10 ext. cab, 4.3L, 4/5 drop (Sold) 1993 Chevy C-1500 short/step Retro-Rod (Sold) 1988 S-10 Blazer 2dr/2wd mild custom (Sold) |
|
|
|
|
|
03-07-2014, 01:55 AM
|
#1322 |
|
Senior Enthusiast
Join Date: Feb 2007
Location: Spokane Valley, WA
Posts: 8,356
|
Re: Markeb01 Build Thread
Hi Mike, if you want it shoot me a PM with your address and Ill send it your way. It was secretly ordered as an early retirement/moving to Spokane gift, but now the cat is out of the bag I might as well send it along ahead of schedule!
Honestly I'd rather it ended up in a cool ride rather than sitting around here collecting dust.
__________________
My Build Thread: http://67-72chevytrucks.com/vboard/s...d.php?t=444502 |
|
|
|
|
03-07-2014, 10:49 AM
|
#1323 |
|
Registered User
Join Date: Jun 2012
Location: Selkirk Ontario Canada
Posts: 1,141
|
Re: Markeb01 Build Thread
that is going to turn out awesome !!!!
__________________
My 63 GMC Panel Slow Build http://67-72chevytrucks.com/vboard/s...=1#post5457281 63
|
|
|
|
|
03-08-2014, 11:45 PM
|
#1324 |
|
Senior Enthusiast
Join Date: Feb 2007
Location: Spokane Valley, WA
Posts: 8,356
|
Re: Markeb01 Build Thread
I finally have some progress to report on the porthole installation. Yesterday morning work began on mounting. I started on the passenger side as it was easiest to access without moving things around, and on the 4th hole because I knew the rear locations were going to be the most difficult, and I wasnt disappointed. The holes in the external sheet metal were easy:
 Fabricating a mounting arrangement for that last porthole was anything but. A hole was drilled into the hood support directly behind the porthole mounting boss, but due to the angle on the side of the hood, the mounting stud pointed uphill at about a 40 degree angle. 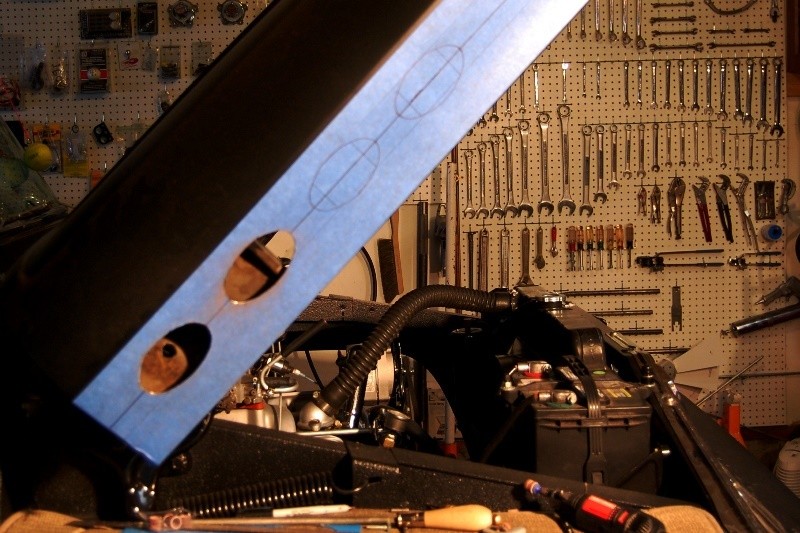 Attempting to tighten the casting to the hood support, pulled it up out of position leaving a gap at the bottom of the forward porthole rim. Attempting to install the plastic clamp failed as there was insufficient room between the casting and the support. Several variations of plastic and steel brackets all failed to pull at the correct angle. Seven hours later I gave up and called it a night, somewhat disappointed with the complete lack of accomplishment. The nice part of hot rod ingenuity is youre never restricted because something is impossible. It just takes longer. This morning I tried a completely different bracket design, and it didnt work either. Hour after hour every configuration resulted in the same issues. Either I couldnt install the mounting stud, or tightening the fastener pulled the porthole out of position. Five hours later I started over again, and hit the jackpot on the third attempt. I finally formed a bracket that pulled the porthole perfectly into alignment. I also traced it out on paper so I can easily create a duplicate for the other side. So after 12 hours I finally had the first one in place. Porthole 3 was already fitted yesterday, so it was just popped in place, and covered it in tape for protection of the chrome. It only took an hour to cut and finish the front two holes and mount the trim pieces. All of the lights have been tested again and still work, but after another marathon day trying to sort this out Id had enough for the day. Ill probably finish the drivers side tomorrow, and wire up the hood once both sides are complete. Although the truck is filthy and covered in grinding powder, I took a few shots just to show how different the portholes look depending on what angle from which viewed:  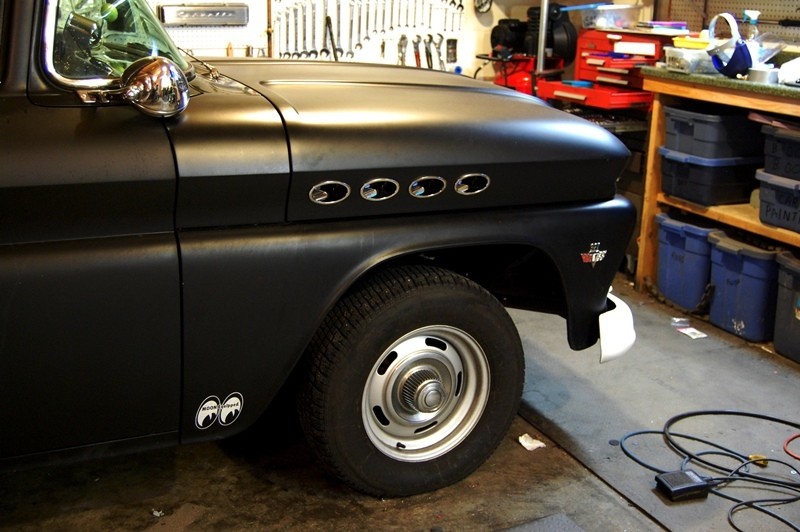 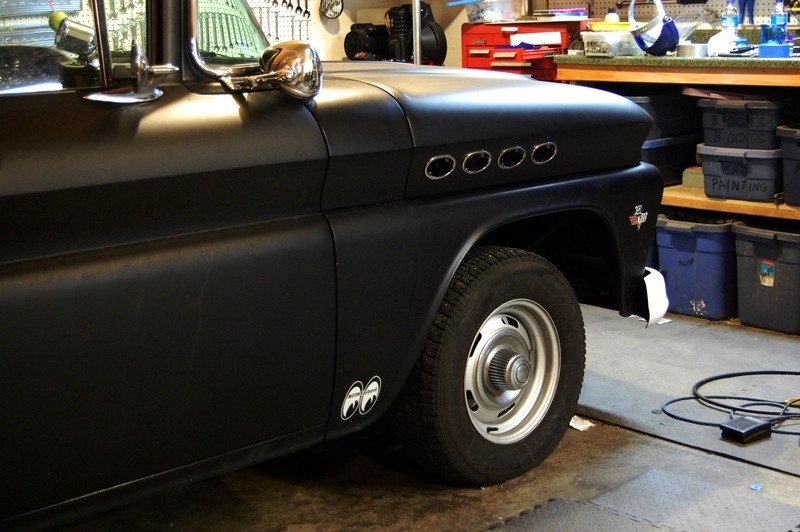 Sadly, I think the Mooneyes decals are going to have to go again, for the last time. Now Im thinking they look like a distraction. In my opinion, the portholes, fender emblems, windshield trim, spotlights, etc. all kind of add class to the truck. Im thinking the decals now look out of place, kind of like the ones I had on the glove box. Here are a couple of examples where they have been digitally removed: 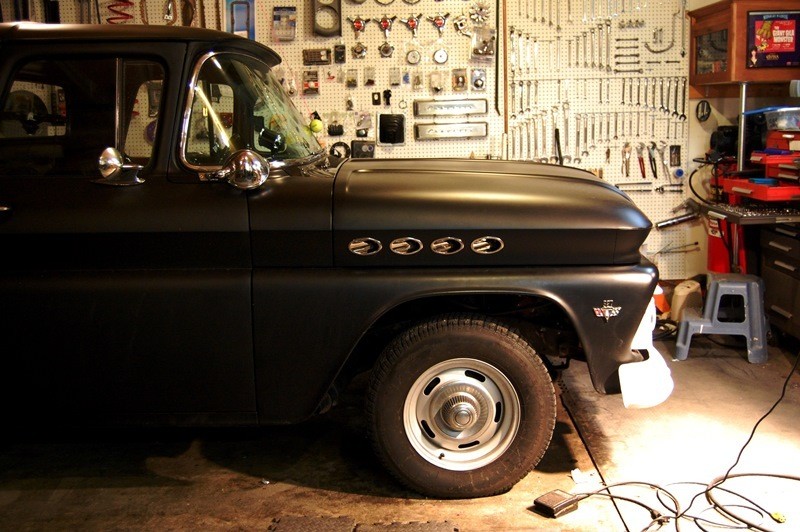 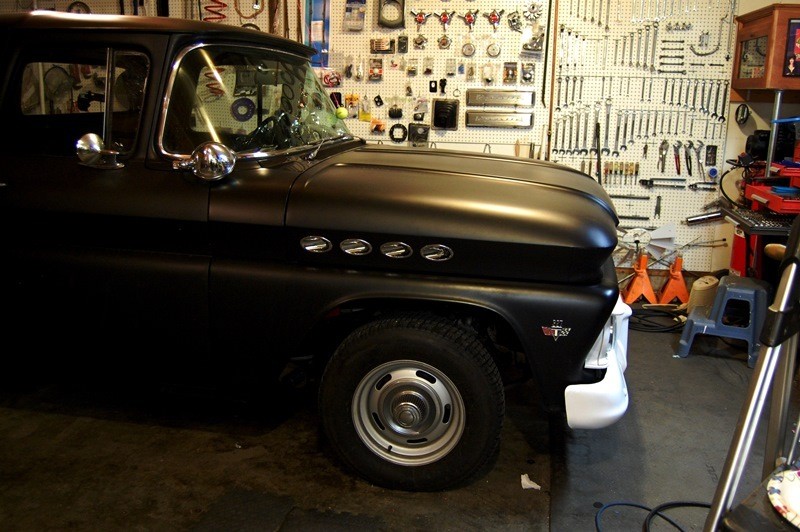 Im really enjoying how these things look on the truck, even if I never added the lights and sequential blinkers. Hopefully the workload tomorrow will be much easier than the last couple of days.
__________________
My Build Thread: http://67-72chevytrucks.com/vboard/s...d.php?t=444502 |
|
|
|
|
03-09-2014, 12:29 AM
|
#1325 |
|
Rollin' Old Skool
Join Date: Jun 2007
Location: Hattiesburg, MS
Posts: 5,371
|
Re: Markeb01 Build Thread
You know, I like it! I was a little on the fence, hence why I didn't say anything. I saw where you made the decision to move forward with the project, & I'm glad you did. It's unique & different, but it looks good at the same time. Looking forward to seeing them with lights. Hope the driver's side goes much smoother for ya!
__________________
_____________________________________________ Phillip My Build threads: 1966 Chevy C-10 "Black Betty" shortbed, fleetside, BBW, 327 V8/ Powerglide (under construction) http://67-72chevytrucks.com/vboard/s...ighlight=betty 1997 Chevy Tahoe, 2dr/2wd, mild custom (Daily driver) http://67-72chevytrucks.com/vboard/s...d.php?t=601142 Pics: '66 C-10 https://flic.kr/s/aHsjHWD4h9 '97 Tahoe https://flic.kr/s/aHsjGZ7wKP '93 C-1500 https://flic.kr/s/aHskxdpdnQ '88 S-10 Blazer https://flic.kr/s/aHsjYGx4Md Previous Rides: 1993 Chevy S-10 ext. cab, 4.3L, 4/5 drop (Sold) 1993 Chevy C-1500 short/step Retro-Rod (Sold) 1988 S-10 Blazer 2dr/2wd mild custom (Sold) |
|
|
|
 |
| Bookmarks |
|
|


 Linear Mode

