
|
 08-06-2012, 11:53 PM
|
#226 |
|
Registered User
Join Date: Mar 2011
Location: tulsa,ok.
Posts: 1,803
|
Re: Br3w City's Project omgwtfbbq
that looks good for here, even if its a ford color, i didnt know until you said it was!!
about how much epoxy primer, basecoat and clear coat did you have to buy?? i'm looking for a ruff est. on how much i will have to buy this fall for my truck! i'm wanting to paint mine by this next summer hopefully and before it gets real hot here!!
__________________
my project: http://67-72chevytrucks.com/vboard/s...d.php?t=456163 |

|

|
|
08-07-2012, 12:58 AM
|
#227 |
|
But Found Her 25yrs Later!
 Join Date: Oct 2010
Location: Oregon City, Oregon
Posts: 10,460
|
Re: Br3w City's Project omgwtfbbq
Grabber Blue is a Spectacular color!
__________________
I lost my 65 - Found it 25 years later: http://67-72chevytrucks.com/vboard/s...d.php?t=426650 66 C20 Service Truck: http://67-72chevytrucks.com/vboard/s...d.php?t=428035 |
|
|
|
|
08-07-2012, 02:07 AM
|
#228 | |
|
meowMEOWmeowMEOW
Join Date: Sep 2009
Location: MKE WI
Posts: 7,128
|
Re: Br3w City's Project omgwtfbbq
Quote:
Lets see, I'll have to guess because I had to do a few runs for more stuff.... (1) GALLON of un-reduced color for the exterior. 2.5 med wet coats plus a bit more took about 2/3-3/4 of the can, it mixes 2:1 with reducer. (1) QUART of un-reduced color for the interior/lower door bottoms. I used barely any of it, maybe a 1/4 of the can and half of that got dumped. Also mixed 2:1 with reducer (1) QUART Wax and grease remover, have about a half can left. (1) GALLON Epoxy Primer, Used a bit more than 3/4 of the can, it also gets reduced 20% more for the sealer coat. (1) PINT Epoxy Hardener To harden the epoxy, duh. Used 95% of it. (1) GALLON 2k High build Primer (1) QUART (i think i have to double check this one) reducer or hardener, i forgot. (6) QUARTS Dupli Color Paint Shop Matte Clear. It is pre-mix, so its ready to spray, you don't have to add reducer or hardener. I could only find it in quarts. A TON OF REDUCER. I had a couple (we had hot ass days and I wanted to adjust the reducer to compensate). Initially I bought it by the quart not really thinking, but because you use it to clean the guns and you use extra for the sealer etc...get a lot. I would say buy a gallon minimum, two if its a good price.. If you use a regular clear, you need about a GALLON or so of clear, as well as reducer and hardener to match the paint system you use. ----------------------------------------------------------------------------- Finished the paint! Got the inside lower doors coated and blended up lightly. It was hard to get a perfect match the unkown interior color, but it came out great, and once the door card are on and the sun fades it all together, you may not even notice. We only had 1 issue, a solvent run that hit the door (dripped off the gun on total accident). With some 800grit and water, we lightly sanding it down, taped off an area to hit with color, then cleared the whole thing to blend. It was a GREAT moment taking the masking off for the first time in a while... Hopefully progress will move along on the other stuff as I have parts waiting in the wings. 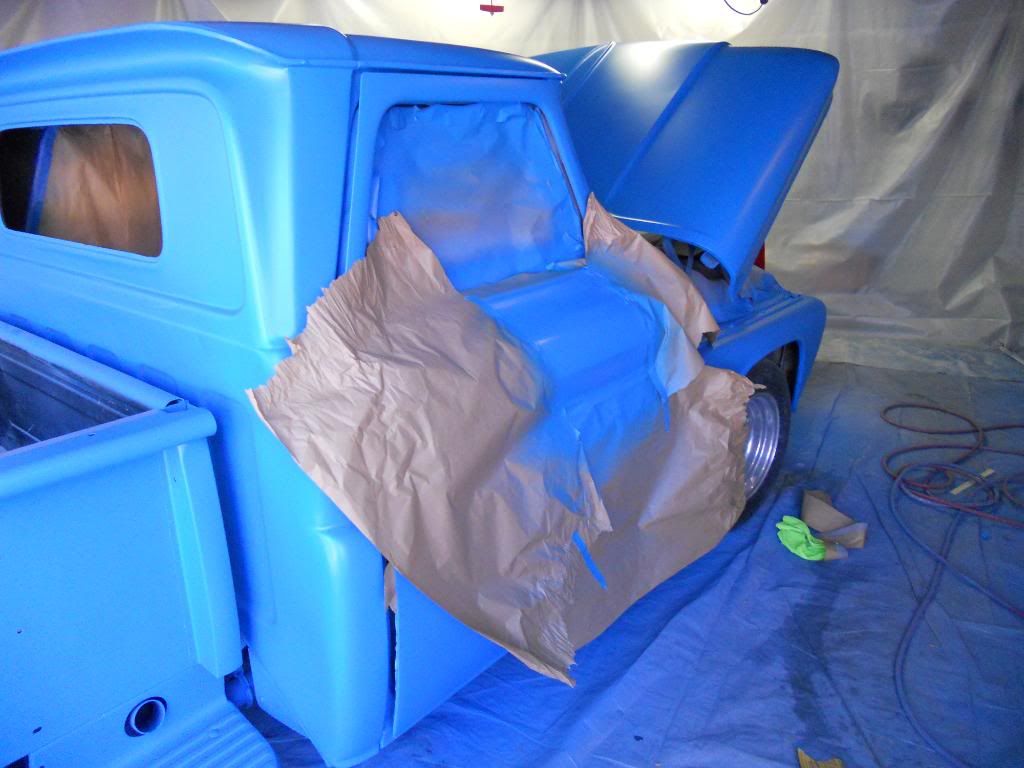 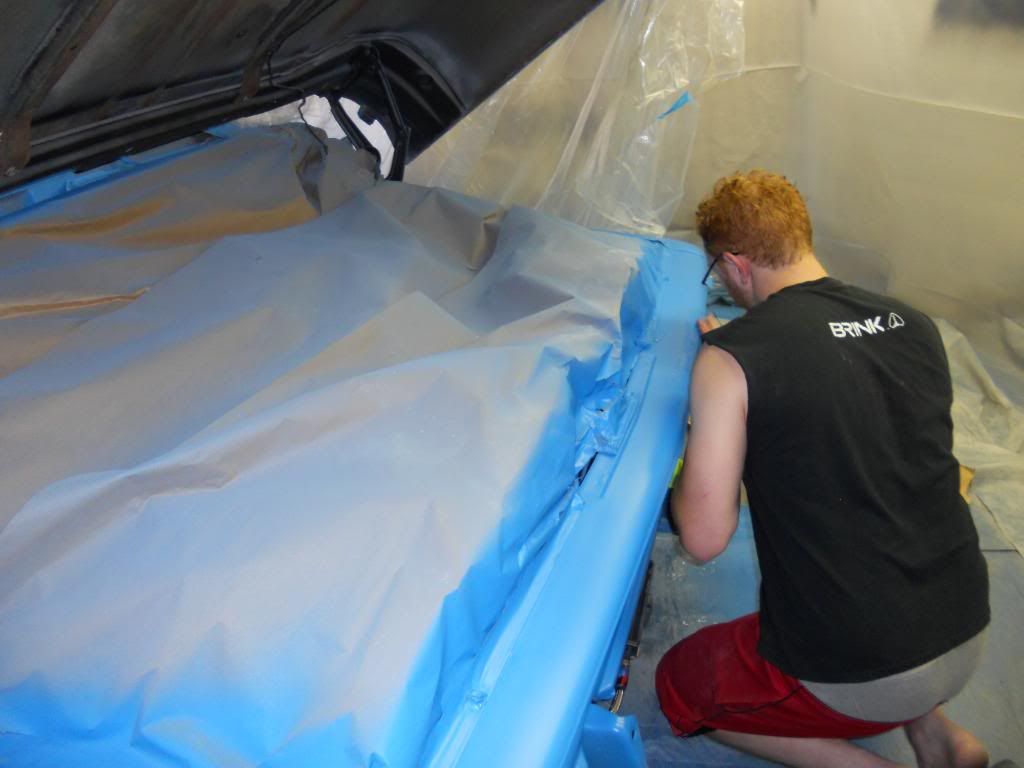 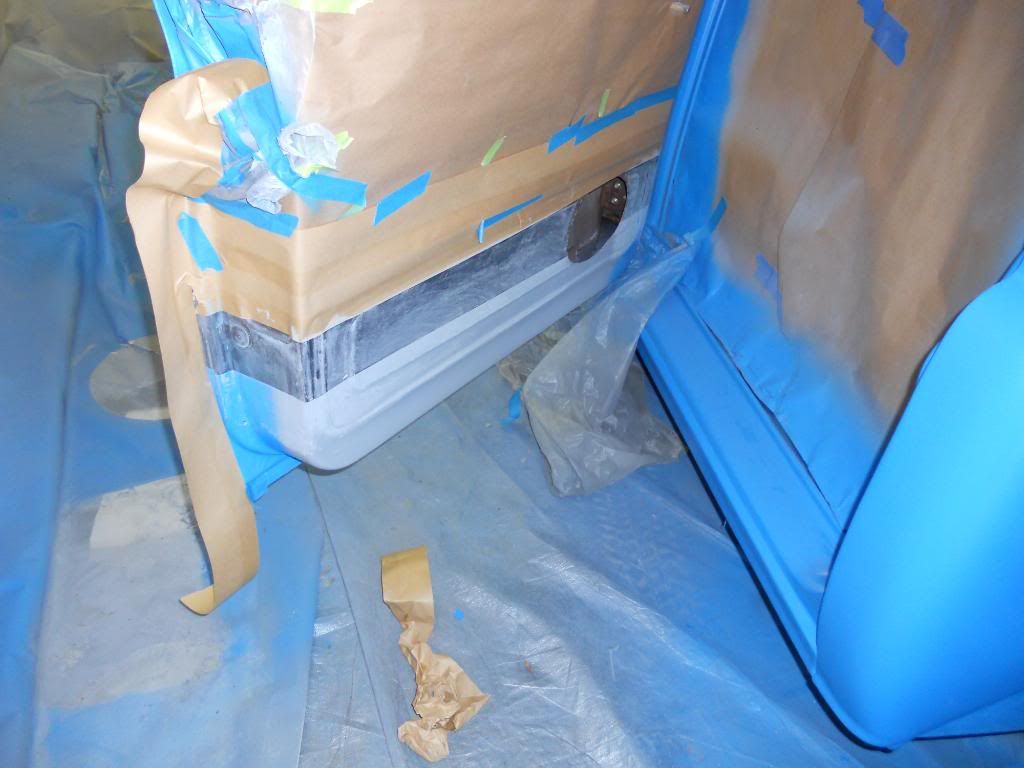  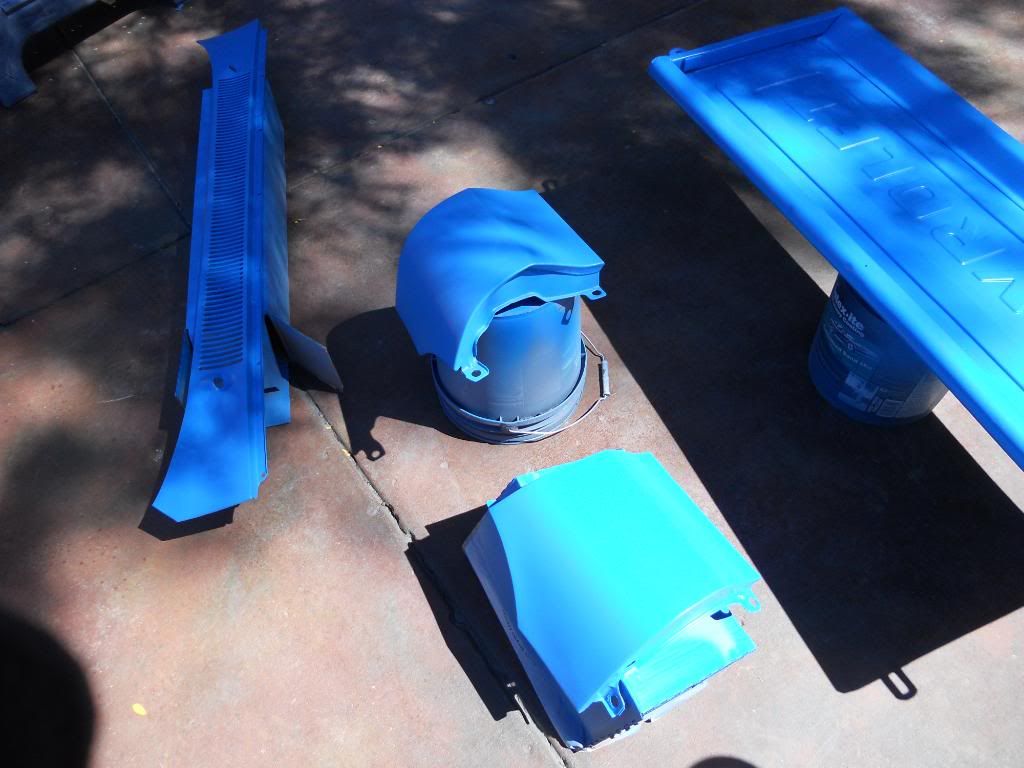 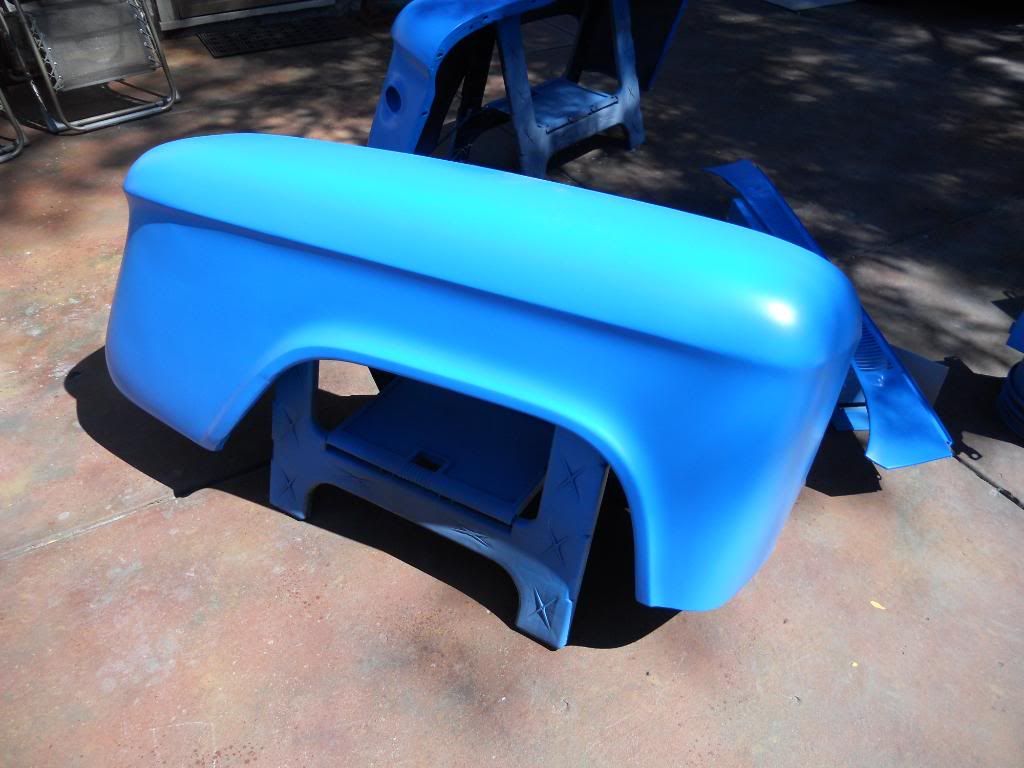 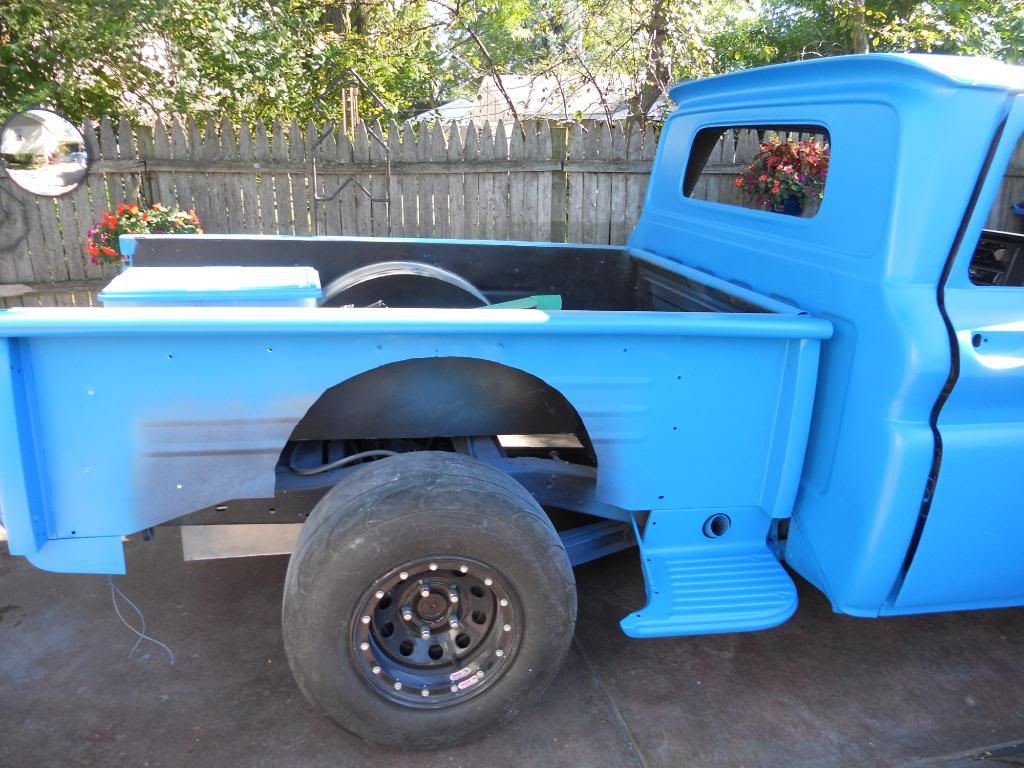 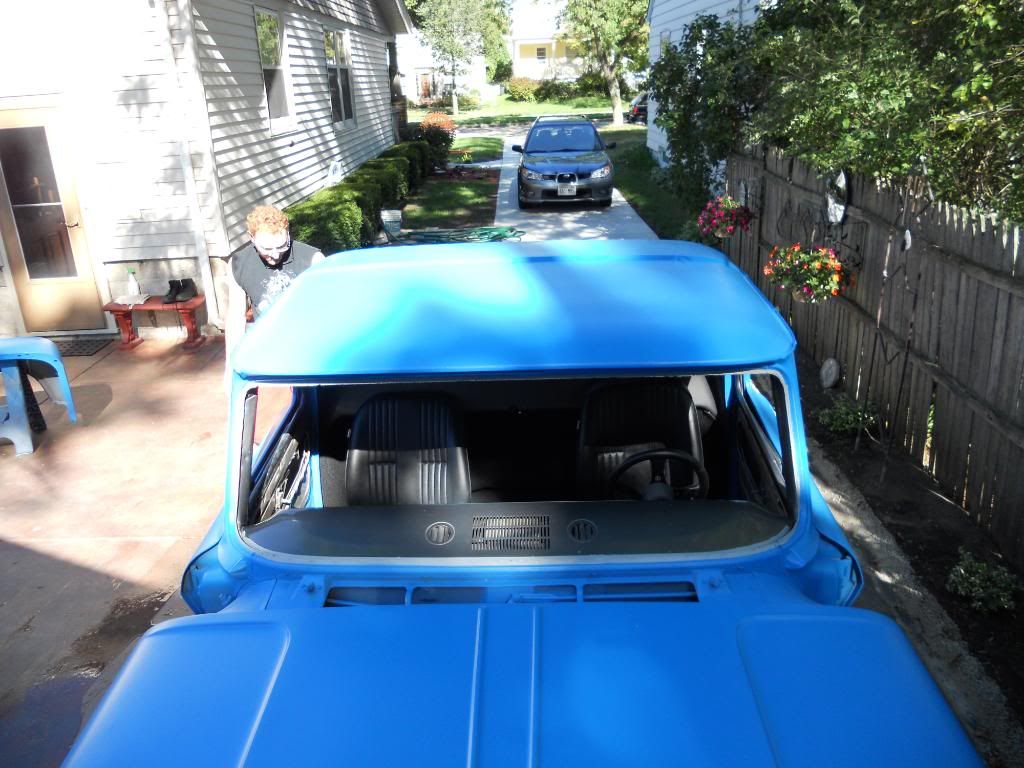 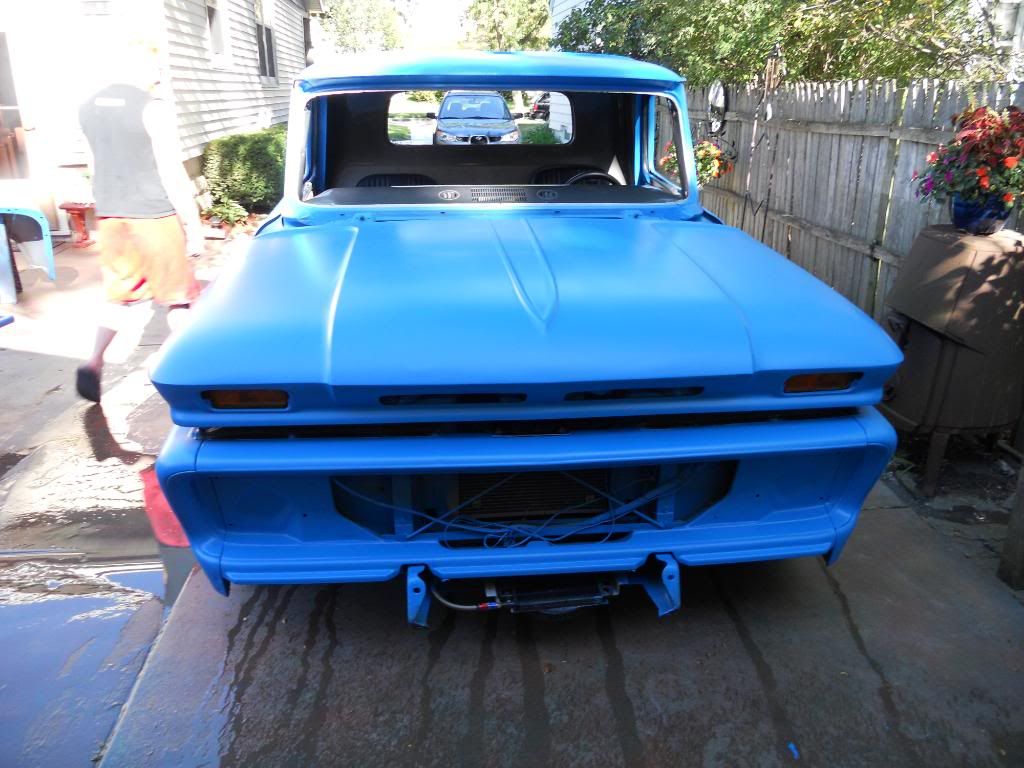 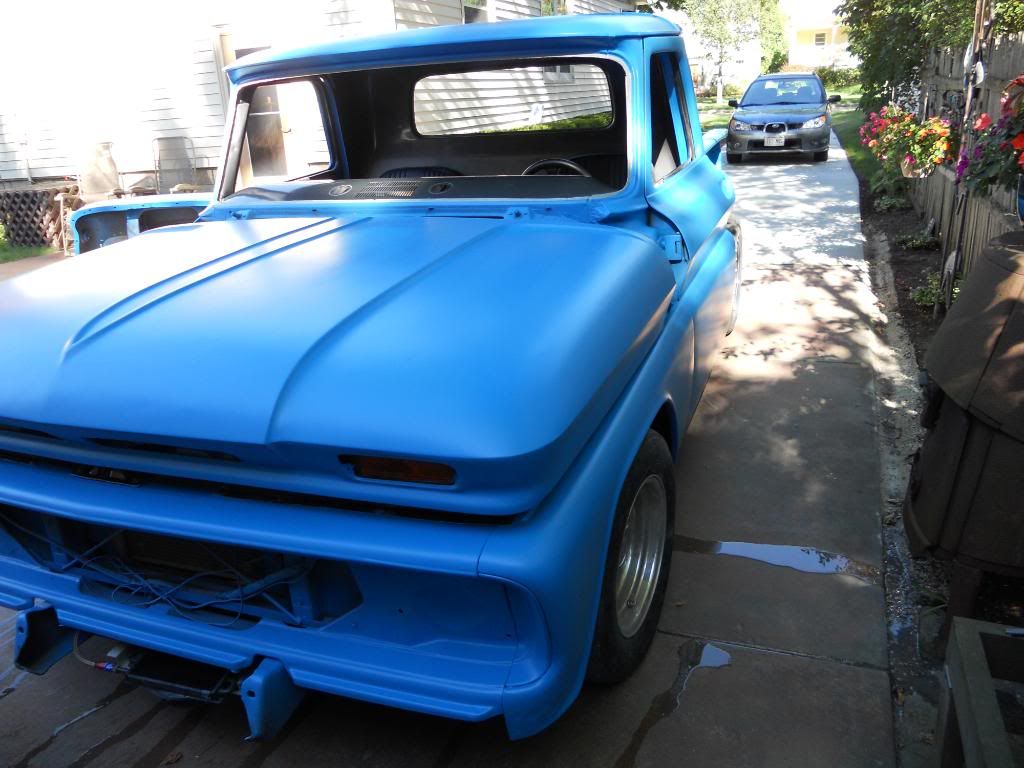 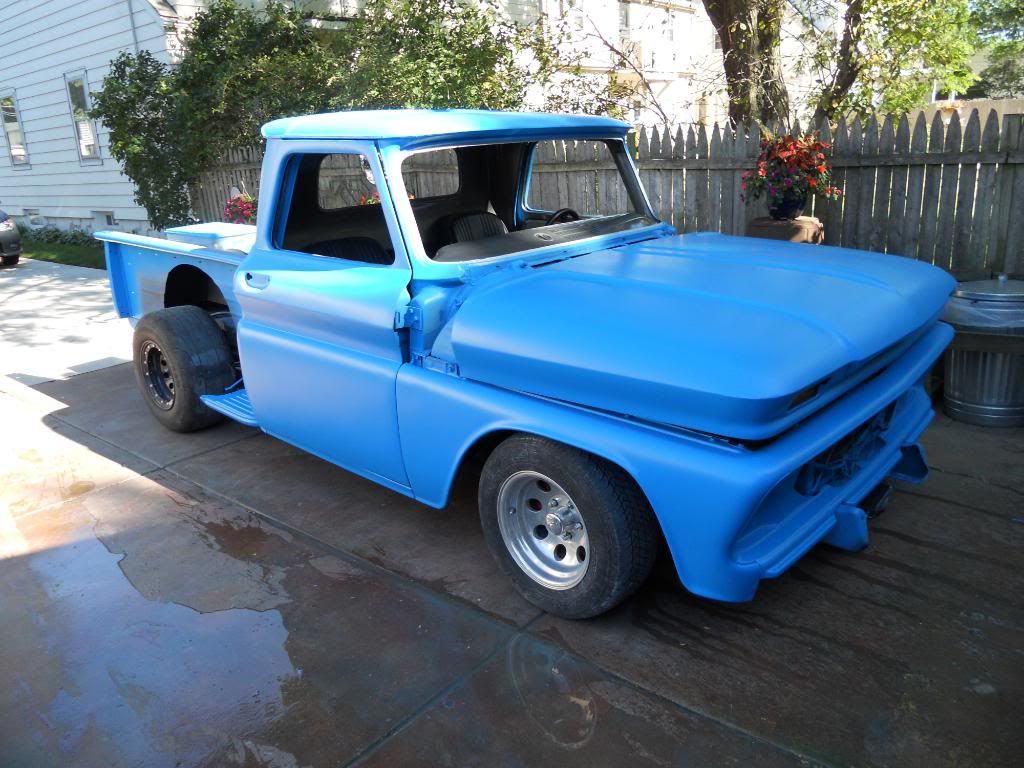
__________________
'66 Short Step / SD Tuned / Big Cam LQ4 / Backhalfed /Built 4l80e / #REBUILDEVERYTHING  |
|
|
|
|
|
08-07-2012, 02:53 AM
|
#229 |
|
Registered User
 Join Date: Jun 2006
Location: Maple Valley, WA
Posts: 1,913
|
Re: Br3w City's Project omgwtfbbq
You only used that matte clear that uses no hardener? It wont last, maybe 6 months if you keep the truck in the garage.
__________________
Custom Painter/Restoration Specialist 1965 GMC 3/4 Ton LB SOLD? 1964 Chevy El Camino in full restoration 1991 Chevy S10 288K+ miles 2nd Owner SOLD 2020 RAM 1500 Warlock |
|
|
|
|
08-07-2012, 03:26 PM
|
#230 |
|
meowMEOWmeowMEOW
Join Date: Sep 2009
Location: MKE WI
Posts: 7,128
|
Re: Br3w City's Project omgwtfbbq
in what sense? fading or?
Can't say I've had anyone say that before. I've used it before with pretty good results. I do have a gal of regular clear and hardener but can't find a flattening agent that will actually work well. I guess since its already done...and its sold for automotive use....and like I said...its already done, I'll be taking my chances.
__________________
'66 Short Step / SD Tuned / Big Cam LQ4 / Backhalfed /Built 4l80e / #REBUILDEVERYTHING |
|
|
|
|
08-09-2012, 03:36 AM
|
#231 |
|
meowMEOWmeowMEOW
Join Date: Sep 2009
Location: MKE WI
Posts: 7,128
|
Re: Br3w City's Project omgwtfbbq
Another step in the put-back-together phase. Had to re do the vent window gaskets.
I did a write up CLICK HERE FOR WRITE UP LINK From old and crusty 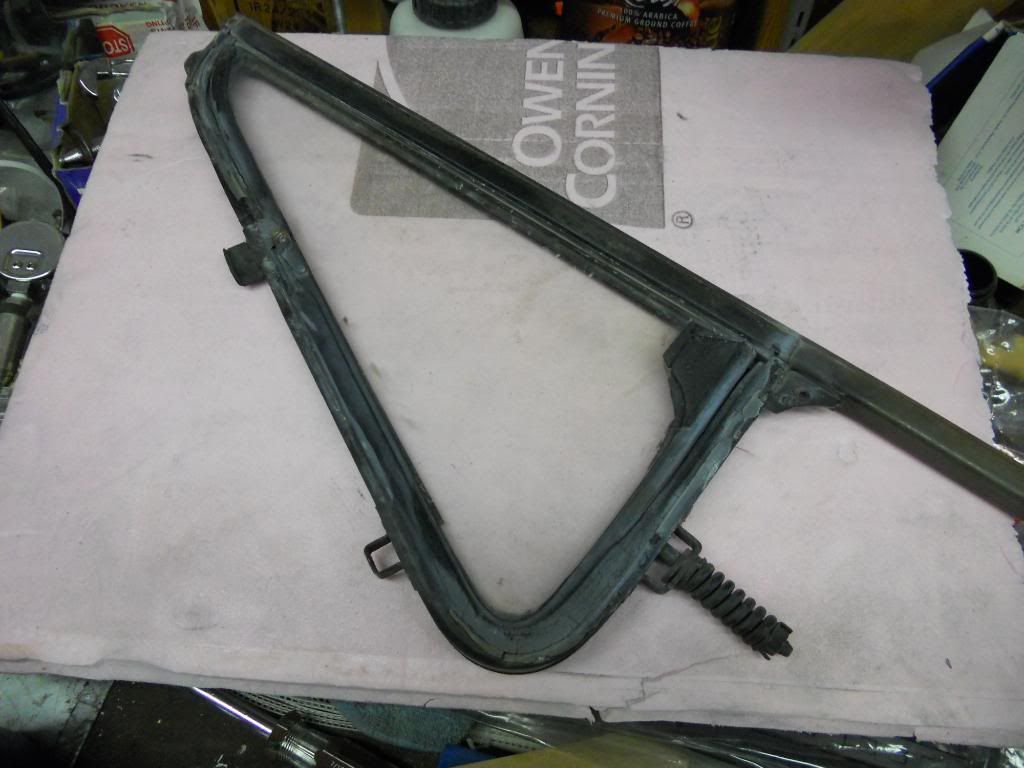 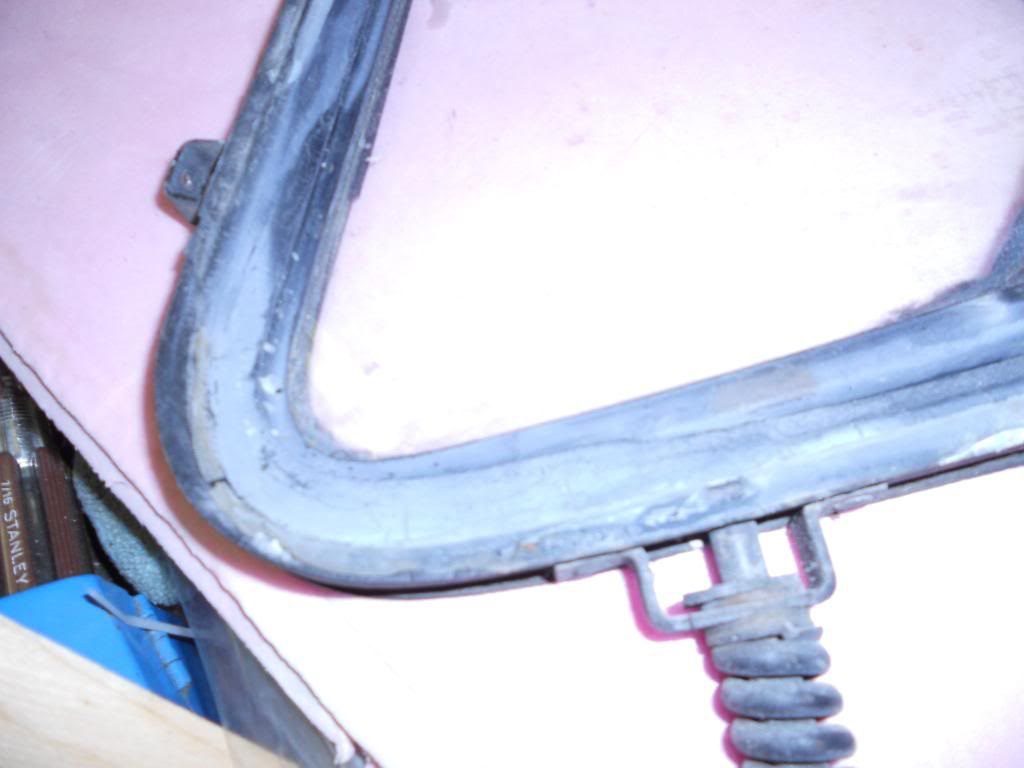 To fresh and functional. 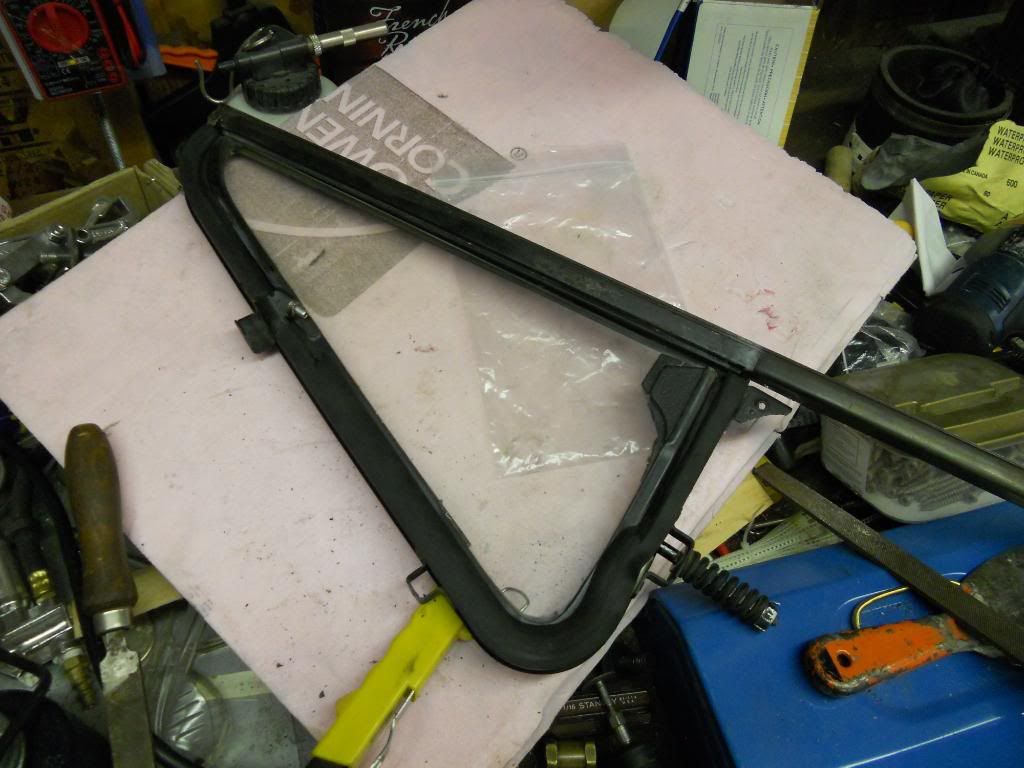 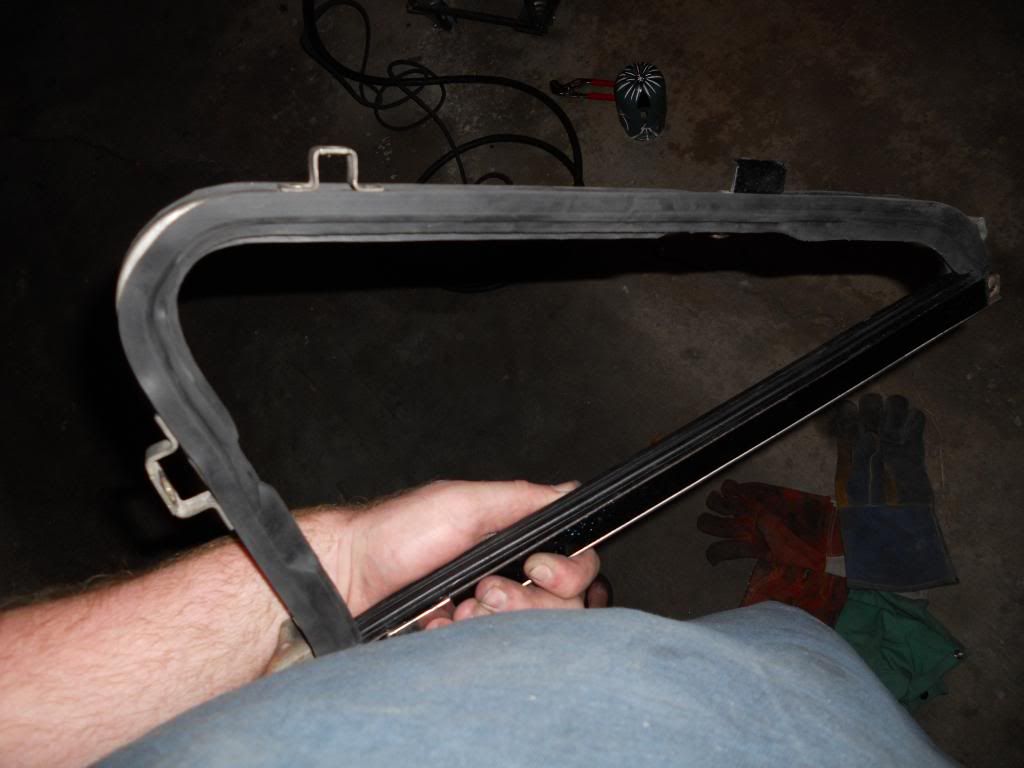
__________________
'66 Short Step / SD Tuned / Big Cam LQ4 / Backhalfed /Built 4l80e / #REBUILDEVERYTHING |
|
|
|
|
08-10-2012, 07:01 PM
|
#232 |
|
meowMEOWmeowMEOW
Join Date: Sep 2009
Location: MKE WI
Posts: 7,128
|
Re: Br3w City's Project omgwtfbbq
Got more done but managed to leave my camera at home again so I just snapped a few teaser cell phone shots.
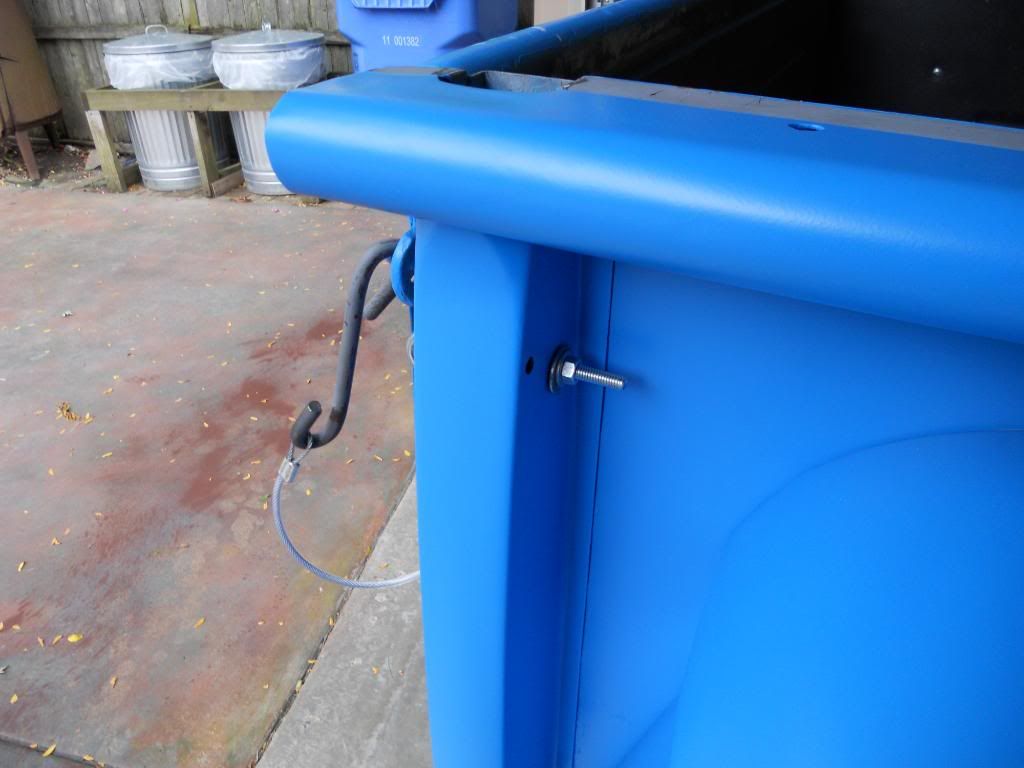
I grabbed some seam sealer tape, its a nice option to prevent rubbing and chaffing on painted surfaces that meet each other. I used it on anything I could, and since its rubberized and closed cell, it won't absorb water...making it a cheap viable option instead of the rust-sucking fender welting. 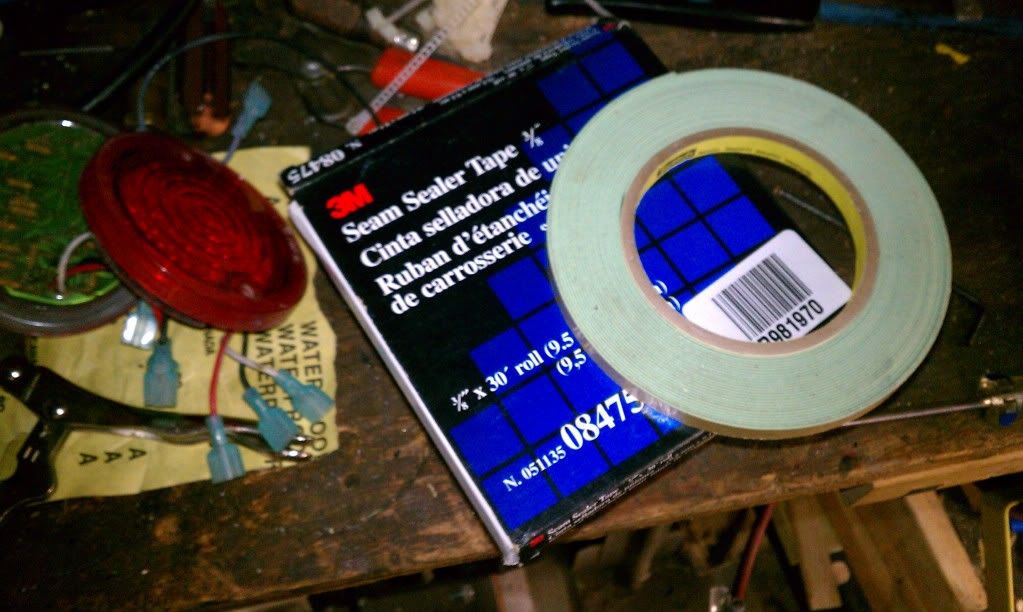 It also was nice for the more flush fitting led tail lights (doesn't use the reverse lense gasket), as well as the pinch point on the sideviews. 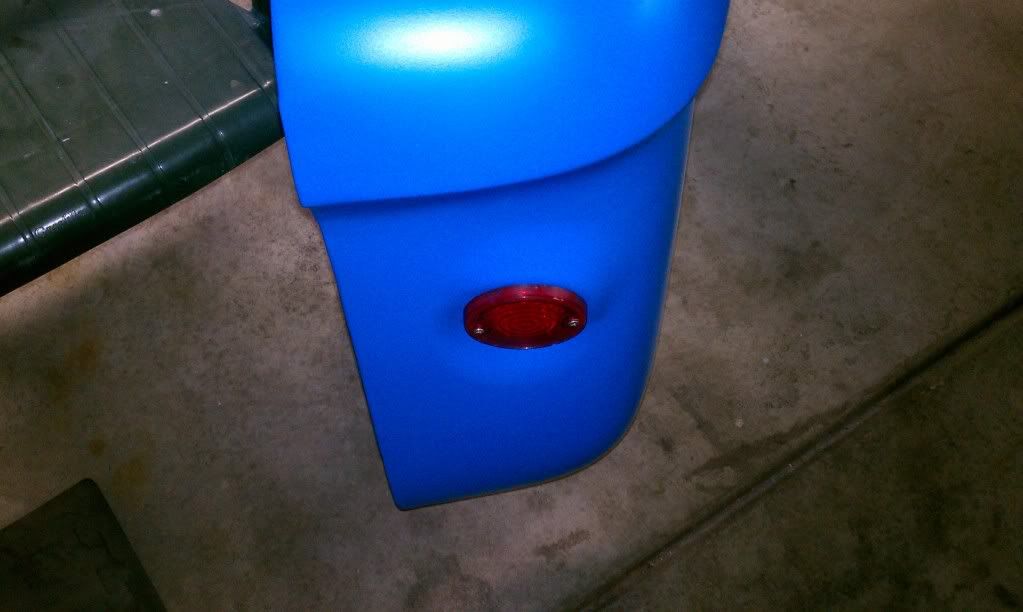 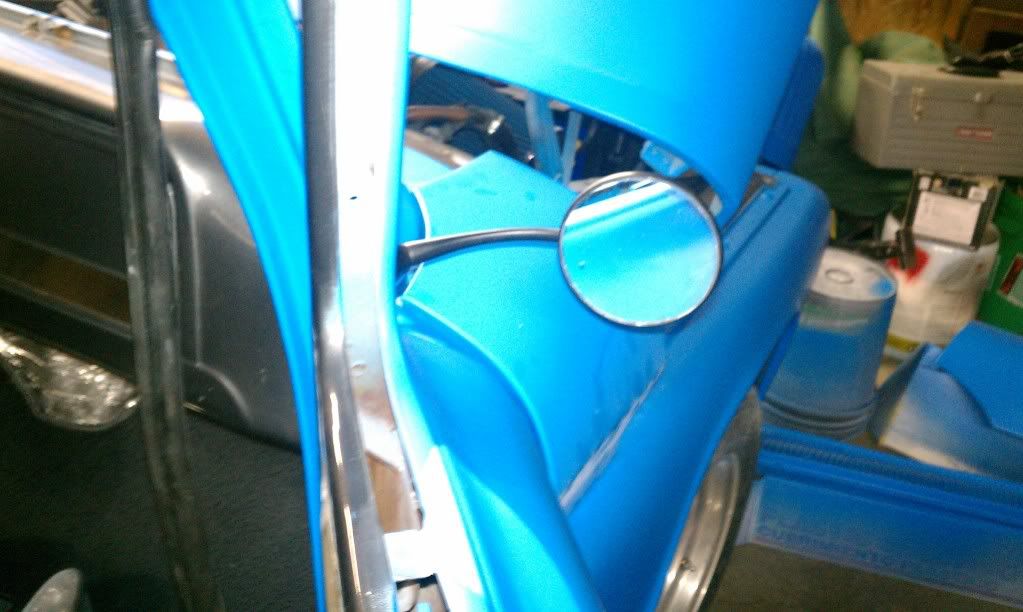 And lastly I had some time to start getting the door seals in place. The aftermarket gaskets don't have the metal lip the old ones did and are thicker in profile. Make SURE you have fitted your doors with these in BEFORE you do anything else. They change the fitment a good deal. You may also want to lightly slot certain section of the gasket at pinch points, because it almost "bunches" in corners. I held it down with some high quality 3m weatherstrip adhesive. Its one of the situations when you NEED the right adhesive. 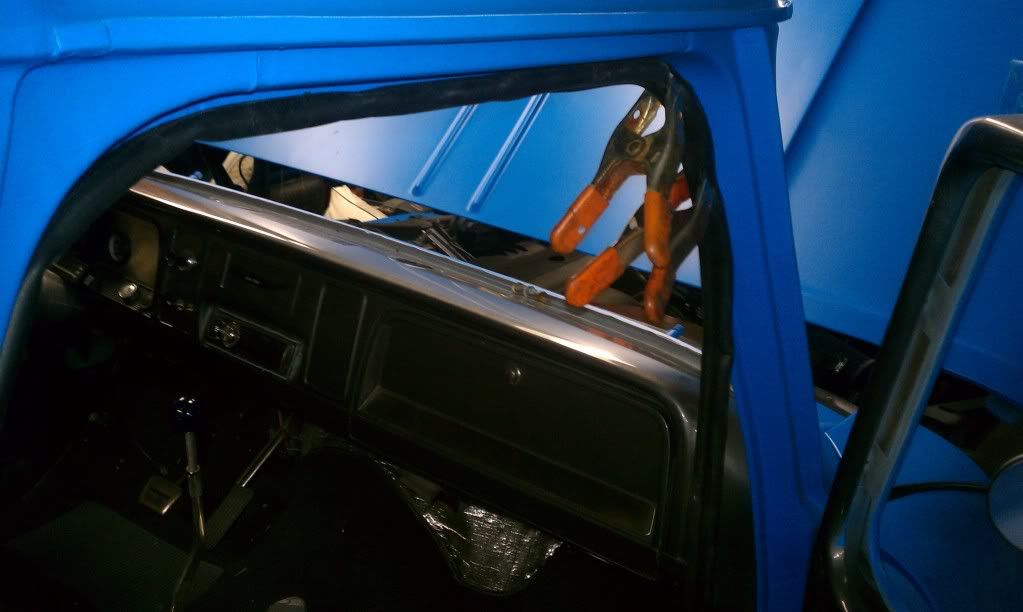 It will be in one piece within a few days....get ready.
__________________
'66 Short Step / SD Tuned / Big Cam LQ4 / Backhalfed /Built 4l80e / #REBUILDEVERYTHING |
|
|
|
|
08-13-2012, 01:50 AM
|
#233 |
|
meowMEOWmeowMEOW
Join Date: Sep 2009
Location: MKE WI
Posts: 7,128
|
Re: Br3w City's Project omgwtfbbq
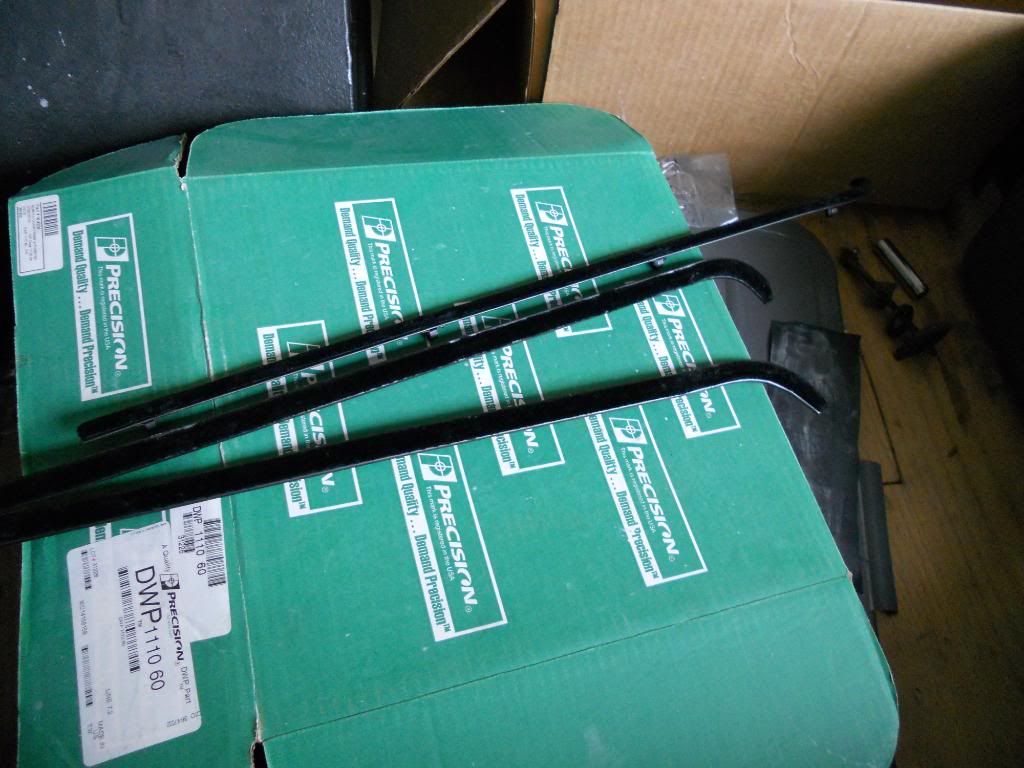
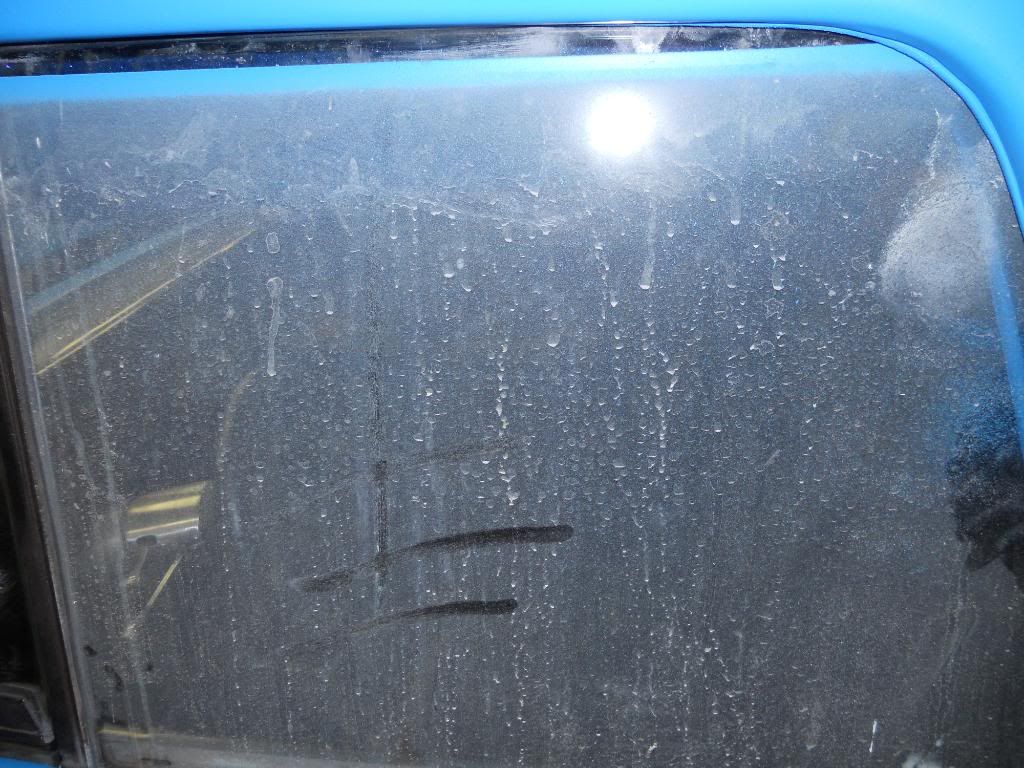
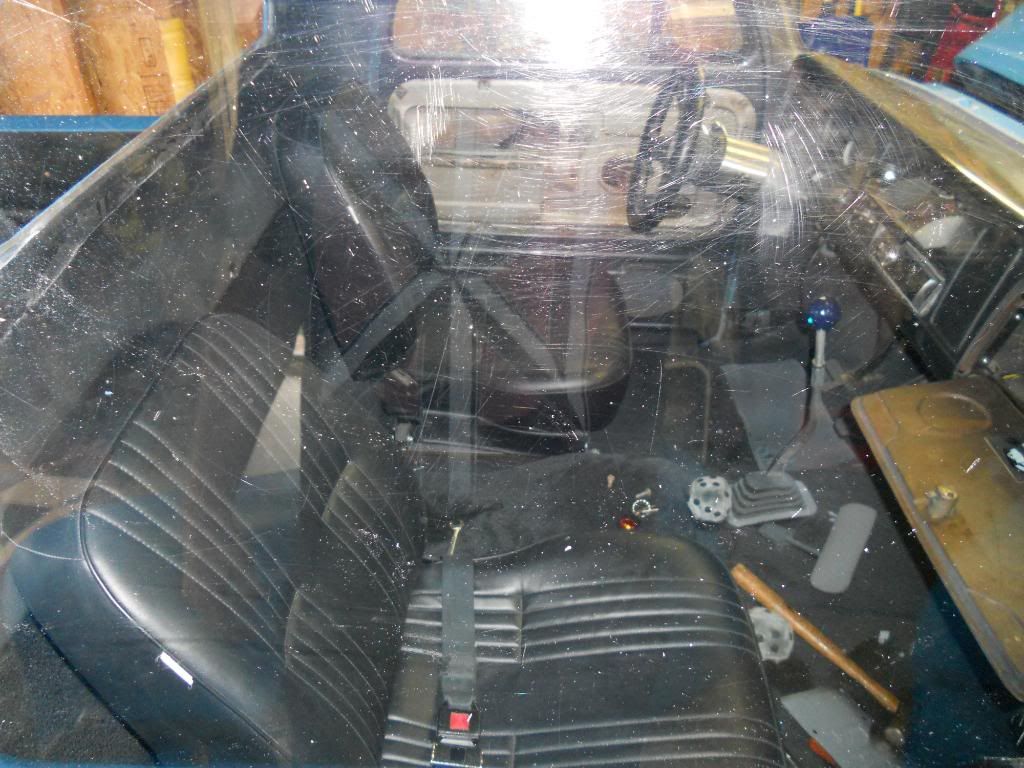
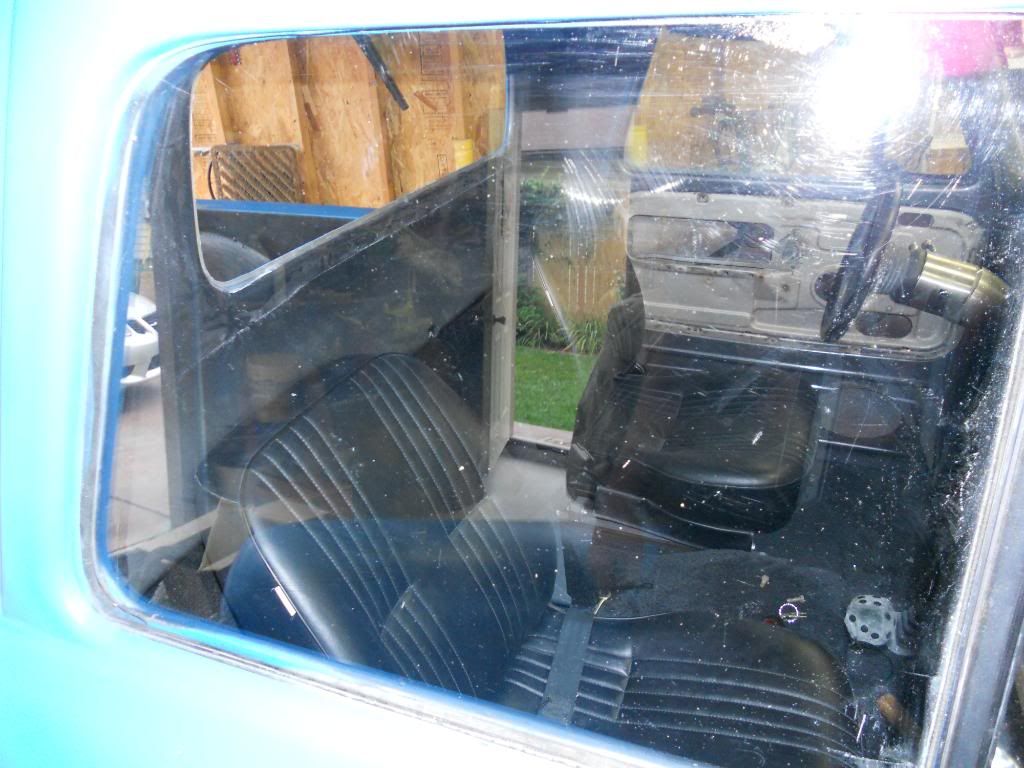
Put my window sweepers and vent window assemblies in, and did a little cleanup on the windows. They still need to be hit with polishing compound to get swirls out.
 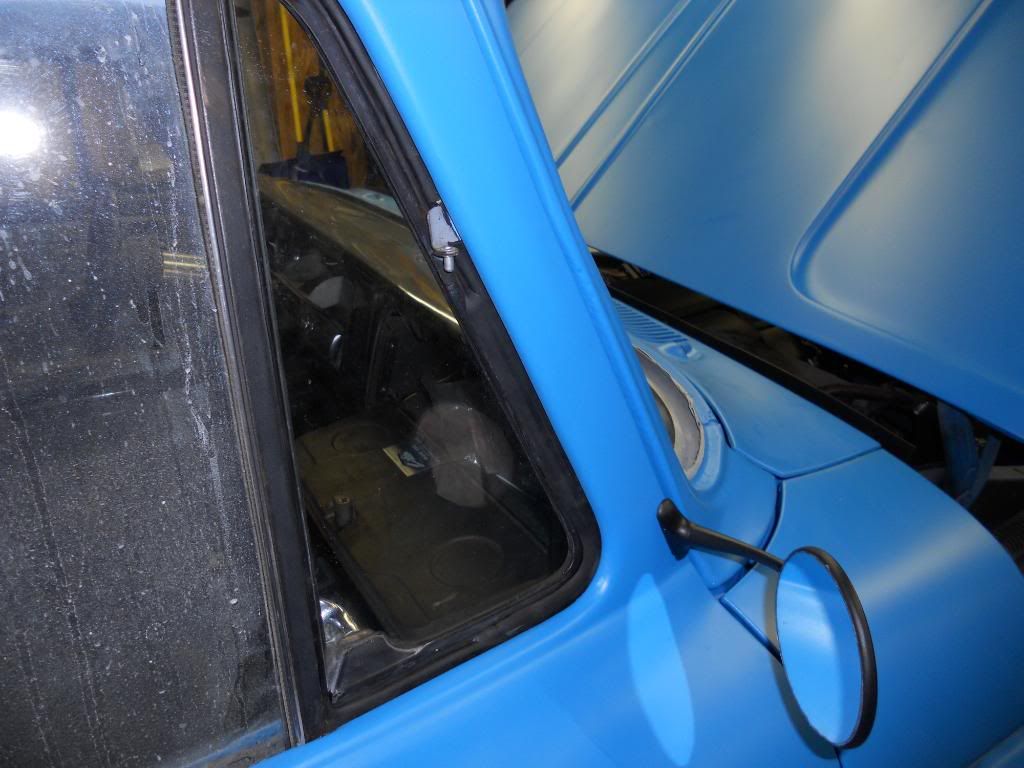    Then it was the hood/cowl gasket, door handles, wings, old gas cap and grill! 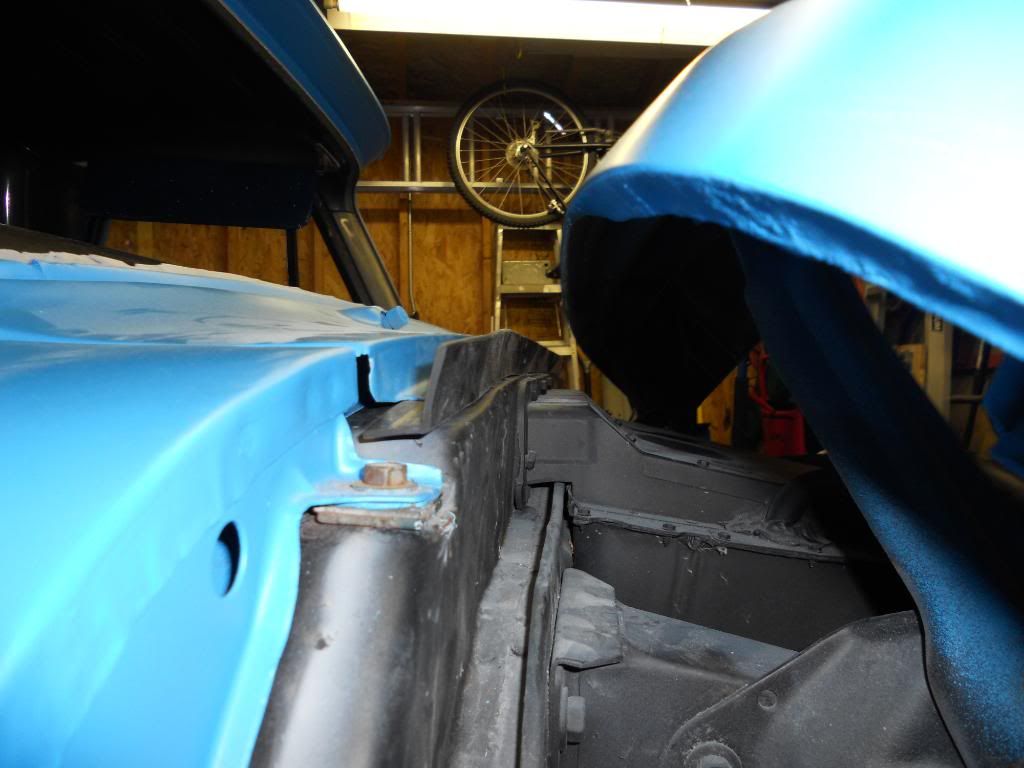 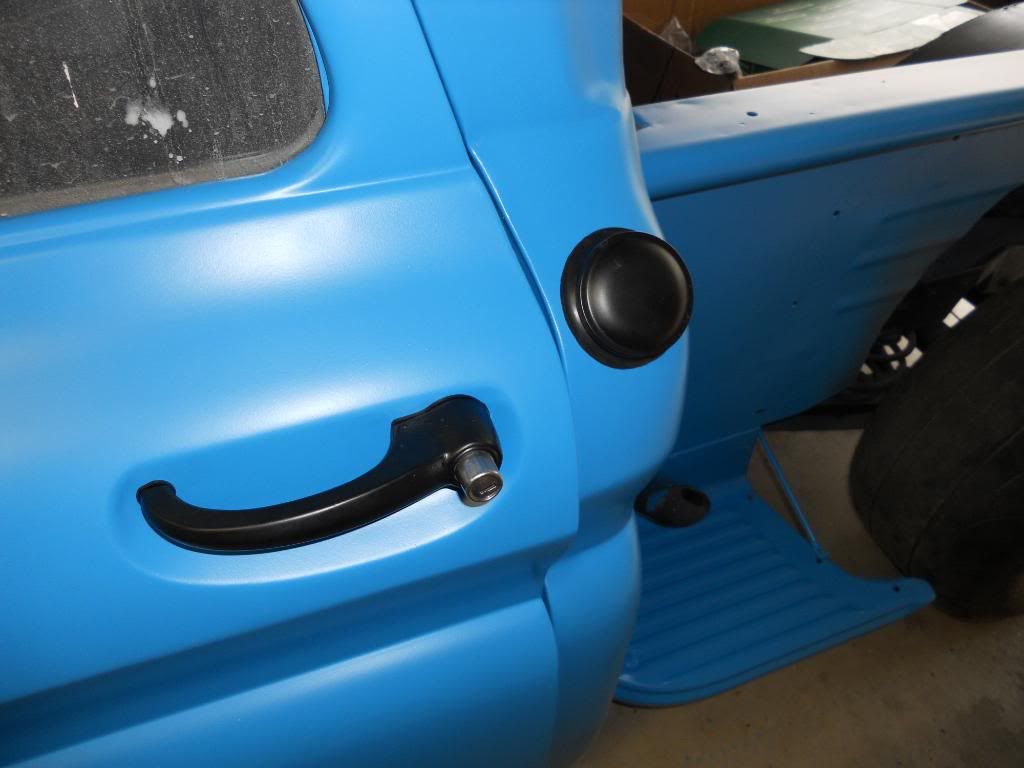 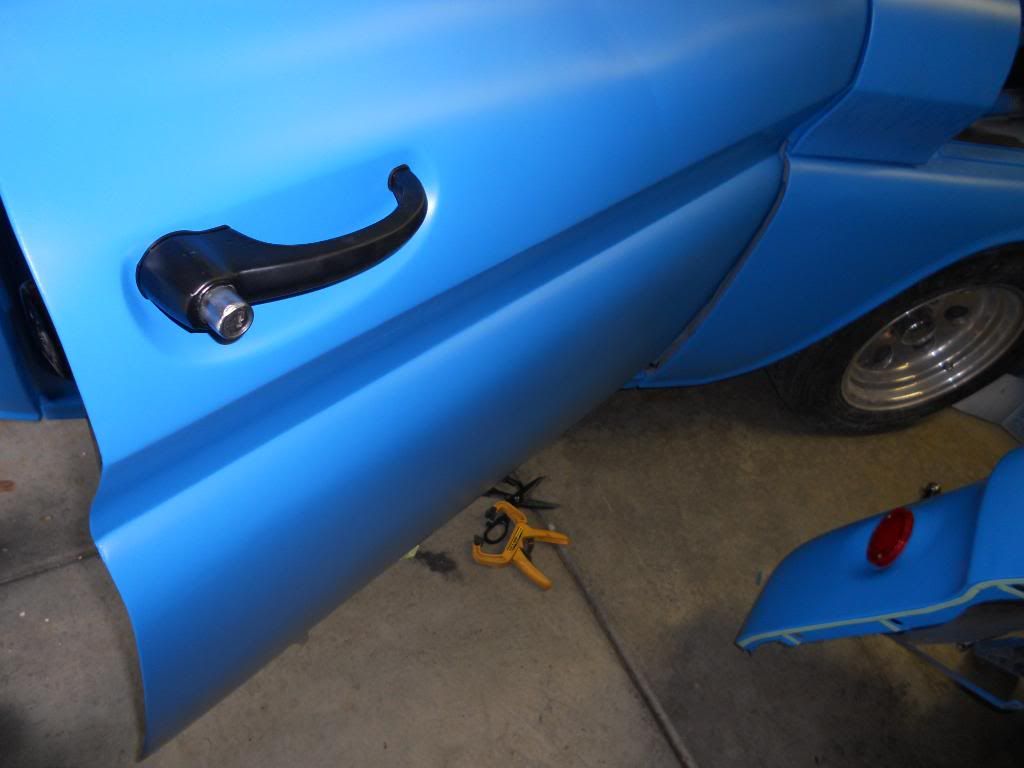 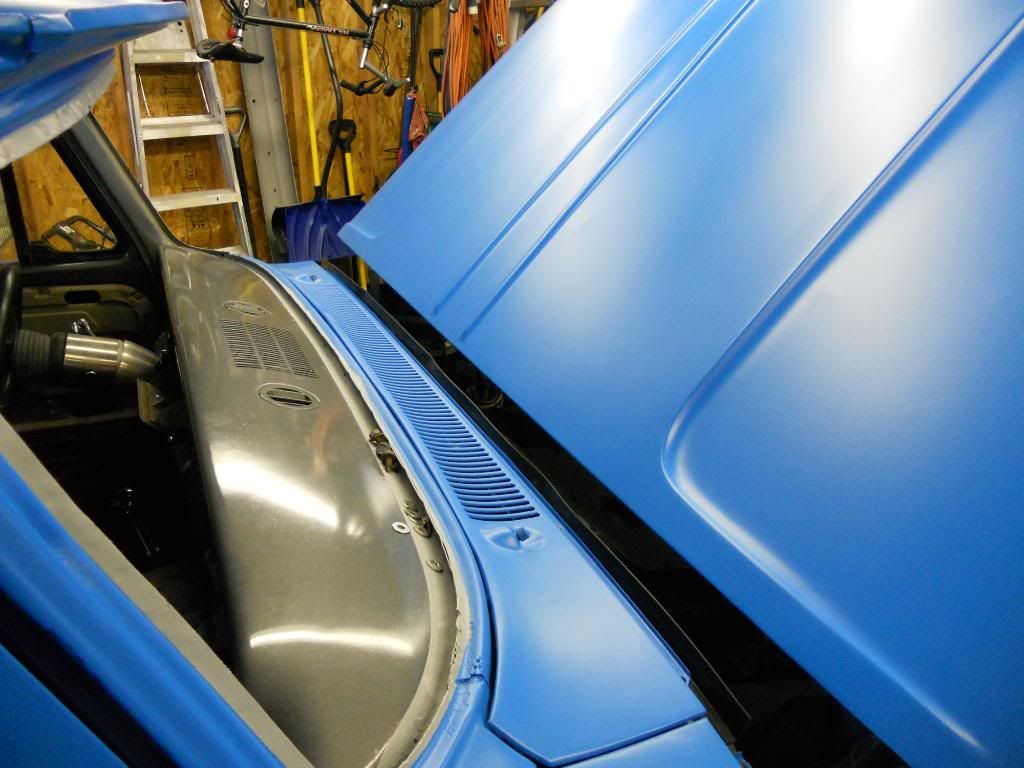 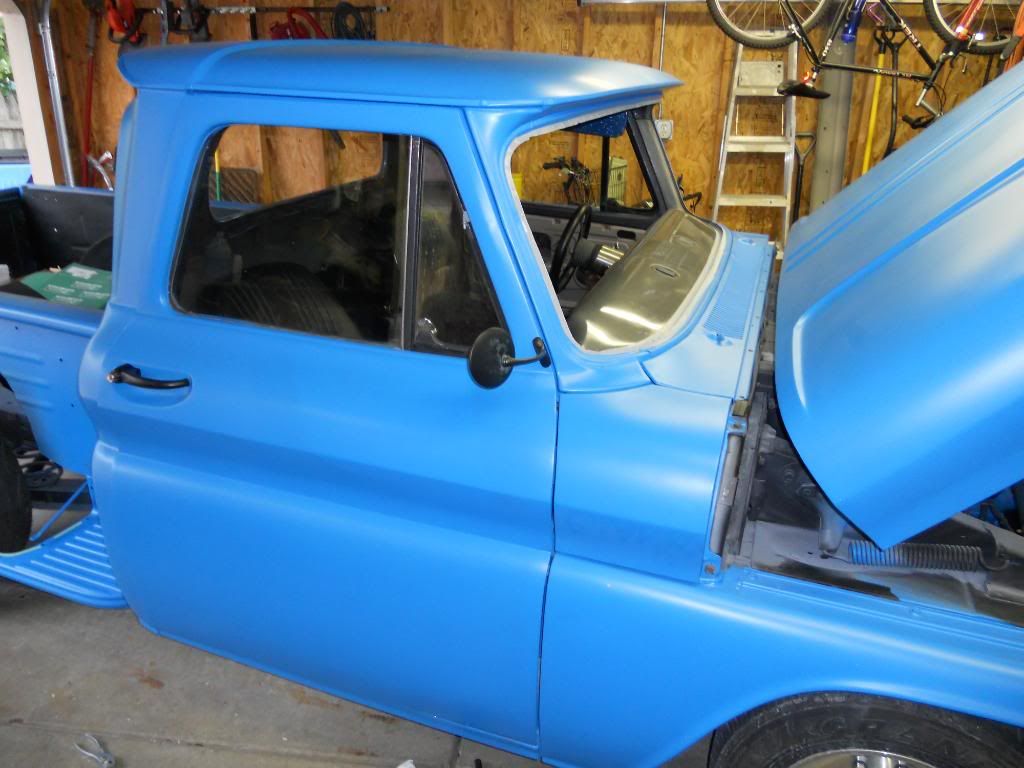  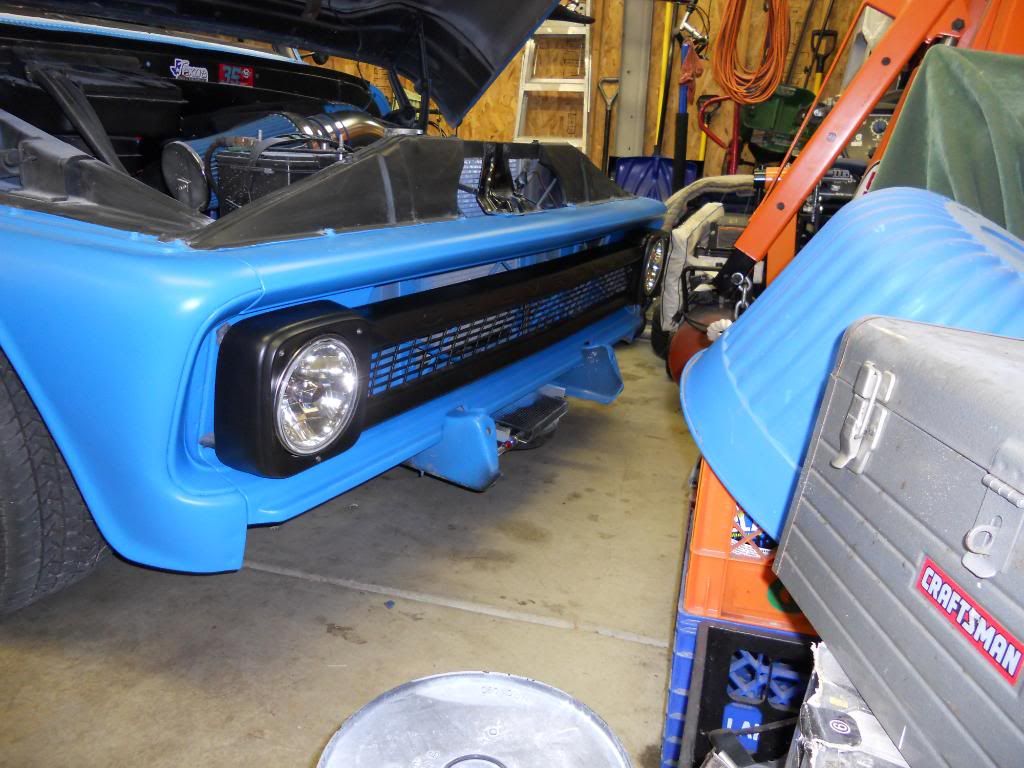
__________________
'66 Short Step / SD Tuned / Big Cam LQ4 / Backhalfed /Built 4l80e / #REBUILDEVERYTHING |
|
|
|
|
08-13-2012, 10:46 AM
|
#234 |
|
One day...
Join Date: Apr 2008
Location: Tuttle, Ok
Posts: 9,240
|
Re: Br3w City's Project omgwtfbbq
Coming along great, nice work!
Posted via Mobile Device |
|
|
|
|
08-13-2012, 10:52 AM
|
#235 |
|
Registered User
Join Date: Mar 2012
Location: San Diego CA
Posts: 223
|
Re: Br3w City's Project omgwtfbbq
Cool truck man. I like the color combo
Posted via Mobile Device |
|
|
|
|
08-13-2012, 04:55 PM
|
#236 |
|
Truck and auto performance nut
Join Date: Feb 2007
Location: McKinney,Texas
Posts: 3,848
|
Re: Br3w City's Project omgwtfbbq
Looks good...I like the black accent. I can only hope that I will do as well when I finally paint mine!
__________________
Kurt - '68 GMC short step - NIB '09 LY6 6.0L crate motor w/mods, NIB '12 crate 4L85e w/billet 3k stall Circle D, 3.73 posi 12 bolt, DynaTech f-swap headers, 3/4 drop, handling mods, etc. - my toy '72 Chevy LWB C-10 Highlander - 350/350 ps/pb/tilt/ac - not original but close '06 Chevy TrailBlazerSS - LS2/4L70e - little black hot rod SUV - my DD '18 Kia Sorento - wife's econo-driver '95 Chevy S10 - reg cab shortbed, LS, 4.3, auto... my '68's powertrain and chassis build -links broken A surprise phase - carb to efi -links broken |
|
|
|
|
08-14-2012, 07:31 PM
|
#237 |
|
meowMEOWmeowMEOW
Join Date: Sep 2009
Location: MKE WI
Posts: 7,128
|
Re: Br3w City's Project omgwtfbbq
Of course, yet more and more re assembly.
Test fitting my floor trim. I only have the door seal in on this side. It kinda scrunches the seal up in the corner but I'm hoping once the doors have compressed on it it should form in a bit. 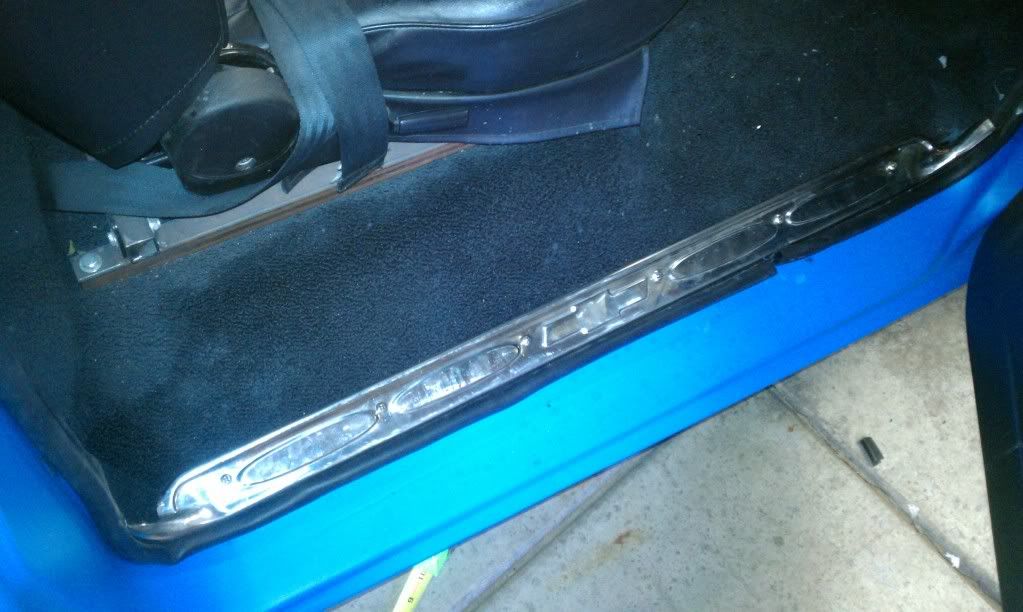 Working on my "lower door cards". They don't really exist, but since I have the speakers there, I wanted to dress it up a bit, and make it flow with the interior looks better. fiberboard, part of a speaker box, and the matching vinyl from the seats and door cards. This is only the first part, I still need to trim the vinyl down a bit in the edges, and pick out some matching hardware. The speakers will bolt through these, into the 1/2" mdf speaker supports, sandwiching the metal and hopefully making it sturdier and less prone to vibration. 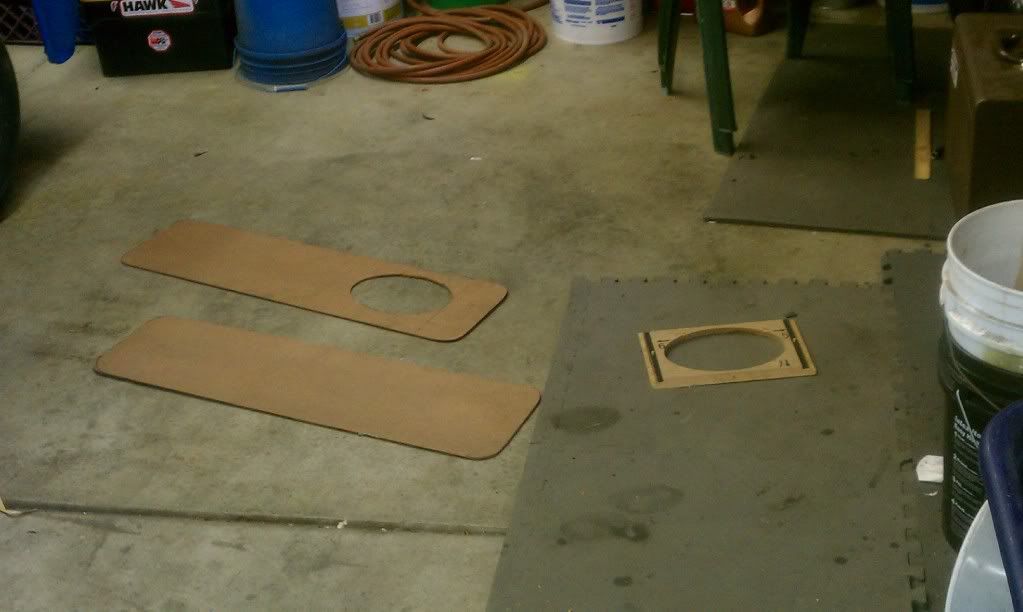 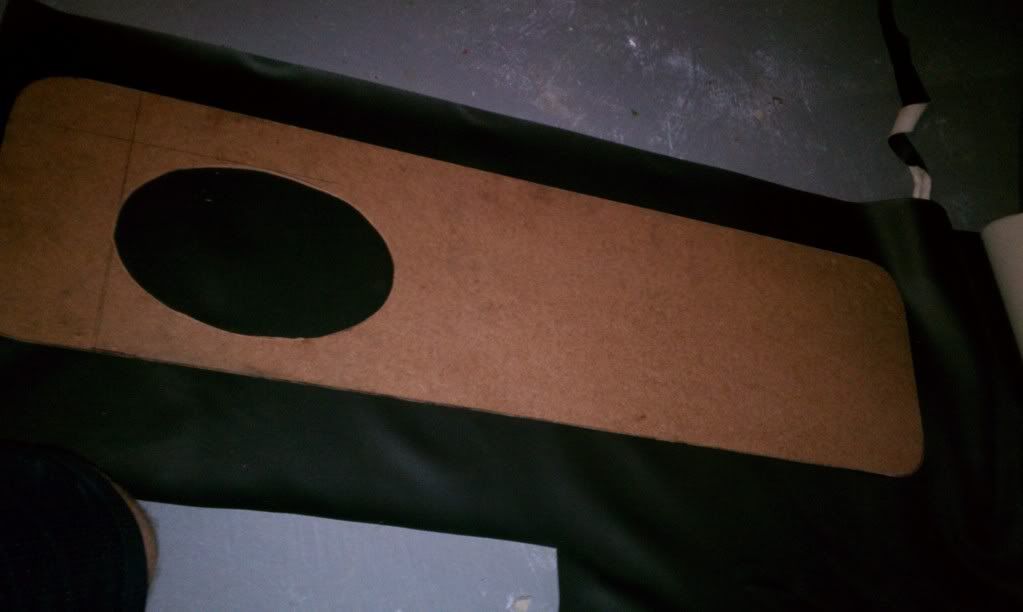 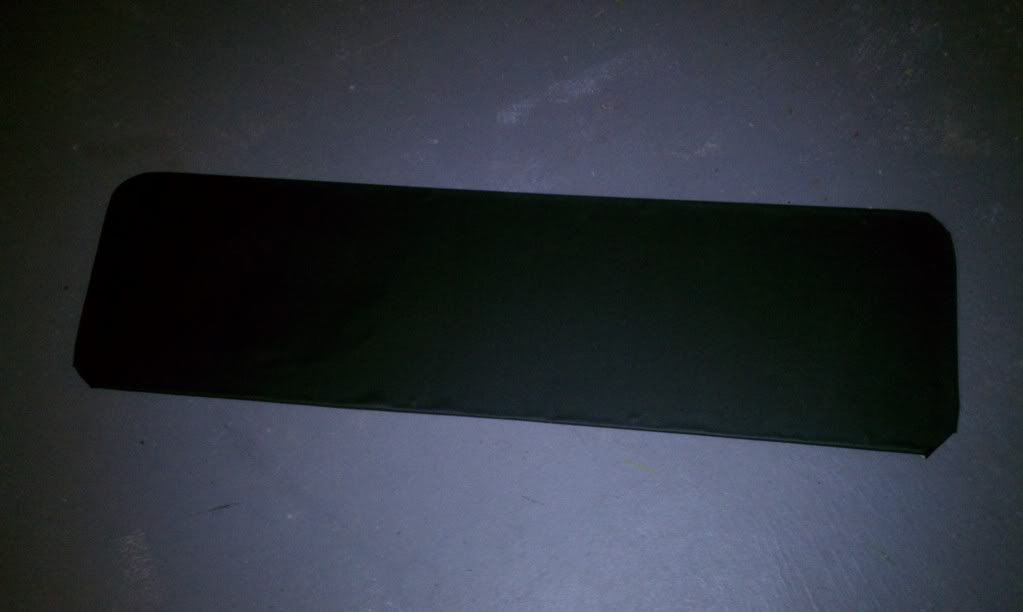 Back out in the garage, we put the rear window and new seal in place, mounted the fenders and tailgate, as well as the tail lights. (the bed rails appear only partially painted, they are getting coated in bed lining when we redo the bed...again) 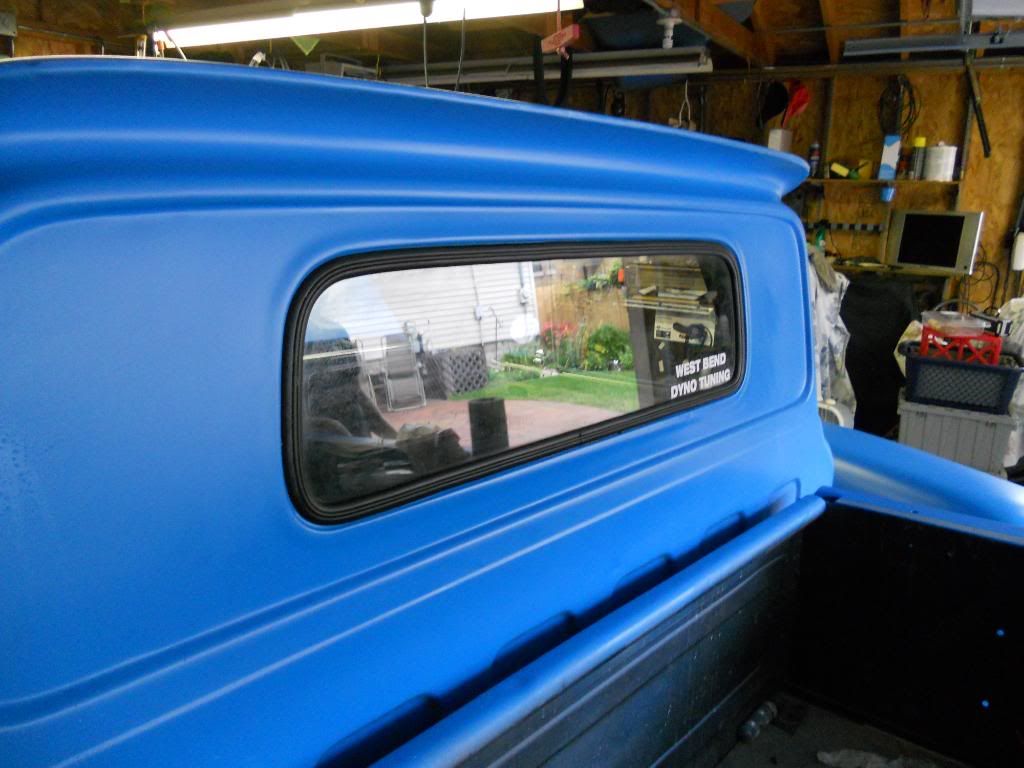 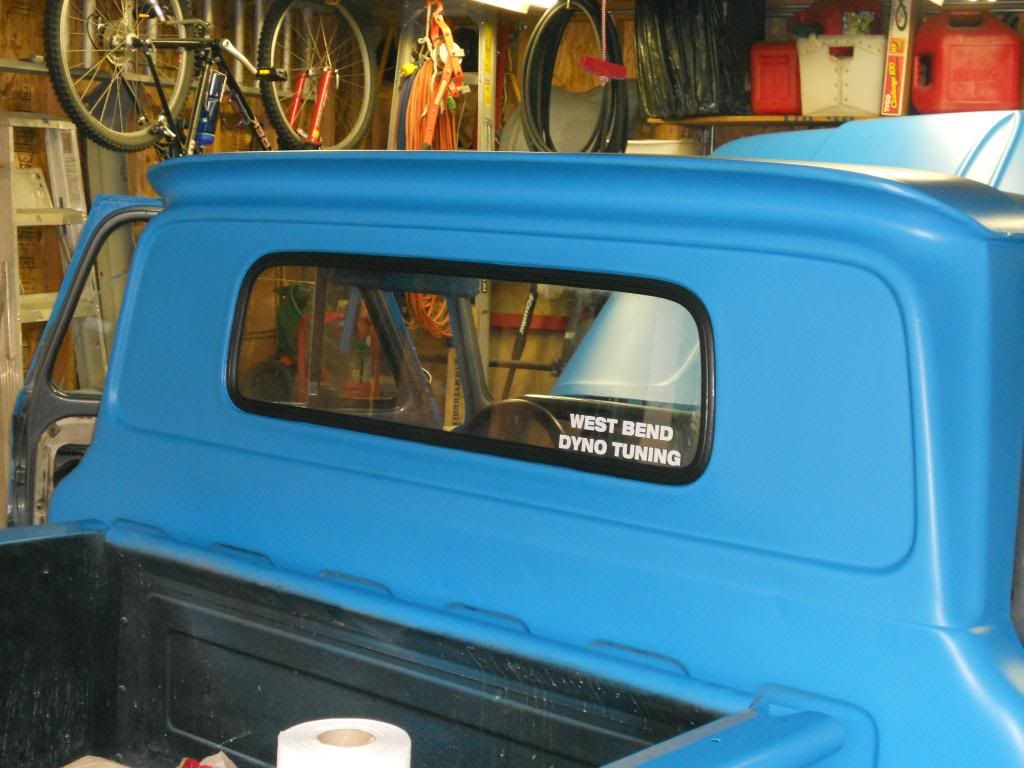 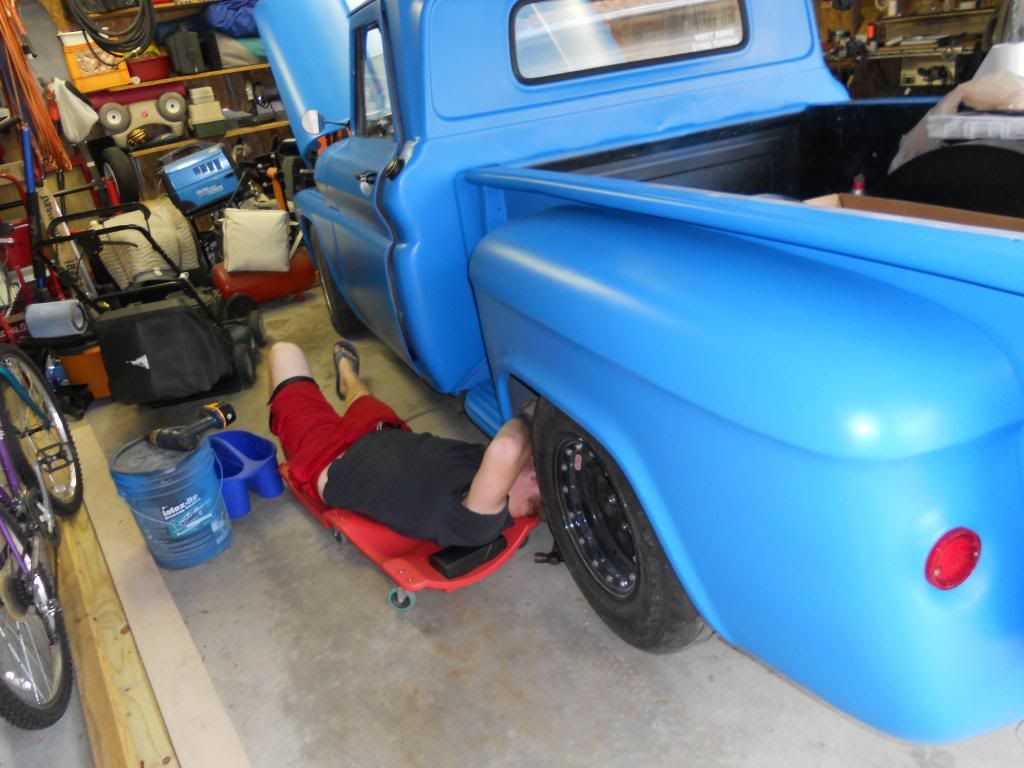 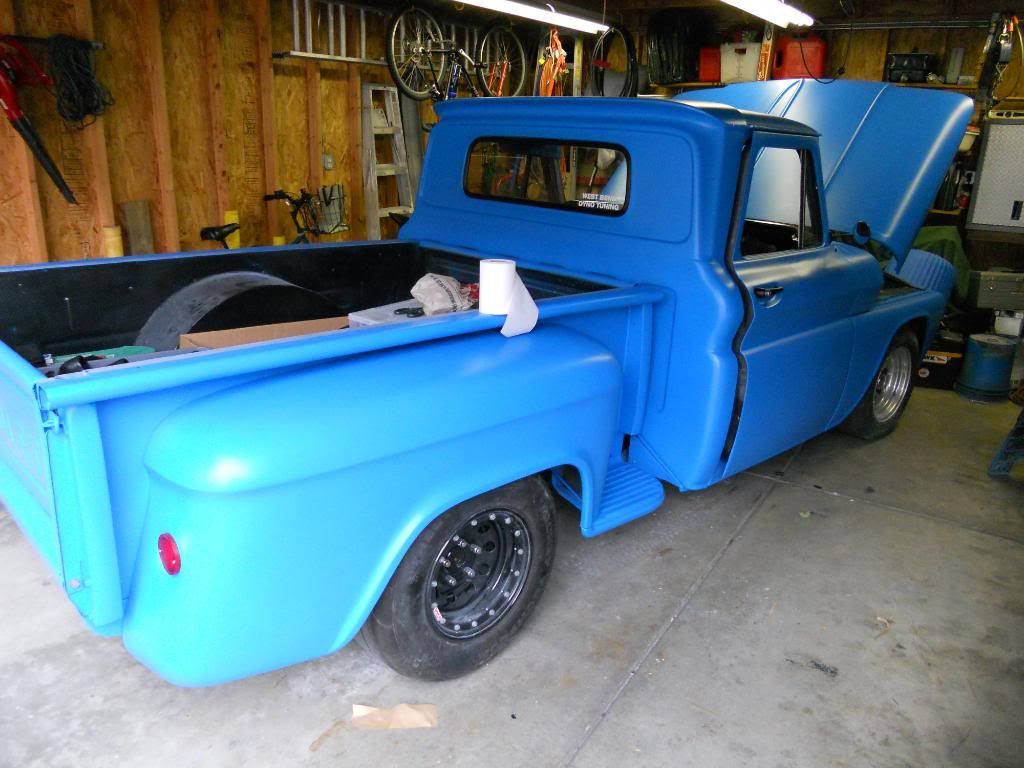 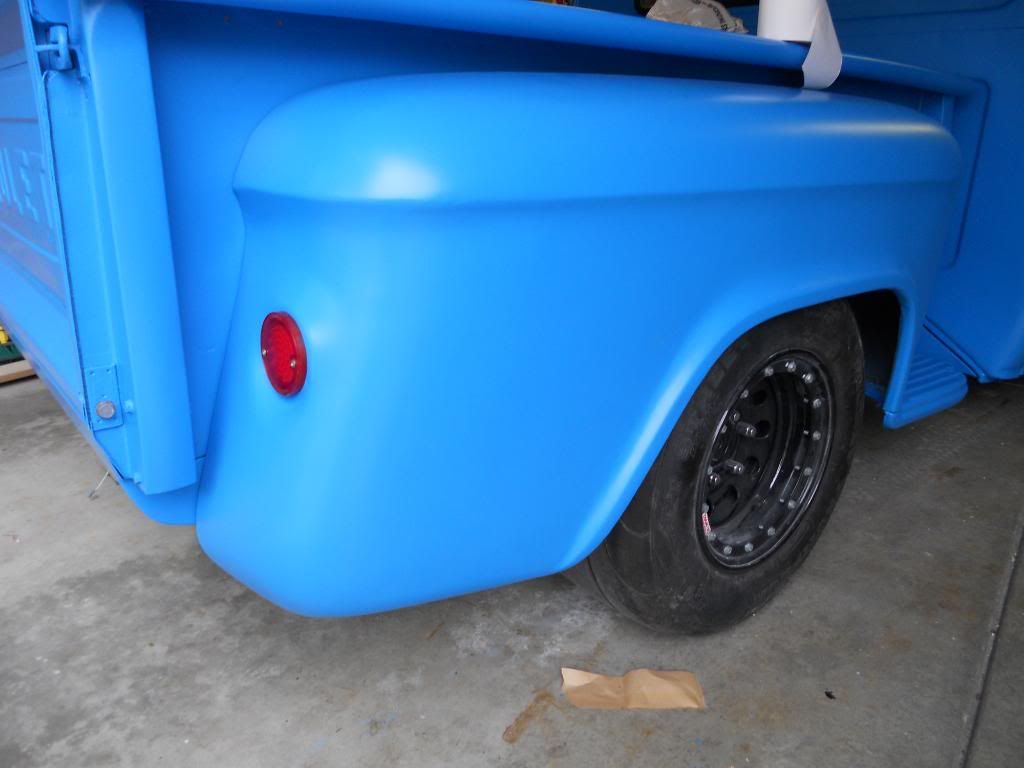 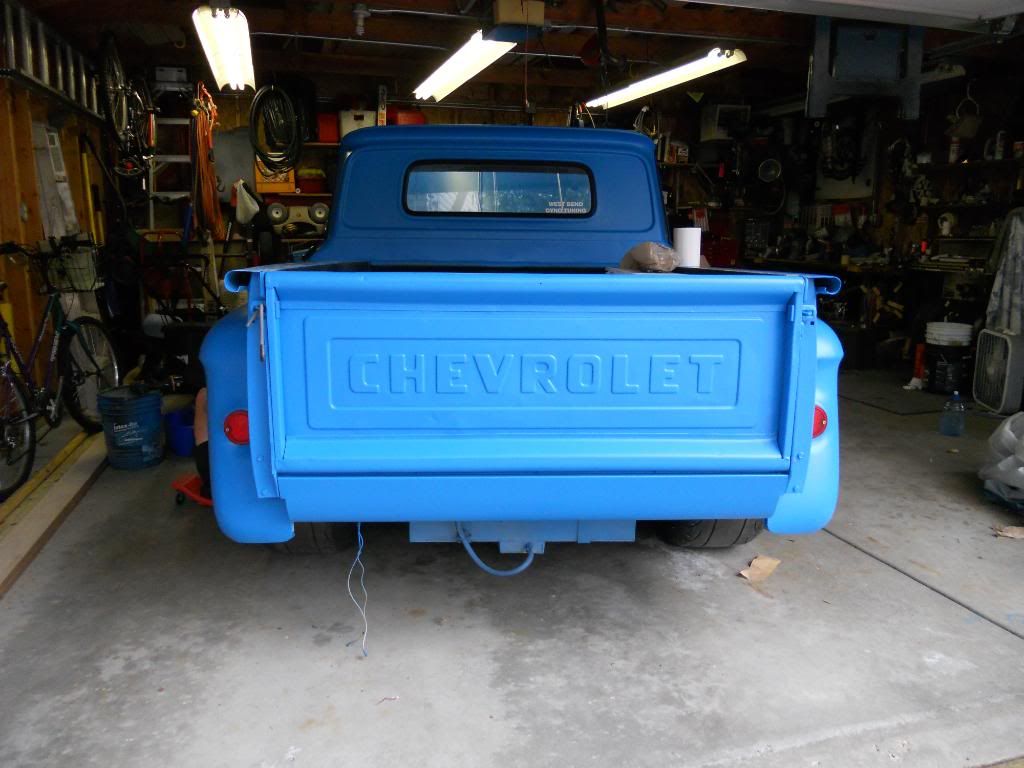
__________________
'66 Short Step / SD Tuned / Big Cam LQ4 / Backhalfed /Built 4l80e / #REBUILDEVERYTHING |
|
|
|
|
08-14-2012, 08:11 PM
|
#238 | |
|
But Found Her 25yrs Later!
Join Date: Oct 2010
Location: Oregon City, Oregon
Posts: 10,460
|
Re: Br3w City's Project omgwtfbbq
Blue & Black look so good together!
I like it! Quote:
__________________
I lost my 65 - Found it 25 years later: http://67-72chevytrucks.com/vboard/s...d.php?t=426650 66 C20 Service Truck: http://67-72chevytrucks.com/vboard/s...d.php?t=428035 |
|
|
|
|
|
08-15-2012, 02:19 PM
|
#239 |
|
Registered User
Join Date: Jan 2012
Location: Killeen, Tx
Posts: 1,347
|
Re: Br3w City's Project omgwtfbbq
Truck is looking good. I think I like that flat look!
__________________
John Z 1962 Chevy C10 Stepside 62 Barnfind My build tread: http://67-72chevytrucks.com/vboard/s...d.php?t=507513 |

|
|
|
08-15-2012, 04:33 PM
|
#240 |
|
Registered User
Join Date: Apr 2012
Location: Cambridge, Ontario, Canada
Posts: 1,771
|
Re: Br3w City's Project omgwtfbbq
I like the covered panel on the door bottom. PO on my truck cut 6x9 speaker holes there... rather poor job of it too. I like the board with the cut out covered with material that will more or less hide the fact that they are there. Thanks man!
__________________
Craigerrr My build thread, CRGRS 66 Winter Build: http://67-72chevytrucks.com/vboard/s...09#post5638709 |
|
|
|
|
08-15-2012, 11:24 PM
|
#241 |
|
Registered User
Join Date: Nov 2011
Location: las vegas nevada
Posts: 218
|
Re: Br3w City's Project omgwtfbbq
Man that will turn heads. I always tend to like low key black but that is an awesome color.
|
|
|
|
|
08-16-2012, 10:32 PM
|
#242 |
|
meowMEOWmeowMEOW
Join Date: Sep 2009
Location: MKE WI
Posts: 7,128
|
Re: Br3w City's Project omgwtfbbq
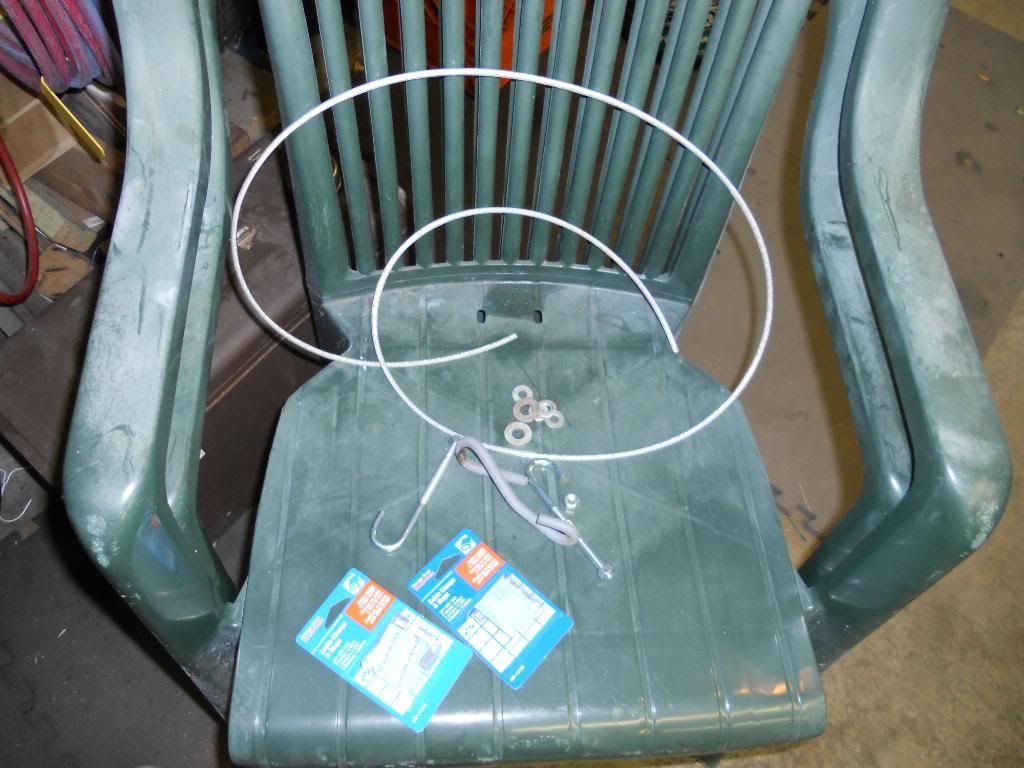
Decided to start making some home-brewed tailgate cables. Picked up some plasti-dip, and will be coating these tomorrow.
 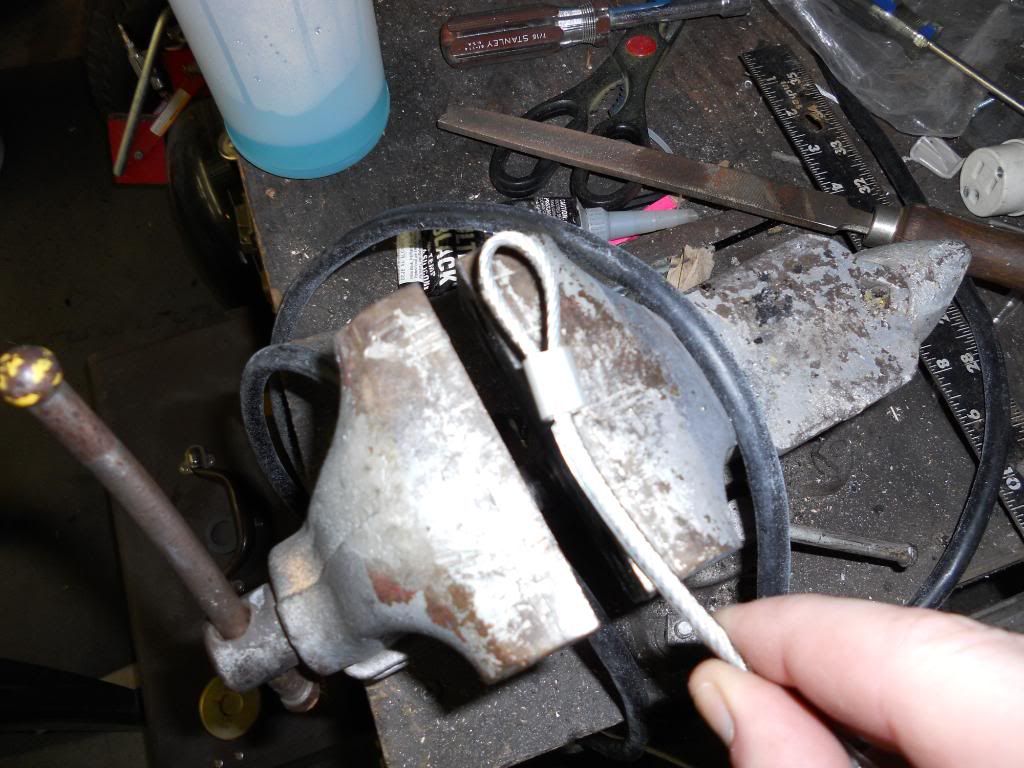 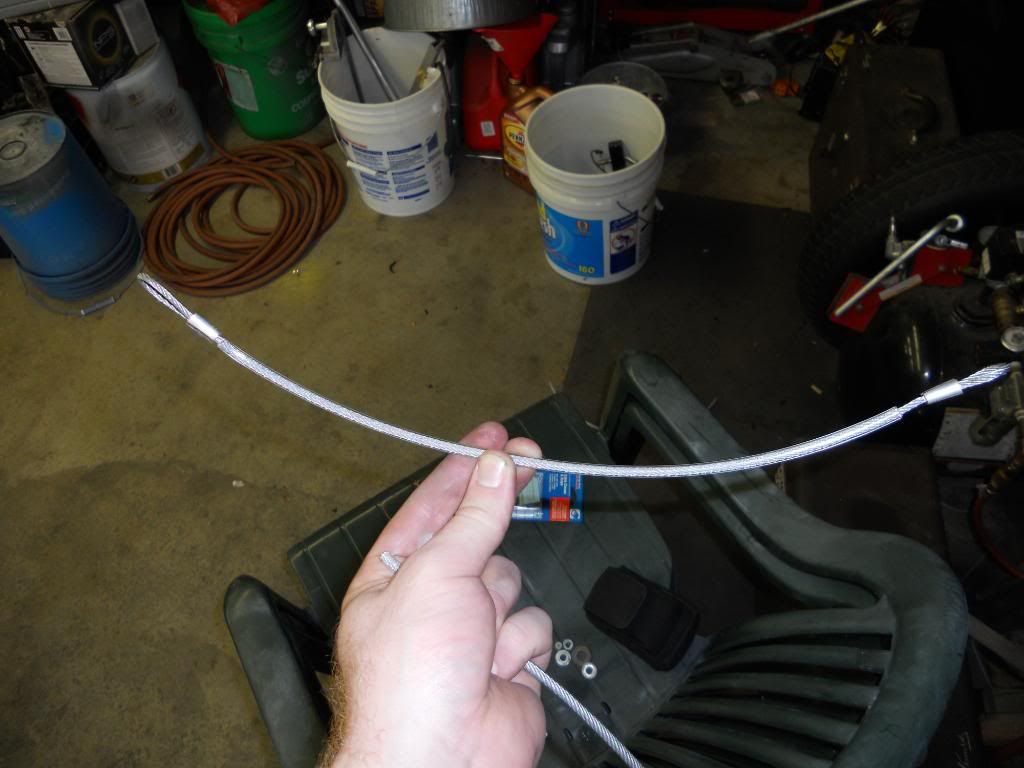    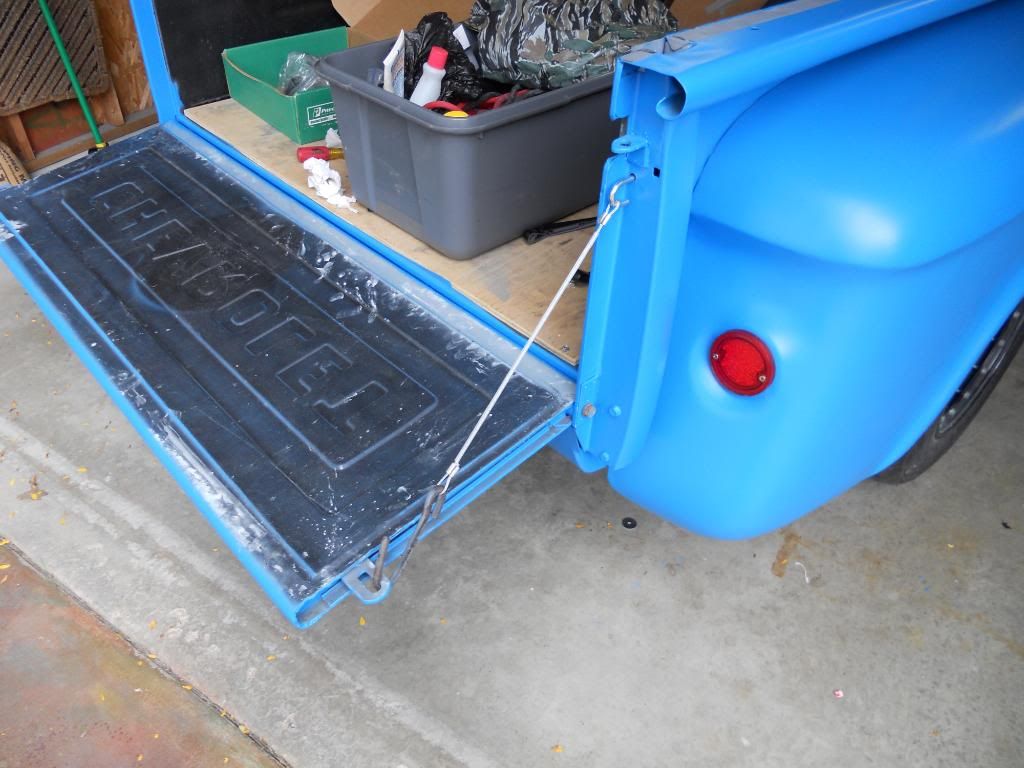 I DON'T KNOW WHY MY CAMERA MAKES EVERYTHING LOOK SO DIRRTY!! 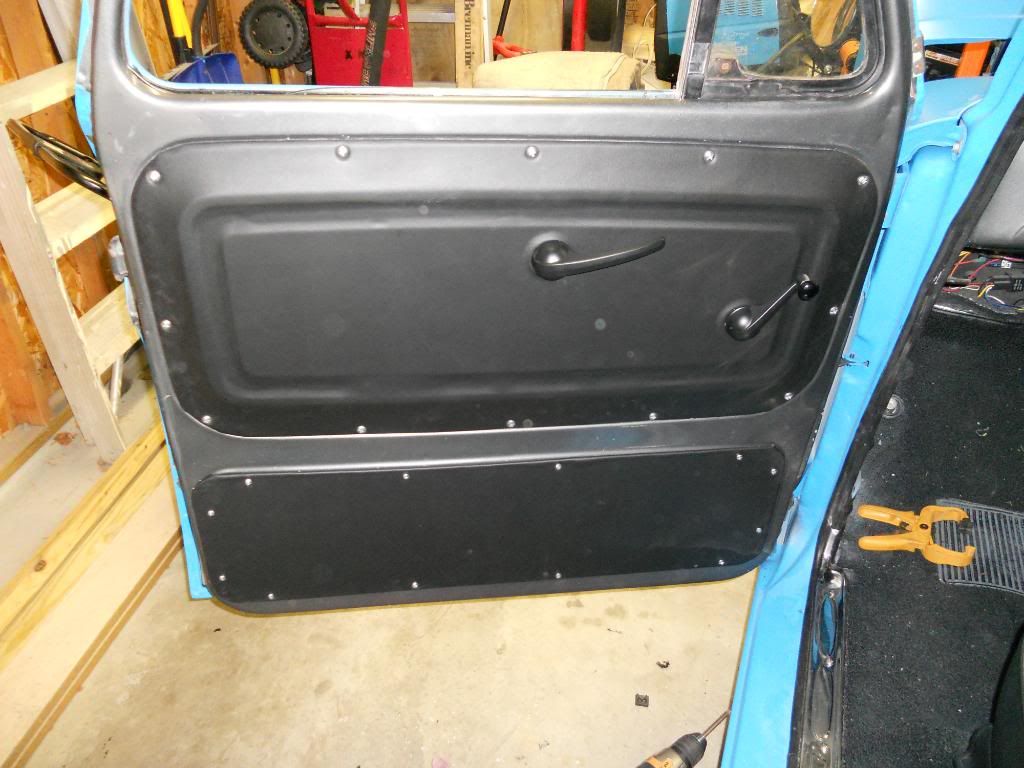
__________________
'66 Short Step / SD Tuned / Big Cam LQ4 / Backhalfed /Built 4l80e / #REBUILDEVERYTHING |
|
|
|
|
08-16-2012, 11:09 PM
|
#243 |
|
Truck and auto performance nut
Join Date: Feb 2007
Location: McKinney,Texas
Posts: 3,848
|
Re: Br3w City's Project omgwtfbbq
uh......check the lens?

__________________
Kurt - '68 GMC short step - NIB '09 LY6 6.0L crate motor w/mods, NIB '12 crate 4L85e w/billet 3k stall Circle D, 3.73 posi 12 bolt, DynaTech f-swap headers, 3/4 drop, handling mods, etc. - my toy '72 Chevy LWB C-10 Highlander - 350/350 ps/pb/tilt/ac - not original but close '06 Chevy TrailBlazerSS - LS2/4L70e - little black hot rod SUV - my DD '18 Kia Sorento - wife's econo-driver '95 Chevy S10 - reg cab shortbed, LS, 4.3, auto... my '68's powertrain and chassis build -links broken A surprise phase - carb to efi -links broken |
|
|
|
|
08-17-2012, 01:38 AM
|
#244 |
|
meowMEOWmeowMEOW
Join Date: Sep 2009
Location: MKE WI
Posts: 7,128
|
Re: Br3w City's Project omgwtfbbq
thats the thing, the lense looks clean. I think paint or dirt got INSIDE of it...and I tried to take it apart to clean once to no avail. It'll get the DSLR treatment once assembly is done and its all cleaned up, but I'd really like to have my camera work normally.
__________________
'66 Short Step / SD Tuned / Big Cam LQ4 / Backhalfed /Built 4l80e / #REBUILDEVERYTHING |
|
|
|
|
08-17-2012, 12:35 PM
|
#245 |
|
Registered User
Join Date: Jan 2012
Location: Killeen, Tx
Posts: 1,347
|
Re: Br3w City's Project omgwtfbbq
I am getting ready to spry mine with Hot rod flatz. How do you take care of flat paint? I have never had it before. Yours came out good.
__________________
John Z 1962 Chevy C10 Stepside 62 Barnfind My build tread: http://67-72chevytrucks.com/vboard/s...d.php?t=507513 |
|
|
|
|
08-17-2012, 04:51 PM
|
#246 |
|
meowMEOWmeowMEOW
Join Date: Sep 2009
Location: MKE WI
Posts: 7,128
|
Re: Br3w City's Project omgwtfbbq
hot rod flatz paint itself will have different care, as the only flat thing on my paintjob is the clear.
I don't know if HRF has a clear available, if so the care may be similar. You can't buff, polish or color sand it, as the texture is only really on the top layer of the paint. Wash it with wax-free soap and a good soft towel. There are some high-end washes and care products for high-end cars (bmw ice paint, audi flat) but all you really need is some Dawn. You CAN wax it, but it wil create a "sheen" that might look weird on black, but looks ok on colors. Once the wax dulls tho, you have to wash with wax removing soap, then RE-wax if you want. Its generally not recommended to layer wax on a flat car. The tendency is also to buff with wax, which will hurt the coating.
__________________
'66 Short Step / SD Tuned / Big Cam LQ4 / Backhalfed /Built 4l80e / #REBUILDEVERYTHING |
|
|
|
|
08-18-2012, 02:29 AM
|
#247 |
|
meowMEOWmeowMEOW
Join Date: Sep 2009
Location: MKE WI
Posts: 7,128
|
Re: Br3w City's Project omgwtfbbq
Had random stuff to do today, as yet again I came just a few connectors/screws/bolts short of getting more done.
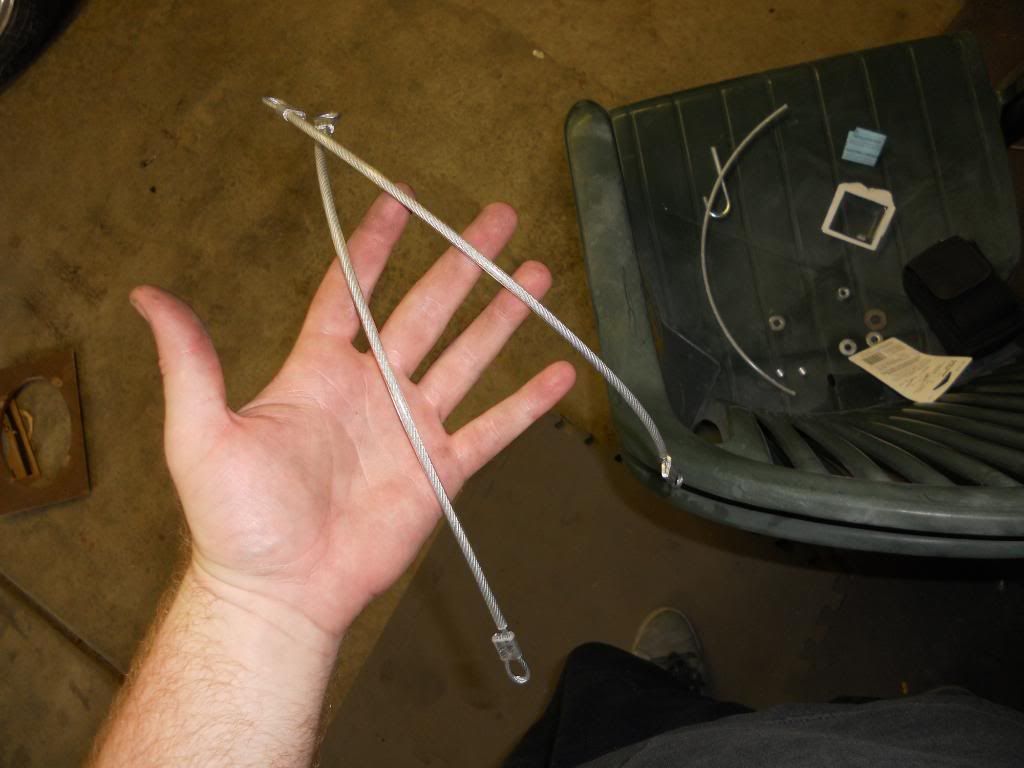
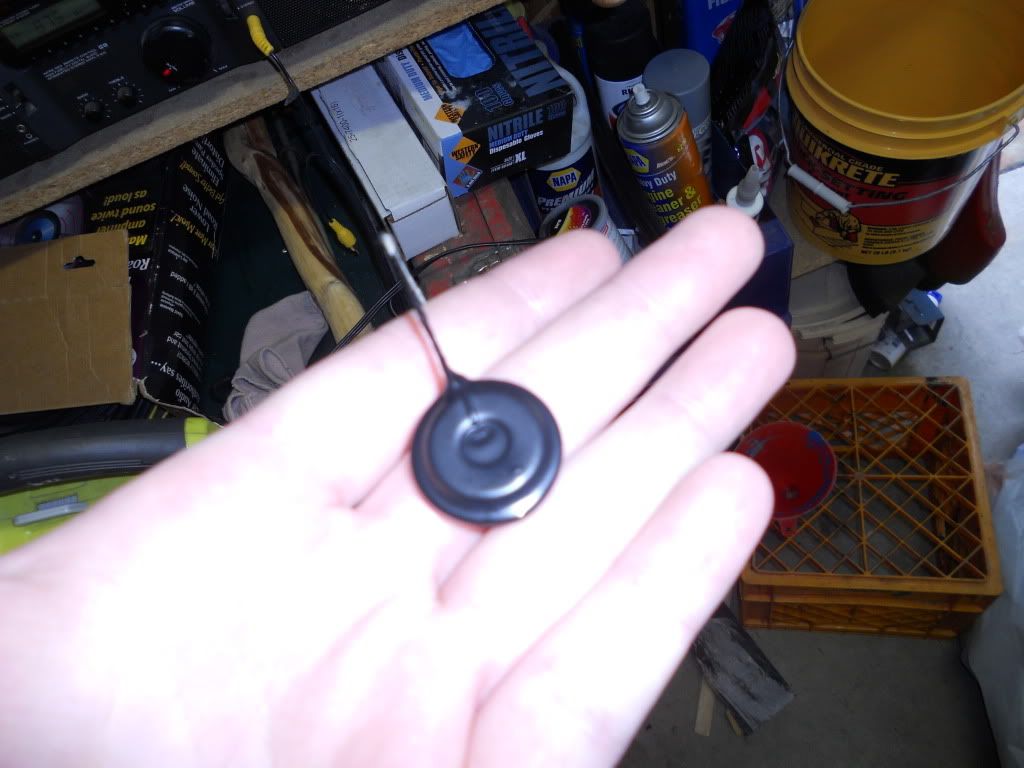
I did do some misc work tho. I wanted to make a custom horn button for my grant wheel. I've already designed it in photoshop, but my only option is to print it or make it like a sticker. Instead I wanted a "thick" button, with the epoxy top much like the vintage horn buttons of years past. The Grant button is 1.55", and I had a little candle holder in the basement that came suuuper close. Stirred up some craft epoxy (high gloss, doesn't dry opaque) and poured it in with a little release agent rubbed on the sides. Hopefully, I'll be able to pull (or more likely break the glass) around it, remove my new bubble top, and buff it clean. Its only an experiment   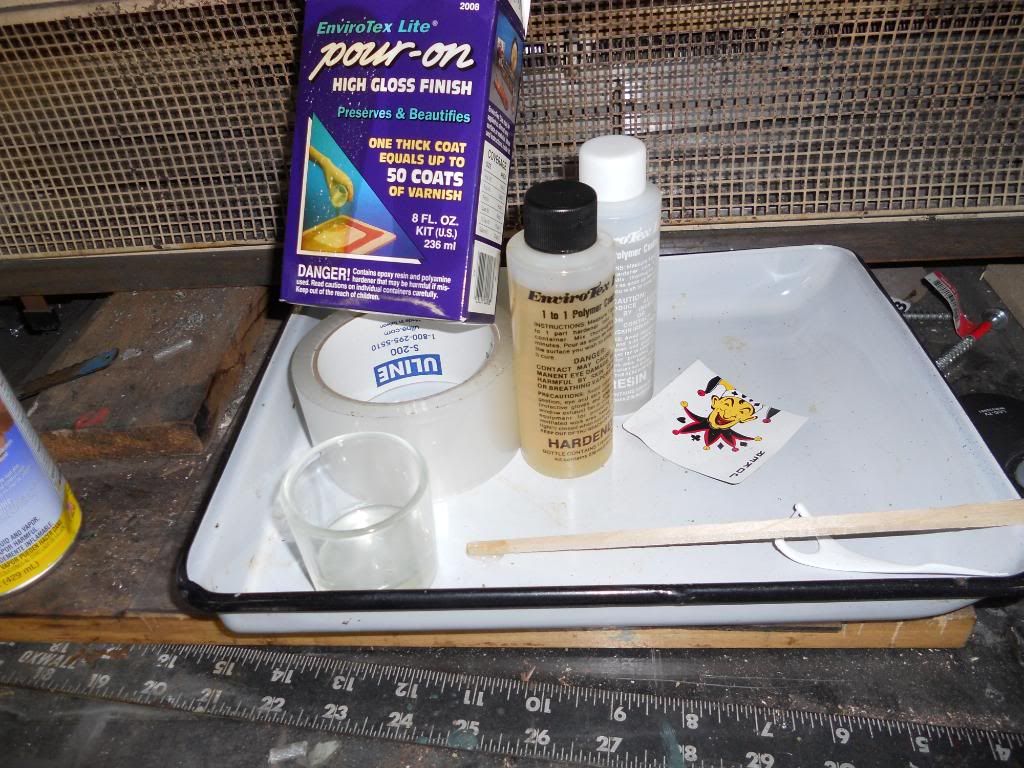 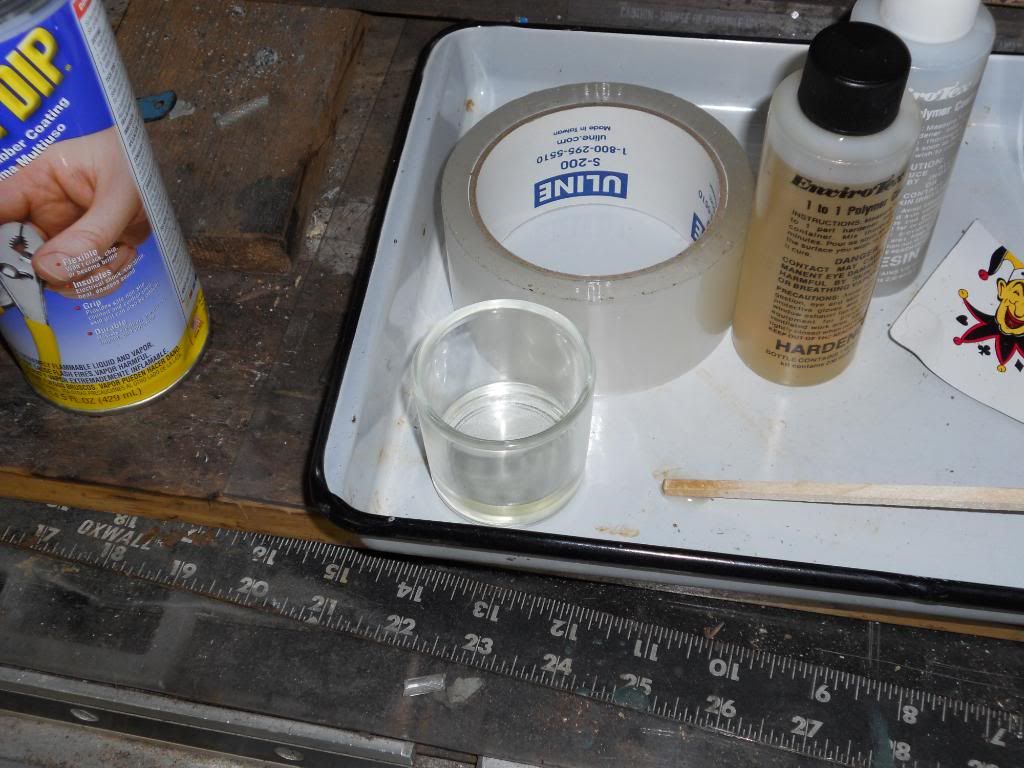 Then I picked up some Plasti-Dip. This stuff is fun, and was the perfect solution to help finish bring together my new tailgate hardware. I dipped the ends in it (2 coats, ended up being thicker than I expected), then let them dry out. These will be re assembled and prevent vibration and scratching. I included a video of a dip below as well. 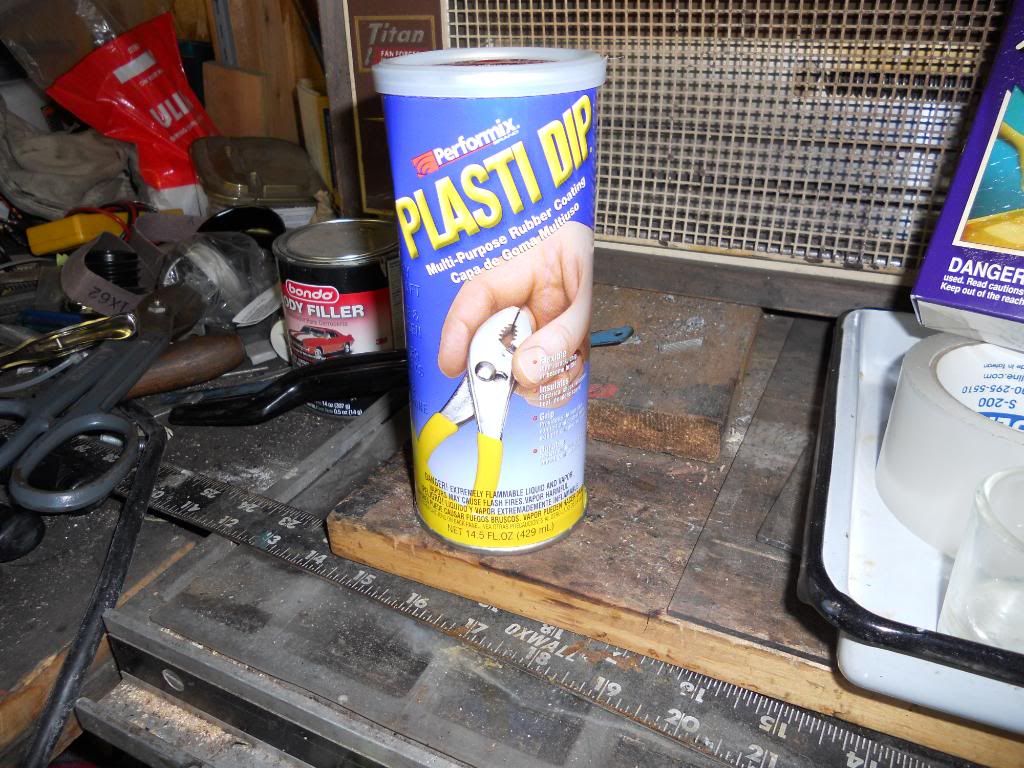 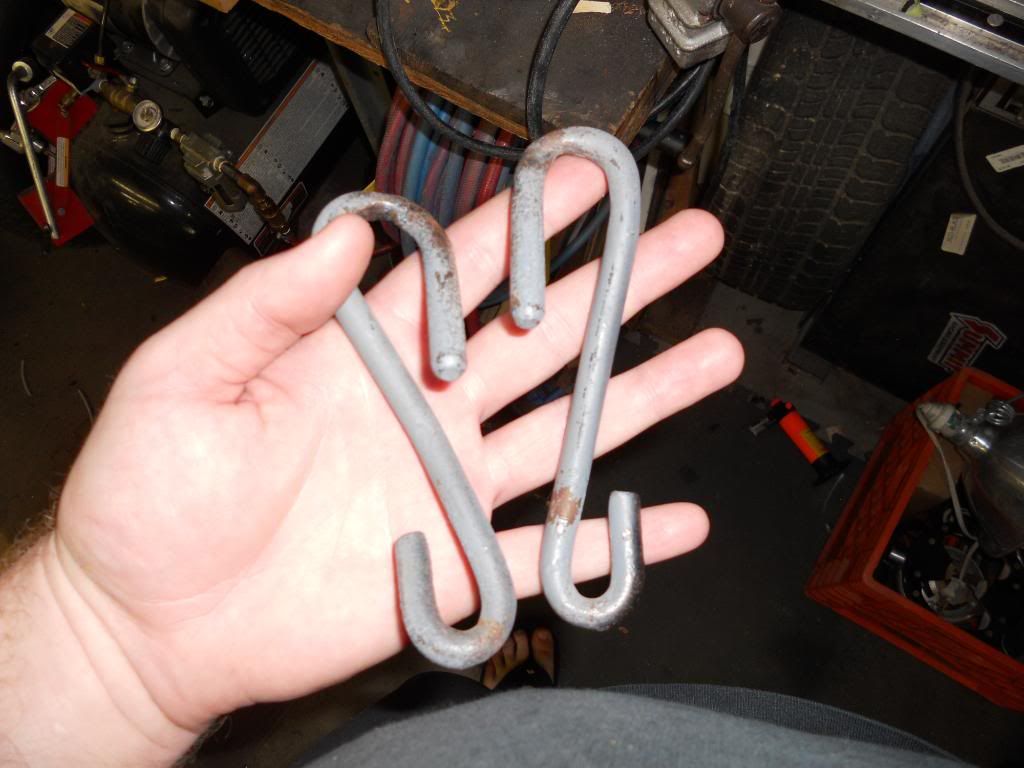 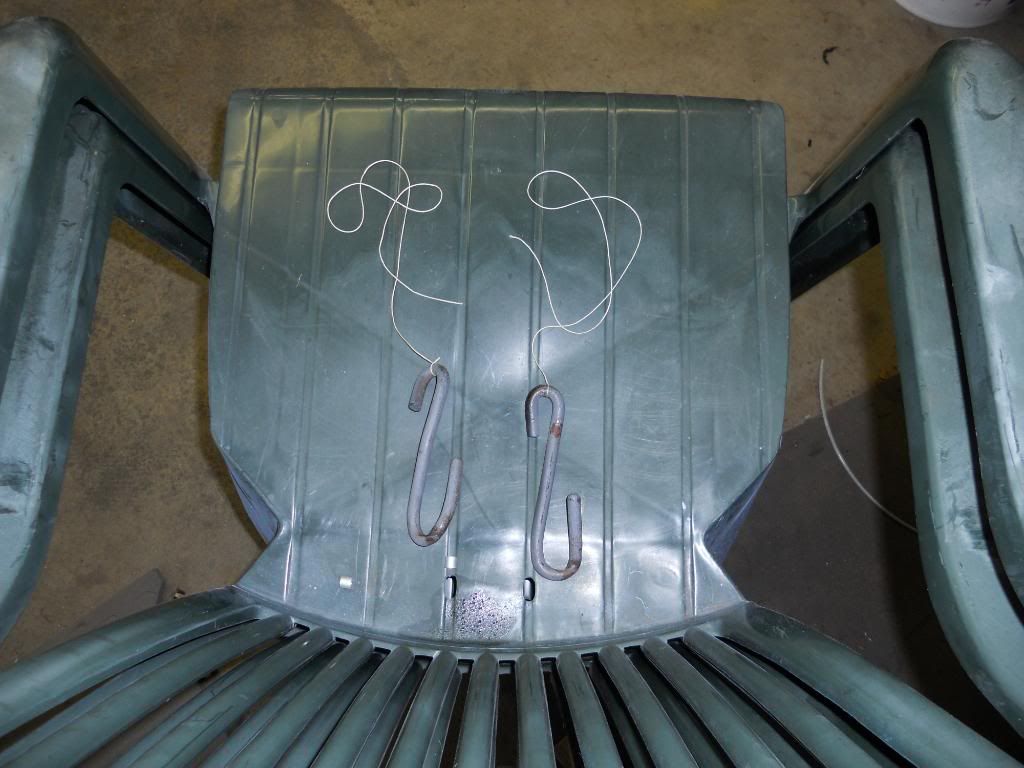 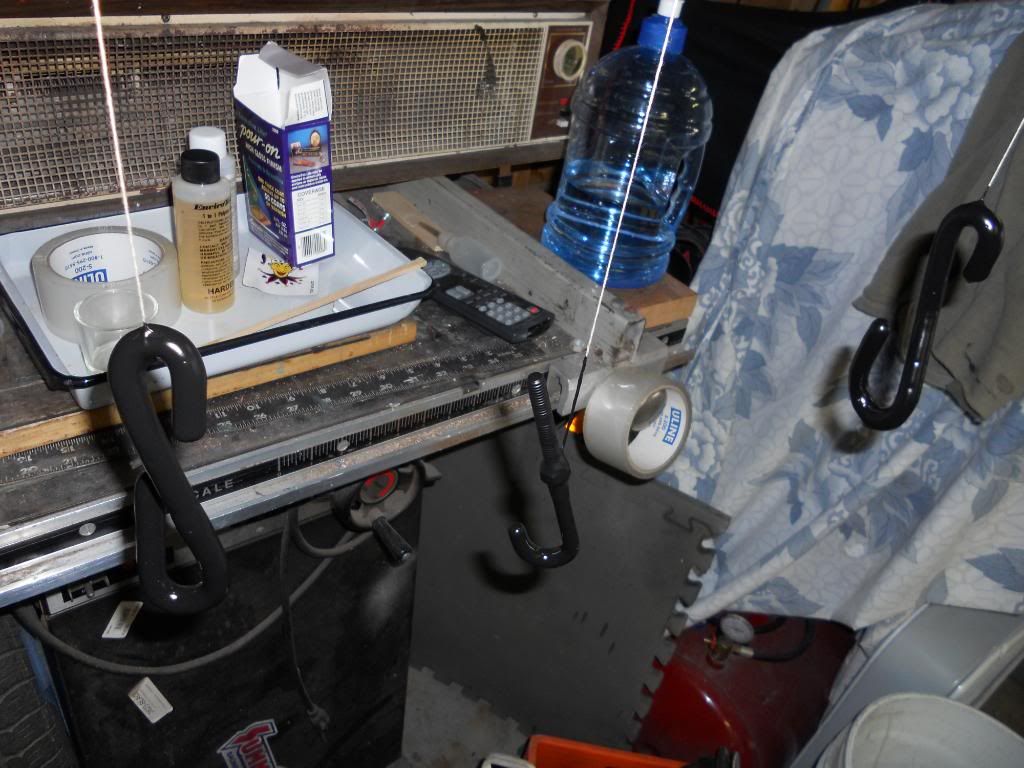 **Video** 
__________________
'66 Short Step / SD Tuned / Big Cam LQ4 / Backhalfed /Built 4l80e / #REBUILDEVERYTHING |
|
|
|
|
08-19-2012, 08:13 PM
|
#248 |
|
meowMEOWmeowMEOW
Join Date: Sep 2009
Location: MKE WI
Posts: 7,128
|
Re: Br3w City's Project omgwtfbbq
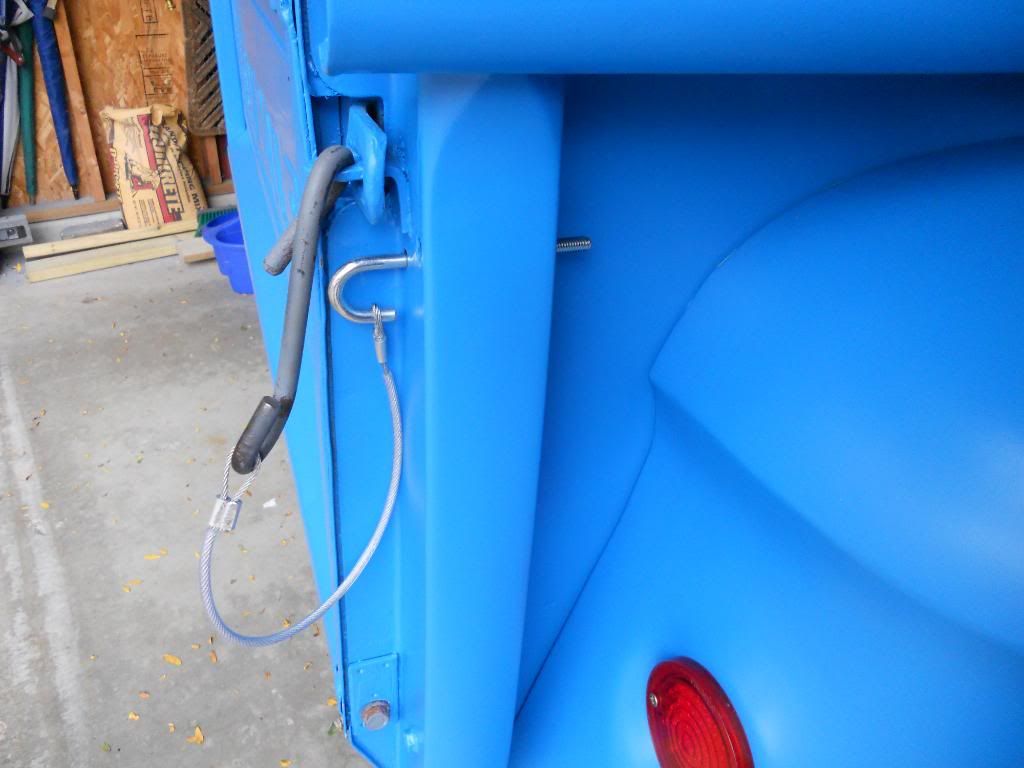
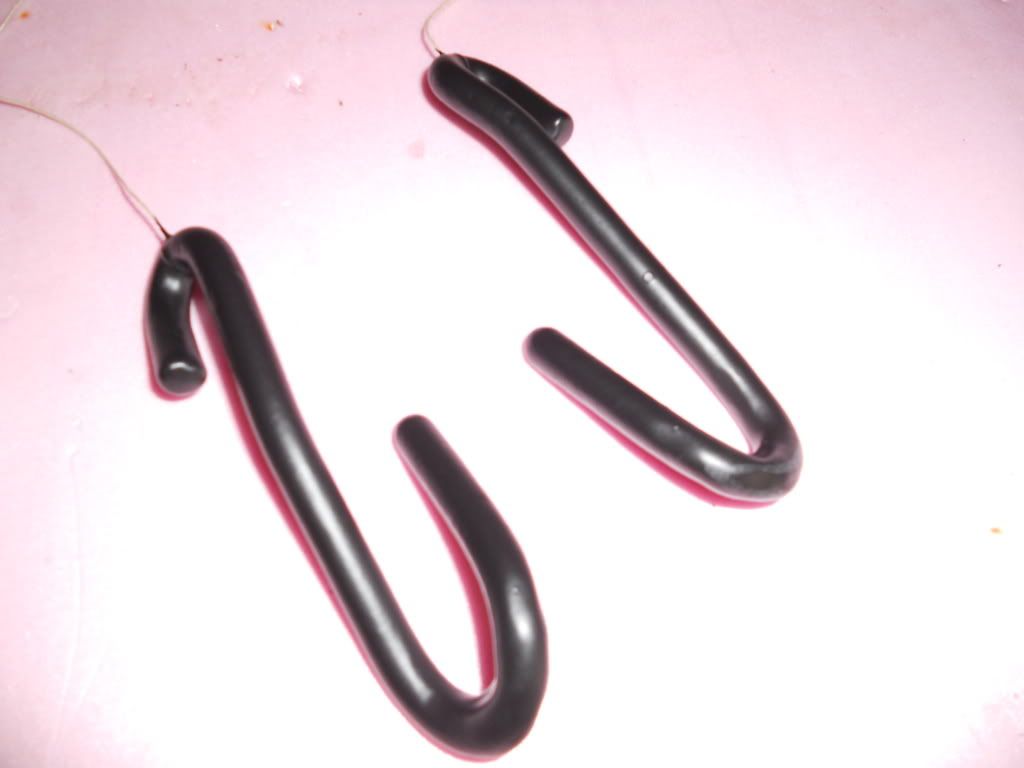
The dipped hooks, washer stacks, and the installed product! (I'm going to clip off the extra thread length, and put a black bolt cap over it)
  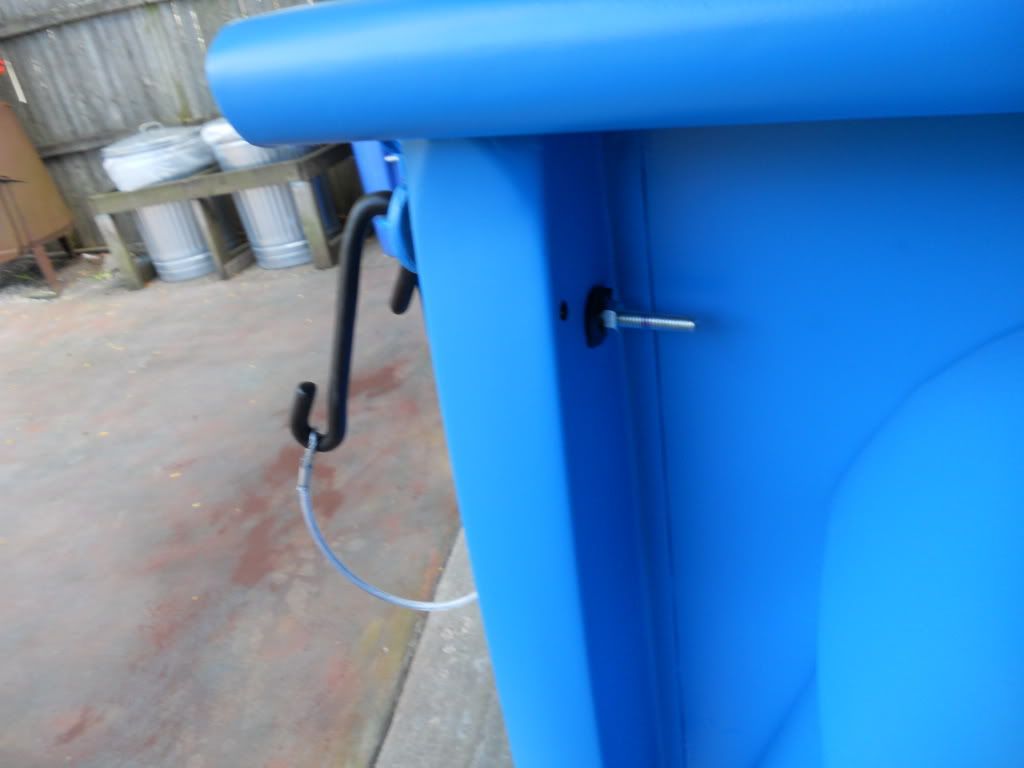 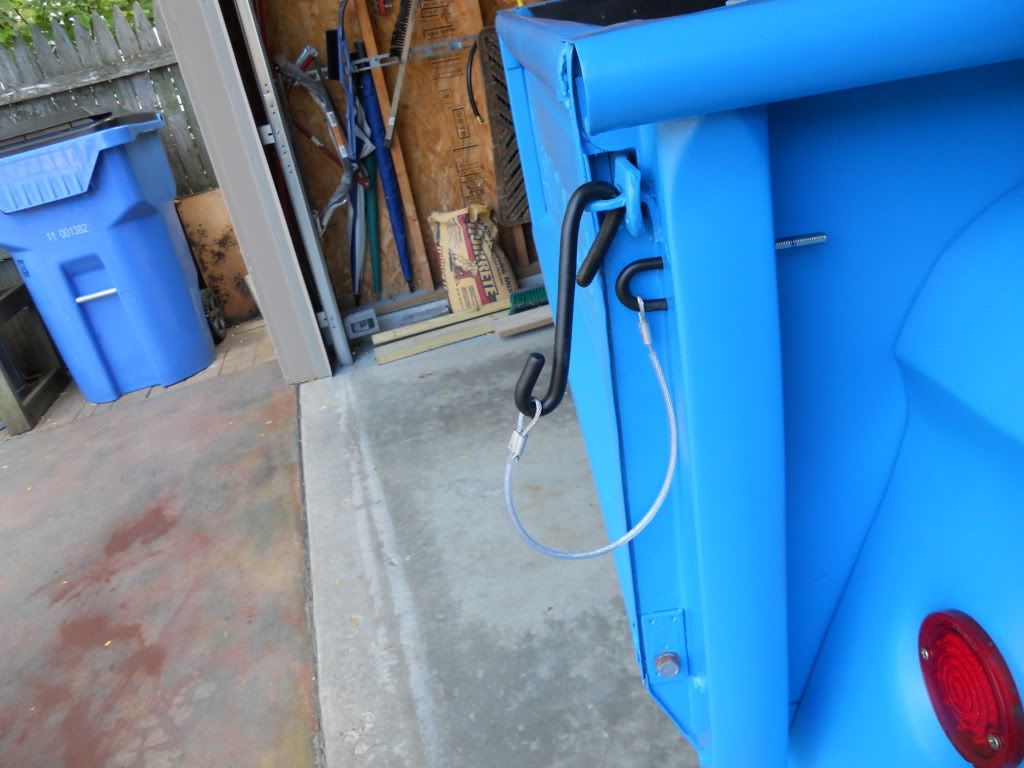
__________________
'66 Short Step / SD Tuned / Big Cam LQ4 / Backhalfed /Built 4l80e / #REBUILDEVERYTHING |
|
|
|
|
08-19-2012, 09:03 PM
|
#249 |
|
One day...
Join Date: Apr 2008
Location: Tuttle, Ok
Posts: 9,240
|
Re: Br3w City's Project omgwtfbbq
Very cool! i like it.
|
|
|
|
|
08-20-2012, 07:49 PM
|
#250 |
|
meowMEOWmeowMEOW
Join Date: Sep 2009
Location: MKE WI
Posts: 7,128
|
Re: Br3w City's Project omgwtfbbq
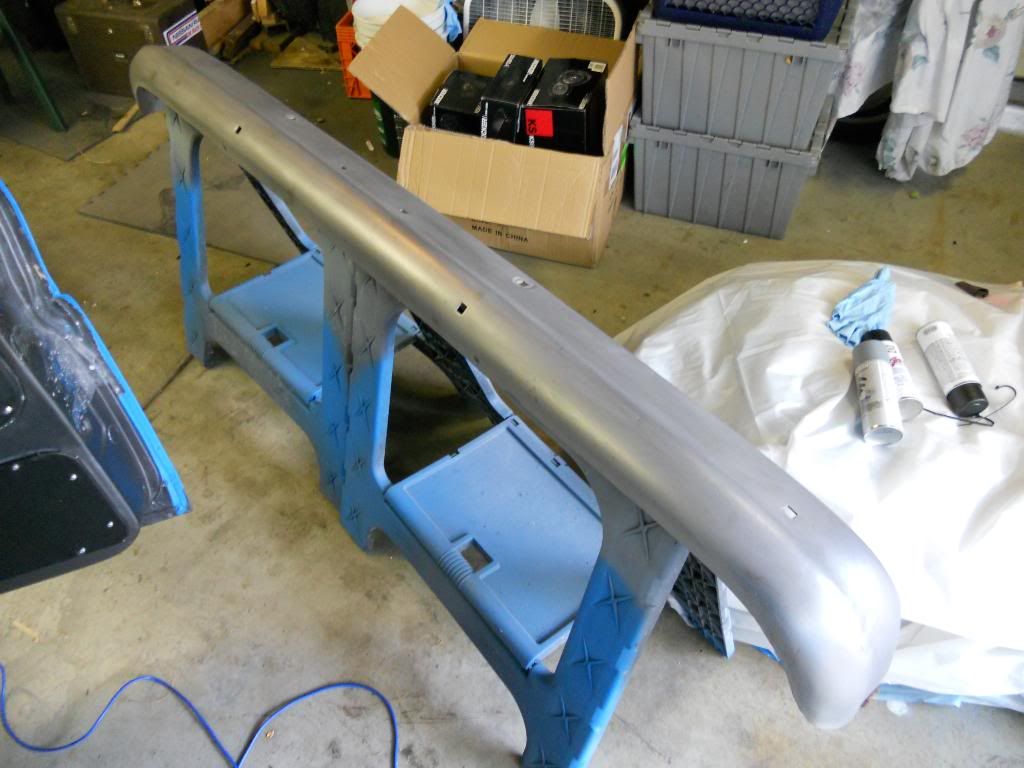
Scuffed up my front bumper to remove a little oxidation from sitting after getting blasted, then started in with the sealer and black topcoat.
  Time for the door speakers to go in and completes work on the door. Got lucky enough to get some plenum-rated speaker wire for free, and as a bonus, its blue 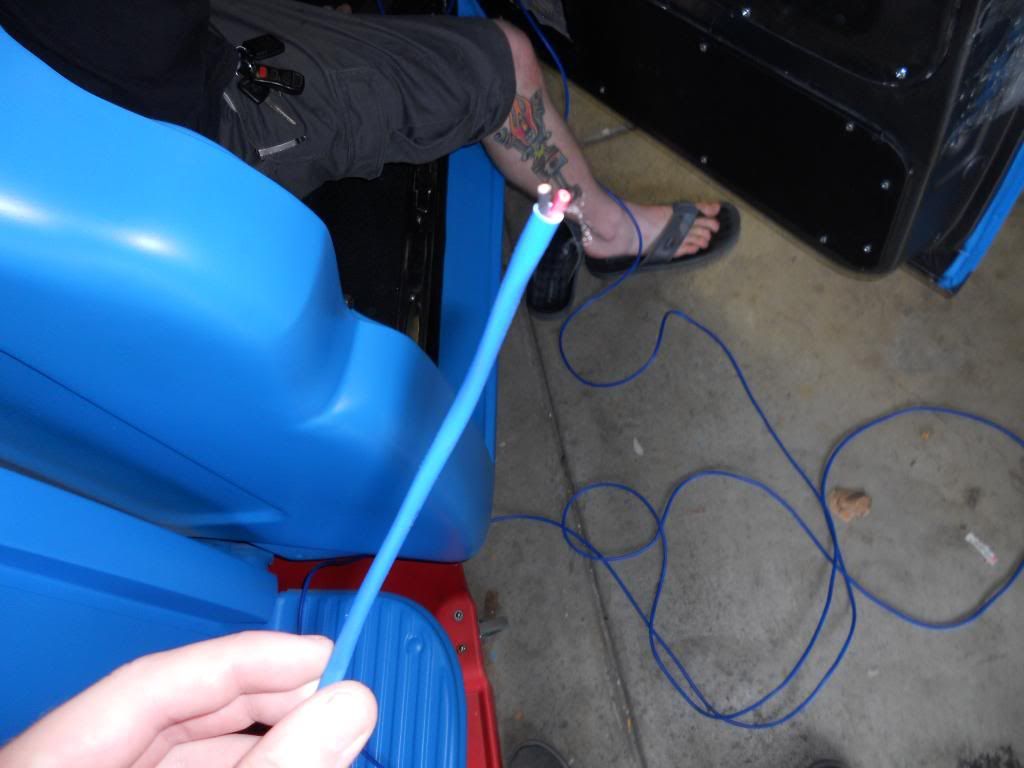 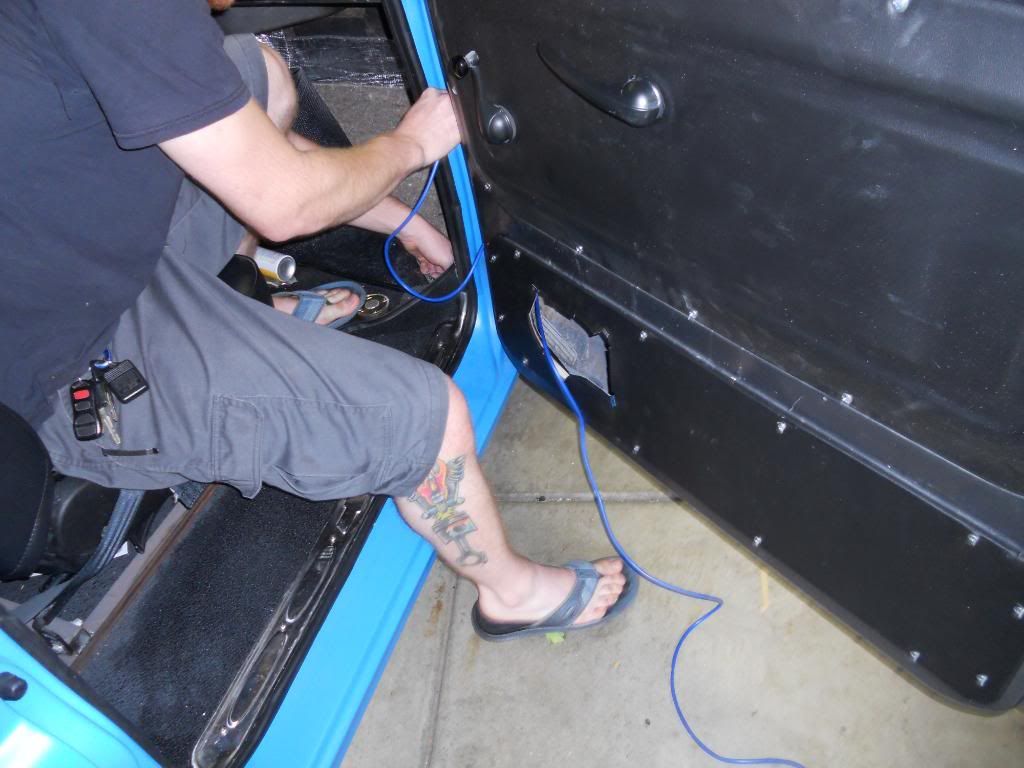 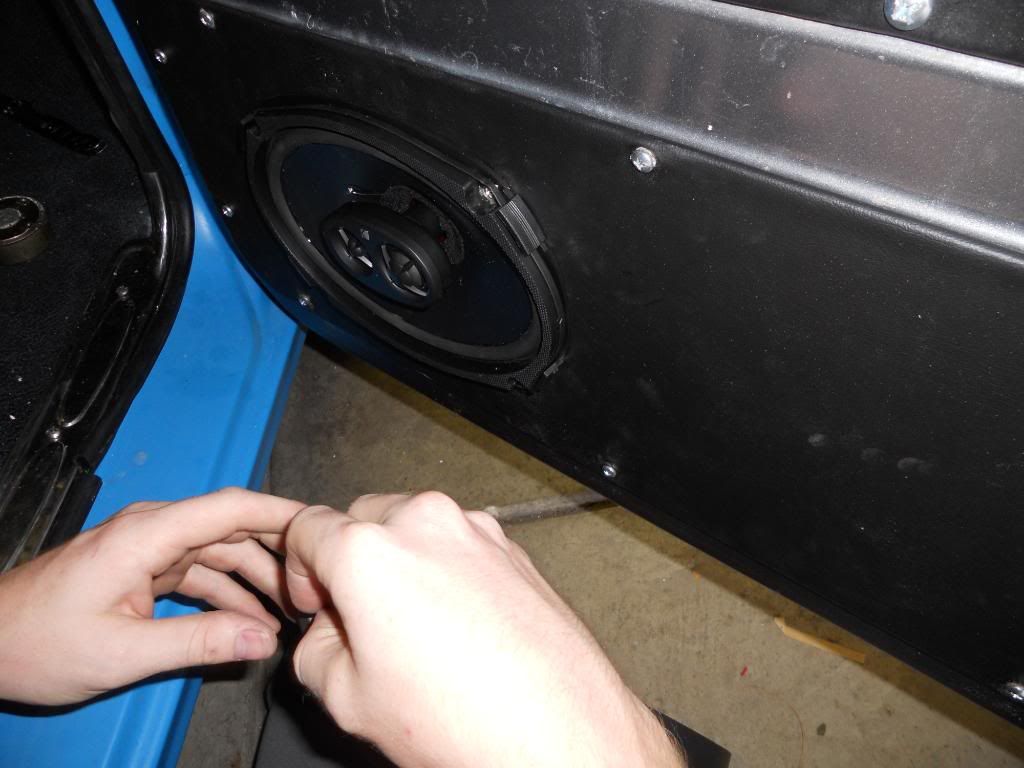 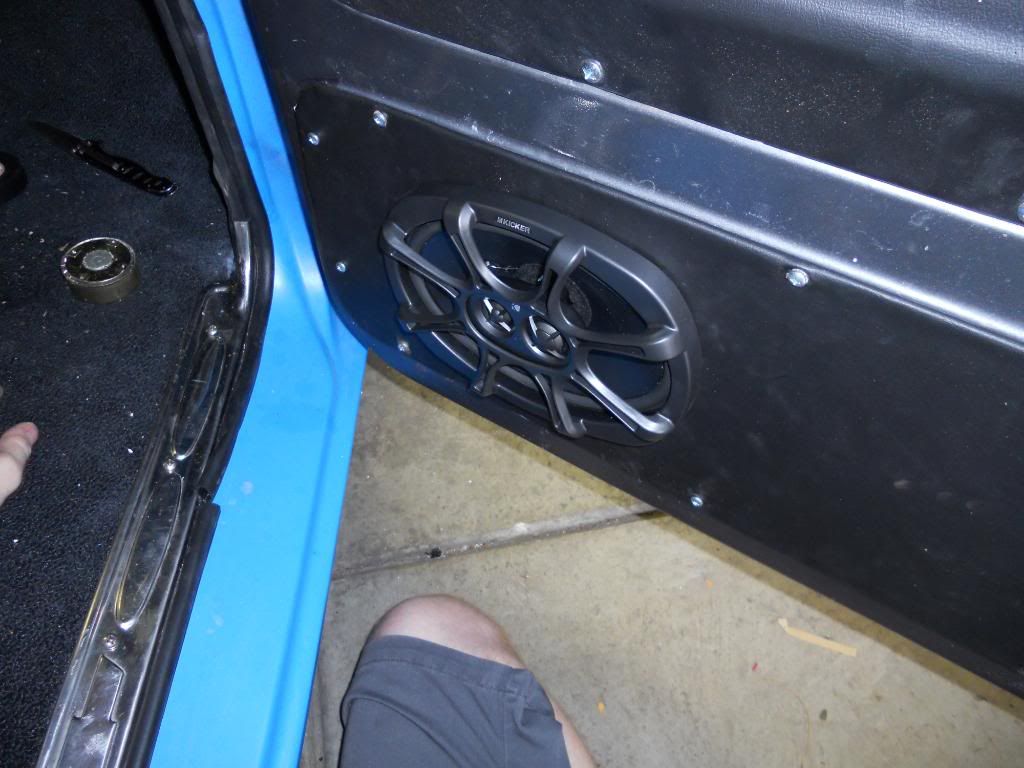 Testing them off the head unit only, there is a MASSIVE improvement. The new door panels and lower panels deaden the sounds MUCH better, and the new carpet etc helps keep it all from rattling around. Considering it was hu power only, windows down, no windshield in and door 6x9's only, I was massively impressed with the sound. Once the console and 6.5 components are in place with the amp, I will have tunes loud enough to hear clearly over my rediculous exhaust note.
__________________
'66 Short Step / SD Tuned / Big Cam LQ4 / Backhalfed /Built 4l80e / #REBUILDEVERYTHING |
|
|
|
 |
| Bookmarks |
| Thread Tools | |
| Display Modes | |
|
|


 \\ MY YOUTUBE CHANNEL


 Linear Mode

