
|
 03-28-2019, 09:33 PM
|
#126 |
|
Registered User
Join Date: Nov 2013
Location: Show Low, Arizona
Posts: 759
|
Re: 49 GMC Five Window
Jadema - thanks for checking in and lending some technical expertise to the delima. (was a controls engineer for an aerospace company at one point in my career too)
To your point - when the airbag compresses there will be a transient pressure spike. It will be interesting to see if the regulator follows it and what rate it will release pressure then try to refill it. If it does respond, I'm wondering what the hysteresis is in the regulator and if it will find the same pressure set point. The check valve seems like it will add a bit of complexity to the system, as you've described it. I'm wondering if an orifice in the line might be enough to damp the pressure pulse to the regulator and keep it from reacting. The big Class A motorhome folks with airbag suspensions sometimes use an auxiliary air tank mounted near the bag to increase the volume (and decrease the spring rate) and decrease the amplitude of pressure spikes to smooth out the ride. They call them a 'ping' tank and typically they're about a gallon in volume. This might tame the regulator response and give me a little better ride too. It is fun to speculate, but I'm going to do what JoeDoh says and 'drive it and see what happens' (my first boss had a sign in his office that said 'there comes a time in every project when you have to fire the engineers and make something' - I guess it's time to stop thinking and try it!) Stalk less and post more! Thanks for chiming in. Phil |

|

|
|
03-28-2019, 09:51 PM
|
#127 | |
|
Senior Member
 Join Date: May 2007
Location: Doodah Kansas
Posts: 7,747
|
Re: 49 GMC Five Window
Quote:
 my favorite way to say it is "engineers will argue for a week about the potential outcome of a five minute test" phoenix aerospace? maybe Honeywell?
__________________
the mass of men live lives of quiet desperation if there is a problem, I can have it. new project WAYNE http://67-72chevytrucks.com/vboard/s...d.php?t=844393 |
|
|
|
|
|
03-28-2019, 10:01 PM
|
#128 | |
|
Registered User
Join Date: Oct 2018
Location: Hudsonville
Posts: 11
|
Re: 49 GMC Five Window
Quote:
and to be fair, I completely agree that there comes a time that the rubber has to meet the road. |
|
|
|
|
|
03-29-2019, 11:40 AM
|
#129 |
|
Registered User
Join Date: Nov 2013
Location: Show Low, Arizona
Posts: 759
|
Re: 49 GMC Five Window
I picked one of the larger Viair compressors with a high duty cycle, but lots of airbag folks run two, so that is always an option.
Here is the accumulator tanks for airbag systems I had in mind to try if the compressor runs too much or ride is choppy- https://pacbrake.com/product/hp10302...ator-tank-kit/ |
|
|
|
|
03-29-2019, 02:23 PM
|
#130 |
|
Registered User
Join Date: Dec 2013
Location: Purmerend, Netherlands
Posts: 1,657
|
Re: 49 GMC Five Window
Hi there!
I just came across your build  Took some time to read everything through. Craftmanship and creativity is awesome, cant believe I didnt see this before... I follow along for the rest of the build!
__________________
Cheers!! Kees. 1959 Chevy Fleetside Longbed My build: http://67-72chevytrucks.com/vboard/s...d.php?t=643426 Kool Guyz CC Instagram: _King_Kustom_ |
|
|
|
|
05-19-2019, 10:42 PM
|
#131 |
|
Registered User
Join Date: Nov 2013
Location: Show Low, Arizona
Posts: 759
|
Re: 49 GMC Five Window
Vacation for this year is behind me so it is time to hunker down for the summer with this truck and see if I can get it on the road. Here's a little progress update
Installed the tailgate with some stainless carriage bolts that I modified to take the 'square' off underneath the head (no lathe, so I used a die grinder and chucked them up in a drill and ground the head square to the shank) I welded a bolt and a nut to a steel rod to use as a polishing fixture and took them over to Wyatt's to polish. There's polished stainless acorn nuts on the other side to hold the gate on (trimed the bolt lengths to get the acorns to fit right) 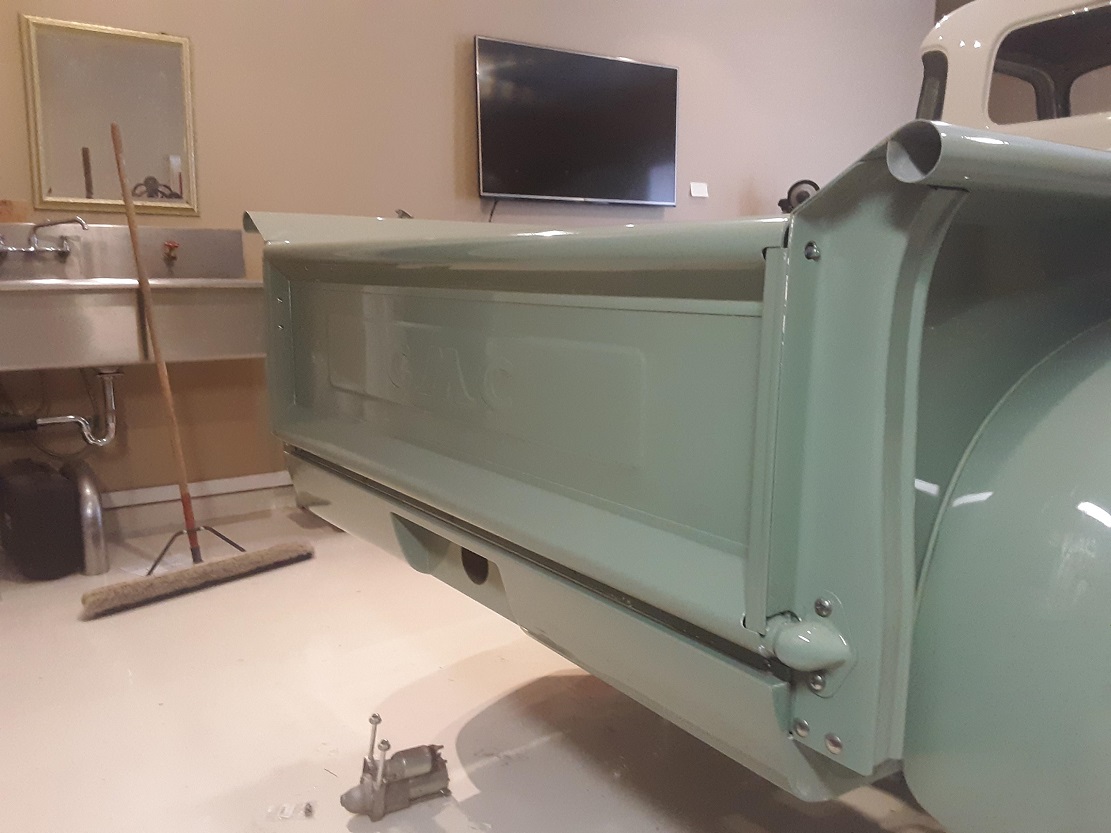 I opted for the sliding pins to close the tailgate instead of chains. I've lost the grommets that go in the receiving holes in the bedside and need to order more from MarK 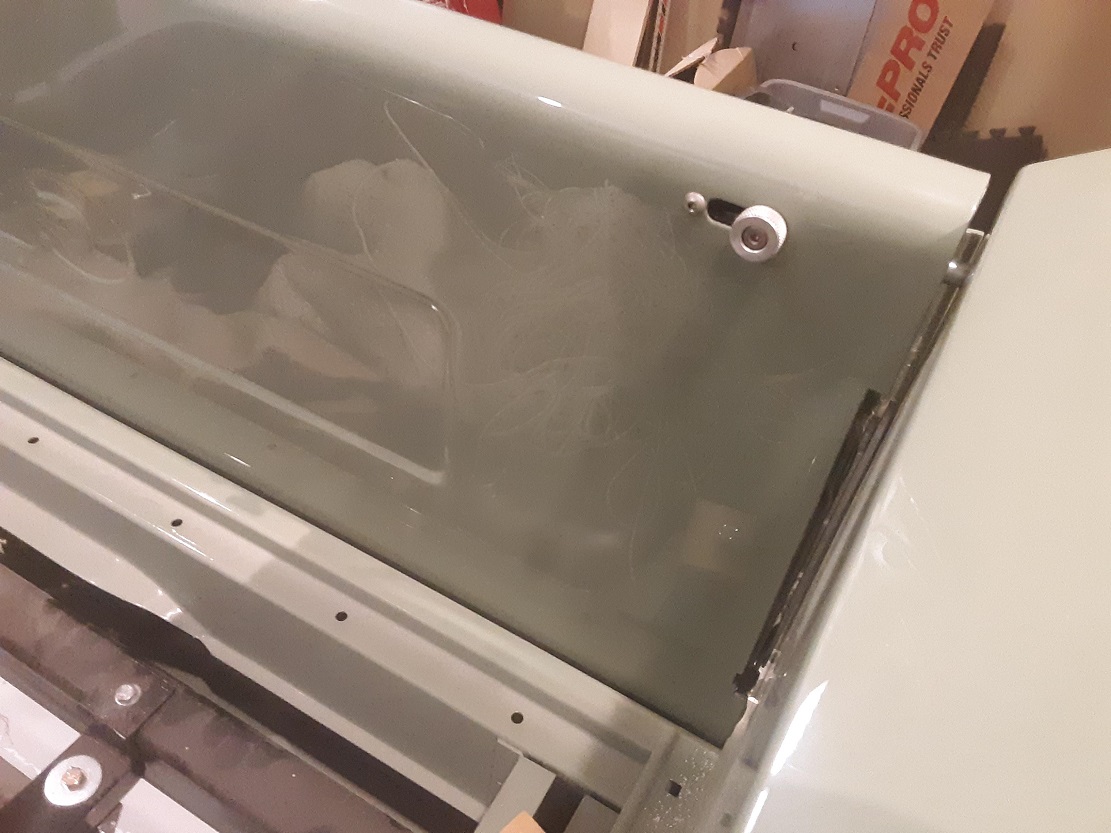 After pricing the repro stainless door window surrounds, I decided to take the pair of them to a local stainless polishing shop to give that a try. They turned out pretty nice and there's nothing like the fit of an OE part.  Put in the front windshield. There were three of us tugging and pulling on it for a couple of hours and it still isn't quite right. Wyatt says that you usually have to put them in a couple of times to get it just right. I thought he was joking, but no, he wasn't. The gasket, glass and the pinch weld will get to know each other for another week then we'll take it out and try again. I wasn't too impressed with the safety glass I got from Jim Carter Truck Parts. There's quite a large burr on one corner of the driver's glass that isn't helping it seat any. Planning on trying some wet or dry paper to see if I can smooth it out, but if that doesn't work I'll try a stone or a diamond saw blade in the grinder. Like all repo parts the stainless trim had to be massaged to be used. It overlaped itself left and right and I had to trim the ends 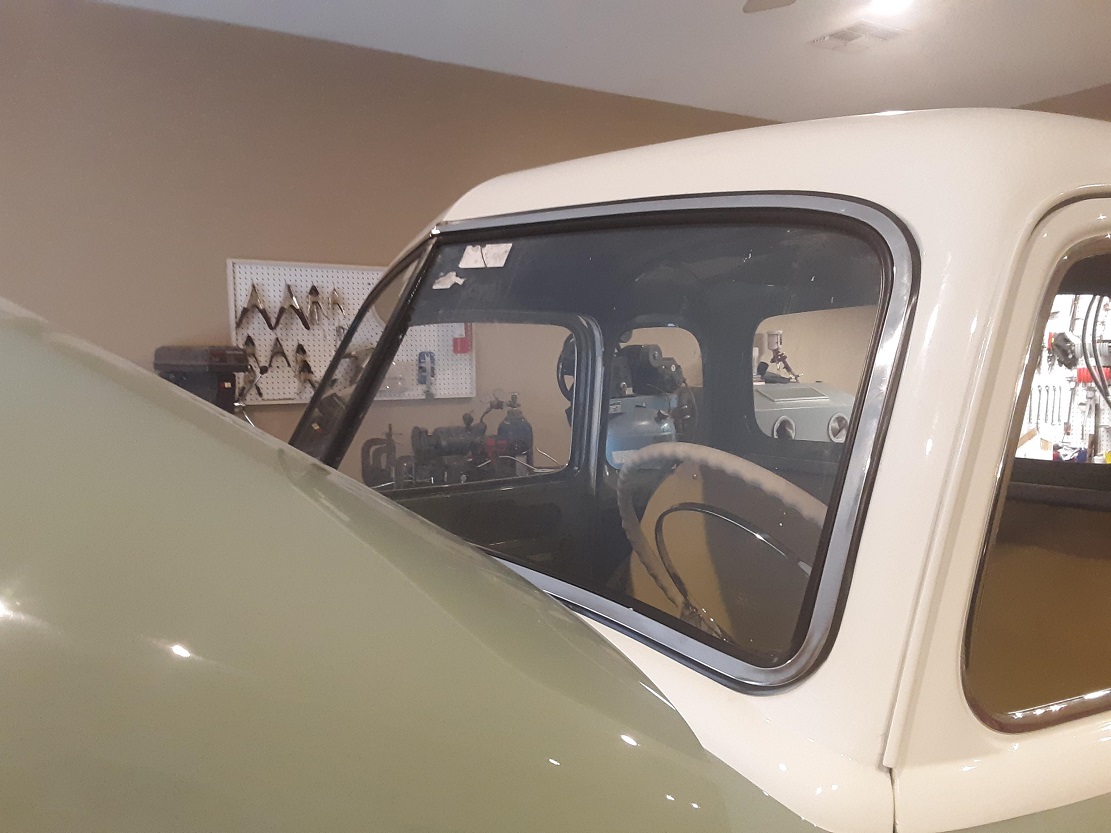 I went to the local hydraulic shop and bought all the material for the hoses to plumb the hydroboost, dry fit the hose on the truck cutting them to length. Now back to the hydraulic shop to have everything crimped. 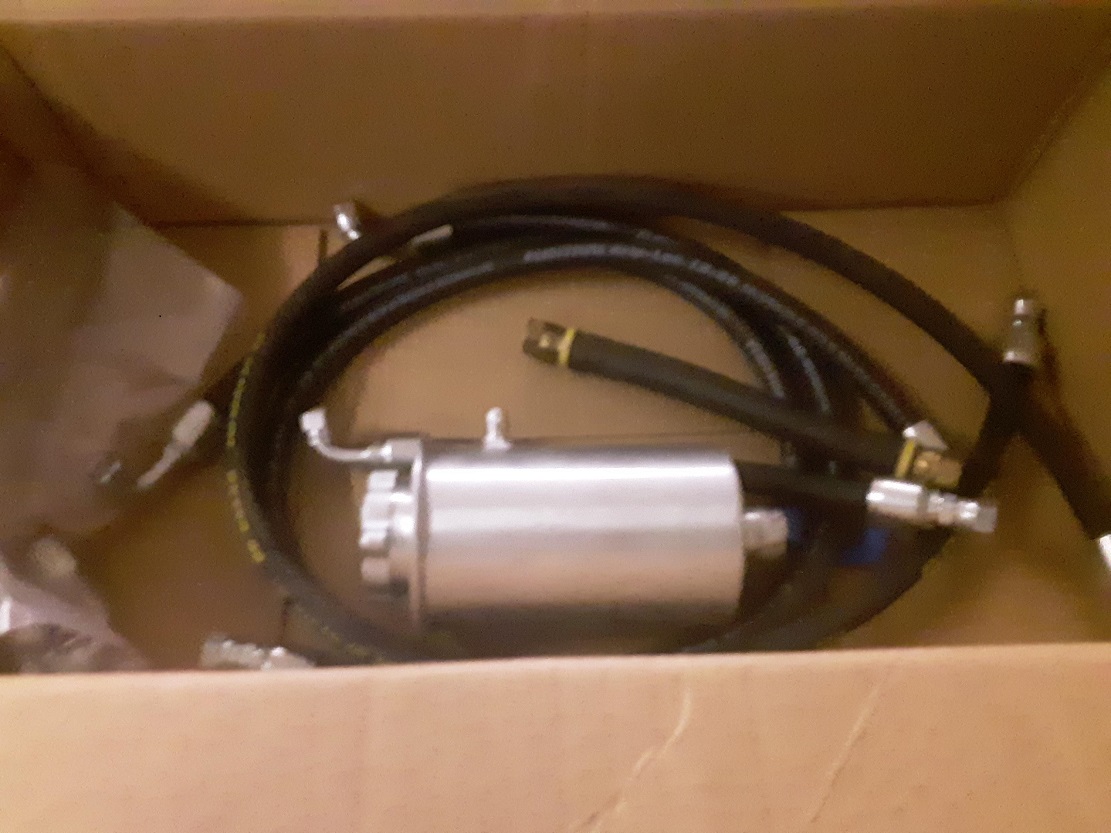 This truck is a mash-up of hydraulic components - the hydroboost if off of a Astrovan, the rack is off a Jaguar XJ6, the pump is a Saginaw TC off of a Chevy Suburban and the reservoir is a cheap ebay item. I wanted the hoses to be easily replaceable anywhere, so each of the individual components got adapters to convert the inlet/outlets to -6JIC so all the hoses could be simple -6 (3/8") hose with JIC ends. A couple of the hoses would have needed a 90 deg fitting on one end and a 120 deg on the other (an expensive and hard to find fitting). In addition, the two fittings would have to be 'clocked' correctly for crimping to get the hose to fit. As a work-around to keep the hoses simple, I fabed these adapters out of stainless tube. This is the one for the oil pump that redirects the outlet down along the frame rail to the hydroboost and lets the hoses disappear down the frame rail. 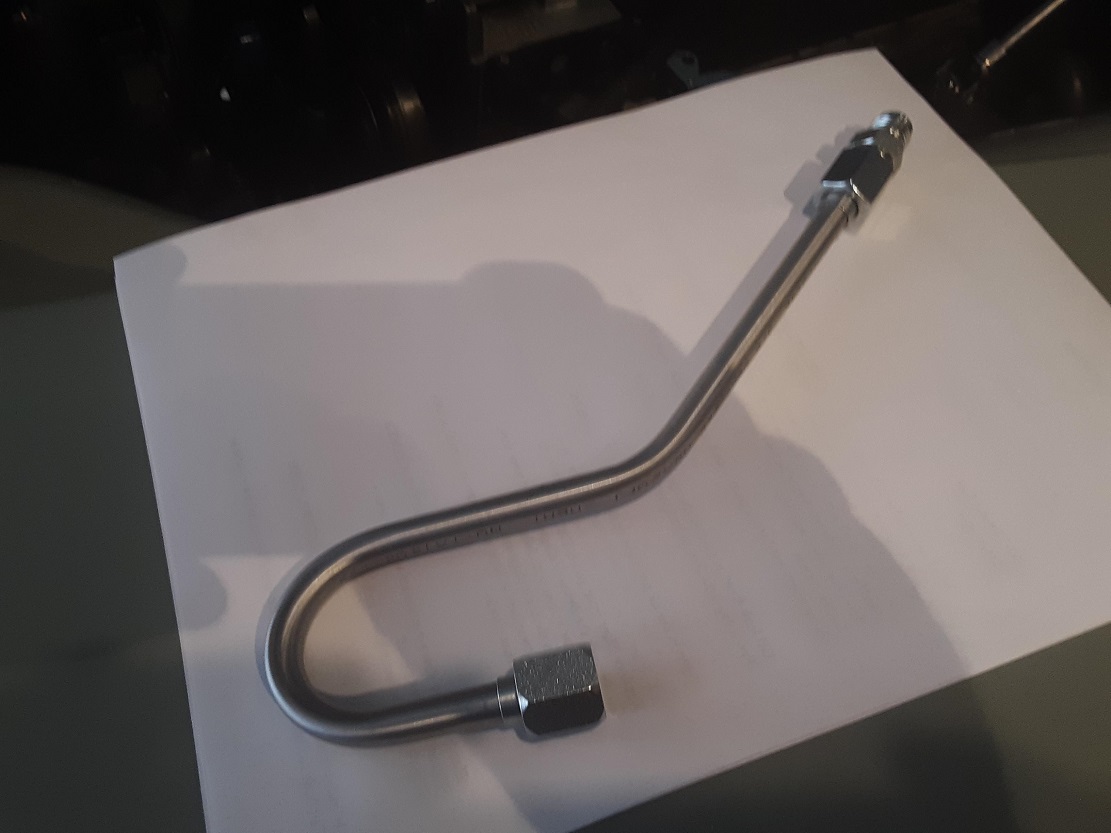 Finish off with a little bling. Took the glove box door to the stainless polisher (Russell's Stainless Polishing in Mesa AZ) and it turned out nice. At one point in its life, the door had screws that were too long for the hinge and it bumped up the metal. The polisher said he'd have to drill some holes in the back to get a backing tool in there to get them out. I told him go ahead and I'll figure out how to hide the holes later! Might have to train a dog to bite anybody that tries to open the glovebox. 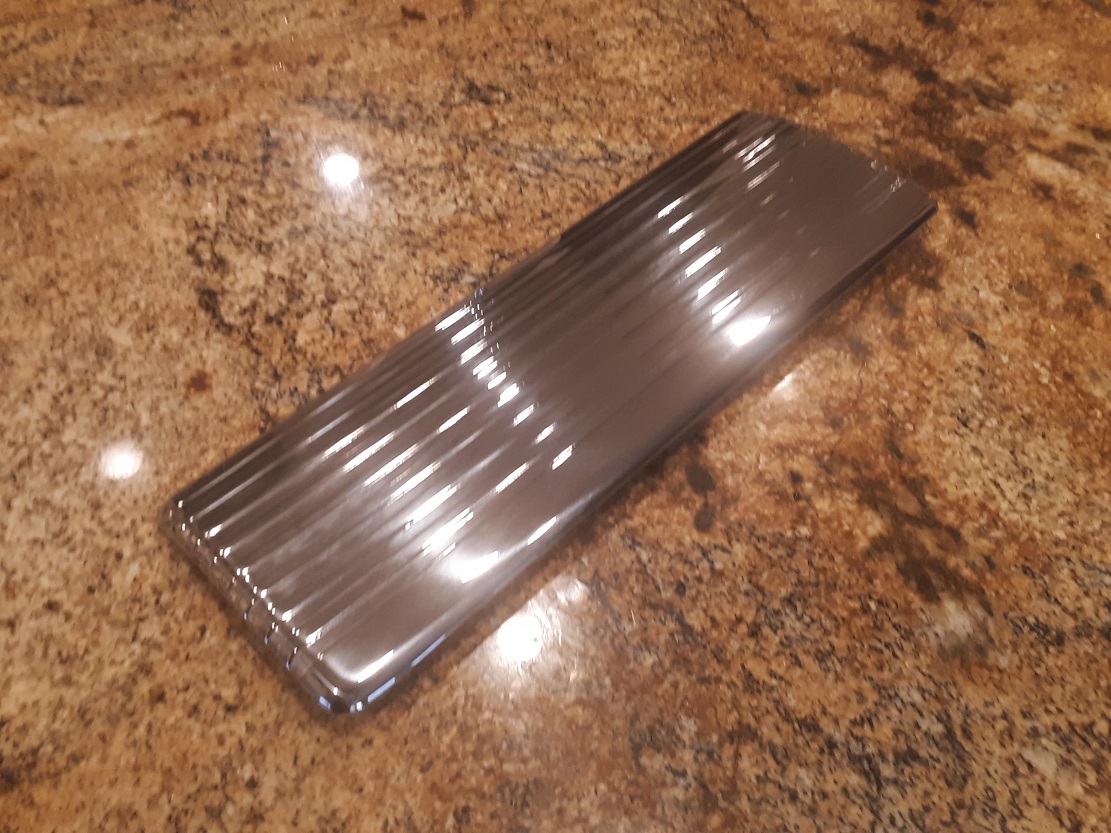 Still looking for the finisher piece in stainless that goes under the ashtray/speaker grill (I have the top one with the 'General Motors Division' script) If anyone has a line on where I can get a decent original, I'd be very grateful Put some KYB gas shocks on the front of the truck too. I bought an old Jaguar XJ6 last year to play with, and the thing I like about it most is the ride. It doesn't drive down the street, it kind of oozes. It is so nice, it kind of puts my wife's Benz to shame. I'll be a happy camper if the airbags and KYBs on the truck come close to the way the old Jag rides. Have three sets of front shocks to evaluate - stock Boges, the KYBs and a set of Monroe gas shocks. 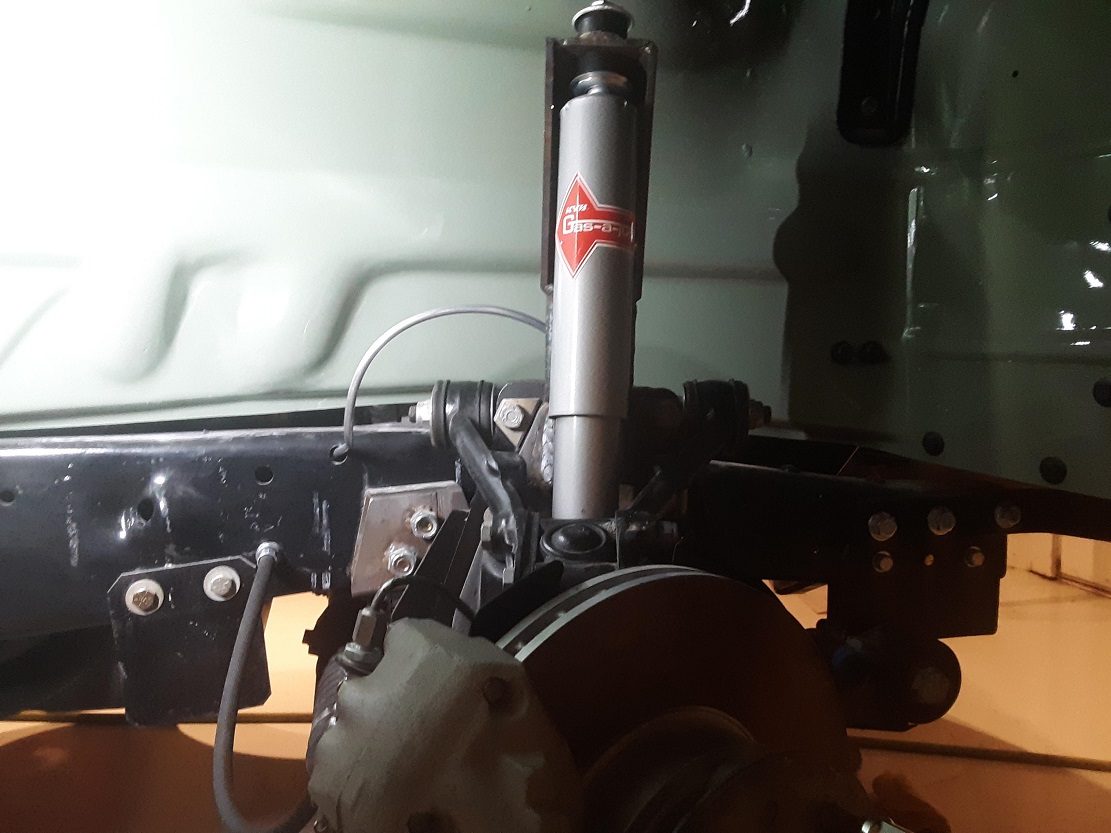 A Rebel wiring harness is on order and will be here late this week as will the mandrel bends for fabbing up the rest of the exhaust system. Phil |
|
|
|
|
05-19-2019, 10:56 PM
|
#132 |
|
Registered User
Join Date: Nov 2013
Location: Show Low, Arizona
Posts: 759
|
Re: 49 GMC Five Window
JoeDoh - Honeywell 40 years ne AiResearch, ne Garrett, ne Allied Signal and almost GE. Released from corporate bondage two years ago.
|
|
|
|
|
05-20-2019, 09:26 AM
|
#133 |
|
Senior Member
 Join Date: Sep 2017
Location: Bryan, Texas
Posts: 2,275
|
Re: 49 GMC Five Window
Just went through your build. Nice fab work.
__________________
8man-aka Robert 1948 on a S10 Frame, small block with a carb 1954 Cab, 53 Front and Bed, 50 Doors, S10 Frame, Power TBD Build thread: "]http://67-72chevytrucks.com/vboard/showthread.php?t=746899&highlight=wife%27s+48[/URL] [/URL]http://67-72chevytrucks.com/vboard/showthread.php?t=840204 |
|
|
|
|
05-21-2019, 12:39 AM
|
#134 | |
|
Senior Member
Join Date: May 2007
Location: Doodah Kansas
Posts: 7,747
|
Re: 49 GMC Five Window
Quote:
__________________
the mass of men live lives of quiet desperation if there is a problem, I can have it. new project WAYNE http://67-72chevytrucks.com/vboard/s...d.php?t=844393 |
|
|
|
|
|
05-21-2019, 09:21 AM
|
#135 |
|
Registered User
Join Date: Nov 2013
Location: Show Low, Arizona
Posts: 759
|
Re: 49 GMC Five Window
Deer Valley does avionics - did a few projects there over the years, but most of time was working on GA turbofans and commercial APUs at Sky Harbor. Still, I'm sure we walked some of the same halls at DV.
|
|
|
|
|
06-18-2019, 09:30 AM
|
#136 |
|
Registered User
Join Date: Nov 2013
Location: Show Low, Arizona
Posts: 759
|
Re: 49 GMC Five Window
Came up gimpy two weeks ago - cut my foot on some glass and ended up on crutches for a couple of weeks and lost a little momentum, but here's progress for the last month or so -
The fixed glass is all in. My truck is a deluxe five-window, so I opted for the chrome (well plastic chrome, anyway) lock strips. I bought my glass from Jim Carter and the rear window had quite a burr on one of the corners and I had difficulty getting it into the aperture. About ten minutes of sanding with some 220 wet or dry on a paint stick knocked it down so it would fit. 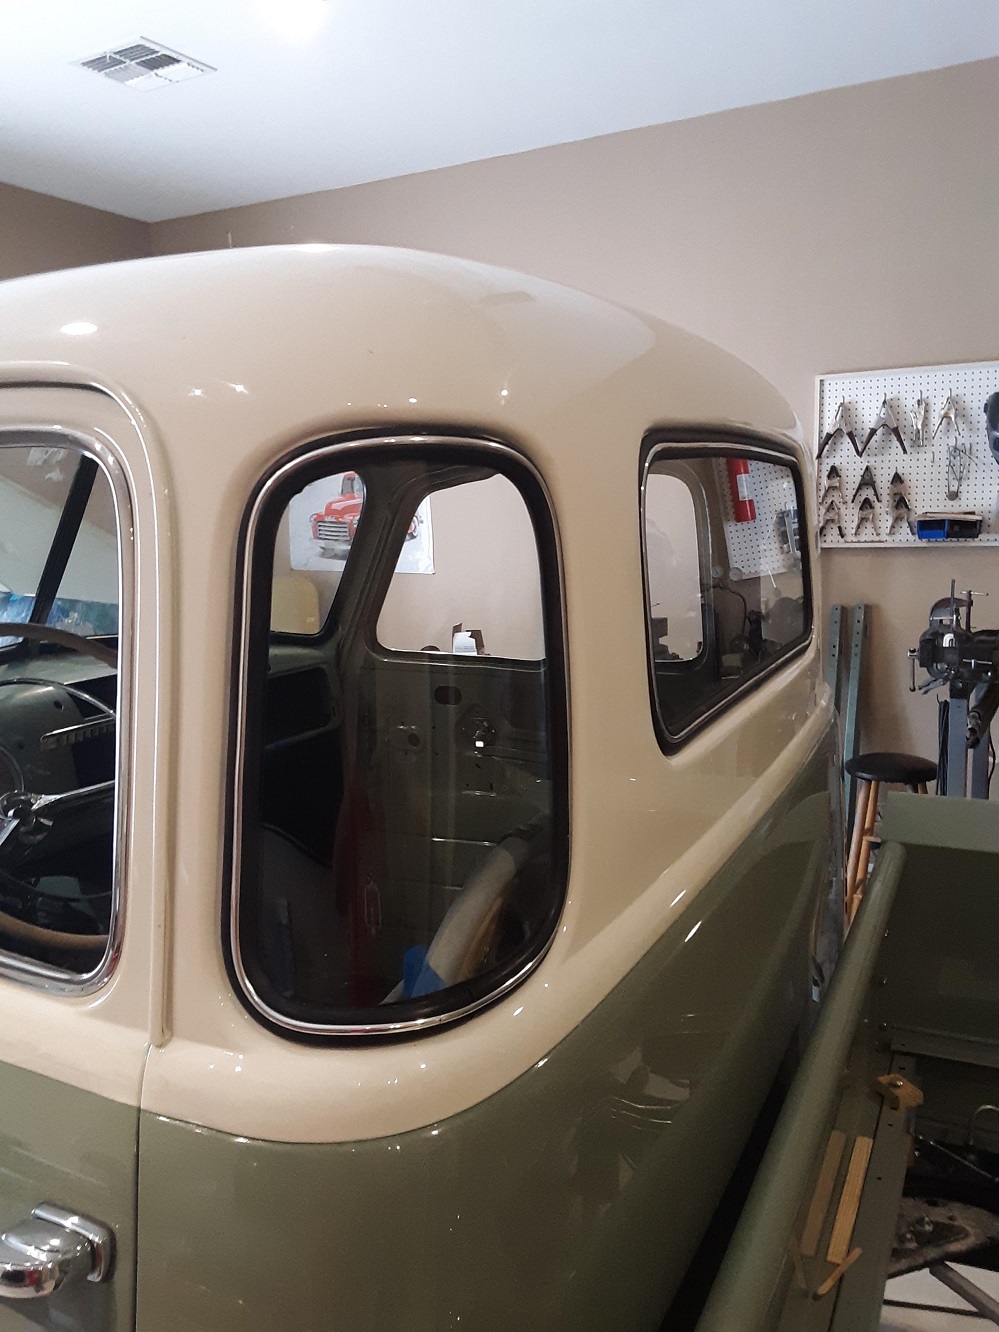 Wyatt had done a lot of big-rigs that had windows with a lock strip, and at first we made a tools out of some welding rod. That turned into a shoulder-killer until bought this Lisle tool - it works really well. There's four different profiles available and I put them all together so I wouldn't lose them. We wrapped the tool with tape so it wouldn't damage the paint.  The airbag system is all in. Here is the compressor mounted on the passenger side frame rail. The system has no push on connectors and is all hard lines with AN fittings. I spent about a half day going through the entire system looking for leaks. I've got most of the big ones, but I charged the system to 50PSI and lost about 10 PSI in my tank in about three days. Need to keep working on it to get it to the point where it will only loose a couple PSI a week. 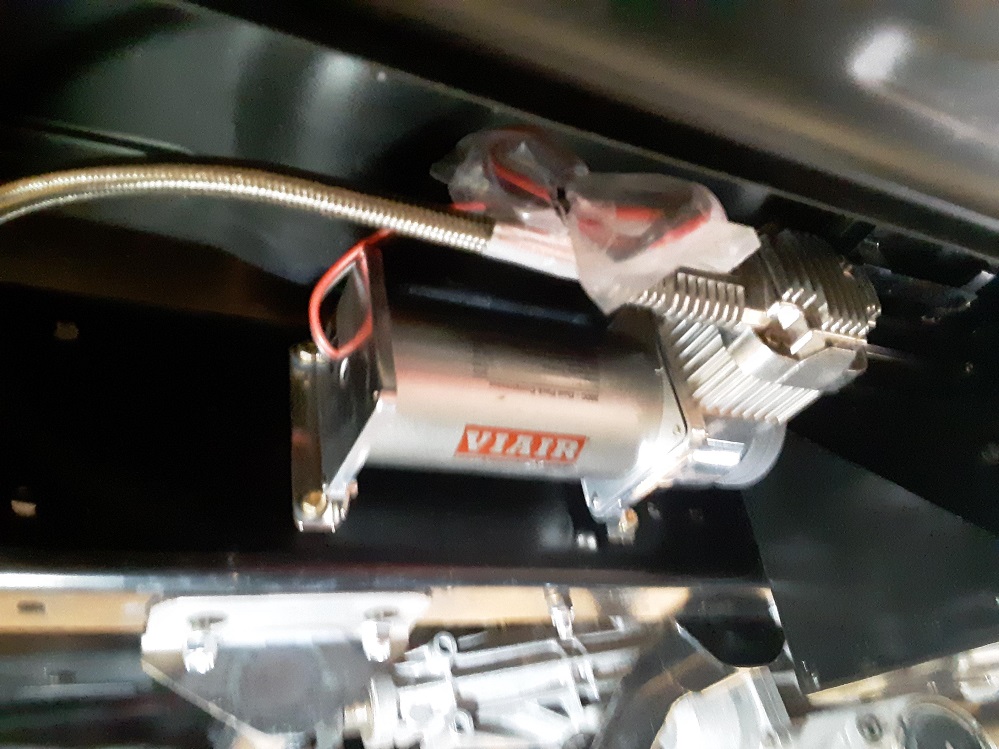 I put a drain on the airbag tank so I could drain the water out of it once in a while. I used a standard air chuck so I could pressurize the system with shop air for service. 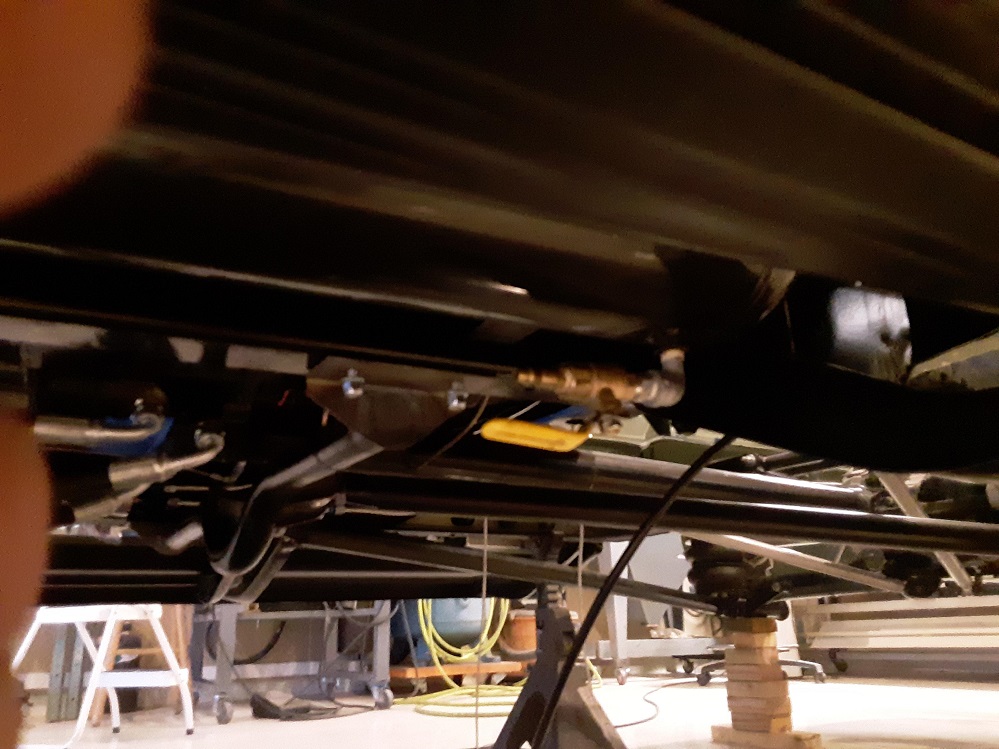 The high and low pressure lines for the hydroboost are all in, but I still can't put the hose clamps on the frame unit it is off the jack stands. I bought a bunch of Adel clamps from Aircraft Spruce (about $10) and will tap the frame for #10 stainless screws to hold them on - brakes, air and hydraulic. 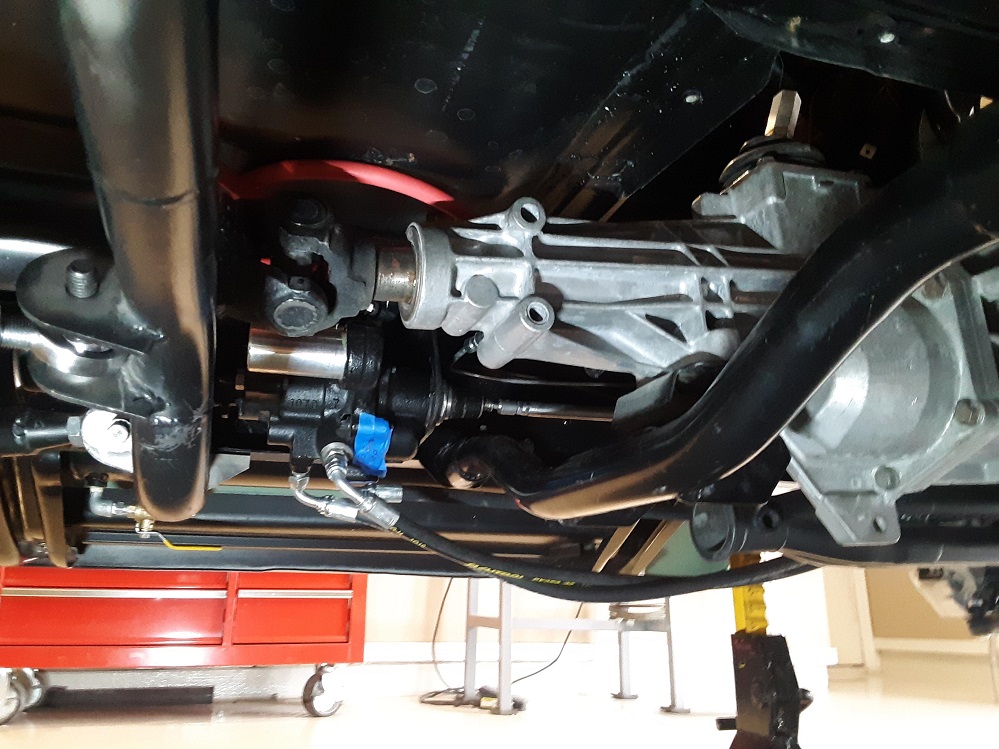 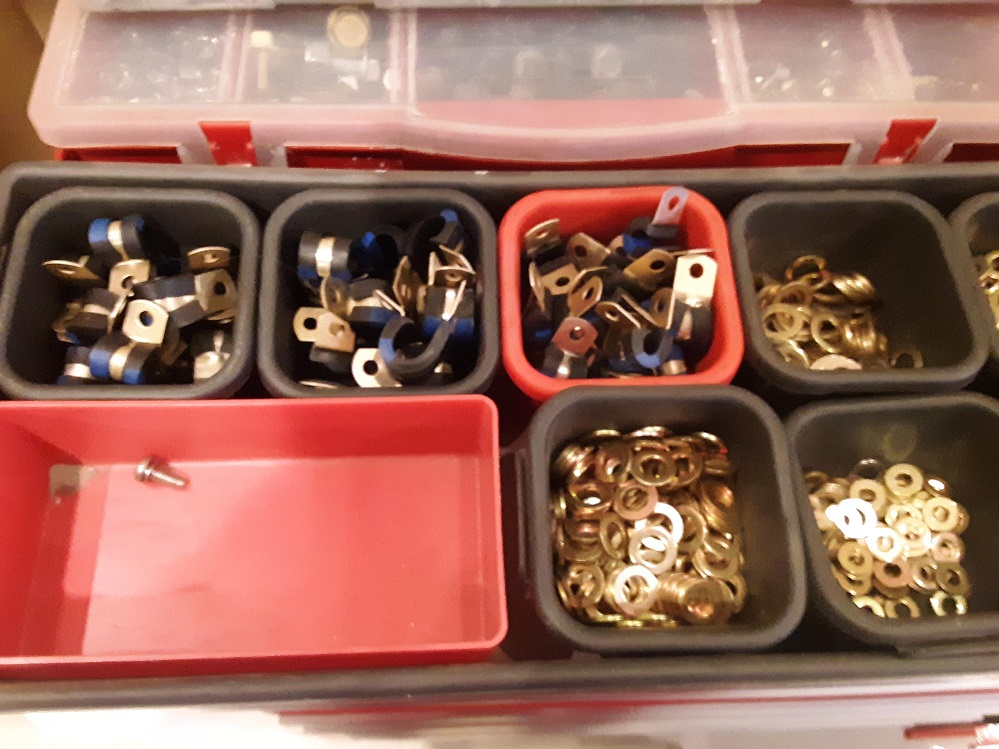 Not supposed to be walking around so I cleaned the shop from my chair. Keep misplacing parts so I set up a stand to hold everything I'm getting ready to install- 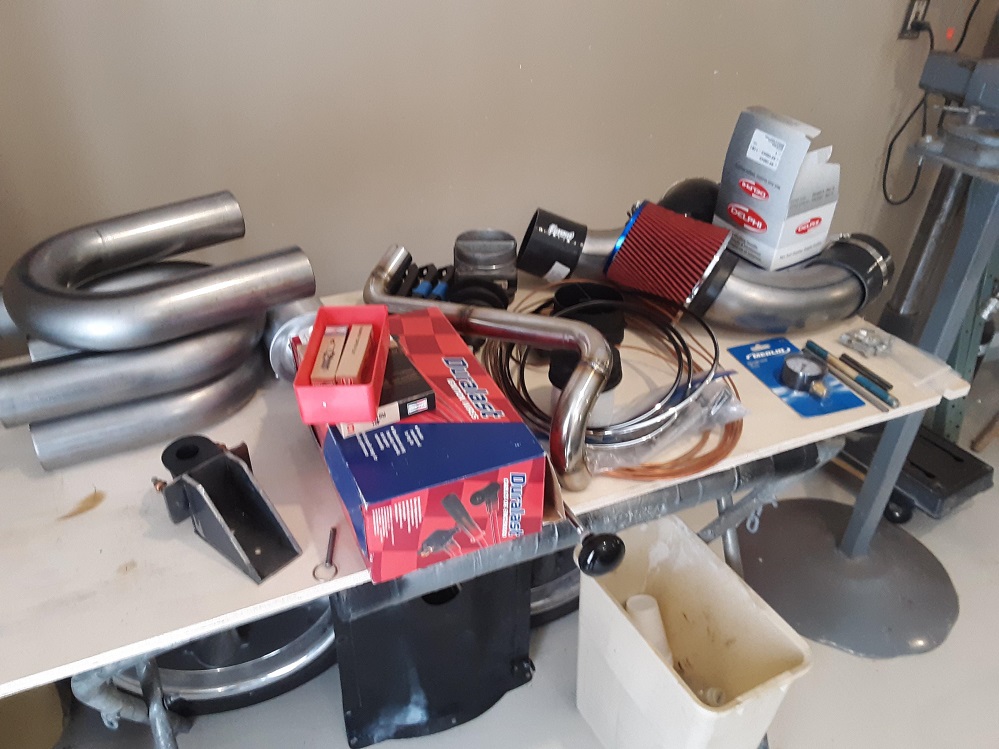 Started on the exhaust system from the header back to the rear bumper. Here's the first pipe tacked together in preparation for TIG welding - this is the pipe from the header to the muffler. 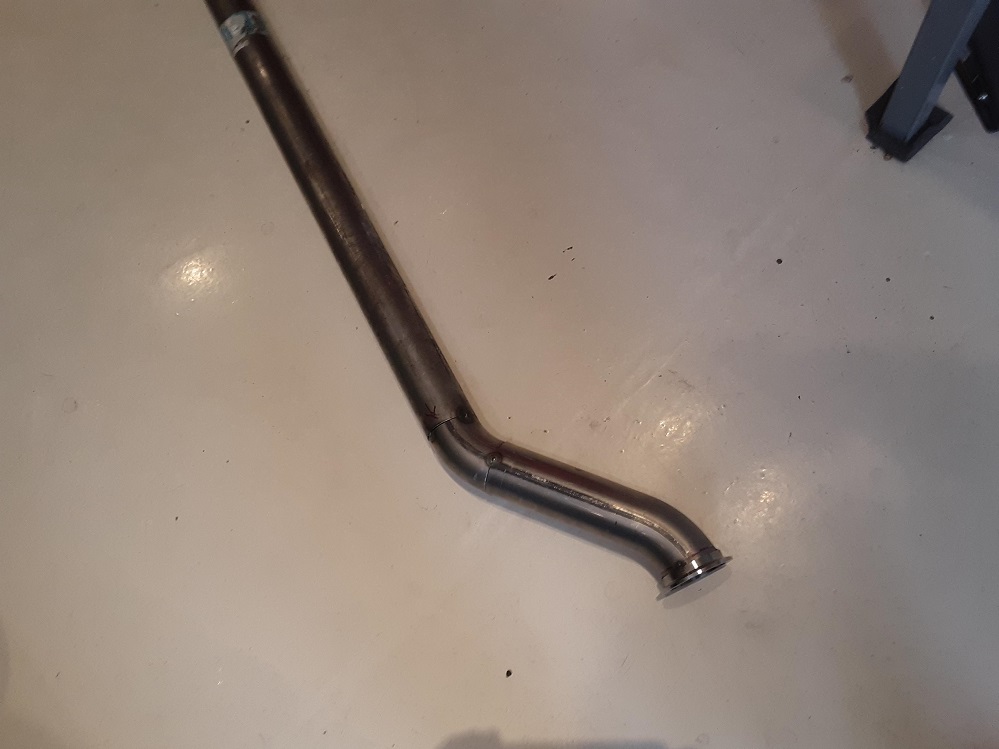 Stainless mandrel bend prices have gotten ridiculous so decided to go mild steel. An H pipe will connect the left and right sides. For reasons I can't figure out, the headers I made didn't turn out symmetrical at the exits - they're off about an inch side to side. No matter, just means I'll have to compensate with the pipe on the other side. Here's the passenger side with the mandrels cut with some extra 'tails' to get it fitting just right under the truck. 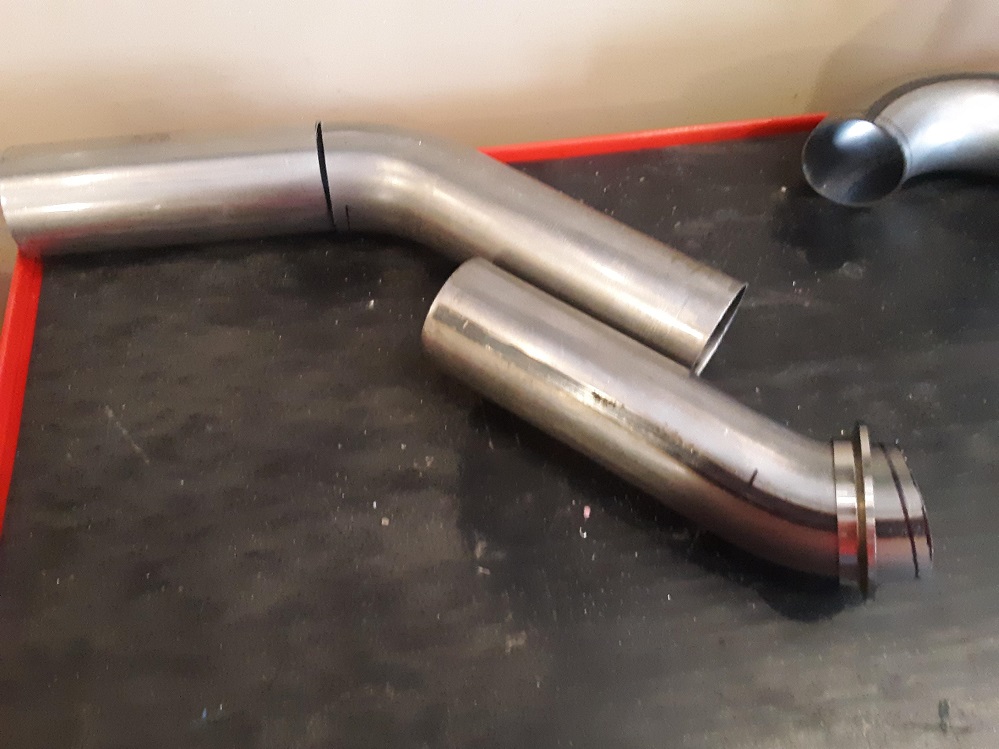 I'll get the two exhaust pipes looking pretty symmetrical under the truck before welding them up. That's about it for now. It is getting hot as hell here now, and it is a good time to hunker down in the shop and work on the truck. It's going to get worse before it gets better. Phil |
|
|
|
|
06-18-2019, 09:41 AM
|
#137 |
|
Senior Member
Join Date: Mar 2011
Location: West Plains, Missouri
Posts: 7,553
|
Re: 49 GMC Five Window
Phil, sorry about the mishap, get better soon. Nice work on the truck...Jim
__________________
my build thread: http://67-72chevytrucks.com/vboard/s...d.php?t=459839 Jimbo's long bed step build:http://67-72chevytrucks.com/vboard/s...t=464626<br /> |
|
|
|
|
06-18-2019, 01:08 PM
|
#138 |
|
Senior Member
Join Date: Sep 2017
Location: Bryan, Texas
Posts: 2,275
|
Re: 49 GMC Five Window
Hope you get better soon. Looking forward to more progress.
__________________
8man-aka Robert 1948 on a S10 Frame, small block with a carb 1954 Cab, 53 Front and Bed, 50 Doors, S10 Frame, Power TBD Build thread: "]http://67-72chevytrucks.com/vboard/showthread.php?t=746899&highlight=wife%27s+48[/URL] [/URL]http://67-72chevytrucks.com/vboard/showthread.php?t=840204 |
|
|
|
|
06-21-2019, 12:35 AM
|
#139 |
|
Registered User
Join Date: May 2018
Location: Phoenix, AZ
Posts: 314
|
Re: 49 GMC Five Window
Beautiful truck.
__________________
Project "Eagle Spirit" 52 Chevy http://67-72chevytrucks.com/vboard/s...d.php?t=763085 Project "LS Scout" https://67-72chevytrucks.com/vboard/...d.php?t=844133 |
|
|
|
|
06-22-2019, 01:10 PM
|
#140 |
|
Registered User
Join Date: Nov 2013
Location: Show Low, Arizona
Posts: 759
|
Re: 49 GMC Five Window
Thanks for the positive comments on the build. Well over my foot injury now and back to the routine problems of just being old.
Worked on the exhaust system yesterday. My order from Jeg's came yesterday with the Thrush mufflers. Built the other side from the header flange to the muffler. I offset one side of the exhaust so it straddles he offset in the driveshaft - about an inch I'd guess. One muffler is higher than the other in this foto- need to put a 2x4 under it to level it up 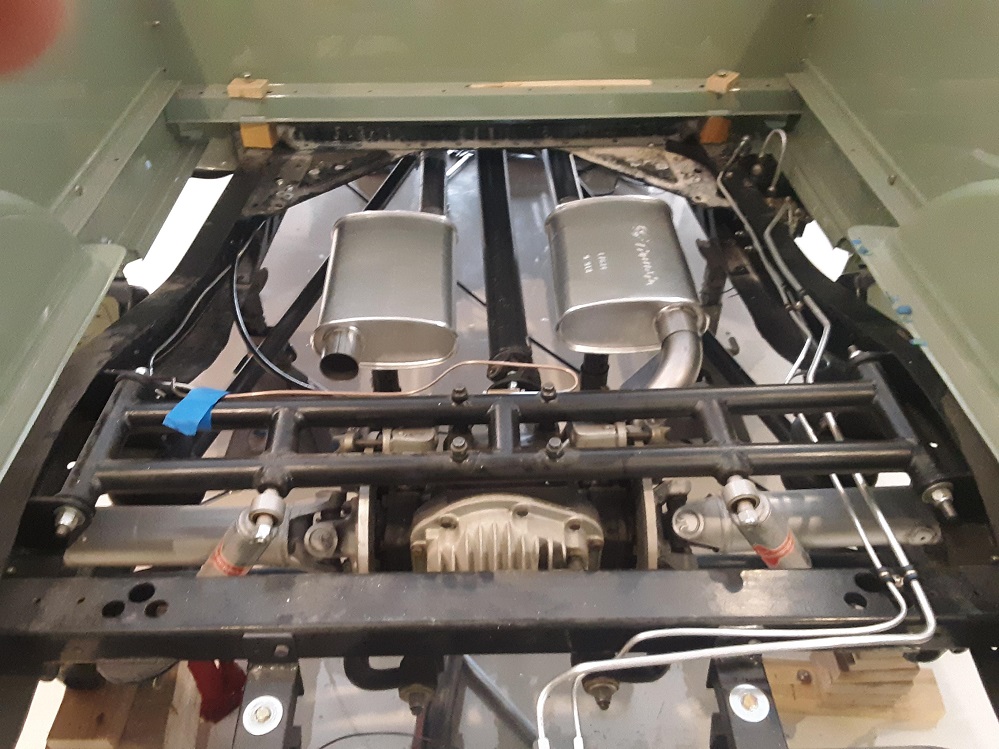 I'm planning to run the exhaust under the IRS. I see a lot of recent production cars do this and don't seem to have any problem with scrubbing the exhaust, so I'm going to give it a try. Once I get it past the diff, it'll sweep up and follow the frame. For now I'm just going to try the Thrush mufflers alone, but I'm going to leave enough room for a resonator just before the dump at the roll pan, just in case I want to quiet it down or need to take some drone out. 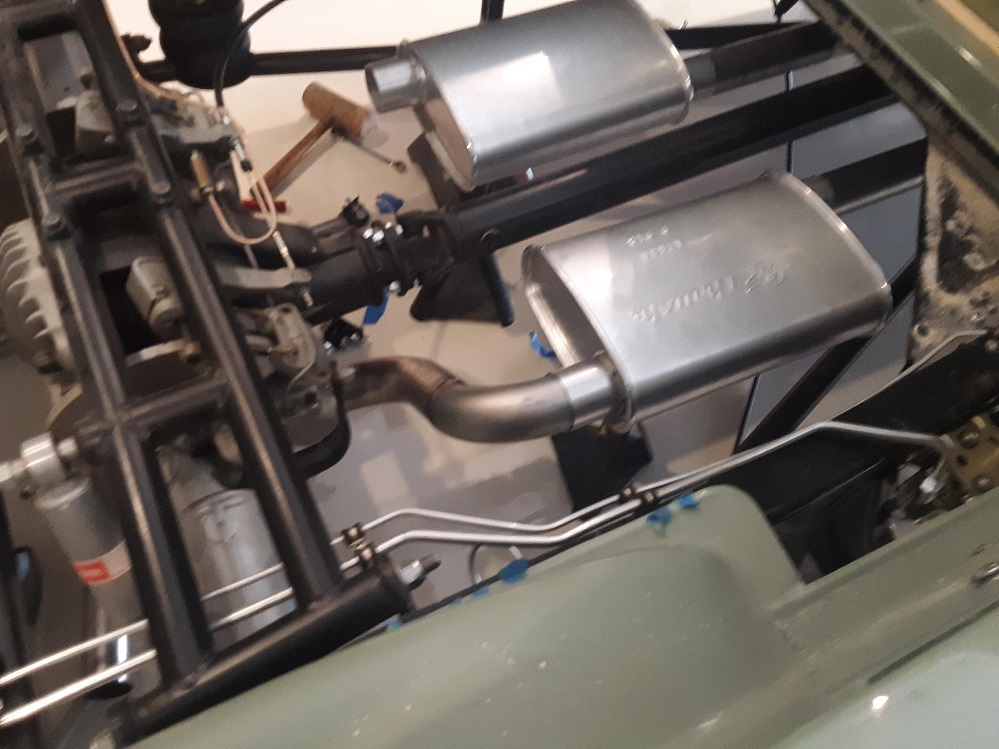 I tucked the exhaust system pretty tight to the frame and couldn't figure how I'd put an X-pipe in there, much less how to get it out if I need to remove the exhaust. So my solution is to go with an H-pipe instead, but I had to put a 'belly' in it to clear the transmission. The drop down of the H-pipe is less than the transmission rear cross member so there won't be any scrub issues. I am a little worried about exhaust condensate running into the H-pipe though. Here's the pieces for the H-pipe cut and ready to fit and tack together (it is upside down in this foto). I put a V-band clamp in the middle so I can take it in and out without removing the transmission and rear suspension cross-member. Just being held together here with gravity and a little help from a radiator hose clamp. 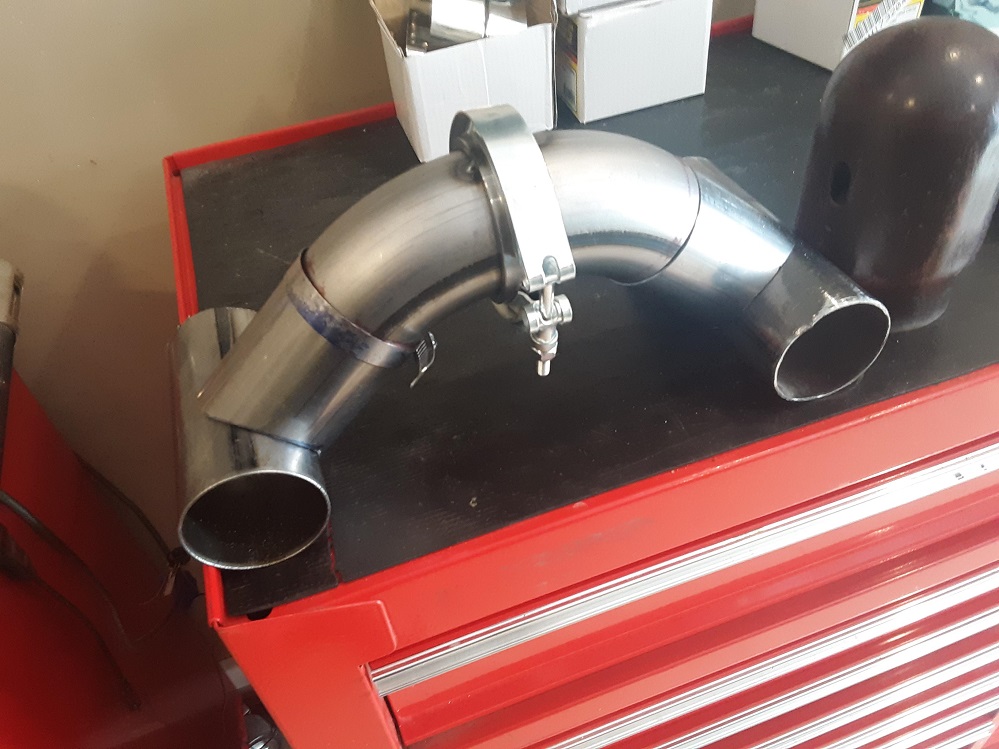 The two pipes laying on the bench are scraps sitting the same distance apart as the pipes under the truck so I could mock it up without having to wiggle under the truck for trial fits (If I ever have two nickles to rub together I'm gonna buy a two post lift). My tube fish-mouth tube cutter won't handle 2.5" tube, so I found a way to make a paper template on the web. Simply printed it out, taped it to the tube and cut the fish-mouth on the band saw. I wouldn't want to do a lot of them this way, but not too bad for just a couple.  Just for fun, here's the other car project I'm working on - '53 MG TD. I made new door skins and replaced some of the rotted wood in the doors last year. I rebuilt the hinges and one door fit the aperture perfect, but the driver's door rubs pretty hard in the corner. To fix it, I had to take the skin back off the door and move the wood around so it fits the aperture, then re-install the skin and trim the metal for the changes I made in the wood. This thing is built pretty much how they built horse-drawn coach carriages and very early automobiles. Even my old '29 Ford didn't have this much wood.  That's about it for now, Phil Phil |
|
|
|
|
06-22-2019, 09:09 PM
|
#141 |
|
Registered User
Join Date: Nov 2013
Location: Show Low, Arizona
Posts: 759
|
Re: 49 GMC Five Window
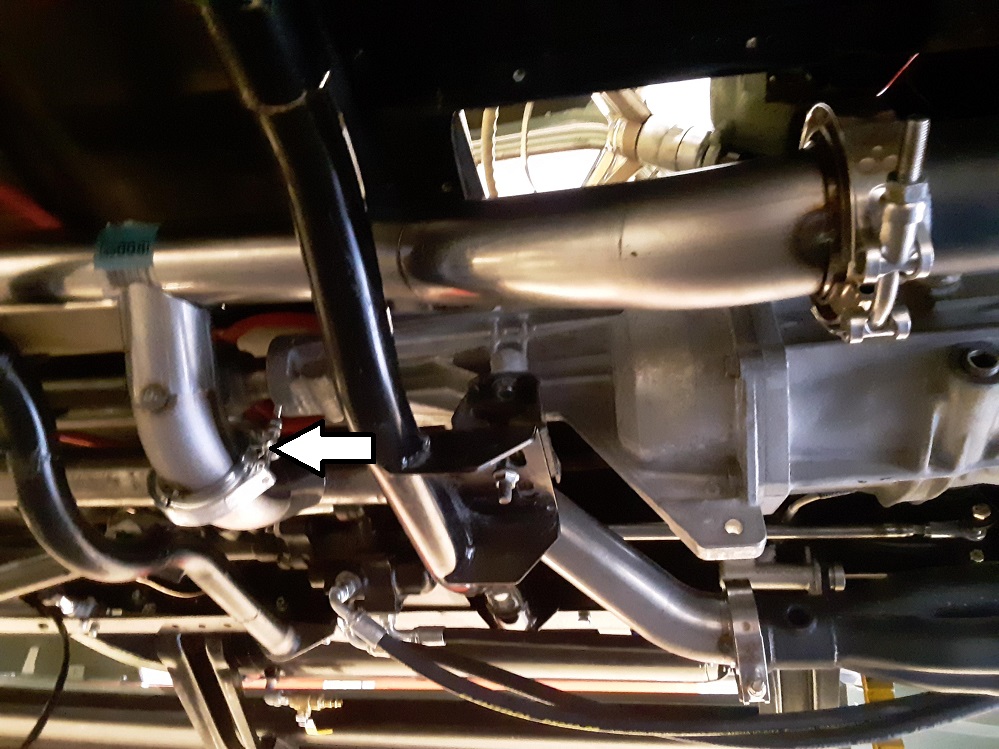
Dry fit of the H-pipe -
|
|
|
|
|
06-22-2019, 11:36 PM
|
#142 |
|
Senior Member
Join Date: Mar 2011
Location: West Plains, Missouri
Posts: 7,553
|
Re: 49 GMC Five Window
Nice work...Jim
__________________
my build thread: http://67-72chevytrucks.com/vboard/s...d.php?t=459839 Jimbo's long bed step build:http://67-72chevytrucks.com/vboard/s...t=464626<br /> |
|
|
|
|
06-23-2019, 08:28 AM
|
#143 |
|
Senior Member
Join Date: Sep 2017
Location: Bryan, Texas
Posts: 2,275
|
Re: 49 GMC Five Window
Nice work on the door. Never seen that.
The exhaust looks good.
__________________
8man-aka Robert 1948 on a S10 Frame, small block with a carb 1954 Cab, 53 Front and Bed, 50 Doors, S10 Frame, Power TBD Build thread: "]http://67-72chevytrucks.com/vboard/showthread.php?t=746899&highlight=wife%27s+48[/URL] [/URL]http://67-72chevytrucks.com/vboard/showthread.php?t=840204 |
|
|
|
|
06-30-2019, 12:25 AM
|
#144 |
|
Registered User
Join Date: Nov 2013
Location: Show Low, Arizona
Posts: 759
|
Re: 49 GMC Five Window
Ordered some Hella halogen lights and installed them - had to modify the stock headlight bucket a little-
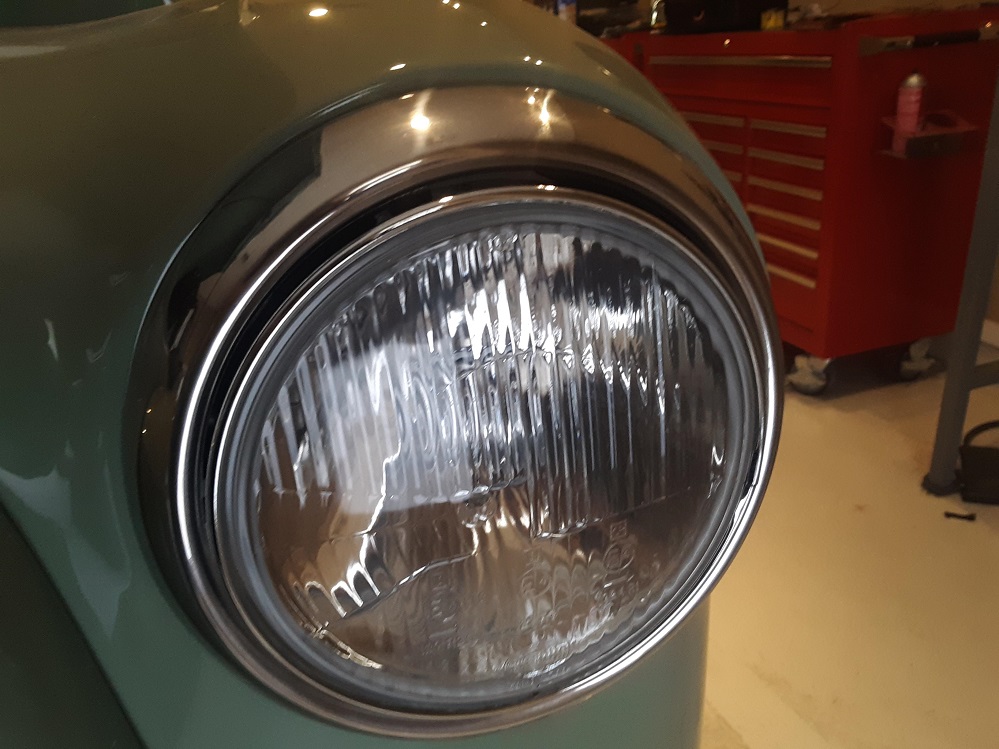 I can't find parking lights for the GMC anywhere. These are Lucas units off of a TR3 - close enough I guess  Worked on the exhaust this afternoon, and got it all tacked together and fitting under the truck. Took it out to start the welding. 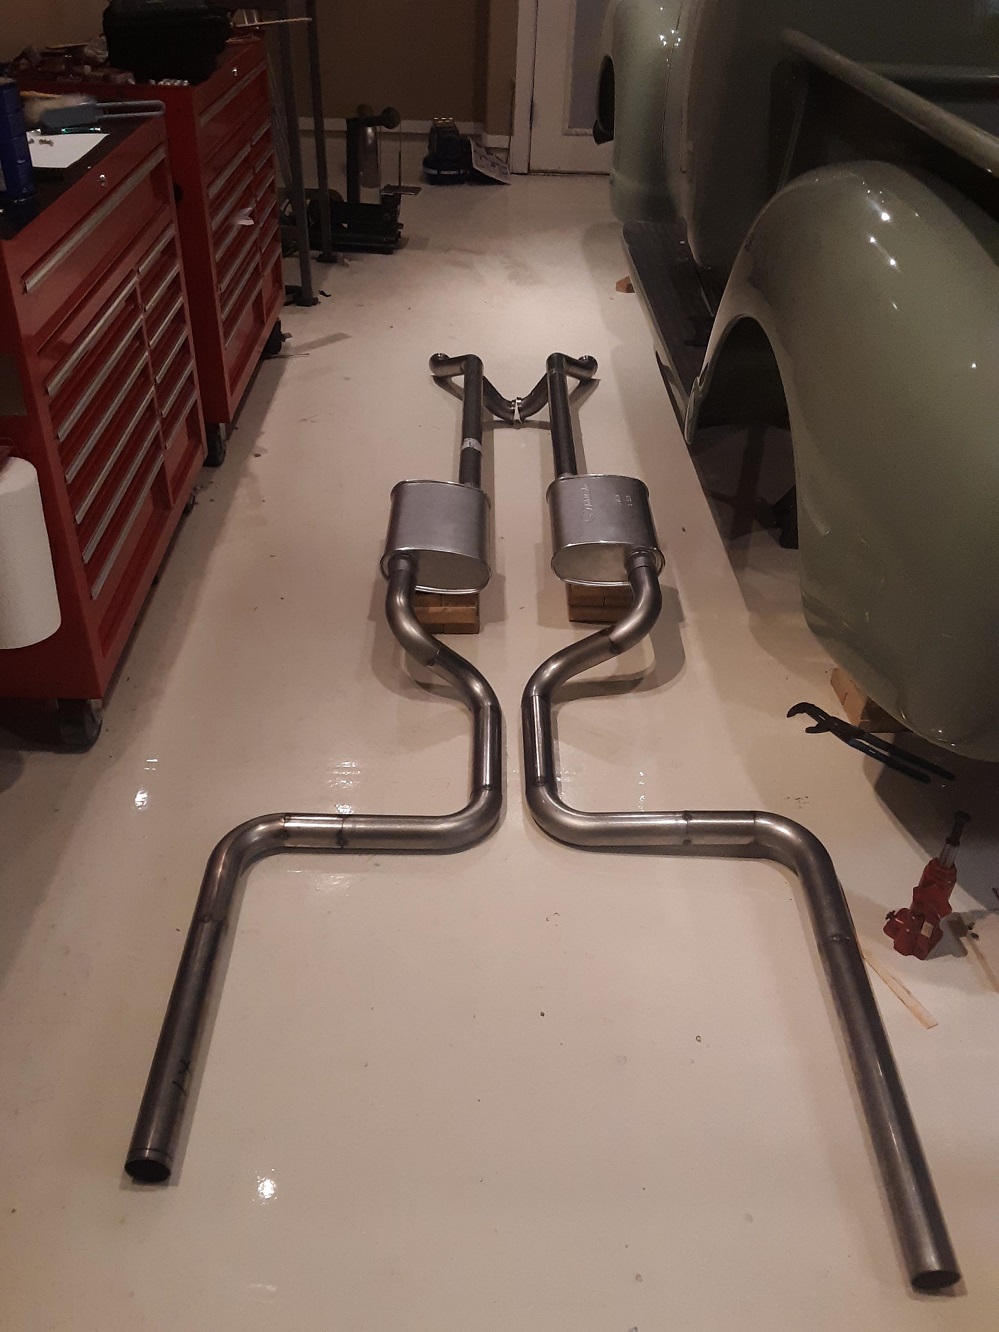 From the other side- 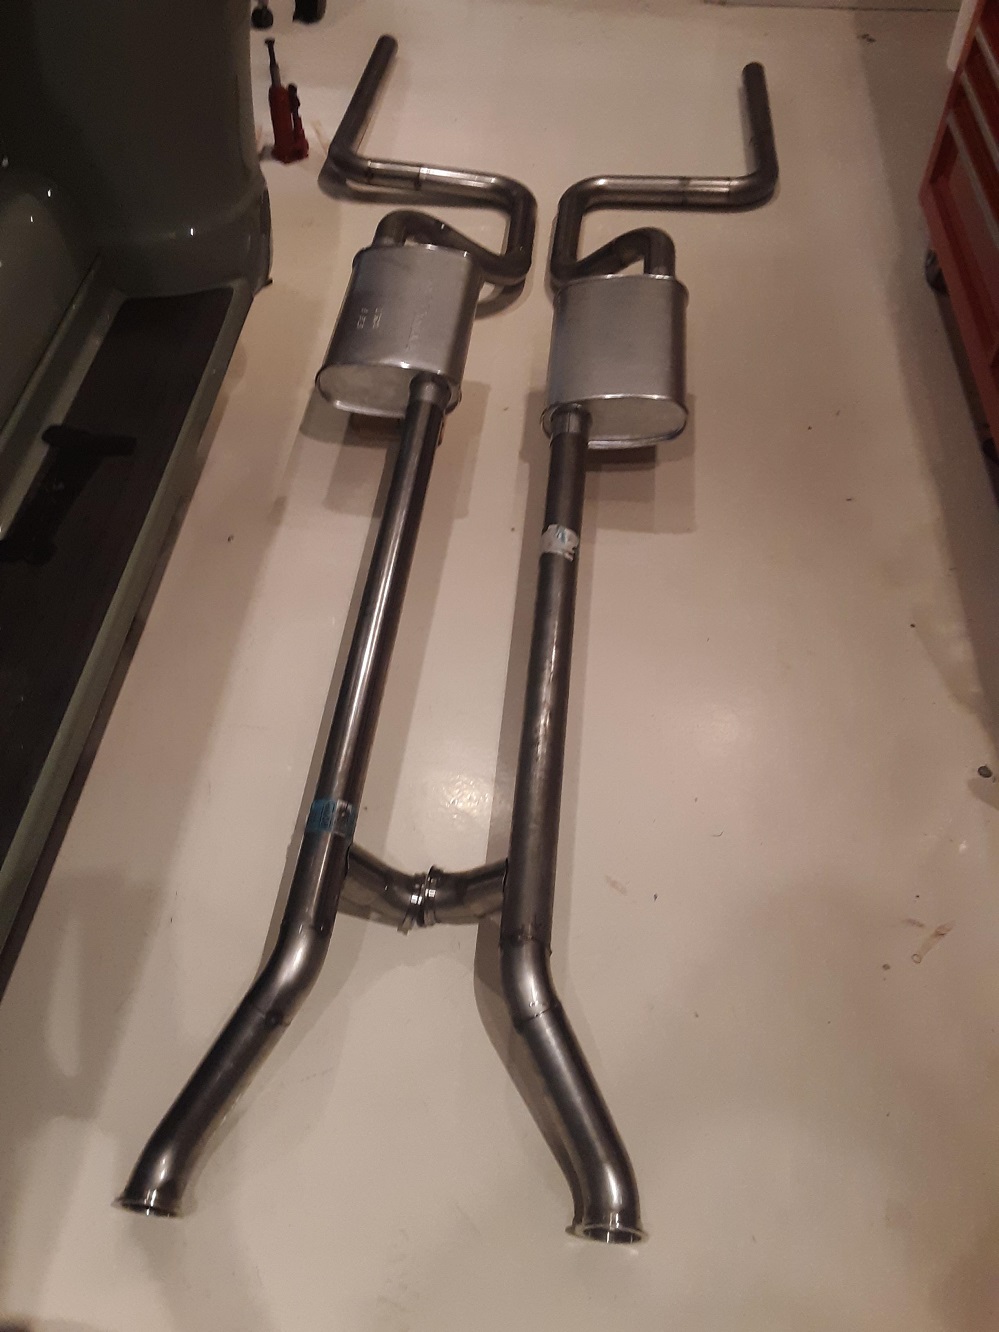
|
|
|
|
|
06-30-2019, 12:28 AM
|
#145 |
|
Registered User
Join Date: Nov 2013
Location: Show Low, Arizona
Posts: 759
|
Re: 49 GMC Five Window
Yes, one exhaust leg is longer than the other. will trim to fit exhaust tips when I'm done welding it up
|
|
|
|
|
06-30-2019, 12:57 AM
|
#146 |
|
Post Whore
 Join Date: May 2015
Location: Alabama
Posts: 14,583
|
Re: 49 GMC Five Window
Slobber, slobber...man that shore is purdy!!!
__________________
Mongo...aka Greg RIP Dad RIP Jesse 1981 C30 LQ9 NV4500..http://67-72chevytrucks.com/vboard/s...d.php?t=753598 Mongos AD- LS3 TR6060...http://67-72chevytrucks.com/vboard/s...34#post8522334 Columbus..the 1957 IH 4x4...http://67-72chevytrucks.com/vboard/s...63#post8082563 2023 Chevy Z71..daily driver |
|
|
|
|
06-30-2019, 08:33 AM
|
#147 |
|
Senior Member
Join Date: Sep 2017
Location: Bryan, Texas
Posts: 2,275
|
Re: 49 GMC Five Window
X2, all that shine is beautiful!
__________________
8man-aka Robert 1948 on a S10 Frame, small block with a carb 1954 Cab, 53 Front and Bed, 50 Doors, S10 Frame, Power TBD Build thread: "]http://67-72chevytrucks.com/vboard/showthread.php?t=746899&highlight=wife%27s+48[/URL] [/URL]http://67-72chevytrucks.com/vboard/showthread.php?t=840204 |
|
|
|
|
07-02-2019, 09:47 AM
|
#148 |
|
Registered User
Join Date: Feb 2014
Location: Sunnyvale, CA
Posts: 605
|
Re: 49 GMC Five Window
Very nice work! truck looks great.
__________________
1950 3100 5 window |
|
|
|
|
07-06-2019, 03:37 AM
|
#149 |
|
Senior Member
Join Date: May 2007
Location: Doodah Kansas
Posts: 7,747
|
Re: 49 GMC Five Window
ouch! careful!
looks great!
__________________
the mass of men live lives of quiet desperation if there is a problem, I can have it. new project WAYNE http://67-72chevytrucks.com/vboard/s...d.php?t=844393 |
|
|
|
|
08-02-2019, 08:34 PM
|
#150 |
|
Registered User
Join Date: Nov 2013
Location: Show Low, Arizona
Posts: 759
|
Re: 49 GMC Five Window
Time for an update , I guess. Thanks to all that read my postings and the nice words.
Working on the wiring and we've got the Rebel kit's fuse panel mounted up under the dash next to the sub-panel for the LS motor and the PCM. Looks a little confusing here, but not too far from wrapping up the wiring work in the cab. 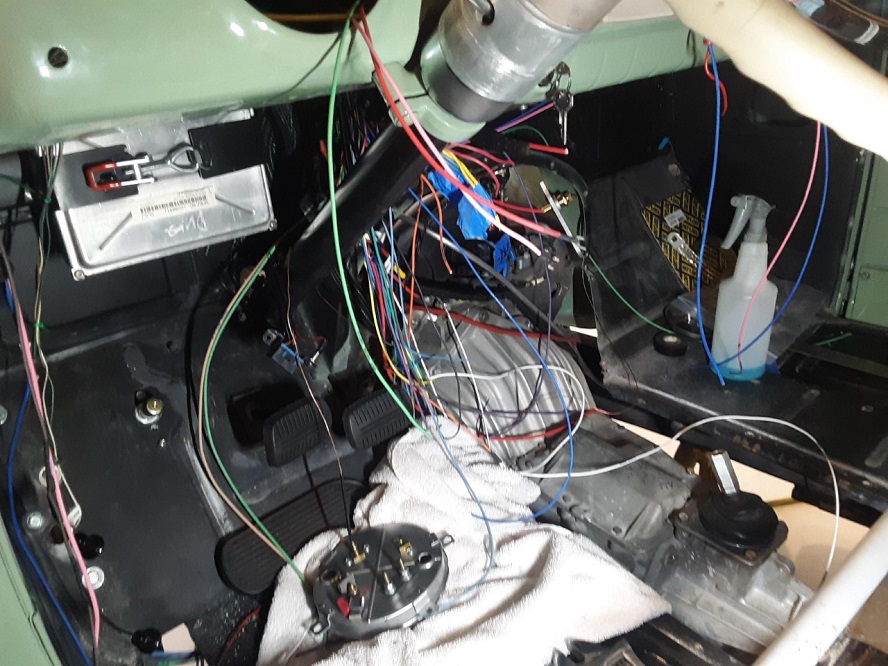 I installed the LED tail lights with the flexible conduit, but really didn't like the look of it. I welded the hole for the light wire closed and then drilled it for a JIC fitting and ran the wire through that. For conduit, I bent some 3/8" stainless tube and flared it for the JIC fitting 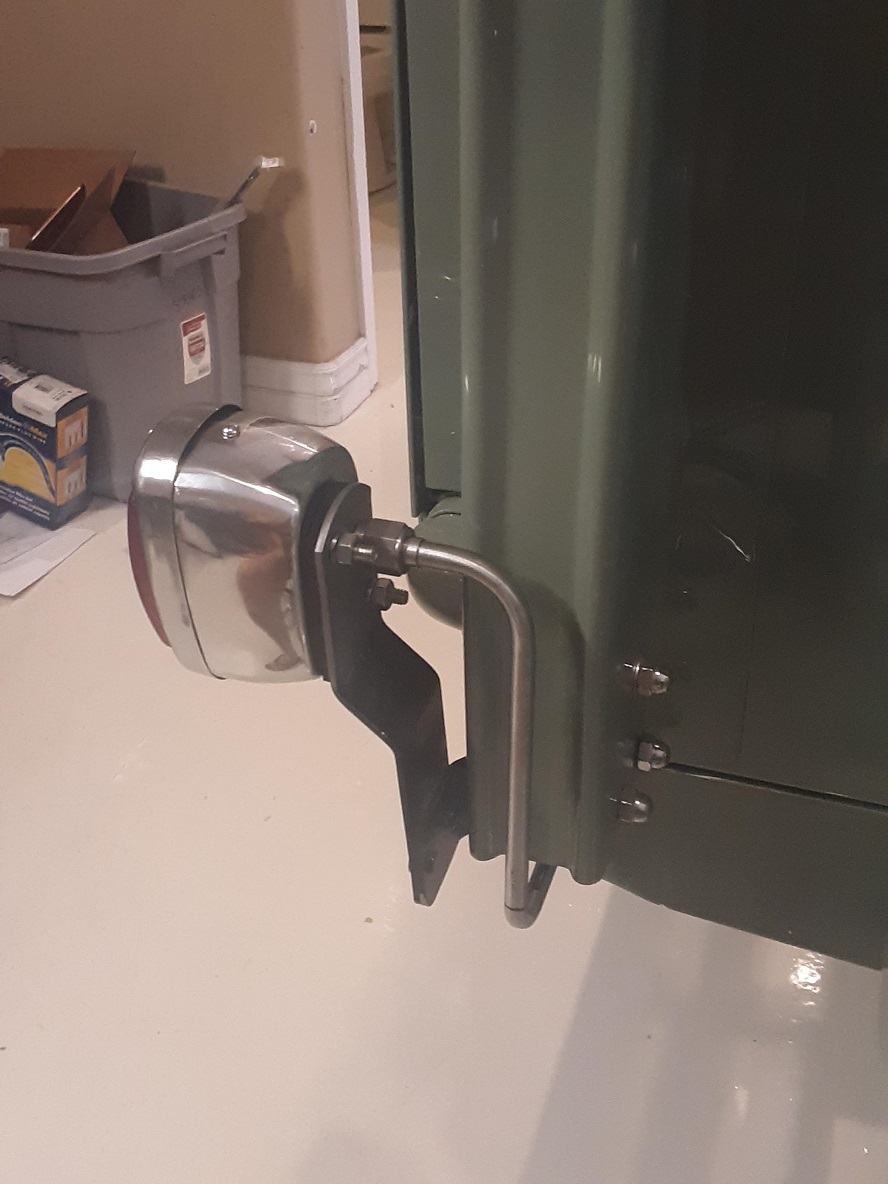 A little closer look. To get the lamp to fit tight against the bracket, I had to take out the wire seal. I made a gasket out of 3/16" rubber to keep the water out 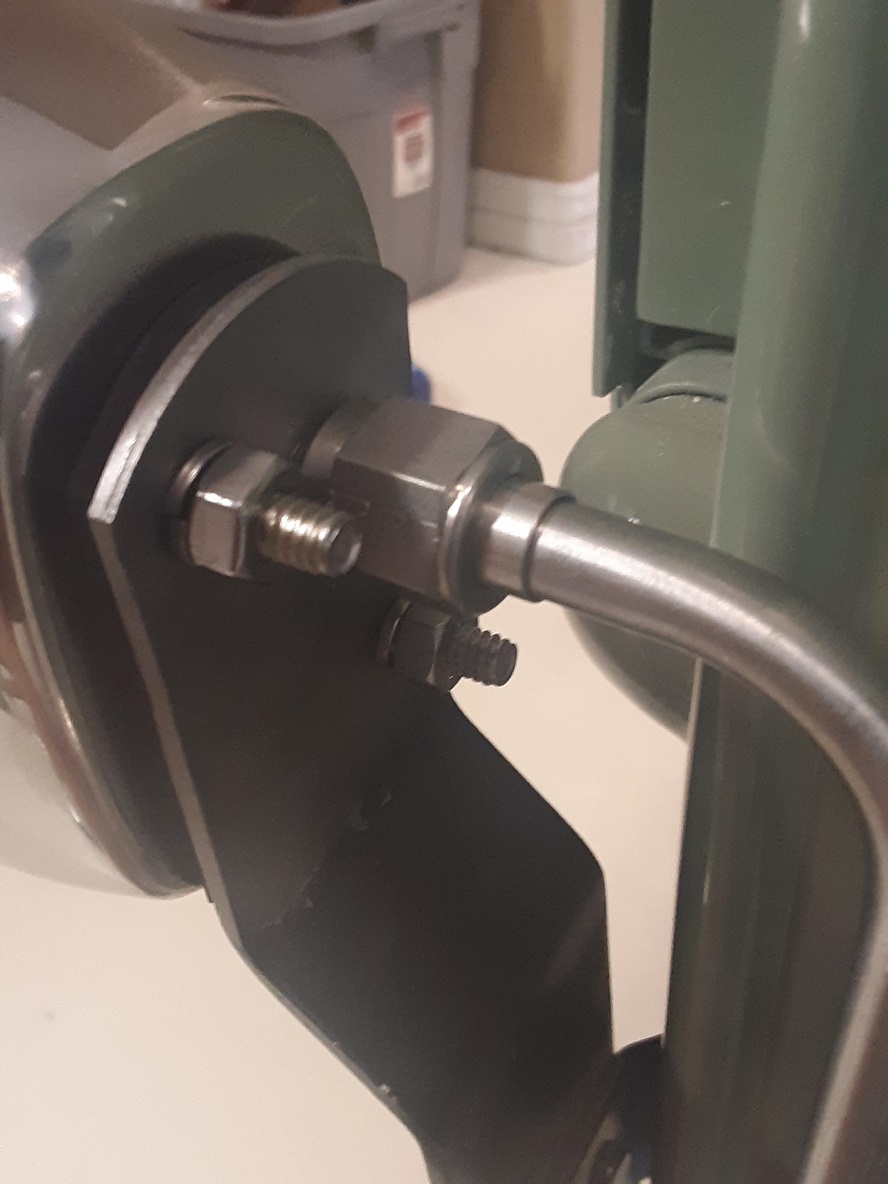 I looked all over for parking lights for the GMC and couldn't find any. The Lucas units off an old Triumph TR3 come pretty close, so I rebuilt these and put an amber bulb in them. There's an extra hole in my fenders underneath the light that didn't get filled when I did the body work. I put a stainless carriage bolt in it to see what it'd look like.  Trying to get other things that I'll need to complete the wiring harness installation. One of the features I'd like to have is some lights in the bed roll to augment the lights in the factory location. I know there's bed roll lights available but I'd like to make some. The plan is to take some 40MM brass core plugs and drill them for discreet LEDs. I want to pot the LEDs in red tinted epoxy resin then sand it smooth and polish it. Thinking about putting one of those boxes that flashes your brake lights a couple of times when you press the pedal. With everyone on their cell phones, I'm feeling a little vulnerable without a rear bumper. 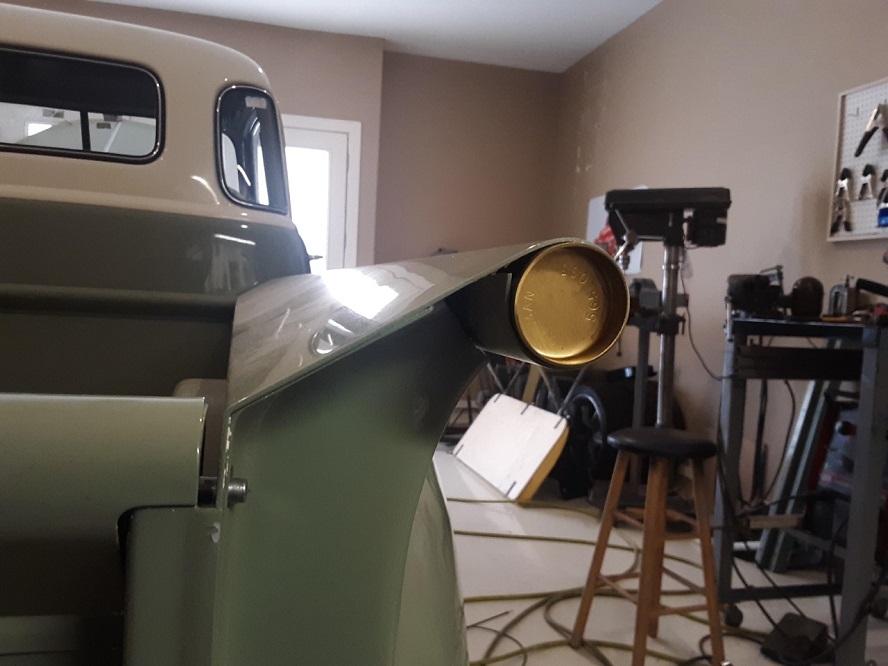 I looked at an ad the other day for an 'electric parking brake' and it looked like a good idea, but the price was pretty steep. I bought a linear actuator off of fleabay for $30 and paired it with a DPDT switch. The fly sheet that came with the actuator said it'd pull 300# with a 2" stroke. I had a custom cable made to work with the Jag IRS brakes. Here's all the parts mocked up on the floor - I'm looking for a place to mount it under the truck and see how it works. 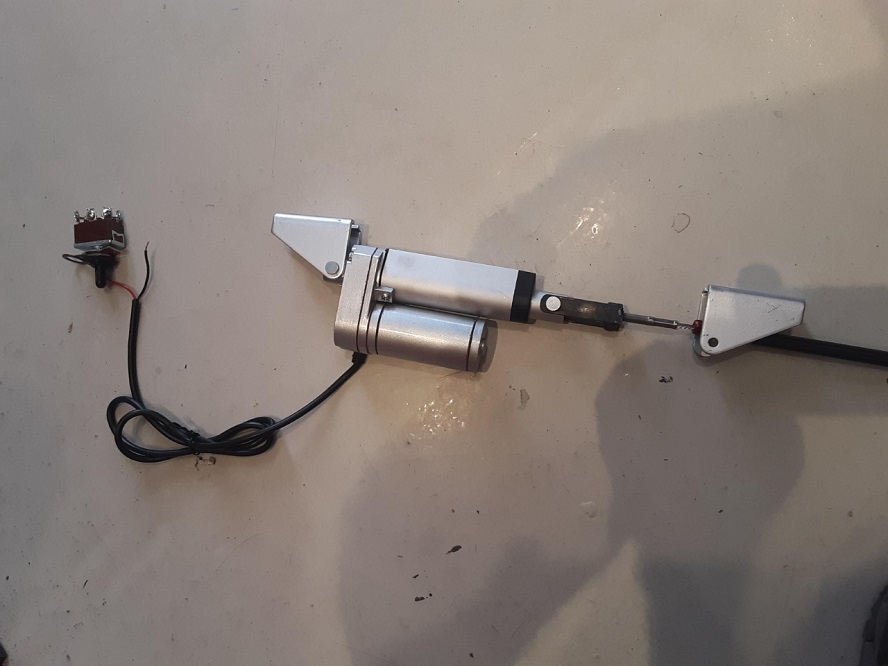 I finished up the exhaust system I made out of mandrel bends and painted it with Rustoleum paint that said it was good to 2000F. I used 'southern' muffler hangers. I'm not sure what makes them 'southern' but now the whole system is isolated on rubber bushings in six locations. 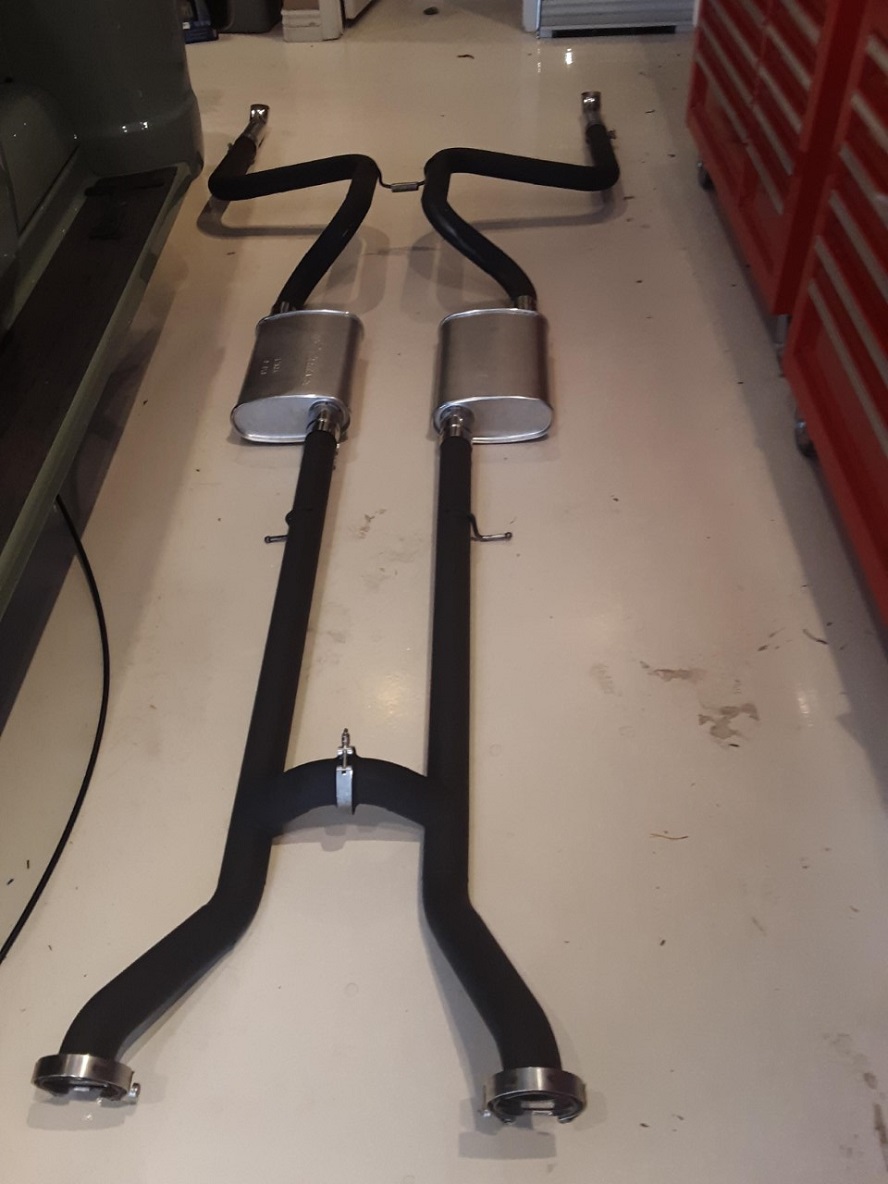 I looked around for exhaust tips but didn't find anything I especially liked. Summit had some polished 304 stainless mandrel bends so I bought one and cut it up for tips. Welded the stainless to the mild steel with some stainless rod' The clamp is just to hold the last hanger rod. 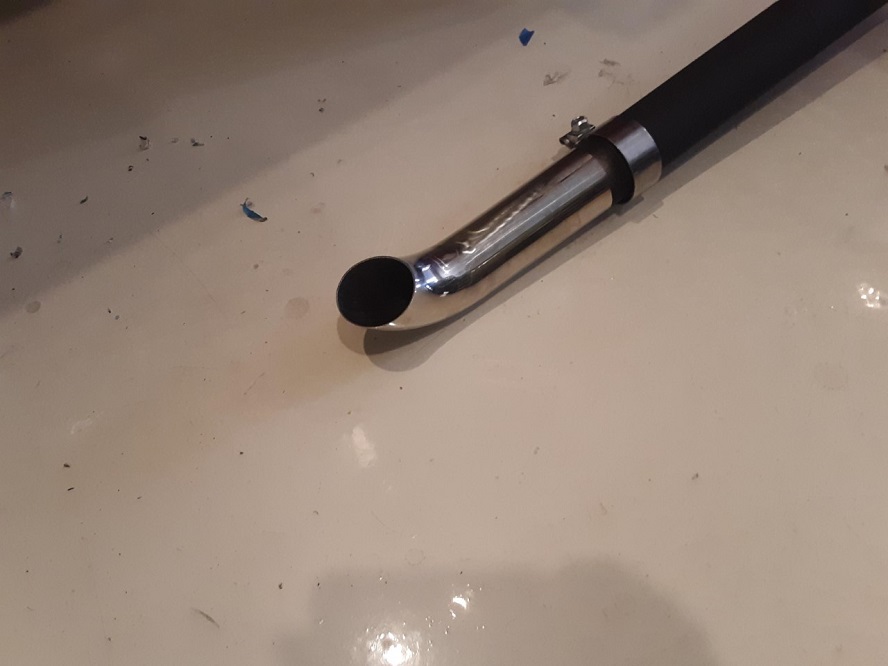 Since the Jag diff doesn't move and is mounted relatively high in the chassis, there's enough room to run the exhaust under the diff. I made a support plate that mounts on the LCA brackets and holds the muffler hangers as well as the attach point for the control rod that sets my pinion angle at 5 degrees to match the engine.  Thinking about what do do for crankcase ventilation for the LS motor in my truck, and ran across this on fleabay. For around $20 I bought this machined aluminum can. It is baffled inside, has a dipstick to check to see if there's oil condensed in the container. The threads on it are a mystery, but I'm thinking they're just poorly tapped NPT and I can run a tap through to clean them up, but other than that it is a nice piece. Going to hard plumb this on the motor.  I also need to do something for a radiator catch can. This is another fleabay Chinese $20 product with mystery threads. For $20 I'll cut the fittings off and weld an NPT bung on it.  That's about it for this month Phil |
|
|
|
 |
| Bookmarks |
|
|


 Linear Mode

