
|
 11-18-2010, 01:29 AM
|
#1 |
|
Registered User
Join Date: Feb 2010
Location: Dayton, OH
Posts: 255
|
Berthas Cummins Build
This is the build of Berthas.
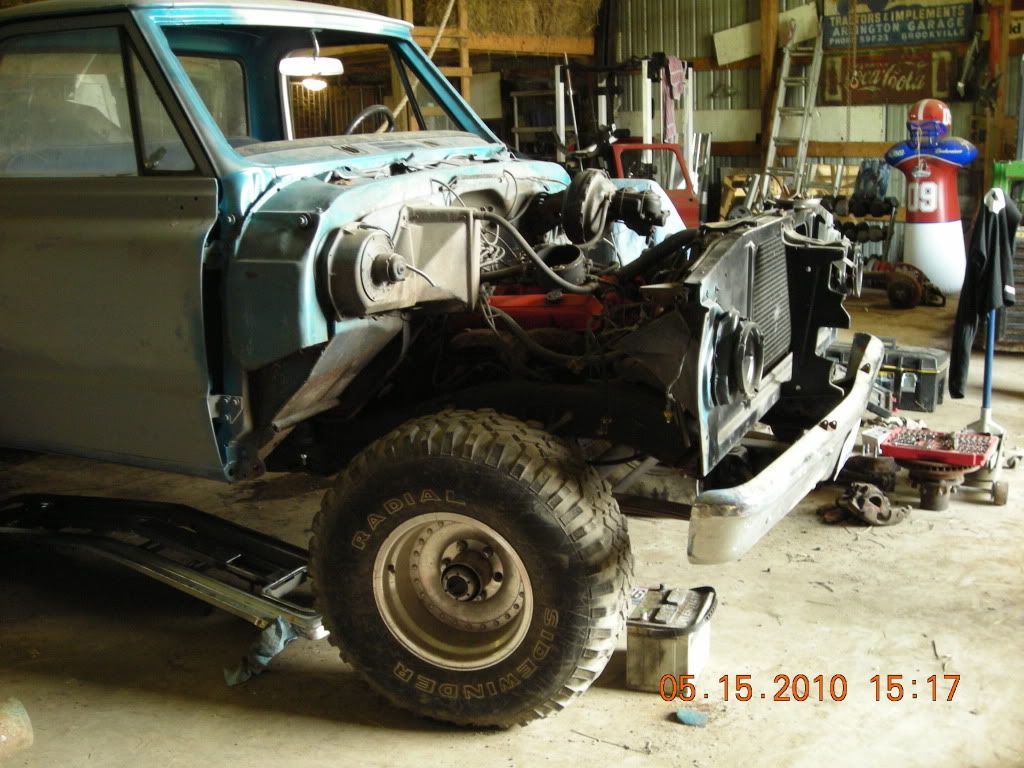
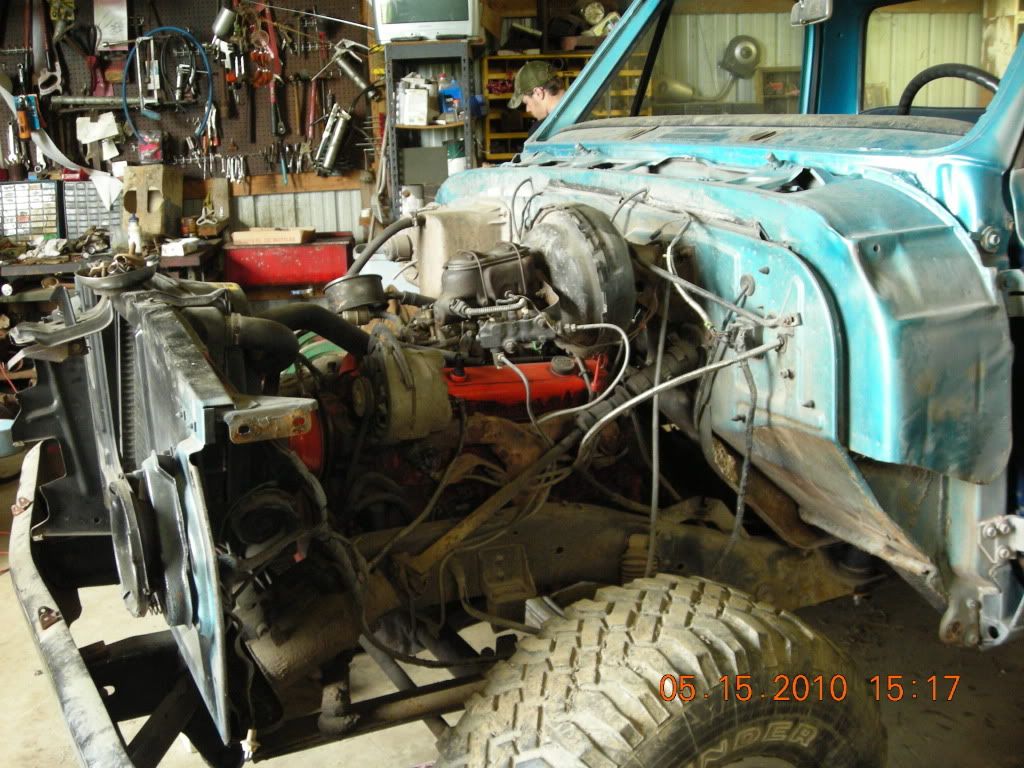
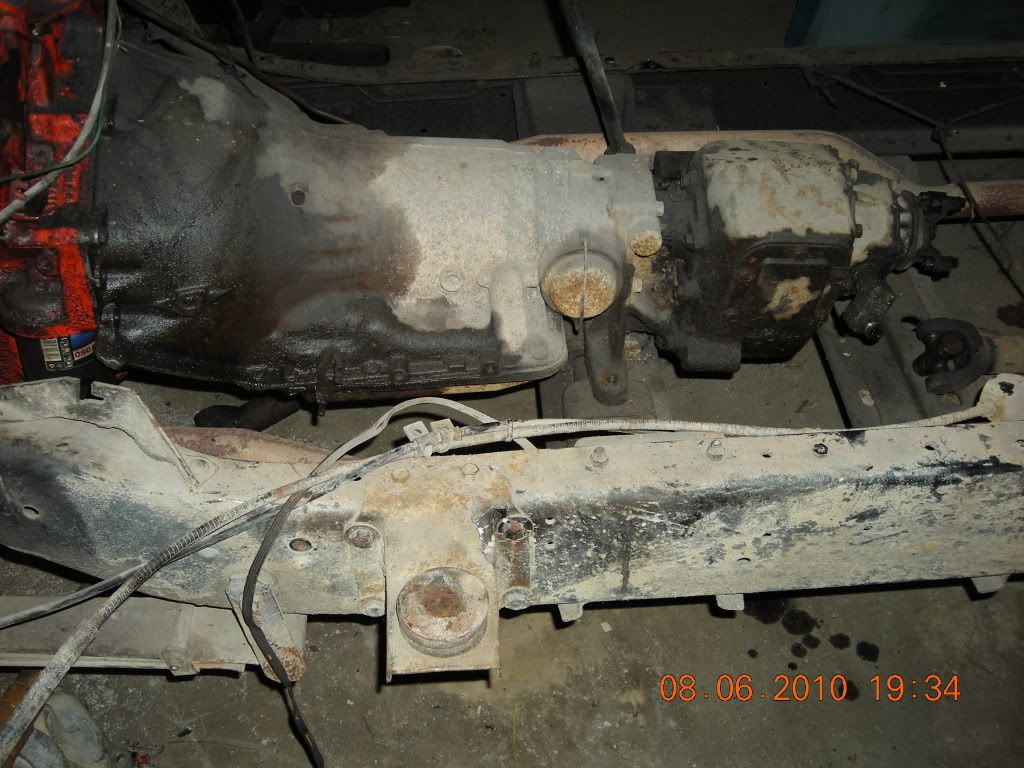
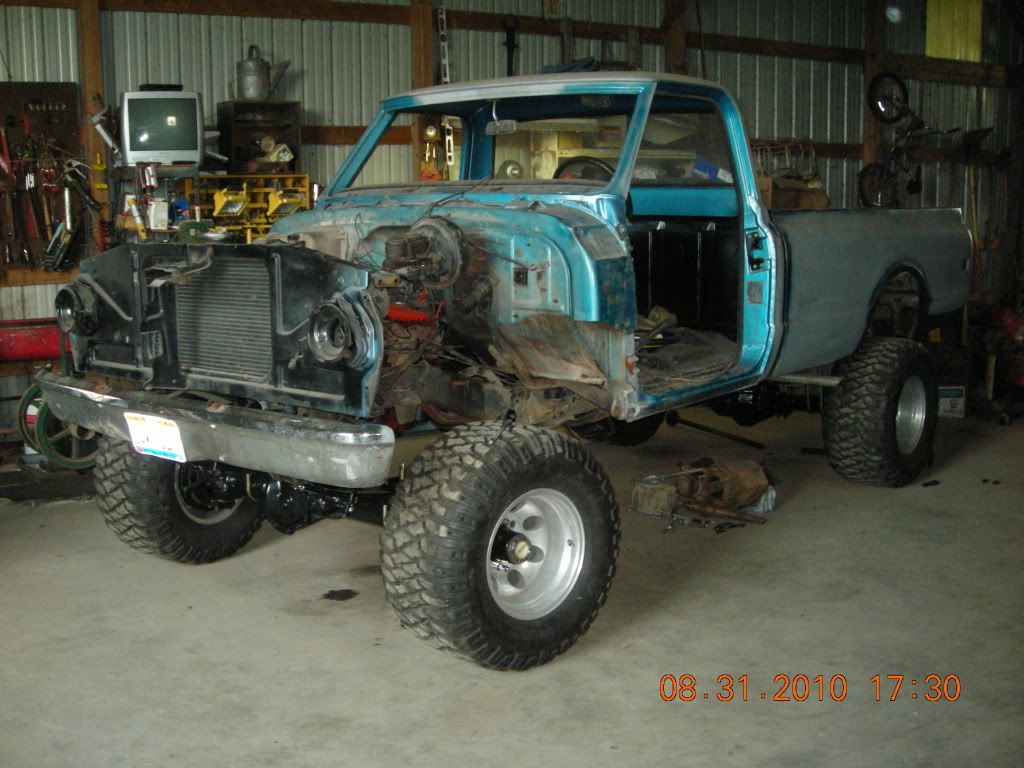
At this point I am well underway on her. I bought the 1971 Chevrolet in February 2010. I started collecting parts and pieces while I let her sit until about June due to the cold weather and a busy schedule. Once summer hit I started on her full out to create what I have so far today. I will post the specs and the pictures I received before I bought the truck for this first post and I will update here and there as I have time until we are caught up to present day. On to the good stuff: Drivetrain Specs: 1994 6bt Cummins NV4500 NP205 D60/14 bolt There are lots of plans for many different areas on the truck that I will cover as I go along. I have collected more parts than I even know that I have right now so I just have to wait to til I get to certain points to actually start putting those parts together to create a truck. Here are some base pictures to give you an idea of the truck as it sat in the previous owner's possesion. Don't mind the creepy guy in the fourth pic......  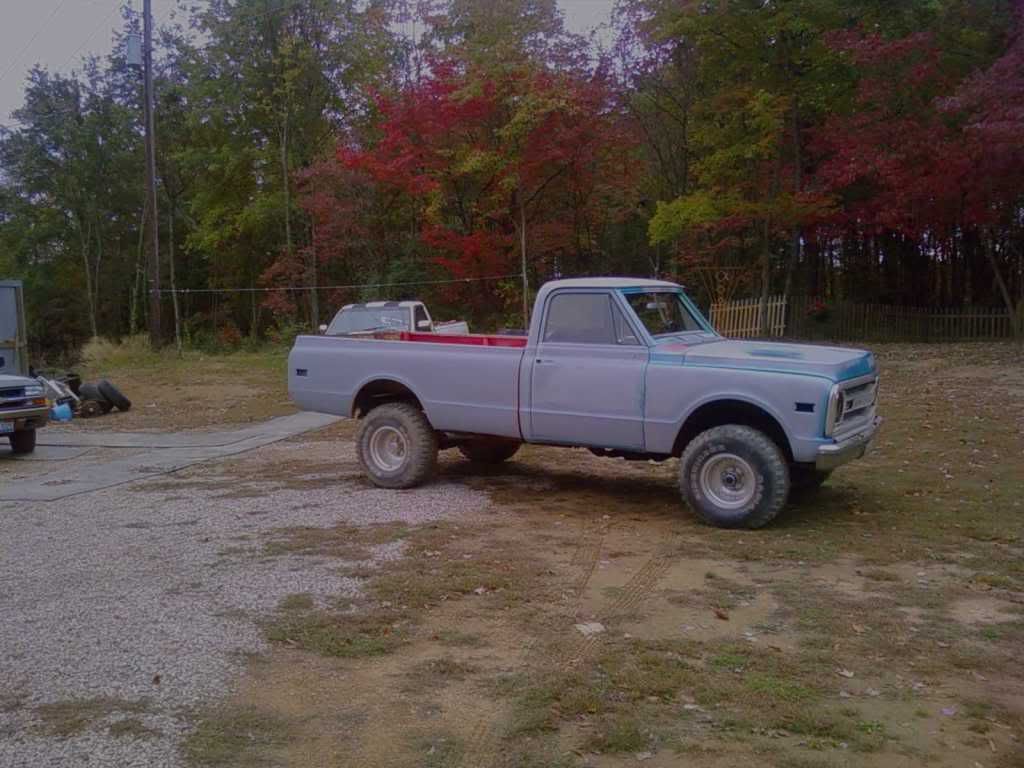 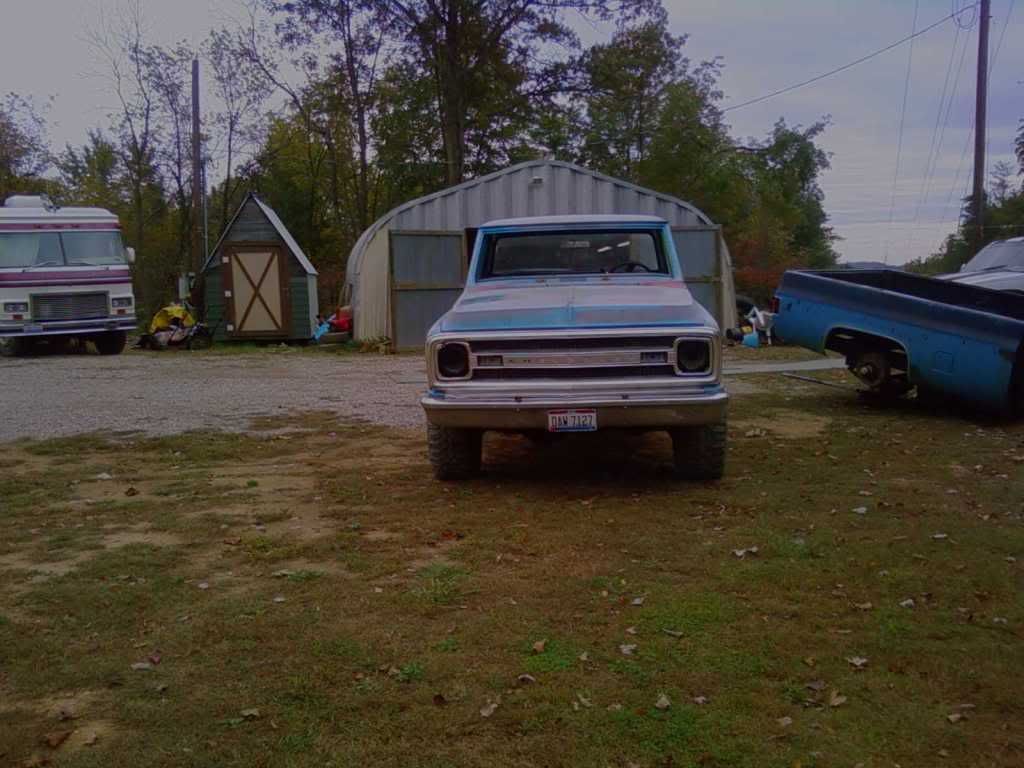 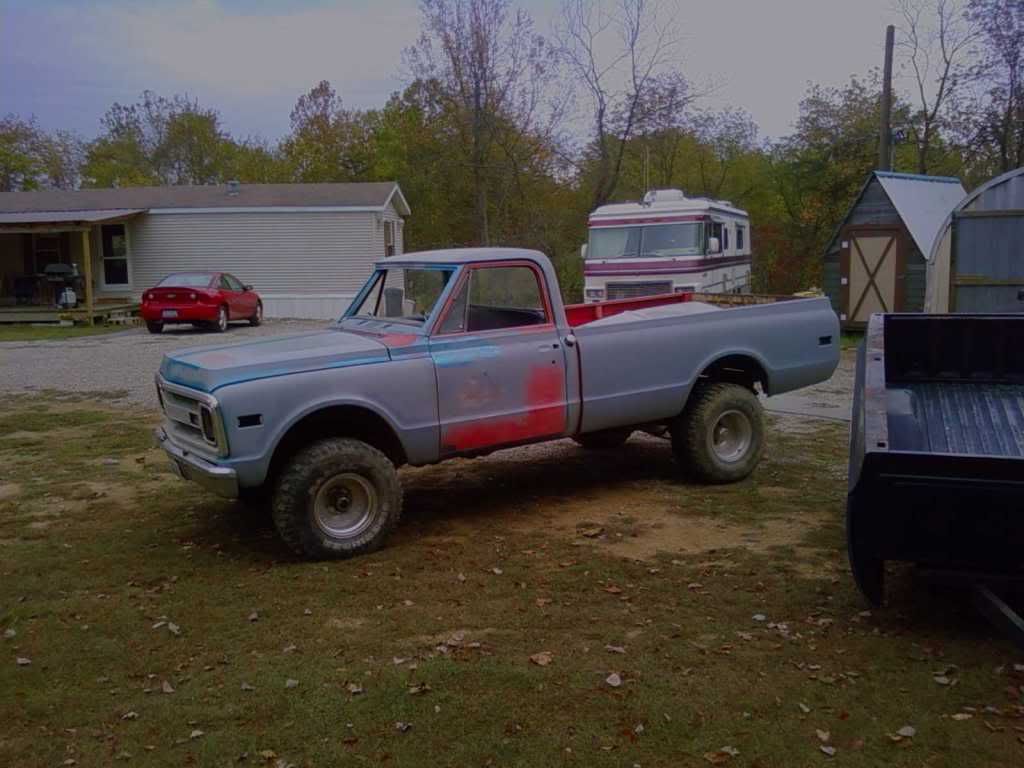 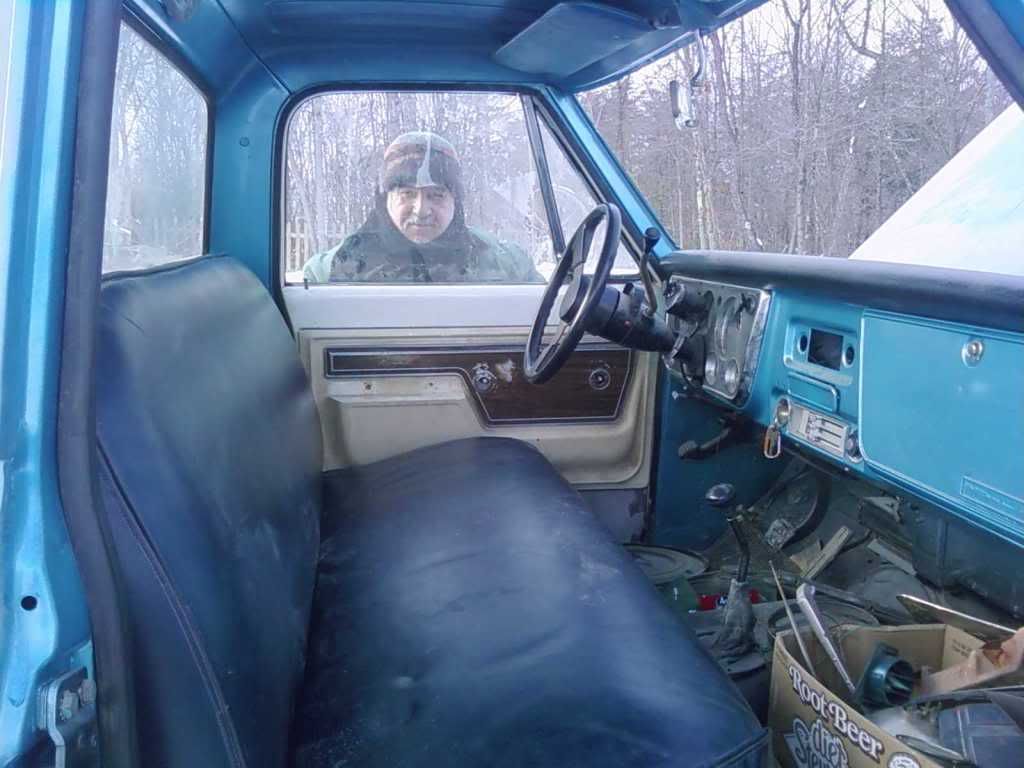 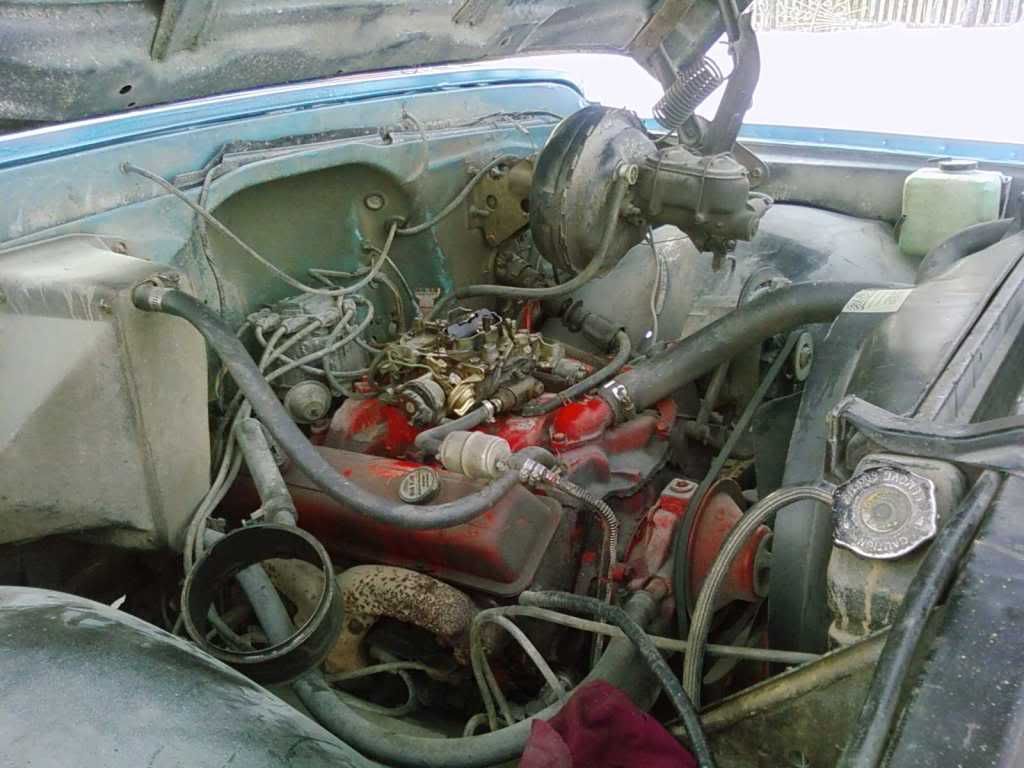
Last edited by dfairchild19; 05-26-2011 at 04:39 PM. |

|

|
|
11-18-2010, 12:10 PM
|
#2 |
|
Registered User
Join Date: Feb 2010
Location: Dayton, OH
Posts: 255
|
Re: Berthas Build
I drove the truck onto the trailer with the 350/350/205 that was in it and she seemed to run great. I thought about adding a few things to get her road worthy but it just wasnt worth it to me so I just decided to dive in and start the disassembly. It had a 2 inch body lift on it to help clear the supposed 33 inch sidewinder mud tires that will be no longer. I will most likely run a 1 inch body lift to help with clearances for the new drive train.
    And then I found these... 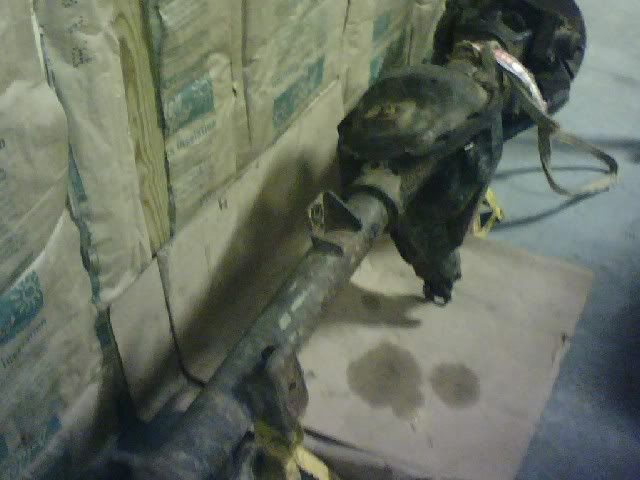 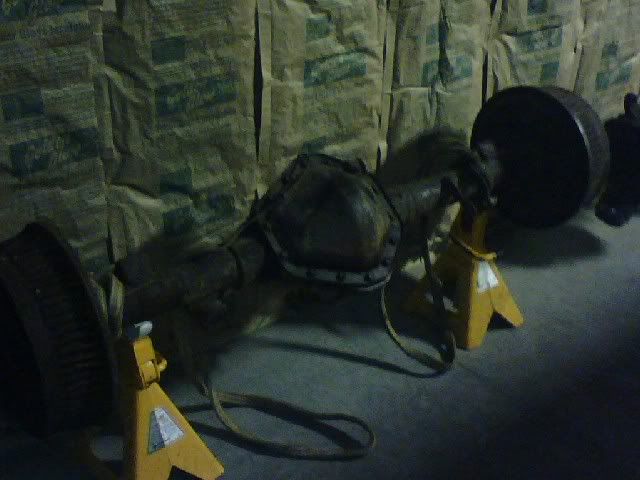 I started on the rebuild of the D60 and 14 bolt and between work and waiting on parts it took about 6 weeks and a small fortune to take them from that ^^^^^^ to this vvvvvvv: 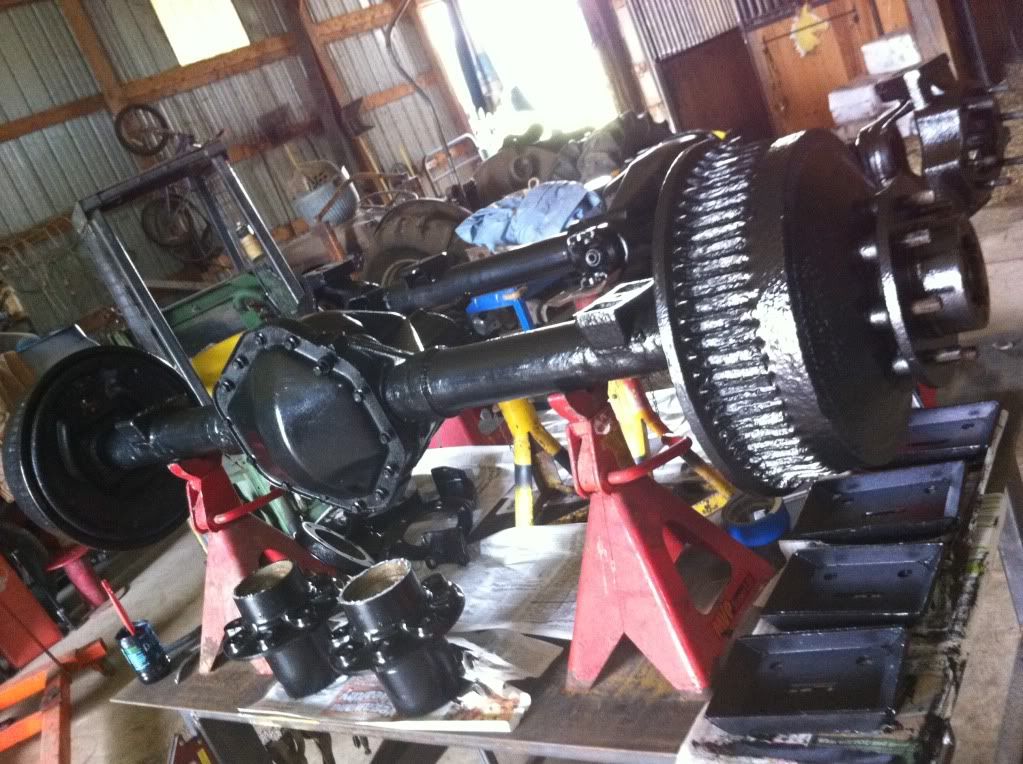 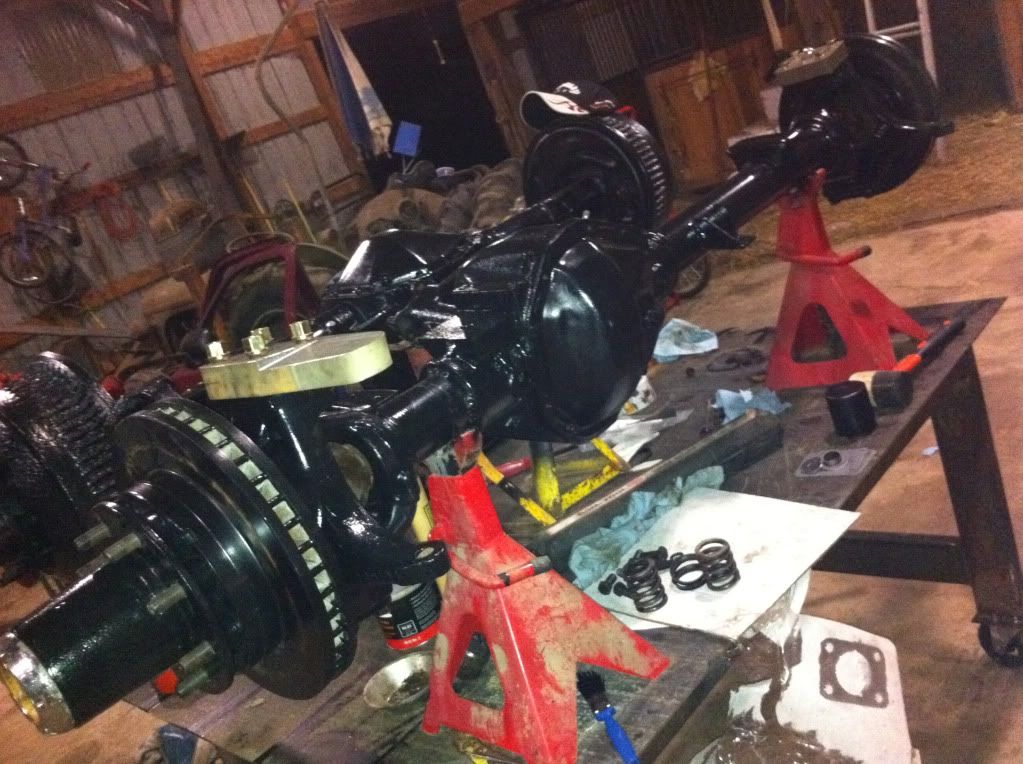 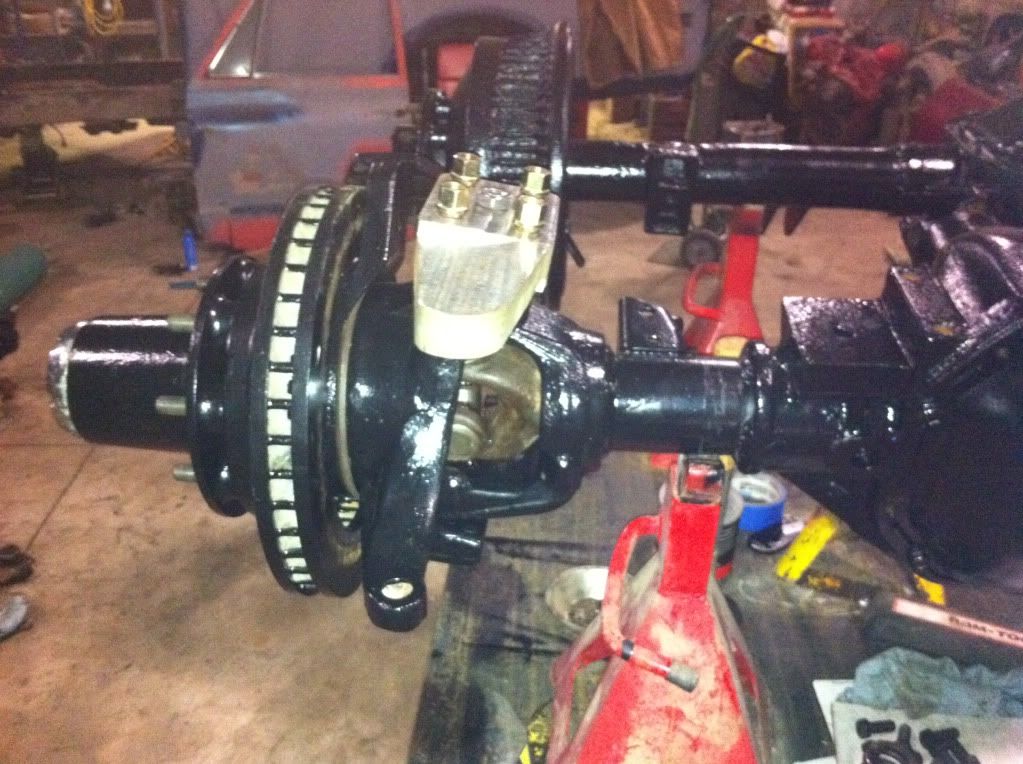 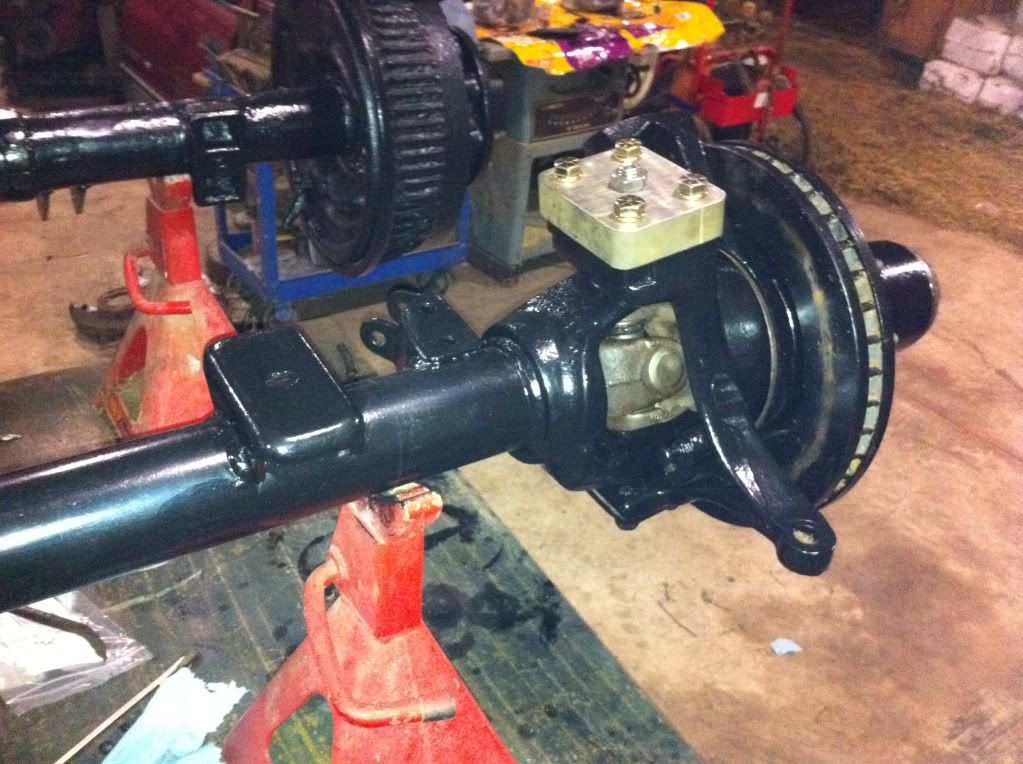 While I waited on parts for rebuilding the axles I decided to "make" some parts on the waterjet for the axles in the meantime: U-bolt plates: 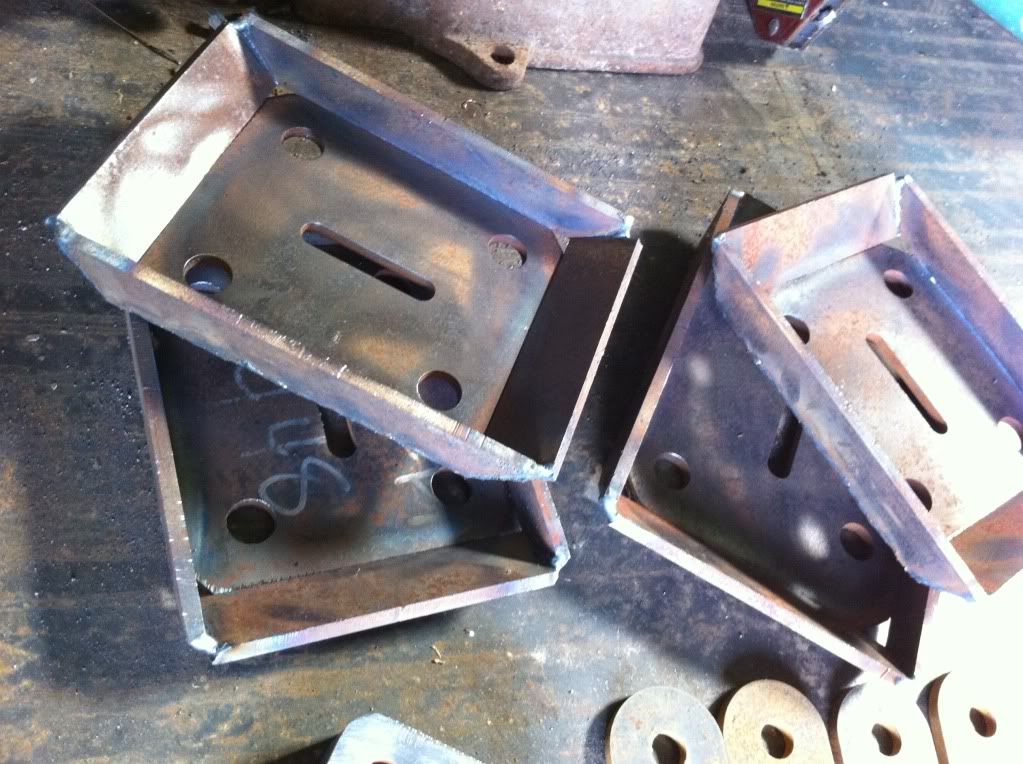 Shackles: 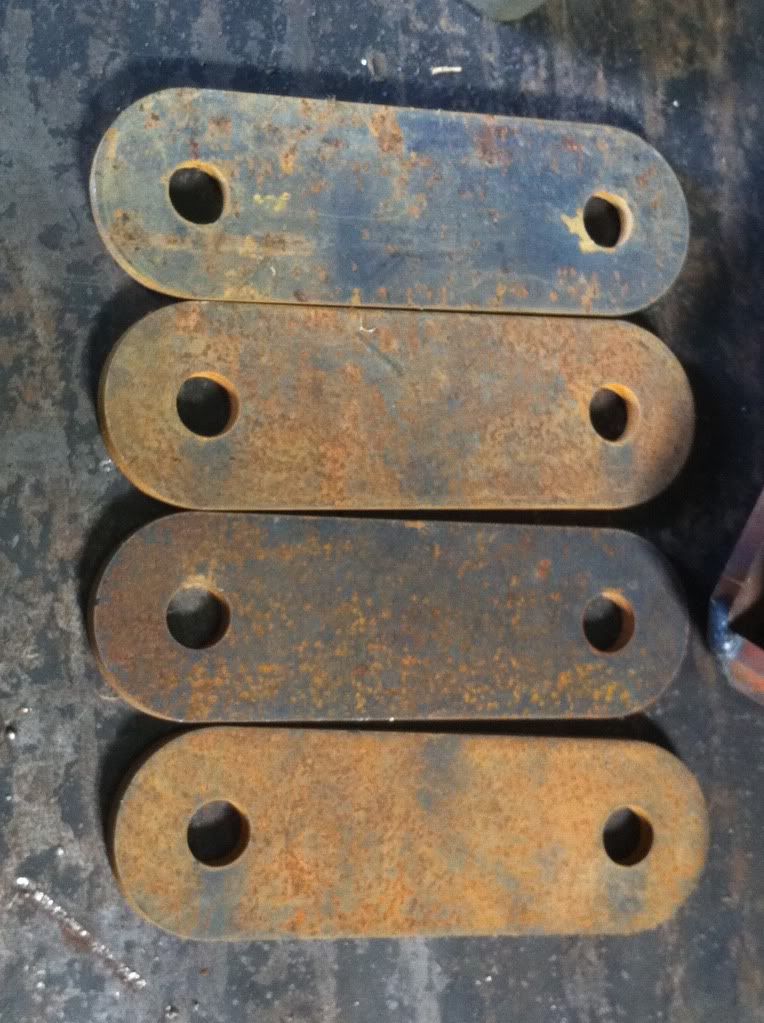 Steering arm and springless kingpin cap for the 60: 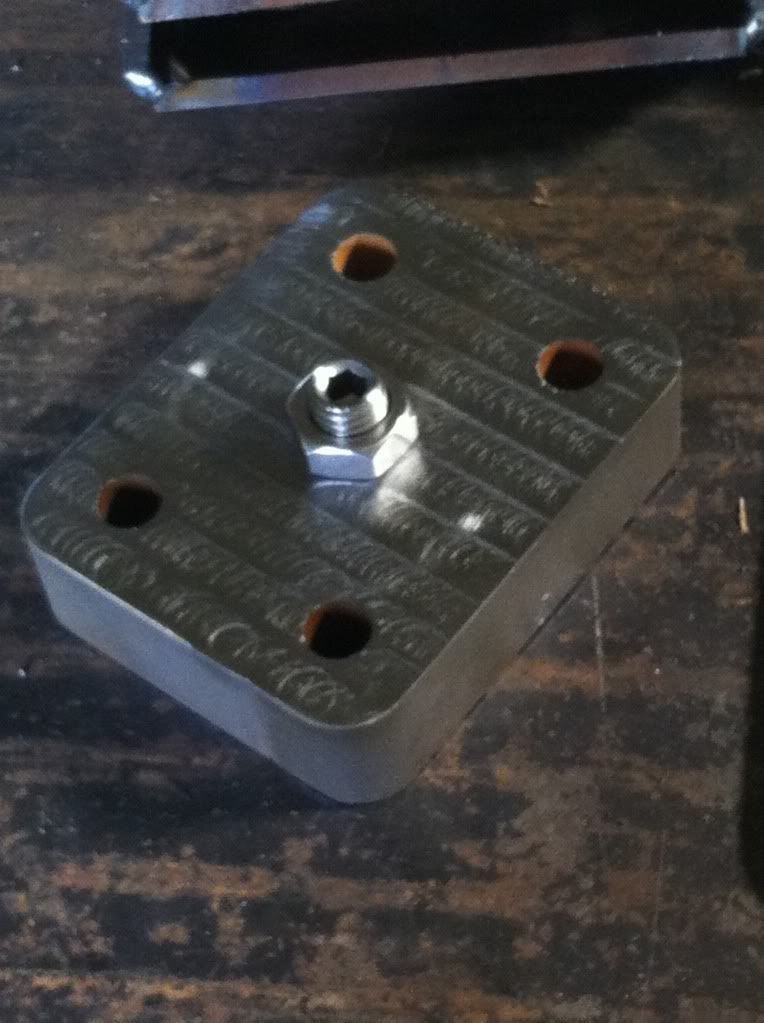 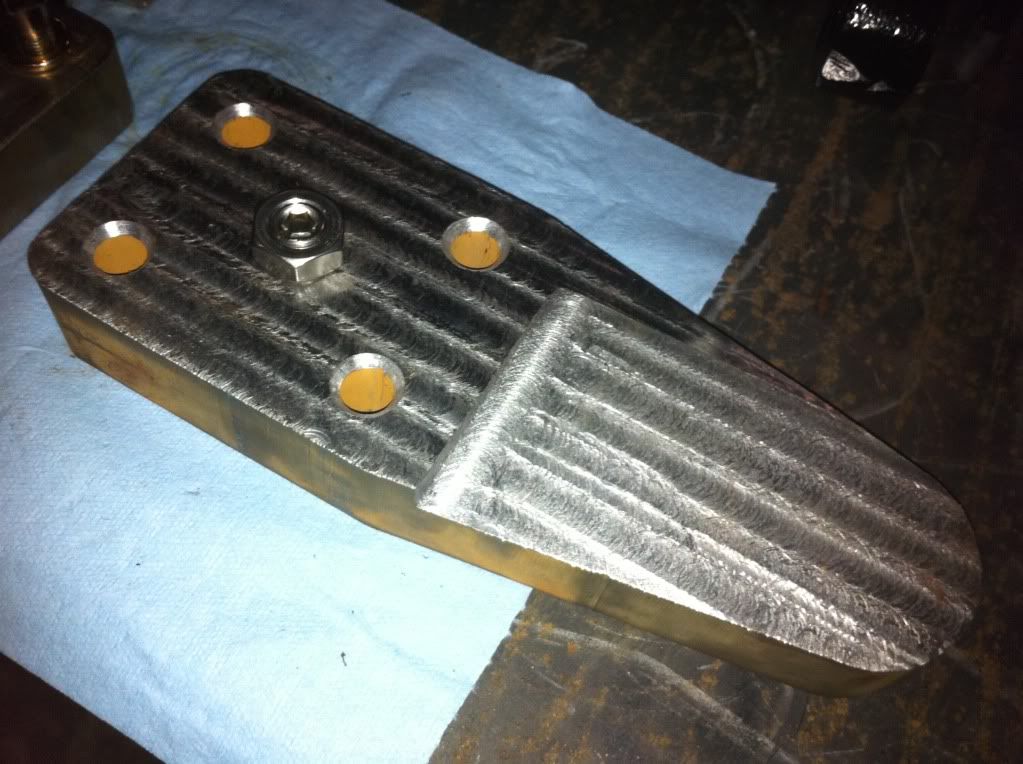 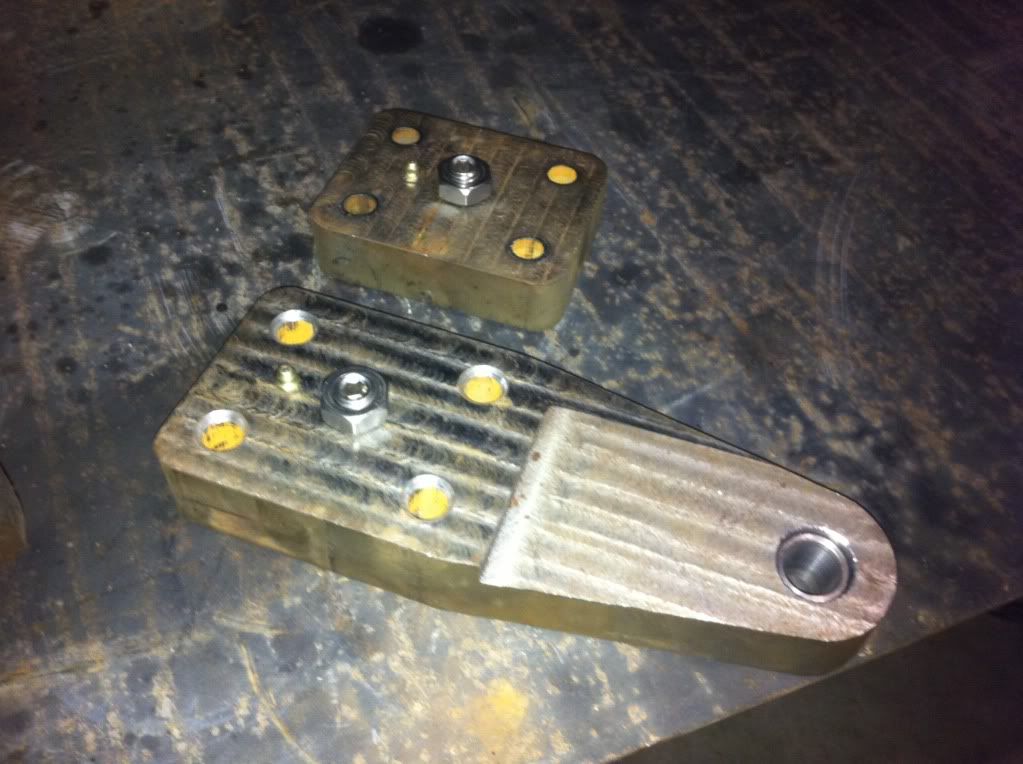 In the middle of building the axles and all of the other parts for them I decided that it would be nice to have a good, solid table to work from. So I built one. The frame of the table was completely overkill being out of 2x4 boxed 3/16 wall tube, but I had the material left over from another project and I will have this thing to use forever. I cannot even explain how much it has helped me having this table for this project. The table is not finished yet as I plan to add brackets and shelves for my welder and other tools, but I could not have built it at a better time: 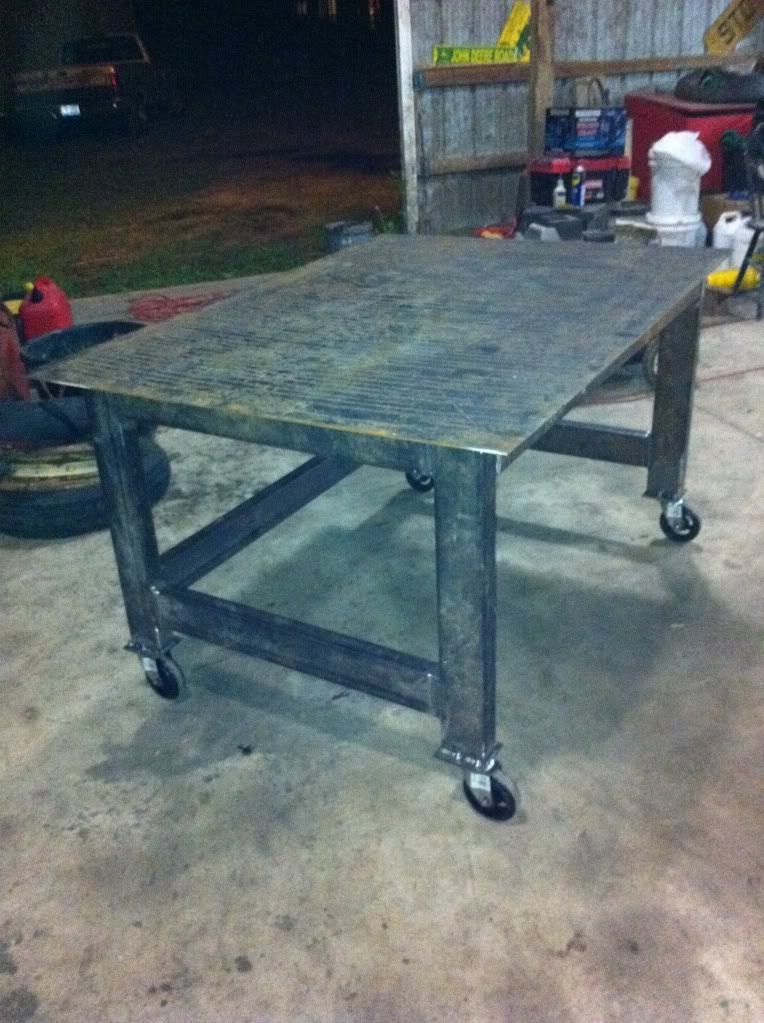 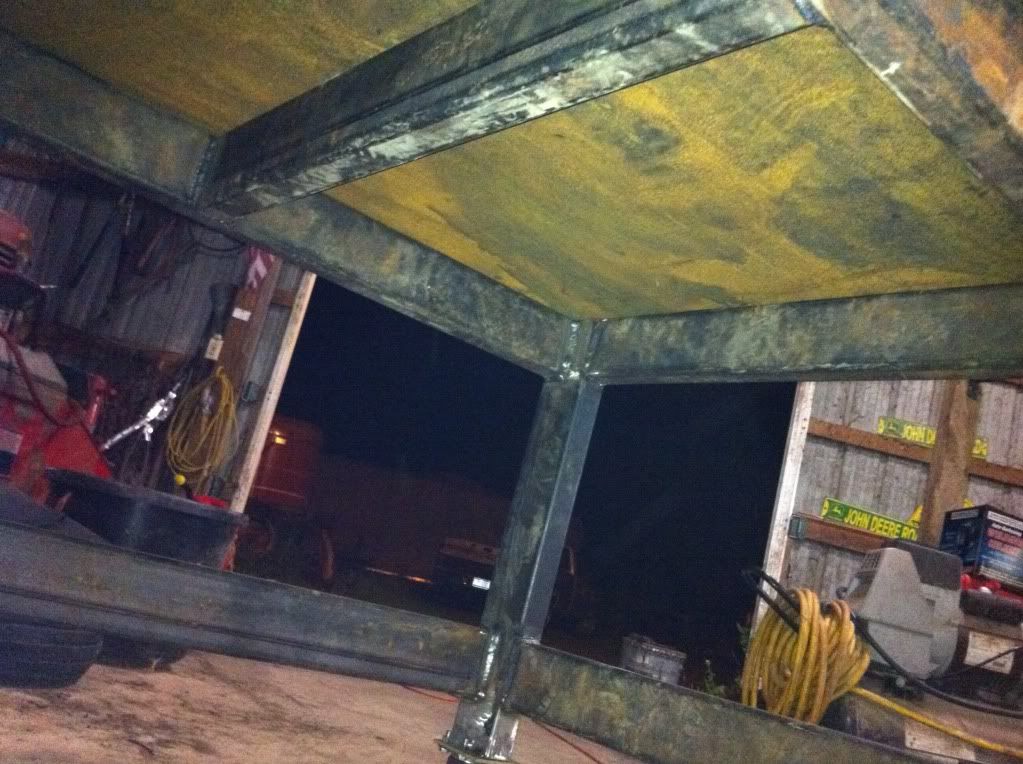
|
|
|
|
|
11-18-2010, 01:12 PM
|
#3 |
|
Local Redneck Authority
Join Date: Mar 2009
Location: Grand Rapids, MI
Posts: 584
|
Re: Berthas Build
Looks like you've got a good truck to start with, best of luck on the build!
Nice work on the axles too!
__________________
-Kevin four on the floor feel the beat in your soul movin to the rhythym pumpin til ya cant take no more dance if you want to do what you came to you cant ignore the feeling of that four on the floor |
|
|
|
|
11-18-2010, 08:48 PM
|
#4 |
|
Chevy Enthusiast
Join Date: Jul 2009
Location: Canyon Lake Texas
Posts: 2,024
|
Re: Berthas Build
Looks good so far! Cant wait to see the cummins swap!
__________________
Tony 1985 GMC K2500 restoration Project: Rust, White & Blue 1989 Chevy R3500 CC Cummins & 4X4 swap some day... 1989 Burb (D60, 14BFF, 12V, NV4500, NP205, 37" tires in progress) |
|
|
|
|
11-18-2010, 08:57 PM
|
#5 |
|
Windy Corner of a Dirty Street
Join Date: Jun 2003
Location: Pueblo West, Colorado
Posts: 2,926
|
Re: Berthas Build
Looks great! Wish I could find a Dana 60
__________________
Current vehicle collection: 1978 Chevrolet K10, 8.1L, NV4500, NP205 1989 Chevrolet Suburban, 8.1L, NV4500, NP241 1993 Chevrolet C1500 Sportside, TBI 7.4L, 4L60E 2001 Chevrolet K2500HD, Ext Cab, SWB, 8.1L, ZF 6 speed 2014 Chevrolet Impala LTZ 3.6L Vortec 8.1L because life is too short to tolerate underpowered vehicles
|
|
|
|
|
11-21-2010, 02:27 PM
|
#6 |
|
Registered User
Join Date: Feb 2010
Location: Dayton, OH
Posts: 255
|
Re: Berthas Build
Thanks for the good words everyone!
|
|
|
|
|
11-21-2010, 03:53 PM
|
#7 |
|
Registered User
Join Date: Feb 2010
Location: Dayton, OH
Posts: 255
|
Re: Berthas Build
When I finished the table and painted the axles and parts I put the axles under the truck and attached them with the ubolts and ubolt plates that I made. I threw on the wheels and tires I got for it and this is how she sat for a bit while I went to work on the removal of the Cummins and NV4500 from the Dodge.
 Once I removed the engine and trans from the Dodge I pushed it outside, set the Cummins aside, and started on the conversion of the nv4500 from 2wd to 4wd. This was a bit of a process because my original plan was to just take all of the parts from the 2wd mainshaft and transfer them to a stock 4wd mainshaft then add the 4wd tail housing and run it that way since the trans seemed to be in good driving condition when it was in the Dodge. I then decided to order the upgraded mainshaft so that I wouldn't have the 5th gear nut issue to worry about. Then I decided that I might as well do it right and do it once and do a full rebuild so that I wouldn't have to worry about it for a long while. Here are some pics of the rebuild: 2wd nv4500 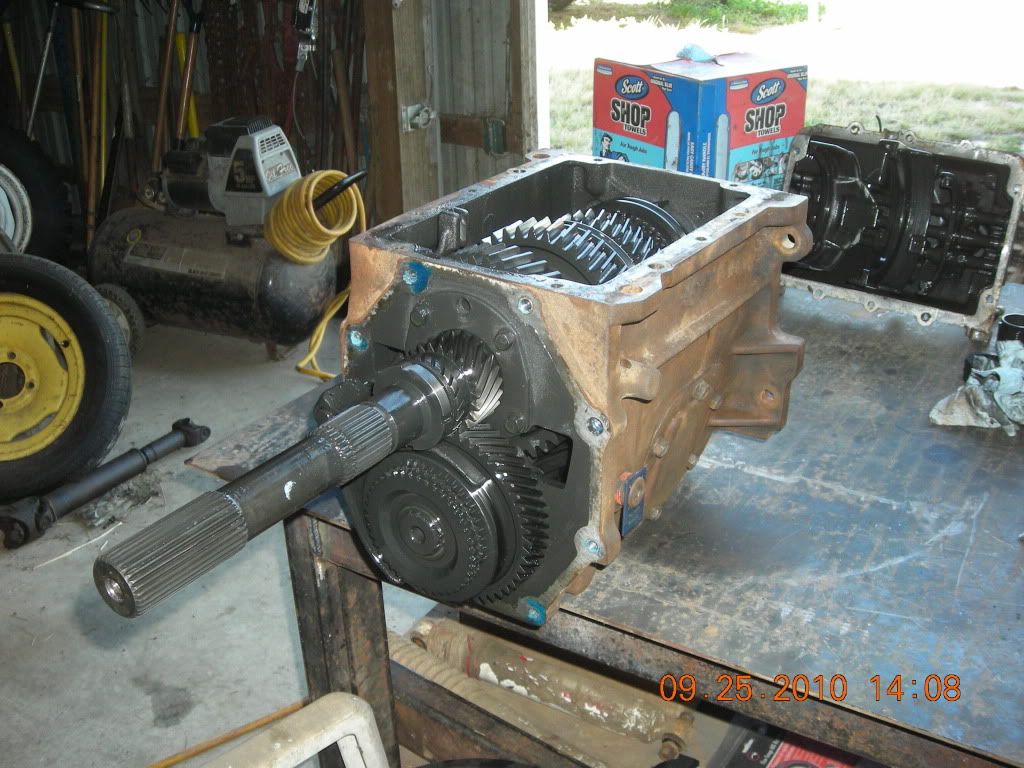 Pulling off 5th gear with a tool I made 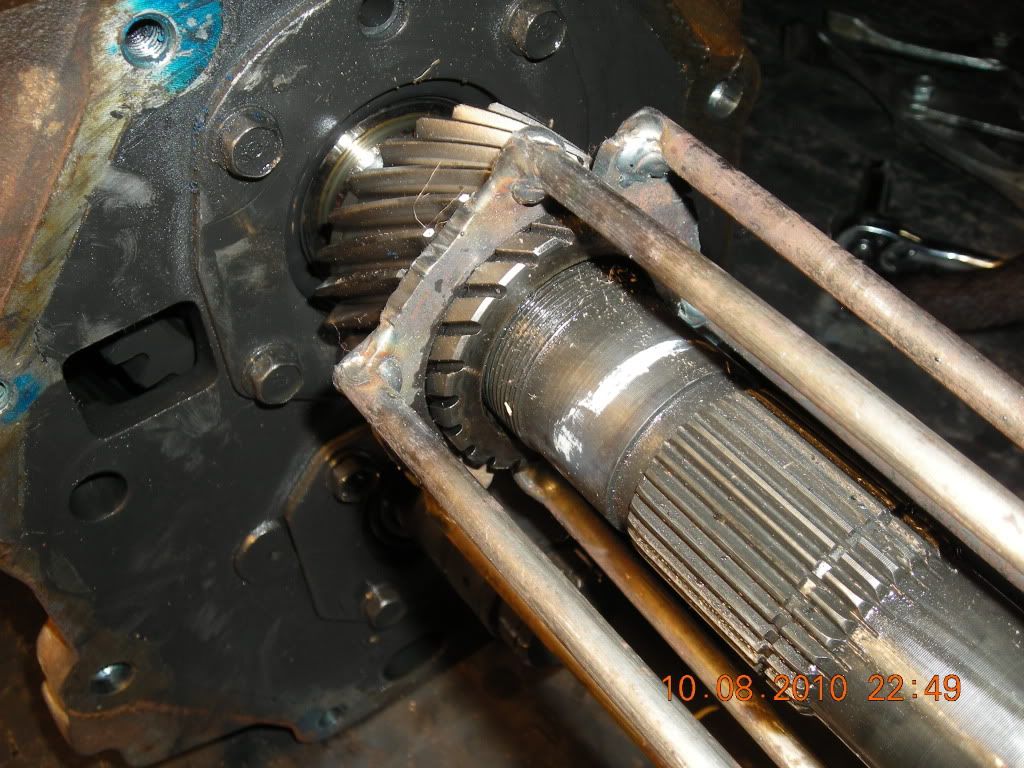 Empty Case 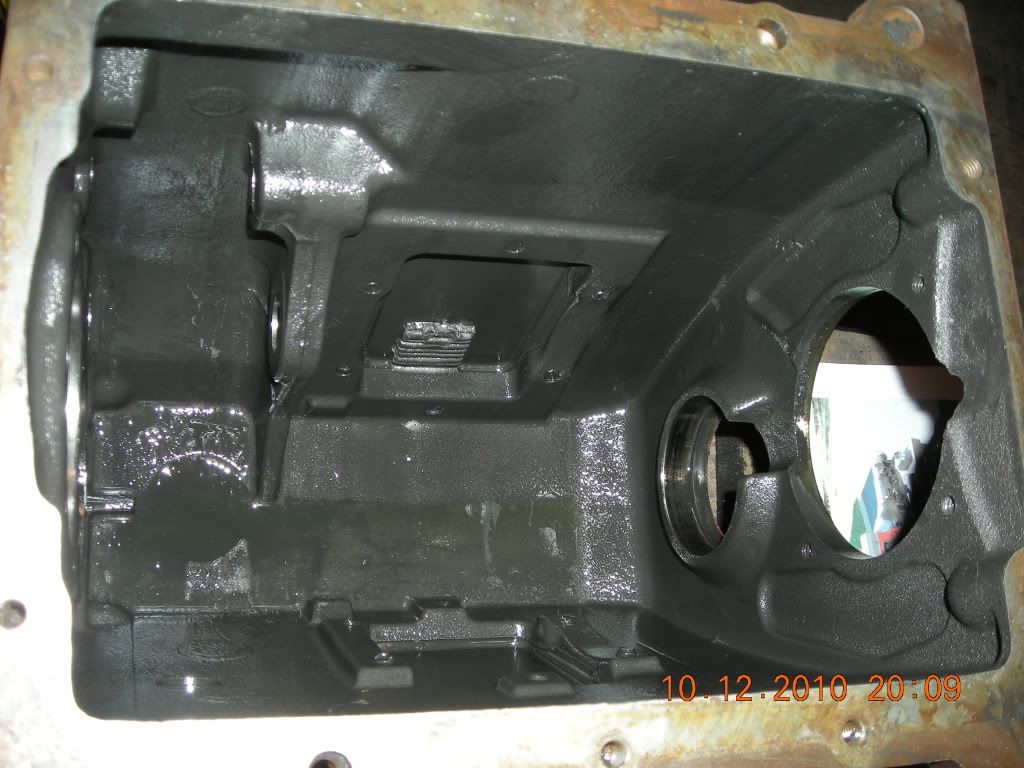 Sea of parts 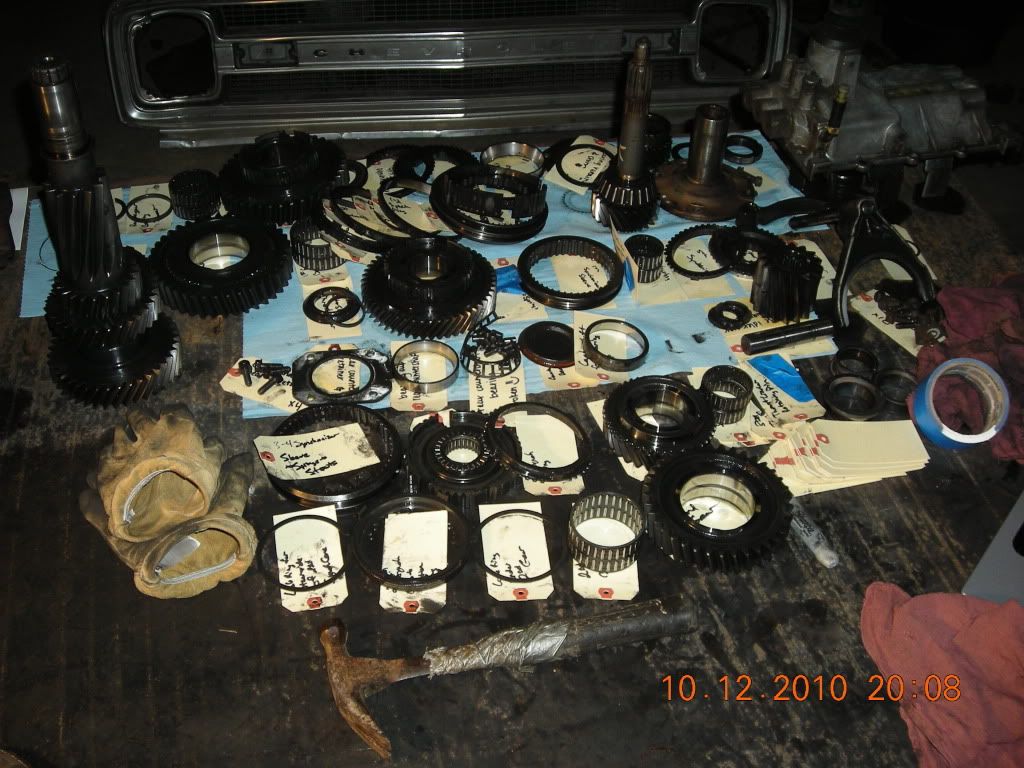 Finally finished and buttoned up 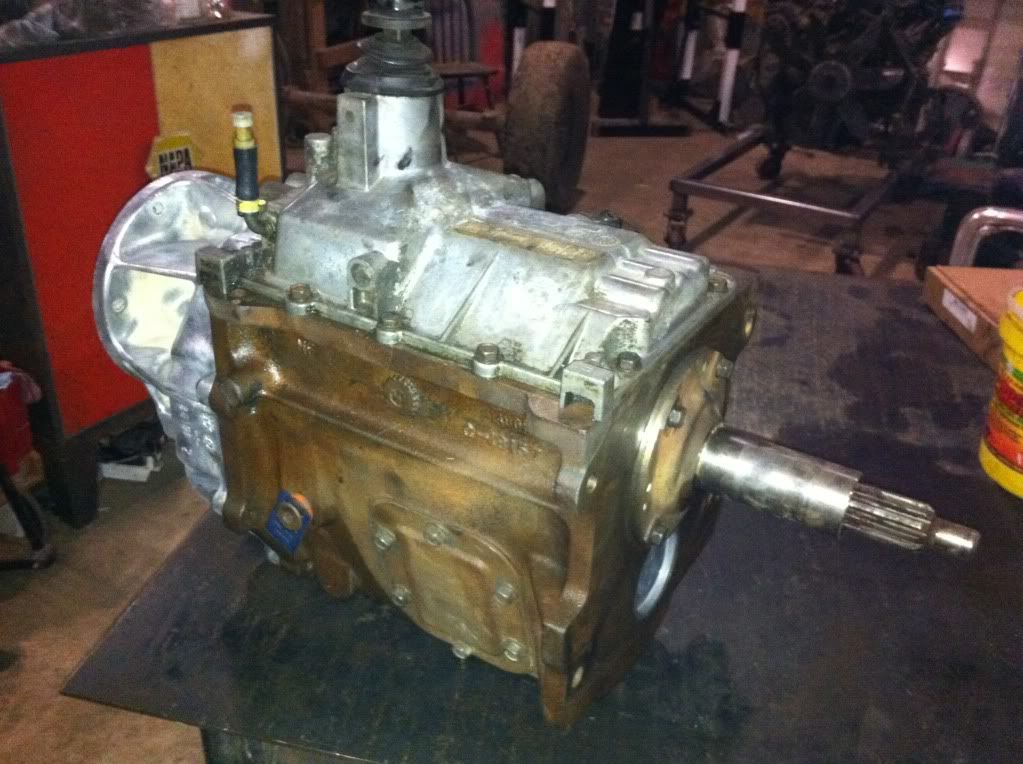
Last edited by dfairchild19; 11-21-2010 at 04:55 PM. |
|
|
|
|
11-21-2010, 04:38 PM
|
#8 |
|
Registered User
Join Date: Oct 2007
Location: Spanaway
Posts: 8,451
|
Re: Berthas Build
Looks like that table has been put to use yet again! You have a great build going on and i'm looking foward to following it.
I am totally envious of your shop!! I'm so tired of working in the dirt.. and now the cold, it showed last night..
__________________
Mike. Swamp Rat build thread : http://67-72chevytrucks.com/vboard/s...d.php?t=595019 72 3/4T 4X4 4" BDS Lift 33" BFG's |
|
|
|
|
11-21-2010, 04:51 PM
|
#9 |
|
Registered User
Join Date: Feb 2010
Location: Dayton, OH
Posts: 255
|
Re: Berthas Build
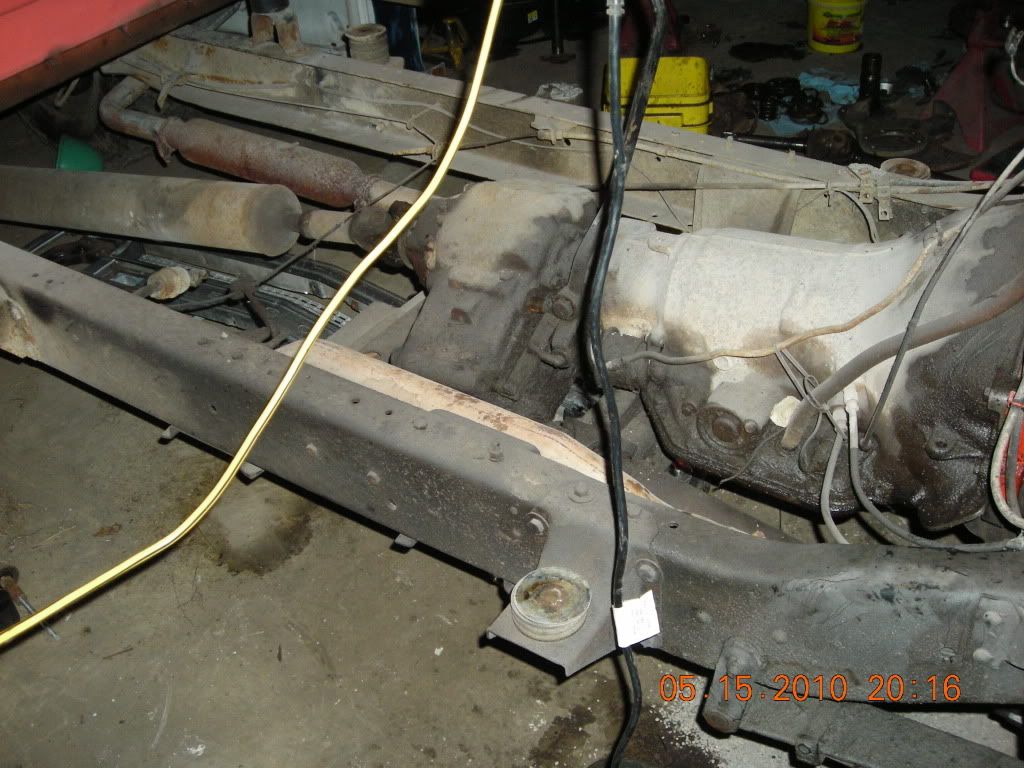
After I finished rebuilding the trans I set it aside and started working on the frame so I could get the the drive train together to start mocking up the motor mounts, trans mount and cross members. I removed the original Chevy motor crossmember, trans crossmember, and transfer case crossmember and then welded in a new temporary crossmember to keep the frame shifting to a minimum. From there I started filling in holes that I will not use in the engine and trans areas of the frame. I will fill the rest of the holes later. After the holes were filled, I tacked in some boxing plates in the motor mount and trans mount areas so that I could get the drive train in to start mocking the mounts for everything.
Original engine crossmember 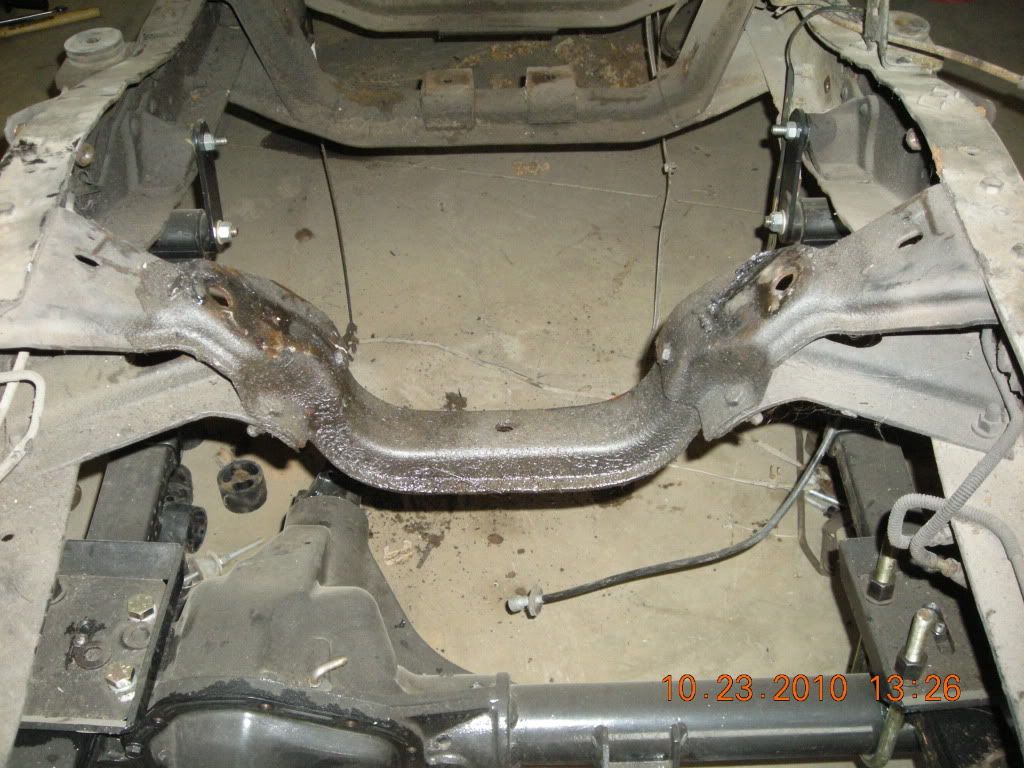 engine crossmember out and original trans and rear crossmember 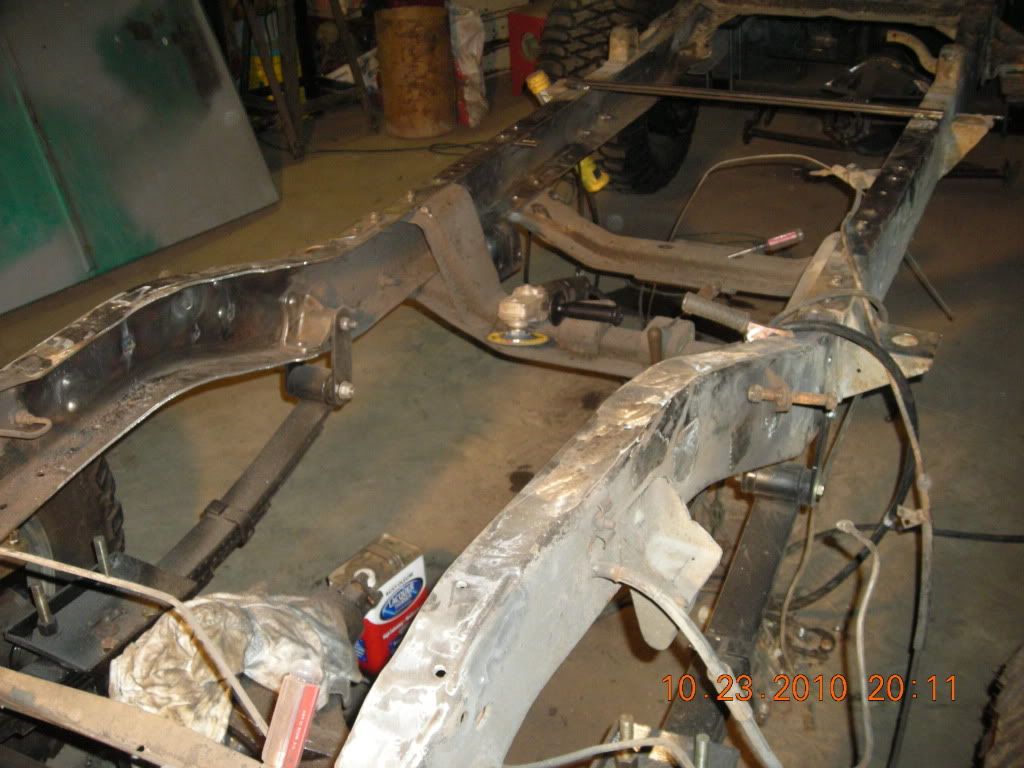 Original crossmembers out and holes filled 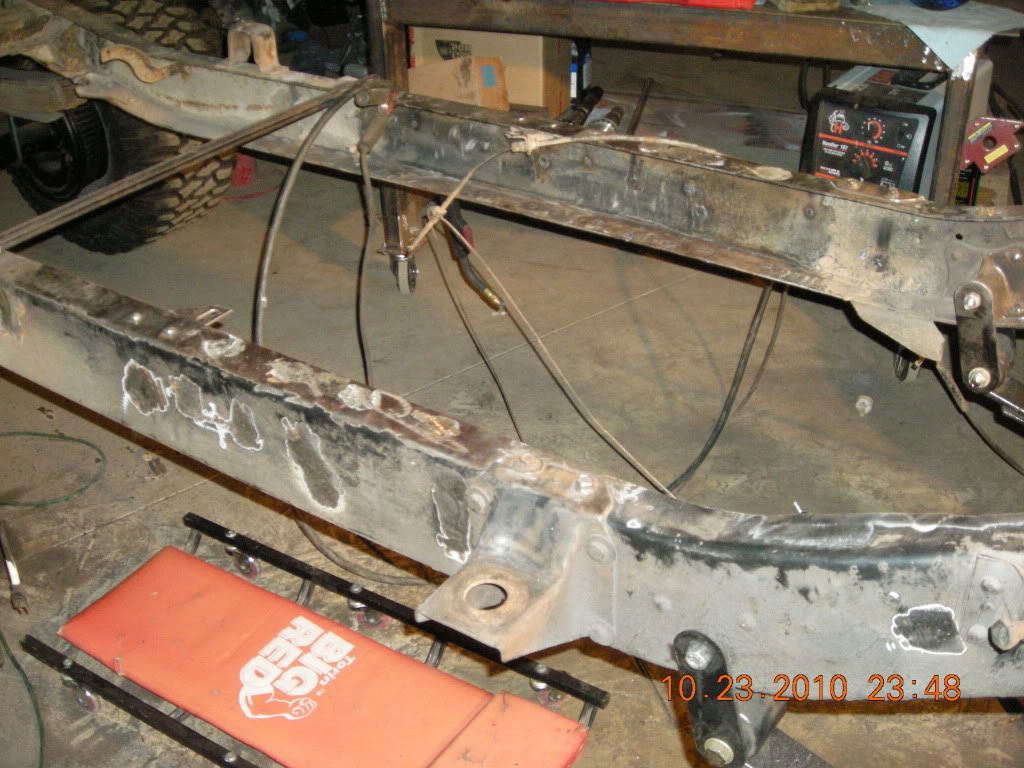 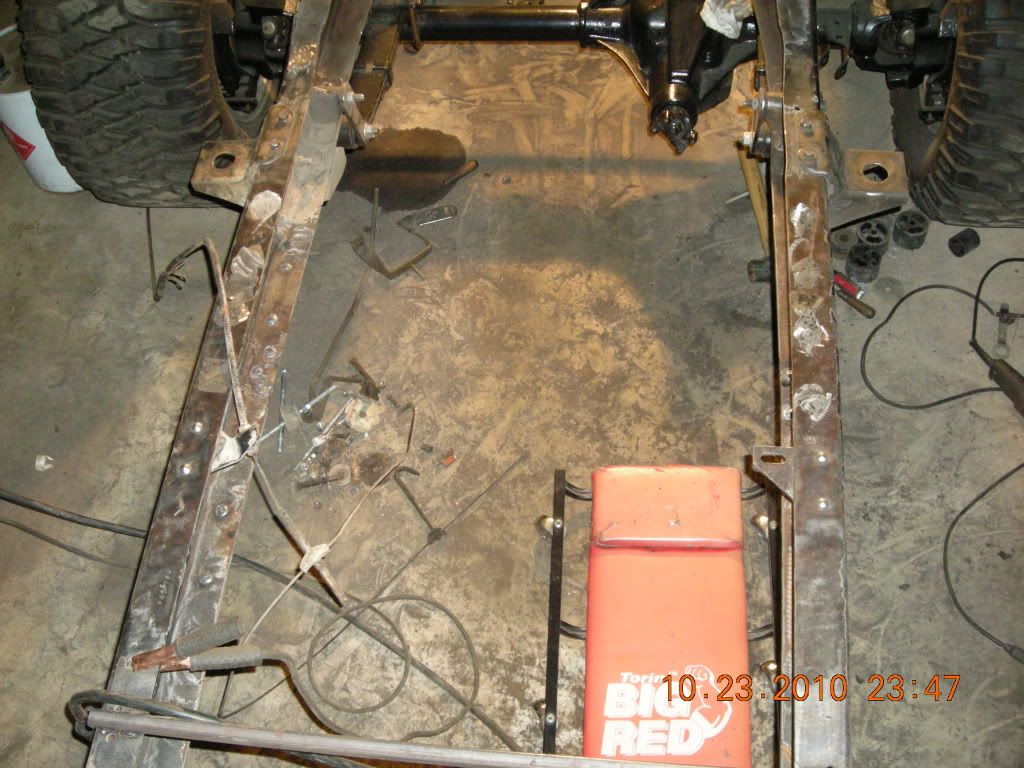 Boxing plates tacked in for mock up 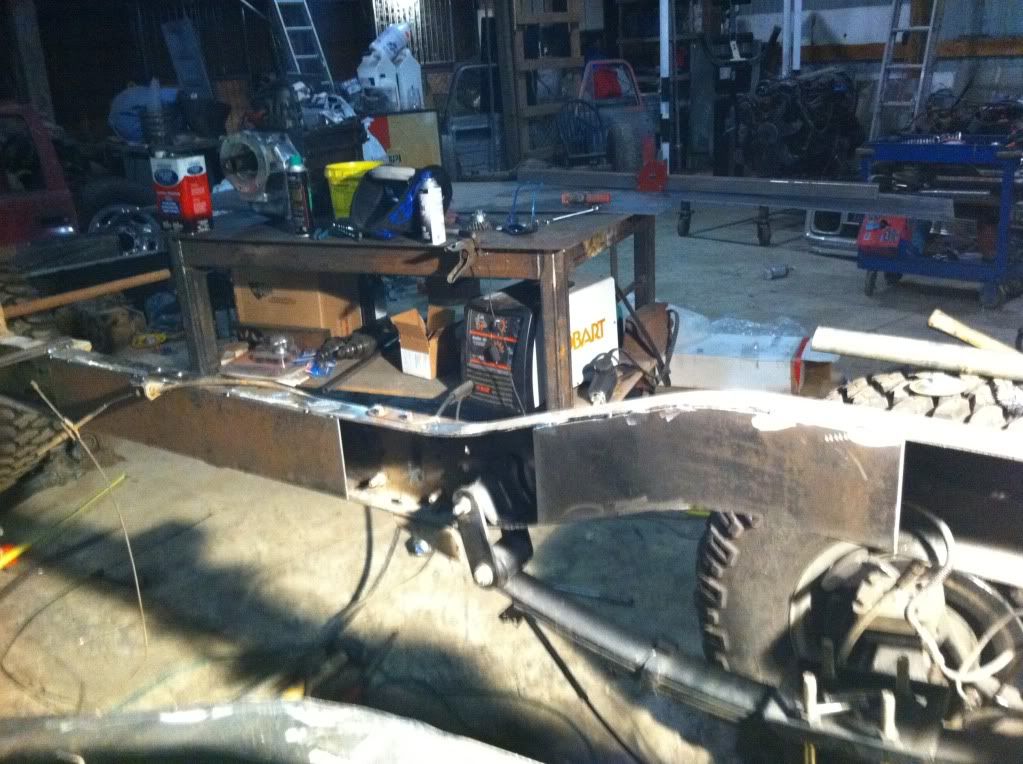 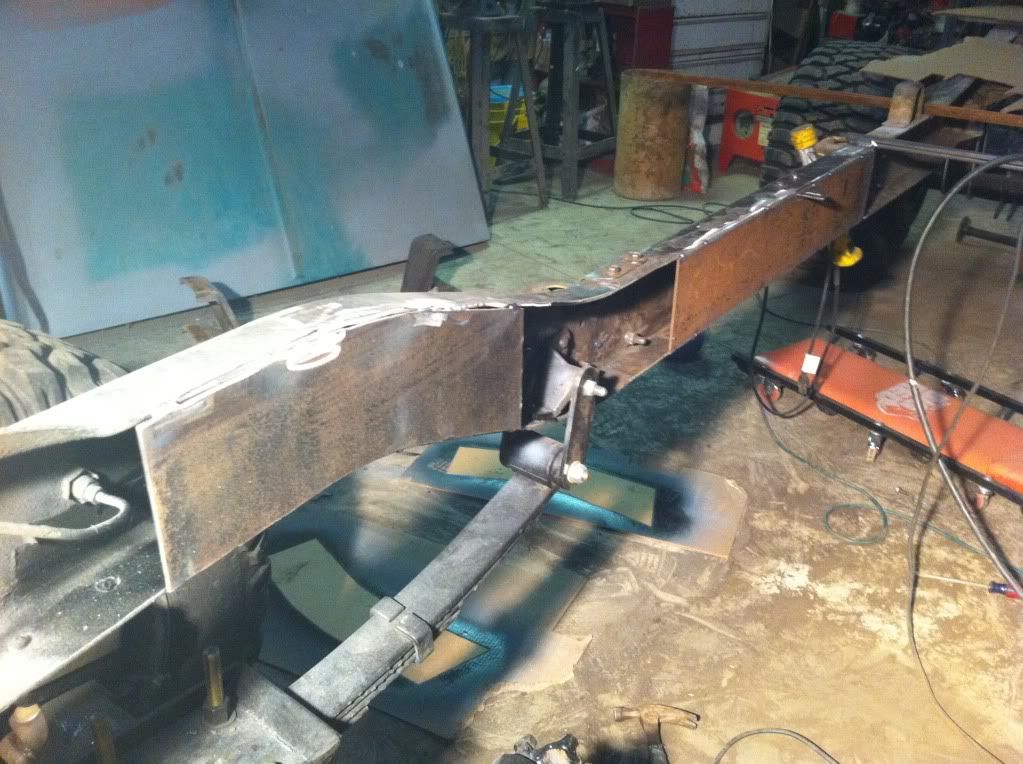 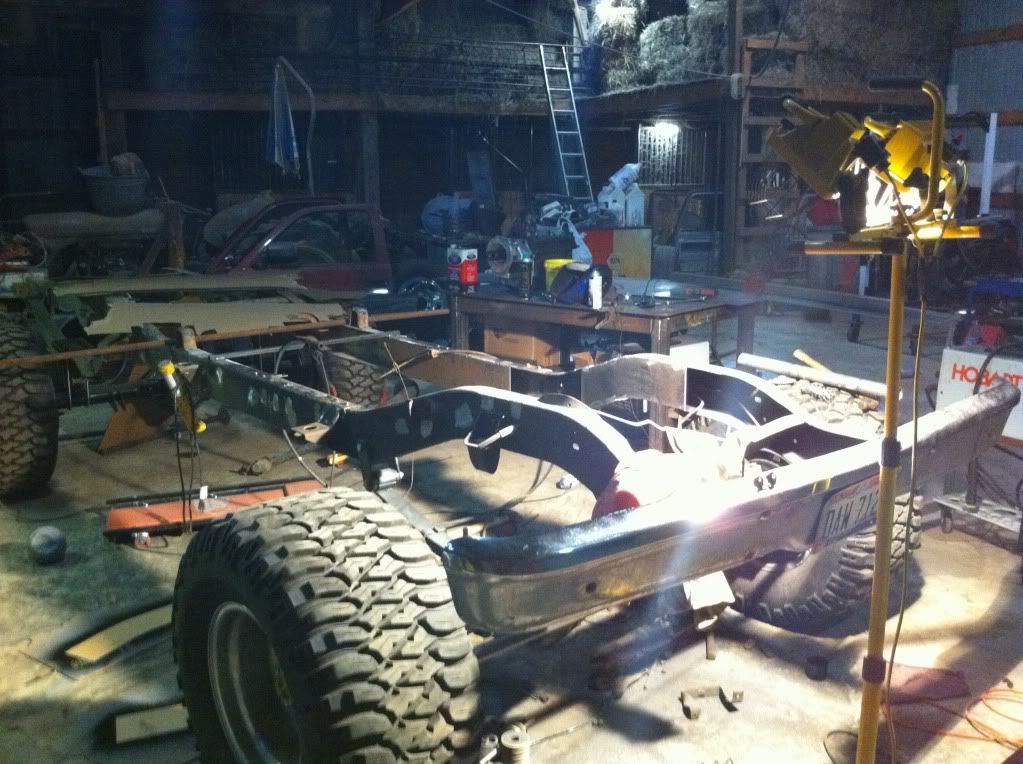 After getting the frame boxed enough to mock up the driveline mounts I set the drivetrain between the rails and threw the cab on its mounts to start the process of figuring out the final location of the drivetrain. 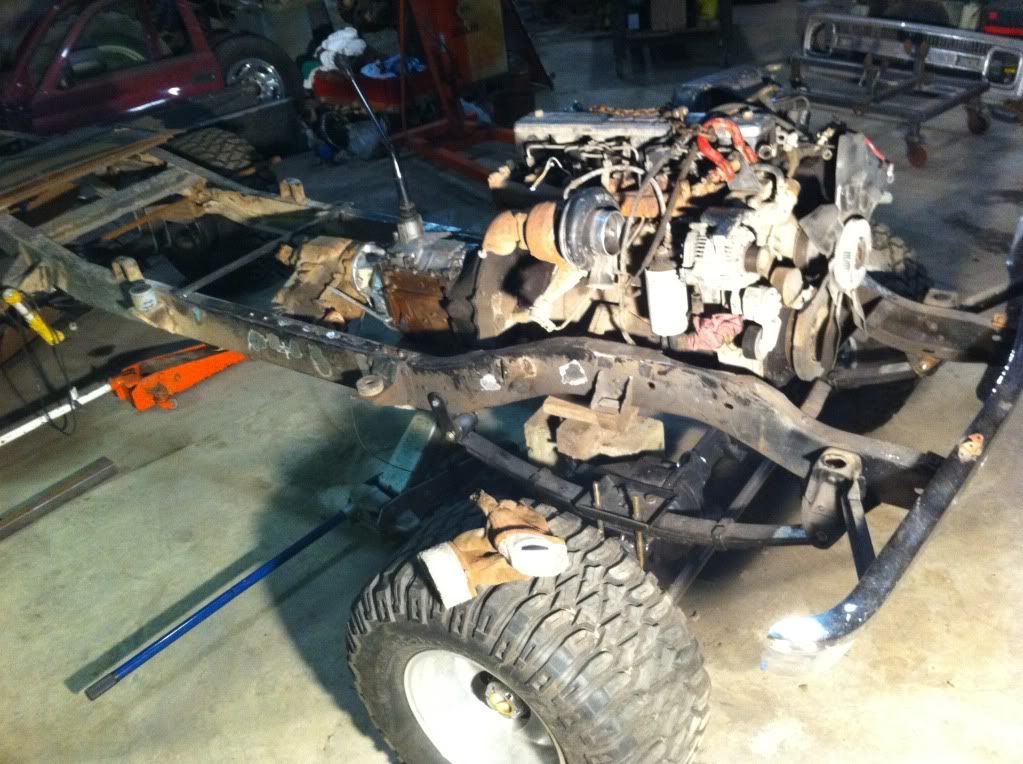 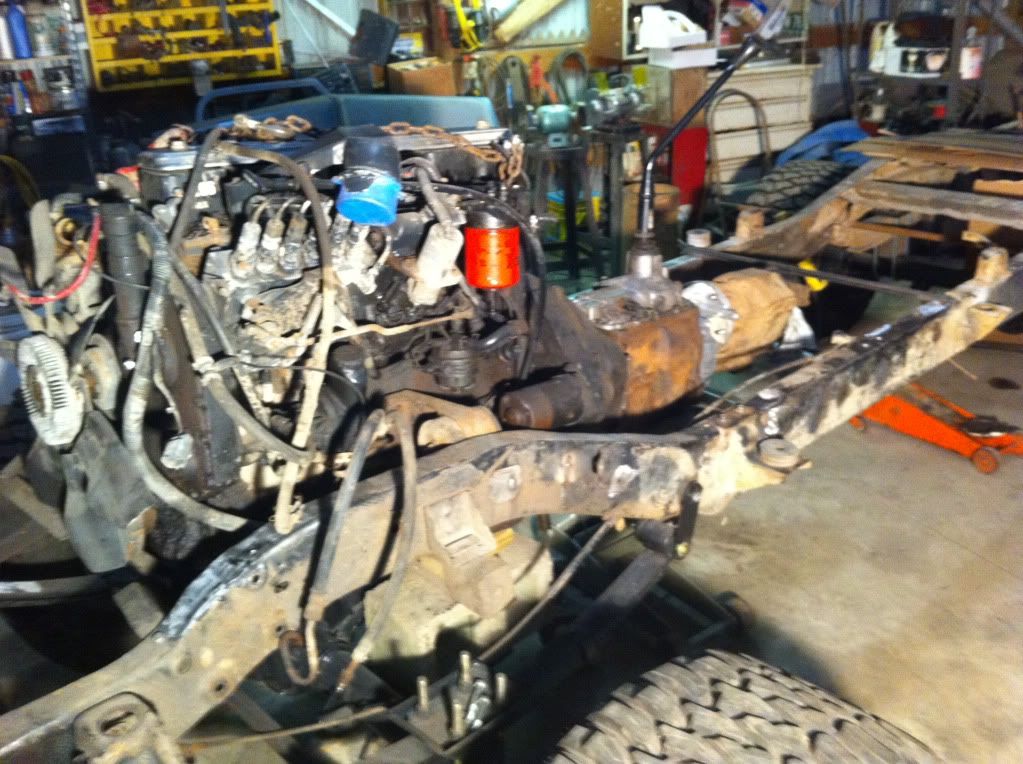 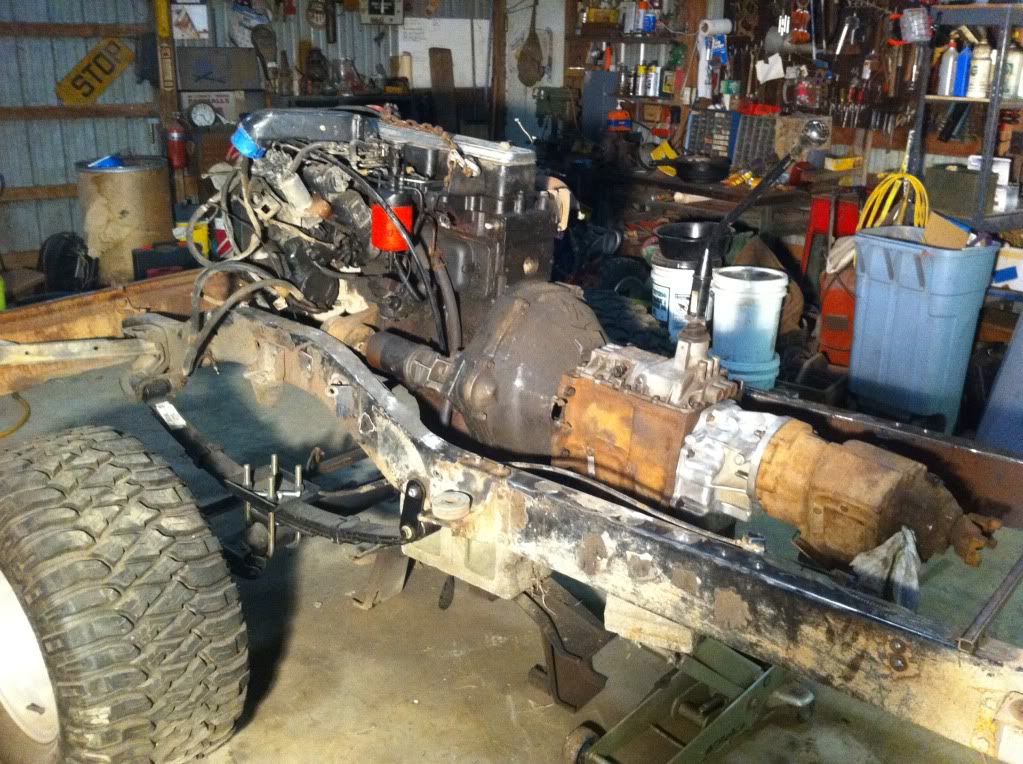 Here is how she sits right now: 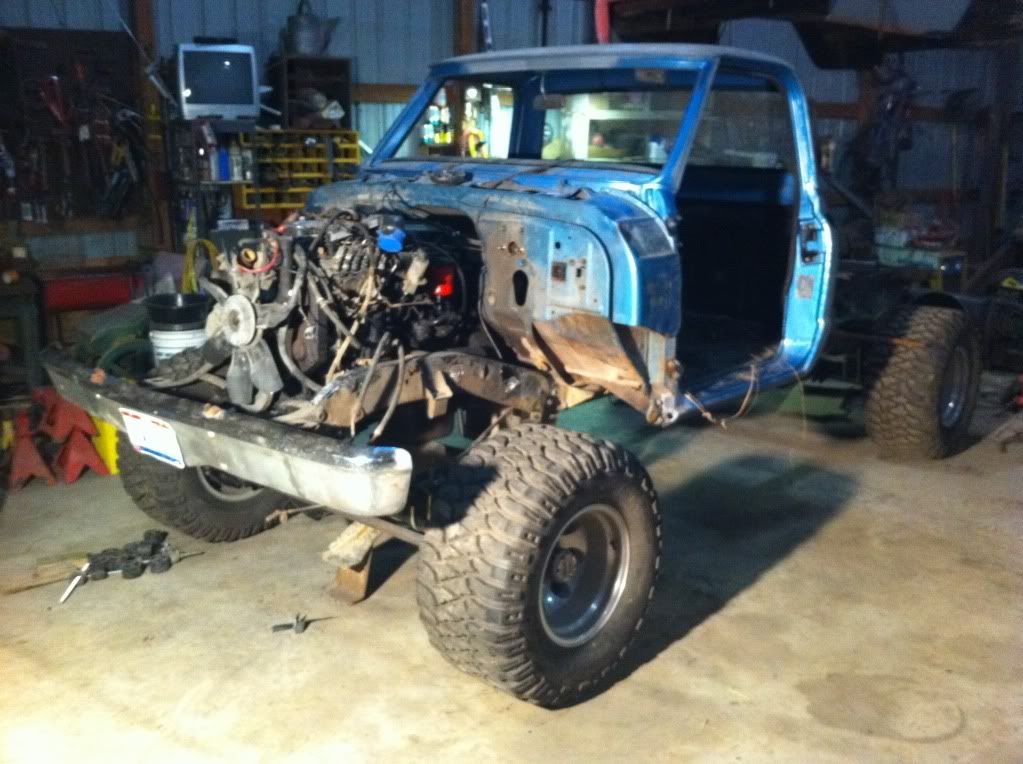
|
|
|
|
|
11-21-2010, 05:10 PM
|
#10 | |
|
Registered User
Join Date: Feb 2010
Location: Dayton, OH
Posts: 255
|
Re: Berthas Build
Quote:
The barn is not heated so I am no stranger to working in the cold!! And it is definately not fun!! I am working on sealing up the open spots in the barn so that I can run a heater of some sort this winter so that it will be more comfortable to work out there. Its a 60x40 steel barn and I am not sure what the best and most efficient method would be to heat it. Anyone have any suggestions? |
|
|
|
|
|
11-25-2010, 10:14 PM
|
#11 |
|
God is good!
Join Date: Sep 2010
Location: Texas
Posts: 689
|
Re: Berthas Build
this is awesome. keep it up.
__________________
Mando "It takes a smart man to know when he's stupid." -- Barney Rubble My build thread: http://67-72chevytrucks.com/vboard/s...d.php?t=430367 |
|
|
|
|
12-06-2010, 05:24 PM
|
#12 |
|
Registered User
Join Date: Feb 2010
Location: Kitimat, British Columbia, Canada
Posts: 234
|
Re: Berthas Build
what size of lift and tires did you go with? You make your own motor mounts, have any pics? I like where you are going with this project. Is the transfercase from the donor dodge truck?

|
|
|
|
|
12-07-2010, 10:35 AM
|
#13 | |
|
Registered User
Join Date: Feb 2010
Location: Dayton, OH
Posts: 255
|
Re: Berthas Build
Quote:
I have not made my motor mounts yet. I plan to once my mid mount A/C setup gets figured out so that I can get it away from the frame rail on the passenger side. I will also fab new transmission and transfer case cross members as well when I figure out the final position of this massive drivetrain. The donor truck is a 94 Dodge 2wd. If you didn't notice in some of my posts, i converted the 2wd nv4500 to 4wd. I bought the 29 spline Dodge np205 from a member on another forum. I haven't gotten into the 205 yet to rebuild but I am hopeful that it will be solid. |
|
|
|
|
|
12-07-2010, 10:45 AM
|
#14 |
|
Registered User
Join Date: Feb 2010
Location: Dayton, OH
Posts: 255
|
Re: Berthas Build
Not much of an update but I figured I might let everyone know whats going on at the moment.
I am waiting to find a supplier for the mid mount F6 or 7 or 800 A/C and alternator mount so that I can get started on the fabrication of the engine mounts, engine cross member, trans mount, trans cross member, and transfer case cross member. I am ready to do it, I just need the components in their final positions so that I don't run into unexpected interferences if I were to mount the components after I finalized all of the mounts and cross members. I would also like to get ahold of a hydroboost unit to see if I will have any interference between it and the air intake plenum. I will update when I get these figured out and start the fab work hopefully in the next week or so. |
|
|
|
|
12-07-2010, 08:49 PM
|
#15 |
|
I had a V-8
Join Date: May 2003
Location: Phoenix AZ
Posts: 1,116
|
Re: Berthas Build
I'm not understanding your need to find a supplier for the water inlet housing (a/c mount). Is it that there are no Cummins dealers near you?? If that is the case, I may be able to help.
On the hydroboost unit, I recommend a unit from a 88-99 C/K truck (not the R/V old body style). The mounting plate is an easy adapt to your firewall. Take it off, drill two holes, move the lower studs to those holes and you're done.
__________________
1972 K20 Suburban, 5.9L Cummins, Banks Power Pack, NV4500HD, NP205, H.A.D., D60/14FF ARB Link To Build: HERE. |
|
|
|
|
12-08-2010, 12:23 AM
|
#16 | |
|
Registered User
Join Date: Feb 2010
Location: Dayton, OH
Posts: 255
|
Re: Berthas Build
Quote:
Well I thought I had a dealer lined up on 4btswaps with a used mount and new compressor and alternator but I haven't heard anything from him in over a week so I'm not sure what's going on there. As far as the hydroboost, I noticed that you used a unit from a 99? C3500? And I was planning to source one from a similar application but now that I know an exact range of years to look for it will make it that much easier. How did you go about running and matching lines and fittings between the dodge power steering pump and the chevy steering box and hydroboost unit? Once again your trial and error saves me a ton of time and hassle! Thanks again moses!! Posted via Mobile Device |
|
|
|
|
|
12-08-2010, 01:19 AM
|
#17 | ||||
|
I had a V-8
Join Date: May 2003
Location: Phoenix AZ
Posts: 1,116
|
Re: Berthas Build
Quote:
Quote:
Quote:
The Dodge power steering pump is not a Dodge power steering pump. It is a Saginaw pump manufactured by GM. Yup, the same GM as made the hydroboost that you are going to get and the steering box you have. The pump and hydroboost will have o-ring fittings. Your box has inverted flare fittings. You can have lines custom made with o-rings on one end and flares on the other. You can also get a steering box out of a GM straight axle 4x4, 1981 and newer to install. It will bolt in and have the superior sealing o-ring ports on it. That is what I did on mine. I found a virgin steering box on a 90 V20 Suburban and rebuilt it. Quote:
__________________
1972 K20 Suburban, 5.9L Cummins, Banks Power Pack, NV4500HD, NP205, H.A.D., D60/14FF ARB Link To Build: HERE. |
||||
|
|
|
|
12-08-2010, 01:19 PM
|
#18 | ||||
|
Registered User
Join Date: Feb 2010
Location: Dayton, OH
Posts: 255
|
Re: Berthas Build
Quote:
It is definitely more than I wanted to shell out for this setup and he supposedly has his alternator and custom made to a one wire 22 si higher output and his compressor lines custom made to a specific orientation as well. I have no experience with this setup to know if any of this is needed or if either of these components are available off the shelf which is part of the reason I asked for the specs for your setup and how much you had wrapped up in it. Quote:
Quote:
 As for the steering box, I will not be running the stock 4wd unit. Instead I already planned to run a 2wd 81-87 box for crossover its splined input shaft that will mate up to an xj steering shaft to keep everything tight and do away with the rag joints. Quote:
|
||||
|
|
|
|
12-09-2010, 02:14 AM
|
#19 | ||||
|
I had a V-8
Join Date: May 2003
Location: Phoenix AZ
Posts: 1,116
|
Re: Berthas Build
Quote:
3285102 might be the thermostat housing 3930822 is the connection, water inlet 3906697 are the seals for this part to the motor and to the hose fitting (x2) 3910495 M12 x 1.75 x 30 (X3) Bolts to retain housing to block 3900679 M10 x 1.50 x 80 (X3) Bolts to retain hose fitting 3930838 Bracket Belt tensioner 3924026 Belt tensioner asm 3904446 M10 x 1.50 x 70 Tensioner bolt 3918275 Alternator Pulley 3930820 lower alt mount 3920862 Brace, alternator (forward/upper bracket) Sanden 4667 compressor. This is the one that I used. There is also a unit available off of a Class 8 Sterling tractor that has hose fittings coming out of the side of the rear head instead of out the rear like the one I used. The bolt number are for reference only (you will need these bolts to mount this stuff, but buy them somewhere else). I have a belt tensioner mounting plate here if you decide you need one. I'm not going to use it. Look real close at how I ran my belt. It wouldn't surprise me if you end up with something very similar by the time you are done. Quote:
Pump pressure hose fitting: 16mm Hydroboost from pump: 18mm Hydroboost to steering box: 16mm Steering box from Hydroboost: 18mm steering box return: 16mm Get some extra o-rings. I use fuel injection line o-rings. Standard Motor Products is a number SK26. Very good thing to have around when you have that many fittings in service on one vehicle. Quote:
Quote:
Luckily I found a guy who was a glutten for punishment and had the patience of a saint and he searched Cummins for many days digging up all the numbers and parts. I did what I could via the internet, but he really save my bacon on this part of the project.
__________________
1972 K20 Suburban, 5.9L Cummins, Banks Power Pack, NV4500HD, NP205, H.A.D., D60/14FF ARB Link To Build: HERE. |
||||
|
|
|
|
12-13-2010, 02:51 PM
|
#20 | ||||
|
Registered User
Join Date: Feb 2010
Location: Dayton, OH
Posts: 255
|
Re: Berthas Build
Quote:
I am having a set of motor mounts/cross member cut out by a member on 4btswaps that I will be able to modify to fit my frame and stock 94 motor side mounts as well as the upper alt bracket notched to run the stock 94 water inlet and a lower tensioner bracket that is made to clear the frame a bit better. He does some pretty incredible work from what I can tell and sometimes my time saved from having all of the trial and error is worth more than the money it would take to just have someone cut them out for me. Quote:
Quote:
 Quote:
|
||||
|
|
|
|
12-13-2010, 11:35 PM
|
#21 | |
|
I had a V-8
Join Date: May 2003
Location: Phoenix AZ
Posts: 1,116
|
Re: Berthas Build
Quote:
__________________
1972 K20 Suburban, 5.9L Cummins, Banks Power Pack, NV4500HD, NP205, H.A.D., D60/14FF ARB Link To Build: HERE. |
|
|
|
|
|
12-14-2010, 10:44 AM
|
#22 | |
|
Registered User
Join Date: Feb 2010
Location: Dayton, OH
Posts: 255
|
Re: Berthas Build
Quote:
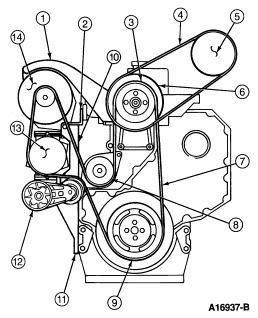 1 10270 Generator Support Strap 2 8A357 Water Inlet Support Bracket 3 8A616 Fan Clutch 4 8620 Drive Belt 5 2N211 Hydro-Max Pump (with Hydraulic Brakes Only) 6 3D673 Auxiliary Drive Pulley (Hydro-Max) 7 8620 Drive Belt 8 8501 Water Pump 9 6312 Crankshaft Pulley 10 - Generator Mounting Bracket (Part of 6010) 11 - Water Inlet Bracket(Part of 6010) 12 6B209 Drive Belt Tensioner 13 19D629 A/C Compressor 14 10300 Generator This is the belt routing for an f800 that uses the mid mount a/c setup. Number 3 will be a bit lower in my application. The belt will come from the crank pulley, over the fan pulley(number 3 in the diagram), down to the water pump pulley, up to the alternator, down to the a/c compressor, over the tensioner and back to the crank pulley just as in the diagram. I asked about the coverage on the compressor in particular and the one guy I talked to didn't seem to think it would be an issue and that it ends up wrapping the compressor more than it looks. It does not look like it will be the case for me but the only reason I am convinced that it will is because it is what they used from the factory(unless they didn't account for the wrap on the compressor pulley) for this model truck(f800) and I could not find in any searches where anyone had a problem with the belt screaming when the compressor clutch engaged. What do you think about this? Did you ever get a chance to see this diagram? |
|
|
|
|
|
12-14-2010, 11:36 PM
|
#23 |
|
I had a V-8
Join Date: May 2003
Location: Phoenix AZ
Posts: 1,116
|
Re: Berthas Build
Well, I guess if it came from the factory that way it should work. I never found a diagram showing a belt routing with those components, so when I was engineering mine (from scratch--no diagram) I did not like the 90* of wrap that I was getting on the compressor, but after seeing this I guess it is ok. I just like to see more, personally.
Before you do anything, hang the water inlet on the motor and make sure your tensioner mount/plate is going to fit you frame rail. I bet there is going to be interference. I hope not, but I think mine got all over the frame rail. Thus the reason I still have one....
__________________
1972 K20 Suburban, 5.9L Cummins, Banks Power Pack, NV4500HD, NP205, H.A.D., D60/14FF ARB Link To Build: HERE. |
|
|
|
|
12-15-2010, 02:07 AM
|
#24 |
|
I had a V-8
Join Date: May 2003
Location: Phoenix AZ
Posts: 1,116
|
Re: Berthas Build
Ok, the more I think about this, the more that is coming back to me. I could not put a tensioner on the plate down there because of framerail interference. With that, take a look at your pic and without a tensioner right there the belt doesn't even come close to 90* of wrap. No good.
So, nothing changes for you. I guess I just wanted to prove that I can still remember things that happened before yesterday. Check that tensioner mounting plate for clearance and hope for the best.....
__________________
1972 K20 Suburban, 5.9L Cummins, Banks Power Pack, NV4500HD, NP205, H.A.D., D60/14FF ARB Link To Build: HERE. |
|
|
|
|
12-15-2010, 10:32 AM
|
#25 | ||
|
Registered User
Join Date: Feb 2010
Location: Dayton, OH
Posts: 255
|
Re: Berthas Build
Quote:
Quote:
Even if the tensioner bracket does come too close for my comfort (in my case anyways) I will have the option of notching the frame where it is close and box it in with the rest of the frame and still not take away from the strength of the frame. This is one heck of an obstacle that I think I have figured out for right now........ And it feels pretty darn good!!! Along with that, all of my Cummins parts came in yesterday for the mid mount a/c setup and I was able to pick them up at lunch. It was a pretty penny for all of this stuff but it really wasn't as much as I would have thought for all that I got in return. The compressor will be here today(out for delivery), the alternator should be here today or tomorrow, and the motor mounts/crossmember, upper alt mount, and tensioner mount will all be here friday or early next week hopefully in time for christmas time off of work to get this thing moving once again!!!! |
||
|
|
|
 |
| Bookmarks |
|
|


 Linear Mode

