
 |
|
|
#1 |
|
Senior Enthusiast
Join Date: Feb 2007
Location: Spokane Valley, WA
Posts: 8,356
|
Headlight Alignment
I donít know that Iíve ever seen a thread on headlight alignment, so thought Iíd share some excellent results I had today with a recently acquired Hopkins (Hoppy) B4A Headlight Aimer Set.
Back in the 50ís and 60ís just about every gas station/service station had equipment to aim headlights inexpensively, and promoted the alignment service similar to lube and oil jobs. This convenience pretty much went away in the 1970ís with the demise of service stations. I never wanted to spend a ton of money having a shop or dealership do the alignment so Iíve always done my own. I simply used a coffee can that fit the lugs on the lamp, a carpenter square, and a level with varying degrees of success. With months of dark winter driving approaching again I really wanted to align the headlights as accurately as possible. Many months ago I did a study of the various commercial alignment tools available on eBay, made a decision on what I wanted then kept checking for a kit at an affordable price. Including shipping I paid less than $50 for the set shown below. I was a bit concerned about buying an obsolete ďhigh techĒ device like this, especially a used model since I knew nothing about them, and assumed the seller probably wouldnít either. I also ďassumedĒ there was some type of laser beam electronics that shot between the mirrors or something, but as it turns out thereís very little ďtechĒ involved. Iím sure there was a lot of expensive engineering that went into designing the set, and the kit produces accurate results, but almost feels like a childís toy. Everything is plastic, with a couple of hinged mirrors freely swinging on plastic flaps, and a few dials to adjust the aimers. There are no electronics in the aimers, everything is set optically, or to sound even less tech ďvisuallyĒ. Using the device is a simple 4 step process, although step 2 took me a while to figure out. 1. Set all three dials to zero. 2. Calibrate the aimers to account for the slope of the floor. 3. Attach to aimers to the headlights and set the horizontal alignment by adjusting the headlight bulbs until a set of split mirror images in both tools line up. 4. Set the vertical alignment by use of a bubble level in each tool. Thatís it. Once the floor slope has been dialed in, all four headlights can be aligned in less than a minute each. Obviously the headlight rims need to come off to adjust the headlights, but I forgot to take pictures until after I finished, and didnít feel like taking them back off for the photos. The following pictures tell most of the story: This is the kit and packaging: 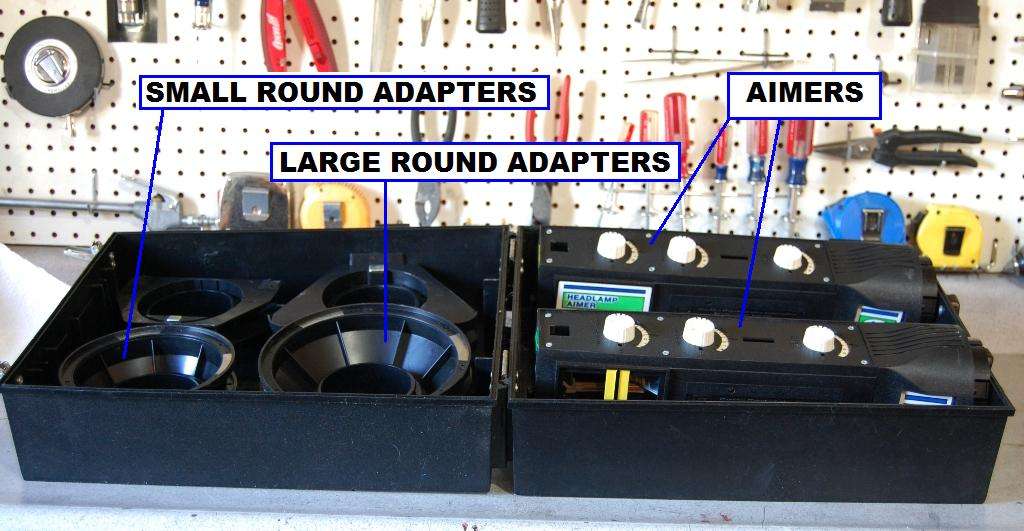 Here are the two aimers. The one on the right has the small headlight adapter installed. All the adapters snap in place and are detached easily. The calibration adapter is only used to set the tool to account for the slope of the floor. 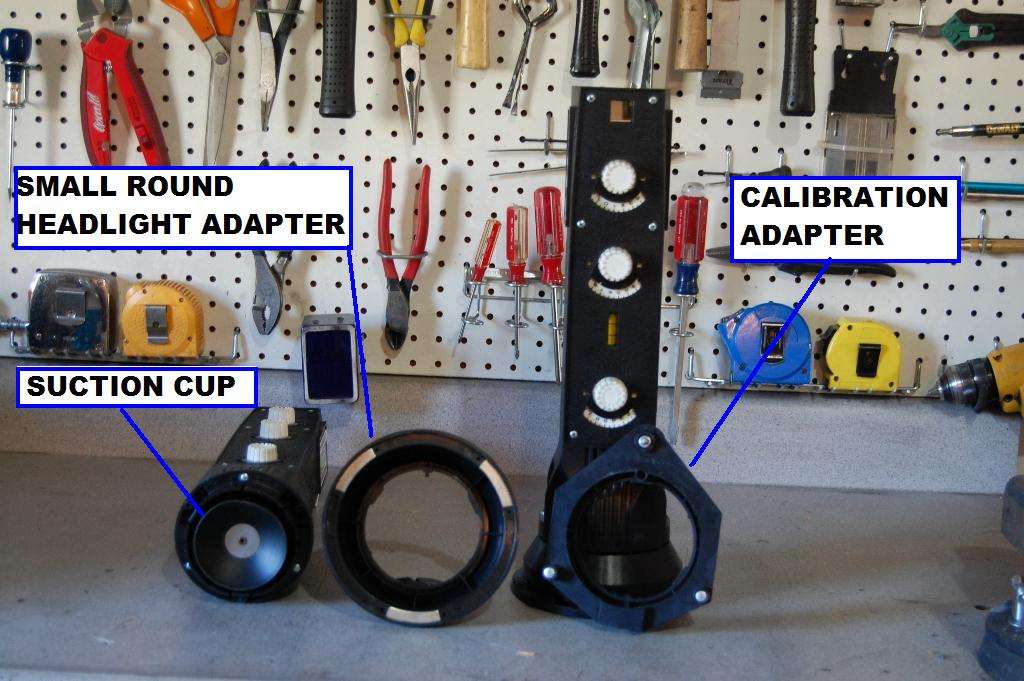 Another shot showing the difference in adapters. 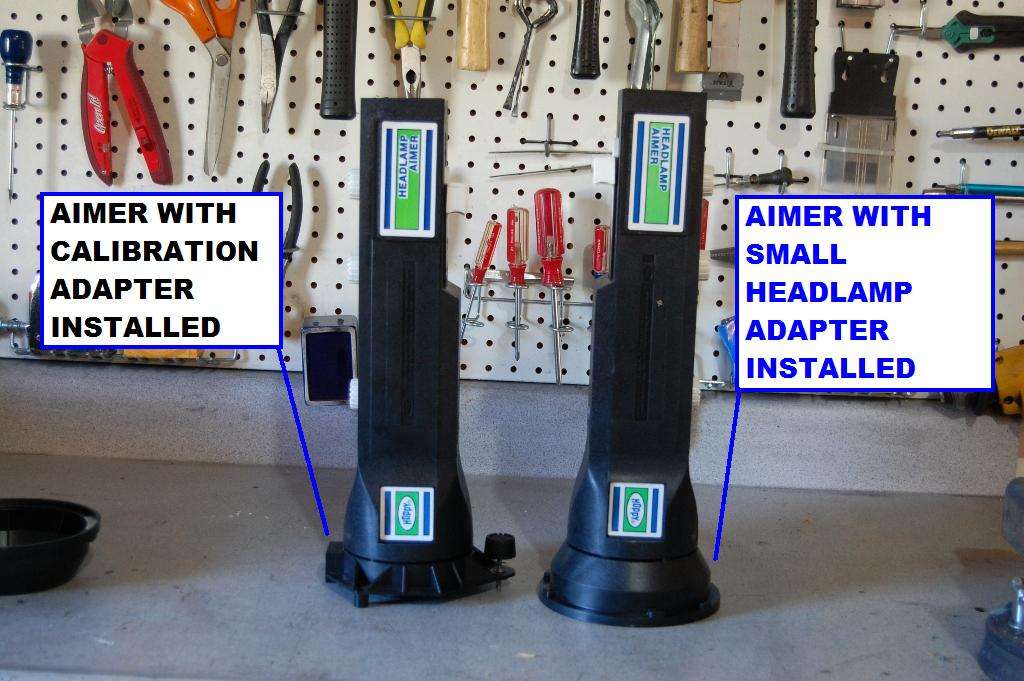 A better breakdown of the various components. 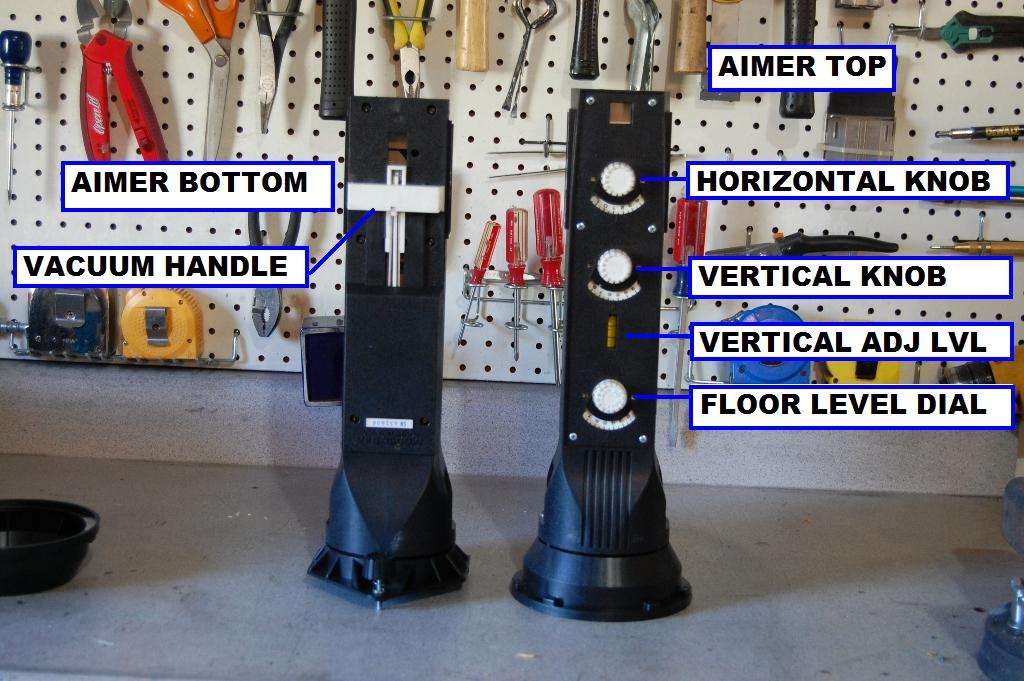 Aimer B suctioned onto passenger headlight. Aimer B always mounts on the passenger side. Once you get this far, itís simply a matter of turning the headlight adjusting screws on the truck until the bubble is level and the picture in the window is aligned on the other aimer. (The bubble isnít showing level because the truck has been moved since the lights were aligned). 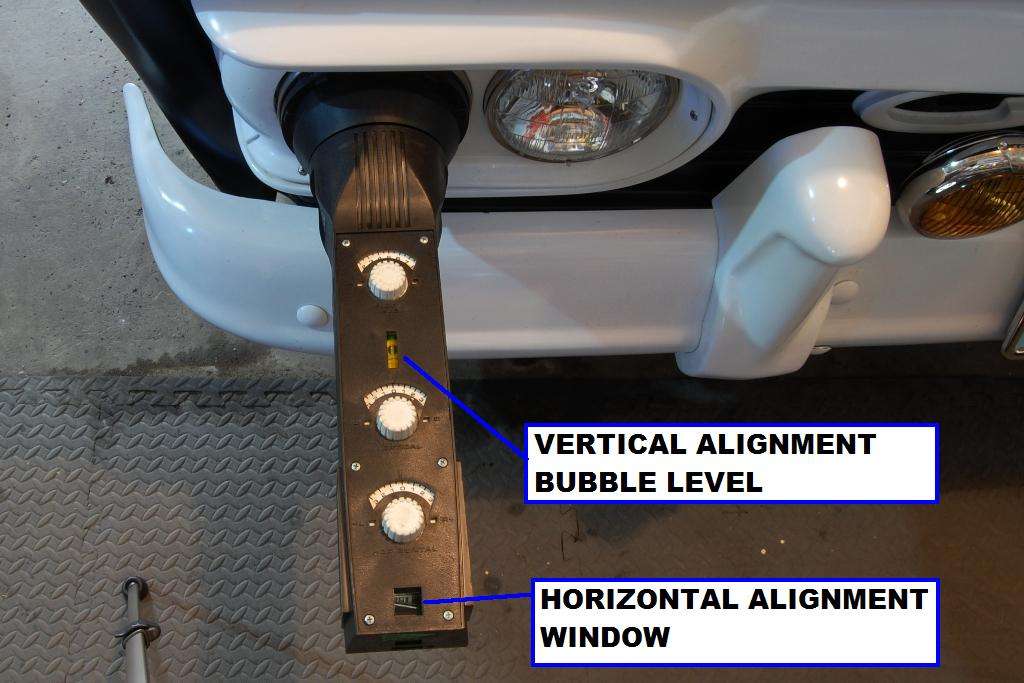 Here we see both aimers mounted on the low beam bulbs. The same drill is performed on the high beams. 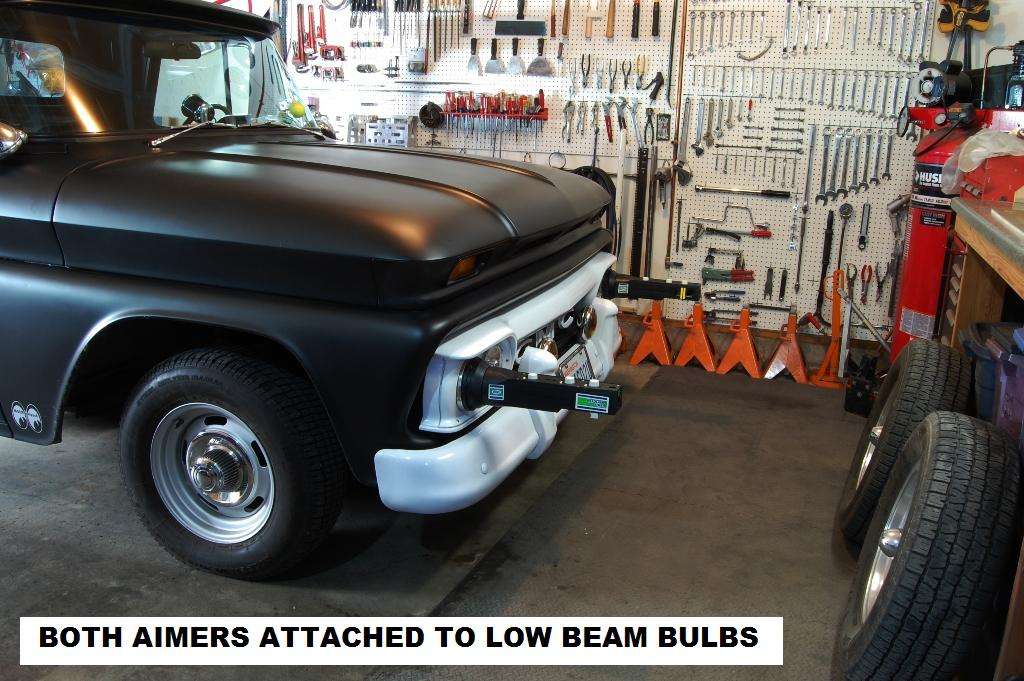 This was where I started getting frustrated. This is actually a shot through the alignment window. Earlier in the process every time I tried to calibrate the floor slope I kept coming up with a picture like this, which showed nothing of value and couldnít be aligned. The instruction booklet isnít very clear on what is desired. I finally figured out the correct image is of the yellow and black stripes on each aimer facing one another. The aligned image is upside down and backwards from each other. Once I figured this out, the rest was easy. 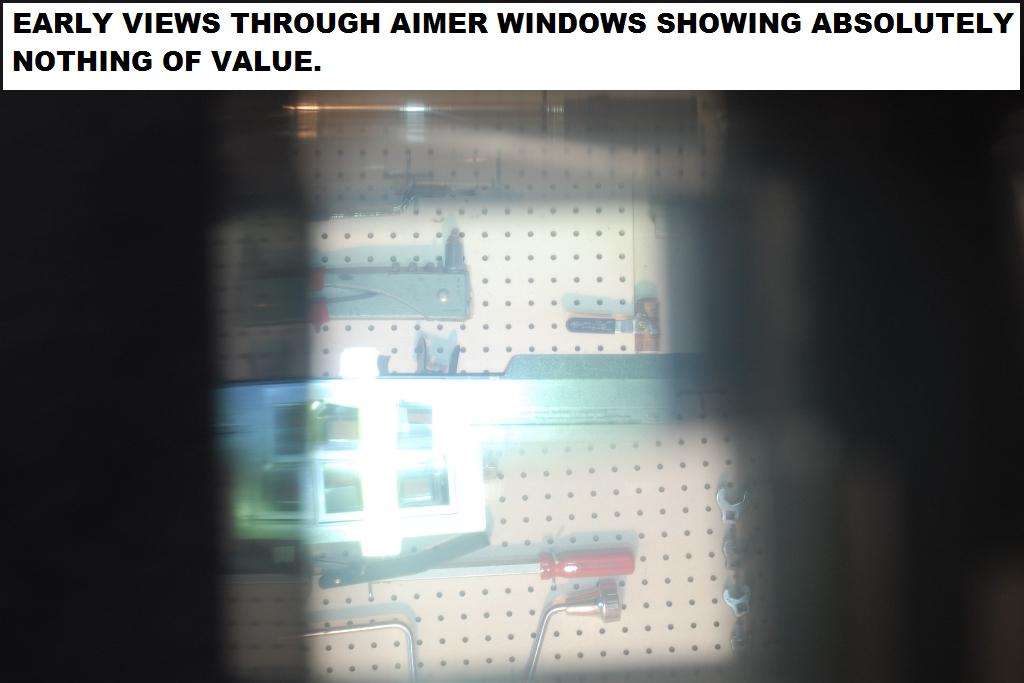 This is the area that is intended to align. 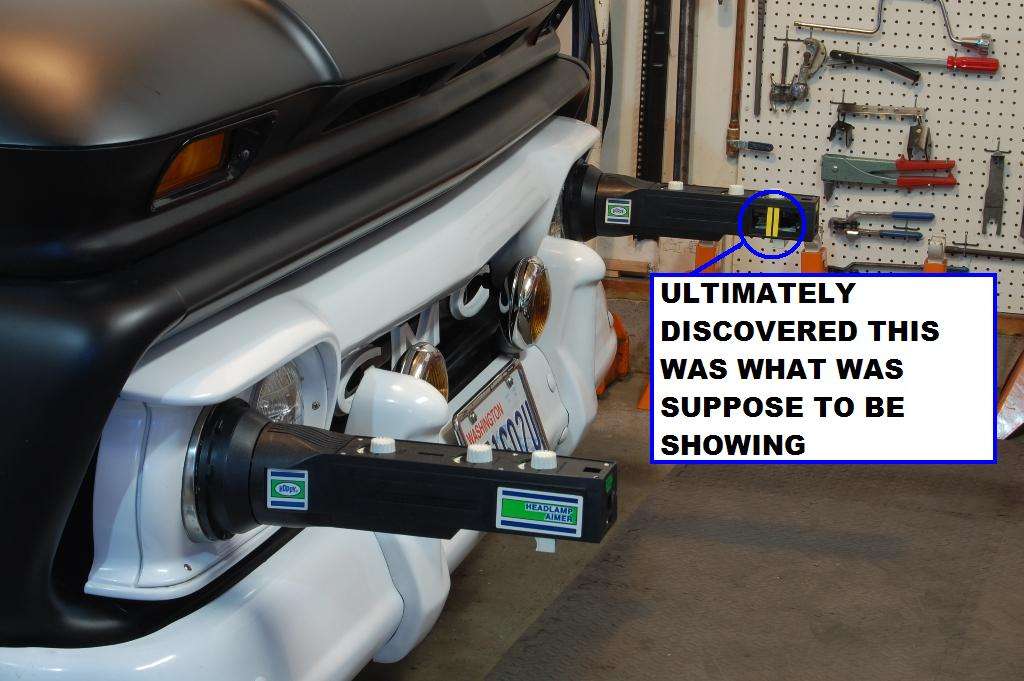 And here is another shot through the alignment window of what good alignment looks like. In real life the lines appear perfectly straight, but I couldnít capture this with the camera. This sets the horizontal. The vertical aim is completed by leveling the bubble on top of the aimer. 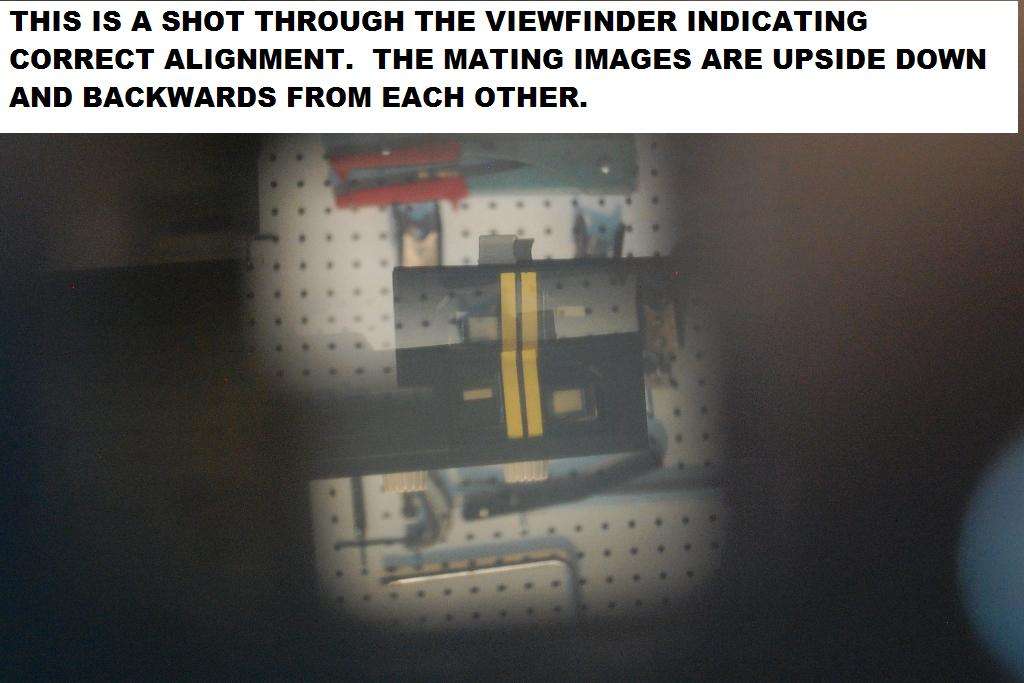 For those of us that drive these vintage trucks all year, good headlight aim will certainly enhance night driving. What I originally thought was a delicate fragile electronic device, is actually rather primitive and mechanical, very simple to use achieving professional results, and would be a nice addition to the tool collection. |
|
|

|
| Bookmarks |
|
|