
|
Register or Log In To remove these advertisements. |
|
|
|
|||||||
 |
|
|
Thread Tools | Display Modes |
 09-04-2016, 01:15 PM
|
#51 |
|
Registered User
Join Date: Feb 2009
Location: Winnipeg, Manitoba
Posts: 68
|
Re: Run Away's '69 C10 LWB Project Log
The bow in the lower A pillar is bothering me. I want to fix it.
How do I do that? Bend it straight with some sort of clamp? Pound it out from the inside and hope I don't tweak the whole pillar? Cut it out and weld it back in? Bring it to work and play with the torches to shrink and pop it back out? No progress yesterday, but I did move everything around and got the trailer/cab inside the garage. Now I can work later (gets dark early now) and out of the bugs and wind. It's also raining all today and tomorrow. Hope to get some more work done today and tomorrow. |

|

|
|
09-04-2016, 07:56 PM
|
#52 |
|
Registered User
Join Date: Dec 2011
Location: Earth, NJ
Posts: 479
|
Re: Run Away's '69 C10 LWB Project Log
Cut a groove in the bowed area with a cut off wheel, then hammer and dolly it flat, if you close the gap when you hammer it, use the cut off wheel to open the gap again and hammer it again. Just so you take a little material out of the bow so you don't stretch something else
|
|
|
|
|
09-05-2016, 09:53 PM
|
#53 |
|
Registered User
Join Date: Oct 2007
Location: Spanaway
Posts: 8,451
|
Re: Run Away's '69 C10 LWB Project Log
Definitely getting the metal too hot by 1) welding too many spots in an area, and not letting it cool compleatly or 2) sanding too quickly and sanding too much of the surrounding metal, and or 3) the sanding disk is too fine of grit and or worn down so creating even more heat by pressing the sanding disk too hard against the surface. I like to use 36 or 50 grit disks and i keep them fresh, i try to sand only the spot weld and not the surrounding metal as every time you do you thin the metal.
The spots need to cool completely before welding the next set, the metal should feel cool to the touch, try and keep the spots well away from each other by an inch minimum. Every time you introduce heat to a weld seam ether by weld or sanding it shrinks when it cools, the best way is to go around to each spot where possible and Planish each spot weld after it cools, this means to put a body dolly on the back of the weld spot and strike the front of the spot with a hammer to flatten them, This stretches each spot weld to counter act the shrinking, then repeat another round of spots, planishing and sanding. I cant help much with your welder setting as i have a different welder, i can tell you that .023 wire is better than .035. There will be a number of places and situations where you can planish the spot weld, even more important to take your time and let it cool, don't try to accelerate the cooling by use of air nozzle or water., that can make the metal brittle. The area in question there is a bracket welded to the back side that holds the nutplate in place so it cant really be hammered outward (cant remember if the back side is accessable?) so possibly a slice as mentioned, then some heat and pull it out may work, do you have a stud welder for pulling dents?
__________________
Mike. Swamp Rat build thread : http://67-72chevytrucks.com/vboard/s...d.php?t=595019 72 3/4T 4X4 4" BDS Lift 33" BFG's |
|
|
|
|
09-05-2016, 09:57 PM
|
#54 |
|
Registered User
Join Date: Oct 2007
Location: Spanaway
Posts: 8,451
|
Re: Run Away's '69 C10 LWB Project Log
Do You see the blue bar just below your forum name in the upper right? in that bar you can click the search button then click on advanced search, type in Planishing or planish welds, then pick threads or posts below it for a lot of reading material on the subject.
__________________
Mike. Swamp Rat build thread : http://67-72chevytrucks.com/vboard/s...d.php?t=595019 72 3/4T 4X4 4" BDS Lift 33" BFG's |
|
|
|
|
09-07-2016, 11:00 PM
|
#55 | |
|
Registered User
Join Date: Feb 2009
Location: Winnipeg, Manitoba
Posts: 68
|
Re: Run Away's '69 C10 LWB Project Log
Thanks for the tips guys.
Quote:
I went out after I posted that and was able to get rid of the bow with a hammer and dolly. It's not perfect, a bit lumpy but the overall width of the pillar on that side is exactly the same as an untouched pillar measured at the same location. |
|
|
|
|
|
09-07-2016, 11:14 PM
|
#56 |
|
Registered User
Join Date: Feb 2009
Location: Winnipeg, Manitoba
Posts: 68
|
Re: Run Away's '69 C10 LWB Project Log
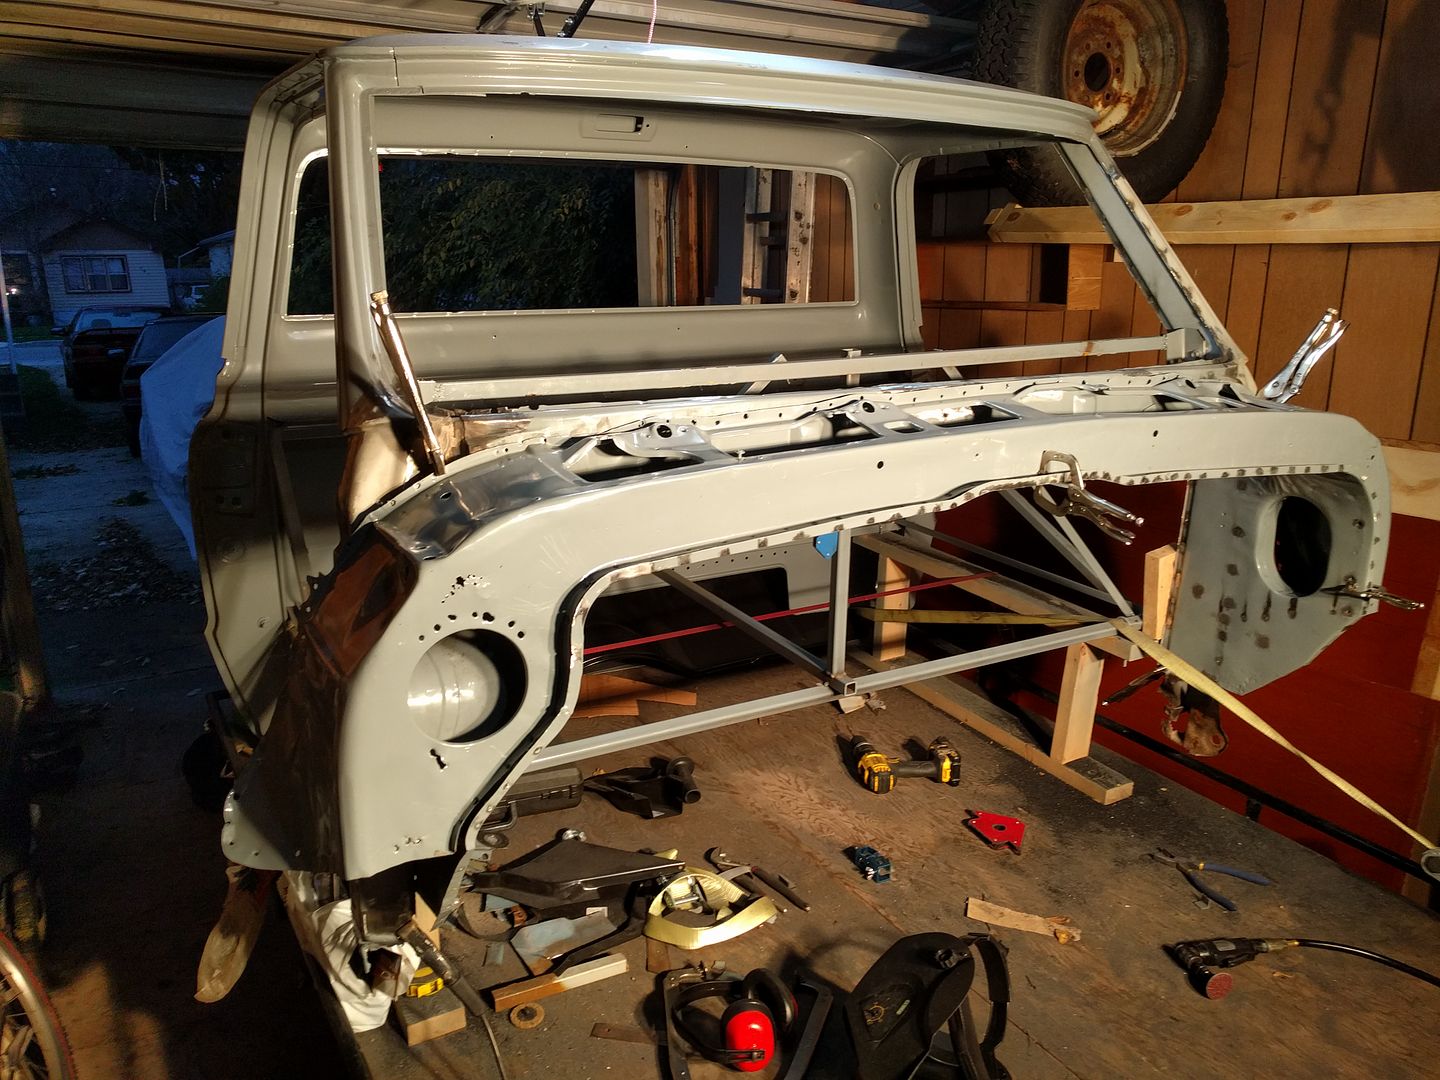
With everything inside now I could work in the rain and dark.
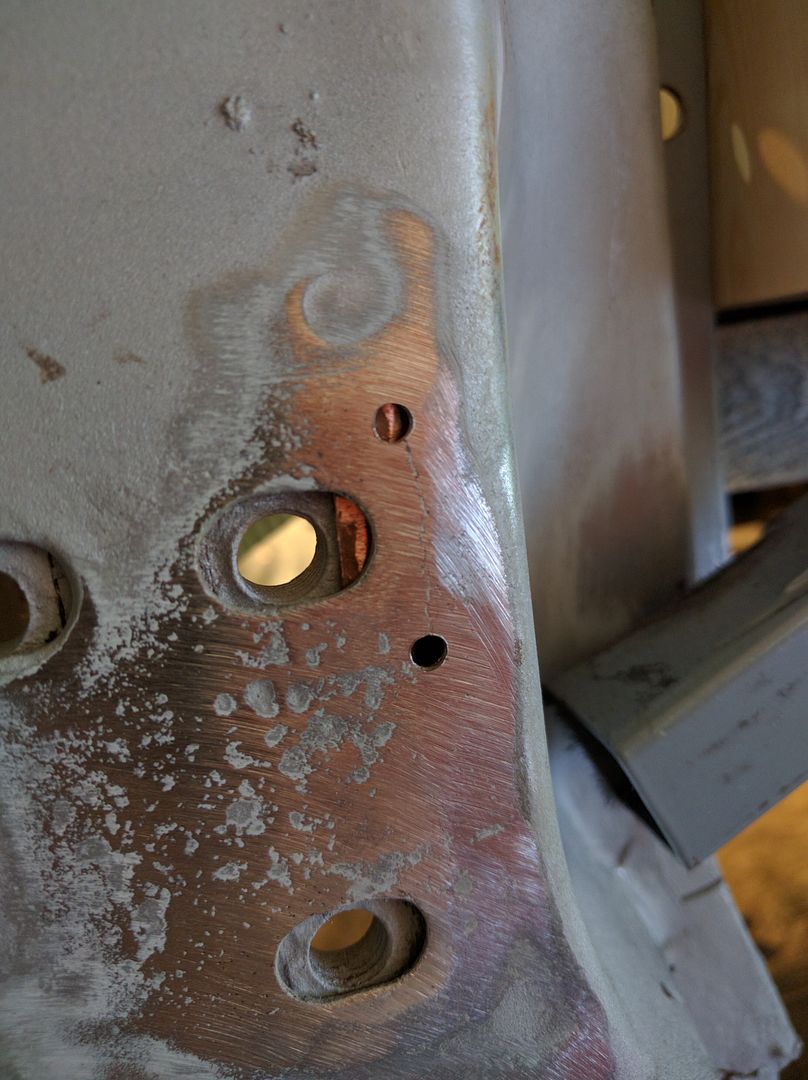
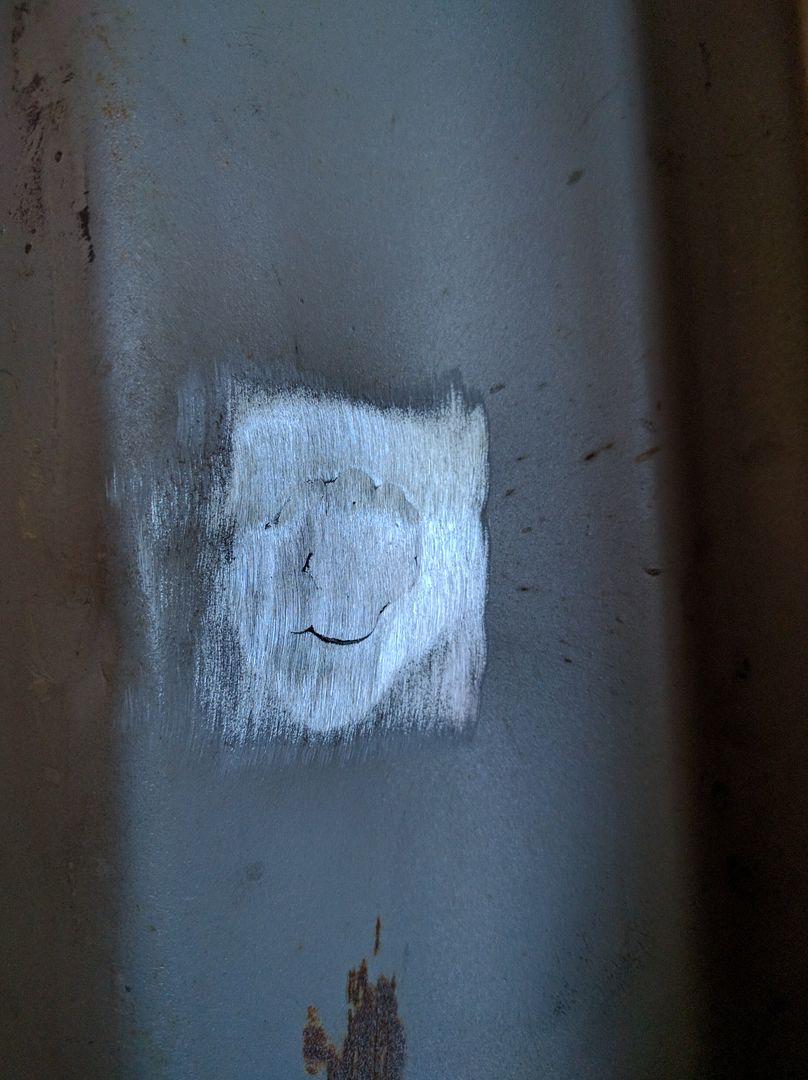
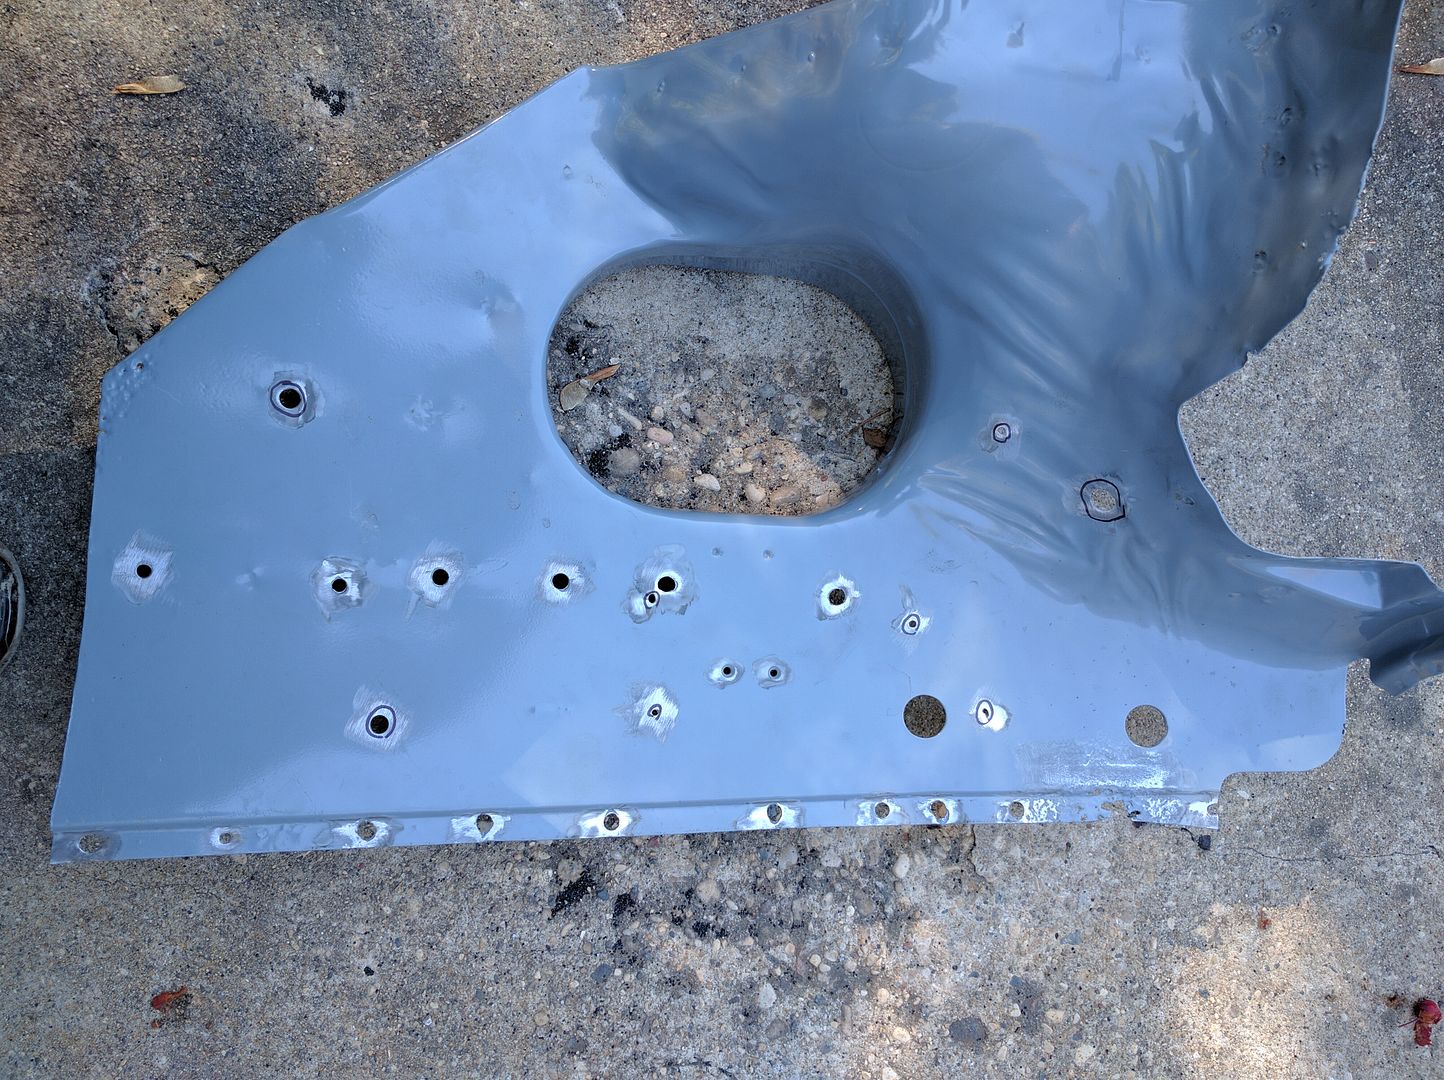
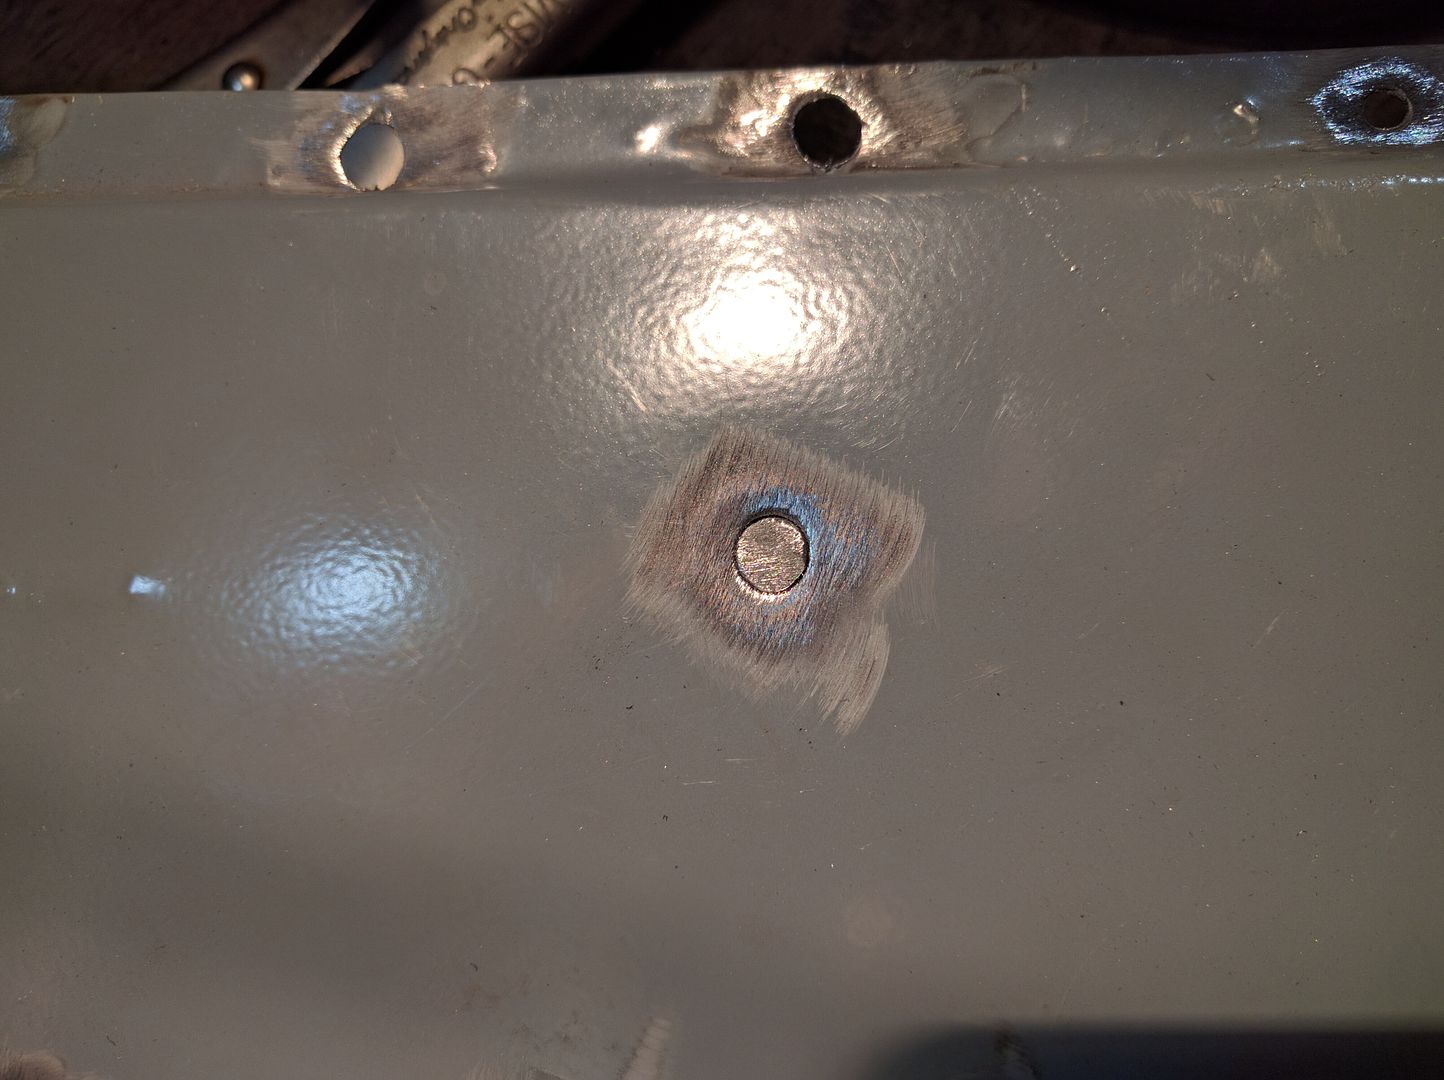
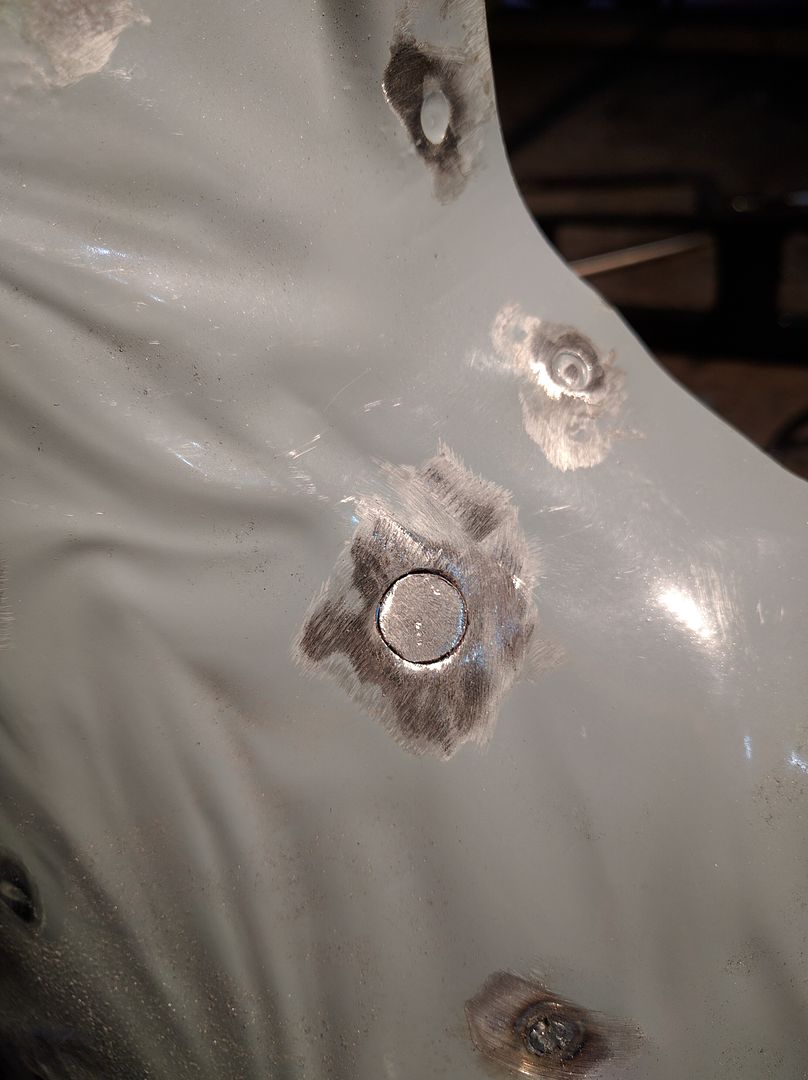
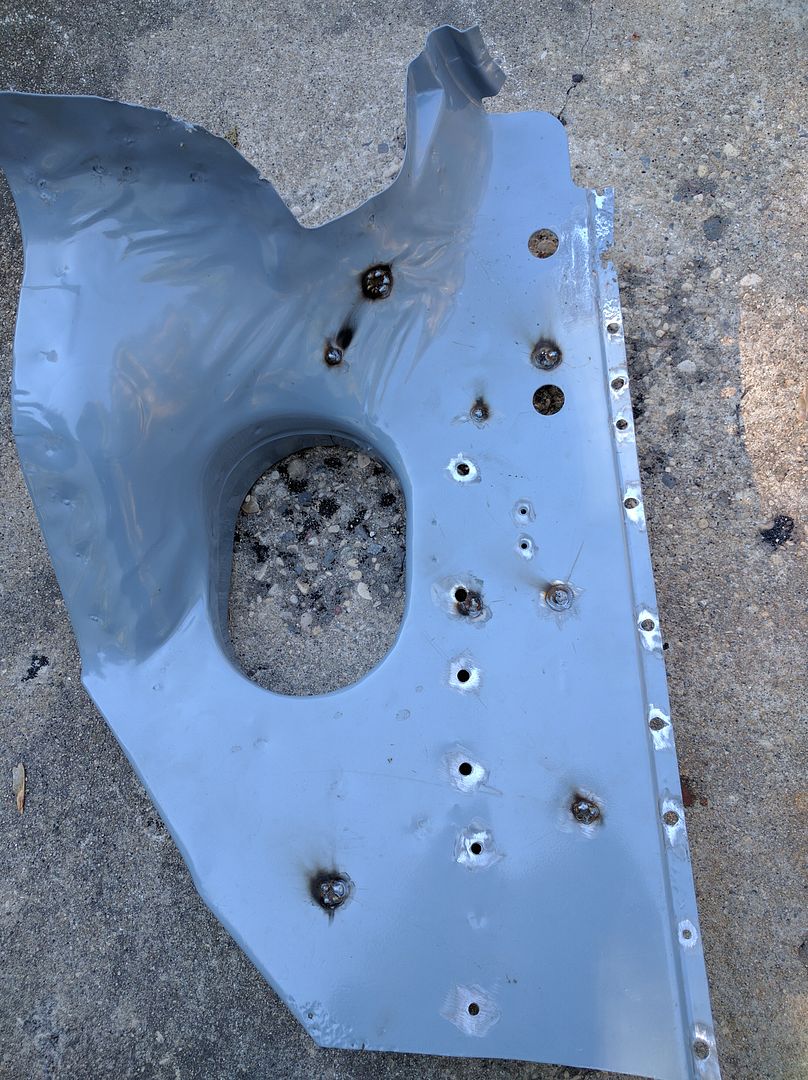
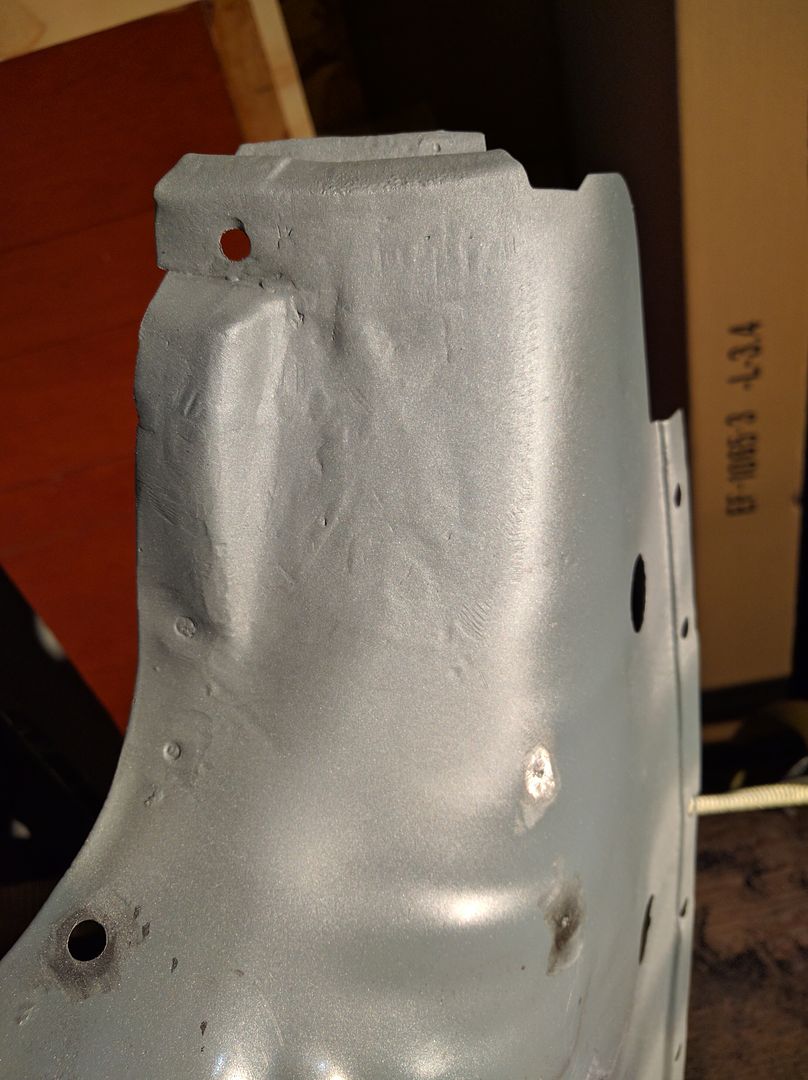
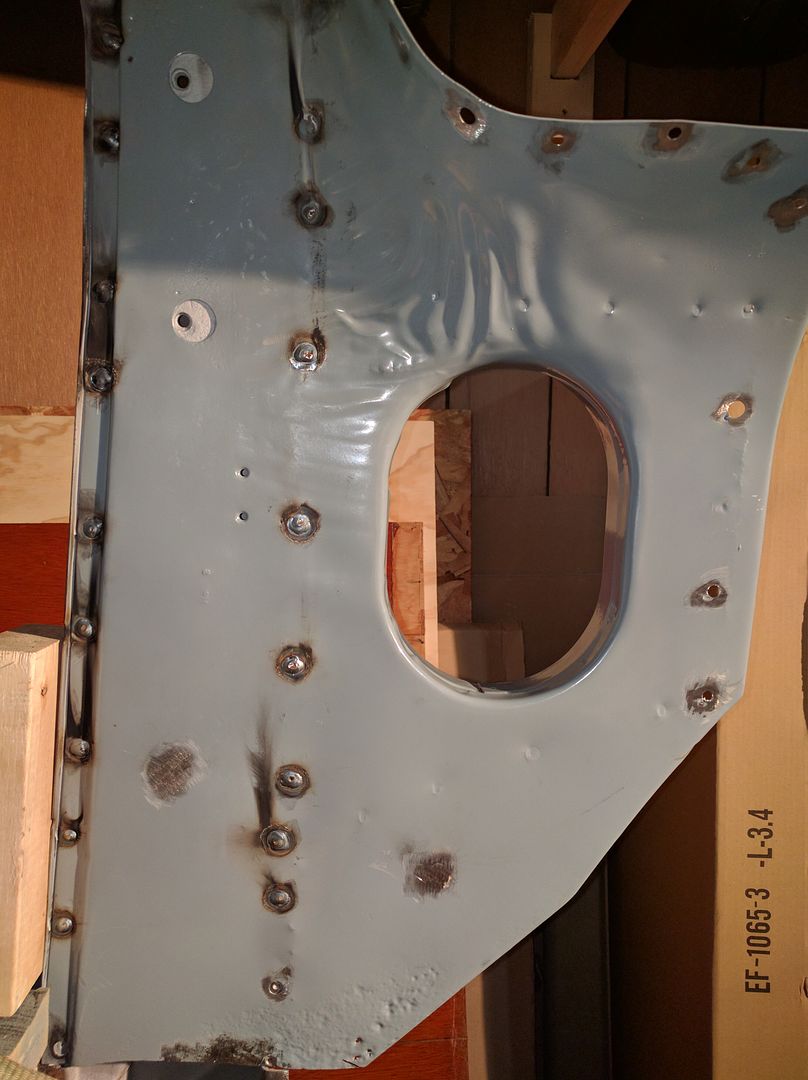
Hammer and dolly on the inside of the pillar got rid of the bow  I need to bring home my 2" air grinder and some roloc disks to finish this area up. Grinding down welds with a 4.5" grinder at full speed isn't easy for the more delicate areas. I also welded in some metal on the pitted areas here. Is this a bad idea? 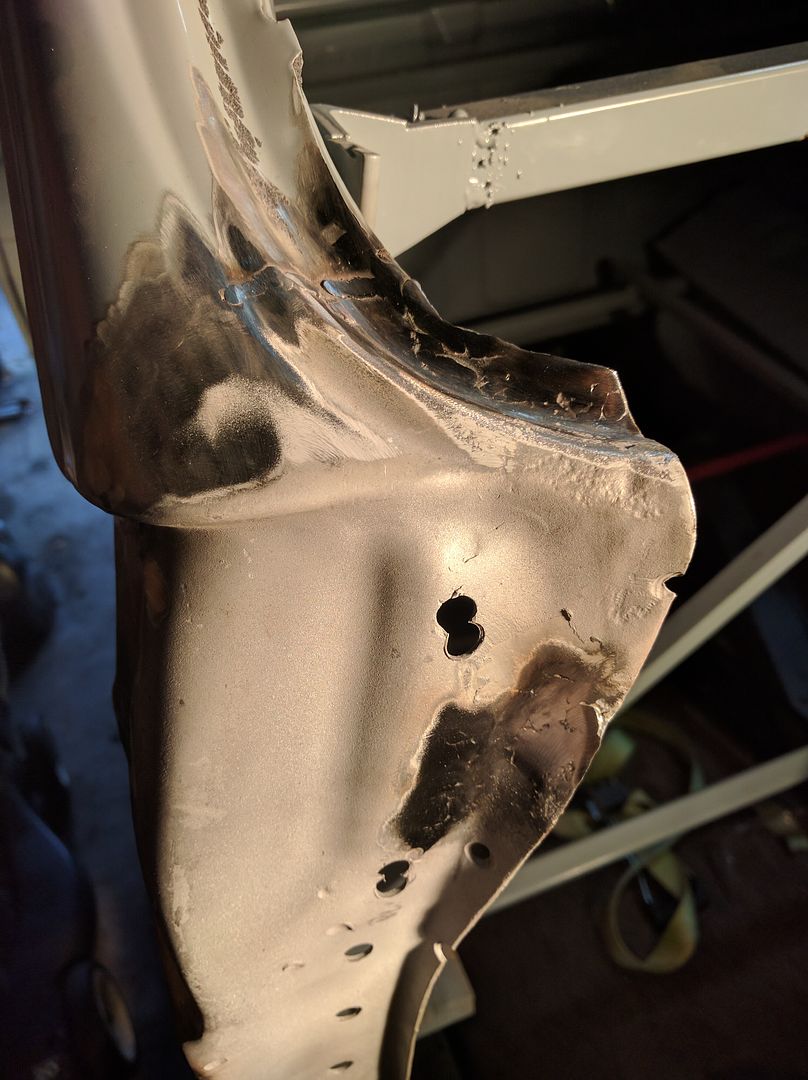 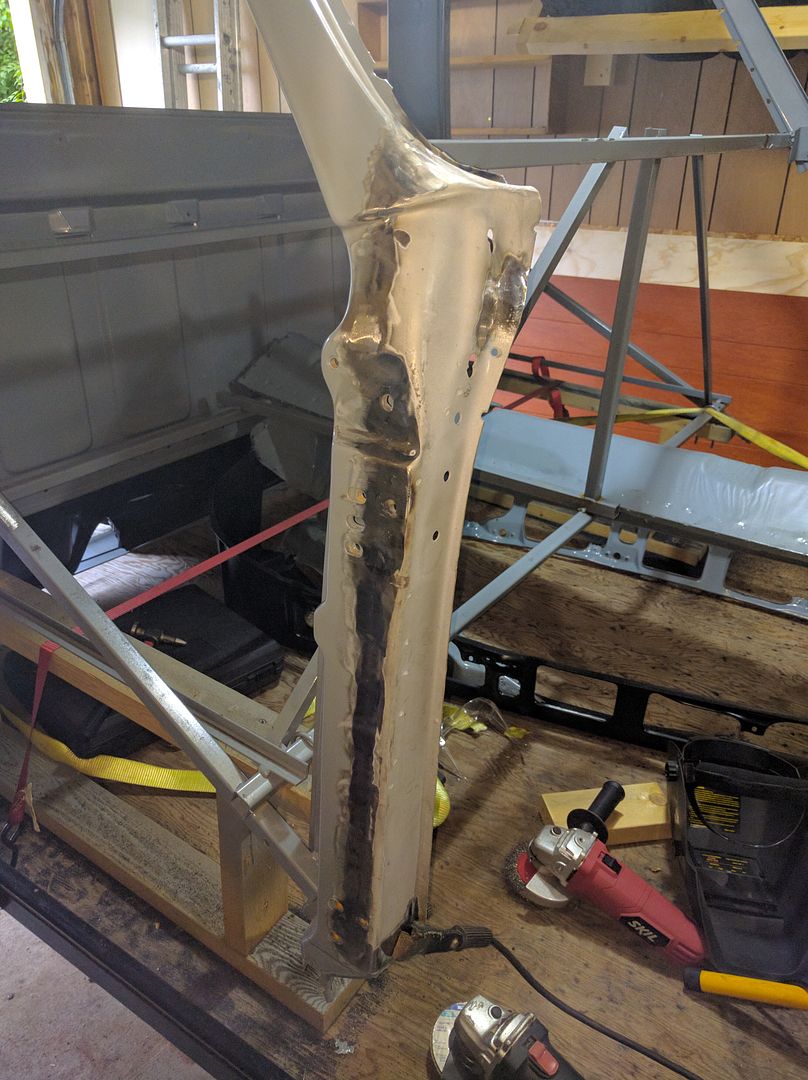 Moved to the drivers side. Here I discovered a difference between the two cabs. My '69 cab has a much more pronounced body line beside the windshield, the '71 cab just has a gentle dip. 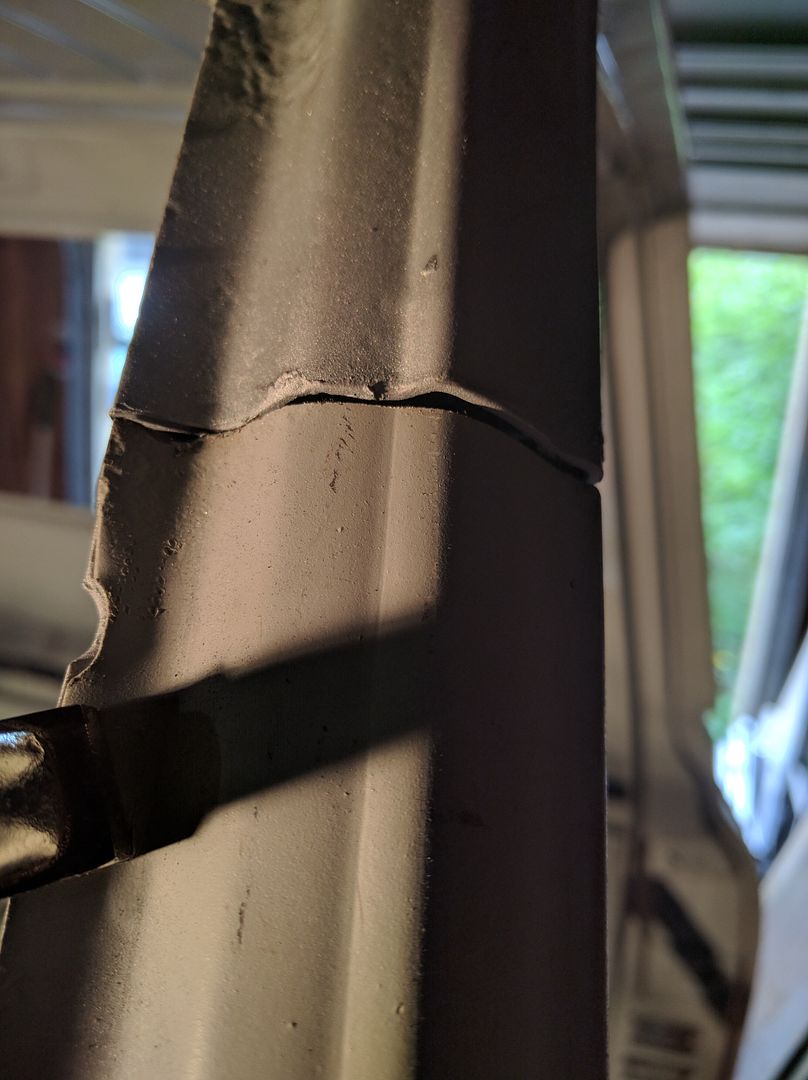 I made sure it all lined up everywhere else and used a chisel and hammer to try and make the transition from the one piece to the other a bit more gradual. 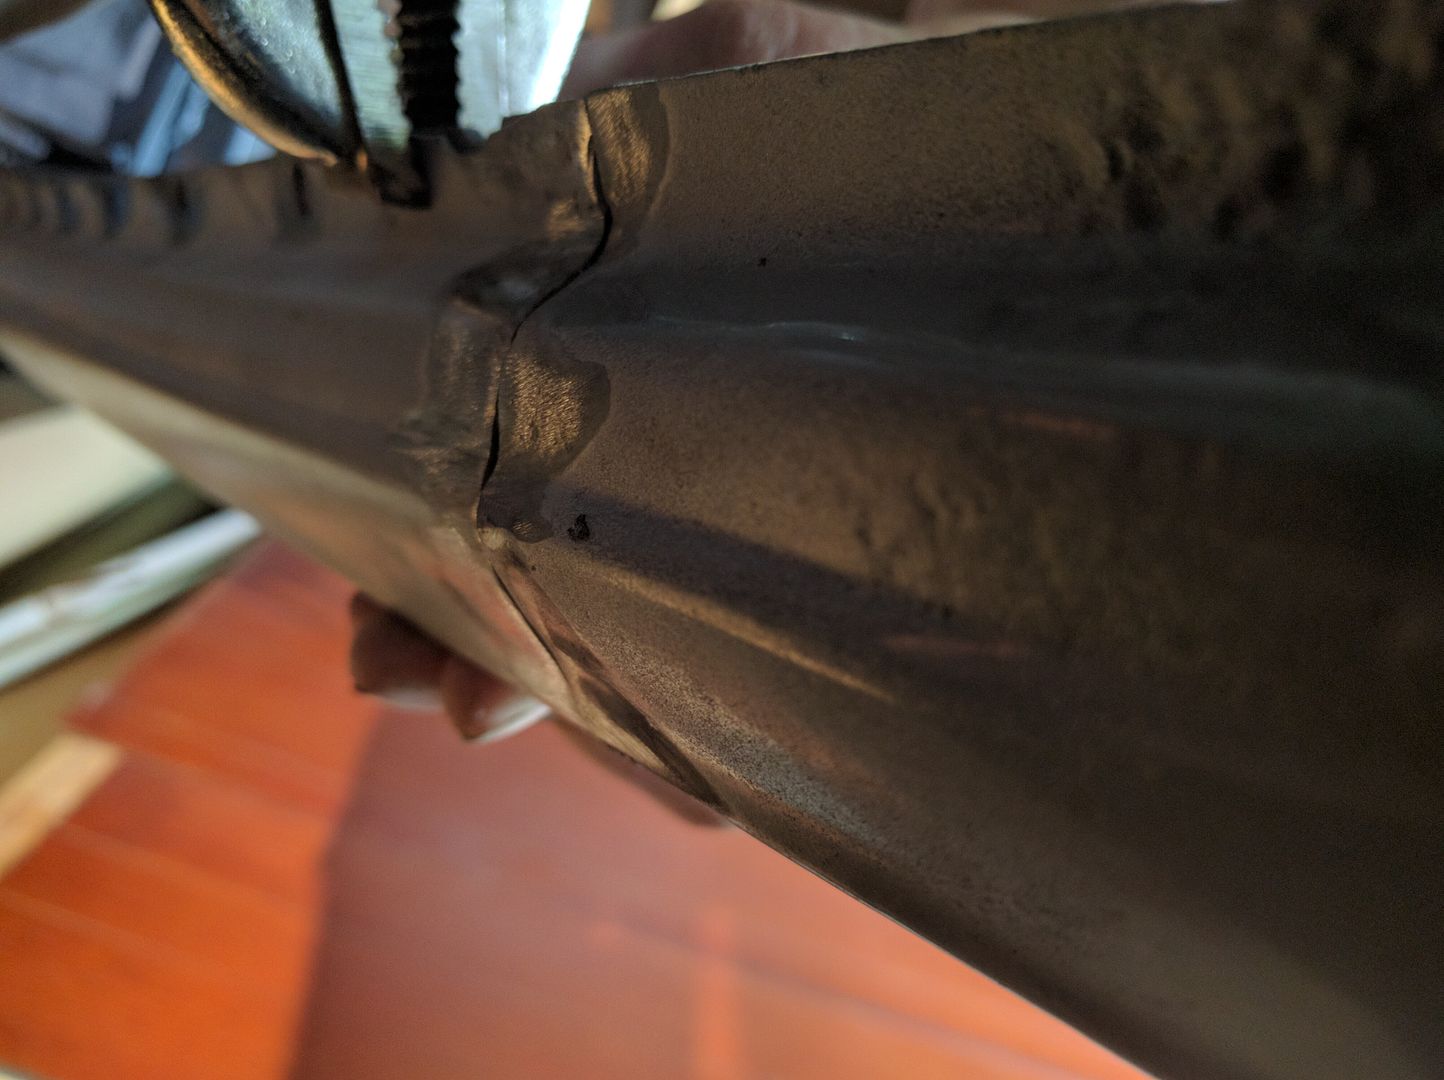 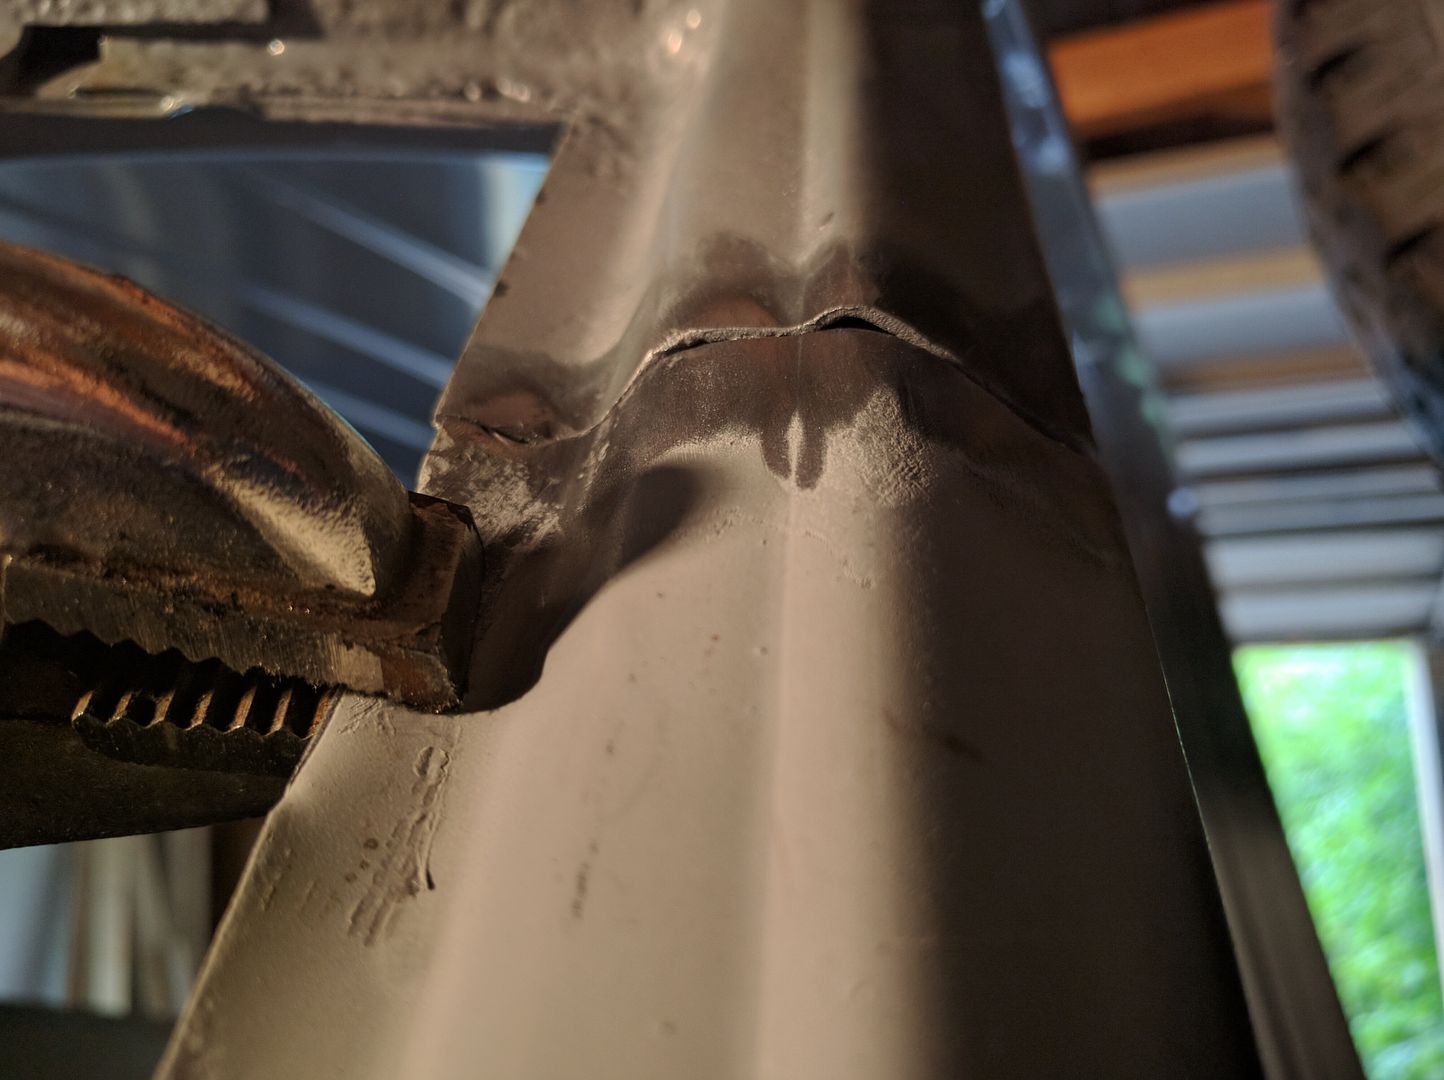 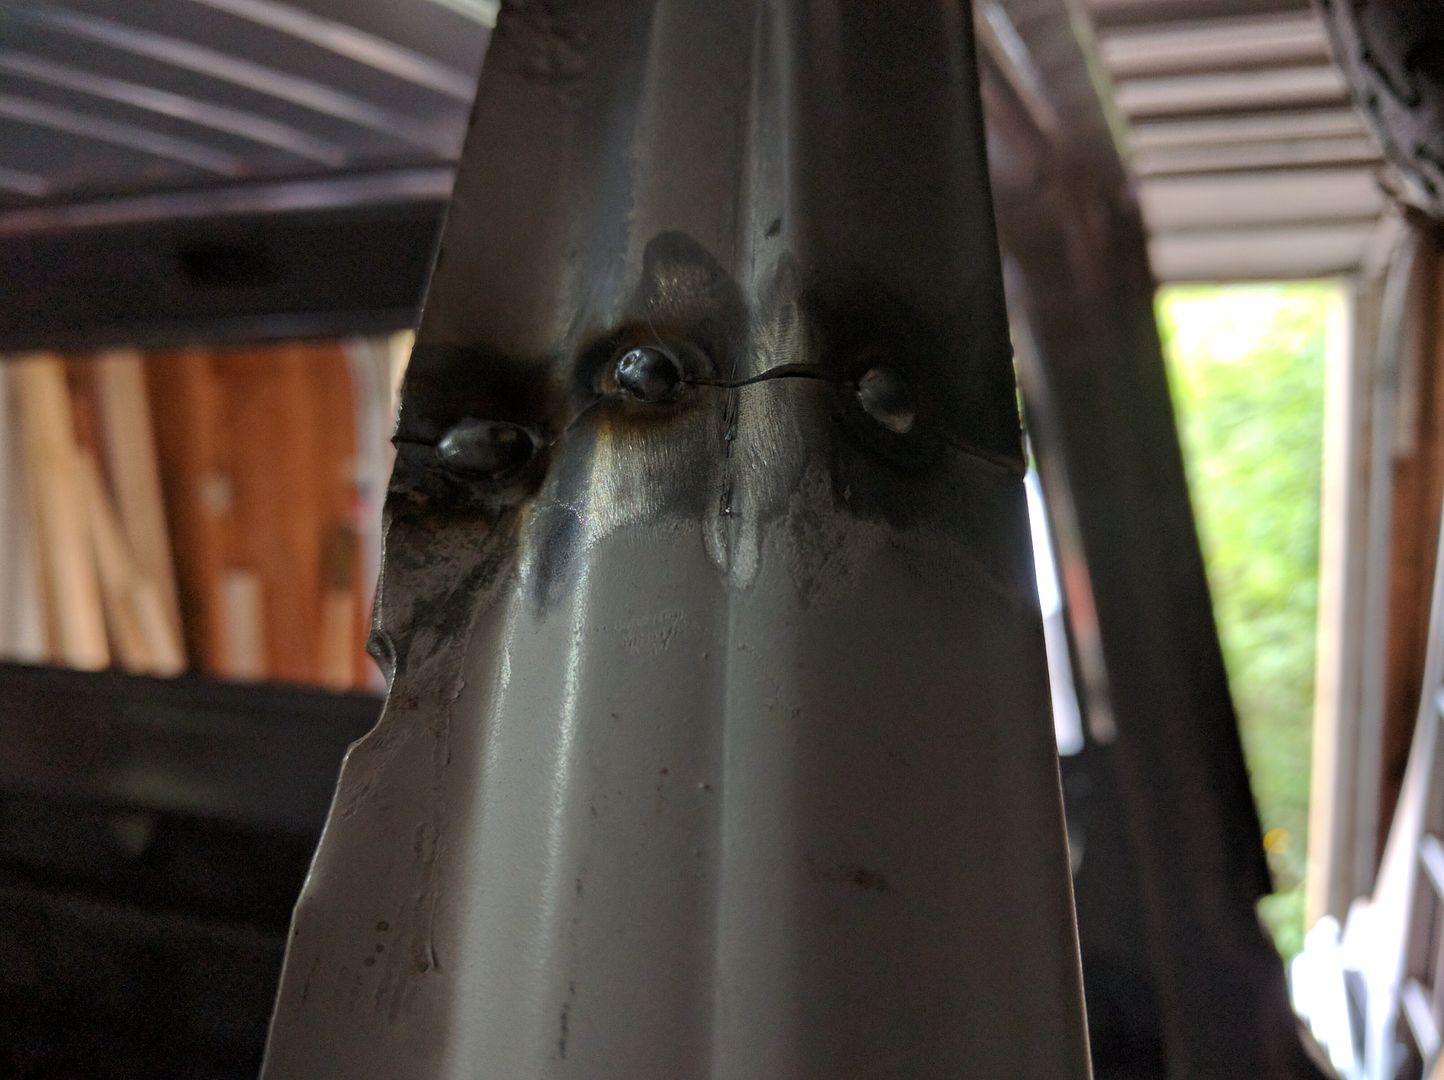
|
|
|
|
|
09-07-2016, 11:16 PM
|
#57 |
|
Registered User
Join Date: Feb 2009
Location: Winnipeg, Manitoba
Posts: 68
|
Re: Run Away's '69 C10 LWB Project Log
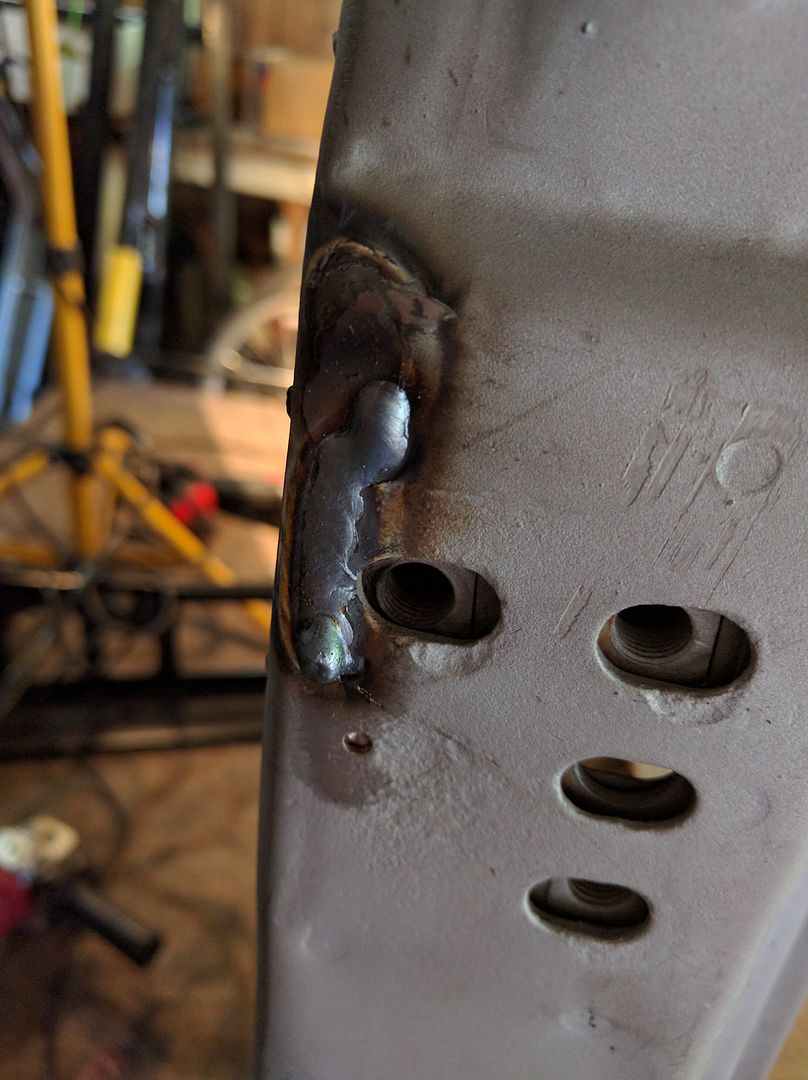
The bottom of the pillar wants to sit about half an inch too far back
 Welded and ground 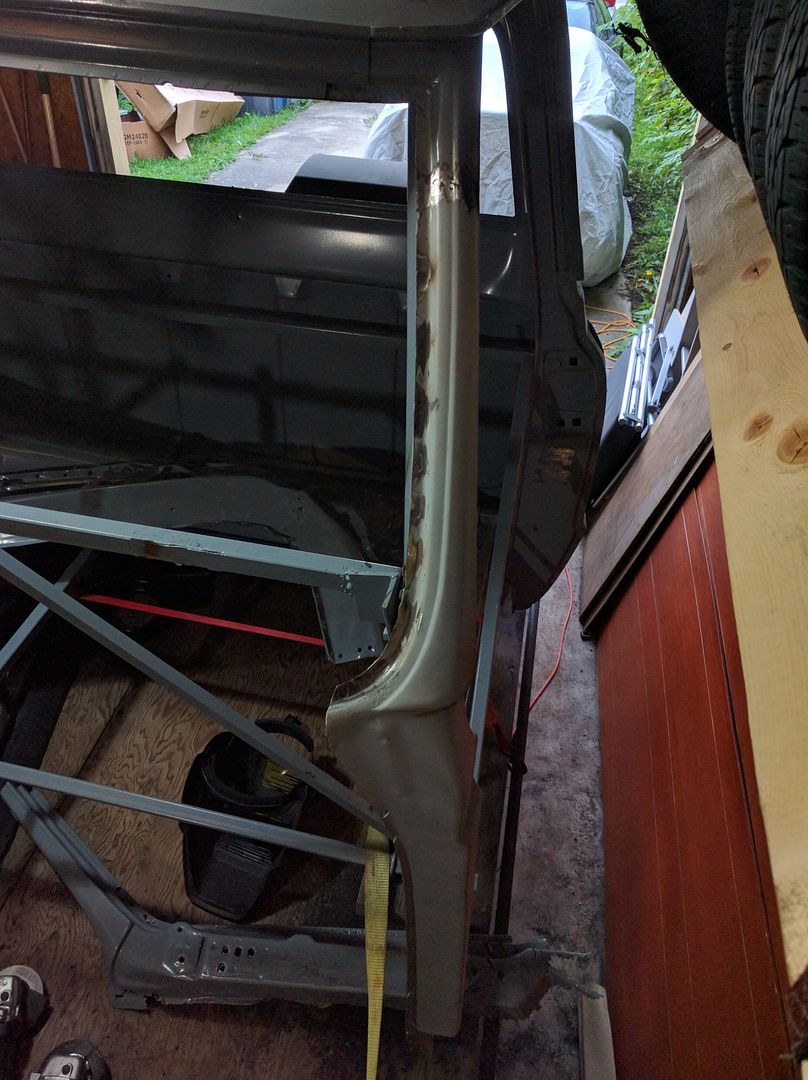 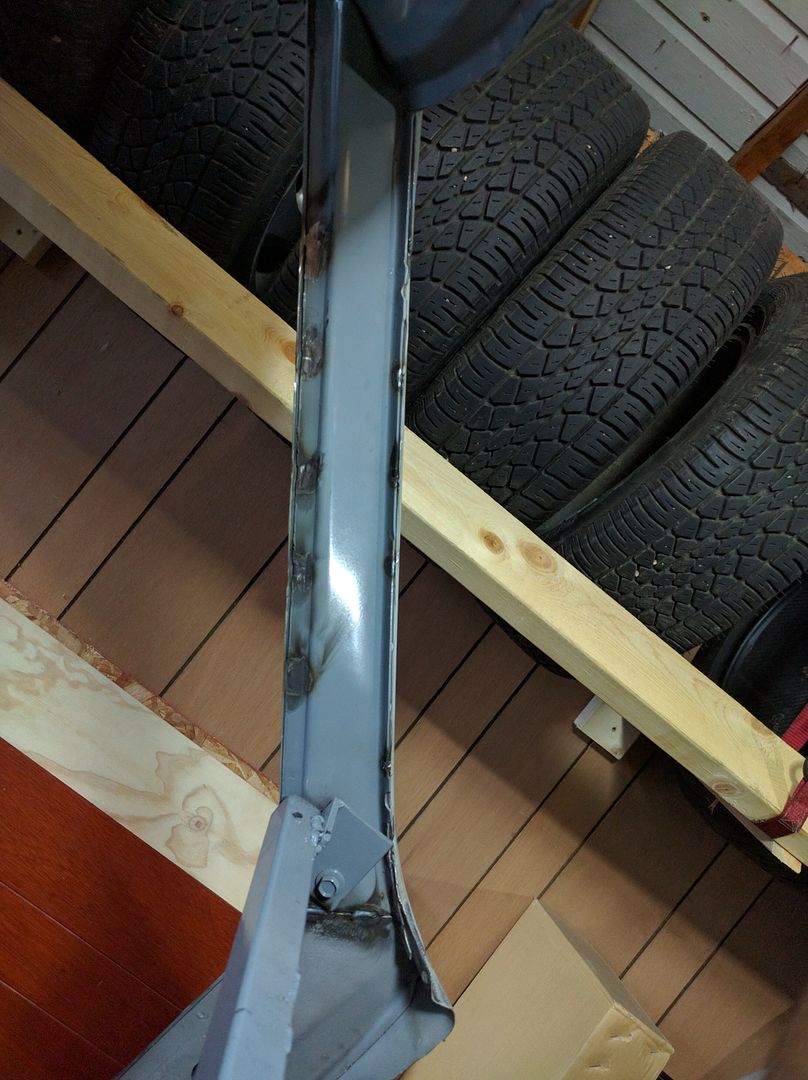 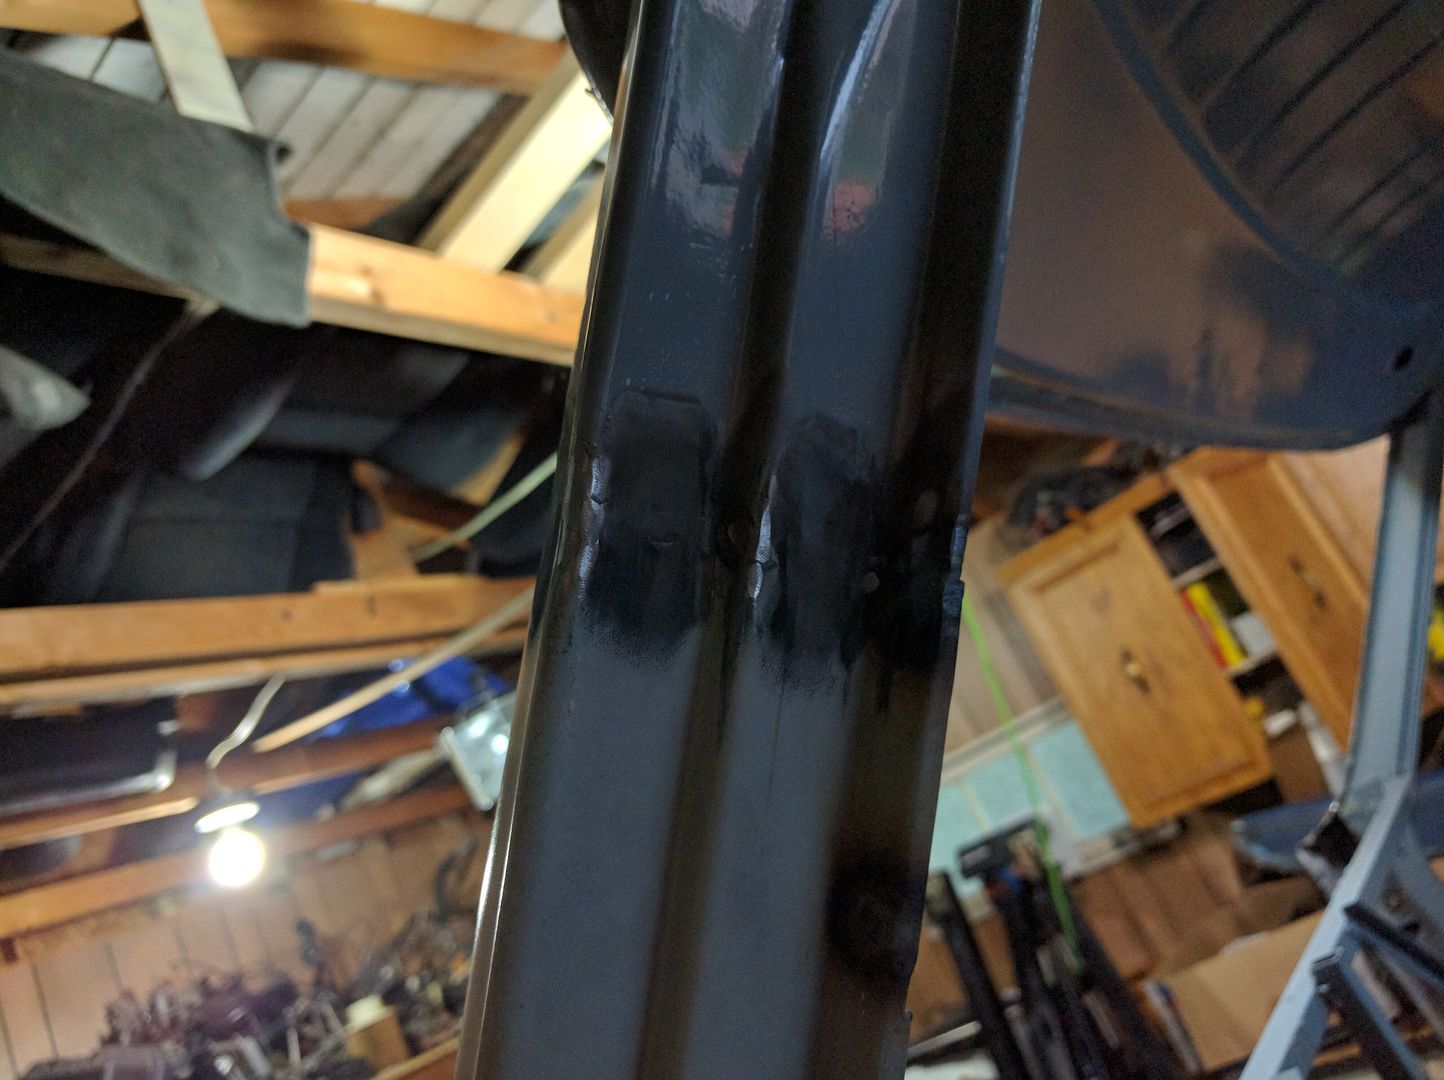 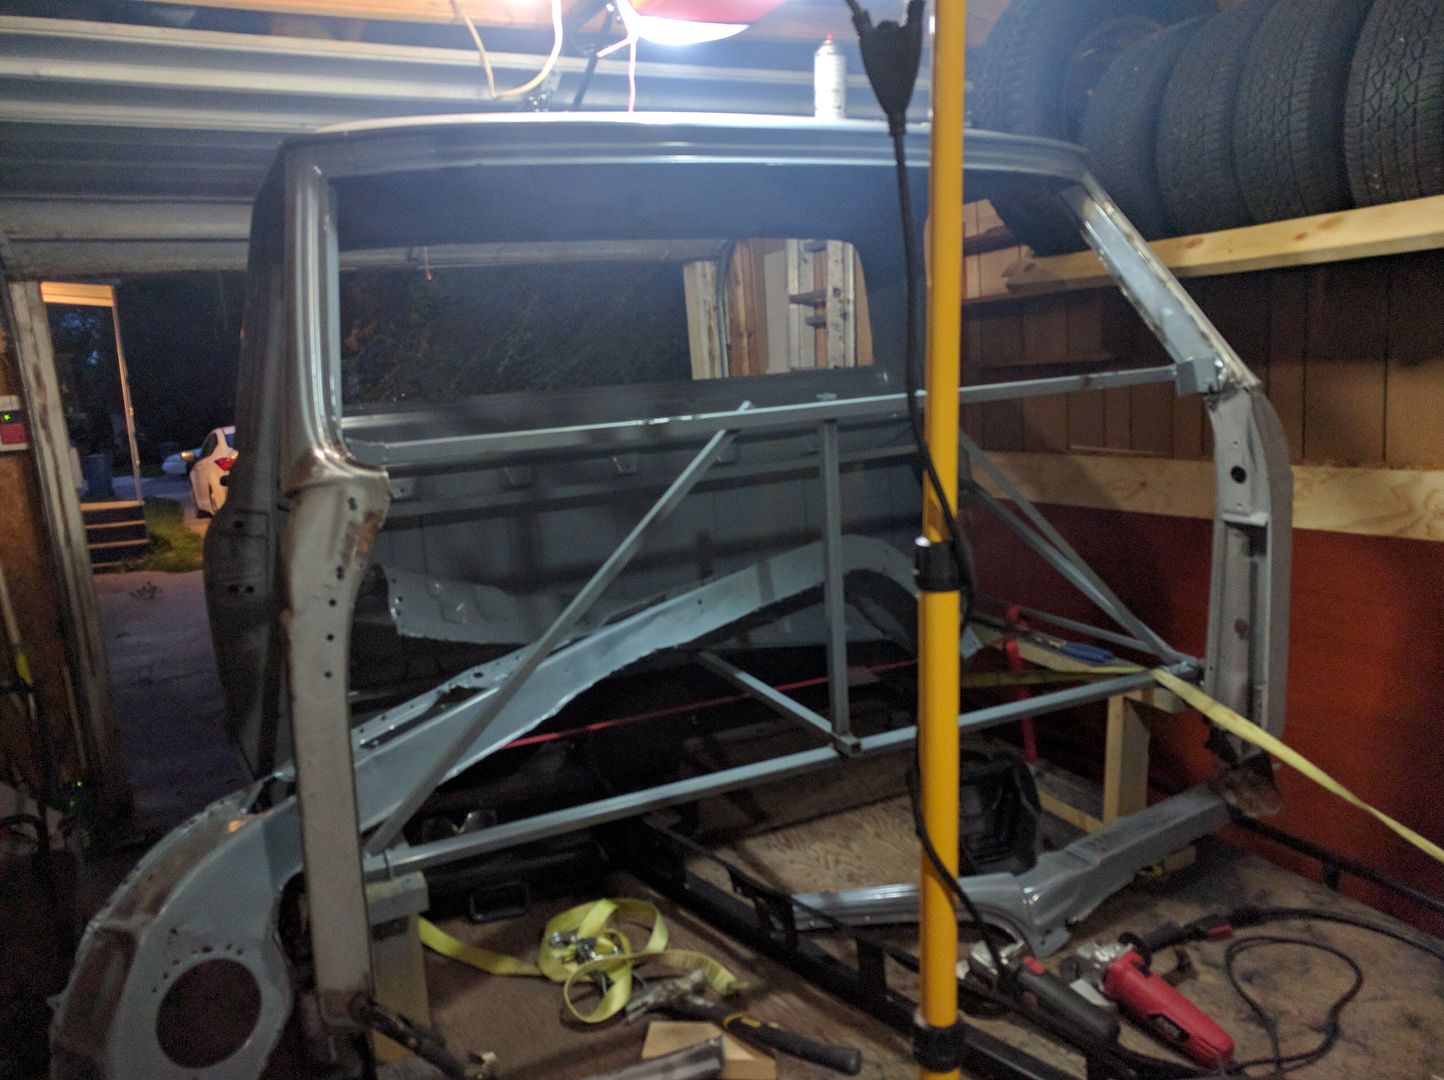
|
|
|
|
|
09-25-2016, 03:37 PM
|
#58 |
|
Registered User
Join Date: Feb 2009
Location: Winnipeg, Manitoba
Posts: 68
|
Re: Run Away's '69 C10 LWB Project Log
Fitted the passenger side inner brace
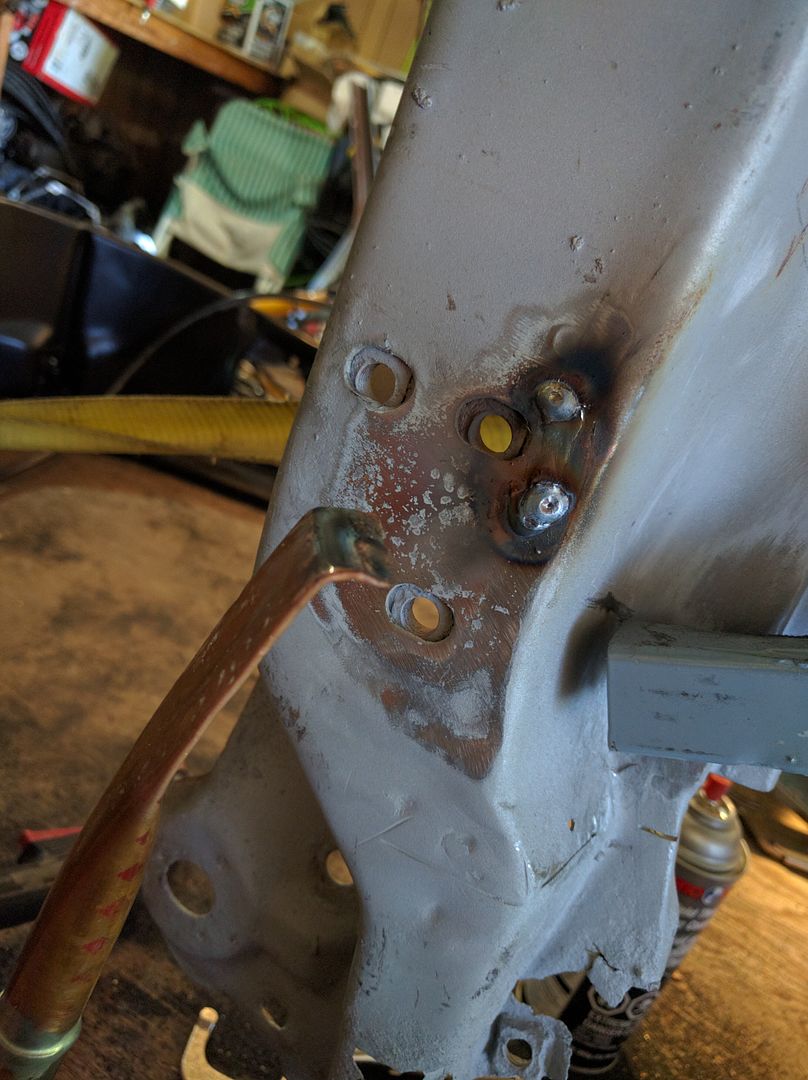
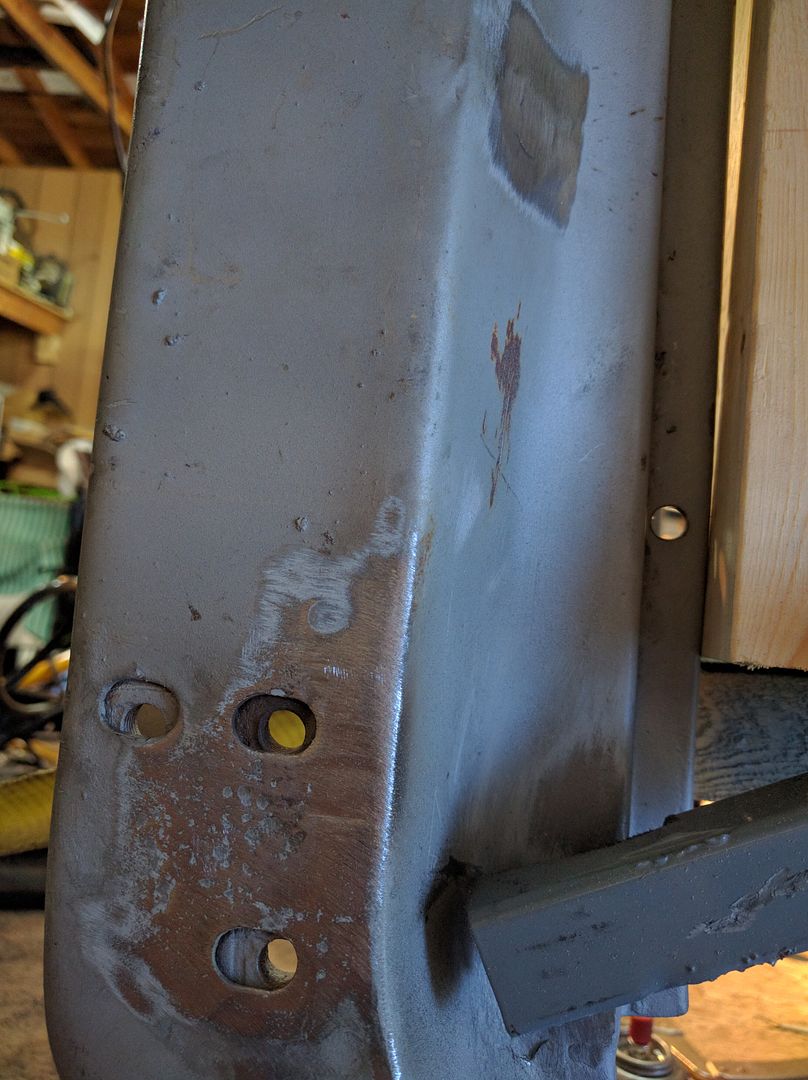
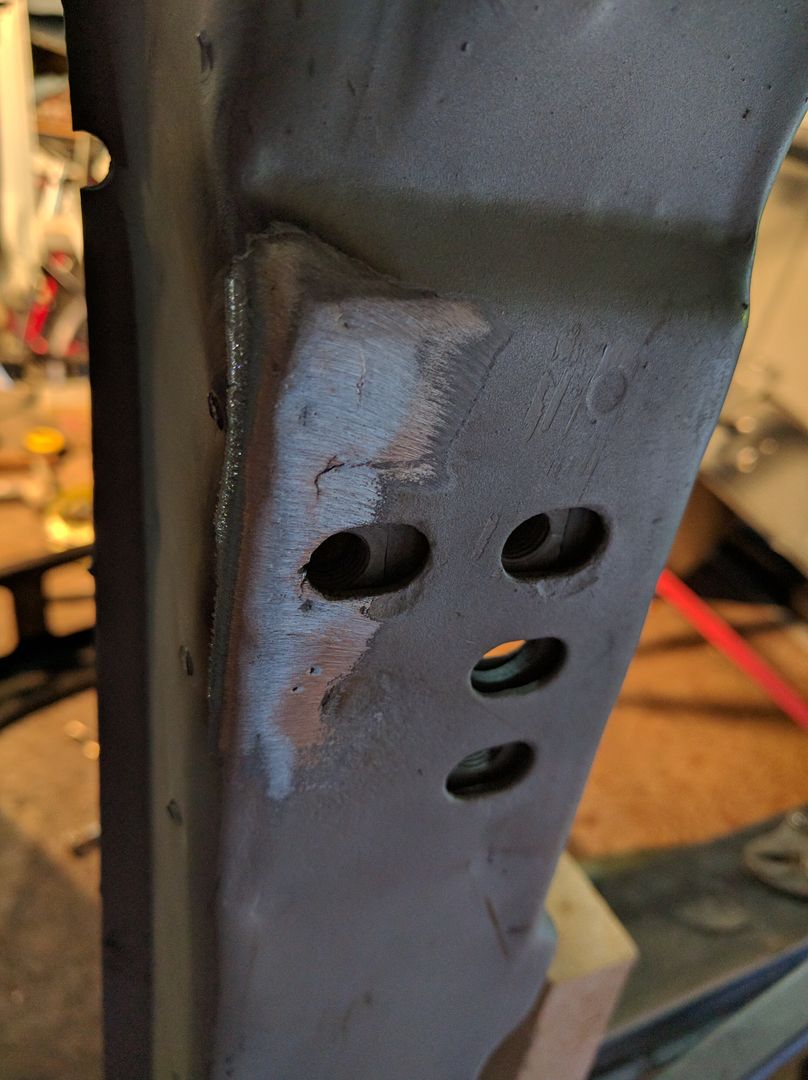
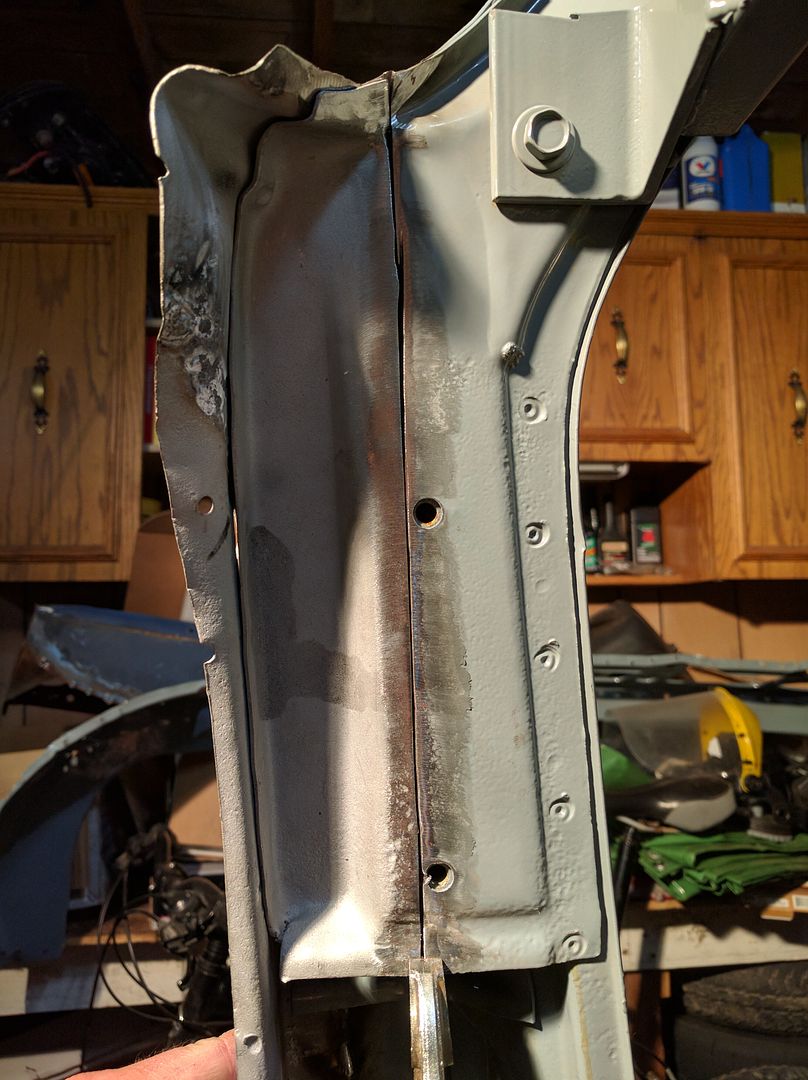 Some tacks 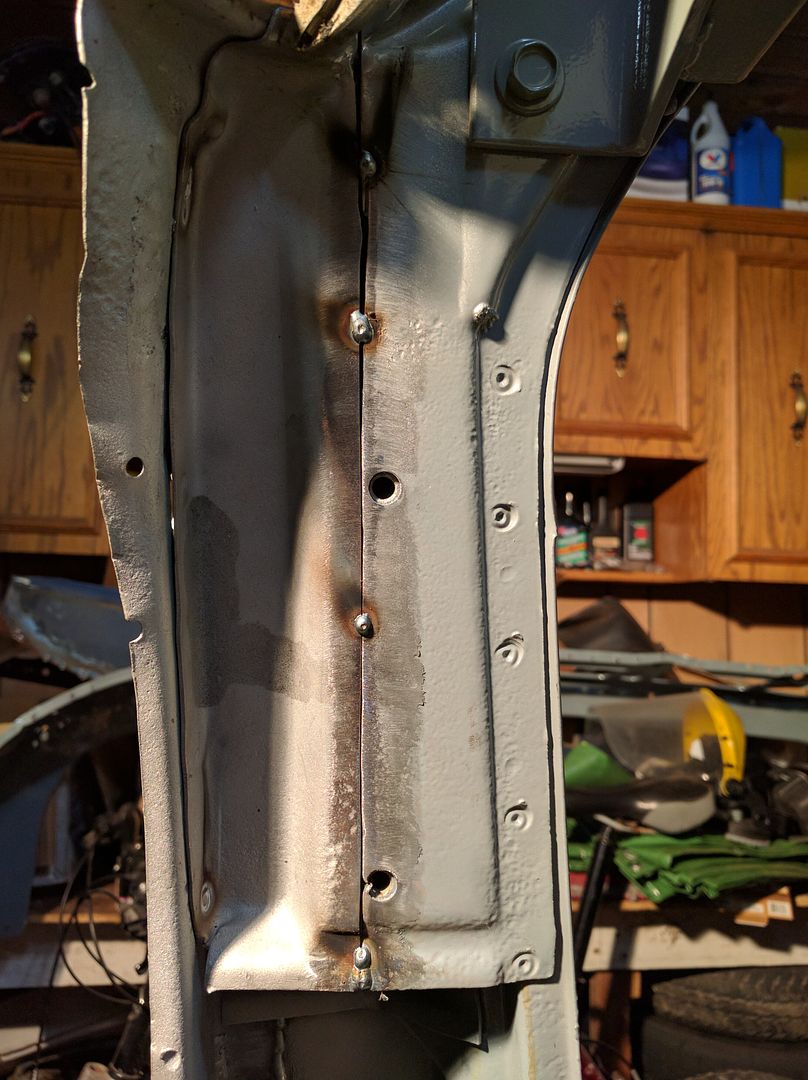 Plug weld from the front 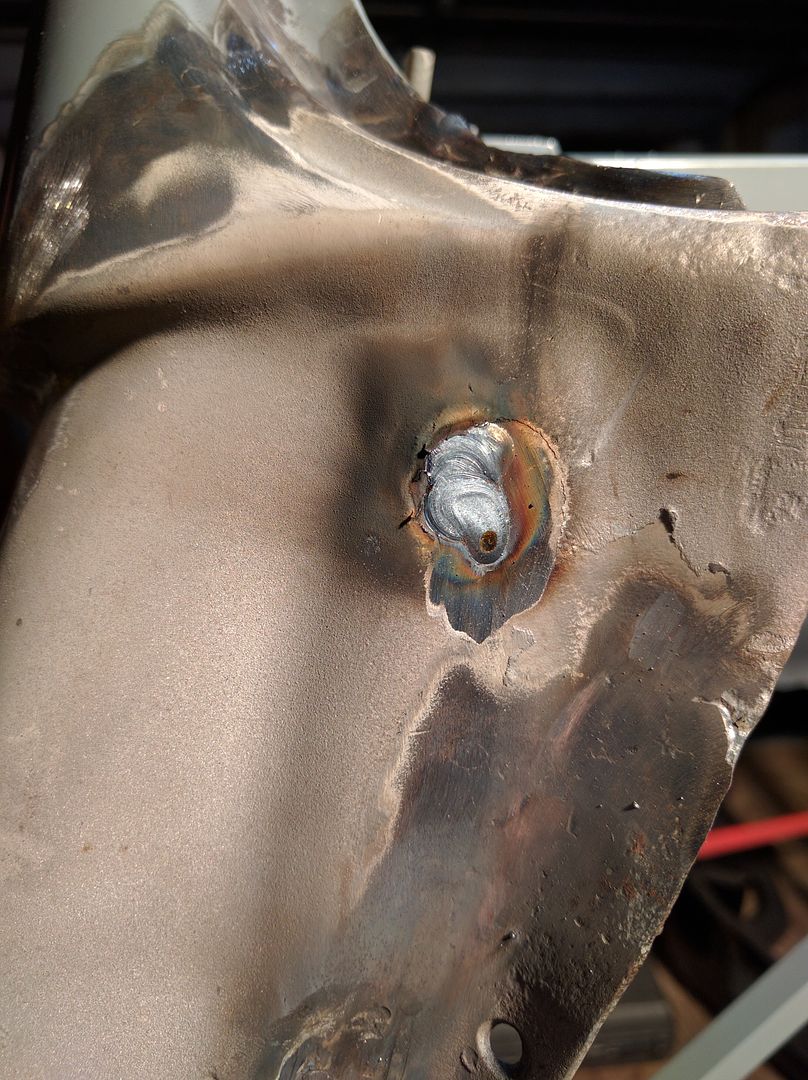 Fully tacked 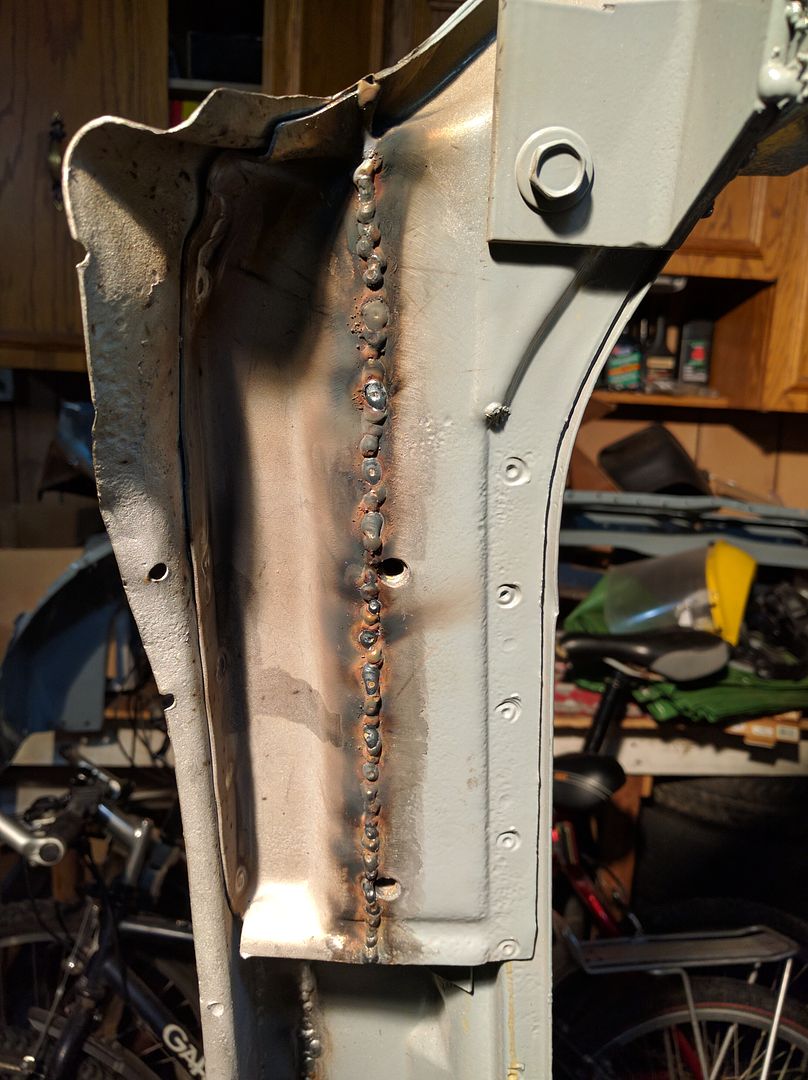 Ground 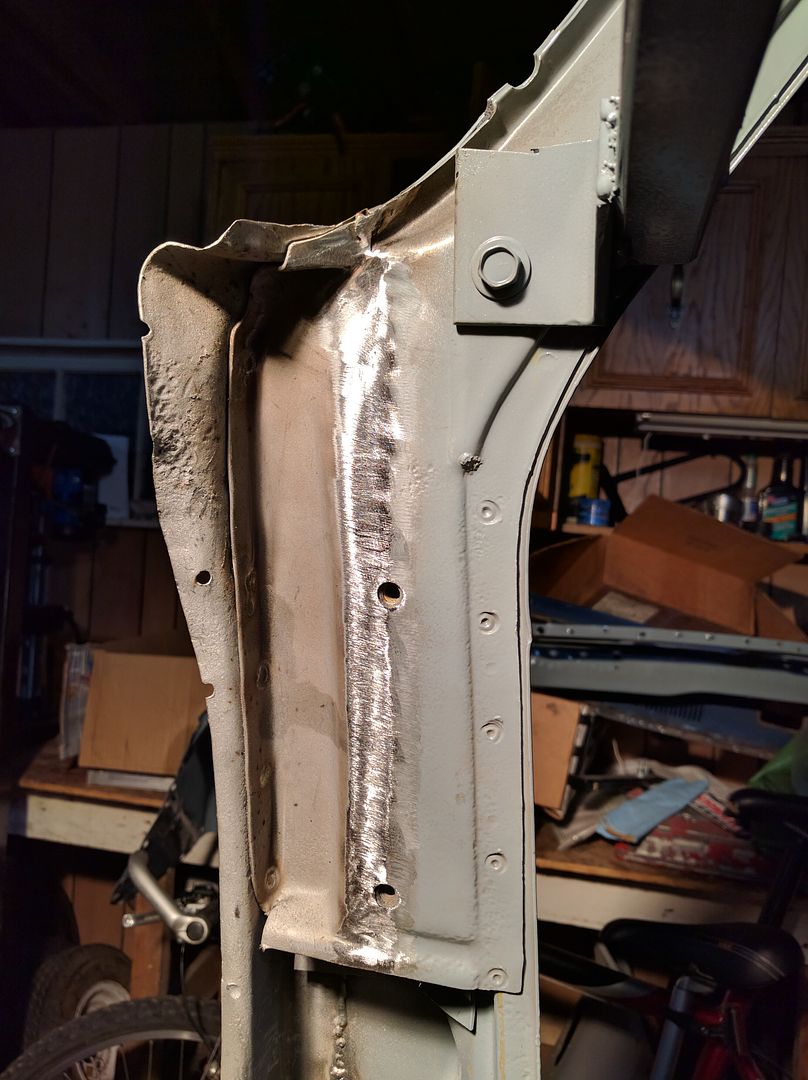 Primed 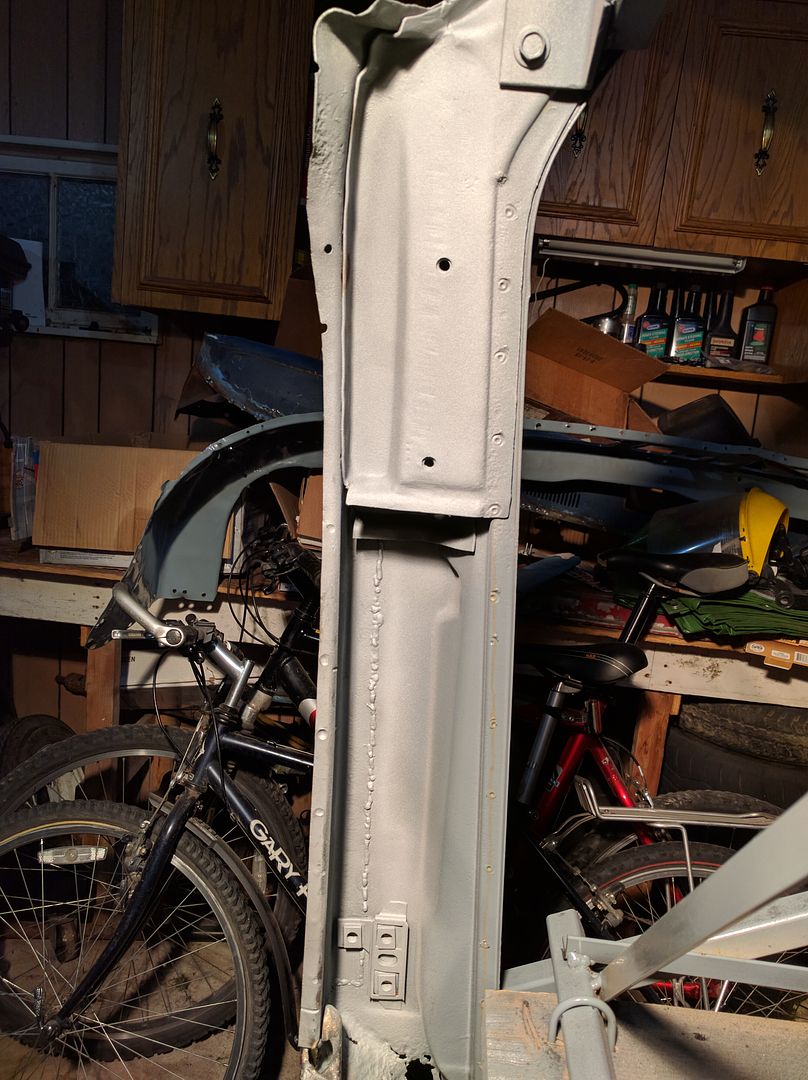 Random holes in the pillar, as well as cracks by the hinges. Drilled the ends to stop. Did the same on the passenger side, but no pictures 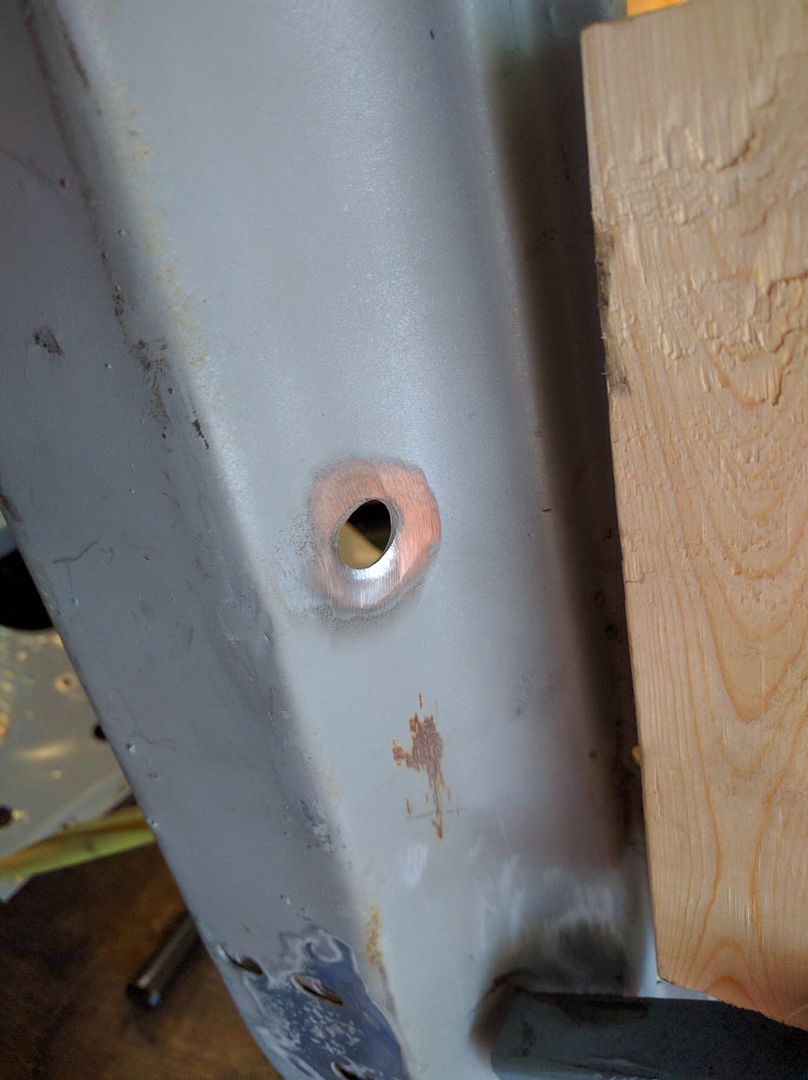 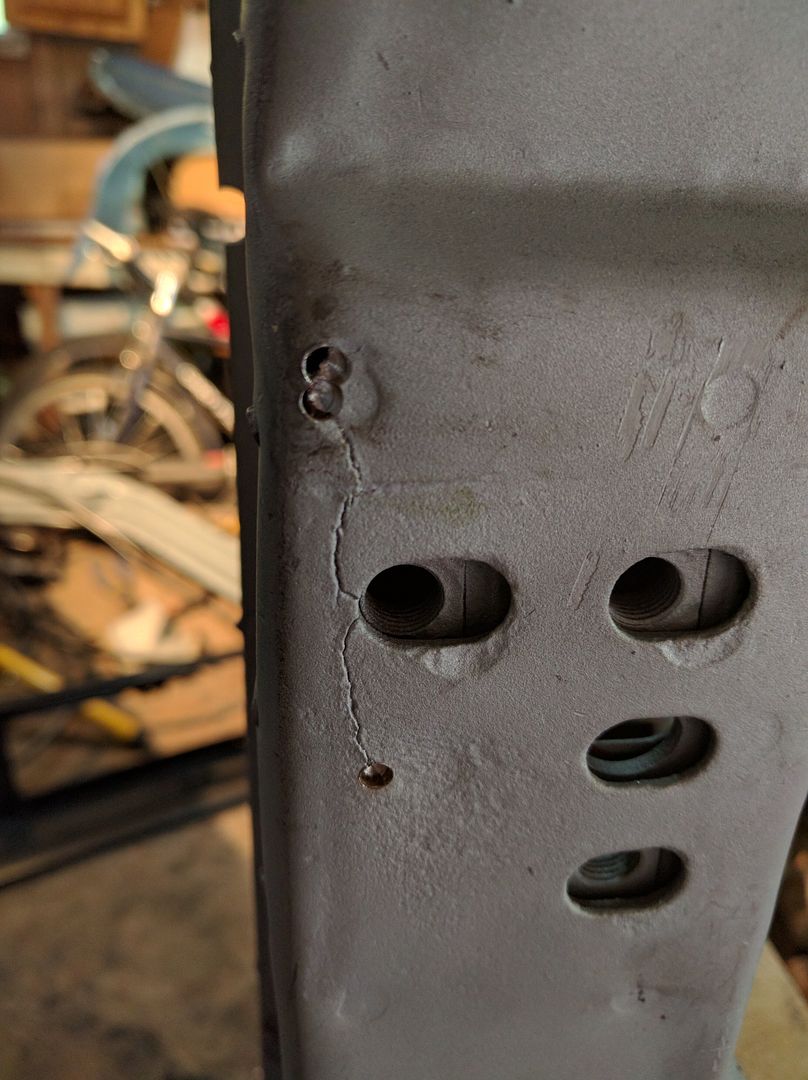  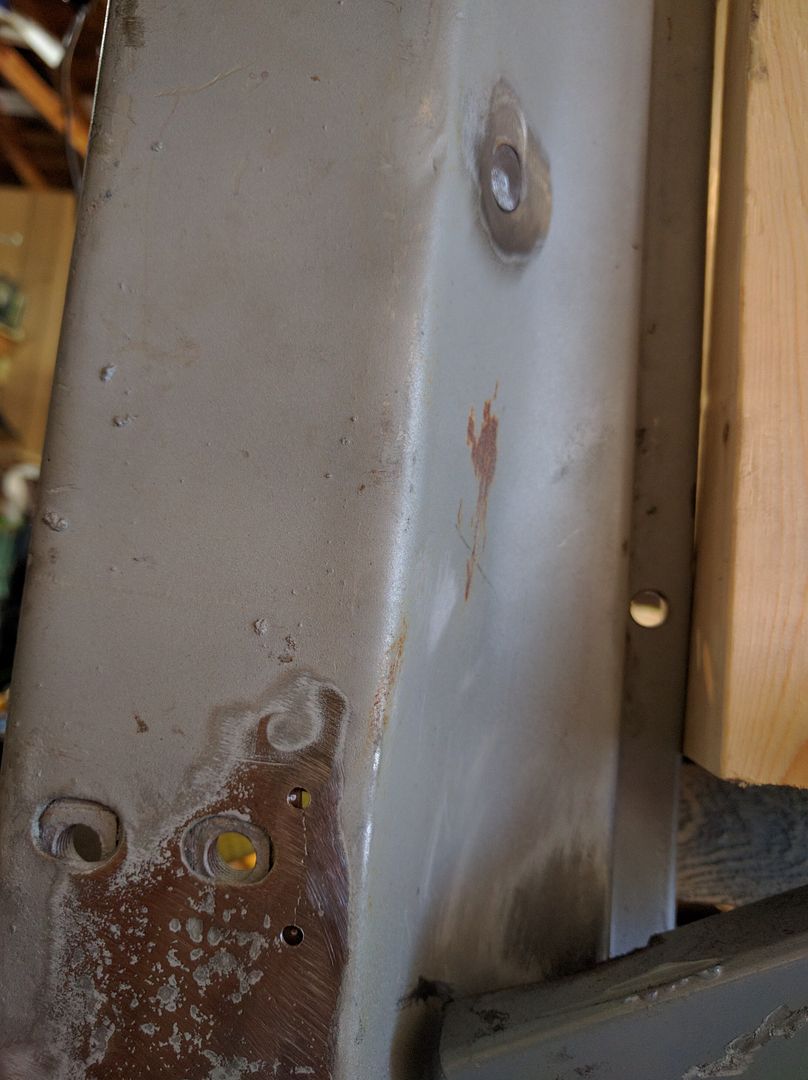
|
|
|
|
|
09-25-2016, 03:38 PM
|
#59 |
|
Registered User
Join Date: Feb 2009
Location: Winnipeg, Manitoba
Posts: 68
|
Re: Run Away's '69 C10 LWB Project Log
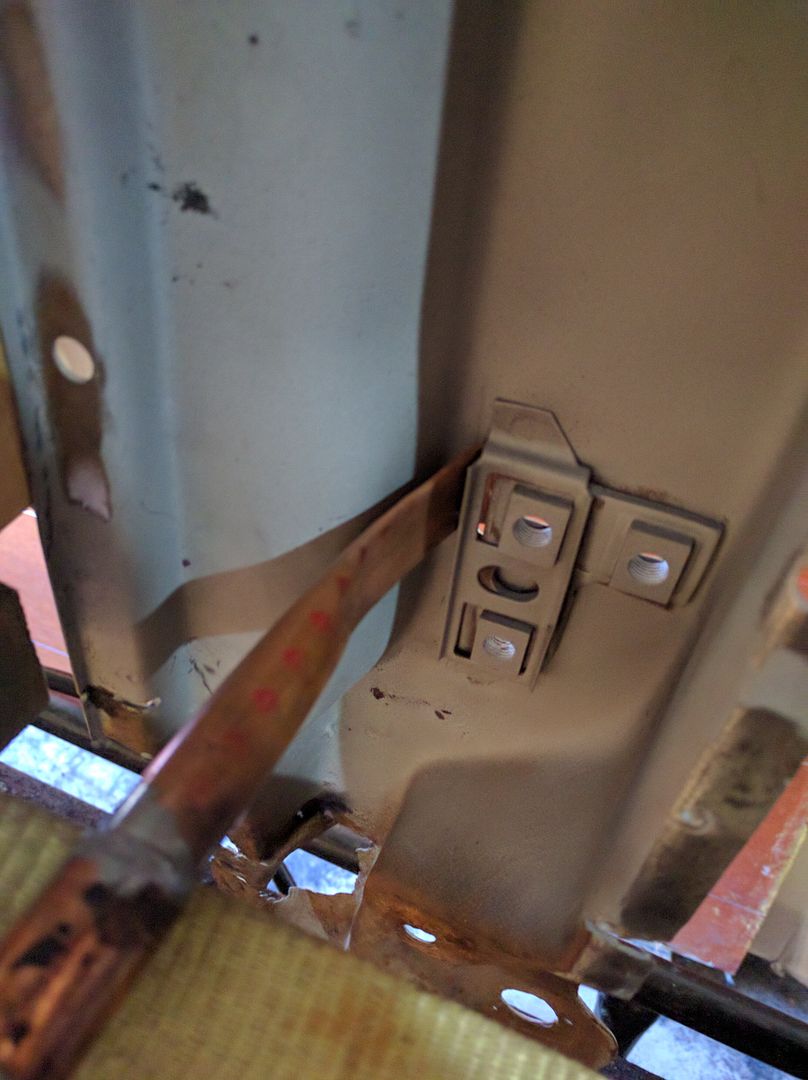
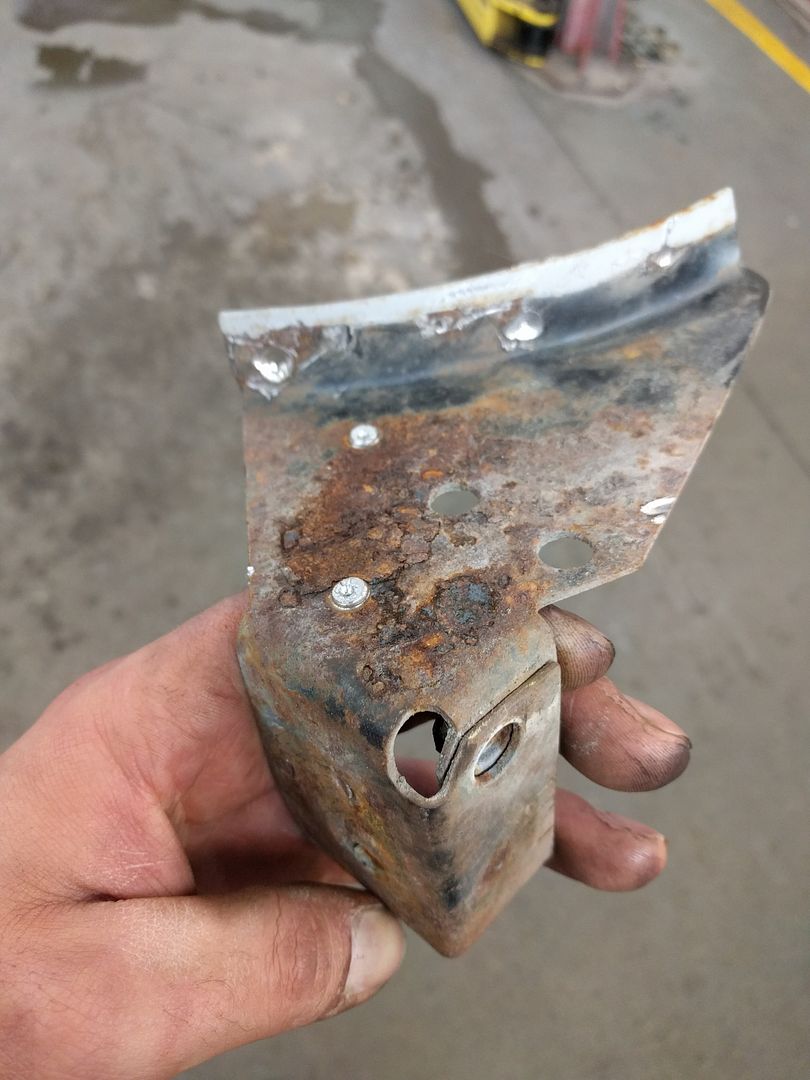
Flattened and bent some old copper plumbing from my house. The crack on the drivers side lower hinge was over top of the free-floating plate, and I didn't want to weld the two together.
|
|
|
|
|
09-25-2016, 03:39 PM
|
#60 |
|
Registered User
Join Date: Feb 2009
Location: Winnipeg, Manitoba
Posts: 68
|
Re: Run Away's '69 C10 LWB Project Log
Filled all sorts of holes in the wing panels, including the radio antenna hole.
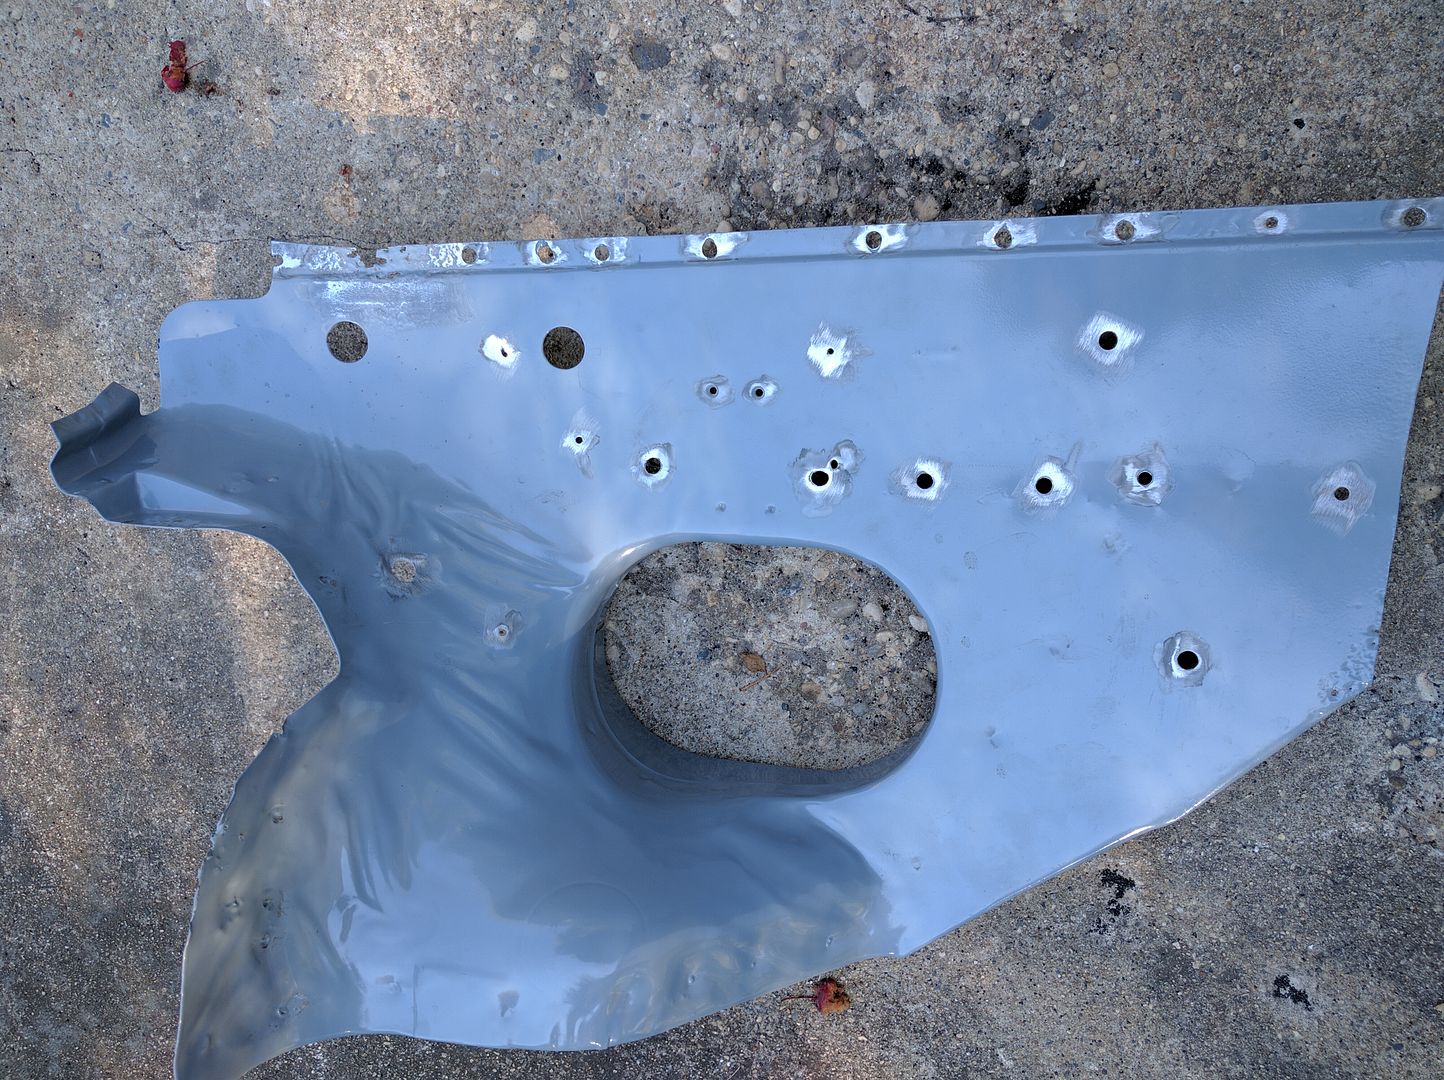     The drivers side wing had rot up by the base of the windshield 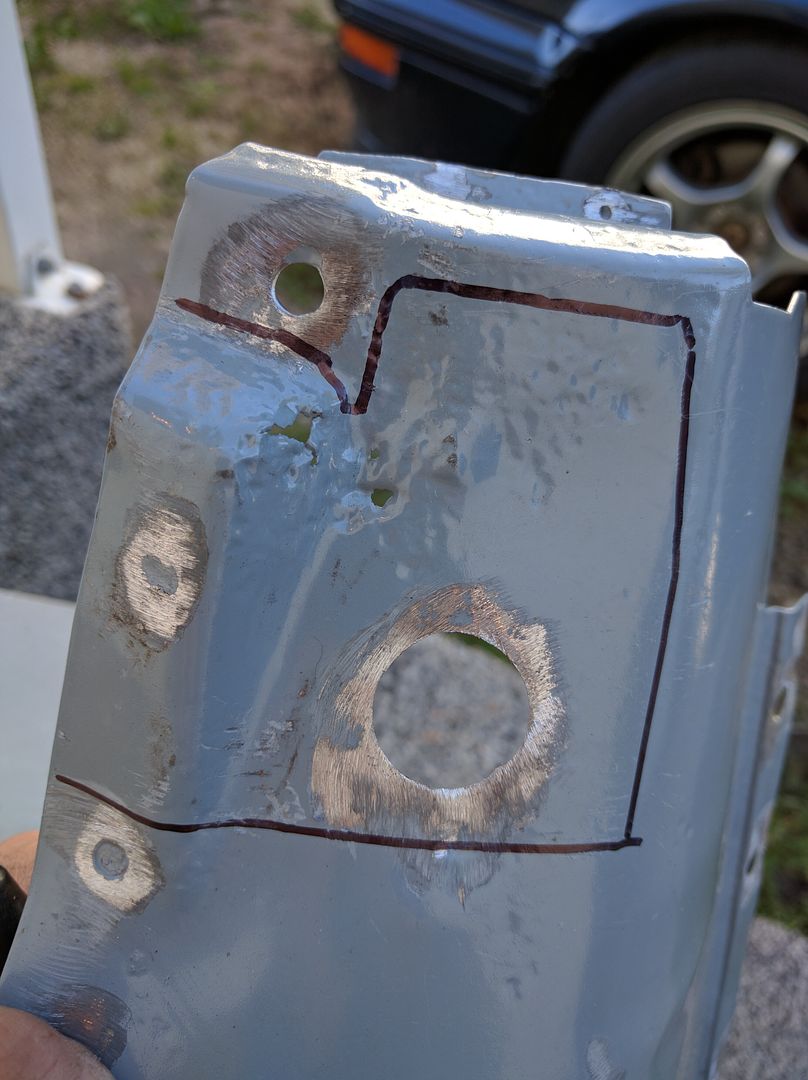  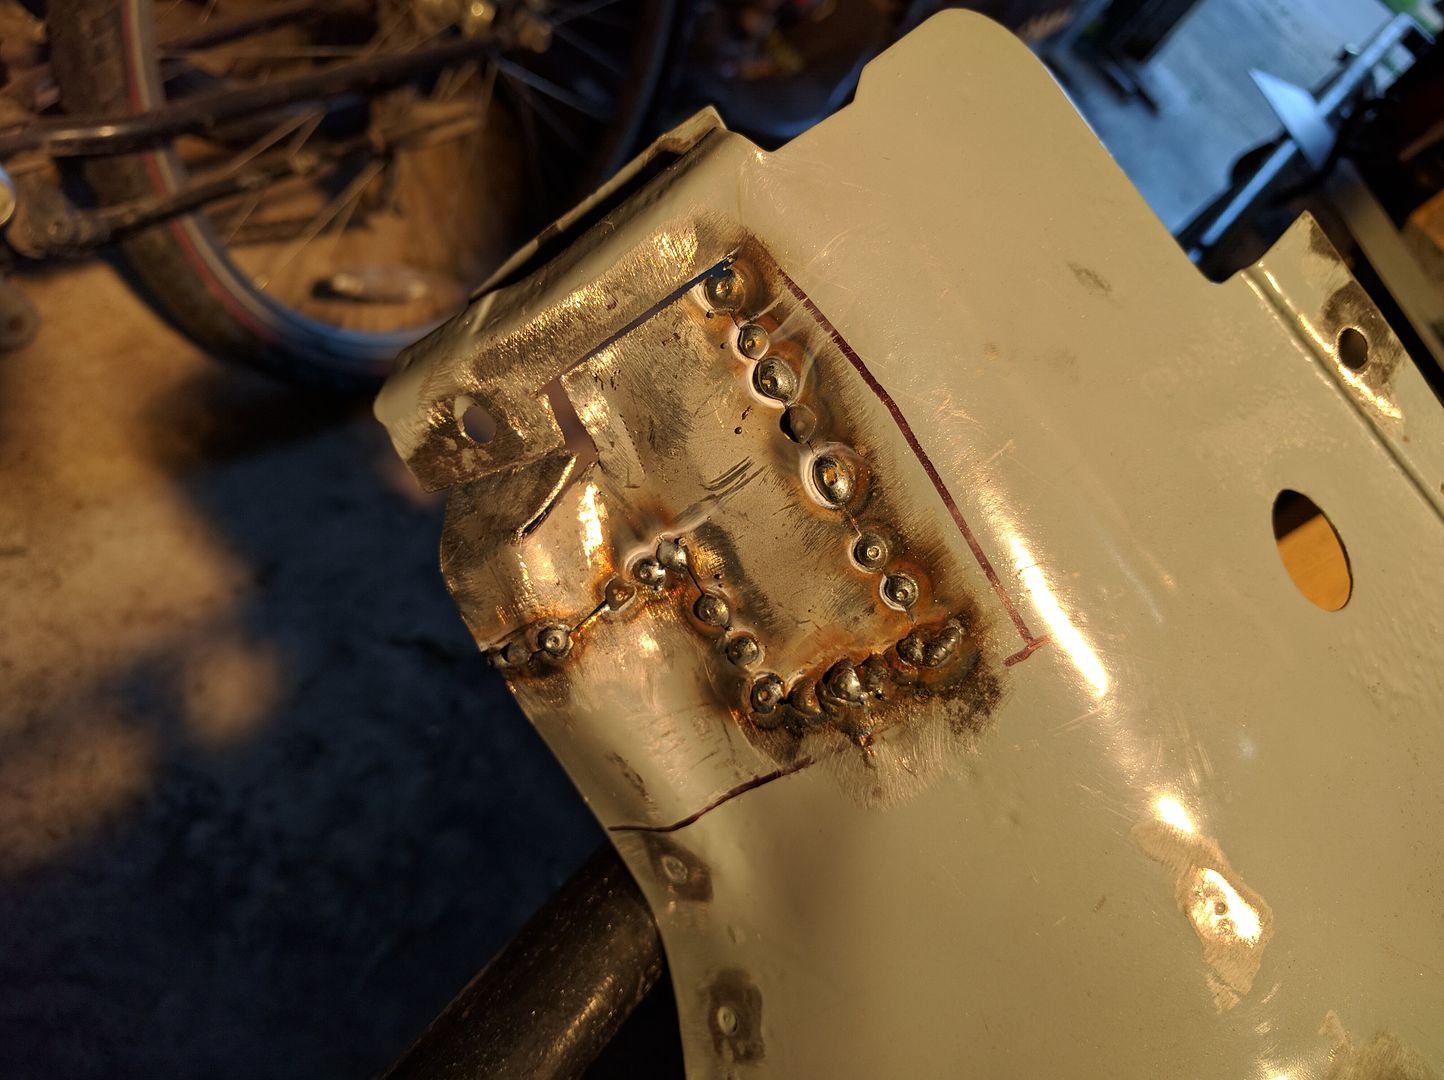 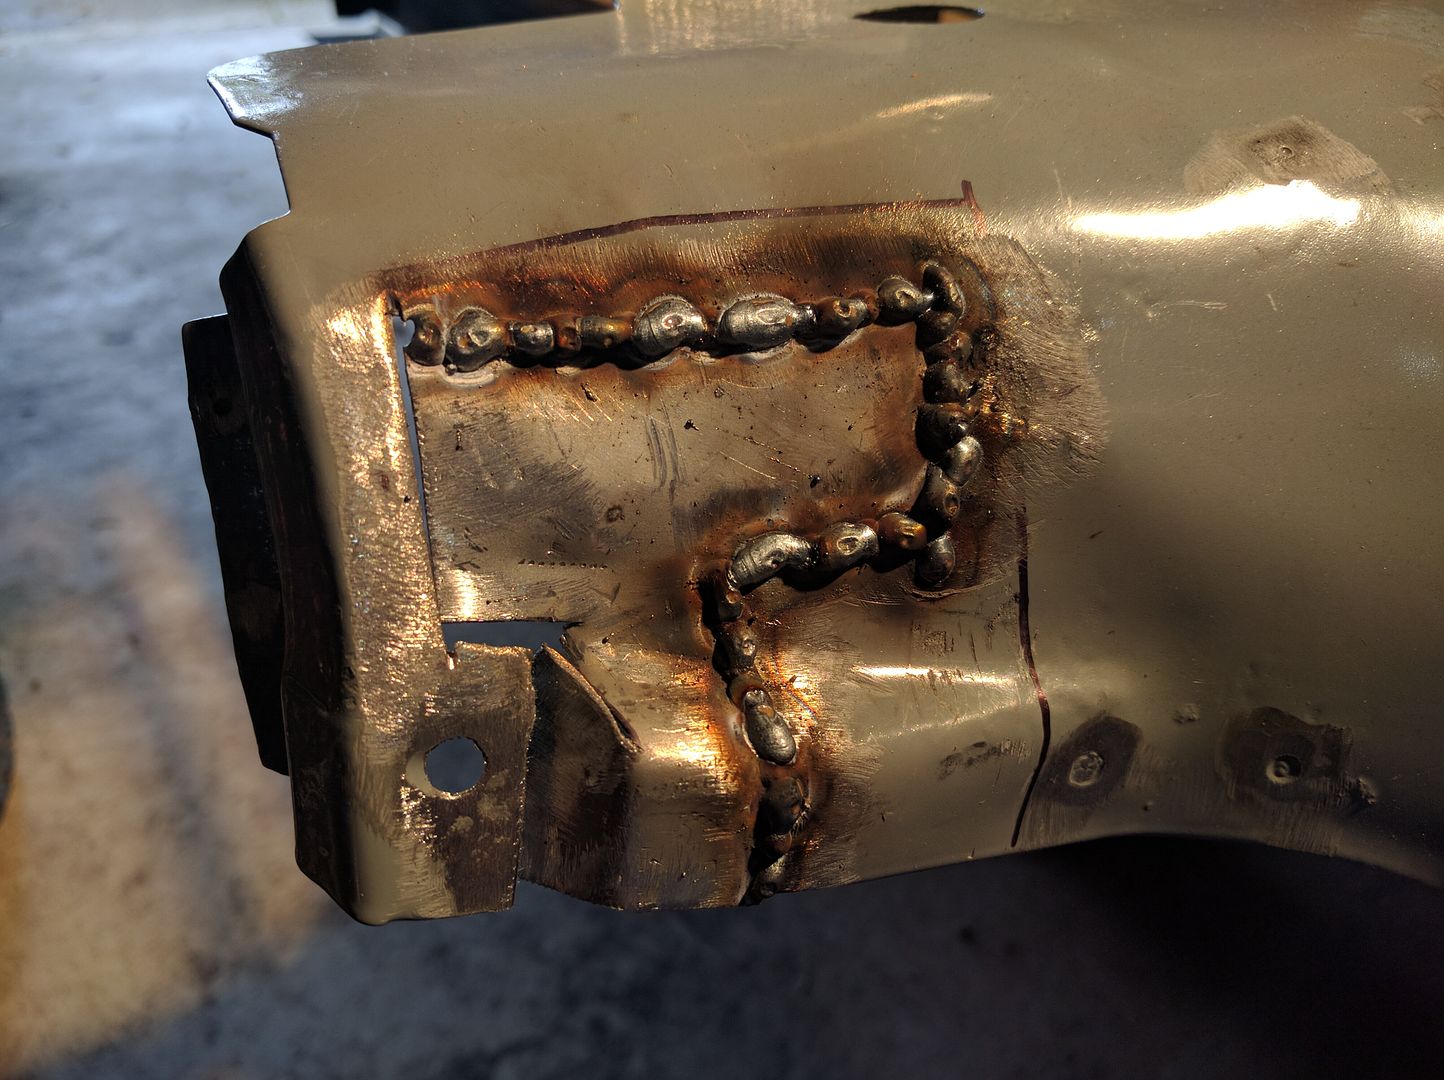
|
|
|
|
|
09-25-2016, 03:40 PM
|
#61 |
|
Registered User
Join Date: Feb 2009
Location: Winnipeg, Manitoba
Posts: 68
|
Re: Run Away's '69 C10 LWB Project Log
Starting to get better at spot welds, I turned the welder way up. Must be pretty poor wiring to the garage. Penetration is better now.
 Welded in and ground. Leaving the top part loose until it's fit to ensure best fitment. 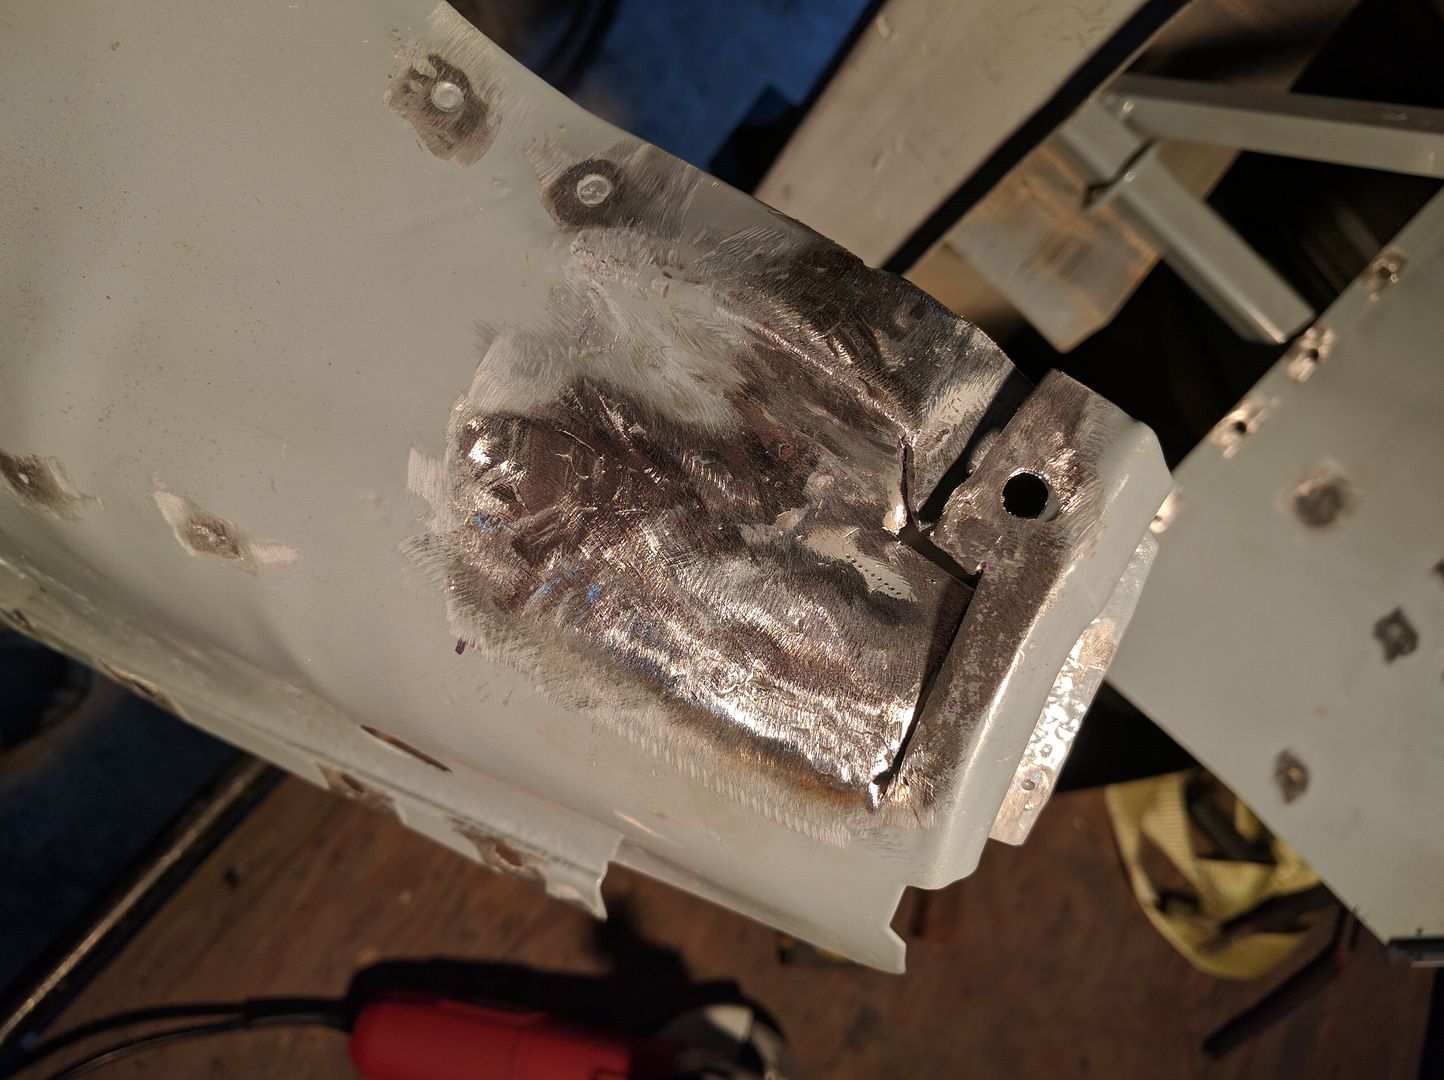 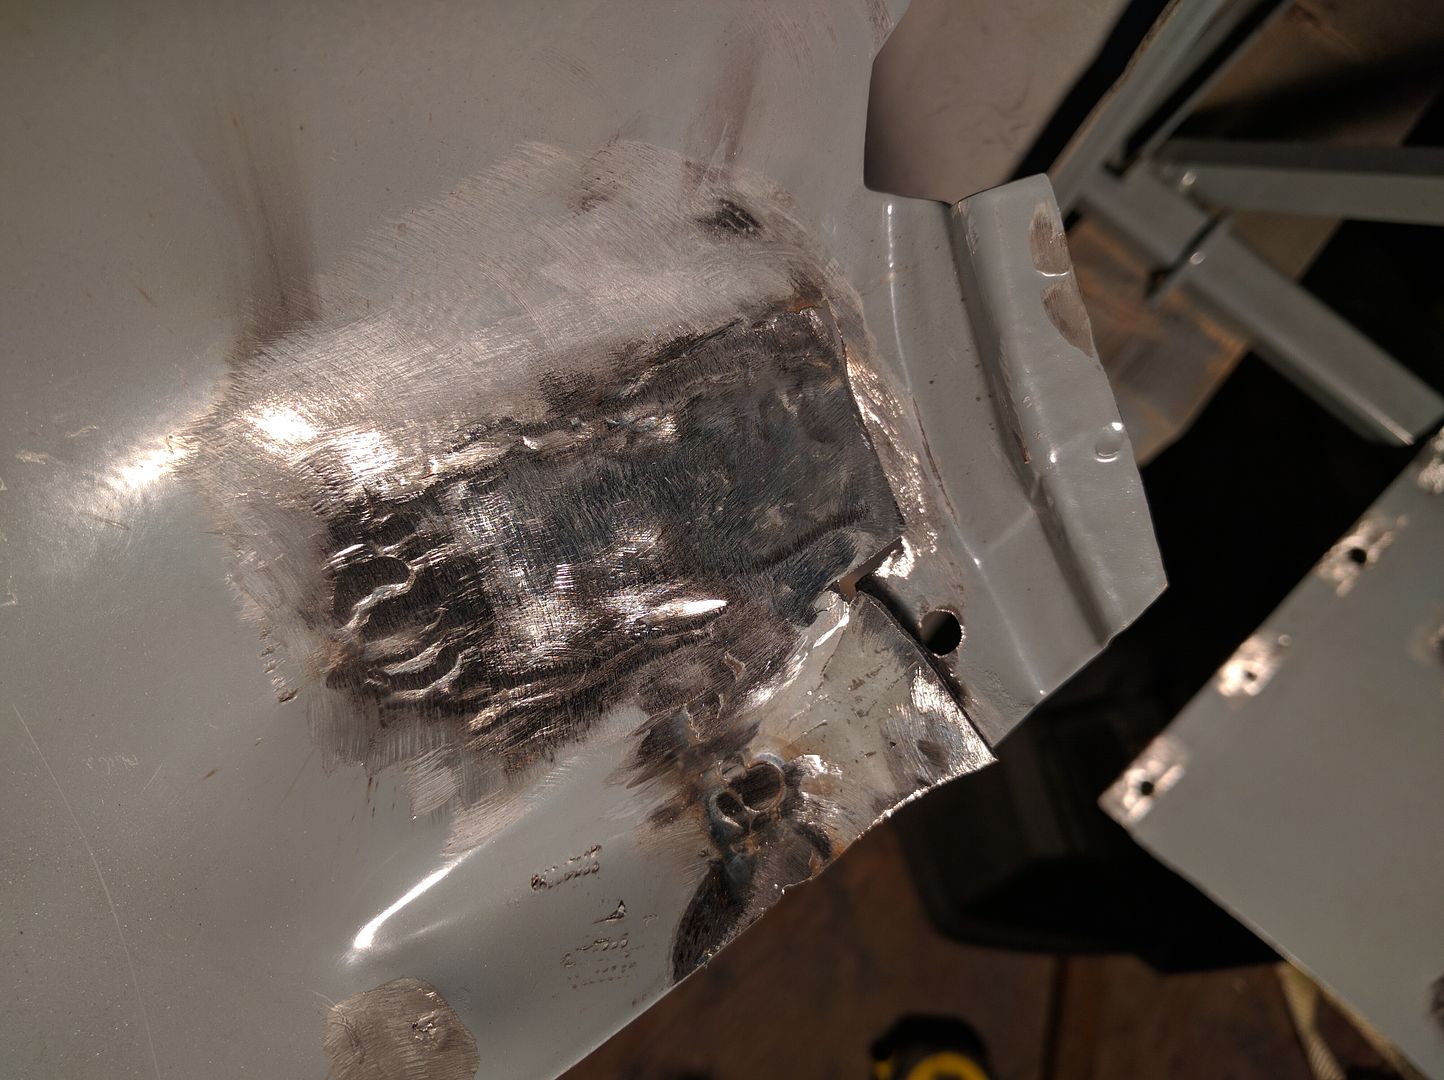 Then it's just a matter of lining up the old spot welds to fit it up 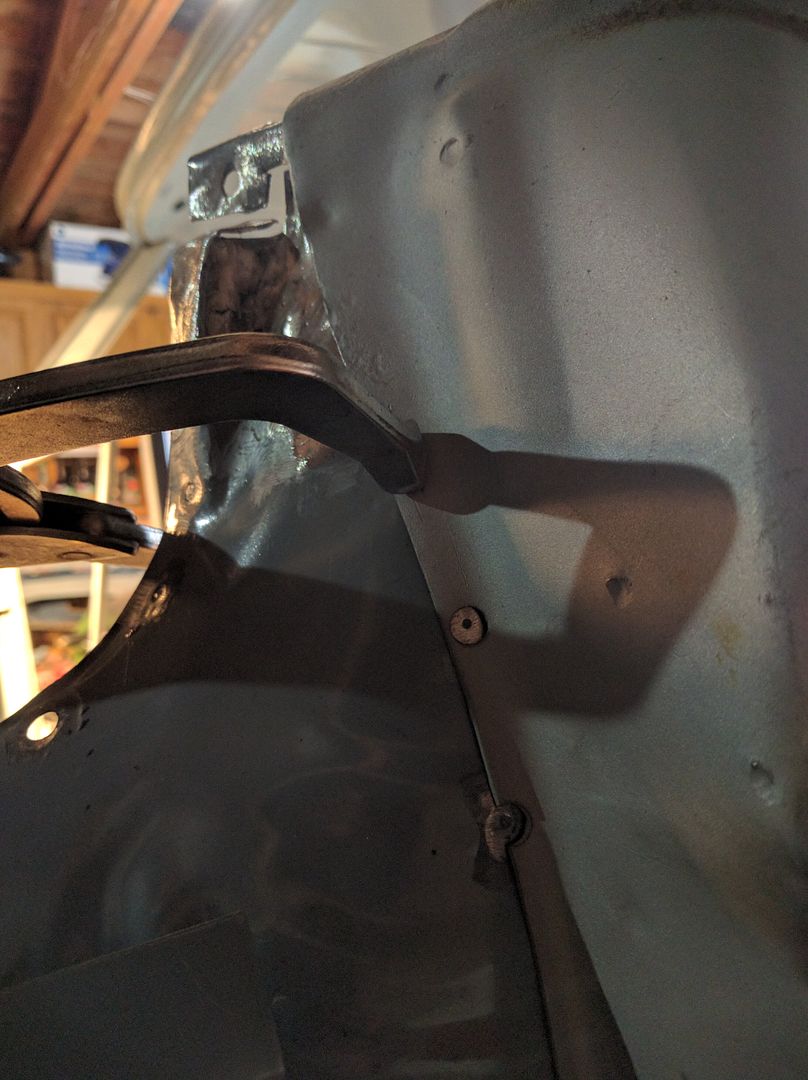 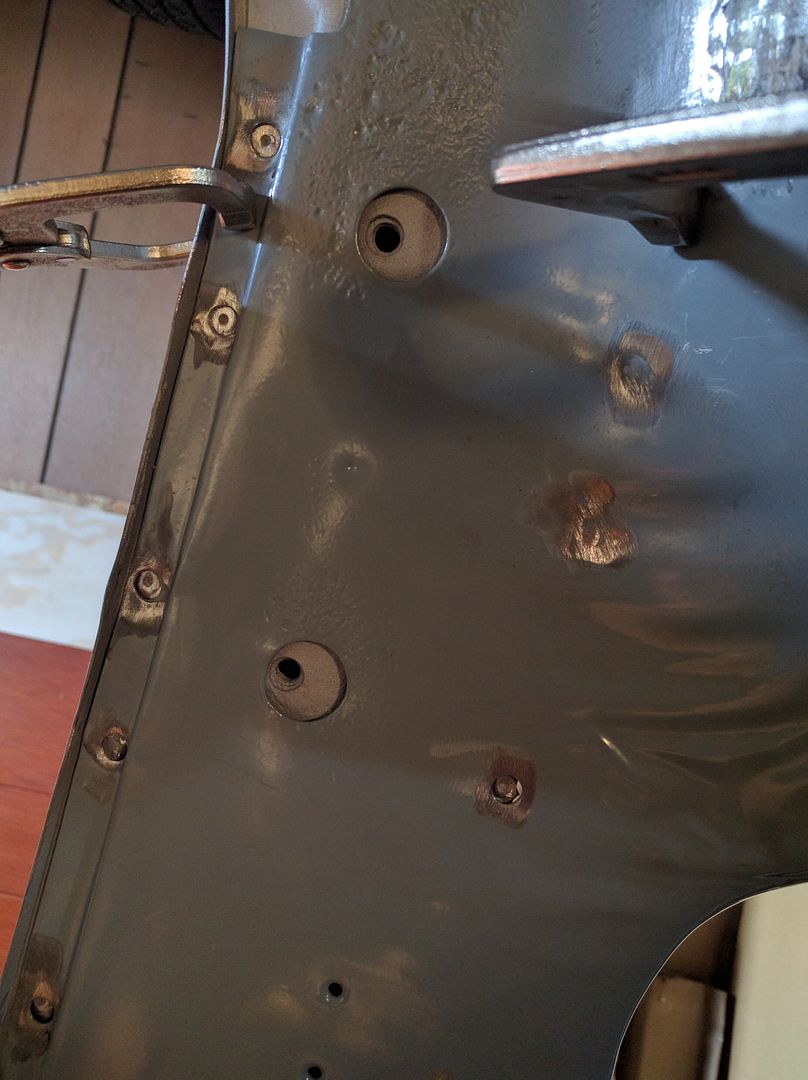 Small hole on the trough thing on the drivers side wing. Drilled it out and tried filling it with weld using the copper pipe as a backing rather than cut a small round plug. 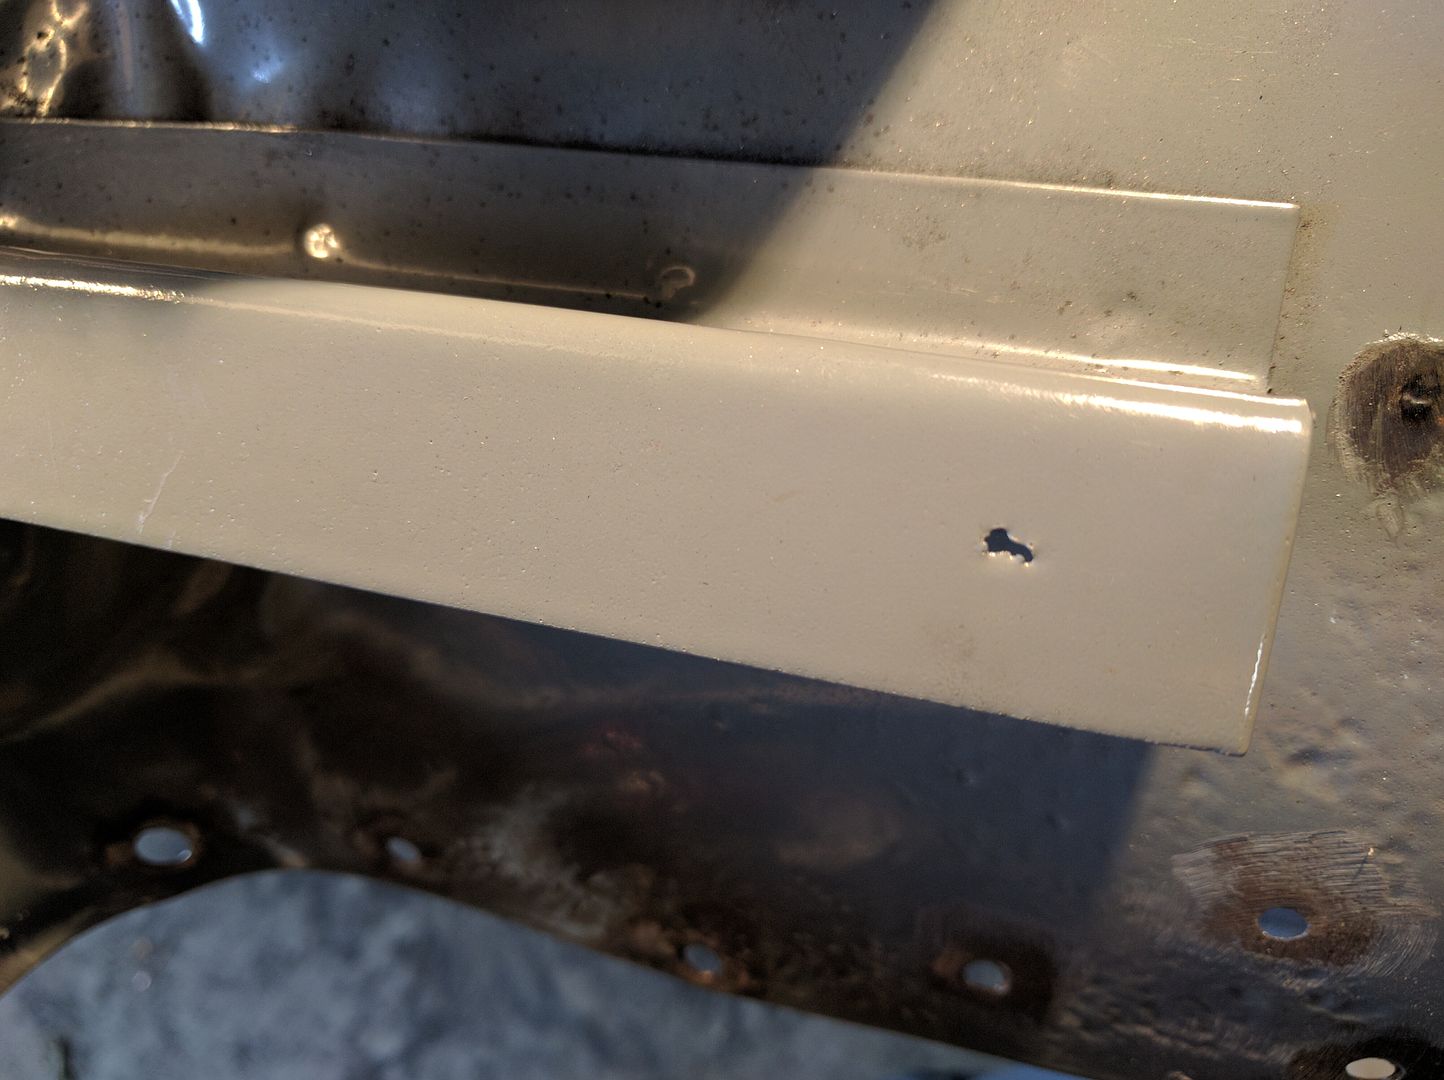 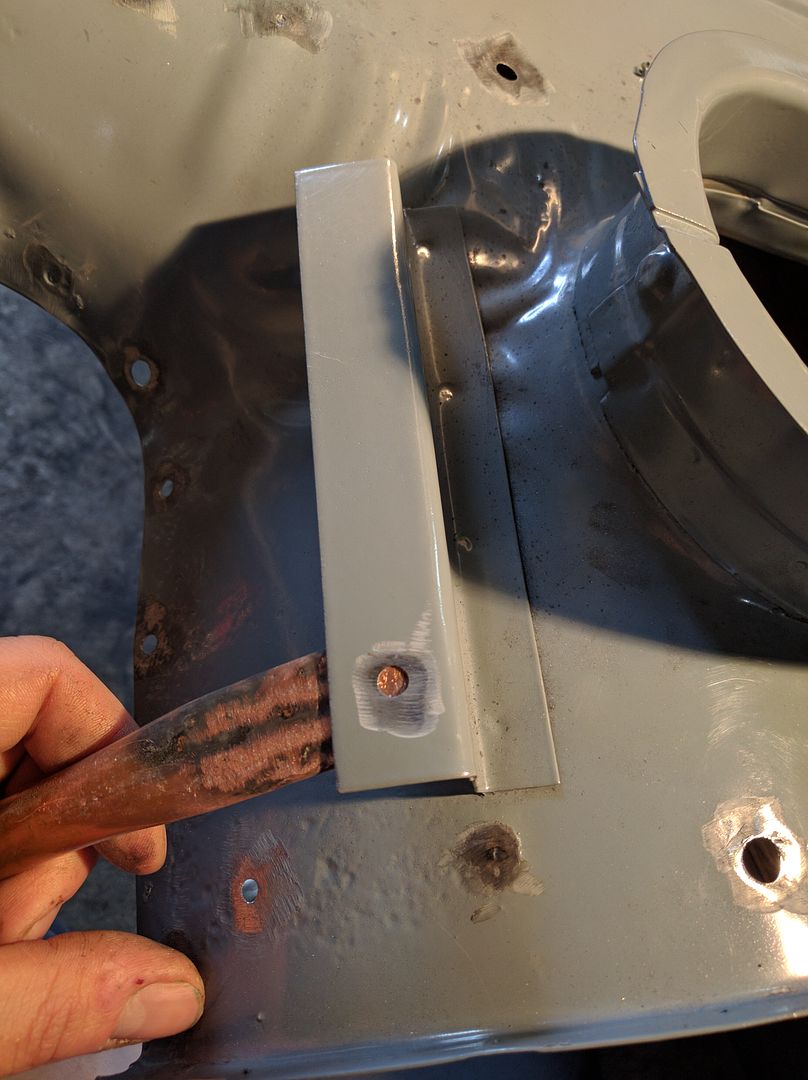 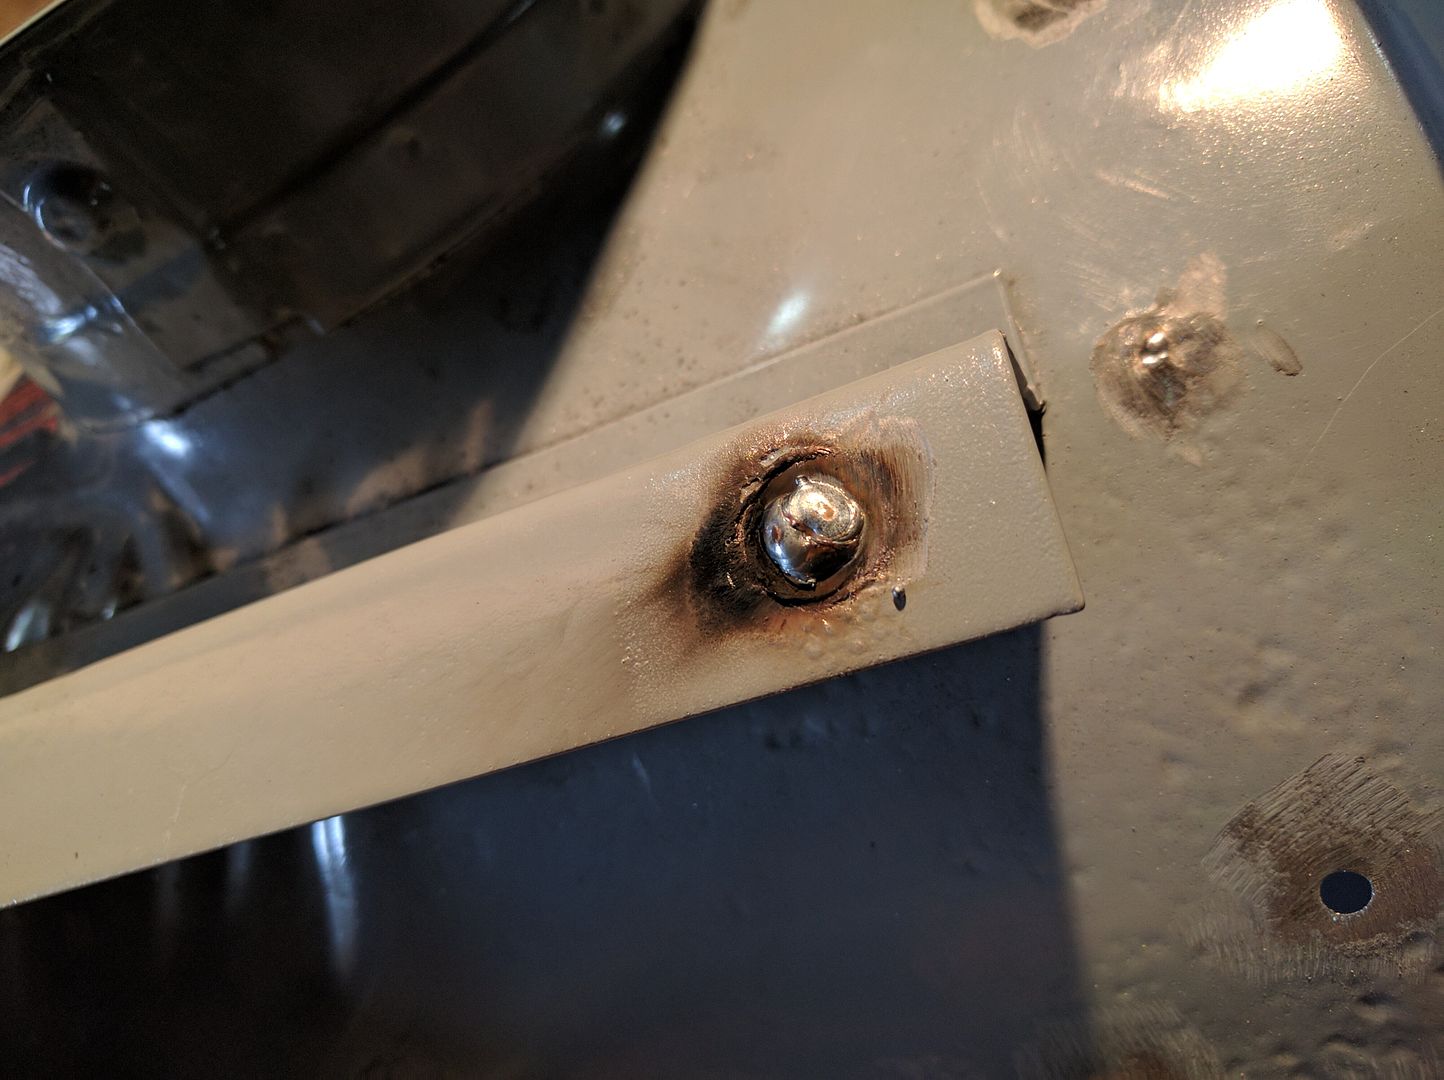 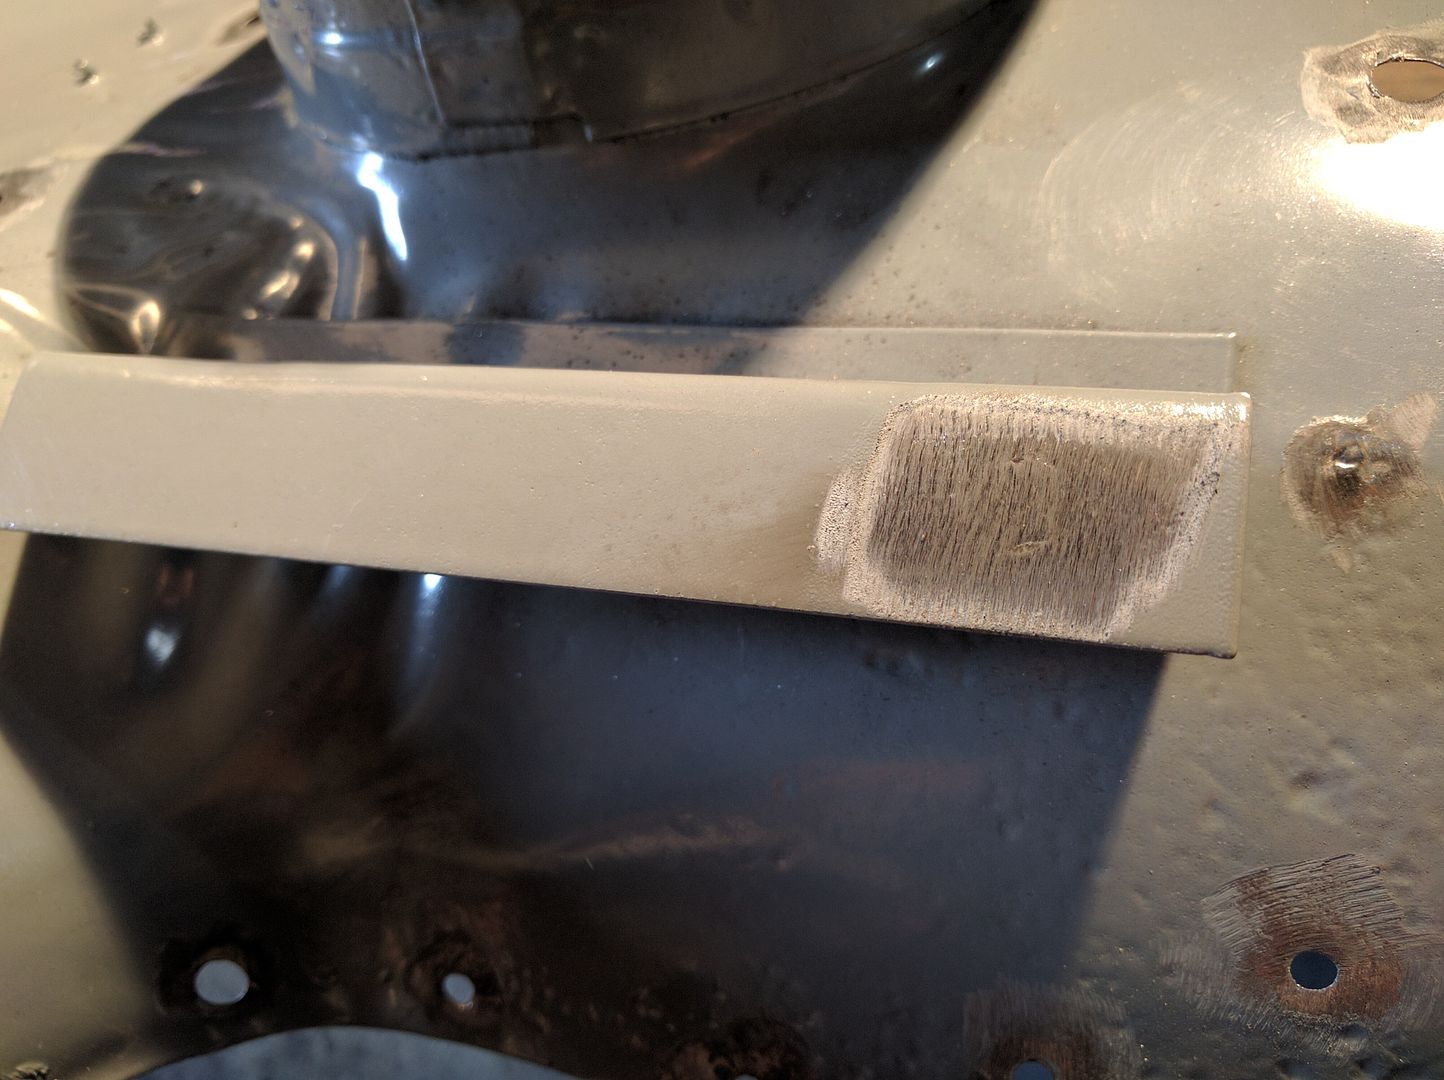 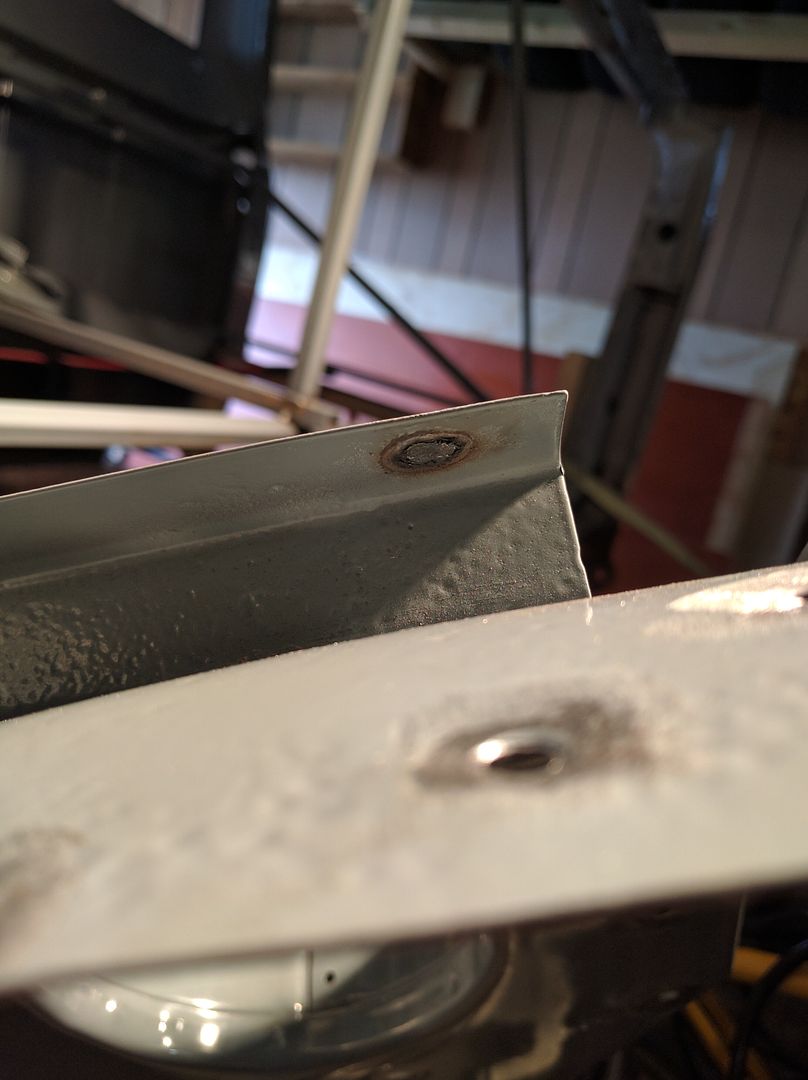 I've got patch panels for the lower A pillar bits, but I'm going to leave replacing those parts until the floor is located properly. That way the gaps will be nice and even. 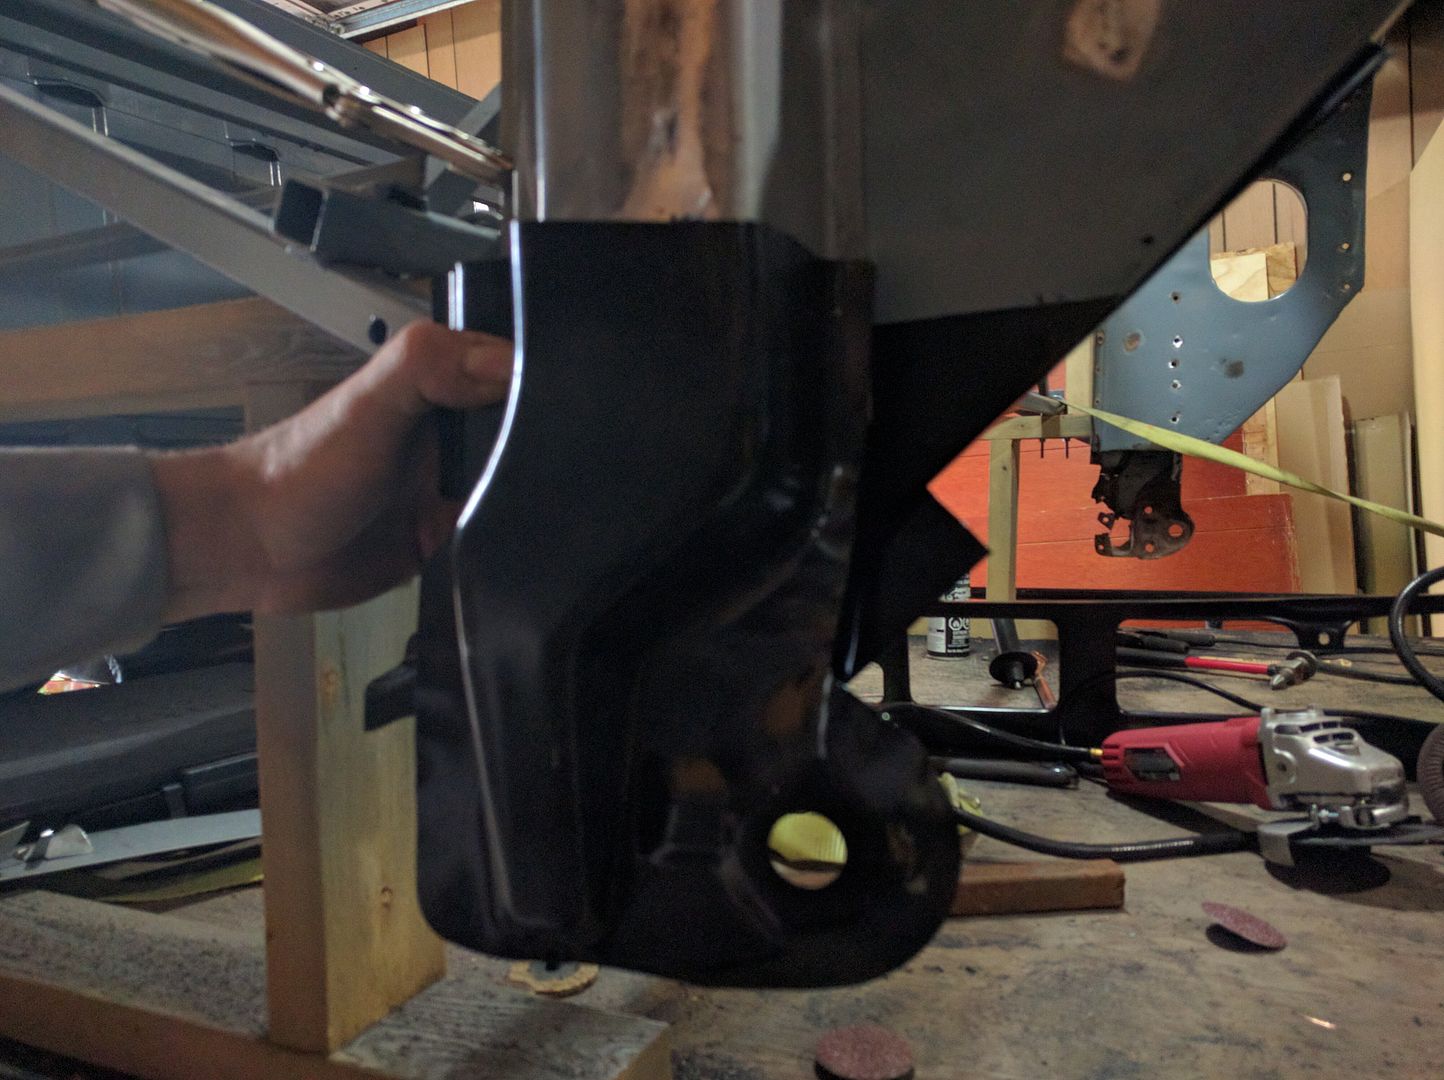 It means I won't be able to get to the back side of the weld for the inner wing, but I'm choosing fitment over better protection. 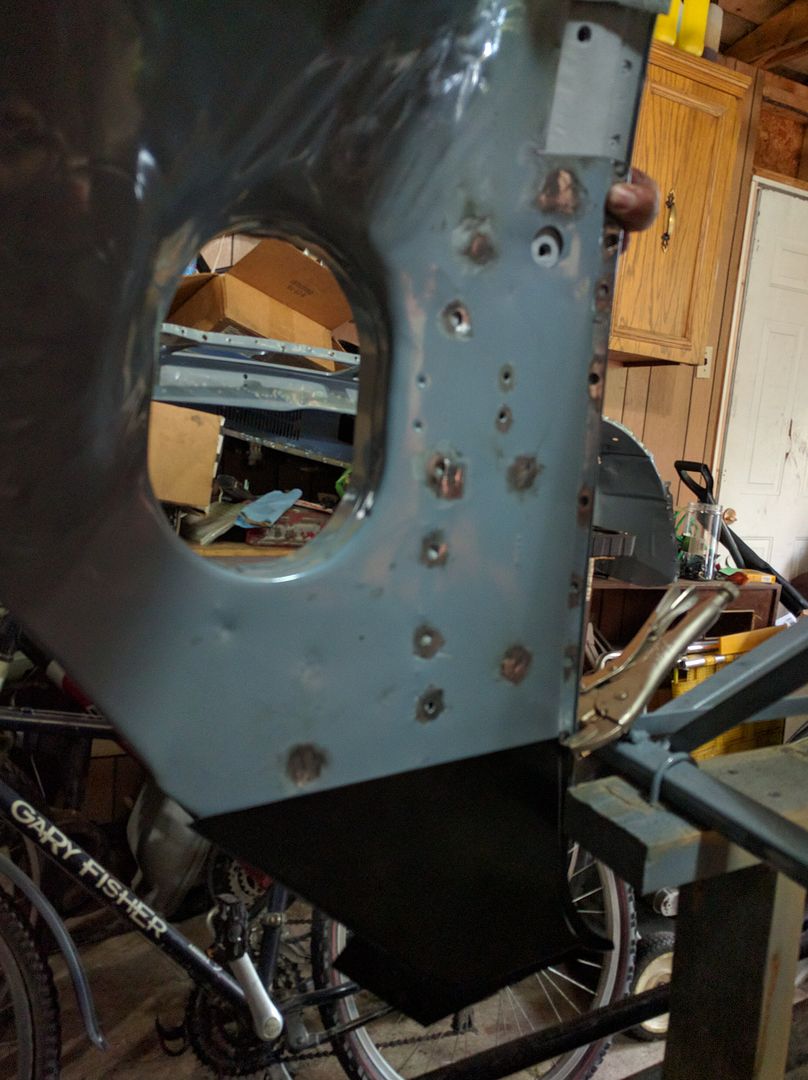
|
|
|
|
|
09-25-2016, 05:57 PM
|
#62 |
|
Registered User
Join Date: Feb 2009
Location: Winnipeg, Manitoba
Posts: 68
|
Re: Run Away's '69 C10 LWB Project Log
Welded the drivers side wing up and primed while it was mocked into place.
  The passenger side wing had rot too. 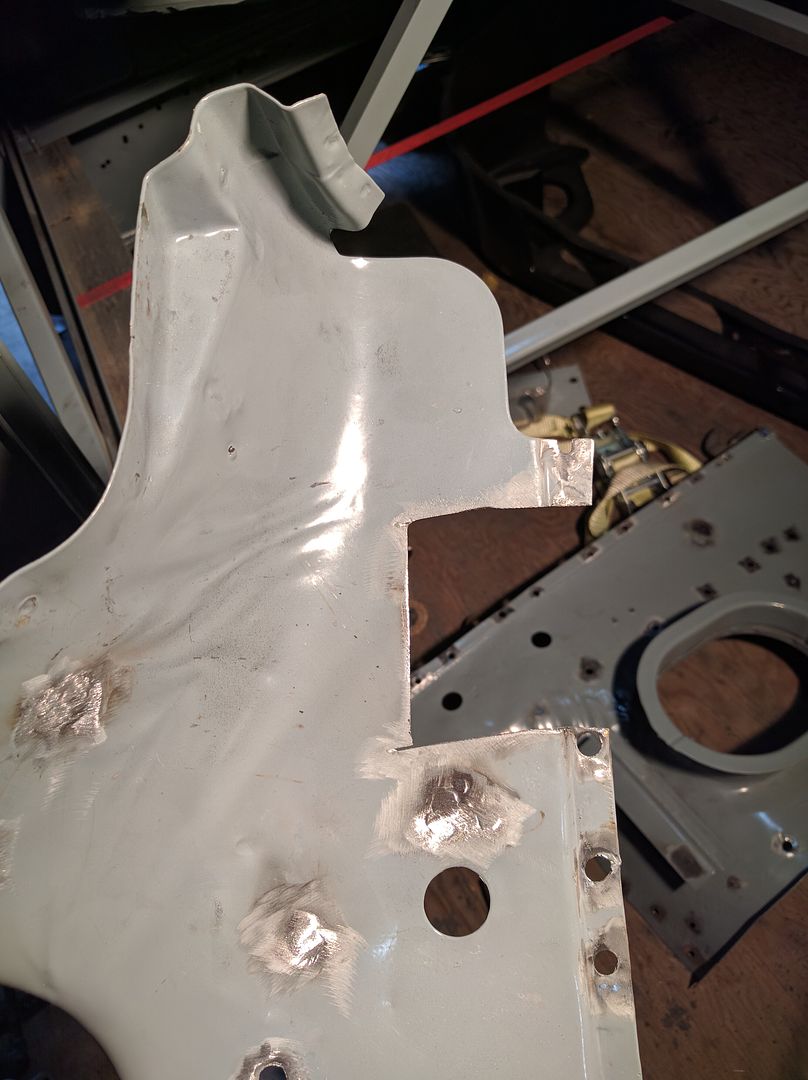 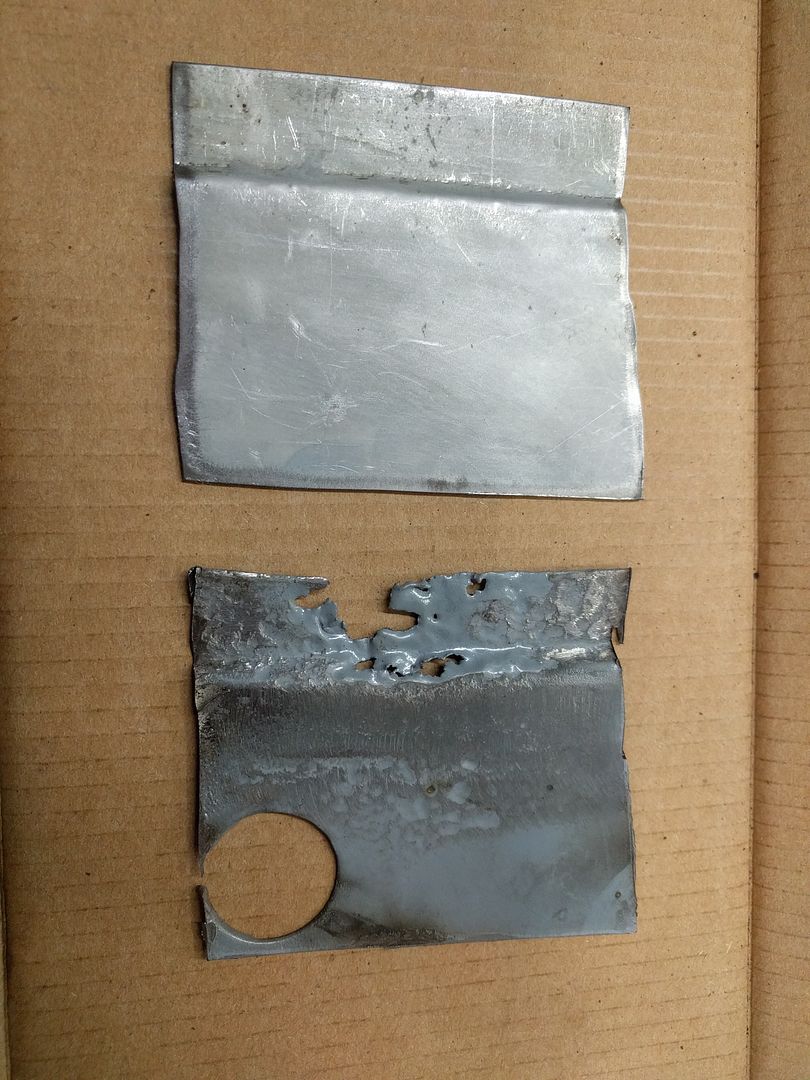 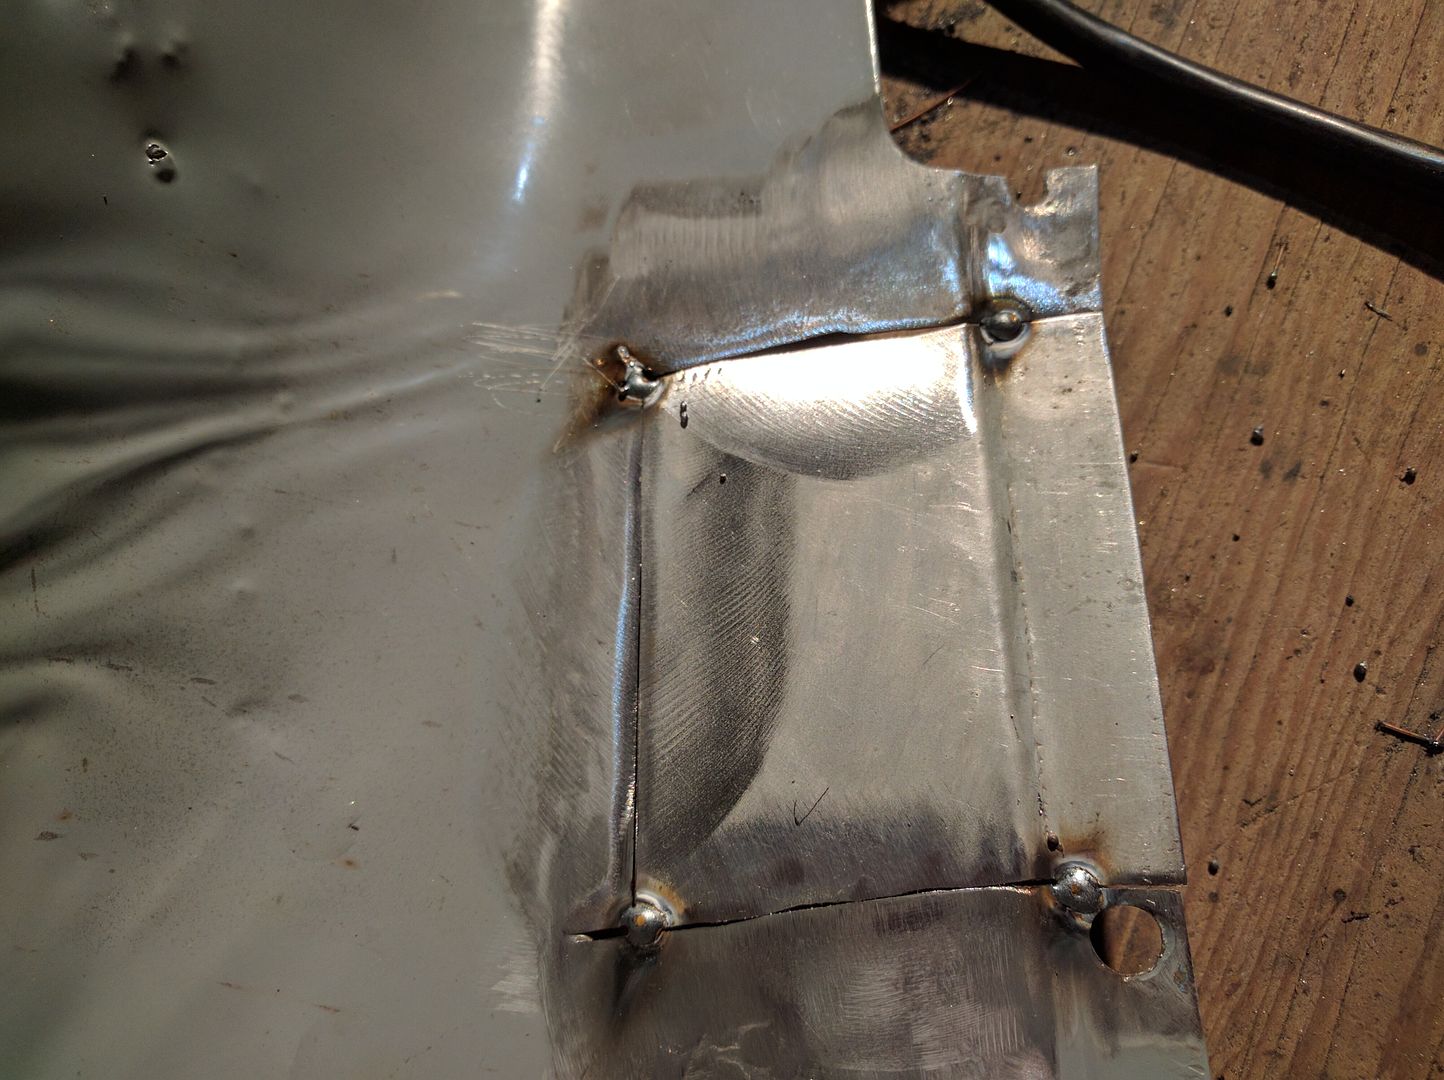 All welded  Back side 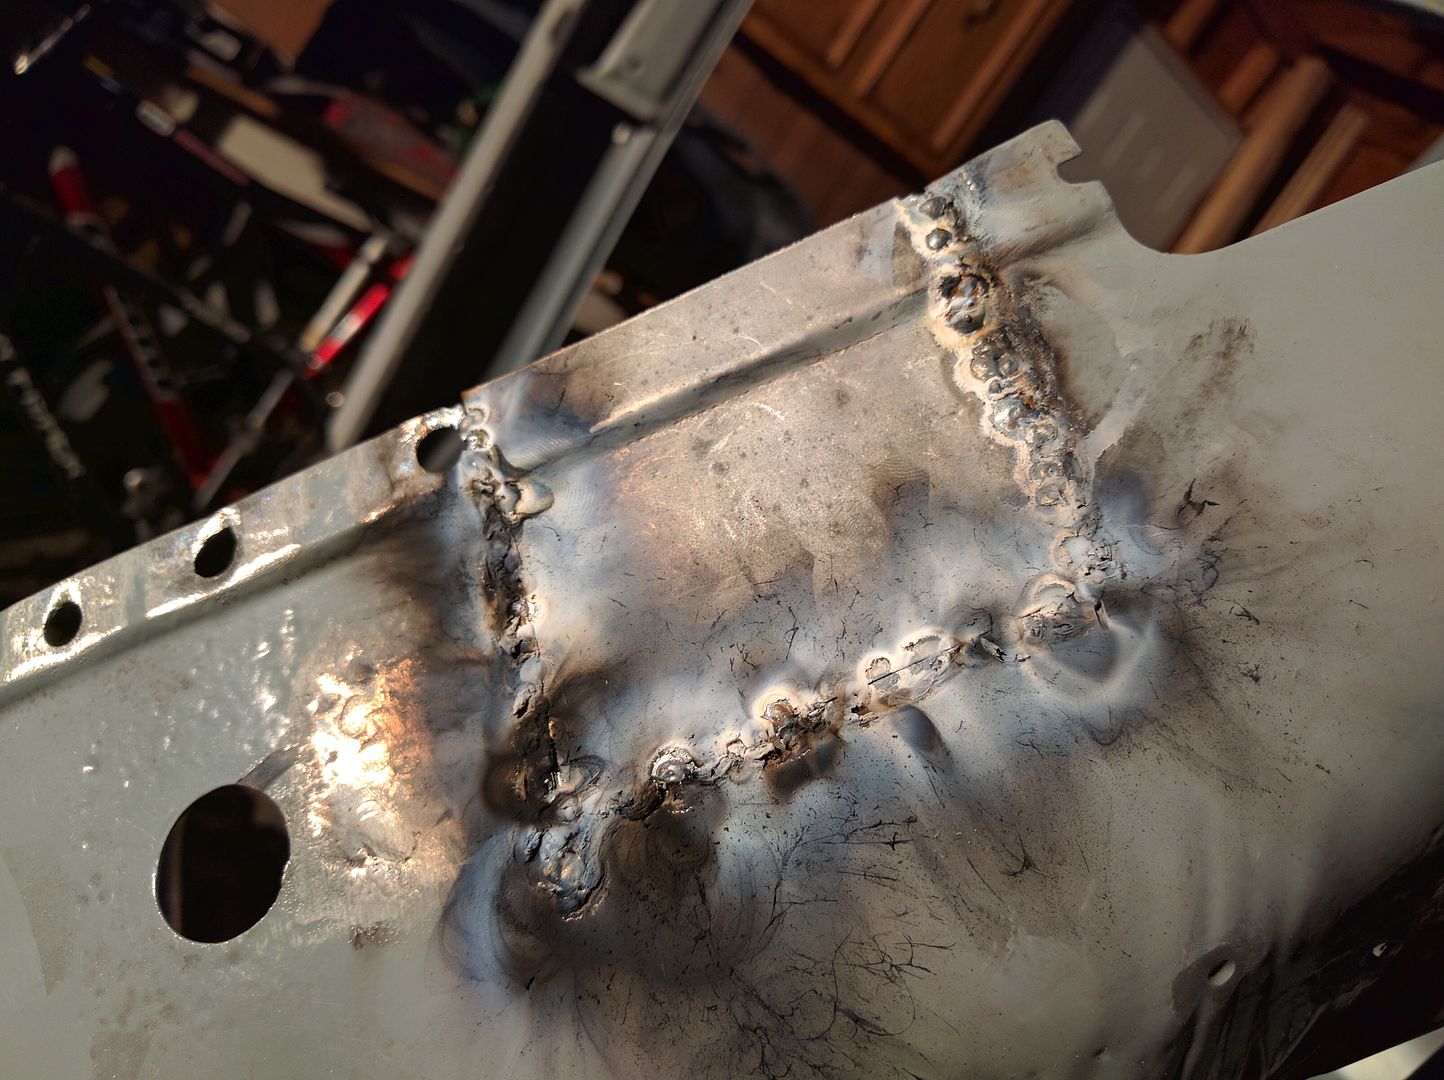 Ground 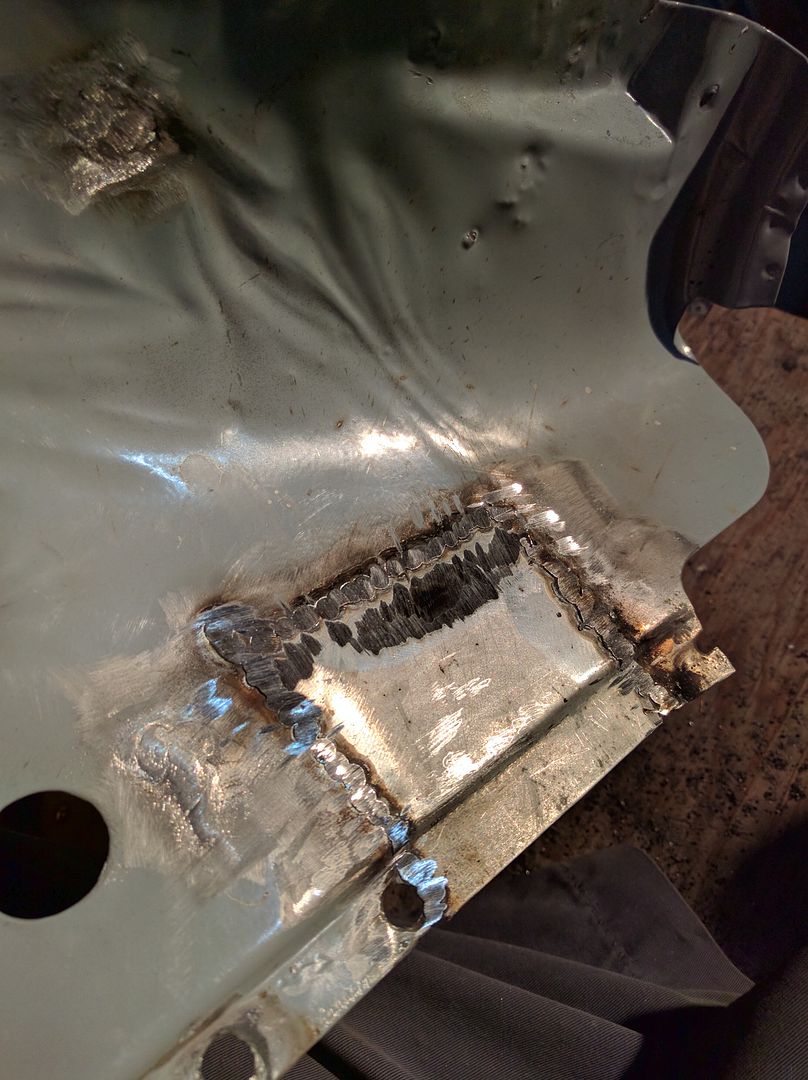 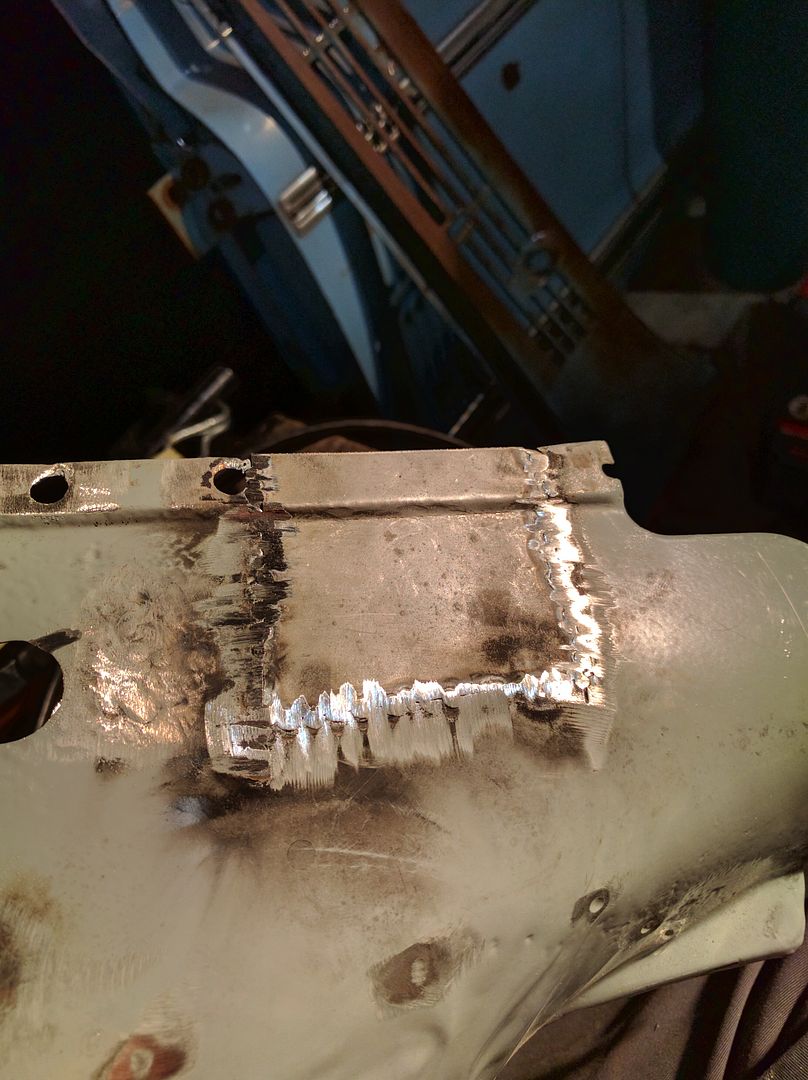 Primed. I made the upper hole where the dash bolts through too big, but it looks nicer than the ugly square I had before. It's all going to be hidden up under the dash anyways... 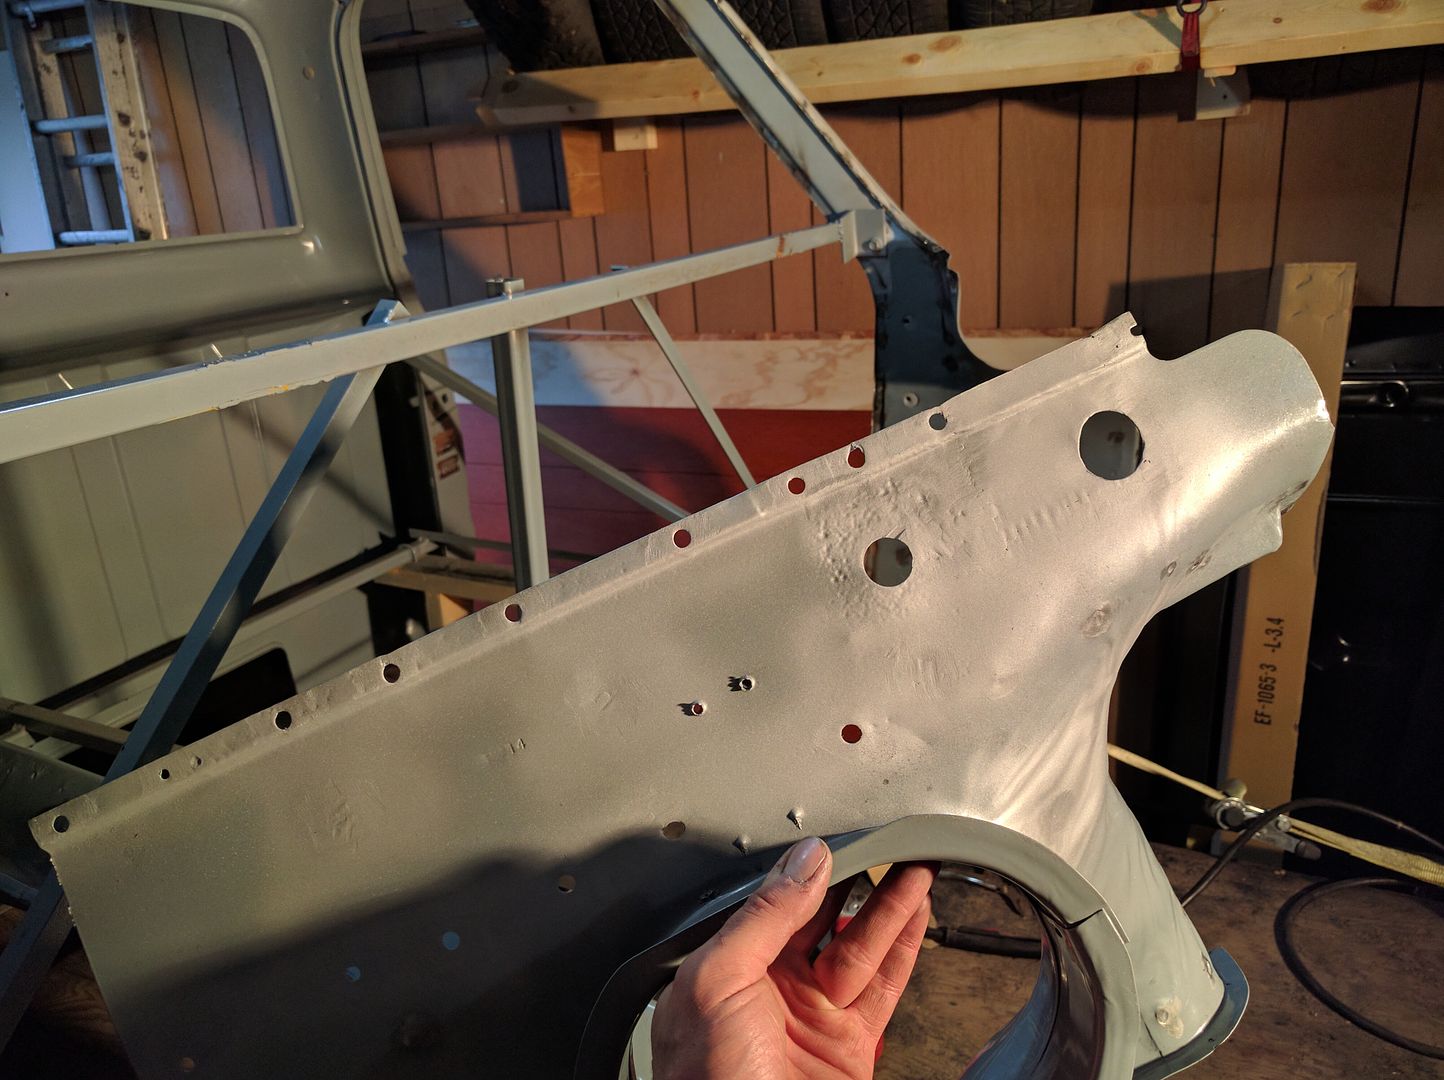
|
|
|
|
|
09-25-2016, 06:01 PM
|
#63 |
|
Registered User
Join Date: Feb 2009
Location: Winnipeg, Manitoba
Posts: 68
|
Re: Run Away's '69 C10 LWB Project Log
Welded the drivers side wing into place
 Back side of the welds 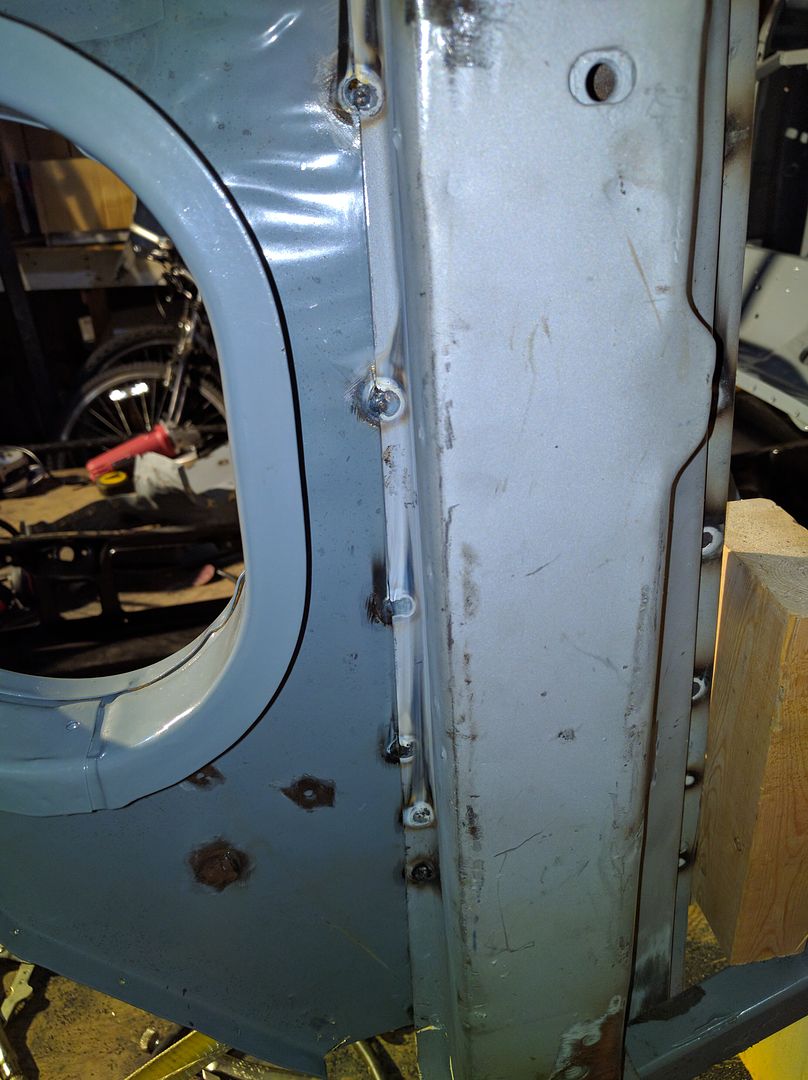 Welding the passenger wing into place. Just have to line up the old spot weld on the leading edge for this side. 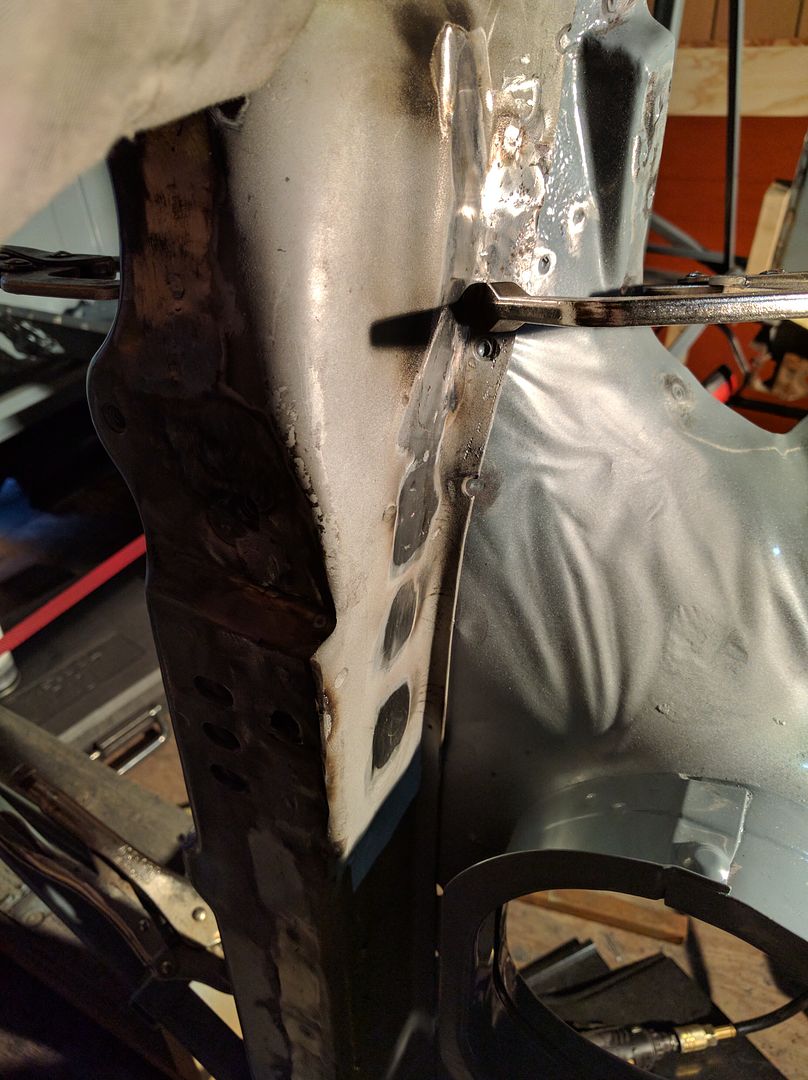 I apologize if I'm jumping all over the place. It's difficult to write this up in order as I'm usually working on 2-3 sections at once so I don't get too impatient waiting for welds to cool. This way I can weld one side, weld the other, grind one side, grind the other and repeat. Keeps my busy. Added a few more welds along to top of the drivers side 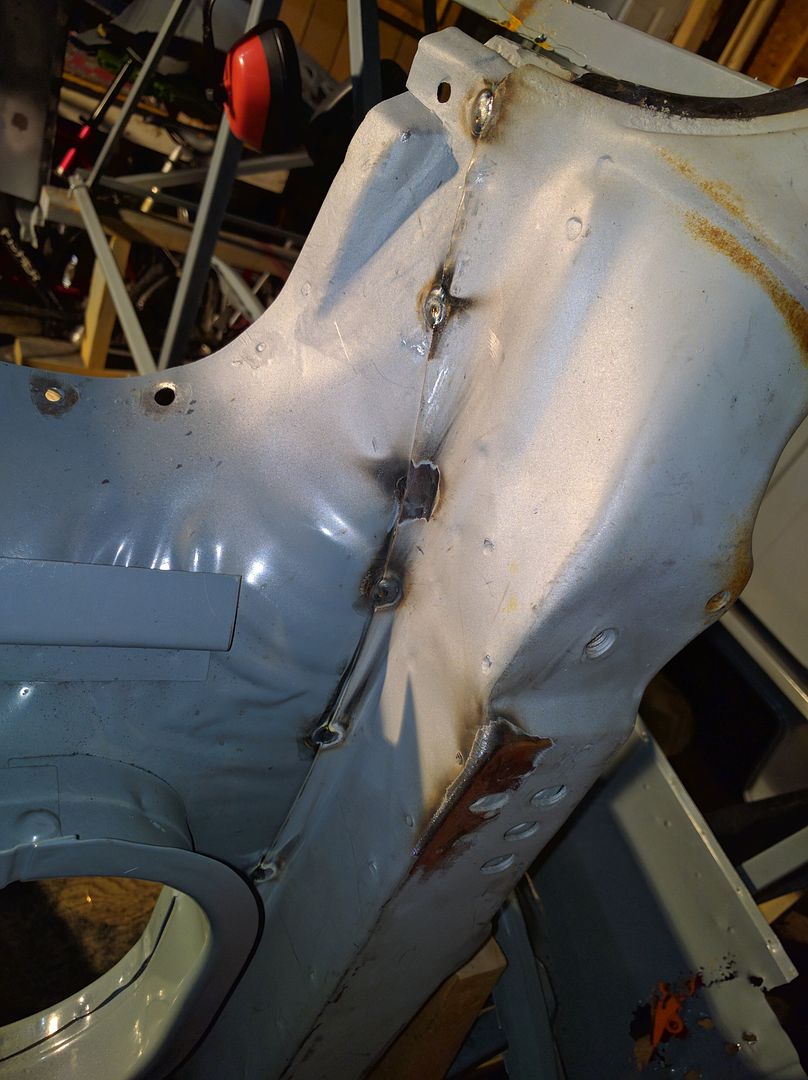 Ground down the inside on the drivers side 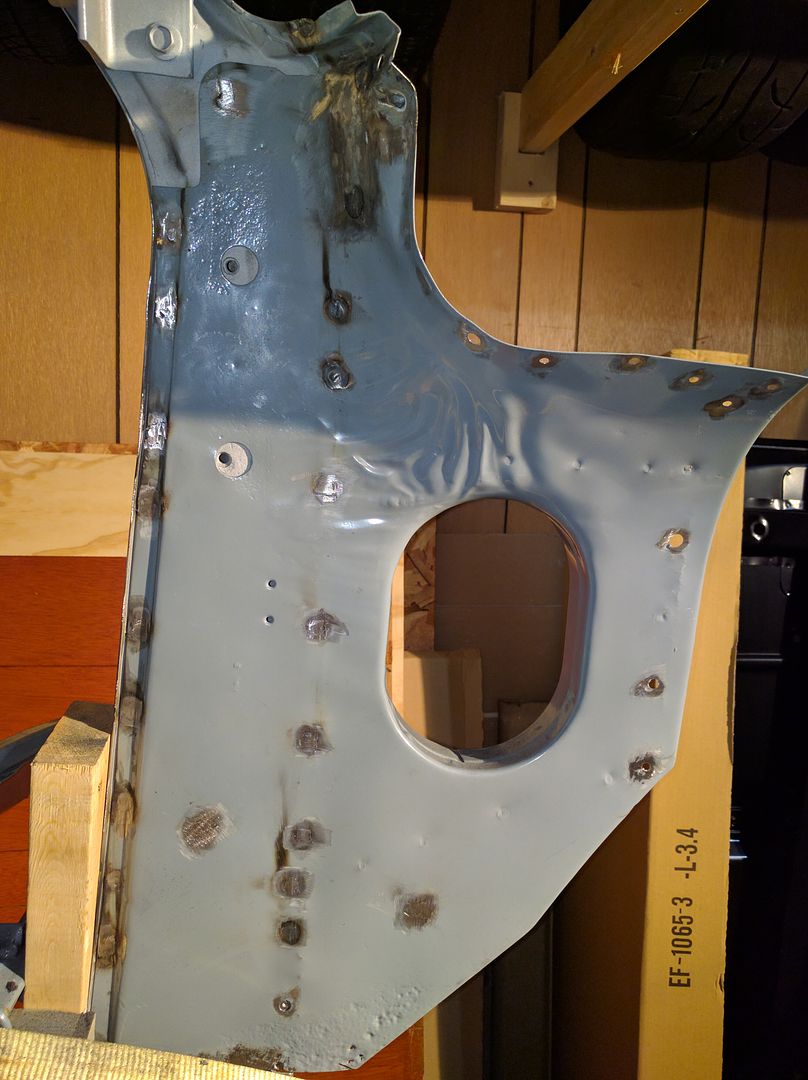 Same on passenger side 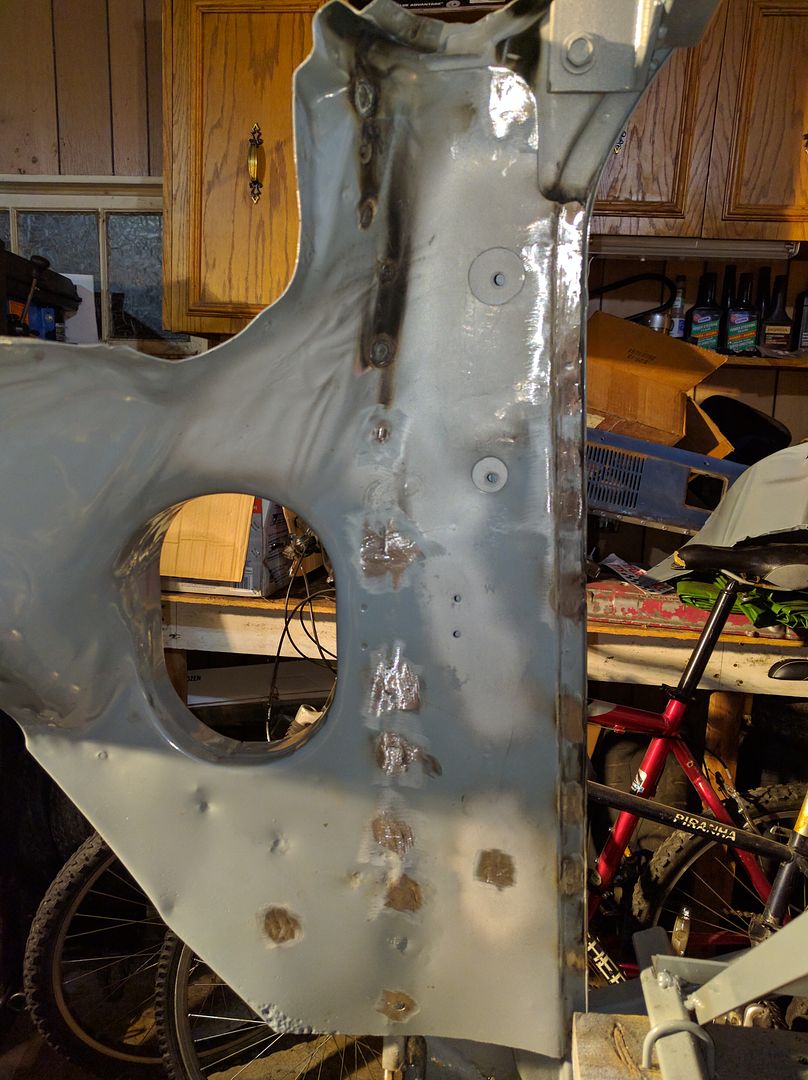 More welds along the top of the passenger side 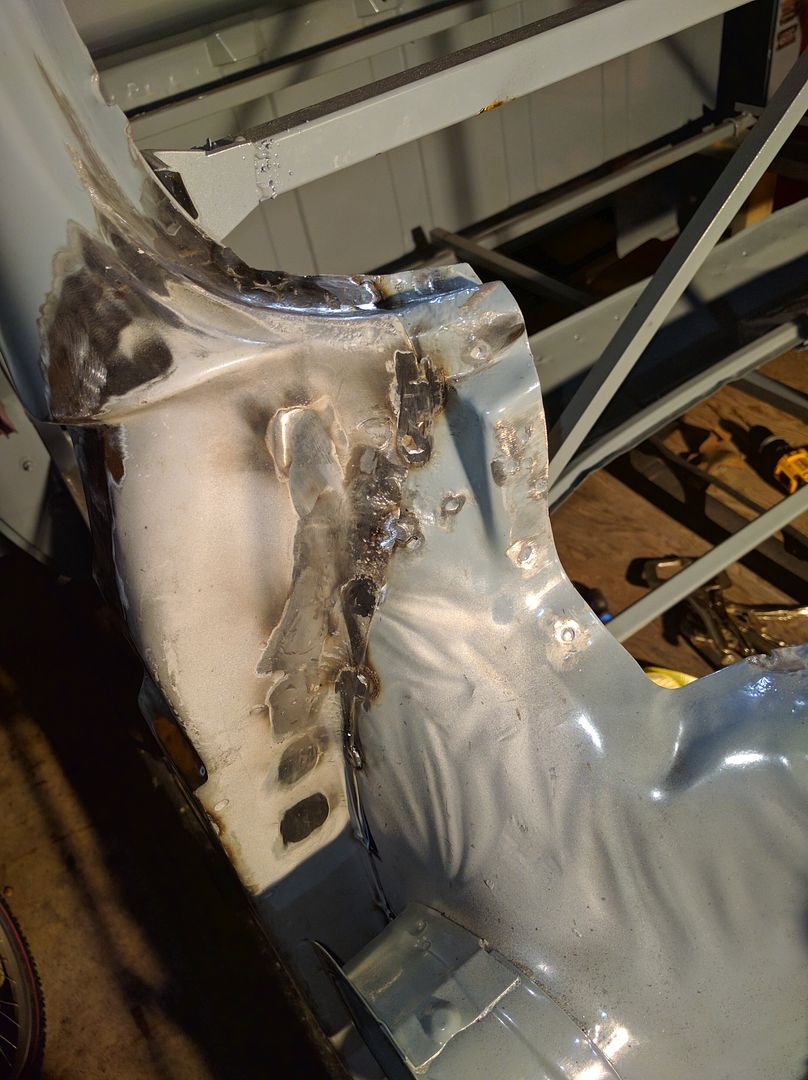 Overall look. 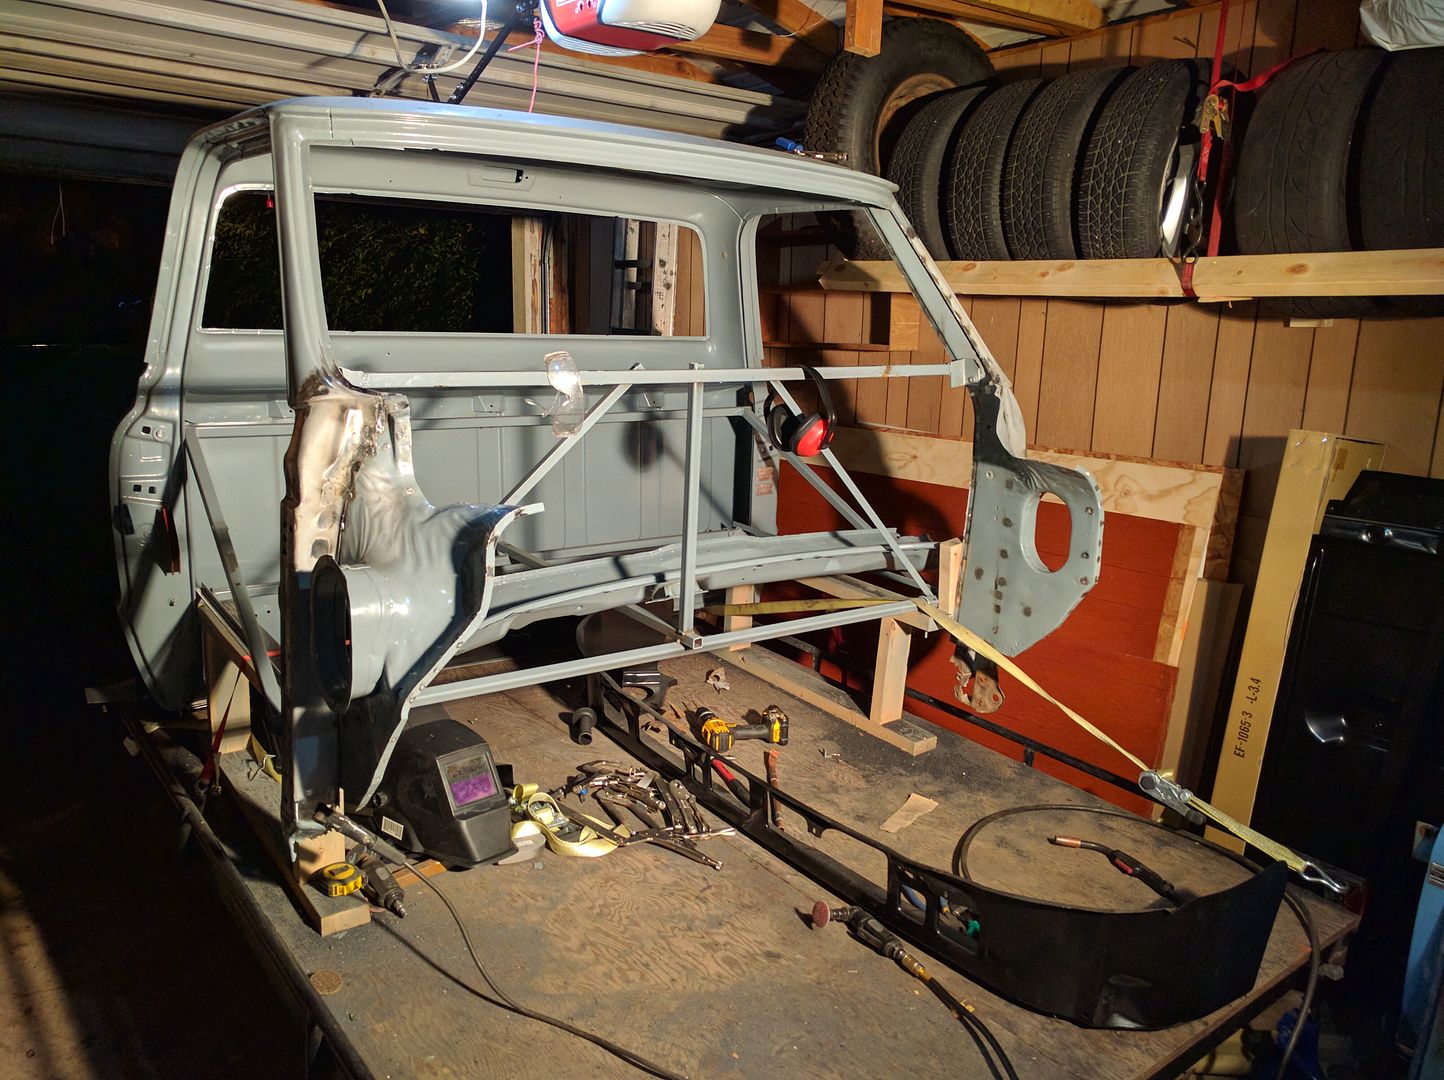 Next up is the inner cowl panel, seen here mocked up 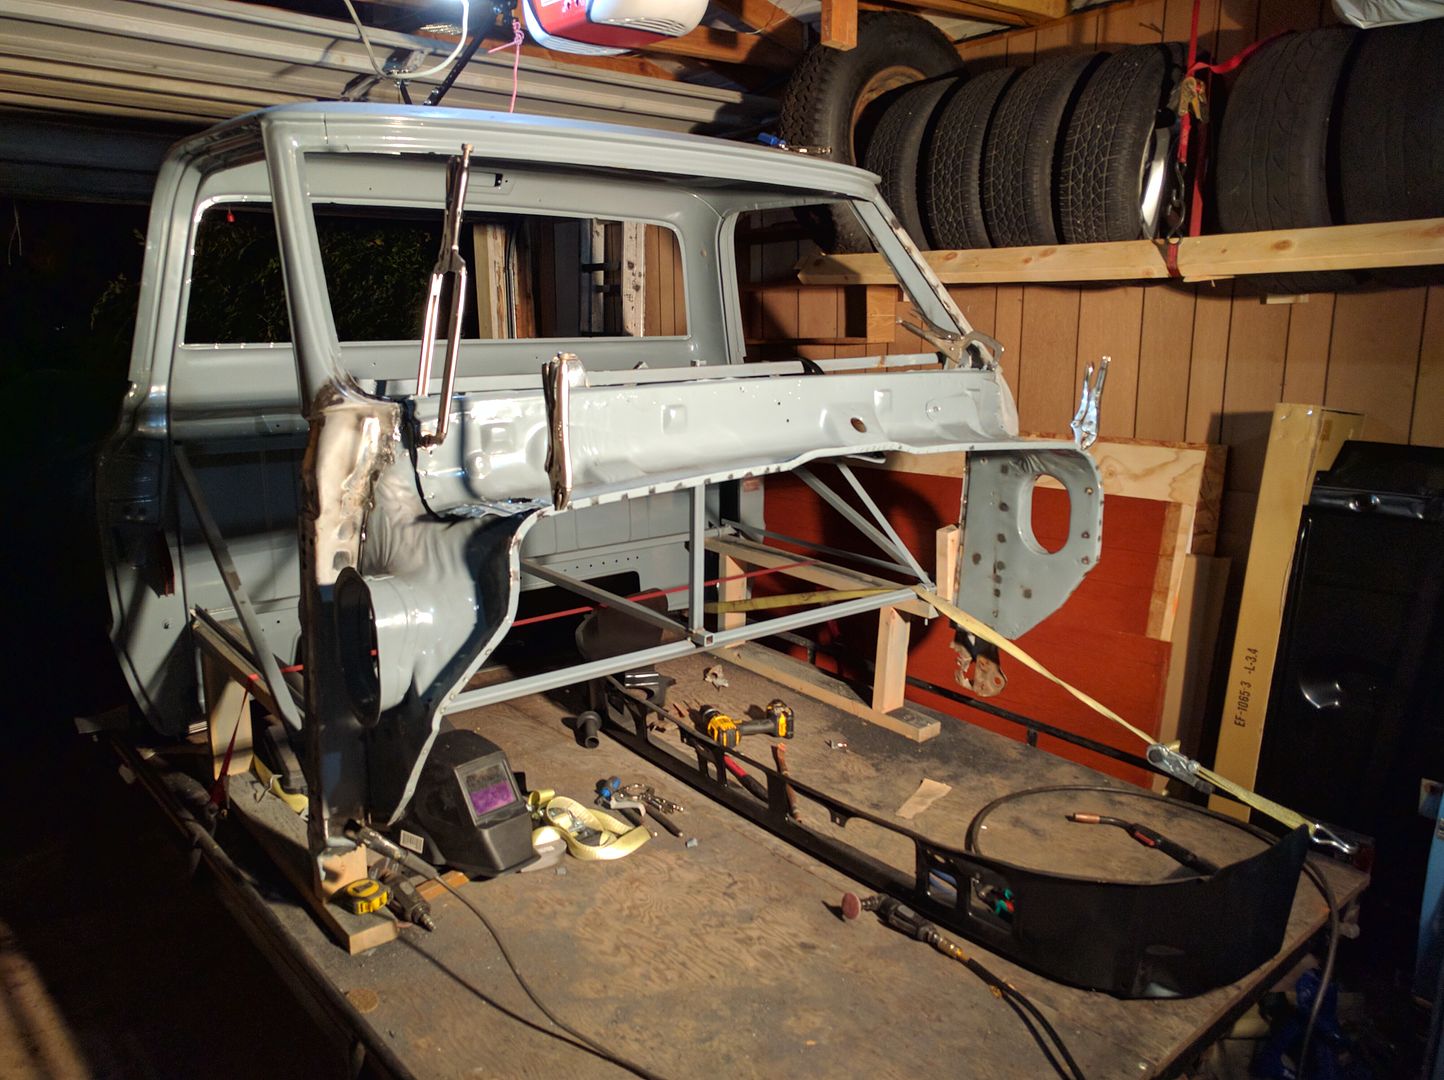 Just have to line up the old original spot welds 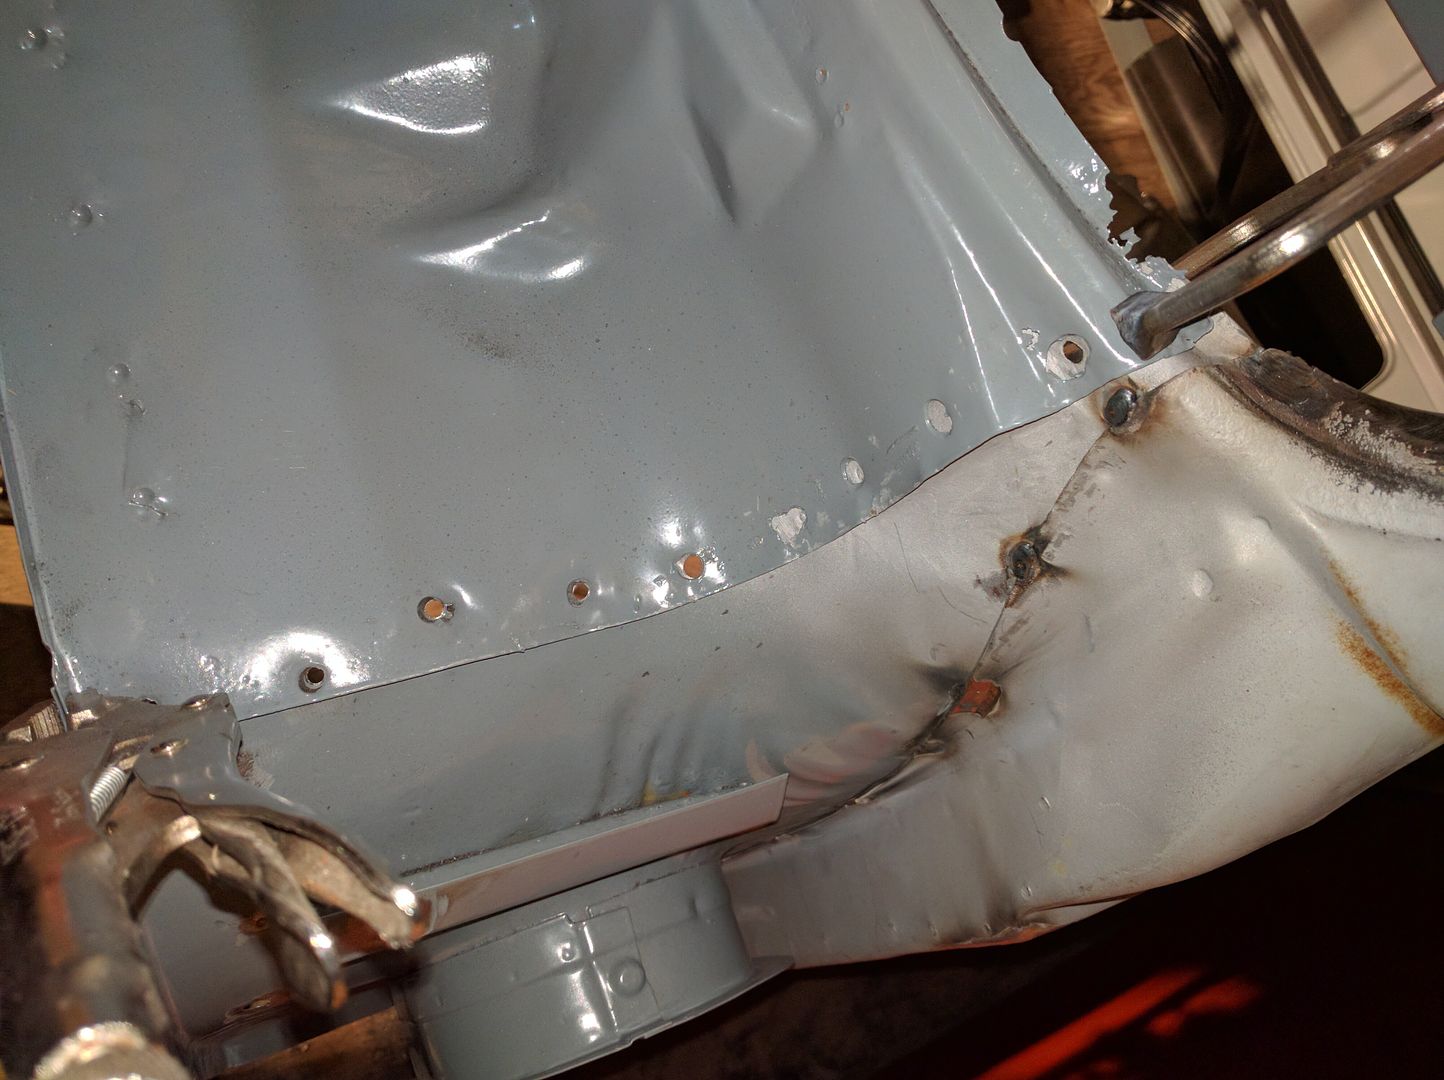 The passenger side has a bunch of rot on both the tip of the wing and the inner cowl as seen here 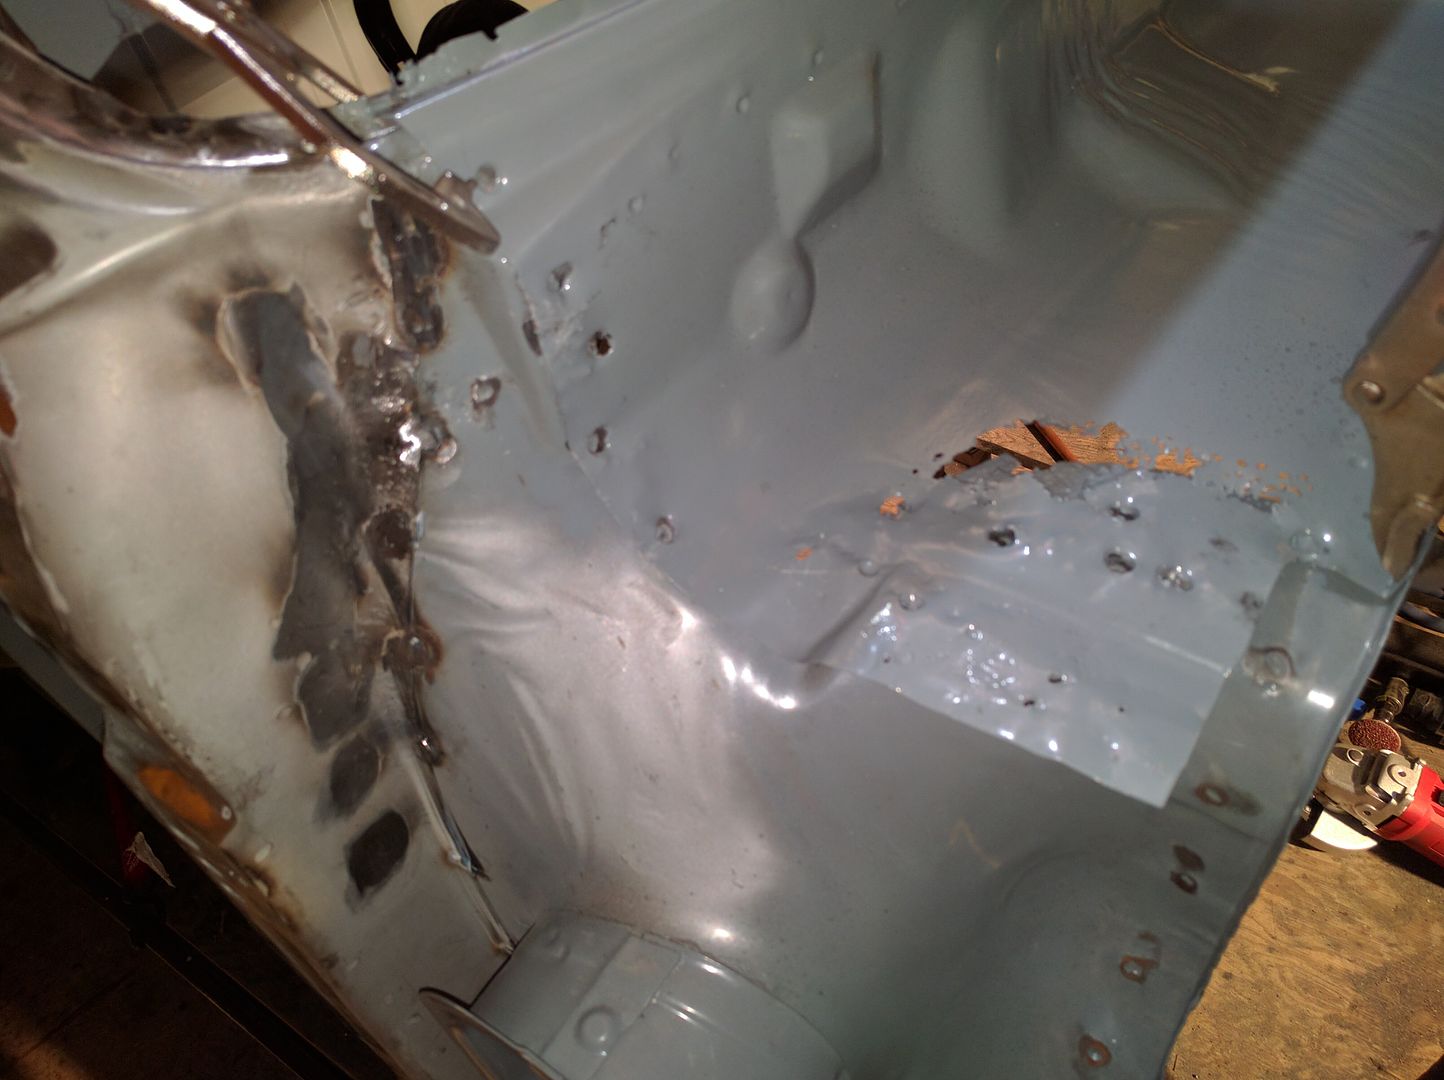 There's also some holes more along the middle of the inner cowl I'll have to patch. This support here I forgot to have blasted and coated. The stock blower motor fits inside of it. 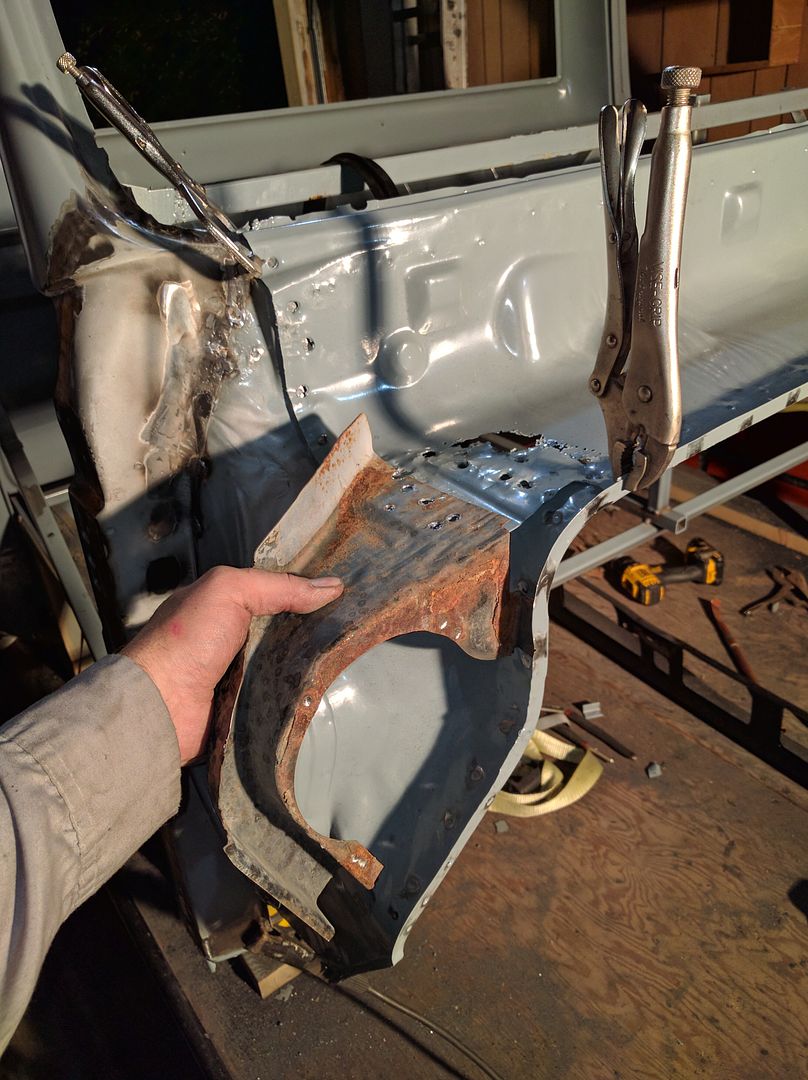 Not sure what I'm going to do about it. I'm not planning on re-installing a factory style heating unit, I'm going to convert to a Vintage Air system that's all contained in the dash. If I end up using it and send it out to be blasted and coated, I should send the dash along with it to save money. Which means I need to make up my mind on putting in a dash with the factory uncut radio, or a dash that's already been cut and mount something like a double DIN unit. |
|
|
|
|
09-26-2016, 11:15 PM
|
#64 |
|
Registered User
Join Date: Oct 2007
Location: Spanaway
Posts: 8,451
|
Re: Run Away's '69 C10 LWB Project Log
Welcome back! Looks like you kicked butt and took names this weekend! I missed your last post, i was down and out for a bit..
__________________
Mike. Swamp Rat build thread : http://67-72chevytrucks.com/vboard/s...d.php?t=595019 72 3/4T 4X4 4" BDS Lift 33" BFG's |
|
|
|
|
09-27-2016, 01:23 AM
|
#65 |
|
Registered User
Join Date: Feb 2012
Location: turlock
Posts: 2,177
|
Re: Run Away's '69 C10 LWB Project Log
My lord!! I feel like I was scrolling forever through weld and weld, but you are kicking ass and taking names, great work!
__________________
 Project NewType 1972 Chevy C/10 Cheyenne Super ( Daily Driven Showtruck ) http://67-72chevytrucks.com/vboard/s...d.php?t=507903 Project NewType 1972 Chevy C/10 Cheyenne Super ( Daily Driven Showtruck ) http://67-72chevytrucks.com/vboard/s...d.php?t=507903Project Great Grandpa's Legacy 1973 Chevy C/10 Cheyenne ( Current daily driver collecting big time parts ) http://67-72chevytrucks.com/vboard/s...89#post7084289 - Dylan (209)-985-7721 |
|
|
|
|
10-08-2016, 09:49 PM
|
#66 |
|
Registered User
Join Date: Feb 2009
Location: Winnipeg, Manitoba
Posts: 68
|
Re: Run Away's '69 C10 LWB Project Log
Thanks! Sorry for all the welding pics, seems like that's all I'm doing....
Cowl before  Pitted and rusted through sections cut out 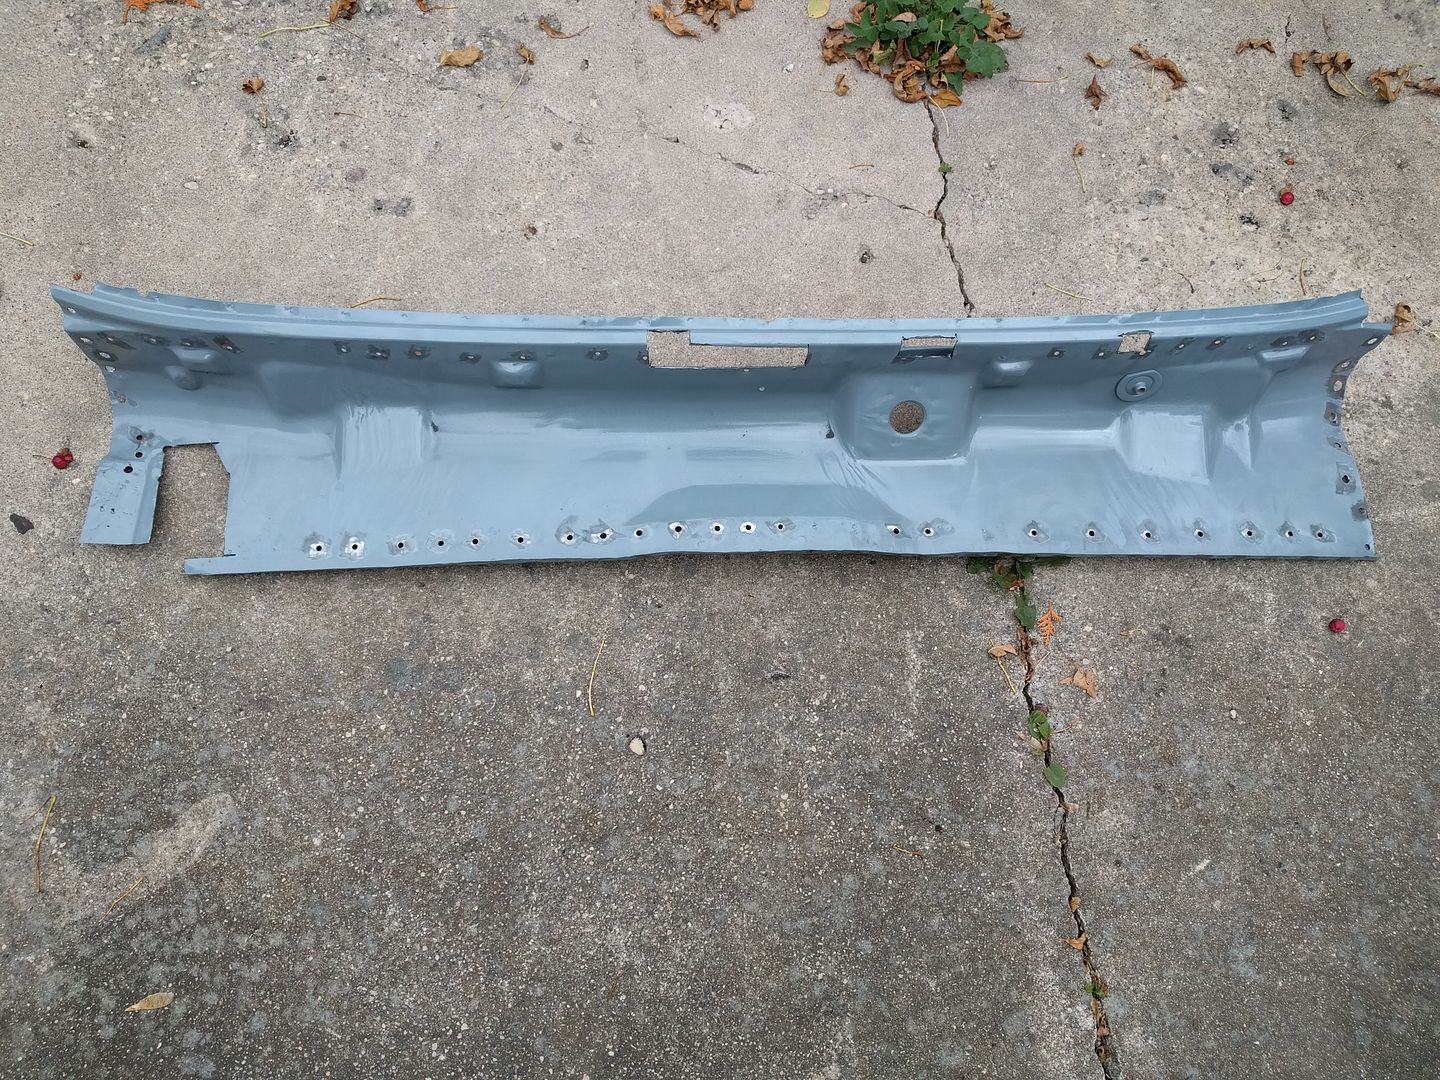 Cut out pitted metal on the wing panel 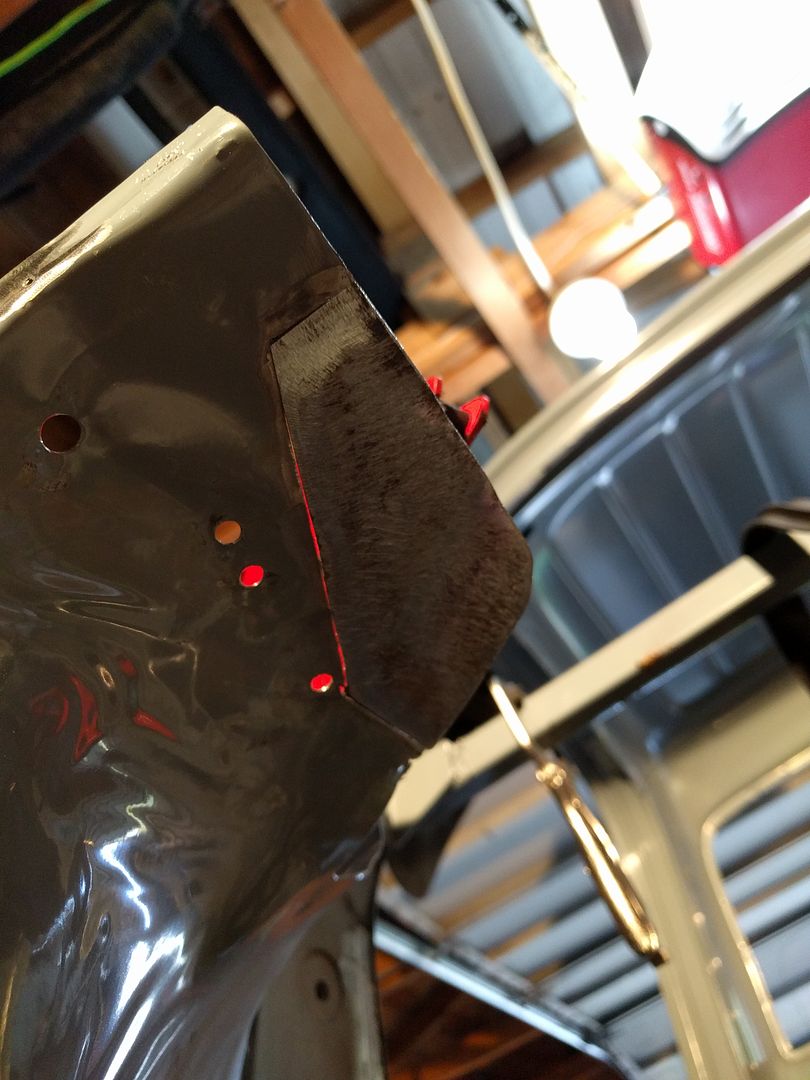 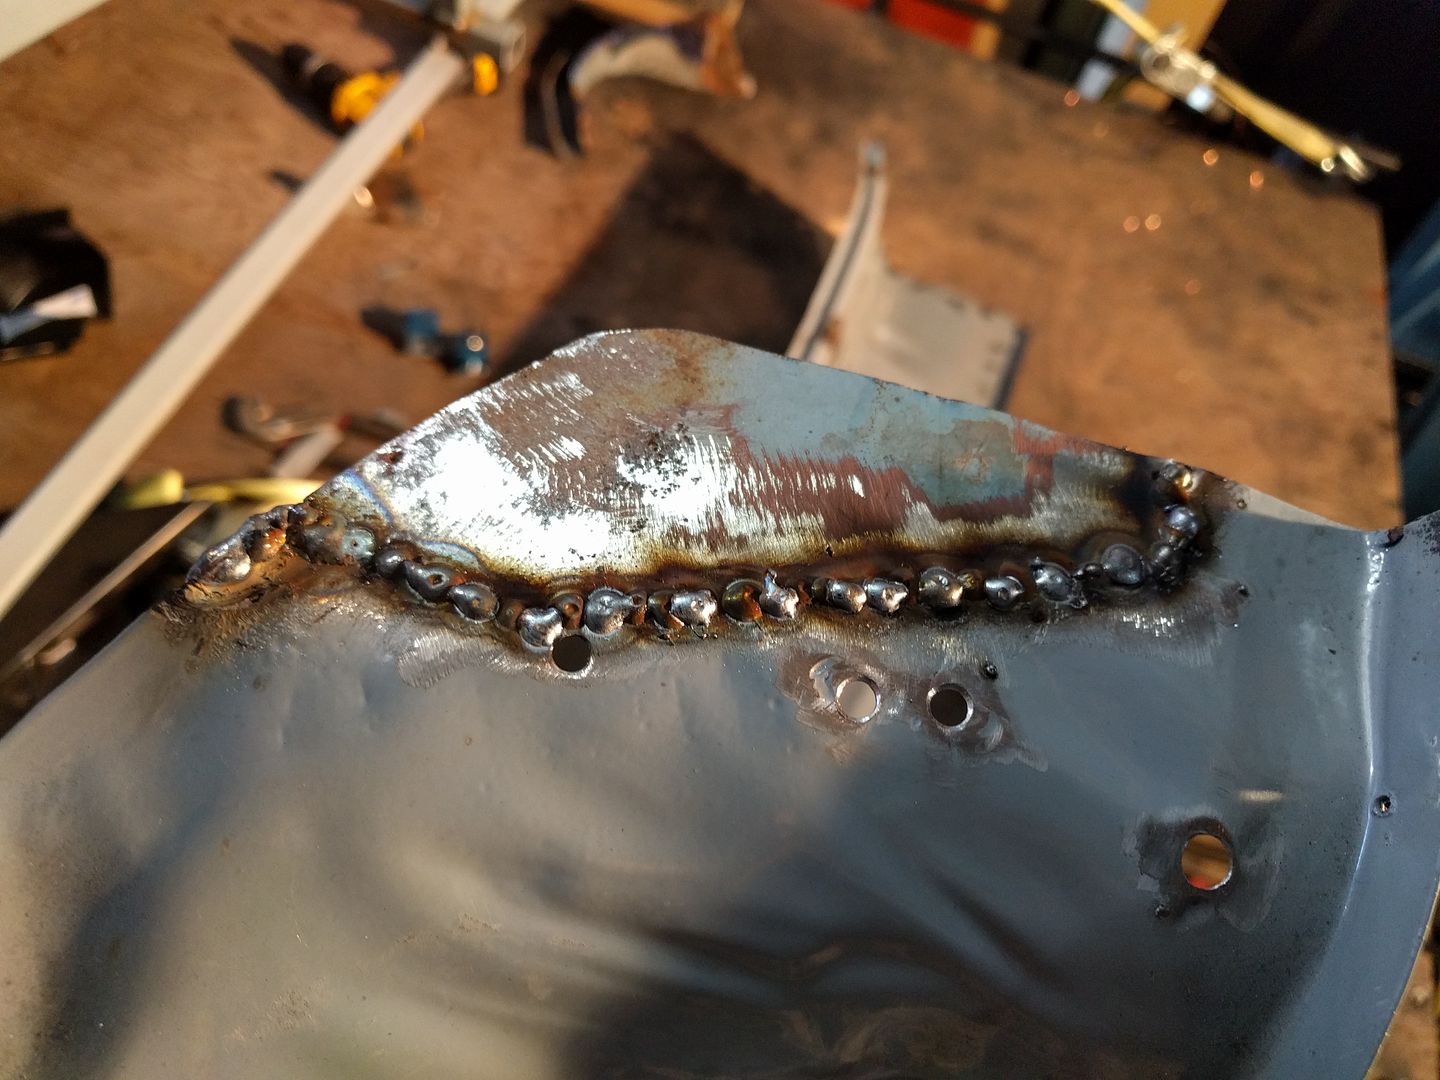 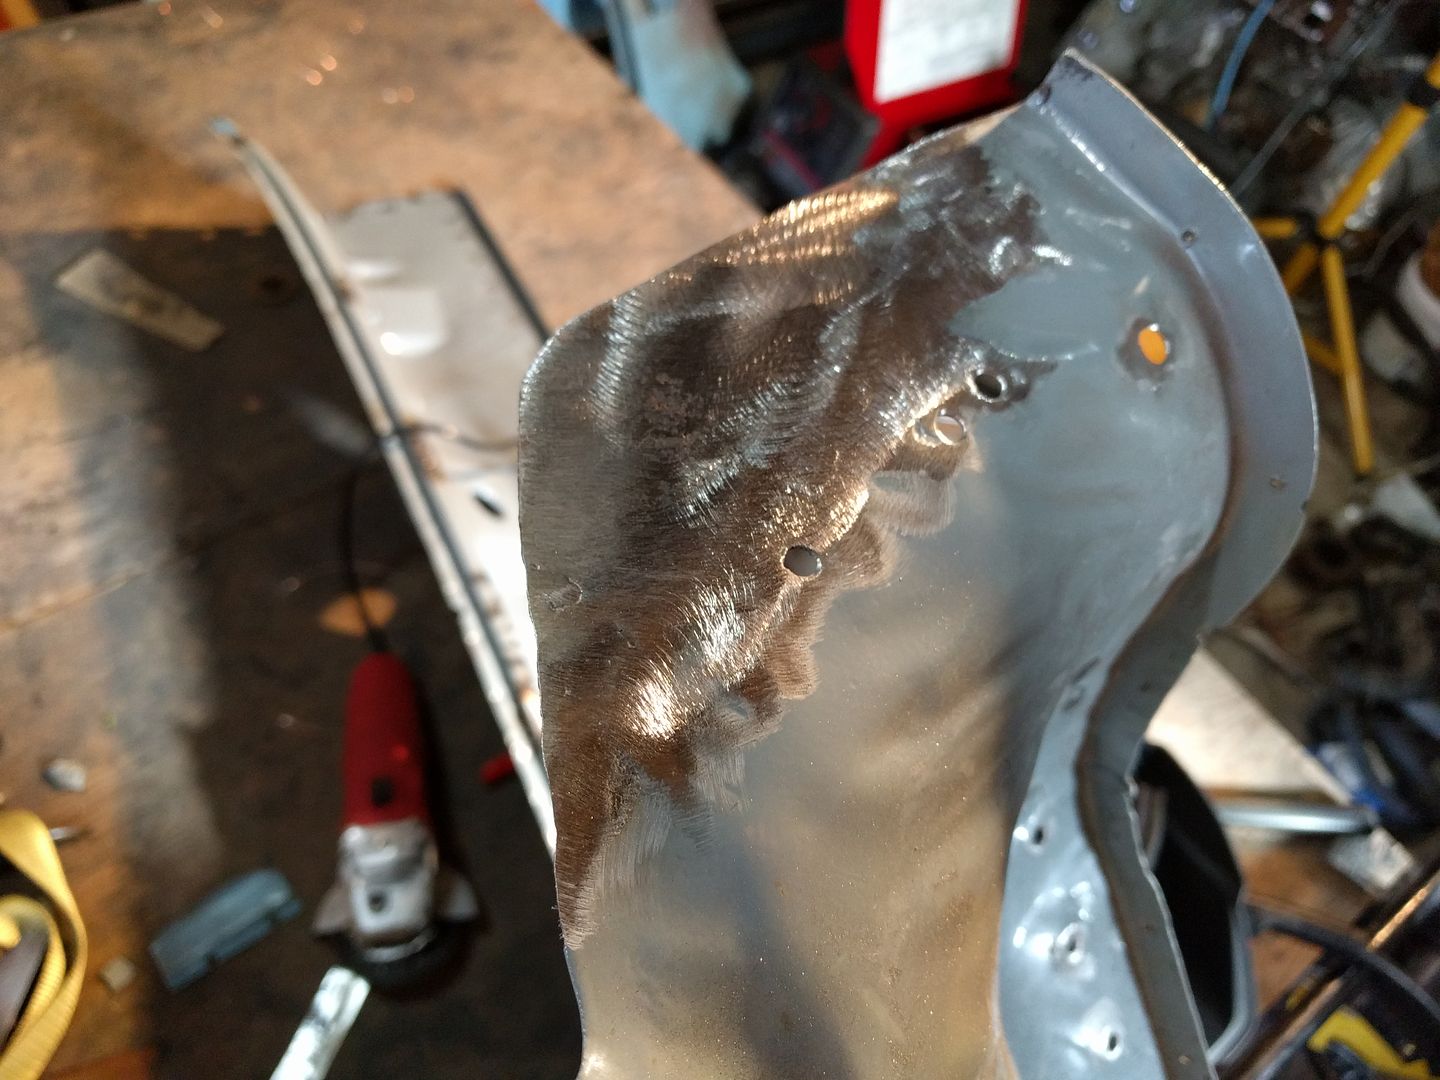 The bits from the original cab going back on 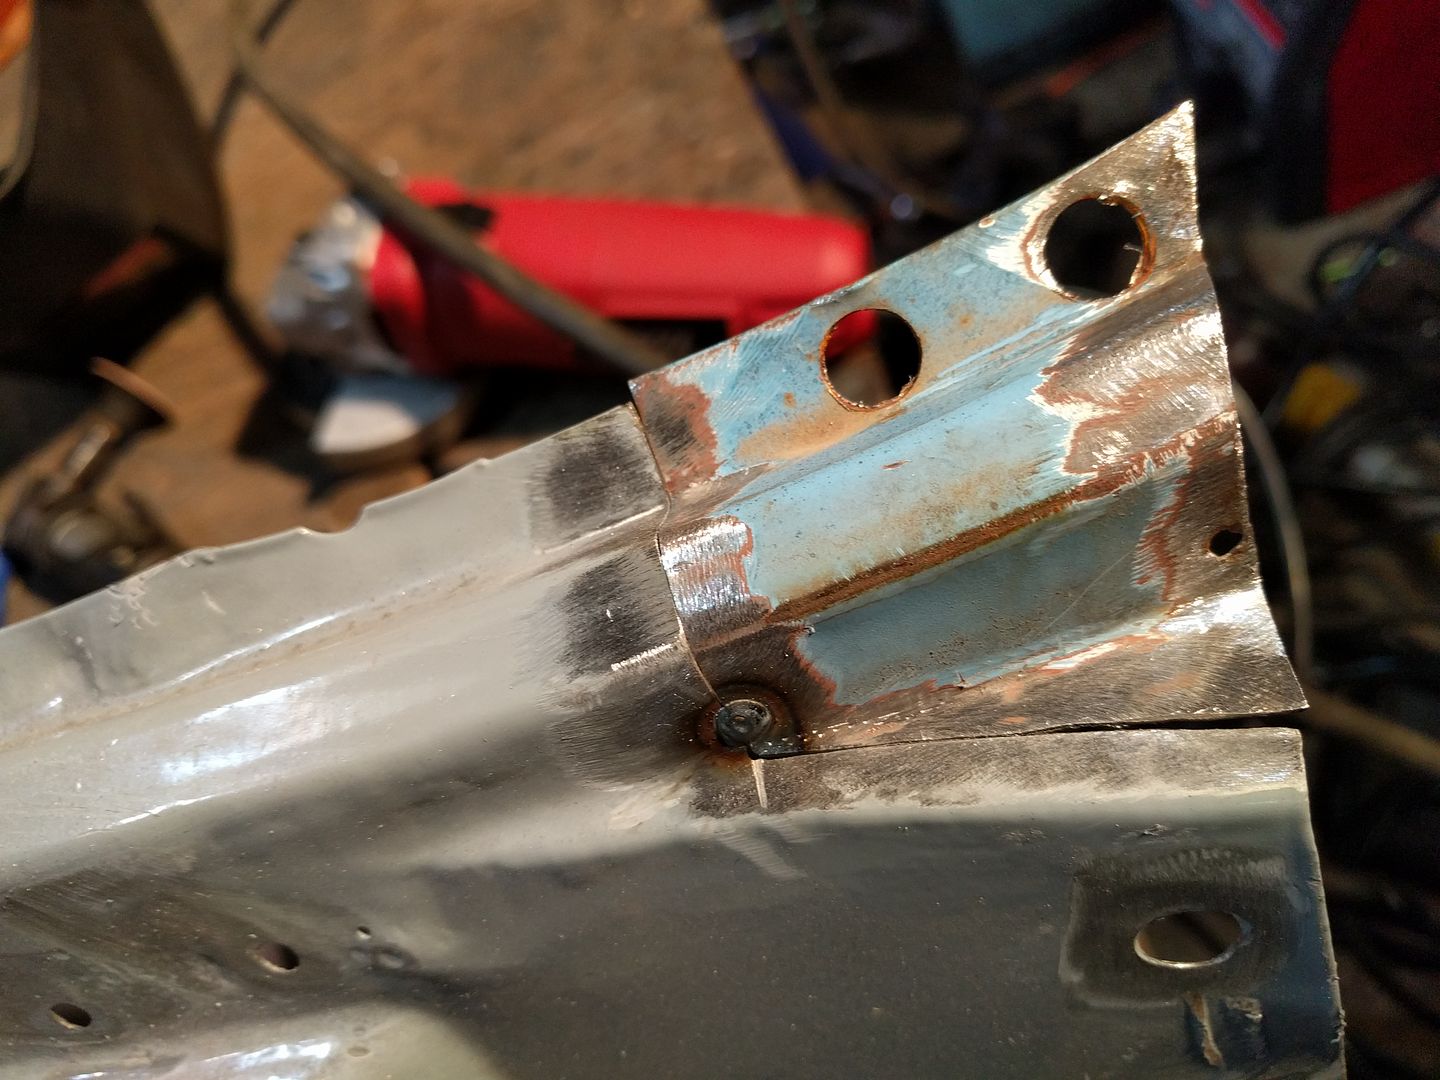 Patches tacked in 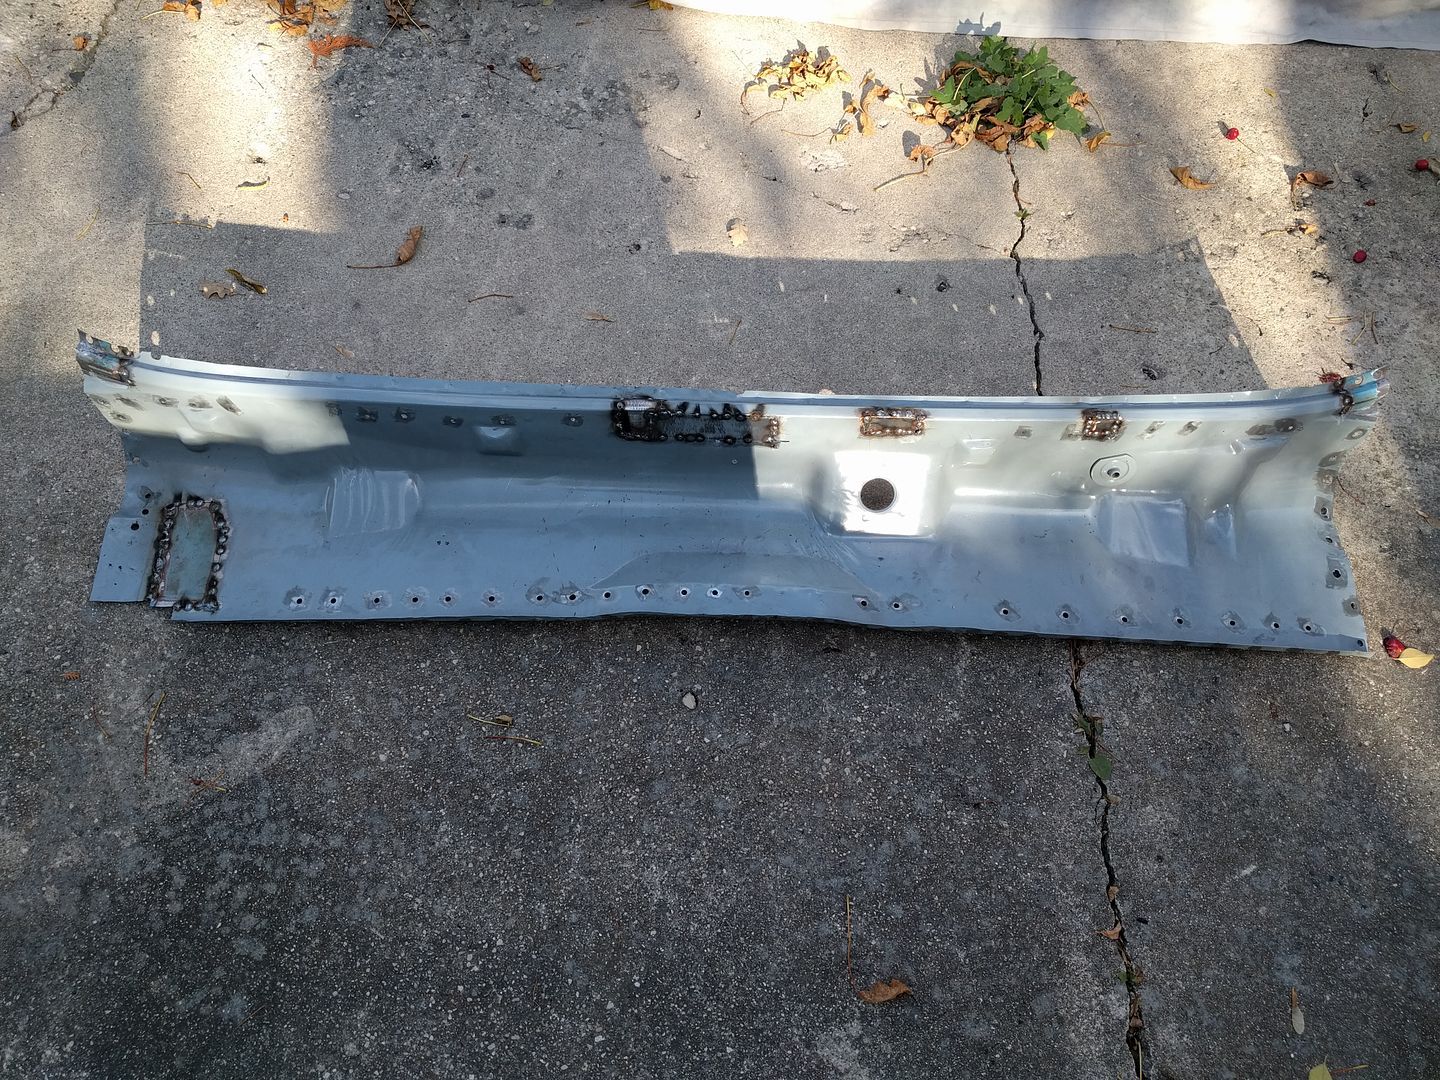 Welded in. Made a huge mistake here, you'll see later. 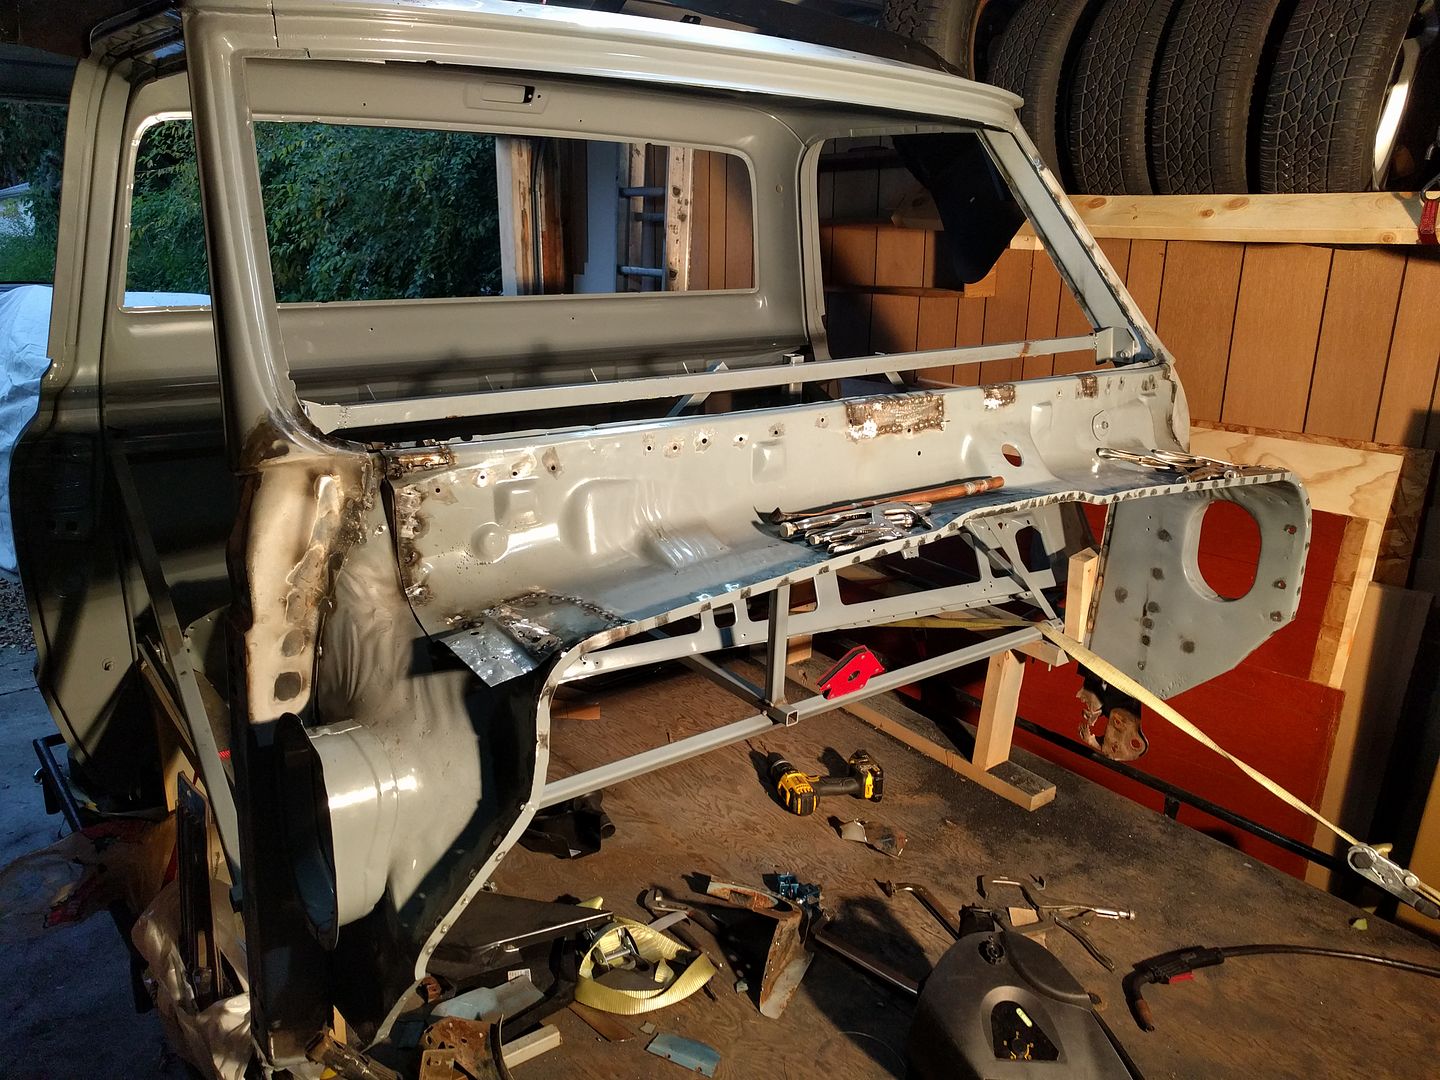
Last edited by Run Away; 10-08-2016 at 09:56 PM. |
|
|
|
|
10-08-2016, 09:51 PM
|
#67 |
|
Registered User
Join Date: Feb 2009
Location: Winnipeg, Manitoba
Posts: 68
|
Re: Run Away's '69 C10 LWB Project Log
Mocking the original cowl
 Mocking the aftermarket cowl  Both don't fit very well, but the factory one fit better. This is where I should have stopped and tried to figure out what went wrong. Weld 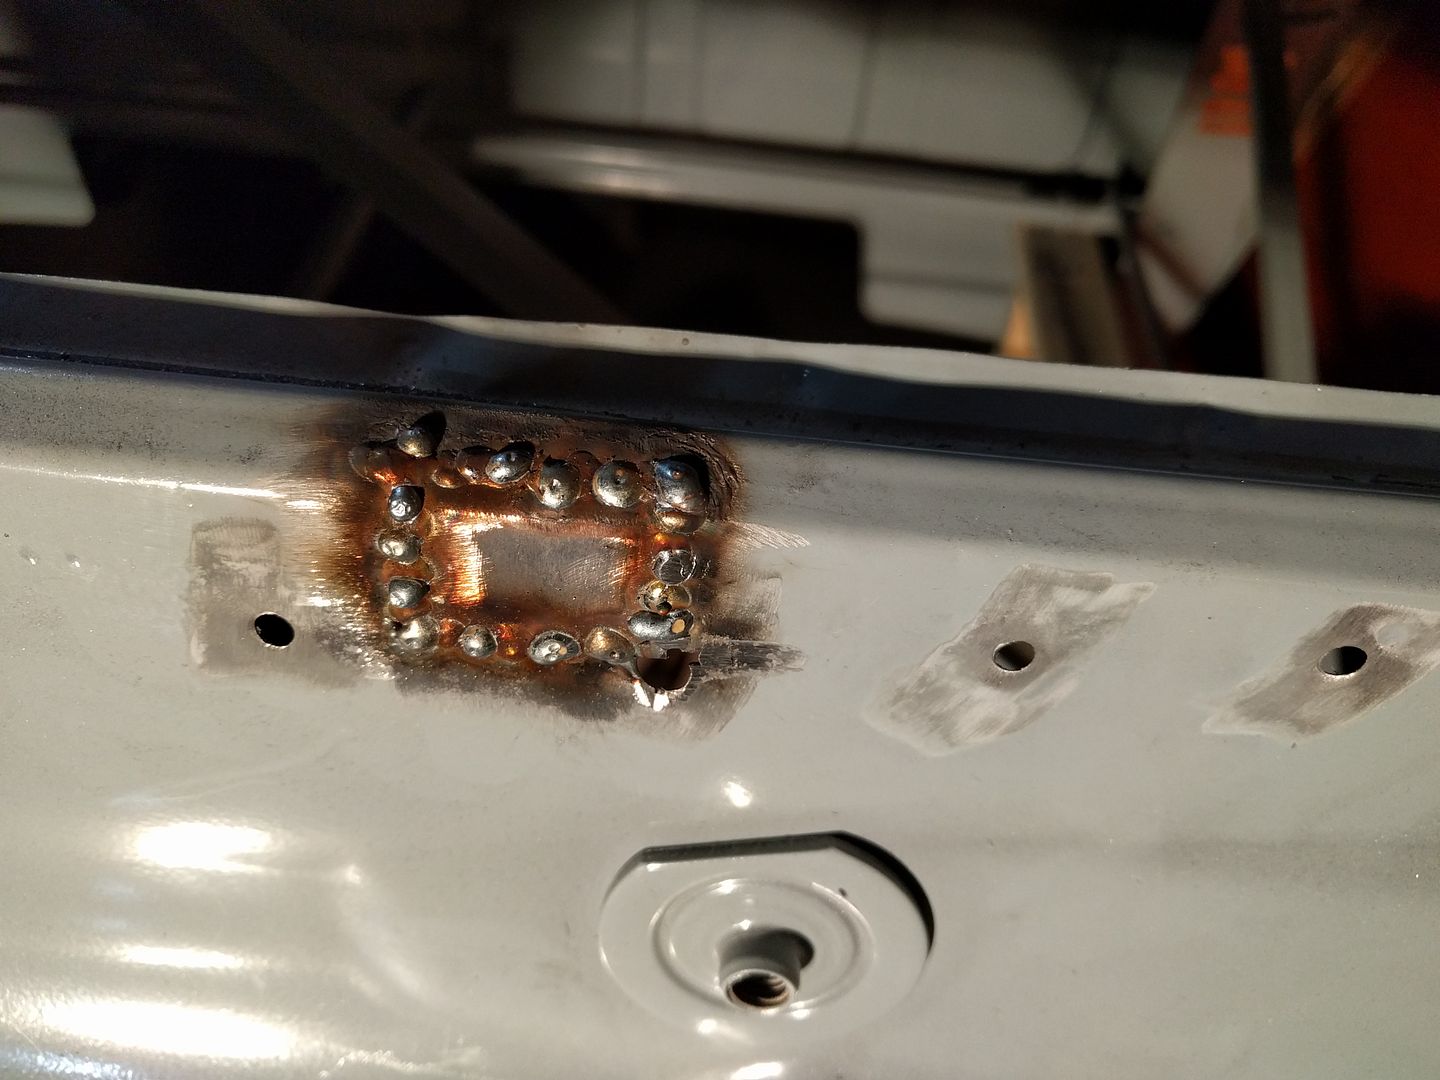 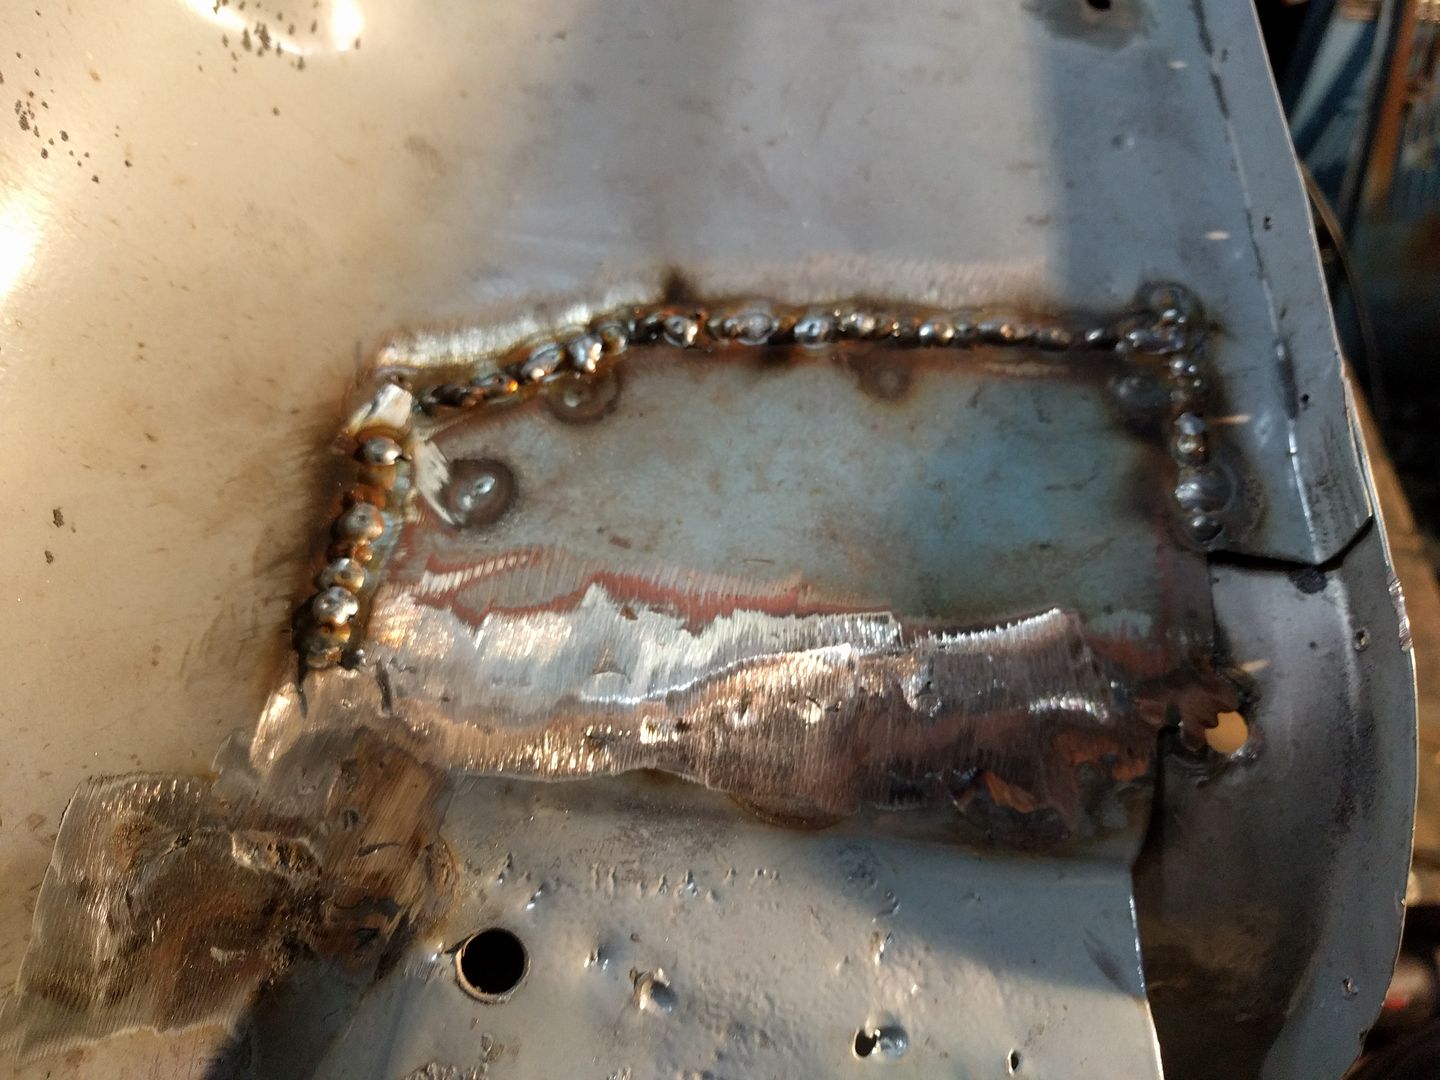 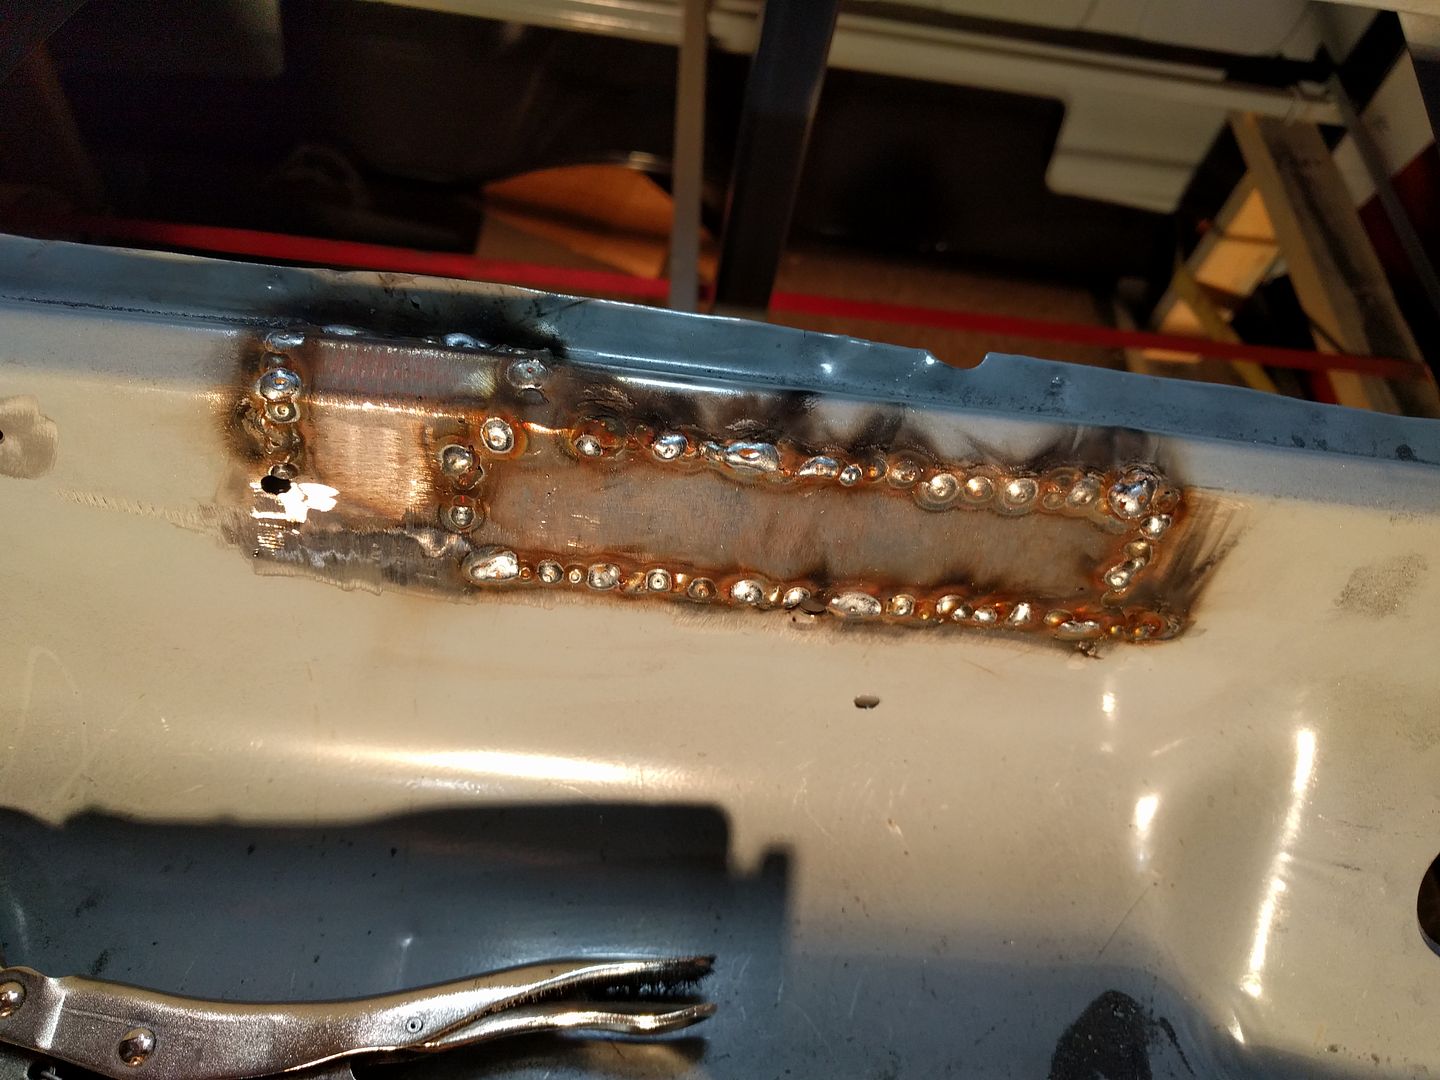 Grind 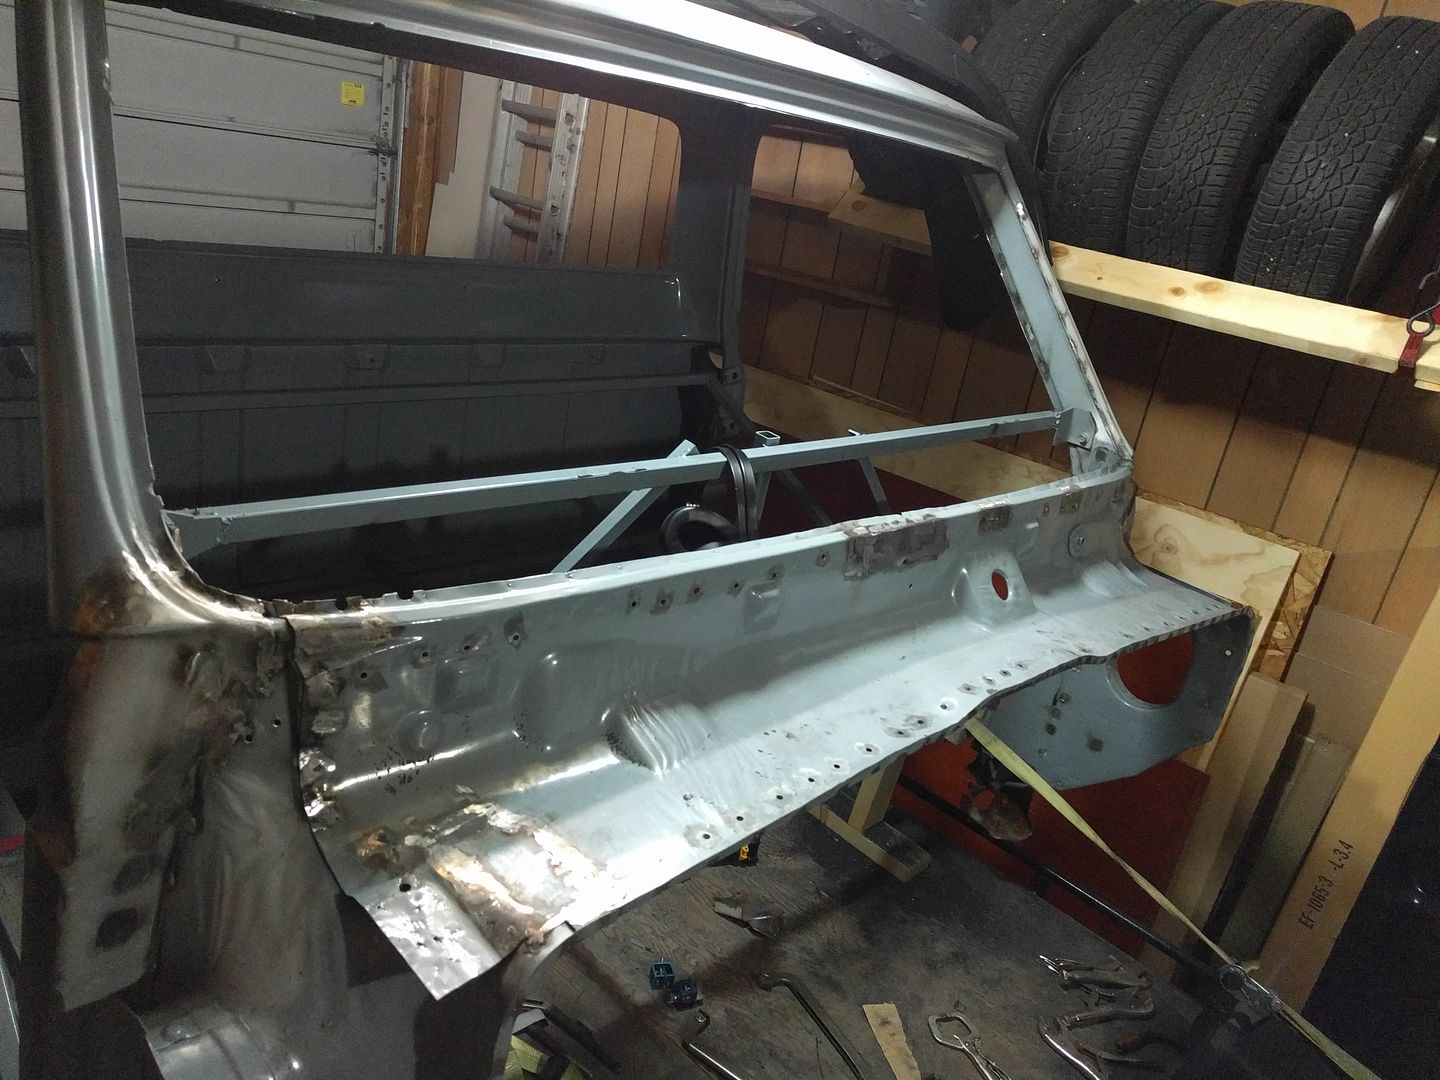
|
|
|
|
|
10-08-2016, 10:45 PM
|
#68 |
|
Registered User
Join Date: Feb 2009
Location: Winnipeg, Manitoba
Posts: 68
|
Re: Run Away's '69 C10 LWB Project Log
These little supports that go inside the outer cowl got accidentally left out when I got everything blasted, so I cleaned them up the old way. Just waiting the 24hrs for the rust converter to do it's thing before paint.
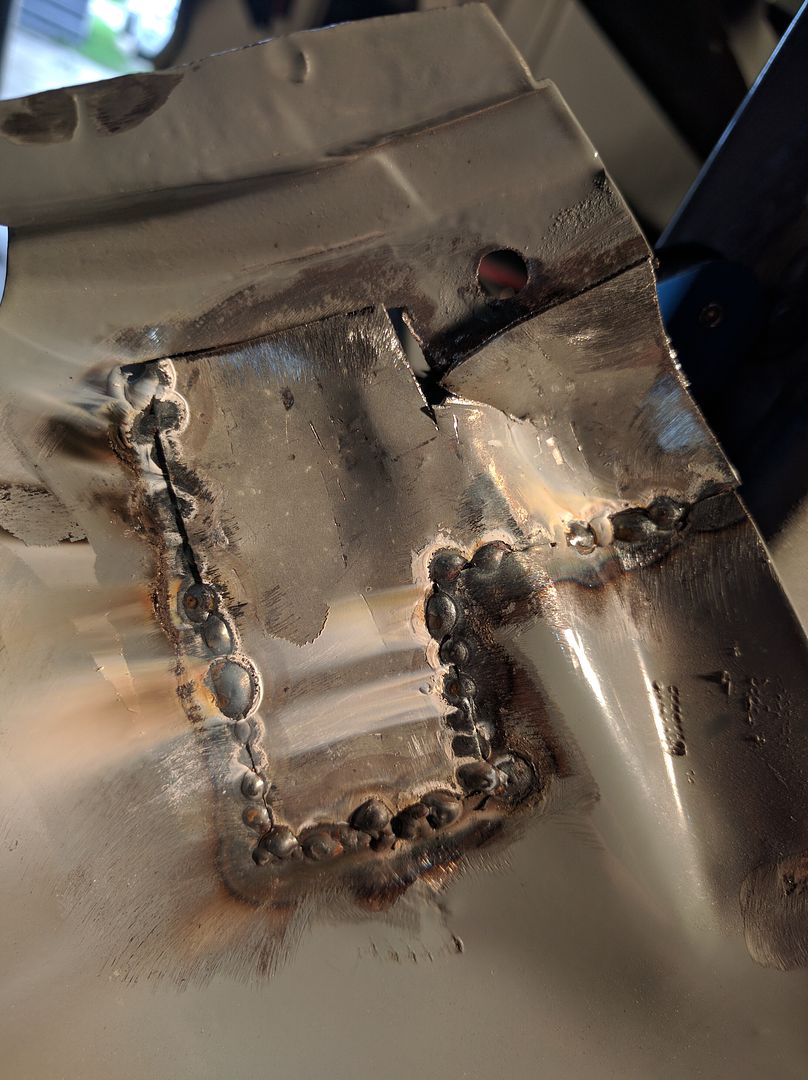
  When I removed the outer cowl I wasn't careful at all because I thought I wasn't going to use it. Put a bunch of dents into it. 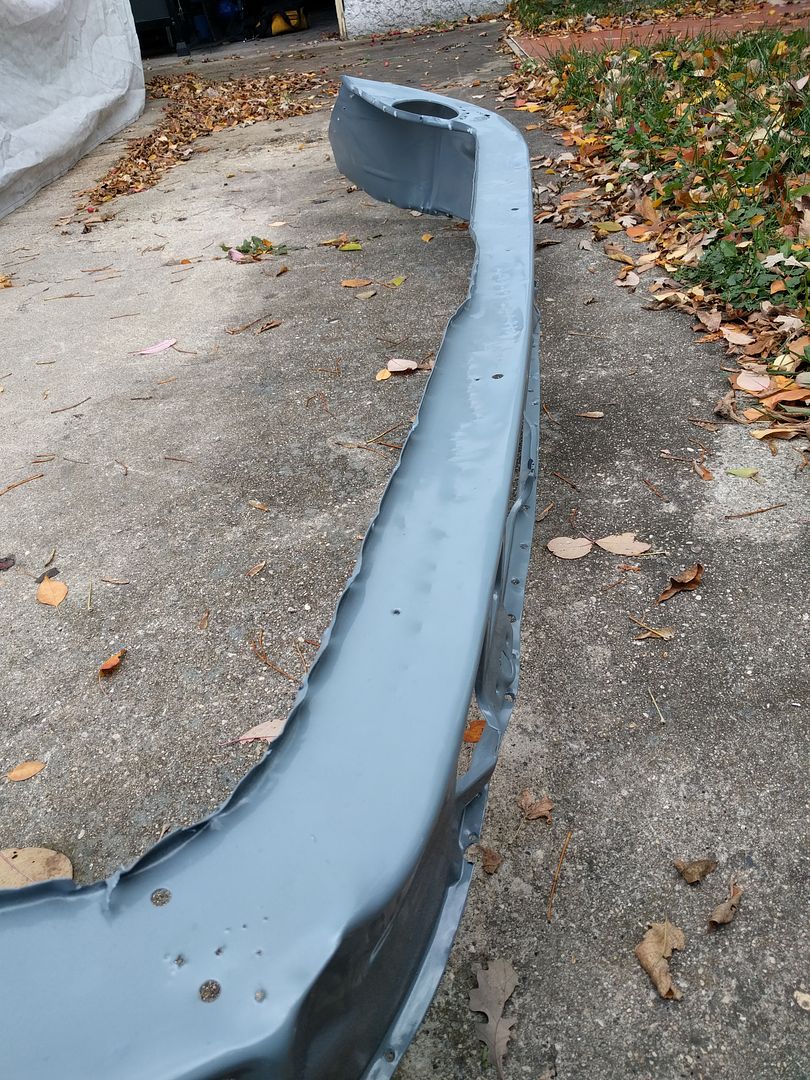 I didn't take an after picture, but I spent a bunch of time with a hammer and dolly putting it back to a point where I think body filler would be enough. Welded in the filler pieces. Just have to line up the old spot welds to put it back to where it was. 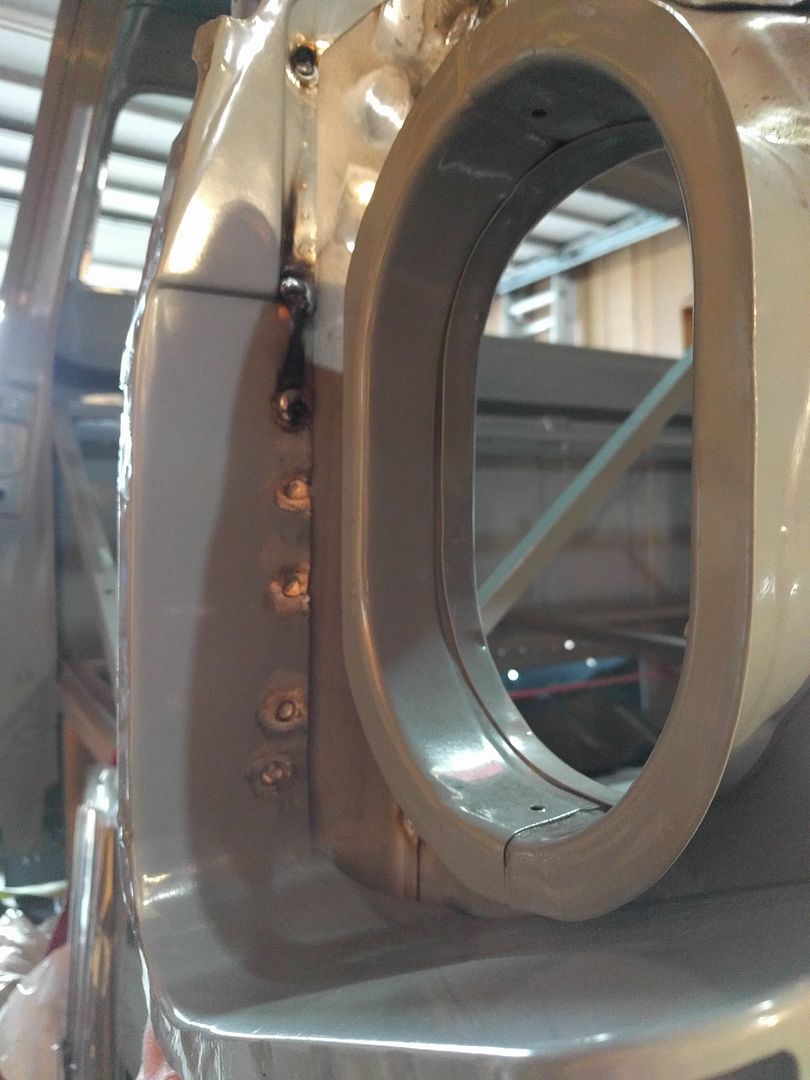 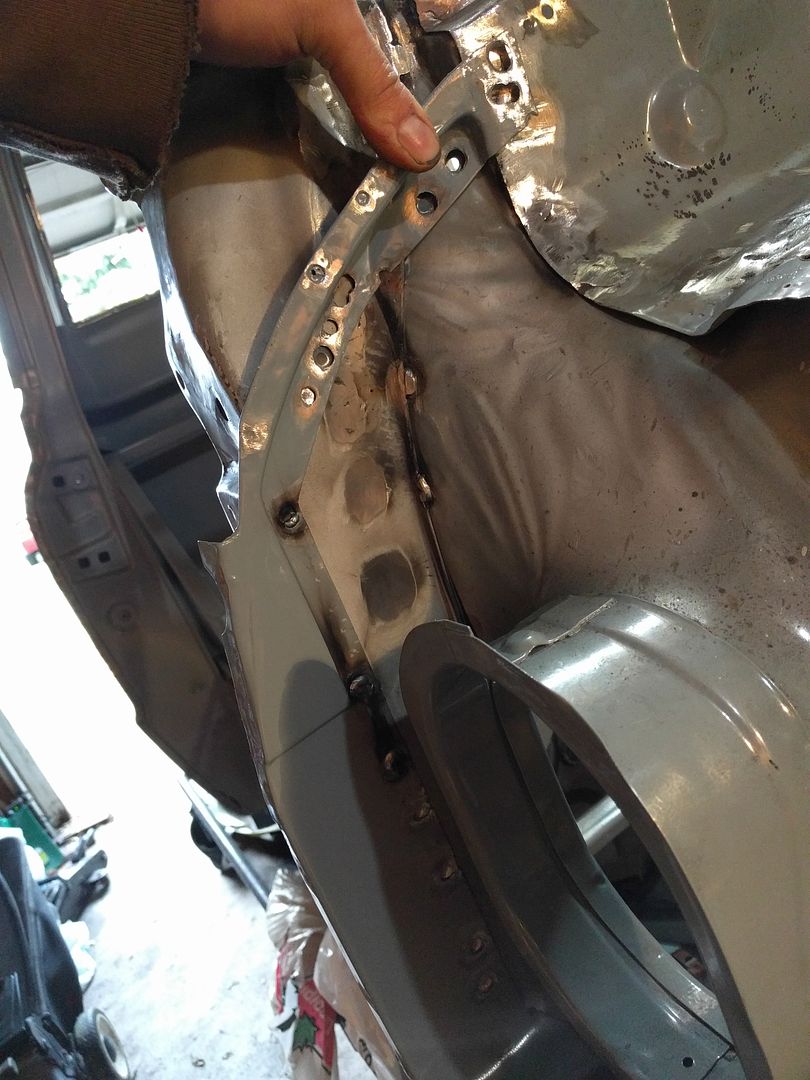 Same thing on the drivers side 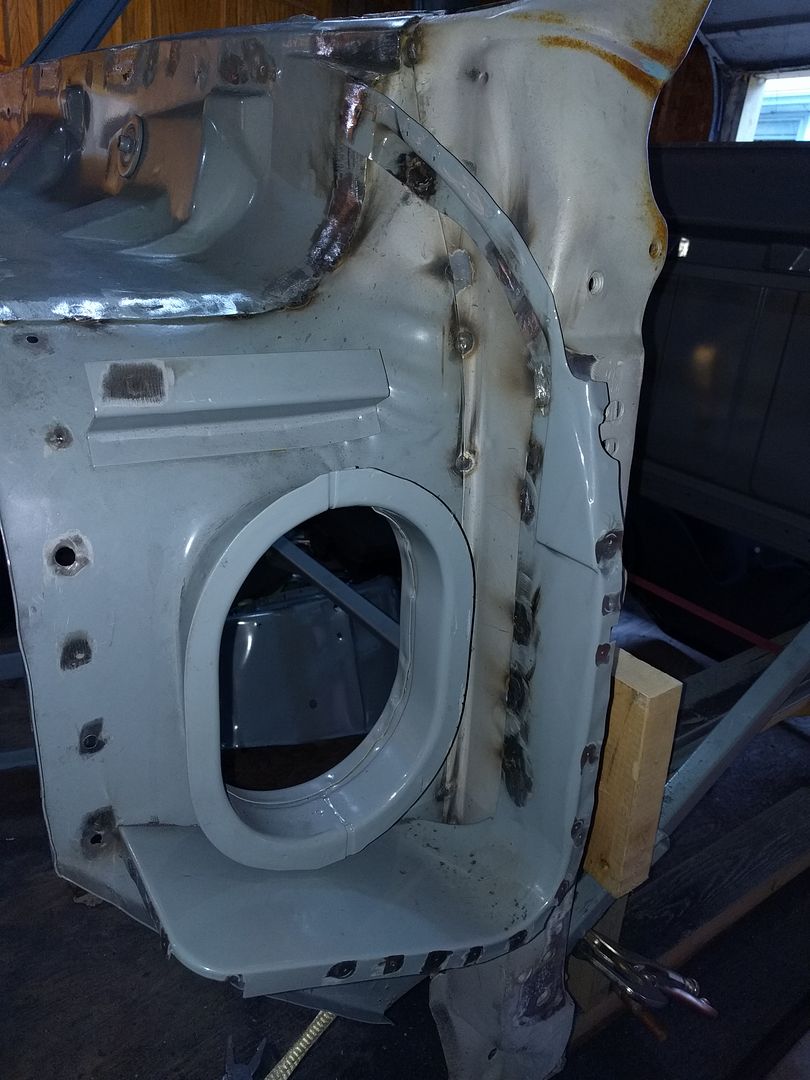 Ground the patches all smooth 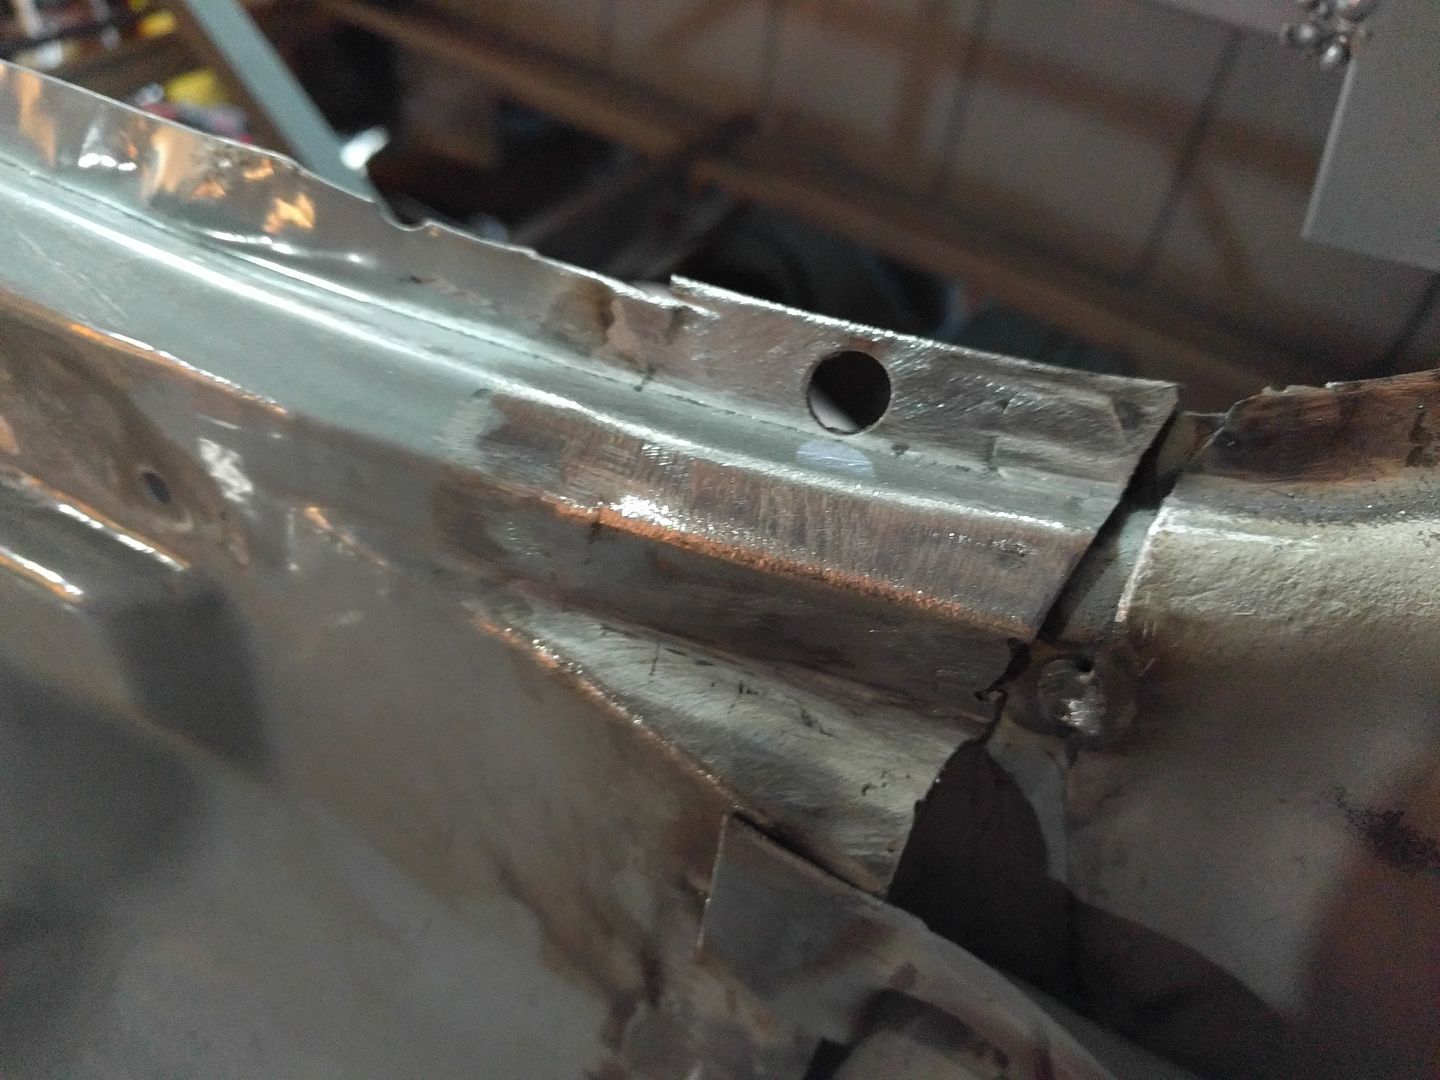 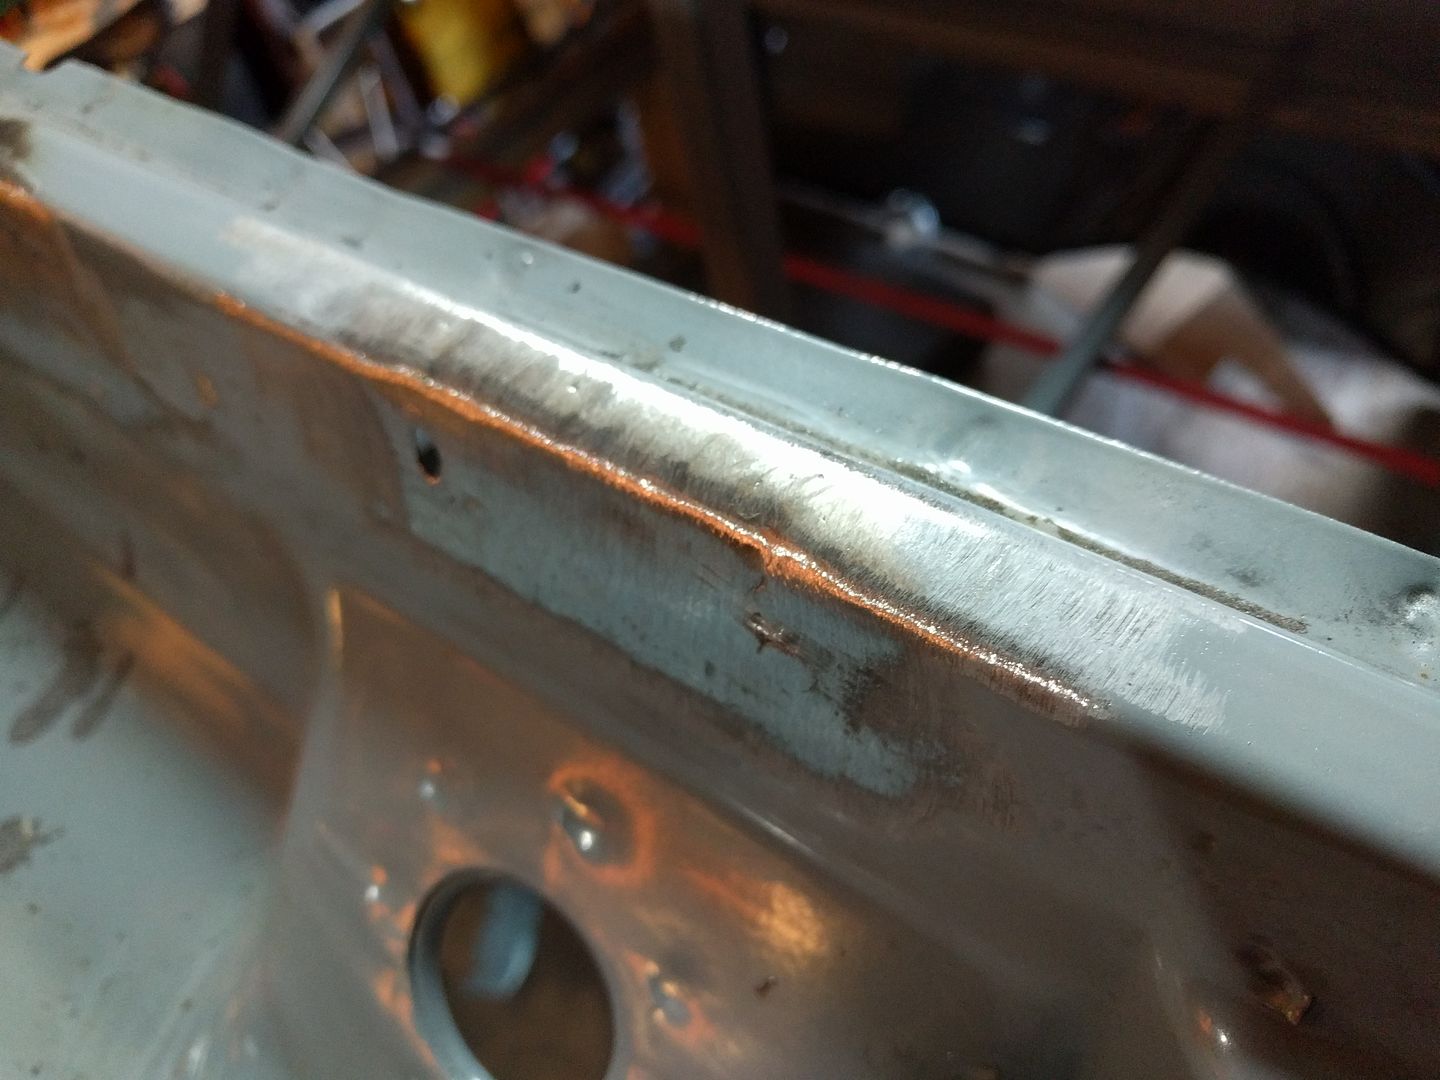 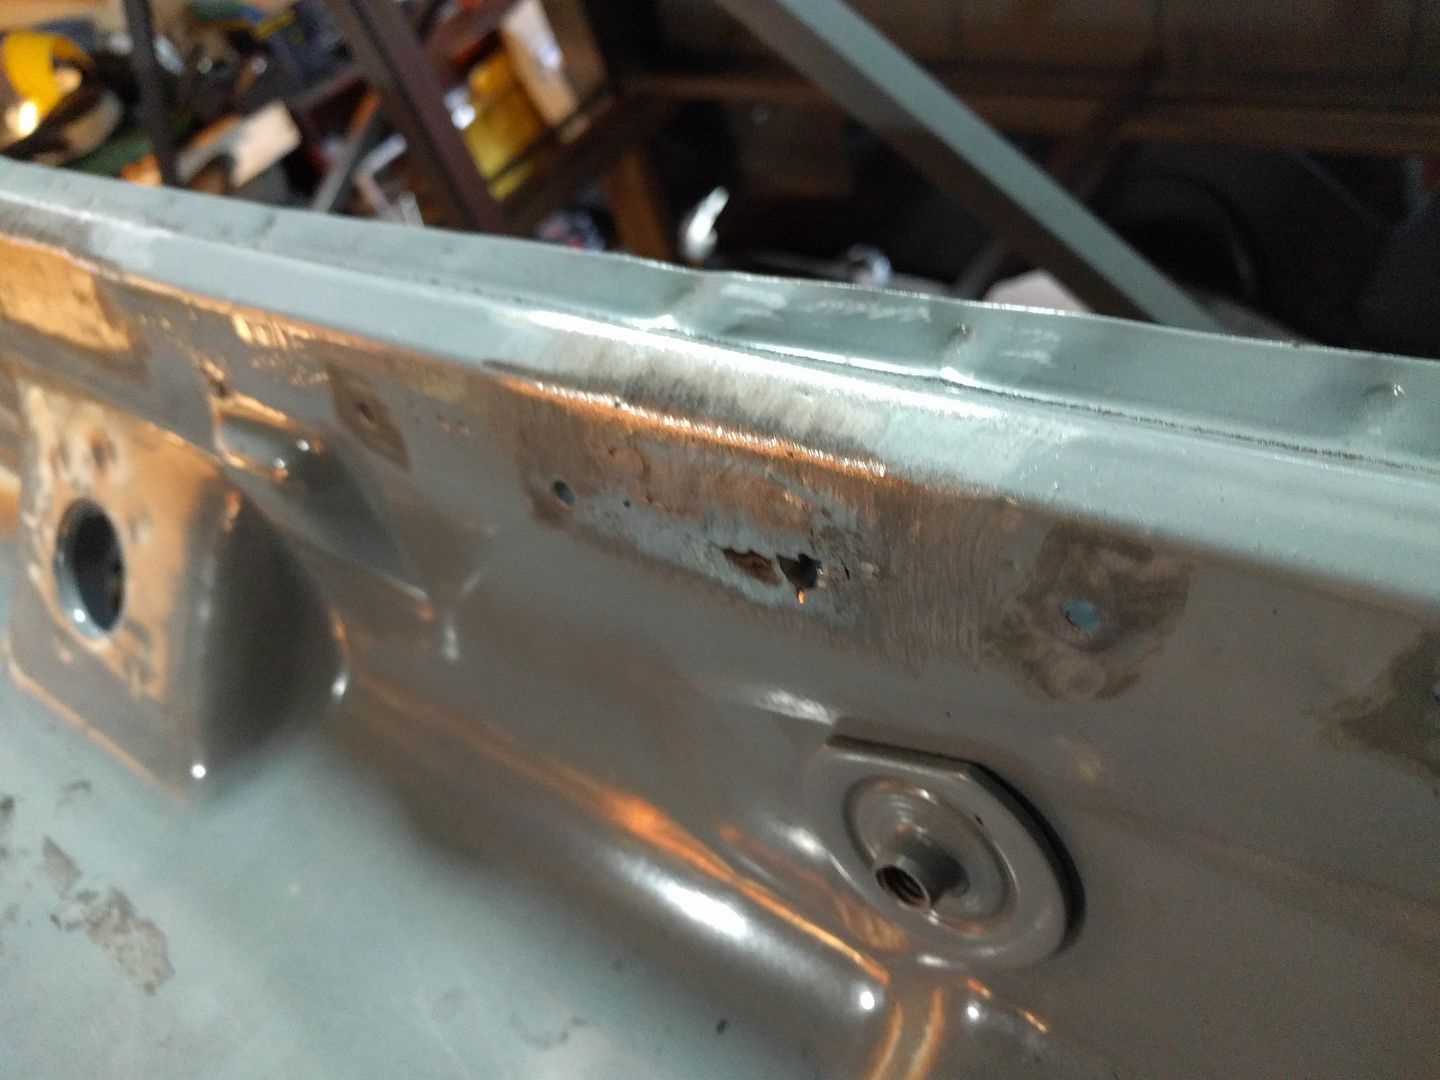 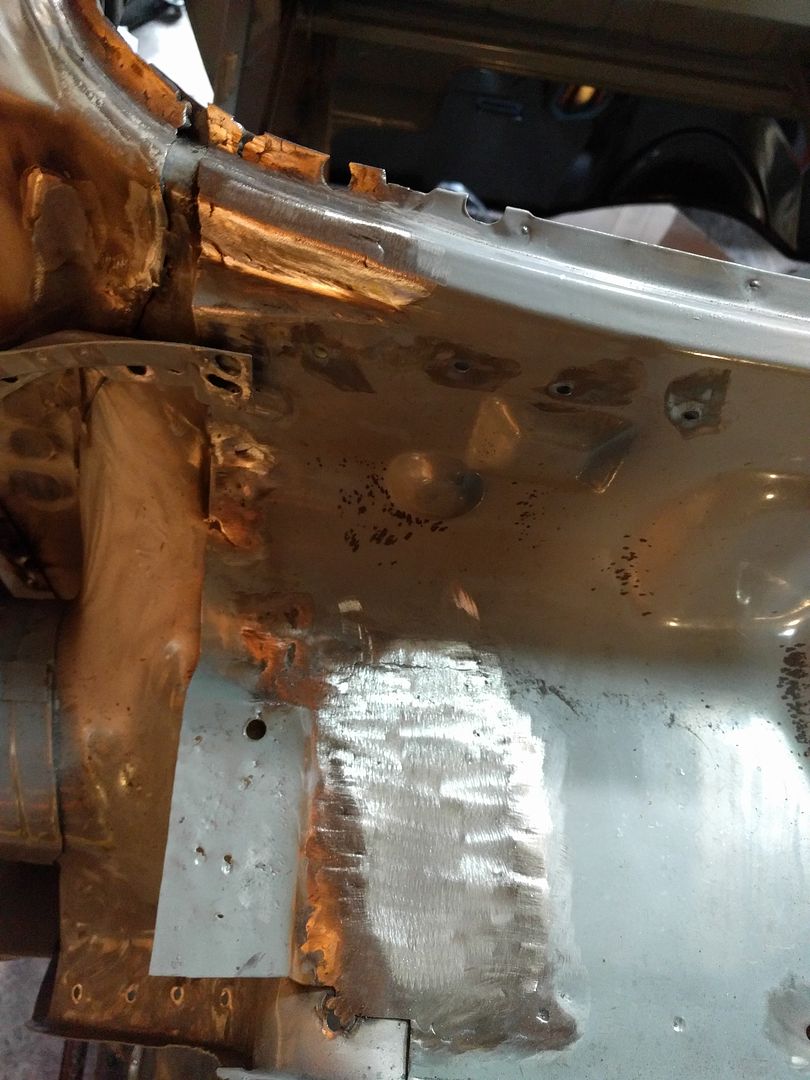
|
|
|
|
|
10-08-2016, 10:48 PM
|
#69 |
|
Registered User
Join Date: Feb 2009
Location: Winnipeg, Manitoba
Posts: 68
|
Re: Run Away's '69 C10 LWB Project Log
Mocking the cowl again.
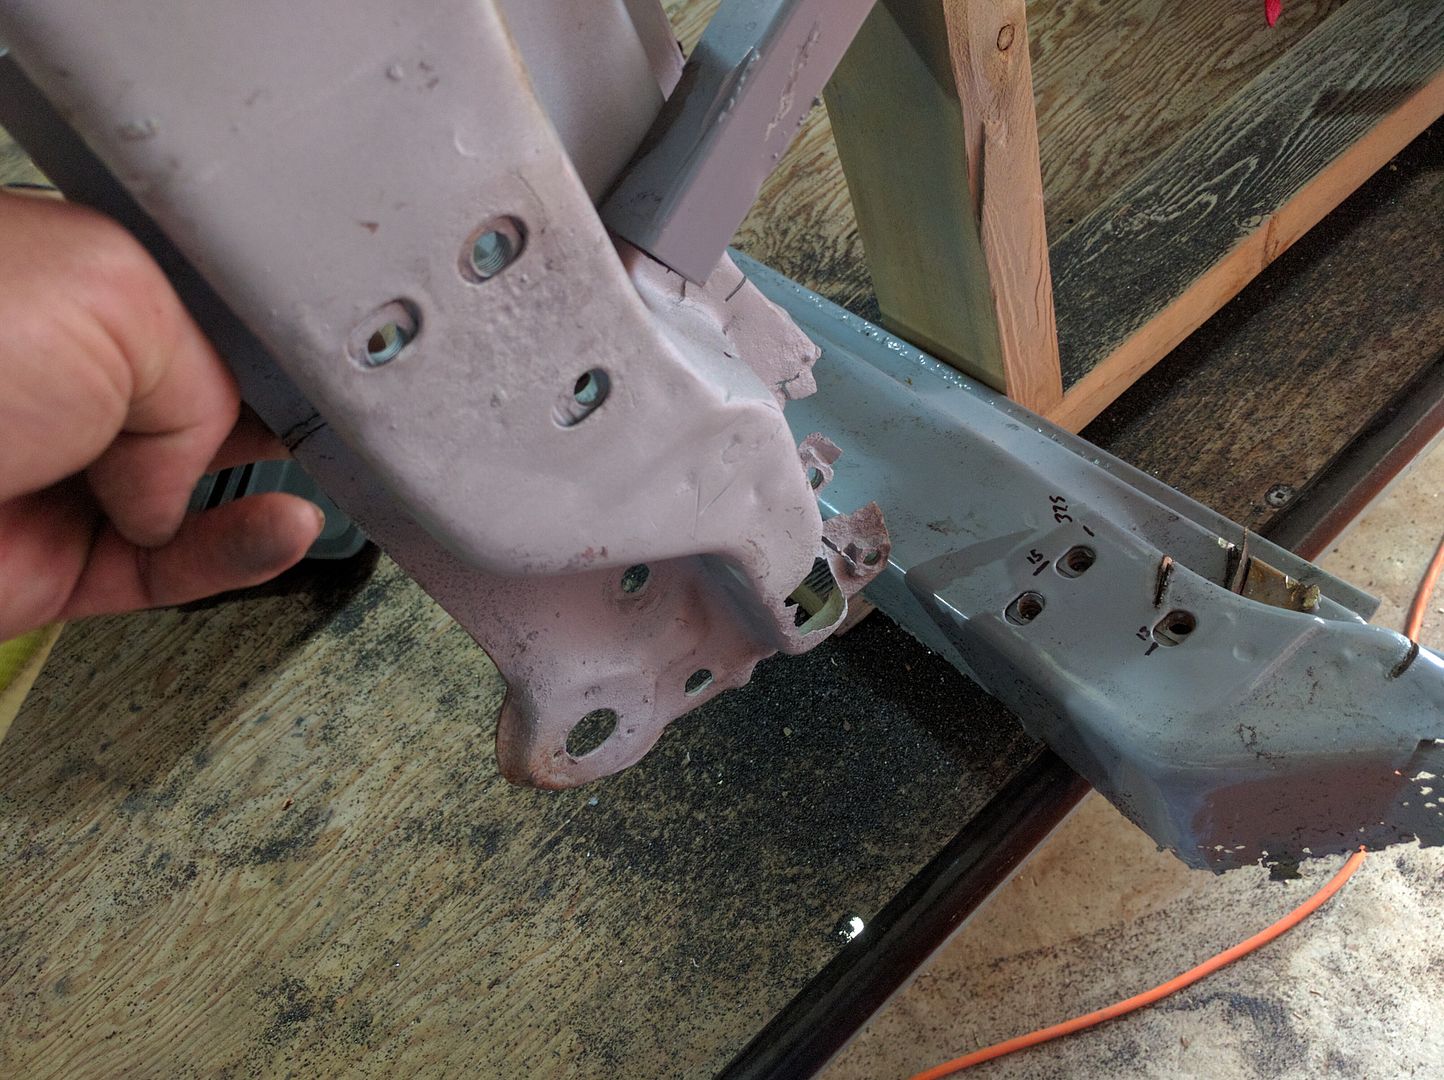
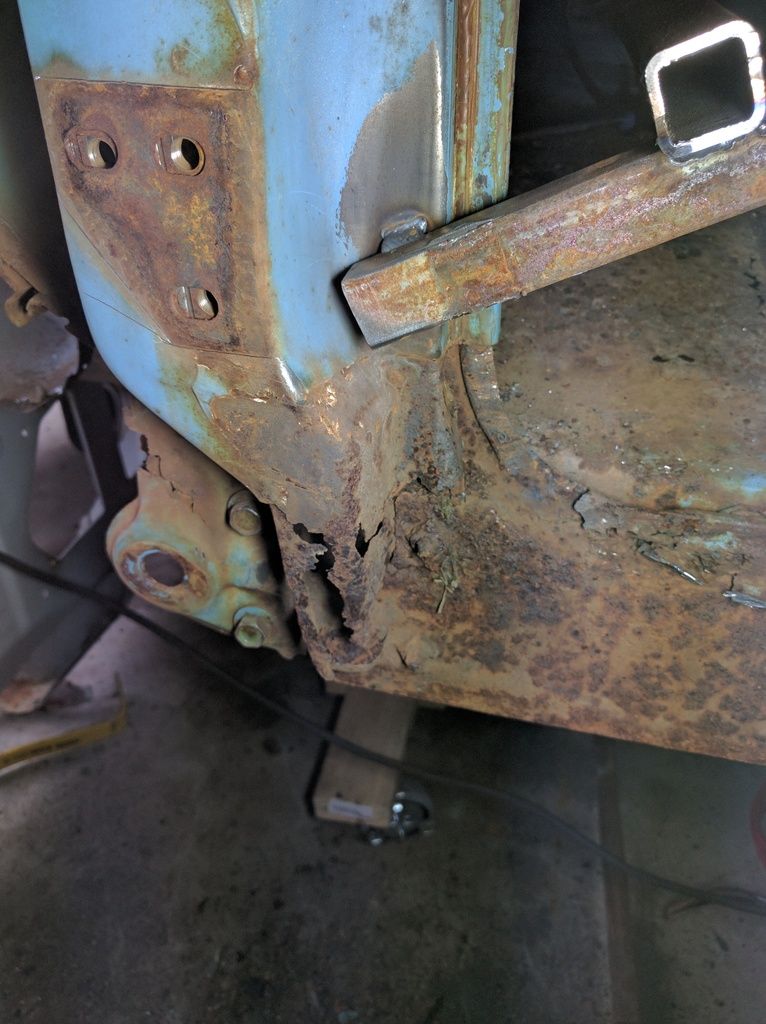
 Fitment issue on the passenger side 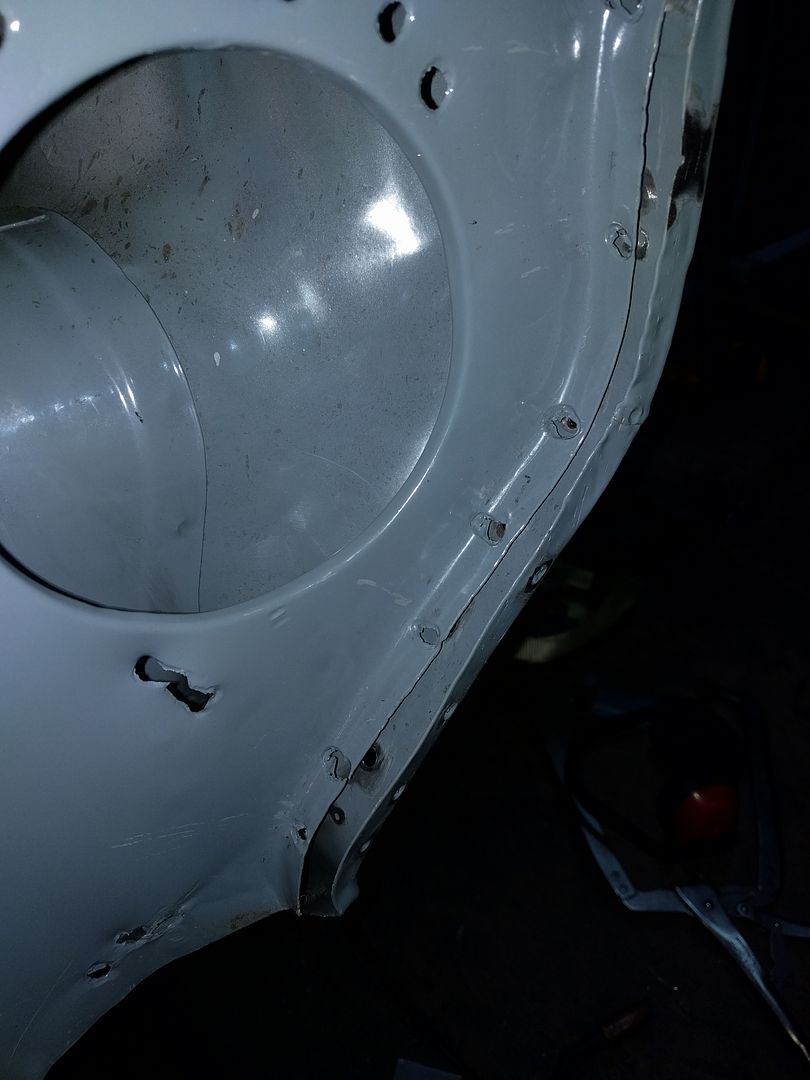 With the firewall too 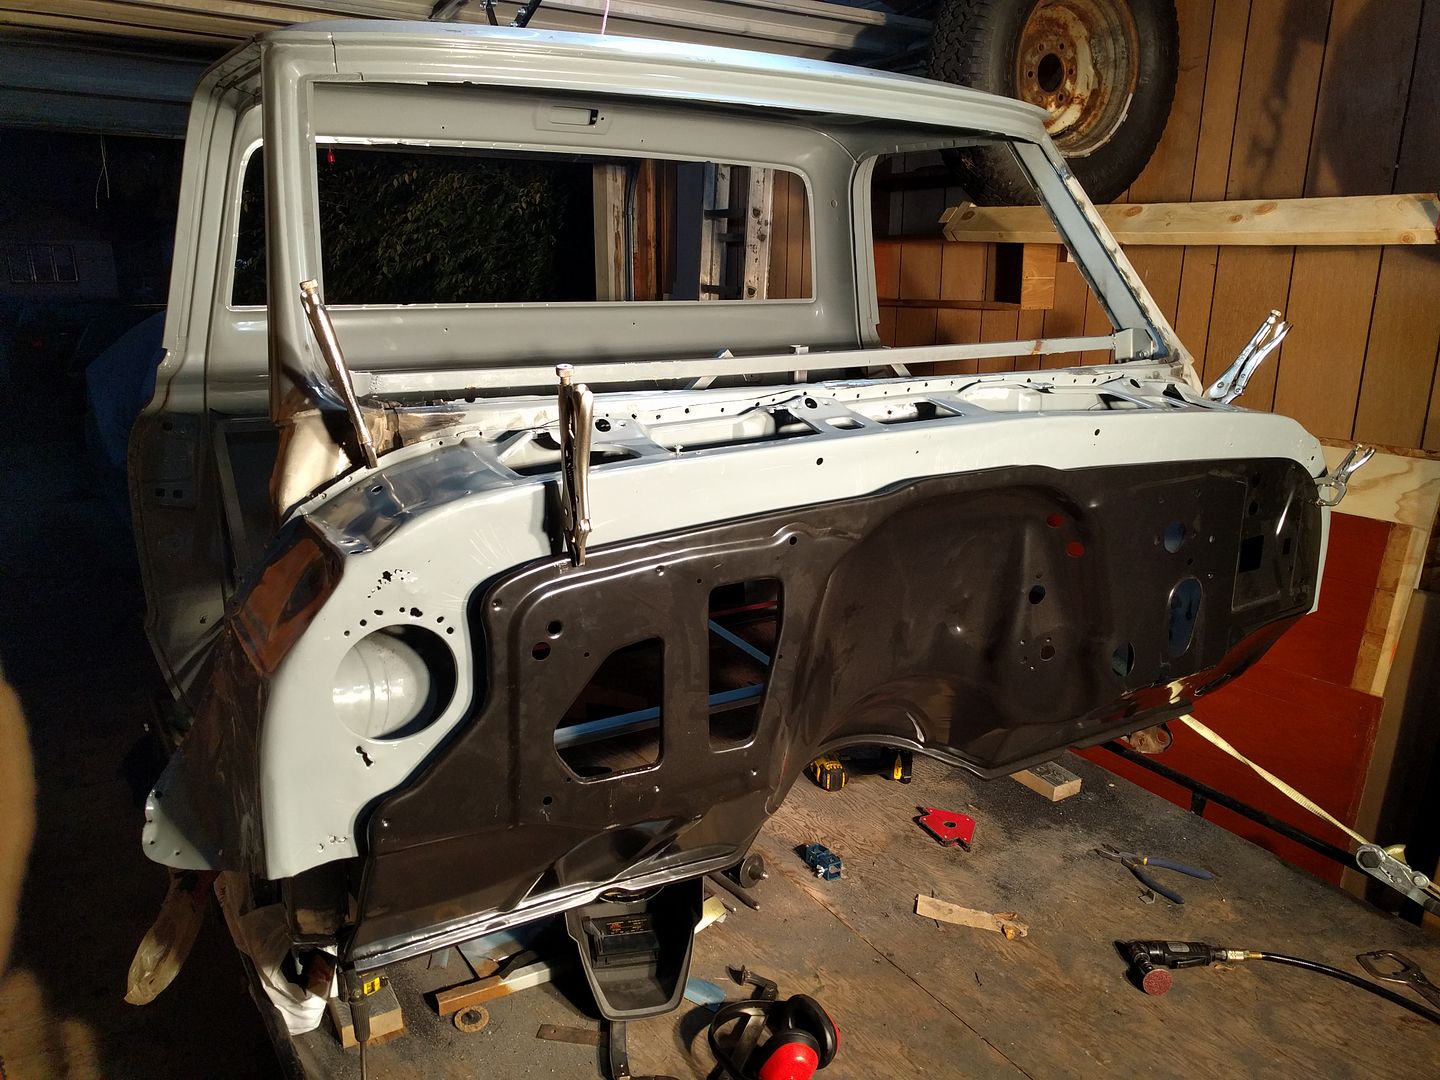 Fitment issue. Basically when I line up the outer cowl to the inner cowl, the passenger side of the outer cowl doesn't follow the contour of the "wing".  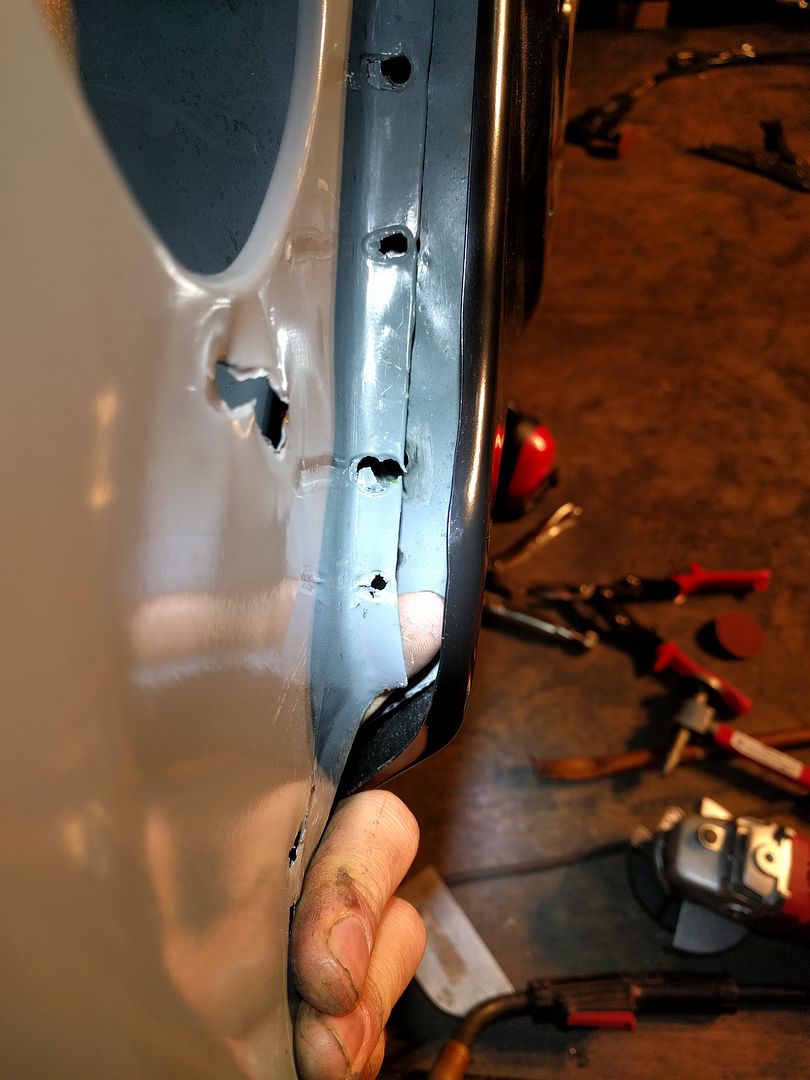 Drivers side all lines up nice  The outer cowl is aligned to the inner cowl by sticking screwdrivers through the holes where I drilled the spot welds. 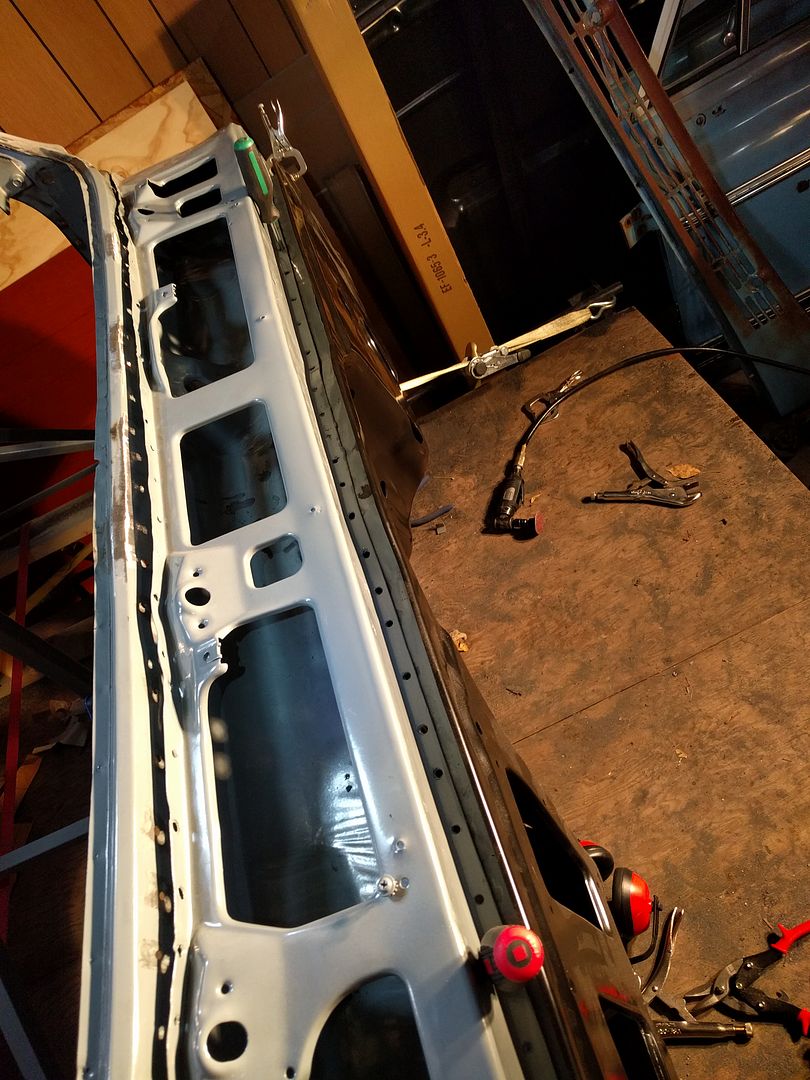 If I start by making the passenger side tight first  Here's how the cowl lines up. Note the drill holes only half overlap. 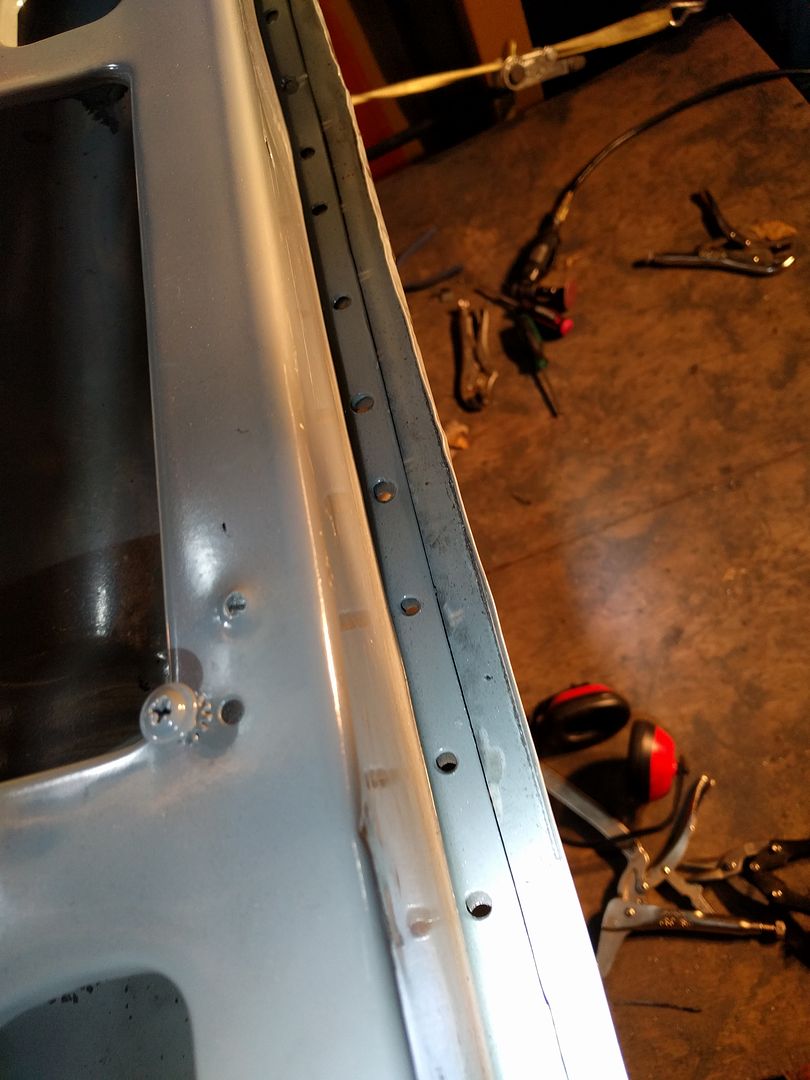 How did this happen? I forgot to clamp the driver's side lower pillar before welding in the inner cowl. 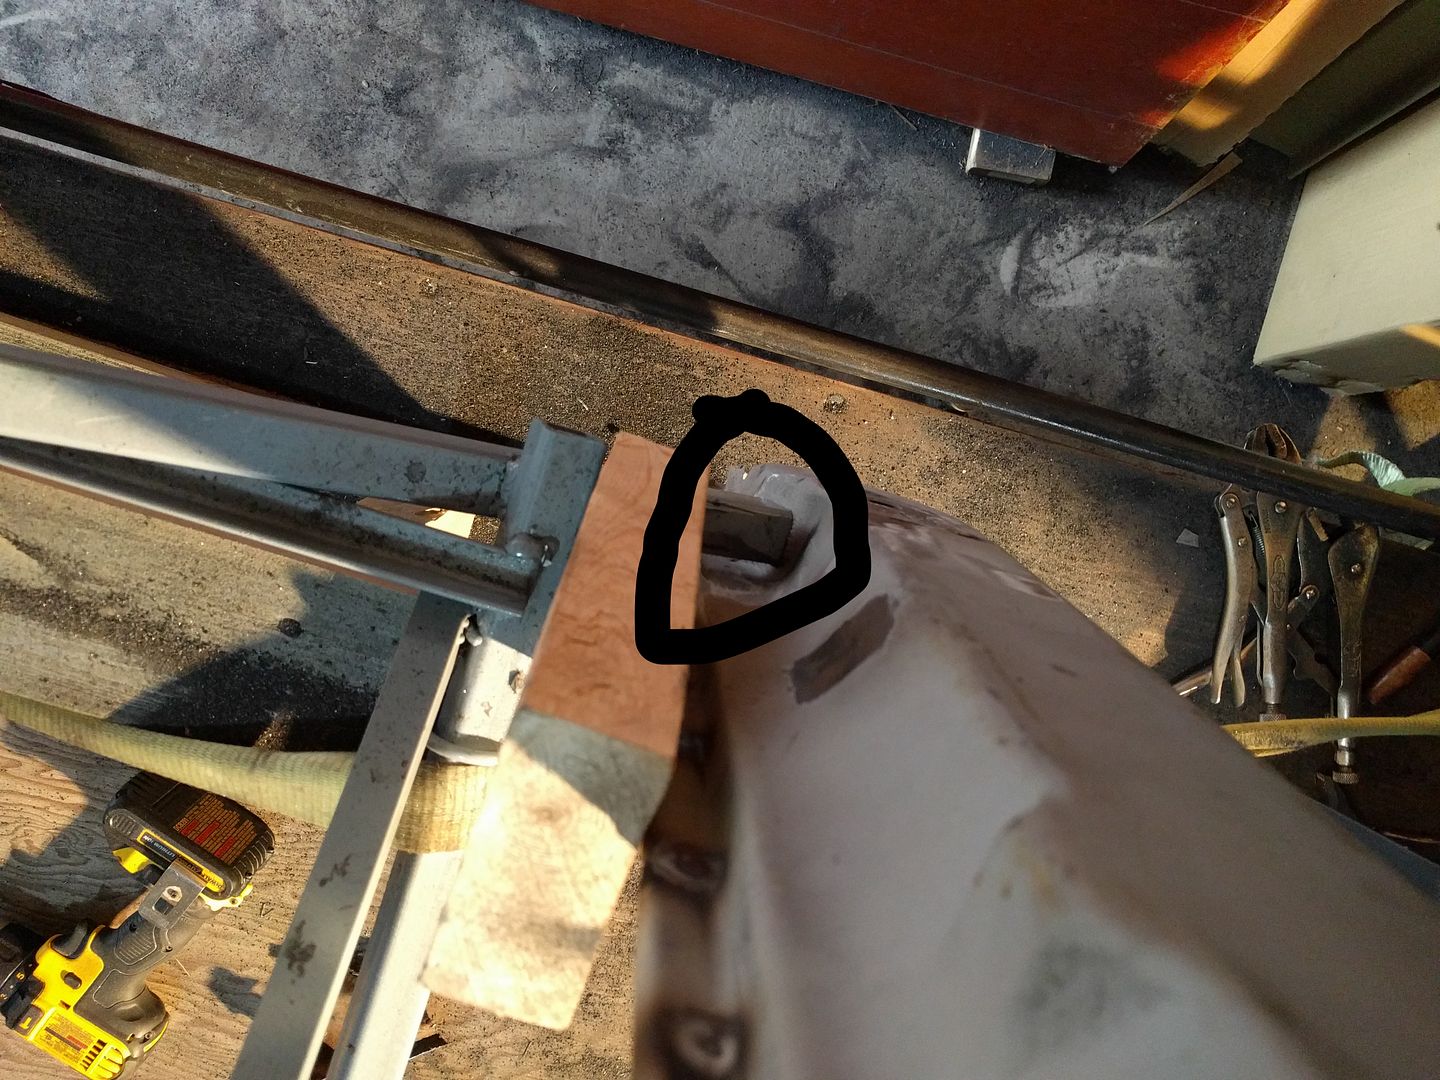 See that gap? It's supposed to be flush. I also suspect the passenger side A pillar front half I welded in isn't quite right, the wing is "toe'd in" if that makes sense. I think the windshield opening is right as there is a horizontal brace right behind it where the dash used to be, and I can't see how that would move. Add all those up with the rotted out bit of metal where the inner cowl and passenger wing piece meet meaning there was no original spot welds for me to line up meant the inner cowl was welded in with the firewall side just a bit too narrow. Don't think I can remove the inner cowl from the wing panel how I welded it in, there's so much weld joints I'd destroy both panels. I think I'm going to cut the inner cowl in half, or almost all the way though and use the outer cowl to line things up properly. Thoughts? |
|
|
|
|
10-09-2016, 01:48 AM
|
#70 |
|
Registered User
Join Date: Oct 2007
Location: Spanaway
Posts: 8,451
|
Re: Run Away's '69 C10 LWB Project Log
Ref: post 57 & 59 If that A pillar is suppose to be flush against that brace and its in too far in then that can affect the door and the fender alignment, not to mention fitting in a new floor, i would suggest measuring the new floor width at the lower A pillars. I think all the welding on the inner sections may have pulled the lower A pillars inward, It looks like the lower A pillar isn't twisted from what i can see in the pic's. Is the passenger side still flush with the brace?
Not sure which part you refer to as the wing panel but if you feel that only the driver Lower A pillar has moved inward then maybe instead of cutting the inner cowl in half ( if you mean at the center of the windshield) maybe try and re drill out the spot welds on the driver inner curved panel that has the vent hole on the side? I am curious how much pressure or force would be required to move that A pillar outward to contact that brace and try and get that floor in there before going forward?
__________________
Mike. Swamp Rat build thread : http://67-72chevytrucks.com/vboard/s...d.php?t=595019 72 3/4T 4X4 4" BDS Lift 33" BFG's |
|
|
|
|
10-09-2016, 12:17 PM
|
#71 |
|
Registered User
Join Date: Feb 2009
Location: Winnipeg, Manitoba
Posts: 68
|
Re: Run Away's '69 C10 LWB Project Log
Yes, the passenger side pillar is welded to that brace. All the bracing I put in place before I removed the top half of the cab from the original floor. Here's a pic:
 The drivers side A-pillar ended up having to be replaced completely (which I wasn't expecting when I braced the cab) so when the replacement pillar was lined up along the windshield area it didn't line up at the brace anymore. It didn't pull inwards from welding, it was always like that, even when it was just clamped into place. Good call on the floor though, I will probably measure the widths to confirm. The wing panel is what I call the curved inner panels with the vent holes. Moving the drivers A pillar against the brace isn't too hard, I can squeeze it together with one hand. It's clamped into place now with vice grips. Rough sketch of what I think is going on: 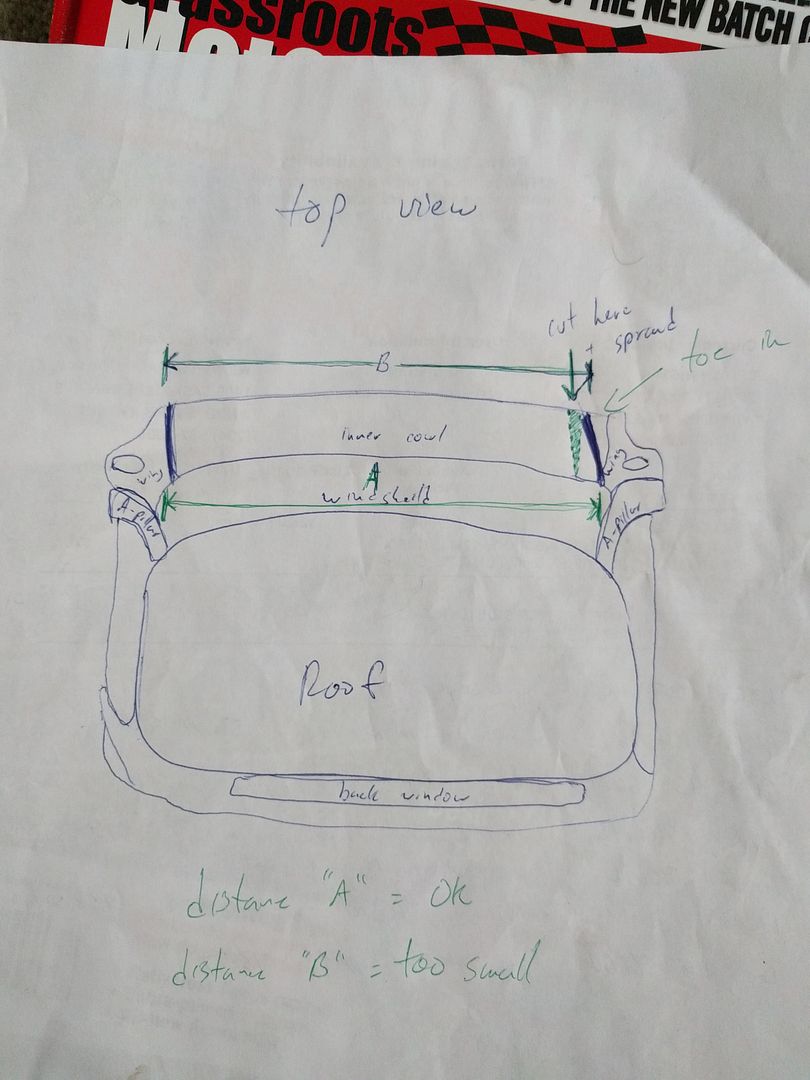
Last edited by Run Away; 10-09-2016 at 12:42 PM. Reason: added sketch |
|
|
|
|
10-09-2016, 02:48 PM
|
#72 |
|
Registered User
Join Date: Oct 2007
Location: Spanaway
Posts: 8,451
|
Re: Run Away's '69 C10 LWB Project Log
I was more concerned about the A pillar spacing but if you can pull and clamp it in place its probably not an issue.
I saw the space left on the passenger side too, although i was pretty tired when viewing, if you don't think you can re-drill the spots on just the top seam? then yea a well placed saw cut would allow you to pull that piece over (i think) then weld in a pie slice. it would be nice if you could just pull it over as is and clamp the inner and outer together and be done with it.
__________________
Mike. Swamp Rat build thread : http://67-72chevytrucks.com/vboard/s...d.php?t=595019 72 3/4T 4X4 4" BDS Lift 33" BFG's |
|
|
|
|
10-10-2016, 01:54 AM
|
#73 |
|
Registered User
Join Date: Feb 2009
Location: Winnipeg, Manitoba
Posts: 68
|
Re: Run Away's '69 C10 LWB Project Log
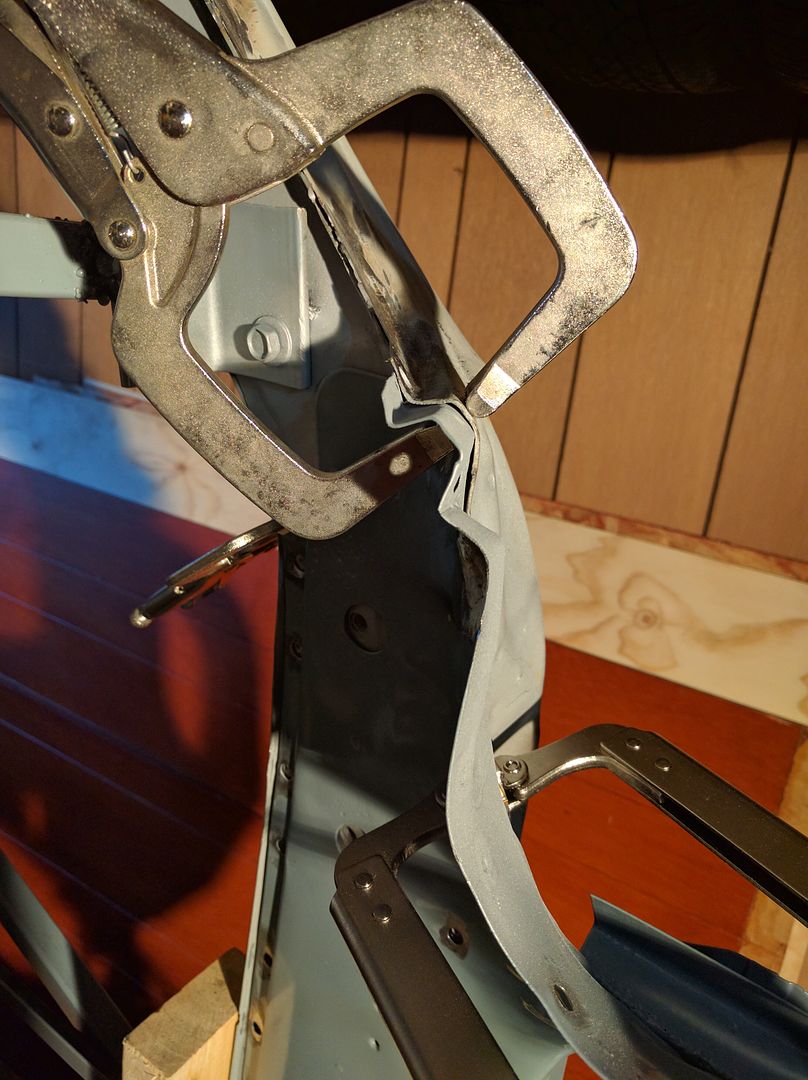
Well, I don't know what happened overnight, but everything fits much better now. Maybe I was just too tired yesterday and needed a break.
Photographic evidence below. Note the round file and screwdriver holding the middle centered and clamps on both sides holding everything together. 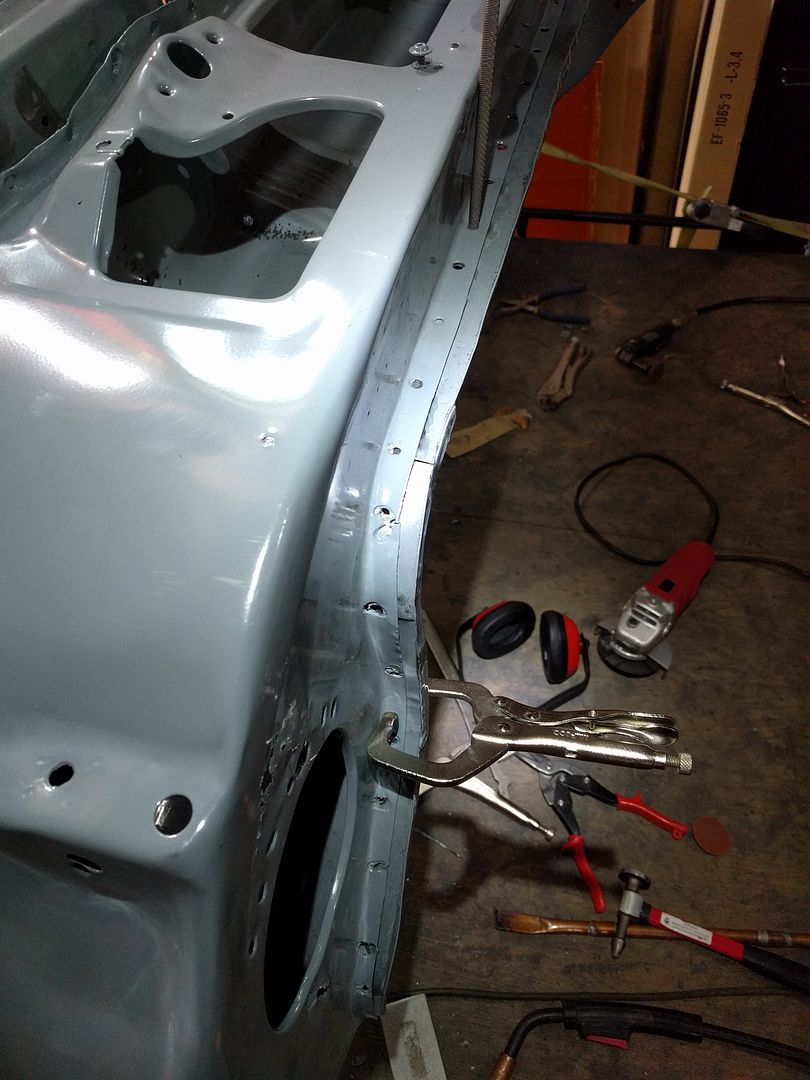 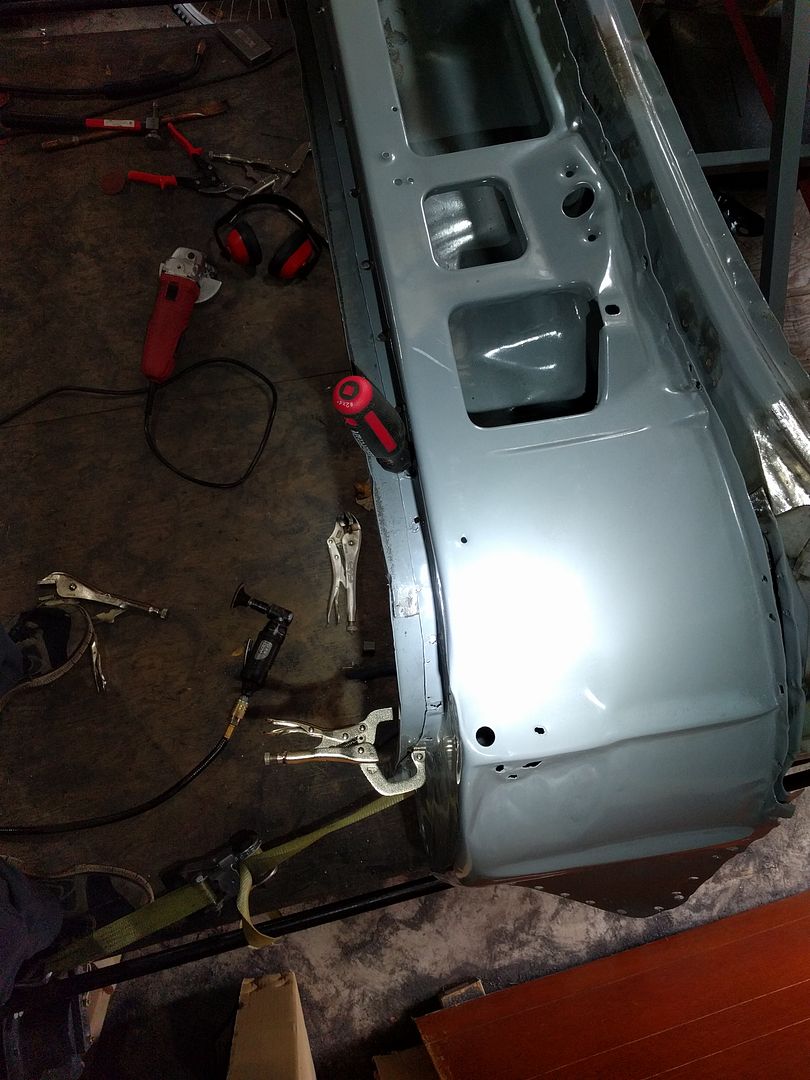 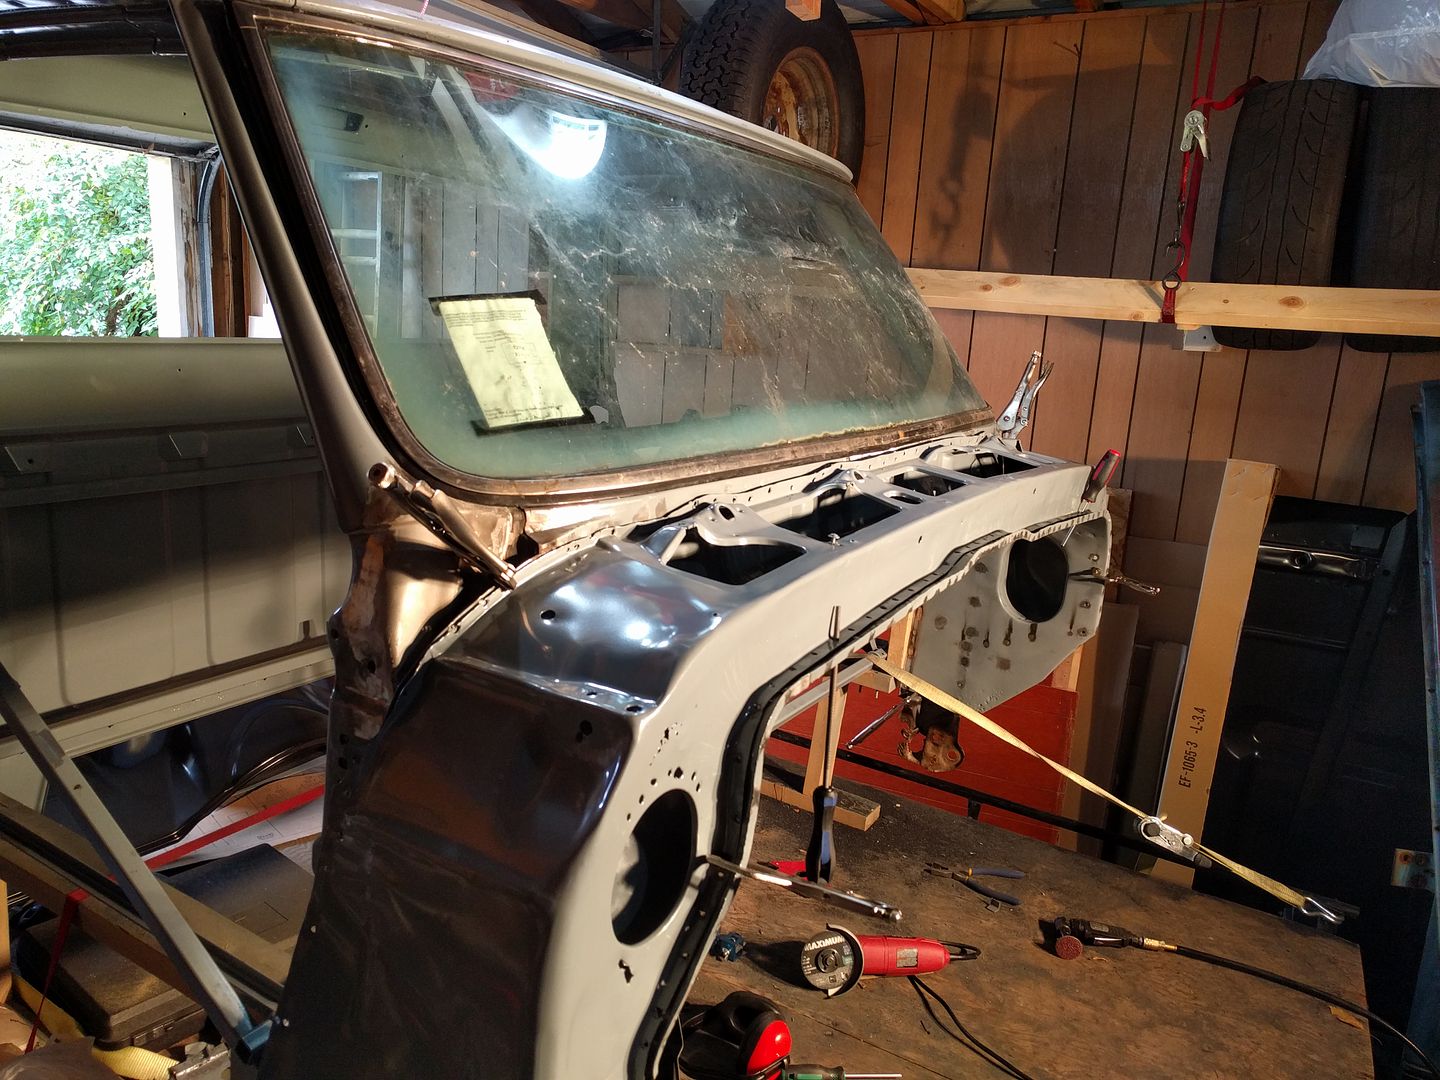 Also had my dad come over and help me set the windshield back in place to make sure it still fits. Didn't set it in all the way (old gasket that I cut, trim still in) but I don't see any issues. I do think it's maybe time for a new windshield, the edges of this one are pretty clouded. Rinsed the rust converter off these guys. Not sure I like how it worked. Dug out an old can of POR15 and gave everything a coat. 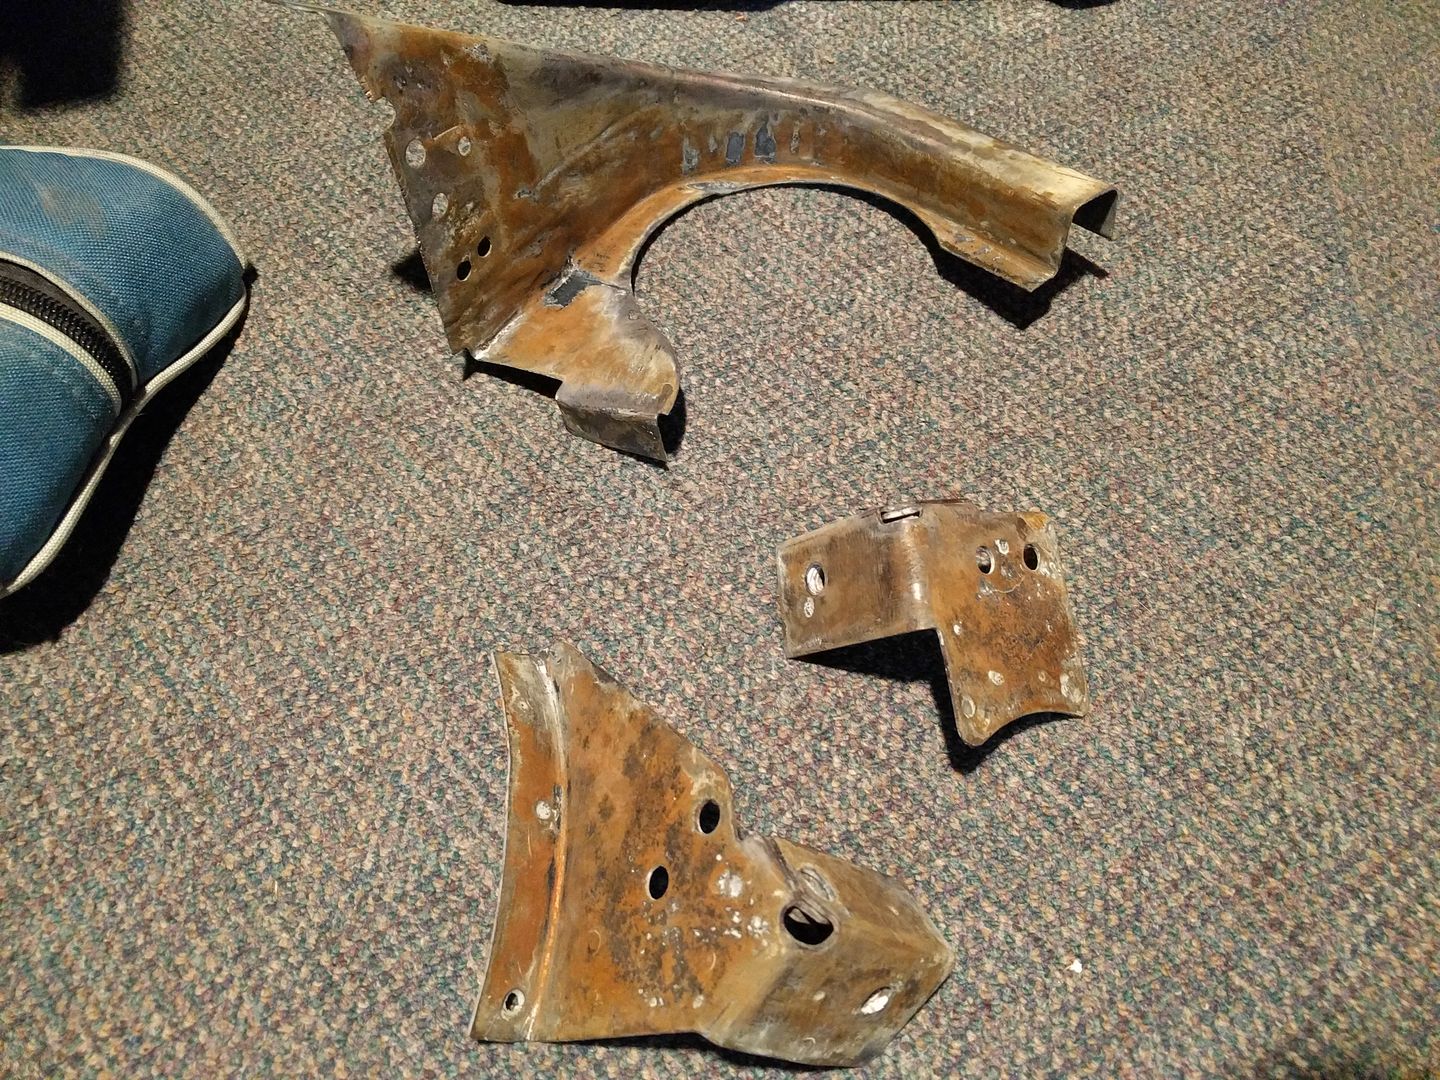 Cleaned up the underside of the dash and all the inner cowl areas that will be inaccessible once the cowl in on and painted it all too. 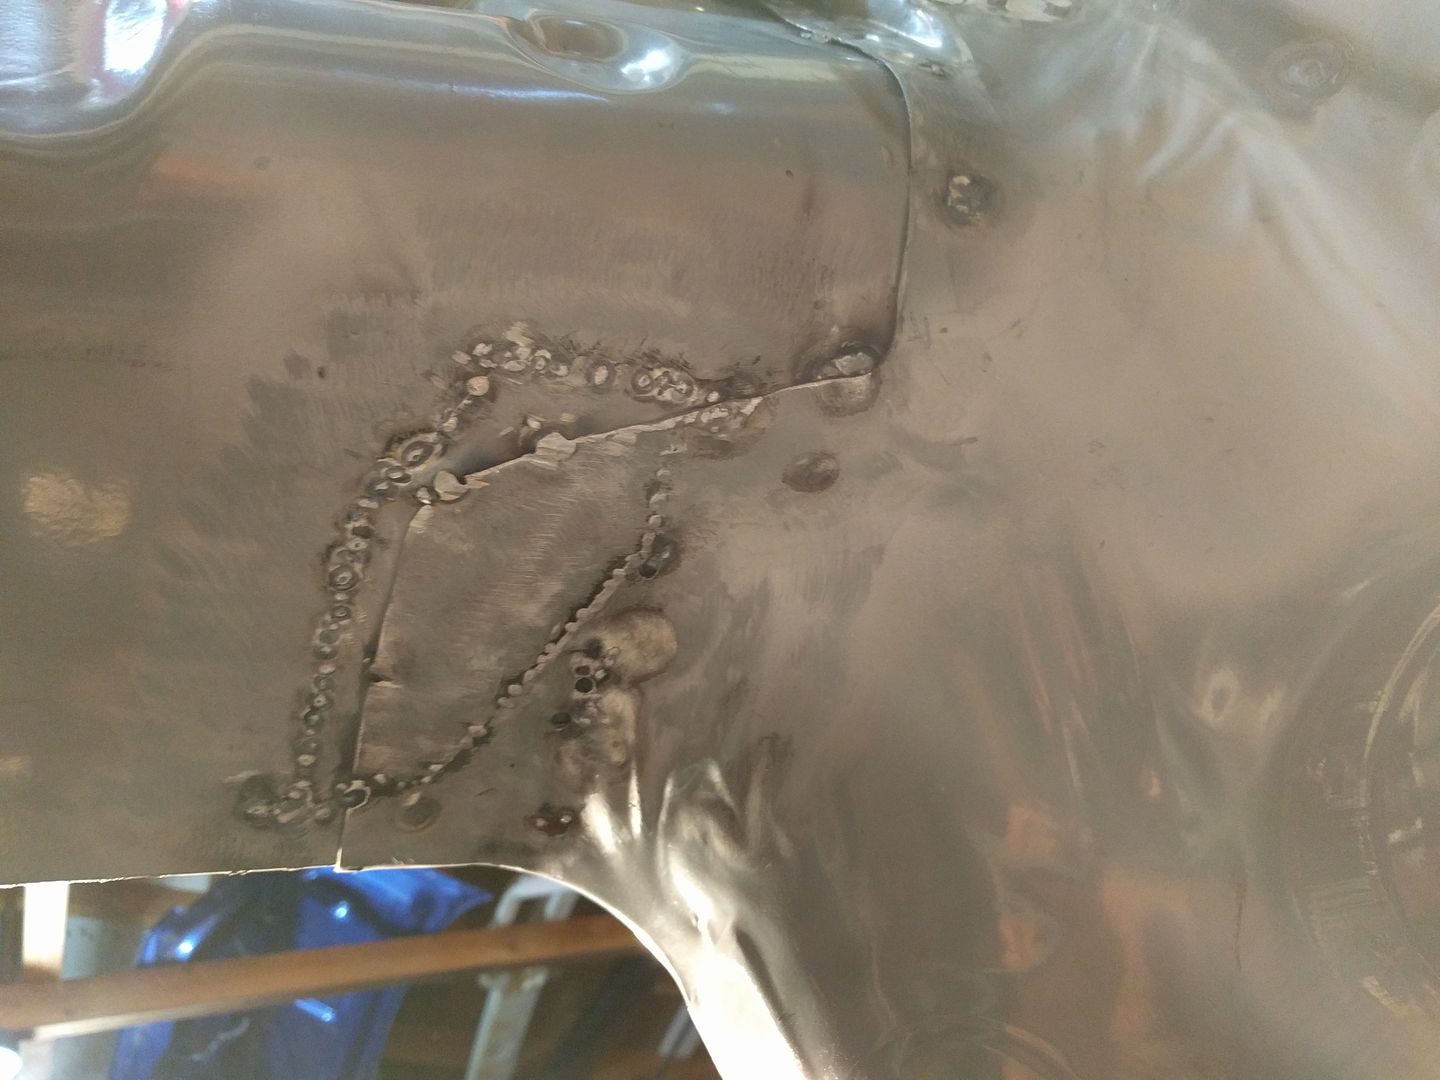 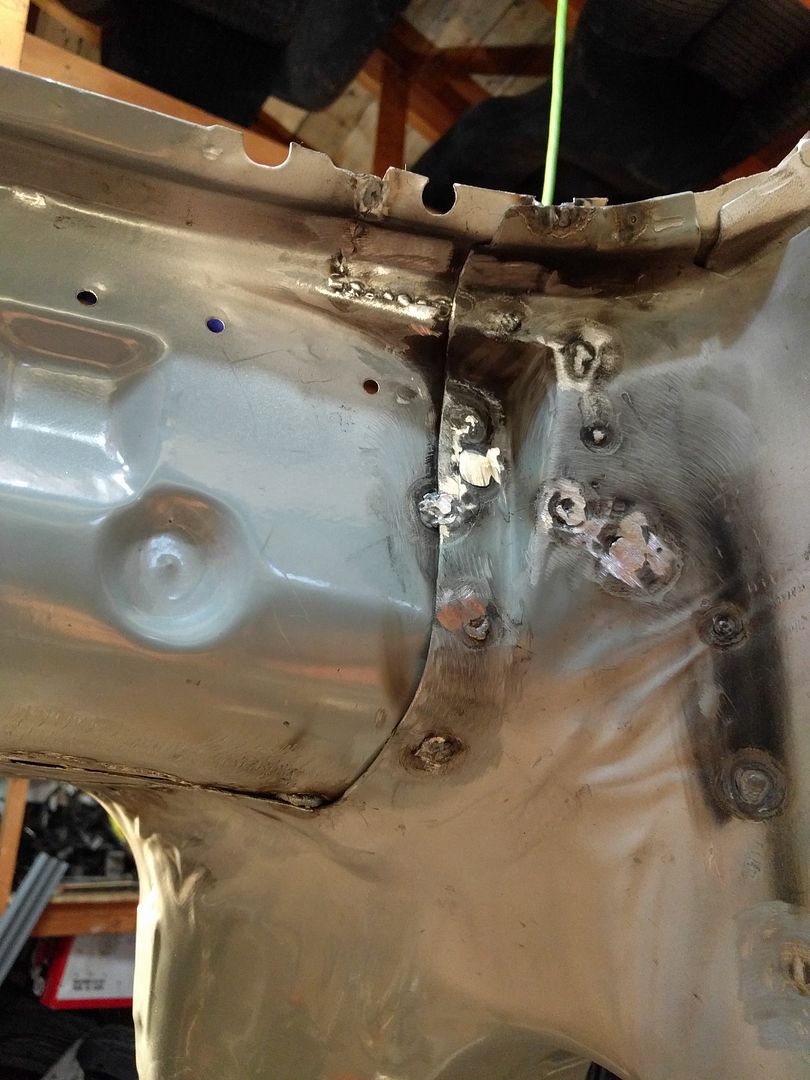 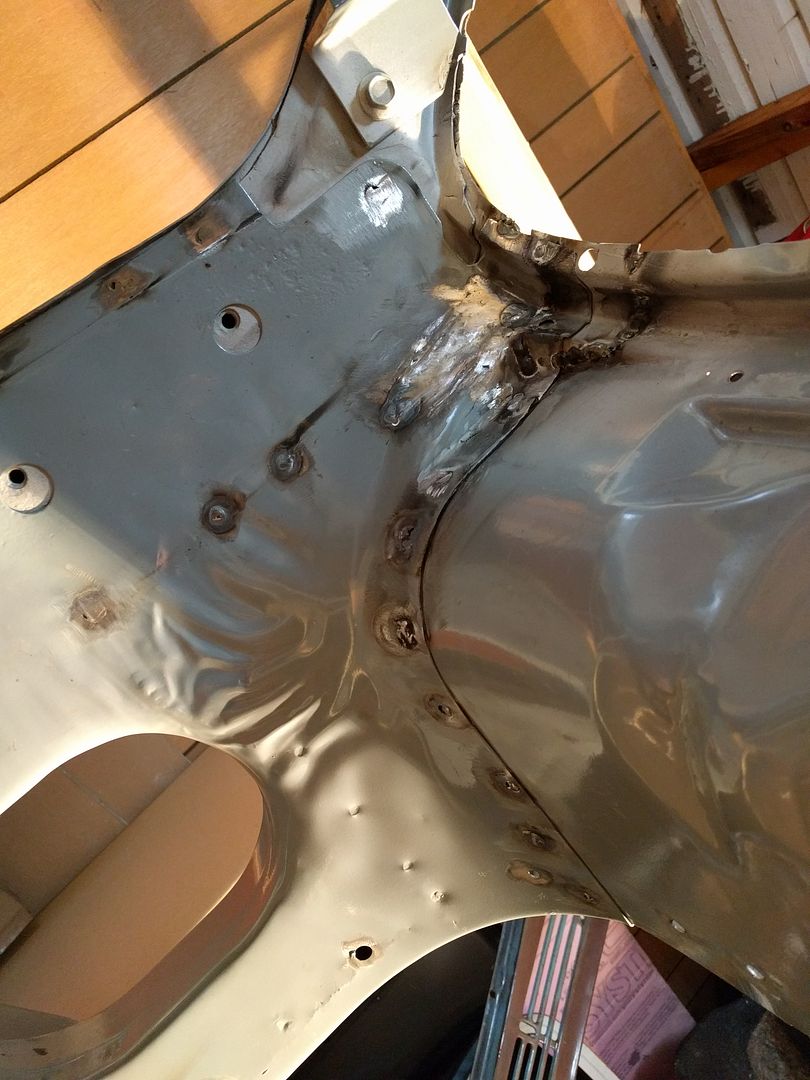 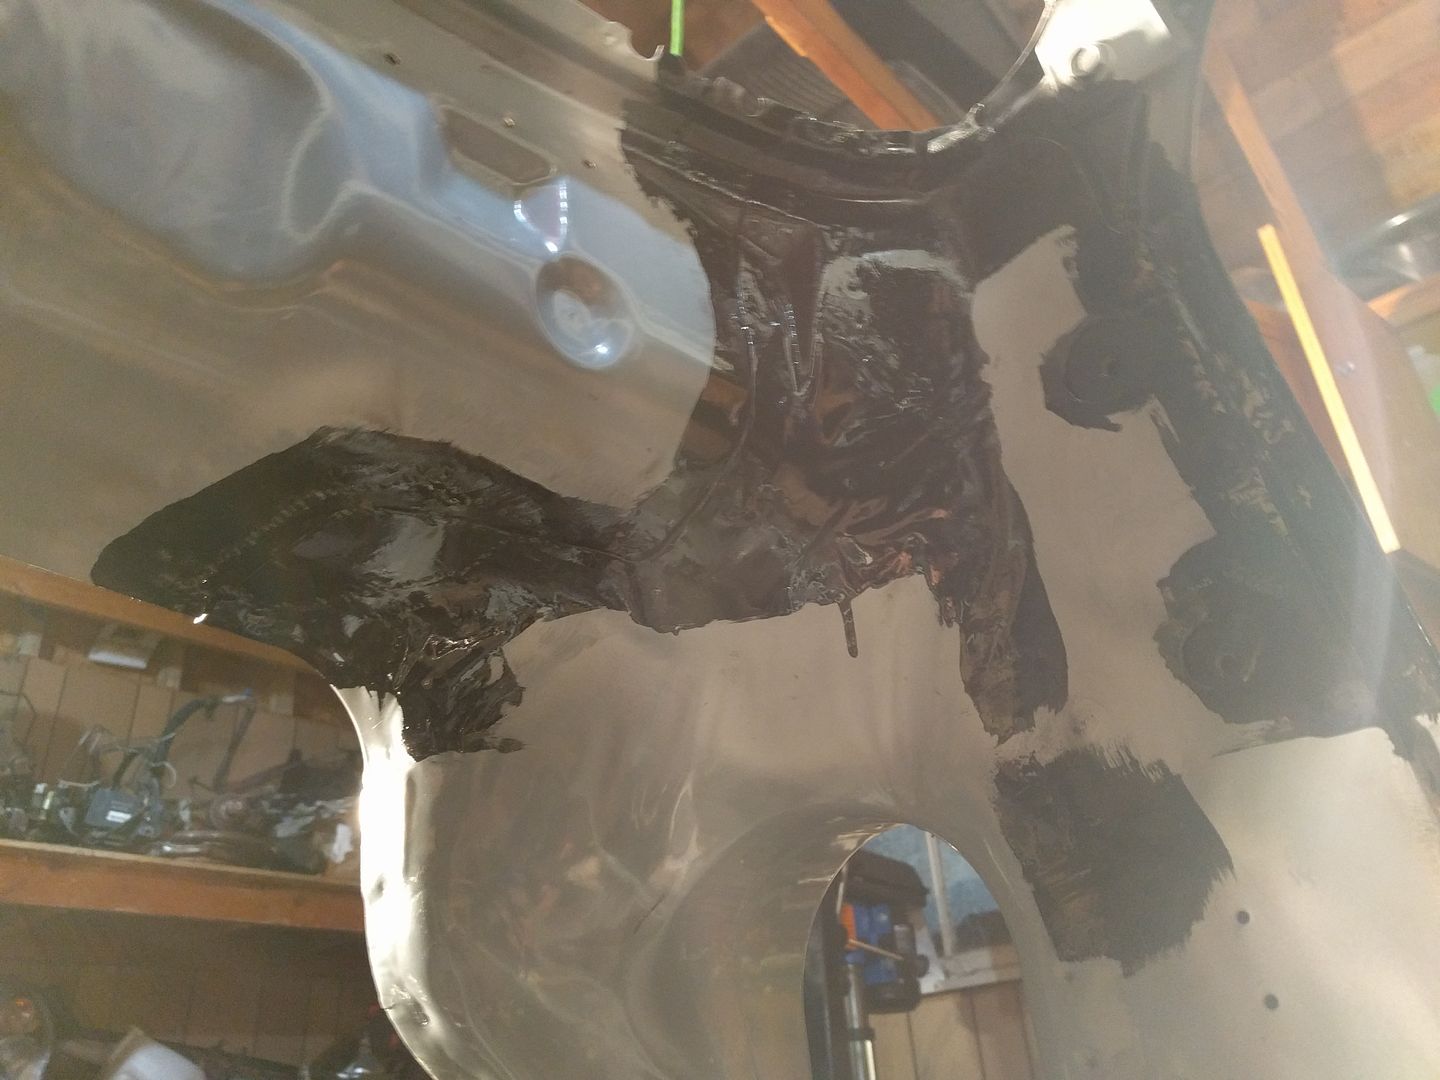 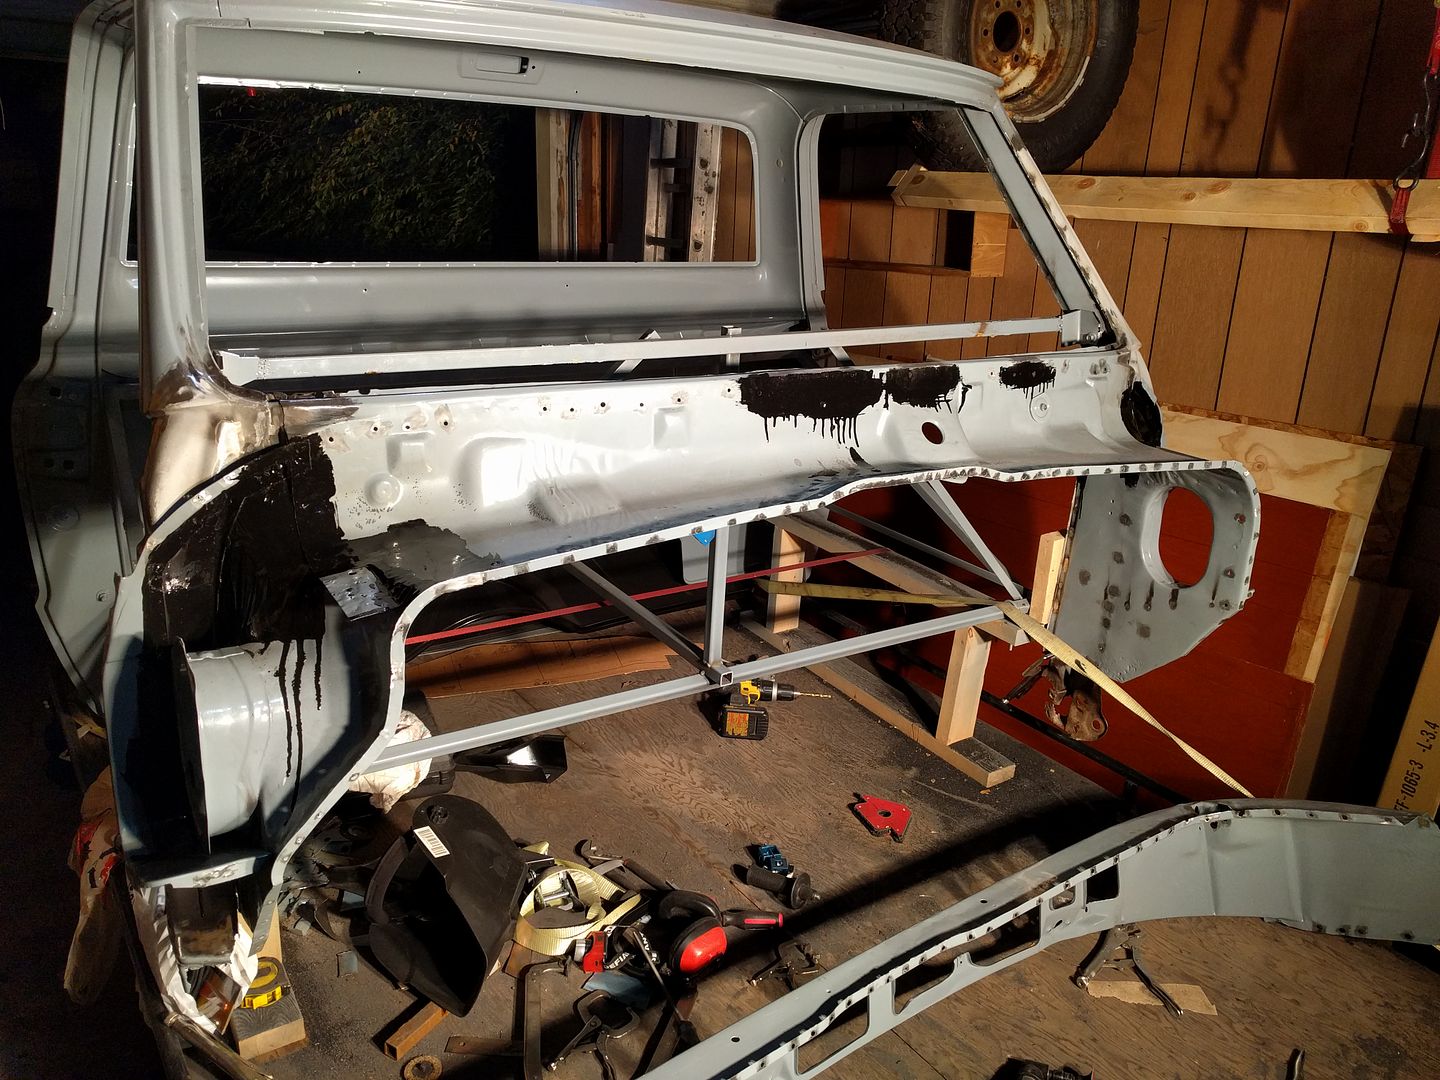 Tomorrow is Thanksgiving, so I'll be able to put a bit more time into it, maybe. Going to add some seam sealer to the inside of the cowl and weld the supports in. I might cut and try to spread the inner cowl still as an extra 1/4" would still make things fit better. |
|
|
|
|
10-11-2016, 03:34 AM
|
#74 |
|
Registered User
Join Date: Oct 2007
Location: Spanaway
Posts: 8,451
|
Re: Run Away's '69 C10 LWB Project Log
Hey glad to see a new day and clear head made for better progress! Don't forget to add seam sealer on the outer seams of the inner cowl too before welding on the outer cowl, also the seams at the bottom of the windshield.
__________________
Mike. Swamp Rat build thread : http://67-72chevytrucks.com/vboard/s...d.php?t=595019 72 3/4T 4X4 4" BDS Lift 33" BFG's |
|
|
|
|
10-11-2016, 07:14 AM
|
#75 |
|
Registered User
Join Date: Jun 2015
Location: Melbourne, Australia
Posts: 231
|
Re: Run Away's '69 C10 LWB Project Log
Great progress.
__________________
John 69 c20, 396, th400, dana60, ps, ac |
|
|
|
|
| Bookmarks |
|
|


 Linear Mode

