
|
 10-26-2016, 04:07 PM
|
#776 |
|
Registered User
Join Date: Mar 2011
Location: Arizona City
Posts: 353
|
Re: 55 Wagon Progress
Awesome! Hoping to read in detail! I am a amateur and am getting ready to do my first exterior panel replacement on a rather beat up 57 Chevy.
__________________
I pity the fool with only 2 headlights! 
|

|

|
|
10-27-2016, 07:42 AM
|
#777 |
|
Registered User
Join Date: Jan 2013
Location: Leonardtown, MD
Posts: 1,633
|
Re: 55 Wagon Progress
Thanks!
Here's our paint sample with some sunlight added. The incremental lines to make the radius really show up, but quite a bit of pop in the sunlight.. https://www.youtube.com/watch?v=lAZFi78fngA
__________________
Robert |
|
|
|
|
10-27-2016, 08:14 PM
|
#778 |
|
Registered User
Join Date: Oct 2016
Location: Australia
Posts: 1
|
Re: 55 Wagon Progress
Hi Robert....I've only recently been lucky enough to have stumbled onto your post's, & are enjoying every single one.
This question is back-tracking a bit, as it relates relates to cutting to open up particularly the door & trunk gaps. Do you mark your actual cutting line at 5/32", or do you cut a little more to allow for grinding the welds. So the finished gap size is at 5/32" Thanks Brett |
|
|
|
|
11-12-2016, 12:23 AM
|
#779 |
|
Registered User
Join Date: Jan 2013
Location: Leonardtown, MD
Posts: 1,633
|
Re: 55 Wagon Progress
Brett, IIRC, it was just a touch more.
Sorry for the lack of posts, we've been cleaning the shop for the 2016 MD Tommasini Metalshaping Class. Here is a new sand bag we made up for the class, made from a full cow hide, it measures 40" x 24" x 4" high. We had some loose leather left over, so the top was wrapped to provide additional protection from any sharp metal... This uses just over four 5 gallon buckets of saved blast media to fill the bag, so we don't need any holes letting all that pour out on the floor! 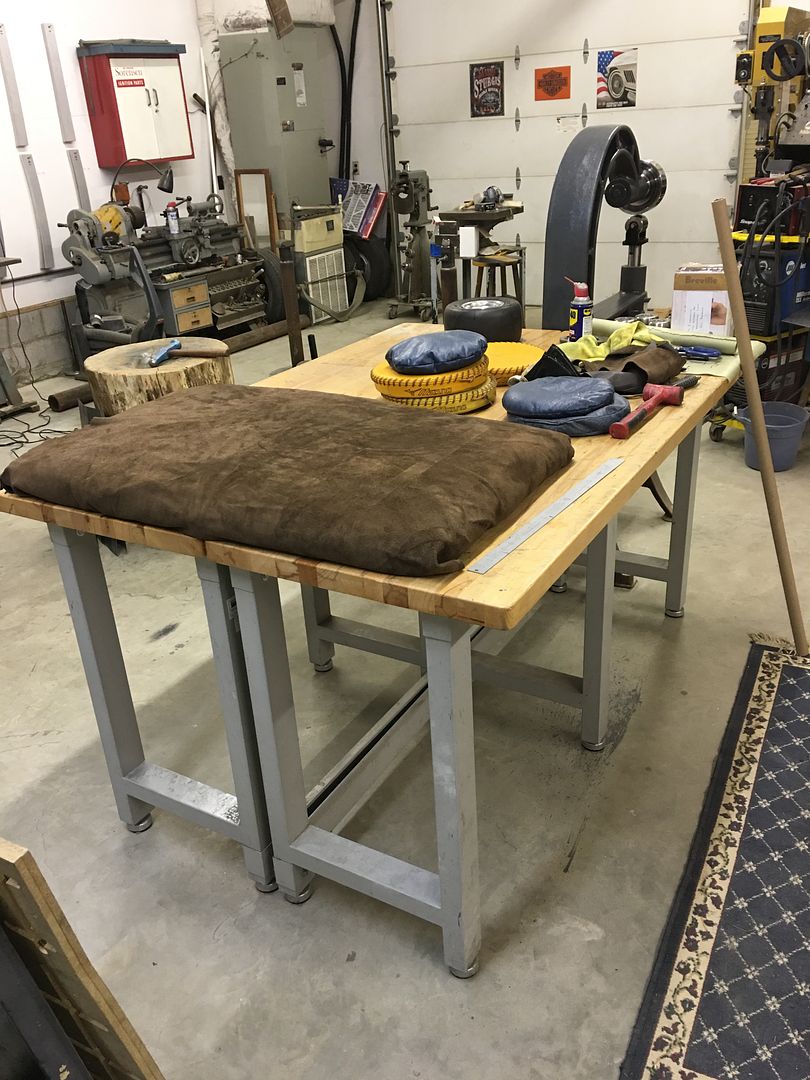 Some of the projects include duplicating these repro BMW saddlebags in aluminum, and this Mopar hood in aluminum...... 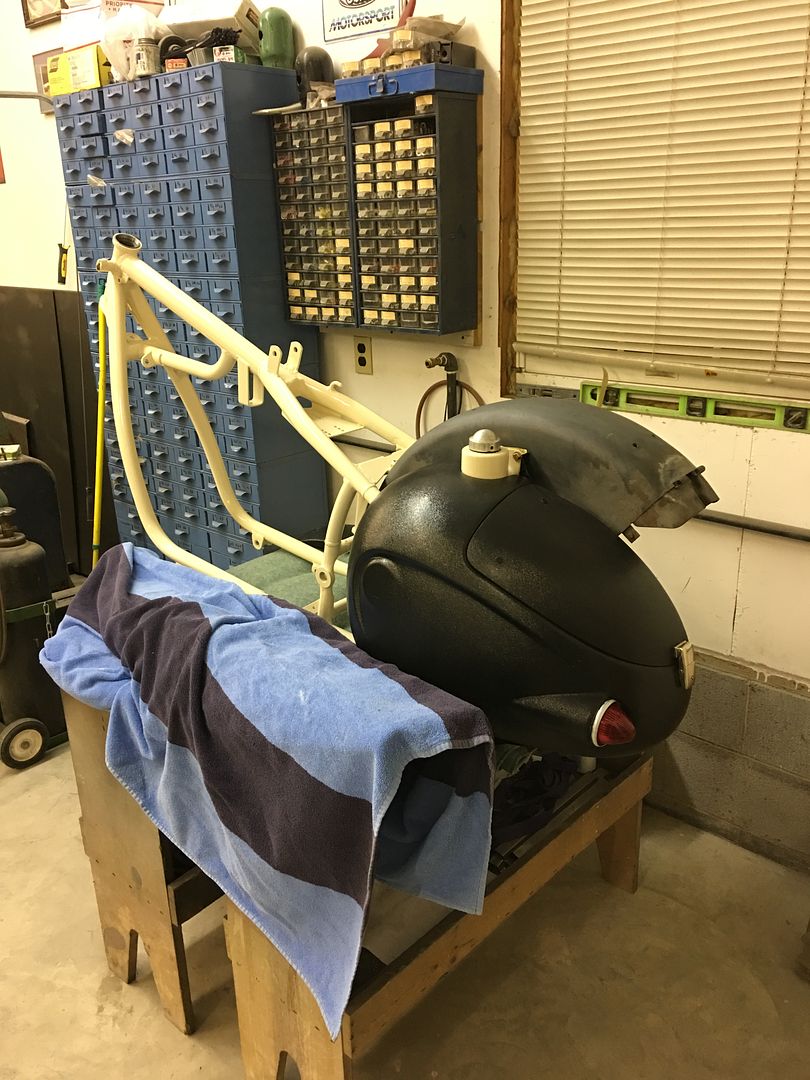 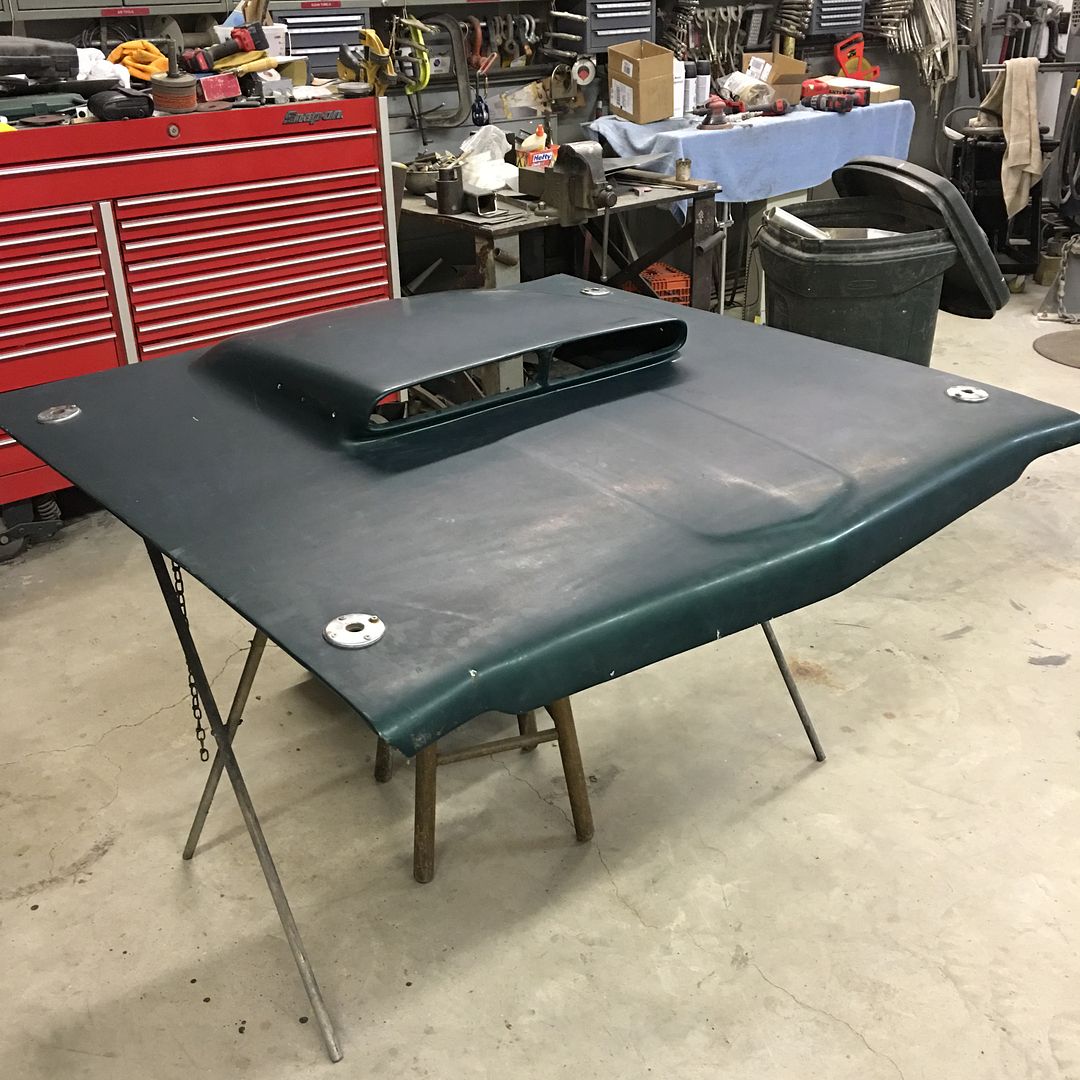 Here Peter shows using the stump for tuck shrinking 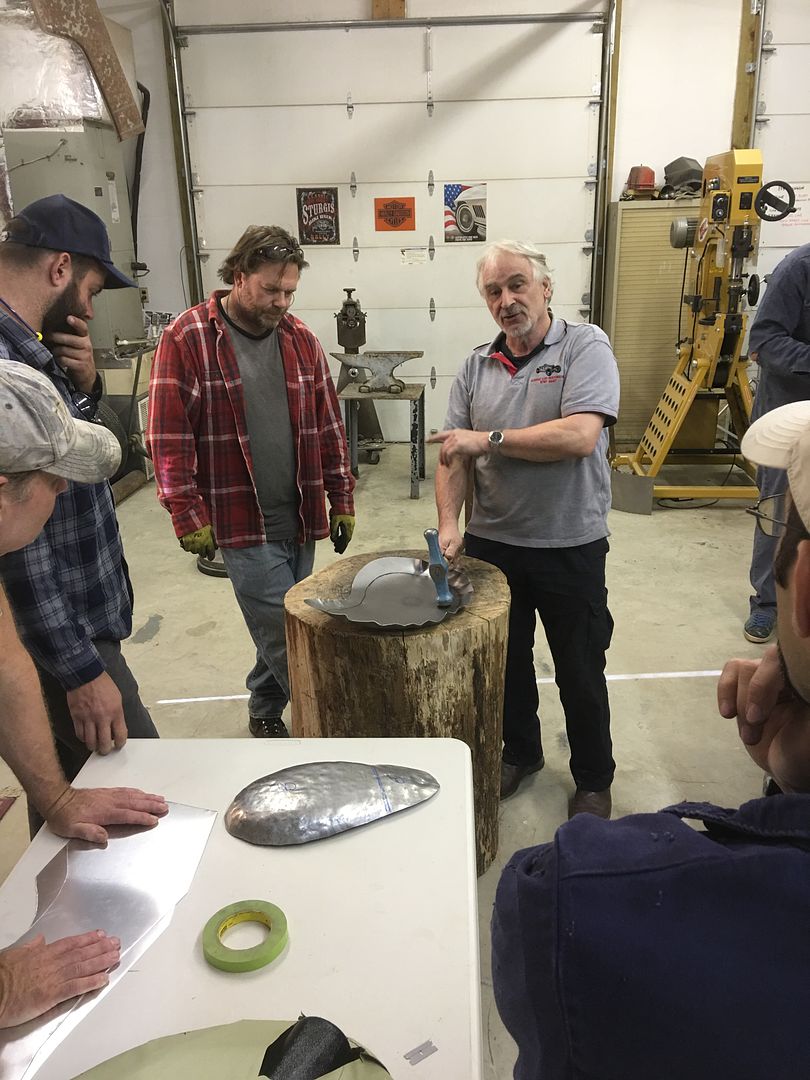 Here Peter modifies the heel of a ball peen hammer for less marking while tuck shrinking... 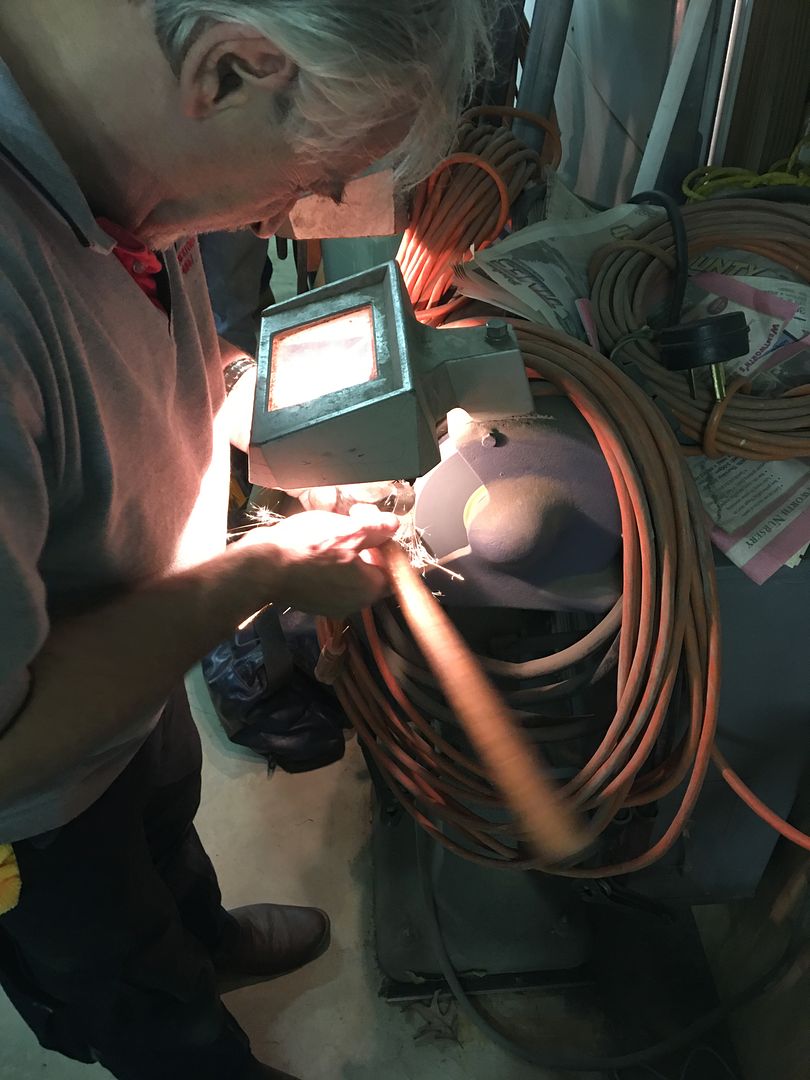 Here it is in use.... https://www.youtube.com/watch?v=plpfX1aPAI0 Duplicating the hood.... 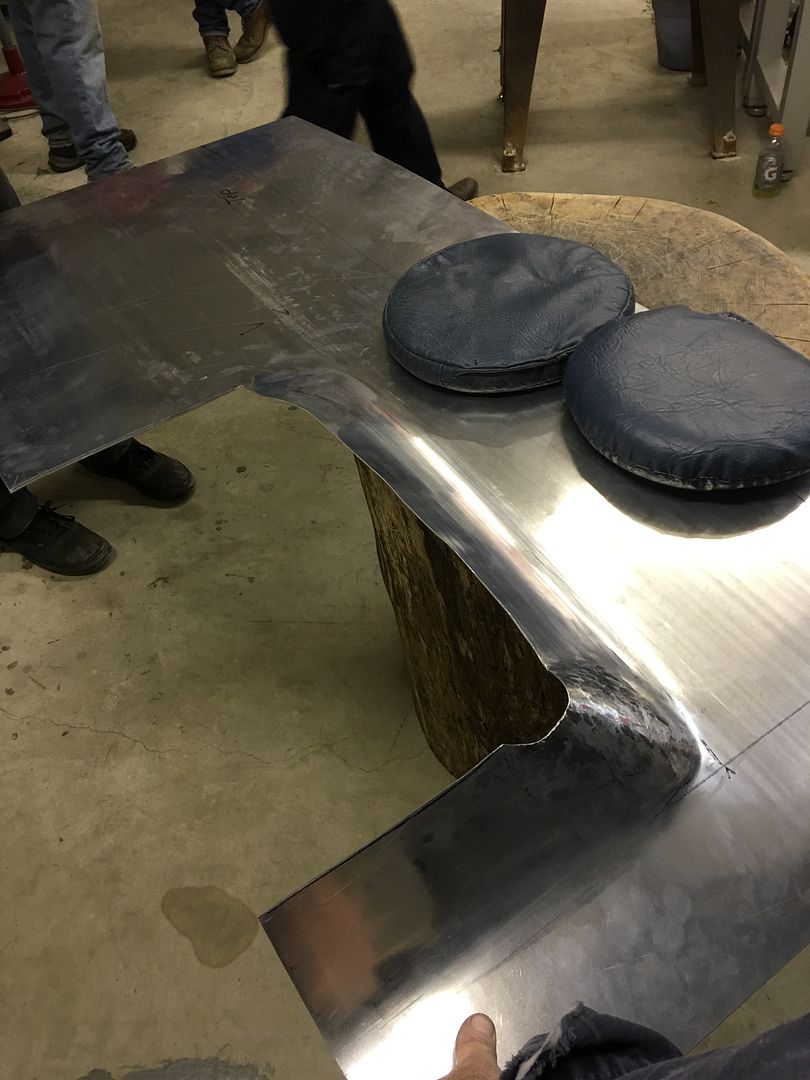 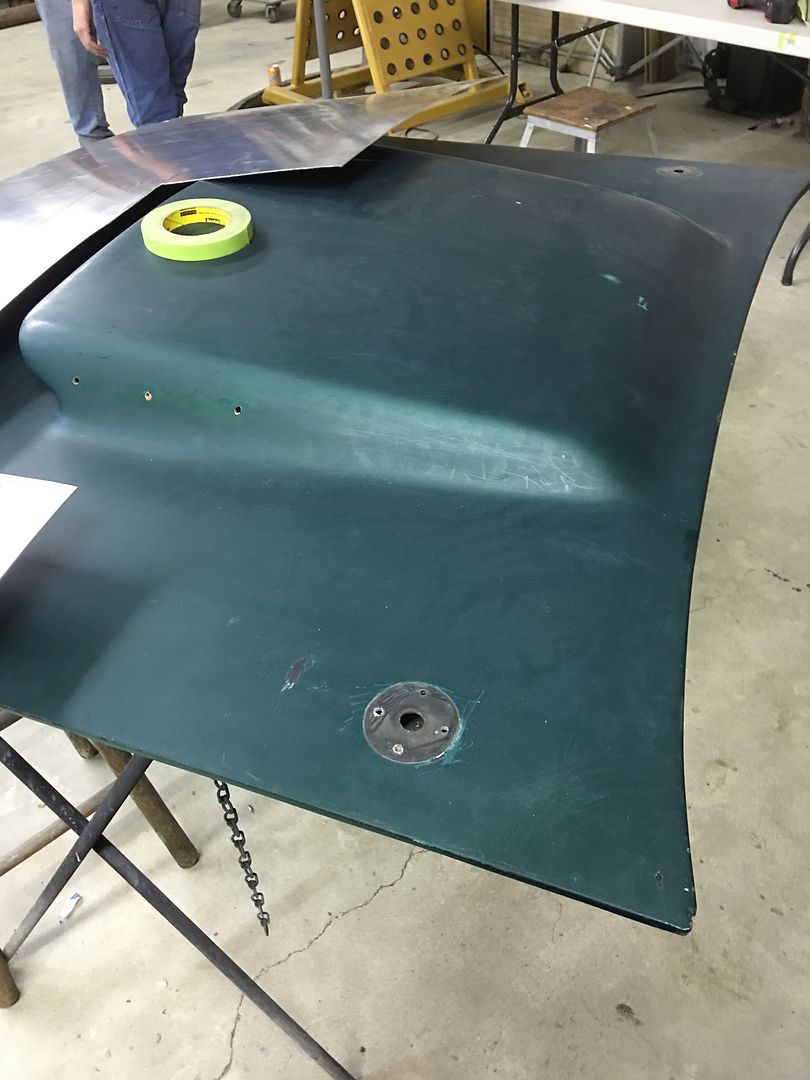  A local source was used to CNC a template for bead detail on some Model A p/u bedsides.... 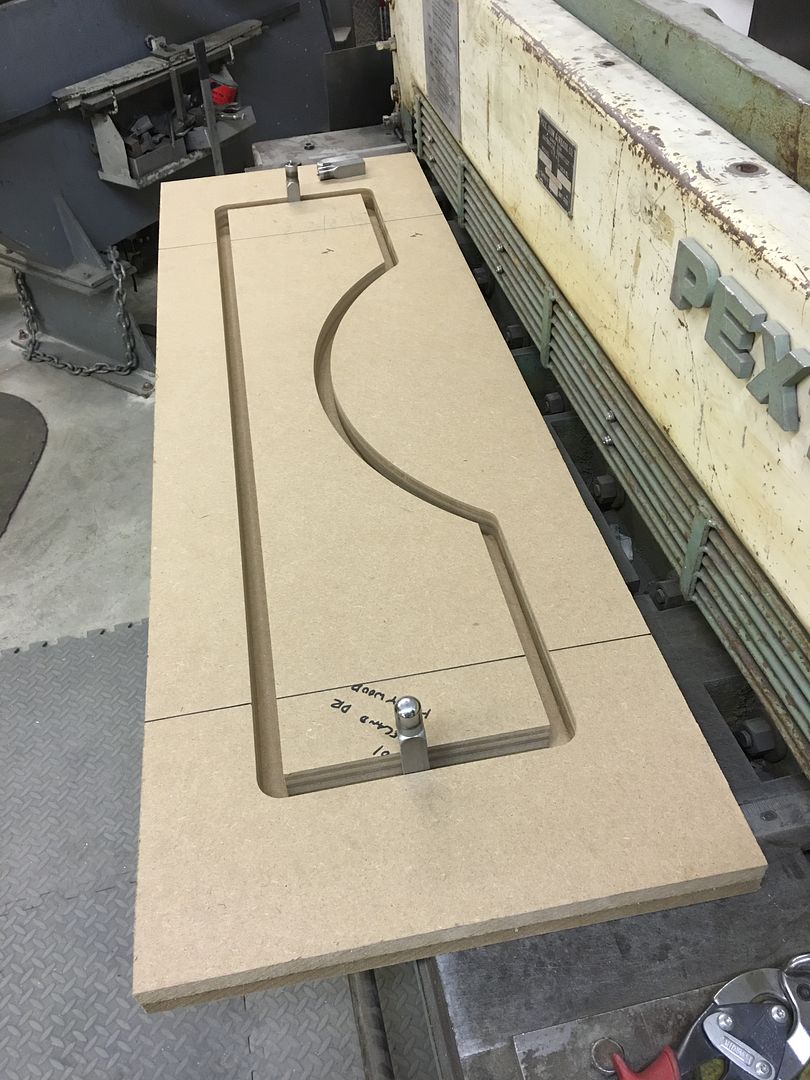 Bead added.... 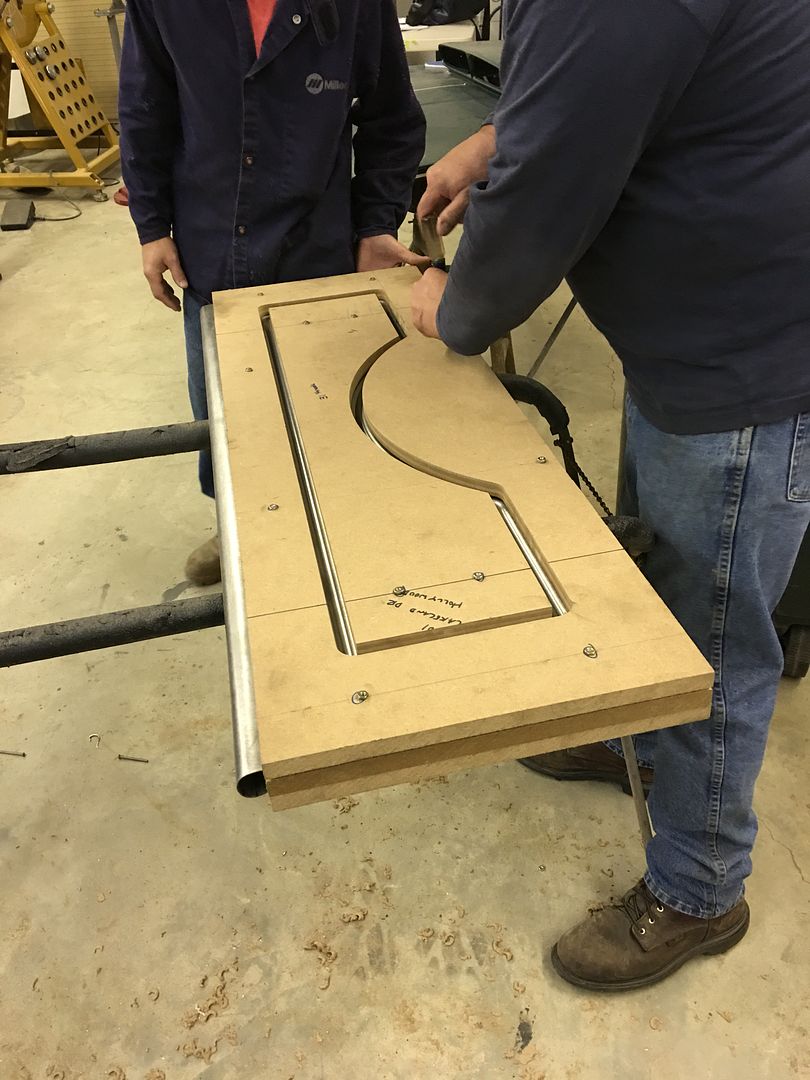 Motion picture version: https://www.youtube.com/watch?v=CSD_RUh6bMg 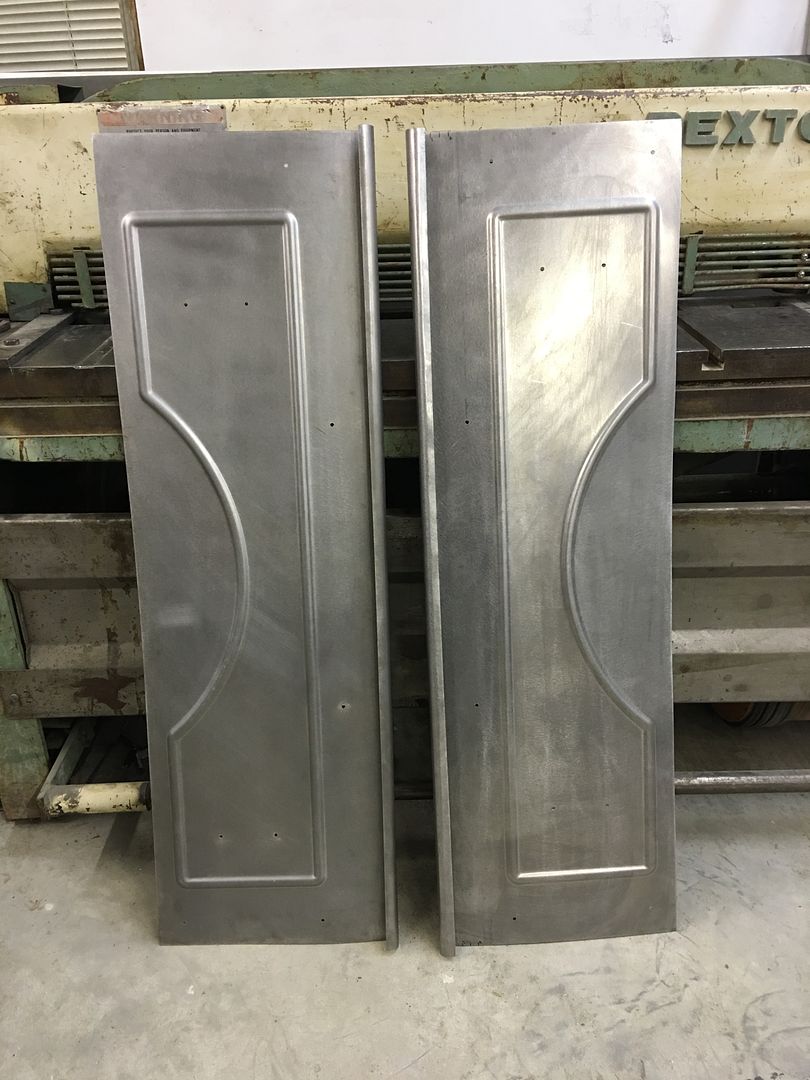 Close-ups of the results... 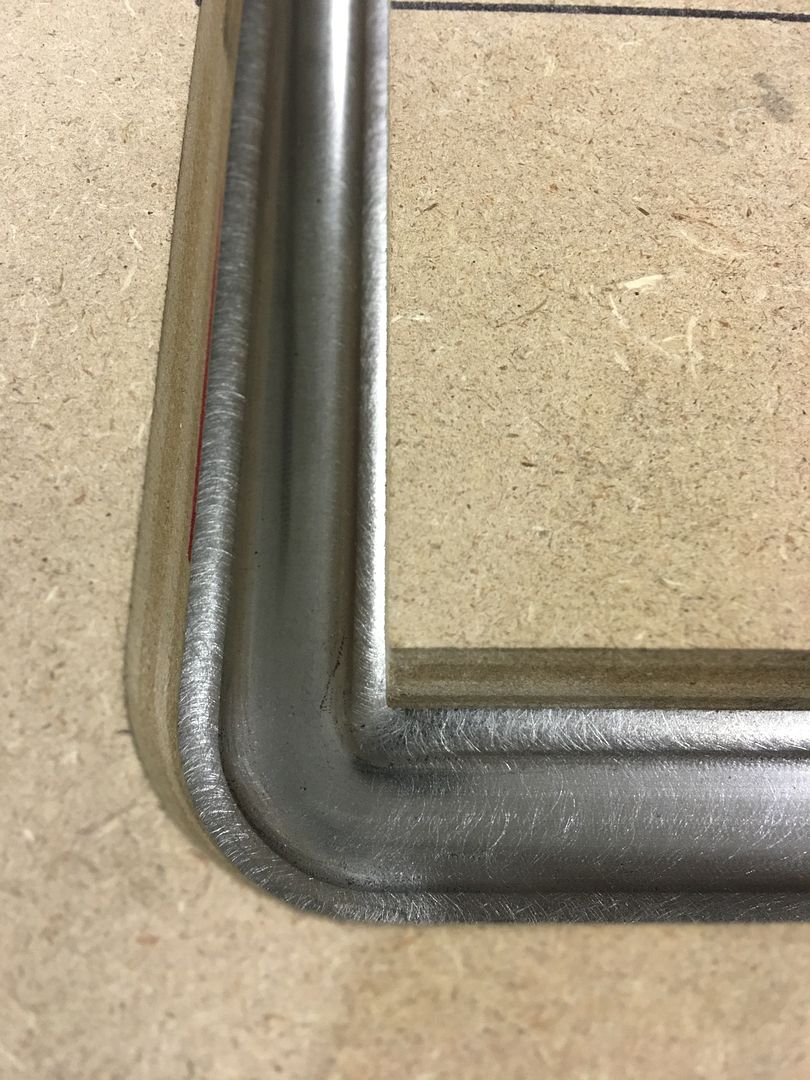 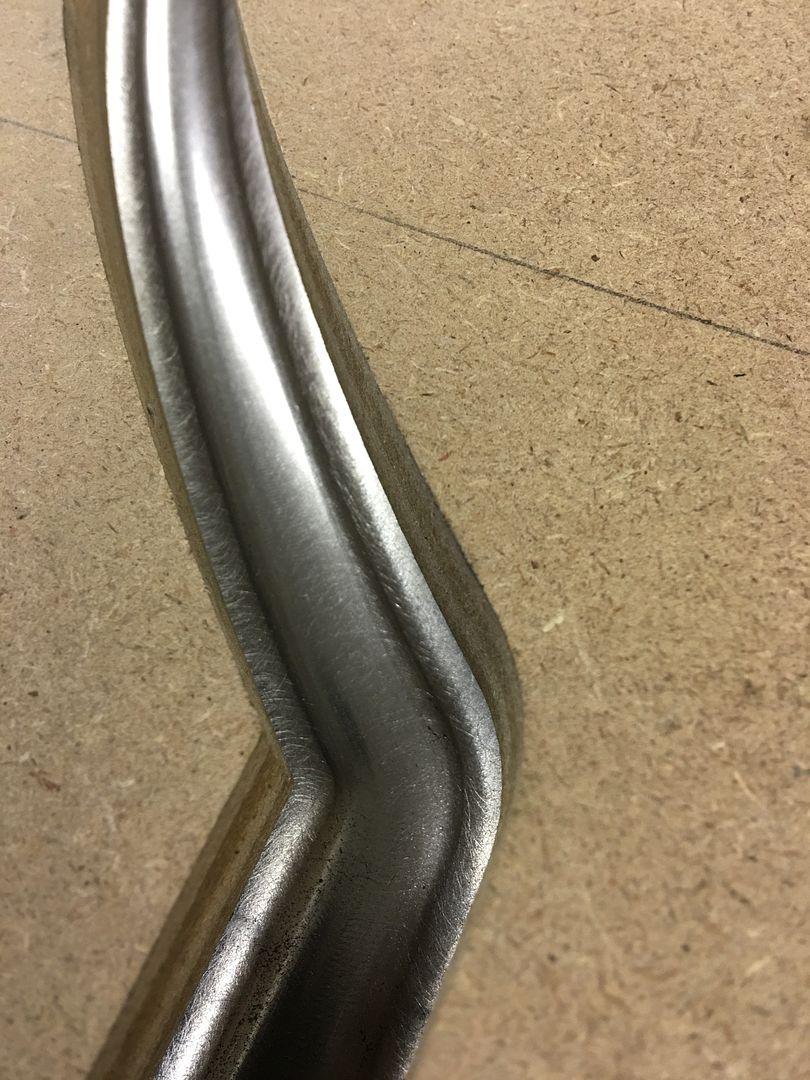 1937 Dodge coupe door repairs... the lower inner and lower door skins are fabricated... 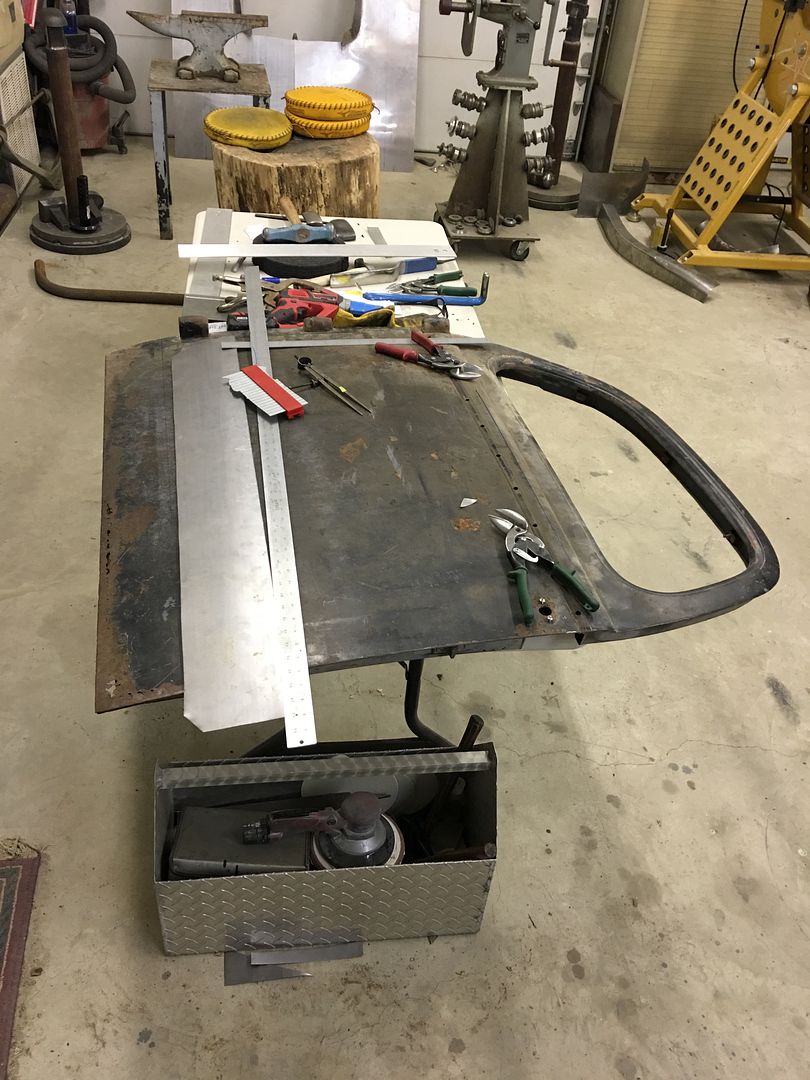 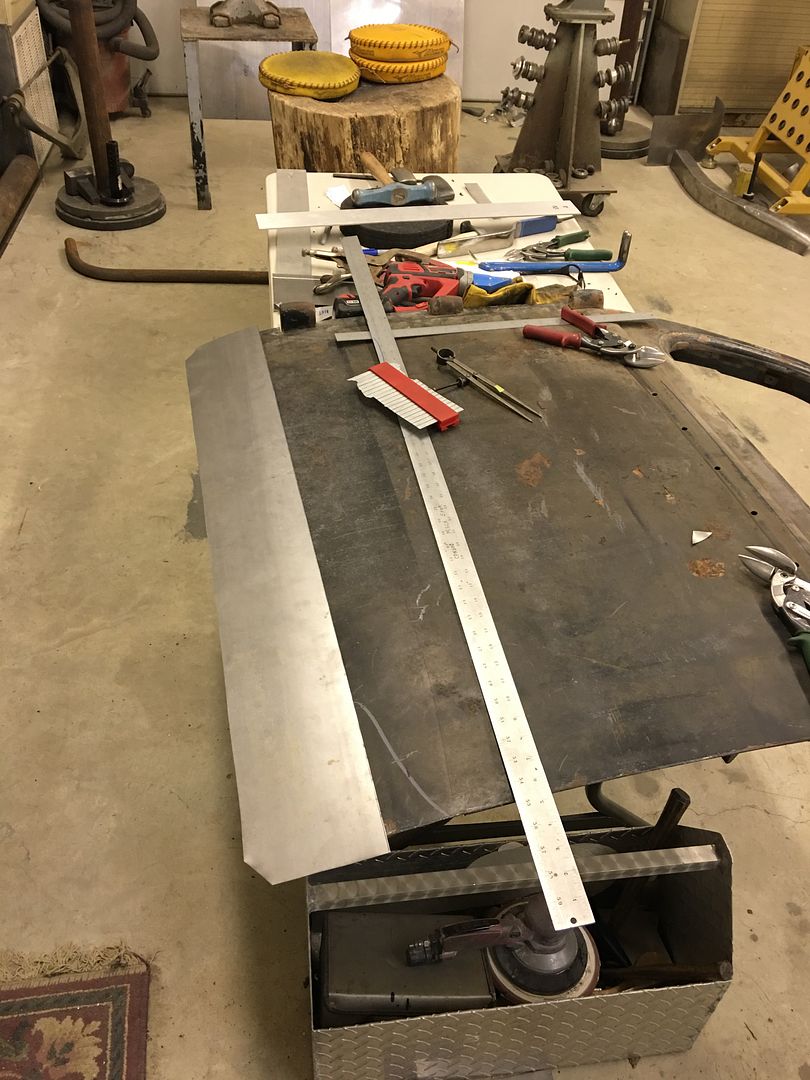 A complex architectural piece that was shrunk, stretched, planished, and reverses added, all with the same hammer... 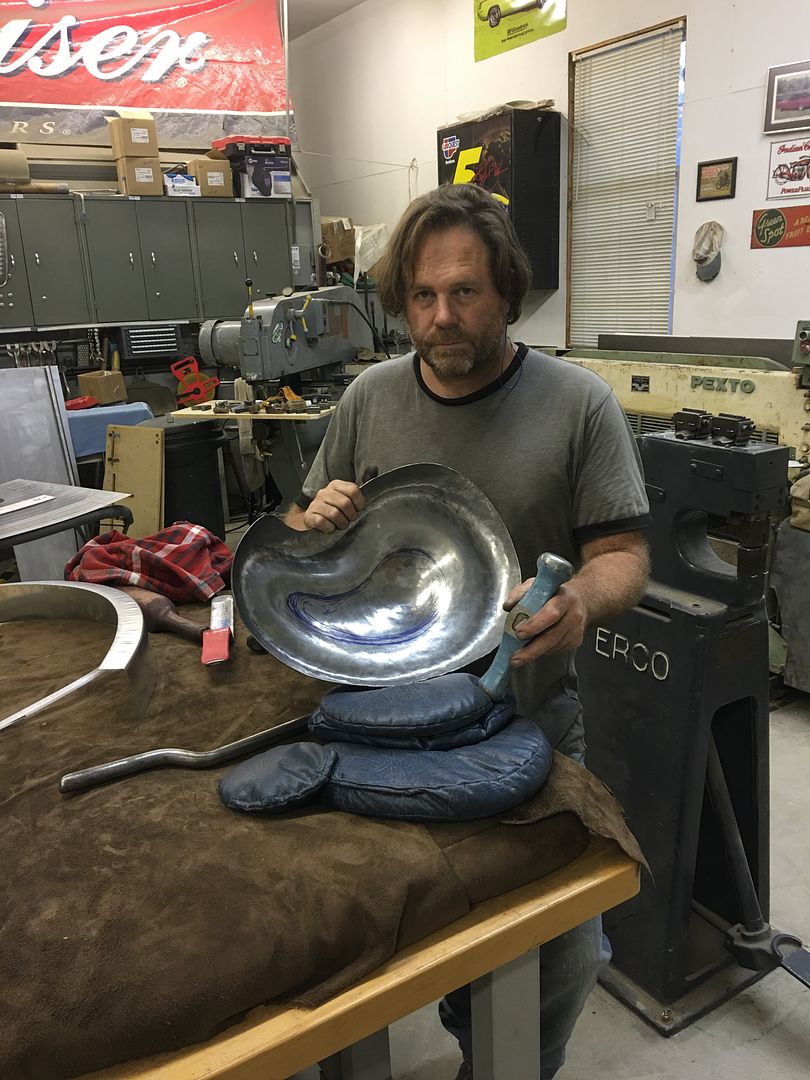 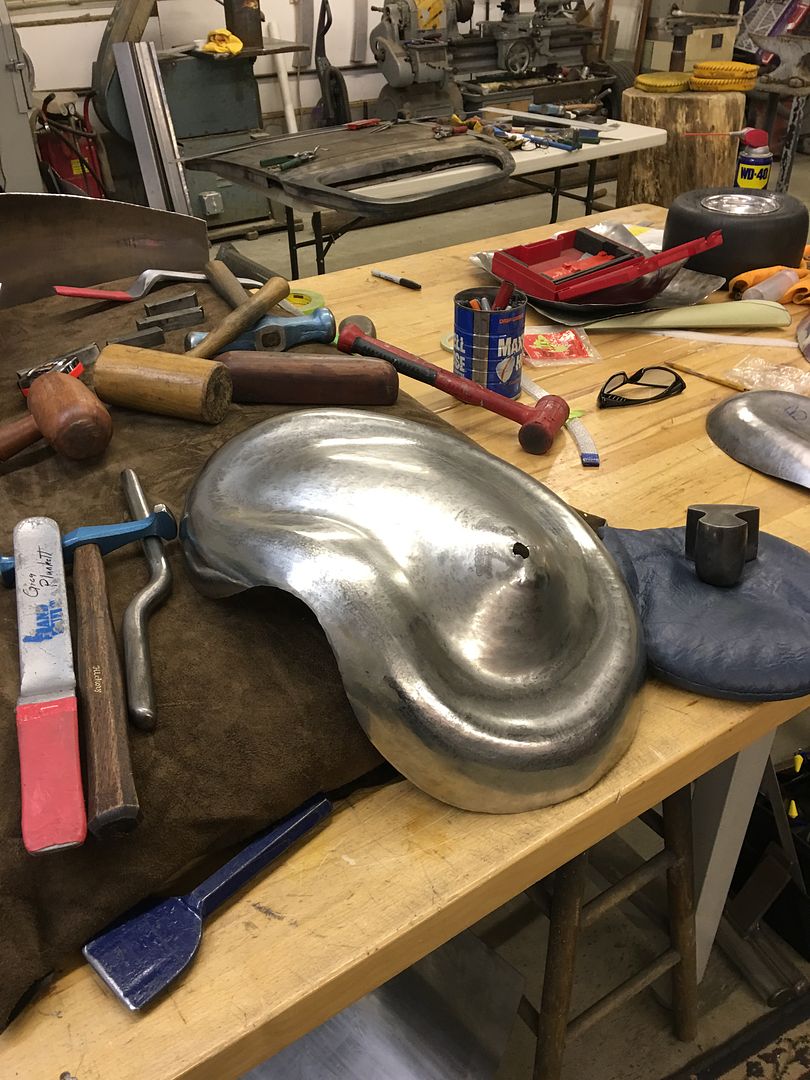 Saddle bags in process... https://www.youtube.com/watch?v=Fnapwrq0lzw after wheeling... 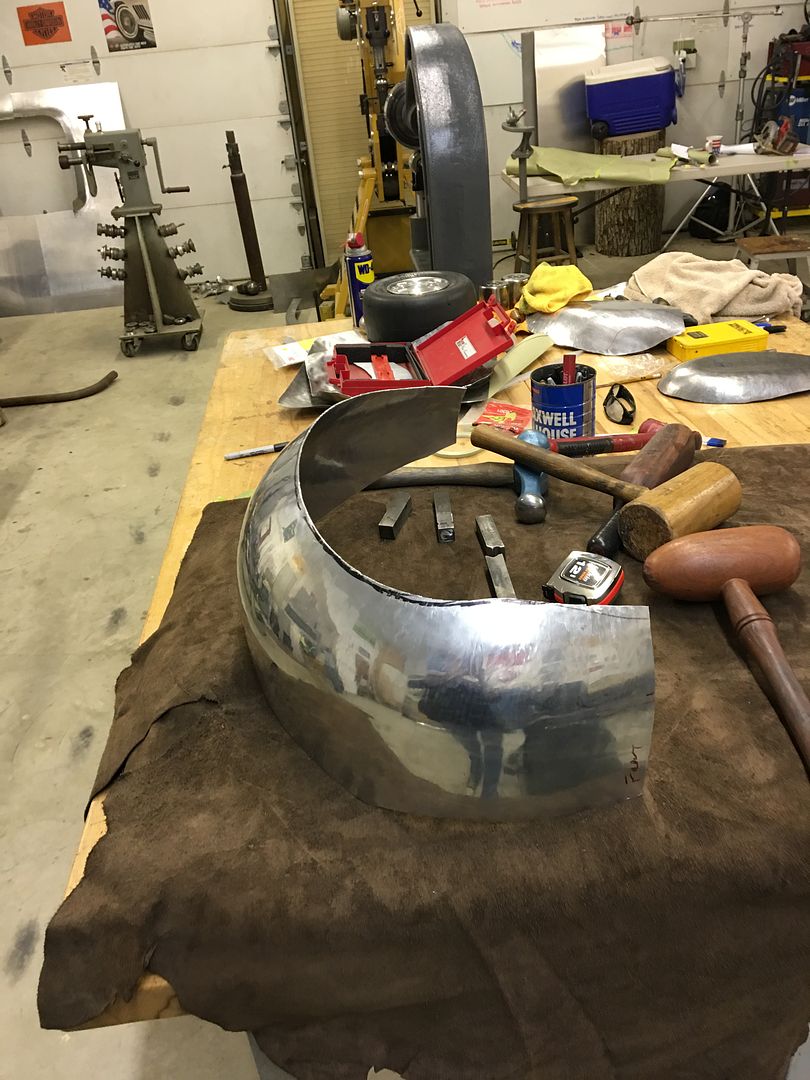 Some other efforts of shrinking, blocking, and planishing in making a fender profile and rear corner of a T-bucket in aluminum... 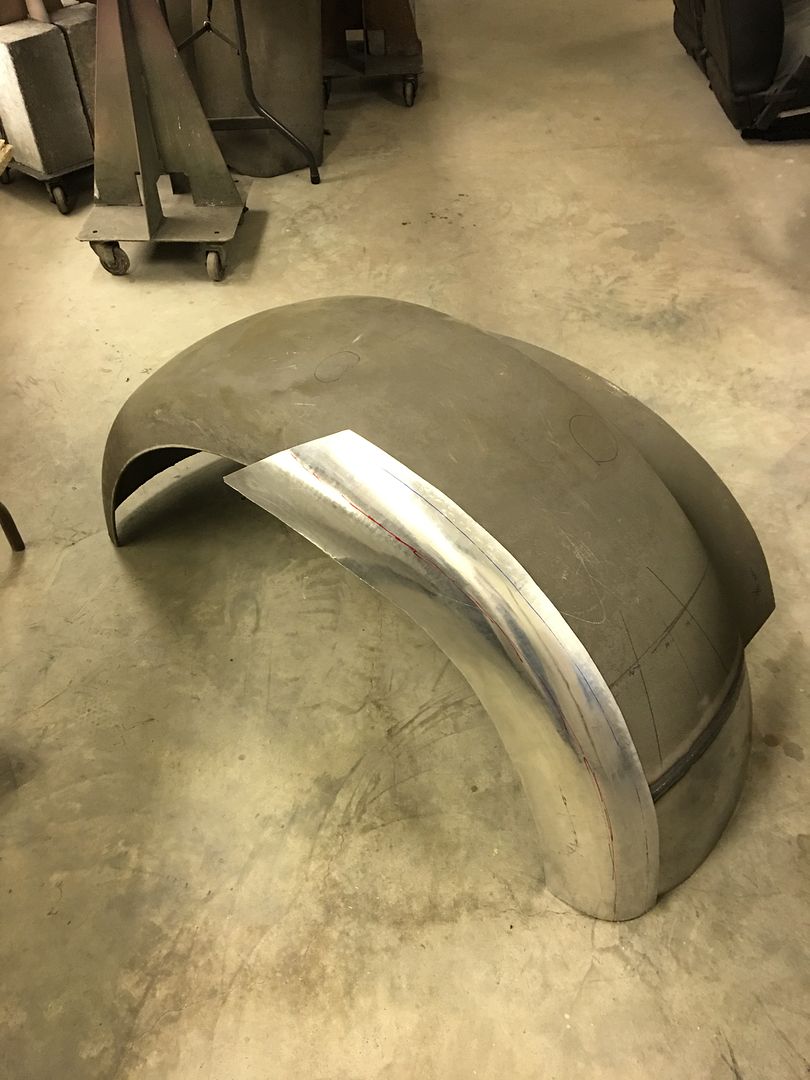 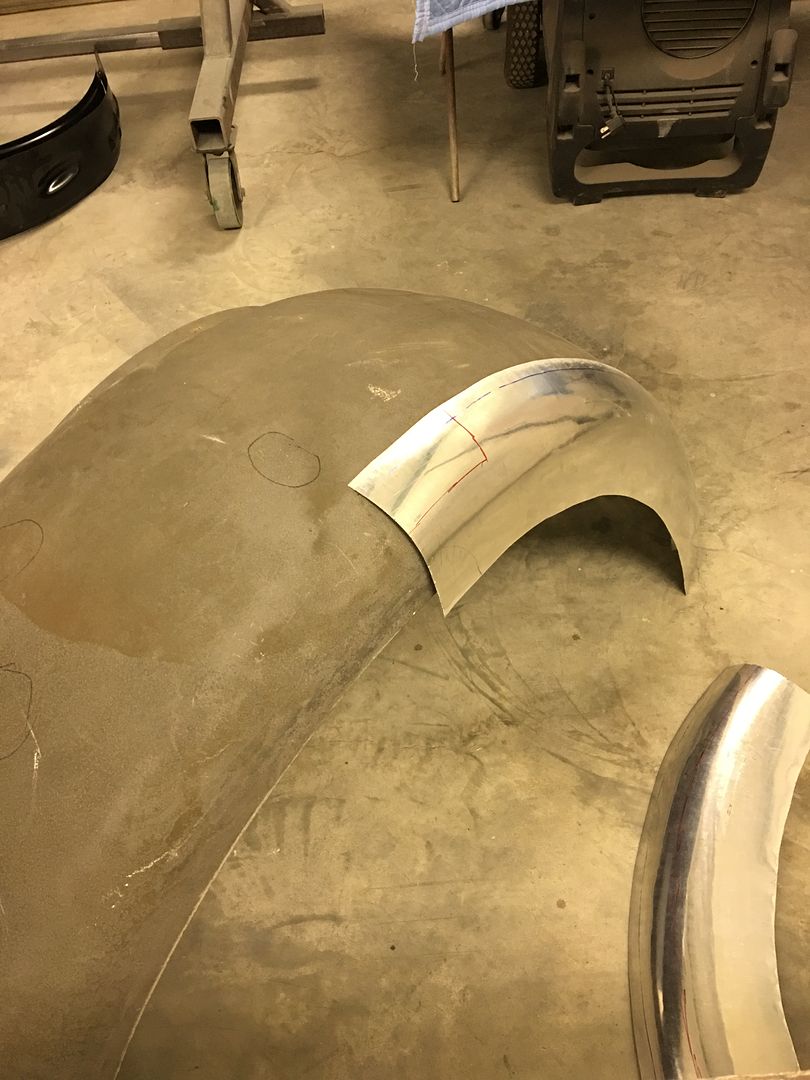 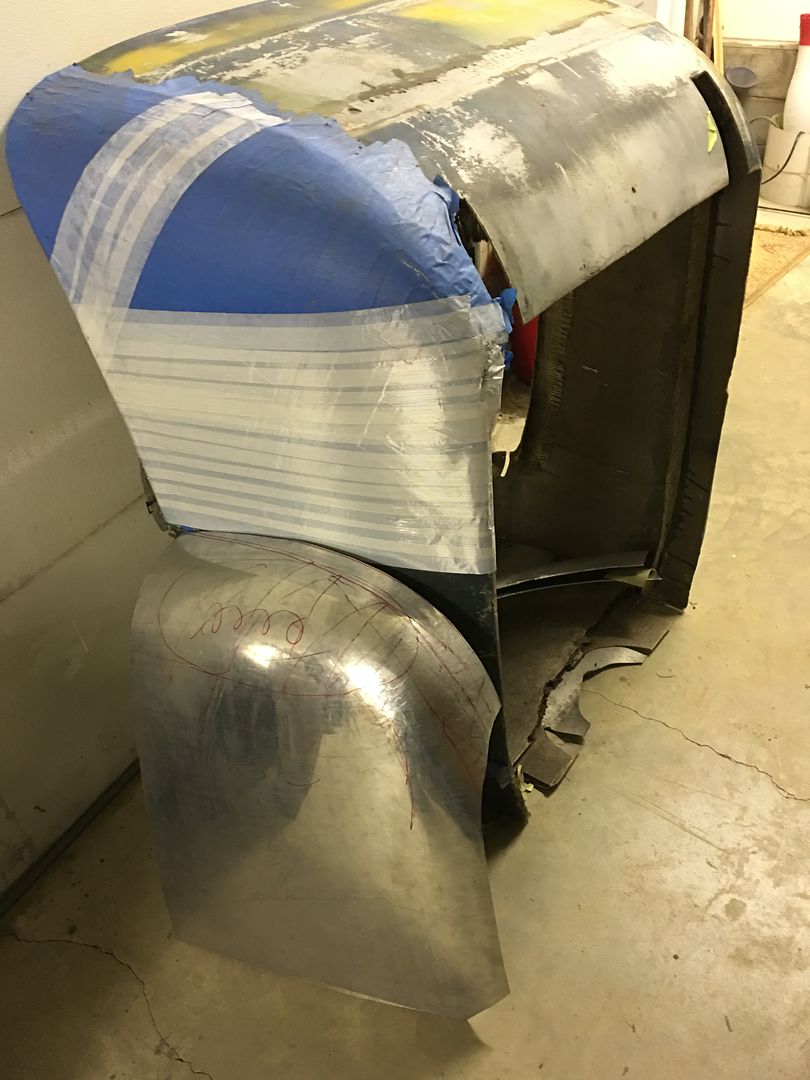 Two days in the books, two to go!
__________________
Robert |
|
|
|
|
11-12-2016, 09:30 AM
|
#780 |
|
Senior Member
 Join Date: Mar 2011
Location: West Plains, Missouri
Posts: 7,553
|
Re: 55 Wagon Progress
Robert, love seeing the stuff made in your shop...Jim
__________________
my build thread: http://67-72chevytrucks.com/vboard/s...d.php?t=459839 Jimbo's long bed step build:http://67-72chevytrucks.com/vboard/s...t=464626<br /> |
|
|
|
|
11-12-2016, 12:31 PM
|
#781 |
|
Registered User
Join Date: Apr 2011
Location: .
Posts: 3,104
|
Re: 55 Wagon Progress
Incredible work. Thank you for sharing. I soak it up like a sponge.
|
|
|
|
|
11-15-2016, 01:50 AM
|
#782 |
|
Registered User
Join Date: Jan 2013
Location: Leonardtown, MD
Posts: 1,633
|
Re: 55 Wagon Progress
Thanks guys!
The final two days of the Maryland Tommasini Metalshaping Class. We had two stumps that we gave to students to take home, here is the final version carved.... https://www.youtube.com/watch?v=5yH-M21yUok I had some requests to show the mammoth sand bag with the loose cover removed... It saw quite a bit of use and came in handy! 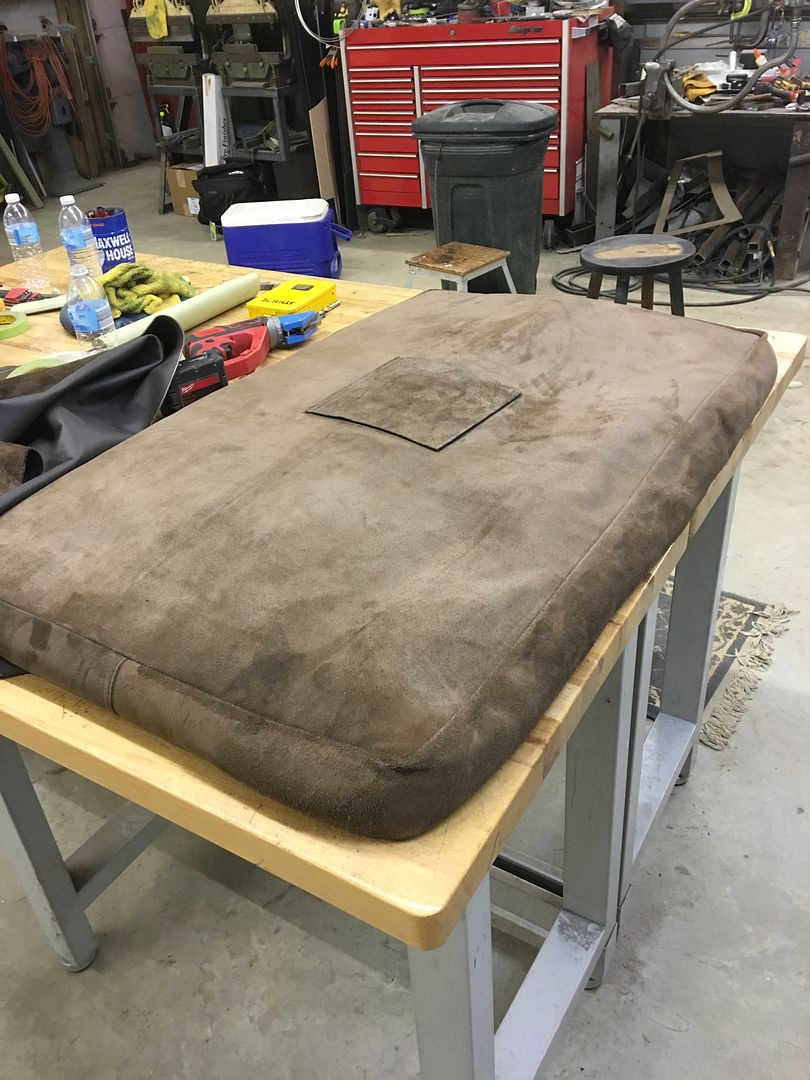 More repair parts were made for the 37 Dodge doors... 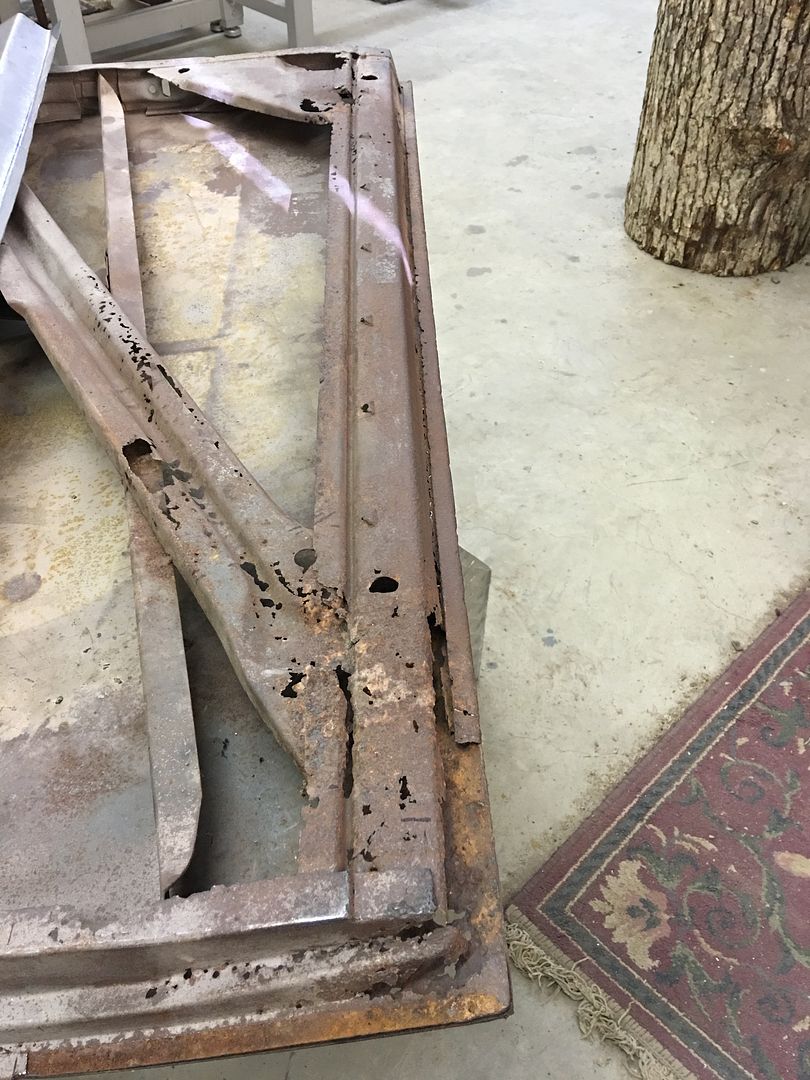 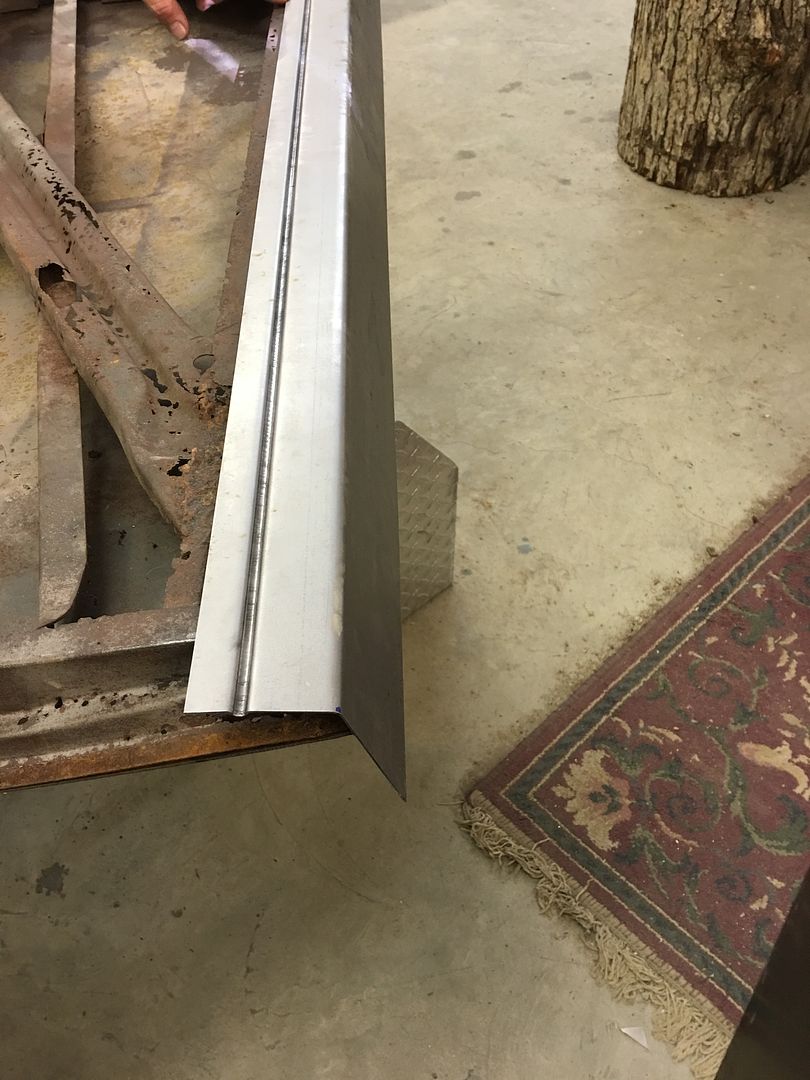 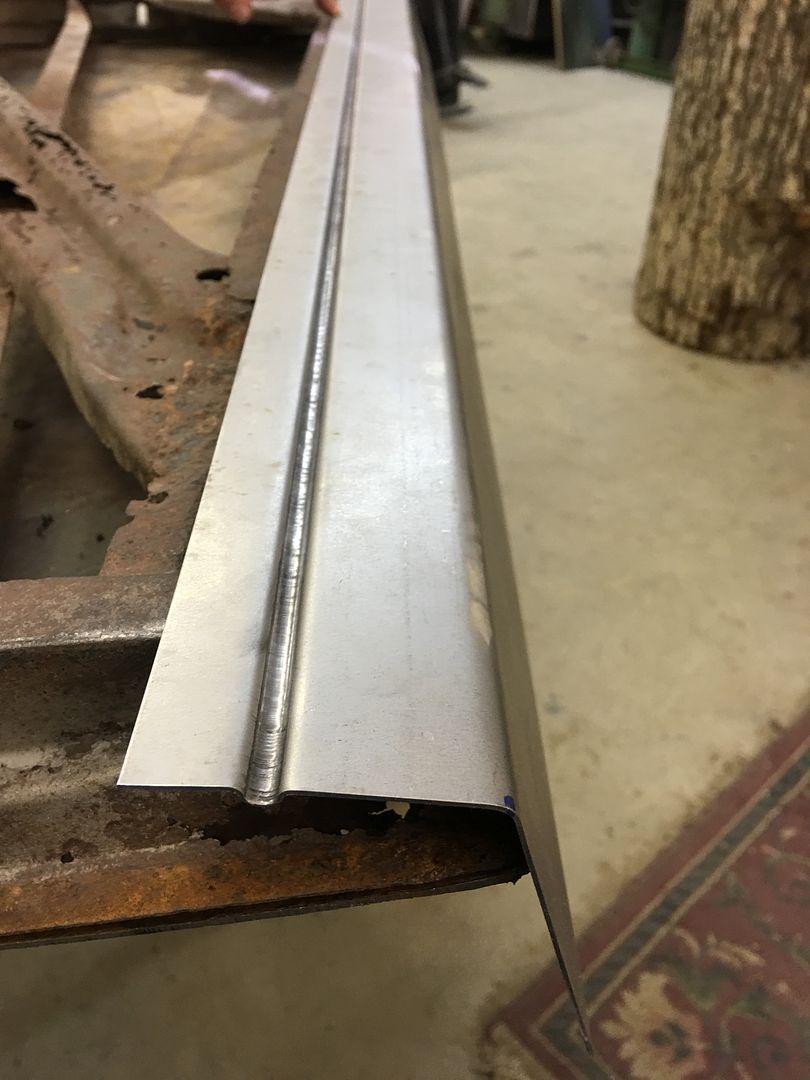 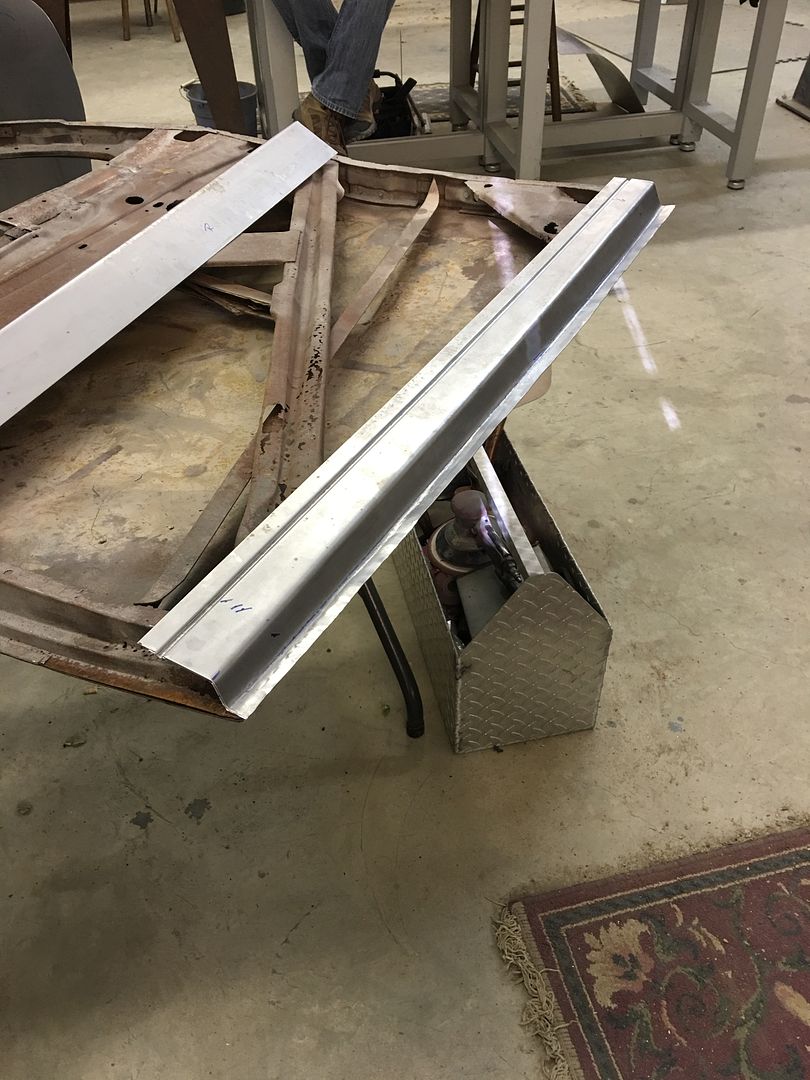   The crease or "swage" at the top center of the hood was difficult to locate through the paper pattern. So the upper and lower "crease" was highlighted by using fineline tape alongside. Then a pencil was used on the outside of the paper pattern, which now showed the location. Better shown here: https://www.youtube.com/watch?v=miZW1aOWwXg The halves still need to be welded together using O/A. Two of the ball glove pounding pads were put into service for metalshaping, one using shot, the other using sand.. 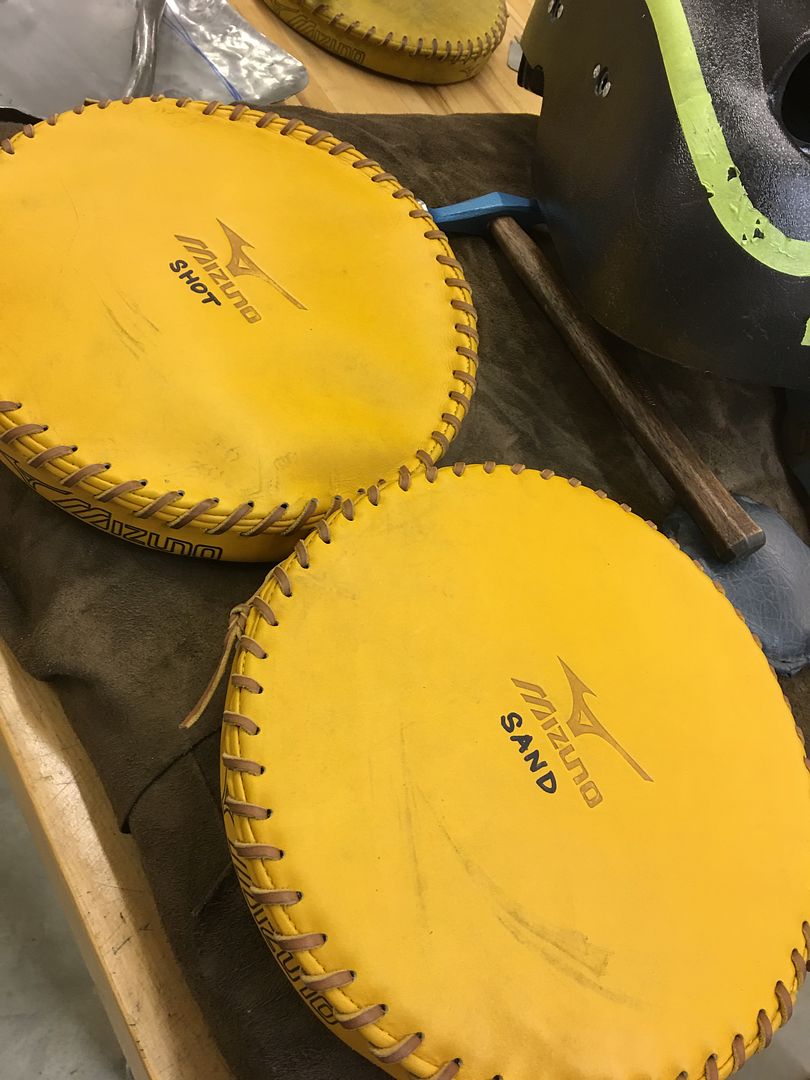 Peter showed lead loading method for aluminum... 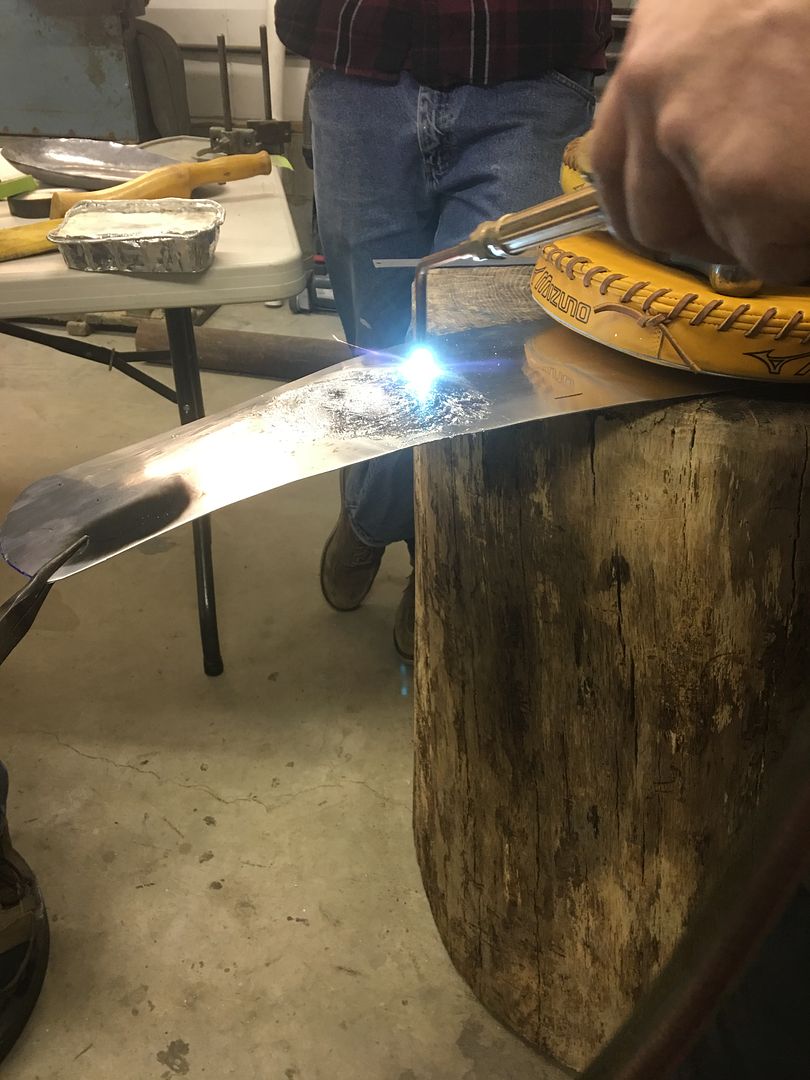 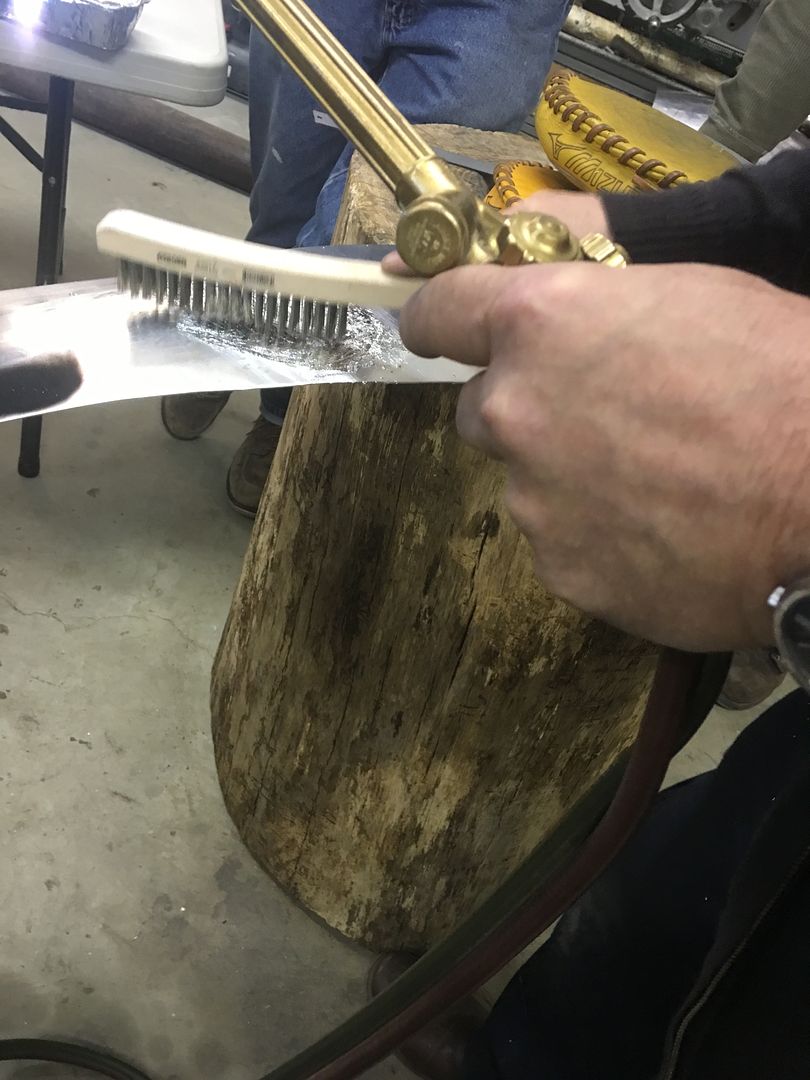 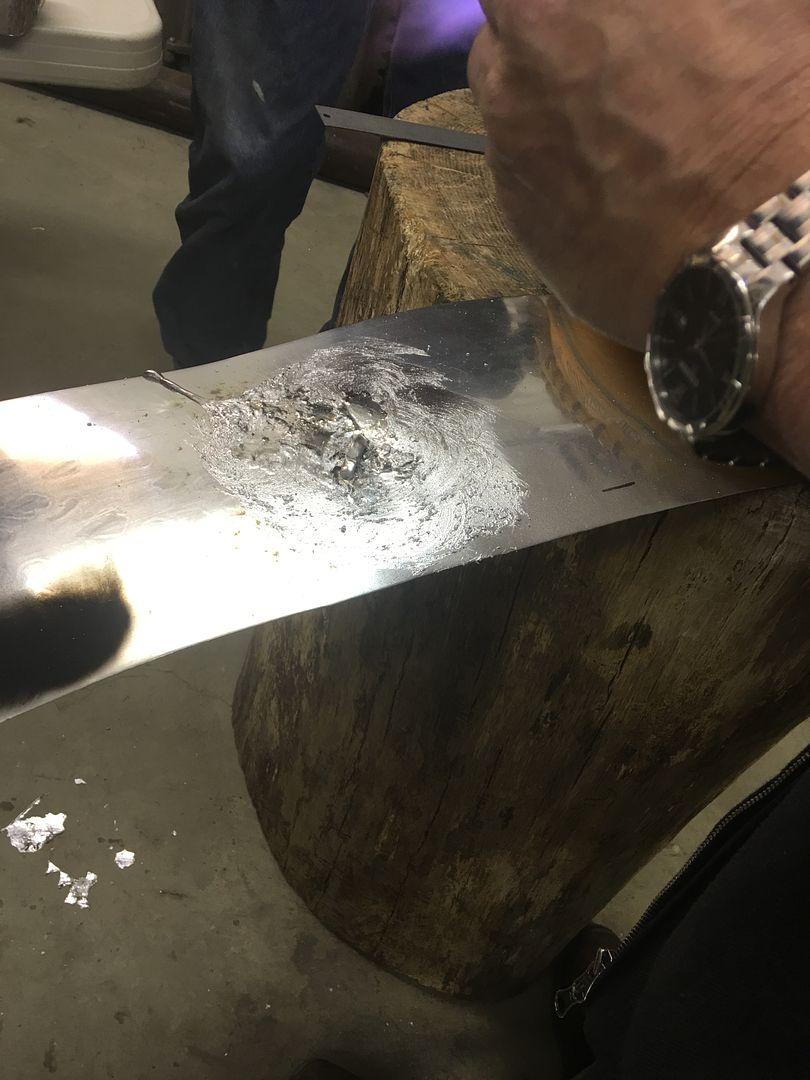 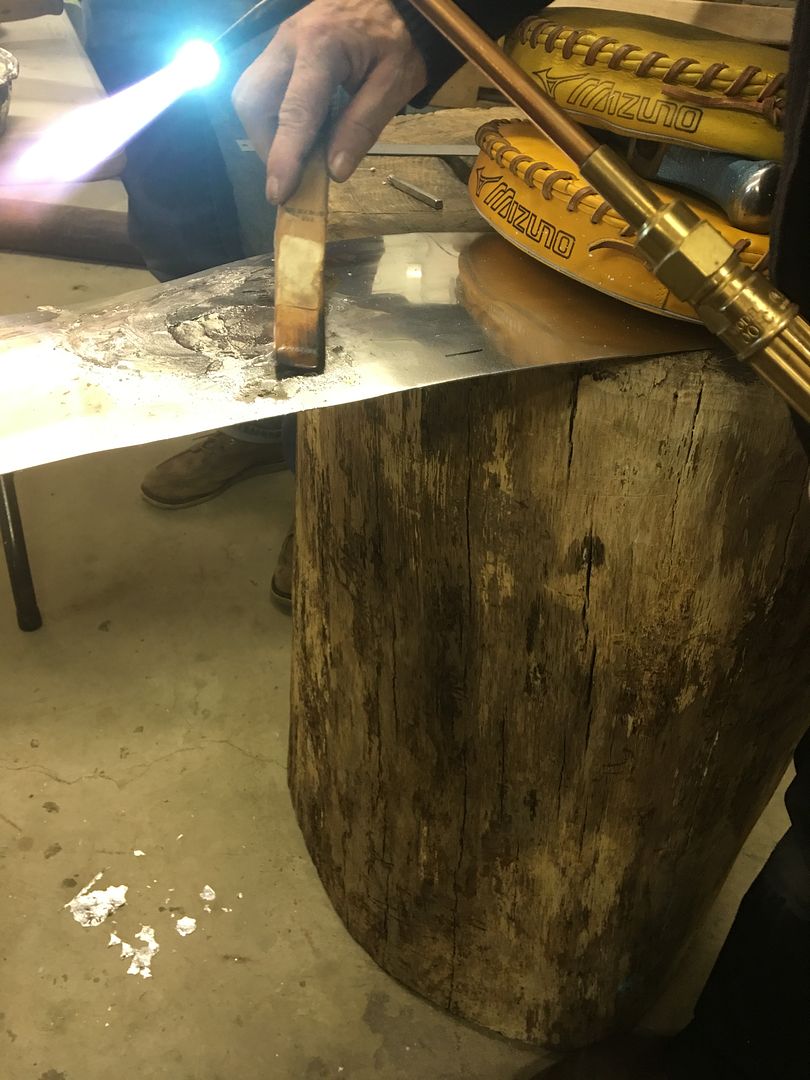
__________________
Robert |
|
|
|
|
11-30-2016, 08:06 AM
|
#783 |
|
Registered User
Join Date: Jan 2013
Location: Leonardtown, MD
Posts: 1,633
|
Re: 55 Wagon Progress
Started the evening off with some TIG practice, here tacking two panels together....
https://www.youtube.com/watch?v=aTqQJoecqCw Next, to use our fancy dancy paint rollers, getting epoxy inside the rocker panels and inner quarter in prep for installing the wheel wells... Had some SPI epoxy mixed up, poured a small amount in the inner quarter and used the long narrow roller to push paint all the way to the front of the rocker. Lather, rinse, repeat. 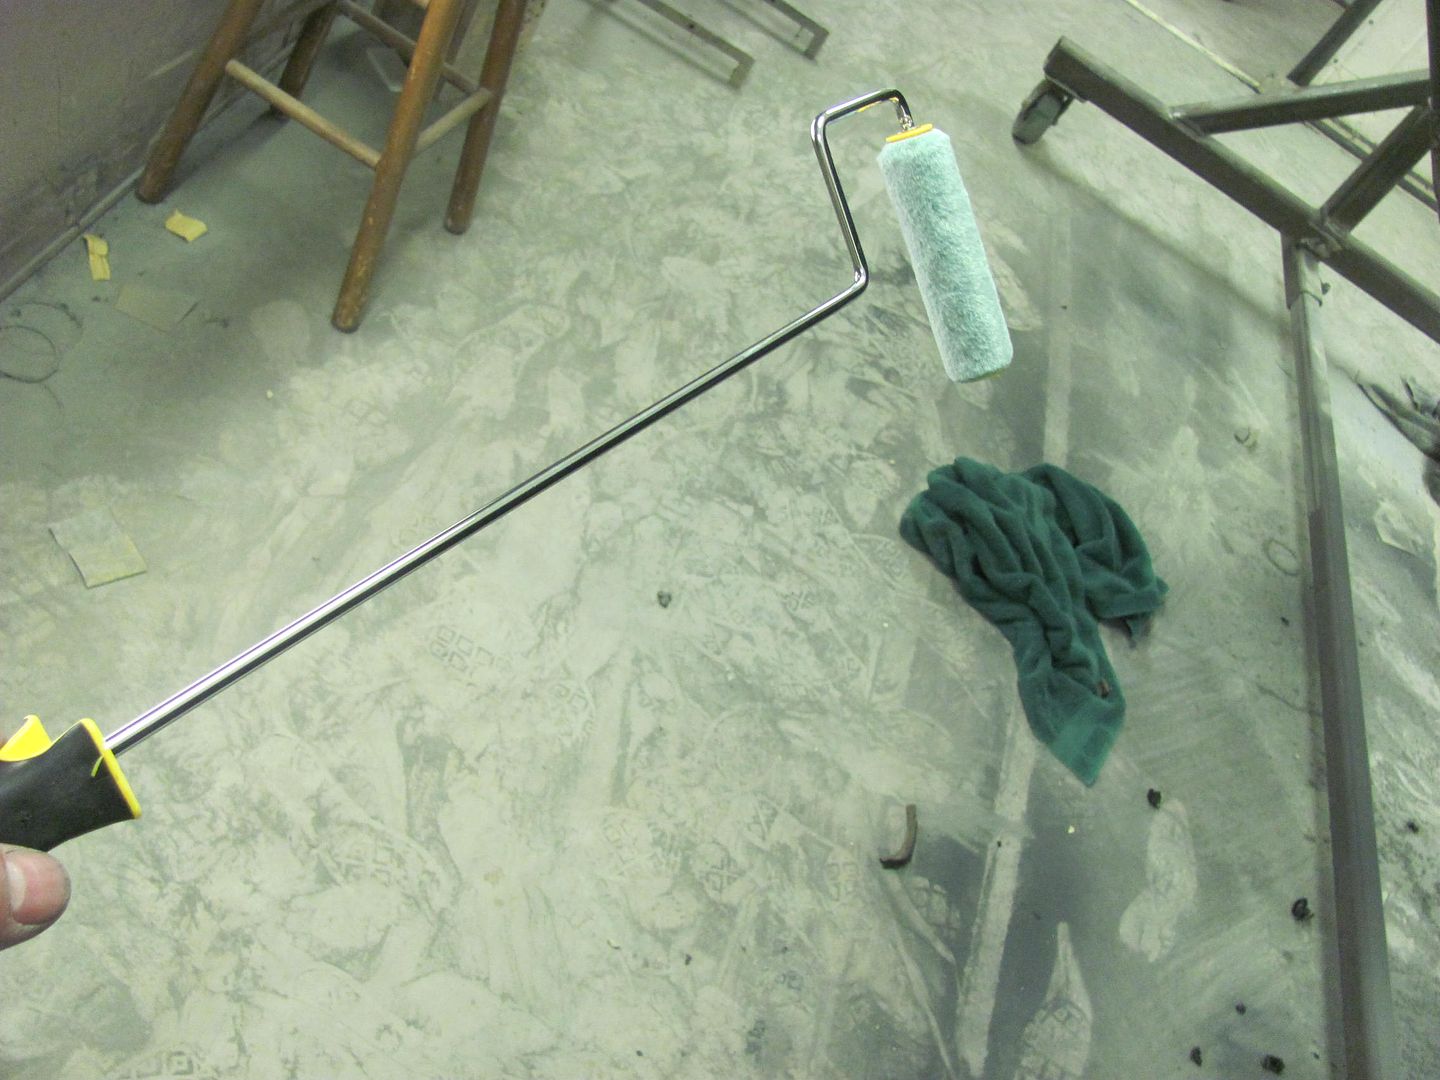 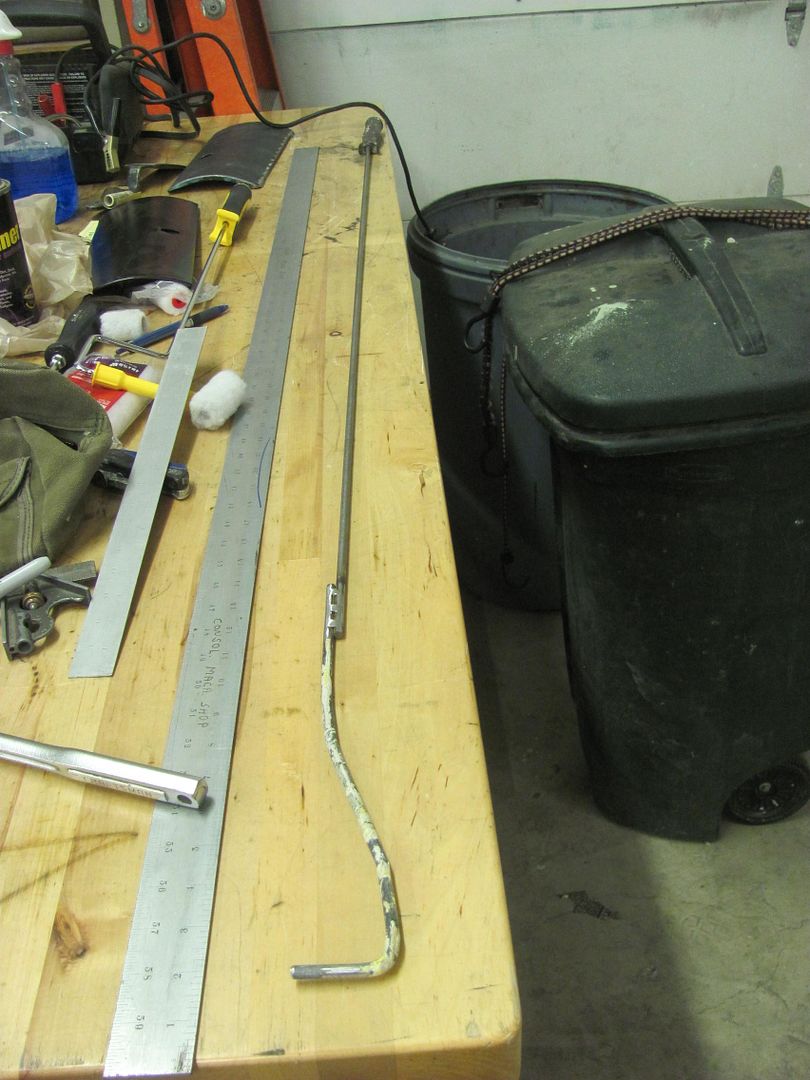 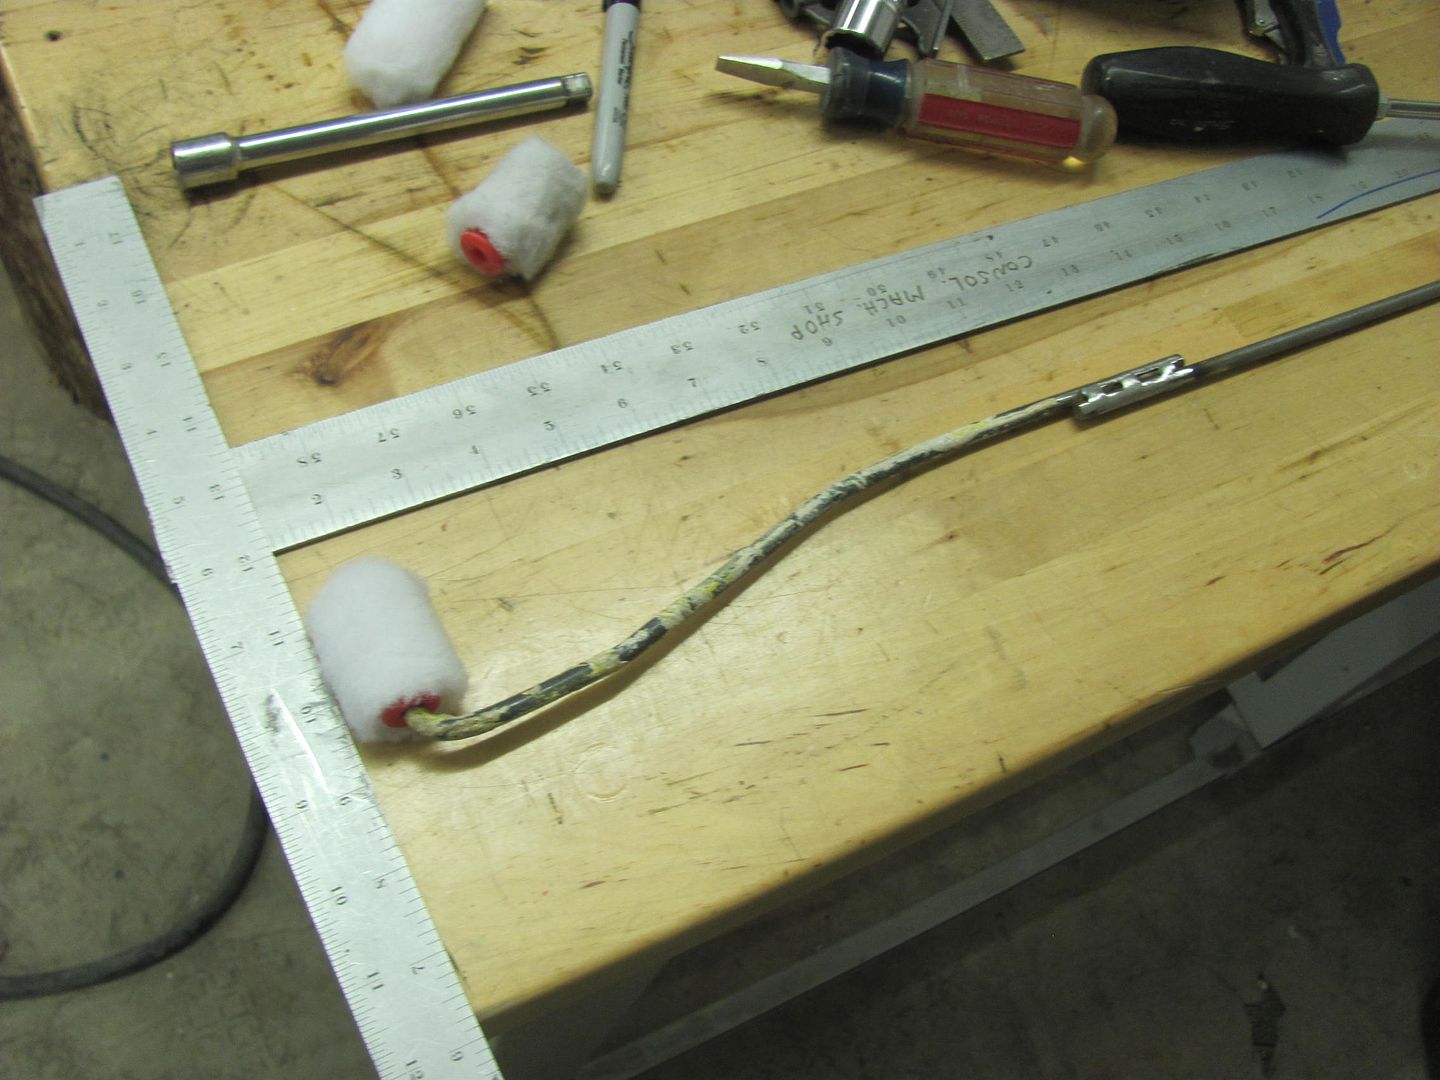 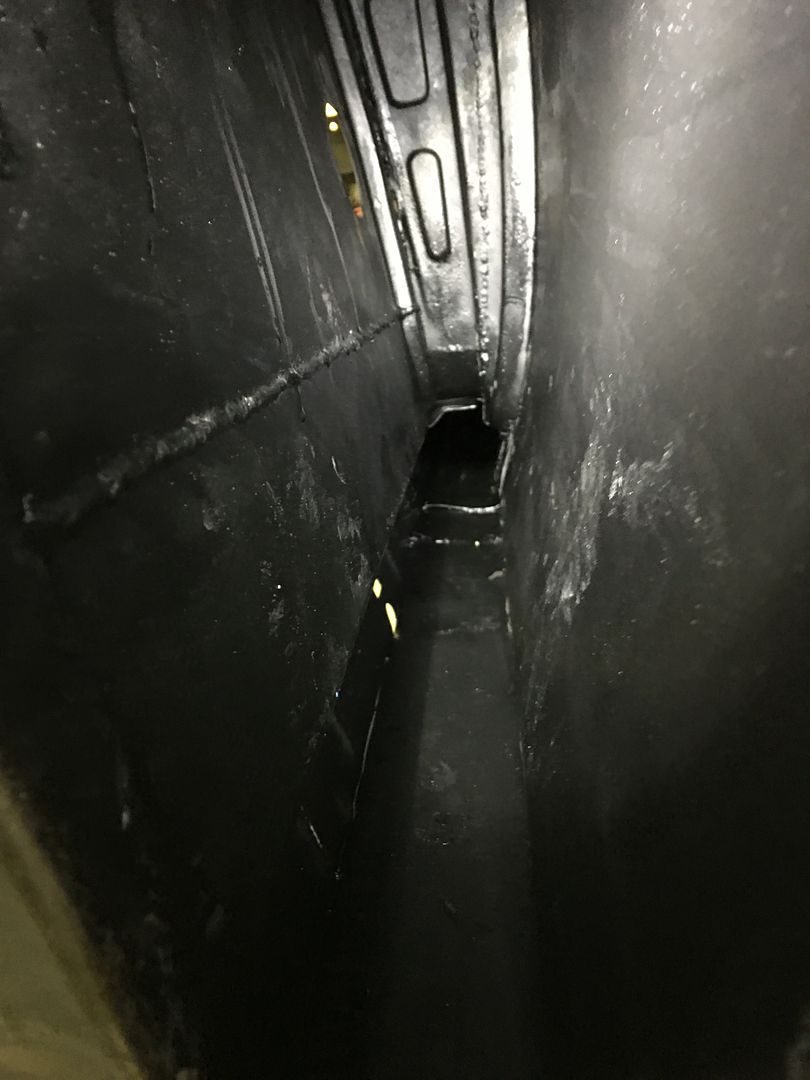 ...and used a brush to cover the bare metal that was above the quarter panel's baffle.. 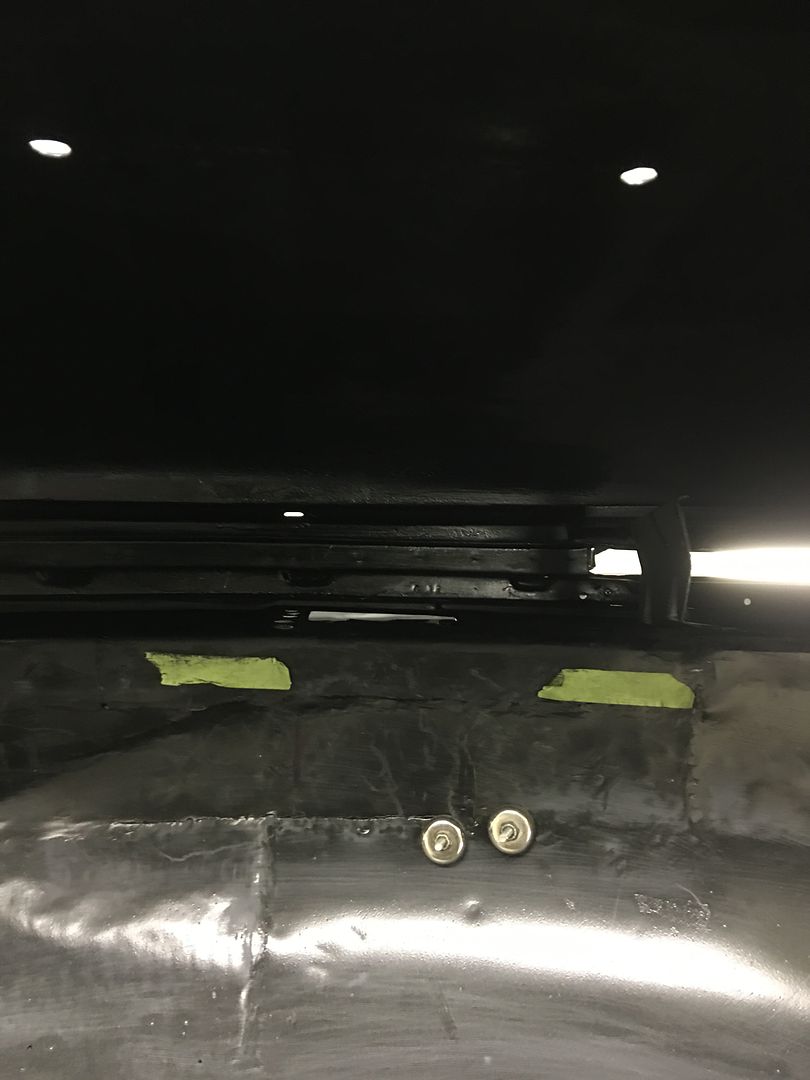 There was a bit of overflow, or dust control shall we say. 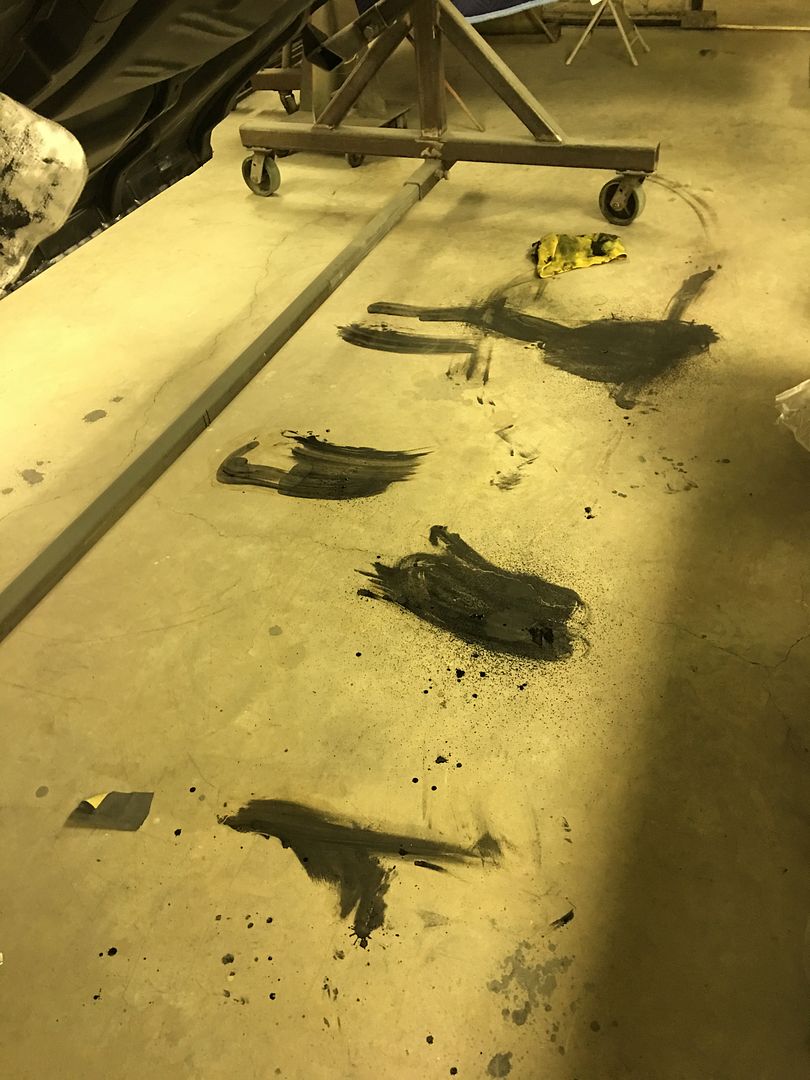 One rocker down, one to go..
__________________
Robert |
|
|
|
|
12-06-2016, 11:49 PM
|
#784 |
|
Registered User
Join Date: Jan 2013
Location: Leonardtown, MD
Posts: 1,633
|
Re: 55 Wagon Progress
With the rockers and inner quarters covered with some SPI epoxy primer, tonight we'll get the quarter panel baffles welded in place so we can install the wheel wells.
 Here's our home-made baffles: 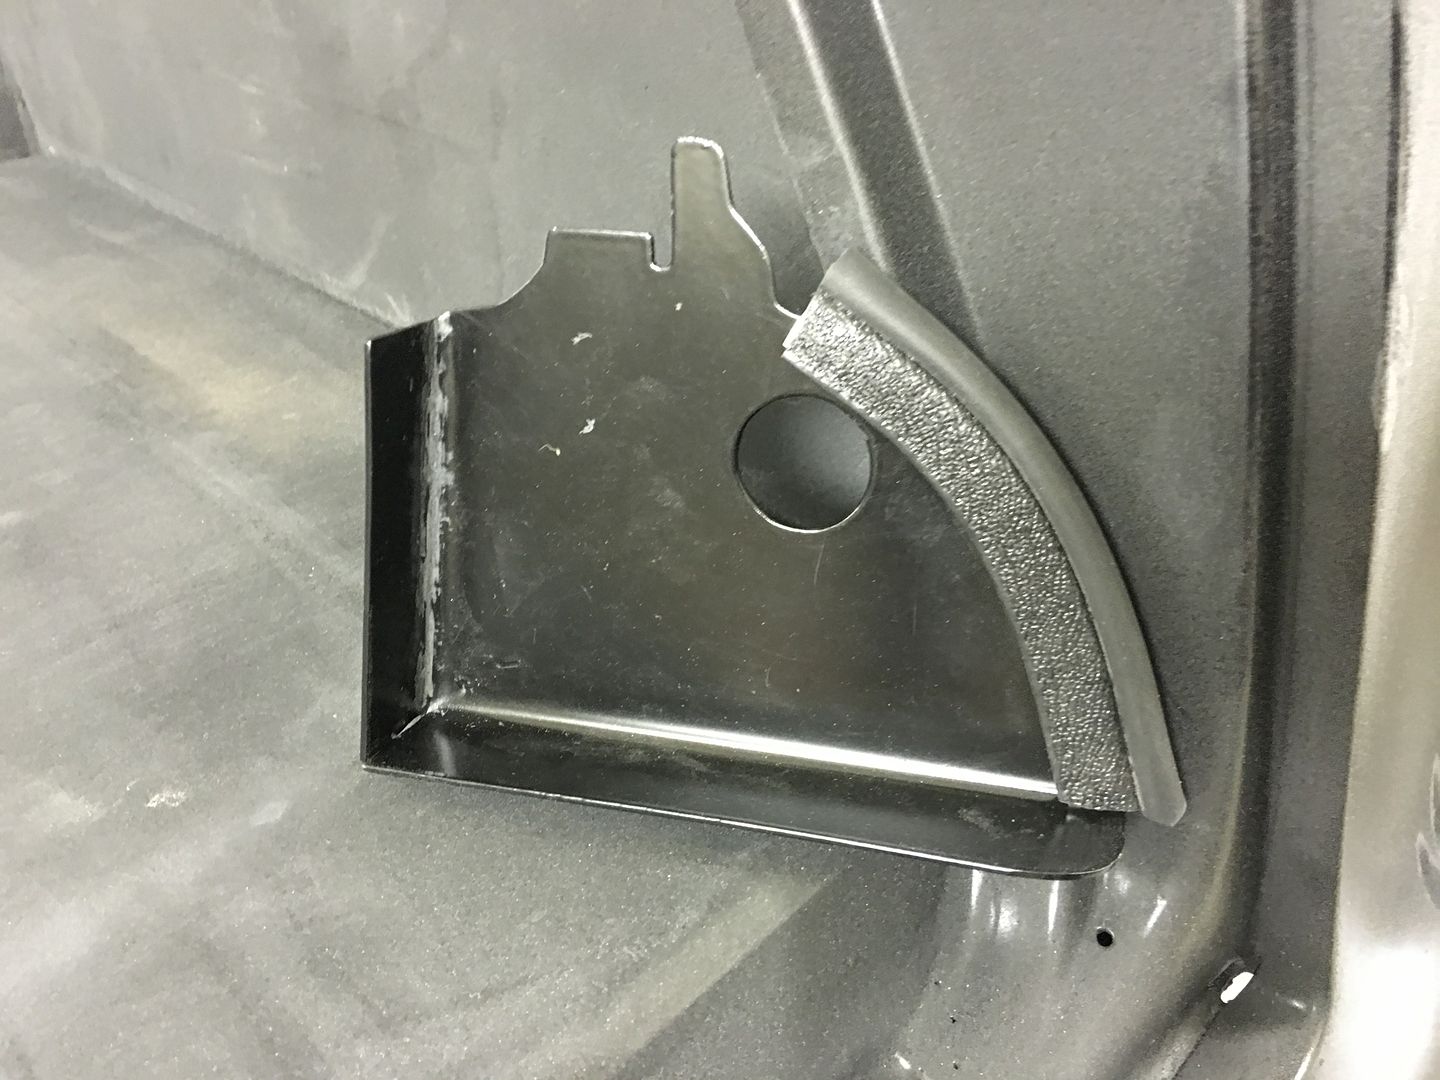 Primer cleaned off for the plug weld holes.. 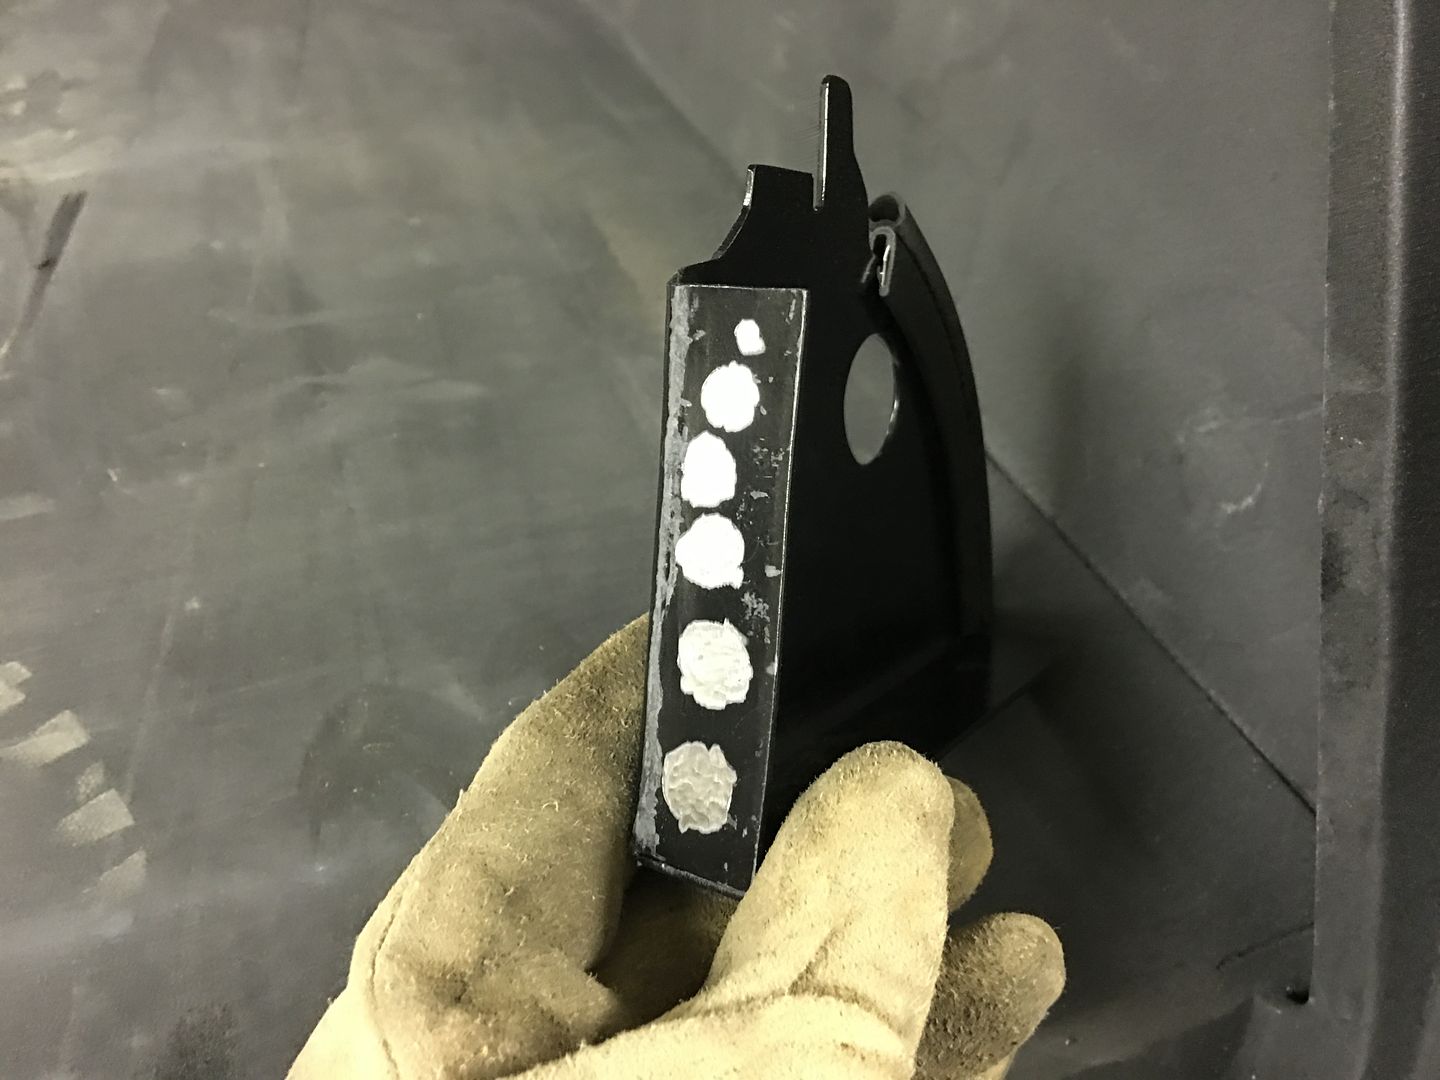 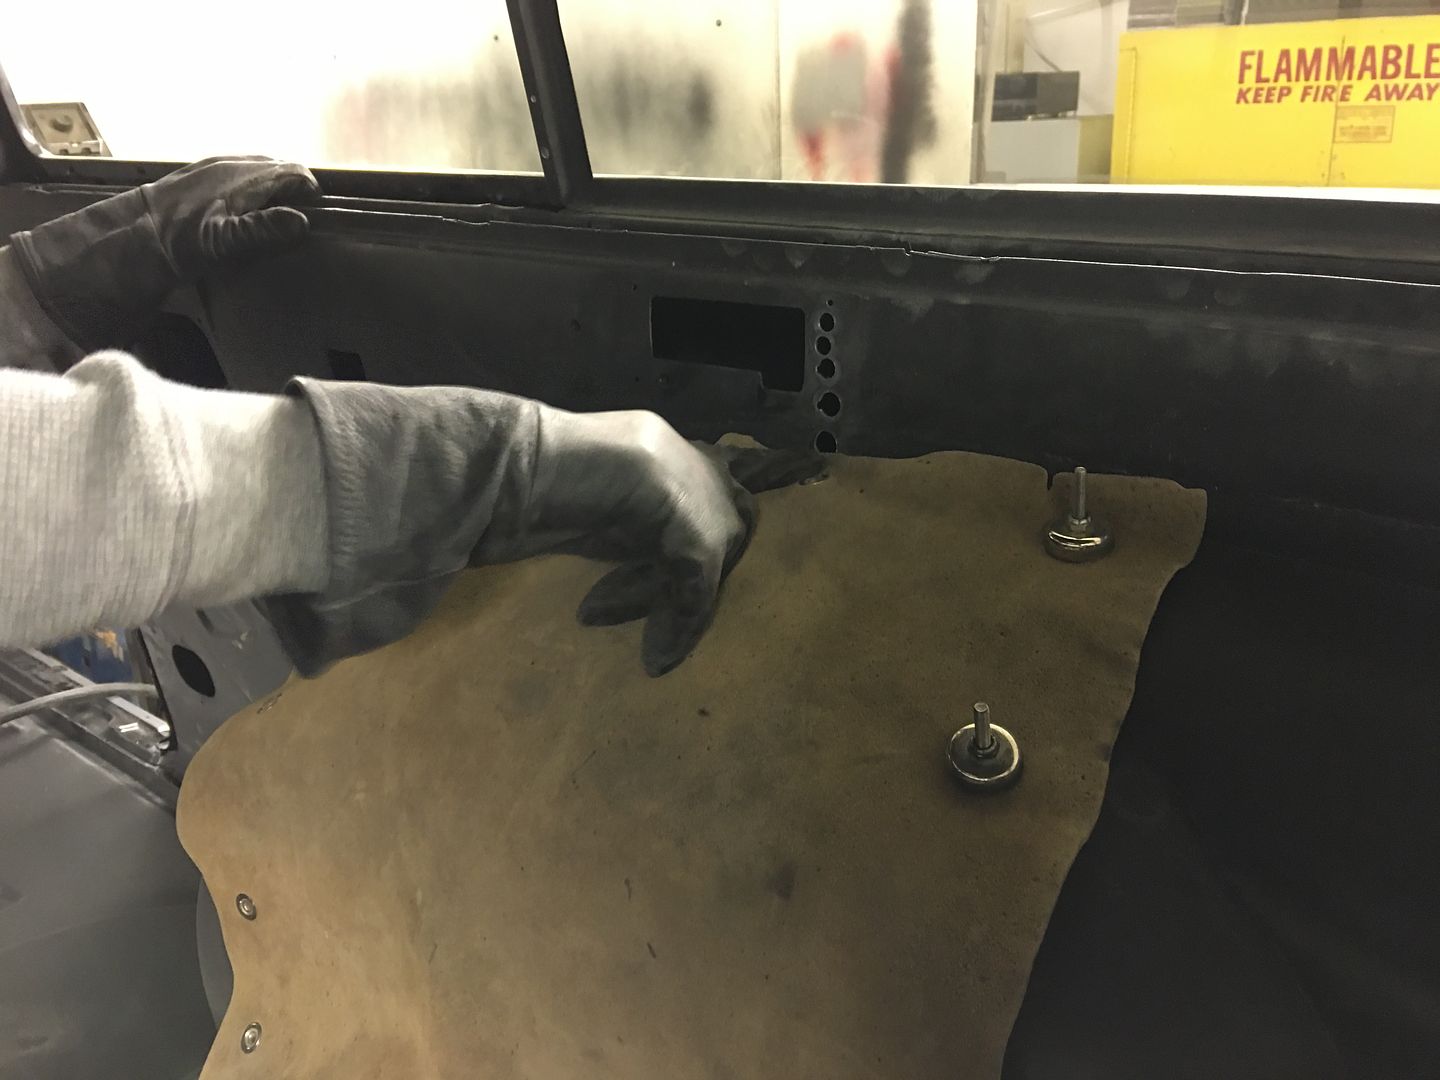 Kyle plug welding: https://www.youtube.com/watch?v=_AIDbEy_uLc Now plug welded in, we'll clean up these welds tomorrow evening, epoxy prime and seam seal around the top profile of the baffle inside the window extrusion area.  
__________________
Robert |
|
|
|
|
12-07-2016, 07:27 AM
|
#785 |
|
Registered User
Join Date: Dec 2011
Location: Mobile, Alabama
Posts: 996
|
Re: 55 Wagon Progress
Attention to detail never disappoints!
__________________
My Build - http://67-72chevytrucks.com/vboard/s...d.php?t=515876 |
|
|
|
|
12-07-2016, 09:15 AM
|
#786 |
|
Registered User
Join Date: Apr 2011
Location: .
Posts: 3,104
|
Re: 55 Wagon Progress
So Im at a swap meet, here in Oregon, run into a forum member and we start shooting the breeze about builders we follow.
When we got to MP&C we talked for 20+ minutes on all the things we've learned from watching the '55 thread. Thanks for sharing and teaching. Level of quality always top notch. |
|
|
|
|
12-07-2016, 09:58 AM
|
#787 |
|
Registered User
Join Date: Jan 2013
Location: Leonardtown, MD
Posts: 1,633
|
Re: 55 Wagon Progress
I've always felt that if you could explain it to others, you would better understand yourself. So I try to explain what I'm doing...
 ......thought my ears were burning
__________________
Robert |
|
|
|
|
12-07-2016, 02:22 PM
|
#788 | |
|
Registered User
Join Date: May 2015
Location: texas
Posts: 253
|
Re: 55 Wagon Progress
amazing, beautiful, craftsmanship, more and more......
in awe. wish you or i was/were closer. i would love to learn from you.
__________________
Black 93 CCLB 3500 6.5 diesel, GV OD, TCI Ez-TCU controlled 4L80E, back on road 10/25/16 after sitting 4 years. 96 ECLB 2500, 6.5 diesel, auto, gone. Quote:
|
|
|
|
|
|
12-11-2016, 01:49 AM
|
#789 |
|
Registered User
Join Date: Jan 2013
Location: Leonardtown, MD
Posts: 1,633
|
Re: 55 Wagon Progress
Thanks!
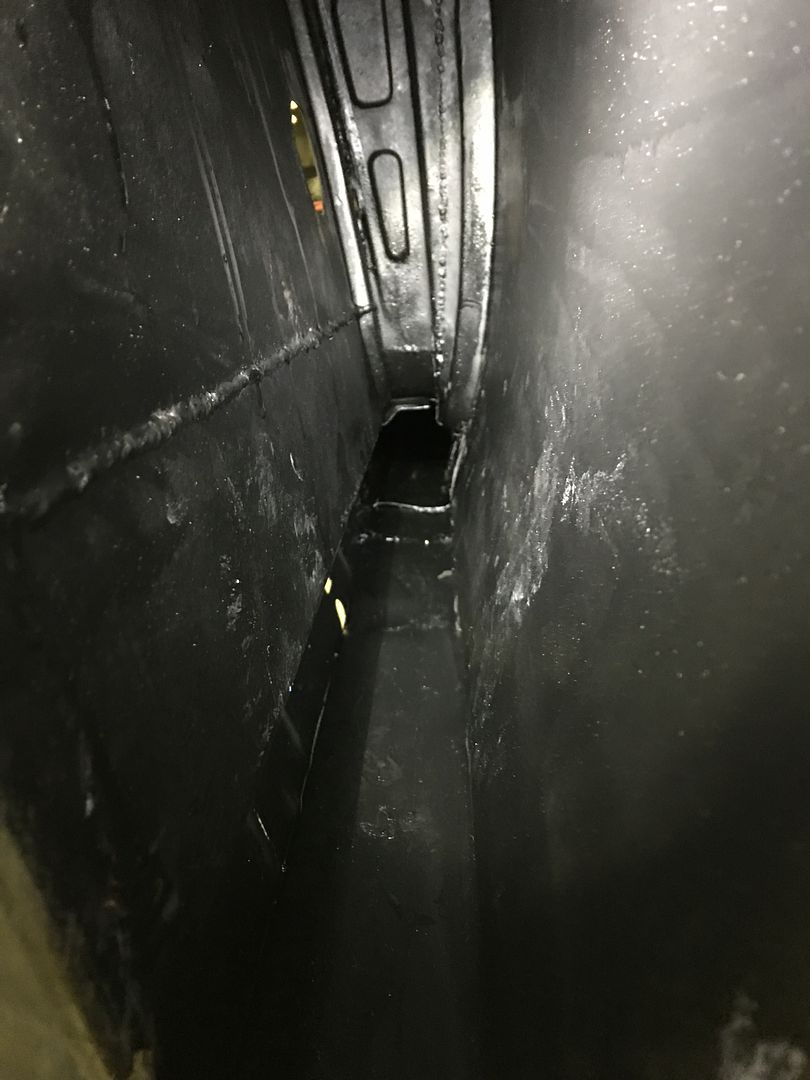
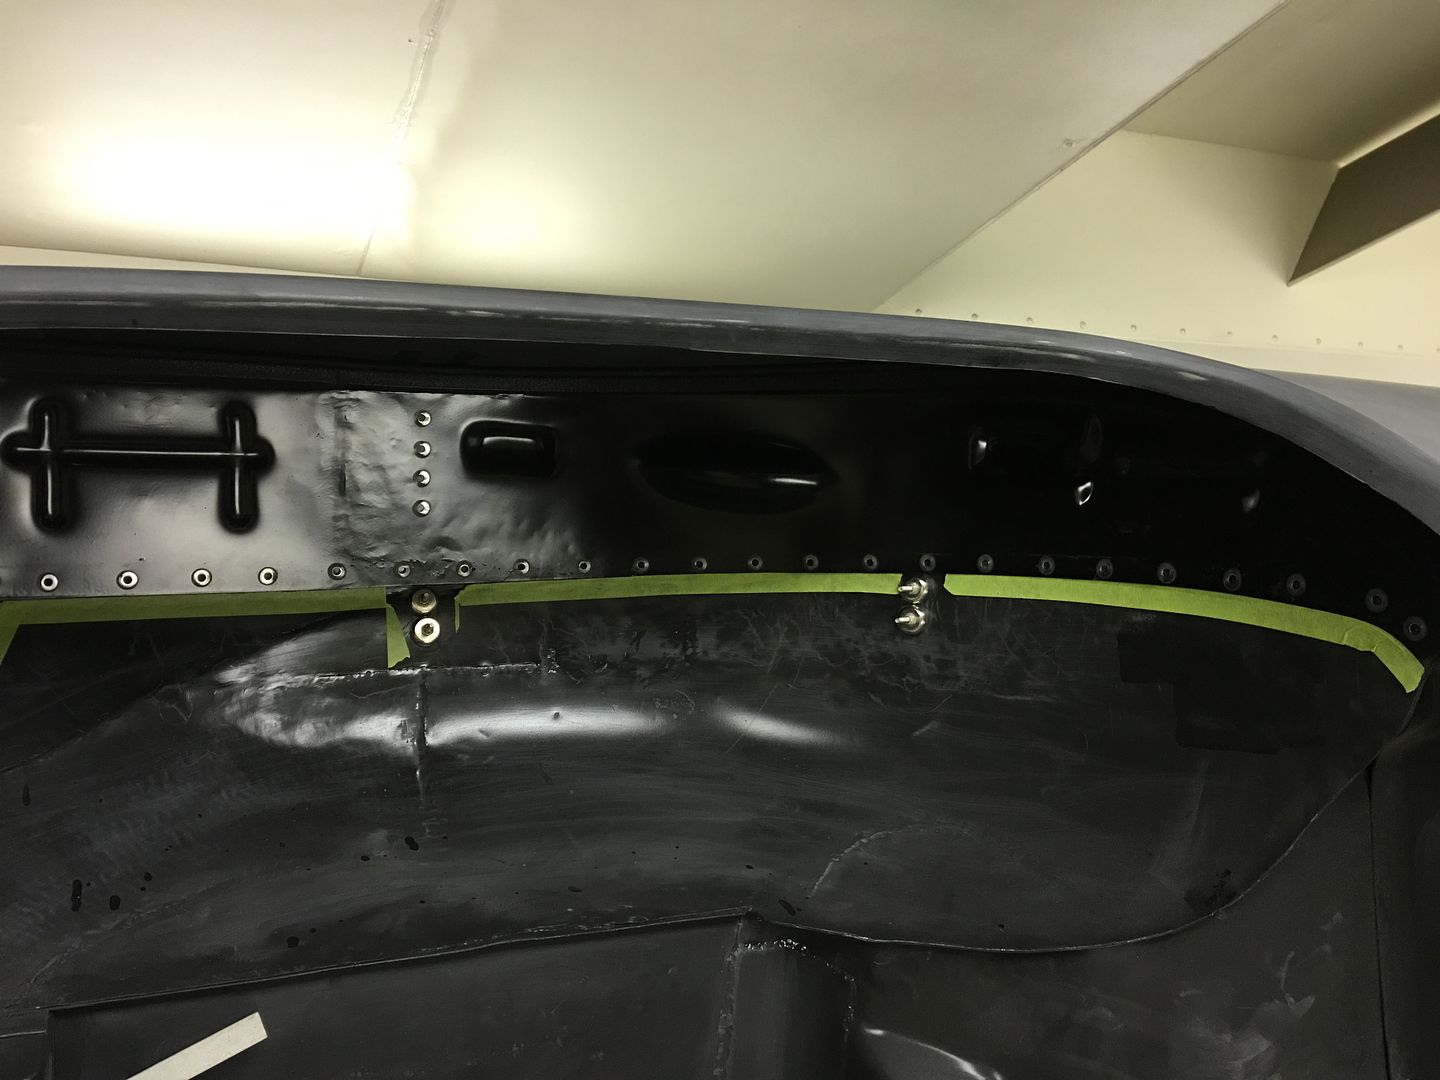
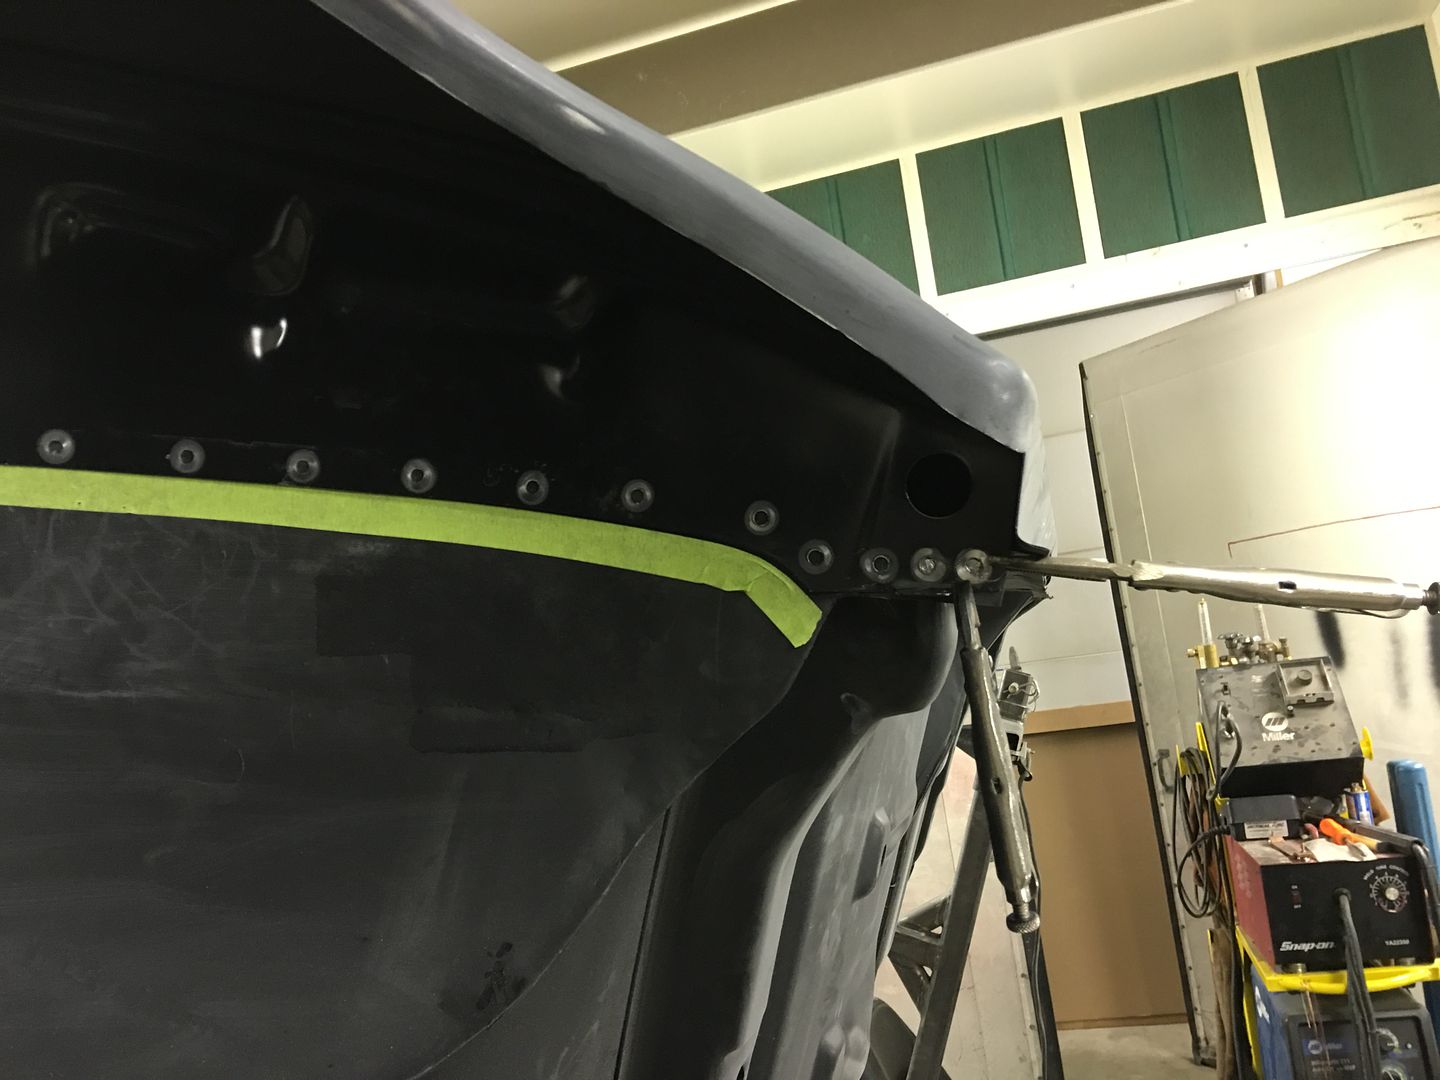
When we fabricated the quarter panel baffles we trimmed the upper profile to leave about a 1/16" gap, so that any possible body flex would be less likely to rub paint.. Plus, it gives a good anchor for the seam sealer.... 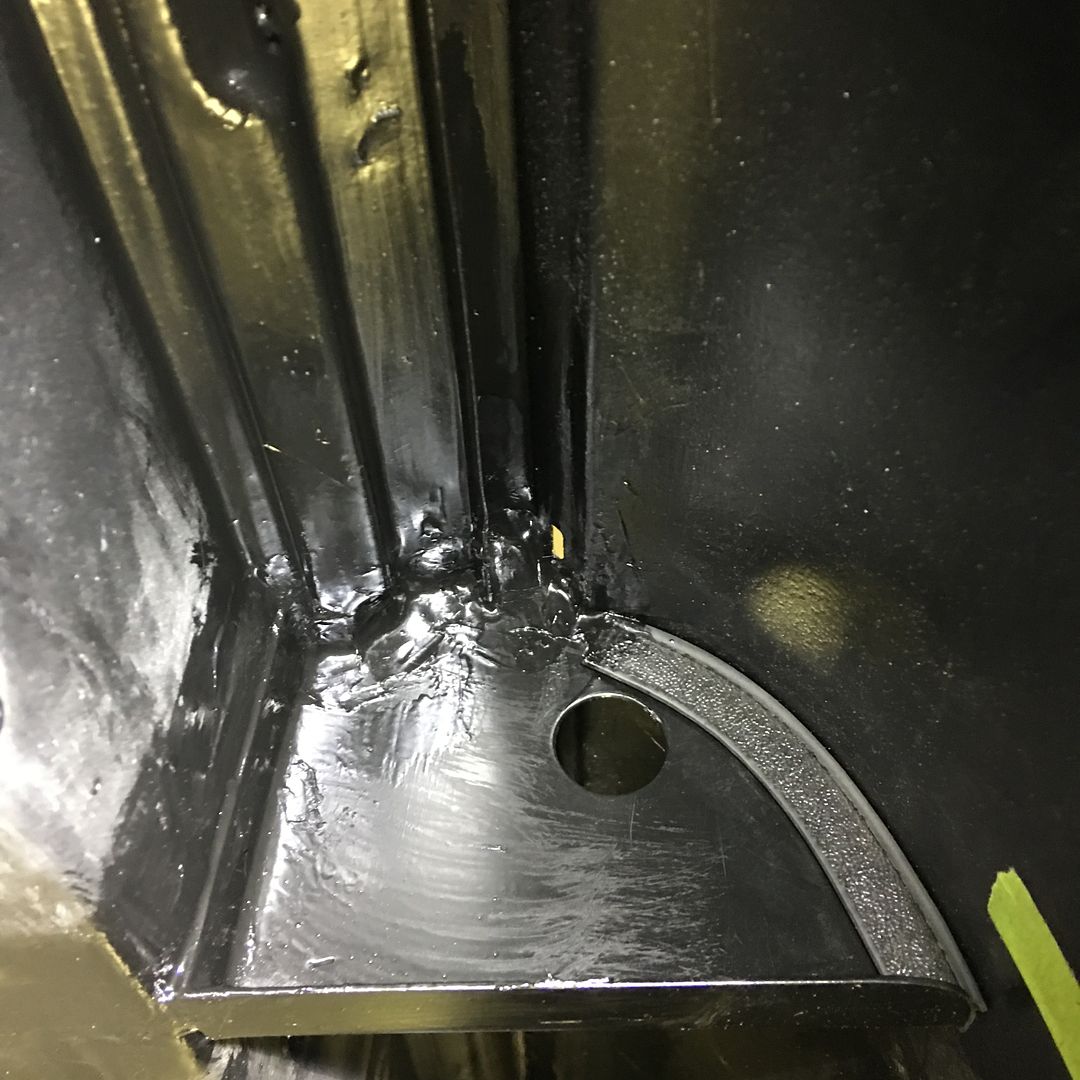 Then we used masking tape to mark off the edges of the flange so we could transpose these to the wheel well for drilling plug weld holes... 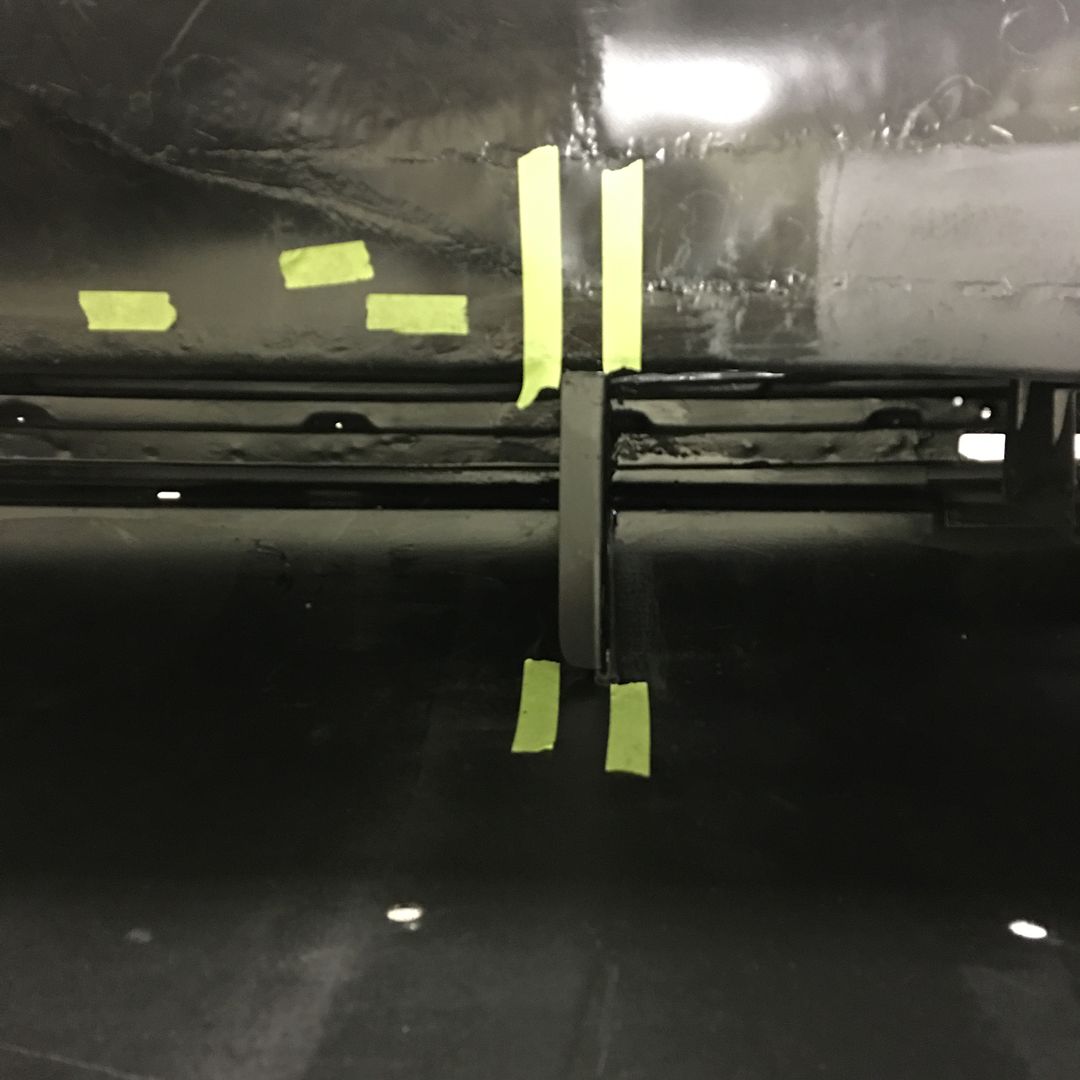 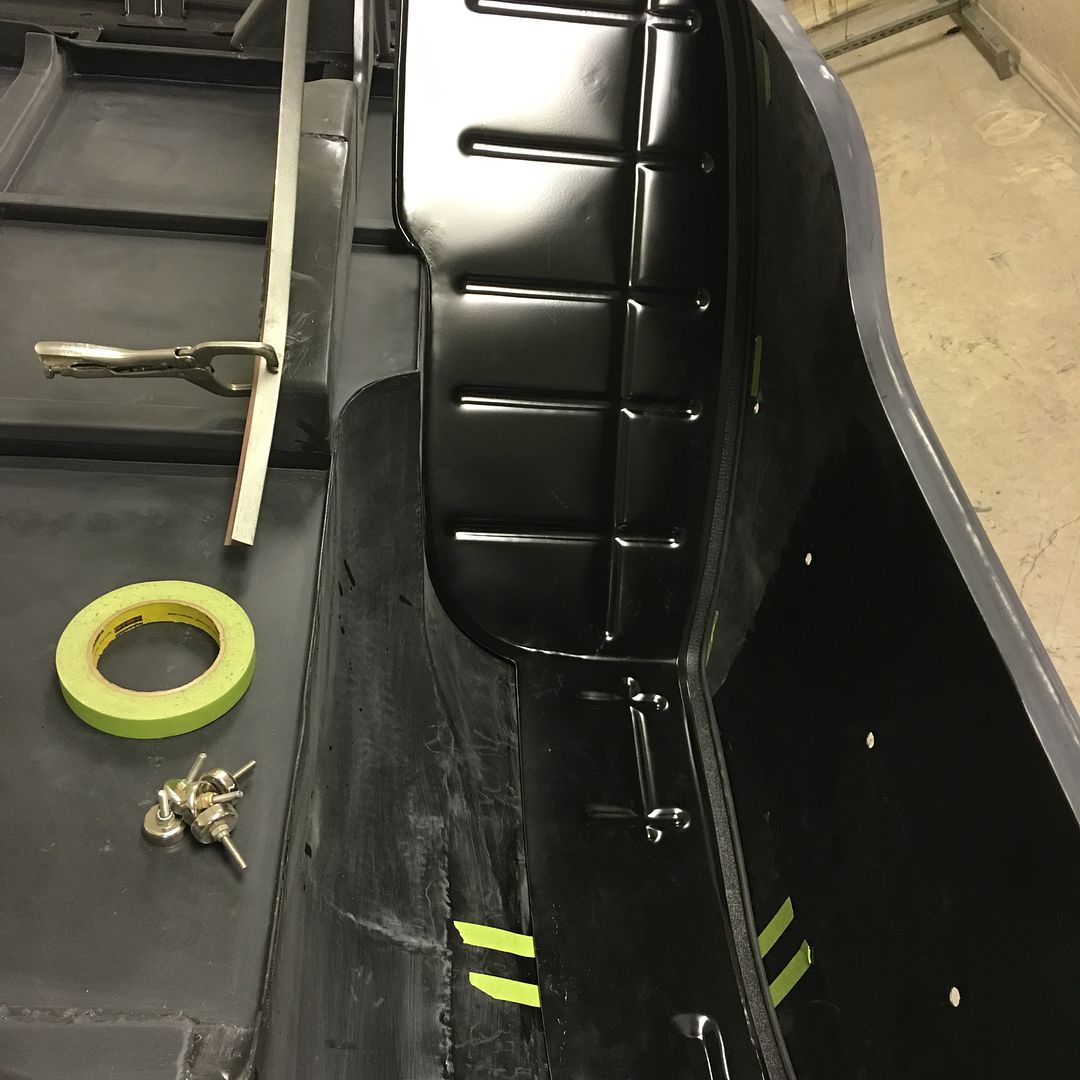 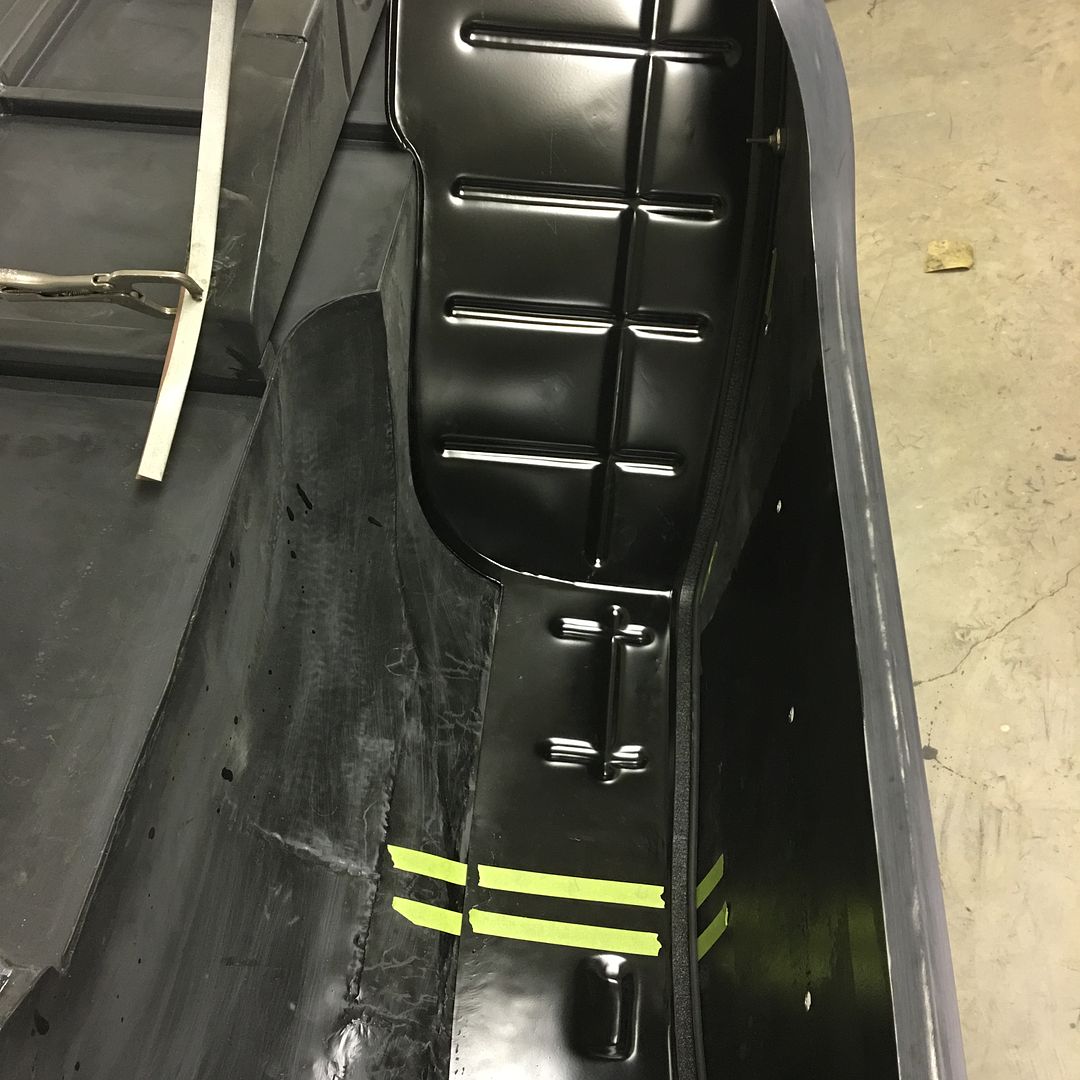 Next, we have another yellow vehicle to work on. A new driver at a local high school missed seeing the bright yellow oversized vehicle as it passed, and backed into the side of it.. 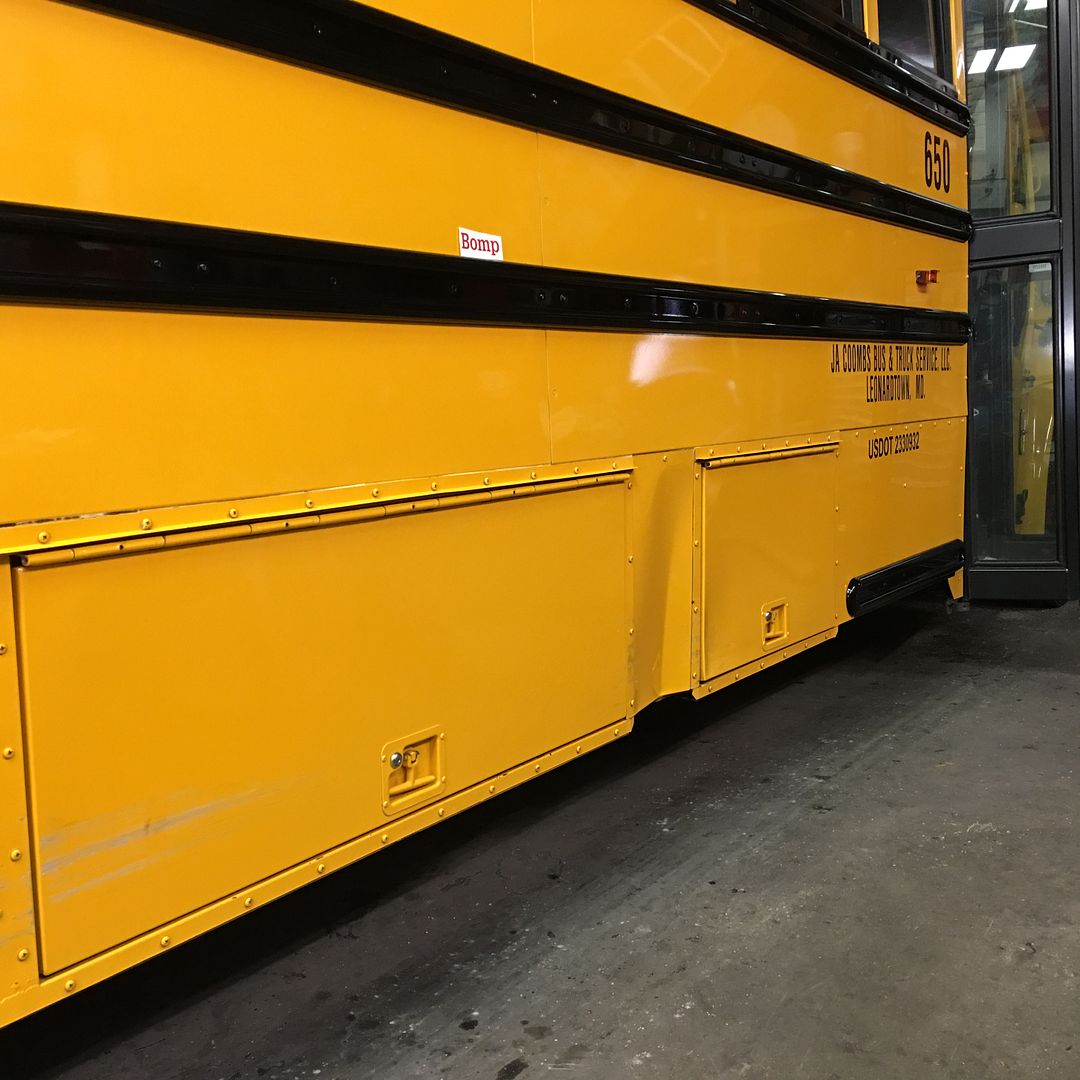 New filler panel was made out of 18 gauge steel, ready for some SPI epoxy.. 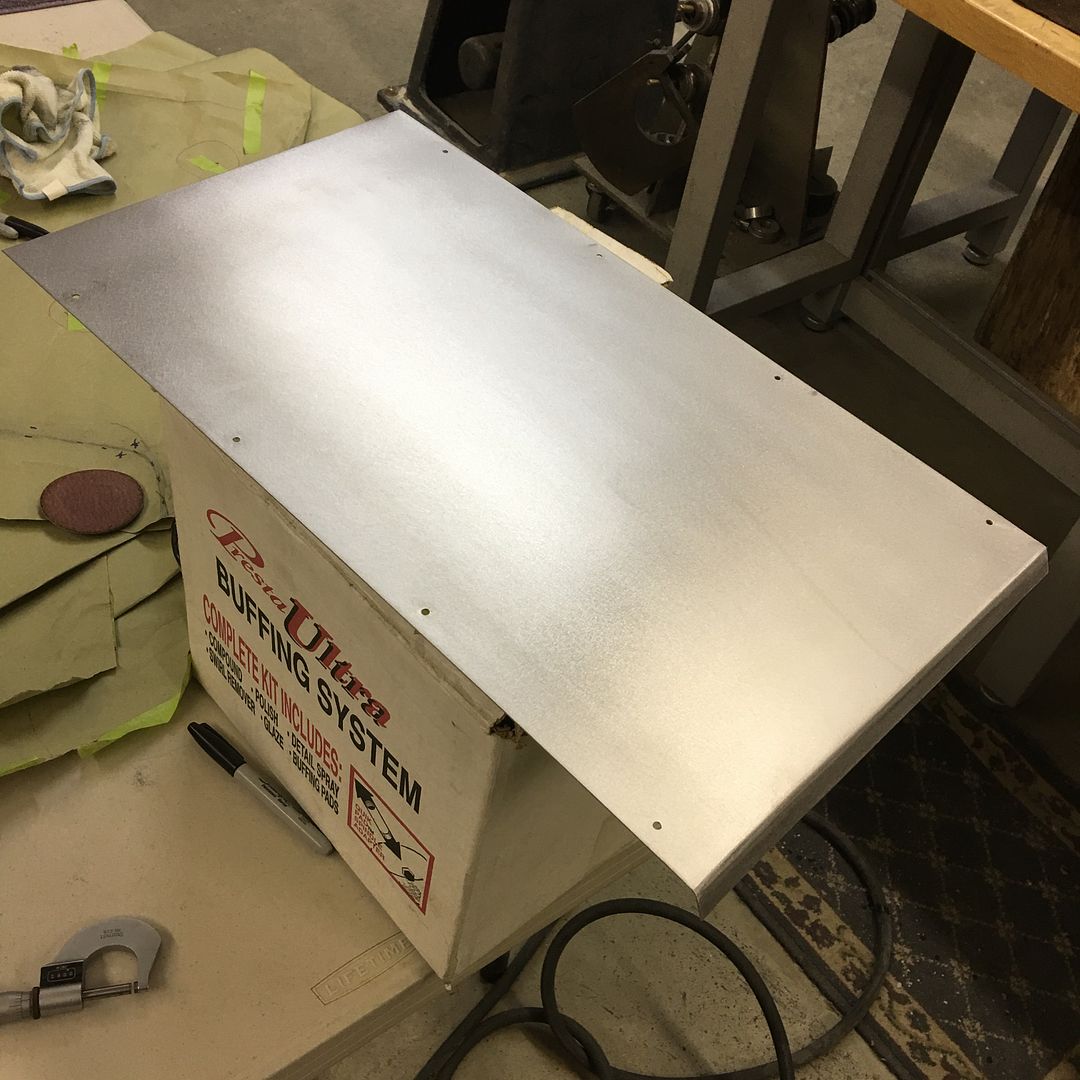
__________________
Robert |
|
|
|
|
12-21-2016, 02:16 PM
|
#790 |
|
Registered User
Join Date: Jan 2013
Location: Leonardtown, MD
Posts: 1,633
|
Re: 55 Wagon Progress
Fitting up the one piece wheel well into the passenger side quarter. Once fitted, the edge is marked with tape, wheel well removed, and the width available beneath for plug welds is noted. Then holes are punched in the wheel well to match, and it gets refitted. We started at the front so we could use vise grips to clamp, and worked progressively toward the back.
   We did have a few plug welds that were contaminated from the epoxy primer, so we'll grind everything smooth, fix those areas, redress the welds and finish any bare areas with epoxy primer. One step closer to the Line-x coating on the underside... Here we are all tacked in place: https://www.youtube.com/watch?v=GuCIhFYUMXY .
__________________
Robert |
|
|
|
|
12-23-2016, 08:45 AM
|
#791 |
|
Registered User
Join Date: Jan 2013
Location: Leonardtown, MD
Posts: 1,633
|
Re: 55 Wagon Progress
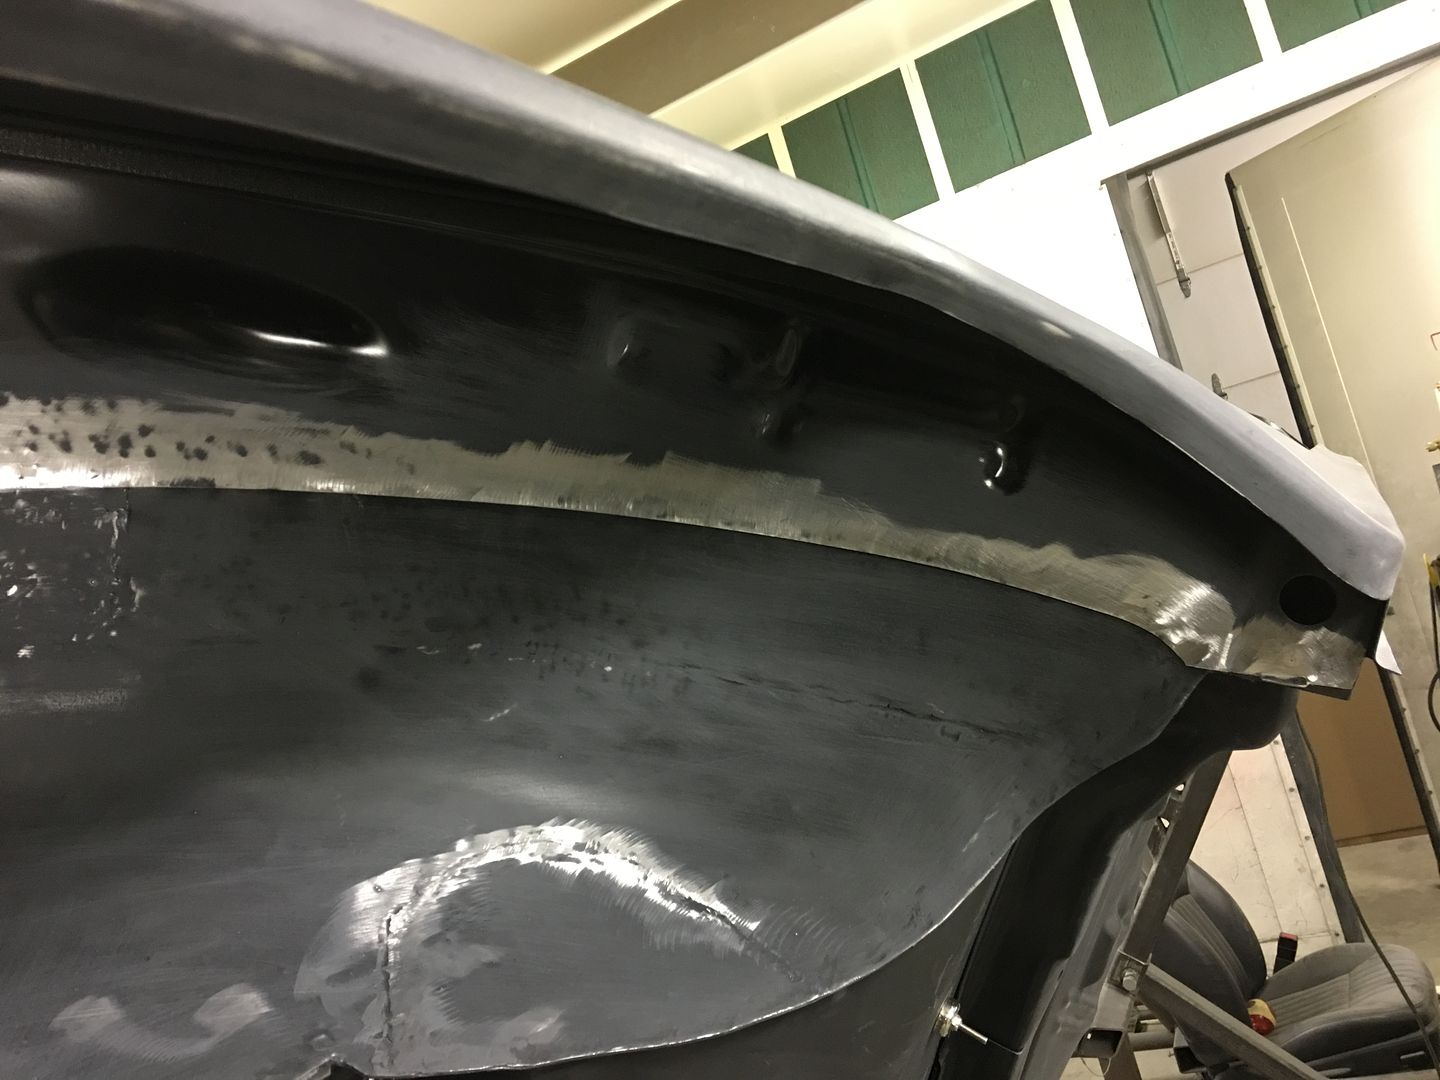
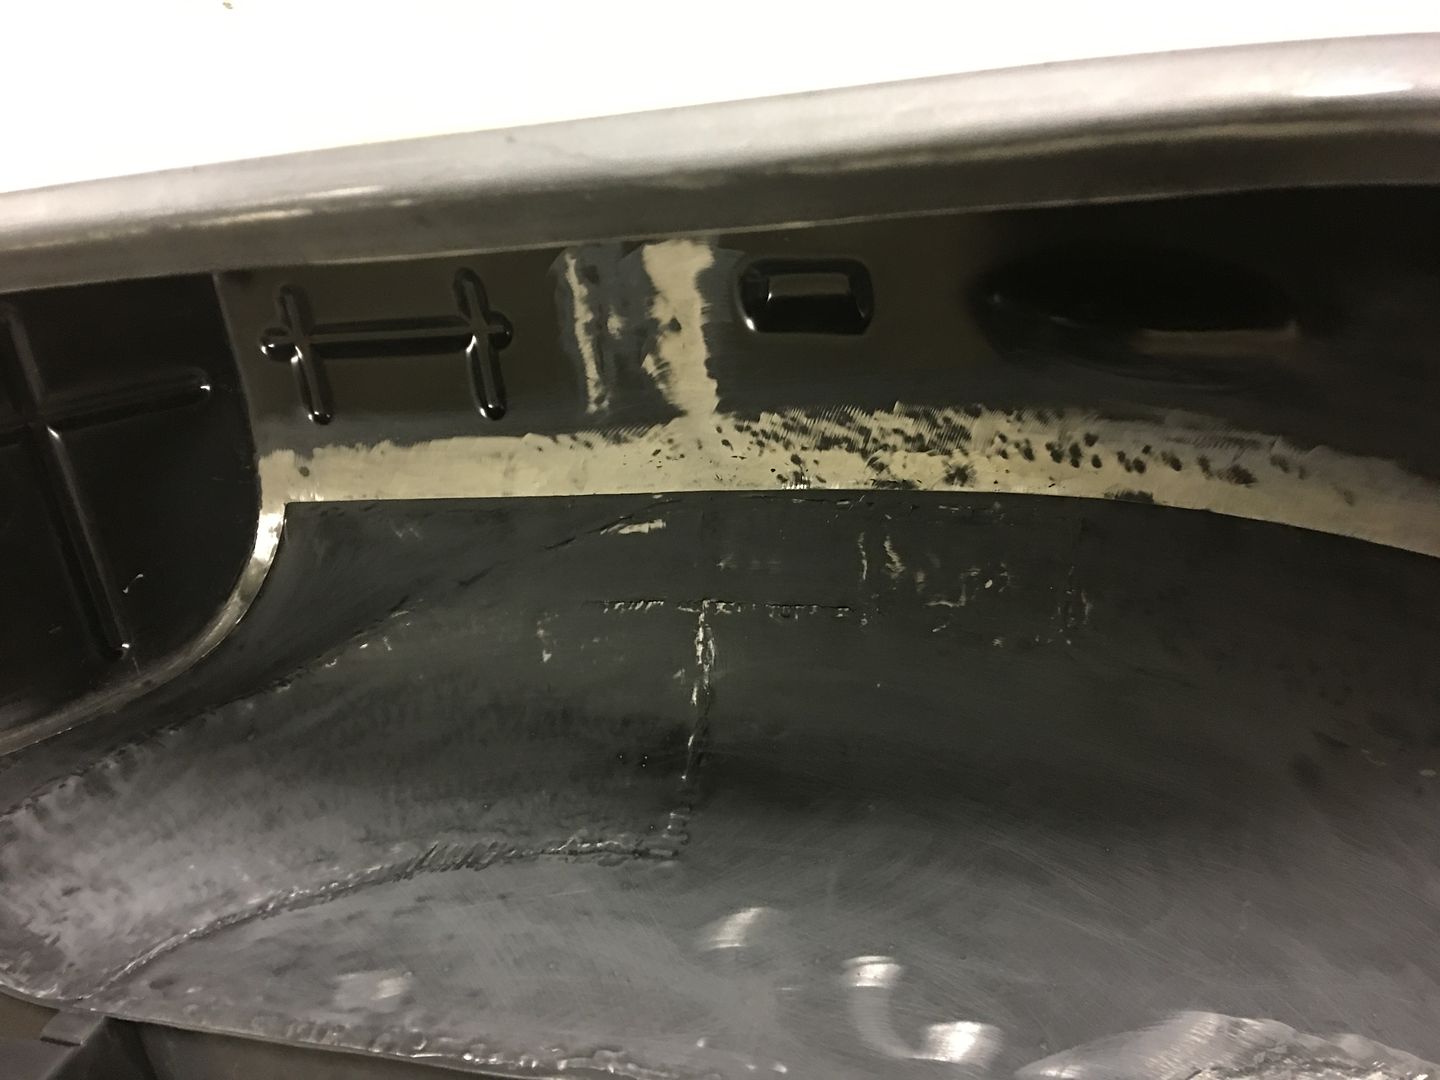
All plug welds completed and dressed. Now for the other side and we'll epoxy prime again..
__________________
Robert |
|
|
|
|
12-23-2016, 01:37 PM
|
#792 | |
|
Registered User
Join Date: May 2015
Location: texas
Posts: 253
|
Re: 55 Wagon Progress
that thing is looking jam up and jelly tight.
__________________
Black 93 CCLB 3500 6.5 diesel, GV OD, TCI Ez-TCU controlled 4L80E, back on road 10/25/16 after sitting 4 years. 96 ECLB 2500, 6.5 diesel, auto, gone. Quote:
|
|
|
|
|
|
12-27-2016, 11:58 PM
|
#793 |
|
Registered User
Join Date: Jan 2013
Location: Leonardtown, MD
Posts: 1,633
|
Re: 55 Wagon Progress
Thanks!
Tonight we worked on getting the driver's side wheel well installed. To help eliminate the contamination issue from the close proximity of the primer, we used these piloted burnishing brushes to remove the paint around the plug weld holes on both front and back sides...  That did the trick, no volcanoes this time... 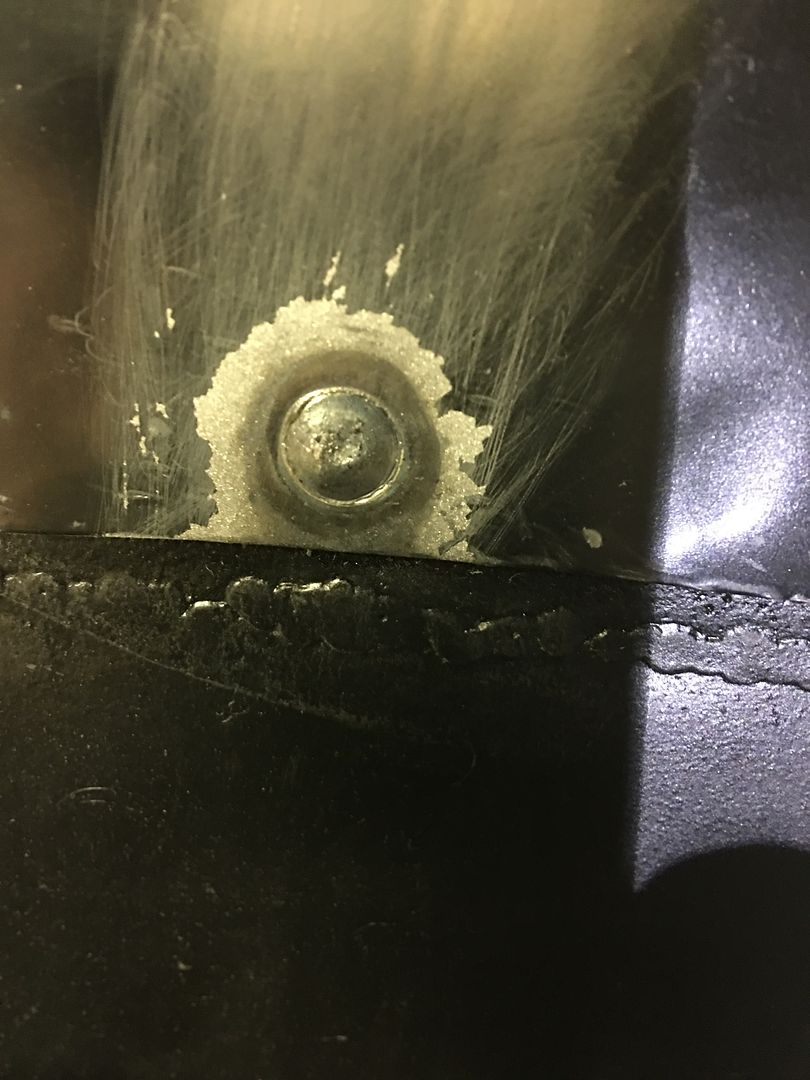 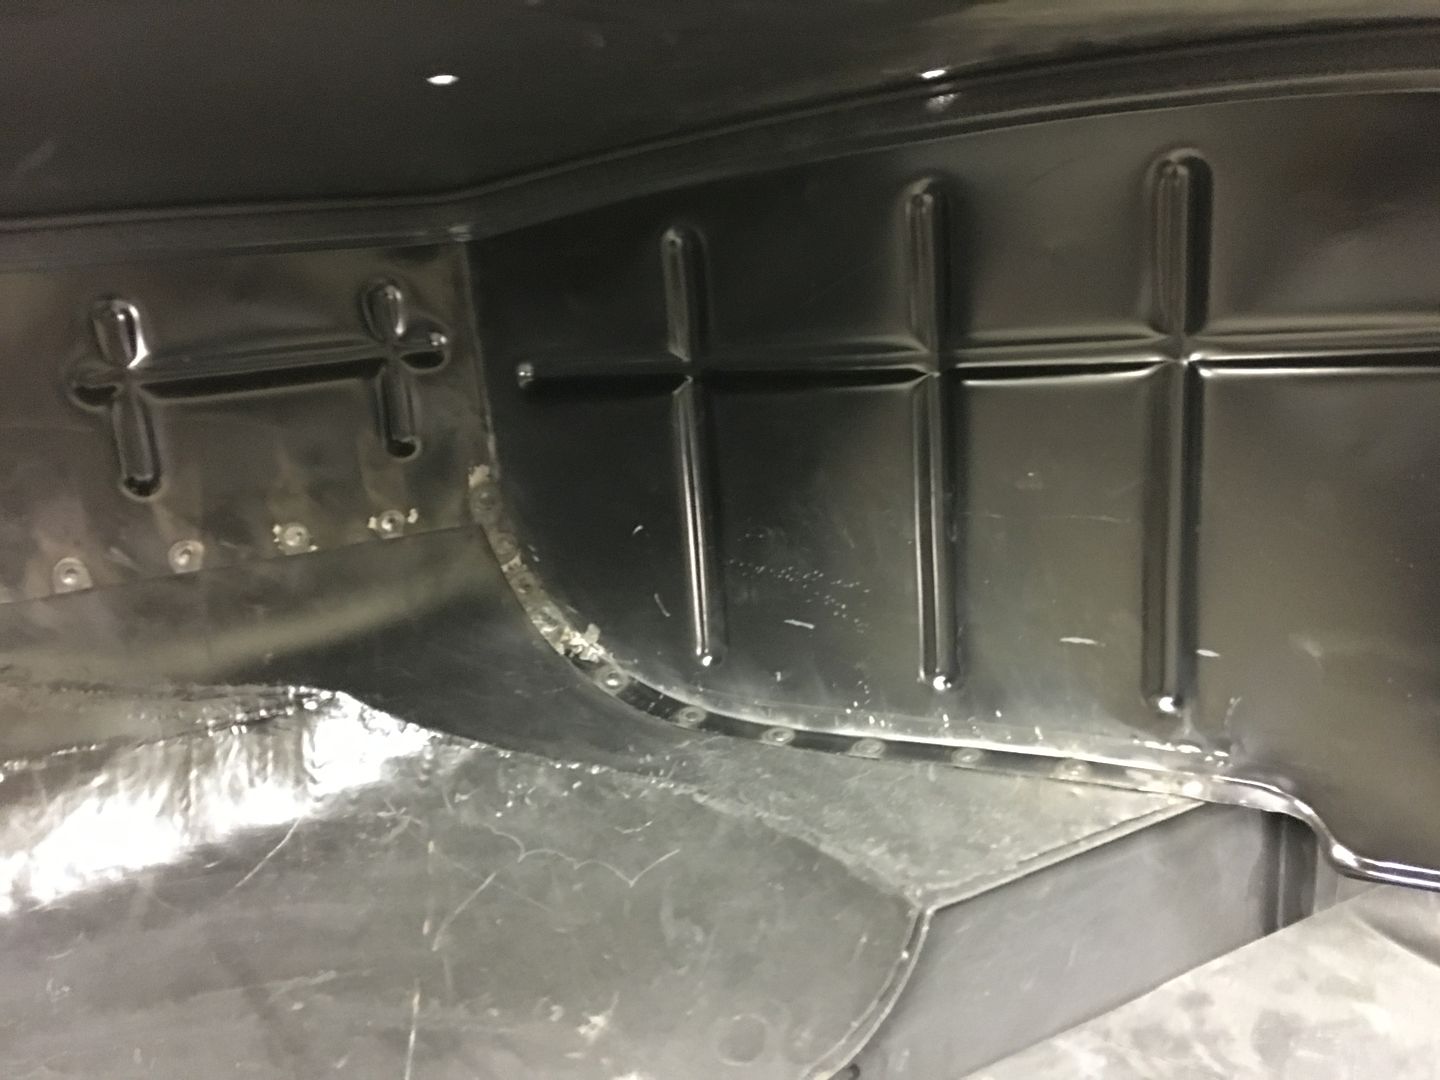 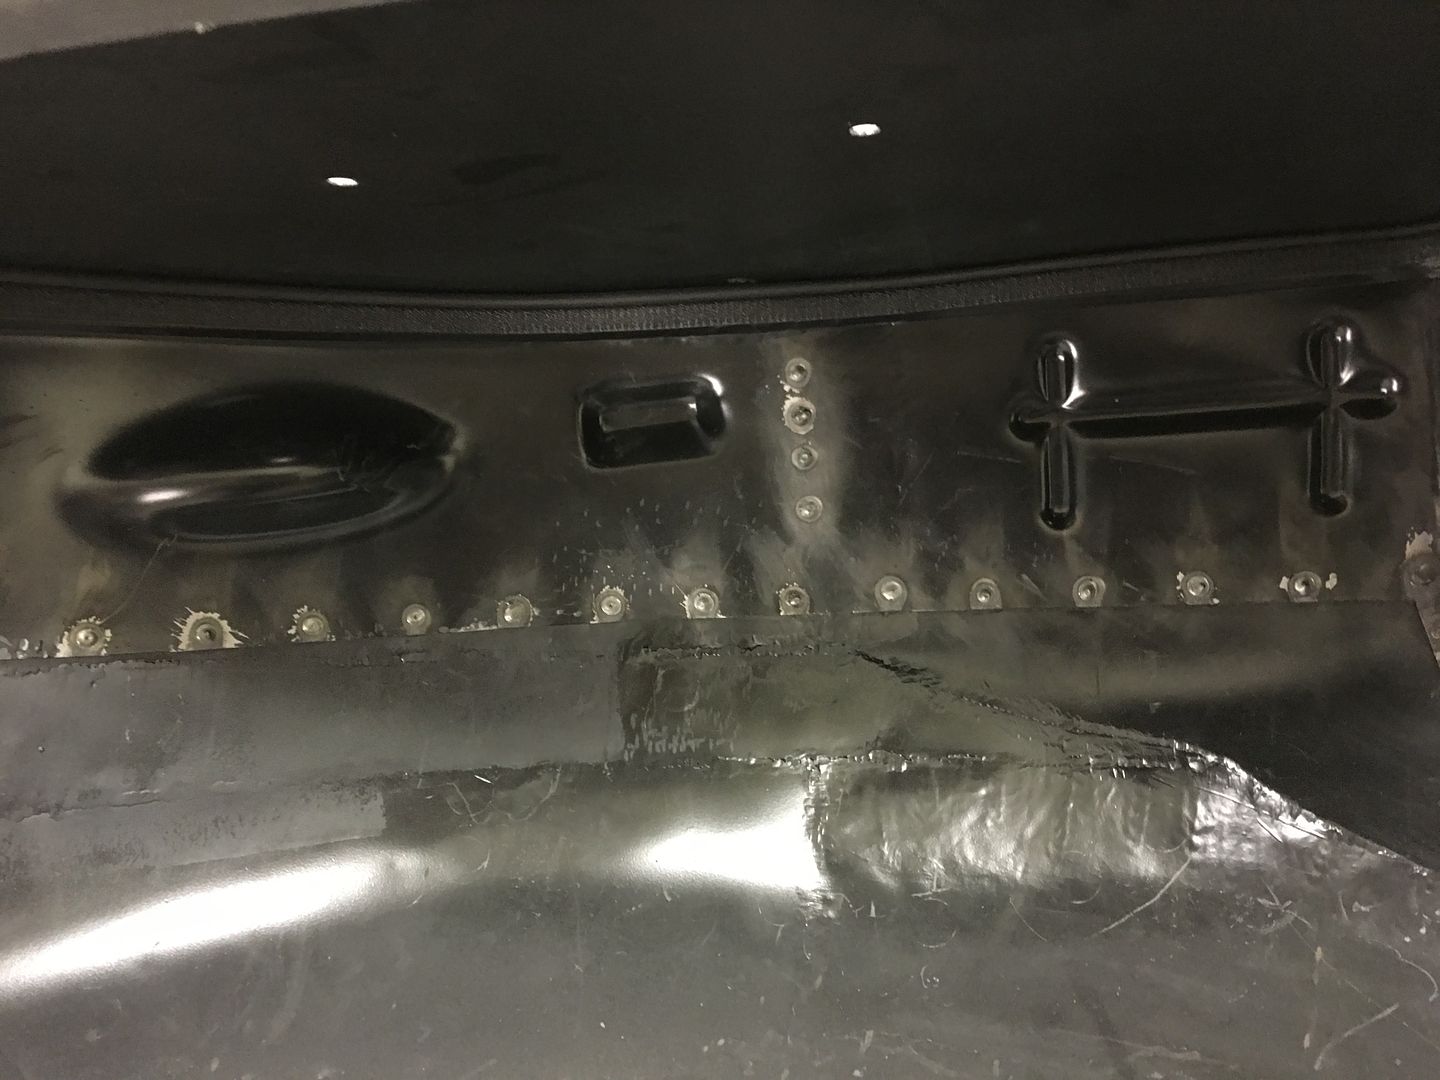 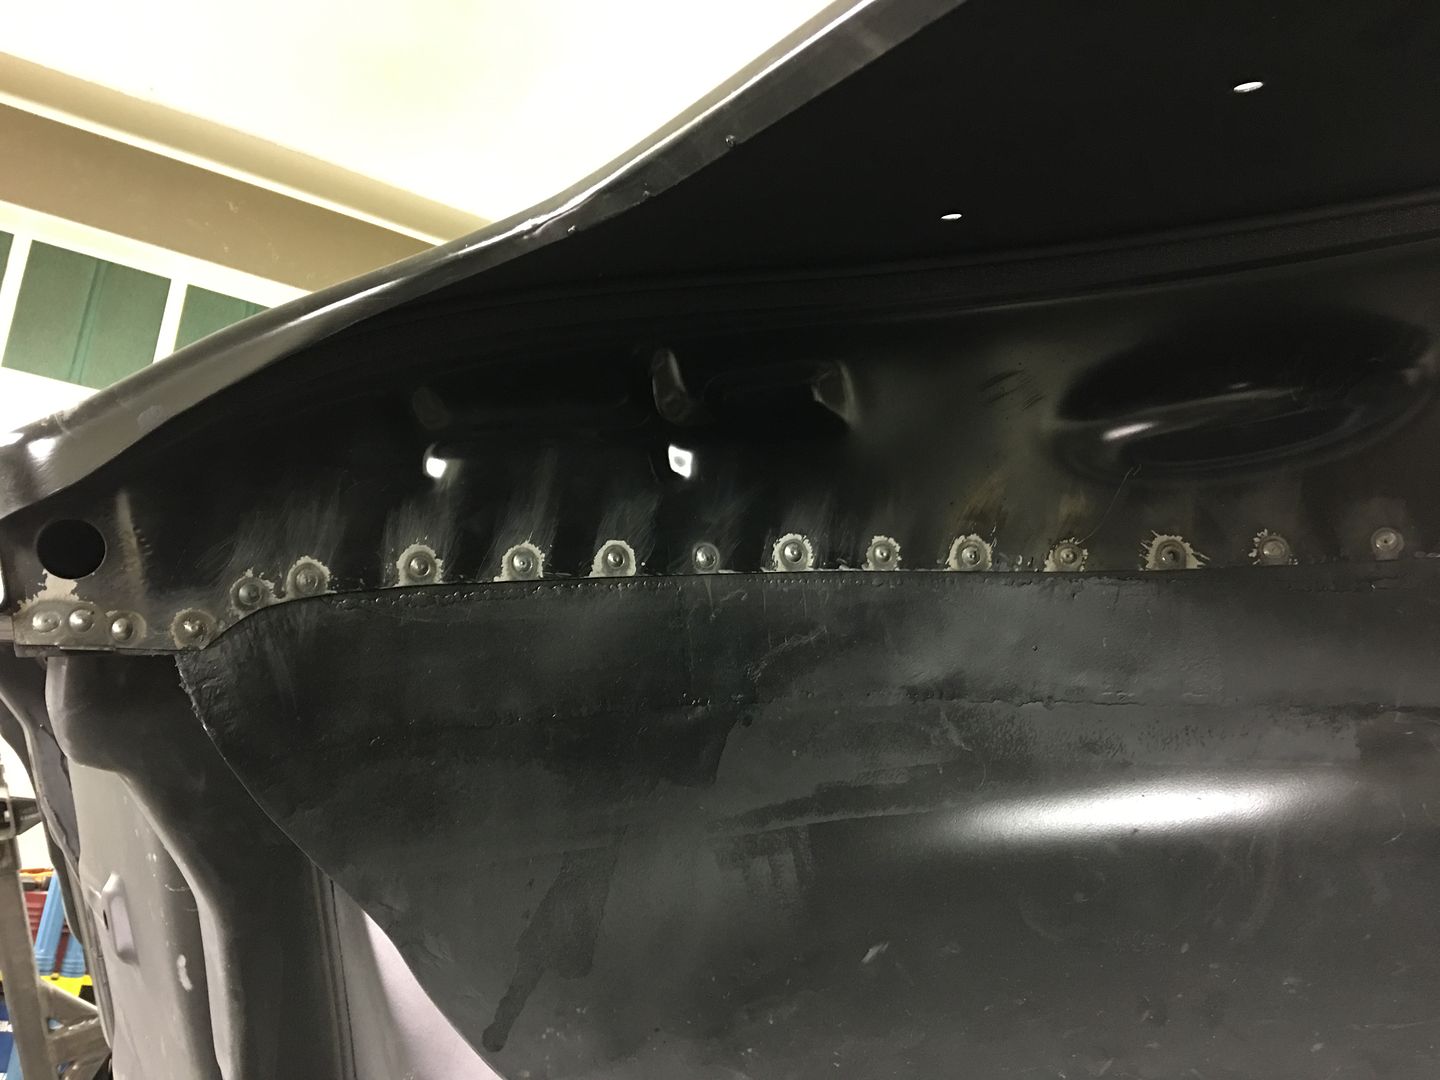 Next we'll need to dress these welds and epoxy prime the bare spots. In the meantime, a test fit of the bucket seats. We're going to need to make some adapter brackets to weld to the floor, I don't think the wood one is going to fly... 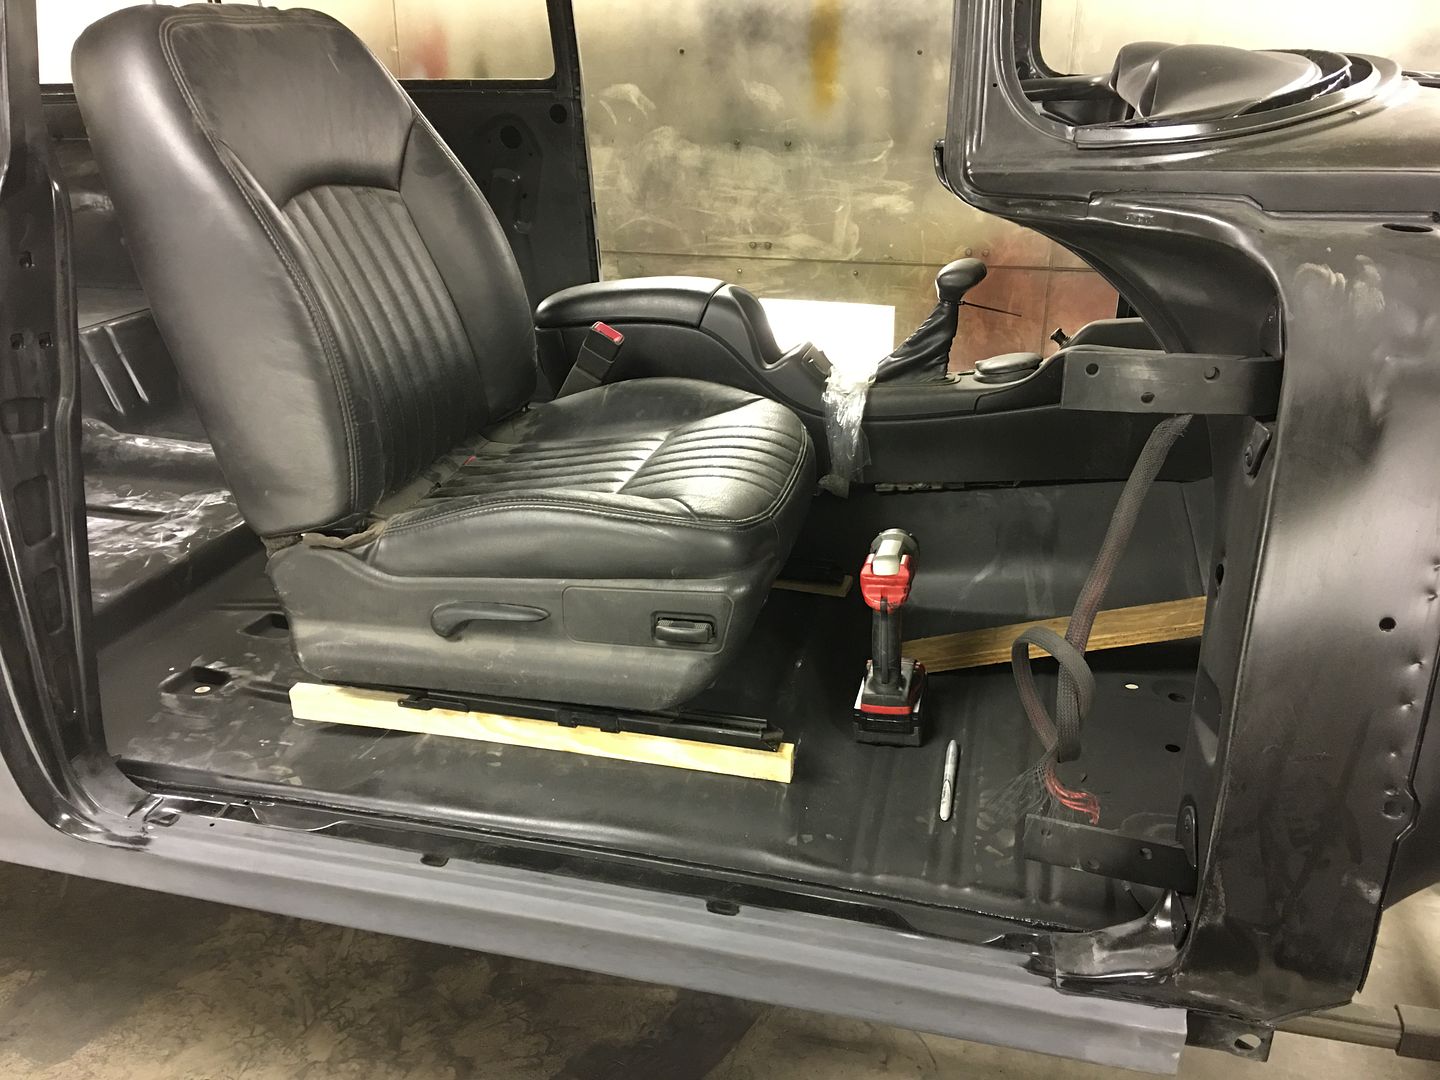
__________________
Robert |
|
|
|
|
12-28-2016, 11:26 AM
|
#794 |
|
Registered User
Join Date: Dec 2011
Location: Morris, Alabama
Posts: 178
|
Re: 55 Wagon Progress
That burnishing brush is the ticket! I've never seen one before but that is a great idea and makes a much nicer area than the 2" roloc I've always used.
|
|
|
|
|
01-03-2017, 08:01 AM
|
#795 |
|
Registered User
Join Date: Jan 2013
Location: Leonardtown, MD
Posts: 1,633
|
Re: 55 Wagon Progress
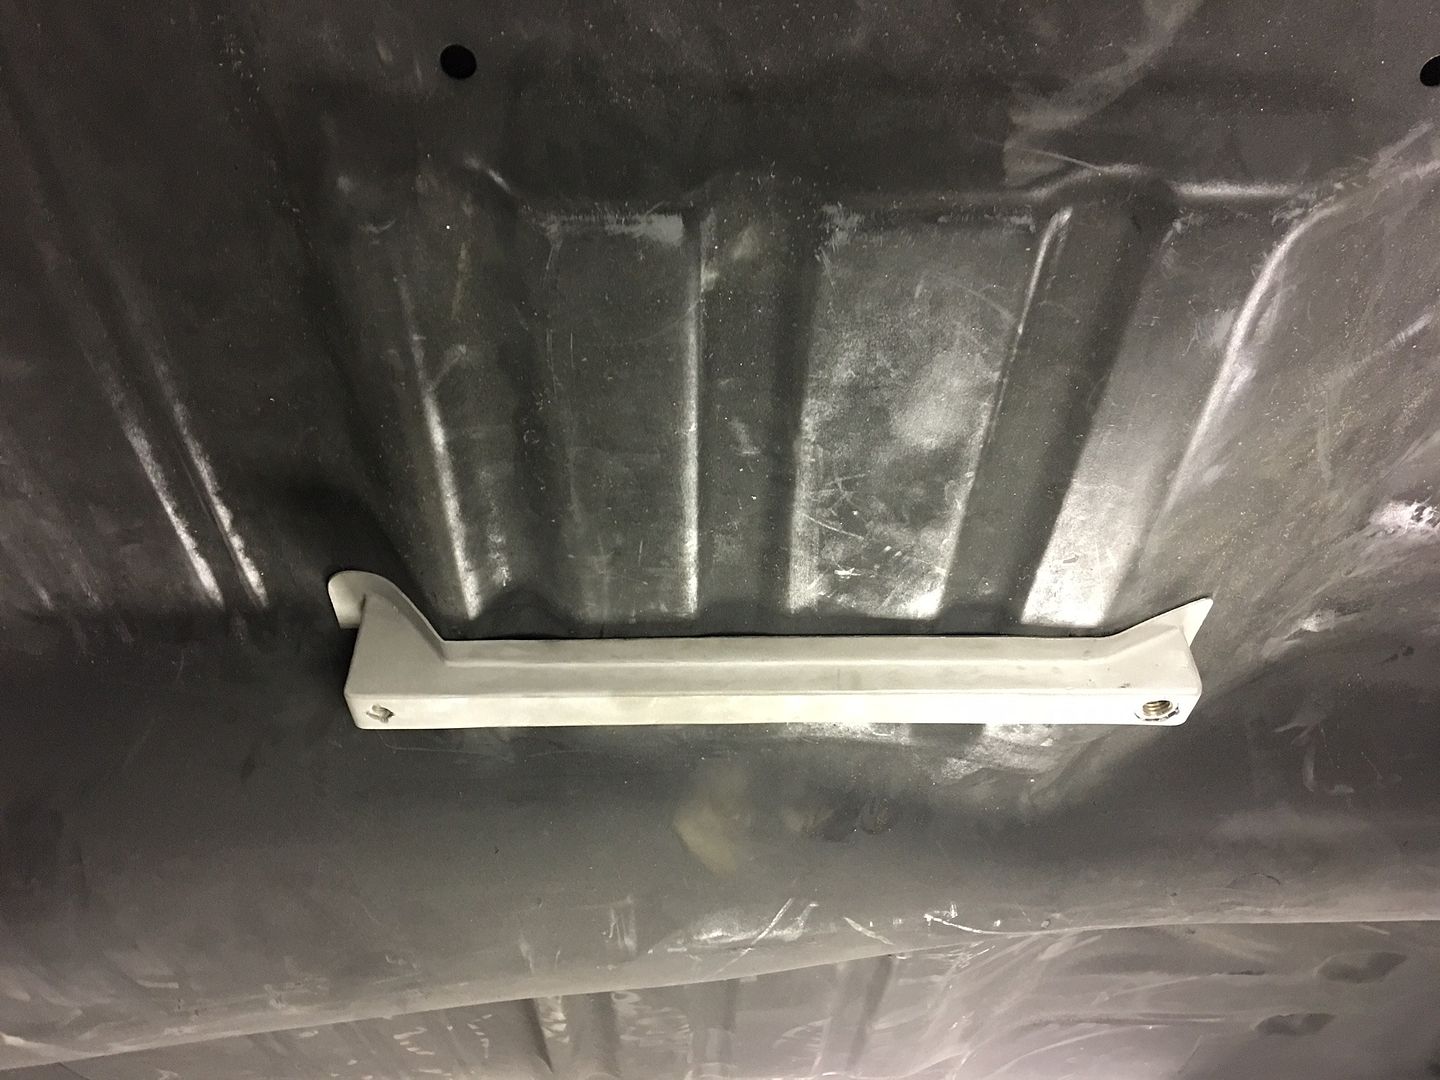
Here's the path we took on the seat risers....it's been a while now that GM has used wood in the vehicle, no sense in us bucking that trend! Started by fabbing up some 14 gauge steel into a hat section and left some longer ears on the ends to fold down and close the ends off..
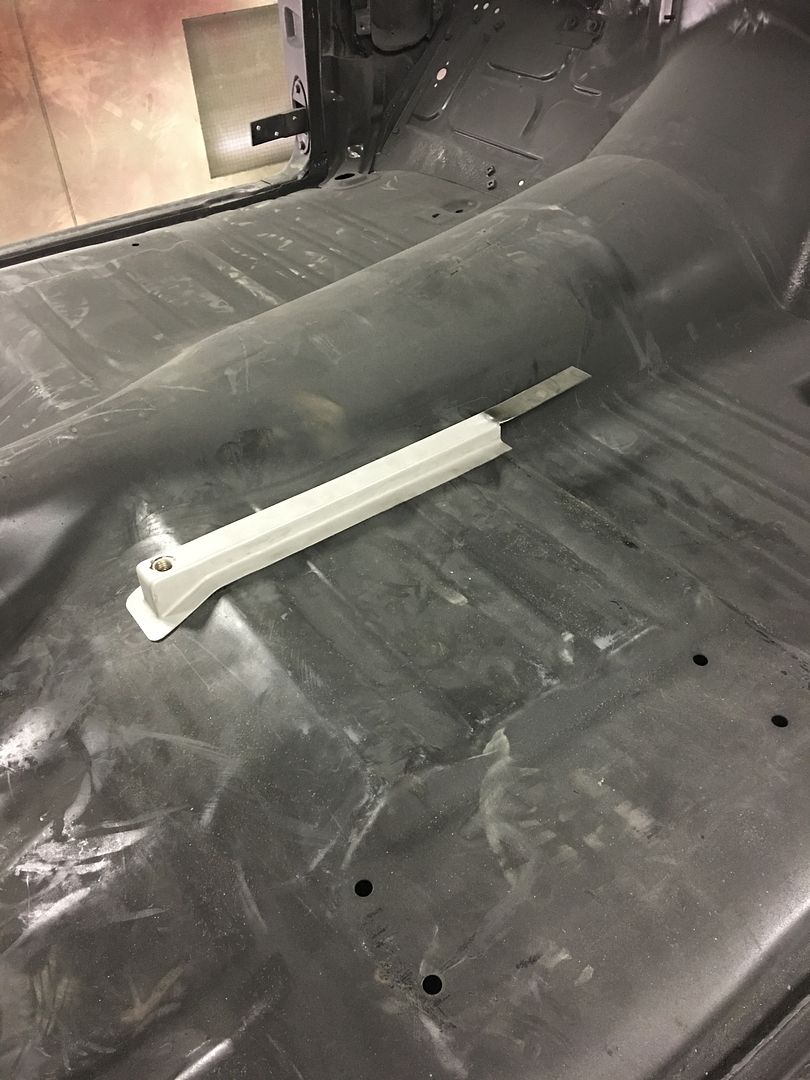 Stainless hex nut welded inside for the seat frame hardware.. 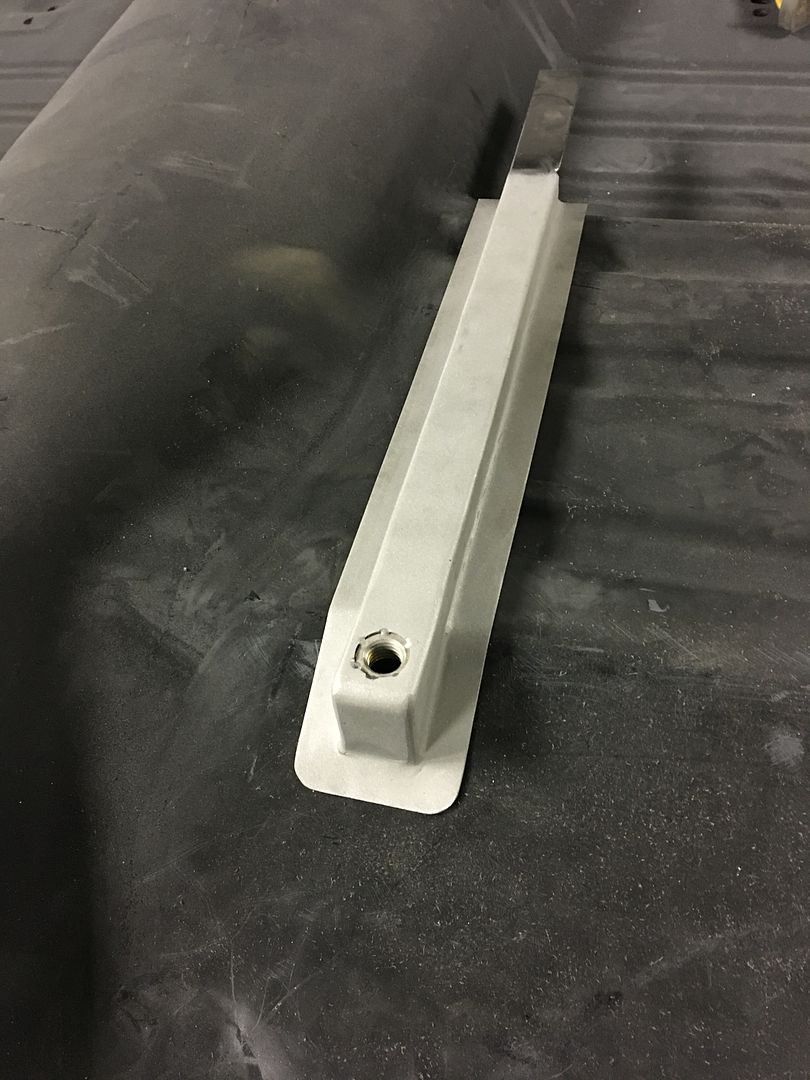 Missed getting these pics on the other end, but cardboard templates were transposed to steel fillers, cut out and welded in place, along with the flanges around the perimeter. 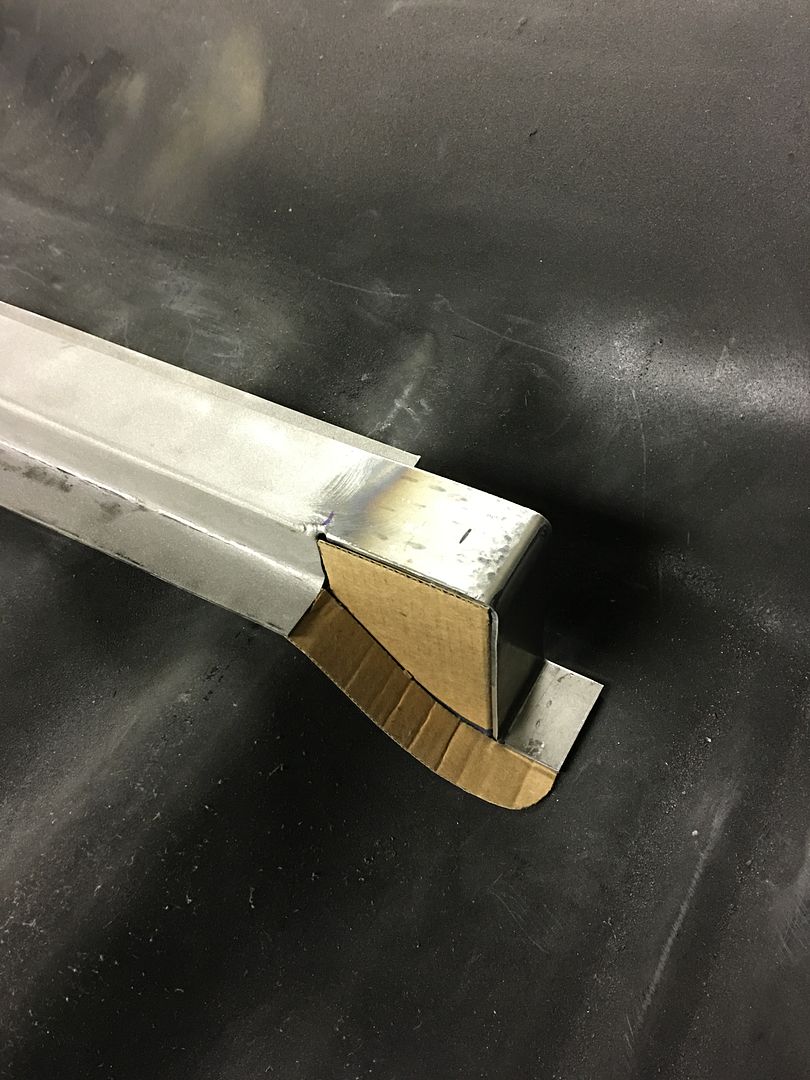 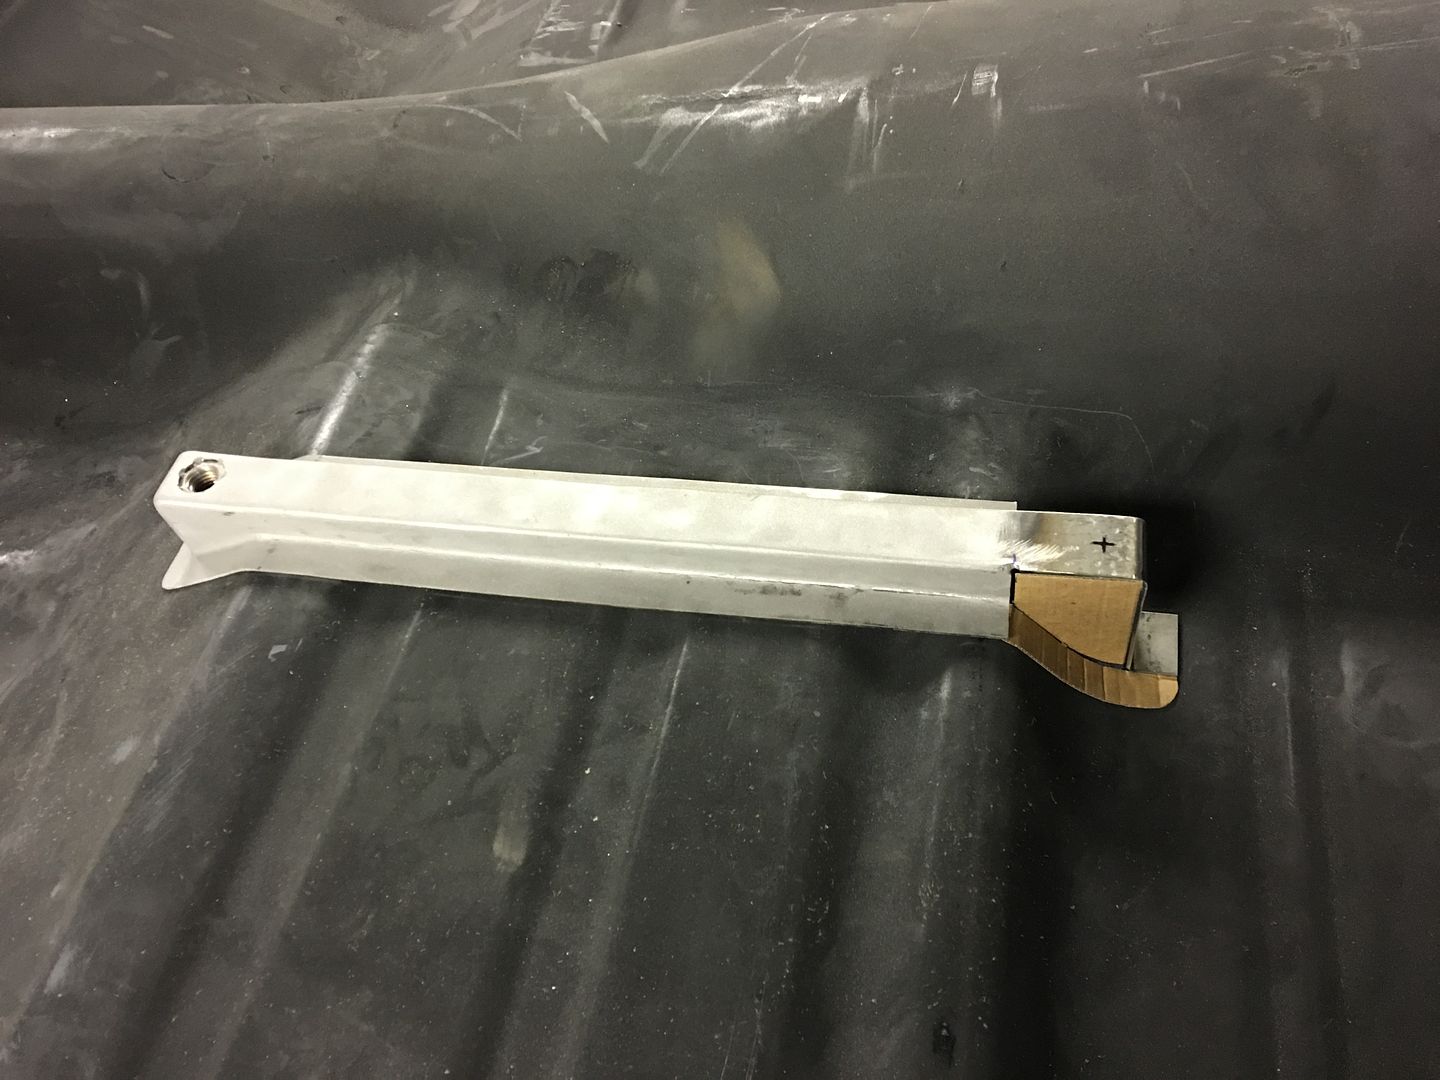 We plan on finishing the inner risers up this evening and leveling the seats across for sizing the height of the outer risers. Finished up the plug welds on the driver's wheel well. We'll get a few more parts prepped for epoxy and address those bare spots at the same time. 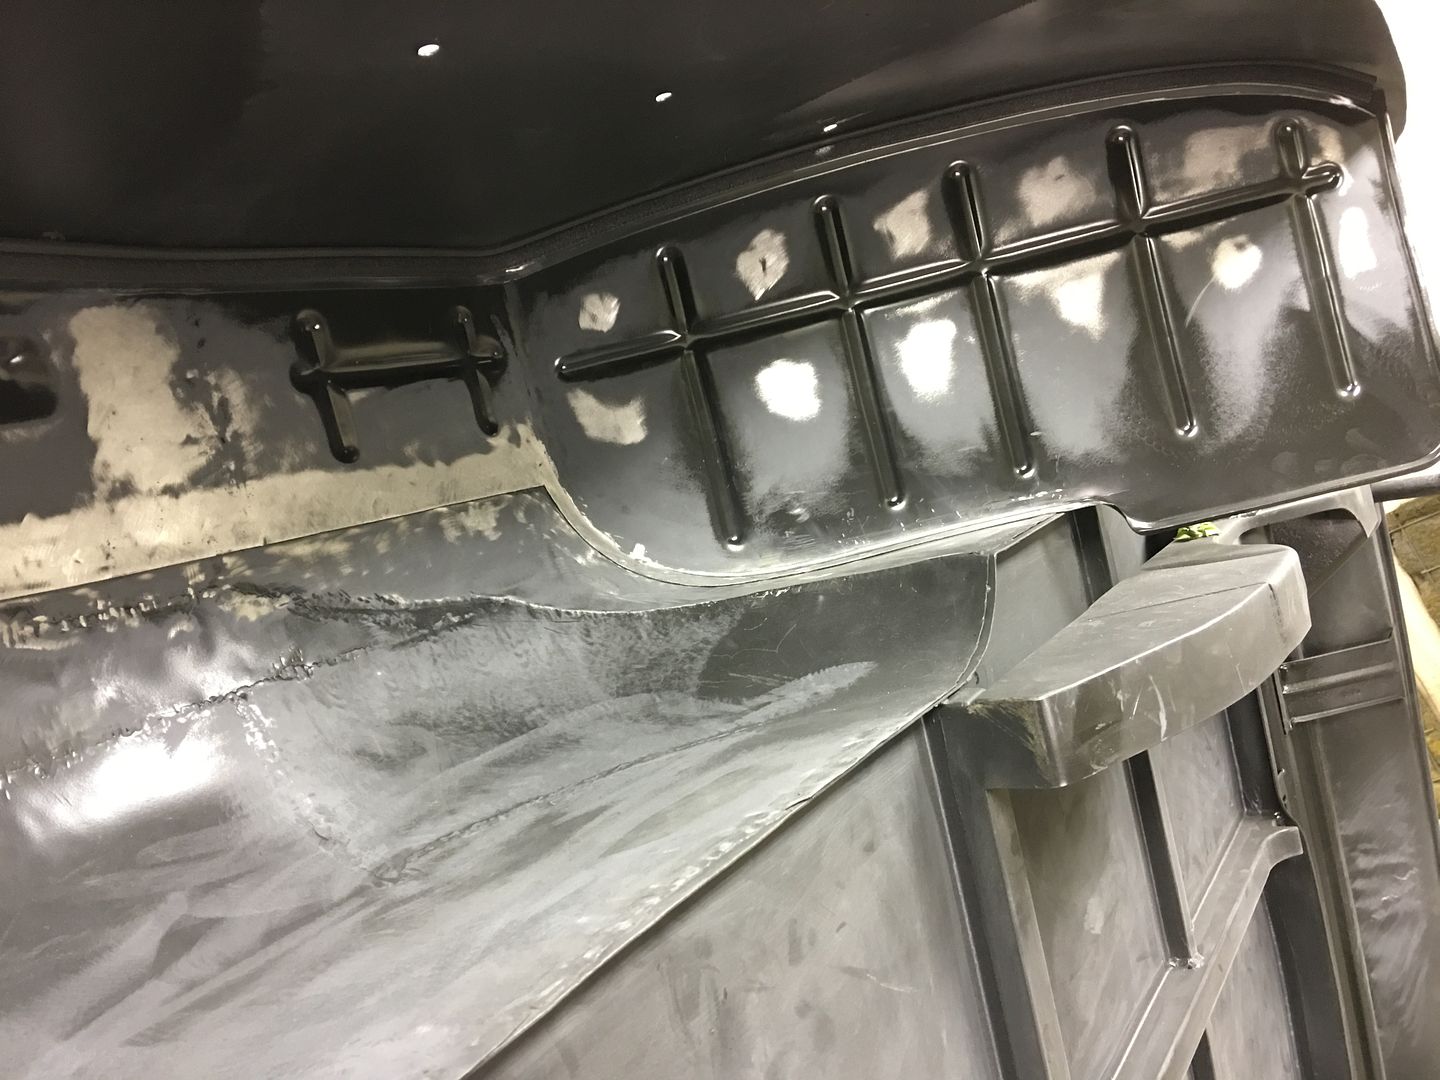 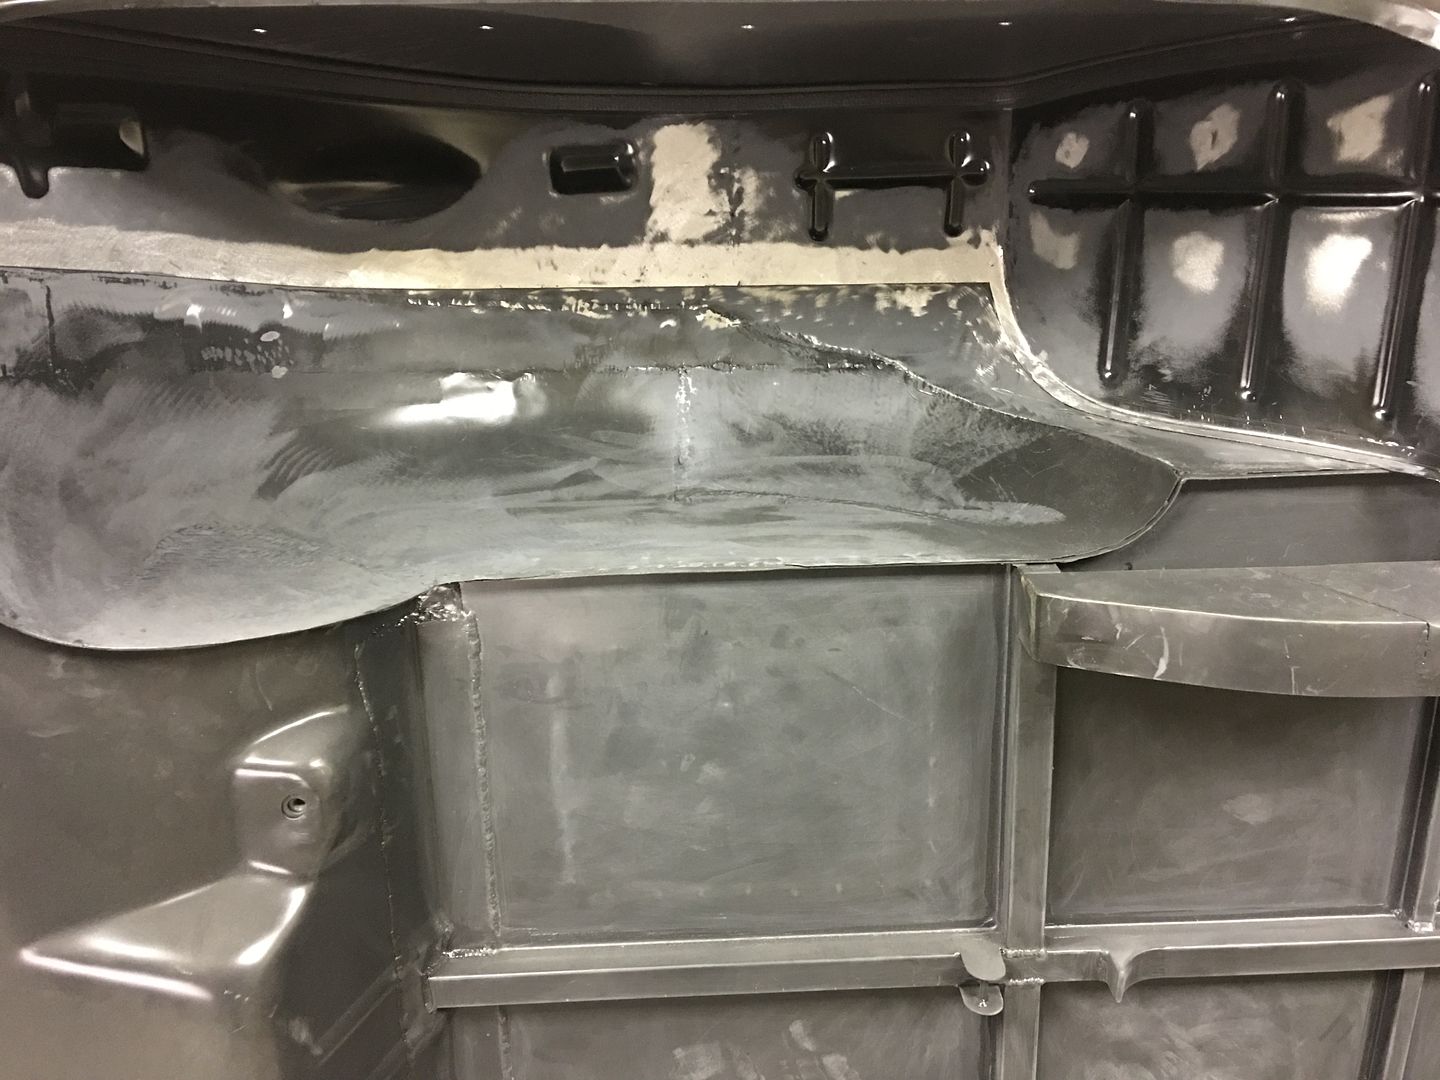 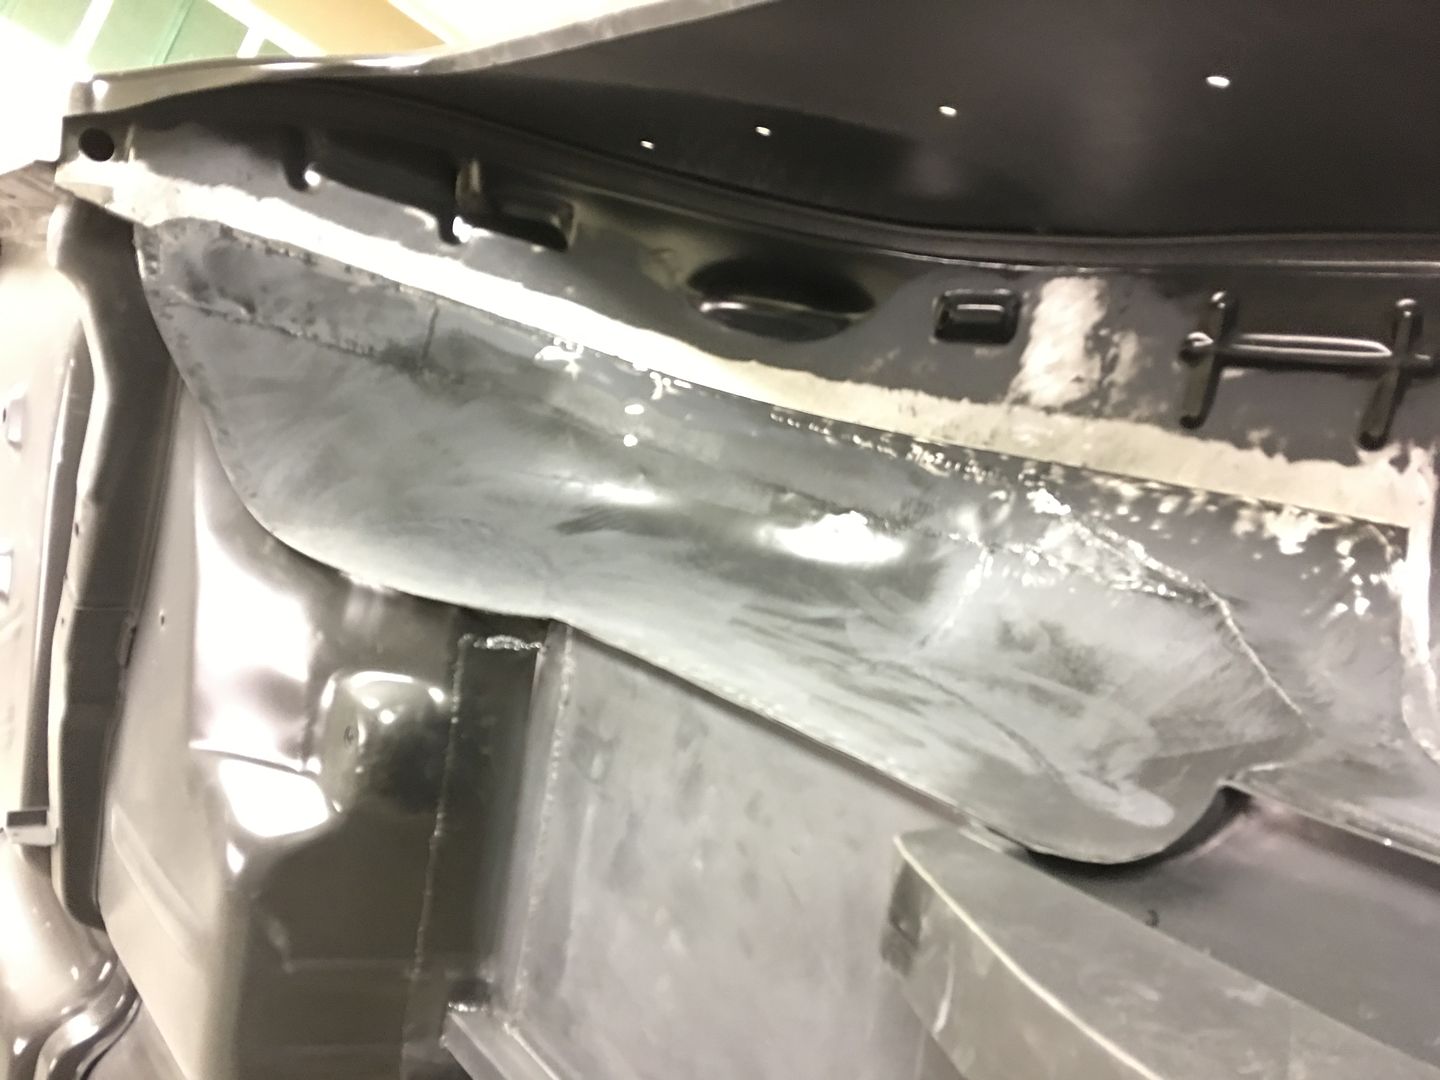
__________________
Robert |
|
|
|
|
01-04-2017, 11:06 PM
|
#796 |
|
Registered User
Join Date: Jan 2013
Location: Leonardtown, MD
Posts: 1,633
|
Re: 55 Wagon Progress
Seat riser bracket number two fabrication, got more detail pictures this time..
Used the Tipping die in the Lennox to thin out the crease line, makes for a more crisp bend, especially given the 14 gauge steel we're using... 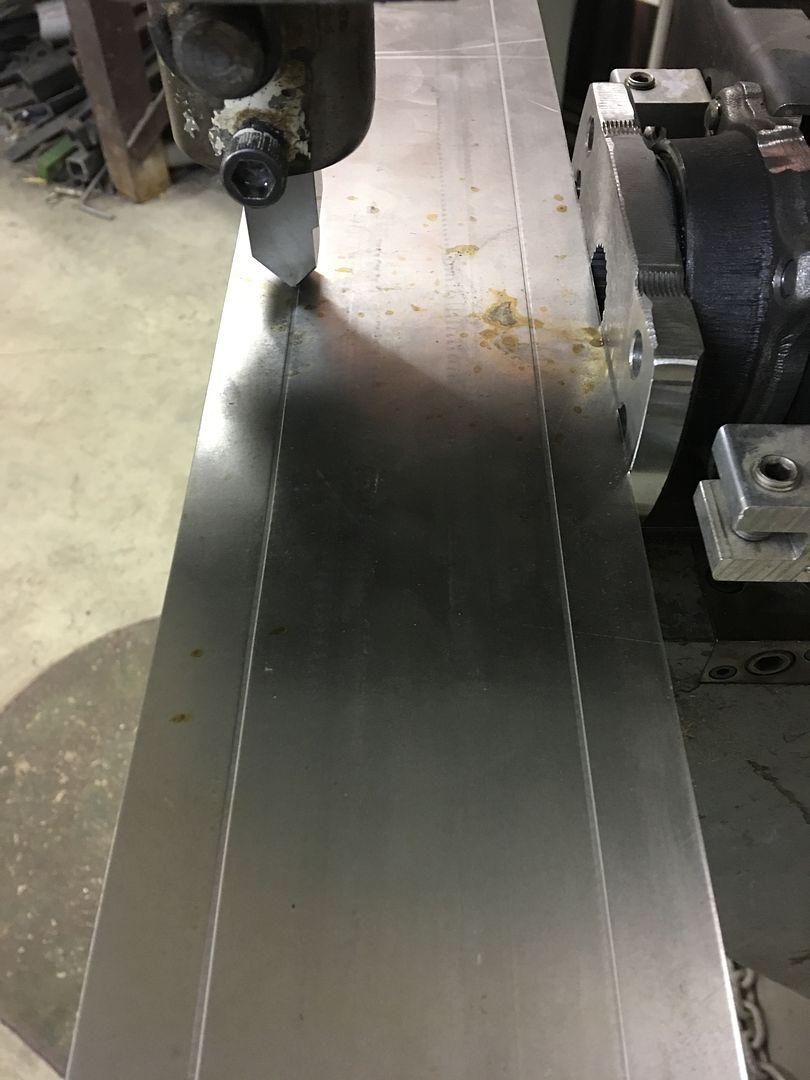 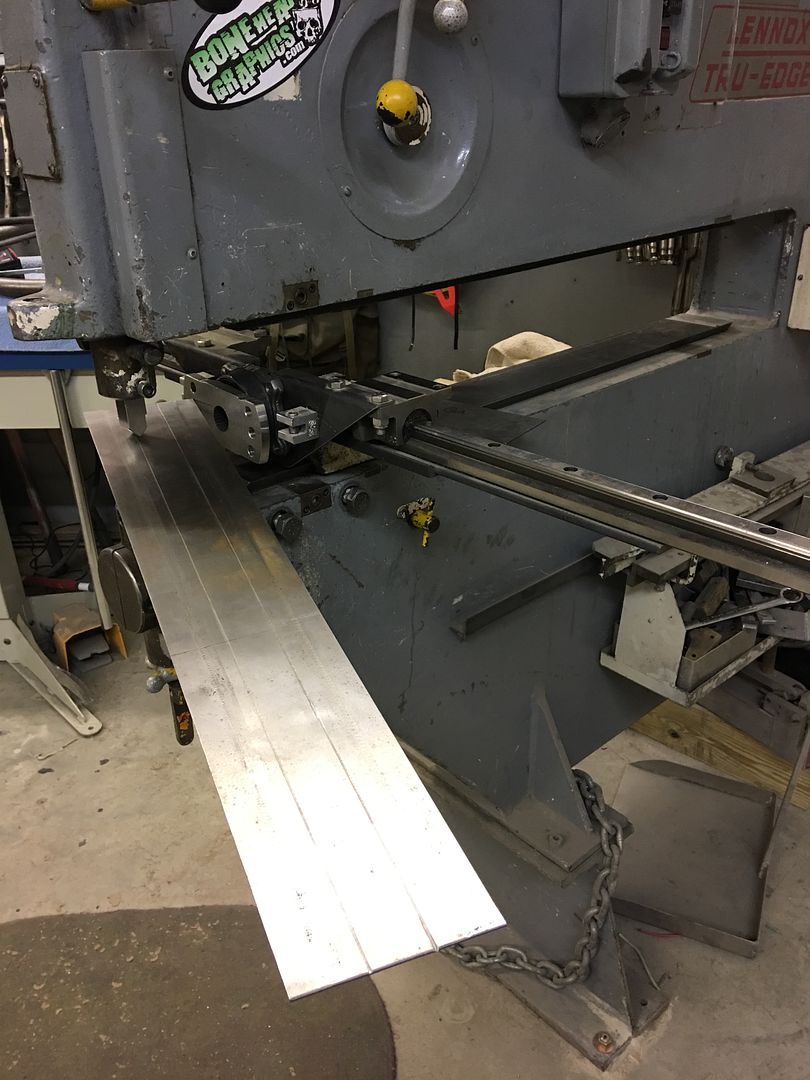 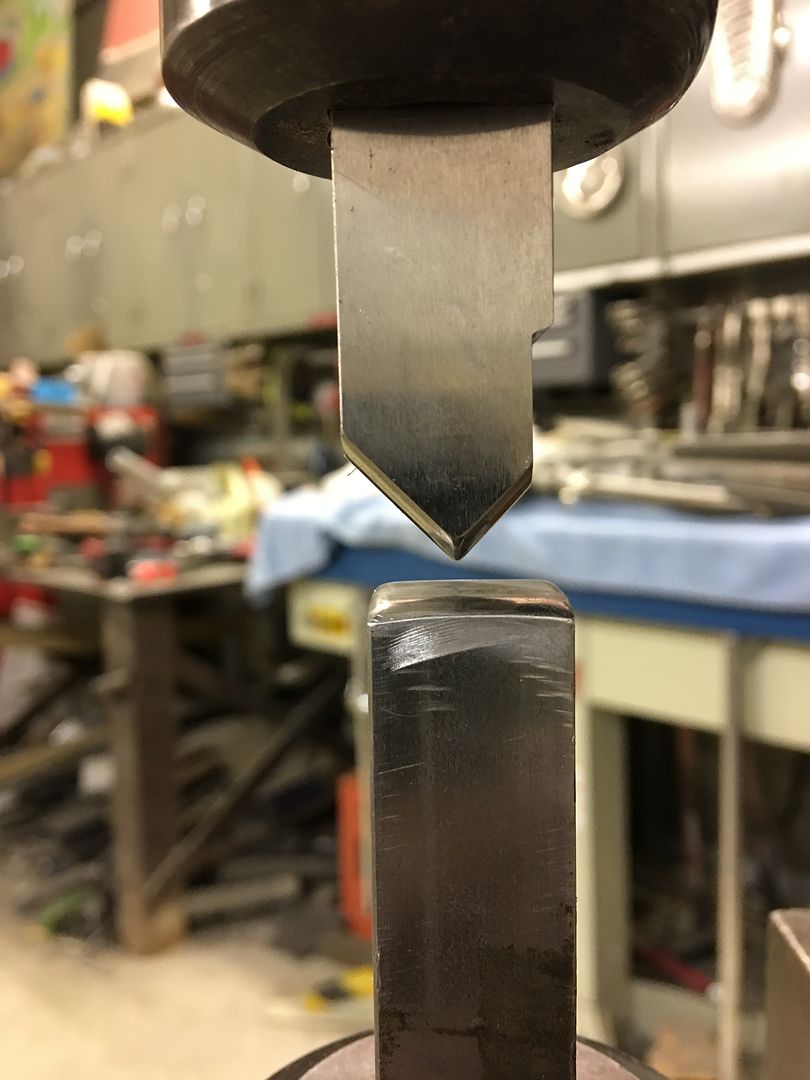 After bending in the Diacro manual press brake using the gooseneck die...  Fitting and trimming the end transitions while matched to the floor... 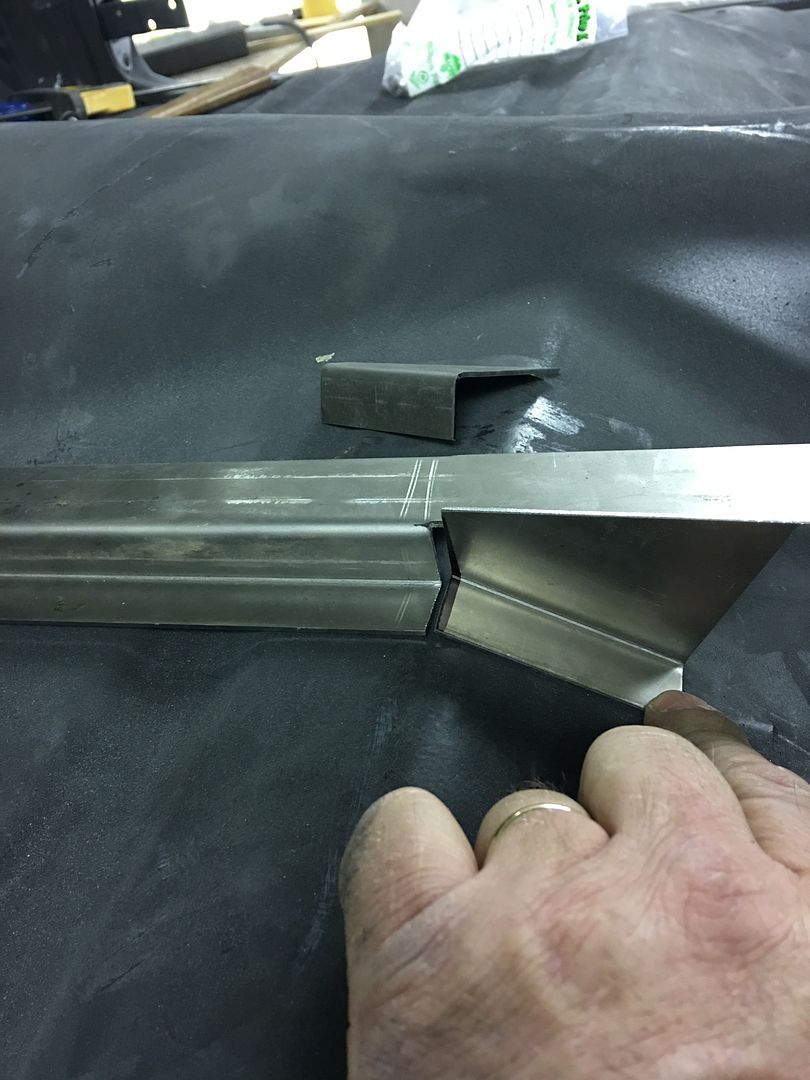 Ready for the TIG 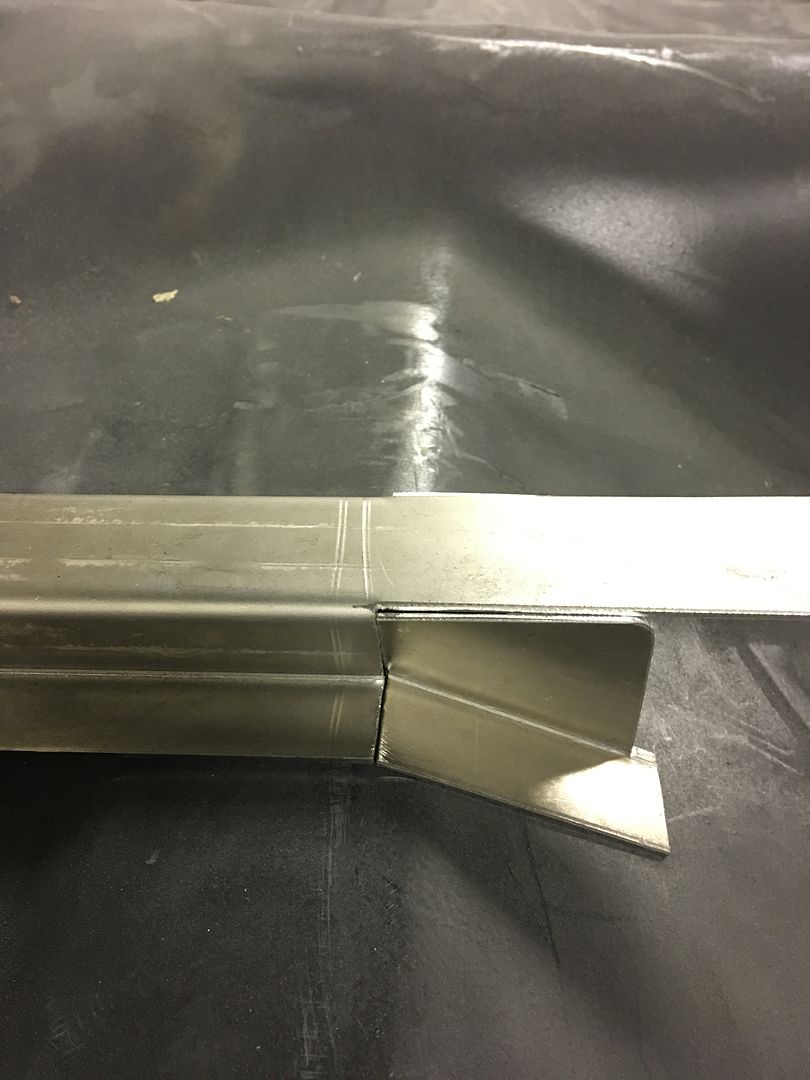
__________________
Robert |
|
|
|
|
01-07-2017, 10:46 PM
|
#797 |
|
Registered User
Join Date: Jan 2013
Location: Leonardtown, MD
Posts: 1,633
|
Re: 55 Wagon Progress
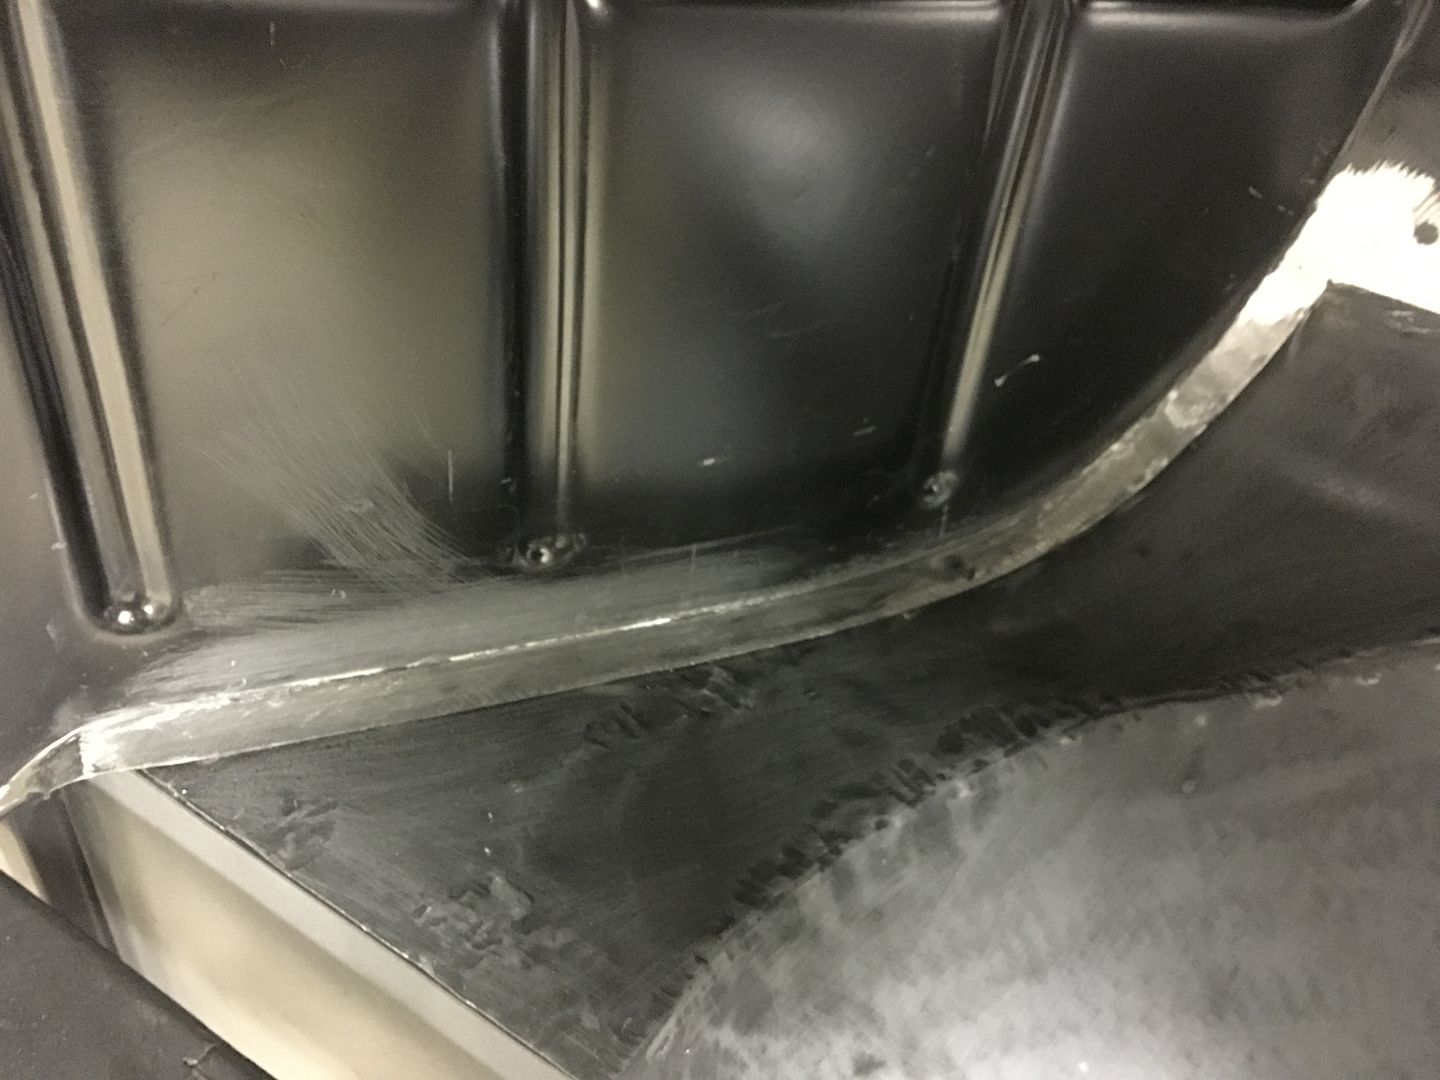
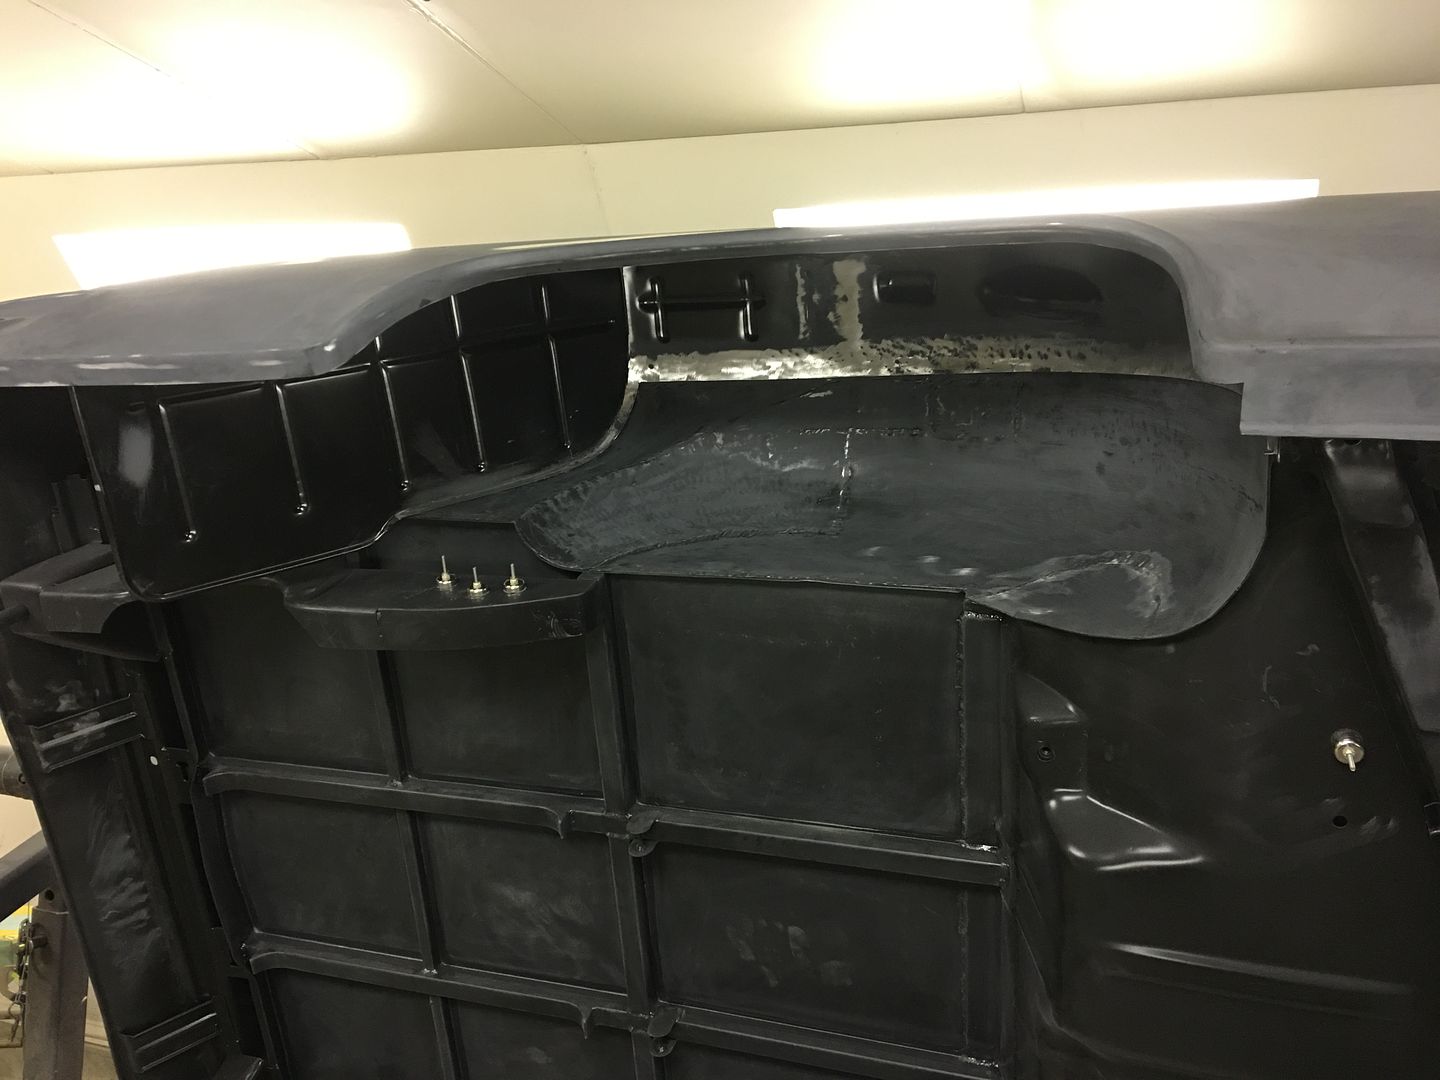
OK, so sometimes you take another look and think yeah, we can do better than that. Today the passenger bucket seat was test fit onto our riser. It could be brought a bit tighter to the floor.
 Next, looking at the cross member, the rear flange (red arrows) didn't match up to the rear flange of our riser. 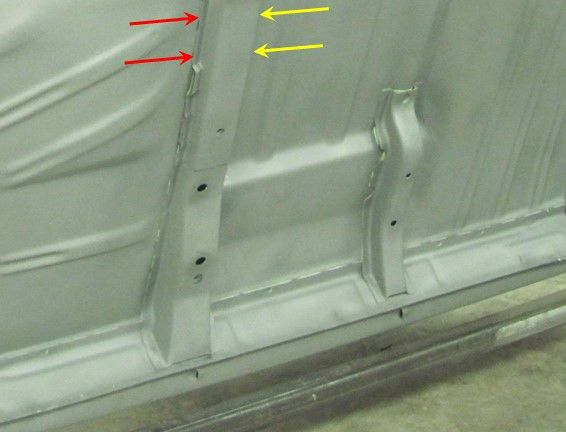 The blue tape shows the rear flange of the cross member below... 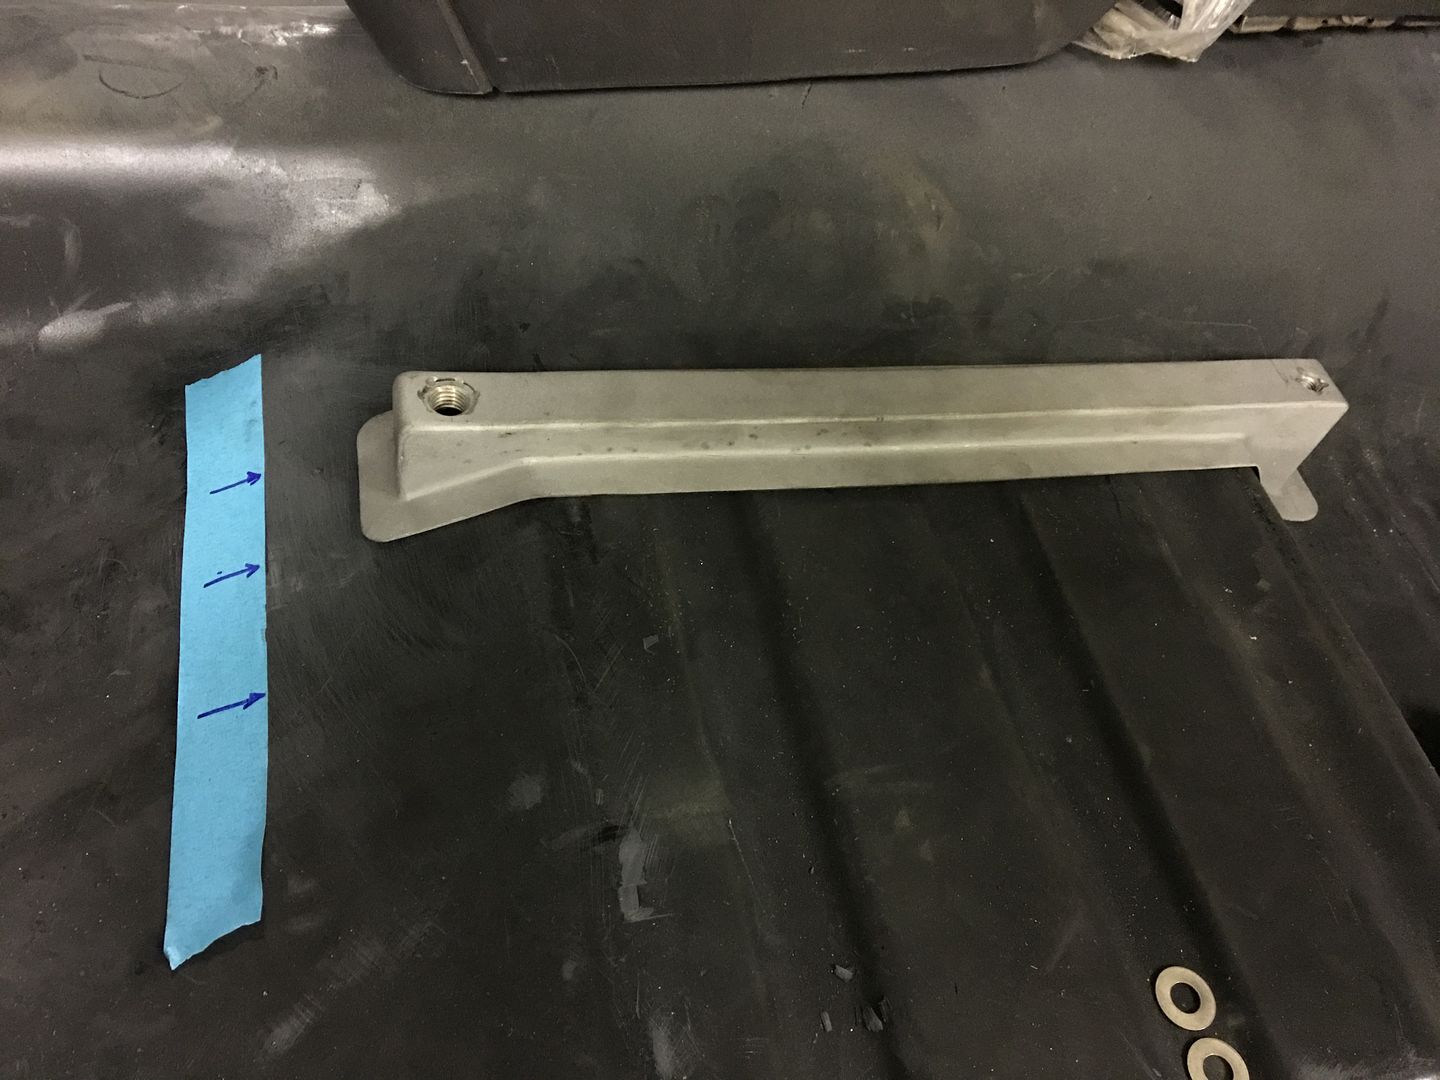 Here's our updated riser, half as tall, and once trimmed the flange will match to above the cross member.. 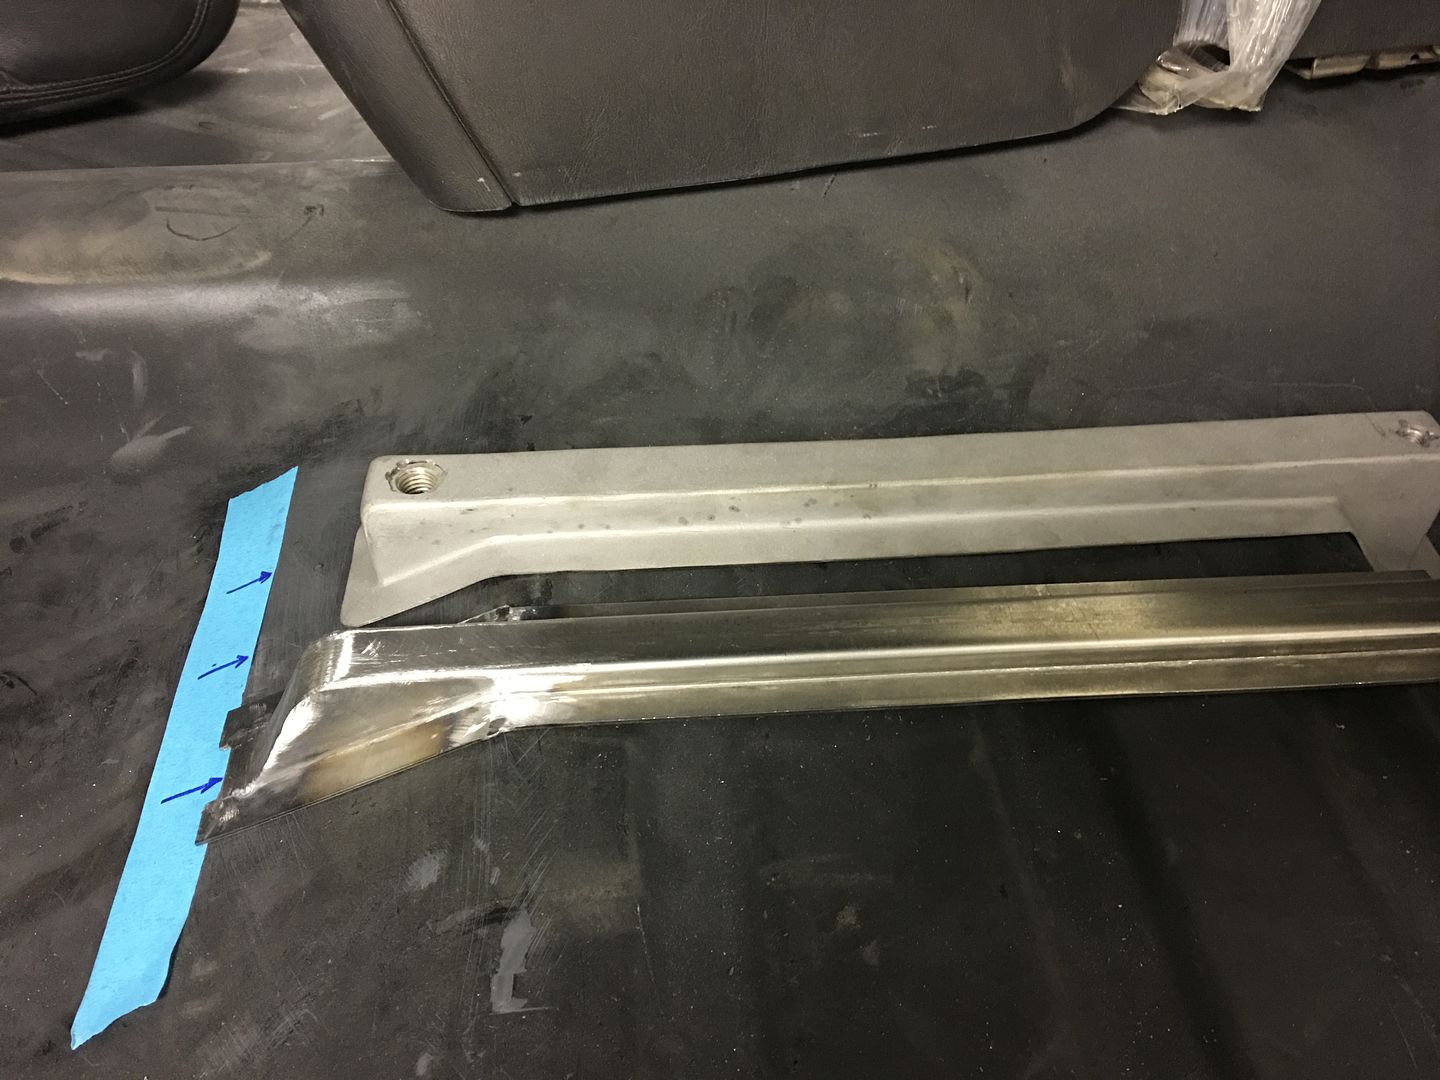
__________________
Robert |
|
|
|
|
01-08-2017, 12:56 AM
|
#798 |
|
Registered User
Join Date: Apr 2011
Location: .
Posts: 3,104
|
Re: 55 Wagon Progress
That is cool,
Make a more awesomer' bracket after making an awesome seat bracket and it fits the underside better. Totally in aw |
|
|
|
|
01-11-2017, 10:27 AM
|
#799 |
|
Registered User
Join Date: Jan 2013
Location: Leonardtown, MD
Posts: 1,633
|
Re: 55 Wagon Progress
Thanks Bomp!
More details on the seat risers, here the 5/8-11 hex nut is welded inside. The tacks at the top are merely to hold it centered within the hole to maintain our correct C-C hole spacing. It gets welded inside as well to keep things anchored in place. 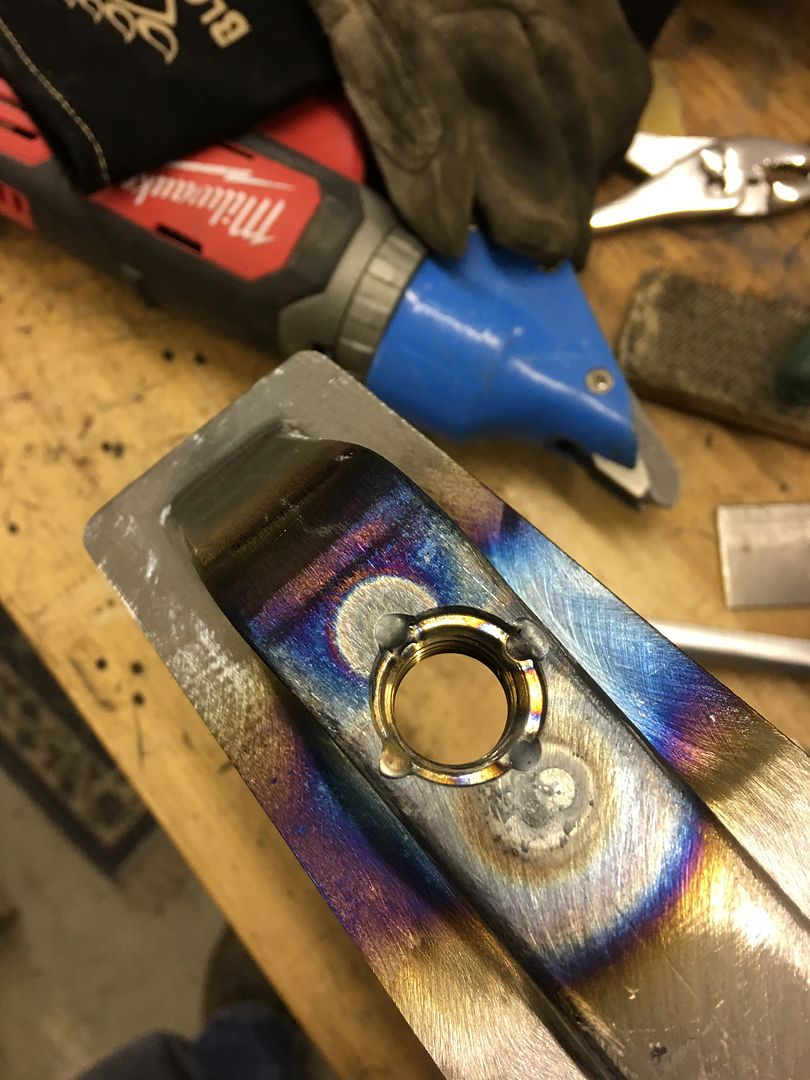  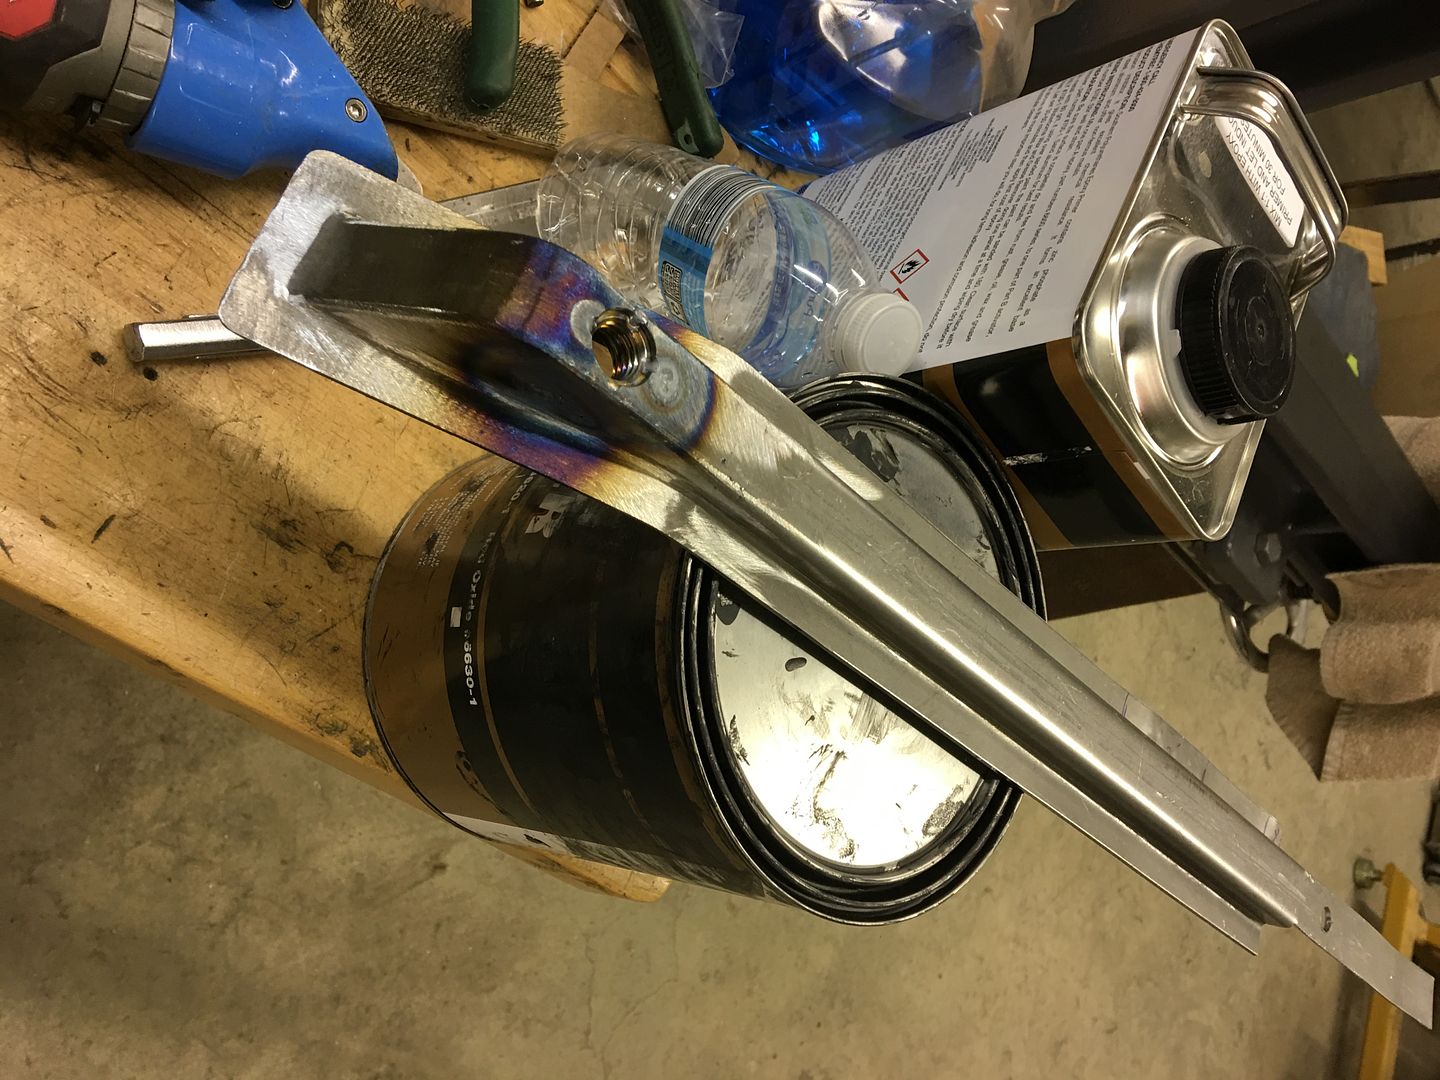 The 5/8 hardware was chosen as the factory seat bracket on these 2002 Monte Carlo seats had a hole that large existing already. The front of the seat bracket actually had another bracket underneath that was held in place with a solid rivet. We drilled out the rivet to remove the obstacle (so the rail was flat across the bottom), and opened the hole up for 3/8 hardware. Test fit.... 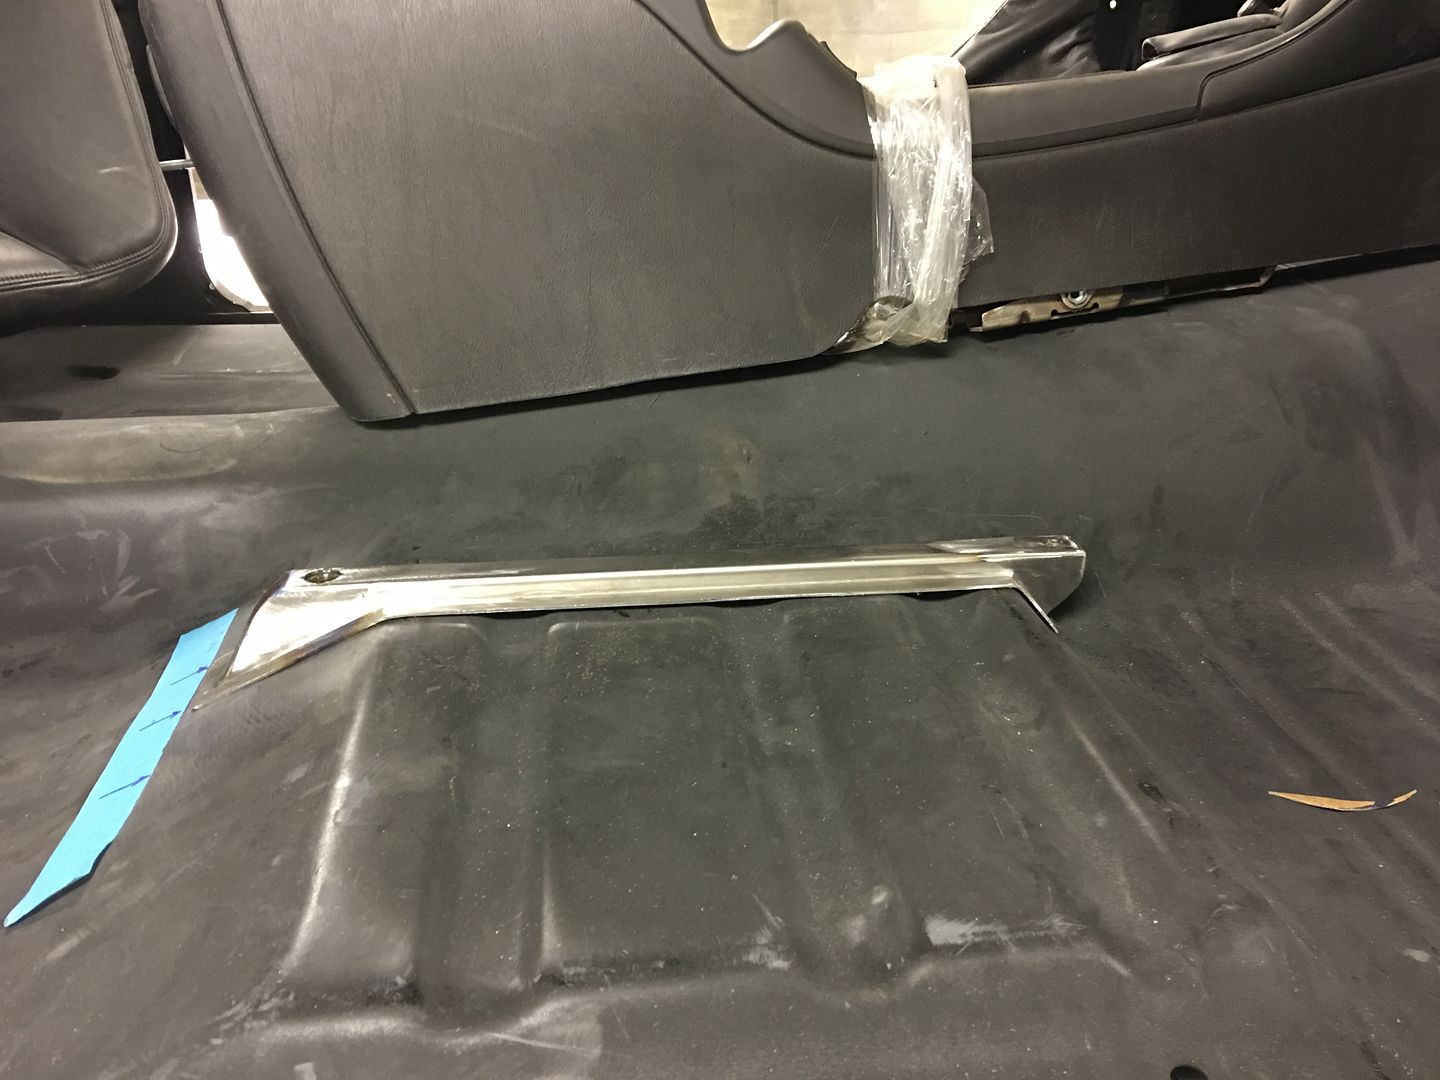  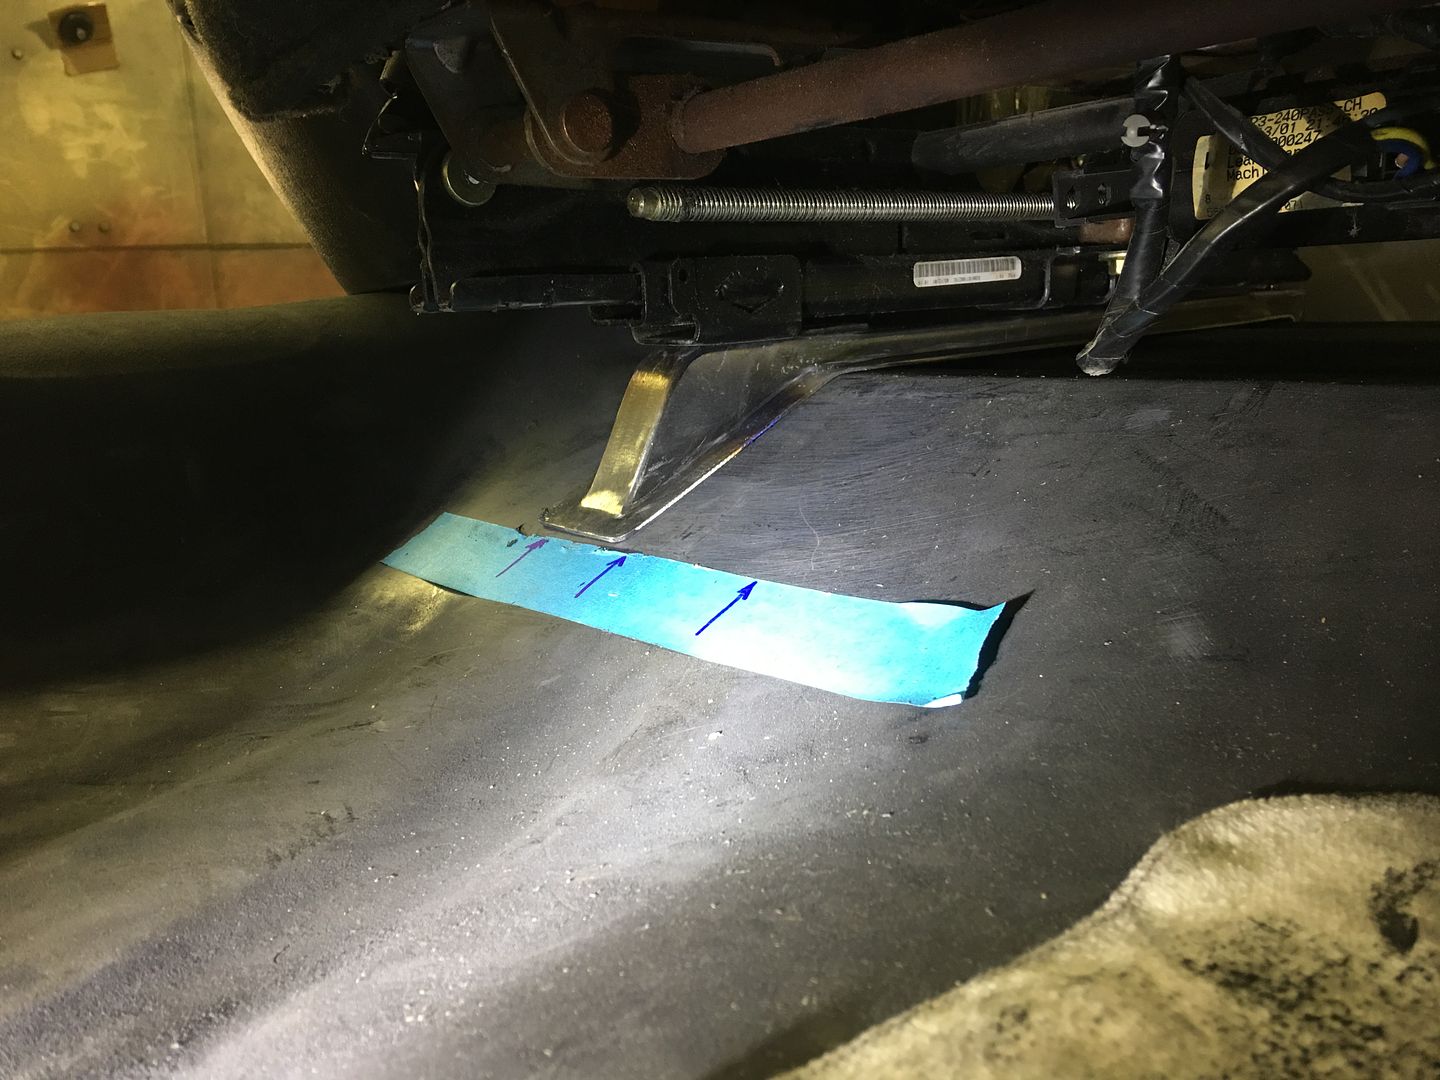 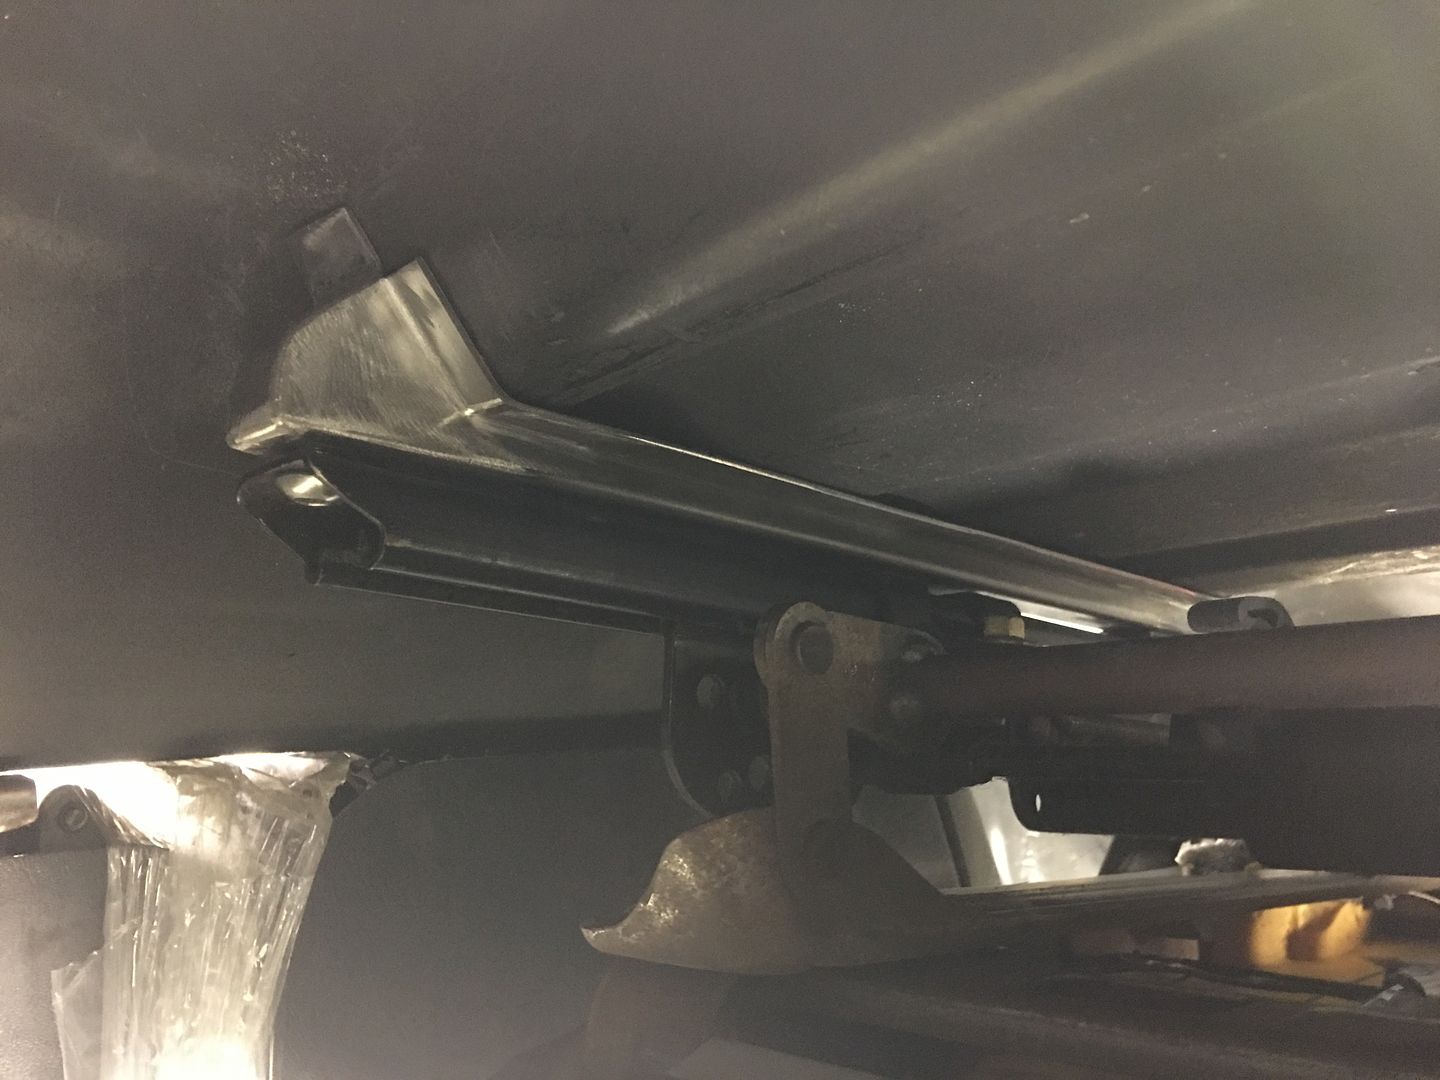 Still need to fill in the flange corners on the front and this one will be ready for SPI epoxy primer to coat all the surfaces before it gets welded in place..
__________________
Robert |
|
|
|
|
01-18-2017, 08:38 AM
|
#800 |
|
Registered User
Join Date: Jan 2013
Location: Leonardtown, MD
Posts: 1,633
|
Re: 55 Wagon Progress
Moving on to the outer risers, these ones will be a bit taller due to the recess where the original seat frames bolted. We started out with using the tipping die in the Lennox to thin the 14 gauge cold rolled steel at the bend line for a more crisp bend.
https://www.youtube.com/watch?v=OKFZqnHb9eY Next, after making the inside bends, the Fasti-werks bead roller is used with a skate board wheel to add a radius to the outer "leg" of the riser. 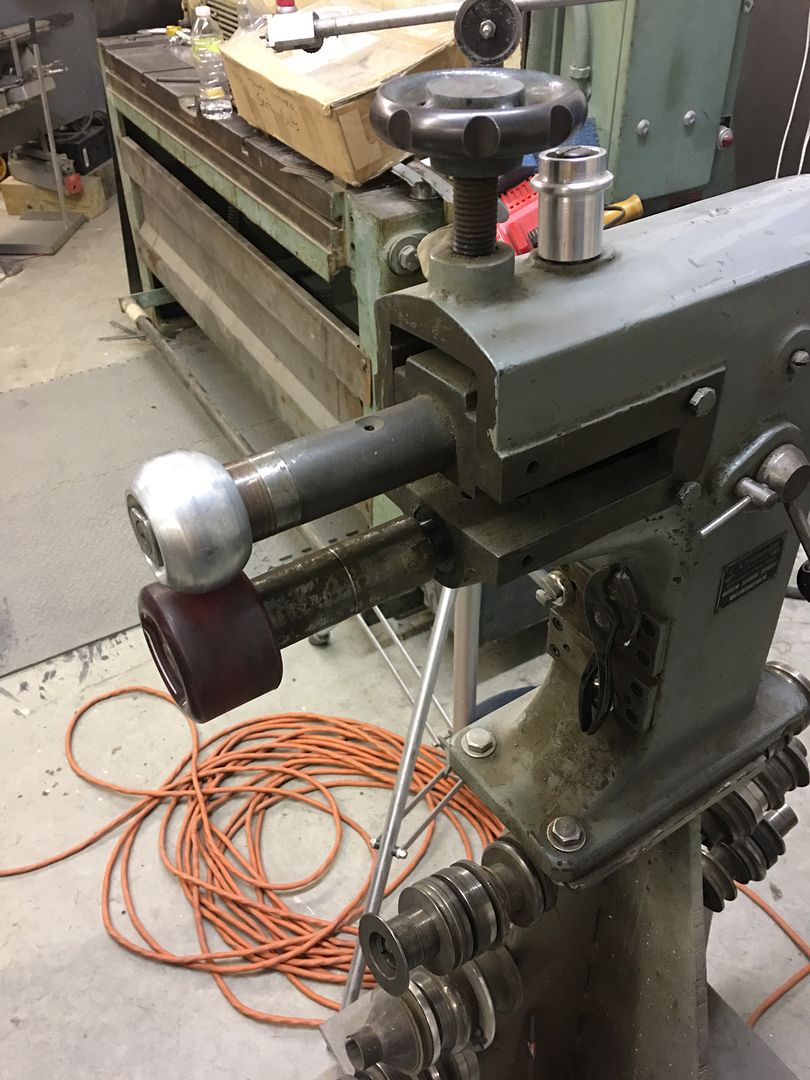 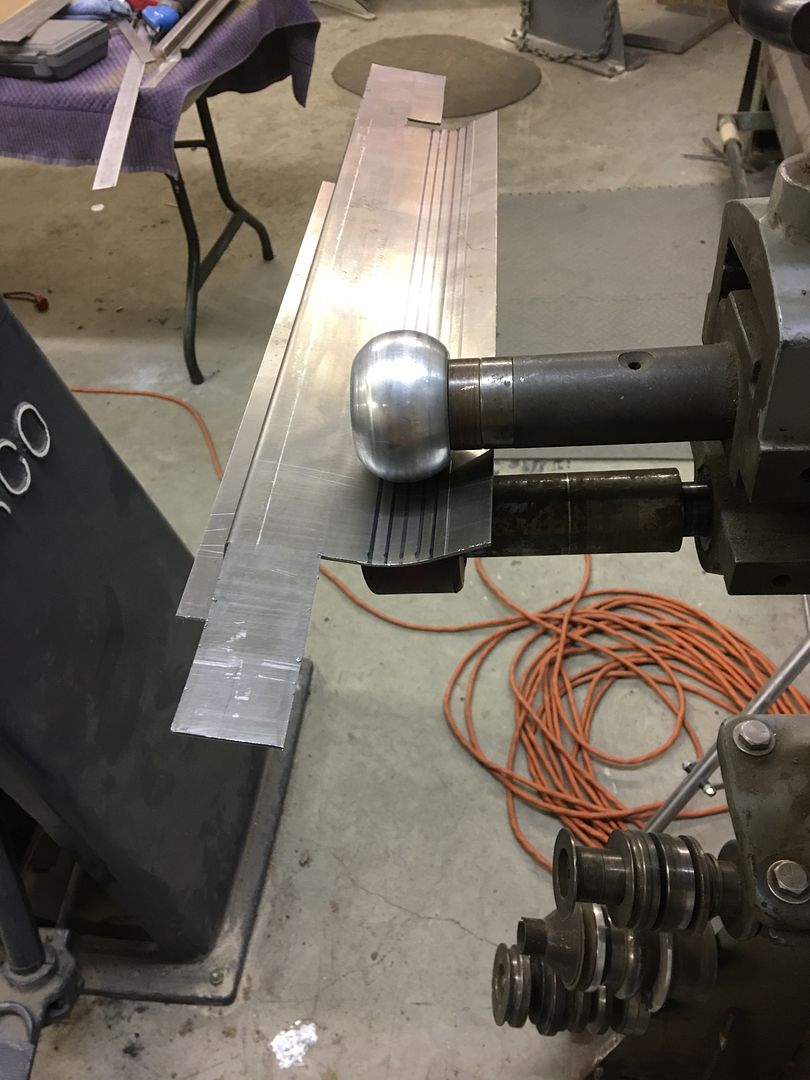 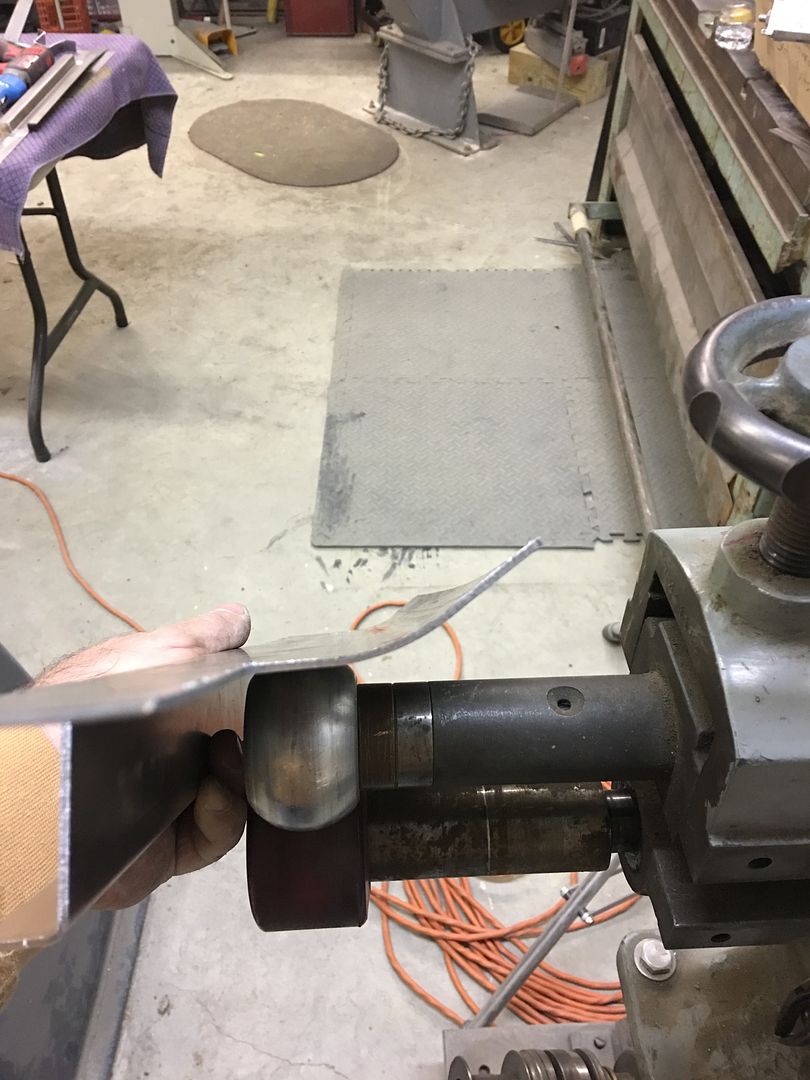 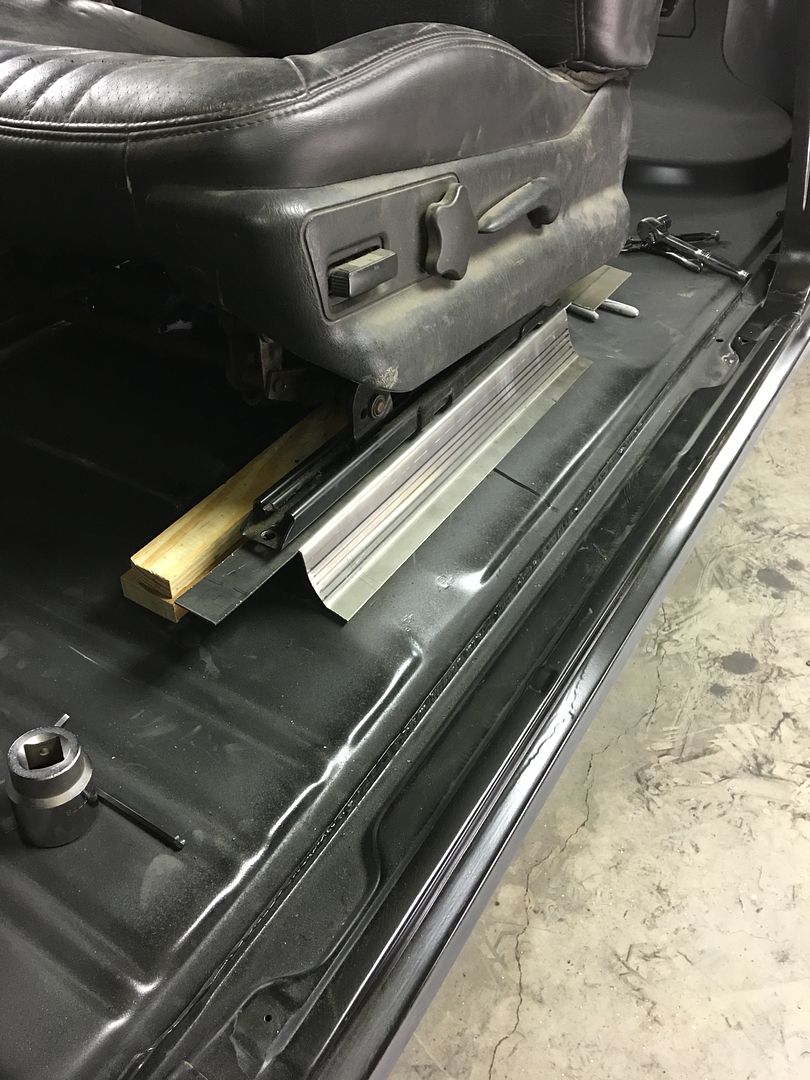 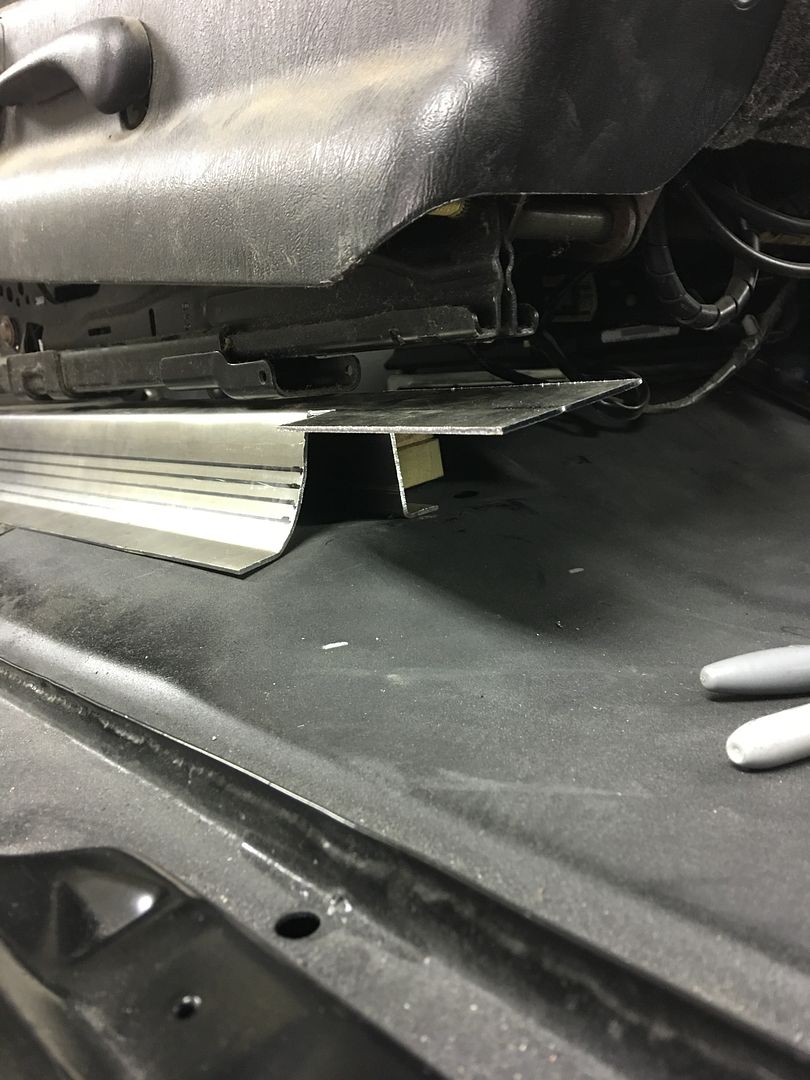 Next time in the shop we'll get the ends closed up.....
__________________
Robert |
|
|
|
 |
| Bookmarks |
|
|


 Linear Mode

