
|
 04-30-2013, 07:53 PM
|
#326 |
|
meowMEOWmeowMEOW
Join Date: Sep 2009
Location: MKE WI
Posts: 7,128
|
Re: Br3w City's Project omgwtfbbq
Well I hit the junkyard today, picked up a hydroboost unit off of a 97ish astro van. Grabbed the unit, bracket, master cyl, and resevoir (I don't even know if I need that) all for $45
  I also snatched some really nice blue and hyper red Airforce 1's, but thats unrelated, I just liked them.
__________________
'66 Short Step / SD Tuned / Big Cam LQ4 / Backhalfed /Built 4l80e / #REBUILDEVERYTHING  |

|

|
|
05-02-2013, 02:02 AM
|
#327 |
|
meowMEOWmeowMEOW
Join Date: Sep 2009
Location: MKE WI
Posts: 7,128
|
Re: Br3w City's Project omgwtfbbq
I decided that I was going to do a light rebuild on it anyway, since its history is unknown, and its my brakes afterall. So that being said, here's what the heck I'm doing.
Pulled it out of the garage and hit it with some carb cleaner. It was caked with oil and fluid, much of it coming from the little weep hole on the bottom of the booster. Thats the most common point of failure, and its from one internal seal.      I started off by pulling off the res and hose, and then taking off the 2 bolts holding the master to the main booster body.      Then I took off the 5 bolts holding the 2 sections of the main booster body together, being careful not to let anything fall out as they seperated.     A larger spring might fall out first leaving you with the 2 halves. In one half, you have this peanut shaped seal, and the piston and rod, with this other little plunger inside. This seal will be replaced on the rebuild. If you pull the piston out a bit and see the spring and this little lever/clip. I left this all attached for now.     The other half has this little shaft (valve?) and spring. If you look into the hole, there is a seal on the outside of this hole (the lip is stickup up there in the middle...It'st still in place for now, Because I have this weird little plastic piece stuck in there...I gotta get a long screwdriver or something to pull it out, its a bit awkward, and I'm not sure exactly WHAT it is yet (my rebuild kit is still in the mail!)  You can pull the valve out with a light tug, and then shake out the little spring left in the small hole.     With it all apart, I started cleaning it all up to give myself a clean, easier to work with set of parts and hardware. I'm going to continue this rebuild when the rest of the parts arrive, and I'll probably toss some of the install stuff up as well...just need to wait on the mailman.....
__________________
'66 Short Step / SD Tuned / Big Cam LQ4 / Backhalfed /Built 4l80e / #REBUILDEVERYTHING |
|
|
|
|
05-02-2013, 10:37 PM
|
#328 |
|
Registered User
Join Date: Sep 2011
Location: Tacoma, WA
Posts: 2,425
|
Re: Br3w City's Project omgwtfbbq
Did you also grab the powersteering pump?
Or did you have that already?
__________________
Michael McMurphy My 66 Stepside My 64 Tow Truck My 66 Tempest Table Of Contents Added to Page1 |
|
|
|
|
05-03-2013, 01:43 AM
|
#329 | |
|
meowMEOWmeowMEOW
Join Date: Sep 2009
Location: MKE WI
Posts: 7,128
|
Re: Br3w City's Project omgwtfbbq
Quote:
__________________
'66 Short Step / SD Tuned / Big Cam LQ4 / Backhalfed /Built 4l80e / #REBUILDEVERYTHING |
|
|
|
|
|
05-08-2013, 01:59 AM
|
#330 |
|
meowMEOWmeowMEOW
Join Date: Sep 2009
Location: MKE WI
Posts: 7,128
|
Re: Br3w City's Project omgwtfbbq
Washing the satin paint can be a little bit of a pain, since you don't want to ruin the finish. This means; no hard wiping, no buffing, no normal car soaps or anything with a wax or oil, no California car dusters, no clay bar, and no rubbing compounds etc. For a while I could only find some really expensive stuff like Svissvax, which at $30+ for a bottle is just nuts.
After a while I found a place called ChemicalGuys, which carries all sorts of cleaning and detailing stuff. They had a few products specifically for satin paint and wraps, and seemed to do a decent job backing it up. I picked up some spray detailer and soap just for satin paint, both together cost about 2/3 of what a single small bottle of the other stuff would run me.  Did a little disassembly on the gun rack and started giving the old adjustable bars a plasti-coating before it goes in.  
__________________
'66 Short Step / SD Tuned / Big Cam LQ4 / Backhalfed /Built 4l80e / #REBUILDEVERYTHING |
|
|
|
|
05-08-2013, 02:15 AM
|
#331 |
|
meowMEOWmeowMEOW
Join Date: Sep 2009
Location: MKE WI
Posts: 7,128
|
Re: Br3w City's Project omgwtfbbq
And a picture dump from the hydroboost refreshening in my other thread.
""""" Got the parts kit in from Nelco Hot Rods on ebay. Its the MBM kit, the only one really around. I got the deluxe kit, but really only need a few gaskets to clean it up and make it serviceable.  Started off by looking in the main oriface and pulled out the small piston seal seated into it, then working in the new seal. It takes a second to work it in even (not pinched!), and I cleaned everything with some rubbing alcohol to make sure nothing affected the seal.       Then I pulled out, cleaned up, and replaced the "peanut" gasket.   Putting in the little spring and the valve back into the unit.    Then re-install the star-retainer from the other side. After that, put the rod and spring into the piston, making sure to seat the locating pins into the channel in the top of the valve.    Then fit the halves together, putting in a couple bolts and tightening them slowly to help pull the piston into the new seal.  And thats pretty much it so far. I need to clean and re-attach the master, then get it all bolted together and move onto the install phase. """"""""
__________________
'66 Short Step / SD Tuned / Big Cam LQ4 / Backhalfed /Built 4l80e / #REBUILDEVERYTHING |
|
|
|
|
05-08-2013, 08:06 PM
|
#332 |
|
meowMEOWmeowMEOW
Join Date: Sep 2009
Location: MKE WI
Posts: 7,128
|
Re: Br3w City's Project omgwtfbbq
Finally tried those new cleaning products out. The soap seams to do a really nice job, doesn't seem to spot, and wiped/washed pretty well. Cleaned up the engine bay and interior as well....so there are just a FEW pictures
                          
__________________
'66 Short Step / SD Tuned / Big Cam LQ4 / Backhalfed /Built 4l80e / #REBUILDEVERYTHING |
|
|
|
|
05-08-2013, 08:34 PM
|
#333 |
|
Registered User
Join Date: Sep 2009
Location: Monroe,Iowa
Posts: 4,370
|
Re: Br3w City's Project omgwtfbbq
Looking Real Good!
|
|
|
|
|
05-14-2013, 08:50 AM
|
#334 | ||
|
"Oh well, it's a driver."
Join Date: Jul 2008
Location: Nashville, TN
Posts: 3,467
|
Re: Br3w City's Project omgwtfbbq
Quote:
__________________
- JB - '93 C1500 SHORT/FLEET SILVERADO, 350/4L60E  Quote:
|
||
|
|
|
|
05-16-2013, 01:40 AM
|
#335 |
|
meowMEOWmeowMEOW
Join Date: Sep 2009
Location: MKE WI
Posts: 7,128
|
Re: Br3w City's Project omgwtfbbq
Thanks yall.
Pic dump from my hydroboost thread. I'll put some of the installation stuff on this thread as well, so its all in one place. It was nice and warm, so I worked on it a while today. Starting with my old manual master cylinder. Started wuth pulling the bolt off the pedal (no clevis) to release the rod and allow it to come out in the cab (has no physical attachment to the master like some do).     The old rod I have, and the new rod on the hydroboost unit have a very similar end. The picture is a tad deceiving, but the hold in the rod end appears to be the same size. If I run into any problems getting the stroke correct (due to the different mounting depth and pedal style/attachment), my backup plan is to either cut and tap or cut and weld the old end onto the rod, giving me the old rod's adjusting capability.    Pulled the master off, to reveal the old-style 2 bolt mounting point, which won't work with the 4 bolt setup I had.   I had two choices; either measure and try to cut/fab a 2 bolt bracket for the booster, OR drill new mounting holes and possibly massage the old opening to fit. On top of that, the astro van bracket mounts at a steep angle, which would put the rod in a rather steep angle that I felt just wouldn't work (and it would look goofy underhood). I decided to try to kill two birds with one stone (and NO material haha). I would run the 4 bolt bracket for the security of the extra bolts, but mod it to fit a level position and dept.        My battery got low so the cam was on charge for the welding. I just used the old removed metal to form a filler piece. and ran two alternating concentric circles of weld holding it in place, and reinforcing anywhere that was cut or scored while I hammered it flat. The filler piece is also supported with stitched welds from the back. The result is a free basic mounting place that already has the scalloped holes for the studs, and the keyed hole for the booster. Then a dry mount of the booster. Starting on more assembly and lines tomorrow.    I'm looking forward to wiping all my alignment markings, penetrating oil, and dot 3 residue off all this so my hard work doesn't always look like its never been washed haha. And YES it will be bolted in all the way, the single half threaded bolt probably won't do much for mounting strength
__________________
'66 Short Step / SD Tuned / Big Cam LQ4 / Backhalfed /Built 4l80e / #REBUILDEVERYTHING |
|
|
|
|
05-20-2013, 01:03 AM
|
#336 |
|
meowMEOWmeowMEOW
Join Date: Sep 2009
Location: MKE WI
Posts: 7,128
|
Re: Br3w City's Project omgwtfbbq
So the fixed length on the pedal-rod for the hydro setup wouldn't reach the back of my pedal, let alone do the full stroke properly. I ended up taking some measurements and cutting the head off the pedal rod on the booster.
Then I cut the old (adjustable) pedal rod off before the adjusters, approxomately where my measurements said it needed to be...with the threaded portion giving me the leeway to actually hook this all up right. To hook the pieces together, I found a steel sleeve/spacer and bored it to fit both sides snugly. It gave me a secure way to butt the rods together, and then weld a strong joint on either side...keeping the heat off the seals in the booster.     Once I fastened it in and adjusted the rod, the pedal moves comfortably. I re attatched the booster/bracket assembly, and cleaned up the bracket and firewall area with some touch up.  So far I've found my current 2004 steering line is the correct length, but has the wrong end (was setup for my 71 steering box). I have an 18mm o-ring end coming which I will flare and fix to the old line for the correct setup. Setting up the other side (16mm o-ring to the iirc 5/8 connection on the gear).  
__________________
'66 Short Step / SD Tuned / Big Cam LQ4 / Backhalfed /Built 4l80e / #REBUILDEVERYTHING Last edited by BR3W CITY; 05-20-2013 at 01:13 AM. |
|
|
|
|
05-20-2013, 01:09 AM
|
#337 |
|
meowMEOWmeowMEOW
Join Date: Sep 2009
Location: MKE WI
Posts: 7,128
|
Re: Br3w City's Project omgwtfbbq
In another bout of boredom, I finally finished the coating and re-assembly of the gun rack. It just needs a good wipedown with armor-all and then to be installed.
  I also decided to add another little fun touch. I had this Milwaukee Tools placard off a tool case kicking around my garage. Since I like to go to shows around the country, we oft get asked "where are you from".....well this seemed like a fun way to answer the question. Sanded it down then washed it with some soap, came back with some sealer primer for the plastic, then a few coats of the same satin black I've used through my build.   Then some time with my light blue one-shot and my liner brushes. Some people would have airbrushed or sprayed this, but I felt the depth on the corners and the look would be cooler if it were hand painted. Plus I like the un-even finish that Id presents when dried. Its being mounted on the heater box underhood, and the depth of the molding makes it "pop" off the satin when in the engine bay.   
__________________
'66 Short Step / SD Tuned / Big Cam LQ4 / Backhalfed /Built 4l80e / #REBUILDEVERYTHING |
|
|
|
|
05-21-2013, 10:11 PM
|
#338 |
|
meowMEOWmeowMEOW
Join Date: Sep 2009
Location: MKE WI
Posts: 7,128
|
Re: Br3w City's Project omgwtfbbq
Pasted the little logo up on my heater box
  Got the first end piece for the booster lines. These little repair kits are kind of neat if you need a more unusual end. They make them in a bunch of sizes, in 90* or straight. This is the 16mm side, and a test fit of the fitting. I will be double flaring and running a new line off of this.  
__________________
'66 Short Step / SD Tuned / Big Cam LQ4 / Backhalfed /Built 4l80e / #REBUILDEVERYTHING |
|
|
|
|
05-24-2013, 01:22 AM
|
#339 |
|
meowMEOWmeowMEOW
Join Date: Sep 2009
Location: MKE WI
Posts: 7,128
|
Re: Br3w City's Project omgwtfbbq
Got the 18mm side in from the store.
   Grabbed the tube cutter and cut the old end off the pressure line, and the hose barb off the 18mm "repair kit" end. Followed by double flaring a 3/8 tube nuts on the respective ends.   Put the sections together, applied the o-ring to the fitting with some lube, and fit it all together. I'm really happy with the position, it hangs clear of the booster and master, but stays tight to them...then comes down cleanly next to the engine cover without touching anything, and terminates at the base of the pump.    Despite its ease of access, I was tired of getting people at carshows confused or displeased by my exposed wiring. It served a simple purpose for troubleshooting, but with the truck proven running fine, a slightly cleaned up look couldn't hurt. I'm still in the testing phase of moving most things around, but its falling into place pretty well and once its zip-tied and loomed up, it will be a better look I think. Its NOT done tho, obviously. For reference, the v1 wiring setup;   What a mess, hopefully tomorrow I should have it all fixed down into some new positions.
__________________
'66 Short Step / SD Tuned / Big Cam LQ4 / Backhalfed /Built 4l80e / #REBUILDEVERYTHING |
|
|
|
|
05-26-2013, 02:23 AM
|
#340 |
|
meowMEOWmeowMEOW
Join Date: Sep 2009
Location: MKE WI
Posts: 7,128
|
Re: Br3w City's Project omgwtfbbq
Used the stub I cut off the old pressure line (11/16), and flared a 3/8 end and union to it, to form the start of the booster to rack line. put the other stub in the pump (the 16mm o-ring end with 3/8 other end I made the other day), and bent a hard line to tie to the two together. The line passes cleanly through the fender skirt, and I added some rubber around the hard line to stop vibration and prevent and rubbing as things move around a bit.
    Then it was a matter of using some hose clamps and hooking up some 3/8 fuel hose for the low pressure return. I need to final tighten it all, then fill up and look for leaks, then give it a good bleed. Here are some "all hooked up" shots of how she's sitting!    
__________________
'66 Short Step / SD Tuned / Big Cam LQ4 / Backhalfed /Built 4l80e / #REBUILDEVERYTHING |
|
|
|
|
05-28-2013, 07:33 PM
|
#341 |
|
6>8 Plugless........
 Join Date: Sep 2007
Location: Prairie City, Ia
Posts: 17,135
|
Re: Br3w City's Project omgwtfbbq
Very nice! It's hard to beat hydraboost unless it's leaking.

__________________
Ryan 1972 Chevy Longhorn K30 Cheyenne Super, 359 Inline 6 cylinder, Auto Trans, Tilt, Diesel Tach/Vach, Buckets, Rare Rear 4-link and air ride option Build Thread 1972 GMC Sierra Grande Longhorn 4x4 1972 Chevy Cheyenne Super K20 Long Step side tilt, tach, tow hooks, AC, 350 4 speed 1972 C10 Suburban Custom Deluxe 1969 Chevy milk truck 1971 Camaro RS 5.3 BTR STG3 Cam Super T10 1940 Ford 354 Hemi 46RH Ford 9" on air ride huge project Tired of spark plugs? Check this out. |
|
|
|
|
05-29-2013, 01:35 AM
|
#342 |
|
60-66 Nut
  Join Date: Mar 2007
Location: Coeur d'Alene, Idaho
Posts: 23,246
|
Re: Br3w City's Project omgwtfbbq
Nice how to on the hydroboost rebuild and install
 Just a FYI, I make the necessary brackets to make the hydroboost a bolt on install to the firewall. http://www.67-72chevytrucks.com/vboa...d.php?t=347480
__________________
Power Steering Box Adapter Plates For Sale HERE Power Brake Booster Adapter Brackets For Sale '63-'66 HERE and '67-'72 HERE and '60-'62 HERE and "60-'62 with clutch HERE Rear Disc Brake Brackets For Sale. Impala SS calipers HERE Camaro Calipers HERE D52 Calipers HERE 6 Lug HERE Hydroboost Mounting Plates HERE |
|
|
|
|
05-29-2013, 12:05 PM
|
#343 |
|
meowMEOWmeowMEOW
Join Date: Sep 2009
Location: MKE WI
Posts: 7,128
|
Re: Br3w City's Project omgwtfbbq
I know you did Cap, I' considered it a few times! I decided to spend the money on the rebuild kit (way more than i needed), and make do with what I had. Functionally it works well, but it isn't as clean as yours. This was one of those "well its in front of me" type of things.
I have no idea why my top left bolt looks like its going in on angle, maybe its just the picture. The bolt fit in straight and sits straight through the firewall.....no idea why it looks crooked.
__________________
'66 Short Step / SD Tuned / Big Cam LQ4 / Backhalfed /Built 4l80e / #REBUILDEVERYTHING |
|
|
|
|
05-30-2013, 05:08 PM
|
#344 |
|
meowMEOWmeowMEOW
Join Date: Sep 2009
Location: MKE WI
Posts: 7,128
|
Re: Br3w City's Project omgwtfbbq
Well I guess after replacing or rebuilding like 94% of this truck, it only makes sense that one of the parts I DIDN'T mess with when I had the steering apart would go out. After god knows how many years and miles, the Ol' GM rag joint failed. Picked up a repair kit from Napa for $11.xx and they offer a full brand new unit completely setup for 50$ if your is stripped or the metal is destroyed. Not a super hard job, just needs some patience, and a vice helps a lot if you have one.
Unbolt the bolts on the collar of the joint, and pull the shaft away. You may have to disconnect the u-joints to make slack if you have them on your setup.  Its pretty worn and crushed, but not COMPLETELY failed. I've seen worse.   Undo the star-bolt that holds the unit to the splined input shaft. You can slide the unit off with a little pressure from a pry bar if its stuck from sitting tightened.  Grind off the back of the rivet heads and work the studs out with a pliers and some force, or a maul/air hammer/nail set and drive them out.   Then place the new joint in place, assembling the metal collar and backing plate the way they came apart. There is a special half stud/half bolt with a special large shanked nut to fit in the old studs place. This makes assembly much easier than the press on stud. You may need to leave one stud/nut off before sliding the unit onto the input shaft, because the new nut interferes with easy access to the star nut you must tighten. Otherwise it goes back straight the way it came out, making sure to put on the lock washers and give everything a good snug down.  
__________________
'66 Short Step / SD Tuned / Big Cam LQ4 / Backhalfed /Built 4l80e / #REBUILDEVERYTHING |
|
|
|
|
05-30-2013, 06:31 PM
|
#345 |
|
Registered User
Join Date: Aug 2012
Location: Smithfield rhode island
Posts: 722
|
Re: Br3w City's Project omgwtfbbq
Nice write up man.....when I had my truck shipped from az I had a flat and when they loaded it up on the 18 wheeler for transport the rag joint broke. When my brother called me he thought the steering box broke luckily it was just that rag joint ,but ill tell you..... It was a pita to get my truck of the car carrier onto the flat bed and then home in my small garage by myself without any steering. Took me like an hour and a 1/2 to unload my truck.....it was worth all the hard work and is finally coming along!
I like the idea of the 6.0 in these trucks...must move along nicely! Keep up the nice work! Posted via Mobile Device
__________________
My frame Layin 63 short bed project http://67-72chevytrucks.com/vboard/s...d.php?t=551353 |
|
|
|
|
06-02-2013, 01:48 AM
|
#346 |
|
meowMEOWmeowMEOW
Join Date: Sep 2009
Location: MKE WI
Posts: 7,128
|
Re: Br3w City's Project omgwtfbbq
The unit put off a nice amount of heat so I figured the $25 investment in a little power steering cooler wasn't a bad idea. Picked one up today and tossed it in. Not a big deal, but hopefully will save my from stanky burned PS fluid.
 
__________________
'66 Short Step / SD Tuned / Big Cam LQ4 / Backhalfed /Built 4l80e / #REBUILDEVERYTHING |
|
|
|
|
06-10-2013, 12:45 AM
|
#347 |
|
meowMEOWmeowMEOW
Join Date: Sep 2009
Location: MKE WI
Posts: 7,128
|
Re: Br3w City's Project omgwtfbbq
Brakes work GREAT with the new setup. Touchy at first but very strong.
Picked up some new front shocks. Damn these are small but the drop only allows for a 13" max shock.   
__________________
'66 Short Step / SD Tuned / Big Cam LQ4 / Backhalfed /Built 4l80e / #REBUILDEVERYTHING |
|
|
|
|
06-10-2013, 04:46 PM
|
#348 |
|
meowMEOWmeowMEOW
Join Date: Sep 2009
Location: MKE WI
Posts: 7,128
|
Re: Br3w City's Project omgwtfbbq
important insight #4345, don't order the wrong parts.
The eyelet size is incorrect on these shocks, try again.
__________________
'66 Short Step / SD Tuned / Big Cam LQ4 / Backhalfed /Built 4l80e / #REBUILDEVERYTHING |
|
|
|
|
06-15-2013, 03:10 AM
|
#349 |
|
meowMEOWmeowMEOW
Join Date: Sep 2009
Location: MKE WI
Posts: 7,128
|
Re: Br3w City's Project omgwtfbbq
Got the correct parts this time. Some QA1 DS304's. They work at the correct stroke, are 18 way adjustable, coil over ready, and can be hooked up to QA1's remote dampening adjustment system. Oddly, they came in different boxes.
    Time to pull the old junk out. These Nitro's were blown pretty well out. Its just 2 bolts securing it in place. The top is a nut, while the bottom is a bolt with a nut securing it from the backside. Then the shock just gets wiggled off.      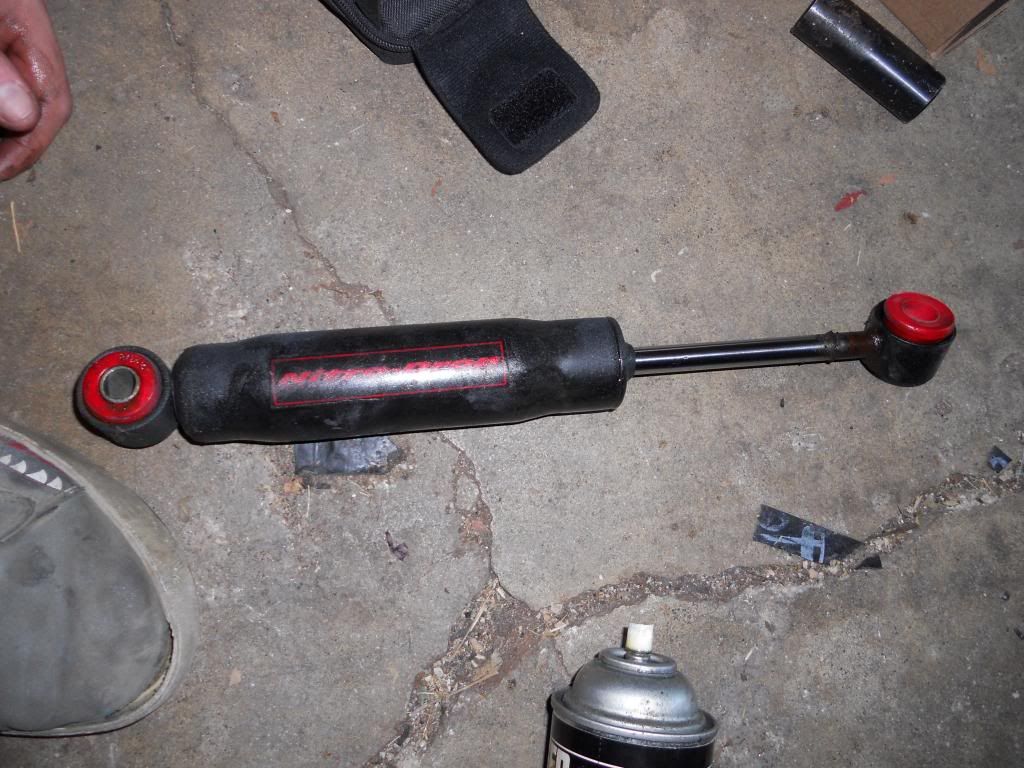  You can see some of the differences right away between the old and new gear. The QA1's come with 4 bushings which swap into the main poly bushing. The 71/2 front suspension uses a different size top and bottom.     Before putting the new shocks in, I took a look at the guide that came with them, and decided to set the aduster to 6 initially. 6 is the top setting for "Drag" and the bottom setting for comfort. I need to mess around with this a lot more, as the weight of the truck seems like it would respond better with a little more stiffness up front.  Then it was a matter of putting them back in. I used the top stud to hook onto so I could extend the shock out to make putting it in easier. On this side, my suspension has this special nut, with a collar that centers on the bushing. I didn't have this on the driver side, but I made sure to re use it and install it correctly with the collar in the right place.     And thats it, shiny goodness.    
__________________
'66 Short Step / SD Tuned / Big Cam LQ4 / Backhalfed /Built 4l80e / #REBUILDEVERYTHING |
|
|
|
|
06-17-2013, 01:48 AM
|
#350 |
|
meowMEOWmeowMEOW
Join Date: Sep 2009
Location: MKE WI
Posts: 7,128
|
Re: Br3w City's Project omgwtfbbq
I decided that the under-dash wiring was a bit unruly, but I wanted to make sure I could still get at what I needed, without over-looming and zippy tying everything. I decided to make some knee-panels to clean it up, and keep the look of the interior.
I started off with the 1/8 fiber board, a few sharp razor blades and a sharpie.      Then I pre-drilled the boar and hand-screwed a screw through each hole. It might seem like a pain but this stuff is finnicky and like glorified carboard. It prevents me from splitting the layers when I thread the screws in, and it also won't split.    Then it was a little sanding to clean it up, and the old process of spraying, wrapping and trimming the same black leather I used for all the other interior.    I measured and pre drilled the holes in the dash, then threaded an extra screw threw each to de-burr and make sure my interior pieces would fit up well and screw in easily. It was just a matter of fitting them up in place and tightening them down. Not bad for an afternoon.     
__________________
'66 Short Step / SD Tuned / Big Cam LQ4 / Backhalfed /Built 4l80e / #REBUILDEVERYTHING |
|
|
|
 |
| Bookmarks |
|
|


 \\ MY YOUTUBE CHANNEL


 Linear Mode

