
|
 08-19-2015, 04:17 PM
|
#751 | |
|
Registered User
 Join Date: Mar 2005
Location: apple valley, ca
Posts: 2,670
|
Re: Project '64 Cheapskate
Quote:
__________________
Check out my latest endeavor: https://roundsixpod.com My build threads: '55 Chevy: http://67-72chevytrucks.com/vboard/s...d.php?t=247512 '64 C-20: http://67-72chevytrucks.com/vboard/s...d.php?t=446527 |
|

|

|
|
08-23-2015, 12:39 AM
|
#752 |
|
Registered User
Join Date: Mar 2005
Location: apple valley, ca
Posts: 2,670
|
Re: Project '64 Cheapskate
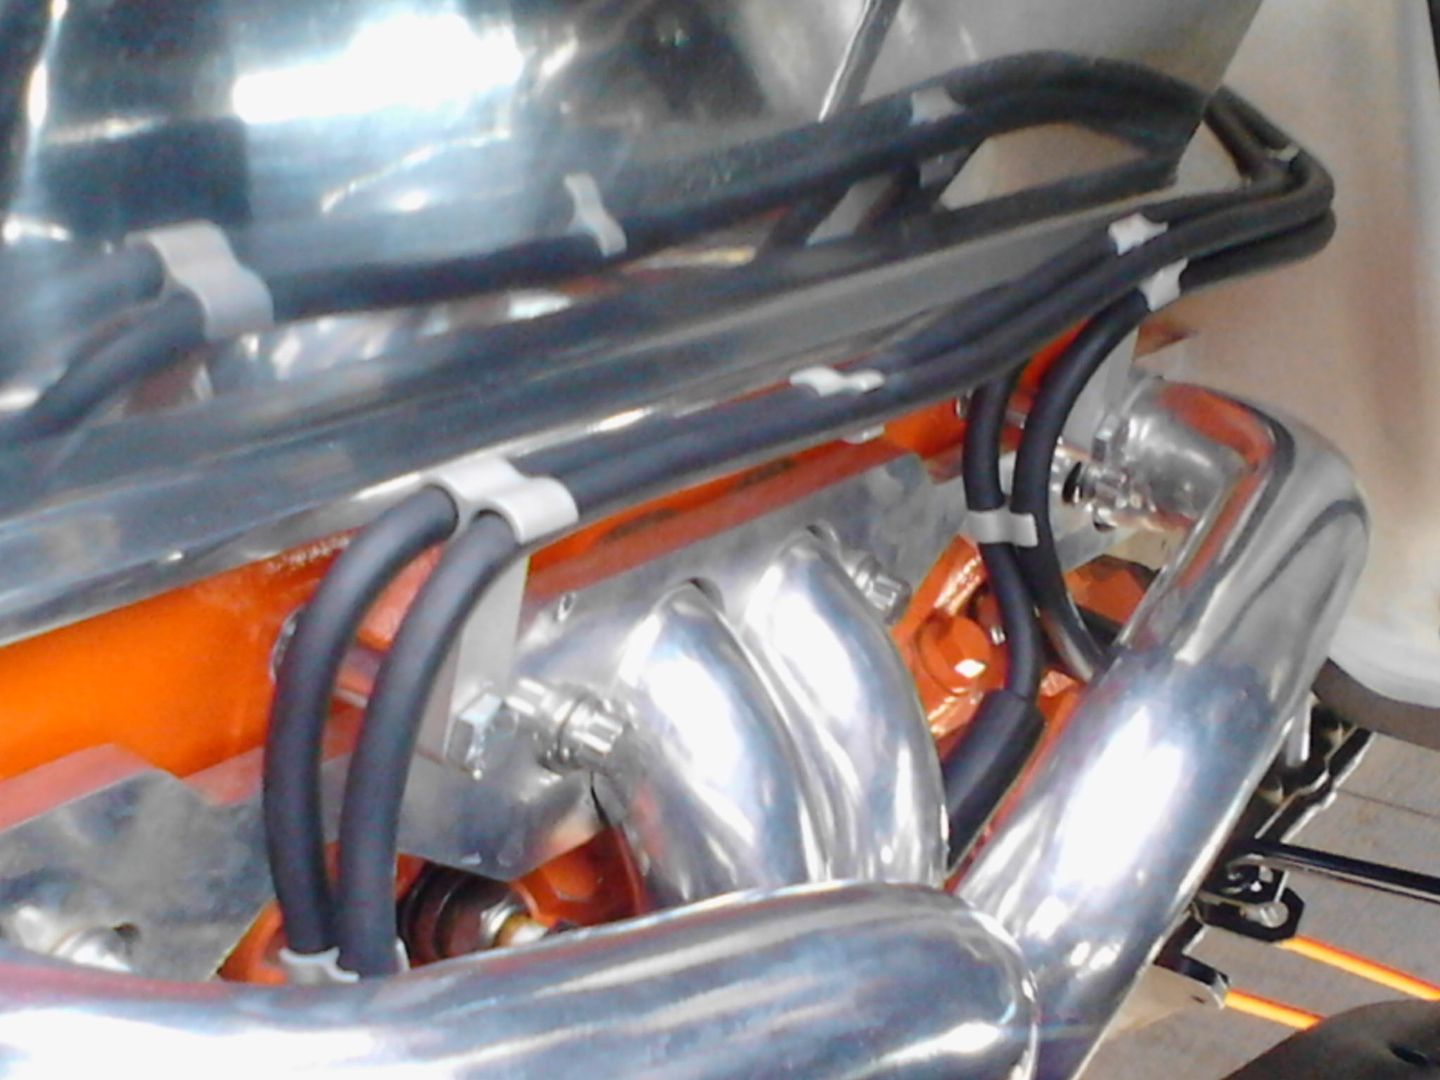
After a lot of mock up, trial fitting, and crimping, the A/C and heater lines are finally done. I wanted the lines to have a nice flow, and to not have anything laying on top of the engine. I wound up using an A/C manifold from a 1989 Chevy truck and welding on new ends. This manifold drops both the suction and return lines perfectly between the passenger valve cover and the compressor. I also wanted to keep the high and low service ports near each other, so I built a bracket that bolts to the battery tray.
   In this shot, you can see both the heater and A/C lines as they route next to the engine. The A/C lines route next to the engine, and the heater lines route outboard of those. The hose seperators are from Squeeges (Mesa, AZ).  I also wanted to have the capability of shutting the water off to the heater in the summer, so I used a water shutoff from Sharkbite. These parts can be bought at nearly any hardware store and are used for PEX plumbing. It has a 5/8 inlet and outlet, made of solid brass, and nice quality. I unscrewed the valve handle and will keep it in the the glovebox until I need to shut the water on or off. I also installed a Prestone flush manifold (5/8" in/out) to help get the air out when the radiator is filled. The heater box is at about the same height or lower as the radiator cap, so the chance of getting an air pocket in the system is common. On my truck, I plan to jack up the rear and fill the system from the manifold. The heater lines now route behind and below the heater box, so I had to get tricky with the hoses at the heater core. I found the custom molded hoses (made by Gates) at Summit. 
__________________
Check out my latest endeavor: https://roundsixpod.com My build threads: '55 Chevy: http://67-72chevytrucks.com/vboard/s...d.php?t=247512 '64 C-20: http://67-72chevytrucks.com/vboard/s...d.php?t=446527 |
|
|
|
|
08-23-2015, 12:52 AM
|
#753 |
|
Registered User
Join Date: Mar 2005
Location: apple valley, ca
Posts: 2,670
|
Re: Project '64 Cheapskate
I like the quality of the façtory GM engine oil and transmission dipsticks, but in their stock form, they are way too long. I wound up getting an oil dipstick and tube from a 1995 Chevy truck and chopping it down about 12 inches. I also used my tubing bender and bent the tube to the angle I wanted. In this shot, you can barely see the yellow handle. It's easy to access, but it's out of sight.
 I really like the lockiñg transmission dipsticks, so I got one from the same '95 Chevy truck and chopped 11" inches out of it. I could have cut it down more, but I didn't want to make it hard to reach. 
__________________
Check out my latest endeavor: https://roundsixpod.com My build threads: '55 Chevy: http://67-72chevytrucks.com/vboard/s...d.php?t=247512 '64 C-20: http://67-72chevytrucks.com/vboard/s...d.php?t=446527 |
|
|
|
|
08-23-2015, 12:55 AM
|
#754 |
|
Registered User
Join Date: Mar 2005
Location: apple valley, ca
Posts: 2,670
|
Re: Project '64 Cheapskate
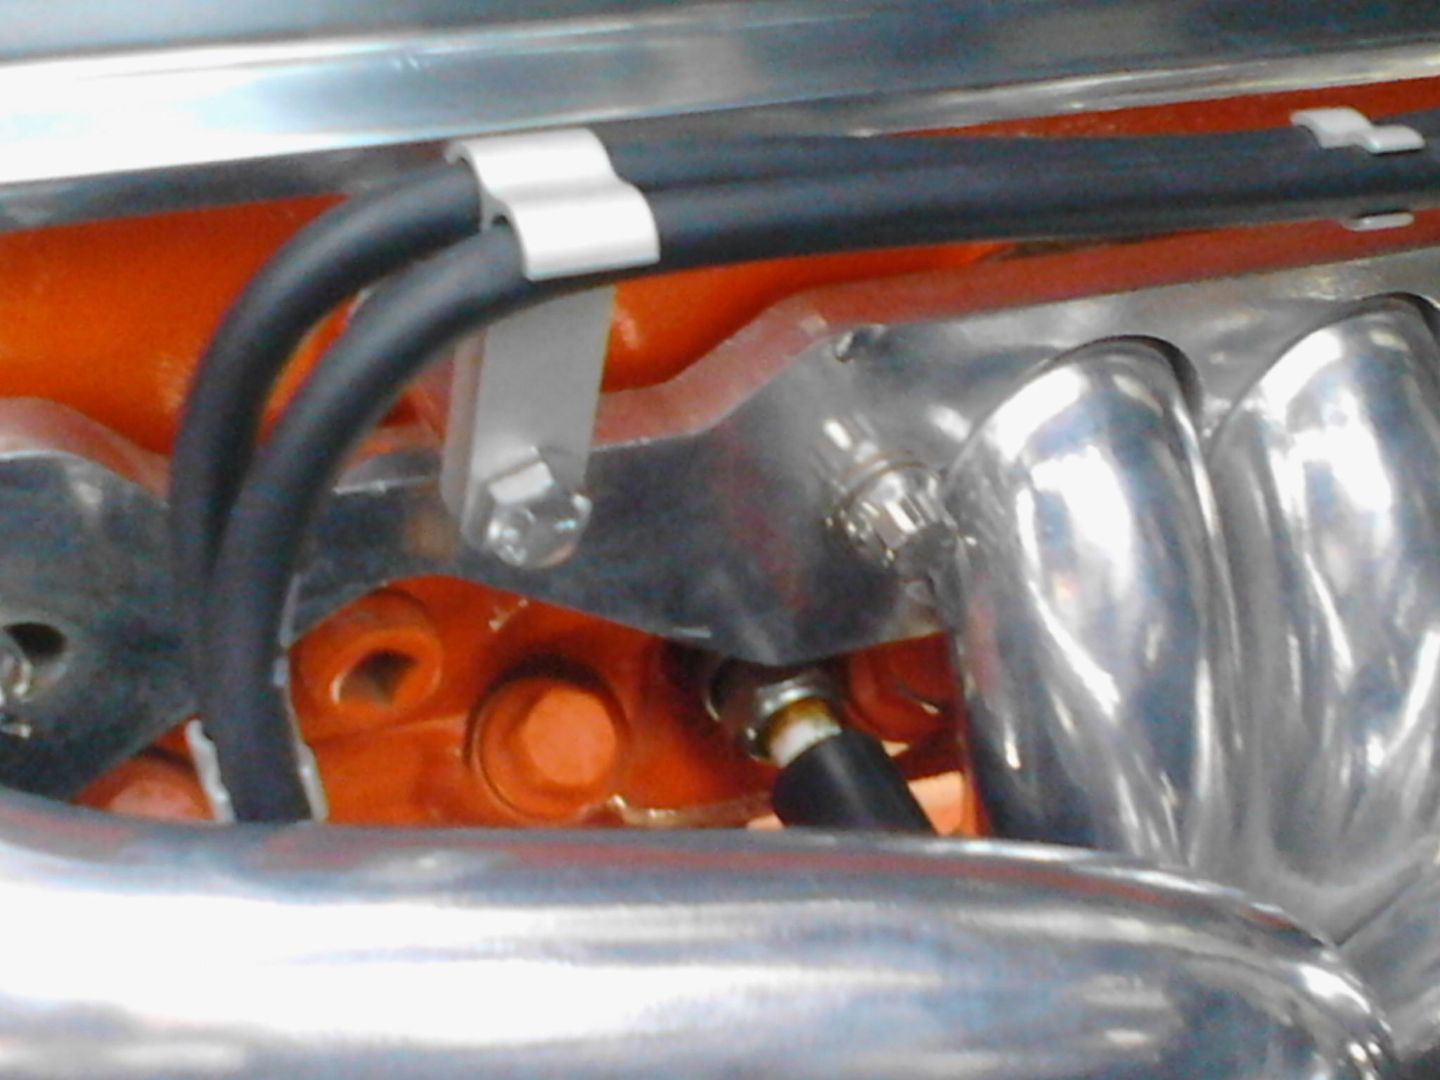
I almost forgot to show the heater hose fittings on the intake mañifold and water pump. They are from Pure Choice Motorsports, and are similar in style to an A/C fitting. I plan to use these on everything I build from now on.

__________________
Check out my latest endeavor: https://roundsixpod.com My build threads: '55 Chevy: http://67-72chevytrucks.com/vboard/s...d.php?t=247512 '64 C-20: http://67-72chevytrucks.com/vboard/s...d.php?t=446527 |
|
|
|
|
08-23-2015, 01:01 AM
|
#755 |
|
Registered User
Join Date: Mar 2005
Location: apple valley, ca
Posts: 2,670
|
Re: Project '64 Cheapskate
I got tired of seeing the truck on jackstands, so I bolted the wheels up and put it on the ground. I needed that! I will be putting it back on stands tomorrow morning because there's still a lot to do. In the meantime......
 
__________________
Check out my latest endeavor: https://roundsixpod.com My build threads: '55 Chevy: http://67-72chevytrucks.com/vboard/s...d.php?t=247512 '64 C-20: http://67-72chevytrucks.com/vboard/s...d.php?t=446527 |
|
|
|
|
08-23-2015, 10:12 AM
|
#756 |
|
Senior Member
Join Date: Mar 2011
Location: West Plains, Missouri
Posts: 7,553
|
Re: Project '64 Cheapskate
Very nice job on the lines in the engine bay, nice work...Jim
__________________
my build thread: http://67-72chevytrucks.com/vboard/s...d.php?t=459839 Jimbo's long bed step build:http://67-72chevytrucks.com/vboard/s...t=464626<br /> |
|
|
|
|
08-23-2015, 06:26 PM
|
#757 |
|
A320 Pilot/USAF Retired
Join Date: Mar 2009
Location: Charleston, SC
Posts: 2,622
|
Re: Project '64 Cheapskate
Vey clean!
__________________
JJ My 1957 build: http://67-72chevytrucks.com/vboard/s...d.php?t=334552 http://www.trifive.com/forums/showthread.php?t=22037 Instagram - Chuckdriver57 |
|
|
|
|
08-23-2015, 10:20 PM
|
#758 | |
|
Rollin' Old Skool
Join Date: Jun 2007
Location: Hattiesburg, MS
Posts: 5,371
|
Re: Project '64 Cheapskate
Quote:
__________________
_____________________________________________ Phillip My Build threads: 1966 Chevy C-10 "Black Betty" shortbed, fleetside, BBW, 327 V8/ Powerglide (under construction) http://67-72chevytrucks.com/vboard/s...ighlight=betty 1997 Chevy Tahoe, 2dr/2wd, mild custom (Daily driver) http://67-72chevytrucks.com/vboard/s...d.php?t=601142 Pics: '66 C-10 https://flic.kr/s/aHsjHWD4h9 '97 Tahoe https://flic.kr/s/aHsjGZ7wKP '93 C-1500 https://flic.kr/s/aHskxdpdnQ '88 S-10 Blazer https://flic.kr/s/aHsjYGx4Md Previous Rides: 1993 Chevy S-10 ext. cab, 4.3L, 4/5 drop (Sold) 1993 Chevy C-1500 short/step Retro-Rod (Sold) 1988 S-10 Blazer 2dr/2wd mild custom (Sold) |
|
|
|
|
|
08-24-2015, 04:57 PM
|
#759 |
|
Registered User
Join Date: Sep 2012
Location: Midway, NC
Posts: 3,275
|
Re: Project '64 Cheapskate
Thank you for the updates. Every thing looks great.
__________________
http://67-72chevytrucks.com/vboard/s...d.php?t=581873 The low buck build threads. Check'em out! http://67-72chevytrucks.com/vboard/s...d.php?t=666022 My build thread Crossmembers CC |
|
|
|
|
09-07-2015, 06:41 PM
|
#760 |
|
Registered User
Join Date: Mar 2005
Location: apple valley, ca
Posts: 2,670
|
Re: Project '64 Cheapskate
With a couple of days off in a row, I decided to check a few more items off of the To Do List.
I never liked the look of battery cables running over the top of everything, so I got couple of 72" positive and negative cables and routed them the way I wanted. I routed them tightly off of the battery and brought them toward the radiator. I reinforced the shroud with 1x1 inch steel squares and bonded on 3 ClickBond nutplates on the inside. I butterflied the positive and negative cables and ran them down towards the frame. About 10" down, I routed the negative cable to the A/C mount and continued the positive cable through the frame using a thick grommet. At that point, I routed the cable inside the passenger frame rail to the starter. It's clamped in two additional locations in the frame rail. I trimmed the excess length and crimped on a new lug for the starter stud. 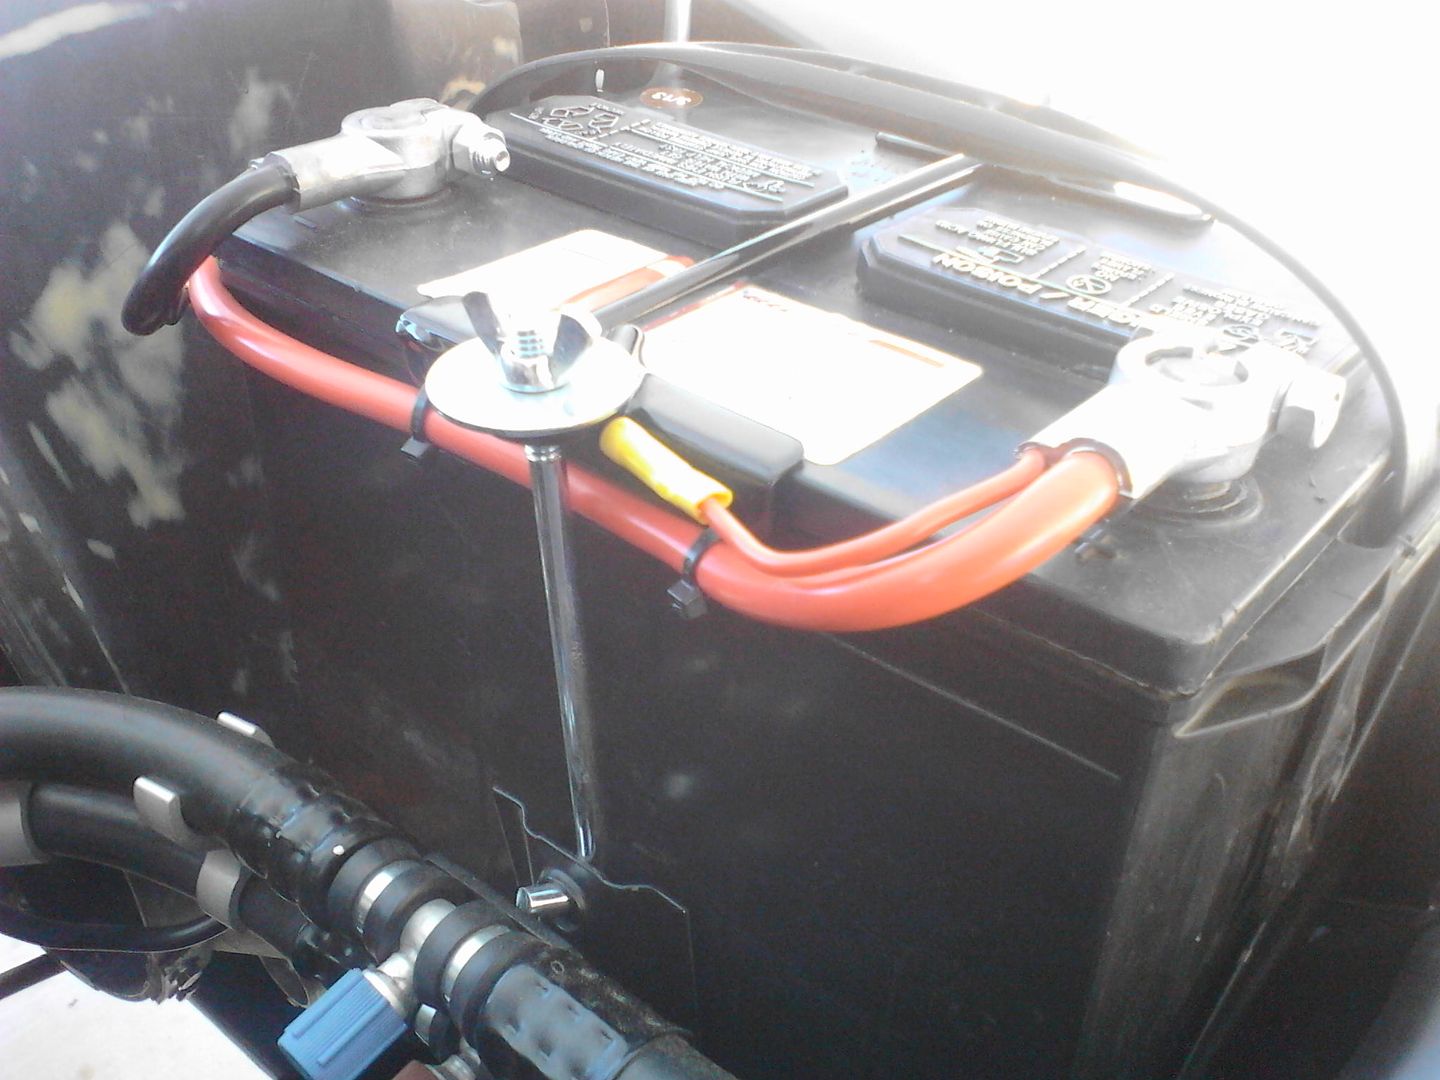 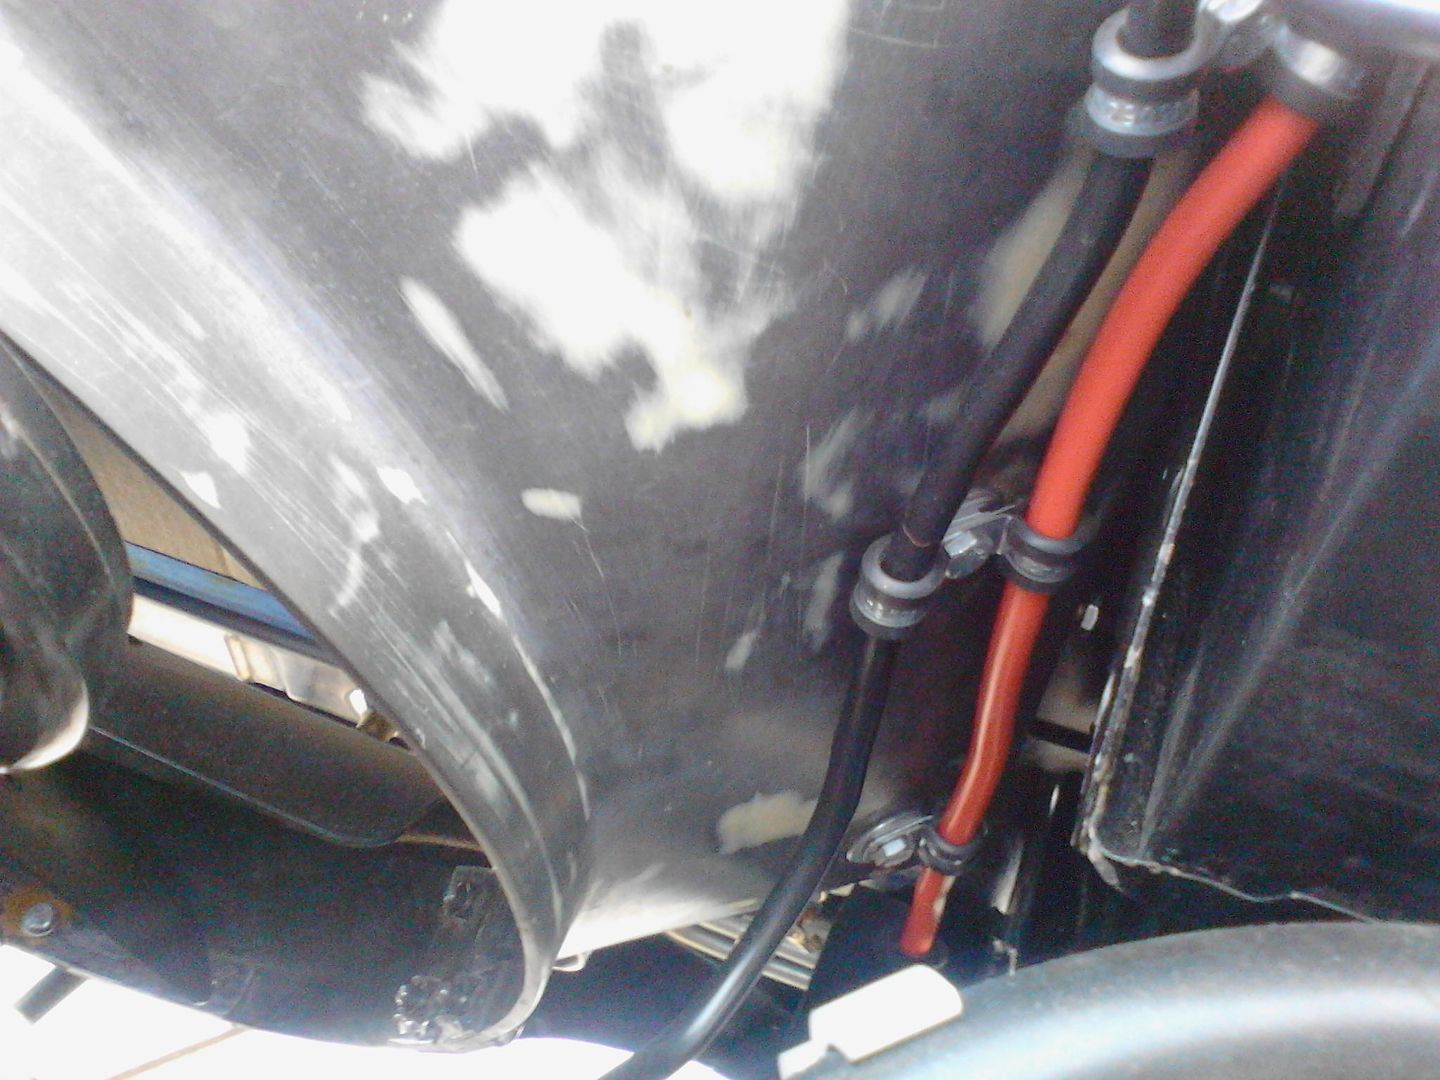 Please disregard the look of the fan shroud. It will be painted in the next few weeks!
__________________
Check out my latest endeavor: https://roundsixpod.com My build threads: '55 Chevy: http://67-72chevytrucks.com/vboard/s...d.php?t=247512 '64 C-20: http://67-72chevytrucks.com/vboard/s...d.php?t=446527 Last edited by chevyrestoguy; 09-07-2015 at 06:47 PM. |
|
|
|
|
09-07-2015, 07:02 PM
|
#761 |
|
Registered User
Join Date: Mar 2005
Location: apple valley, ca
Posts: 2,670
|
Re: Project '64 Cheapskate
Another item: the coolant overflow
My radiator is an aftermarket unit from a small custom shop in San Dimas, California, and they welded on the neck and clocked on the overflow fitting to point at the passenger side. Well, my passenger side engine compartment is already cluttered with the battery and all of the A/C components, so I had to think of a way to route the line to the driver's side. I decided to use a factory windshield washer bottle as the overflow bottle because I really didn't like the look of the aftermarket tanks and also for the fact that I already had a new bottle and a bracket. I got a 48" piece of 5/16 steel line and bent it to where it runs inside the core support over to the tank. I wound up lowering the tank from it's factory mounts. I shifted it to where the lower bolt hole in the core support is now the upper bolt in the bracket. I wanted a nice, gradual gravity feed from the radiator to the tank. 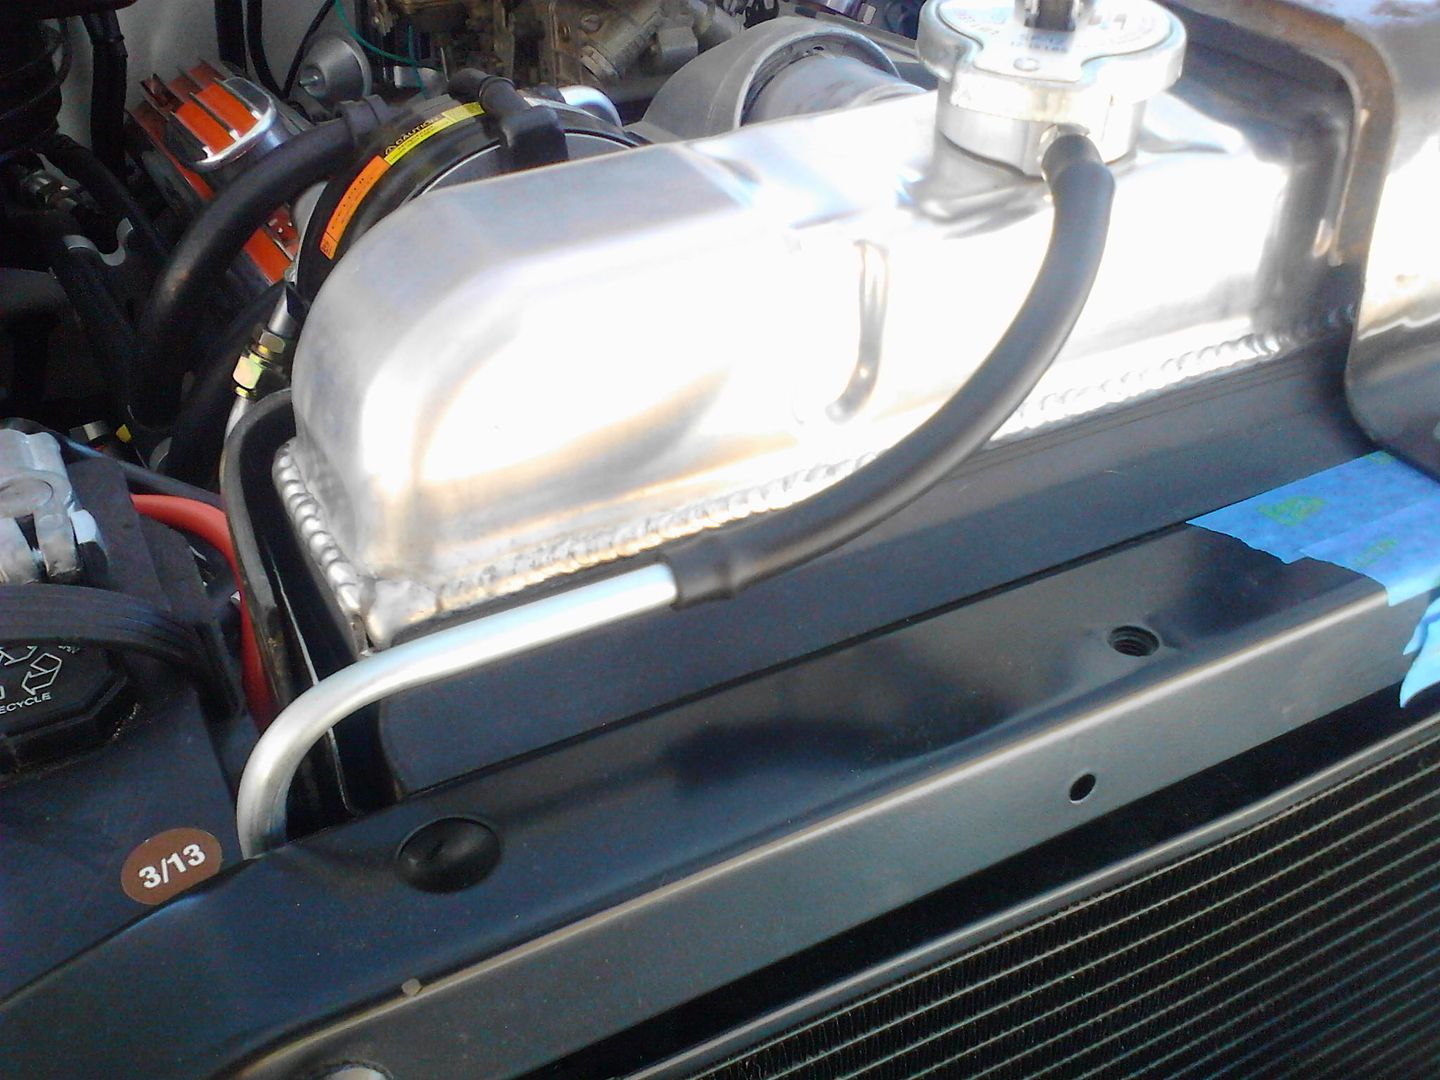 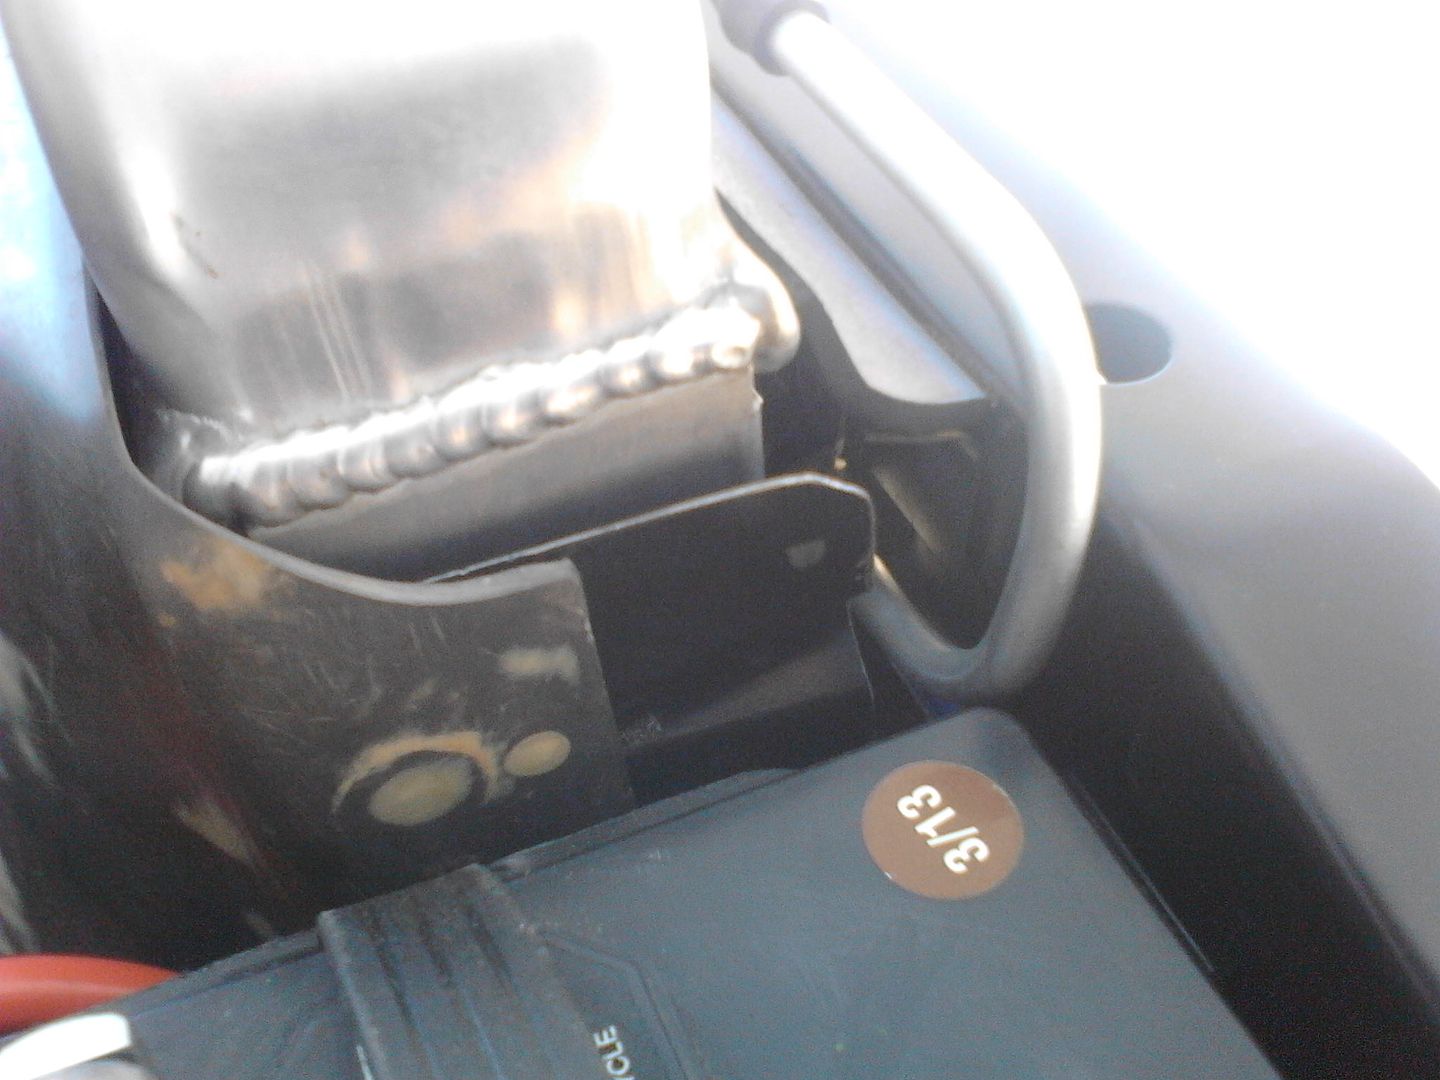 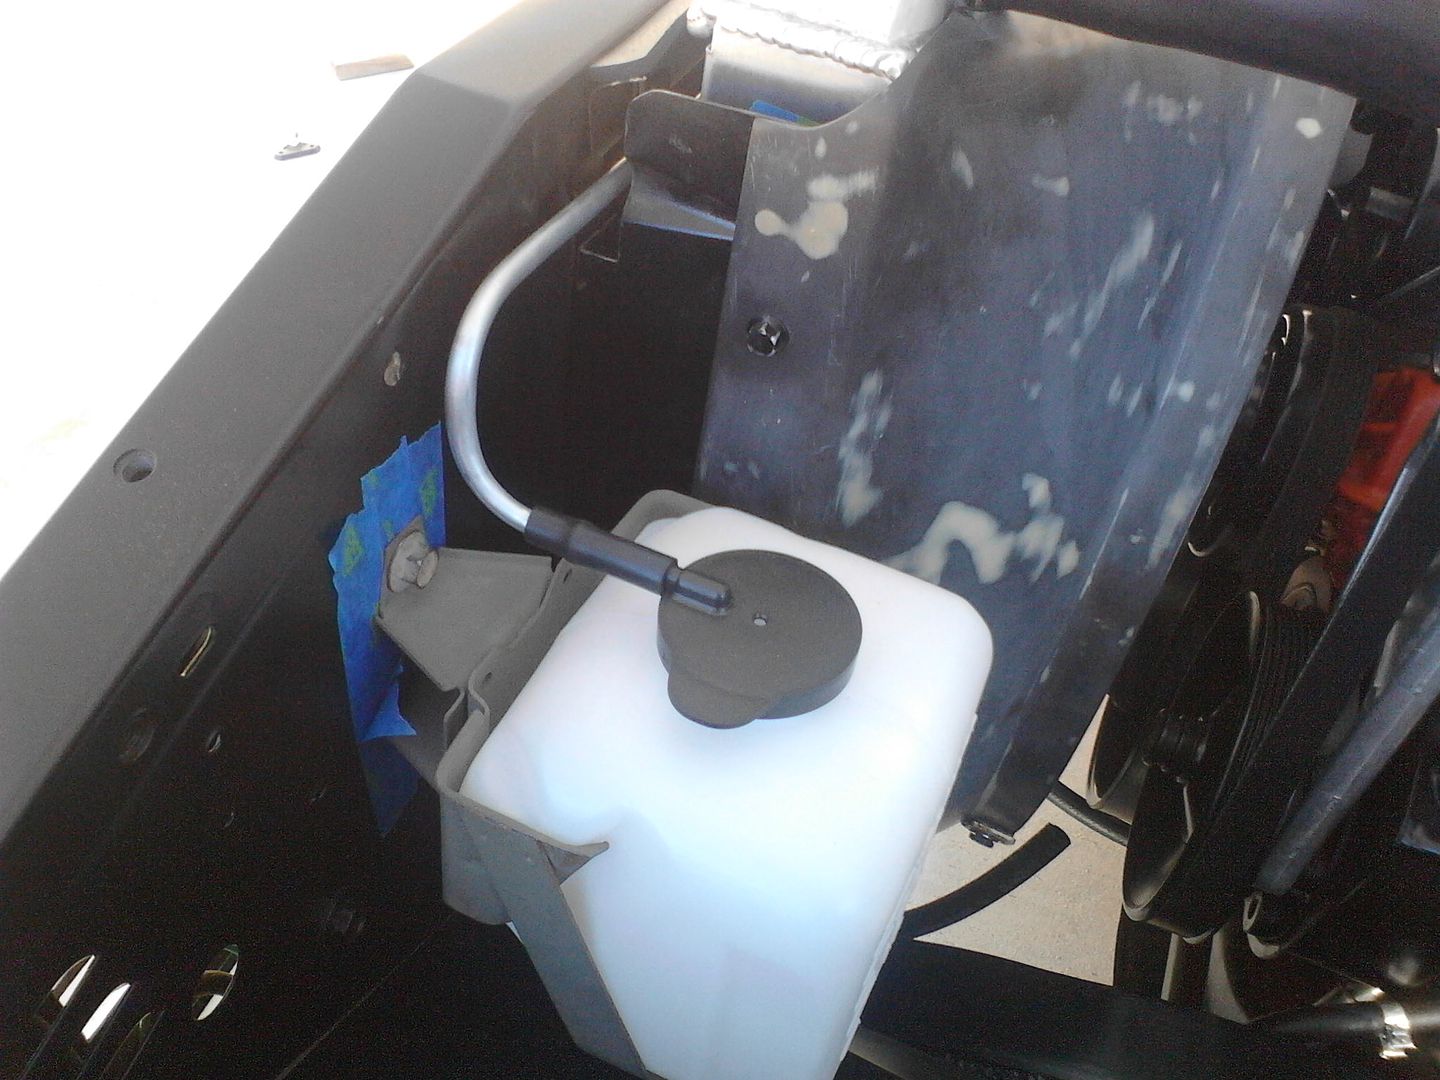 The bottle bracket will be painted black when I'm done
__________________
Check out my latest endeavor: https://roundsixpod.com My build threads: '55 Chevy: http://67-72chevytrucks.com/vboard/s...d.php?t=247512 '64 C-20: http://67-72chevytrucks.com/vboard/s...d.php?t=446527 |
|
|
|
|
09-07-2015, 07:10 PM
|
#762 |
|
Registered User
Join Date: Mar 2005
Location: apple valley, ca
Posts: 2,670
|
Re: Project '64 Cheapskate
Another item: Upper radiator hose
I like the look of rubber hoses, and as cool as I think they look, I didn't want the hard pipe that came from the factory on the V8 models. I wanted to find an off-the-shelf hose that I could source from any parts store. After a bunch of research, I found one. It's a Gates hose, part# 20676, and it's for a 1970-1972 Monte Carlo. I'm using a swivel water neck, but if you cut 15.25" from the long end and .25" from the radiator end, this hose fits perfectly if you're using a factory serpentine belt set-up. 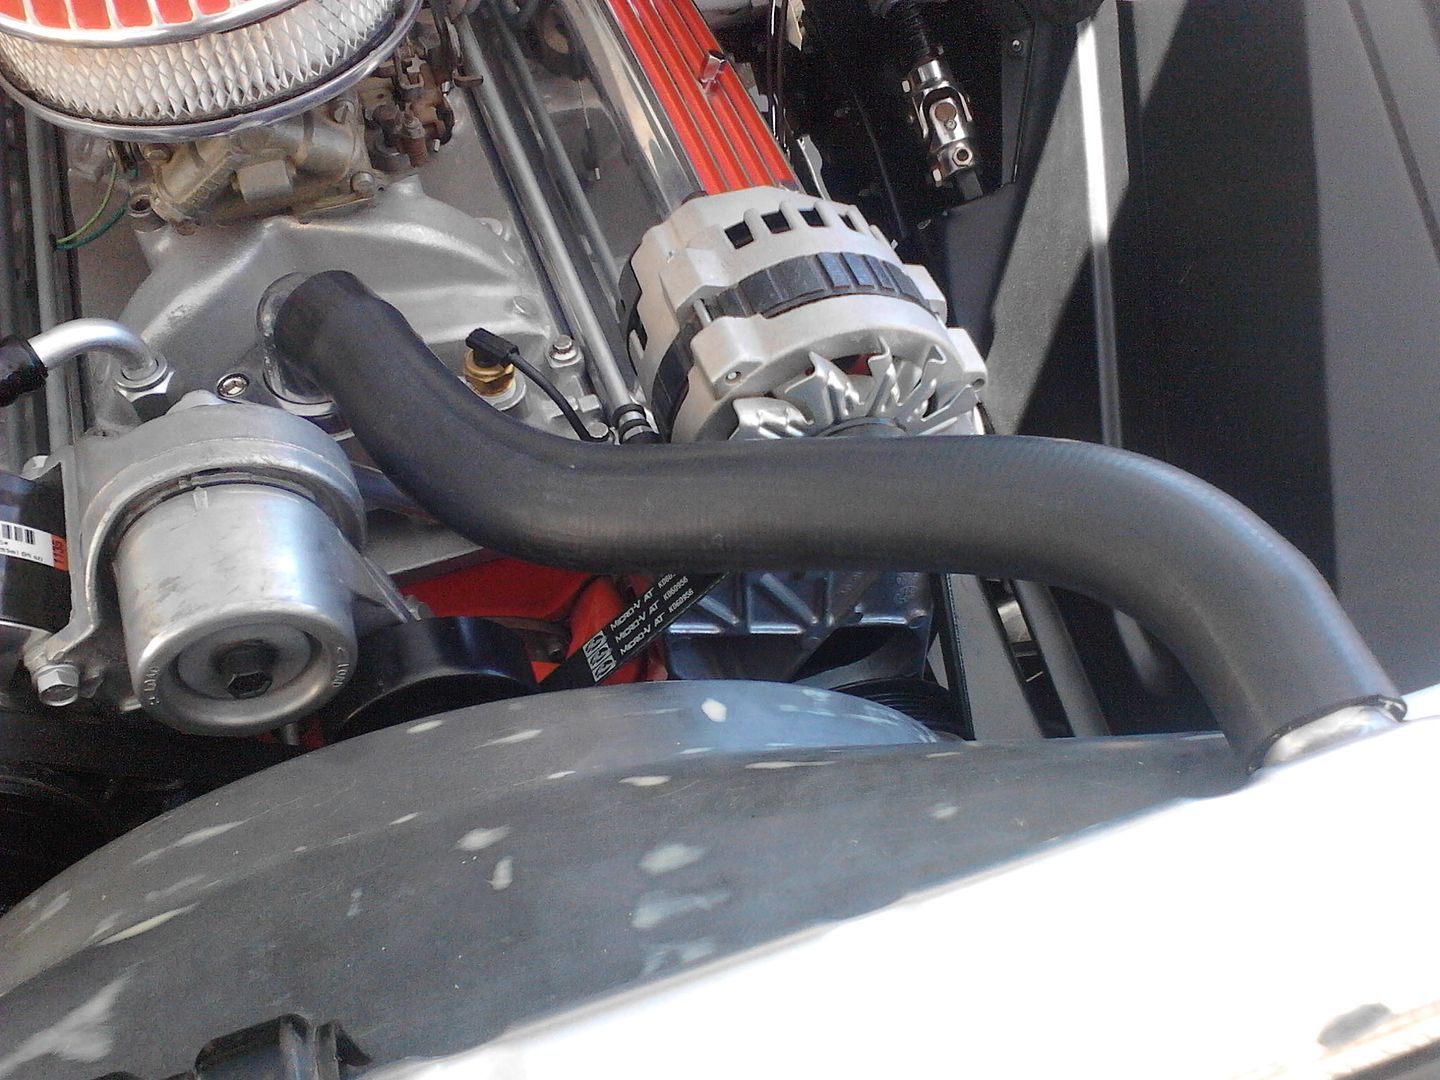 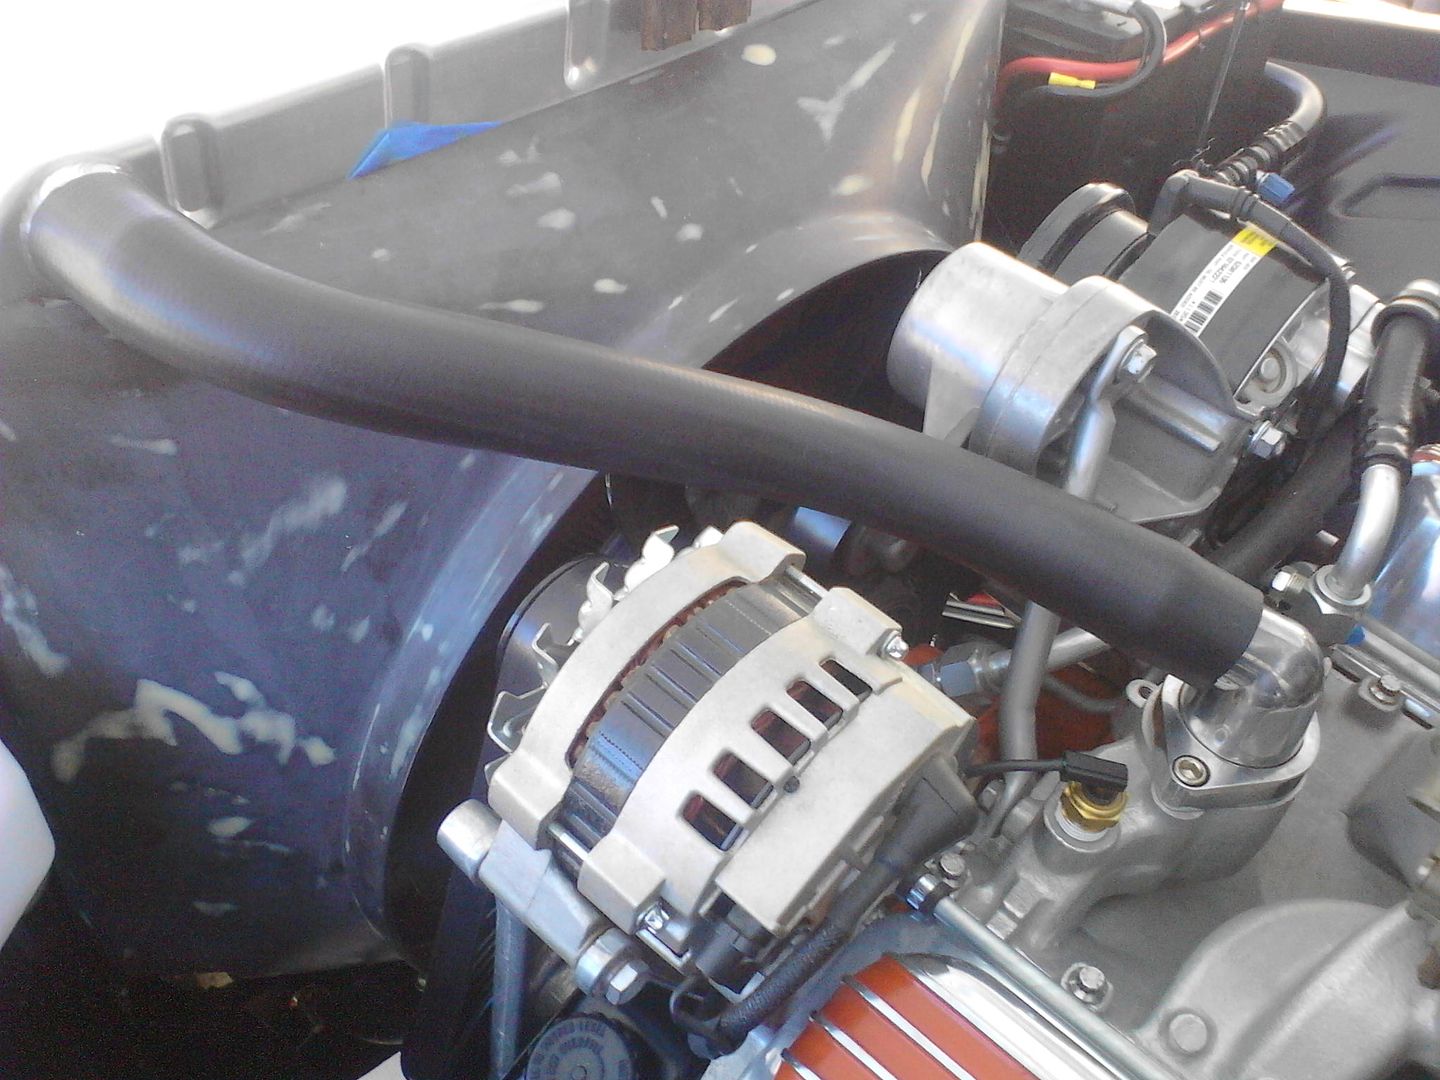
__________________
Check out my latest endeavor: https://roundsixpod.com My build threads: '55 Chevy: http://67-72chevytrucks.com/vboard/s...d.php?t=247512 '64 C-20: http://67-72chevytrucks.com/vboard/s...d.php?t=446527 |
|
|
|
|
09-07-2015, 07:18 PM
|
#763 |
|
Registered User
Join Date: Mar 2005
Location: apple valley, ca
Posts: 2,670
|
Re: Project '64 Cheapskate
Here's a post if what Not To Do:
After I bent my brake lines at the master cylinder, a Scotchbrited them to give a brushed aluminum look, and I then I sprayed them with a satin clear to preserve the look. WRONG! It turned them a nasty dove gray, and they looked awful. So, I tore everything back apart, got the clear coat off with an aerosal paint stripper and re- Scotchbrited them. While I was at it, I resprayed the booster with some SEM satin black. I love SEM products. Now, I can look at the booster and not get spun out about the look of the brake lines. Muuuch better! 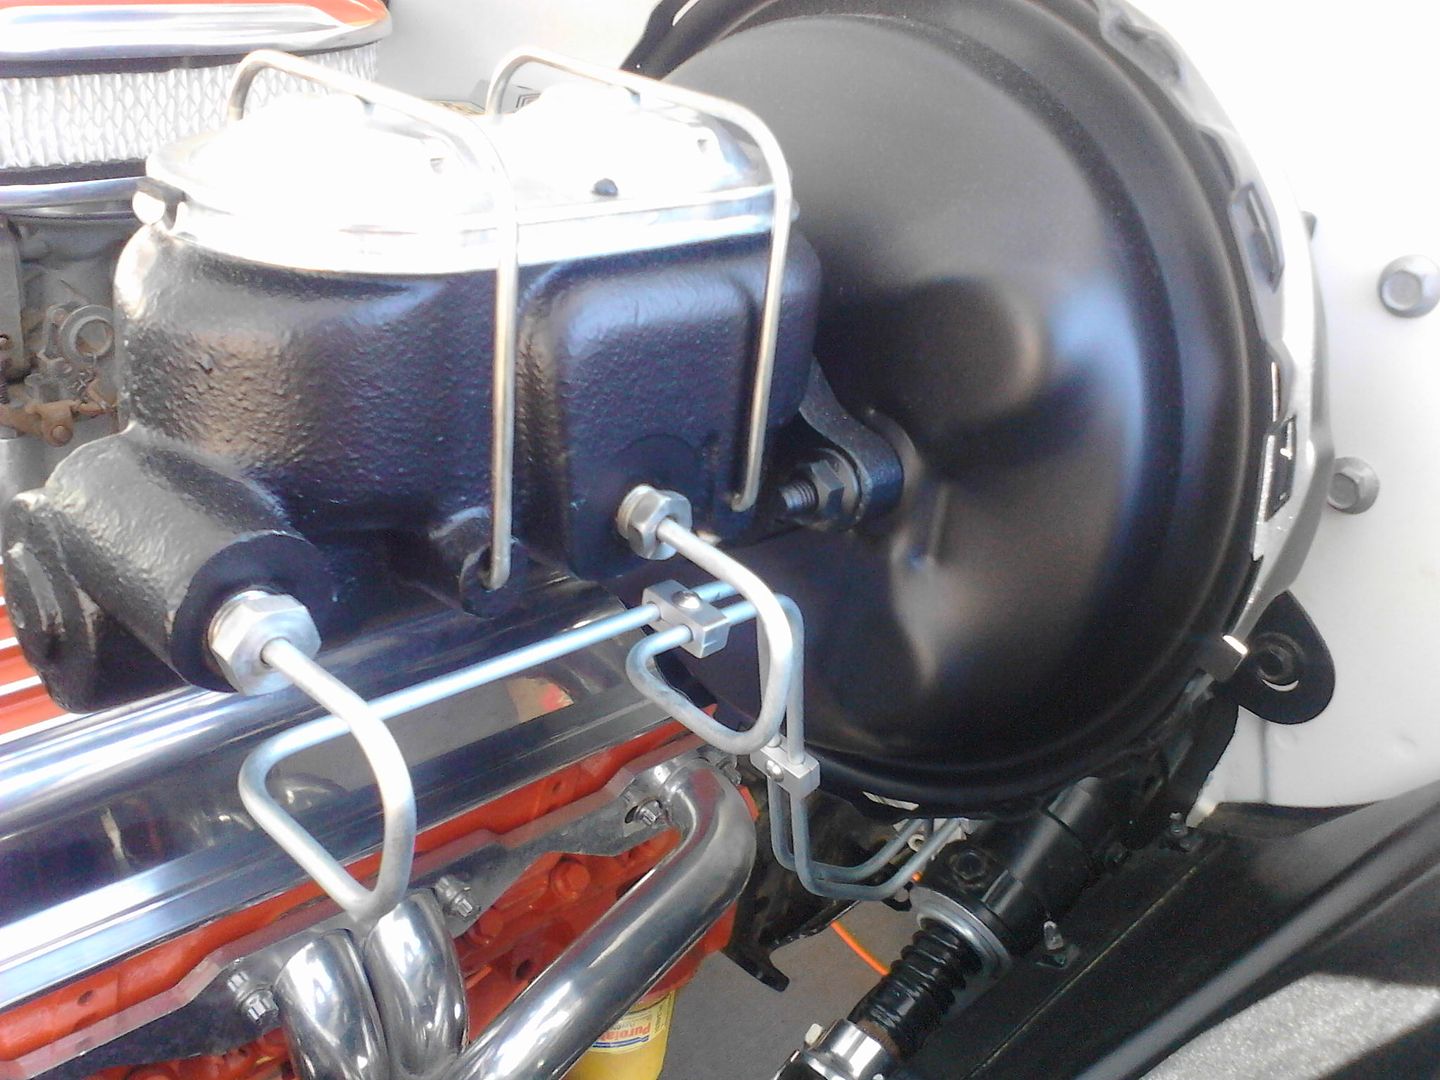
__________________
Check out my latest endeavor: https://roundsixpod.com My build threads: '55 Chevy: http://67-72chevytrucks.com/vboard/s...d.php?t=247512 '64 C-20: http://67-72chevytrucks.com/vboard/s...d.php?t=446527 |
|
|
|
|
09-07-2015, 08:10 PM
|
#764 |
|
Registered User
Join Date: Mar 2005
Location: apple valley, ca
Posts: 2,670
|
Re: Project '64 Cheapskate
Last one for the day: Shift linkage
Because I'm running a 700r4 and a factory automatic column, I had to make a new rod. I tried a bunch of factory shift rods but nothing worked right. The angles were wrong and the action was not smooth. So, Brad gave me a section of 3/8 dowel rod, and after a couple of minutes with the torch, it was done. Because I wanted a straight shot down the the trans linkage, the offset at the column was pretty big, so I added a custom gusset. After a little primer and paint, it was done. It works great! 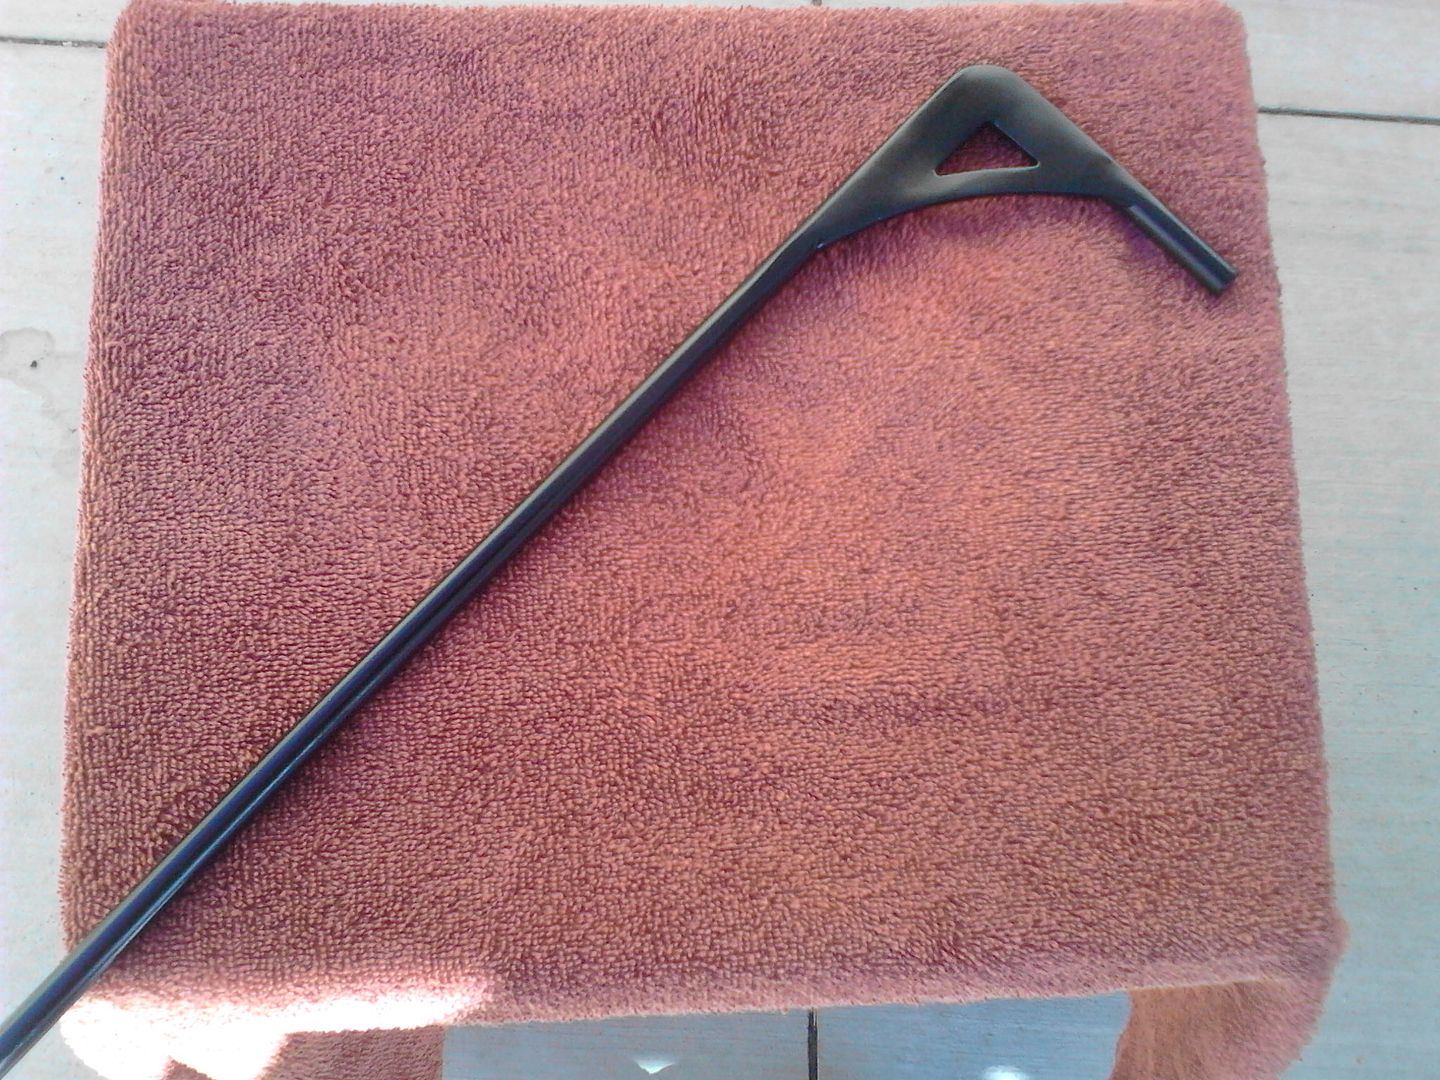 
__________________
Check out my latest endeavor: https://roundsixpod.com My build threads: '55 Chevy: http://67-72chevytrucks.com/vboard/s...d.php?t=247512 '64 C-20: http://67-72chevytrucks.com/vboard/s...d.php?t=446527 |
|
|
|
|
09-07-2015, 08:49 PM
|
#765 |
|
Registered User
Join Date: Jul 2006
Location: Willis, Texas
Posts: 754
|
Re: Project '64 Cheapskate
Dayum, this is some clean work.
__________________
65Gregg Blue long bed White TBSS 61 Impala The two most important days in your life are the day you are born and the day you find out why. Mark Twain |
|
|
|
|
09-07-2015, 10:04 PM
|
#766 |
|
Rollin' Old Skool
Join Date: Jun 2007
Location: Hattiesburg, MS
Posts: 5,371
|
Re: Project '64 Cheapskate
Nice, clean work as usual!
__________________
_____________________________________________ Phillip My Build threads: 1966 Chevy C-10 "Black Betty" shortbed, fleetside, BBW, 327 V8/ Powerglide (under construction) http://67-72chevytrucks.com/vboard/s...ighlight=betty 1997 Chevy Tahoe, 2dr/2wd, mild custom (Daily driver) http://67-72chevytrucks.com/vboard/s...d.php?t=601142 Pics: '66 C-10 https://flic.kr/s/aHsjHWD4h9 '97 Tahoe https://flic.kr/s/aHsjGZ7wKP '93 C-1500 https://flic.kr/s/aHskxdpdnQ '88 S-10 Blazer https://flic.kr/s/aHsjYGx4Md Previous Rides: 1993 Chevy S-10 ext. cab, 4.3L, 4/5 drop (Sold) 1993 Chevy C-1500 short/step Retro-Rod (Sold) 1988 S-10 Blazer 2dr/2wd mild custom (Sold) |
|
|
|
|
09-08-2015, 08:53 AM
|
#767 |
|
Senior Member
Join Date: Mar 2011
Location: West Plains, Missouri
Posts: 7,553
|
Re: Project '64 Cheapskate
Nice job on all your items...Jim
__________________
my build thread: http://67-72chevytrucks.com/vboard/s...d.php?t=459839 Jimbo's long bed step build:http://67-72chevytrucks.com/vboard/s...t=464626<br /> |
|
|
|
|
09-08-2015, 09:31 AM
|
#768 |
|
Registered User
Join Date: Nov 2008
Location: So. Cal.
Posts: 452
|
Re: Project '64 Cheapskate
AND it's still just low budget coolness! Just a little extra time on the details and being a little (or lot!) OCD. Looks awesome dude!!
__________________
It's all about the stance, baby! http://67-72chevytrucks.com/vboard/s...d.php?t=320546 |
|
|
|
|
09-08-2015, 12:04 PM
|
#769 | ||||
|
Registered User
Join Date: Mar 2005
Location: apple valley, ca
Posts: 2,670
|
Re: Project '64 Cheapskate
Quote:
Quote:
Quote:
Quote:
__________________
Check out my latest endeavor: https://roundsixpod.com My build threads: '55 Chevy: http://67-72chevytrucks.com/vboard/s...d.php?t=247512 '64 C-20: http://67-72chevytrucks.com/vboard/s...d.php?t=446527 |
||||
|
|
|
|
09-08-2015, 04:57 PM
|
#770 |
|
Registered User
Join Date: Sep 2012
Location: Midway, NC
Posts: 3,275
|
Re: Project '64 Cheapskate
It all looks great. And your attention to detail is wonderful. Keep on keeping.
__________________
http://67-72chevytrucks.com/vboard/s...d.php?t=581873 The low buck build threads. Check'em out! http://67-72chevytrucks.com/vboard/s...d.php?t=666022 My build thread Crossmembers CC |
|
|
|
|
09-10-2015, 12:37 AM
|
#771 |
|
Registered User
Join Date: Feb 2013
Location: tucson,az
Posts: 179
|
Re: Project '64 Cheapskate
Super clean work
__________________
efi 496bbc th350 custom brakes narrowed 9 coilover rear. |
|
|
|
|
09-10-2015, 12:10 PM
|
#772 |
|
A320 Pilot/USAF Retired
Join Date: Mar 2009
Location: Charleston, SC
Posts: 2,622
|
Re: Project '64 Cheapskate
Nice and clean!
__________________
JJ My 1957 build: http://67-72chevytrucks.com/vboard/s...d.php?t=334552 http://www.trifive.com/forums/showthread.php?t=22037 Instagram - Chuckdriver57 |
|
|
|
|
09-20-2015, 09:17 PM
|
#773 |
|
Registered User
Join Date: Mar 2005
Location: apple valley, ca
Posts: 2,670
|
Re: Project '64 Cheapskate
Spent the day making plug wires, and I àlso have been itching to try these really cool wire looms that Doug Jerger (Squeeg's Hot Rods) makes. The only problem is, they are not designed for centerbolt heads (Vortec). So that meant that I had to figure out how to make them work. It wound up being very simple. The factory Vortec heads have two 1/4-20 threaded holes that I can only assume are for the factory wire looms. I was able to use a 1.75" long 1/4-20 bolt and a 1" spacer and I orientated the loom in a vertical position. It worked great.
  Disregard the nasty mockup spark plugs. The wires are MSD, 8mm.
__________________
Check out my latest endeavor: https://roundsixpod.com My build threads: '55 Chevy: http://67-72chevytrucks.com/vboard/s...d.php?t=247512 '64 C-20: http://67-72chevytrucks.com/vboard/s...d.php?t=446527 |
|
|
|
|
09-21-2015, 12:25 AM
|
#774 |
|
Registered User
Join Date: Nov 2008
Location: So. Cal.
Posts: 452
|
Re: Project '64 Cheapskate
Those look badass! I had no idea what the plan was, but your idea worked out great! Of course you're screwed now 'cuz I'll badger you to put "matching" 12 point bolts on! Lol I have some extra 1/4" stainless AN washers you need for those...
__________________
It's all about the stance, baby! http://67-72chevytrucks.com/vboard/s...d.php?t=320546 |
|
|
|
|
09-21-2015, 06:55 AM
|
#775 |
|
Registered User
Join Date: Mar 2005
Location: apple valley, ca
Posts: 2,670
|
Re: Project '64 Cheapskate
Yep, I'm screwed. Pretty soon, I'll be swapping all of my 6 points for 12 points because of my header bolts. Hahahaha.
__________________
Check out my latest endeavor: https://roundsixpod.com My build threads: '55 Chevy: http://67-72chevytrucks.com/vboard/s...d.php?t=247512 '64 C-20: http://67-72chevytrucks.com/vboard/s...d.php?t=446527 |
|
|
|
 |
| Bookmarks |
|
|


 Linear Mode

