
|
Register or Log In To remove these advertisements. |
|
|
|
|||||||
|
|
Thread Tools | Display Modes |
 09-17-2018, 10:57 AM
|
#1 |
|
Registered User
Join Date: Sep 2018
Location: Athens, AL
Posts: 6
|
Classic Auto Air AC System Review and Install Notes
I just finished the install on my third 67-72 C10 Classic Auto Air System - this one on a 1971 Suburban. I figure that after three installs, Ive gathered enough experience and time with these systems to make an honest and fair evaluation of this company and its products
at least in this narrow context The following is my take on CAAs 67-72 equipment, the install process, and their customer service.
System Design: The current generation system essentially does away with all of the factory system. The previous versions that Ive installed, kept the factory control panel and cables, and used a manual heater control valve. It utilized micro switches to turn the compressor on and off. The only time the compressor was on, was when the vents were either 100% on the face vent settings or 100% on the defrost/floor setting, so there was no blending with AC on. The new system uses a logic module that uses 0-10k ohm potentiometers to control the motorized blend door and heater control valve, as well as the AC compressor relay. The new system still provides AC demand in the above mentioned states, but ads a third parameter - when the temperature control is fully on the cold setting. This allows you to blend the air flow and still keep the AC on - a welcome upgrade during humid/rainy days when you need to keep your windows defogged, but still want some cold air on your face. The supplied control panel assembly is black, and looks totally out of place in an original 67-72 dash. it looks as though it was designed around the Ronald Reagan era. I mounted it and asked my wife to come take a look - she hated it as soon as she saw it too. CAA offers a kit to retrofit the original controls to the 0-10K pots, but I purchased some slide pots and fitted them to the OE panel myself. (Im a bit of a purist when it come to the interior, and Im sure the control panel would look much more at home if youre swapping in a up-to-date instrument cluster and a DIN radio for example). This system moves the heater core and the evaporator core into the cabin, so theres a plate that installs over the huge hole where the old heater and/or AC box was mounted on the engine side of the firewall. This cleans up the engine bay nicely. The plate is painted black and looks just fine (I painted mine the firewall/body color). You do have to cut a small piece out of the firewall, so theres no going back to 100% original without welding the piece back in (but if youre installing this system, thats obviously not a concern). The plastic block-off cover for the original fan mounting hole on the firewall has been improved since the previous two systems, but is still not going to win any design/beauty contests. There are some downsides to moving everything inside the cabin. Most obvious is the loss of about 70% of your glove compartment volume. The supplied molded plastic box is about 4 deep and is good for little more than well gloves. The hard, slick interior is also very noisy if you place any hard objects inside and they are allowed to roam about. Another major drawback to this compact design is the lack of OEM-style temperature blending. All of the cabin air that travels through the system, flows through the evaporator coil and the heater core - always! This mean that to control temperature, you have to choke off the flow of hot water to your heater core with a valve. (A well engineered system diverts air through either, or both coils to achieve a very precise and quick-to-react blend). With the CAA system, you must allow what you think is the correct amount hot water into the heater core, and wait a few minutes to see if you made the right choice. In most cases you will not have made the correct choice, so you must make an adjustment and wait another few minutes for the new equilibrium. The three-to-five minutes for all of the heat to be removed from the heater core can seem like an eternity if its getting warm because the only way to remove the heat is to dump it into the cabin. (As time with the system goes by, you will get better and better at making your adjustments). For the 67-72 C10 system, there is also no floor-defrost blend - they are supplied by the same air passage. So, you cannot isolate one from the other. therefore, your three choices for air flow blend are: All face; a blend of face and floor/defrost; or all floor/defrost. If you remember the bi-level option the GM had in the 70s and 80s controls thats pretty much what youve got here... face and/or bi-level. This is really not much of an issue in my opinion, but there have been a few times when Id like more options. Finally, this compact system lacks the fresh air / recirculate option. Air is always pulled from inside the cabin near the passenger kick panel. I feel this is a minor shortcoming, since there is a perfectly fine kick panel vent within inches of the suction point (of course, you cant reach it from the drivers seat). That being said, it would be nice to have the option to reduce noise, exchange cabin air, and improve efficiency on cool evenings and during the first few minutes of summer operation when the cabin air may be 125+ degrees and outside air is a much easier-to-cool, 90. The supplied fan control has three fan speeds. The fan is a Spahl fan and is very noisy on high. It emits a relatively high pitched whine that is very annoying to my ears. The medium setting is much quieter and I am always in a hurry to try to reach a comfort level that allows me to switch to medium. (During prime Alabama hot/humid days however, this only happens on cloudy days of after sundown) Low is only slightly slower/quieter than medium. I feel that CAA should drop the RPM down considerably for the low setting. During times when you want just a little cool or heat, low is simply way too much airflow. I added a 1.8 Ohm resister (an old ignition coil resistor) to the low speed circuit and now its perfect for those situations, and for in-cab conversations. (On my Suburban install, I purchased a 15A motor controller that uses a 0-10K ohm pot to control the fan speed. This gives me infinite fan speed adjustment, and allowed me to keep the original look of a slide knob for fan speed). The dash vents that came with the systems Ive installed were for a non-factory AC dash. In my opinion, the small side vents supplied by CAA are better looking than the bulky original vents. They are very unobtrusive and clean and look like they belong there. The OE vents look more like an afterthought to me. The center vent above the radio is a reproduction of the OE vent and looks very nice. The outer housing is made of plastic, but the diffuser is metal. The chrome looks very nice.  Cutting the holes for the side vents can be done with a hole saw, but I prefer a panel punch if you can find one. The center vent hole is much more of a challenge but it could be worse. You drill some 1/2 holes on each end and then cut out the shape you traced from the provided template with a cut-off wheel or a jig saw be careful! Do a lot of checking and re-checking before you make the first cut, and its better to err on the small side and work your way out. 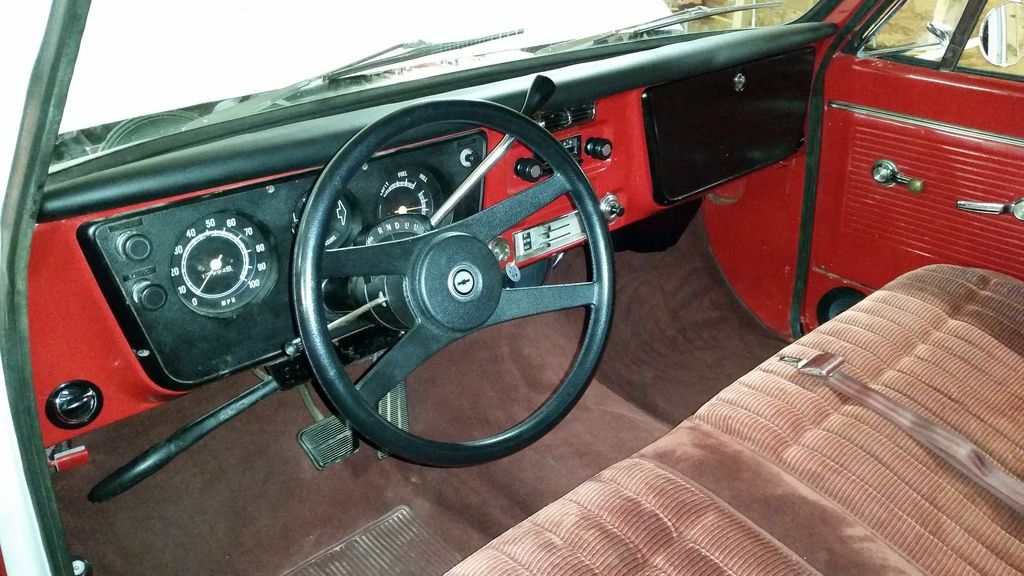 These is plenty of flex hose provided with the kit to run to the vents and it will look like an octopus crawled under your dash and expired when you get them all connected. It seems like theres no room for anything else, but Ive had no issues with fitting radios, speakers, relays, etc. AC compressor cycling is handled by a capillary tube temperature switch, mounted in/on the evaporator. This switch is set to cycle the compressor off at just above freezing, to prevent frosting over the coil. There is also a high pressure cut-out switch mounted on the dryer that will protect the compressor if the system is overcharged, or there is not enough air flow through the condenser to keep the high pressure in check. This switch also prevents the compressor from running if there is very low refrigerant levels, to protect the compressor from oil starvation. An optional trinary switch ($55) can be used to turn on a condenser fan at a preset high-side pressure. This allows the fan to remain off unless the system needs the extra air. The condenser and its mounting hardware for the 67-72 C10 is the shining star of this system. The condenser nestles perfectly in front of the radiator and would look at home even on a show truck. The dryer and its mounts are also top notch. Most of the mounting holes are existing GM provisions, with one additional hole required - 1 3/8 hole that is cut in the radiator support near the battery tray. The compressor is a Chinese Sanden copy, and the brackets that Ive received for both old SBC and LS conversions were well designed/built and came with very good instructions. The AC hoses are supplied with plenty of extra length and must be crimped once you have the final position s and lengths pinned down. One minor nit-pick with the hoses is that the liquid line fitting at the firewall is a 90 degree fitting and looks totality out of place with the other straight fittings nearby (yeah.. Im picky). Why CAA supplies a 90 here is beyond me. To satisfy my OCD, CAA has provided a straight fitting at my request... for about $3 extra. The system is very complete. The only thing you will need to purchase are new heater hoses, some R134a refrigerant, and if you dont have a crimping die set, youll have to carry the hoses to have them crimped (dont forget to mark the clocking with a some tape and marker). All the necessary o-rings are provided and all of the components were shipped with plugs to keep moisture and contamination out. Packaging is top notch too. System install Notes: The system install is relatively easy for someone familiar with the ins and outs of typical aftermarket equipment. The instructions are top notch, with plenty of pics and drawings. It seldom seemed as though I was figuring things out on my own. One thing the literature is lacking are operators instructions. Its pretty common sense, but listing a few features and how the system works would be a nice touch. System Quality Issues: 1967 C10 with LS6: 2 years and 13,000 miles on system. (Earlier CAA system with cable controls)  The first heater control valve would not close completely allowing a small amount of coolant into the heater core, and vent temps were too high. After doing some over-the-phone troubleshooting to verify that was the problem, CAA sent a new one out right away. The temperature control switch on the evaporator was cycling the compressor off at around 50 degrees instead of the 35 degree desired set point. Again, CAA helped me insure that was the problem, and sent out a new one at no charge. 1971 C20 Suburban with 6.0 L96: 3 weeks and 150 miles on system (Latest CAA system with electronic controls) 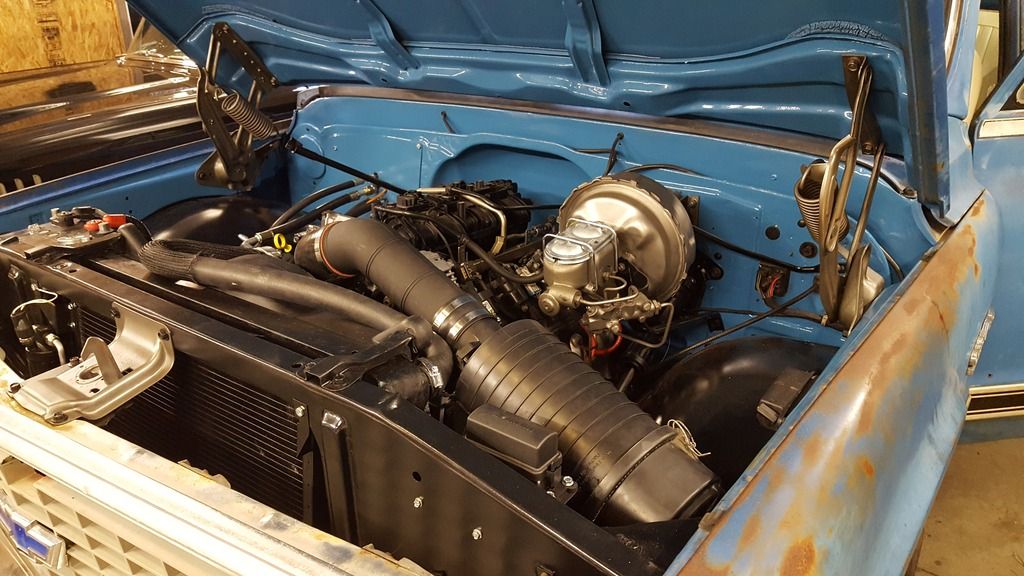 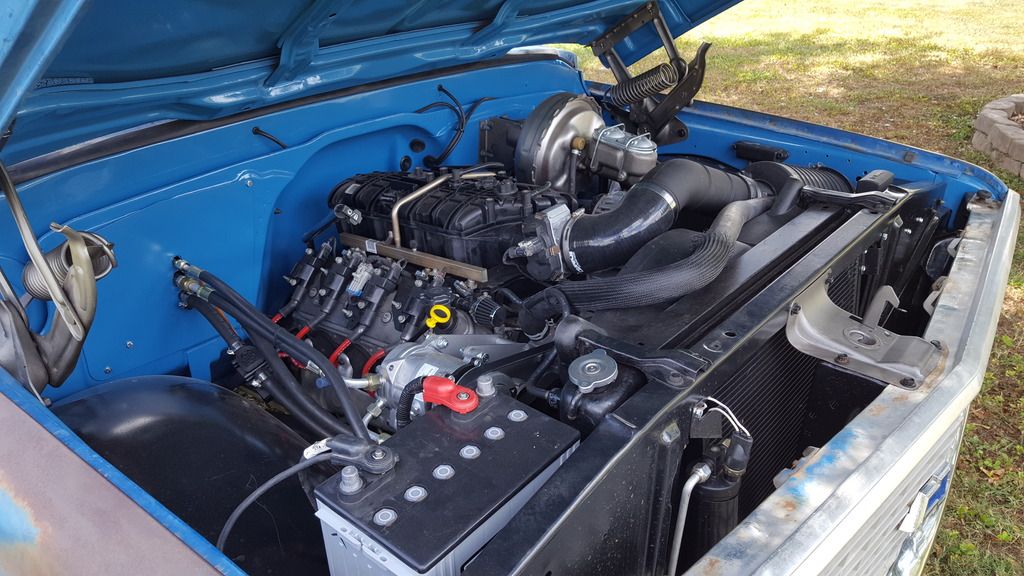 The supplied evaporator drain hose was too short to even reach the firewall, much less pass through it, even though I drilled it in the exact location CAA recommended. (I found an extension around the shop)... a very annoying inconvenience for about $0.25 worth of hose. I Notified the CAA tech for their information. There is a hole in the firewall block-off plate for the heater control valve harness to pass through. This hole was too small to fit the wire through with the connector still attached. I had to find an appropriate tool and de-pin the connector and then re-pin it after passing the cable through the hole. Im not sure if I got an old plate for the manual cable, or if they just forgot to update the plate. There was no mention or help with this in the instructions. The electronic face/defrost/floor blend controls would not keep the calibration (it was cycling and seemed to be hunting the blend position) I performed the calibration process numerous times with no improvement. I spoke with a tech about it and he told me I was not doing the calibration correctly (although I was following the instructions precisely.. and he didnt bother to ask me any details). After further troubleshooting, I found that the problem was a faulty terminal connection where the control board plugs into the control module. I took a small flat tool and squeezed the terminal together to make it fit a little tighter and it seems to be fixed (this is not the same connector I had to de-pin). 1967 C10 with 350 SBC: 7 years - 200 miles (Earlier CAA system with cable controls) This is a garage queen - only driven a few times a year. No issues that I can think of. Tech Staff: The technicians Ive dealt with have been very helpful. They are very knowledgeable about their products and AC systems in general. They do come across a little patronizing at times. I have been a professional mechanic and have extensive experience in repairing/troubleshooting OEM and custom AC systems for 20+ years, yet they have (at times) seemed a tiny bit arrogant and sometimes want to do all the talking and no listening. They tend to assume first, that I have made some mistake instead of there being a problem with their product. This is the exception though, and Ive been overall satisfied. Overall opinion/Final thoughts: This system suffers (like pretty much everything else in this day and time) from being made up of a lot of cheap imported components assembled here in the US. Thats just the reality of things, but we reap the benefits of a getting lower cost product overall. As long as CAA makes up the failures the way theyve been doing it, its just an inconvenience. The design falls way short of modern HVAC systems, with the lack of OEM-style blending and the absence of a recirc mode, etc., but these features would drive the complexity, cost, and bulkiness of the system beyond what many enthusiasts would be willing to live with. The cooling capacity seems to be a little shy of what I need during the hottest part of the season here in Alabama, but I realize we are probably in the top 5-10% of the demand requirements here in the States. The undersized evaporator doesnt even begin to cool the cavernous interior of the Suburban, but I really wasnt expecting it to - I plan on adding a auxiliary/rear unit soon. Will my next system be a CAA system? I think its time to try another company and see if theres enough difference to make a permanent change. After talking to friends whove installed other brand name systems, my expectations is that all of these companies are built on the same business plan and have similar designs and quality levels. Time will tell. |

|

|
| Bookmarks |
|
|


 Threaded Mode