
|
 04-01-2018, 08:15 AM
|
#651 |
|
Registered User
Join Date: Sep 2012
Location: Leander, TX
Posts: 969
|
Re: 64 C10 Stepside "Jaybird"
So the moment finally came!
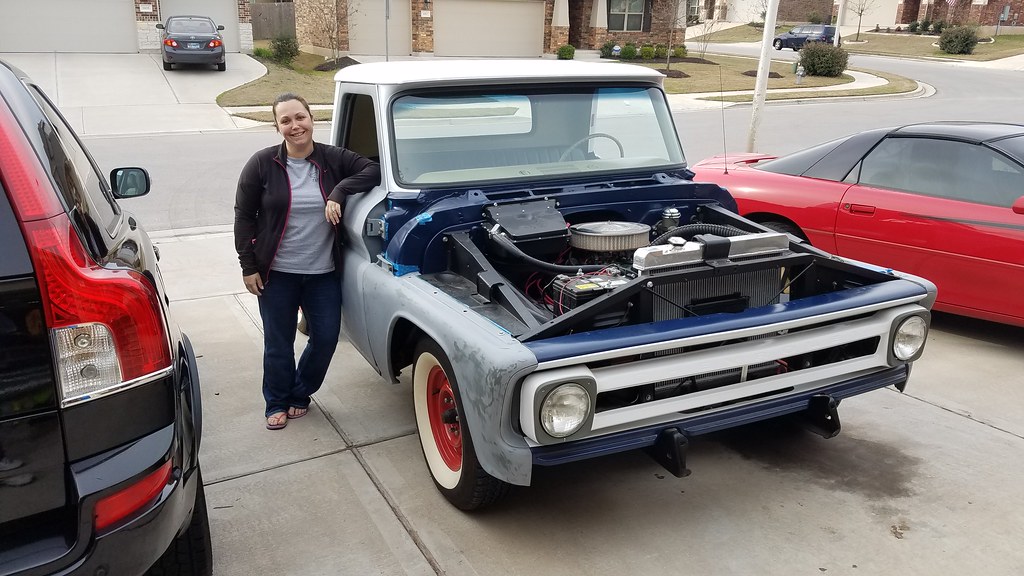 20180308_085140 by bjohnson388, on Flickr 20180308_085140 by bjohnson388, on FlickrSo there are 2 parts. The end of the first one I dropped the screwdriver I was using to change gears. I am about to order my new shifter. And dang it if I didn't leave the fender cover hanging on the front.  https://youtu.be/te-B126jofI https://youtu.be/3nSQnY-xYVQ thanks for stopping in.
__________________
64' Build Thread http://67-72chevytrucks.com/vboard/s...d.php?t=586955 |

|

|
|
04-01-2018, 08:24 AM
|
#652 |
|
Registered User
Join Date: Sep 2012
Location: Leander, TX
Posts: 969
|
Re: 64 C10 Stepside "Jaybird"
These pictures were taken while I thought I was videoing.
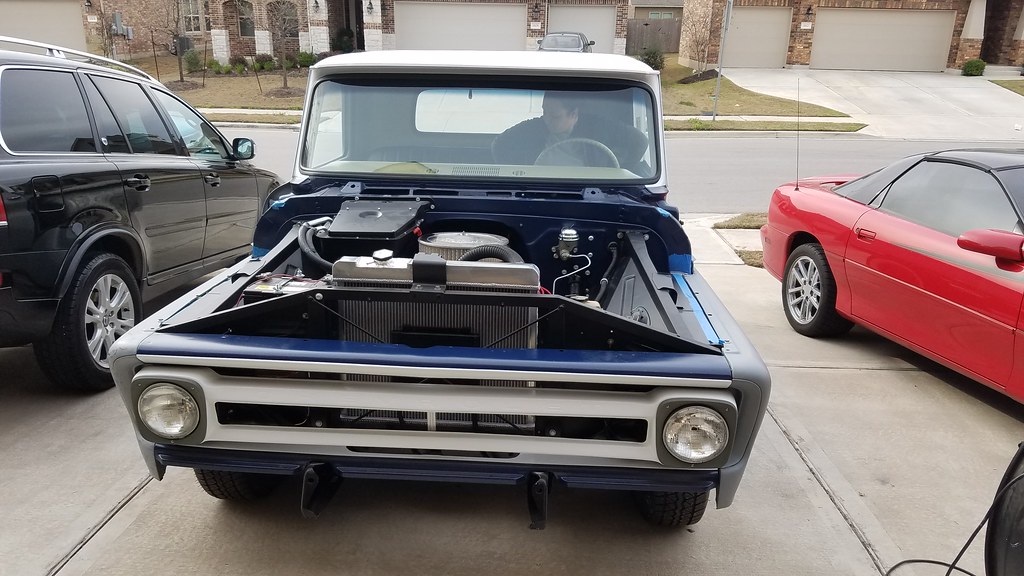 20180308_084828 by bjohnson388, on Flickr 20180308_084828 by bjohnson388, on Flickr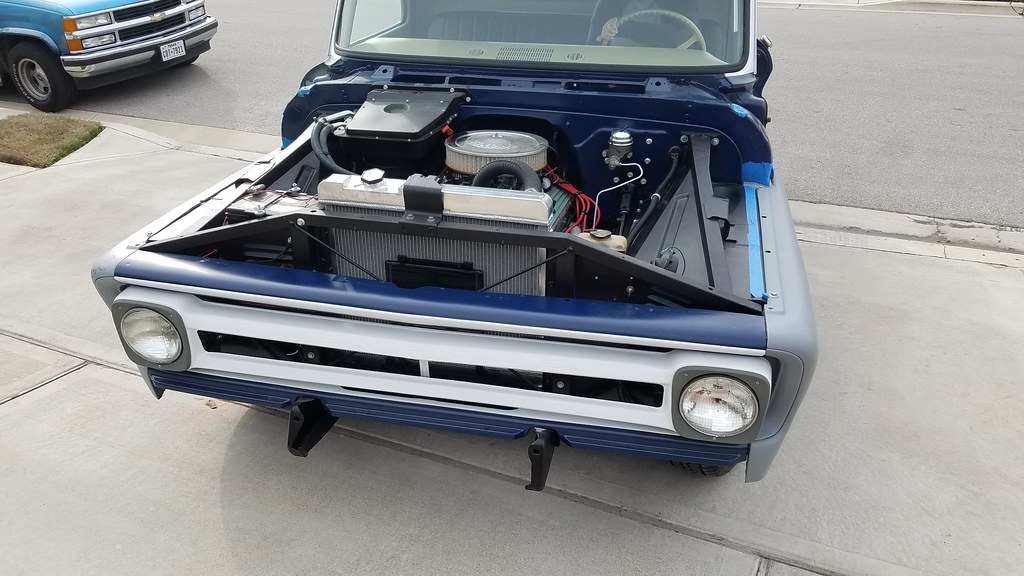 20180308_084921 by bjohnson388, on Flickr 20180308_084921 by bjohnson388, on FlickrIt looks so incomplete without the fender. 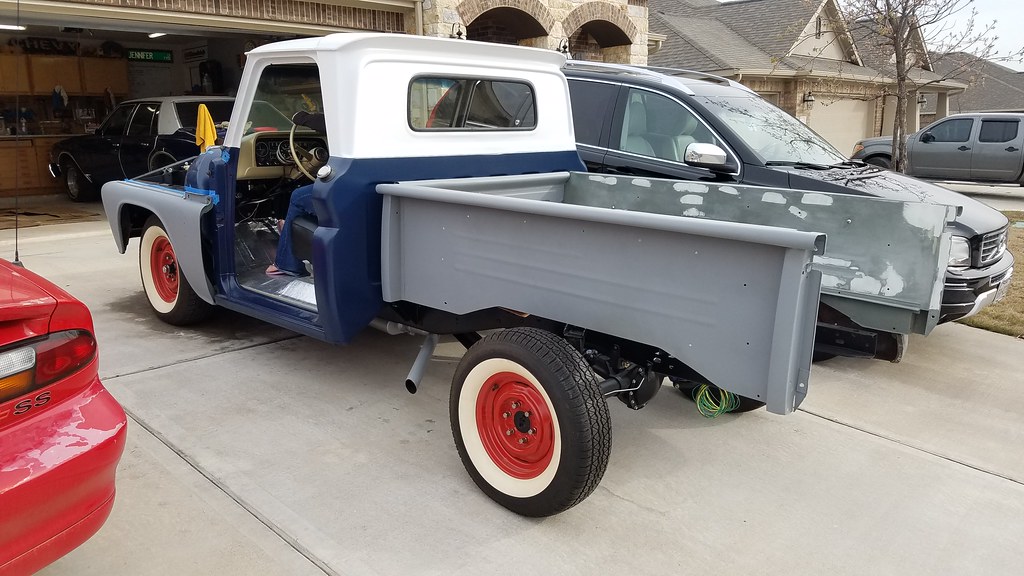 20180308_085036 by bjohnson388, on Flickr 20180308_085036 by bjohnson388, on FlickrSorry lots of photos haven't photographed it outside since 2014 when I sat the cab on it at the other garage. 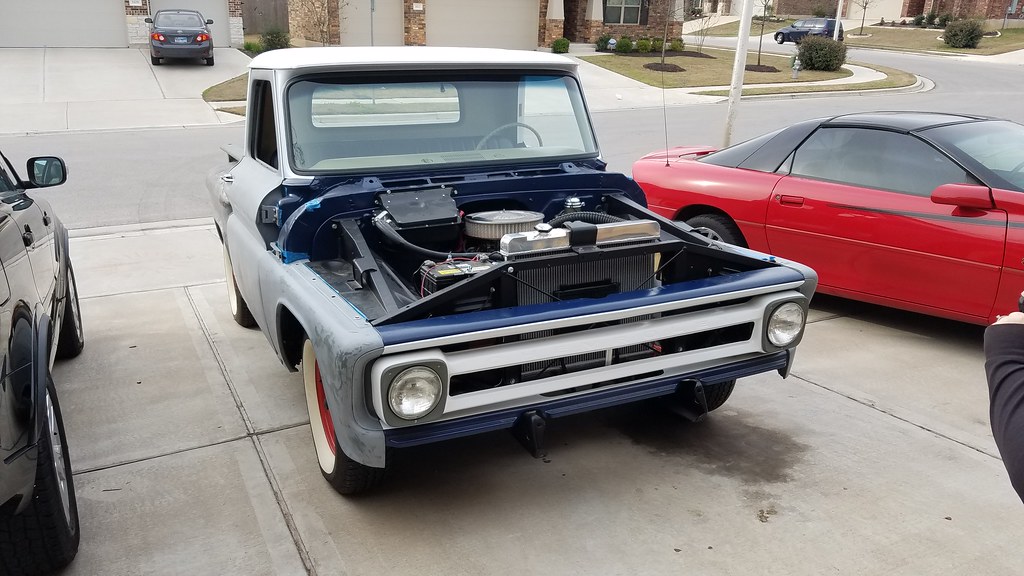 20180308_085120 by bjohnson388, on Flickr 20180308_085120 by bjohnson388, on Flickr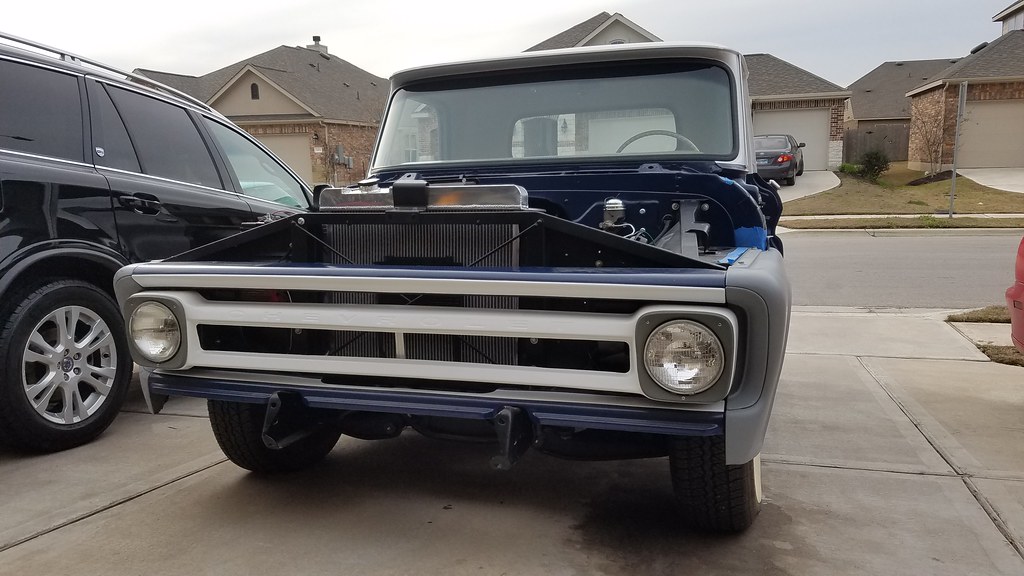 20180308_085147 by bjohnson388, on Flickr 20180308_085147 by bjohnson388, on Flickr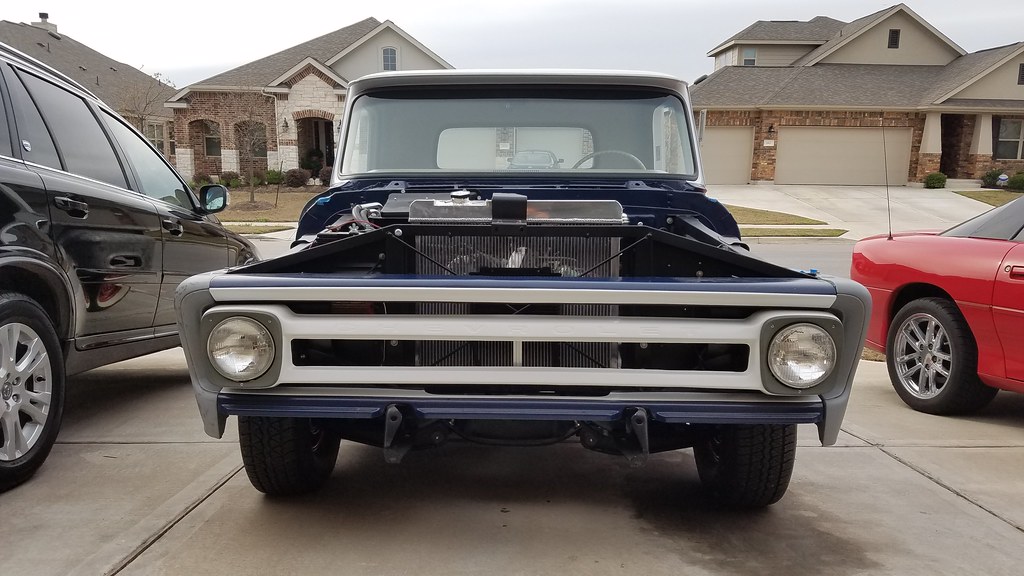 20180308_085153 by bjohnson388, on Flickr 20180308_085153 by bjohnson388, on FlickrTime to do some cleaning. Has been in this spot since June of 2016. 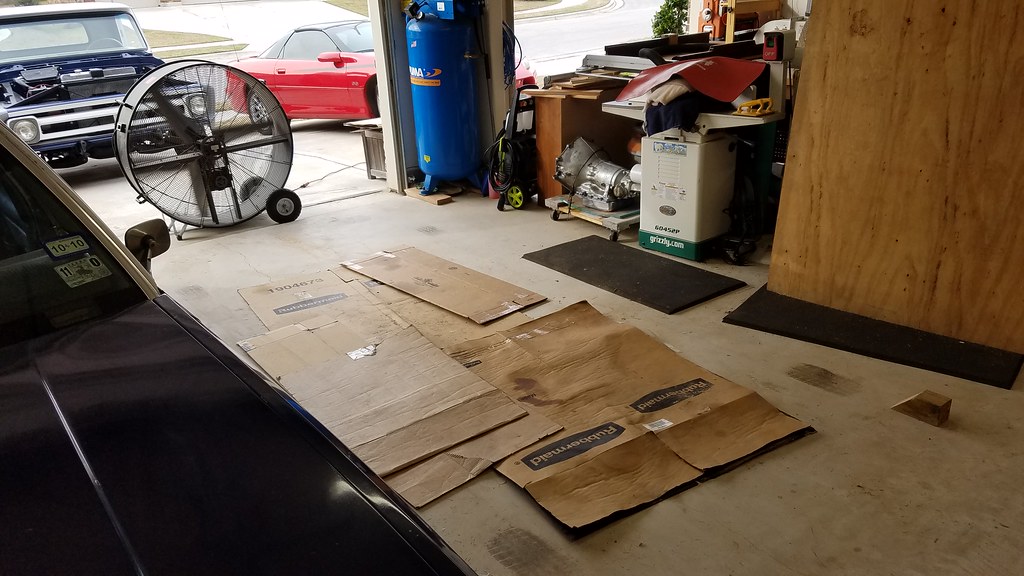 20180308_085626 by bjohnson388, on Flickr 20180308_085626 by bjohnson388, on Flickr 20180308_091735 by bjohnson388, on Flickr 20180308_091735 by bjohnson388, on Flickr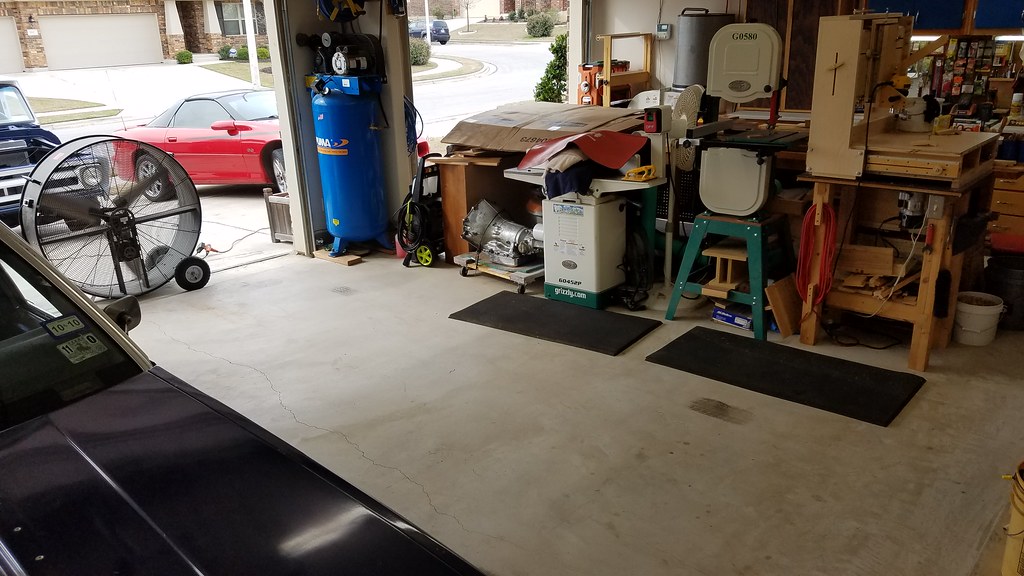 20180308_091725 by bjohnson388, on Flickr 20180308_091725 by bjohnson388, on Flickr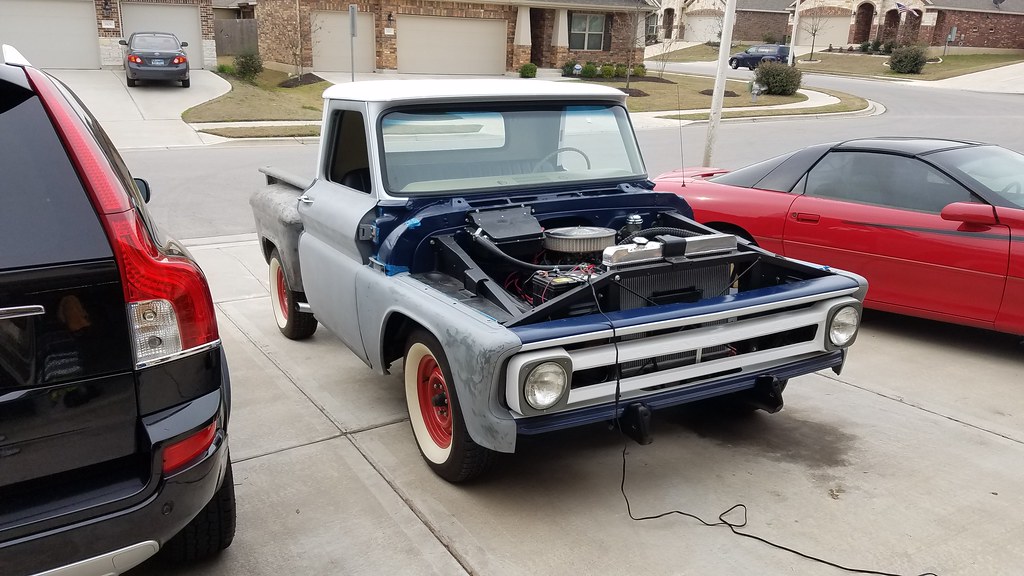 20180308_091745 by bjohnson388, on Flickr 20180308_091745 by bjohnson388, on FlickrNow I need to clean my front bench it has developed a bad case of FSD. 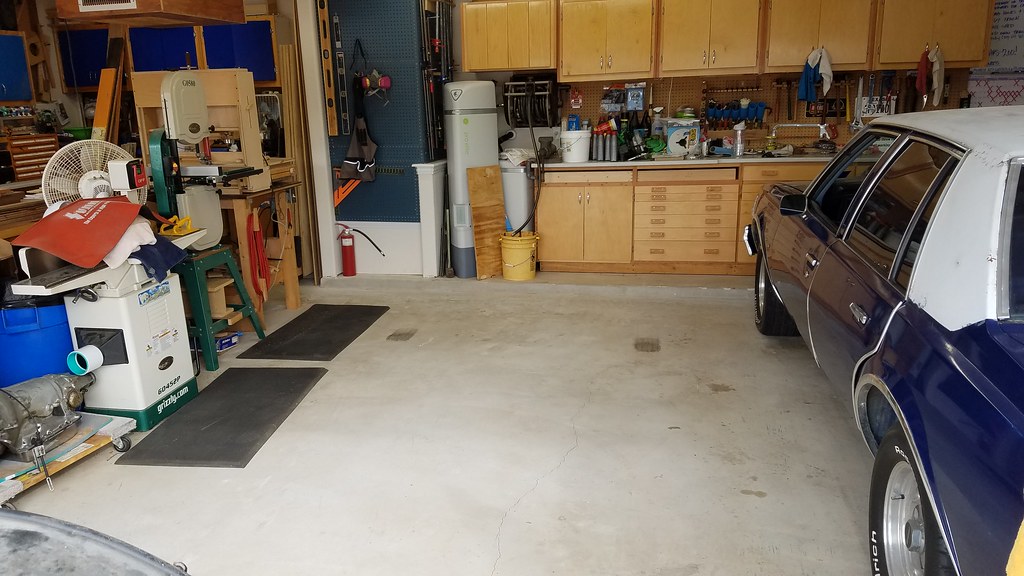 20180308_091755 by bjohnson388, on Flickr 20180308_091755 by bjohnson388, on FlickrTook the hinges off the driver door and these bolts need to be replaced they have some cancer. All of that was hiding and you would have never known without pulling the hinge. 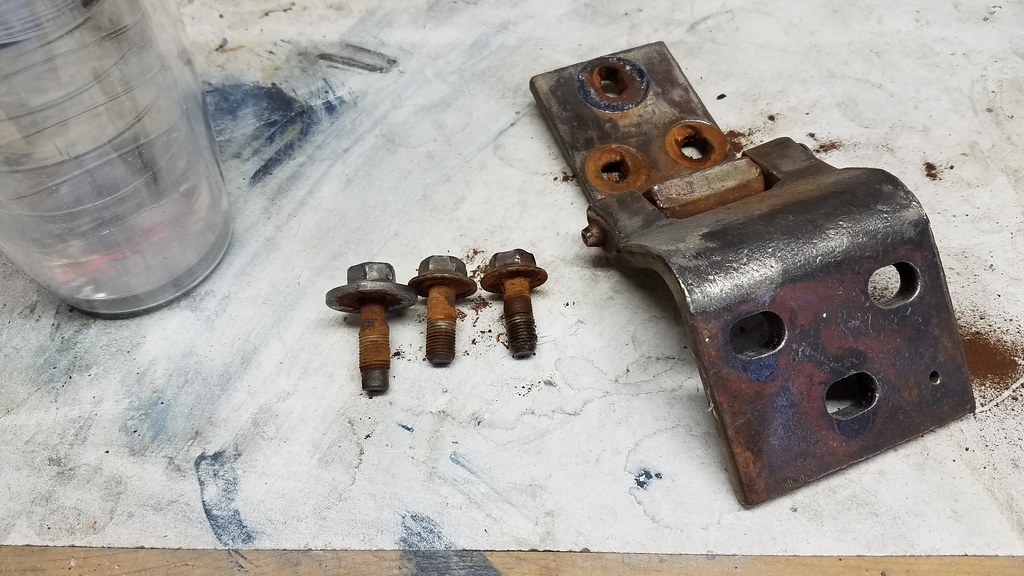 20180308_180432 by bjohnson388, on Flickr 20180308_180432 by bjohnson388, on FlickrThe new door bottom patch I bought will come all the way up and fix this rotted part. 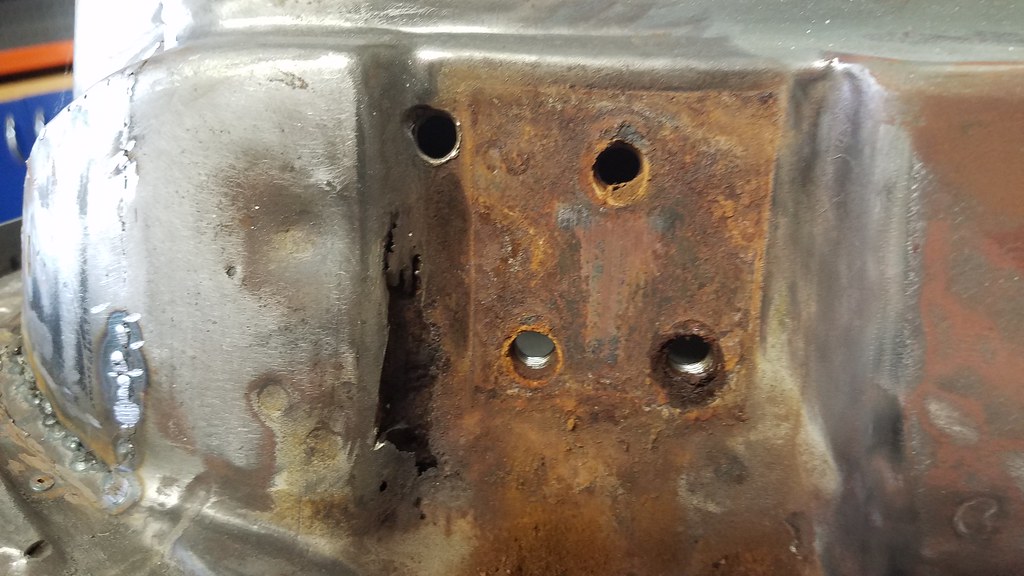 20180308_180440 by bjohnson388, on Flickr 20180308_180440 by bjohnson388, on FlickrPeeling back the door skin. I am going to replace the inside piece before I do the outside skin. 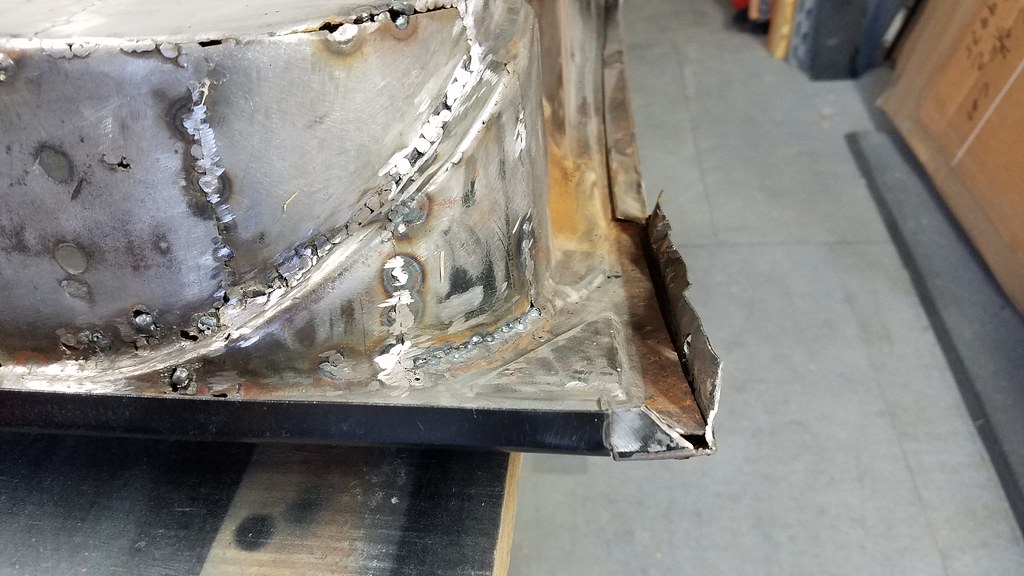 20180308_182041 by bjohnson388, on Flickr 20180308_182041 by bjohnson388, on FlickrHere is what I am going to cutout and replace. 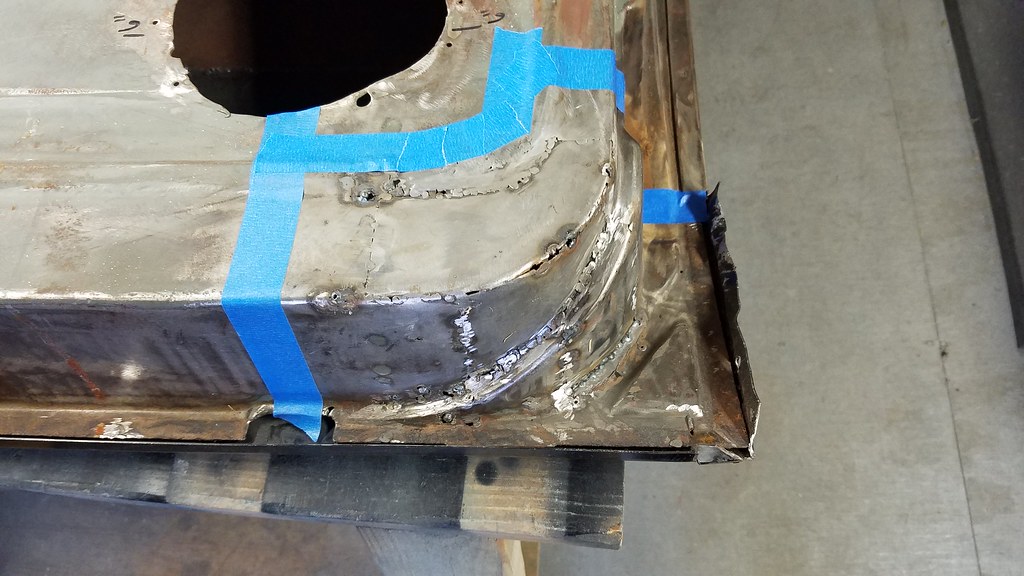 20180308_182402 by bjohnson388, on Flickr 20180308_182402 by bjohnson388, on Flickr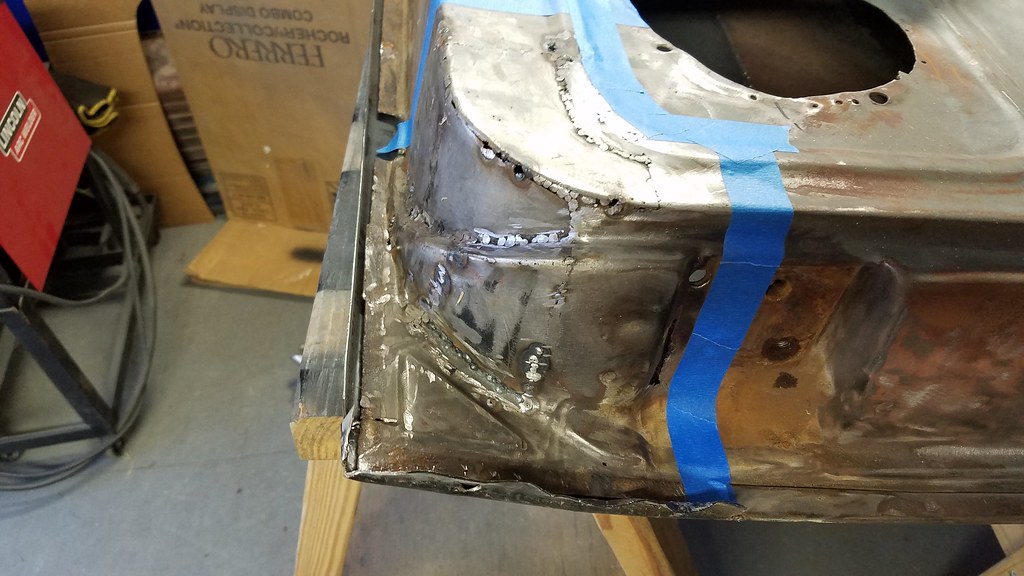 20180308_182411 by bjohnson388, on Flickr 20180308_182411 by bjohnson388, on FlickrThe new piece laid out for cut.  20180308_183053 by bjohnson388, on Flickr 20180308_183053 by bjohnson388, on Flickr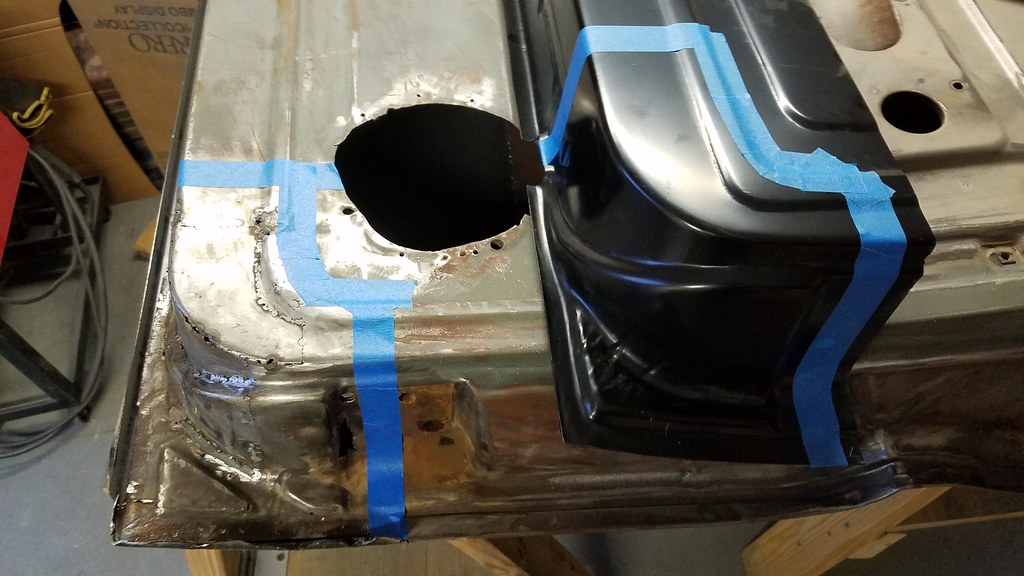 20180308_183058 by bjohnson388, on Flickr 20180308_183058 by bjohnson388, on FlickrThanks for stopping in, Bret
__________________
64' Build Thread http://67-72chevytrucks.com/vboard/s...d.php?t=586955 |
|
|
|
|
04-01-2018, 08:28 AM
|
#653 |
|
Registered User
Join Date: Sep 2012
Location: Leander, TX
Posts: 969
|
Re: 64 C10 Stepside "Jaybird"
Working on getting the corner patch to fit good. Which was difficult it was not bent properly which doesn't surprise me.
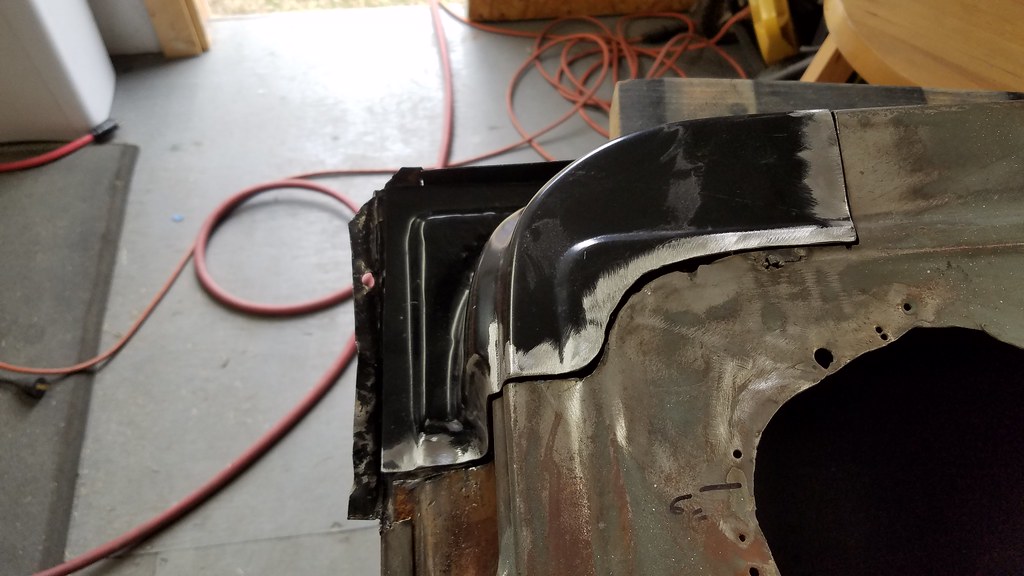 20180311_125806 by bjohnson388, on Flickr 20180311_125806 by bjohnson388, on FlickrIt's hard to see but the very bottom curve did not go down and line up at all. 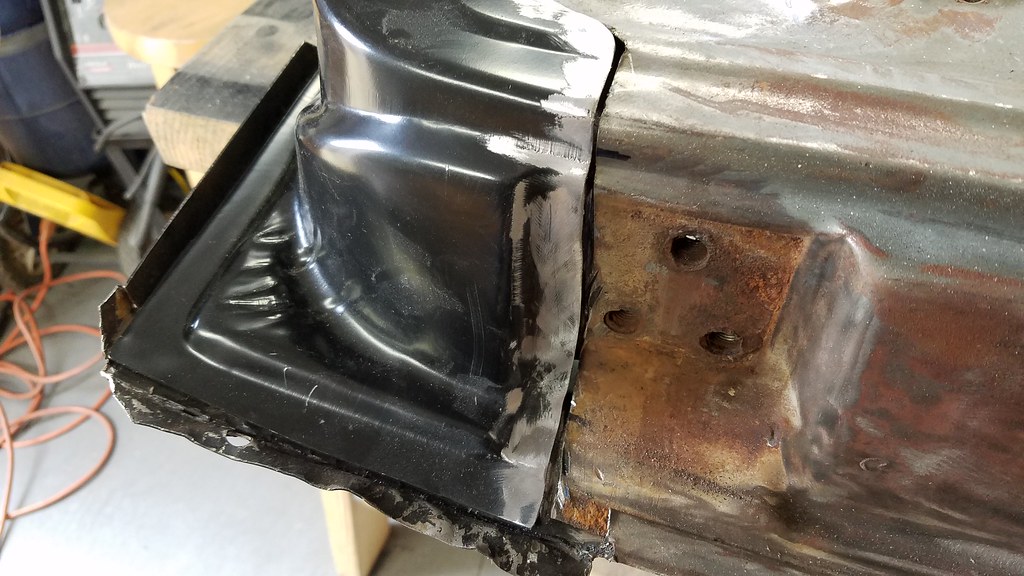 20180311_125802 by bjohnson388, on Flickr 20180311_125802 by bjohnson388, on FlickrThis left side corner fit really good once it was pulled up tight. 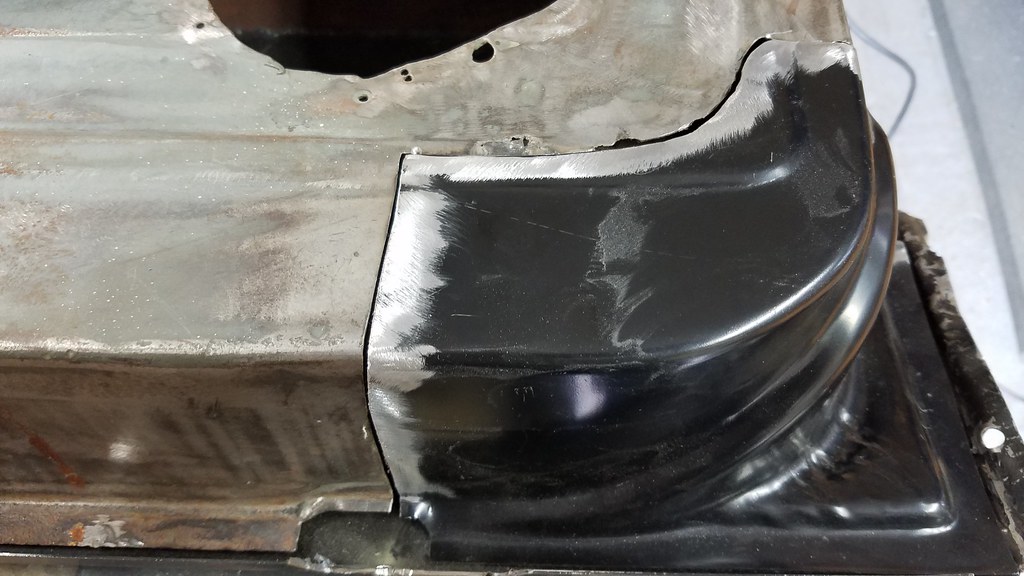 20180311_125756 by bjohnson388, on Flickr 20180311_125756 by bjohnson388, on FlickrDrilled 1/4" holes for the plug welds to the inside corner brace. 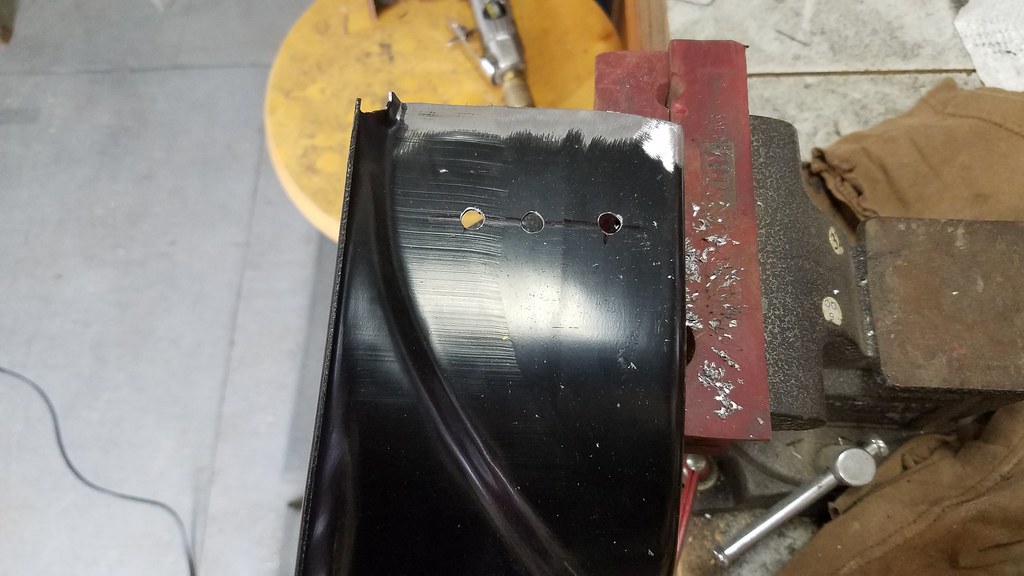 20180311_131812 by bjohnson388, on Flickr 20180311_131812 by bjohnson388, on Flickr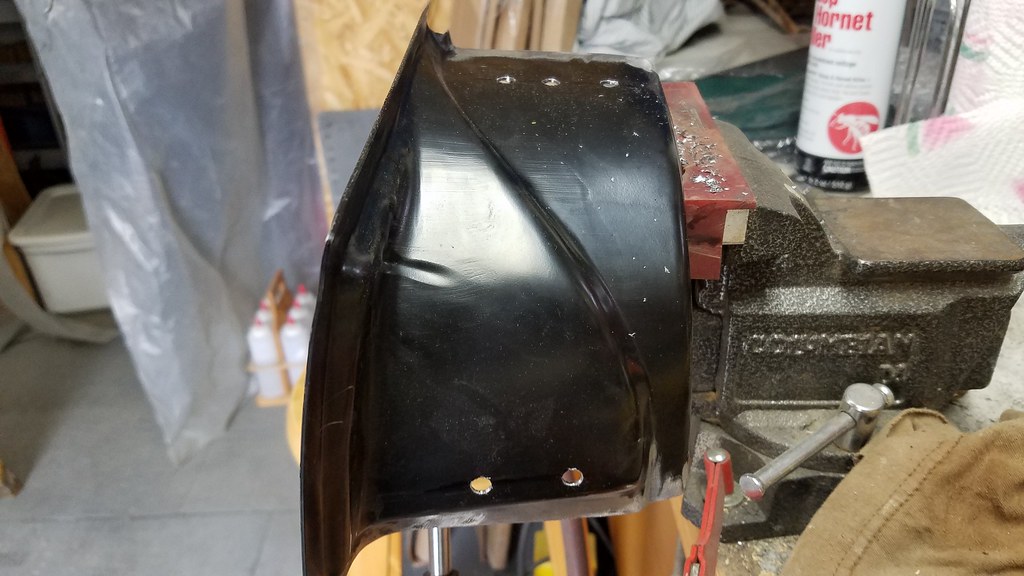 20180311_131816 by bjohnson388, on Flickr 20180311_131816 by bjohnson388, on FlickrCleaned up where the plugs welds will be. 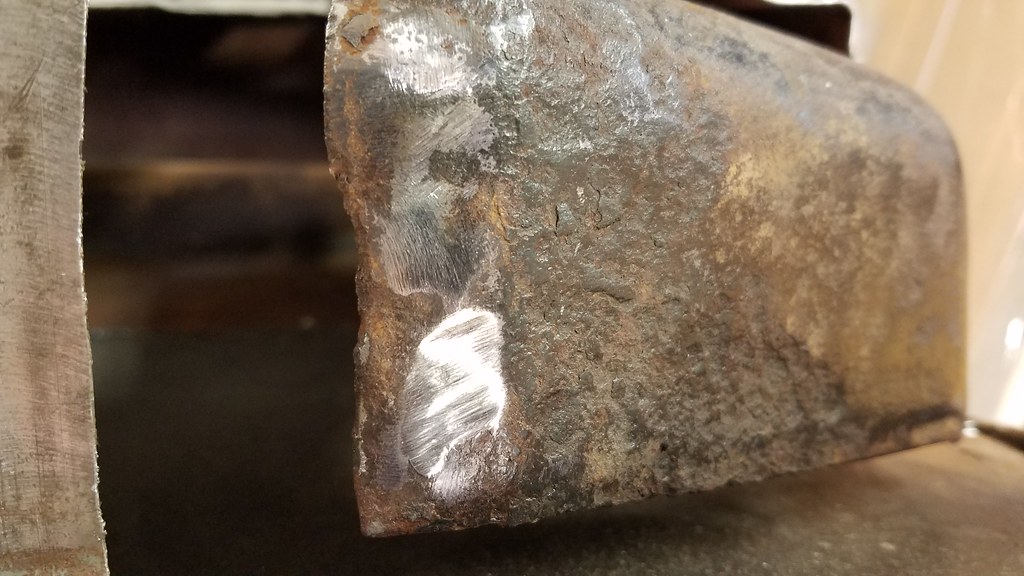 20180311_132155 by bjohnson388, on Flickr 20180311_132155 by bjohnson388, on FlickrStitching it in place. 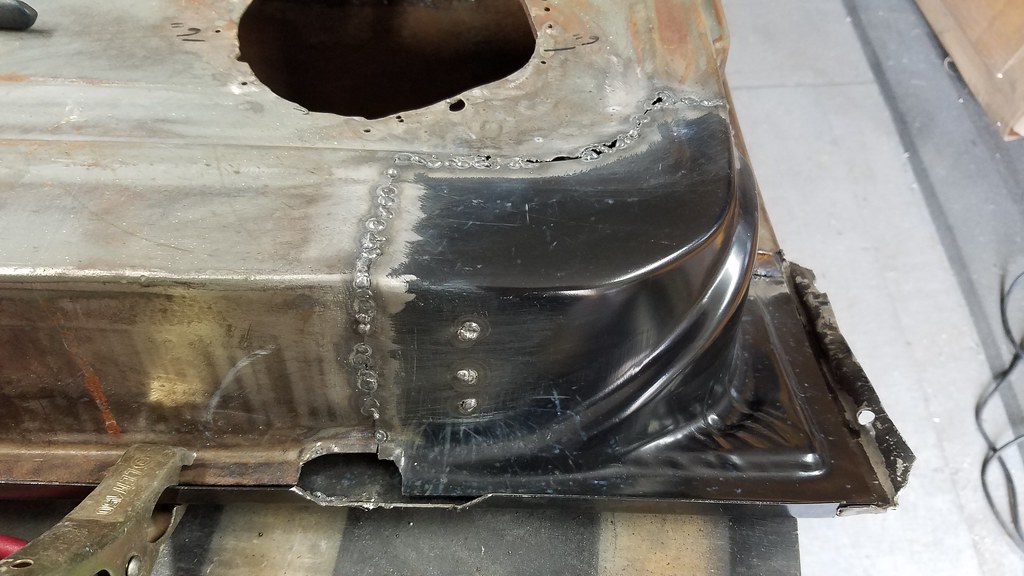 20180311_140005 by bjohnson388, on Flickr 20180311_140005 by bjohnson388, on FlickrAfter final cleanup not to bad. 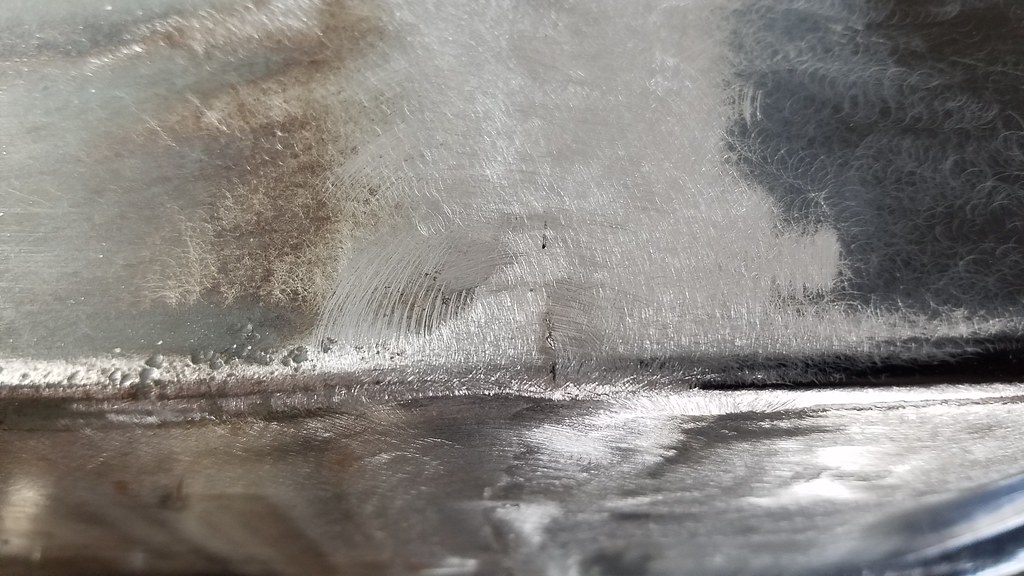 20180311_145809 by bjohnson388, on Flickr 20180311_145809 by bjohnson388, on FlickrLittle mud and no one will know what happened here. 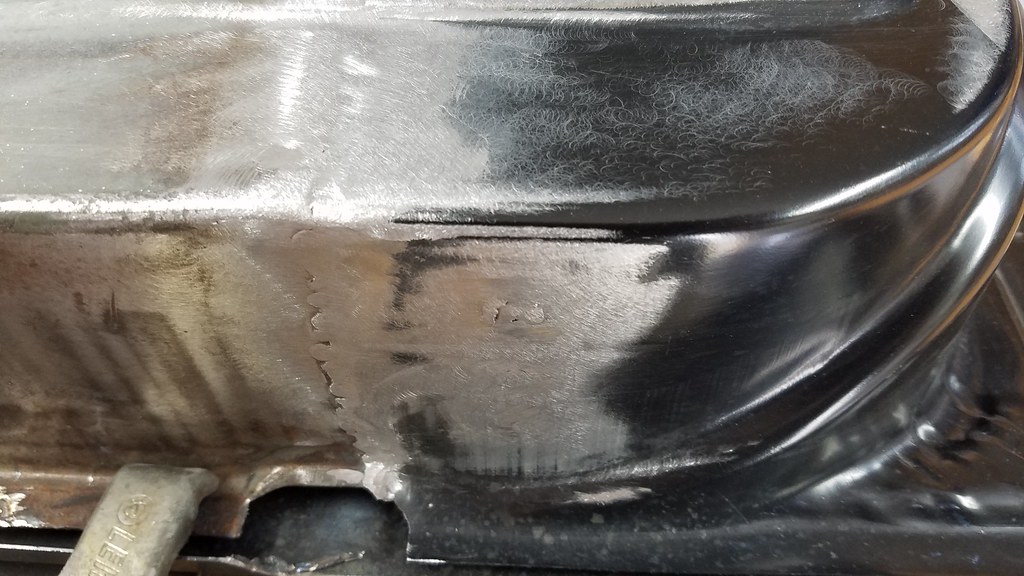 20180311_145805 by bjohnson388, on Flickr 20180311_145805 by bjohnson388, on FlickrThis side was alot harder to clean the welds up do to it being difficult to get the grinders in there. Will go over with some metal to metal to finish it out. 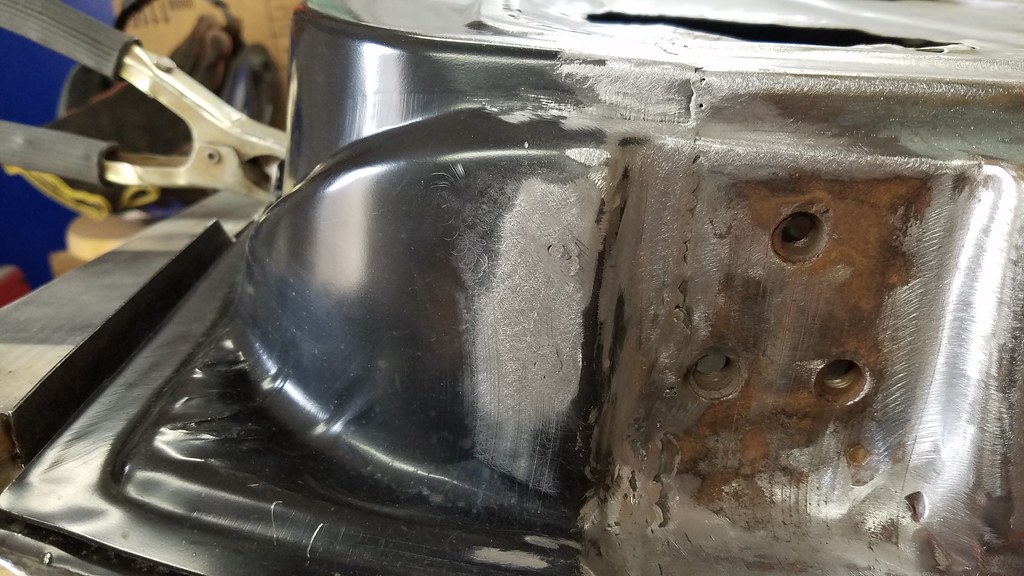 20180311_145819 by bjohnson388, on Flickr 20180311_145819 by bjohnson388, on FlickrCame out right on at 6" 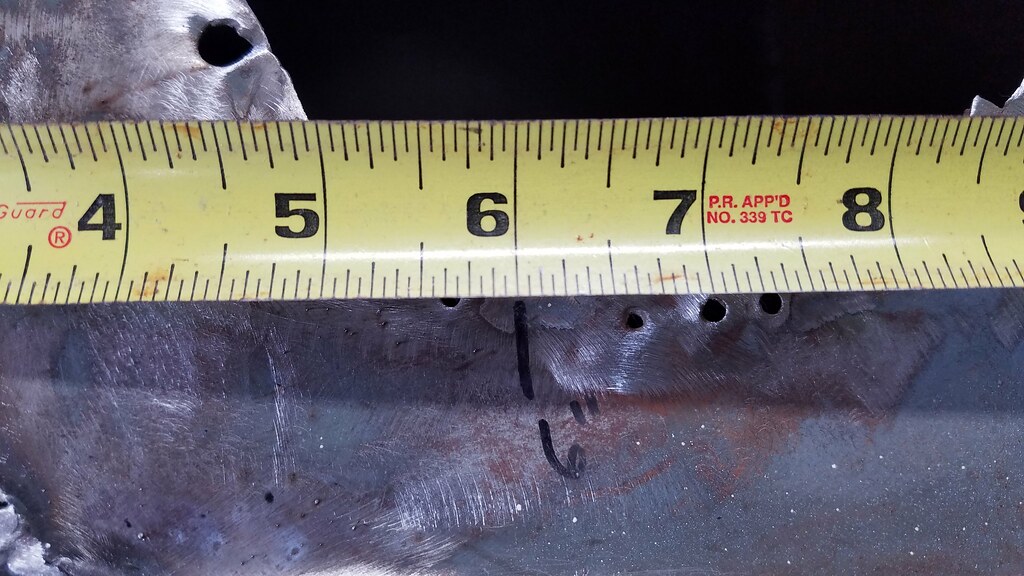 20180311_145850 by bjohnson388, on Flickr 20180311_145850 by bjohnson388, on FlickrNext up was pulling the skin off. 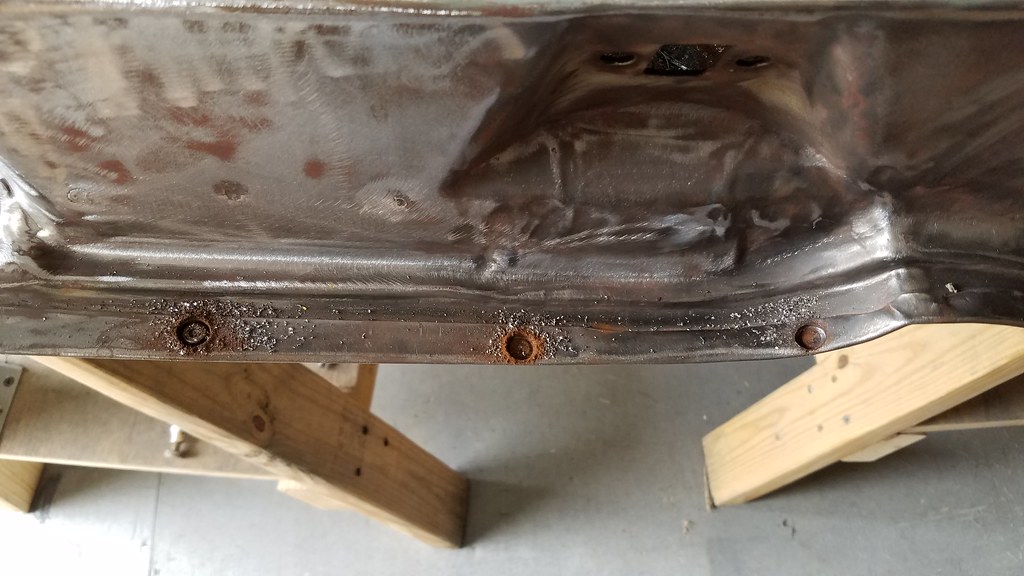 20180311_150458 by bjohnson388, on Flickr 20180311_150458 by bjohnson388, on FlickrNasty 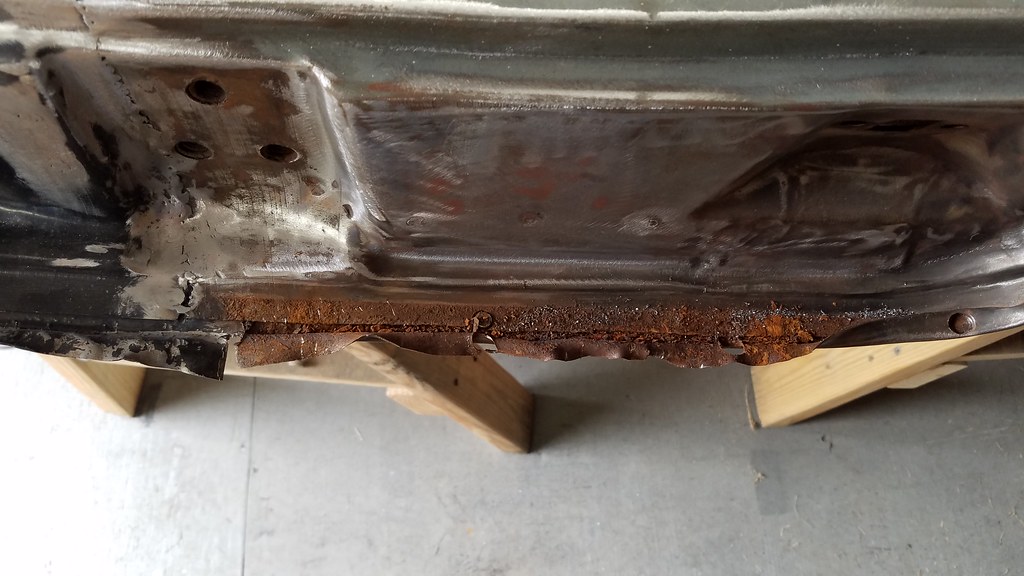 20180311_151113 by bjohnson388, on Flickr 20180311_151113 by bjohnson388, on Flickr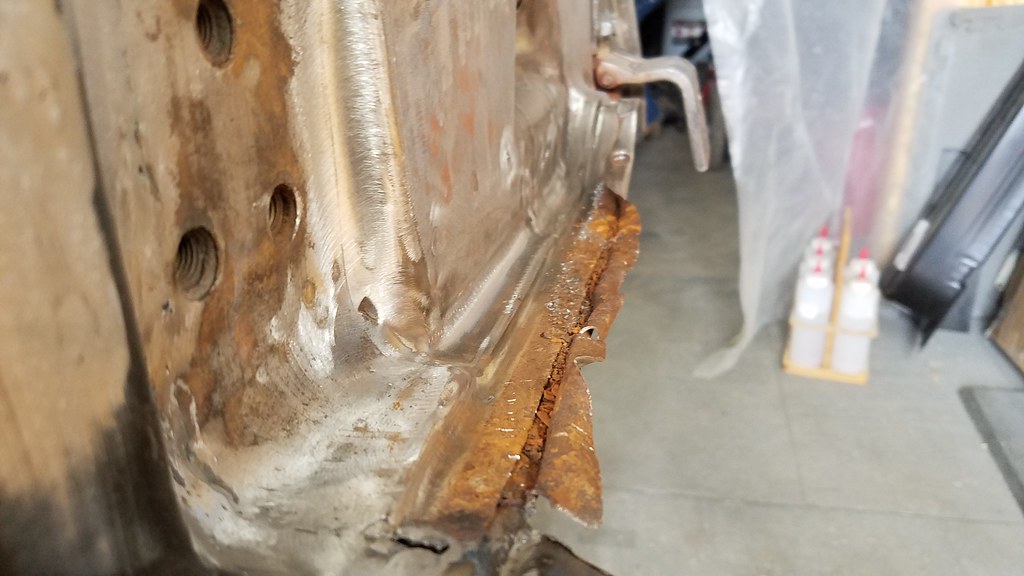 20180311_151119 by bjohnson388, on Flickr 20180311_151119 by bjohnson388, on FlickrTaped off the for the cut. Get rid of this horrible messed up patch I did. 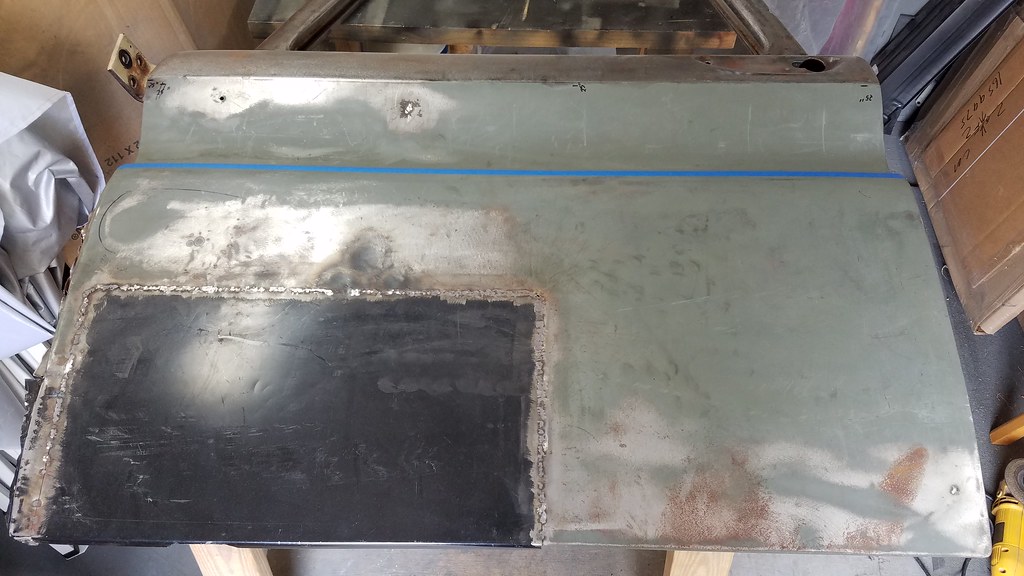 20180311_151831 by bjohnson388, on Flickr 20180311_151831 by bjohnson388, on FlickrAll gone. 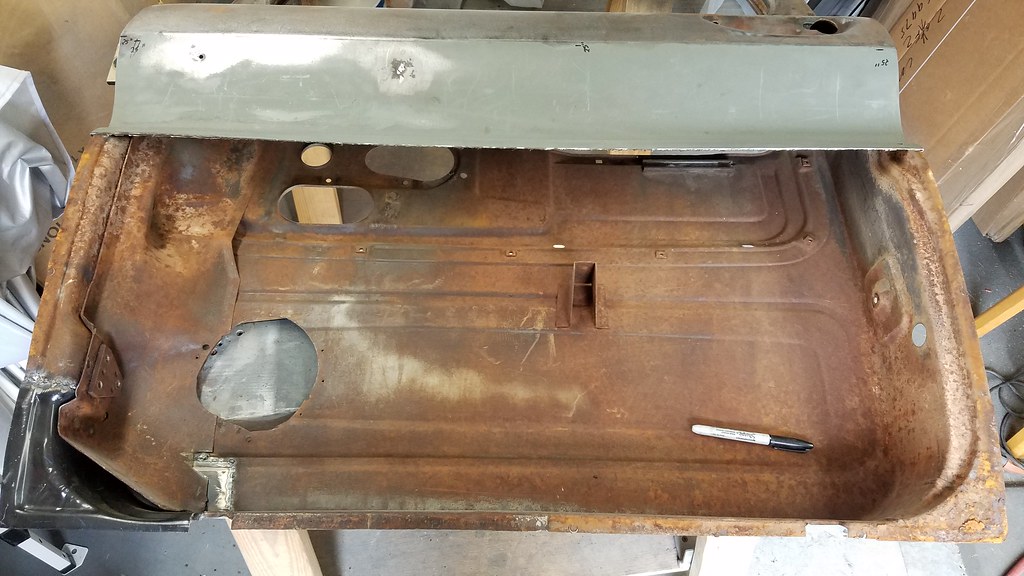 20180311_154955 by bjohnson388, on Flickr 20180311_154955 by bjohnson388, on FlickrWhile I was cutting I noticed the piece still had some tension even way up here, so going to have to make my cut higher up. It sagged afterwards that is no bueno. 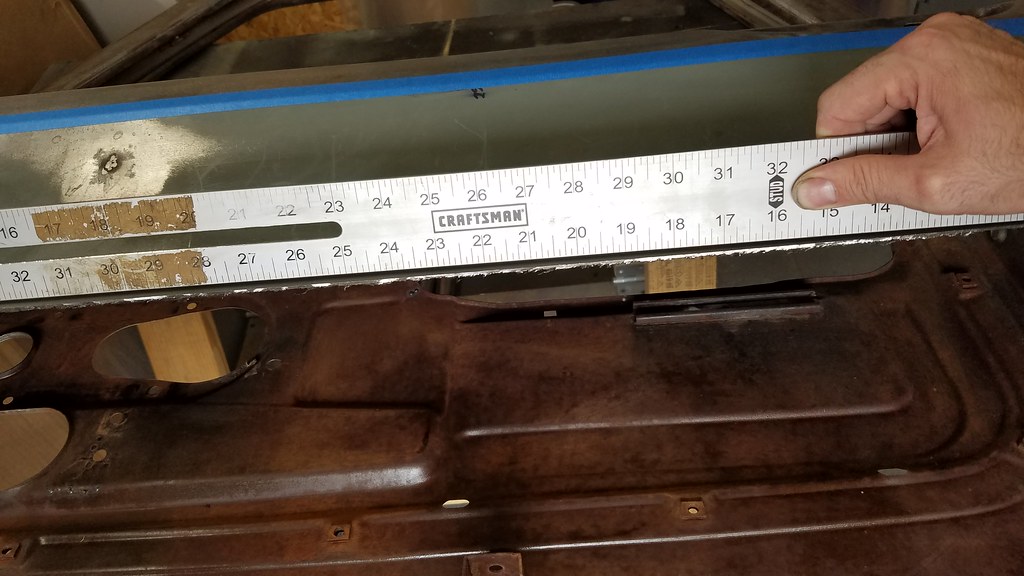 20180311_161401 by bjohnson388, on Flickr 20180311_161401 by bjohnson388, on FlickrSo will cut it up here at my 25" marks I made to line up the bottom of the door. Should actually be easier to line the new skin up because it will fit down into the belt line. 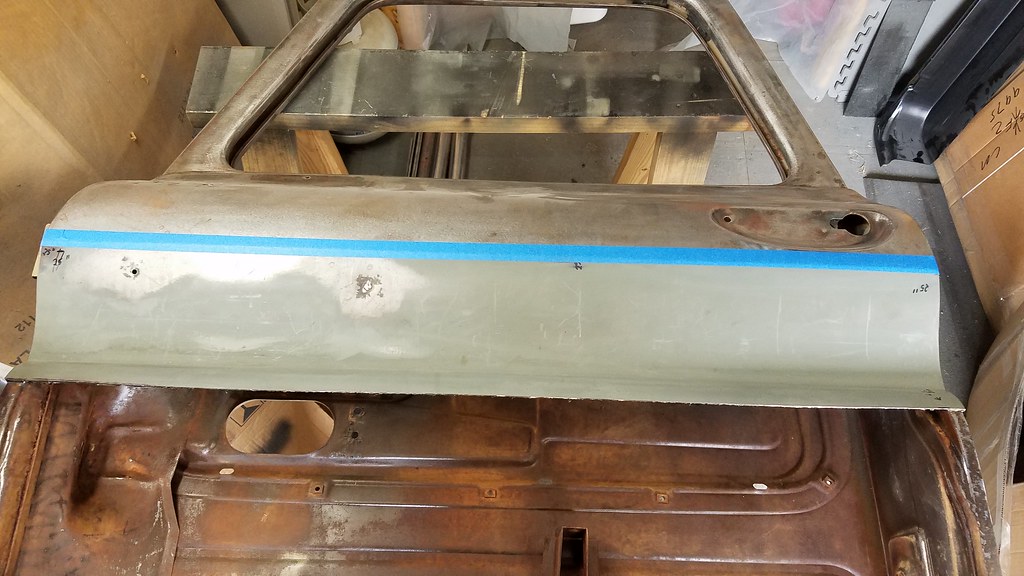 20180311_161456 by bjohnson388, on Flickr 20180311_161456 by bjohnson388, on FlickrCan't wait to this done. Hopefully 3rd time is the charm! 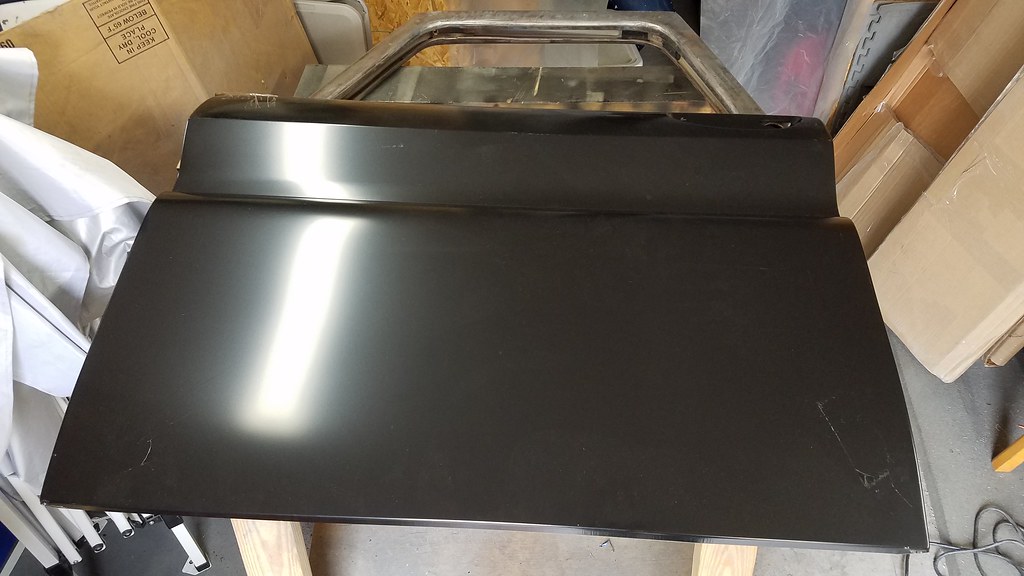 20180311_161826 by bjohnson388, on Flickr 20180311_161826 by bjohnson388, on Flickr 20180311_161831 by bjohnson388, on Flickr 20180311_161831 by bjohnson388, on FlickrBret
__________________
64' Build Thread http://67-72chevytrucks.com/vboard/s...d.php?t=586955 |
|
|
|
|
04-01-2018, 08:31 AM
|
#654 |
|
Registered User
Join Date: Sep 2012
Location: Leander, TX
Posts: 969
|
Re: 64 C10 Stepside "Jaybird"
The interior side of the door is 99% done. Still have some bodywork to do on the outside skin where I grafted it together.
I ended up having a major debacle with the skin that I am not going to share but I found a solution even though it caused me a lot more work. Outer skin welded in. 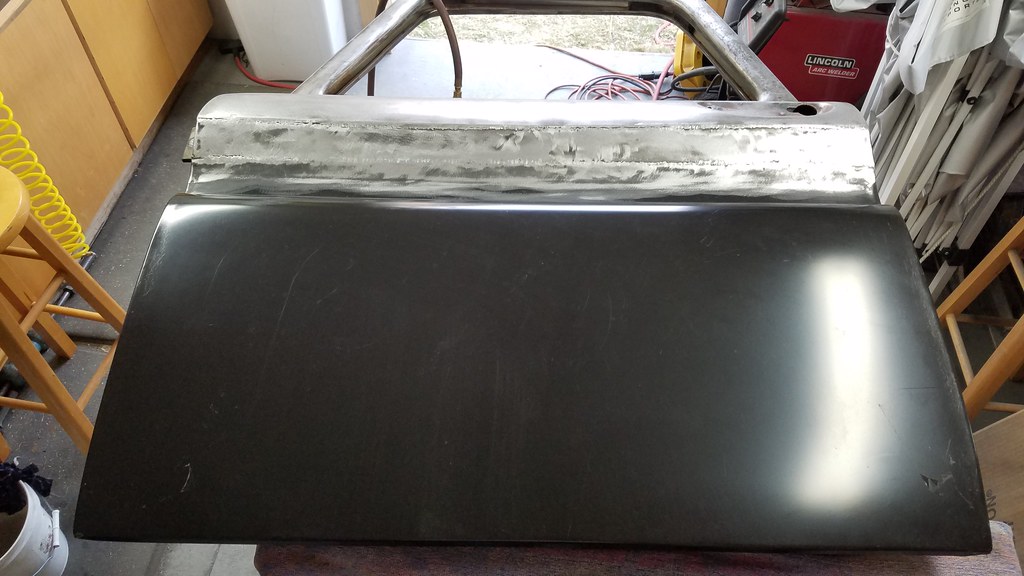 20180314_185205 by bjohnson388, on Flickr 20180314_185205 by bjohnson388, on FlickrAfter 3 days of cutting, welding and grinding inside the shed it was a mess and disorganized so I had to stop this morning and do some major cleaning and organizing.  20180315_100614 by bjohnson388, on Flickr 20180315_100614 by bjohnson388, on FlickrI built this quick and dirty pegboard organizer to get stuff off the bench and just using it this afternoon has been so much easier to stay organized and clean. 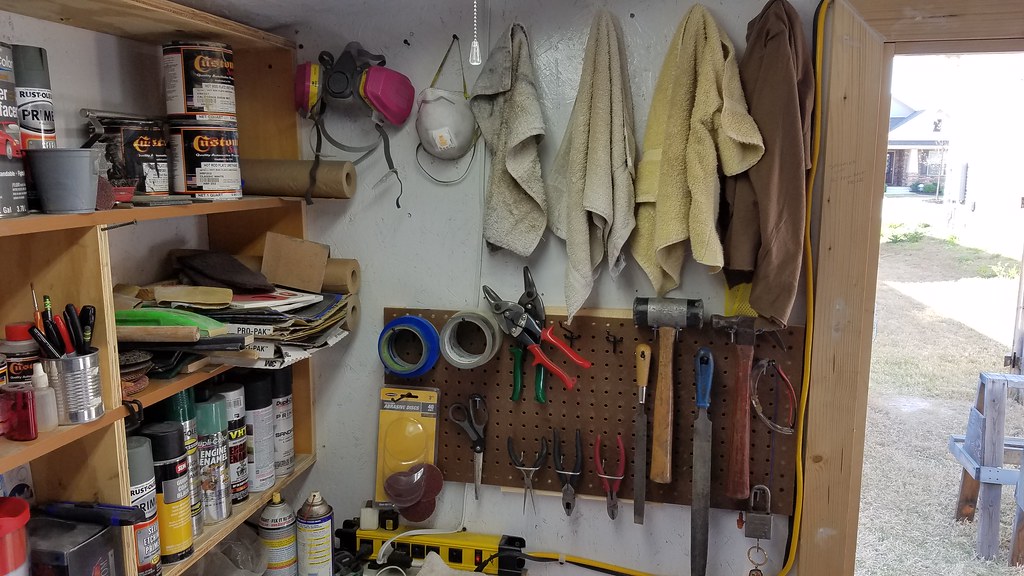 20180315_100619 by bjohnson388, on Flickr 20180315_100619 by bjohnson388, on FlickrThis lower door hinge had alot of slop in it so out comes the old pin. 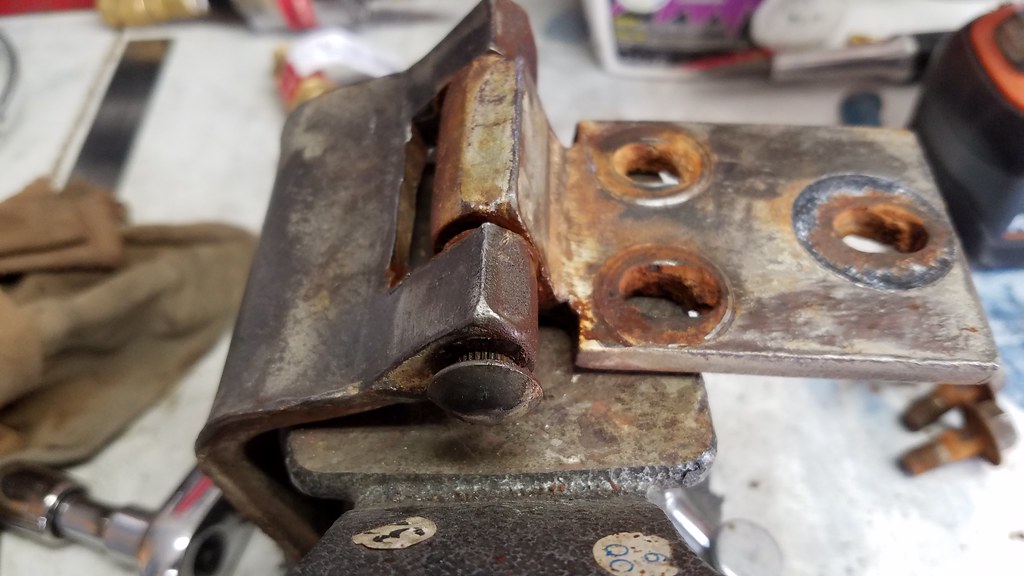 20180315_114032 by bjohnson388, on Flickr 20180315_114032 by bjohnson388, on FlickrYeah I would say the bushings are wore just a little. 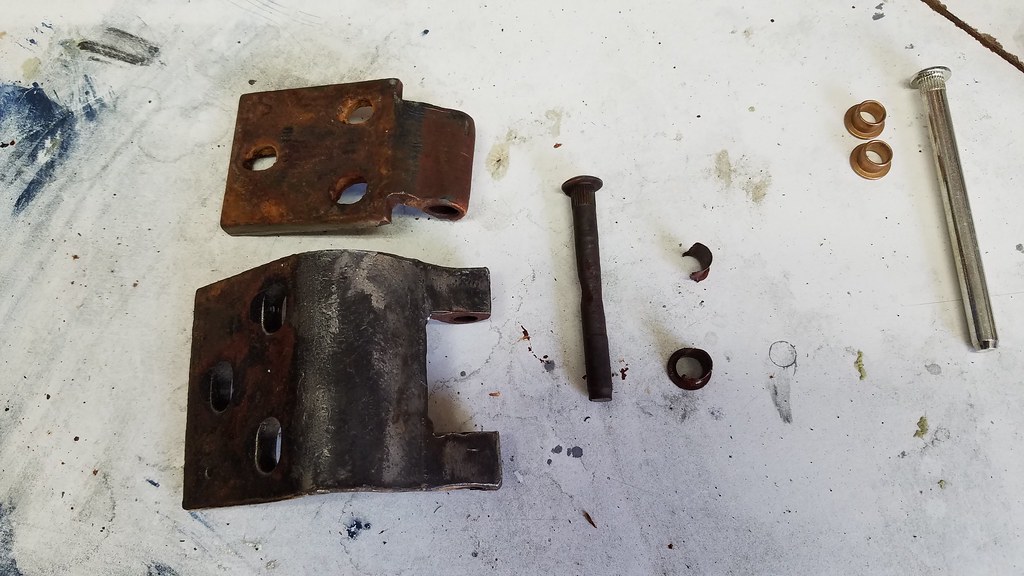 20180315_120126 by bjohnson388, on Flickr 20180315_120126 by bjohnson388, on FlickrQuick trip to the sandblaster. 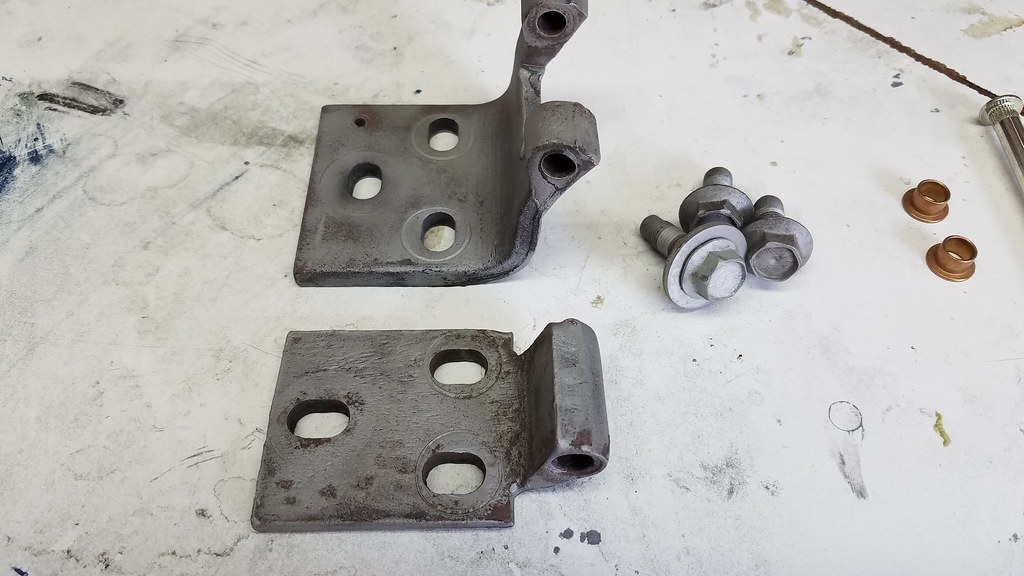 20180315_121923 by bjohnson388, on Flickr 20180315_121923 by bjohnson388, on FlickrSome Primer 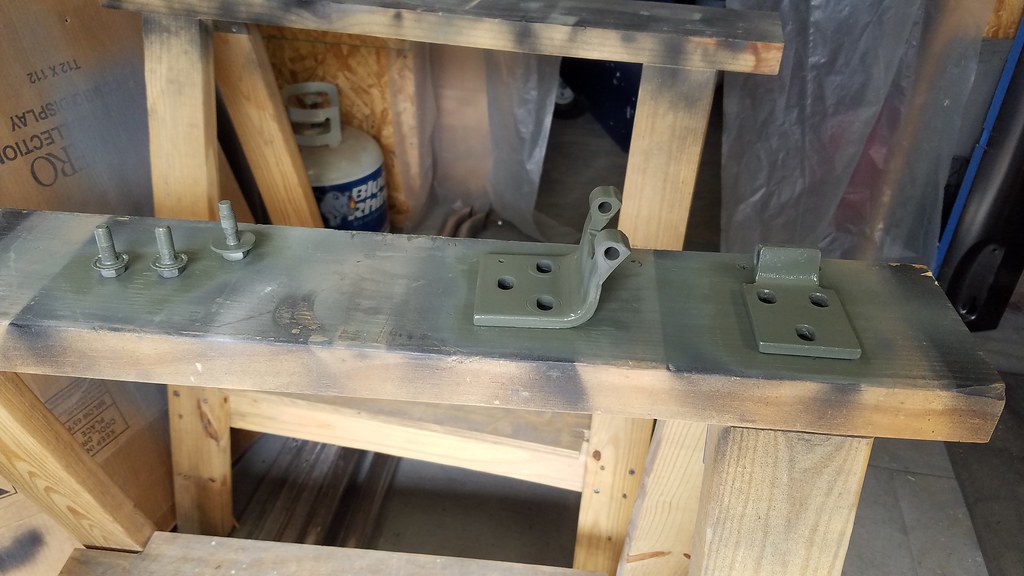 20180315_123435 by bjohnson388, on Flickr 20180315_123435 by bjohnson388, on FlickrPin was a little too long. 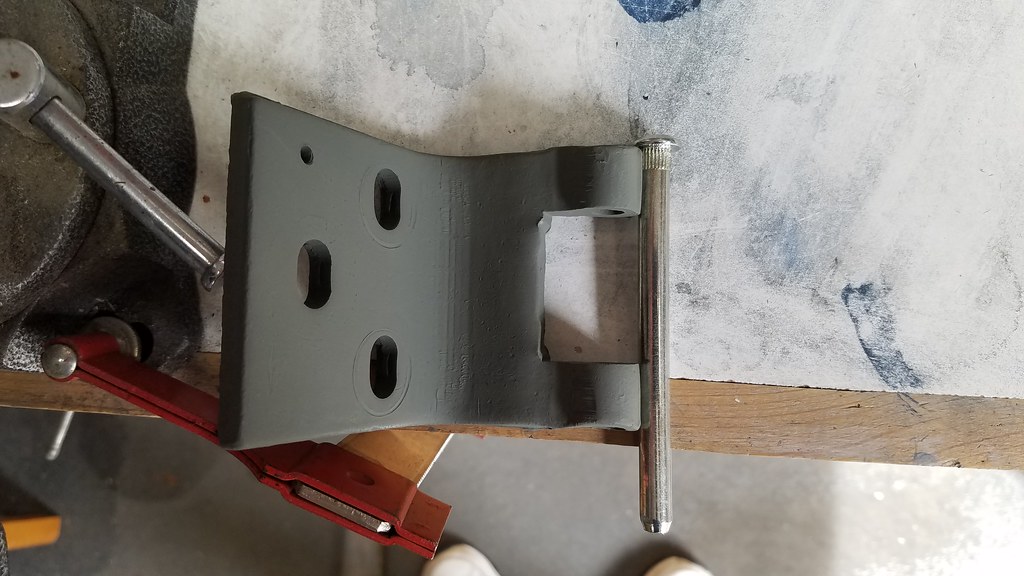 20180315_142000 by bjohnson388, on Flickr 20180315_142000 by bjohnson388, on FlickrThat's much better. 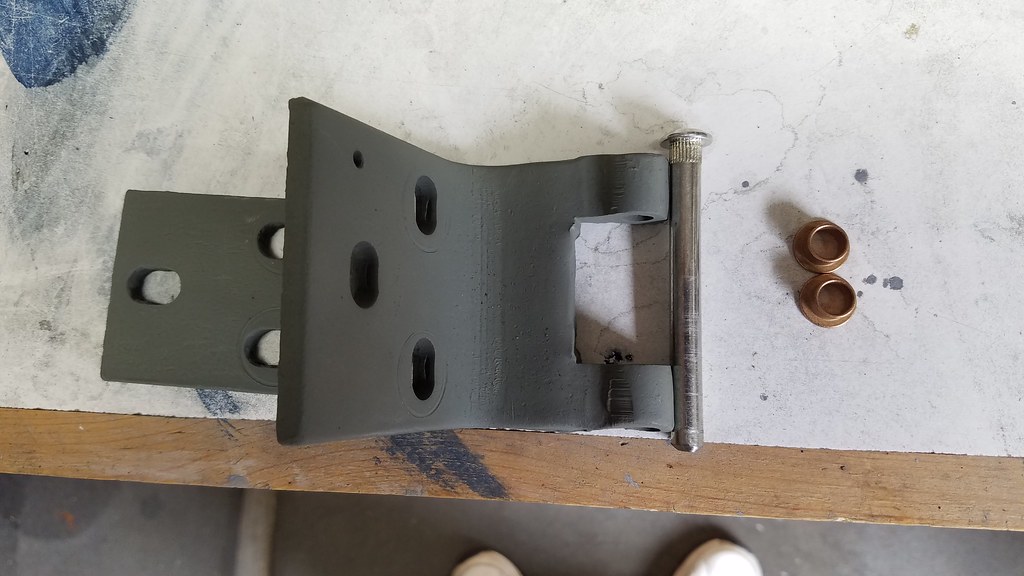 20180315_142600 by bjohnson388, on Flickr 20180315_142600 by bjohnson388, on FlickrBrand new hinge ready for another 54 years of use. 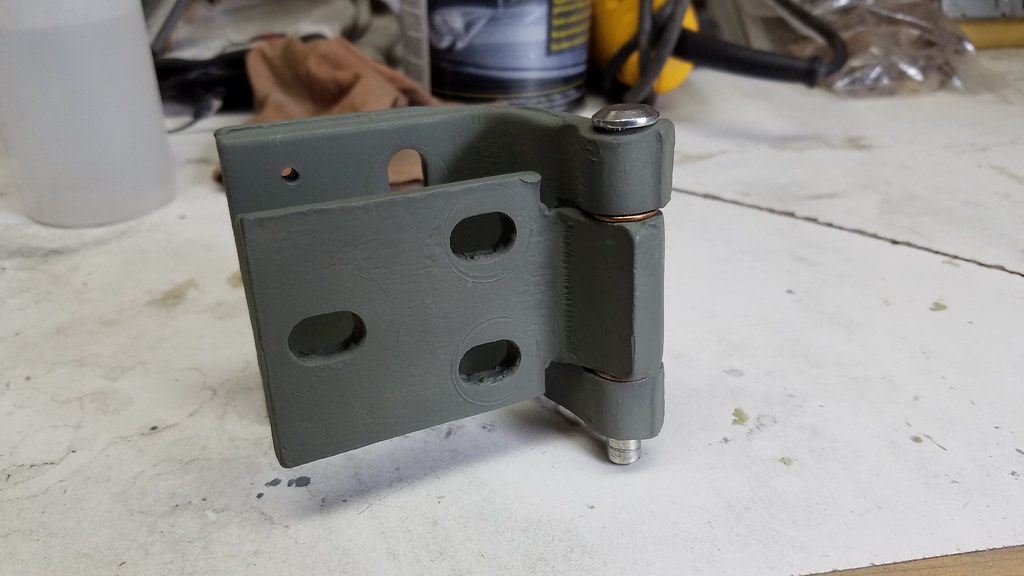 20180315_142819 by bjohnson388, on Flickr 20180315_142819 by bjohnson388, on FlickrQuick test fit. 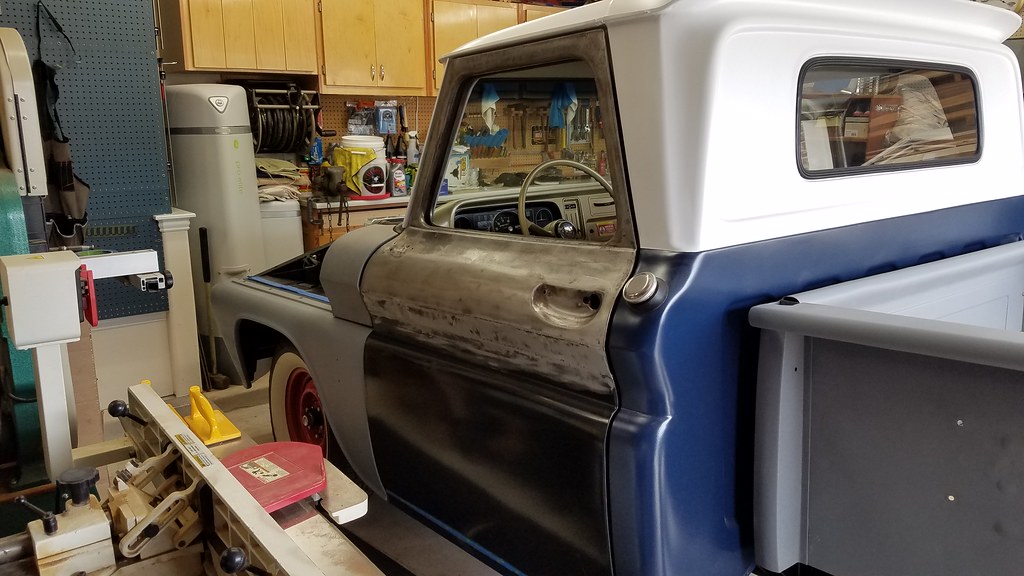 20180315_150046 by bjohnson388, on Flickr 20180315_150046 by bjohnson388, on FlickrThis poor old truck hasn't had a driver door on it since Nov' of 2013. 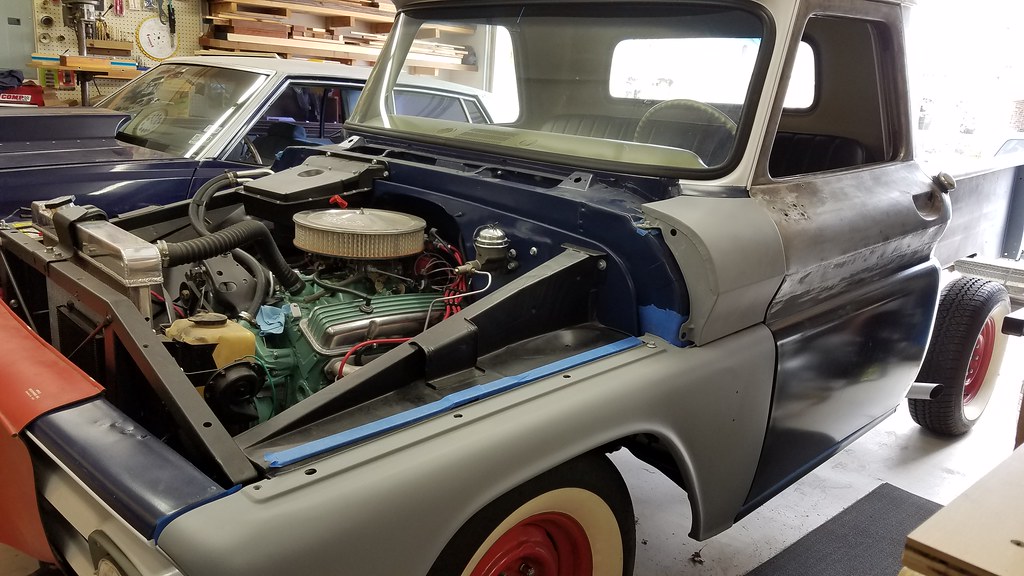 20180315_150025 by bjohnson388, on Flickr 20180315_150025 by bjohnson388, on FlickrEverything looks better in primer. 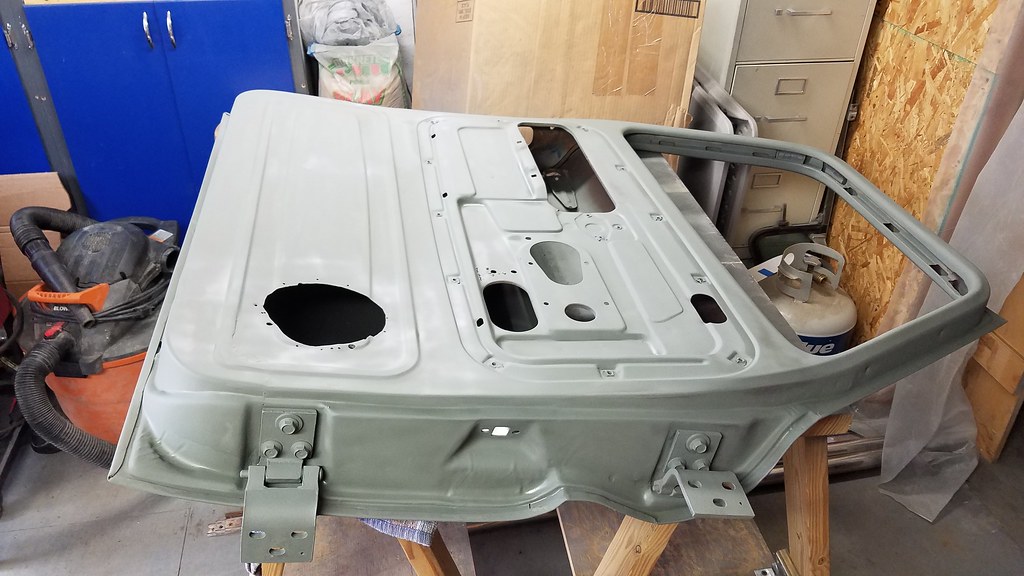 20180315_175236 by bjohnson388, on Flickr 20180315_175236 by bjohnson388, on Flickr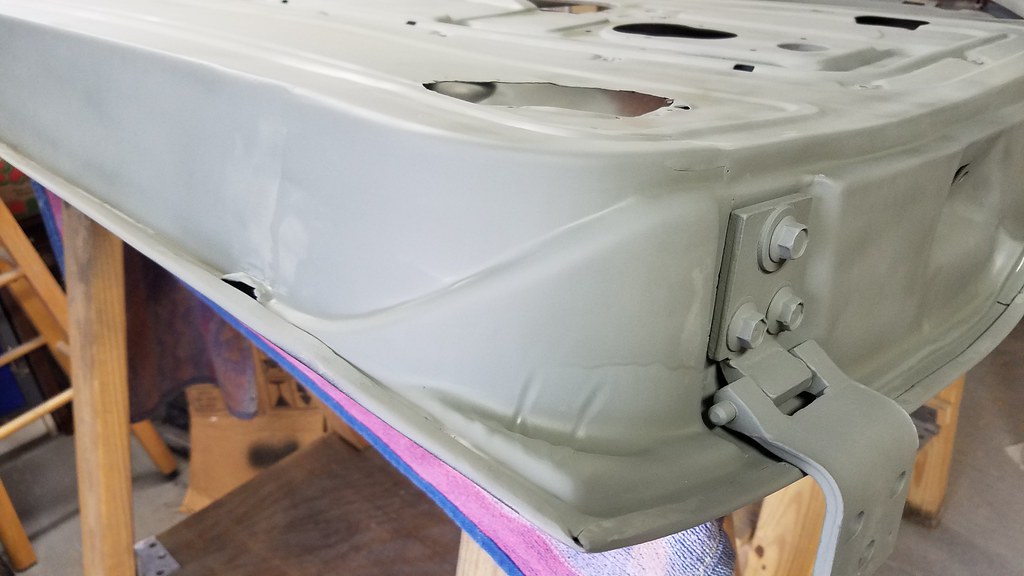 20180315_175231 by bjohnson388, on Flickr 20180315_175231 by bjohnson388, on FlickrOriginal state of the door bottom. 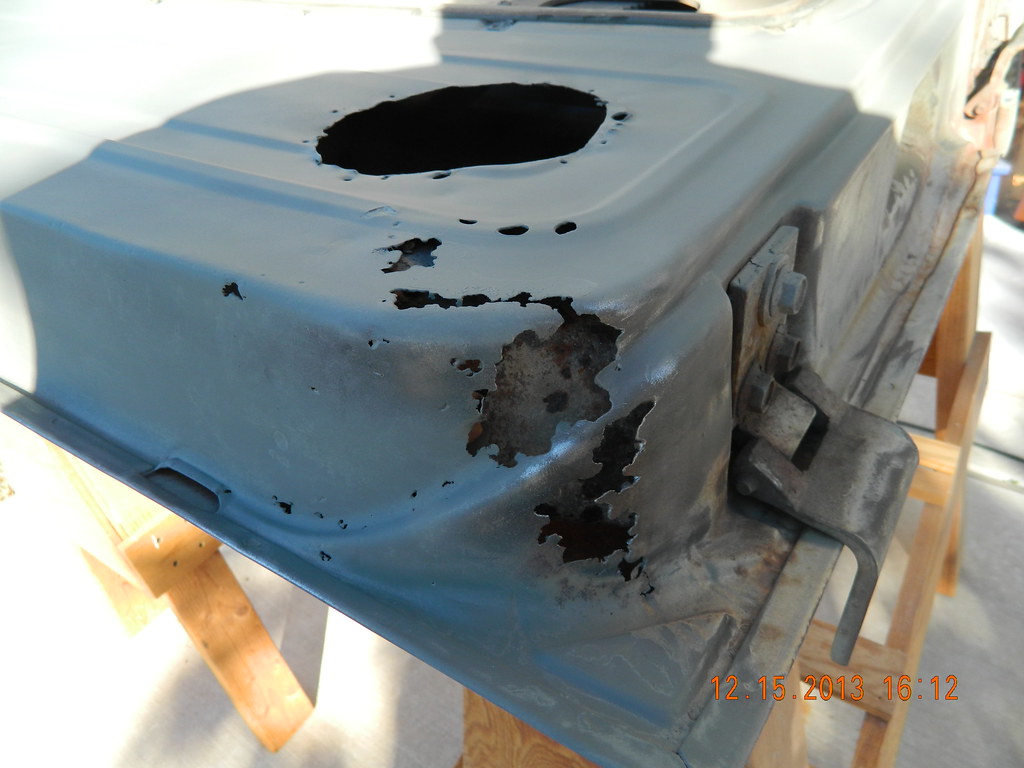 DSCN7664 by bjohnson388, on Flickr DSCN7664 by bjohnson388, on FlickrBret
__________________
64' Build Thread http://67-72chevytrucks.com/vboard/s...d.php?t=586955 |
|
|
|
|
04-01-2018, 08:50 AM
|
#655 |
|
Registered User
Join Date: Sep 2012
Location: Leander, TX
Posts: 969
|
Re: 64 C10 Stepside "Jaybird"
I slaved all week on the driver door and while I am not going to get it painted it is damn close to being ready.
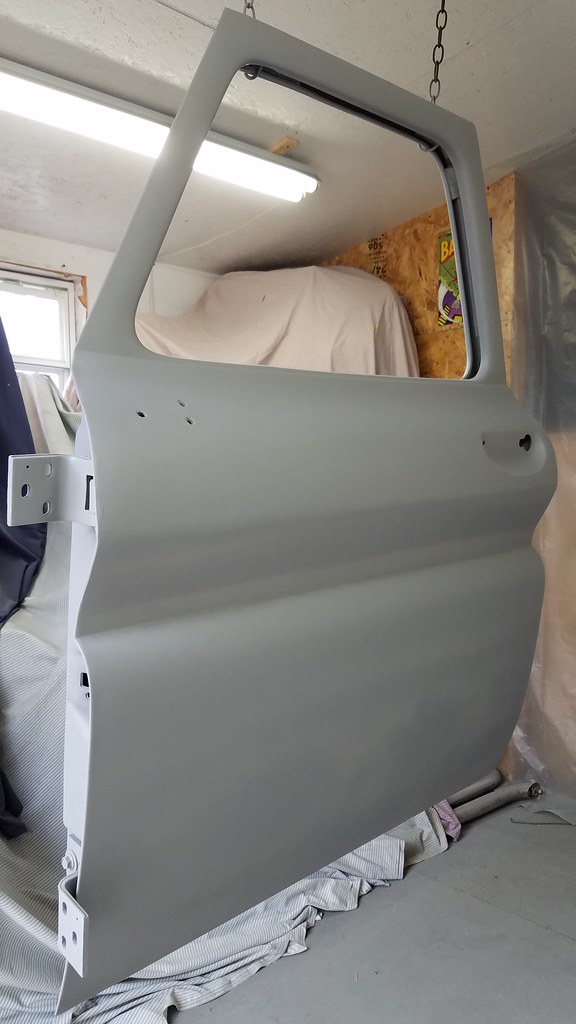 20180318_161412 by bjohnson388, on Flickr 20180318_161412 by bjohnson388, on FlickrIt was really hard to take a decent photo of it but I just shot 2 heavy coats of filler primer on it so I can block sand it tomorrow and fix any small imperfections. 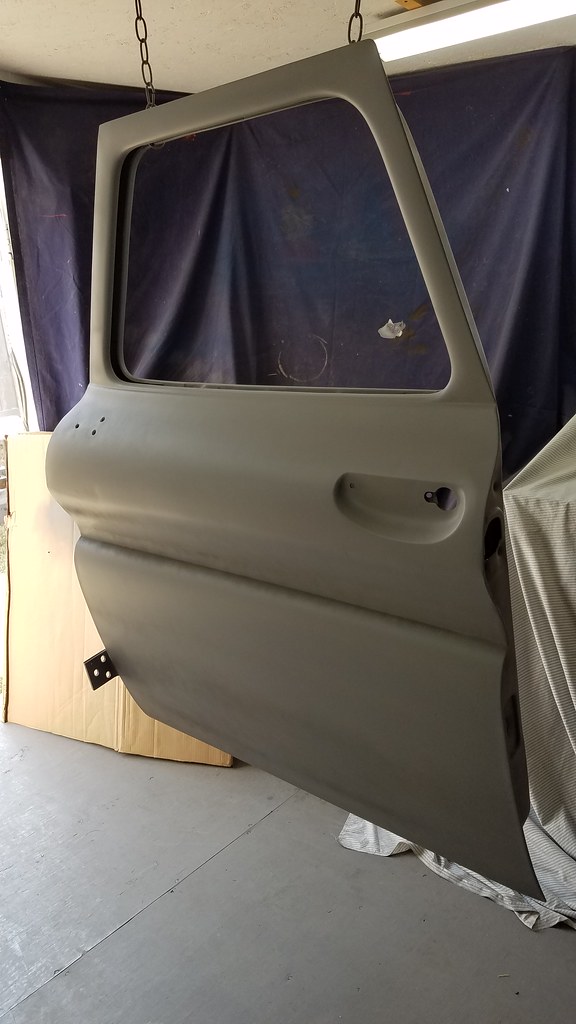 20180318_160812 by bjohnson388, on Flickr 20180318_160812 by bjohnson388, on FlickrThe inside is 100% ready to shot color on. 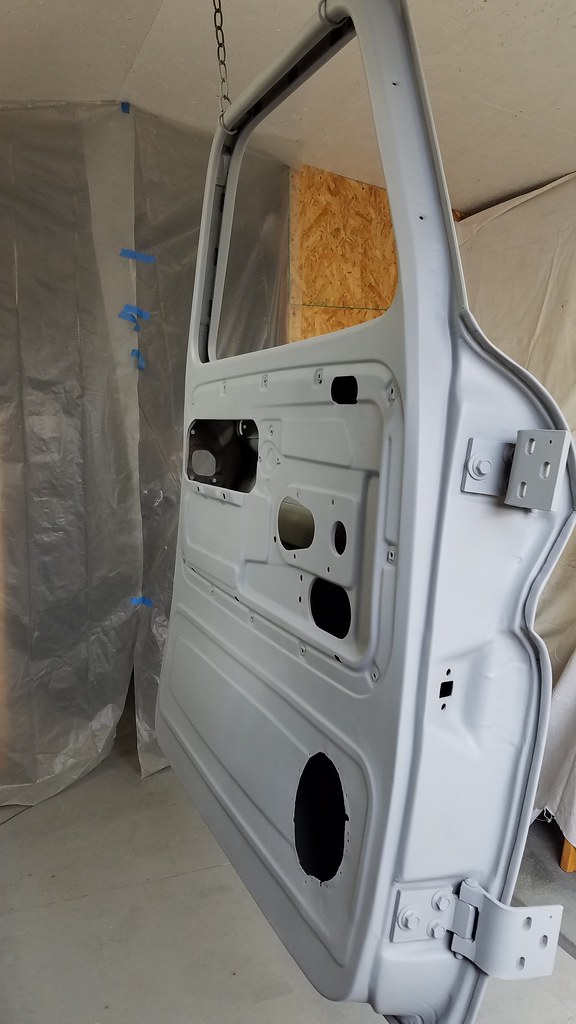 20180318_161422 by bjohnson388, on Flickr 20180318_161422 by bjohnson388, on FlickrHanging it from the ceiling worked out really well I was able to shot both sides at the same time. I was even thinking when I shot the color since I will be painting the outside and inside different colors I could put both doors back to back and paint them at the same time. 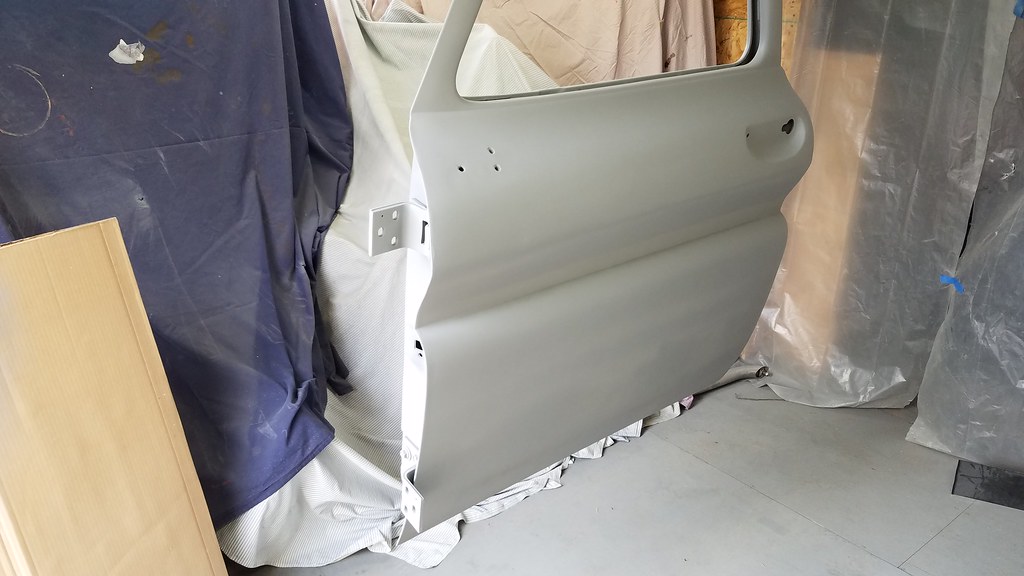 20180318_160714 by bjohnson388, on Flickr 20180318_160714 by bjohnson388, on FlickrI covered everything up this time so I wouldn't have overspray everywhere like last time when I shot the grille support. 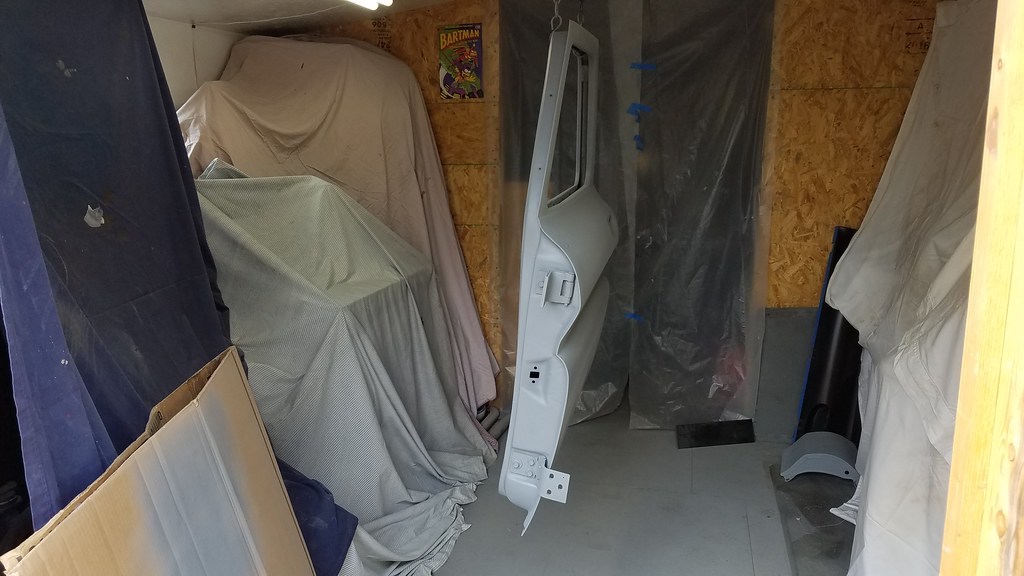 20180318_160723 by bjohnson388, on Flickr 20180318_160723 by bjohnson388, on FlickrI also got my Lokar shifter in and somewhat installed. Haven't cut the hole in the hump yet. This thing is really nice and well worth the money. 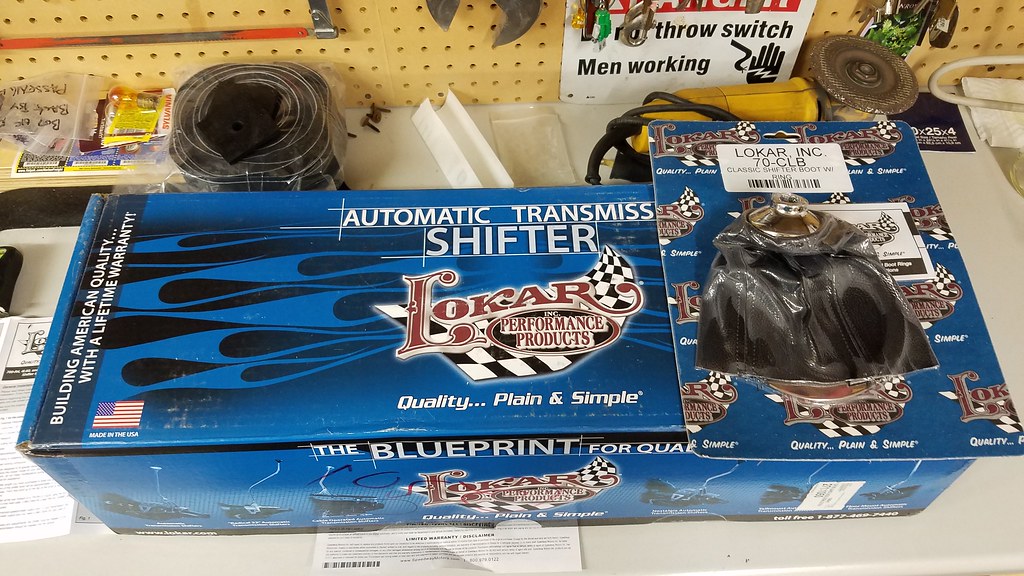 20180317_195326 by bjohnson388, on Flickr 20180317_195326 by bjohnson388, on Flickr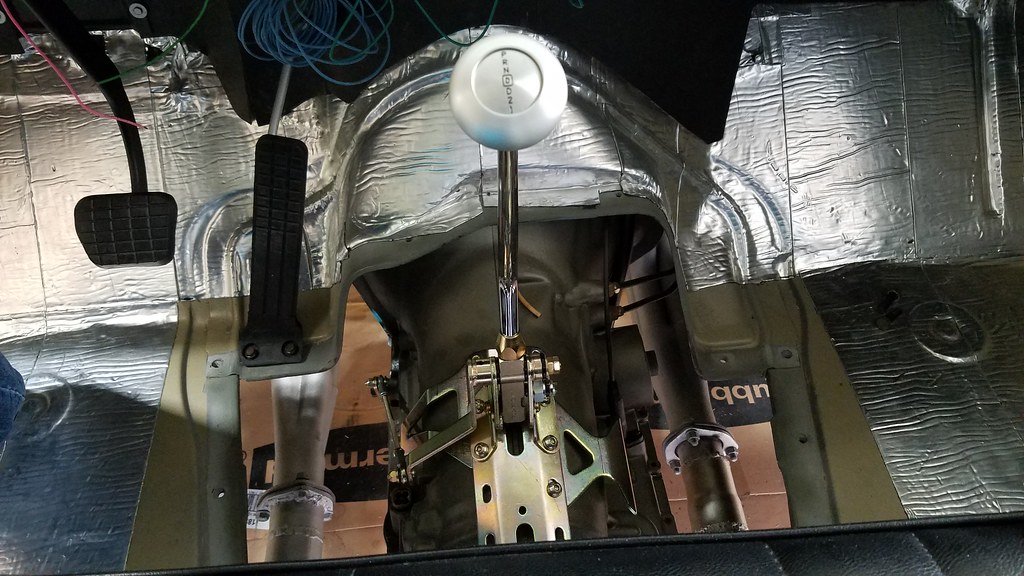 20180317_192324 by bjohnson388, on Flickr 20180317_192324 by bjohnson388, on Flickr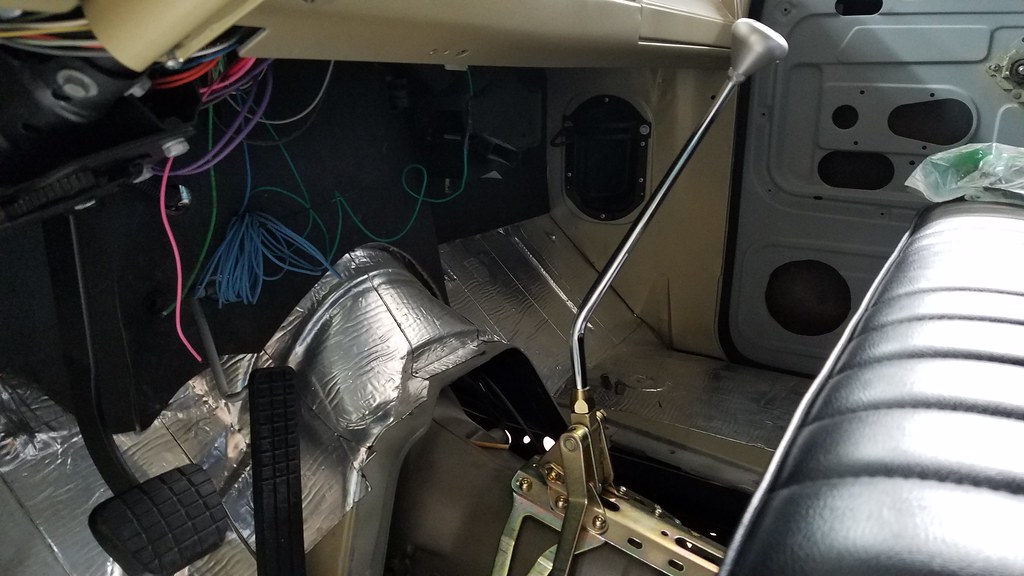 20180317_192331 by bjohnson388, on Flickr 20180317_192331 by bjohnson388, on Flickr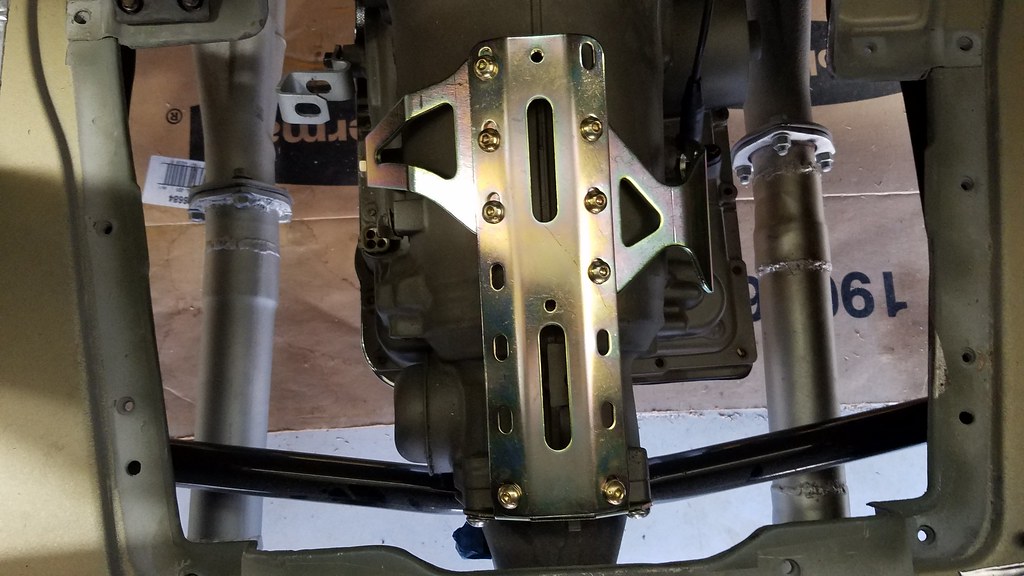 20180317_195813 by bjohnson388, on Flickr 20180317_195813 by bjohnson388, on FlickrIgnore my messy wiring under the dash. I can know hookup the neutral safety switch and backup lights. After I cut the hole in the hump and shoot the underside with some undercoating. It will get some sound deadening as well. 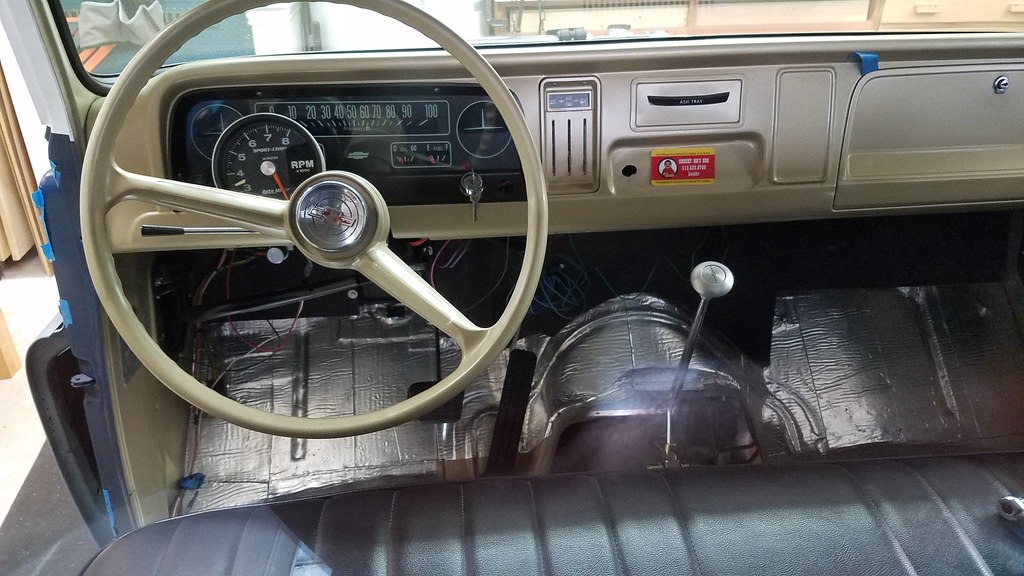 20180317_192350 by bjohnson388, on Flickr 20180317_192350 by bjohnson388, on FlickrThanks for stopping in, Bret
__________________
64' Build Thread http://67-72chevytrucks.com/vboard/s...d.php?t=586955 |
|
|
|
|
04-01-2018, 08:54 AM
|
#656 |
|
Registered User
Join Date: Sep 2012
Location: Leander, TX
Posts: 969
|
Re: 64 C10 Stepside "Jaybird"
I am keeping the speaker holes so I did some finish work around them and got my speaker fitting pretty damn good. Going to paint the speaker grilles interior color to make them blend in better. These pictures were taken before the previous 2 coats of filler primer were sprayed.
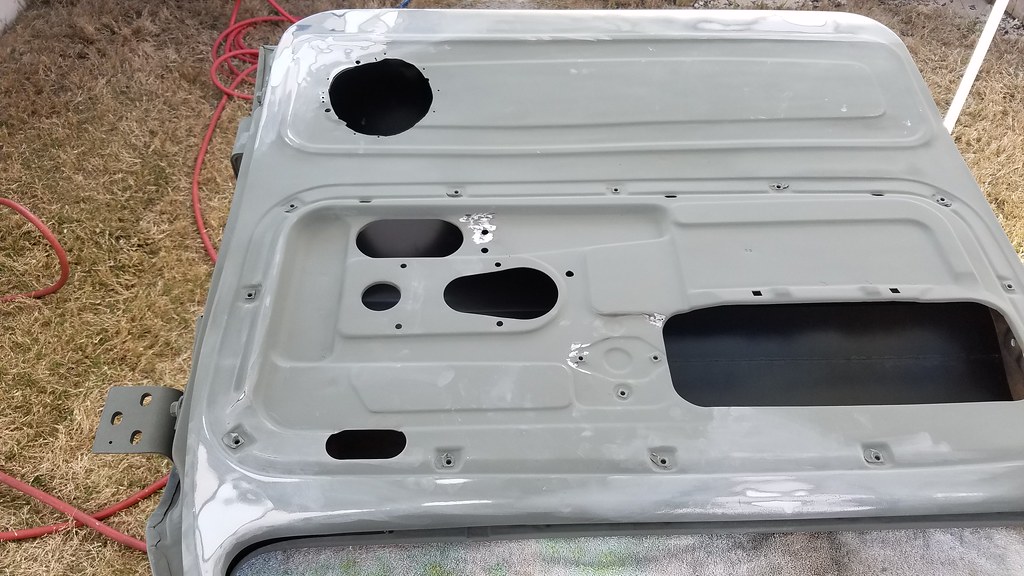 20180316_102502 by bjohnson388, on Flickr 20180316_102502 by bjohnson388, on Flickr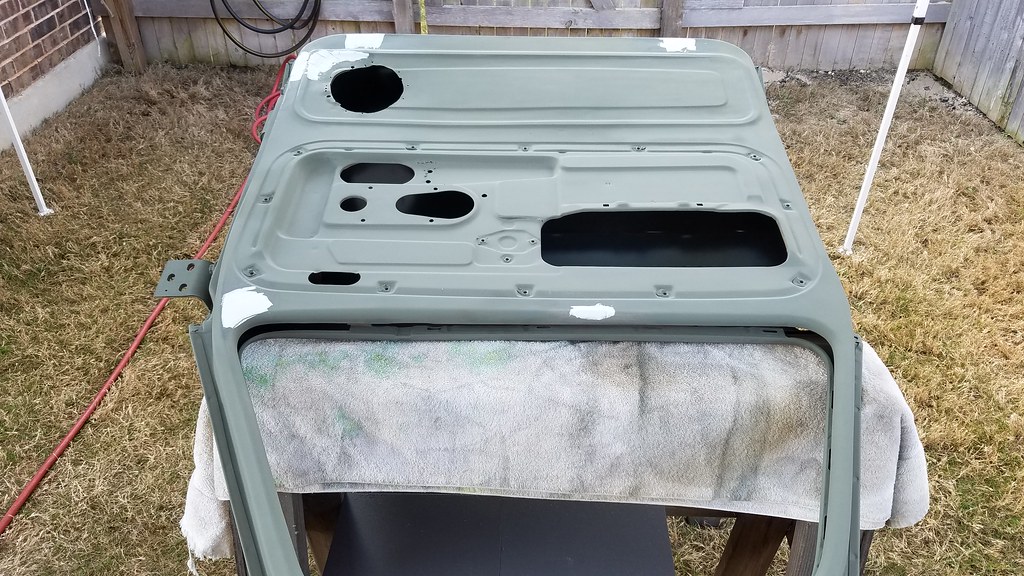 20180316_094700 by bjohnson388, on Flickr 20180316_094700 by bjohnson388, on Flickr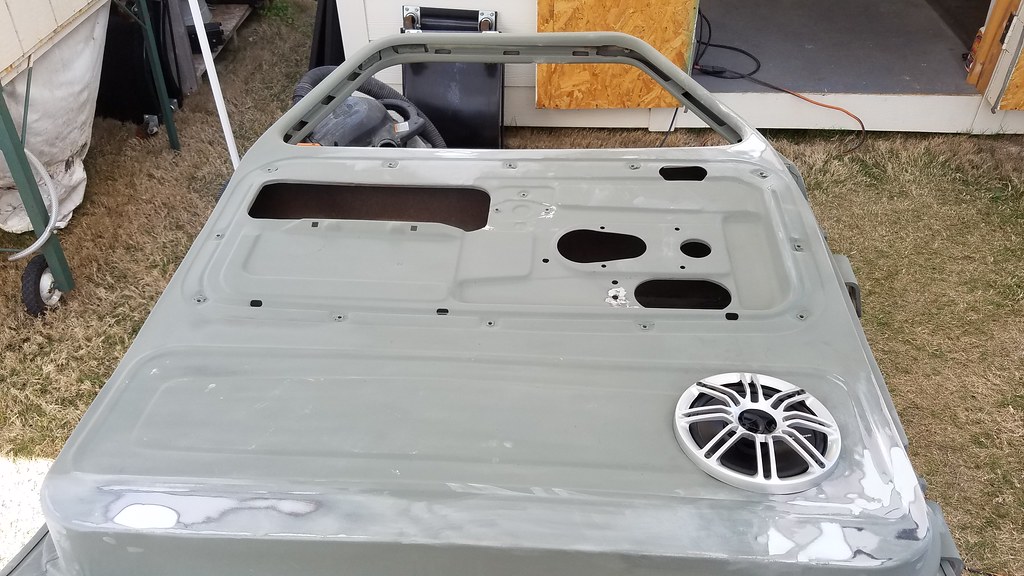 20180316_110034 by bjohnson388, on Flickr 20180316_110034 by bjohnson388, on Flickr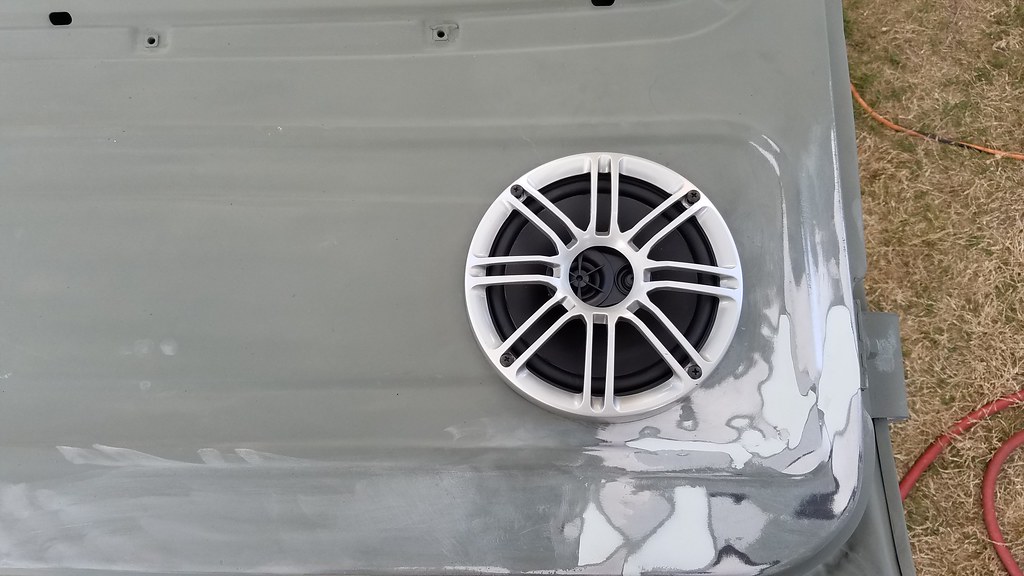 20180316_110039 by bjohnson388, on Flickr 20180316_110039 by bjohnson388, on Flickr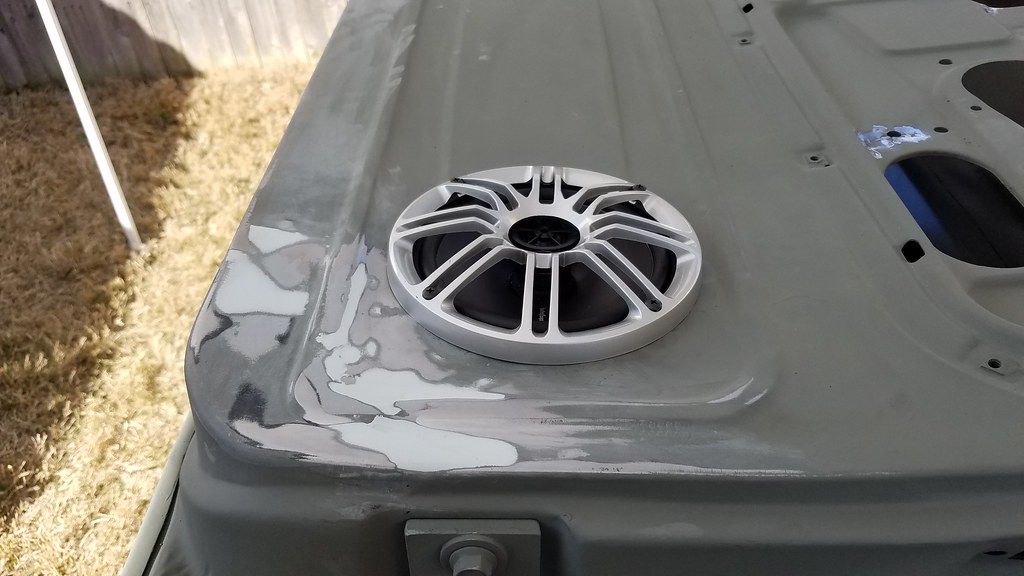 20180316_110042 by bjohnson388, on Flickr 20180316_110042 by bjohnson388, on Flickr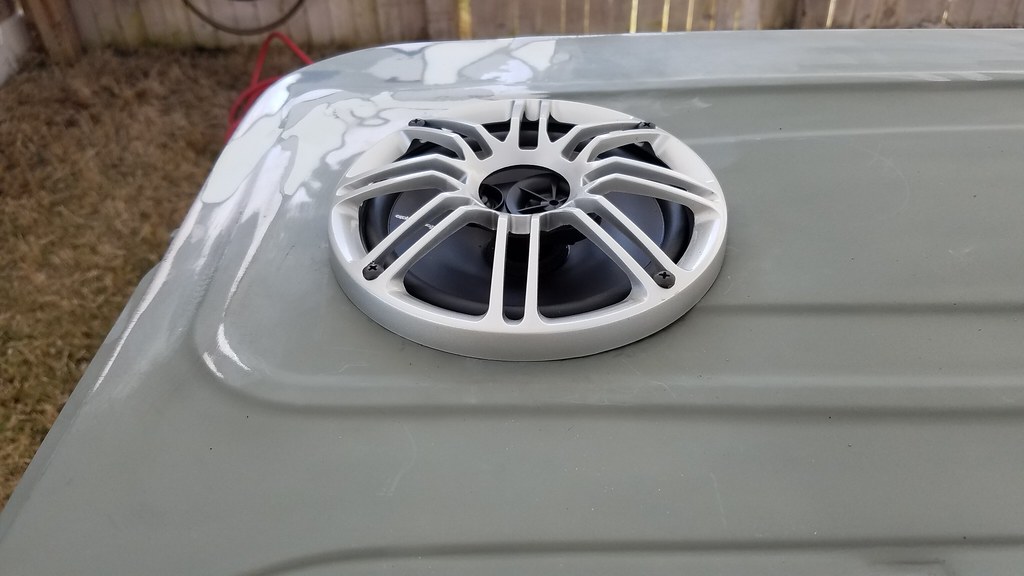 20180316_110046 by bjohnson388, on Flickr 20180316_110046 by bjohnson388, on FlickrBret
__________________
64' Build Thread http://67-72chevytrucks.com/vboard/s...d.php?t=586955 |
|
|
|
|
04-01-2018, 09:08 AM
|
#657 |
|
Registered User
Join Date: Sep 2012
Location: Leander, TX
Posts: 969
|
Re: 64 C10 Stepside "Jaybird"
Hole cut in the hump and test fitted it.
Used a 3 1/4" hole saw. The biggest I had. The boot instructions said up to a 4 " hole could be cut. So I still had a little grinding on the edge to get it perfect. 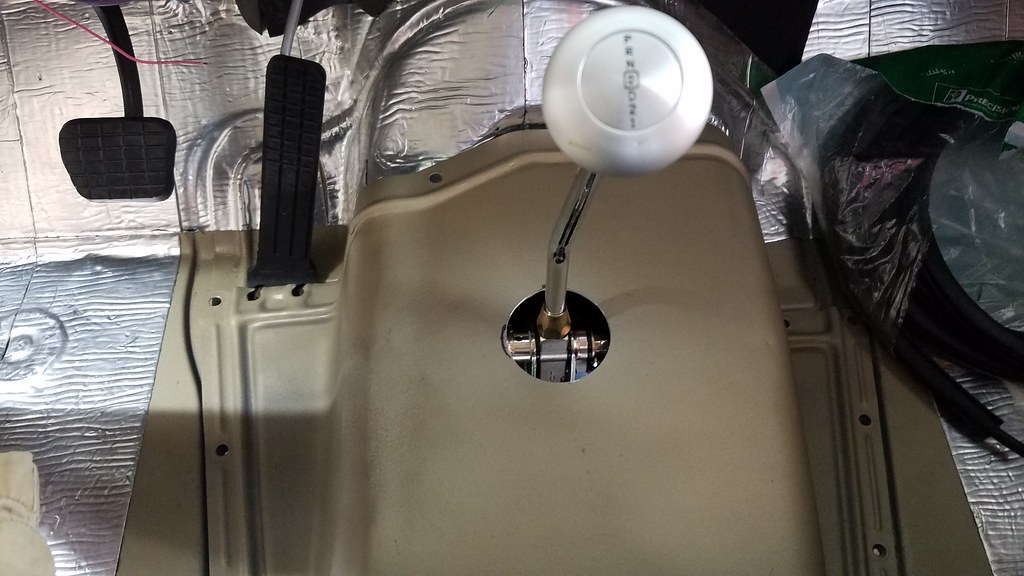 20180323_183346 by bjohnson388, on Flickr 20180323_183346 by bjohnson388, on Flickr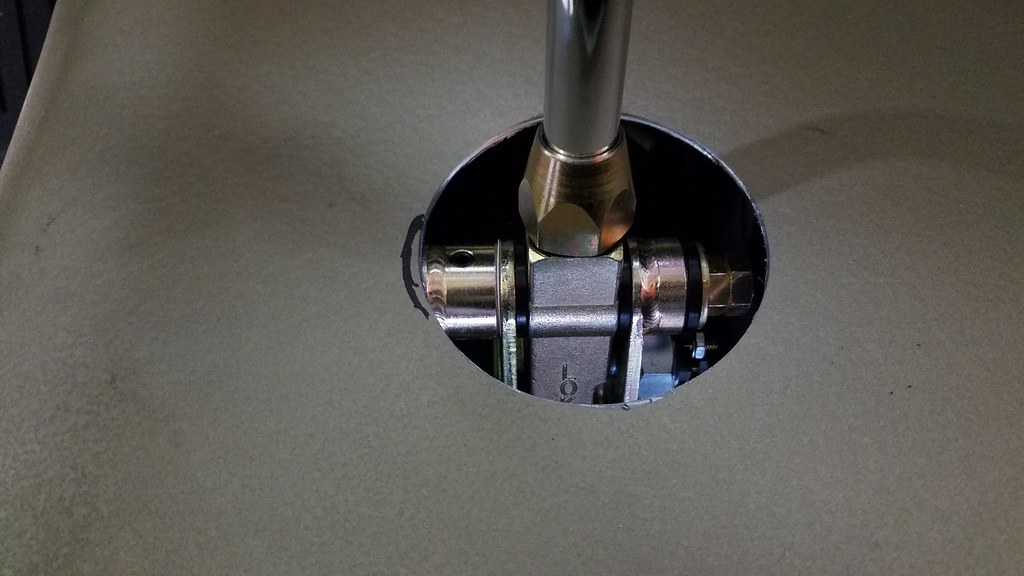 20180323_183355 by bjohnson388, on Flickr 20180323_183355 by bjohnson388, on Flickr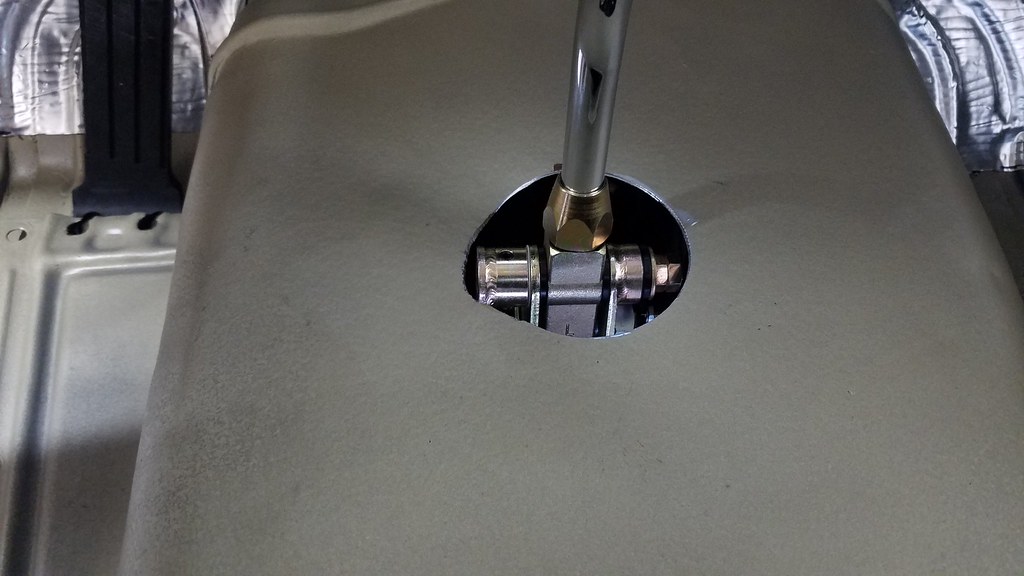 20180323_184548 by bjohnson388, on Flickr 20180323_184548 by bjohnson388, on Flickr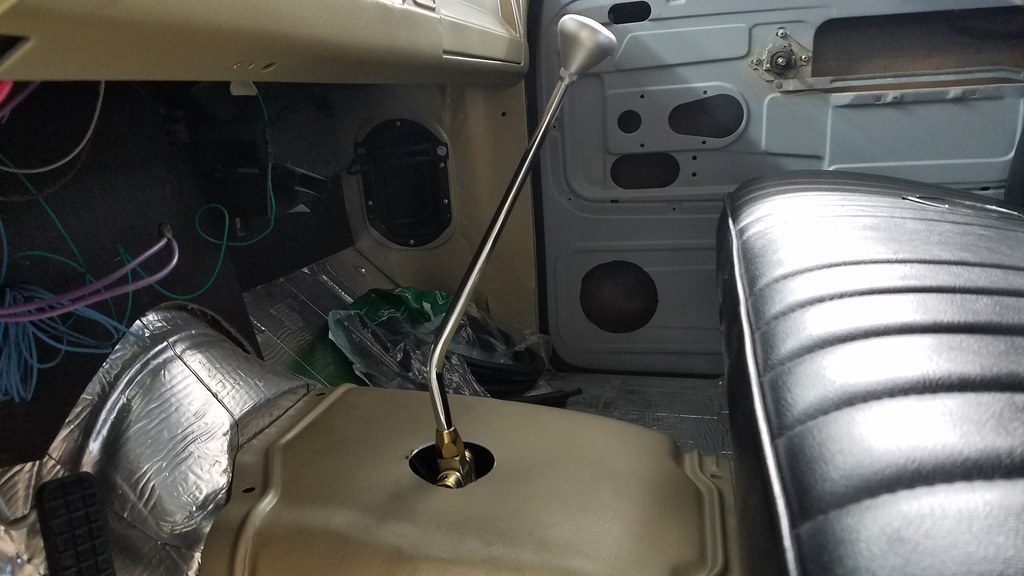 20180323_184554 by bjohnson388, on Flickr 20180323_184554 by bjohnson388, on Flickr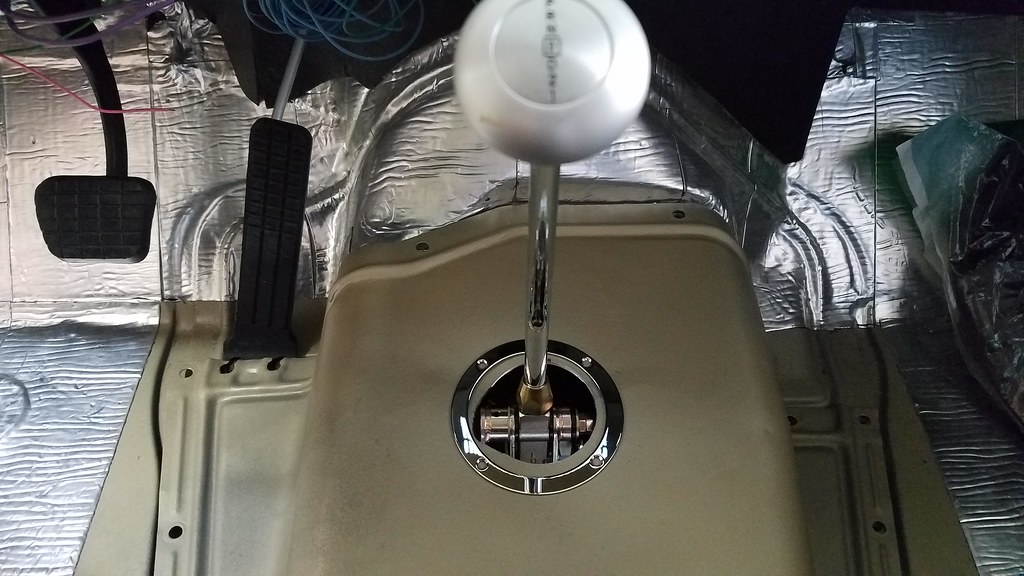 20180323_184614 by bjohnson388, on Flickr 20180323_184614 by bjohnson388, on FlickrAnd with that I primed the bottom of the hump and tomorrow after work I will get the undercoating sprayed on and then install it for good and cover it in peel in stick. 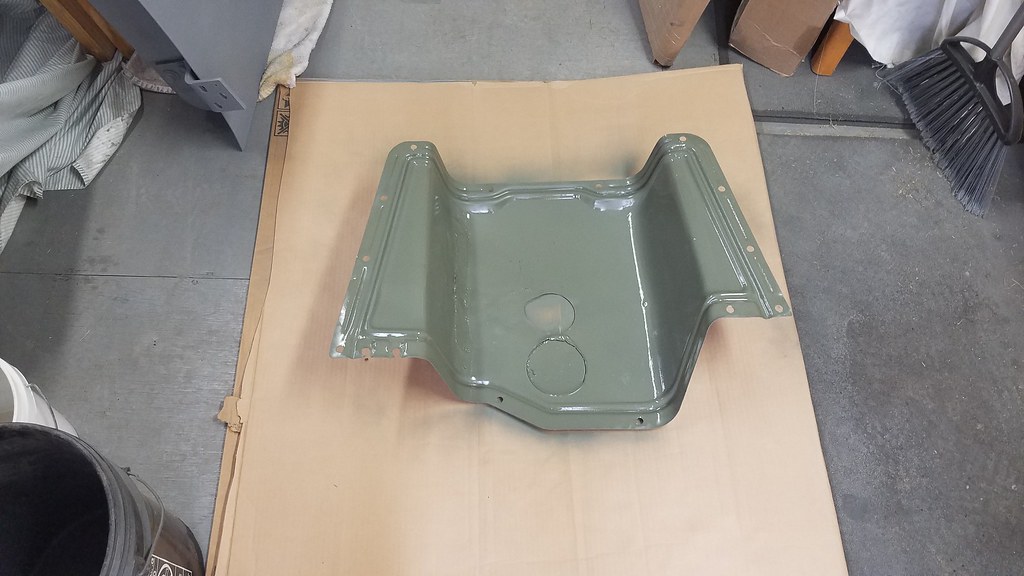 20180323_185807 by bjohnson388, on Flickr 20180323_185807 by bjohnson388, on FlickrBret
__________________
64' Build Thread http://67-72chevytrucks.com/vboard/s...d.php?t=586955 |
|
|
|
|
04-01-2018, 09:11 AM
|
#658 |
|
Registered User
Join Date: Sep 2012
Location: Leander, TX
Posts: 969
|
Re: 64 C10 Stepside "Jaybird"
My 4" lowering springs for the 64 showed up. Wow what a huge difference they make. I need to pull the Caprice out of the garage and get a better side shot for comparison.
So they arrived entangled together. I spent over 30 minutes trying to get them apart and scratched the paint. The wife comes out and separates them in 30 SECONDS!. I WAS ABOUT TO PULL MY HAIR OUT! 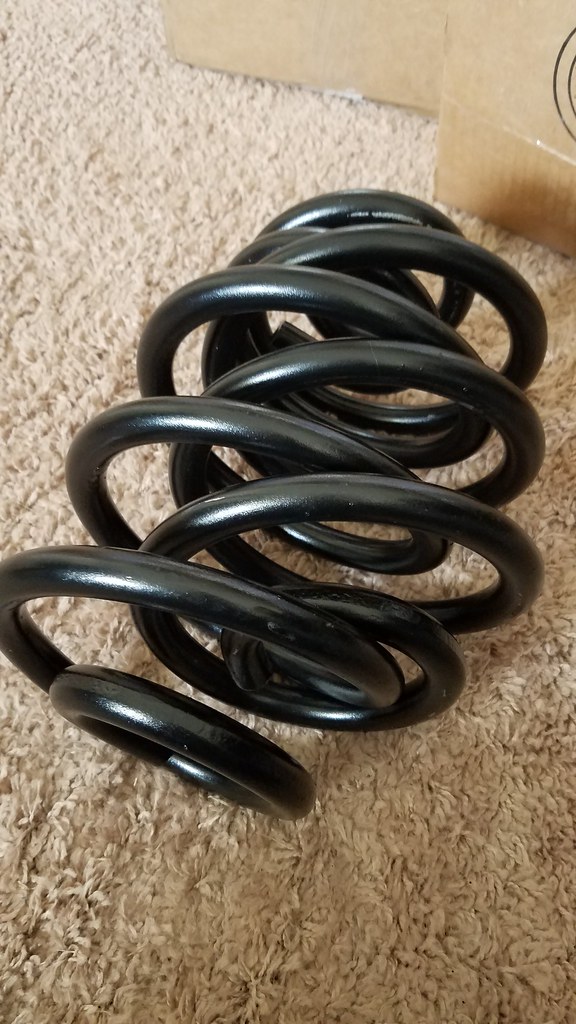 20180324_155514 by bjohnson388, on Flickr 20180324_155514 by bjohnson388, on Flickr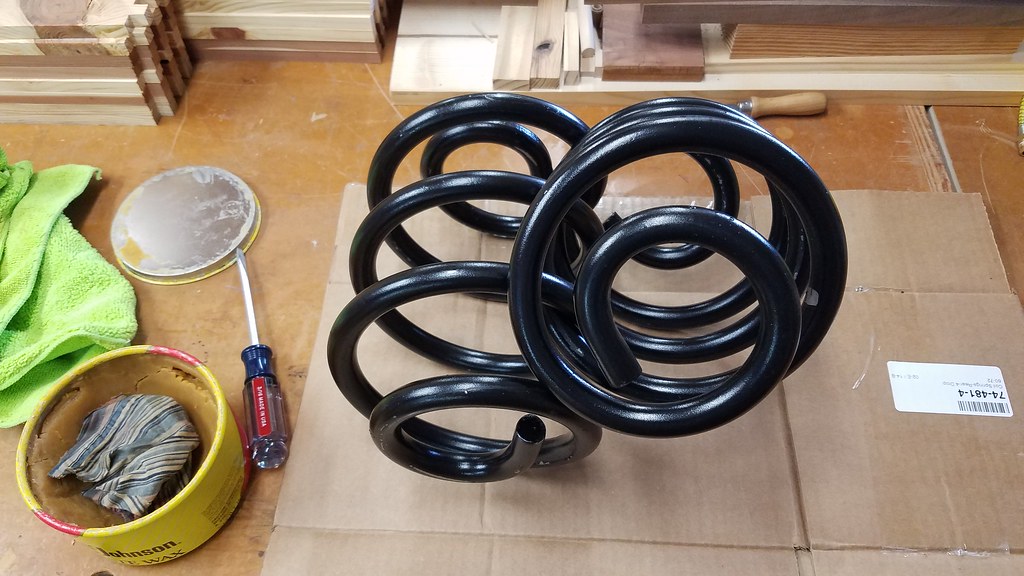 20180324_181153 by bjohnson388, on Flickr 20180324_181153 by bjohnson388, on FlickrWhat a huge difference to the factory. The factory definitely look more heavy duty. But now that I have the 95' I won't be hauling anything heavy in this truck. 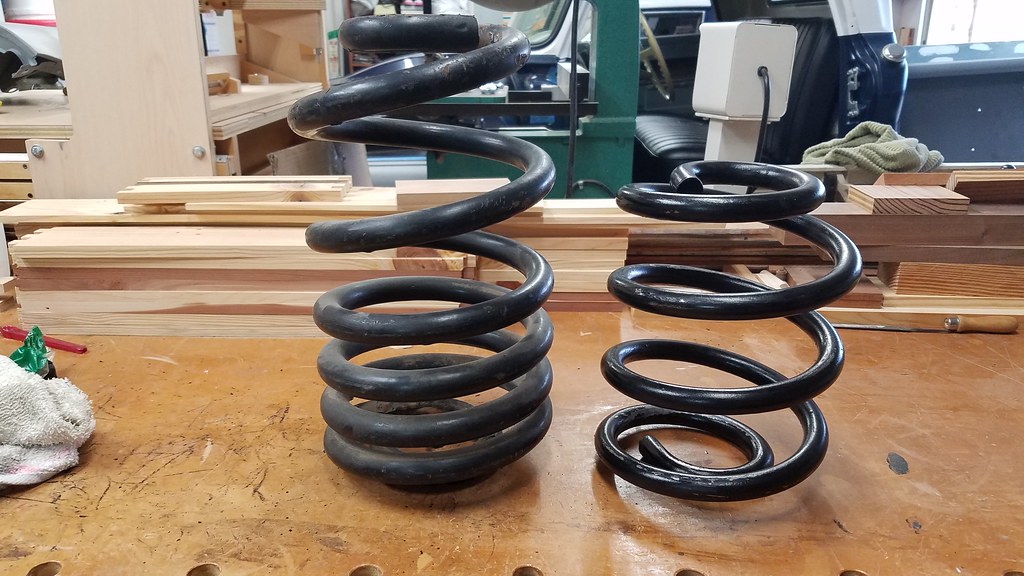 20180324_190622 by bjohnson388, on Flickr 20180324_190622 by bjohnson388, on Flickr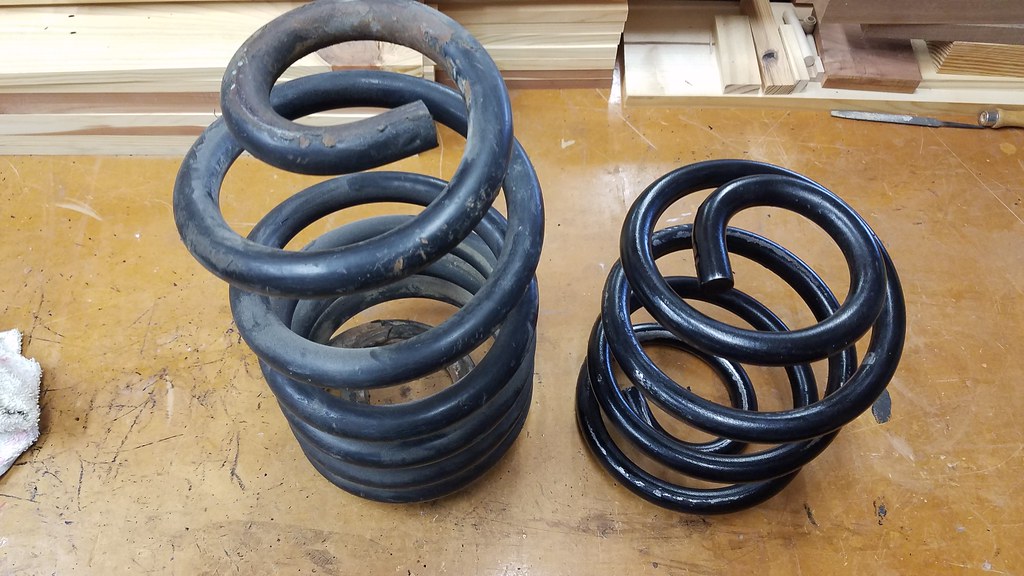 20180324_190626 by bjohnson388, on Flickr 20180324_190626 by bjohnson388, on FlickrVery rear of the frame with old springs. It is exactly at 24" 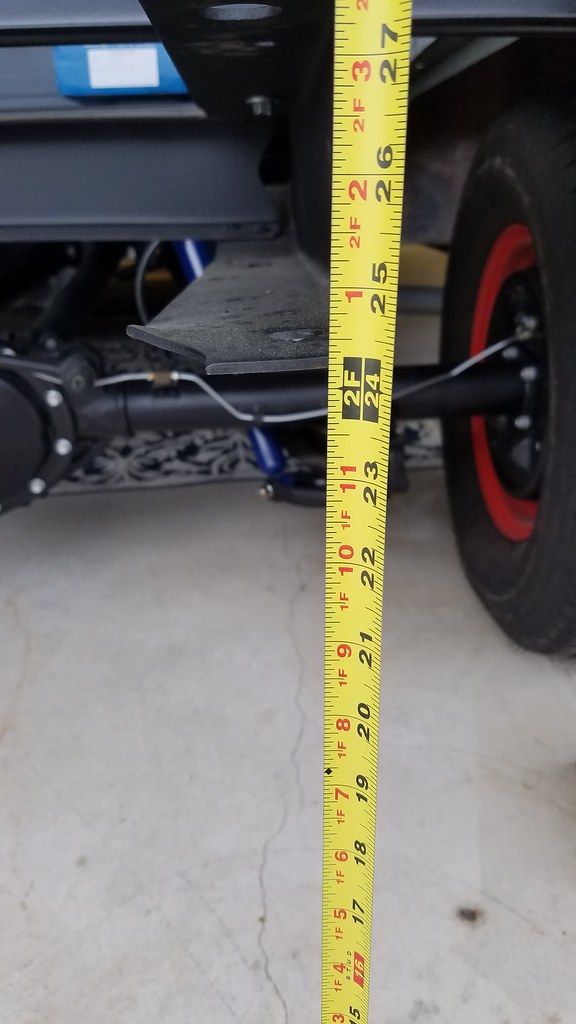 20180324_185200 by bjohnson388, on Flickr 20180324_185200 by bjohnson388, on FlickrNew springs installed it dropped 6" down to 18" 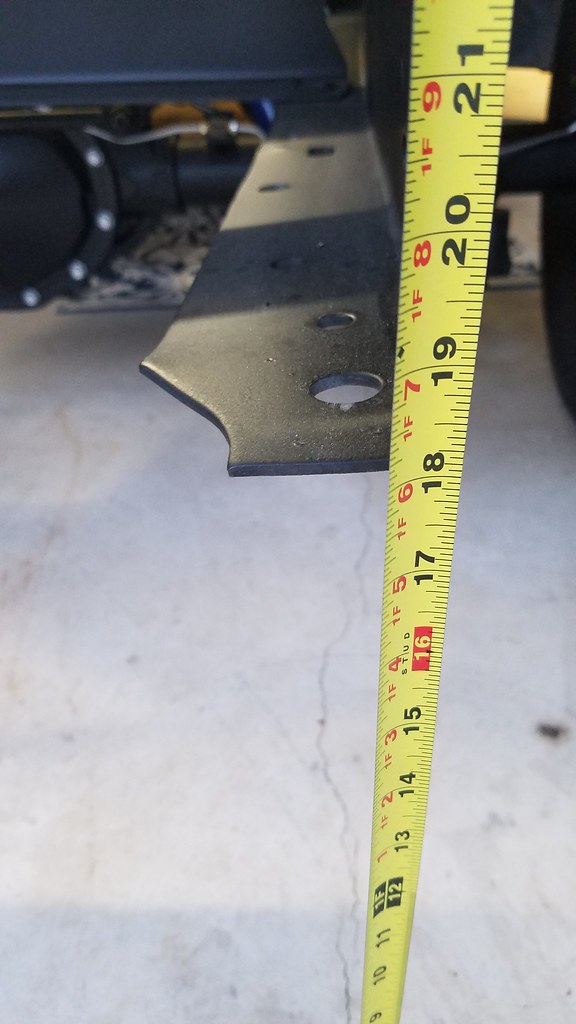 20180324_194156 by bjohnson388, on Flickr 20180324_194156 by bjohnson388, on Flickr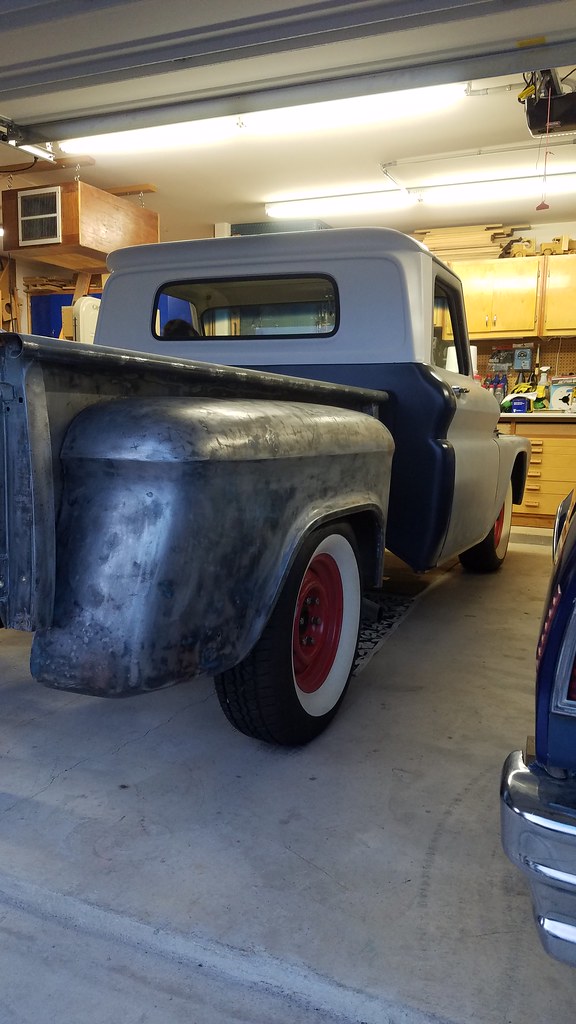 20180324_194206 by bjohnson388, on Flickr 20180324_194206 by bjohnson388, on FlickrThe tire tucks into the fender nicely now. 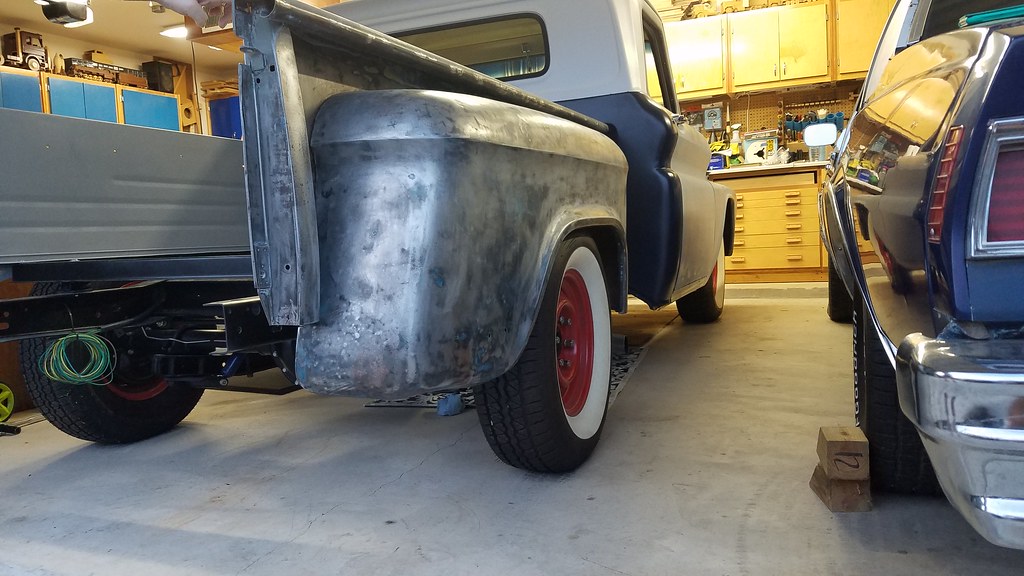 20180324_194212 by bjohnson388, on Flickr 20180324_194212 by bjohnson388, on FlickrThe youngest is driving again!  20180324_194341 by bjohnson388, on Flickr 20180324_194341 by bjohnson388, on Flickr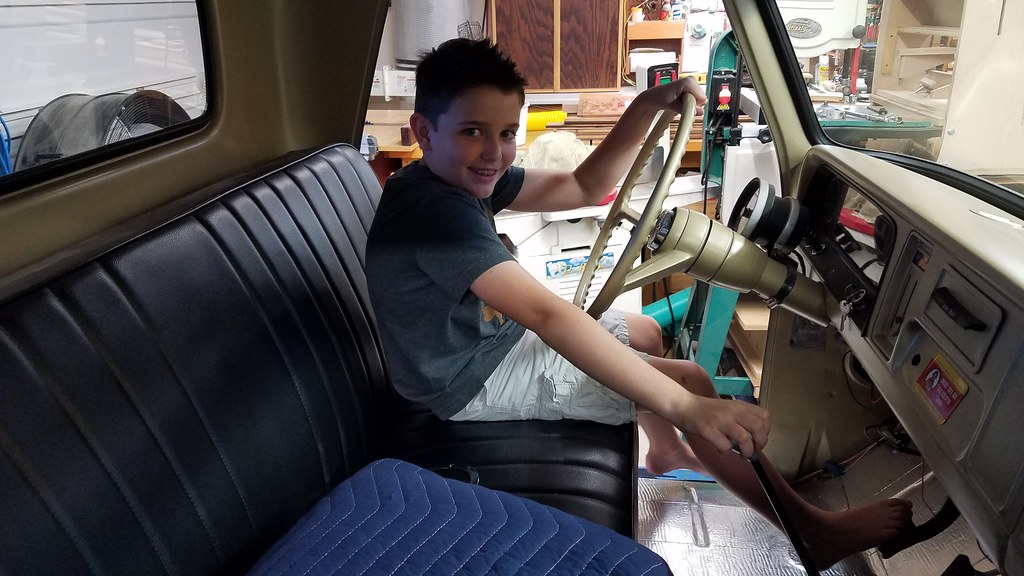 20180324_194352 by bjohnson388, on Flickr 20180324_194352 by bjohnson388, on Flickr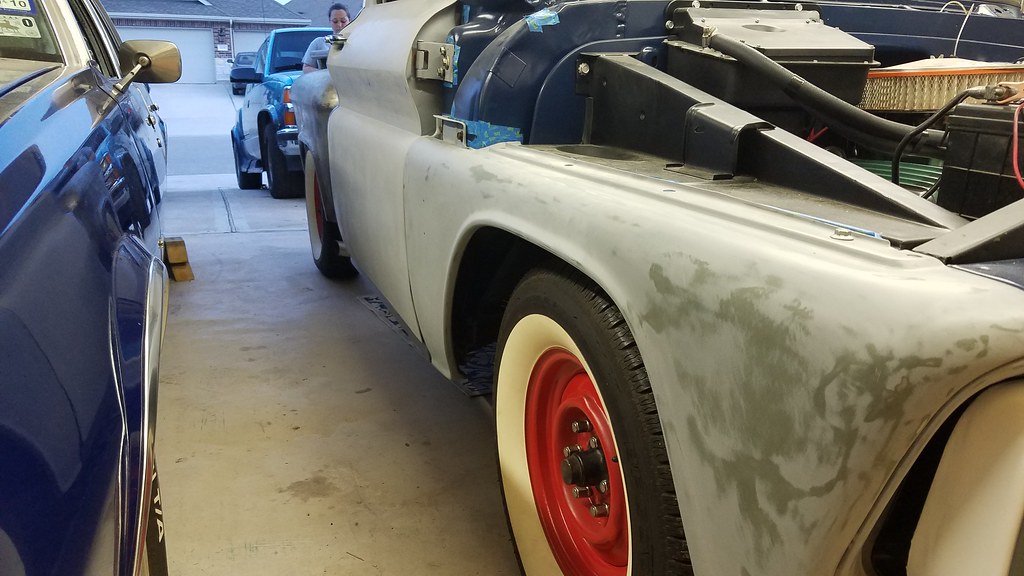 20180324_194402 by bjohnson388, on Flickr 20180324_194402 by bjohnson388, on Flickr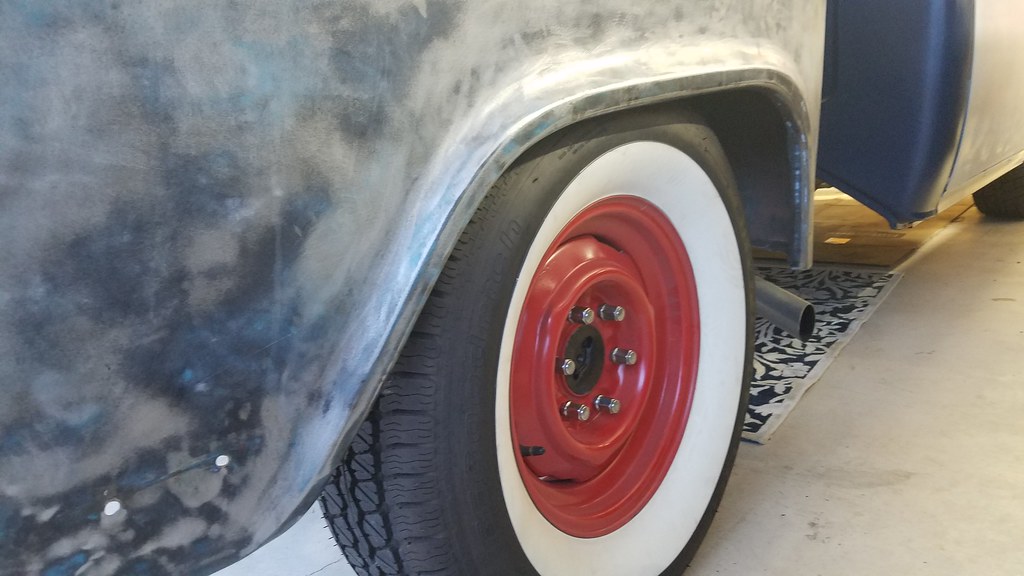 20180324_194411 by bjohnson388, on Flickr 20180324_194411 by bjohnson388, on FlickrThese pics are from October. 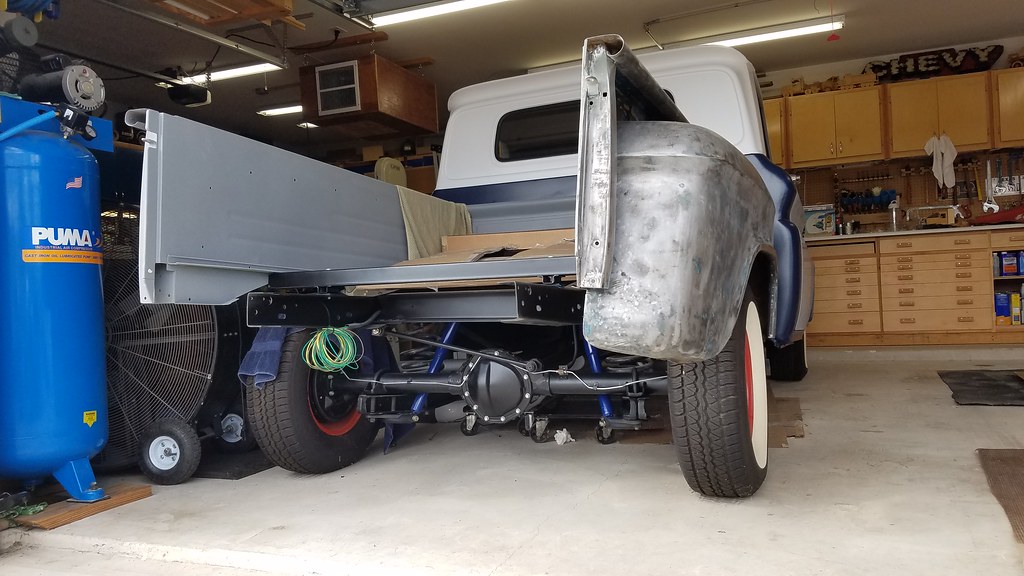 20171116_135238 by bjohnson388, on Flickr 20171116_135238 by bjohnson388, on Flickr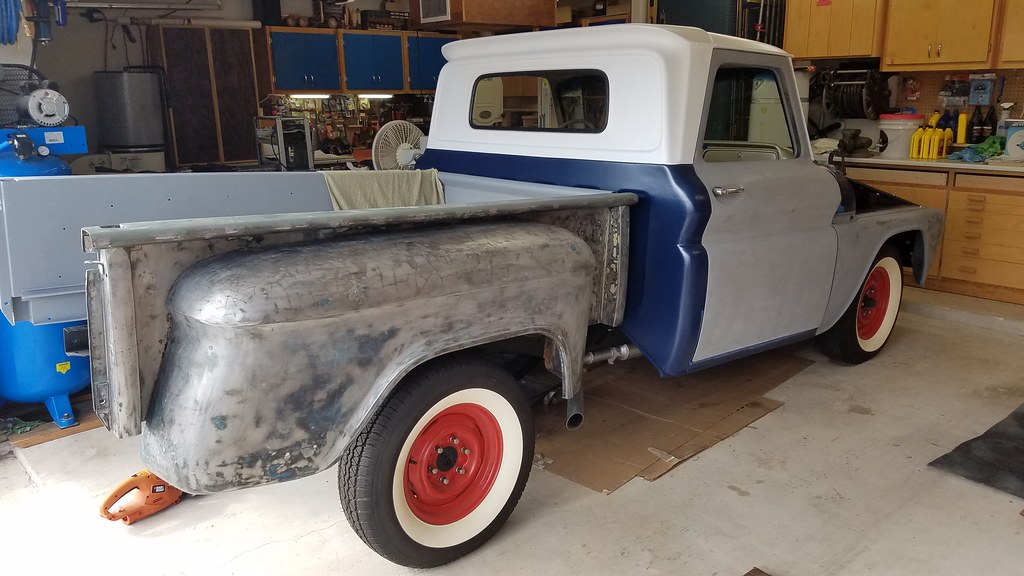 20171116_134959 by bjohnson388, on Flickr 20171116_134959 by bjohnson388, on FlickrI think the truck damn near sits level now. I will get some more pics tomorrow. I have been wanting the springs from day one just never got around to ordering them. I also shot the bottom of the hump with undercoating so I can get it installed tomorrow. 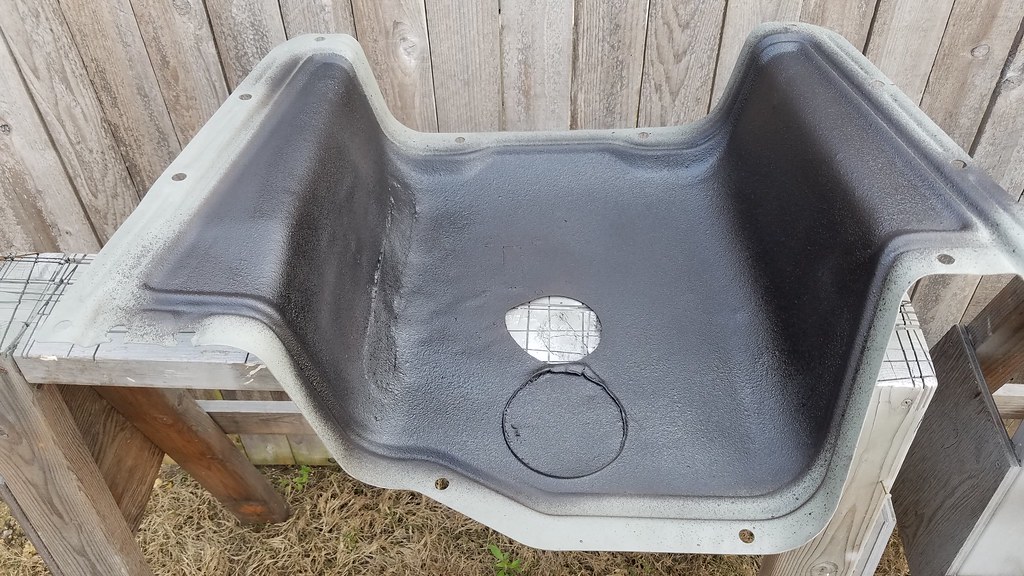 20180324_180842 by bjohnson388, on Flickr 20180324_180842 by bjohnson388, on FlickrBret
__________________
64' Build Thread http://67-72chevytrucks.com/vboard/s...d.php?t=586955 |
|
|
|
|
04-01-2018, 09:15 AM
|
#659 |
|
Registered User
Join Date: Sep 2012
Location: Leander, TX
Posts: 969
|
Re: 64 C10 Stepside "Jaybird"
Installing the high hump for the final time. 1/4" thick gasket to seal it up.
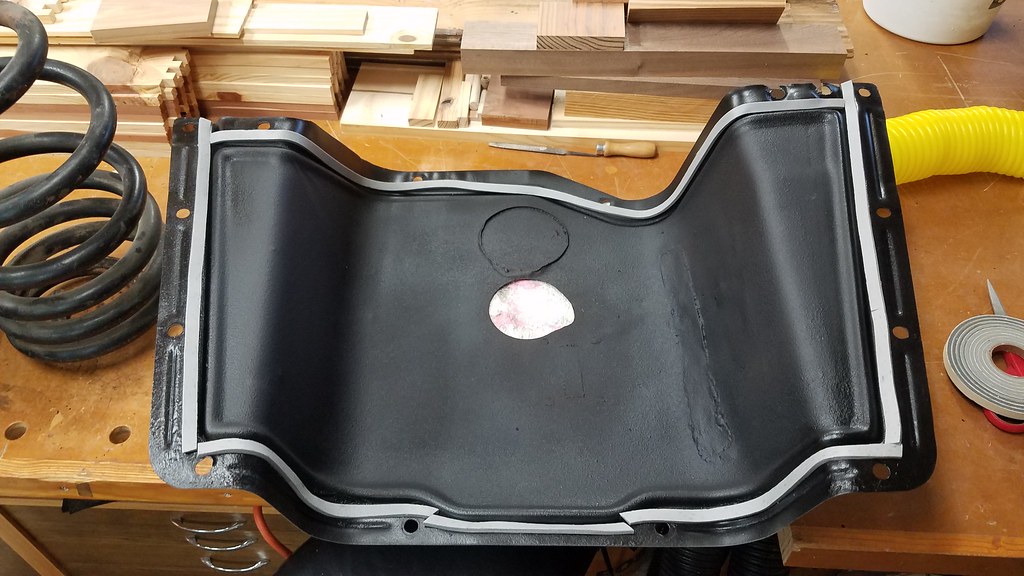 20180325_080546 by bjohnson388, on Flickr 20180325_080546 by bjohnson388, on FlickrThen finalized the shifter boot placement and drilled the holes. 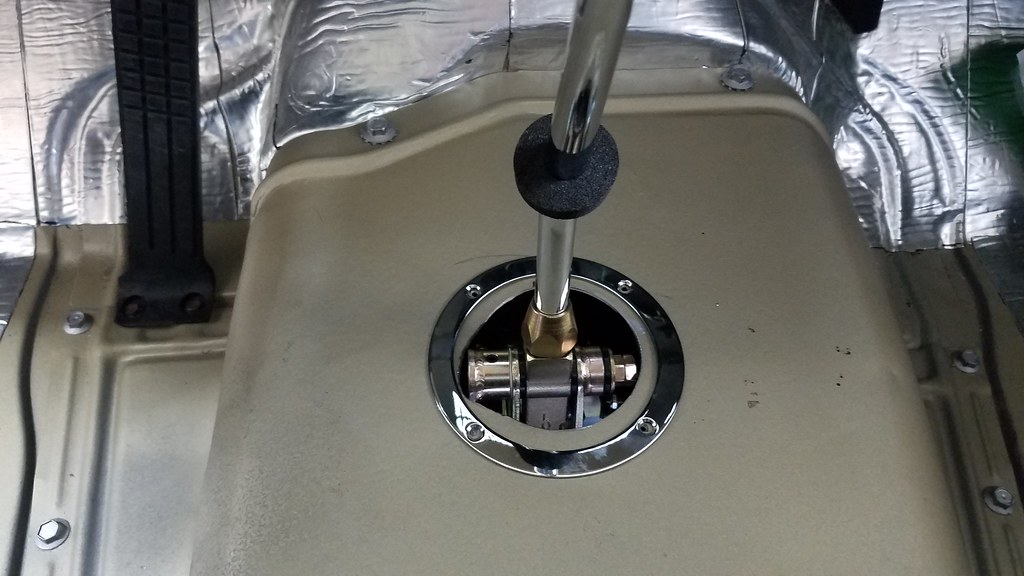 20180325_083321 by bjohnson388, on Flickr 20180325_083321 by bjohnson388, on Flickr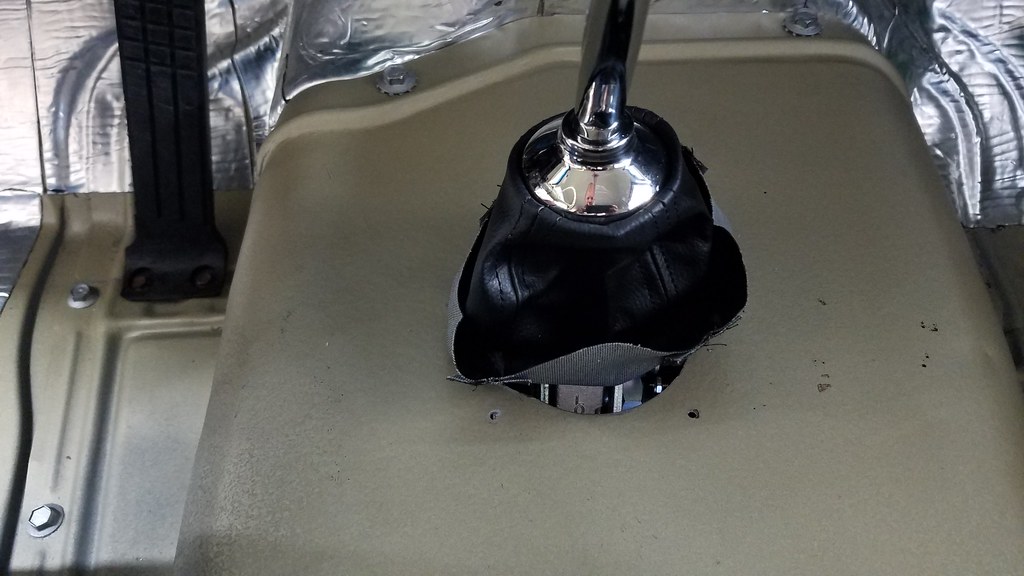 20180325_083534 by bjohnson388, on Flickr 20180325_083534 by bjohnson388, on Flickr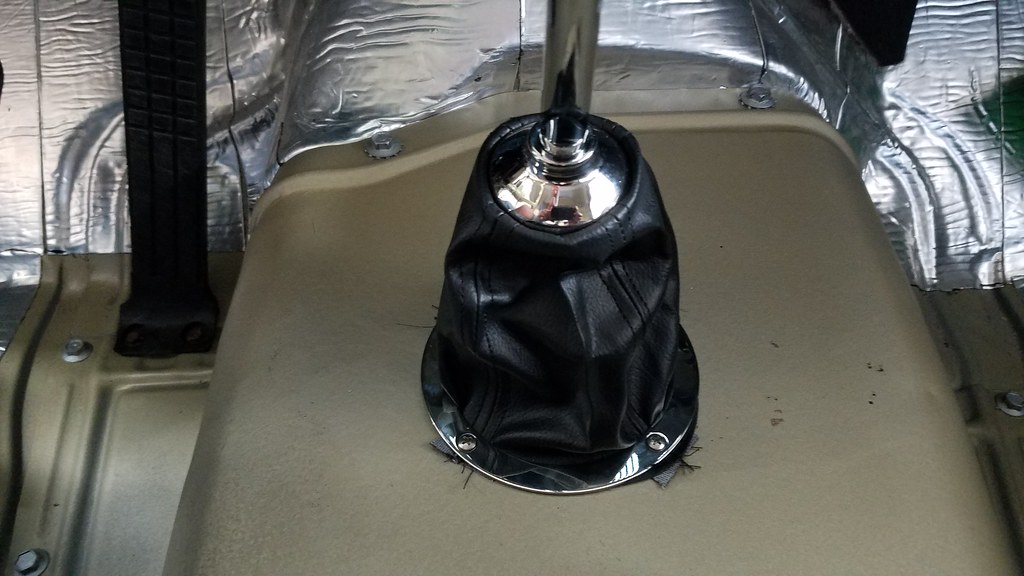 20180325_084137 by bjohnson388, on Flickr 20180325_084137 by bjohnson388, on FlickrTrimmed off the excess. 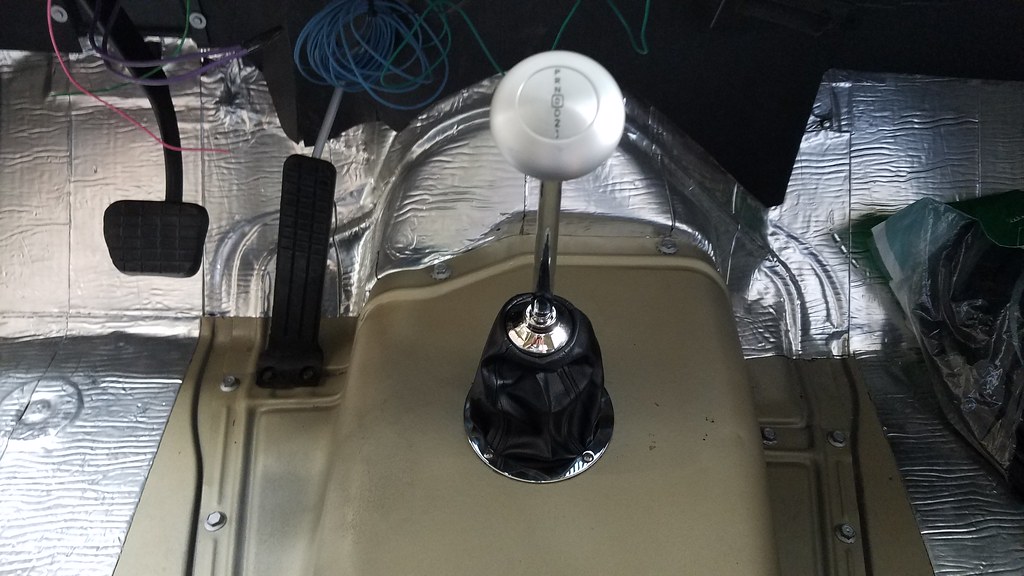 20180325_084730 by bjohnson388, on Flickr 20180325_084730 by bjohnson388, on Flickr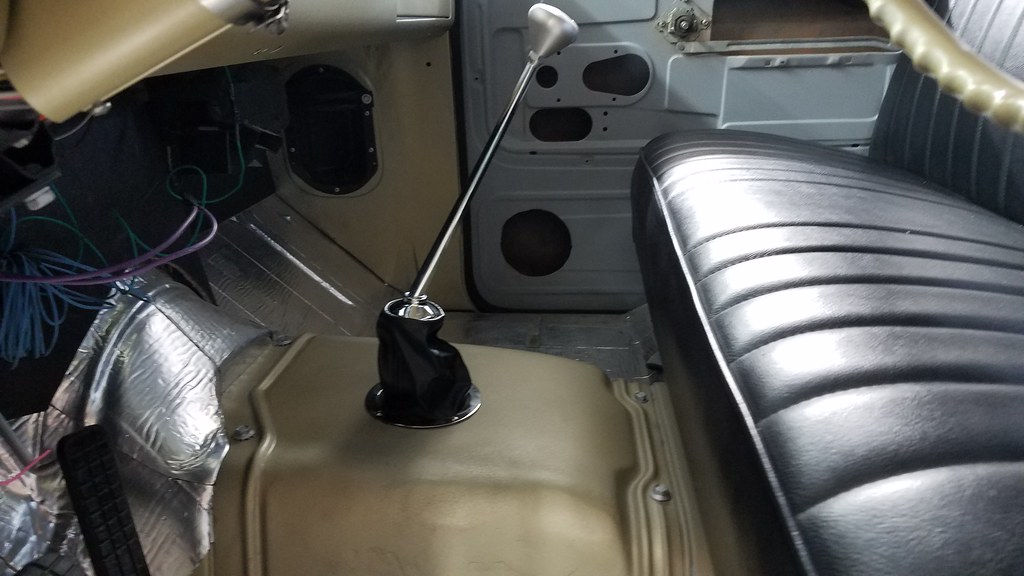 20180325_084750 by bjohnson388, on Flickr 20180325_084750 by bjohnson388, on FlickrNext up was putting this door seal on. 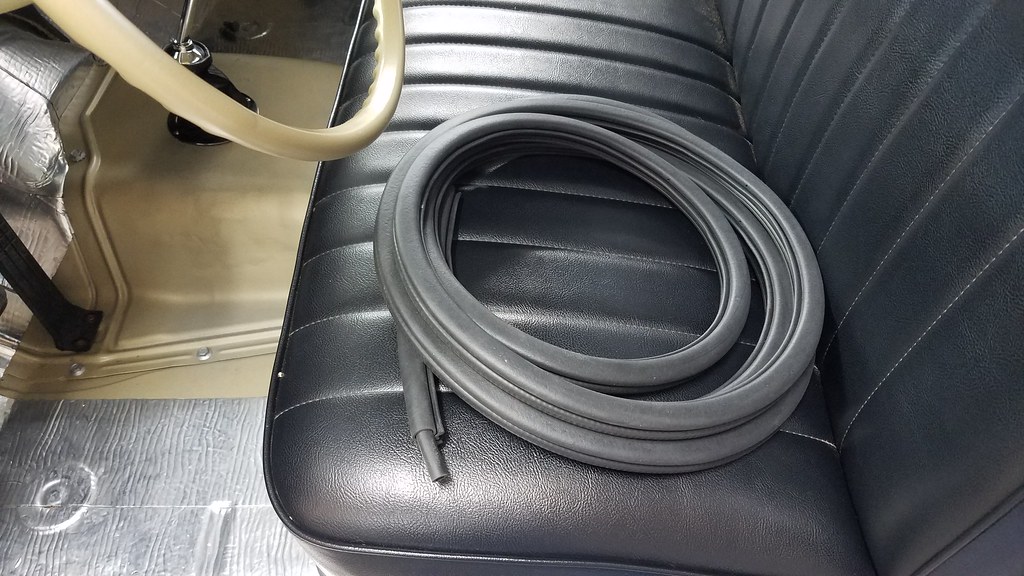 20180325_085306 by bjohnson388, on Flickr 20180325_085306 by bjohnson388, on FlickrEasy peasy. 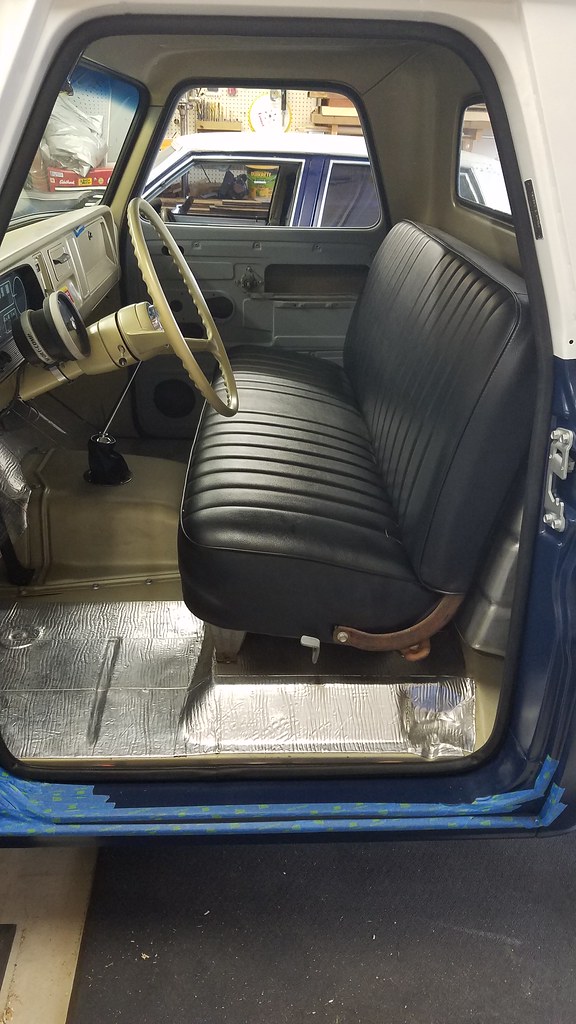 20180325_090756 by bjohnson388, on Flickr 20180325_090756 by bjohnson388, on Flickr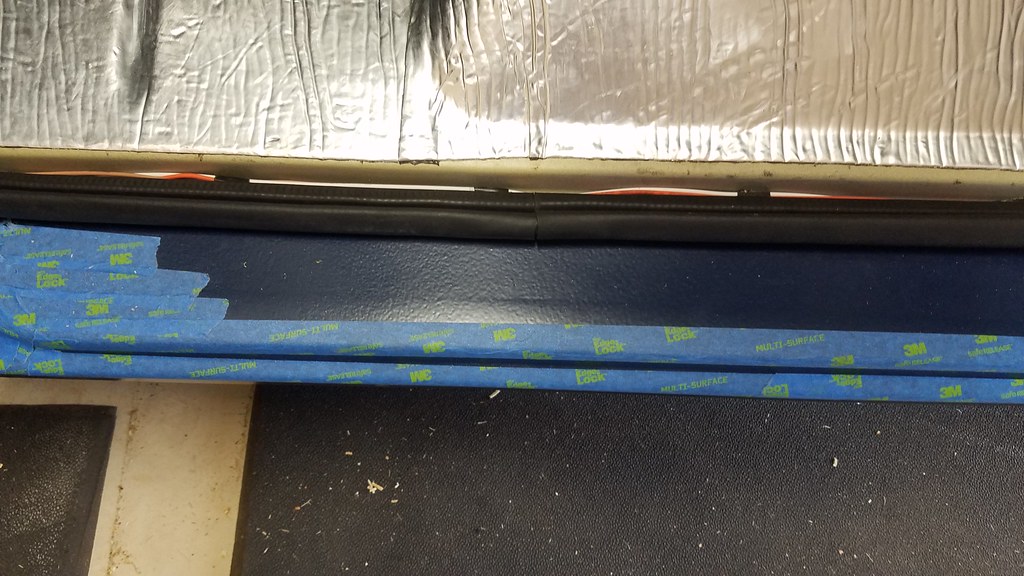 20180325_090801 by bjohnson388, on Flickr 20180325_090801 by bjohnson388, on Flickr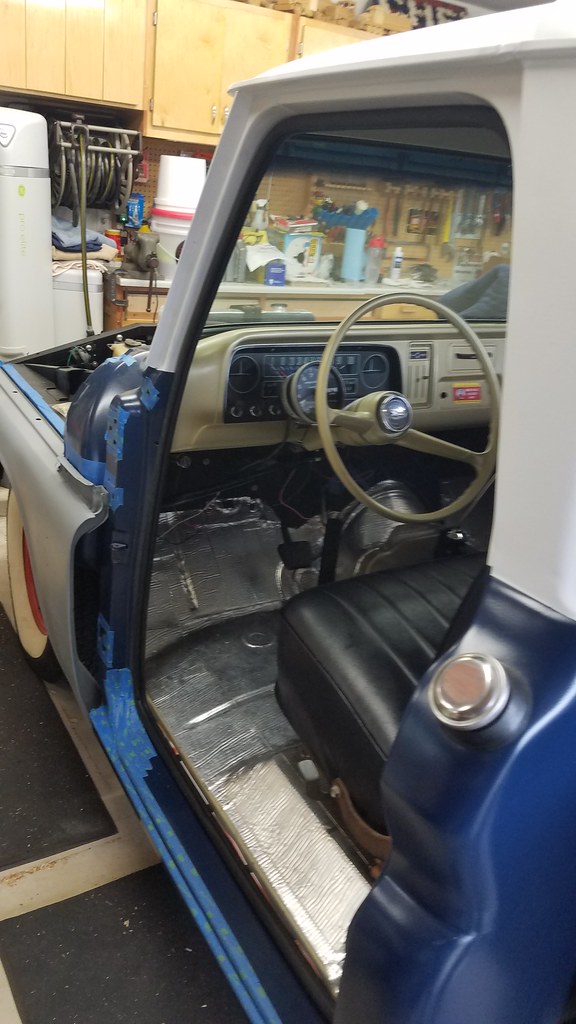 20180325_090809 by bjohnson388, on Flickr 20180325_090809 by bjohnson388, on FlickrNext project was block sanding the driver door with my new Durablock and my homemade round Durablock. They both work great. I am using PSA sandpaper that comes in rolls. What a joy to work with. 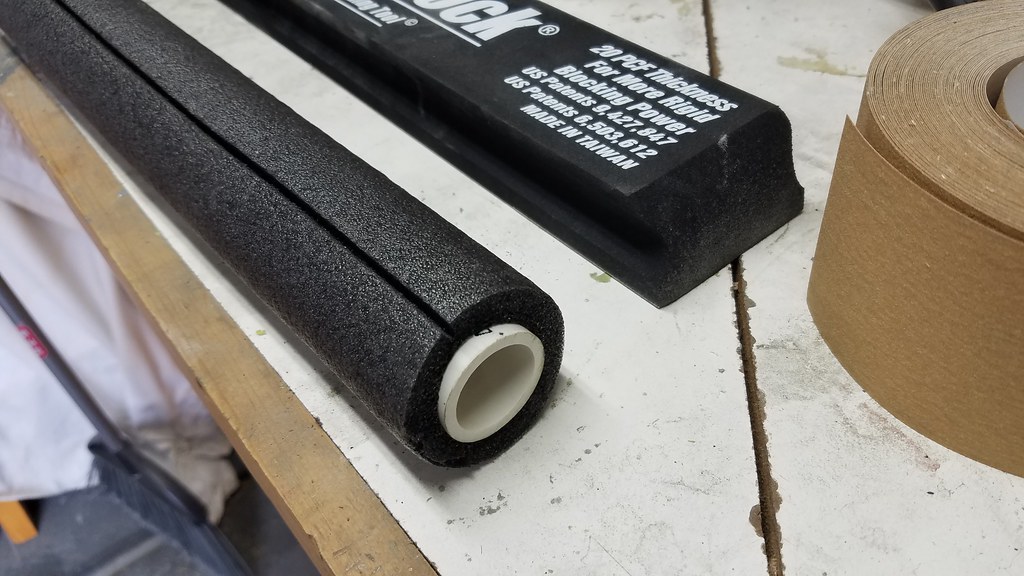 20180325_123148 by bjohnson388, on Flickr 20180325_123148 by bjohnson388, on Flickr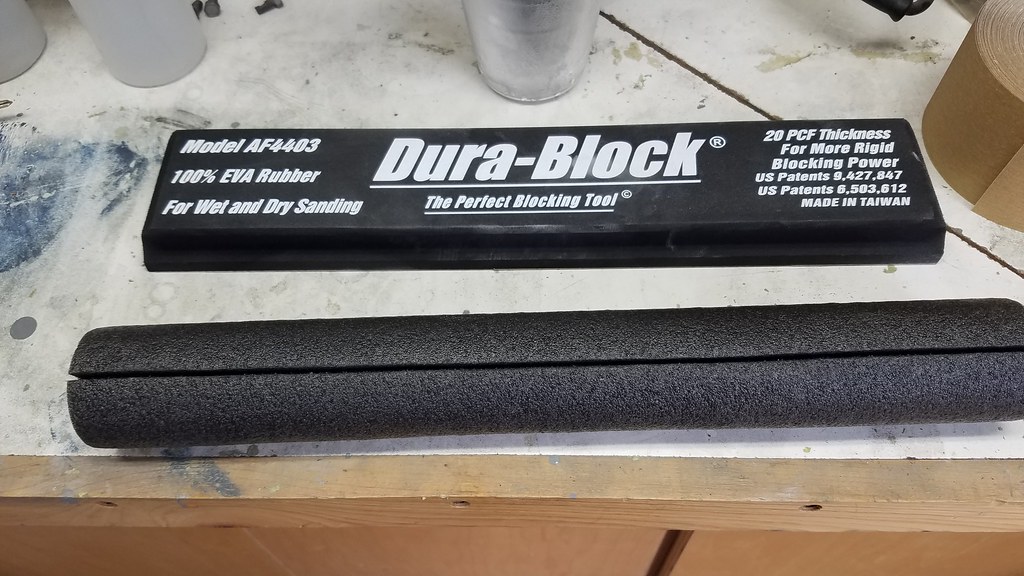 20180325_123143 by bjohnson388, on Flickr 20180325_123143 by bjohnson388, on FlickrBlocked the door and found some low spots and did a round of glazing putty. 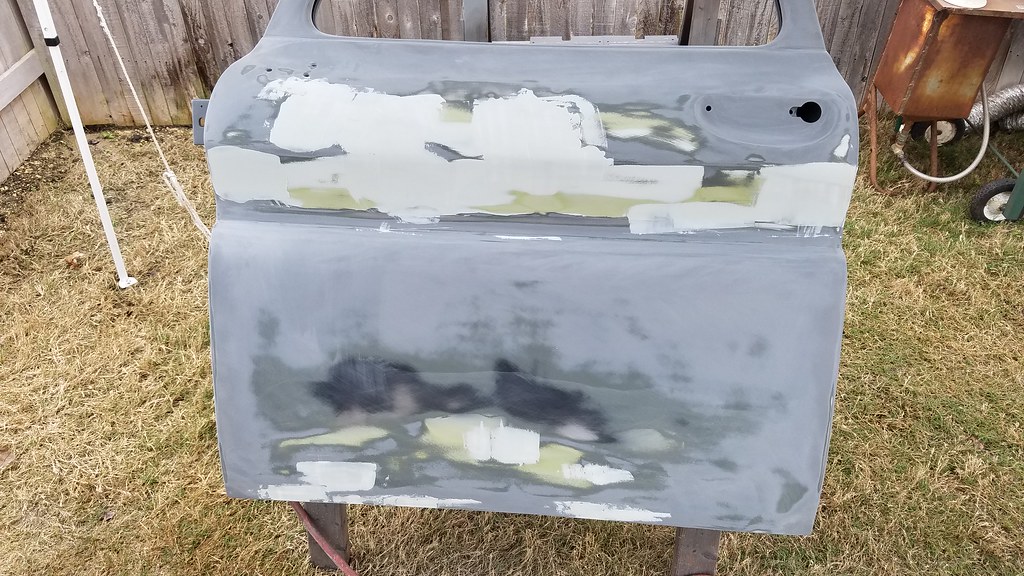 20180325_130859 by bjohnson388, on Flickr 20180325_130859 by bjohnson388, on FlickrAnother round of filler primer. Will block sand this in the next few days and see where I am at. I shot this with Rattle can dupli color. Didn't have time to break out the spray gun. 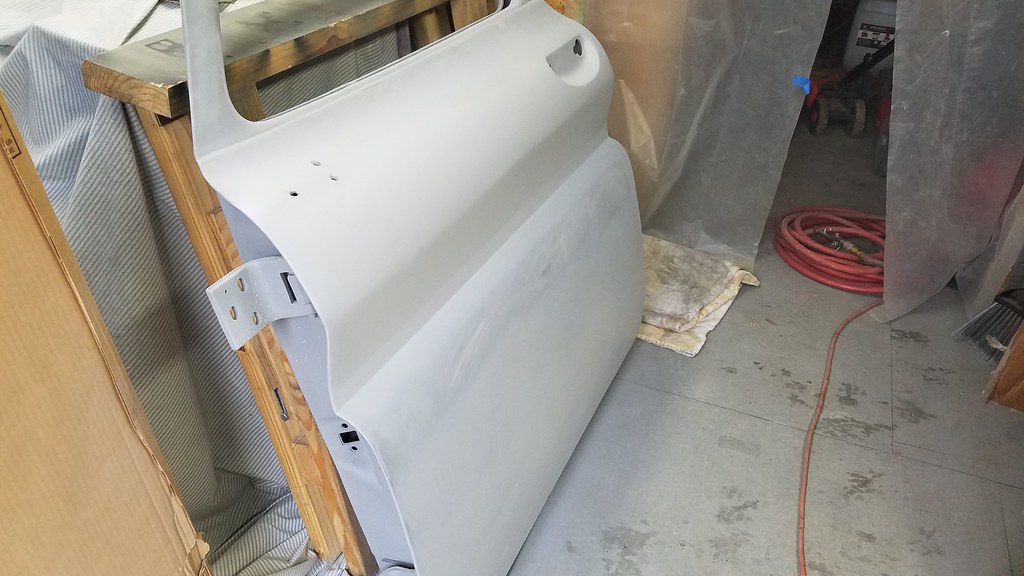 20180325_151106 by bjohnson388, on Flickr 20180325_151106 by bjohnson388, on Flickr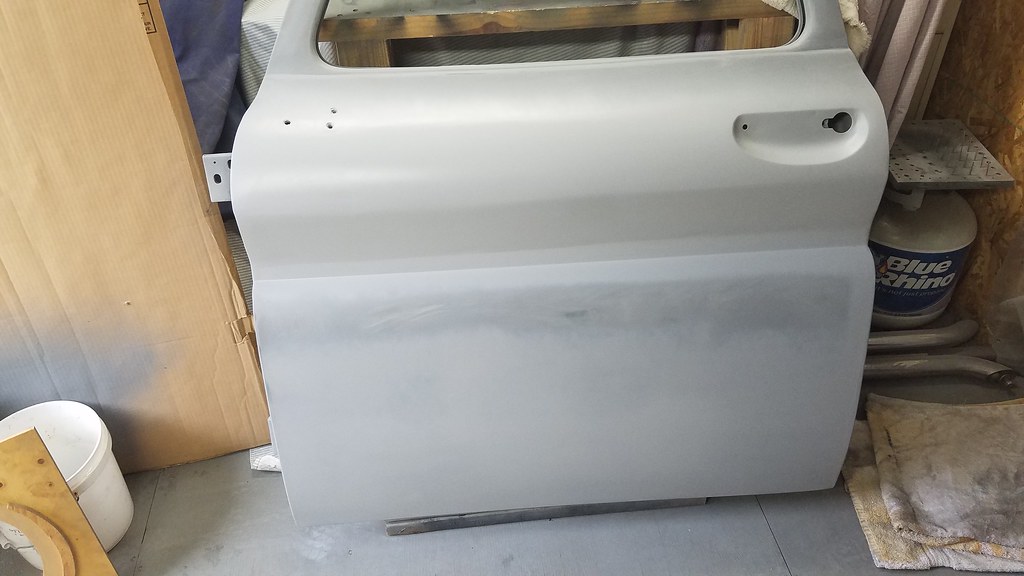 20180325_151101 by bjohnson388, on Flickr 20180325_151101 by bjohnson388, on FlickrAnd this brings my thread up to date. I have a hard finish date for the truck. September is 6 years since I took possession of her and I am ready to get her on the road and enjoy her. Sorry for the mega update. Bret
__________________
64' Build Thread http://67-72chevytrucks.com/vboard/s...d.php?t=586955 |
|
|
|
|
04-01-2018, 09:42 AM
|
#660 |
|
Registered User
Join Date: Jan 2015
Location: Arlington VA
Posts: 359
|
Re: 64 C10 Stepside "Jaybird"
Nice work on the high hump, I am thinking of using a seam sealer of sorts and plug welds but may bolt it as well.
|
|
|
|
|
04-01-2018, 11:47 AM
|
#661 |
|
Registered User
Join Date: Sep 2009
Location: Monroe,Iowa
Posts: 4,370
|
Re: 64 C10 Stepside "Jaybird"
It's Really taking shape. Thanks for the Update, many of the things you did are on my paper in the TO DO LIST!
|
|
|
|
|
04-01-2018, 04:56 PM
|
#662 |
|
State of Confusion!
  Join Date: Jul 2002
Location: Gulfport, MS USA
Posts: 46,634
|
Re: 64 C10 Stepside "Jaybird"
Looking good on everything! Glad to see an update.
__________________
Bill 1970 Chevy Custom/10 LWB Fleetside 2010 Toyota Tacoma PreRunner SR5 Double Cab - DD Member of Louisiana Classic Truck Club (LCTC) Bill's Gallery Life isn't tied with a bow, but it's still a gift. Live simply. Love generously. Care deeply. Speak kindly. Leave the rest to God! |
|
|
|
|
04-01-2018, 05:39 PM
|
#663 |
|
Registered User
Join Date: Apr 2017
Location: Brownwood, Texas
Posts: 55
|
Re: 64 C10 Stepside "Jaybird"
Hey jaybird where did you get that door seal looks a lot better than the ones I have and mine don't fit at all
|
|
|
|
|
04-01-2018, 06:03 PM
|
#664 | ||||
|
Registered User
Join Date: Sep 2012
Location: Leander, TX
Posts: 969
|
Re: 64 C10 Stepside "Jaybird"
Quote:
Quote:
Quote:
Quote:
It's on this page. Part # 17880392 http://www.gmcpauls.com/60-66rubber_weather_strip.htm Bret
__________________
64' Build Thread http://67-72chevytrucks.com/vboard/s...d.php?t=586955 |
||||
|
|
|
|
04-02-2018, 09:46 AM
|
#665 | |
|
Registered User
Join Date: Jan 2012
Location: Killeen, Tx
Posts: 1,348
|
Re: 64 C10 Stepside "Jaybird"
Quote:
__________________
John Z 1962 Chevy C10 Stepside 62 Barnfind My build tread: http://67-72chevytrucks.com/vboard/s...d.php?t=507513 |
|
|
|
|
|
04-10-2018, 11:55 PM
|
#666 |
|
Post Whore
Join Date: Mar 2013
Location: Southern Oregon
Posts: 10,384
|
Re: 64 C10 Stepside "Jaybird"
Dang you been hard at work brotha! Nice weather is starting and I been getting back into gear on mine. Seeing this is makin me motorvated!

__________________
1966 Chevy C10 "Project Two Tone" http://67-72chevytrucks.com/vboard/s...d.php?t=596643 1964 GMC "Crustine" semi-build:http://67-72chevytrucks.com/vboard/s...d.php?t=665056 My youtube channel. Username "Military Chevy": https://www.youtube.com/channel/UC_h...fzpcUXyK_5-uiw |
|
|
|
|
04-11-2018, 01:36 AM
|
#667 |
|
Senior Member
Join Date: Mar 2011
Location: Tucson, Arizona
Posts: 2,058
|
Re: 64 C10 Stepside "Jaybird"
I just did some catching up on your thread. You've got yourself a fine ride.
__________________
Sanity'66 http://67-72chevytrucks.com/vboard/s...d.php?t=515110 Long bed, Fleetside, Small back window I've Done So Much, With So Little, For So Long, That Now I Can Do Anything With Nothing.
|
|
|
|
|
04-11-2018, 05:27 AM
|
#668 |
|
Registered User
Join Date: Nov 2014
Location: Omaha
Posts: 558
|
Re: 64 C10 Stepside "Jaybird"
|
|
|
|
|
05-20-2018, 08:20 AM
|
#669 |
|
Registered User
Join Date: Sep 2012
Location: Leander, TX
Posts: 969
|
Re: 64 C10 Stepside "Jaybird"
Couple of videos of test drives. Click on the picture it will take you to the video.
 20180513_094012_ID_tOqGA7mtMiCYmt0DBPbUYA== by bjohnson388, on Flickr 20180513_094012_ID_tOqGA7mtMiCYmt0DBPbUYA== by bjohnson388, on Flickr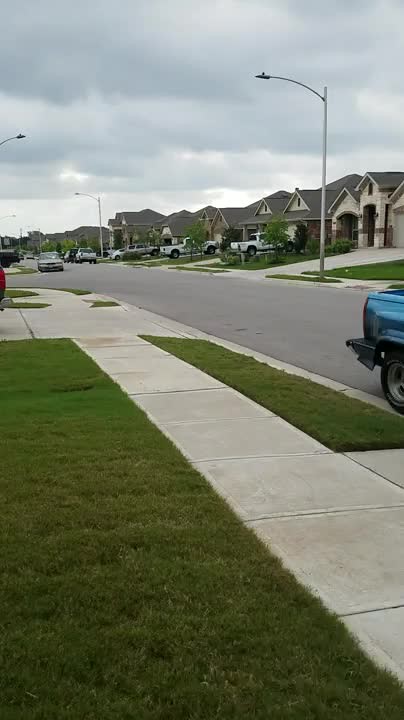 20180519_091845_ID_qEdCCjxSPcCR2RkComt1Mg== by bjohnson388, on Flickr 20180519_091845_ID_qEdCCjxSPcCR2RkComt1Mg== by bjohnson388, on FlickrOther rear fender stripped. 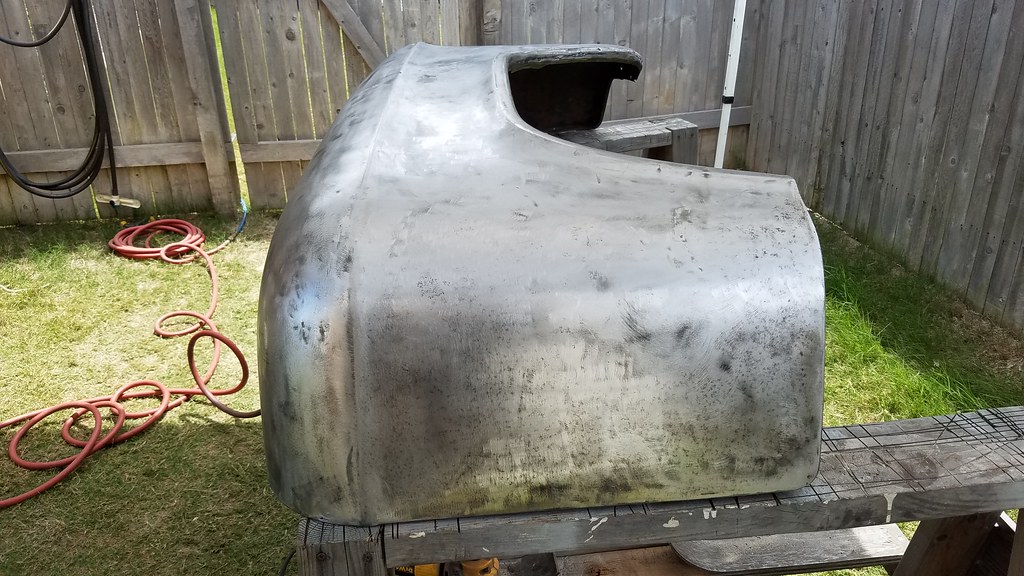 20180429_140751 by bjohnson388, on Flickr 20180429_140751 by bjohnson388, on Flickr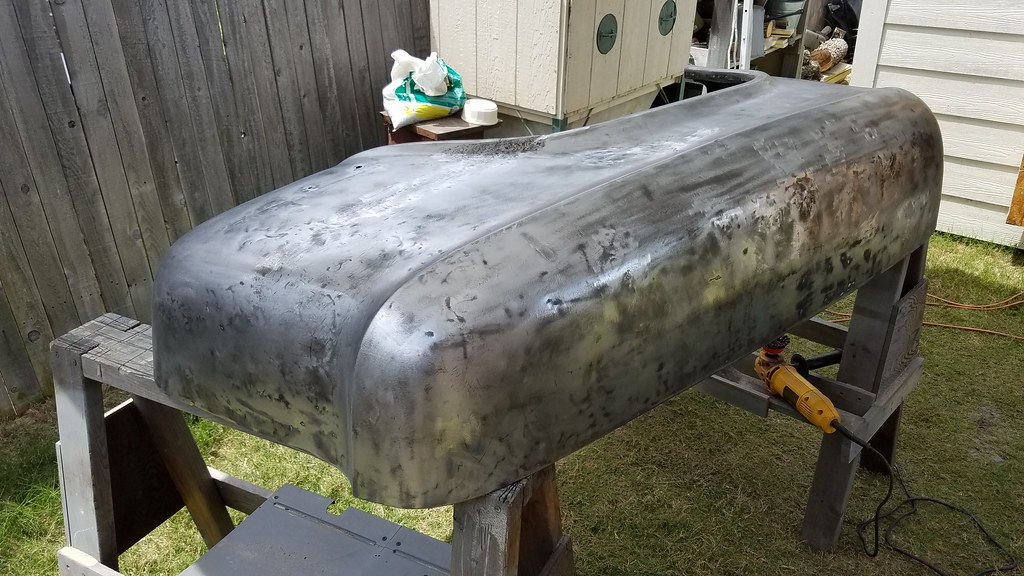 20180429_140800 by bjohnson388, on Flickr 20180429_140800 by bjohnson388, on FlickrRebuilding the vent assemblies. 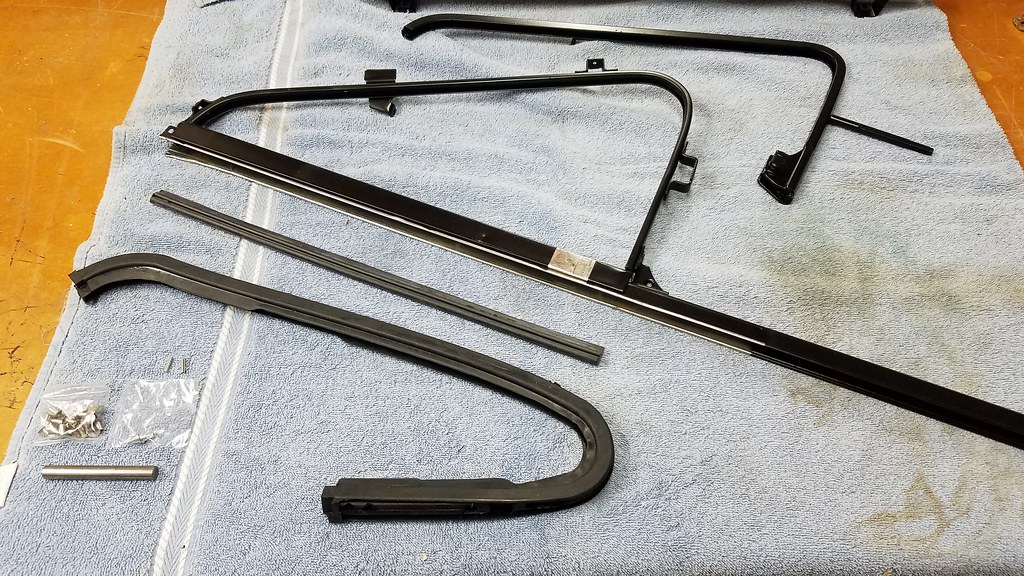 20180501_191117 by bjohnson388, on Flickr 20180501_191117 by bjohnson388, on FlickrTCI Cable Corrector kit and cable installed for 700R4 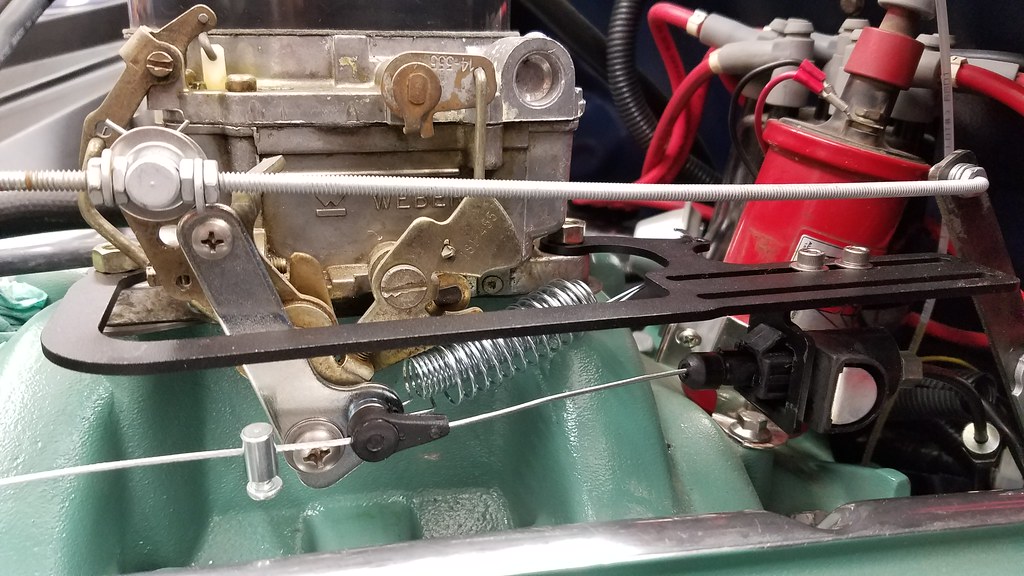 20180510_105446 by bjohnson388, on Flickr 20180510_105446 by bjohnson388, on FlickrBunch of parts blasted and painted.  20180422_093849 by bjohnson388, on Flickr 20180422_093849 by bjohnson388, on Flickr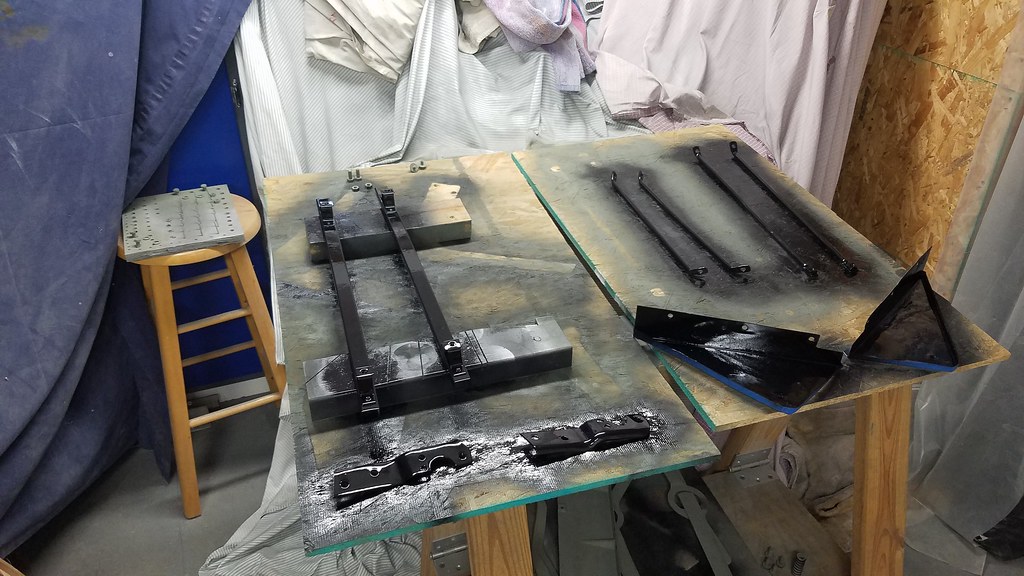 20180427_074126 by bjohnson388, on Flickr 20180427_074126 by bjohnson388, on Flickr 20180427_074327 by bjohnson388, on Flickr 20180427_074327 by bjohnson388, on FlickrGot my carpet samples. 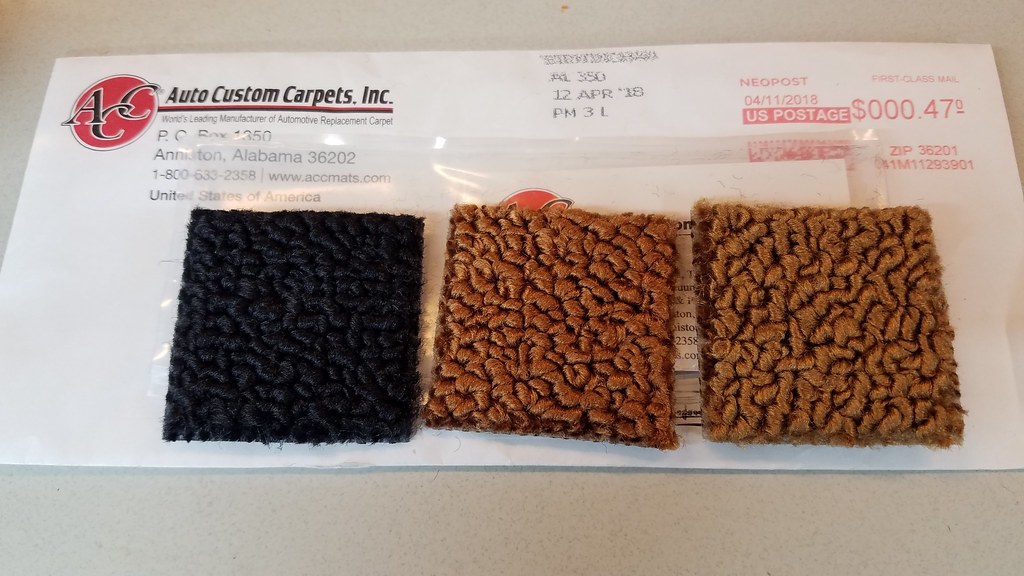 20180417_193002 by bjohnson388, on Flickr 20180417_193002 by bjohnson388, on FlickrGoing with the medium saddle. 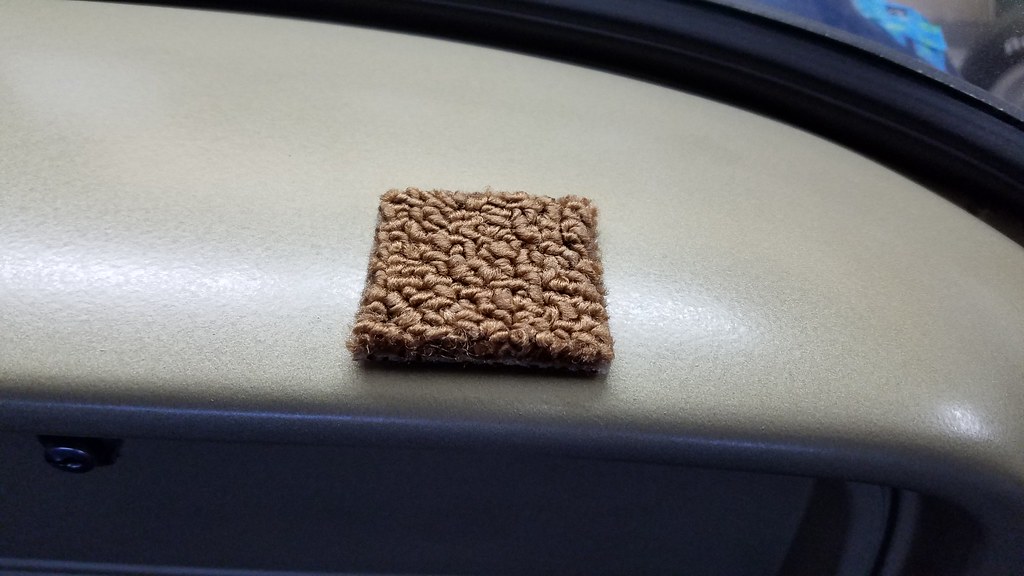 20180417_195350 by bjohnson388, on Flickr 20180417_195350 by bjohnson388, on Flickrand that brings me up to date. On vacation this week going to attempt to get some body panels in final paint if the weather cooperates. Bret
__________________
64' Build Thread http://67-72chevytrucks.com/vboard/s...d.php?t=586955 |
|
|
|
|
05-20-2018, 09:53 AM
|
#670 |
|
Registered User
Join Date: Nov 2014
Location: Omaha
Posts: 558
|
Re: 64 C10 Stepside "Jaybird"
|
|
|
|
|
05-20-2018, 02:22 PM
|
#671 |
|
Moderator
  Join Date: Aug 2011
Location: China Spring, TX
Posts: 7,280
|
Re: 64 C10 Stepside "Jaybird"
Great work. When you get the carpet keep us posted on the coverage, if here is any short areas?
__________________
Master Chief, US Navy, Retired 1964 C10 Step-side Short Bed - In Progress 2009 2500HD Duramax LTZ 1948 GMC Panel 1956 Big Window Stepside 1953 5 Window Chevy Stepside 1932 Coupe New Seat Foam for Bench Seats? |
|
|
|
|
05-22-2018, 04:02 PM
|
#672 |
|
Registered User
Join Date: Nov 2009
Location: alabama
Posts: 2,079
|
Re: 64 C10 Stepside "Jaybird"
Great build, cant wait to read it all when I have time.
__________________
my 86 c10 build: http://67-72chevytrucks.com/vboard/s...d.php?t=496829 my 56 3100 build: http://67-72chevytrucks.com/vboard/s...09#post5712509 my 95 silverado build: http://67-72chevytrucks.com/vboard/s...35#post5879335 my gray 86 c10 http://67-72chevytrucks.com/vboard/s...34#post7624734 |
|
|
|
|
06-23-2018, 08:12 AM
|
#673 | |||
|
Registered User
Join Date: Sep 2012
Location: Leander, TX
Posts: 969
|
Re: 64 C10 Stepside "Jaybird"
Quote:
 Quote:
Bret
__________________
64' Build Thread http://67-72chevytrucks.com/vboard/s...d.php?t=586955 |
|||
|
|
|
|
06-23-2018, 08:27 AM
|
#674 |
|
Registered User
Join Date: Sep 2012
Location: Leander, TX
Posts: 969
|
Re: 64 C10 Stepside "Jaybird"
Rear Driver fender done and ready for paint.
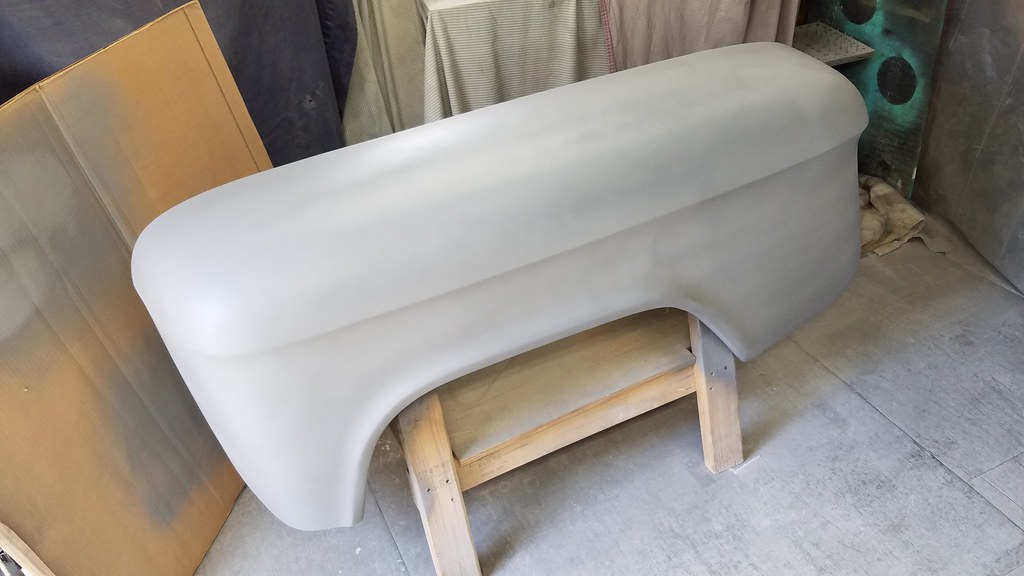 20180523_095938 by bjohnson388, on Flickr 20180523_095938 by bjohnson388, on FlickrBought a junkyard fan off of a 74' GMC and restored it. 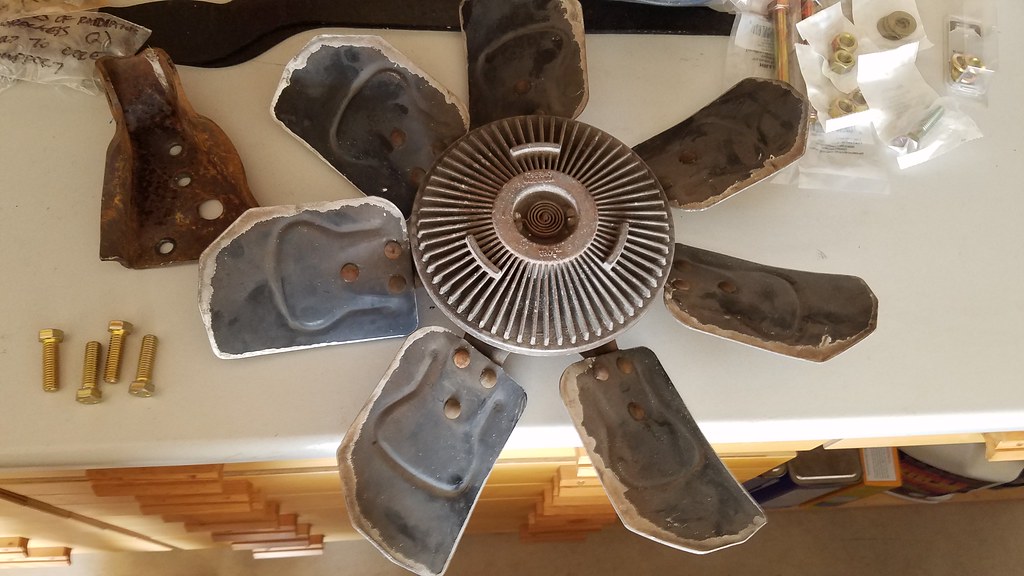 20180524_134146 by bjohnson388, on Flickr 20180524_134146 by bjohnson388, on Flickr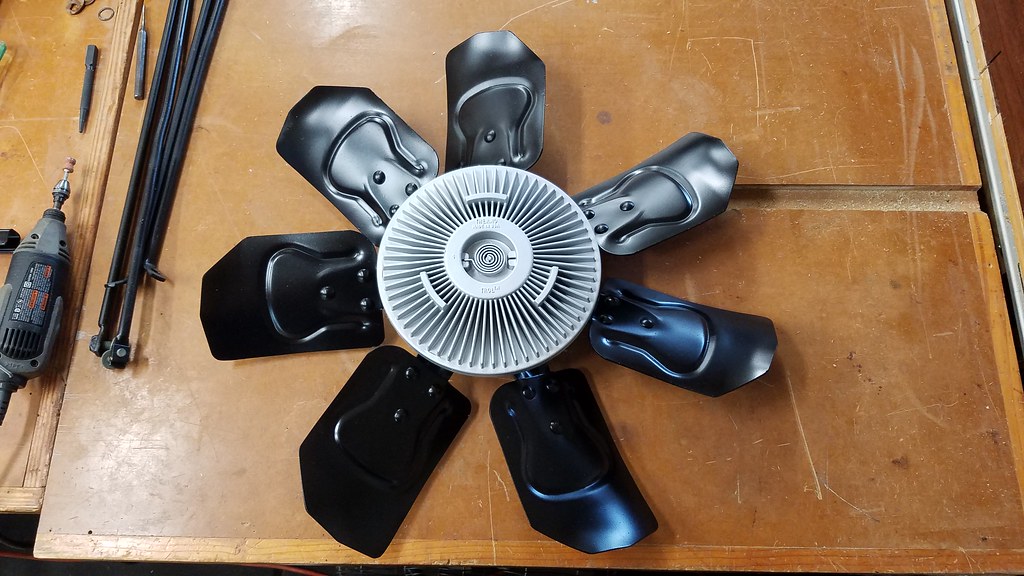 20180615_201757 by bjohnson388, on Flickr 20180615_201757 by bjohnson388, on Flickr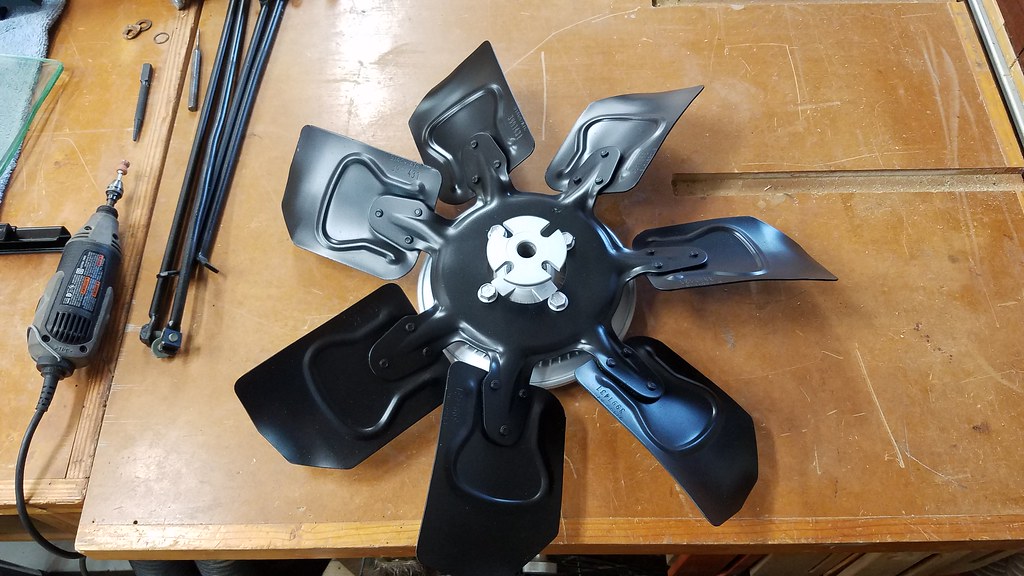 20180615_201744 by bjohnson388, on Flickr 20180615_201744 by bjohnson388, on FlickrInstalled an A/C in my shed so I can continue to do bodywork and paint this summer. 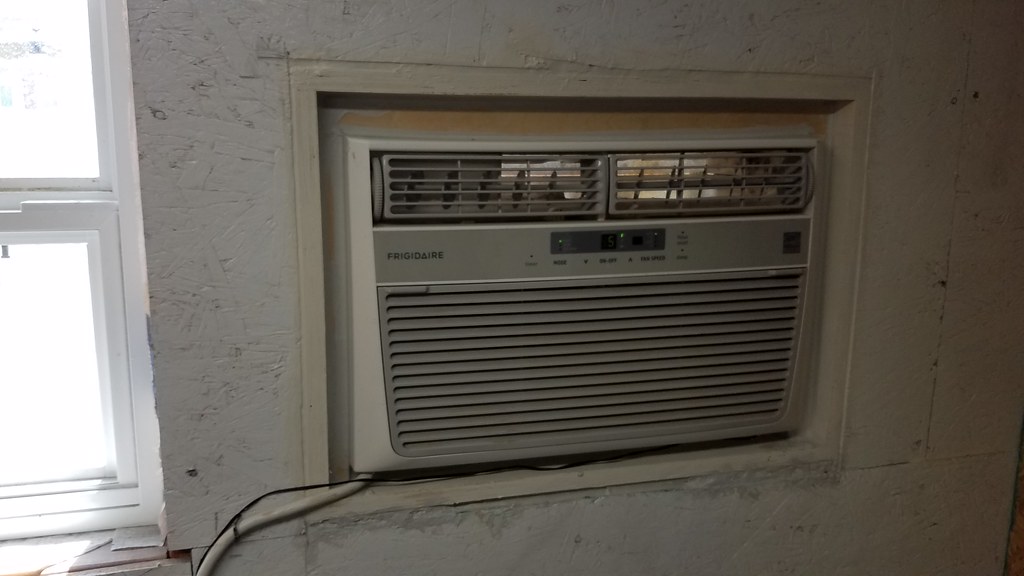 20180526_155034 by bjohnson388, on Flickr 20180526_155034 by bjohnson388, on FlickrGot a small parts order to finish the doors and bed. I went with 55-59 tailights as I think the fit my Hot Rod theme better and are way better looking than the plan 60-66 ones. 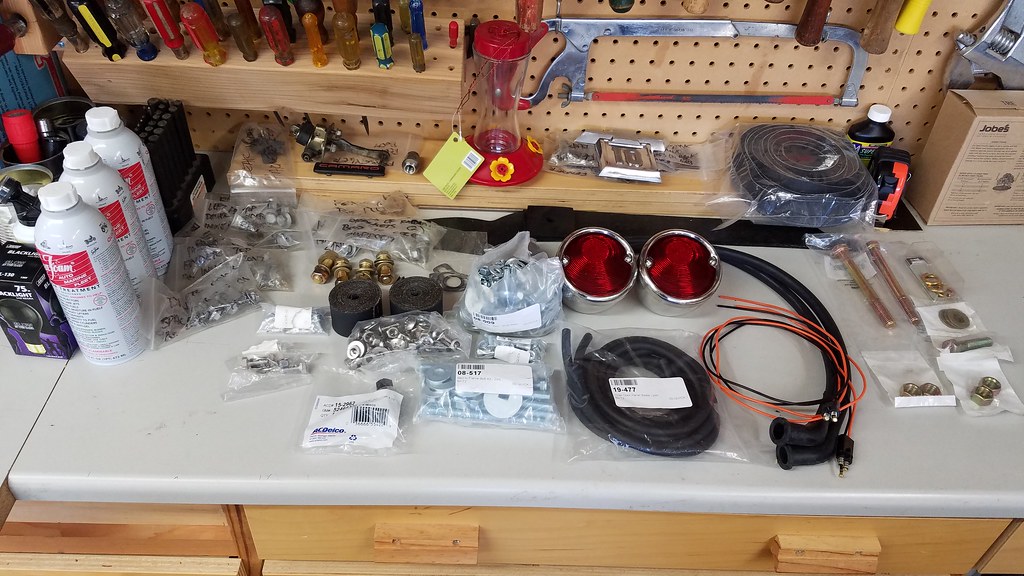 20180602_181643 by bjohnson388, on Flickr 20180602_181643 by bjohnson388, on Flickr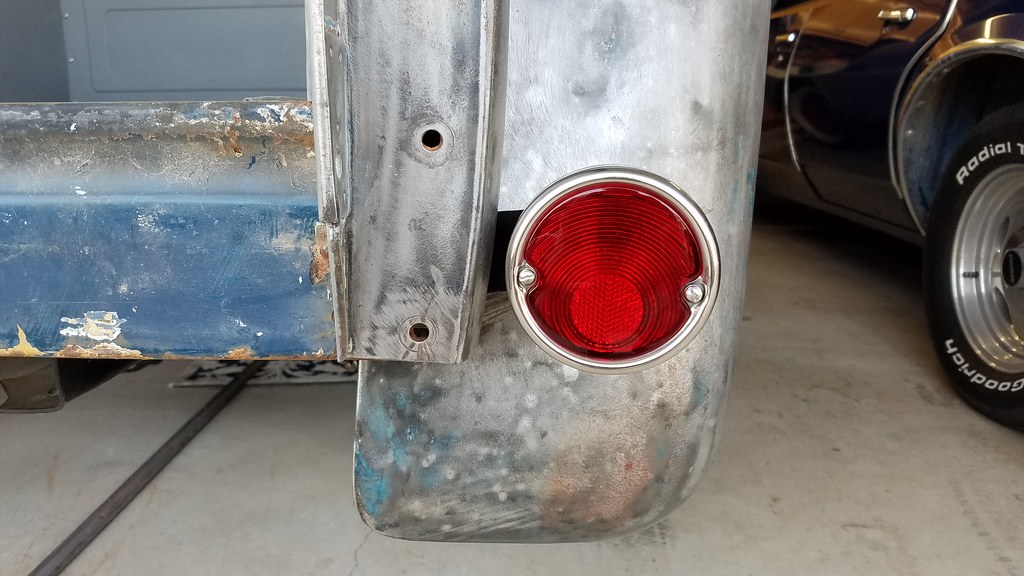 20180602_182826 by bjohnson388, on Flickr 20180602_182826 by bjohnson388, on FlickrRear fender installed and wired up tailights. 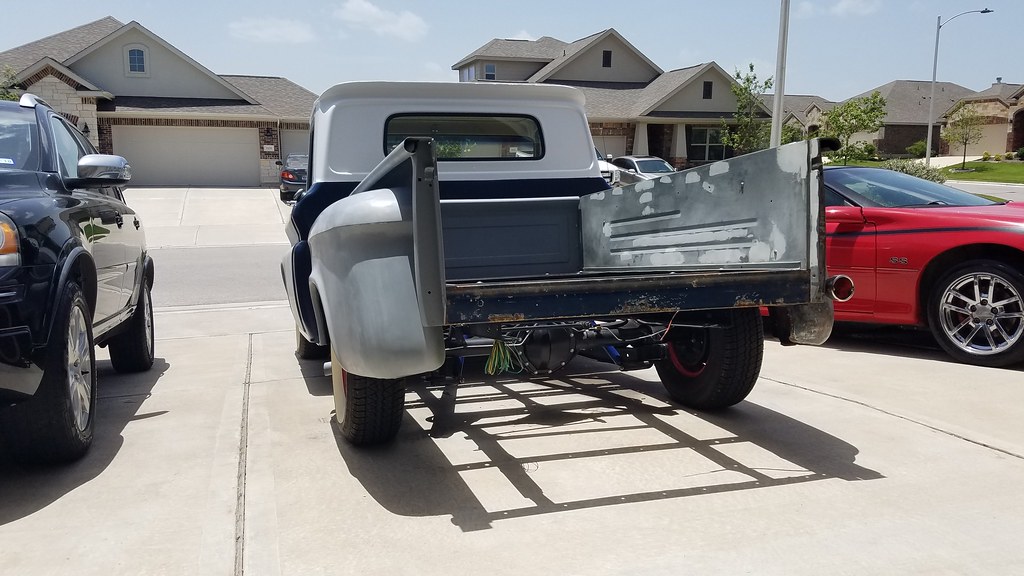 20180610_125159 by bjohnson388, on Flickr 20180610_125159 by bjohnson388, on Flickr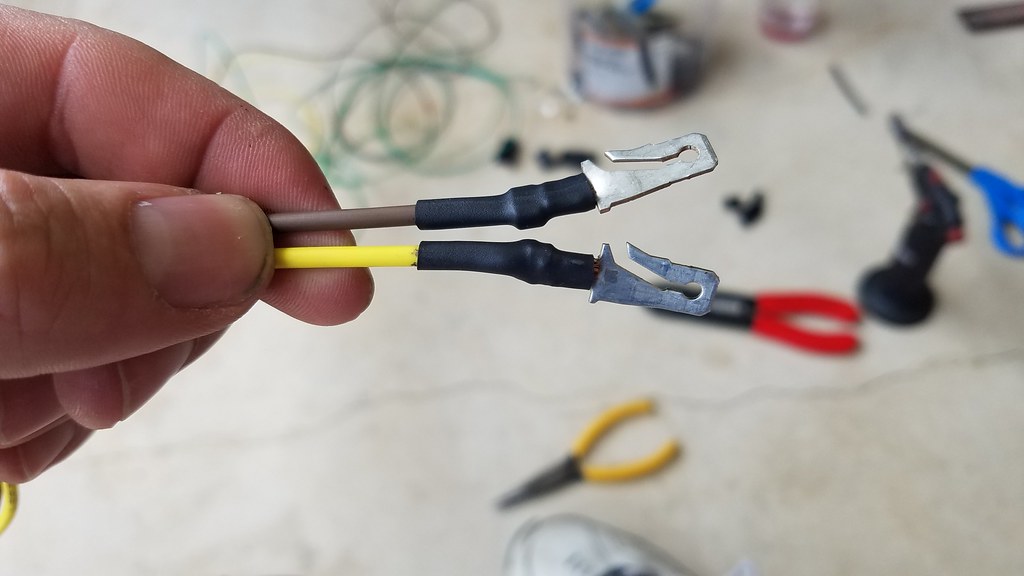 20180610_145333 by bjohnson388, on Flickr 20180610_145333 by bjohnson388, on Flickr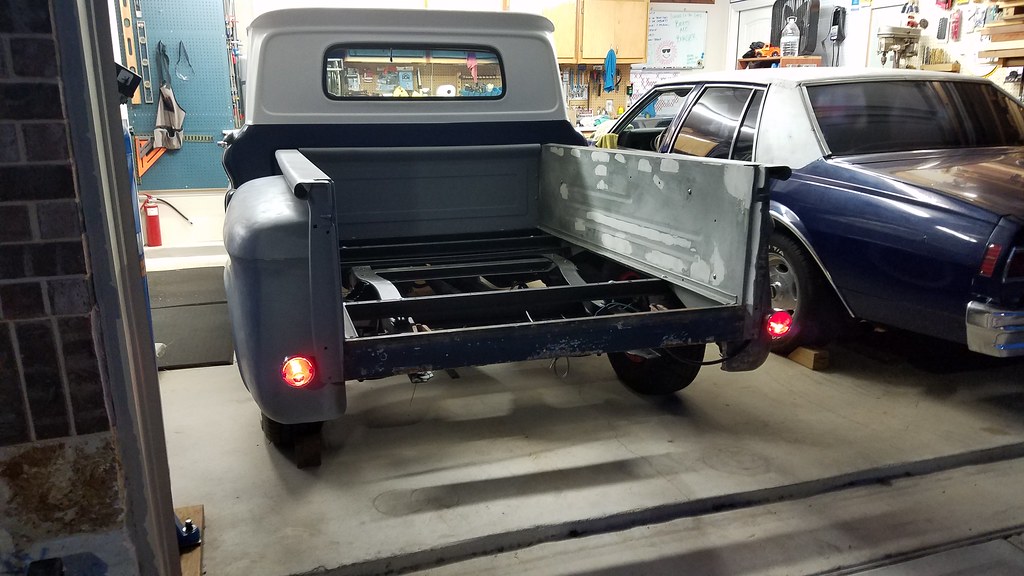 20180615_205708 by bjohnson388, on Flickr 20180615_205708 by bjohnson388, on FlickrCleaned my whitewalls for the first time since purchase in July of 13'. They were pretty yellowed even thought they have zero miles and live inside. I just used Simple Green to clean them and 303 Sealant to protect. 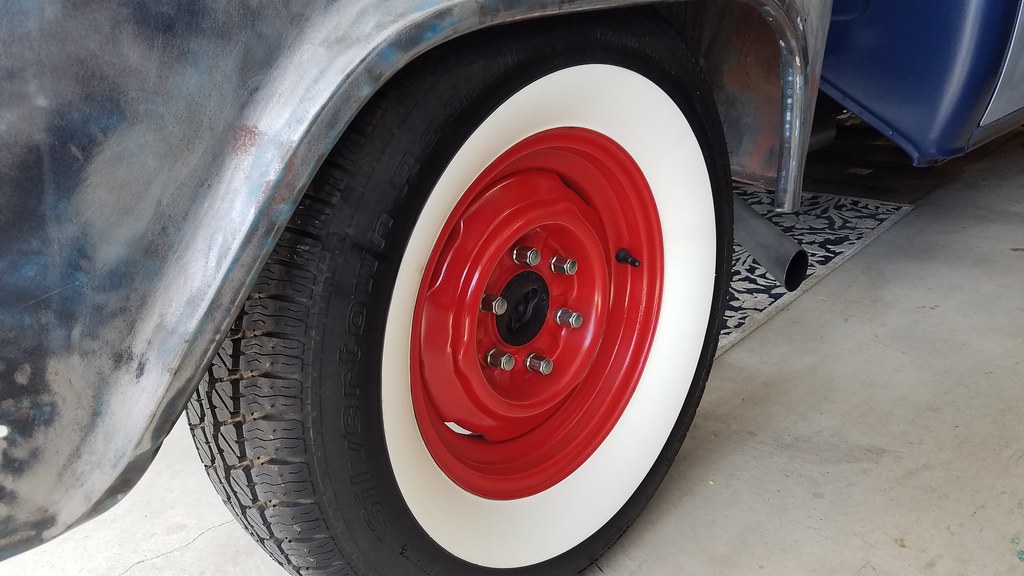 20180610_155451 by bjohnson388, on Flickr 20180610_155451 by bjohnson388, on FlickrPassenger door is ready for paint. I am actually going to start that today. 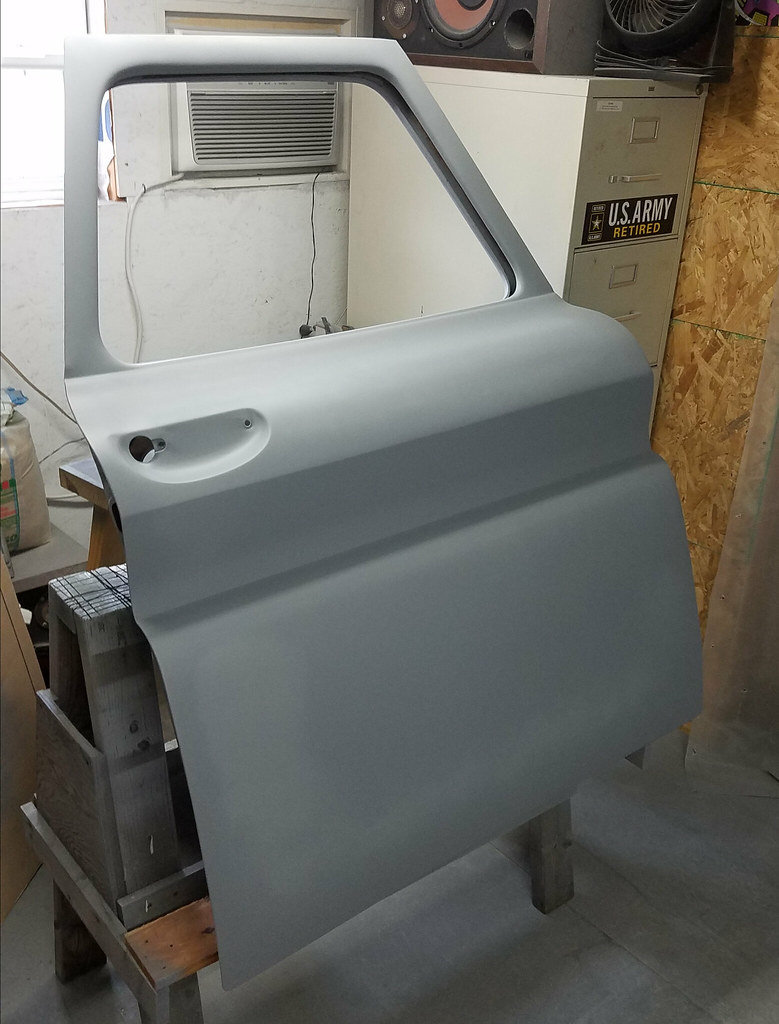 20180617_135817 by bjohnson388, on Flickr 20180617_135817 by bjohnson388, on FlickrThis past Monday my new driver door came in. This is one of the coolest things I have bought for the truck. No rust and no damage. Fits damn near perfect and shuts and opens like a dream. It will be even better when the door seals get broke in. Only thing I had to do was enlarge the holes for the door latch. I guess the replacement door latches have smaller screws. 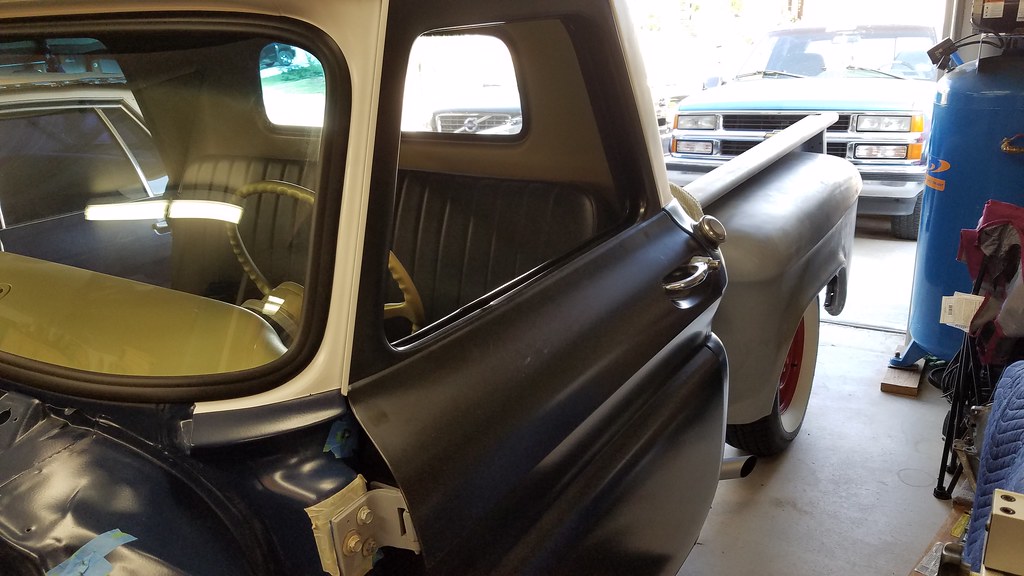 20180618_183549 by bjohnson388, on Flickr 20180618_183549 by bjohnson388, on Flickr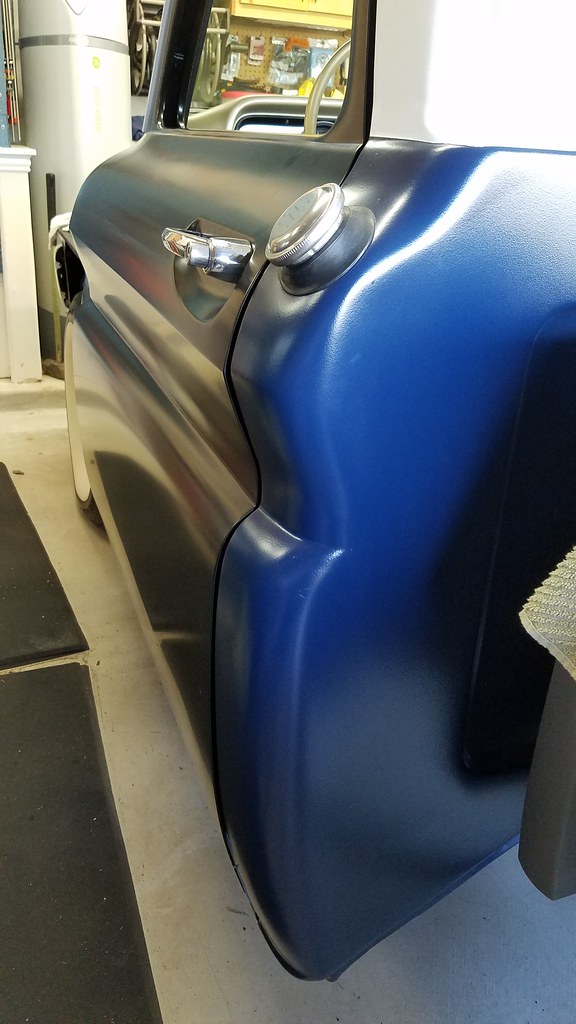 20180618_183542 by bjohnson388, on Flickr 20180618_183542 by bjohnson388, on FlickrAlso got a brand new rear bed sill. 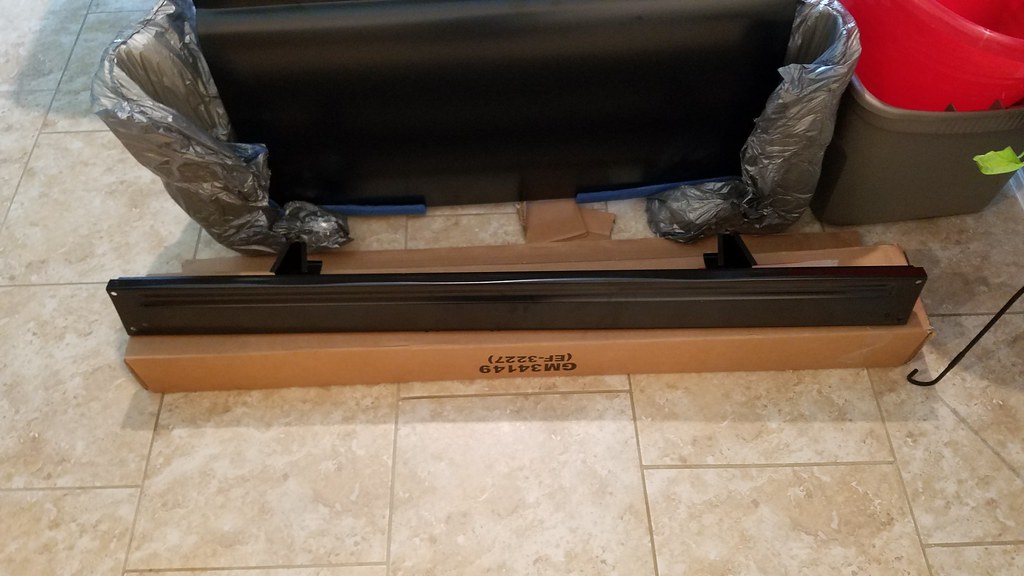 20180618_152318 by bjohnson388, on Flickr 20180618_152318 by bjohnson388, on FlickrDoor was packaged really well. Much better than the door skin I bought. 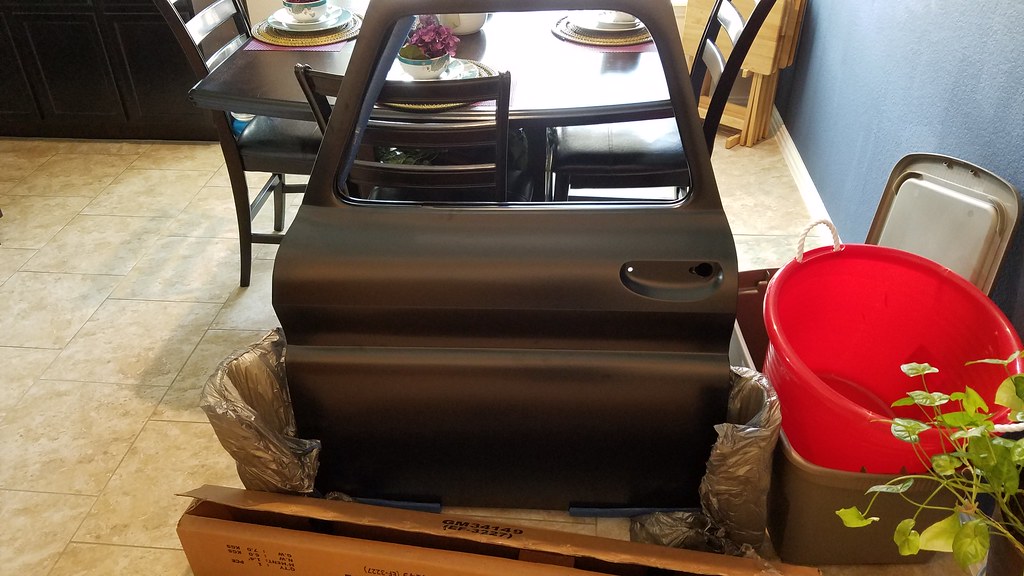 20180618_152239 by bjohnson388, on Flickr 20180618_152239 by bjohnson388, on Flickr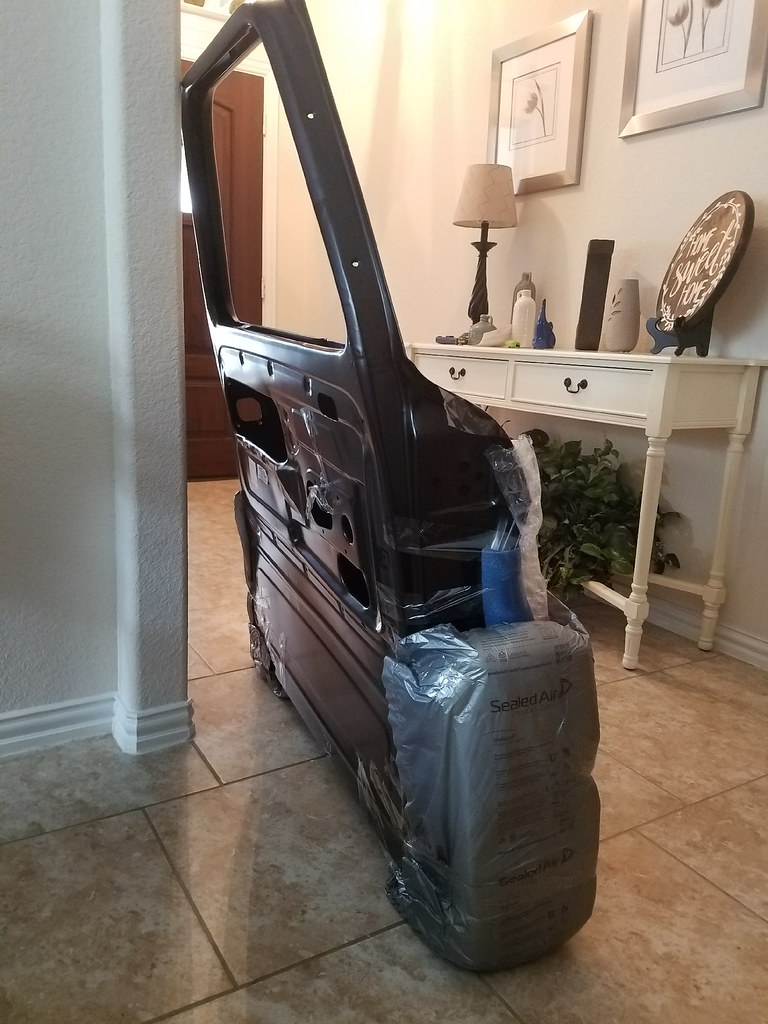 D5 by bjohnson388, on Flickr D5 by bjohnson388, on Flickr D7 by bjohnson388, on Flickr D7 by bjohnson388, on FlickrBret
__________________
64' Build Thread http://67-72chevytrucks.com/vboard/s...d.php?t=586955 |
|
|
|
|
06-23-2018, 12:18 PM
|
#675 |
|
Registered User
Join Date: Sep 2009
Location: Monroe,Iowa
Posts: 4,370
|
Re: 64 C10 Stepside "Jaybird"
That Door looks like it fits nice. Where did you buy it and do you know who made it?
|
|
|
|
 |
| Bookmarks |
|
|


 Linear Mode

