
|
 09-18-2008, 12:11 PM
|
#26 | |
|
Just here to tinker
 Join Date: Jun 2008
Location: Holland, MI
Posts: 3,672
|
Re: Kizer and his 65 here
Quote:
__________________
78 C10 SWB Diesel #1 (wrecked)http://67-72chevytrucks.com/vboard/s...1978+silverado 78 C10 SWB Diesel #2 (sold)http://67-72chevytrucks.com/vboard/s...d.php?t=650751 60 GMC Suburban (sold)http://67-72chevytrucks.com/vboard/s...d.php?t=445526 60 GMC 1000 (sold)http://67-72chevytrucks.com/vboard/s...d.php?t=298235 67 GMC 1500 (sold) http://67-72chevytrucks.com/vboard/s...d.php?t=803695 86 Suburban(summer unit) http://67-72chevytrucks.com/vboard/s...d.php?t=810697 88 Suburban 4x4(winter unit)https://67-72chevytrucks.com/vboard/...25#post8900725 |
|

|

|
|
09-18-2008, 12:13 PM
|
#27 |
|
Just here to tinker
Join Date: Jun 2008
Location: Holland, MI
Posts: 3,672
|
Re: Kizer and his 65 here
I just noticed that it looks like you have a mechanical clutch, not hydraulic. Same adjustment except there is no slave cylinder and the clutch fork is on the driver side...
__________________
78 C10 SWB Diesel #1 (wrecked)http://67-72chevytrucks.com/vboard/s...1978+silverado 78 C10 SWB Diesel #2 (sold)http://67-72chevytrucks.com/vboard/s...d.php?t=650751 60 GMC Suburban (sold)http://67-72chevytrucks.com/vboard/s...d.php?t=445526 60 GMC 1000 (sold)http://67-72chevytrucks.com/vboard/s...d.php?t=298235 67 GMC 1500 (sold) http://67-72chevytrucks.com/vboard/s...d.php?t=803695 86 Suburban(summer unit) http://67-72chevytrucks.com/vboard/s...d.php?t=810697 88 Suburban 4x4(winter unit)https://67-72chevytrucks.com/vboard/...25#post8900725 |
|
|
|
|
09-18-2008, 01:19 PM
|
#28 |
|
Its Deja Vu time again
Join Date: Aug 2008
Location: Marysville, North of Seattle WA
Posts: 815
|
Re: Kizer and his 65 here
Thanks. I did pickup a 63 manual and a 65 supplement and it talked about it, but I haven't tried it yet. I figured lets tear things apart and look for rust prevention before I experiment with things.
I never thought about if I had hydraulic or not. I guess not having a master does answer that question. hahahaha |
|
|
|
|
09-27-2008, 04:20 PM
|
#29 |
|
Its Deja Vu time again
Join Date: Aug 2008
Location: Marysville, North of Seattle WA
Posts: 815
|
Re: Kizer and his 65 here
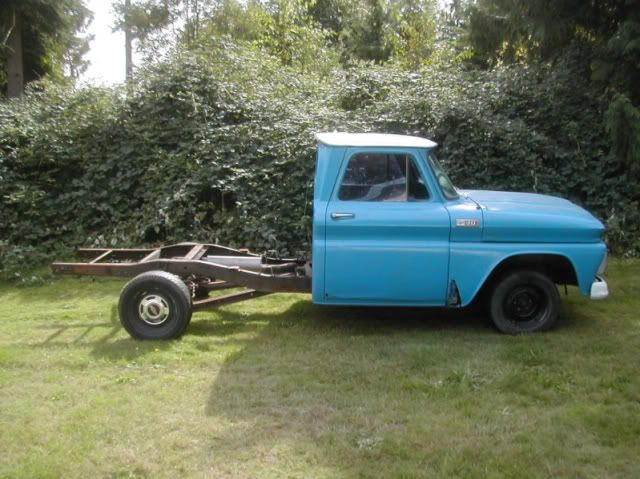
Welp today was my Birthday so my present to myself and well work was to take it off. They just happen to believe in paid Birthday leave so I took it.
I decided to take the bed off and do some cleaning on the frame since I need to because hopefully I'll be able to paint the frame under the bed next week before I man up and tackle real work. You know looking for rust and taking big body parts off. Anyways I got creative and used my engine hoist and some motor cycle straps to lift the bed off after using a cutting wheel on my 4-inch grinder to cut off the bolts holding the bed to the frame. Oh yeah the wife wasn't to impressed coming home finding me using the lawn furniture to support the bed, but hey it was my Birthday so she forgave me some.  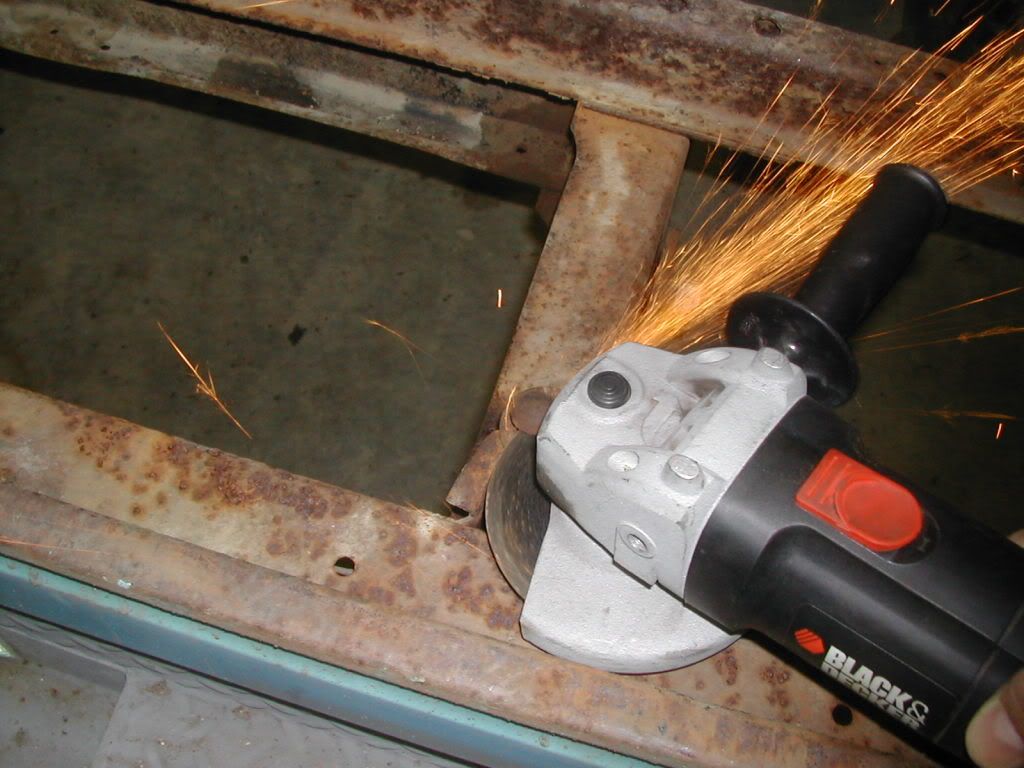 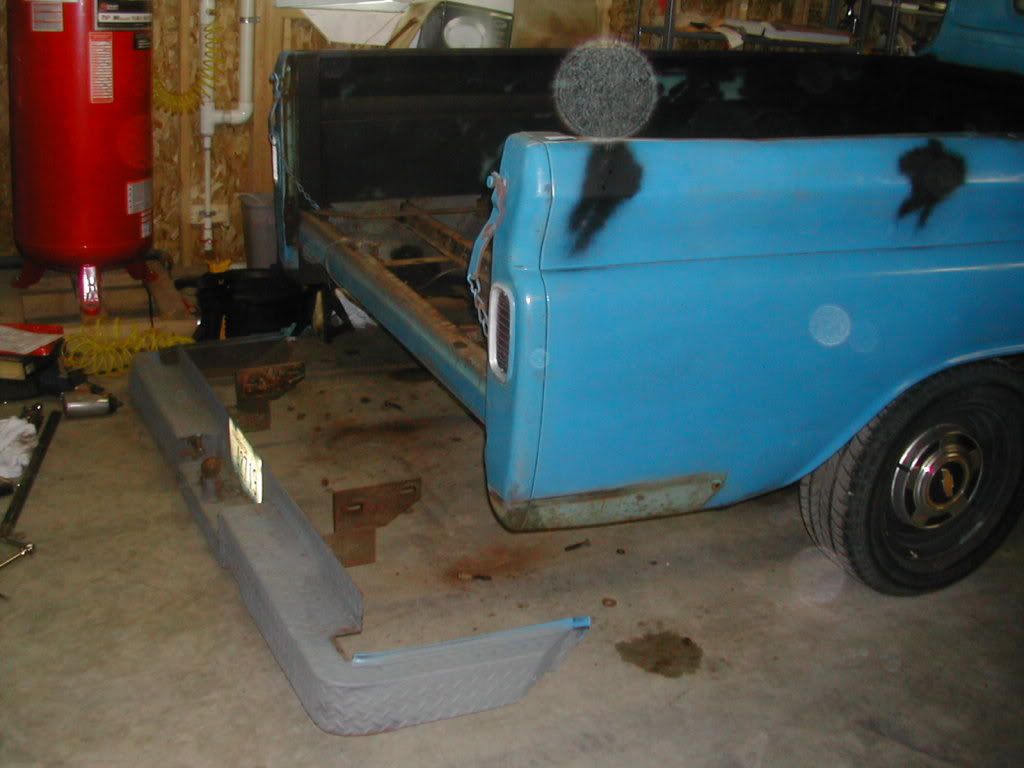 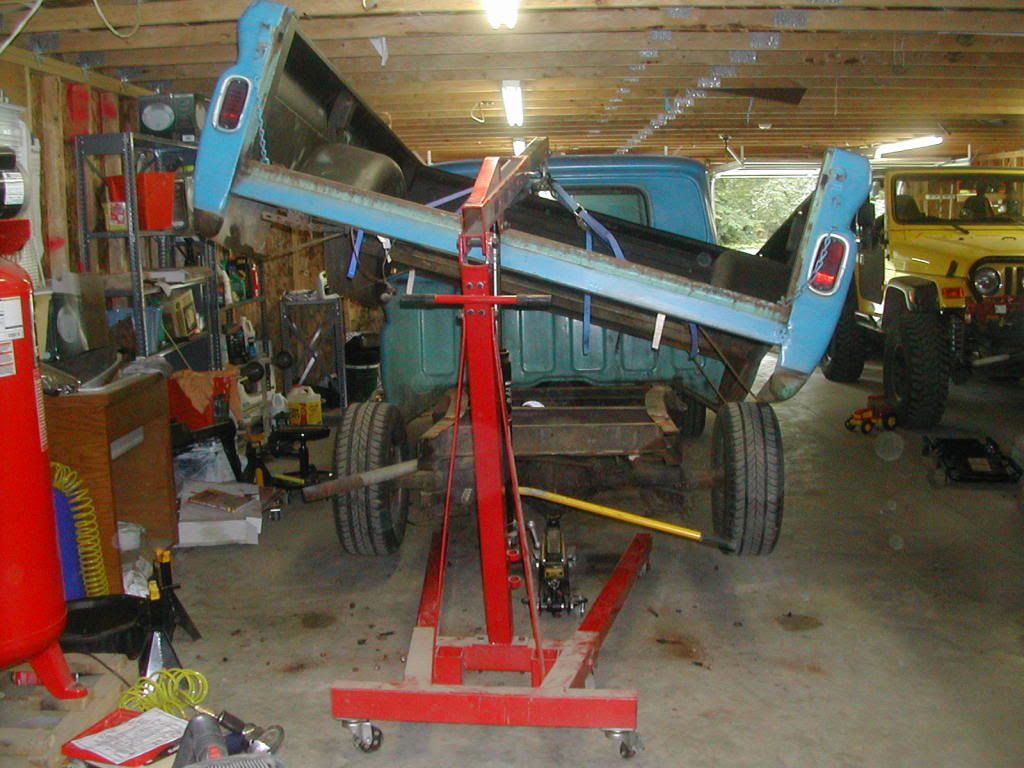  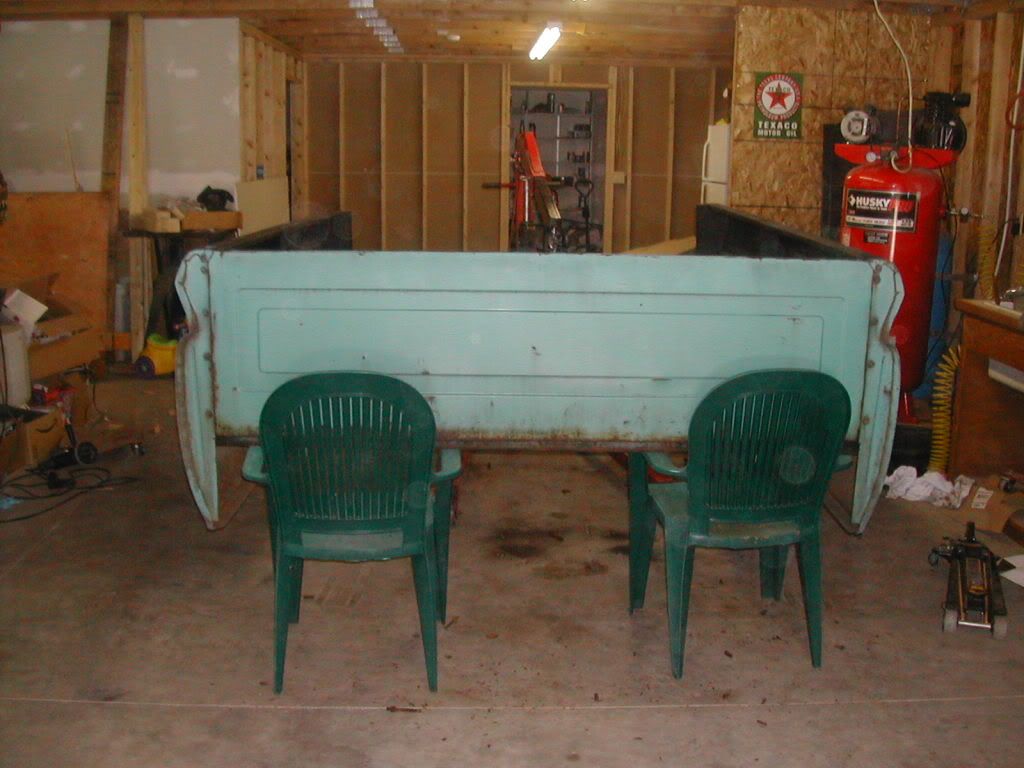
|
|
|
|
|
09-27-2008, 04:27 PM
|
#30 |
|
Its Deja Vu time again
Join Date: Aug 2008
Location: Marysville, North of Seattle WA
Posts: 815
|
Re: Kizer and his 65 here
 Wife says it looks retarded because of the big ass front end and the tiny looking rear end. I of course reassured here that its supposed to look that way because if didn't look retarded everybody would be doing it. hahahaha 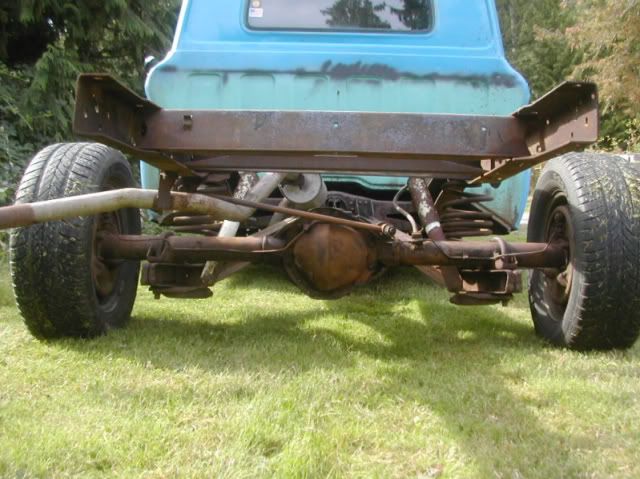 I took the power washer to it and hit every possible nook and cranny on the frame behind the cab. I wanted every loose piece to be removed so when I hit it will a stripping wheel next weekend there isn't HUGE chunks of crap everywhere. Its going to be bad enough with the flying surface rust. After power washing it I let the truck sit outside all after noon so any water would evaporate and or just drip off. 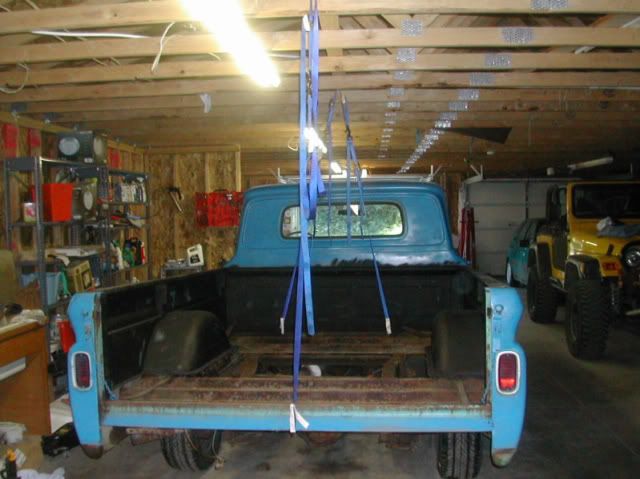 After its little visit outside I backed the truck in to the garage and used the same motor cycle straps suspended the bed from the ceiling and lowered it back on to the frame. For now its just going to sit there until I get the frame stripped and painted. As well I made sure I had a support beam running across several trusses so my roof wouldn't buckle and well hurt things. I used two straps on each connection so they would be longer. I could literally raise it up to the ceiling or lay it on the ground. I just wanted a little flexibility. Of course its just a temp hoist not intended to hold up the bed for any lengthy period. Just so I can back in or out and then use the lovely lawn furniture. I took a ton of photos of the frame just looking for problems. I know I have to replace my bushings on my trailing arms as well as the pan hard bar. Also I have to look at the shocks, springs and the U-joints. http://s398.photobucket.com/albums/p..._chevy/13_bed/ |
|
|
|
|
09-27-2008, 04:30 PM
|
#31 |
|
Its Deja Vu time again
Join Date: Aug 2008
Location: Marysville, North of Seattle WA
Posts: 815
|
Re: Kizer and his 65 here
If I post to much on little things just let me know. I just planned on taking photos along the way of everything I did just for my own sake of remembering and figured why not share. Worst case I take so many photos and not share them all and if somebody is looking for a shot of something I might have it.
|
|
|
|
|
10-06-2008, 11:35 AM
|
#32 |
|
Its Deja Vu time again
Join Date: Aug 2008
Location: Marysville, North of Seattle WA
Posts: 815
|
Re: Kizer and his 65 here - POR15 has begun
Well my POR15 arrived and between dodging the wifes Honey Do lists and my 3year old I was able to spend some time in the garage.
 As we can tell here the surface was well nasty and needed some cleaning. I took a flapper wheel and more or less pulled off all the grime and loose stuff. It it wasn't loose or flakey I just scuffed it up some to give POR15 something to stick to. I was truely surprised to see actual paint under all that crap. 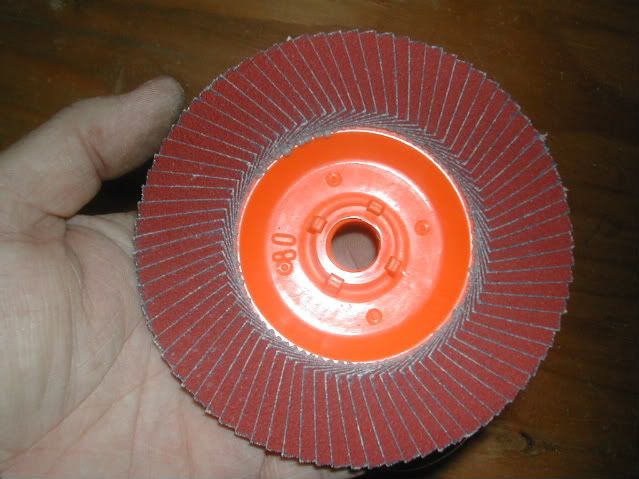 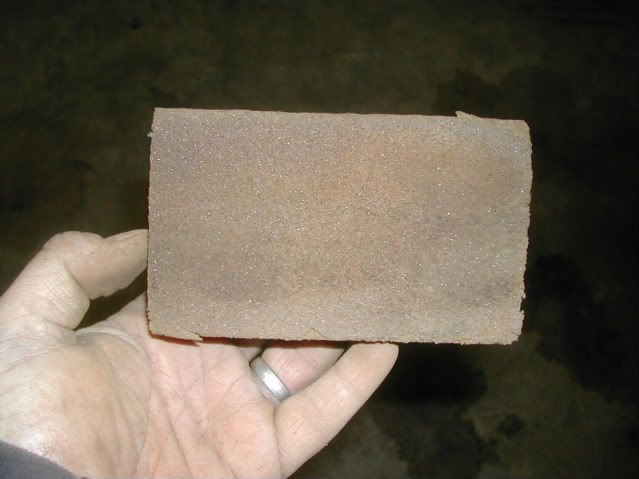 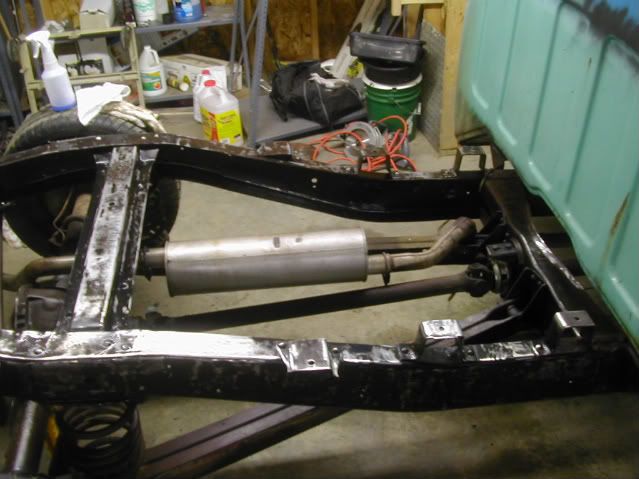 Following the instructions from POR15 they recommend using a cleaning solution which to me sorta smelt like Simple Green and floor wax stripper mixed together. After a rise and then followed by an etching solution followed by another rinse this is what the results where. I of course dried it and let it sit for a few more minutes not indicated in this photo of course.  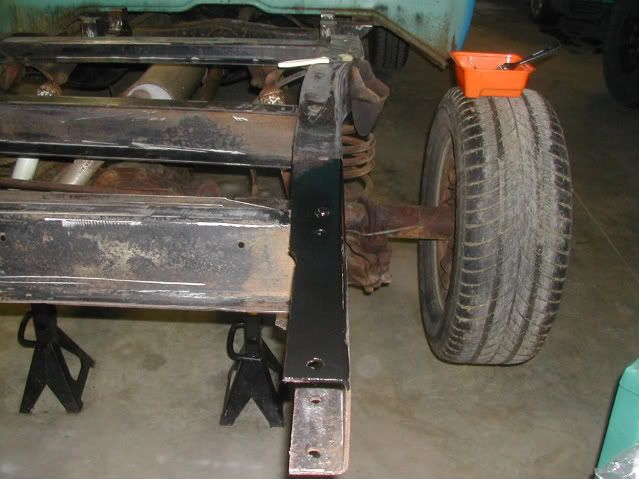 Grabbed a paint brush and gave it a few strokes. This stuff really lays on pretty easily and they say its self leveling and they are not kidding. 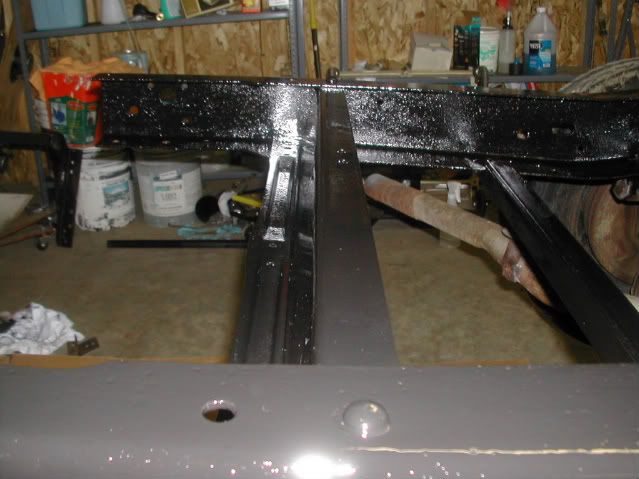 Little side shot of the surface. For some reason my flash turned the surface grey and really exagerated the roughness inside the frame on the drivers side. Another coat is needed of the base paint then I'm going to hit the frame with Chasis black, pull the coils, shocks and track bar and hit under them. Replace bushings on the control arms, trackbar and relace. I've thought about hitting the control arms front and rear along with the rear axle with a metal color that they have, but haven't decided as of yet. Either way its all getting hit with the base coat just to keep it painted and well less prone to rust. I also started locating all of the fastners to reattach the bed. I'm going to replace evertying with with Stainless Steel to make it easier to put things back together and in the future to take things apart. Also I've decided to pickup one of those Factory Assembly Manuals so I can see how things are "supposed" to go back together.
Last edited by kizer; 10-06-2008 at 12:03 PM. |
|
|
|
|
10-06-2008, 03:47 PM
|
#33 | |
|
Cantankerous Geezer
Join Date: Aug 2002
Location: Bel Aire, KS
Posts: 6,264
|
Re: Kizer and his 65 here
Quote:
 She might try to collect on your life insurance. She might try to collect on your life insurance.On the POR-15, be sure to apply 2 coats. I wear rubber gloves, my wife doesn't like black spots on my hands.  You will find that most of your mechanical parts for the engine, brakes, clutch and steering at your local auto parts.
__________________
Fred There is no such thing as too much cam...just not enough engine. 
|
|
|
|
|
|
10-06-2008, 04:49 PM
|
#34 |
|
Its Deja Vu time again
Join Date: Aug 2008
Location: Marysville, North of Seattle WA
Posts: 815
|
Re: Kizer and his 65 here
Yeah I'm actually going 2 coats of the regular stuff then I'm putting on at least 1 coat if not 2 of the Chasis black since its not "UV" friendly out of the can.
Yeah I got that stuff on my fore arm and man did it hurt rubbing off. You'd think I gave myself a rug burn for fun getting it off. Thanks for the heads up on the parts. I did the regular thing and of course got catalogs from the regular sites that sell the "hard" to find items and then I'm hitting up the chain stores for those things that should be easy to come by and need to be replaced more regulary. Don't worry I'm not going to compare the truck to the wife I don't have a death wish. Does remind me of a story once in my Jeep. Wife and her friend are in the back seat. I'm driving and my buddy is riding shotgun. We where out pavement pounding since it was sunny at the top was down and I mentioned that the gas guage said we are low. We hop out and I just put on new tires earlier in the week. 33x12.50's and my buddy said man I'm glad you stoped for gas. I'd hate to push these fatties up hill. The wives gave us the death stare like you wouldn't belive. It was funny and frightning at the same time. hahahaha |
|
|
|
|
10-13-2008, 12:34 PM
|
#35 |
|
Its Deja Vu time again
Join Date: Aug 2008
Location: Marysville, North of Seattle WA
Posts: 815
|
Re: Kizer and his 65 here
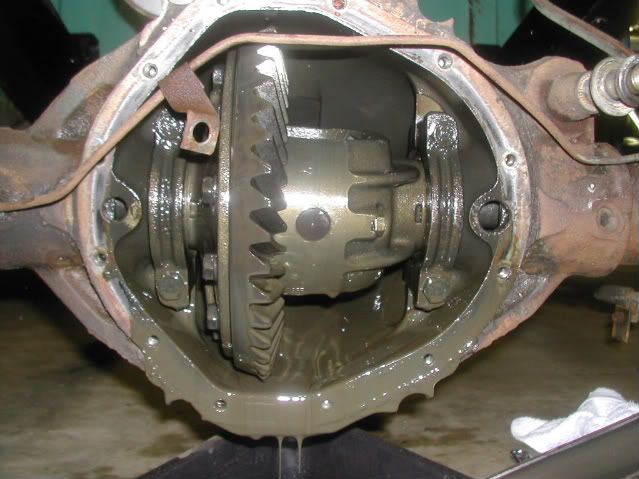 Dumped the gear old and yes its brown. Not the goldish brown that I'm used to seeing with gear oil, but like a dirty brown and didn't stink like gear oil normally does. It was really weird. I opened up a can of brake cleaner and just went a little overboard with it because I wanted to make sure whatever was in the diff came out. 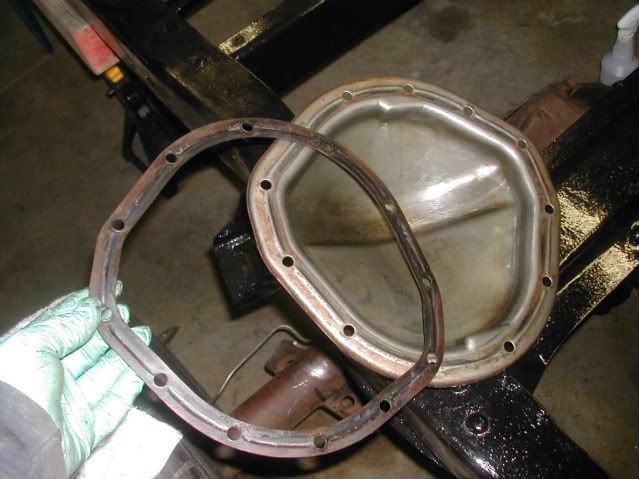 I also noticed there was no RTV, but found what looks like a gasket of some sort. It had the same indention on the backside like it was meant for the cover. Man it was really nice not having to scrape any RTV off. I just took a wire brush to the surface of the cover and the housing and made sure the gasket was clean of any debris. Did they come with rubber gaskets from the factory? My Jeep didn't so I use RTV, but I know they make rubber gaskets. I'm just trying to guage the last time the rear was serviced. 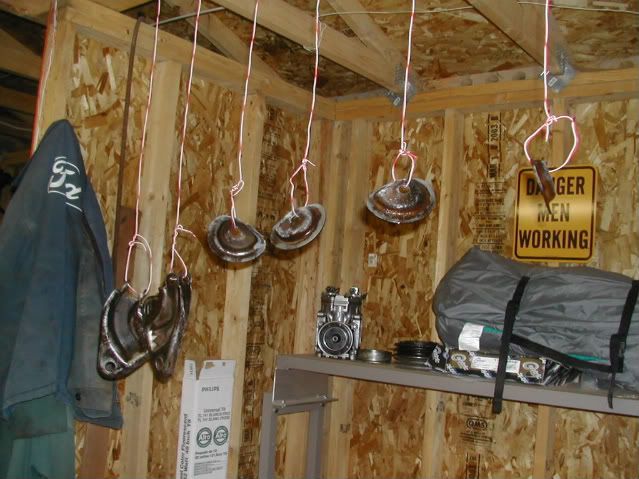 Made a little painting station since it was all paint brush on I just used some wire to hang from a piece of PVC piping and went to town. 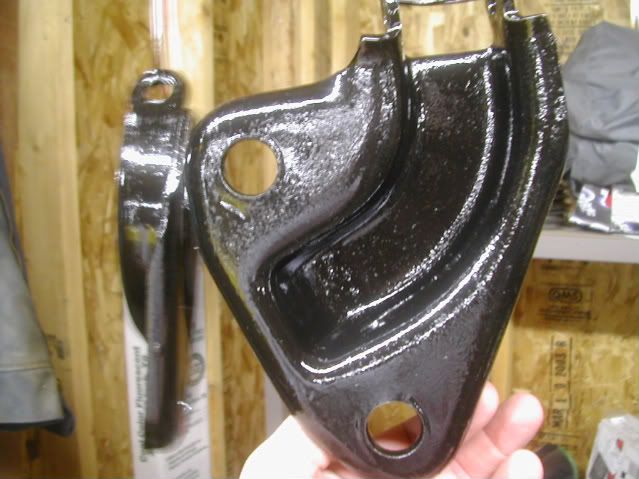 I think the first coat turned out pretty good. It could of been a little better, but I started to loose my patience using the steel brush. 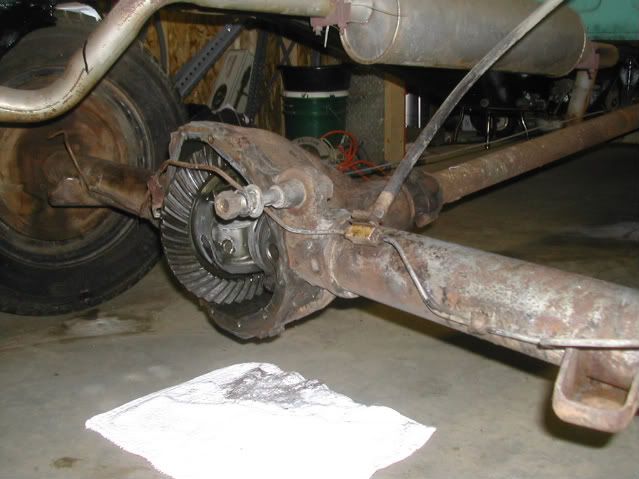 Hit the axle with some degreaser, rinsed it off and used the etching solution that POR15 recommends. I plan on painting it this evening so I don't have to hit it again with the wire wheel. Man there are way to many little hiding spots for grease and 40year old clumps of debris to live in. I pulled the fill plug and the rear cover so I can make sure I don't POR15 them on since it would be a little bit of a pain in the butt to get them off once they are painted on. Control arms are painted as well as the rear track bar with new bushings. I just have to hit the diff and the suspension parts one more time with a second coat and then hit everything with the top coat of chasis black because the bottom coat doesn't like the UV rays. Last edited by kizer; 10-13-2008 at 12:36 PM. |
|
|
|
|
10-14-2008, 10:03 AM
|
#36 |
|
Registered User
Join Date: Sep 2008
Location: southdakota
Posts: 179
|
Re: Kizer and his 65 here
400 bucks sweet !!! drive it like you stole it cuz u did!!!!!!
|
|
|
|
|
10-14-2008, 11:05 AM
|
#37 |
|
Its Deja Vu time again
Join Date: Aug 2008
Location: Marysville, North of Seattle WA
Posts: 815
|
Re: Kizer and his 65 here
Yeah I thought I got it for a pretty good deal. It needs some work, but hey its a project truck and not my daily driver so I'm learning things and well cutting fingers and getting dirt everywhere.
Did do a little more last night. Got the majority of the axle painted up. I haven't done the ends as of yet. I wasn't in the mood to pull the tires off and pull the axles or brake cylinders. As well I didn't want to paint them on so I could never remove them either. I do plan on addressing the rear brakes soon so I'll tackle that when I get close.Man those brake lines look really nasty. I guess I should address those as well when I address the rear brakes. 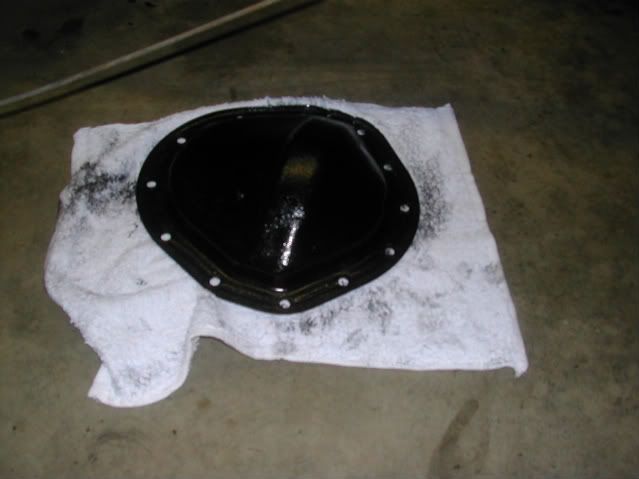  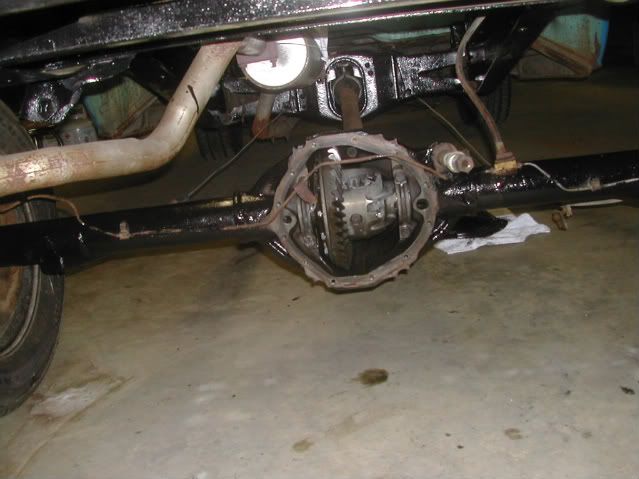
Last edited by kizer; 10-14-2008 at 11:09 AM. |
|
|
|
|
10-14-2008, 11:08 AM
|
#38 |
|
Its Deja Vu time again
Join Date: Aug 2008
Location: Marysville, North of Seattle WA
Posts: 815
|
Re: Kizer and his 65 here
What does everybody normally do with their Driveshafts? Scuff on them and paint them?
I thought about trying to remove the rust and maybe hit it with a coat of something silver so it kept that metallic metal looking color, but haven't decided or really put a lot of thought into it. |
|
|
|
|
10-21-2008, 12:57 PM
|
#39 |
|
Its Deja Vu time again
Join Date: Aug 2008
Location: Marysville, North of Seattle WA
Posts: 815
|
Re: Kizer and his 65 here
Welp I decided to say screw it and hit the shaft with a wide piece of what appears to be thin sand paper rolled around the shaft. The surface rust was well very easy to remove and it came off pretty clean. I hit it a few times and used some degreaser in between each scrub just to make sure it was coming out clean. Then I used some acid etch and painted it. As well I top coated the entire frame with the UV protectant for POR15. Let it sit for a few days and started putting things together.
I got wild and painted the coils and shocks with some silver Hammerite paint. They are to be replaced with Bags and new shocks anyways, but thought it would be fun to see some color back there.  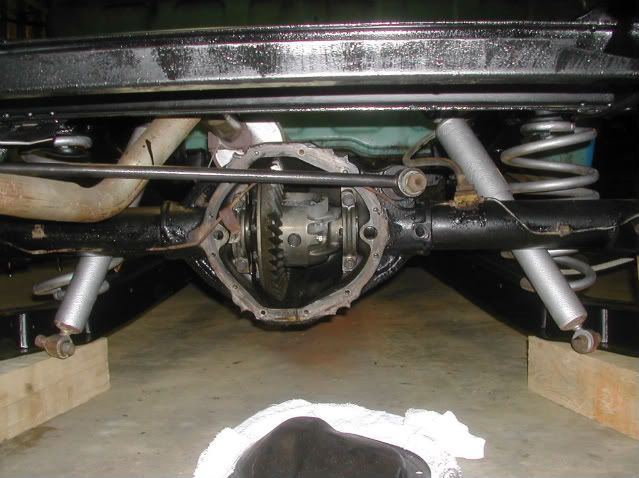 There are some shinny spots that I need to touch up which is the base coat of the POR15 showing through. The top coat is a real flat looking paint that I really like. It almost reminds me of flat black Rustoleum which I've always liked. Of course I have to pick up some Ubolts to mount the lower shock mounts. Im going to write off the rear for now and address the following when I can because the garage is getting cold and I don't have heat to paint: Rear brake lines and hoses Fill the rear end Rear brakes Axle ends which unless Im wrong is also the backing plate for the brakes Repair/replace the bed wiring Replace Ujoints and paint touch up shaft and rear end |
|
|
|
|
10-21-2008, 03:55 PM
|
#40 |
|
Registered User
Join Date: Sep 2008
Location: southdakota
Posts: 179
|
Re: Kizer and his 65 here
dang!! lookin good !!!!!! i see you are motivated thanks for the update keep up the good work
wowwowowowowwowowoww |
|
|
|
|
10-21-2008, 04:30 PM
|
#41 | |
|
Its Deja Vu time again
Join Date: Aug 2008
Location: Marysville, North of Seattle WA
Posts: 815
|
Re: Kizer and his 65 here
Quote:
I would of loved to take it completely apart, but my luck I would forget how things go back together. With the rear sorta done I can either start in the bed or move all the stuff off the front into the bed and come back to the bed. The front is going to be discusting. I saw the build up on the frame and control arms. Man that junk has to be at least an inch thick. I'm not sure what I'm going to do to the motor, which is a 250. I need to pull the plugs and give it a compression test first I suppose. Either way all the gaskets need to be replaced along with the carb. I'd really like to go with a split exhaust manifold and go with a few carbs and keep it old school hot rod looking. |
|
|
|
|
|
10-22-2008, 07:11 AM
|
#42 | |
|
Shloooooong bed member #2
Join Date: Aug 2008
Location: Millington Tn.
Posts: 1,864
|
Re: Kizer and his 65 here
Quote:
I understand completely, I am just putting along myself. But don't it fill good when you finish something? could be as little as changing the dang spark plugs, but you did it and saved some cheese too.... 
__________________
David, Daughters 66 truck: http://67-72chevytrucks.com/vboard/s...d.php?t=484601 Learning to drive a 3 on the tree: http://www.youtube.com/watch?v=CcCMvRgBo1Q |
|
|
|
|
|
10-28-2008, 10:16 AM
|
#43 |
|
Its Deja Vu time again
Join Date: Aug 2008
Location: Marysville, North of Seattle WA
Posts: 815
|
Re: Kizer and his 65 here
I call this the off the boards back on all 4's post.
UPS last told me that my U-bolts would be here tomorrow, but since they arrived I just had to install them so I could push the truck back since its hogging part of my wife's parking spot in the garage. 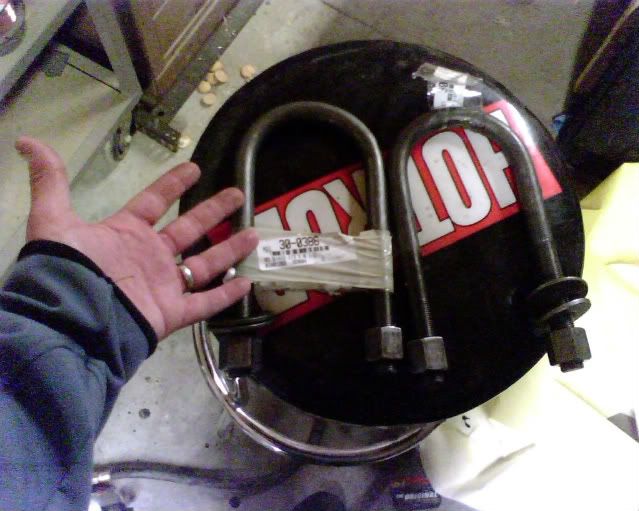 Is it just me or do they appear to be freaking HUGE? I couldn't believe how big they where when I took them out of the box. I thought damn where they really this big when I cut the last ones off? Yep it appears so. As well I figured I might as well get the rear cover back on since I need to fill it up full of lube soon and my excuse earlier was that the pinion angle is way off since there is nothing to set the pinion. I went a little clean happy and well hit all of the cover bolts with a wire wheel mounted on my grinder.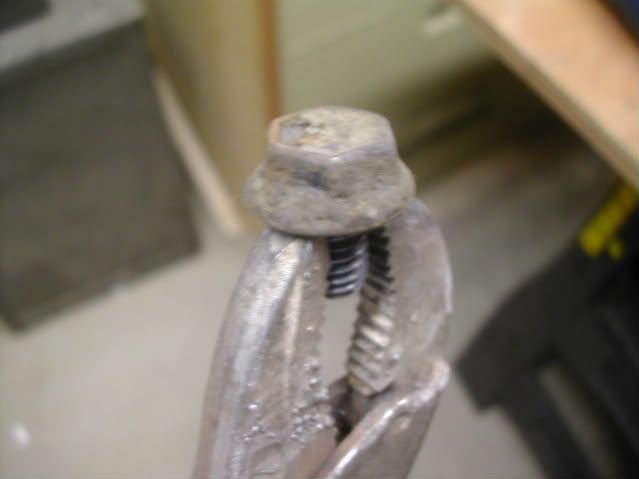 Before 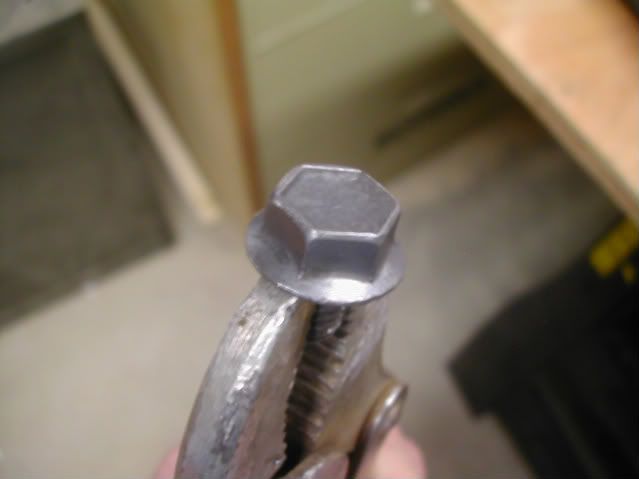 After I did notice something that I thought was a bit odd. When you use the U-bolts they run over the axle, through the control arm and connect to the lower shock mount like shown in the below picture. 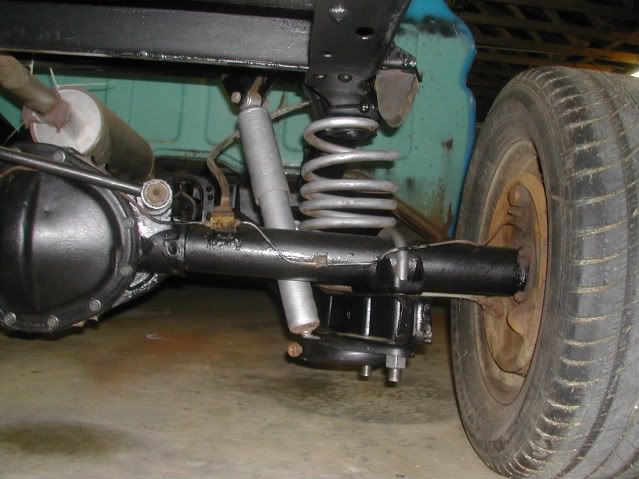 However the U-bolts came with some rather thick fender type washers that are used on the bottom of the lower shock mount. They simply do not fit so I had to clearance them a little bit with the grinder. I just took off some of the material on one side so it would fit inside the lower shock mount. 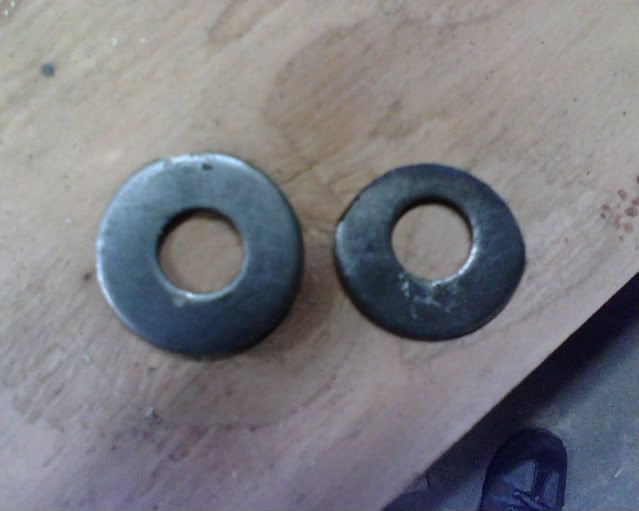 While I was at it I installed a new vent for the axle. The old one was covered with a lot of dried up grease or at least I think it was. 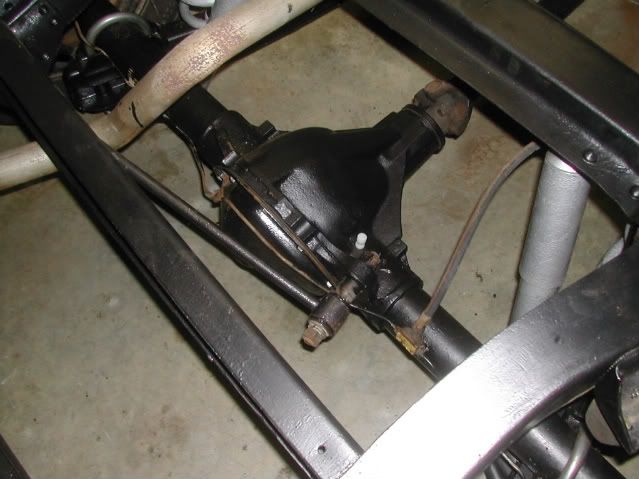 The pictures/flash really point out things I seem to need to address in the future. You know the red/rust color things that aren't black. Some day I sware. hahahaha Next I just need to tighten everything down and fill up the rear with some gear lube. What happens after that I'm not really sure. I know I need to push the frame back under the bed so the wife can have back some of her parking area since she nearly hits the truck every time she pulls in. I guess I'll throw on some more bolts on the bed while I look for more things to replace. The budget is getting really slim and I might have to just do little things that do not require funds for a while. Now that I look at the photos I should pull off the other bolts and give them the wire brush treatment. Just have to see what I can steel brush and what I can't so they don't rust.
|
|
|
|
|
10-28-2008, 10:19 AM
|
#44 | |
|
Its Deja Vu time again
Join Date: Aug 2008
Location: Marysville, North of Seattle WA
Posts: 815
|
Re: Kizer and his 65 here
Quote:

|
|
|
|
|
|
10-28-2008, 10:52 AM
|
#45 |
|
Shloooooong bed member #2
Join Date: Aug 2008
Location: Millington Tn.
Posts: 1,864
|
Re: Kizer and his 65 here
Kizer,
You are moving on now. And everything looks clean and neat, great job.
__________________
David, Daughters 66 truck: http://67-72chevytrucks.com/vboard/s...d.php?t=484601 Learning to drive a 3 on the tree: http://www.youtube.com/watch?v=CcCMvRgBo1Q |
|
|
|
|
10-28-2008, 12:18 PM
|
#46 |
|
Its Deja Vu time again
Join Date: Aug 2008
Location: Marysville, North of Seattle WA
Posts: 815
|
Re: Kizer and his 65 here
Only 2/3 more to go. hahaha
I plan on tinkering with the bed some meaning throwing down some plywood then I'm going to throw all of the front in the bed and pull the cab off. After the frame is done toy around with the cab replacing what needs to be replaced in the floor and then work forward. More than likely since the motor doesn't require warmth since its going to be cold in the garage with no heat I'll tear into the engine replacing things. Gaskets and other pieces and parts hopefully I wont have to do a ring Job, but I guess time will tell and I've never done one before hahahaha Maybe next spring I'll be able to hit the frame with a grinder and finish off with POR15 and then tackle sheet metal unless I can cut some this winter and prime, but from what I understand everything is pretty much tempreture sensitive. I suppose I could just rattle can rusty looking areas to try and prevent the spreading and then remove and patch. Working Full Time, School in the evenings, a 3year old boy and a wife are putting a dampering on my new money pit.
Last edited by kizer; 10-28-2008 at 12:20 PM. |
|
|
|
|
10-29-2008, 07:50 AM
|
#47 |
|
Shloooooong bed member #2
Join Date: Aug 2008
Location: Millington Tn.
Posts: 1,864
|
Re: Kizer and his 65 here
Been there done that, And trust me I wouldn't trade it for anything. The truck will always be there, so slow down and enjoy the other things you mentioned. Mine are 16 and 11 and boy does time with them fly.
__________________
David, Daughters 66 truck: http://67-72chevytrucks.com/vboard/s...d.php?t=484601 Learning to drive a 3 on the tree: http://www.youtube.com/watch?v=CcCMvRgBo1Q |
|
|
|
|
10-29-2008, 08:58 AM
|
#48 |
|
Registered User
Join Date: Apr 2007
Location: Jane,Missouri
Posts: 844
|
great job Kizer looks great!!!!

Last edited by 283 Man; 10-29-2008 at 08:59 AM. |
|
|
|
|
11-17-2008, 04:07 AM
|
#49 |
|
Its Deja Vu time again
Join Date: Aug 2008
Location: Marysville, North of Seattle WA
Posts: 815
|
Re: Kizer and his 65 here
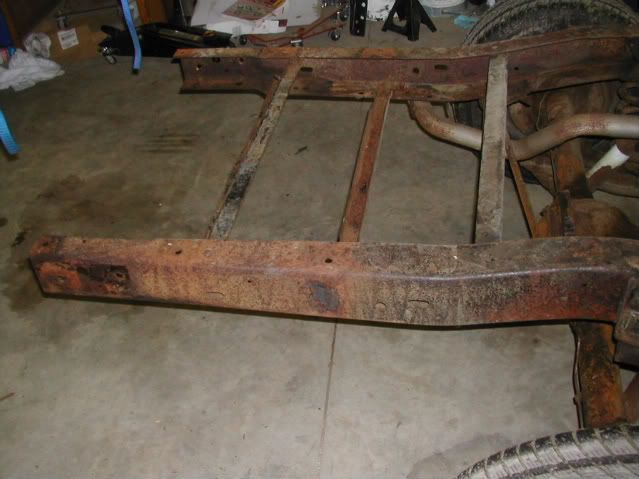
Just a little update. I've been tinkering out in the garage. The rear frame is completely done and I just need to set the bed back on it. The wife said why don't you do the cross supports before you put the bed on so its done and all you have to do is tackle the bed when you have time. Well being that shes a smart wife I decided to do that.
Of course there was some grinding and striping, but I figured those are kinda boring to look at so I didn't bother posting them.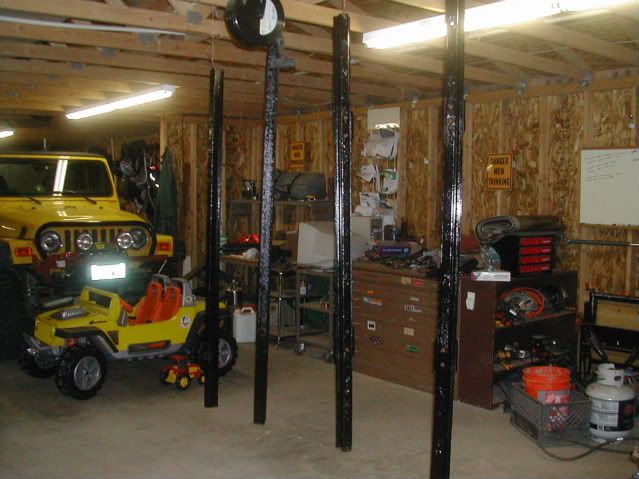 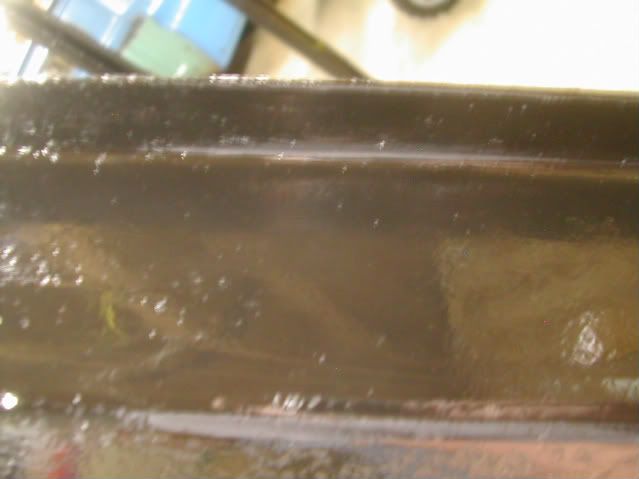 Interesting enough I get a call from a buddy who knows I'm working on this project. He asked what engine I had and I told him I had a 66 Chevelle 250 in it. He asked me if I had a Engine hoist and a Engine Stand. I told him I didn't have an Engine stand, but I wanted one. He asked if I could bring my Engine hoist over because he had an Engine on his stand and wanted me to take the stand home. Well I get there and I pull the engine off his stand and then he says where do I want the motor. "I thought what the heck are you talking about" Needless to say we through a tire in the back of a trailer and brought home a Rebuilt 1980-1985 Chevy 350. 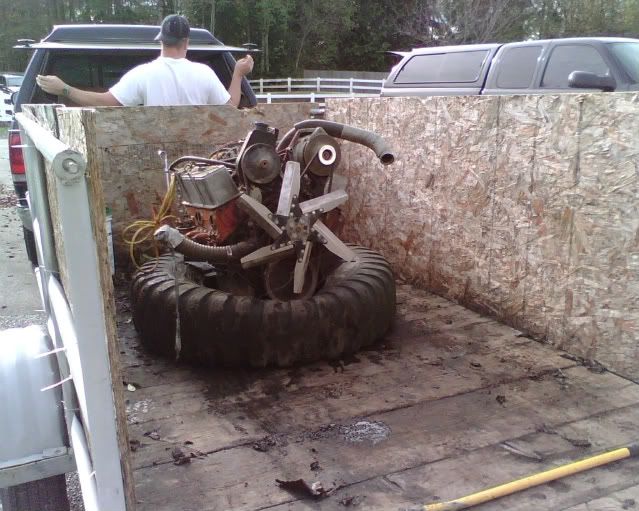 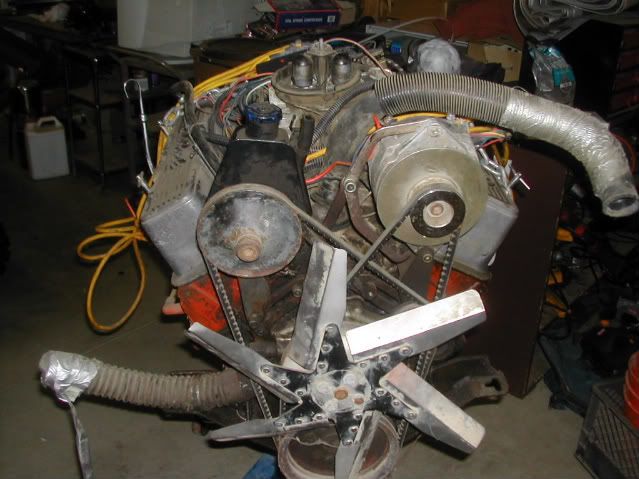 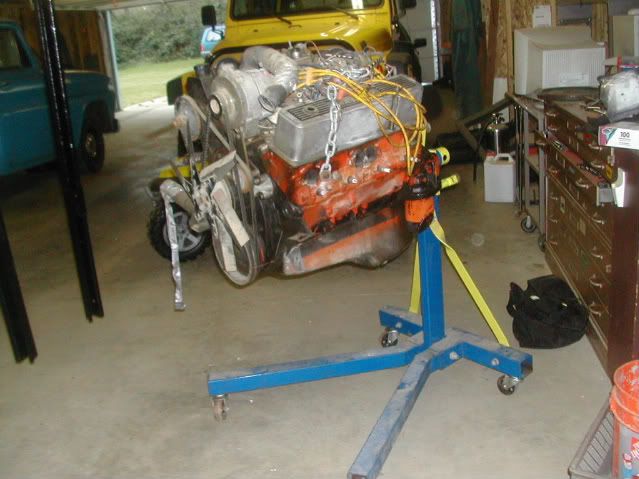 What to use, what to use. 250 is installed an runs. Smokes a little at start up, but runs. I suppose I could build up the 350 slap in an auto and step on the single pedal.Its got wires all over it from a booty fab Electronic Fuel Injection system http://s398.photobucket.com/albums/p.../28_motor_350/ This is what I was told from a buddy seeing those photos Cylinder heads.....3998991 307, 350, 75cc, 72-73, 73 had hard seats The intake is an Edlebrock Performer RPM The fuel injection is an aftermarket Holly Mallory electronic ignition and a collection of other stuff...... Last edited by kizer; 11-17-2008 at 04:16 AM. |
|
|
|
|
11-17-2008, 09:37 AM
|
#50 |
|
Ol' Blue Viking
Join Date: Nov 2006
Location: north of Baton Rouge
Posts: 172
|
Re: Kizer and his 65 here
I'd say go with the V8 if it has good compression.
Sell the fuelie and keep your fun pedal.
__________________
Driving Paw-paws truck into the Sunset! |
|
|
|
 |
| Bookmarks |
|
|


 Linear Mode

