
|
Register or Log In To remove these advertisements. |
|
|
|
|||||||
 |
|
|
Thread Tools | Display Modes |
 03-12-2017, 02:43 PM
|
#76 |
|
Registered User
Join Date: May 2016
Location: richmond va
Posts: 265
|
Re: My LQ4/T56 build thread
Wow that's cool. Good idea there. Have a part number for the pump and the timer module to share?
__________________
LS Swap build thread http://67-72chevytrucks.com/vboard/s...d.php?t=722579 |

|

|
|
03-12-2017, 10:06 PM
|
#77 |
|
Registered User
Join Date: Mar 2009
Location: WARRENSBURG,MISSOURI,64093
Posts: 1,518
|
Well, I don't have a part number on mine, but here is a
similar model : 2001-2005 Volkswagen Passat Vacuum Pump - Genuine W0133-1958732 The retail price for one of these pumps brand new is pretty huge, About $250.00 that's why I got mine at pick n pull. The timer module was only $15.00-$20.00 on eBay http://www.ebay.com/itm/USA-1-PC-12-...MAAOSw7NNT8Axt The instructions are included, but I followed the examples given on the eBay page and it worked just fine. Hope this helps! Ben 
__________________
"Persistence is the twin sister of Excellence.one is a matter of quality,the other, a matter of time" Serious Black my 1971 Short Bed Fleetside Sold to an outstanding man in Lees Summit,Mo. Gone, but by no means,Forgotten |
|
|
|
|
03-20-2017, 08:51 PM
|
#78 |
|
Registered User
Join Date: Jul 2013
Location: Rockwell, NC
Posts: 1,639
|
Re: My LQ4/T56 build thread
Hey Chuck...l lost track of your build when they moved your thread. (Other than the tree hug marks) What's the latest?
__________________
1970 C-10 LWB "Blu" Instagram (current build pictures) 70_nc_c10 |
|
|
|
|
03-24-2017, 09:01 PM
|
#79 | |
|
Registered User
Join Date: May 2016
Location: richmond va
Posts: 265
|
Re: My LQ4/T56 build thread
Quote:
__________________
LS Swap build thread http://67-72chevytrucks.com/vboard/s...d.php?t=722579 |
|
|
|
|
|
03-25-2017, 07:36 AM
|
#80 | |
|
Registered User
Join Date: Jul 2013
Location: Rockwell, NC
Posts: 1,639
|
Re: My LQ4/T56 build thread
Quote:
The delays waiting for parts are what are costing me money- the longer it takes to get the engine back, the more time I have to think of stuff I decide I need to add. I decided to ditch the GM crank pulley and get an ATI dampener(my builder heartily agreed). I think I am getting the Holley oil pan baffle kit to keep the oil pump fed when I am throwing the truck around. I decided this week that while the truck is down for the count I might do a SWB conversion. (Brothers kit and cut down the bed). That should allow me to go to a one piece driveshaft (and eliminate worries about this toothpick of one I have now) and only do the exhaust (and new fuel lines) once. If I can find a good answer to cutting the bed I'll probably do it. The longer it is apart the more money it costs.
__________________
1970 C-10 LWB "Blu" Instagram (current build pictures) 70_nc_c10 |
|
|
|
|
|
03-28-2017, 12:08 AM
|
#81 |
|
Registered User
Join Date: Mar 2015
Location: Utah
Posts: 748
|
Re: My LQ4/T56 build thread
looking at doing a t-56 swap one day in my current project, thanks for the info you are putting out it really helps me to have an idea of what I will be getting into.
__________________
72 GMC highlander nicknamed by my then 6-year-old brother "stripes" http://67-72chevytrucks.com/vboard/s....php?p=7378180 Check out my Youtube channel @Chad's Fab |
|
|
|
|
04-19-2017, 01:42 PM
|
#82 | |
|
Registered User
Join Date: May 2016
Location: richmond va
Posts: 265
|
Re: My LQ4/T56 build thread
Quote:
I have been sidetracked by other vehicles that I've now sold. In their place, I bought a reliable "daily driver" WS6 with a built LS7 swap. The other cars I had were attention and maintenance hogs, so I needed something that wouldn't give me trouble but that could still get the blood flowing   Untitled by FlickrAccount83, on Flickr Untitled by FlickrAccount83, on Flickr Untitled by FlickrAccount83, on Flickr Untitled by FlickrAccount83, on Flickr Untitled by FlickrAccount83, on Flickr Untitled by FlickrAccount83, on FlickrSo all that said, attention is back on the C10, and so this weekend I tore down the cab. I'm going to prime and paint the cab after sandblasting it (inside, underside and all) but I'm wondering how easy/hard and expensive/inexpensive it is to remove all the glass or if it's just better to leave as is and tape the windows and seals off.  Untitled by FlickrAccount83, on Flickr Untitled by FlickrAccount83, on FlickrIn case I decide to shave holes, I marked the holes I have to keep in the swap.  Untitled by FlickrAccount83, on Flickr Untitled by FlickrAccount83, on FlickrThe factory HVAC setup is all there and in tact and worked but the ducting under the dash was just rough and I would like to get a more simple and cleaner setup anyhow (maybe Vintage Air, not sure) Anyone know the story behind the factory lettering on the firewall here?  Untitled by FlickrAccount83, on Flickr Untitled by FlickrAccount83, on FlickrI'm not personally a fan of the factory bench, although I do want to be able to take two passengers with me, so I'm hoping to score a deal on some gray 2011+ Honda Odyssey seats for cheap somewhere. They will also give me the option of a fold down middle seat and also cup holders, etc.  2011 odyssey seats by FlickrAccount83, on Flickr 2011 odyssey seats by FlickrAccount83, on Flickr Untitled by FlickrAccount83, on Flickr Untitled by FlickrAccount83, on FlickrI know the Previous Owner (PO) did already paint and treat a lot of surface area before laying down the sound/heat deadening material but I'm probably going to rip it all up and blast all this metal too. I hate to be this far down and not do that, lol, but that thinking is truly truly destroying all date goals for this project.  Untitled by FlickrAccount83, on Flickr Untitled by FlickrAccount83, on Flickr
__________________
LS Swap build thread http://67-72chevytrucks.com/vboard/s...d.php?t=722579 |
|
|
|
|
|
04-19-2017, 01:50 PM
|
#83 |
|
Registered User
Join Date: Mar 2015
Location: Utah
Posts: 748
|
Re: My LQ4/T56 build thread
The rear window is reasonably easy to pull without breaking, but the windshield you pretty much HAVE to break to get out, especially where this one has the trim around it. I would recommend pulling it, you will get a better-finished product around that area, and windshields are reasonably priced. Not to mention if you try to mask it off, you run the risk of the masking paper coming off and the blasting material will either ruin your windshield or the trim around it.
One nice thing if you tear up the floor sheeting, is it will make it that much easier to switch to a high hump trans tunnel. Which would help give you quite a bit more room for the trans. Plus you can never truly tell how well the past owner did in their work until you tear that sheeting up.
__________________
72 GMC highlander nicknamed by my then 6-year-old brother "stripes" http://67-72chevytrucks.com/vboard/s....php?p=7378180 Check out my Youtube channel @Chad's Fab |
|
|
|
|
04-19-2017, 01:54 PM
|
#84 | |
|
Registered User
Join Date: May 2016
Location: richmond va
Posts: 265
|
Re: My LQ4/T56 build thread
Quote:
__________________
LS Swap build thread http://67-72chevytrucks.com/vboard/s...d.php?t=722579 |
|
|
|
|
|
04-19-2017, 03:04 PM
|
#85 | |
|
Registered User
Join Date: Mar 2015
Location: Utah
Posts: 748
|
Re: My LQ4/T56 build thread
Quote:
__________________
72 GMC highlander nicknamed by my then 6-year-old brother "stripes" http://67-72chevytrucks.com/vboard/s....php?p=7378180 Check out my Youtube channel @Chad's Fab |
|
|
|
|
|
04-19-2017, 08:17 PM
|
#86 |
|
Registered User
 Join Date: May 2007
Location: dallas ga
Posts: 1,503
|
Re: My LQ4/T56 build thread
Cut the rubber all the way around the windshield from the inside and it should come right out
|
|
|
|
|
04-19-2017, 09:01 PM
|
#87 |
|
Registered User
Join Date: May 2016
Location: richmond va
Posts: 265
|
Re: My LQ4/T56 build thread
Yah, I just researched it earlier, You can even use something like a strip of garden hose on top and bottom and something thinner on the sides to hold the flap from the inside so you can push it right out. In that case I can reuse the seal (mine looks new)
__________________
LS Swap build thread http://67-72chevytrucks.com/vboard/s...d.php?t=722579 |
|
|
|
|
04-20-2017, 03:31 PM
|
#88 |
|
Registered User
Join Date: May 2016
Location: richmond va
Posts: 265
|
Re: My LQ4/T56 build thread
Update on windshield removal
Good news: method mentioned above works and definitely can be done without breaking glass. Just use garden hose for top between rubber lip seal and metal windshield frame. Use something smaller for the sides in the same fashion. The key is PATIENCE and WD40. You will find after multiple attempts that all a sudden the seal will start to work with you and not against you. At that point, don't rush it, just stay the course and gently push from inside at top corners and a little bit inwardtowards the center also and it will "pop" out. Bad news: I cracked my windshield Good news: I can really go after it now with the sandblaster Bad news: I cracked my windshield Basically, my screwdriver tapped the glass accidentally. Definitely would all have worked out had I not slipped up there. I'm not going to dwell on this, moving on.
__________________
LS Swap build thread http://67-72chevytrucks.com/vboard/s...d.php?t=722579 |
|
|
|
|
04-21-2017, 12:05 AM
|
#89 |
|
Registered User
Join Date: May 2016
Location: richmond va
Posts: 265
|
Re: My LQ4/T56 build thread
Couldn't just leave on that sour note today.
I scored these brand new take-outs (from a dealer wheelchair access upgrade) from a 2013 Honda Odyssey for $300 shipped! These are second row seats by the way in case anyone out there is confused.  Untitled by FlickrAccount83, on Flickr Untitled by FlickrAccount83, on FlickrThey even include rails. Score!  Untitled by FlickrAccount83, on Flickr Untitled by FlickrAccount83, on FlickrThose seats being gray definitely are directing my paint color choice. Here's a messy pic just for fun. Looks like a cheap Christmas theme.  Untitled by FlickrAccount83, on Flickr Untitled by FlickrAccount83, on FlickrAnd the rear window came out rather easily (i say that now, but it was actually a pain till I figured out what I was doing). Take your time hear, don't pry and bend metal or crack glass as it feels like it would be easy to do. Just work on a bottom corner or close to corner and see if you can just slip the rubber flap on the other side of the metal frame surround. From there, just keep working that plan along the bottom and eventually you can just push the window right out. BE CAREFUL!  Untitled by FlickrAccount83, on Flickr Untitled by FlickrAccount83, on FlickrOh and back to the engine sitting in the garage.... I have 2 sets of JE forged pistons, one set is 4.005 overbore and the other is stock bore which I am more inclined to use. These pistons are made of the 2618 alloy which has a growth factor of .0045 to .005. I'm hoping I don't get noticeable cold piston slap because of this choice but we shall see. The rings I have with this particular piston set only have like maybe 700 miles on them and were in a brand new block, but I suppose I should still get new ones. Before anyone attacks, I have ordered new ones.  Untitled by FlickrAccount83, on Flickr Untitled by FlickrAccount83, on FlickrI also got a set of forged Scat I-beam rods I'll run with this setup. I need to get that motor built!
__________________
LS Swap build thread http://67-72chevytrucks.com/vboard/s...d.php?t=722579 |
|
|
|
|
04-21-2017, 05:05 AM
|
#90 |
|
Registered User
Join Date: Jul 2013
Location: Rockwell, NC
Posts: 1,639
|
Re: My LQ4/T56 build thread
My advice on the pistons is what my builder told me. I wanted him to go maximum overbore on mine and he gently but firmly said "NO." "You are going to have a lot of money invested in this block by the time we finish all the machinework. Hone/bore the minimum required to clean it up. That way if you break something, like a ring and score a cylinder, or wear it out, you still have a chance (or several) to bore it again and save it." He's right. I gave up a few cubic inches but unless something catastrophic happens in the engine this block should be good for a couple builds.
Glad to see progress on your build again (and I dig the f-body)!
__________________
1970 C-10 LWB "Blu" Instagram (current build pictures) 70_nc_c10 |
|
|
|
|
04-21-2017, 05:02 PM
|
#91 |
|
Registered User
Join Date: Nov 2013
Location: Rocklin, CA
Posts: 204
|
Re: My LQ4/T56 build thread
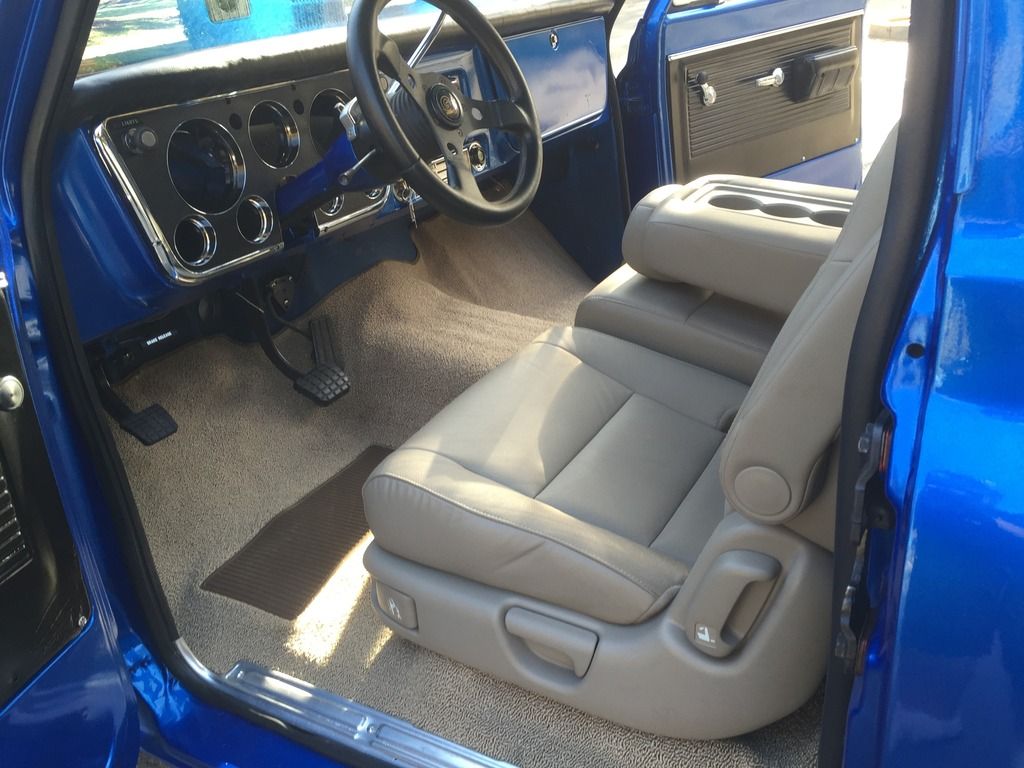
Your going to really like those seats. I used them in my previous build and now have a set for the new build. Make sure you cut out the excess lower hardware to make them sit lower in the cab.
|
|
|
|
|
04-21-2017, 05:34 PM
|
#92 | |
|
Registered User
Join Date: Jul 2015
Location: Alberta
Posts: 161
|
Re: My LQ4/T56 build thread
Quote:
...can you post a few more pics of them to convince me!! |
|
|
|
|
|
04-21-2017, 05:51 PM
|
#93 |
|
Registered User
Join Date: Jul 2012
Location: Rosenberg, Texas
Posts: 3,506
|
Re: My LQ4/T56 build thread
Those seats look pretty good. Are they comfortable?
__________________
-Duane C/10 Club Texas member 1971 Chevy C10 "Brutus" SWB Fleetside 2016 6.0L (L96) 6L90E (driver/project) 1965 Pontiac GTO "Royal Goat" 400/TH400 w/AC (my baby) |
|
|
|
|
04-22-2017, 12:11 AM
|
#94 |
|
Registered User
Join Date: May 2016
Location: richmond va
Posts: 265
|
Re: My LQ4/T56 build thread
I already know they are WAY more comfortable than the stock bench.
They look so much cleaner and updated too. I can't wait! Definitely would appreciate some pics of the underside of your seats and how you modified and mounted them! Did you use stock perches or did you fab up a whole new mounting setup? I'm wanting the same height you have yours at. So clean man!
__________________
LS Swap build thread http://67-72chevytrucks.com/vboard/s...d.php?t=722579 |
|
|
|
|
04-25-2017, 11:09 PM
|
#95 |
|
Registered User
Join Date: May 2016
Location: richmond va
Posts: 265
|
Re: My LQ4/T56 build thread
So after coming home this evening with the family, I showed my girls the progress of the tear down. My 3 and 5 year old were pretty impressed, so I thought I would be a goof and get in the cab and stick my body half-way out the windshield opening for them. Bad idea, as I lost my equilibrium because the whole cab was starting to roll/tip forward off of the stands. Somehow I jumped back and stopped myself from rolling the cab with me in it and really looking like an idiot. The things we do to look cool in front of our children
 This stuff is pretty tough! It's only a couple years old. Maybe I will regret tearing the truck down so far, but for now I just keep going.  Untitled by FlickrAccount83, on Flickr Untitled by FlickrAccount83, on Flickranyone want to come over and pull the rest of this sound deadener up for me?  Untitled by FlickrAccount83, on Flickr Untitled by FlickrAccount83, on Flickr Untitled by FlickrAccount83, on Flickr Untitled by FlickrAccount83, on Flickrmystery relay........anyone know what this is for?  Untitled by FlickrAccount83, on Flickr Untitled by FlickrAccount83, on Flickr
__________________
LS Swap build thread http://67-72chevytrucks.com/vboard/s...d.php?t=722579 |
|
|
|
|
04-26-2017, 09:17 AM
|
#96 |
|
Registered User
Join Date: Mar 2015
Location: Utah
Posts: 748
|
Re: My LQ4/T56 build thread
That is either for the horn or the timing advance that the trans controls
__________________
72 GMC highlander nicknamed by my then 6-year-old brother "stripes" http://67-72chevytrucks.com/vboard/s....php?p=7378180 Check out my Youtube channel @Chad's Fab |
|
|
|
|
04-26-2017, 09:35 AM
|
#97 | |
|
Registered User
Join Date: May 2016
Location: richmond va
Posts: 265
|
Re: My LQ4/T56 build thread
Quote:

__________________
LS Swap build thread http://67-72chevytrucks.com/vboard/s...d.php?t=722579 |
|
|
|
|
|
06-08-2017, 09:43 AM
|
#98 |
|
Registered User
Join Date: May 2016
Location: richmond va
Posts: 265
|
Re: My LQ4/T56 build thread
1) Finished getting all the sound deadening out of the cab. That was a fun 8 hours of my life wasted. metal looks good underneath, and will be much better after a sandblast and recoat.
2) I finally got the high hump tunnel after incorrectly getting one from a newer truck. I used the high hump as a template over the low hump and traced its footprint onto the floor of the cab so I knew where to cut the old one out with plasma cutter.  Untitled by FlickrAccount83, on Flickr Untitled by FlickrAccount83, on Flickr Untitled by FlickrAccount83, on Flickr Untitled by FlickrAccount83, on FlickrThis is my first attempt at a patch panel with a welder, so it isn't perfect. Made it on paper and transferred to metal then welded it on then bolted it up with stainless hardware. Used extra sheet metal from unusable fender.  Untitled by FlickrAccount83, on Flickr Untitled by FlickrAccount83, on Flickr Untitled by FlickrAccount83, on Flickr Untitled by FlickrAccount83, on Flickr Untitled by FlickrAccount83, on Flickr Untitled by FlickrAccount83, on FlickrNext, I need to extend the rear section of the tunnel come out further to make clearance for the shifter hole location (using the T56's most rear tailshaft shifter location. I will again make a template and convert to metal then tack it in. I'll do something like this...  Untitled by FlickrAccount83, on Flickr Untitled by FlickrAccount83, on Flickr3) There is little to no info on people using 2nd row Odyssey seats in their c10's so I'm hoping this will help some people down the road. If you aren't a fan of the factory saggy bench or just want to "update" in this area, these seats fit GREAT and look excellent in my opinion. It is personal taste for sure. These do give the look of a modernized bench seat or buddy bucket look with cupholders when you fold down the middle seat. But out with the old (anyone want to buy this let me know)  Untitled by FlickrAccount83, on Flickr Untitled by FlickrAccount83, on FlickrAfter much deliberation, I decided to remove the Odyssey seat bracketry on the bottom that allows "click-in" installation. They simply sit too high and in reality I will never need to remove the seats in a single cab truck in less that 1 minute. Removing these is not difficult at all, but the first one will be time consuming until you get the hang of it (like everything). Couple nuts to remove, and a 5/16" drill bit will pop out the rivets for the back. Undo the couple clips holding the adjustment cables and then they will pop right out after a couple other things. Untitled by FlickrAccount83, on Flickr Untitled by FlickrAccount83, on Flickr Untitled by FlickrAccount83, on FlickrThis presents a problem, as it separates the left and right rail on each seat. Not having synchronized sliders is a pet peeve of mine, so I welded a piece of steel between the two rails in an area where it would not affect the sliding mechanism.  Untitled by FlickrAccount83, on Flickr Untitled by FlickrAccount83, on Flickr Untitled by FlickrAccount83, on Flickr Untitled by FlickrAccount83, on Flickr Untitled by FlickrAccount83, on Flickr Untitled by FlickrAccount83, on FlickrNow, I know I will get burned for this, but I'm learning as I go. Welcome to my journey of making the most over-engineered, over-strengthened seat mounting brackets of all C10-dom. It is embarrassing how long this took me, but it's the beginning of my attempts to "make my own stuff". I had a blast doing it I must say, and the build is always the fun is it not?! I plan on taking my little girls (toddler ages) and baby boy (he'll be a toddler by the time this truck is running, lol) in this truck for ice cream and what not so safety was a must. I know that the force of an accident sends most the force into the safety belt mounting locations and less on the cab floor, but I still felt safer doing it my way. I made 4 separate brackets for each seat so that there would be more support. I used square tube and flat bar for everything  Untitled by FlickrAccount83, on Flickr Untitled by FlickrAccount83, on FlickrThese are for the back corners of each seat. (now you are thinking....this guy is insane, yes I know)  Untitled by FlickrAccount83, on Flickr Untitled by FlickrAccount83, on Flickr Untitled by FlickrAccount83, on Flickr Untitled by FlickrAccount83, on Flickrinstalled  Untitled by FlickrAccount83, on Flickr Untitled by FlickrAccount83, on FlickrI did all the rear first so as to ensure even fitment across the seating surfaces in the end.  Untitled by FlickrAccount83, on Flickr Untitled by FlickrAccount83, on Flickr Untitled by FlickrAccount83, on Flickr Untitled by FlickrAccount83, on FlickrUnder my seats looks like a jail cell!  Untitled by FlickrAccount83, on Flickr Untitled by FlickrAccount83, on FlickrAnd under the cab matching length plates to ensure footprint strengthening across the sheet metal cab. I haven't decided yet whether I'll weld these undercab plates in after sandblasting the whole cab or if i'll keep them removable. I don't see any real added benefit to welding them honestly but I may still do it.  Untitled by FlickrAccount83, on Flickr Untitled by FlickrAccount83, on FlickrI have my seats sitting an inch or maybe 1-3/4" higher than stock seating surface because I need a little more clearance for the shifter that will pop out under the middle seat a little. I didn't want to turn my floorboard into swiss cheese, and I really didn't want brackets getting in the way of shifter area and the trans tunnel extension I'll make, so I connected the front inner brackets to the middle seat and welded in a gusset of sorts to prevent any movement or stress during an accident. They aren't going anywhere.  Untitled by FlickrAccount83, on Flickr Untitled by FlickrAccount83, on FlickrAs a general rule, my brackets are approx 4" tall from floor to slider for the outer seats. The center seat is shorter due to higher floor. Obviously you can cut that in half if you are super tall, but this is perfect for me. The outer front brackets utilize the factory threaded mounting hole and underplating.  Untitled by FlickrAccount83, on Flickr Untitled by FlickrAccount83, on FlickrMessed up on passenger side one, remaking it, and will grind down and paint these a semi-gloss black (or maybe it's time to make a powdercoating station, hmmmm.)  Untitled by FlickrAccount83, on Flickr Untitled by FlickrAccount83, on Flickrvoila  Untitled by FlickrAccount83, on Flickr Untitled by FlickrAccount83, on Flickr Untitled by FlickrAccount83, on Flickr Untitled by FlickrAccount83, on Flickr
__________________
LS Swap build thread http://67-72chevytrucks.com/vboard/s...d.php?t=722579 |
|
|
|
|
06-08-2017, 10:19 AM
|
#99 |
|
Registered User
Join Date: Jul 2015
Location: Alberta
Posts: 161
|
Re: My LQ4/T56 build thread
How much narrower are the Honda seats compared to your stock bench seat?
Looks like you might have to move your shifter ahead? |
|
|
|
|
06-08-2017, 10:43 AM
|
#100 | |
|
Registered User
Join Date: May 2016
Location: richmond va
Posts: 265
|
Re: My LQ4/T56 build thread
Quote:
If I have to I will, but I don't see that happening at this point. I'm goinng to have one interesting shifter  To answer your other question, that all depends on how you mount them and space them out. My goal was to use the most provided space in the cab and also have the seating surfaces FEEL seemless when sliding from one seat to another.  Untitled by FlickrAccount83, on Flickr Untitled by FlickrAccount83, on Flickr
__________________
LS Swap build thread http://67-72chevytrucks.com/vboard/s...d.php?t=722579 Last edited by ChuckLee; 06-08-2017 at 12:10 PM. |
|
|
|
|
|
| Bookmarks |
| Thread Tools | |
| Display Modes | |
|
|


 Linear Mode

