
|
 03-16-2014, 07:09 AM
|
#1351 |
|
Registered User
Join Date: Sep 2012
Location: Leander, TX
Posts: 969
|
Re: Markeb01 Build Thread
Sounds awesome Mark. What cam do you have in it? With the cutouts open it sounds really mean.
Bret
__________________
64' Build Thread http://67-72chevytrucks.com/vboard/s...d.php?t=586955 |

|

|
|
03-16-2014, 09:27 AM
|
#1352 |
|
Registered User
Join Date: Apr 2012
Location: Searcy, AR
Posts: 4,203
|
Re: Markeb01 Build Thread
Dat Sound..

__________________
DON Proverbs 27:17  US Air Force Retarded errr Retired My '65 Stepper Build:http://67-72chevytrucks.com/vboard/s...d.php?t=533920 My '60 Rusty Patina Build:http://67-72chevytrucks.com/vboard/s...66#post7402266 My '72 http://67-72chevytrucks.com/vboard/s...59#post7204359 SOLD |
|
|
|
|
03-16-2014, 10:12 AM
|
#1353 |
|
Registered User
Join Date: Jun 2012
Location: Selkirk Ontario Canada
Posts: 1,141
|
Re: Markeb01 Build Thread
sounds awesome mark
__________________
My 63 GMC Panel Slow Build http://67-72chevytrucks.com/vboard/s...=1#post5457281 63 
|
|
|
|
|
03-16-2014, 01:57 PM
|
#1354 |
|
Senior Enthusiast
Join Date: Feb 2007
Location: Spokane Valley, WA
Posts: 8,356
|
Re: Markeb01 Build Thread
It’s a Comp Cams High Energy 268H (K12-210-2), but with the idle set at 550 rpms and the pipes open it sounds bigger than it is. With 4.10 gears and a manual 4 speed it's very driveable, compared to a Thumpr cam. With a vacuum canister it also generates over 20 inches of vacuum for the power brakes.
__________________
My Build Thread: http://67-72chevytrucks.com/vboard/s...d.php?t=444502 |
|
|
|
|
03-16-2014, 02:12 PM
|
#1355 |
|
Registered User
Join Date: Sep 2012
Location: Leander, TX
Posts: 969
|
Re: Markeb01 Build Thread
Cool. I have their Xtreme energy cam in the 383 in my Caprice. I cant idle it at 550 though. I think its around 1000. As u said its very driveable with a 2200 rpm conv. Mine has about 16in of vacumn.
Bret
__________________
64' Build Thread http://67-72chevytrucks.com/vboard/s...d.php?t=586955 |
|
|
|
|
03-16-2014, 09:35 PM
|
#1356 |
|
Registered User
Join Date: Apr 2011
Location: .
Posts: 3,104
|
Re: Markeb01 Build Thread
Nice mod on the portholes. Real clean but TUFF lookin
Great Job. |
|
|
|
|
03-24-2014, 09:44 PM
|
#1357 |
|
Senior Enthusiast
Join Date: Feb 2007
Location: Spokane Valley, WA
Posts: 8,356
|
Re: Markeb01 Build Thread
Here's another iPhone camera test. At least this one doesn't appear to bend the truck in half. Caution - it's loud. We had the cutouts open. I'm not sure why I bothered talking. I also ordered up an iPhone/tripod bracket that is due to arrive Thursday. I'm looking forward to trying that out. The audio is so much better than my dash cams:
__________________
My Build Thread: http://67-72chevytrucks.com/vboard/s...d.php?t=444502 |
|
|
|
|
03-24-2014, 11:34 PM
|
#1358 |
|
Registered User
Join Date: Apr 2012
Location: Searcy, AR
Posts: 4,203
|
Re: Markeb01 Build Thread
There's that sound again...
__________________
DON Proverbs 27:17 US Air Force Retarded errr Retired My '65 Stepper Build:http://67-72chevytrucks.com/vboard/s...d.php?t=533920 My '60 Rusty Patina Build:http://67-72chevytrucks.com/vboard/s...66#post7402266 My '72 http://67-72chevytrucks.com/vboard/s...59#post7204359 SOLD |
|
|
|
|
03-25-2014, 12:41 AM
|
#1359 |
|
Senior Enthusiast
Join Date: Feb 2007
Location: Spokane Valley, WA
Posts: 8,356
|
Re: Markeb01 Build Thread
With the limited amount of stuff I'm thinking of filming in the future, I'm wondering if I'd be wiser spending money on a GoPro, or perhaps chrome vent windows and/or having my side glass frames chromed instead. Currently my side glass frames are mostly bare metal with some pieces of black paint here and there. It would sure clean up the doors, especially when they're rolled down.
The iPhone records sound so much better than the dash cams, I'm thinking of just switching to that for rod runs & car shows. I'm also thinking of just pulling my side glass frames and doing without them while they're out for plating, rather than wasting money on a second set. Maybe just protect the glass with some extra window channel molding to keep them from getting broken when the frames are missing.
__________________
My Build Thread: http://67-72chevytrucks.com/vboard/s...d.php?t=444502 |
|
|
|
|
03-29-2014, 03:18 AM
|
#1360 |
|
Senior Enthusiast
Join Date: Feb 2007
Location: Spokane Valley, WA
Posts: 8,356
|
Re: Markeb01 Build Thread
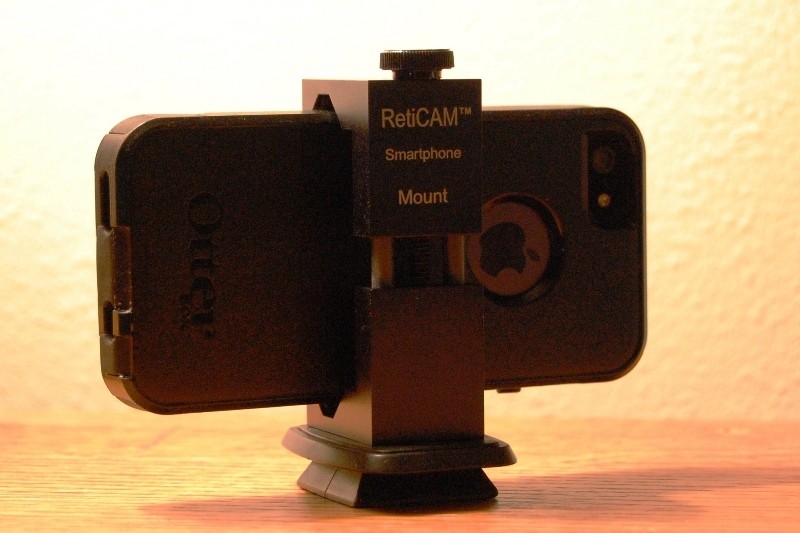
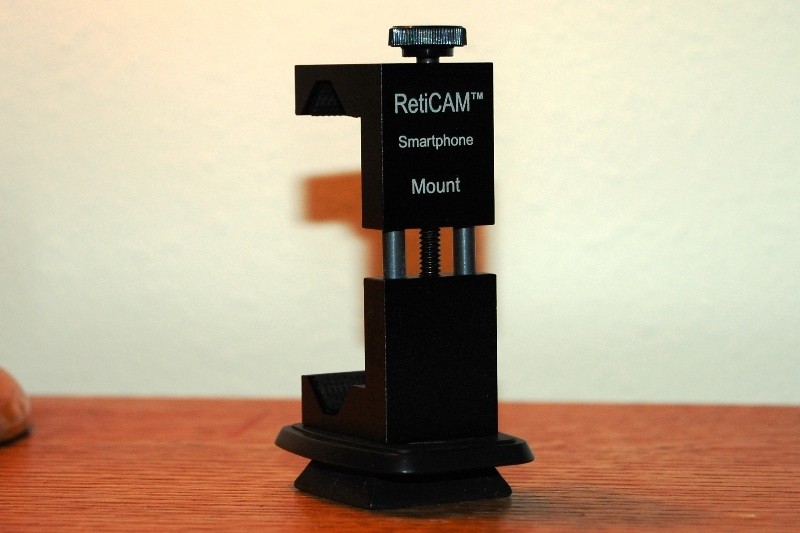
No updates on the truck, but wanted to share the new iPhone camera bracket I received yesterday. Its made by RetiCAM and works like a charm. I ordered it from Amazon. Its a two piece aluminum machined part, and in the photos below it is attached to a quick release adapter that fits both of my tripods. I tried to take a photo showing the front, but my Nikon refused to focus. I havent used the mount yet, but it should be helpful taking videos at our next car event.
__________________
My Build Thread: http://67-72chevytrucks.com/vboard/s...d.php?t=444502 |
|
|
|
|
03-29-2014, 07:17 AM
|
#1361 |
|
Registered User
Join Date: Sep 2012
Location: Leander, TX
Posts: 969
|
Re: Markeb01 Build Thread
That's a very neat mount Mark. How does it mount at the bottom suction cup or bolt?
Bret
__________________
64' Build Thread http://67-72chevytrucks.com/vboard/s...d.php?t=586955 |
|
|
|
|
03-29-2014, 12:05 PM
|
#1362 |
|
Senior Enthusiast
Join Date: Feb 2007
Location: Spokane Valley, WA
Posts: 8,356
|
Re: Markeb01 Build Thread
Sorry, I should have shown the two pieces separately. The phone mount has a standard 1/4x20 threaded hole in the bottom, and there are a variety of standard adapters available. I happen to use a tripod quick release, but there are swivel ball mounts, suction cups and other accessories on the market that will hook right up.
Here's what the bottom looks like with the adapter removed: 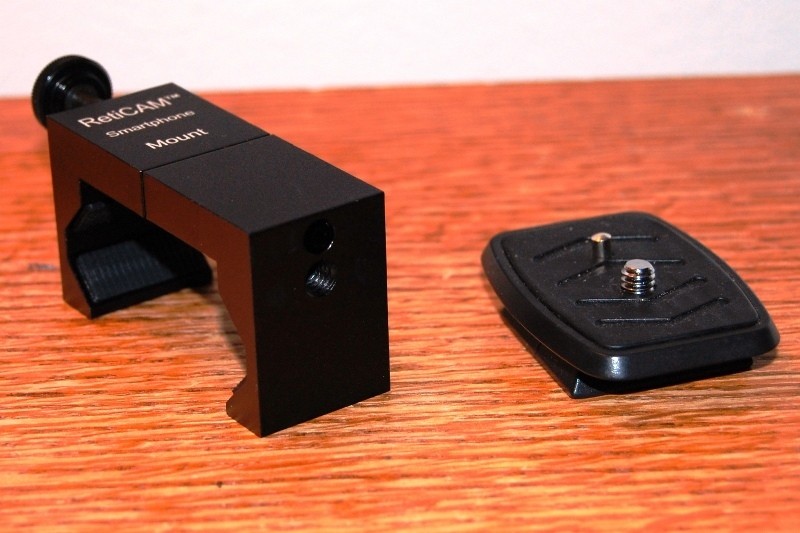
__________________
My Build Thread: http://67-72chevytrucks.com/vboard/s...d.php?t=444502 |
|
|
|
|
03-31-2014, 02:10 AM
|
#1363 |
|
Senior Enthusiast
Join Date: Feb 2007
Location: Spokane Valley, WA
Posts: 8,356
|
Re: Markeb01 Build Thread
This afternoon I relocated the engine vacuum gauge from the steering column to the side panel forward of the spotlight handle:
Before: 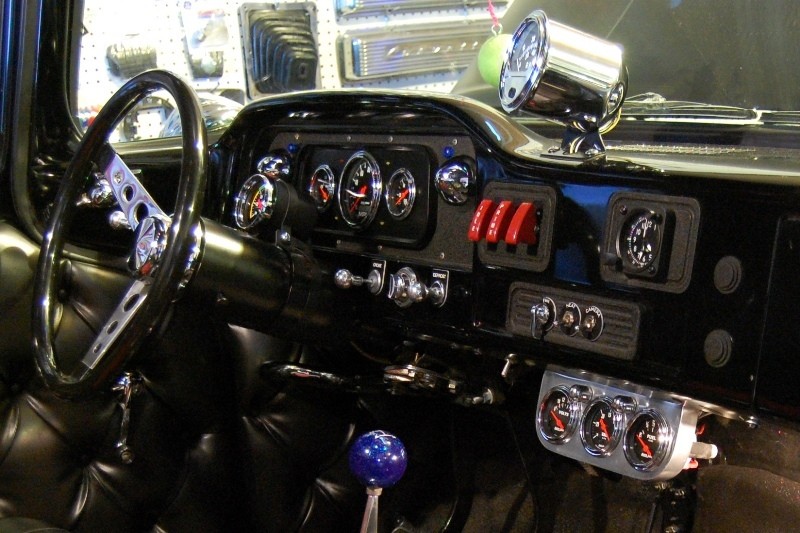 After: 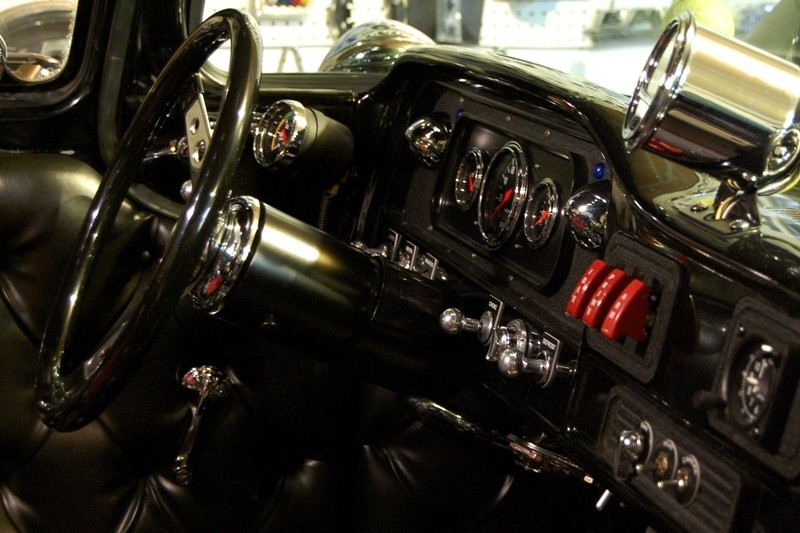 This is in preparation for a new non-tilt steering column with a chrome or stainless finish. Im focusing on this one from Ididit at the moment: 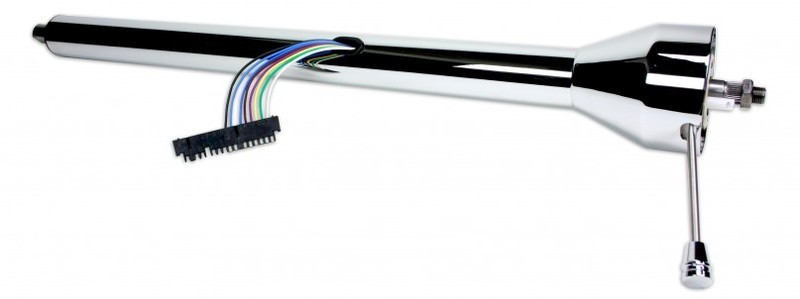 Im also considering retiring the Covico wheel to my parts collection and replacing it with one of the new high quality black versions from Moon: 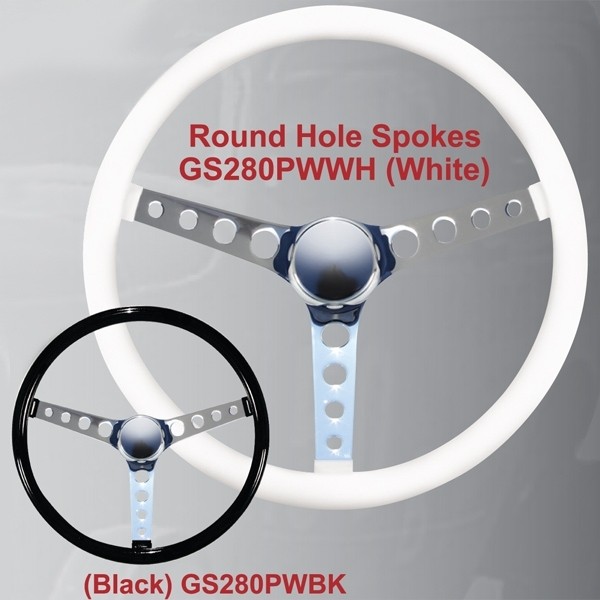 And depending how it all goes together I might also include an Ididit adapter as the shape reminds me of the old Covico adapters: 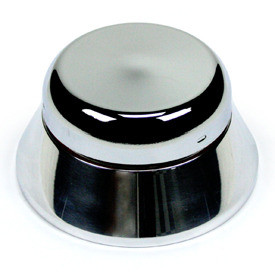
__________________
My Build Thread: http://67-72chevytrucks.com/vboard/s...d.php?t=444502 |
|
|
|
|
03-31-2014, 08:18 AM
|
#1364 |
|
Senior Member
 Join Date: Oct 2009
Location: Fayetteville, Arkansas
Posts: 1,923
|
Re: Markeb01 Build Thread
mark, thats the toughest looking dash out there. like all you've done including the portholes. and the sound from the dumps... awesome.
|
|
|
|
|
03-31-2014, 05:08 PM
|
#1365 |
|
Old and crusty
Join Date: Jan 2009
Location: Surprise, AZ
Posts: 462
|
Re: Markeb01 Build Thread
Mark,
Before you pull the trigger on that column check this guy out. I put one in my 64 along with a Grant wheel and it's nice. http://67-72chevytrucks.com/vboard/s...d.php?t=486139
__________________
65 Chevy long wide daily driver - SOLD! 64 Chevy Short Step LS |
|
|
|
|
03-31-2014, 06:28 PM
|
#1366 |
|
Senior Enthusiast
Join Date: Feb 2007
Location: Spokane Valley, WA
Posts: 8,356
|
Re: Markeb01 Build Thread
Thanks for the tip Dean. I'll check him out.
__________________
My Build Thread: http://67-72chevytrucks.com/vboard/s...d.php?t=444502 |
|
|
|
|
04-02-2014, 01:43 AM
|
#1367 |
|
Senior Enthusiast
Join Date: Feb 2007
Location: Spokane Valley, WA
Posts: 8,356
|
Re: Markeb01 Build Thread
I guess this means Im committed to a new steering column. As of tonight the truck is out of service again for a few days. Heres a photo of its ugliest feature. Everything that looks rusty and nasty will be stripped and repainted before going back together:
 This shot shows where the column opening in the dash is all scratched up from where I cut off the upper corner of the lower steering column bell so I could shorten the column long ago. All damages will be sanded down and reshot with lacquer that matches the dash: 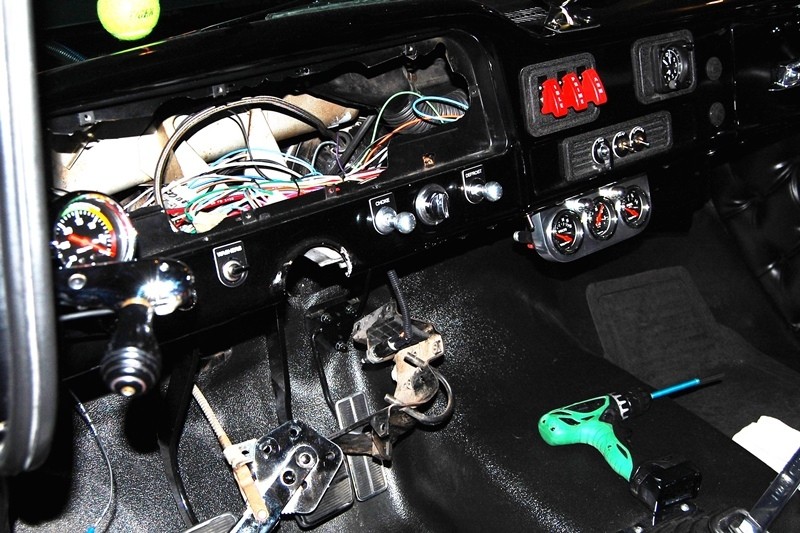 Heres the factory (Monte Carlo) intermediate shaft u-joint that will be replaced with a Borgeson joint: 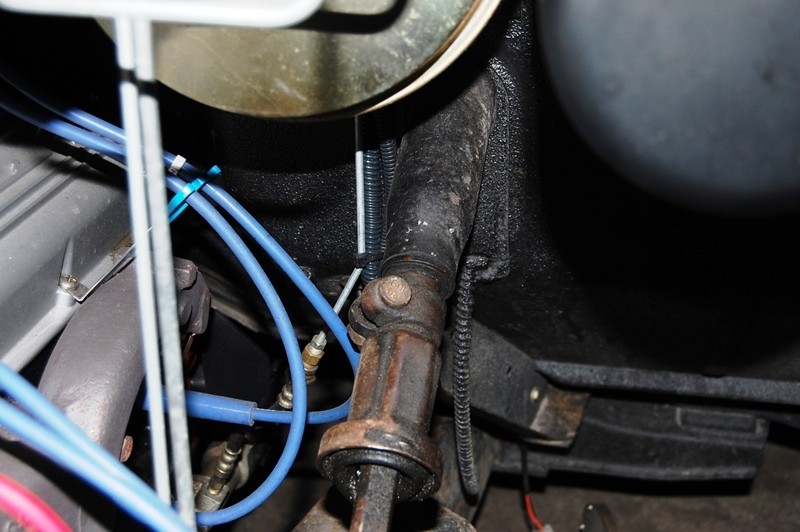 And for anyone thats ever wondered what these look like inside, here are the components after getting it apart. The two square blocks fit on the pin and ride up and down in the steel housing. The assembly is held together with a snap ring and a (usually torn) rubber boot: 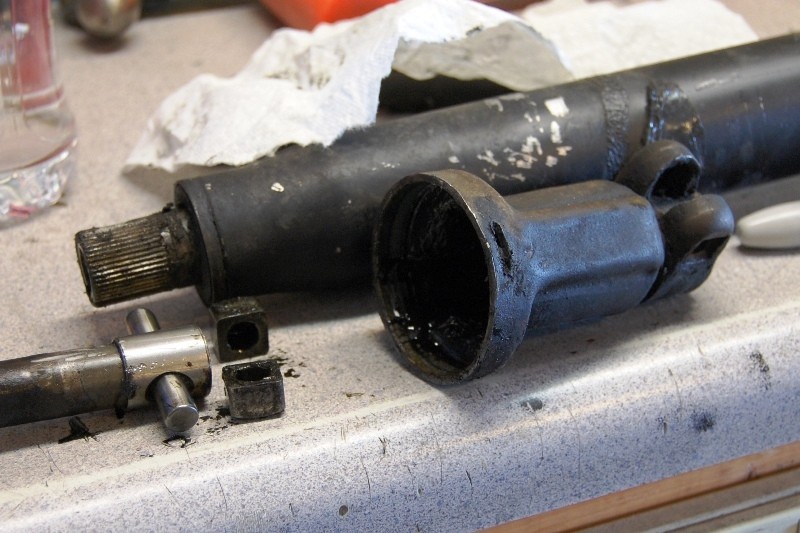 After taking the photo I drove the pin out of the shaft and knocked the sleeve off, so it will be easier to cut once I determine the final length. This has to be the longest bell/tilt mechanism Ive ever seen (8 ¾), which explains why I cut it up years ago to gain some additional belly room. 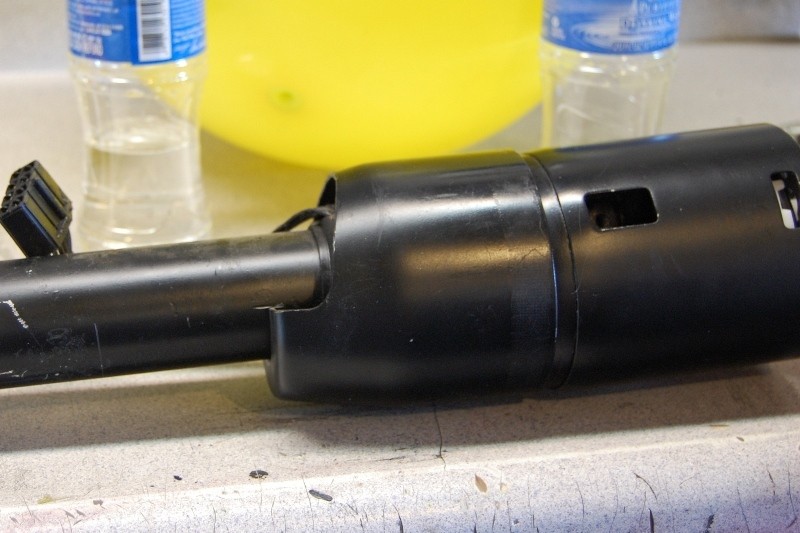 I did check out KevsClassics. He sure has a great reputation, but does mostly tilt columns, and I wanted something off the shelf so I have my back up ride returned to service quickly. I am going to see if he wants my old tilt column for parts (for the cost of shipping). Thanks Dean for putting me on to him. So I ordered the stuff I showed earlier plus the required Borgeson joint to hook it up. Tomorrow I get to assemble & install a new garden windmill and hang plastic pegboard in the sewing room. Once thats done Ill be back to cleaning/painting parts and waiting for the new stuff to show up.
__________________
My Build Thread: http://67-72chevytrucks.com/vboard/s...d.php?t=444502 |
|
|
|
|
04-03-2014, 12:11 AM
|
#1368 |
|
Senior Enthusiast
Join Date: Feb 2007
Location: Spokane Valley, WA
Posts: 8,356
|
Re: Markeb01 Build Thread
Not much to share tonight. Spent a couple hours on the intermediate shaft this morning. Cut off the area where the cross pin used to be, and shaped what was left to match the rest of the double D portion of the shaft in case I need another 1/4 or so. Once it is final fitted with the new column and u-joint, Ill trim off the excess length. I couldnt find my can of Krylon Dull Aluminum, so it was sprayed with Martin Senour Iron Cast Gray instead. I think it will look much more attractive anyway when bolted up to a polished stainless Borgeson joint at the bottom of the chrome steel column.
I pulled all the removable steering column attachment pieces from under the dash and wire wheeled them to bare metal. Finished that up just about the time the sewing room pegboard and garden windmill arrived, which explains why I forgot to take pictures of the parts all stripped to shiny bare metal. The windmill consumed the afternoon. By the time I got back to the truck stuff it was dark outside, so no windmill photos tonight. Our previous version was a cheap Chinese model that held up remarkably well for about 10 years. The new aluminum version has very little in common with the old one other than both were 8 tall. The legs are made of tubing, are farther apart at the base, there is about twice as much bracing, and all the fasteners are stainless steel. The fan/wheel is 2 bigger in diameter and everything fit perfectly with no bad language needed during assembly! Before cleaning up for the night I washed all the column parts with wax & grease remover a second time. They were shot with Rustoleum black lacquer, and all five items came out smooth and shiny: 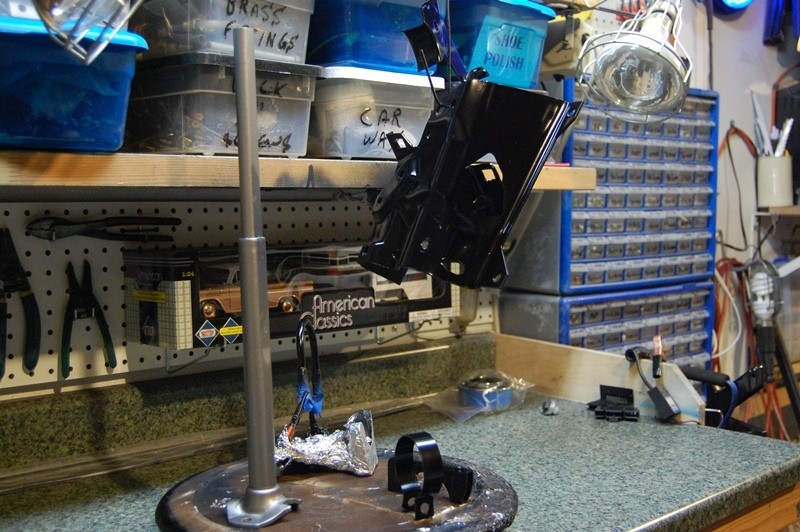 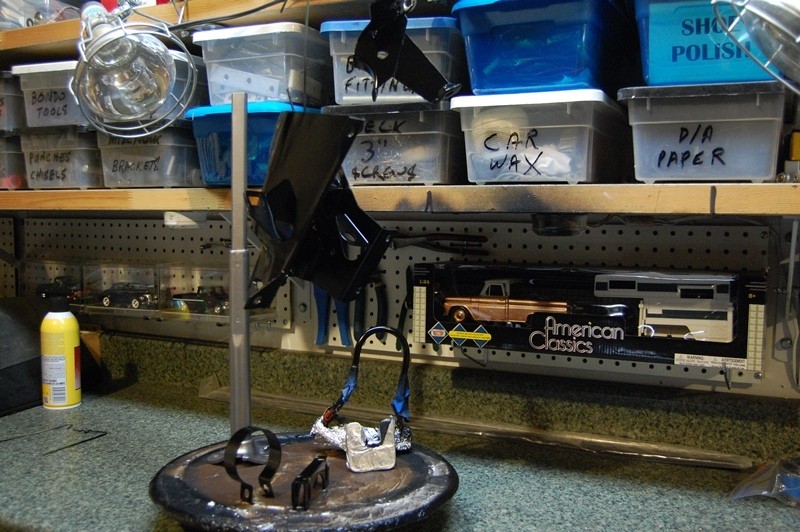 I was going to spray them with satin finish, but I thought the high gloss black might look better against the chrome column. The only two items left to accomplish before the column shows up is to paint the emergency brake cable and clevis, and sand the dash opening around the column and get that repainted. Ill probably do the dash touch up tomorrow and solicit my wife to finish the brake cable, as it requires a lot more bending and twisting than my back likes to tolerate.
__________________
My Build Thread: http://67-72chevytrucks.com/vboard/s...d.php?t=444502 |
|
|
|
|
04-03-2014, 11:17 AM
|
#1369 |
|
Rollin' Old Skool
Join Date: Jun 2007
Location: Hattiesburg, MS
Posts: 5,371
|
Re: Markeb01 Build Thread
Looking good, Mark. I think the shiny black will look just fine with all your other gloss black inside the cab.
__________________
_____________________________________________ Phillip My Build threads: 1966 Chevy C-10 "Black Betty" shortbed, fleetside, BBW, 327 V8/ Powerglide (under construction) http://67-72chevytrucks.com/vboard/s...ighlight=betty 1997 Chevy Tahoe, 2dr/2wd, mild custom (Daily driver) http://67-72chevytrucks.com/vboard/s...d.php?t=601142 Pics: '66 C-10 https://flic.kr/s/aHsjHWD4h9 '97 Tahoe https://flic.kr/s/aHsjGZ7wKP '93 C-1500 https://flic.kr/s/aHskxdpdnQ '88 S-10 Blazer https://flic.kr/s/aHsjYGx4Md Previous Rides: 1993 Chevy S-10 ext. cab, 4.3L, 4/5 drop (Sold) 1993 Chevy C-1500 short/step Retro-Rod (Sold) 1988 S-10 Blazer 2dr/2wd mild custom (Sold) |
|
|
|
|
04-03-2014, 12:15 PM
|
#1370 |
|
Senior Enthusiast
Join Date: Feb 2007
Location: Spokane Valley, WA
Posts: 8,356
|
Re: Markeb01 Build Thread
Thanks Phillip. I just confirmed the steering wheel adapter will be here today, and the column and U-joint are due tomorrow. I may have to run my old Covico wheel for a while since Mooneyes is known for being slow to ship.
Regardless I'm looking forward to having the truck back together by the weekend, all nice and shiny!
__________________
My Build Thread: http://67-72chevytrucks.com/vboard/s...d.php?t=444502 |
|
|
|
|
04-03-2014, 09:30 PM
|
#1371 |
|
Senior Enthusiast
Join Date: Feb 2007
Location: Spokane Valley, WA
Posts: 8,356
|
Re: Markeb01 Build Thread
The Ididit steering wheel adapter arrived today, and man that thing is a work of art.
Im tempted to hang the Moon wheel on the wall and keep the Covico in service, simply because the new adapter really makes it look like an authentic Covico wheel. The tapered style and additional height compared to the traditional Grant/Superior bell look so much like the 1960s Covico Adapters. Heres an ad showing the original:  And heres my Covico wheel sitting on both styles of adapter: 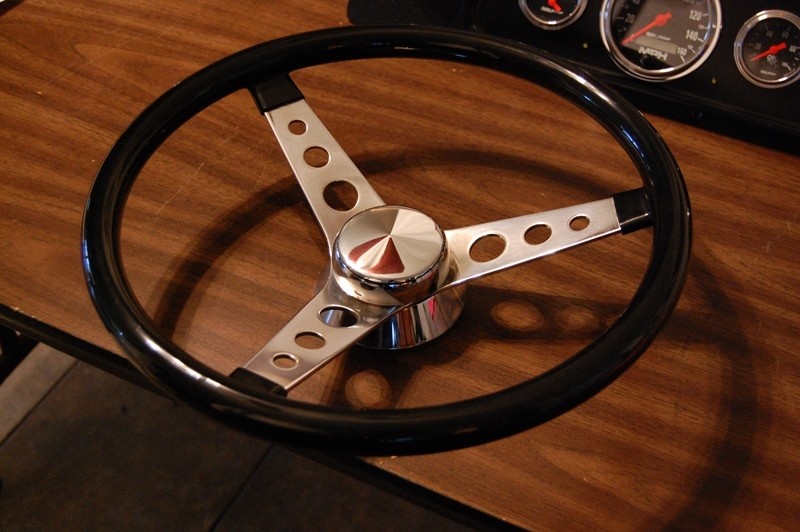 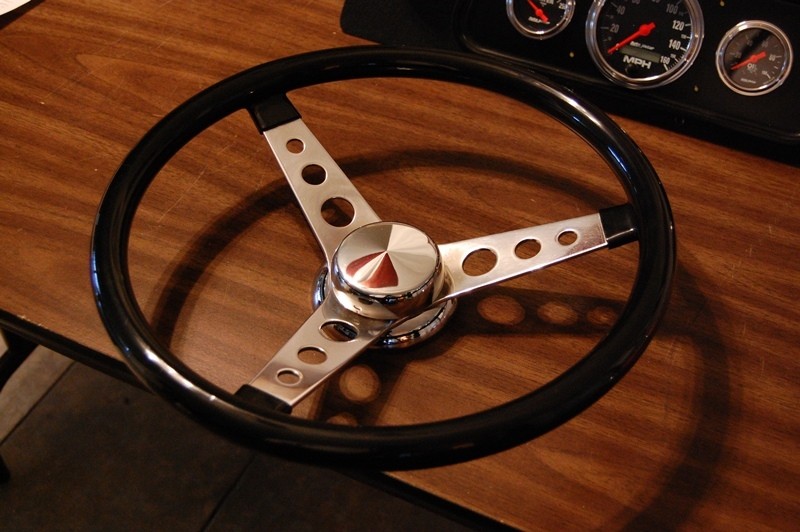 I occurred to me the only items that actually fasten the column in place are the upper and lower clamps, so I went ahead and loosely reassembled all the under dash pieces today. My wife also painted the brake cable, and I refinished the dash opening for the column. It turns out my firewall is still ugly, but I dont look under there enough to care. At least the brackets look pretty good now: 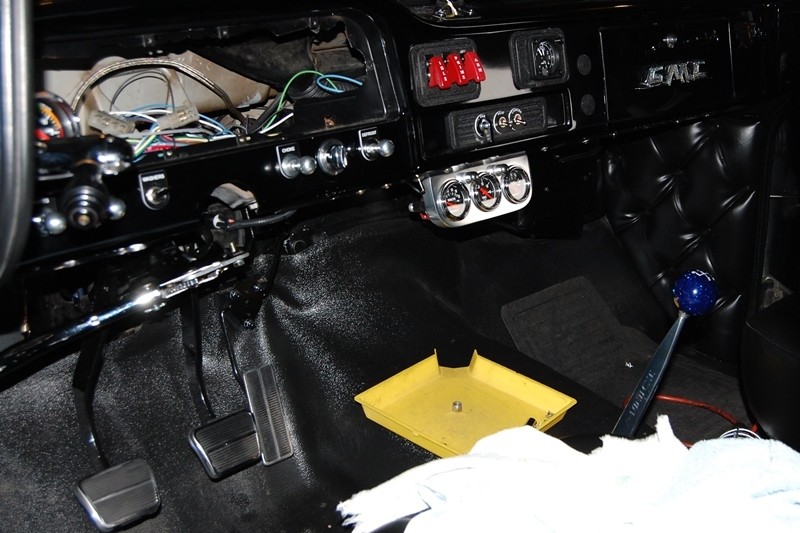 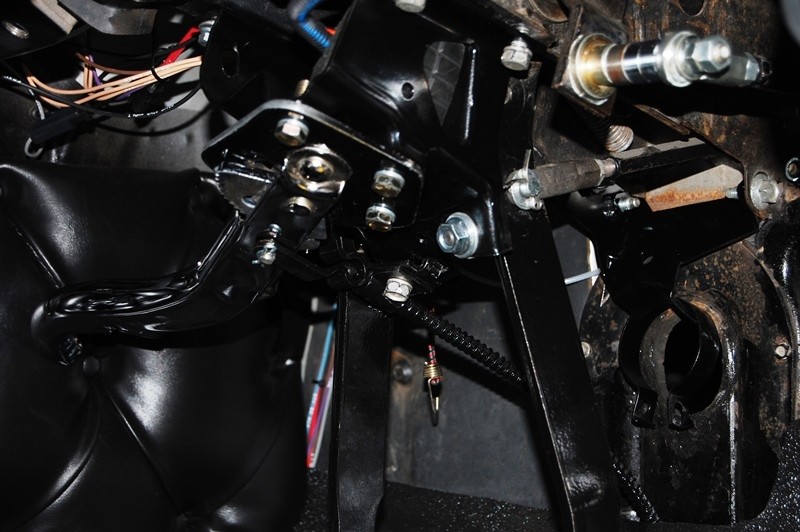 Tomorrow should be a simple matter of installing the intermediate shaft & U-joint, sliding the column in place, connecting the wiring and reinstalling the cluster. The of course Ill need to take it for a test drive to see how much the mileage has improved! 
__________________
My Build Thread: http://67-72chevytrucks.com/vboard/s...d.php?t=444502 |
|
|
|
|
04-04-2014, 08:38 AM
|
#1372 |
|
Old and crusty
Join Date: Jan 2009
Location: Surprise, AZ
Posts: 462
|
Re: Markeb01 Build Thread
It should get at least 10% better mileage with all that bling!
__________________
65 Chevy long wide daily driver - SOLD! 64 Chevy Short Step LS |
|
|
|
|
04-04-2014, 03:57 PM
|
#1373 |
|
Senior Enthusiast
Join Date: Feb 2007
Location: Spokane Valley, WA
Posts: 8,356
|
Re: Markeb01 Build Thread
That’s what I always tell the wife as justification for all these expenses. According to her calculations I should already be getting around 75 mpg!
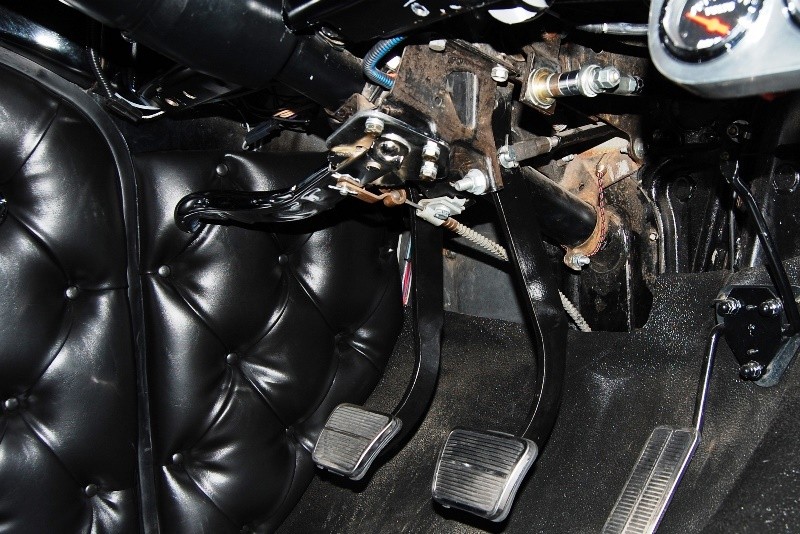
Well there’s been a delay of game. I couldn’t sleep last night so around 2 am I decided to order up the clutch pedal bumper that went missing. While I was on the Chevy Duty site, it occurred to me there must be some kind of seal that goes around the column at the firewall. Sure enough there’s a foam seal that goes under a sheet metal plate that is sandwiched between the plate and the firewall. In all the years I’ve owned the truck I never really paid attention to this detail. Years ago I just slopped sealer around the column to make sure it was air tight. I don’t think that’s going to cut it with a new chrome column. So I tossed the seal in the basket and placed the order. This morning I went out and looked at the firewall, and discovered the ugly black seal retaining plate was removable. So out it came. Here’s the before picture: 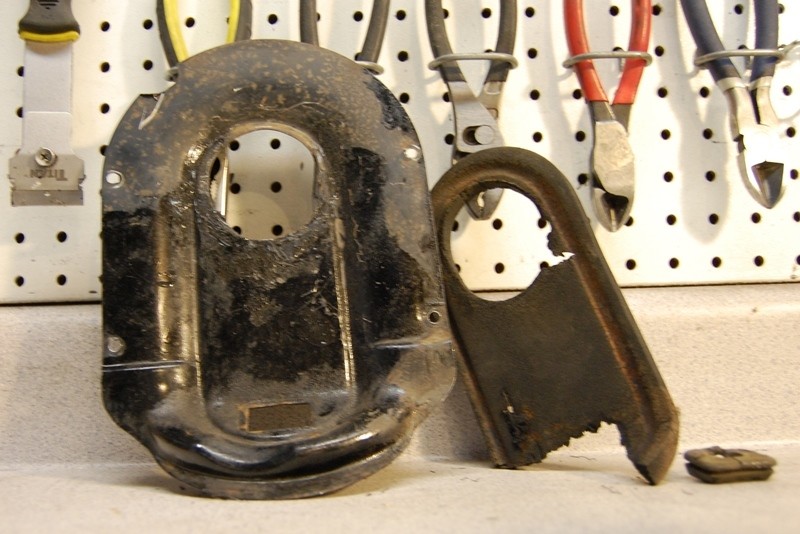 A few minutes of attention with an angle grinder and a wire cup left it looking like this:  A double wash of wax & grease remover was followed up with a quick shot of U-Pol #8 Acid Primer followed by two coats of Rustoleum Black Lacquer: 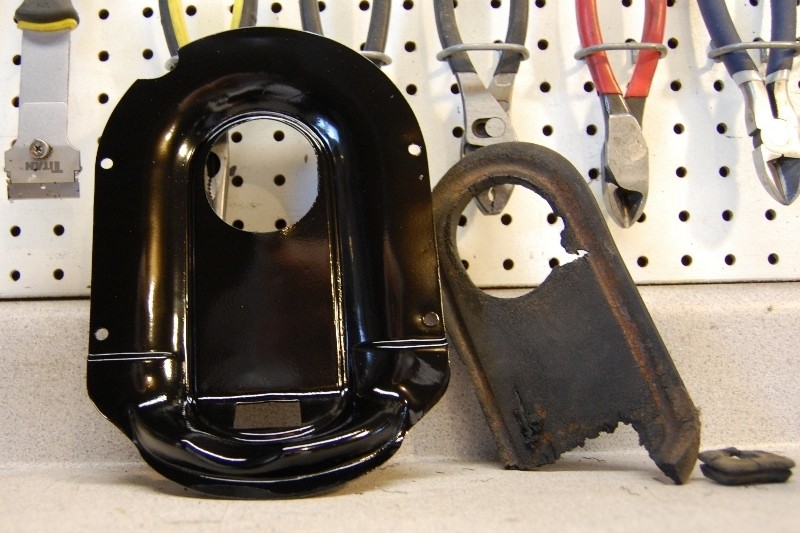 Unfortunately I now have to wait for the seal to arrive before I can do the final installation of the column. The column is due to arrive any moment. While I’m waiting for the seal I’ll mask up the column and slide it into place to determine the correct length of the intermediate shaft. I’ll then turn to the electrical connector and see what is going to be required to mate that up to my harness.
__________________
My Build Thread: http://67-72chevytrucks.com/vboard/s...d.php?t=444502 |
|
|
|
|
04-04-2014, 09:35 PM
|
#1374 |
|
Senior Enthusiast
Join Date: Feb 2007
Location: Spokane Valley, WA
Posts: 8,356
|
Re: Markeb01 Build Thread
The column and u-joint arrived about 2 pm. Rather than jumping into a test fit, I started sorting out the wiring connector. Fortunately I remembered I recently bought a rebuild kit for the turn signal, and it had all this stuff left over:
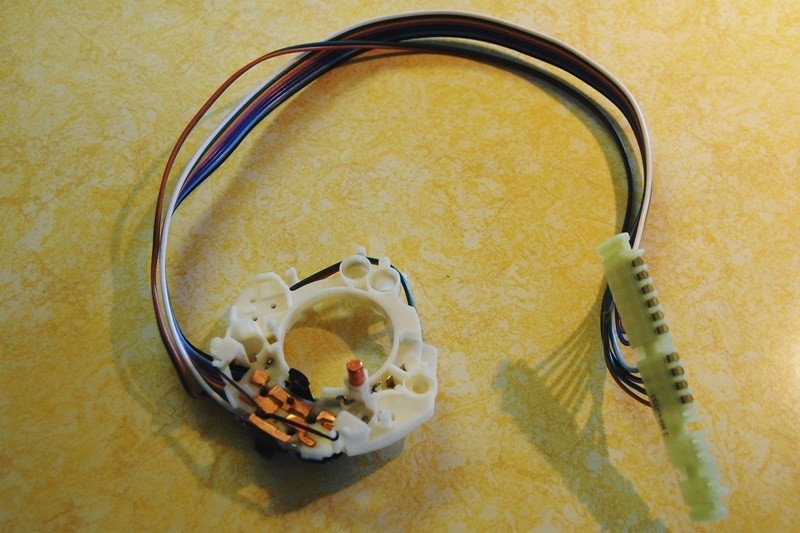 The white connector on the right end is a stock GM model F connector, which is 4.25 long. Newer columns (and all new columns from Ididit) use a model P connector, which is 3 7/8 long. Not knowing which is in the vehicle being repaired, the turn signal repair kit included this adapter which allowed connecting the model F turn signal wiring to the model P connector, should that be whats in the car: 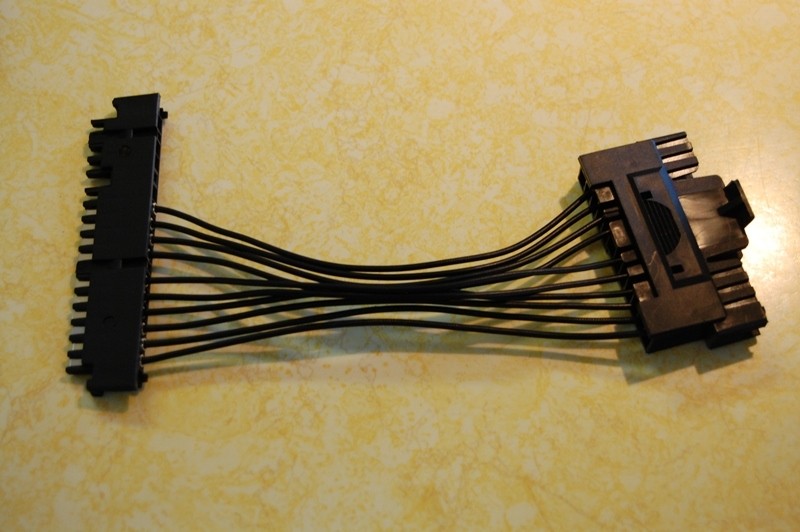 The left end is male model P, the right end is female model F. This is what it looks like plugged in to the turn signal harness: 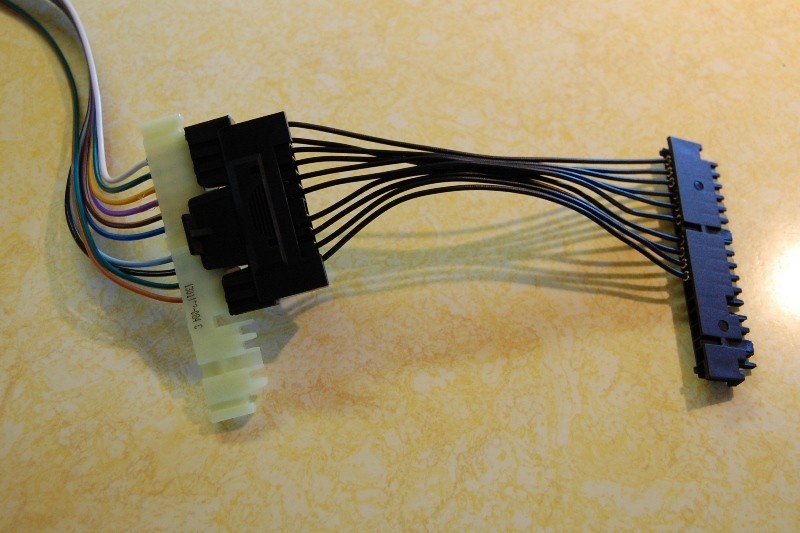 Unfortunately I have what I believe used to be referred to as a model B connector. Its a rectangle with 2 rows of four terminals: 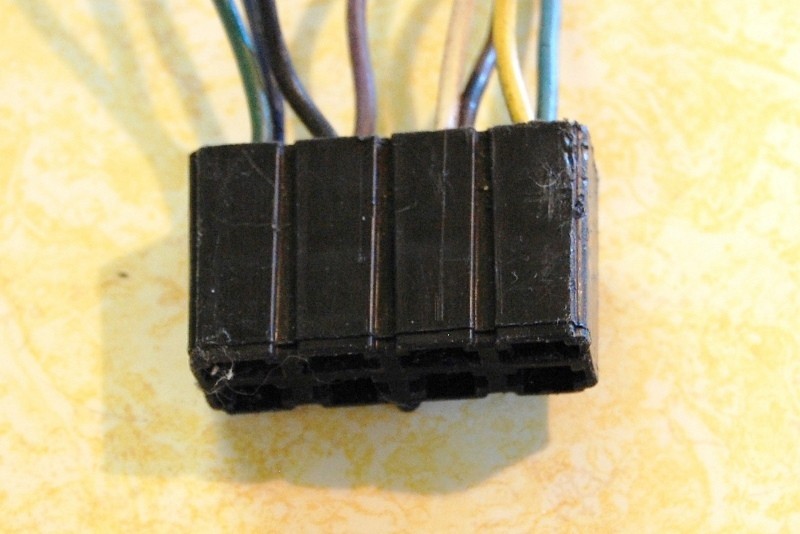 This is what came with my steering column back in 1992 and I saw no reason to change it when I recently rewired the truck. Luckily both the new and previous Ron Francis wiring kits came with a female model P connector to create compatibility with newer columns: 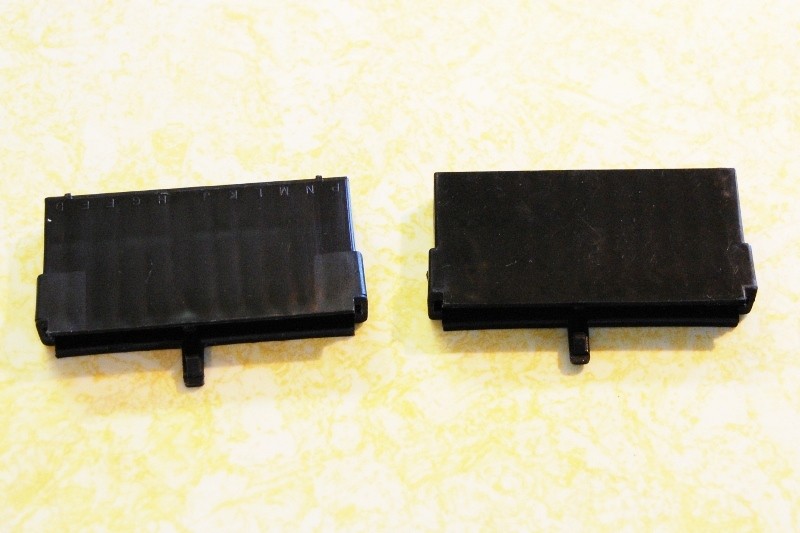 I used the older one (on the left) as it had the letter designations molded in the housing that match up with the male counterpart. I pulled 8 of the terminated wires out of the jumper housing that came with the turn signal kit. I dont know what this style of terminal is called, and I have no replacements. So I jumped them to the turn signal harness and terminated the other end in my old model B plug: 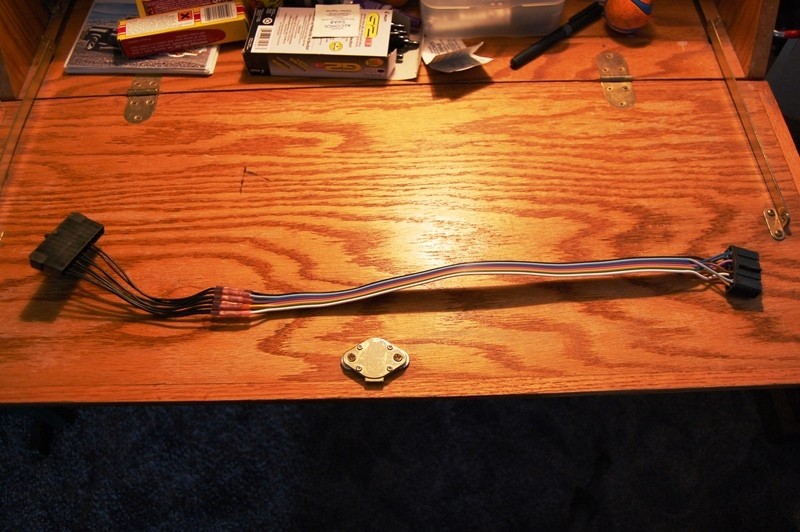 Since there is only a limited amount of wire poking out of the column, I now have more than enough to hook up to my main wiring harness behind the speedometer. Also, by leaving the model P connector in the circuit, I can easily remove the column in the future without have to remove the cluster to disconnect it. Next step was drilling the lower end of the DD shaft to attach the U-joint. Per instructions a 3/8 inch hole was drilled for a long set screw to tighten against the inside of the tube: 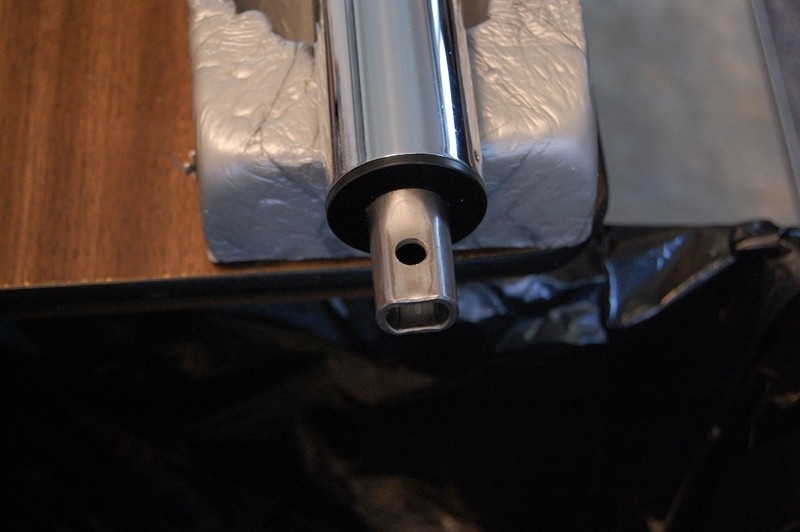 The end of the column was placed over a waste basket, and Red Loctite was liberally poured over the screw, and subsequently over the nut as well. The polished joint was torqued in place: 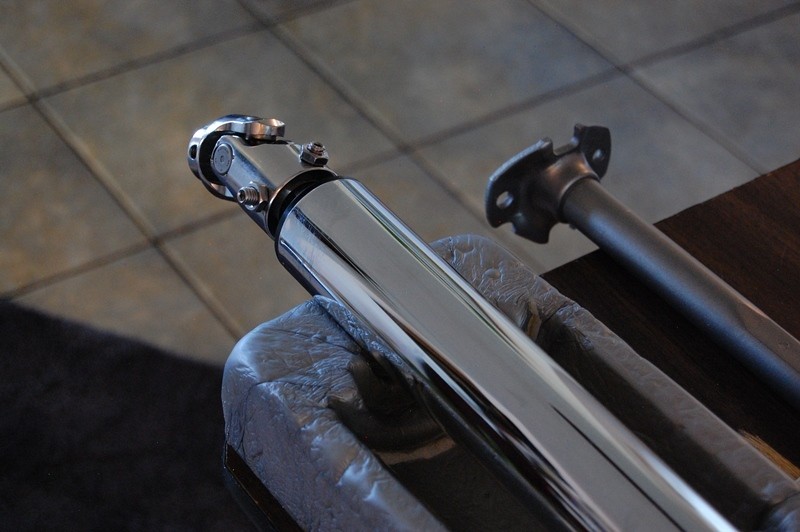 Finally the turn signal lever and 4 way flasher knob were attached. What looks like nicks or scratches on the chrome is actually flecks of Styrofoam packing material: 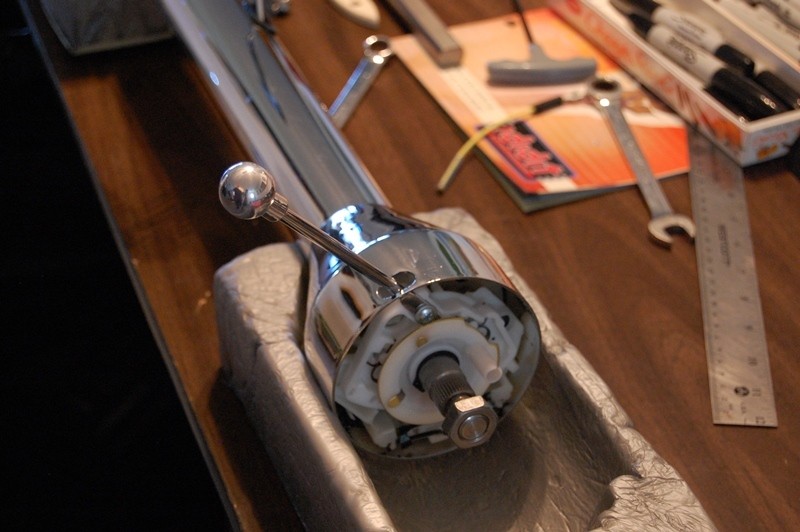 And here is where the project sits as of this evening: 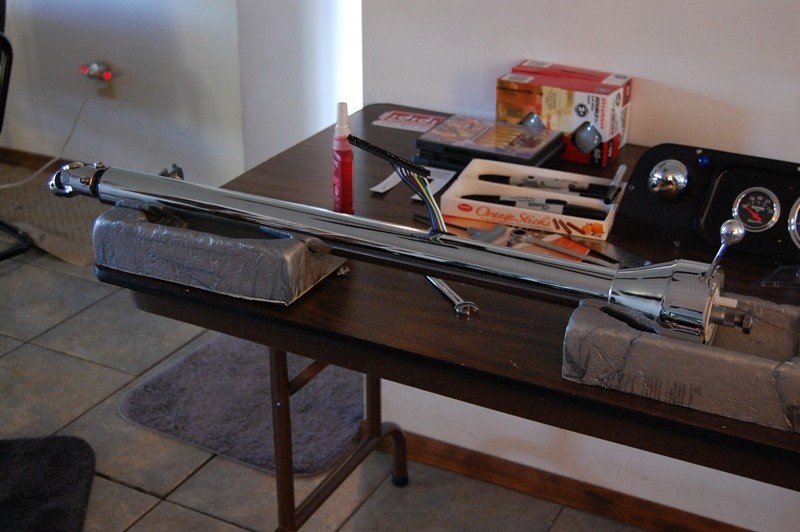
__________________
My Build Thread: http://67-72chevytrucks.com/vboard/s...d.php?t=444502 |
|
|
|
|
04-04-2014, 11:50 PM
|
#1375 |
|
Registered User
Join Date: Apr 2012
Location: Searcy, AR
Posts: 4,203
|
Re: Markeb01 Build Thread
That is SWEET!
__________________
DON Proverbs 27:17 US Air Force Retarded errr Retired My '65 Stepper Build:http://67-72chevytrucks.com/vboard/s...d.php?t=533920 My '60 Rusty Patina Build:http://67-72chevytrucks.com/vboard/s...66#post7402266 My '72 http://67-72chevytrucks.com/vboard/s...59#post7204359 SOLD |
|
|
|
 |
| Bookmarks |
|
|


 Linear Mode

