
|
 09-20-2014, 01:51 AM
|
#1726 |
|
Senior Member
 Join Date: Mar 2011
Location: Tucson, Arizona
Posts: 2,058
|
Re: Markeb01 Build Thread
I like your style in the clocks. I've got a set of qauges I would love to have but the price has been stopping me. I think they are real cool, though. Have you seen these?
__________________
Sanity'66 http://67-72chevytrucks.com/vboard/s...d.php?t=515110 Long bed, Fleetside, Small back window I've Done So Much, With So Little, For So Long, That Now I Can Do Anything With Nothing. 
|

|

|
|
09-20-2014, 02:51 PM
|
#1727 |
|
Senior Enthusiast
Join Date: Feb 2007
Location: Spokane Valley, WA
Posts: 8,356
|
Re: Markeb01 Build Thread
Yes I first discovered those right after investing in my last full set of Autometer traditional hot rod gauges, and I couldn’t afford to swap to a different style either. That and I couldn’t afford those bomber style gauges anyway!
At the time, my machinist son had a different job with plenty of spare time, so we discussed him whittling up a full set of screw on retaining flanges to fit over conventional gauge rims. That would have been no problem, but neither of us thought they would look correct on gauges with chrome rims. I thought they’d look best on all black gauges, perhaps like these with through dial lighting and illuminated pointers: 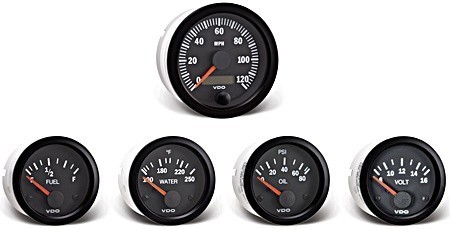 Though not quite as cool as the bomber gauges, they'd look integrated with the retaining rings, and were far more affordable. Then I got to the tachometer, which is never coming off the dash, and I realized how out of place it would look – the only hot rod gauge all by itself – and the whole concept was abandoned. So yes, I’ve seen them and think they are extremely cool! I’ve seen a few sets at car shows and they do not disappoint. And I still like things that are easy to assemble and take apart. Having the benefit of being able to pull any gauge individually would be a nice feature.
__________________
My Build Thread: http://67-72chevytrucks.com/vboard/s...d.php?t=444502 |
|
|
|
|
09-20-2014, 07:04 PM
|
#1728 |
|
Senior Member
Join Date: Mar 2011
Location: Tucson, Arizona
Posts: 2,058
|
Re: Markeb01 Build Thread
Yes, they are spendy. And they want over $200 for just the rings. I think I have found an alternative direction. It can be tough some time working things out so it all comes together, but that is the part of the build that's the most fun for me.
By the way, your truck looks fantastic with the new guards on.
__________________
Sanity'66 http://67-72chevytrucks.com/vboard/s...d.php?t=515110 Long bed, Fleetside, Small back window I've Done So Much, With So Little, For So Long, That Now I Can Do Anything With Nothing.
|
|
|
|
|
09-21-2014, 11:36 AM
|
#1729 |
|
Registered User
Join Date: Apr 2011
Location: .
Posts: 3,104
|
Re: Markeb01 Build Thread
I like the shirt. Well, I like all the things you do.
Looking great Mark. |
|
|
|
|
09-21-2014, 04:13 PM
|
#1730 | ||
|
Senior Enthusiast
Join Date: Feb 2007
Location: Spokane Valley, WA
Posts: 8,356
|
Re: Markeb01 Build Thread
Quote:
Quote:
Recognizing Im really coming to the end of modifying the truck, Ive been straying out and observing other topics. I noticed every time my wife and I are out, someone offers a compliment about her cowboy jean jacket. Its all dolled up with fancy stitching and such. It inspired me to wonder if I could do something interesting to my jean jacket. Many strangers assume I ride because of my appearance and dress, but Im not a poseur so youll never see me in a Harley T-shirt. Since Im a rather shy and bashful type, I wanted something subliminal and quiet, not so garish as to draw unwanted attention. So I had my wife attach a small insignia on the back of my jacket that will likely go unnoticed most of the time:  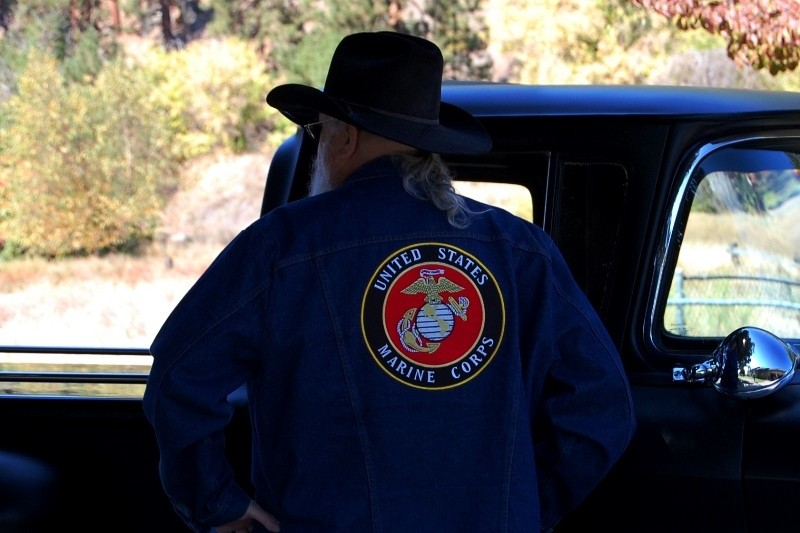 I also did another reversal last night and picked up another mechanical aircraft clock. Its the same type as what I already have, except it has the 12 hour timer (that works) as opposed to the 12 minute timer (that doesnt work). The only visible difference is the arrowhead on the 12 hour timer hand is right side up. The seller has a 100% favorable rating, and buying another clock is cheaper than finding someone to overhaul the other one.
__________________
My Build Thread: http://67-72chevytrucks.com/vboard/s...d.php?t=444502 |
||
|
|
|
|
09-23-2014, 09:25 PM
|
#1731 |
|
Senior Enthusiast
Join Date: Feb 2007
Location: Spokane Valley, WA
Posts: 8,356
|
Re: Markeb01 Build Thread
Another change of plans today. UPS showed up with an unexpected delivery, which turned out to be the electric clock that was backordered and cancelled. I subsequently purchased another mechanical clock that hasnt arrived yet. So I looked at the electric clock, and damn if it wasnt so pretty I had to pop it in the dash just to see how it looks.
I guess Ill have to reinstate the order now, as Im keeping the clock. Heres what the original electric aircraft clock looked like before I switched to a mechanical version:  Its easy to see how deep the face sits in the housing, and with the knob in the middle and lack of numerals it isnt very good for telling time at a glance. Heres the new Mid Continent MD90 clock - the face sits very close to the glass and is easily seen from just about any angle: With flash: 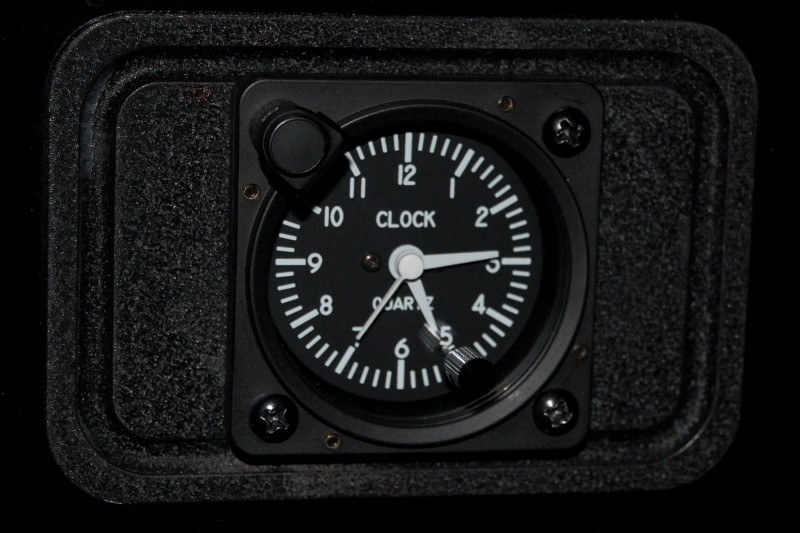 Without flash:  With night vision provided by the LED pedestal light: 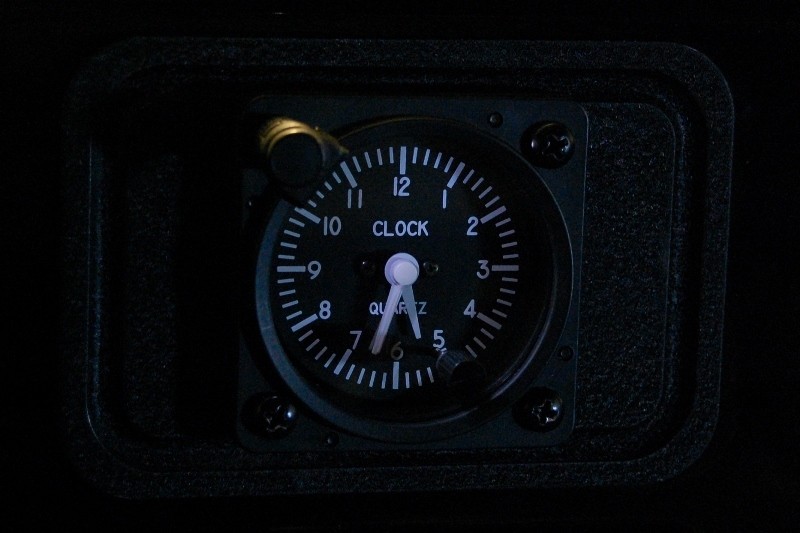 I keep asserting Im finished, and I believe Im getting pretty close. The only thing remaining I can think of is my son the custom upholstery guy has offered to make some diamond stitched sun visors that look sort of like these: 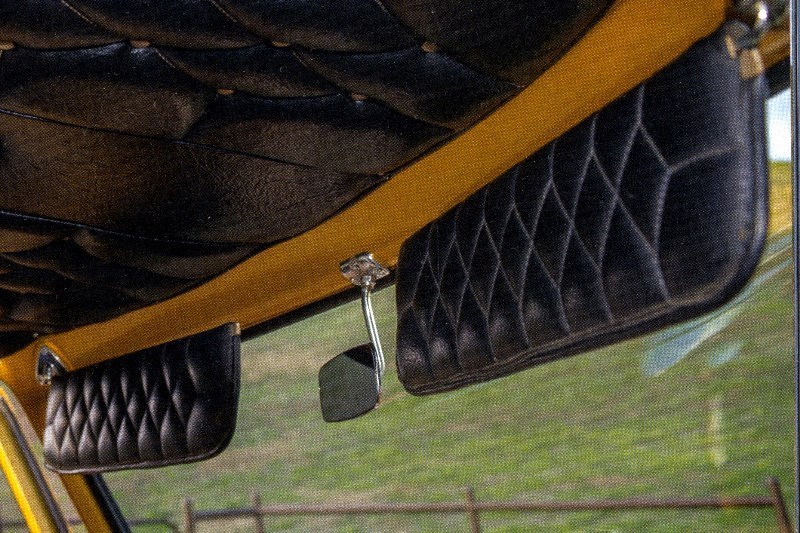
__________________
My Build Thread: http://67-72chevytrucks.com/vboard/s...d.php?t=444502 |
|
|
|
|
09-23-2014, 09:41 PM
|
#1732 |
|
Registered User
Join Date: Feb 2012
Location: pleasant valley--placerville ca
Posts: 3,039
|
Re: Markeb01 Build Thread
funny-- i have a few Harley t-shirts (no i didn't buy them) but i ware them to get dirt and grease on while working on my tk or dirt bikes. and i don't feel like a poseur. you need to take a ride on a 501 Husaberg---love your tk though, and yes you are about done?? Or start over lol. as they say it never ends. take care as i enjoy your build.
__________________
1961 chevy K10 my build is------------61K10 build |
|
|
|
|
09-27-2014, 09:11 AM
|
#1733 | |
|
Registered User
Join Date: Apr 2012
Location: Searcy, AR
Posts: 4,203
|
Re: Markeb01 Build Thread
Quote:
 Thank you for your Service!!! Thank you for your Service!!! I always enjoy checking in on your ongoing build, modification, informative thread It's been said before, but I will say again Thank You for the documentation you so painstakingly input... 
__________________
DON Proverbs 27:17  US Air Force Retarded errr Retired My '65 Stepper Build:http://67-72chevytrucks.com/vboard/s...d.php?t=533920 My '60 Rusty Patina Build:http://67-72chevytrucks.com/vboard/s...66#post7402266 My '72 http://67-72chevytrucks.com/vboard/s...59#post7204359 SOLD |
|
|
|
|
|
09-28-2014, 05:06 PM
|
#1734 |
|
Active Member
Join Date: Aug 2011
Location: Salem, Oregon
Posts: 112
|
Re: Markeb01 Build Thread
What Ta2Don said x2. Always informative and entertaining at the same time! Keep up the great work.
__________________
Fleet '66 ***************** '66 C-10 SWB 350 w/3 spd OD 4:11's - driver/project...future T-5 trans upgrade '64 C-10 LWB BBW near future project - "The Wife's Ride" '58 "Apache"Stepside BBW w/'75 K-10 4x4 conversion 331 w/350TH and NP 205 transfer 3:73's - occasional driver/ show |
|
|
|
|
09-30-2014, 12:58 AM
|
#1735 |
|
Senior Enthusiast
Join Date: Feb 2007
Location: Spokane Valley, WA
Posts: 8,356
|
Re: Markeb01 Build Thread
Thanks for all the input, feedback, and compliments guys. It is appreciated.
The person Im really attempting to help with the sometimes excessive level of detail I provide, is the mechanically inspired kid that has the ambition but doesnt know how to accomplish the task. And that person may be 10 or 40. There are a lot of first timers, and experienced members (including myself) seeking information or specific help. Im thankful to live in a time where this website exists. My truck may be nearing completion, but I intend to continue participating on this forum until Ive misplaced my very last marble! I mentioned to my wife the truck was finally nearing completion, and she intentionally misinterpreted that assertion. Acting as if I actually meant it, shes been bombarding me with honey-do projects in a deliberate effort to keep me so busy I cant dream up any more truck improvements! 
__________________
My Build Thread: http://67-72chevytrucks.com/vboard/s...d.php?t=444502 |
|
|
|
|
09-30-2014, 08:32 AM
|
#1736 |
|
Registered User
Join Date: Nov 2011
Location: fayetteville nc
Posts: 10,338
|
Re: Markeb01 Build Thread
I had to go through and catch up on your projects. As always.....great attention to detail. Your truck is a true work of craftsmanship!!!
__________________
1963 Short bed step side SBW 427 big block and borg warner T-16 HD 3 speed manual http://67-72chevytrucks.com/vboard/s...d.php?t=519869 1963 Short bed fleetside BBW 348 1st gen big block w/Powerglide http://67-72chevytrucks.com/vboard/s...d.php?t=619024 1964 Short bed trailer |
|
|
|
|
09-30-2014, 10:28 AM
|
#1737 | |
|
Registered User
Join Date: Apr 2012
Location: Searcy, AR
Posts: 4,203
|
Re: Markeb01 Build Thread
Quote:
__________________
DON Proverbs 27:17 US Air Force Retarded errr Retired My '65 Stepper Build:http://67-72chevytrucks.com/vboard/s...d.php?t=533920 My '60 Rusty Patina Build:http://67-72chevytrucks.com/vboard/s...66#post7402266 My '72 http://67-72chevytrucks.com/vboard/s...59#post7204359 SOLD |
|
|
|
|
|
10-06-2014, 02:12 AM
|
#1738 |
|
Senior Enthusiast
Join Date: Feb 2007
Location: Spokane Valley, WA
Posts: 8,356
|
Re: Markeb01 Build Thread
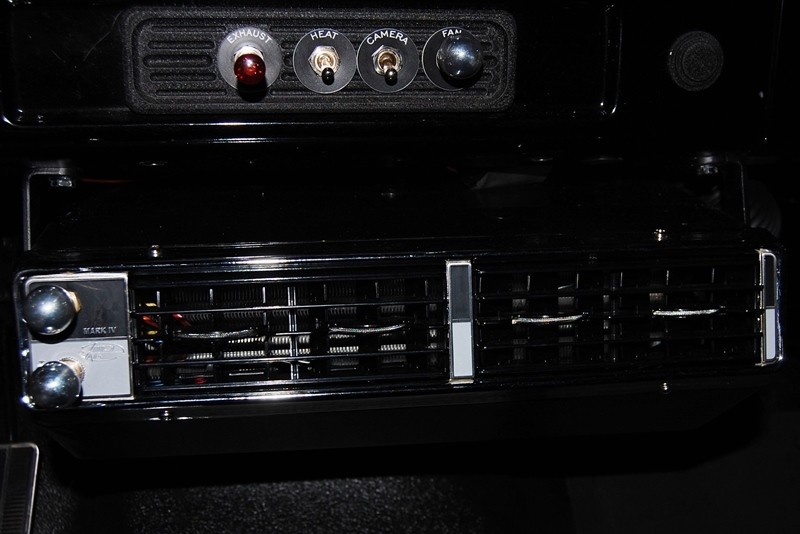
In between cutting down trees, removing stumps, repairing fences, shoveling crushed rock, and rebuilding yard ornaments I finally found another truck project to work on. I dislike the light coloring on the lower half of the faceplates on the A/C evaporator:
 So they are either going to be painted black, or replaced with some 1980s vintage prism tape that came in model car kits: 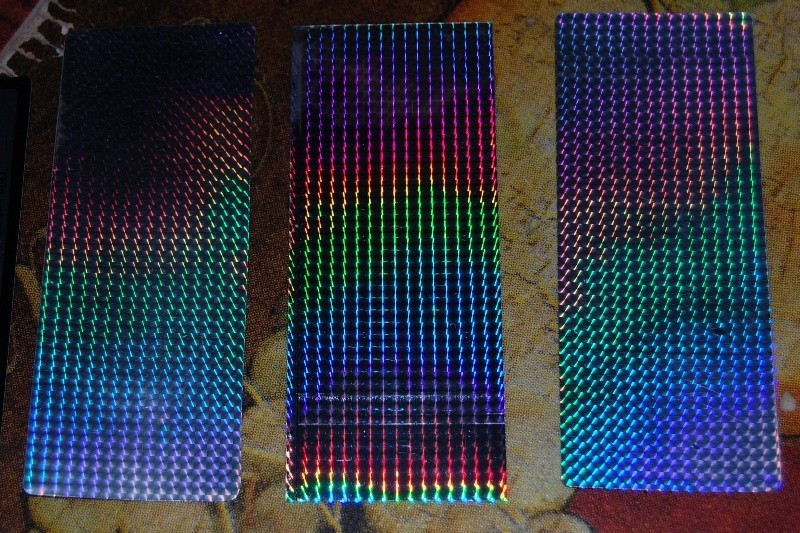 I figure it will fit right in with the metalflake steering wheel and shift knob. I also took a few minutes to mount my 1960s vintage Dragmaster 15x6 mags on the garage wall: 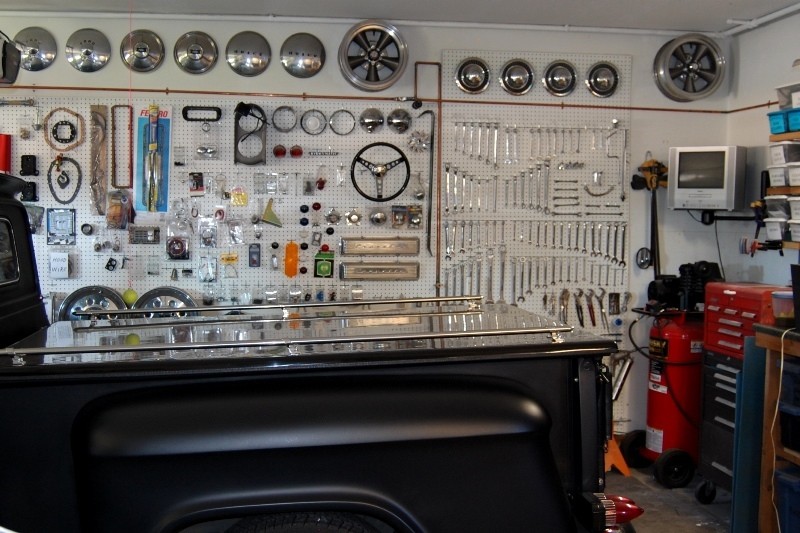 Im hanging on to them for possible future use. Either with old pie edge Firestones on the front if I can ever afford a pair of Radir slicks, or perhaps for the snow tires to keep the Americans out of the winter weather. Rather than using lag bolts into a wall stud, I fabricated brackets which bolted to a stud, and left a ½x20 bolt sticking out. This way I can attach them to the wall with a single lug nut. It makes putting them up or removing them much easier. And heres a sample of the wife projects. This was a sign her brother made for our property up in Idaho years ago. It was badly deteriorated from weather and extreme temperatures. So I sanded it all down and coated both sides with Rage body filler. After final sanding it was given about 4-5 brush applied coats of black acrylic enamel car paint I had left over. Here it is mounted on the post:  And here it is with a bit of digital enhancement (removing the post) making it appear as if walking on the other side of the street! 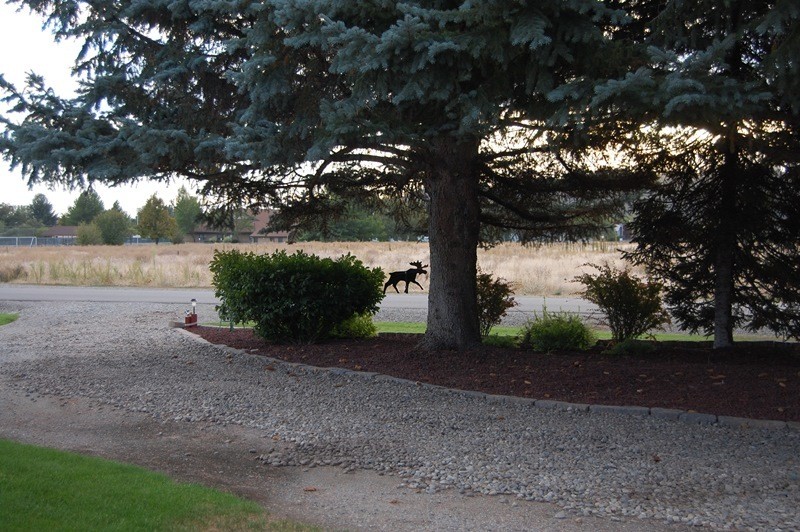 More landscape shoveling tomorrow, so I better call it a night.
__________________
My Build Thread: http://67-72chevytrucks.com/vboard/s...d.php?t=444502 |
|
|
|
|
10-07-2014, 08:08 AM
|
#1739 |
|
Registered User
Join Date: Jun 2012
Location: Selkirk Ontario Canada
Posts: 1,141
|
Re: Markeb01 Build Thread
thats cool mark ..hey i see a couple of things on the wall i need to borrow lol
__________________
My 63 GMC Panel Slow Build http://67-72chevytrucks.com/vboard/s...=1#post5457281 63 
|
|
|
|
|
10-09-2014, 07:39 AM
|
#1740 |
|
Registered User
Join Date: Dec 2012
Location: Rochester, KENT
Posts: 10,474
|
Re: Markeb01 Build Thread
Looking great Mark.
I love weather vanes on house chimneys etc and your "moose" would make a great looking centre piece for one.
__________________
MY BUILD LINK: http://67-72chevytrucks.com/vboard/s...585901]Redneck Express - 1966 C10 Short Fleetside MY USA ROADTRIPS http://forum.retro-rides.org/thread/...2018-humdinger IF YOU CAN'T FIX IT WITH A HAMMER, YOU'VE GOT AN ELECTRICAL PROBLEM MATE. |
|
|
|
|
10-12-2014, 09:55 PM
|
#1741 | ||
|
Senior Enthusiast
Join Date: Feb 2007
Location: Spokane Valley, WA
Posts: 8,356
|
Re: Markeb01 Build Thread
Quote:
Quote:
Regarding new business, I disliked the appearance of the gray/black two tone markings on the front of the Vintage Air evaporator from day 1: 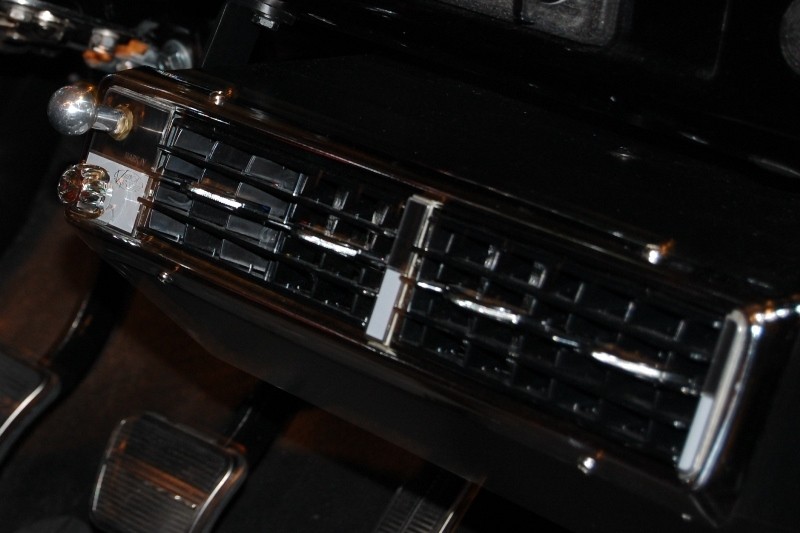 This evening they were finally covered over with model car prism tape from model car kits produced in the 1980’s: 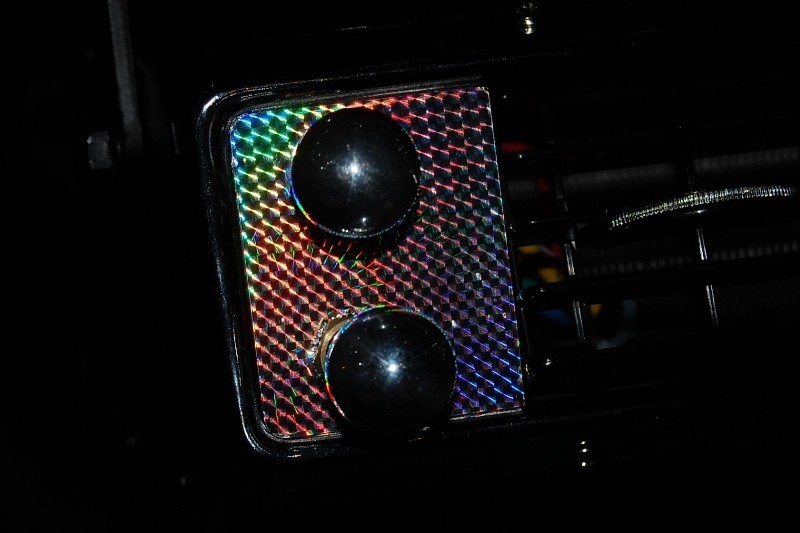 The left panel with the switches is a solid steel plate that detaches when the switch nuts are removed. I simply flipped it over and used the smooth back to eliminate the embossed lettering. It really dazzles in the proper light: 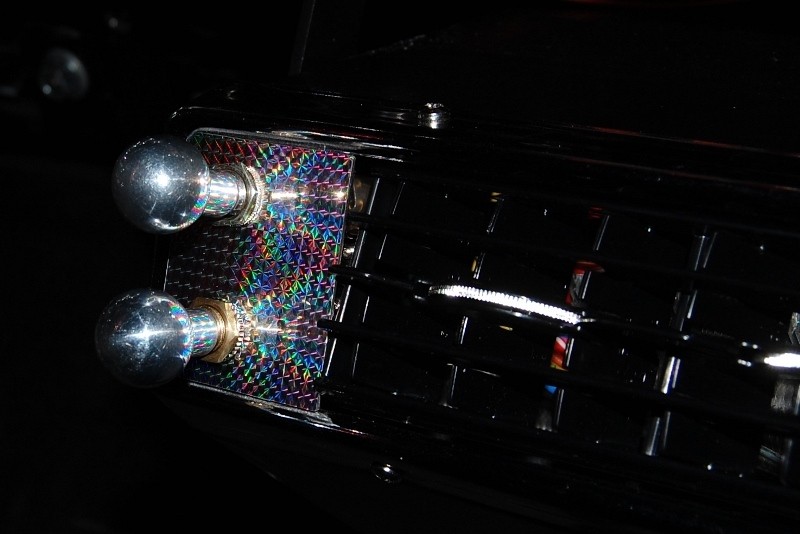 The other two pieces are not easily removable without possible damage to the bezel, so I just fitted pieces over them. This might not be the ultimate solution in the universe, but I like it much better than the two tone presentation, and will suffice until something better comes along: 
__________________
My Build Thread: http://67-72chevytrucks.com/vboard/s...d.php?t=444502 Last edited by markeb01; 10-12-2014 at 10:02 PM. |
||
|
|
|
|
10-13-2014, 10:05 AM
|
#1742 |
|
Registered User
Join Date: Apr 2012
Location: Searcy, AR
Posts: 4,203
|
Re: Markeb01 Build Thread
Nice change!!!
__________________
DON Proverbs 27:17 US Air Force Retarded errr Retired My '65 Stepper Build:http://67-72chevytrucks.com/vboard/s...d.php?t=533920 My '60 Rusty Patina Build:http://67-72chevytrucks.com/vboard/s...66#post7402266 My '72 http://67-72chevytrucks.com/vboard/s...59#post7204359 SOLD |
|
|
|
|
10-14-2014, 12:25 AM
|
#1743 |
|
Senior Enthusiast
Join Date: Feb 2007
Location: Spokane Valley, WA
Posts: 8,356
|
Re: Markeb01 Build Thread
Not that anyone else would ever notice, but today I moved the external clock light from the upper left to the upper right corner, providing more unrestricted viewing from the drivers seat. I would have done that in the first place, but was concerned there might be glare from the light. The truth is its impossible to tell where the light is coming from. It makes the clock look like it has soft glow-in-the-dark illumination.
I also made new brackets for attaching the evaporator to the bottom of the dash. This relocated the evaporator roughly 1 inch closer to the dash, and 1 inch closer to the firewall. It makes a nice cosmetic improvement in real life: 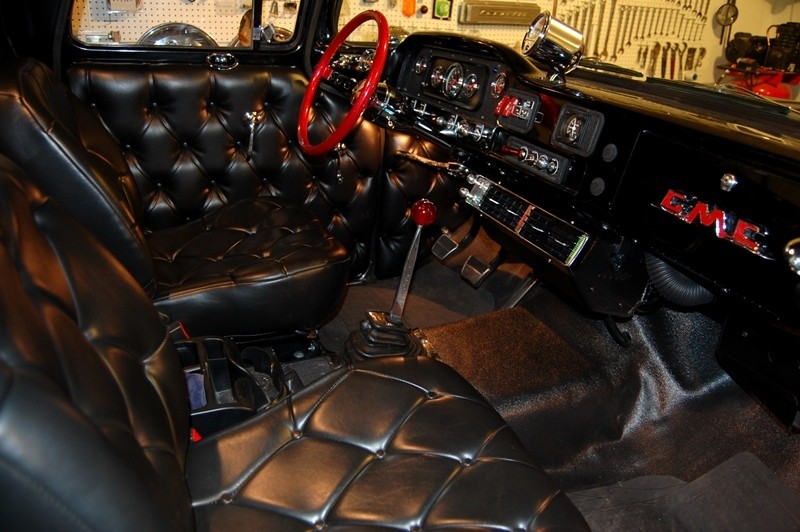 
__________________
My Build Thread: http://67-72chevytrucks.com/vboard/s...d.php?t=444502 |
|
|
|
|
10-14-2014, 09:48 AM
|
#1744 |
|
Registered User
Join Date: May 2007
Location: Deale Md
Posts: 4,663
|
Re: Markeb01 Build Thread
I like it.
__________________
James 63 GMC V6 4speed carryall 65 chevy swb bbw V8 auto 68 K20 327/4 speed, buddy buckets 2002 GMC CC Dually Duramax 64 GMC lwb 3/4 V6 4speed SOLD 66 GMC swb bbw buddy buckets SOLD IG duallyjams The only thing that stays the same is constant change! |
|
|
|
|
10-14-2014, 07:53 PM
|
#1745 |
|
Registered User
Join Date: Apr 2012
Location: Searcy, AR
Posts: 4,203
|
Re: Markeb01 Build Thread
Diggin' the subtle changes
__________________
DON Proverbs 27:17 US Air Force Retarded errr Retired My '65 Stepper Build:http://67-72chevytrucks.com/vboard/s...d.php?t=533920 My '60 Rusty Patina Build:http://67-72chevytrucks.com/vboard/s...66#post7402266 My '72 http://67-72chevytrucks.com/vboard/s...59#post7204359 SOLD |
|
|
|
|
10-14-2014, 08:40 PM
|
#1746 |
|
Registered User
Join Date: Sep 2013
Location: Strawberry Arkansas
Posts: 1,137
|
Re: Markeb01 Build Thread
Very nice! I love checking in on you to see what you come up with next.
__________________
http://67-72chevytrucks.com/vboard/s...d.php?t=605217 |
|
|
|
|
10-21-2014, 11:48 PM
|
#1747 |
|
Senior Enthusiast
Join Date: Feb 2007
Location: Spokane Valley, WA
Posts: 8,356
|
Re: Markeb01 Build Thread
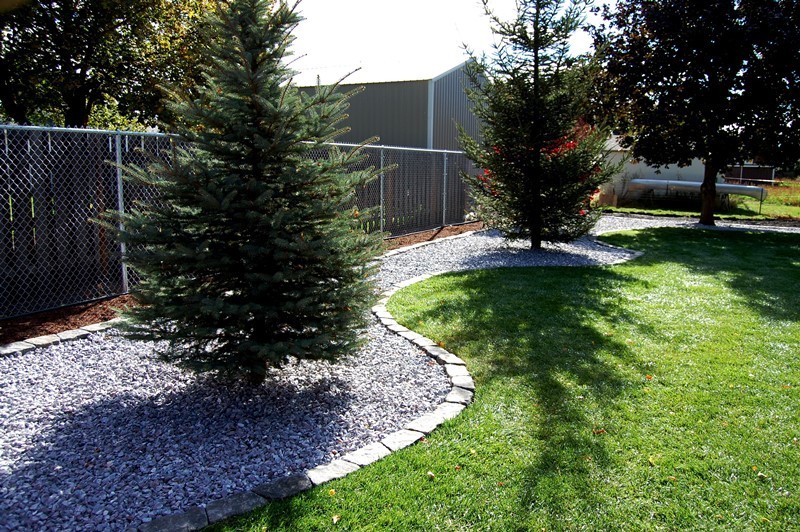
Havent been working on too many truck projects, but finally wrapped up most of the landscaping projects for the year. My wife and youngest daughter set 3 pallets of mowing blocks around the perimeter of the lawn (1/2 acre) after digging out and leveling the required spacing. After this 20 yards of white rock and 7 yards of mulch were hand shoveled into position:
 They also power tilled a nice size garden area for planting next spring, (shown on the right side below: 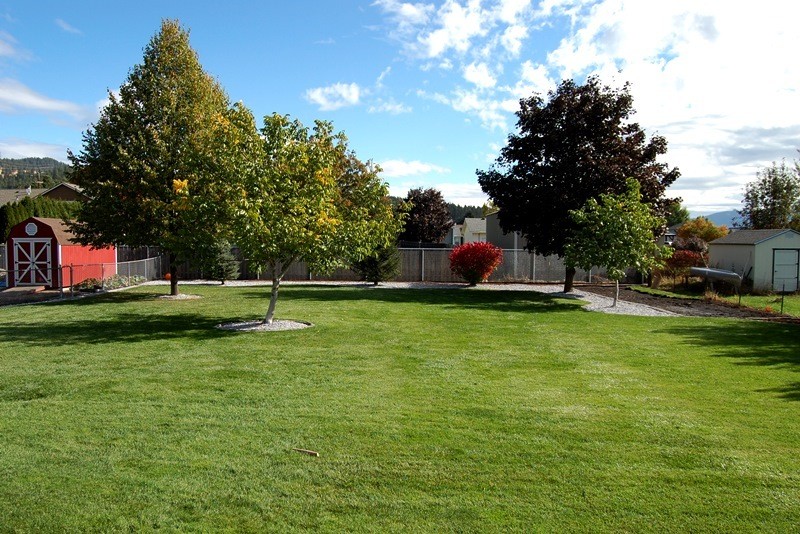 I showed my wife how to do bare foil on model car trim, and shes been going to town. First up was this 63 Corvette:  Followed by this 1960 Ranchero: 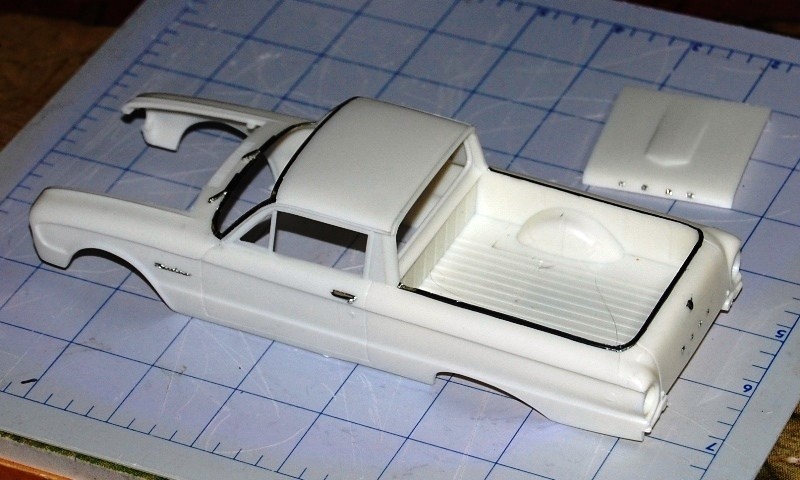 Shes now working on a 59 Buick hardtop and has a 64 Falcon Sprint on standby. I stripped my Giant Gila Monster diorama from its cabinet, returned it to an open 2x4 display with both sides of the movie set represented: 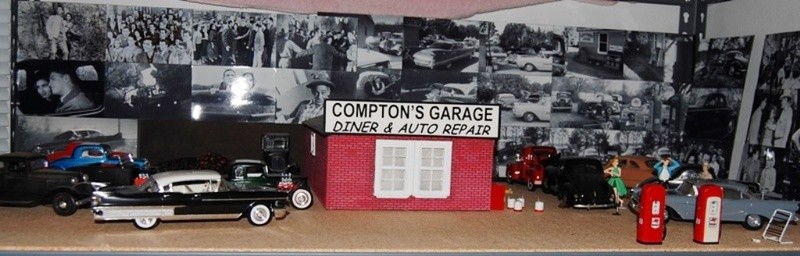 This allows me to repurpose the enclosed cabinet for Monogram 1/8th scale models: 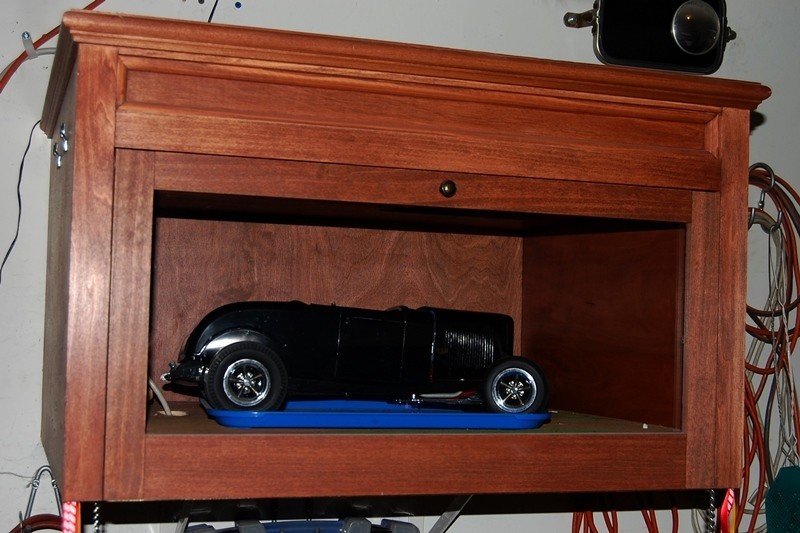 I have several big models Ive never completed as I had no place to display them. Two will easily fit in the cabinet. And finally I did perform a couple of trinket projects on the truck. I found the decal that Comp Cams provided with the camshaft kit, so it replaced the Moon decal Ive had stuck on the heater plate for a year or so:  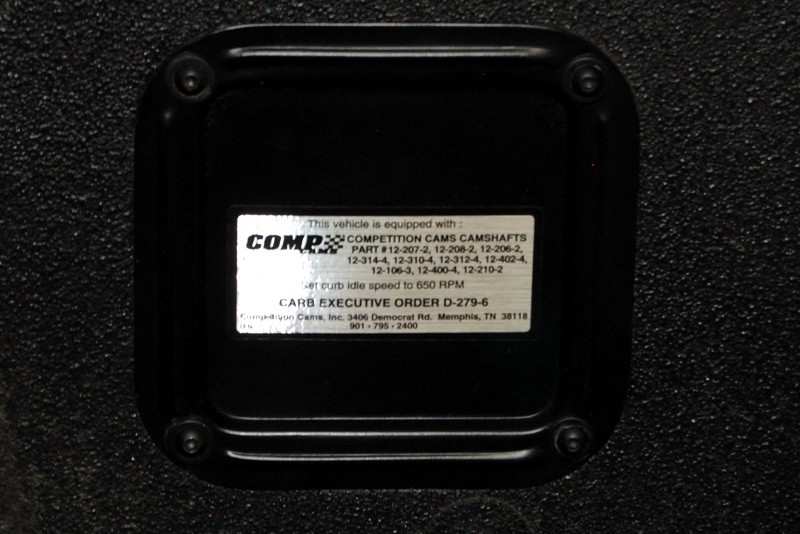 I had another Moon decal, so it was placed on the end of the brake booster vacuum reserve tank: 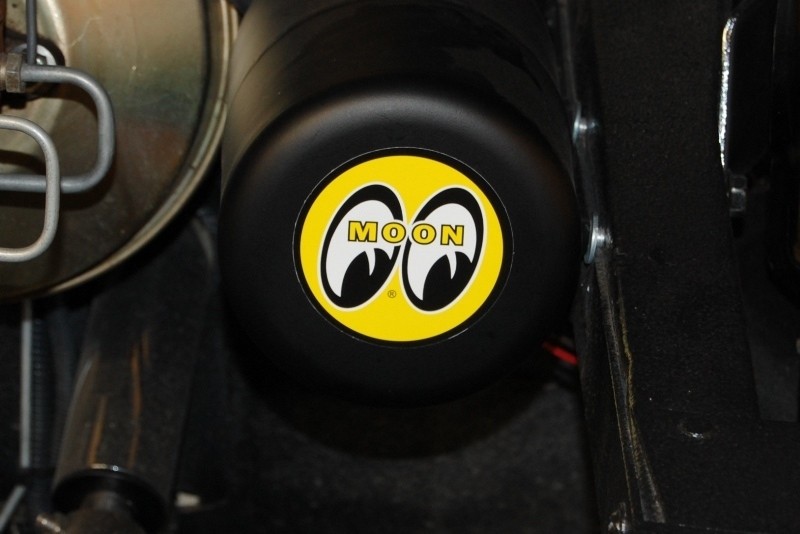 Looking at the overall engine compartment, it seemed the air filter was looking somewhat soiled. I tracked back and discovered it had been on the engine about 18 months, so I went ahead and slapped on a new one: 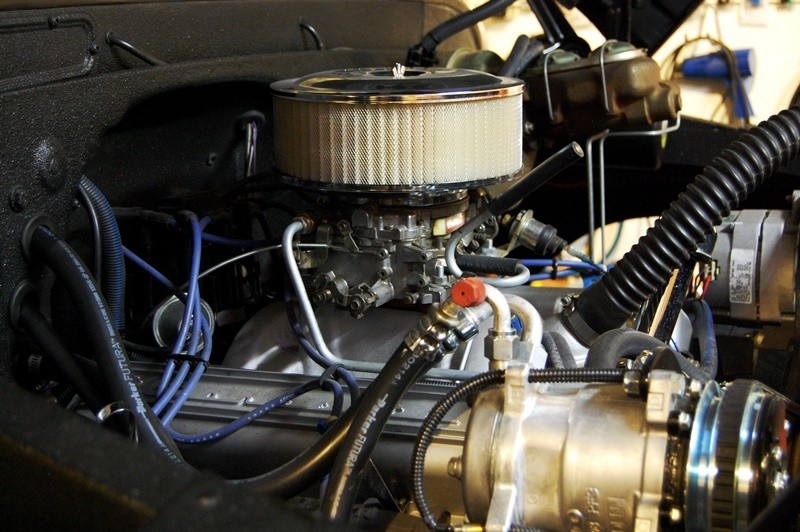 Thats about it for today. With the truck mostly finished, model car production is in full swing for the first time in several years. The goal is to build out all the unfinished kits so I can work on diorama arrangements rather than building more cars.
__________________
My Build Thread: http://67-72chevytrucks.com/vboard/s...d.php?t=444502 |
|
|
|
|
10-22-2014, 10:03 AM
|
#1748 |
|
Registered User
Join Date: Apr 2012
Location: Searcy, AR
Posts: 4,203
|
Re: Markeb01 Build Thread
Not sure if there are any trade secrets involved in the foil trim work on the models, but thanks for the idea something to try soon on a couple of models I need to finish...
__________________
DON Proverbs 27:17 US Air Force Retarded errr Retired My '65 Stepper Build:http://67-72chevytrucks.com/vboard/s...d.php?t=533920 My '60 Rusty Patina Build:http://67-72chevytrucks.com/vboard/s...66#post7402266 My '72 http://67-72chevytrucks.com/vboard/s...59#post7204359 SOLD |
|
|
|
|
10-22-2014, 04:45 PM
|
#1749 |
|
Senior Enthusiast
Join Date: Feb 2007
Location: Spokane Valley, WA
Posts: 8,356
|
Re: Markeb01 Build Thread
For someone in your line of work it should be relatively easy. Theres really no magic to it, but a few things are essential enthusiasm, patience, a steady hand, fresh Bare Foil, and a new Xacto blade every time. Q-Tips and a link free cloth really help in forming sharp edges. A clean surface without mold release or fingerprints really helps as does good engraving on the model. The AMT 40 Ford coupe is a classic example. The body trim is always crisp, but the hood trim can be almost non-existent on newer kits. Theyve been in virtually continuous production for 54 years, so I buy and build mostly vintage kits that produced nice engraving, years before the tools wore out.
Here are a few of the more tedious applications:  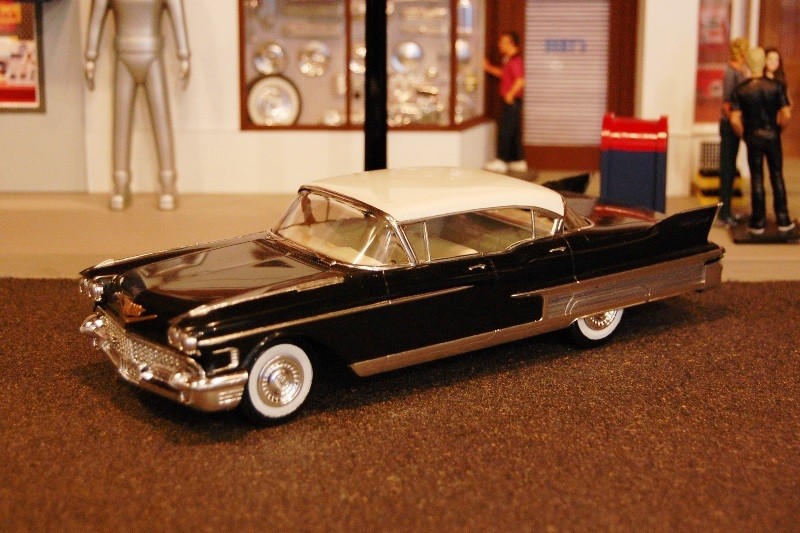 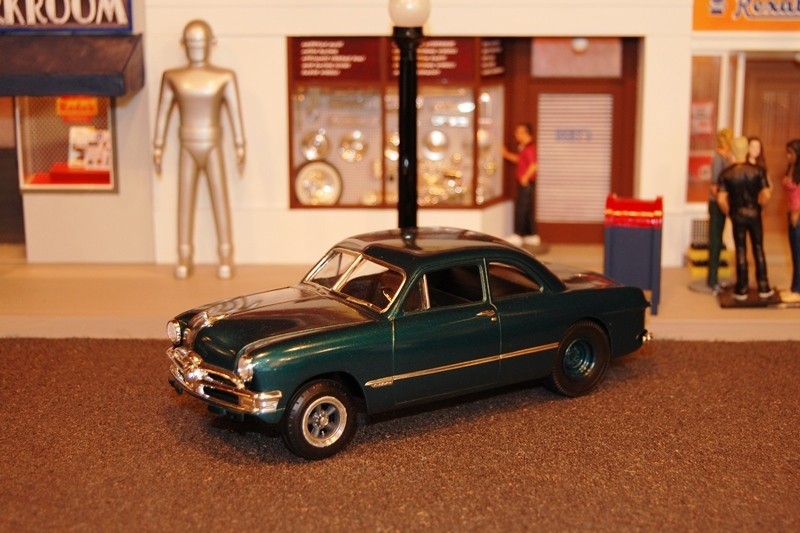 This one was extra difficult, as it started out as a two door Fairlane hardtop. All the side trim had to be stripped, new doors cut, new side trim added, and window posts created before the foil could be applied: 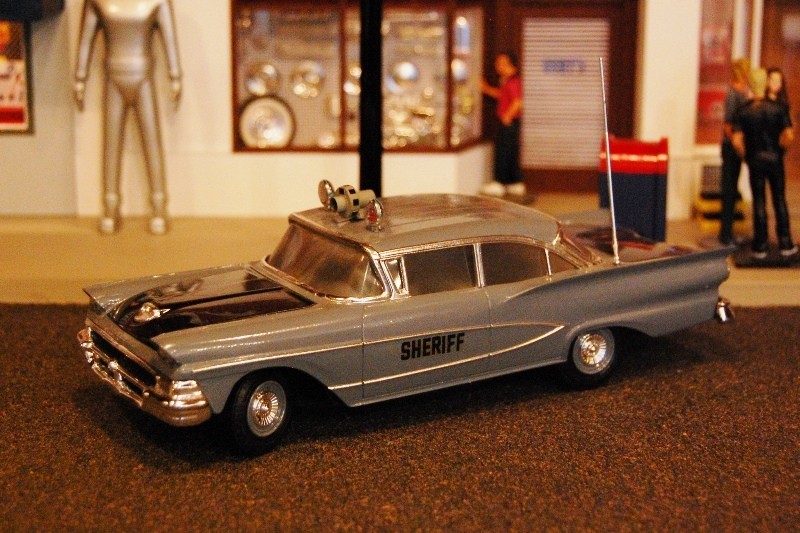 This is a model of my wifes first car: 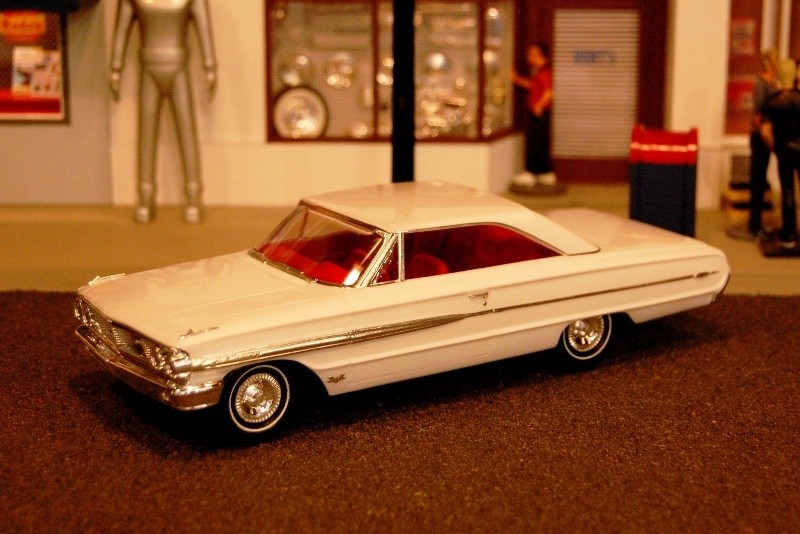 And this is a model of the car I owned upon return from Vietnam: 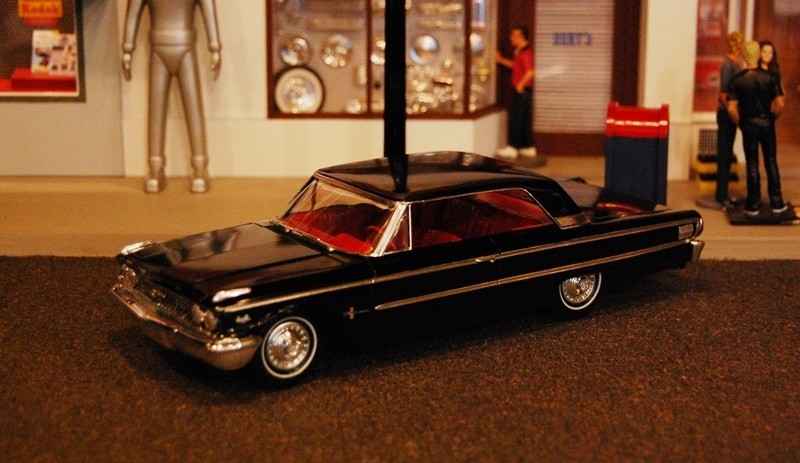 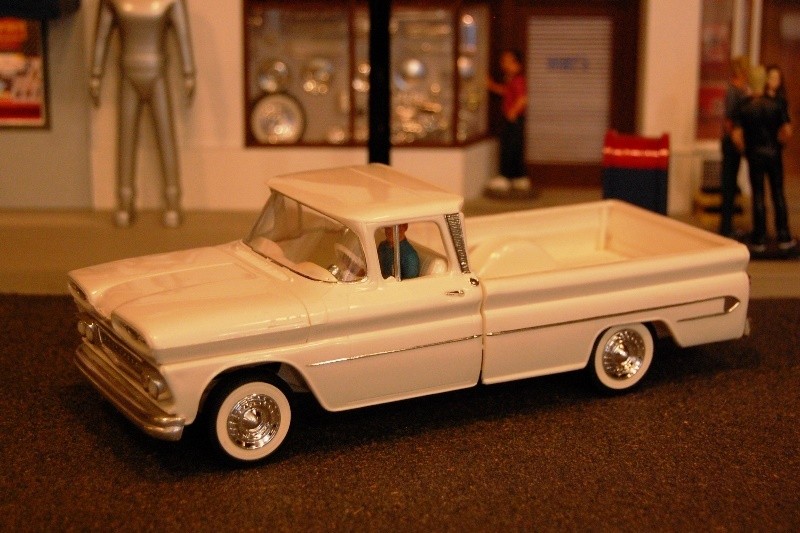 This is a 1960 vintage 40 Ford kit with polished plastic and no paint: 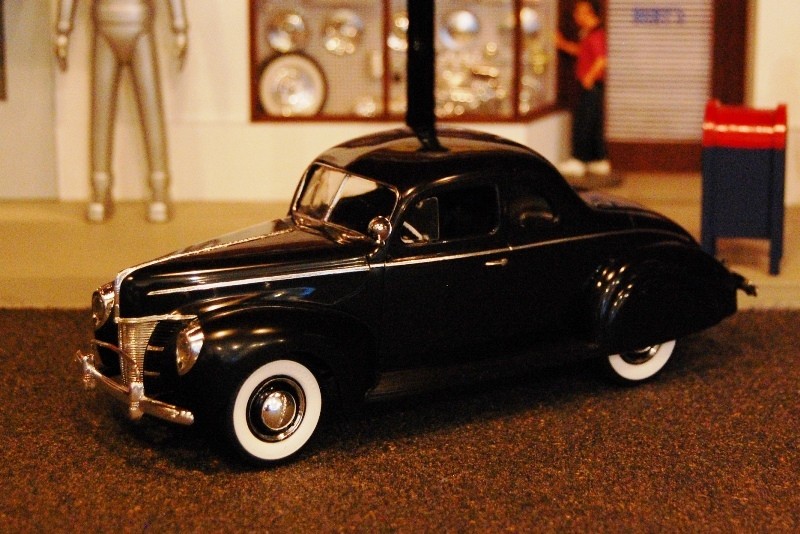 My oldest son did this one. It was well beyond my enthusiasm level. The model is one of the original 1962 Revell paint it from the inside metalflake releases: 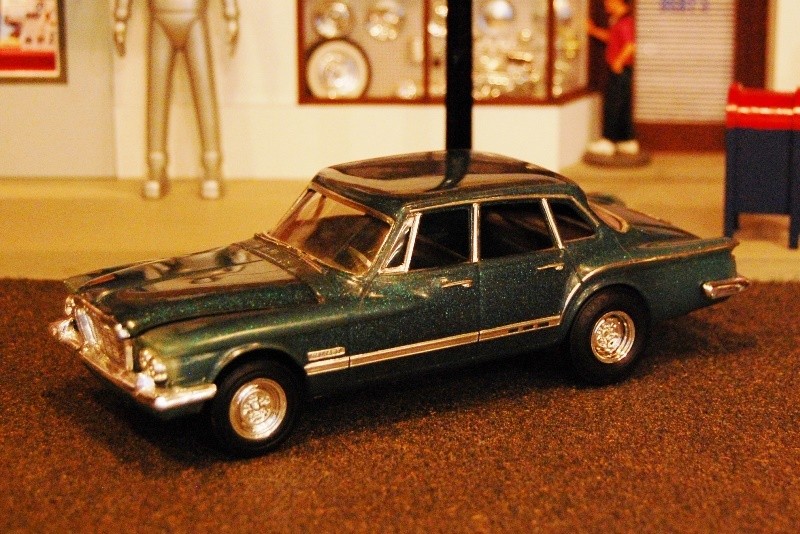
__________________
My Build Thread: http://67-72chevytrucks.com/vboard/s...d.php?t=444502 |
|
|
|
|
10-22-2014, 07:51 PM
|
#1750 |
|
Registered User
Join Date: May 2007
Location: Deale Md
Posts: 4,663
|
Re: Markeb01 Build Thread
The blonde looks like Debbie from American Graffiti.
__________________
James 63 GMC V6 4speed carryall 65 chevy swb bbw V8 auto 68 K20 327/4 speed, buddy buckets 2002 GMC CC Dually Duramax 64 GMC lwb 3/4 V6 4speed SOLD 66 GMC swb bbw buddy buckets SOLD IG duallyjams The only thing that stays the same is constant change! |
|
|
|
 |
| Bookmarks |
|
|


 Linear Mode

