
|
Register or Log In To remove these advertisements. |
|
|
|
|||||||
 |
|
|
Thread Tools | Display Modes |
 02-22-2009, 10:43 AM
|
#1 |
|
Registered User
Join Date: Feb 2009
Location: coloradical springs
Posts: 29
|
Intro and My project and project woes
hey all, My name is mike i live in CO
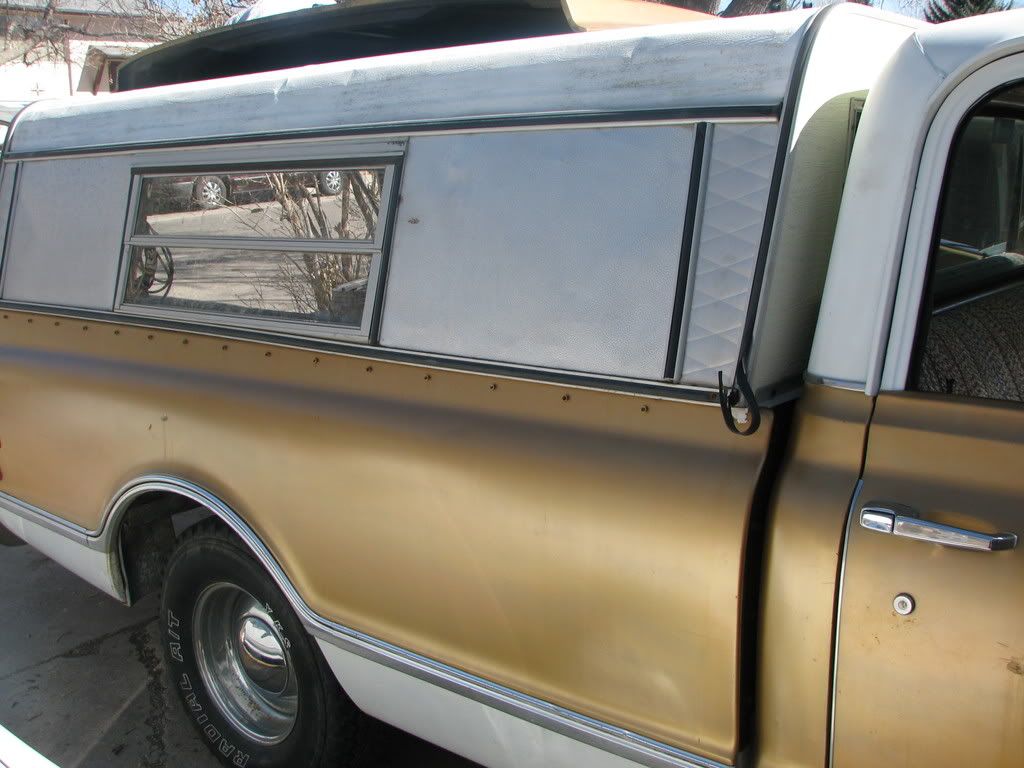
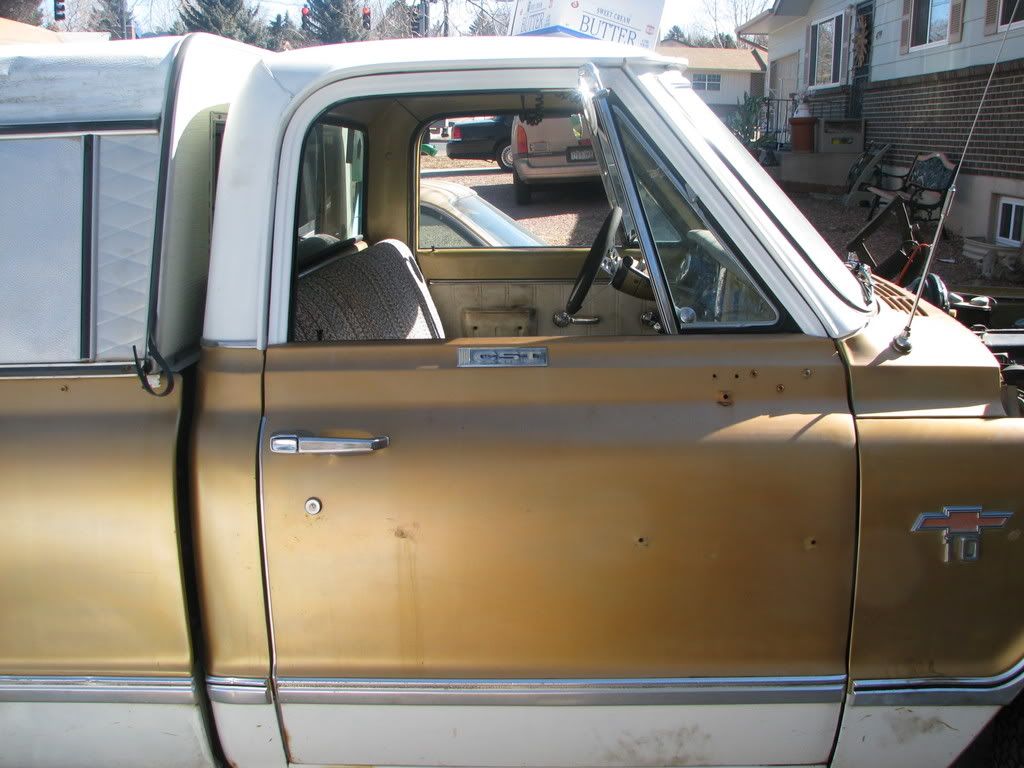
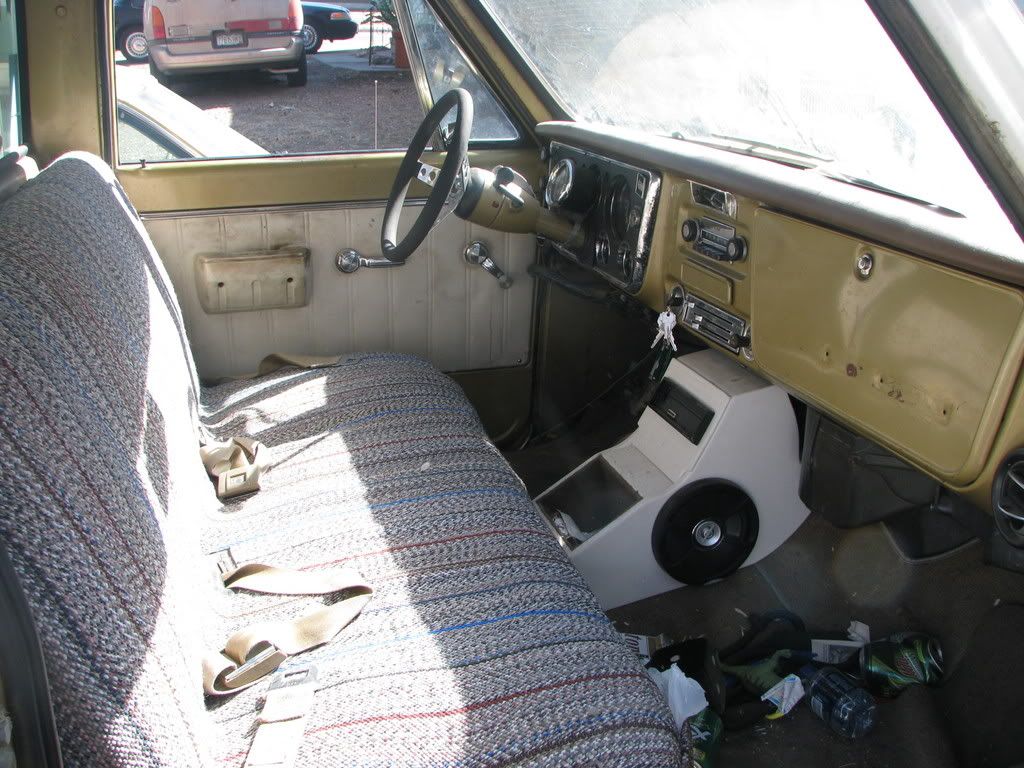
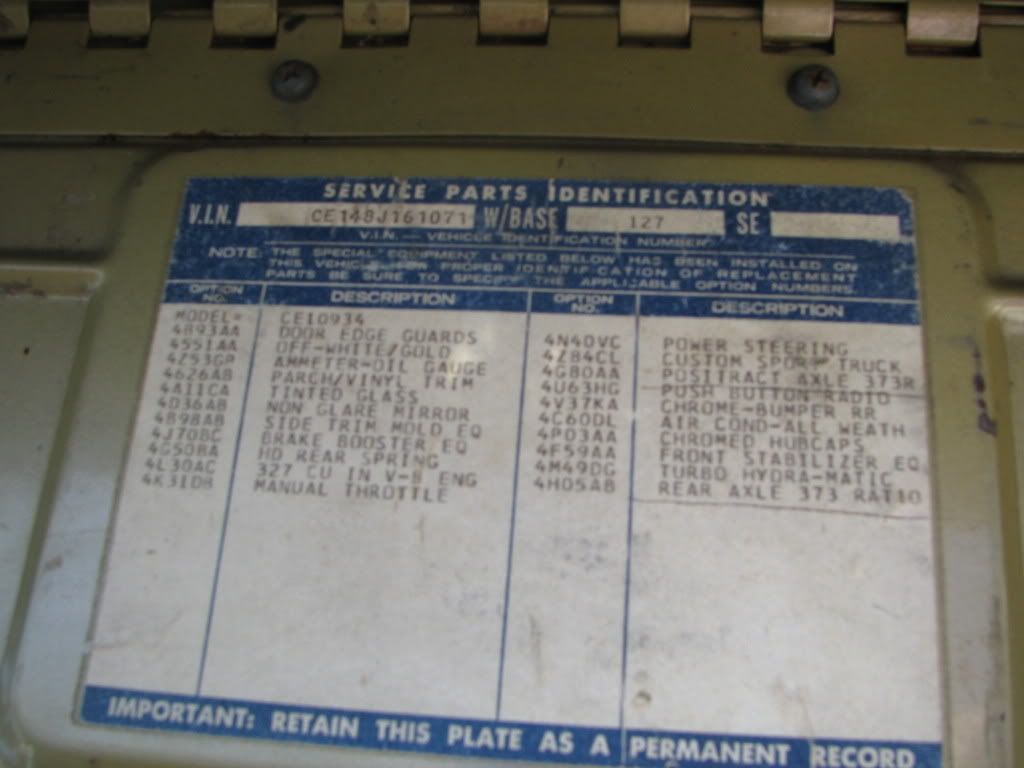
i have a 1986 Chevy c10 CST 50th anniversary LWB with a 1970ish topper current mods/recent work: early classic ultimate 2/4 drop kit early classic dash pad/misc badges/rearview mirror/dome light/door handle all new brakes edelbrock 650cfm edelbrock performer series intake manifold rebuilt 3.73posi rear axle rebuilt th400r tranny rebuilt heads RV-grind cam....Read below rebuilt HEI disto LMC: new speedo (factory style) LMC: carpet sound proofing (uninstalled) LMC: carpet kit-gold (uninstalled) LMC: white vinyl /hounds-tooth upholstery (uninstalled) Tachometer (generic-mounted to steering column) Grant steering wheel (factory one was in shambles and replacement was very expensive) i bought the truck from a friend (now and ex-friend) about 3 years ago for a case of beer and 1300.00. I was happy to buy it since my granddad had the exact same truck when i was a kid (his was white) and i loved that truck. truck is in pretty decent/very good condition for being 41 years old. original paint is faded, no rust issues (other than 2 spots in the truck bed floor near the tailgate) but needless to say i have been working out the gremlins ever since i bought it. and sometimes it seams like i fix something just so something else will break/go wrong. 2 years ago, when the carb on the truck died, i decided to buy the intake and carb (cheaper than rebuilt factory) and give the truck a little more pep, and installed/converted to HEI. truck ran fine for about 2 days then started back-firing through the carb. took it to a reputable shop, here in town, when i could not figure it why. (im used to working on 4cyl OBD VWs, not carbs and V8s) the cam was rounded down on half the lobes, ok...easy fix and hey while your working on the truck here is a list of other things i want and need done..... enter rebuilt heads (i sent to a machine shop), axle, brakes, installed new suspension, and tranny (he pulled and i took it to a tranny shop then he installed it), and "edelbrock performer series RV-grind cam". $3500.00 later i had one bad truck. and i was happy for about 300 miles... driving down 45mph road leaving a friends house at 1230am.... my truck sputters (softly) and stalls. ok give it a couple minutes go to start...the starter torques the engine and the whole truck torques until the starter goes CLICK and shuts off with out the engine turning....<enter 5minutes strand of explicits that would make a sailor cry> get out check under the hood, no signs of oil splatter truck wasn't hot and had coolant o signs of a cracked block or thrown rod..... tow the truck out to my parents place.... since i didn't have the money for a new engine or rebuild....fast forward to 2 weeks ago.... my GF (of 5years and mother of my daughter) and I decided that with the current economy...we should trade in my 07 VW GTi and her 06 honda Accord and get 1 safe AWD family car, fix my truck and ill drive it...saving us about 600.00 a month in car payments and insurance) so we got our tax returns and i bought... i bought a new engine: http://high-performance-engines.com/...duct_Code=HP29 (with dyno test/tune) new motor mounts, alternator, water pump, fuel pump, flex-plate, weiend dual-plane intake, and all the other misc items and fluids etc. yesterday a friend and i pulled the old lump (with plans of rebuilding the 327 and so i would have a spare engine just in case) when we pulled the distributor i noticed the gear was a little worn down and had metal flakes on it...ut-oh. continue pulling apart, when we started pulling the exhaust manifolds, the drivers side was spit in 2 just above the flange, that's when we noticed the motor mount had also split in 2 (causing the broken manifold).....grrg. when we got the engine out of the engine bay and still on the engine-lift, i look at the flex-plate/torque converter and i see what caused the failure..... the camshaft was hanging out the rear journal......pull the flex-plate...and 4" of camshaft falls to the ground..... look into the rear journal and the lifters are hanging down, stick my finger in the journal and a lifter and push rod falls into the oilpan. after 10 minutes we pulled about 5-10 ounces of iron chunks of block out of the rear journal (which was scored and ground down by the cam gear). so the block is toast.....(grrg and laughter) have some questions: 1) the alternator bracket and A/C compressor bracket are cast into the exhaust manifolds, what do i need to do to keep those parts and install headers? i don't really want to buy the serpentine belt conversion from GM. 2)am i the only person to ever shatter a camshaft? 3) what else would you recommend i replace since i am currently sitting with an empty engine bay, other than cleaning 40years of grime and oil from the engine bay and chassis? |

|

|
|
02-22-2009, 11:40 AM
|
#2 |
|
Old member
Join Date: Jan 2002
Location: Liberty, & Garden City S.C. , U.S.
Posts: 19,936
|
Re: Intro and My project and project woes
WELCOME
Sounds as if you have it covered pretty good. Get the fire wall and frame all cleaned up good and reinstall it. Go back with a HEI distributor makes a lot nicer starting and firing.
__________________
1971 LWB Custom, 6.0LS & 4L80E, Speedhut.com GPS speedometer & gauges with A/C. 20" Boss 338's Grey wheels 4 wheel disc brakes. My Driver Seeing the USA in a 71  Upstate SC GM Truck Club 2013,14 and 2016 Hot Rod Pour Tour http://upstategmtrucks.com/ Get out and drive the truck this summer and have some fun! It sucks not being able to hear! LWB trucks rule, if you don't think so measure your SWB! After talking to tech support at Air Lift I have found out that the kit I need is 60811. Per the measurements I gave them. Ride height of truck inside spring and inside diameter of springs. Last edited by Andy4639; 02-22-2009 at 11:41 AM. |
|
|
|
|
02-22-2009, 11:49 AM
|
#3 |
|
GEARHEAD
Join Date: Aug 2003
Location: MN
Posts: 6,107
|
Re: Intro and My project and project woes
I broke a cam once in my truck. But it started by breaking a connecting rod, a part of which flew up and broke the cam in 3 places. The only parts from the short block to be salvaged were 7 rods and pistons and the oil pan, which are still in my engine now 20+ years later.
__________________
If no one knows what you're doing, they can't tell you you're doing it wrong HG's Dream Car Build - Shelby Cobra Kit Build your own adjustable track bar 71  Long Fleet C/10 Long Fleet C/10 72  Jimmy 4x4 (Junkyard Jimmy) Jimmy 4x4 (Junkyard Jimmy)HG's Plow Truck '78  K35 Dually K35 DuallyBigass Farm Truck HG's thread of miscellaneous stuff |
|
|
|
|
02-22-2009, 11:54 AM
|
#4 |
|
Registered User
Join Date: Apr 2000
Location: Bonne Terre, Mo
Posts: 3,005
|
Re: Intro and My project and project woes
On your engine mounts maybe upgrade to something heavier than stock. Seems to me every engine yanked has been tuff on the drivers side seems to take a beating.
__________________
'69 Chevy Long Fleet & '71 GMC Short Step & Project "ODD BALL" "You can wash a pig, soak it in most expensive perfume. In the end it is still just a pig." ODD BALL build thread http://67-72chevytrucks.com/vboard/s...d.php?t=478629" |
|
|
|
|
02-22-2009, 12:13 PM
|
#5 |
|
Special Order
  Join Date: Nov 2004
Location: Mt Airy, MD
Posts: 85,863
|
Re: Intro and My project and project woes
Hey,WELCOME!! Sounds like a nice truck.
You just had a cam put in it?I dunno,doesn`t look good for that shop in my eyes.What exactly did they do with the motor? There are brackets you can buy for headers on pre-69 small blocks with no boss mounts.I'd think those would still work with later-style heads with the bosses.Or,you could seek out the later brackets. Take out your speedometer cable and clean/lube it.Take you cowl cover off,clean cowl,and install screen.How`s the fuel line?
__________________
"BUILDING A BETTER WAY TO SERVE THE USA"......67/72......"The New Breed" GMC '67 C1500 Wideside Super Custom SWB: 327/M22/3.42 posi.........."The '67" (project) GMC '72 K2500 Wideside Sierra Custom Camper: 350/TH350/4.10 Power-Lok..."The '72" (rolling) Tim "Don't call me a redneck. I'm a rough cut country gentleman" R.I.P. ~ East Side Low Life ~ El Jay ~ 72BLUZ ~ Fasteddie69 ~ Ron586 ~ 67ChevyRedneck ~ Grumpy Old Man ~ |
|
|
|
|
02-23-2009, 11:32 AM
|
#6 | |||
|
Registered User
Join Date: Feb 2009
Location: coloradical springs
Posts: 29
|
Quote:
Quote:
Quote:
...lol been searching for these brackets and it seams that there are a ton of different versions, i need to figure out which ones i need, so ill make some calls today. speedo cable: clean/lube: i can do that. cowl clean and install screen? just a screen to prevent junk from going into the cowl? who makes a screen or should i just DIY one? fuel line: not sure, but i can easily replace it... although i plan on relocating the gas tank behind the axle as soon as funds come in.... update: pulled my pressure washer out yesterday, got the truck out of the garage, and on jackstands and jack, pulled the front wheels/tires to clean the under carriage and it looks alot better, still needs alot more cleaning.... and i think i'm going to go buy a 2k psi washer the 1k psi is 6-7 years old and doesnt work as well as it used to. ill try and get some more work done through out the week, and ill try and post up some pics soon. thanks fior the help.  any other suggestions? |
|||
|
|
|
|
02-24-2009, 08:47 PM
|
#7 |
|
Registered User
Join Date: Feb 2009
Location: coloradical springs
Posts: 29
|
ok i found a set of prothane motor mounts, prothane tranny mount, and prothane 1 1/16" front sway bar ordered them.
i think i am just going to get a factory ram horn manifold for the drivers side until i have the money for headers, a dual exhaust and cross-member with exhaust cut-outs at the same time. i think i wanna get the disc brake conversion done first(2.5" drop spindles) and possibly bag the rear end and relocate the gas tank to the rear. my main goal is a slammed OEM-plus look with decent performance and a nice interior with all the amenities of a new truck. |
|
|
|
|
02-24-2009, 09:32 PM
|
#8 |
|
Tot Roddin'
Join Date: Apr 2005
Location: Mid-MO
Posts: 24,461
|
Re: Intro and My project and project woes
 to the board from Mid-MO!!! to the board from Mid-MO!!!Sounds like one sweet project!
__________________
-Nate  1969 CST SWB - Project Blank Slate (4.5/6" ECE Static Drop, 6-lug disc brake upgrade (manual), Billet Specialties Vintec 20x8.5 255/40 (F) 20x10 295/40 (R), 250 I-6) 1960 AMF Skylark - Tot Roddin' (Lowered with custom frame; soon to include custom push bar and interior) 2008 Silverado CrewCab 1LT (5.3L, 3:73, 4x4, LT1, Z-71, Towing Package) |
|
|
|
|
02-24-2009, 09:38 PM
|
#9 |
|
Formerly- 1972SuperCheyenne
 Join Date: Oct 2008
Location: Wake Forest NC
Posts: 5,782
|
Re: Intro and My project and project woes
Welcome from North Carolina. Sounds like a nice truck for sure. Good luck with it, and of course,

__________________
--Josh My Build Thread:http://67-72chevytrucks.com/vboard/s...d.php?t=799218 A good crossthread is better than Loctite any day. Life is not about what you have, but who you have to share it with. Last edited by STOCKISH; 02-24-2009 at 09:38 PM. |
|
|
|
|
02-26-2009, 04:02 PM
|
#10 |
|
Registered User
Join Date: Feb 2009
Location: coloradical springs
Posts: 29
|
Re: Intro and My project and project woes
parts ordered on Monday and Tuesday have started to arrive....
Tuesday i opened the boxes from LMC for the interior and they didn't match (it was cream colored when i ordered white, and the carpet was tan and i ordered gold??? so i shipped it all back and ordered from brothers trucks (going to have to wait for refund to get new tires lol) i just received a box from summit with: Prothane motor mounts (red), energy suspension 1 1/16" polyurethane front sway-bar bushing, AN fittings for the fuel pump, grant classic walnut and billet chevy steering wheel. New ram horn exhaust manifolds, new heat risers and gaskets shipped out yesterday, from LMC brothers trucks just shipped out a new interior white/hounds-tooth seat upholstery (closest i can find to the factory upholstery + houds-tooth is cool) white dash pad (ill have a new saddle one for sale here in a couple days) armrests-white carpet-gold carpet install kit (soundproofing/adhesive/padding/stainless door sill moldings) sat morning im going to 1) finish steaming the engine bay and chassis first thing in the morning, 2) pull it back into the garage (with the help of a come-along) 3) install the sway bar bushings 4) finish swapping the accessories to the new 350 5) drop in the new engine, get it mounted up to the tranny and new motor mounts 6) start putting the engine bay back together hopefully UPS doesnt take too long either the rams-horns or the the interior pieces and i can get her all done by next week.... ill take some pictures and post them up with the progress on Sat evening.
__________________
1968 C-10 CST LWB 50th anny work in progress. Coloradical Lowlife |
|
|
|
|
03-01-2009, 12:50 AM
|
#11 |
|
Registered User
Join Date: Feb 2009
Location: coloradical springs
Posts: 29
|
Re: Intro and My project and project woes
ok got the engine bay, chassis and friont suspension cleaned today..... and started swapping motor parts over and prepared for the install. would have gotten more done but the cleaning took over 1/2 the day.
     the nastiness....the whole chassis from mid cab forward looked like this 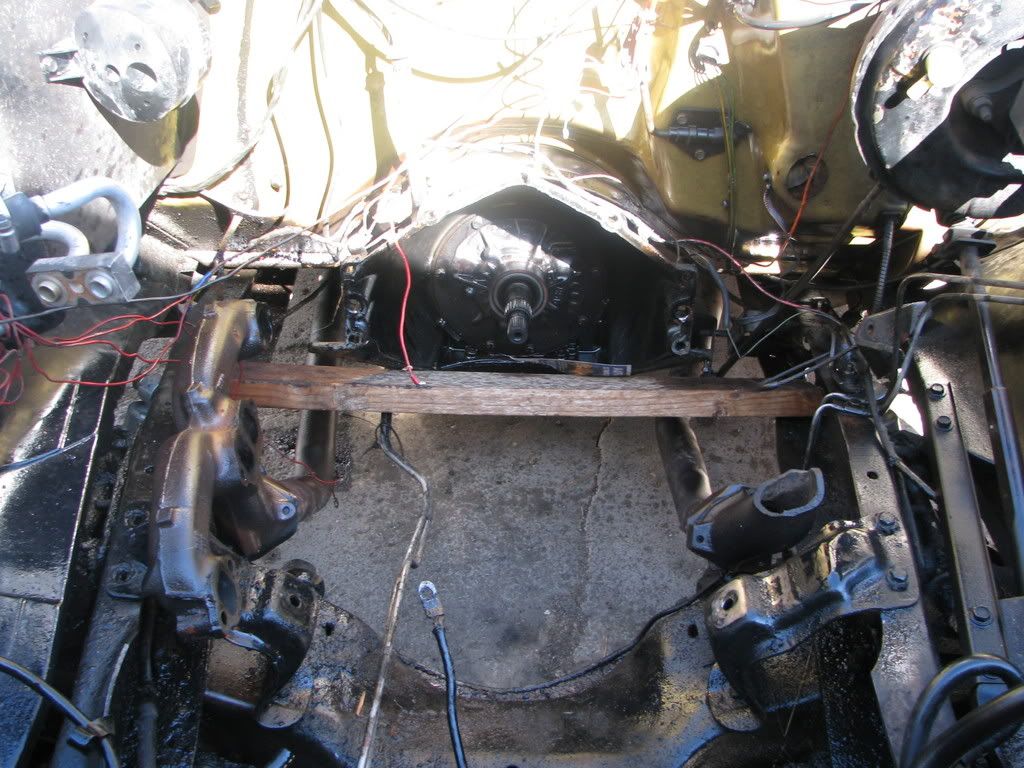 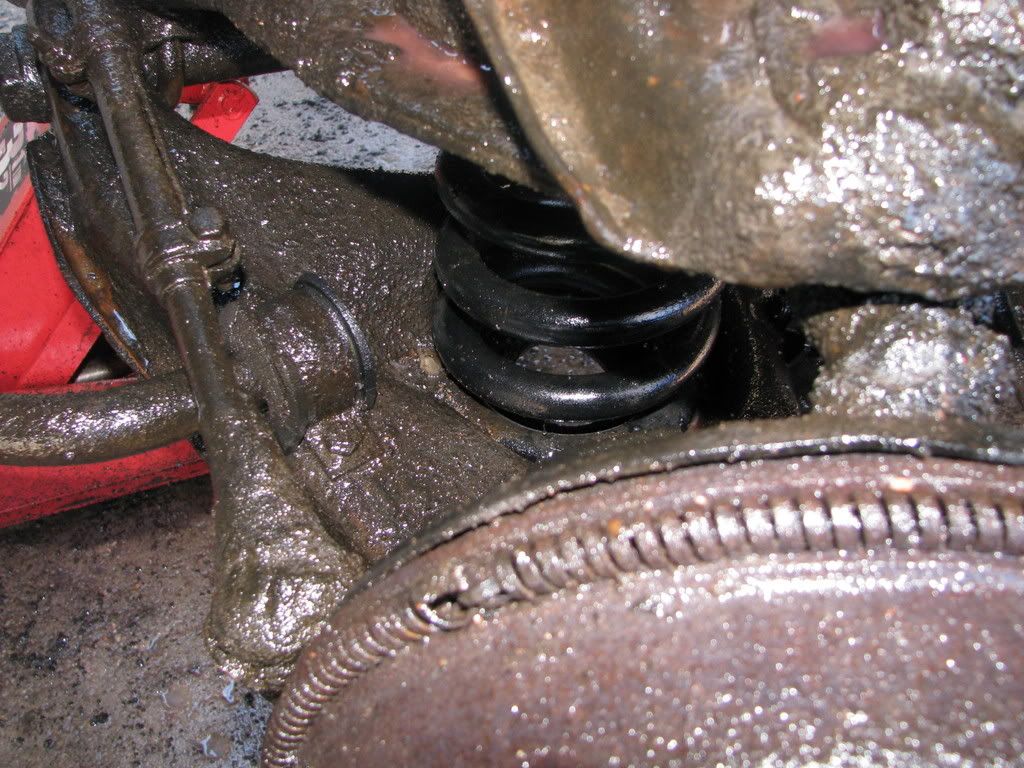 and the new hottness (ill take some more in the morning, didnt want to lay on the soaked driveway covered in 1/4 layer of oilslick) 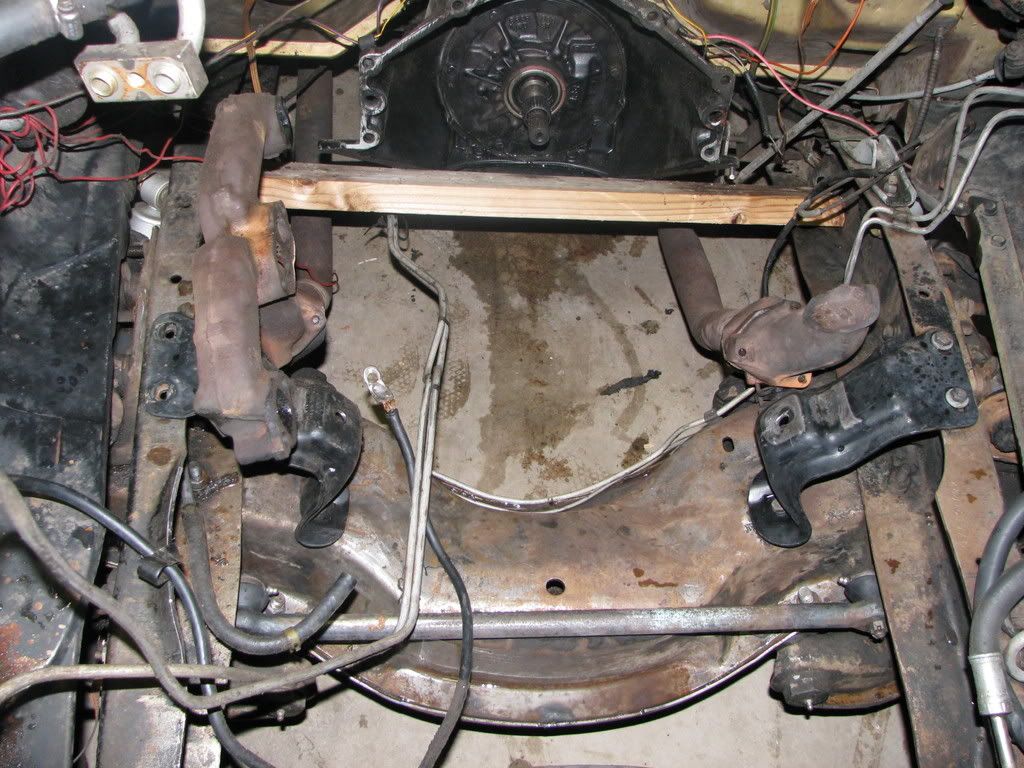 the new heart ATK engine, model HP29 325hp 350cu in. 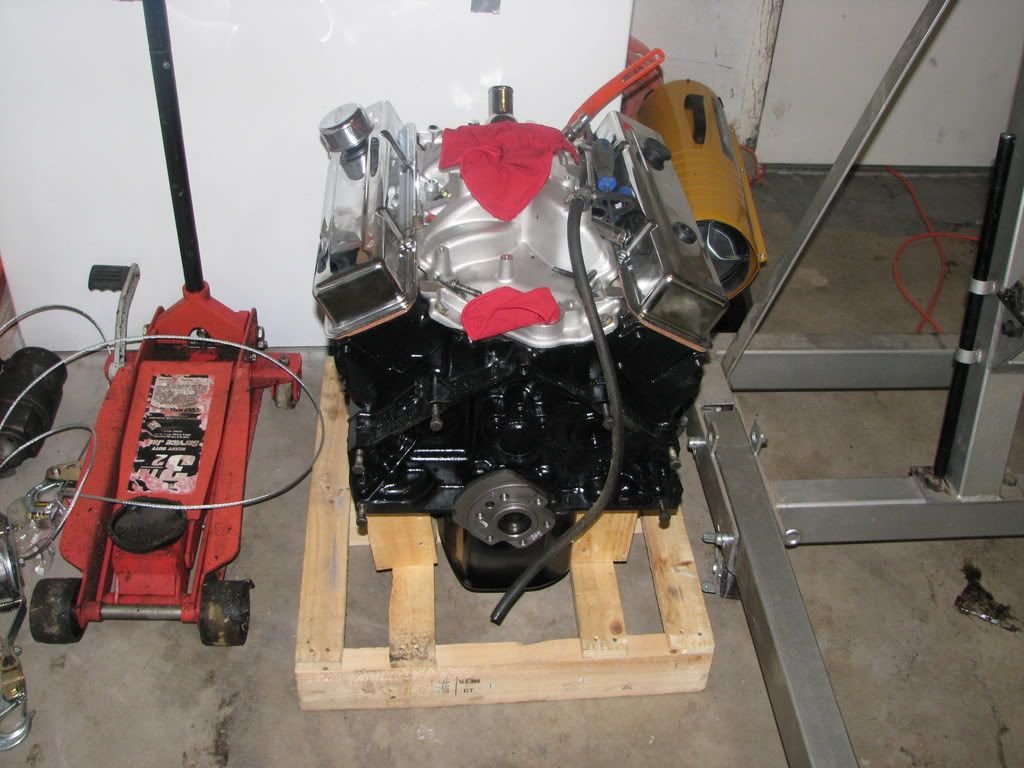 she still needs alot of work...but she is a very good starting point for a $1300.00 running (barely) and complete truck....
__________________
1968 C-10 CST LWB 50th anny work in progress. Coloradical Lowlife |
|
|
|
|
03-01-2009, 01:24 AM
|
#12 |
|
Eat My Rust
Join Date: Jan 2007
Location: Cypress, Texas
Posts: 3,362
|
Re: Intro and My project and project woes
Sweetness, sounds like it's gonna be a solid build.
 I have found ramhorn headers if you'd like to check them out. Think they were 200-something for a pair. Can't remember where I found them, their book marked on my PC at my mom's. I'll post it tomorrow. |
|
|
|
|
03-01-2009, 01:37 AM
|
#13 |
|
Senior Member
Join Date: Nov 2001
Location: Rapid City, SD
Posts: 2,281
|
Re: Intro and My project and project woes
The header companies have bracket for D/S alt & A/C mounting. If you still need help finding part numbers, PM me I work at a Speed Shop, I can get you part numbers...
Bryan
__________________
My Trucks: 1967 Chevrolet Short Wide Box 327 TH350 9" w/3.90 gears paint will be White - Current Project 1967 Chevrolet Custom LWB 283 TH400 3.73 Posi, no-AC, no-PS, no-PB, bench-seat, small-window - mostly orig driver 1967 Chevrolet CST LWB originally a 327 TH400 3.73 Posi AC PS PB, had Buddy Buckets, Small Window - parts truck 1967 Chevrolet CST LWB, 283 MT 3.73 had Buddy Buckets, Panoramic Window - parts truck 2001 Chevrolet 3500 2WD Crew Cab Dually 8.1L Allison White 2002 Chevrolet 1500HD 4x4 Crew Cab 6.0L 4L80E Red |
|
|
|
|
03-01-2009, 01:12 PM
|
#14 |
|
Registered User
Join Date: Feb 2009
Location: coloradical springs
Posts: 29
|
Re: Intro and My project and project woes
i decided to go with a factory replacement manifold and heat riser, instead of headers for now...
i did this because i dont have the money for a new exhaust, and since im going to lower the truck another 2.5 inches, ill need a modified crossmember with holes for the exhaust pipes to go through (dont want to pay a shop to do the exhaust twice.) i'll need a disc brake conversion (to drop it farther) also i would like to convert it to a serpentine belt as well (which would include all new brackets) but that i'll do this summer when i need to get the A/C up and running.... well im off to drop the new motor into the engine bay..... i'll post more pics tonight. thanks for the replies! :-)
__________________
1968 C-10 CST LWB 50th anny work in progress. Coloradical Lowlife |
|
|
|
|
03-01-2009, 03:06 PM
|
#15 |
|
Resident of Here
Join Date: May 2008
Location: Wesley Chapel, FL, USA
Posts: 7,716
|
Re: Intro and My project and project woes
Nice project!
__________________
~Bradley~ 2004 Black GTO LS2/T56 too much to list  Miss having a truck 
|
|
|
|
|
03-01-2009, 04:02 PM
|
#16 |
|
dazed and confused
Join Date: Jul 2008
Location: marion nc
Posts: 1,649
|
Re: Intro and My project and project woes
man looks loke a good start! good luck!
__________________
members met: redbaron69, billsbowtie,nc67 |
|
|
|
|
03-01-2009, 04:29 PM
|
#17 |
|
Registered User
Join Date: Sep 2008
Location: Houma LA
Posts: 193
|
Re: Intro and My project and project woes
I thoght about just putting my truck back to gether and do the same thing!!!!! The only problem with that my cab floor needs replacing and so does the bed floor!!!! Nice start good luck with the swap!!!!
__________________
1968 GMC Rebuilding Stage 2001 Camaro SS SOLD 
|
|
|
|
|
03-02-2009, 11:18 AM
|
#18 |
|
Registered User
Join Date: Feb 2009
Location: coloradical springs
Posts: 29
|
Re: Intro and My project and project woes
ok got the motor in, and mounted to the tranny and is just sitting on mounts because i had a few problems....
problem #1: the harmonic balancer is not as wide as the one on the old 327 so the V-belt pullies dont line up exactly, there is a 1/4" difference.... solution: attempt to make this work. if not i'll buy the GM perfromance parts serpentine conversion kit. problem #2: With Prothane urethane motor mounts, the motor mount thru bolt, that goes thru the lower mount and bolts into the urethane mount itself, does not fit thru the lower (steel) mount and has to be drilled out. solution: so ill lift the engine and pull out those 2 pieces drill it out and post those pics later.... here it sits.... (please excuse the massive wire mess that still needs to be sorted out) 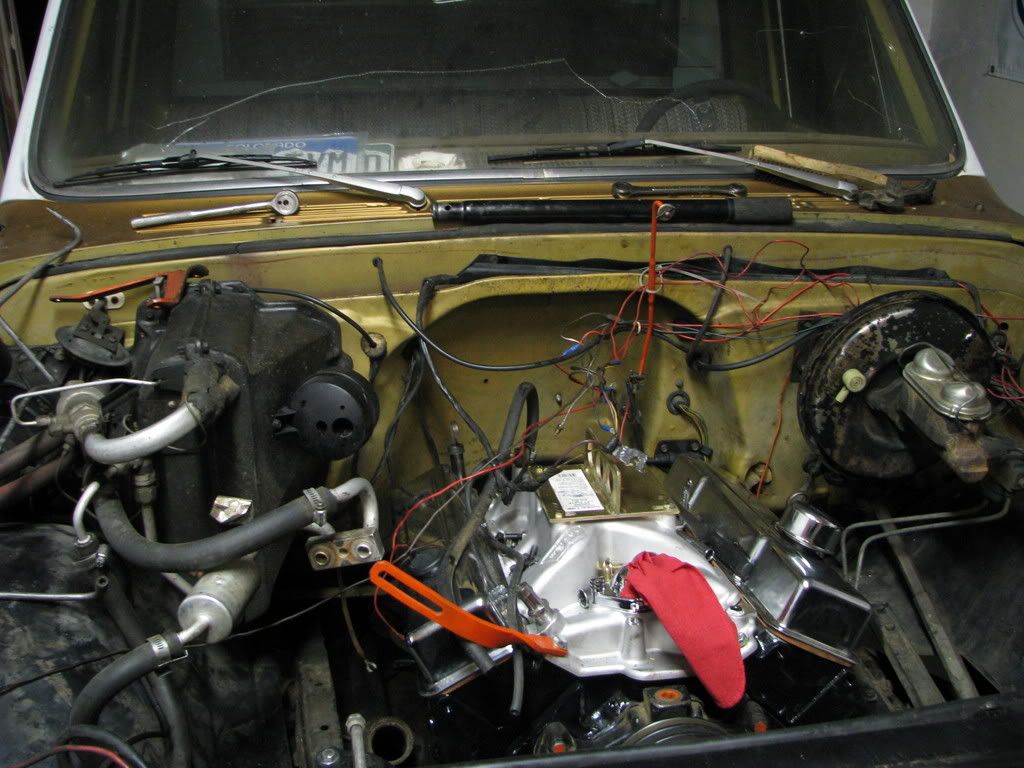 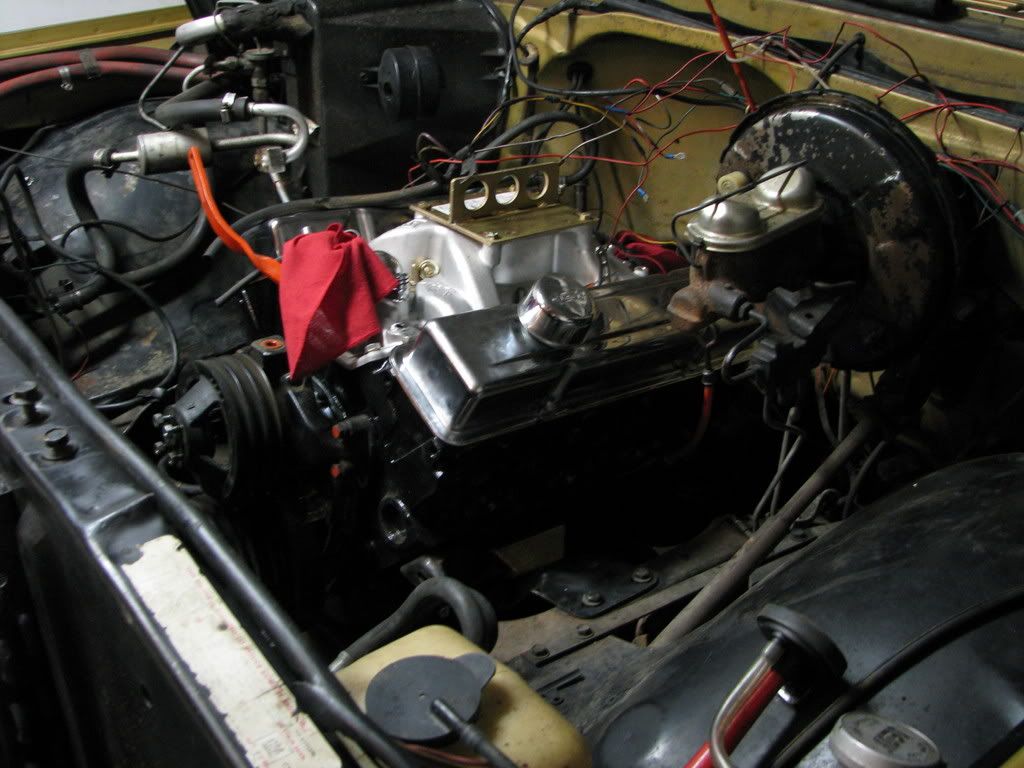 thanks for all the awesome replies!
__________________
1968 C-10 CST LWB 50th anny work in progress. Coloradical Lowlife |
|
|
|
|
03-02-2009, 11:48 AM
|
#19 |
|
Saving 1 truck at a time!
Join Date: Aug 2001
Location: Kent, WA
Posts: 6,463
|
Re: Intro and My project and project woes
Mike, What did you do with your old 327? Just curious since I seem to be collecting them for my 1968 Anniversary trucks...LOL!
__________________
'68 C20 Longhorn 50th Anniversary 400/TH400 '68 C20 Longhorn 50th Anniversary 468/TH400w/buckets '72 C20 Halfhorn (Longhorn w/o cab and front clip) '69 Flxible Cruiser (look up ugly in the dictionary) |
|
|
|
|
03-02-2009, 11:56 AM
|
#20 |
|
Registered User
Join Date: Feb 2009
Location: coloradical springs
Posts: 29
|
Re: Intro and My project and project woes
right now its sitting on an engine pallet wrapped in 55gallon trashbags and duct tape..... i still have to tear the heads off it, but from what i pulled out of the block (through the rear cam journal) i dont think it is rebuildable.... once my truck is up and running, ill start that teardown.
__________________
1968 C-10 CST LWB 50th anny work in progress. Coloradical Lowlife |
|
|
|
|
03-02-2009, 06:59 PM
|
#21 |
|
Registered User
Join Date: Feb 2009
Location: coloradical springs
Posts: 29
|
Re: Intro and My project and project woes
ok with problem#1 i solved that with a pulley shim kit,
#2 I got the motormounts (lowers) out, drilled the hole to 11/16ths, reinstalled then bolts slid right intoplace, tightened them up and we are good to go.... lastly i finally got the right size AN fittings for the fuel pump, so i can install my new 3/8" fuel lines..... however, im at a stopping point, im behind on some work i have to get done, so wont work on it again until thursday. BUT she should be up and running this sat for a test drive! more pics and video comming soon.
__________________
1968 C-10 CST LWB 50th anny work in progress. Coloradical Lowlife |
|
|
|
|
03-06-2009, 01:12 AM
|
#22 |
|
Registered User
Join Date: Feb 2009
Location: coloradical springs
Posts: 29
|
Re: Intro and My project and project woes
well got some more work done today...
~starter installed ~new tranny mount installed, ~new 1 1/16" swaybar bushings installed ~started putting the V-belt system together (with the help of a shim kit to line everything up) some good news...UPS showed up today with a 5 boxes of new items. new carpet (brothers) new sound proofing (brothers) new carpet pad (brothers) new dashpad (brothers), upholstery (brothers), chrome door sills (brothers) L/R chrome mirrors (brothers) new armrests (brothers) new drivers side manifold (LMC) since it is going so slow, and im worling 100% on my own, my dad is gonna come over and help button up the mechanical stuff and get her running on Sat..... getting excited to be close to finishing.
__________________
1968 C-10 CST LWB 50th anny work in progress. Coloradical Lowlife |
|
|
|
|
04-30-2009, 12:48 PM
|
#23 |
|
Registered User
Join Date: Feb 2009
Location: coloradical springs
Posts: 29
|
Re: Intro and My project and project woes
Well after I finally got the engine back in the truck fired right up..... yay!
HOWEVER, the tranny was not shifting past 1st gear .so I took it to my favorite mechanic shop Al De Mark (Costilla and tejon), and had the tranny pulled and rebuilt with heavy duty parts, replaced the factory torque converter to a B&M 2500stall high performance. The Radiator was sent to Manny's radiator shop to fix a crack in the radiator end cap where the upper radiator hose attaches. Picked it up yesterday, filled her up with Premium unleaded and drove her around for a while. The tranny now works flawlessly and will be able to with stand any performance mods I want to throw at it. The only part I need to replace is the 3 to 1 transmission kick-down switch (pedal mounted) as its it not completing the circuit under WOT. Another bad thing is after sitting for 2 years the brand new alpine deck in the truck will not play any CDs ..so that needs to be replaced as well. The only mechanicals that have not been replaced on the entire truck are: Alternator, Power steering pump, Steering gear, Brake booster and master cylinder. I have a complete new interior for the truck which I will be installing on Sunday. Pics for clicks: 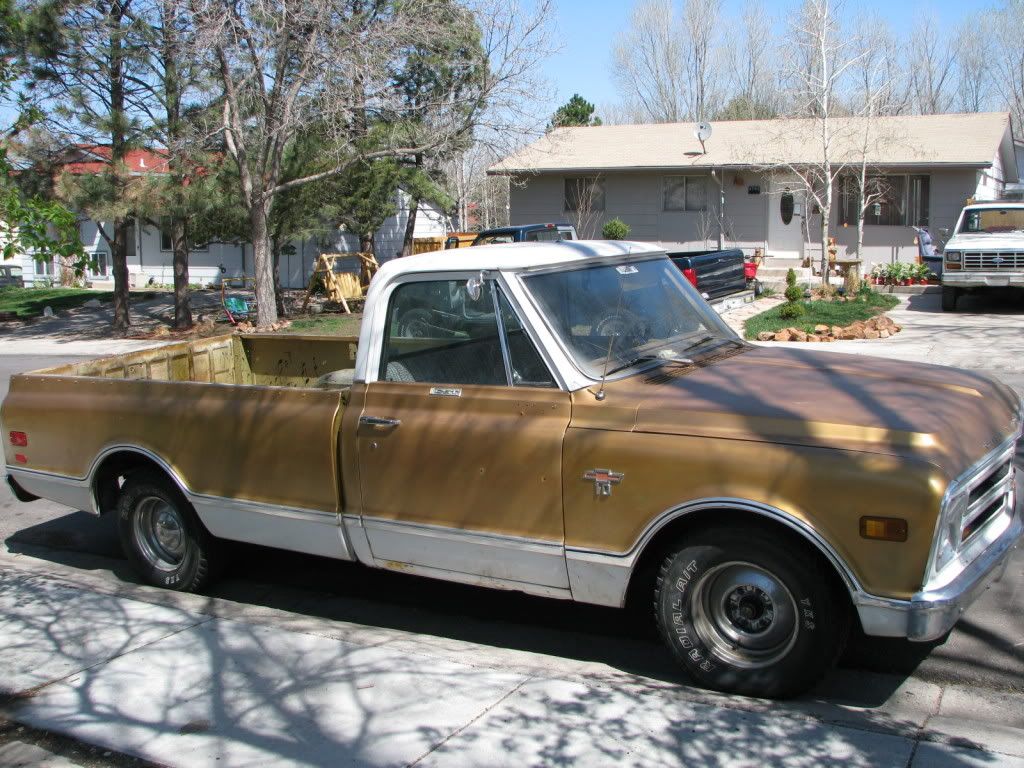 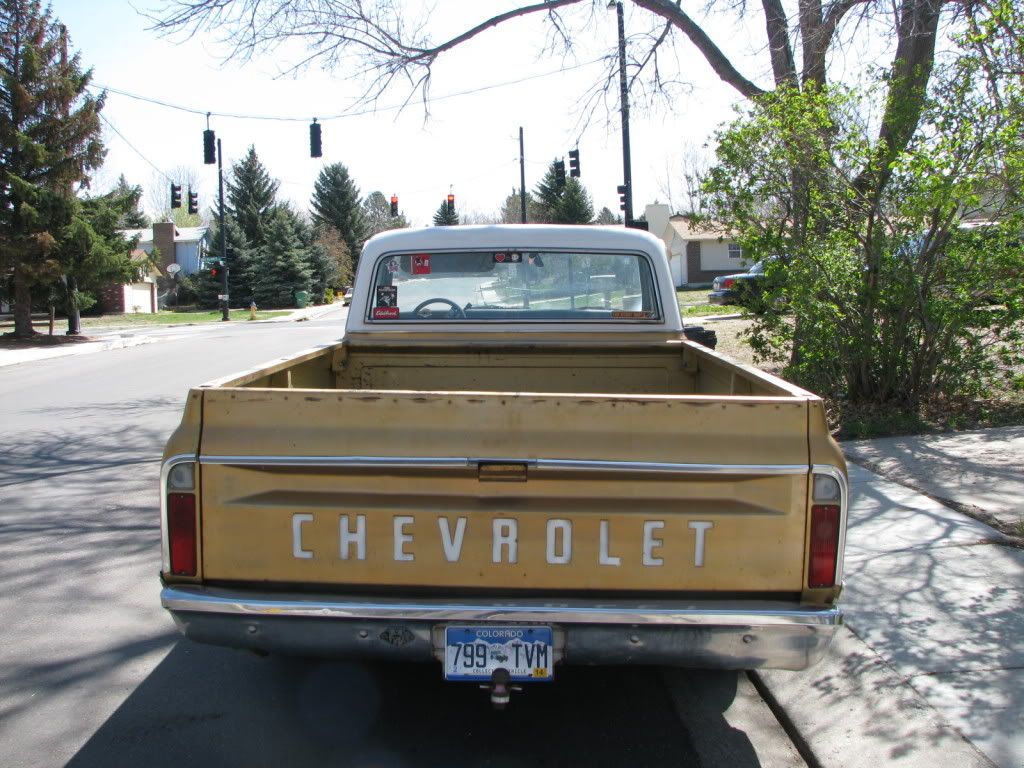 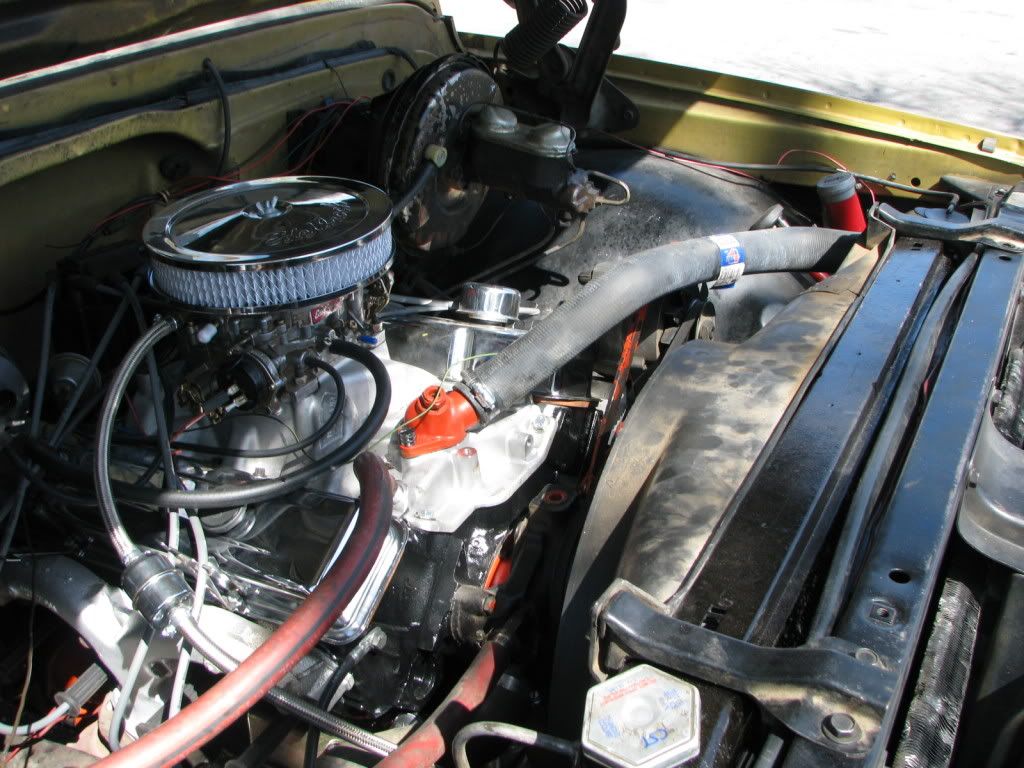 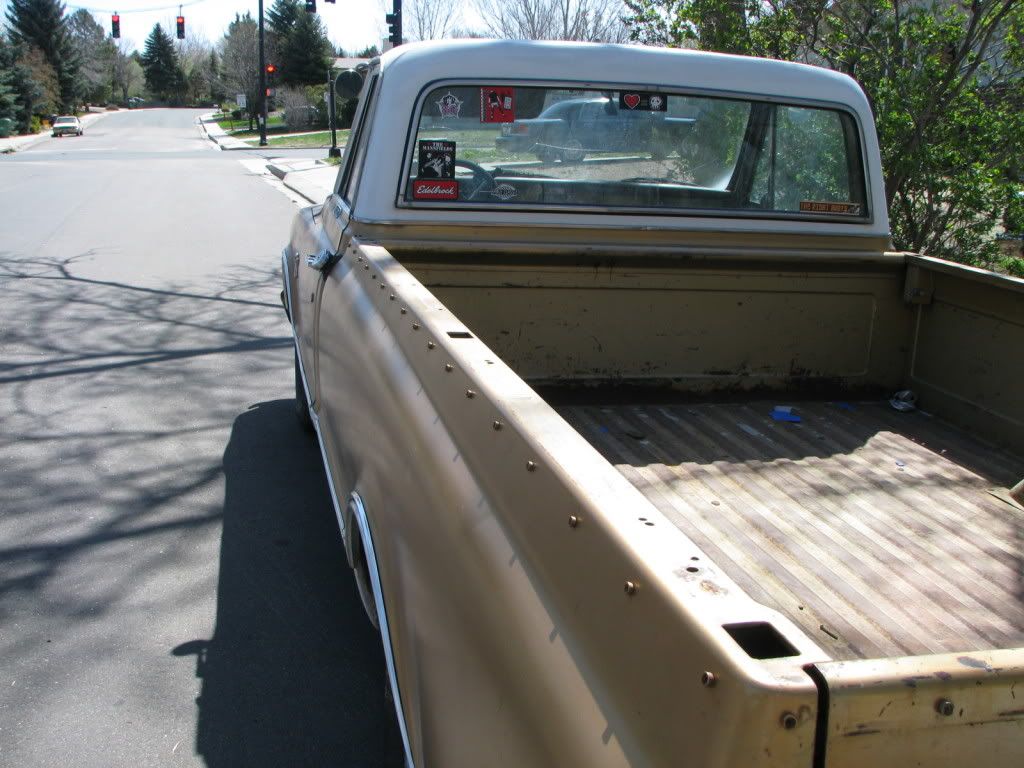 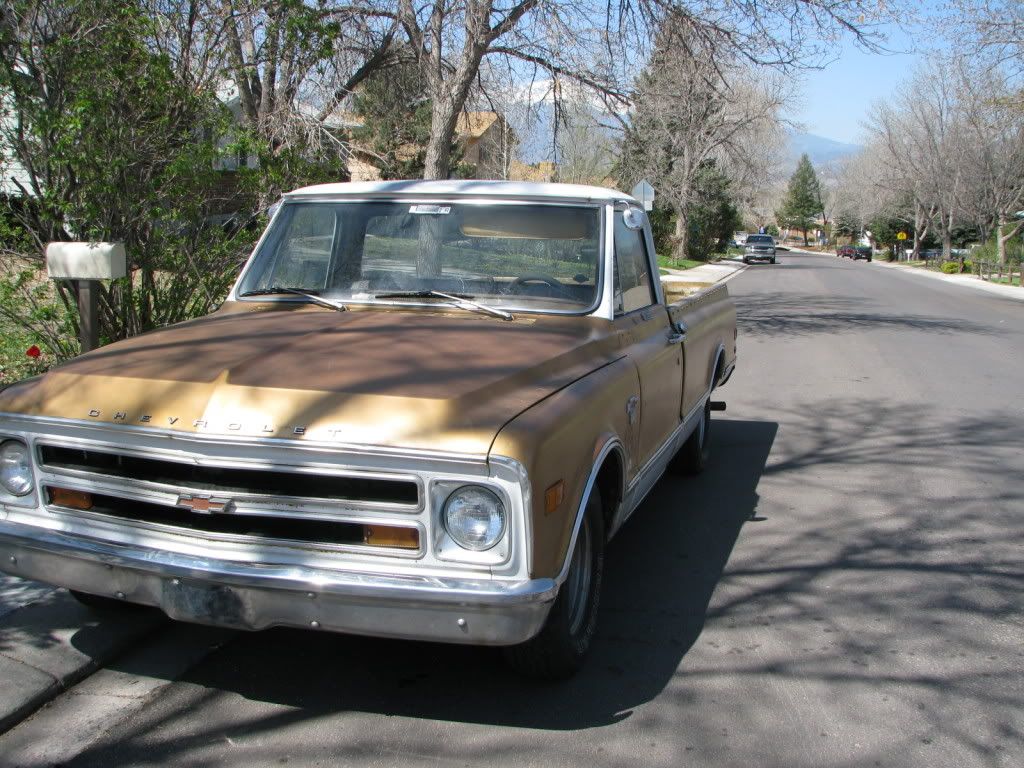 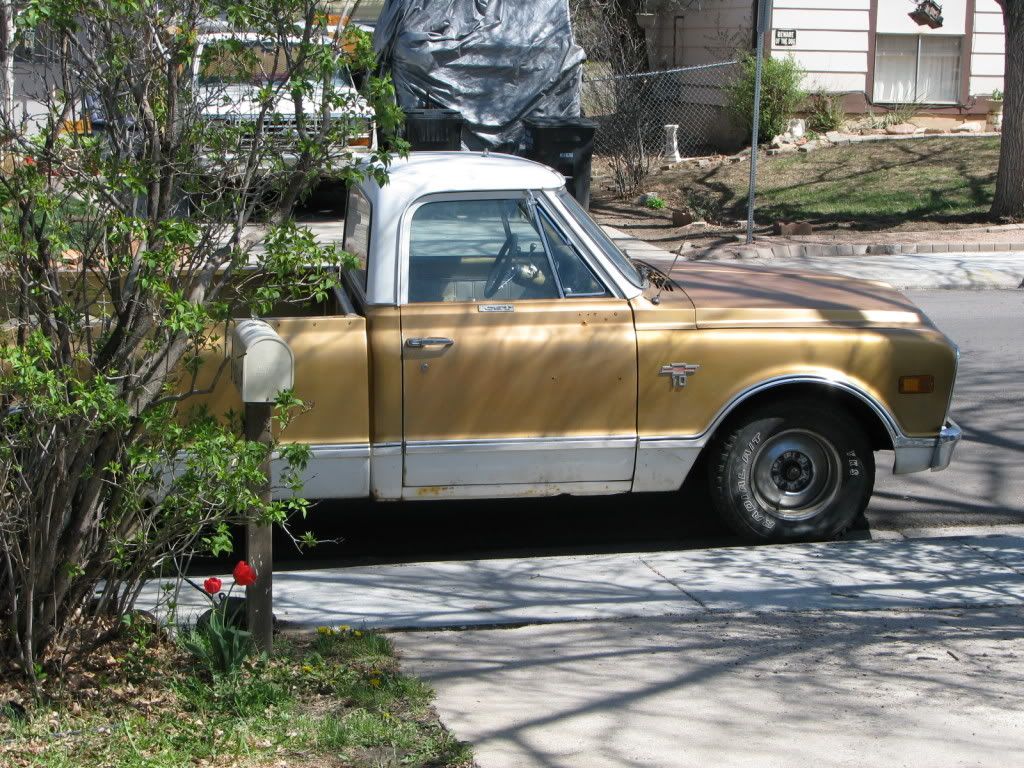 Now for Wheels/Tires, a blower and airbags. what do you all think?
__________________
1968 C-10 CST LWB 50th anny work in progress. Coloradical Lowlife |
|
|
|
|
04-30-2009, 02:56 PM
|
#24 | |
|
Registered User
Join Date: Aug 2008
Location: Graham, Texas
Posts: 239
|
Re: Intro and My project and project woes
Quote:
Greg |
|
|
|
|
|
04-30-2009, 07:55 PM
|
#25 | |
|
Maintenance Man
Join Date: May 2002
Location: Phoenix, AZ US
Posts: 213
|
Re: Intro and My project and project woes
Quote:
Spot was the vehicle I rode in on my first ever car trip, home from the hospital the first time, strapped to the top of the console in my car seat! Wheels, Baby Moons, Chrome bumpers, Color, Trim, Patina, Bed Snaps, everything! The only thing yours is "missing" is a set of 78" Laker sidepipes with heat shields, curb feelers, a Black vinyl tonneau cover (which is what the snaps on the bedsides are for), and a black vinyl rooftop (hey, it was the seventies and the parents bought it that way). Spot also came with buckets and console (black), a 307, and a three on the tree. He even had a god-awful bed cap, just like yours! And no power anything, especially with the 307! But wow! They look almost exactly alike! Or rather they would look exactly alike if if Spot wasn't in a bazillion pieces spread across two states right now. )When (and if) you ever decide that you want to go with another set of wheels, I call dibs! (J/K..... kinda) Another thing. Earlier in the thread you mentioned buying a set of the GM Performance parts serpentine brackets... I thought the same and then I discovered that the bracketry set that GMPP offers is basically the same thing as what came stock in a late 80's to early 90's Camaro Z-28. GMPP can keeps theirs for the $600 they want for it. I bought mine for about $100 on Craigslist and it came with everything minus the smog delete pulley, which can be had from your local Government Motors dealership parts counter for $60 or so. The only things I've (so far) had to replace were the alternator, some bolts, and the power steering hoses. I also had to buy an alternator cable adaptor to hook up our stock 2 pin connector to the 4 pin connector on the Camaro alternator. You can wire it as a one wire if you want and not go thru the hassle, but I'm weird and wanted it connected properly. I found the adaptor, $20.95 on Summit, here's a link. http://store.summitracing.com/egnsea...nresults=false Anyway, good luck! I plan on starting my "real" truck build, on Spot, when I get back from my Government Sponsored Camping Trip. Which I leave for in a little over a month. |
|
|
|
|
|
| Bookmarks |
|
|


 Linear Mode

