
|
Register or Log In To remove these advertisements. |
|
|
|
|||||||
 |
|
|
Thread Tools | Display Modes |
 09-26-2016, 10:03 PM
|
#51 |
|
Registered User
Join Date: Jan 2015
Location: Prior Lake MN
Posts: 87
|
Re: Project Eugene: 1949 5 window
A couple questions for the guys that have rebuilt their floors:
1. I am putting in a 5.3 LS- which pedals, both gas and brake should I consider? 2. Which ididit steering column do I want for my 51 cab? I have read that some versions do not come with a neutral safety switch or gear indicator, want to make sure I get it right. I want to get these parts next so I can get my pedals and steering set up correctly while it's still together. |

|

|
|
09-26-2016, 10:46 PM
|
#52 |
|
Senior Member
 Join Date: Jul 2012
Location: Oblong, Illinois
Posts: 7,017
|
Re: Project Eugene: 1949 5 window
Hulk, are you doing column or floor shift?
|
|
|
|
|
09-27-2016, 07:14 AM
|
#53 |
|
Registered User
Join Date: Jan 2015
Location: Prior Lake MN
Posts: 87
|
Re: Project Eugene: 1949 5 window
Column shift- auto trans.
Side note- are my pic links working for you? |
|
|
|
|
09-27-2016, 07:54 AM
|
#54 |
|
Formerly- 1972SuperCheyenne
Join Date: Oct 2008
Location: Wake Forest NC
Posts: 5,782
|
Re: Project Eugene: 1949 5 window
Looks amazing! Can't wait for more pics!
__________________
--Josh My Build Thread:http://67-72chevytrucks.com/vboard/s...d.php?t=799218 A good crossthread is better than Loctite any day. Life is not about what you have, but who you have to share it with. |
|
|
|
|
09-27-2016, 08:17 PM
|
#55 |
|
Registered User
Join Date: Aug 2012
Location: West Side of the valley, CA
Posts: 878
|
Re: Project Eugene: 1949 5 window
Regarding pedals, you never mentioned which 5.3 you were getting. If its drive by wire, make sure to get the gas pedal from the donor.
|
|
|
|
|
09-27-2016, 09:35 PM
|
#56 |
|
Registered User
Join Date: Jan 2010
Location: Titusville, PA
Posts: 3,585
|
Re: Project Eugene: 1949 5 window
just found this one. very nice patina, nice pics and family project. Its critical we keep the youth aware of this type of stuff.
__________________
51' 99toLife finished 2011,355 sbc,5speed, patina, redoing whole truck, inter, bags, etc http://67-72chevytrucks.com/vboard/s...d.php?t=382481 49Hardtimes s/10 susp- bagged, vortec sbc, 5 speed, patina, sold http://67-72chevytrucks.com/vboard/s...d.php?t=594874 VIDEOS https://youtu.be/E8zHhjgS_lA https://youtu.be/E8zHhjgS_lA Geronimo 54' LS engine, static drop IFS, Client build, just about done http://67-72chevytrucks.com/vboard/s...62#post7399162 52' 3100 Slowly in progress, will be painted two toned, have 235 with a t-5, lowered OG frame Other projects, 49' farmuse 3100, killer Patina, will be slammed, LS engine, full done interior up next! www.coffeeandcustoms.com |
|
|
|
|
09-27-2016, 10:21 PM
|
#57 |
|
A320 Pilot/USAF Retired
Join Date: Mar 2009
Location: Charleston, SC
Posts: 2,622
|
Re: Project Eugene: 1949 5 window
Great build!
__________________
JJ My 1957 build: http://67-72chevytrucks.com/vboard/s...d.php?t=334552 http://www.trifive.com/forums/showthread.php?t=22037 Instagram - Chuckdriver57 |
|
|
|
|
12-04-2016, 12:54 PM
|
#58 |
|
Registered User
Join Date: Jan 2015
Location: Prior Lake MN
Posts: 87
|
Re: Project Eugene: 1949 5 window
We have had an interesting go lately- as one of my best shop helpers got bitten in the face by a dog.
  Plastic surgery, over 30 stitches, most of them internal- and lots of hugs later- and she is doing OK. Still a ways to go- she's a tough little chick. We have still been staying after it on the project, even as it gets cold here in MN. Had to make a decision on what to do with the inner fenders, since the ones I bought were designed to be used with a stock frame. My S10 didn't line up with the bottom of the fenders at all. So, I ended up chopping off the bottom bend and moving the louvers up into the top half since I thought they were coolest part. 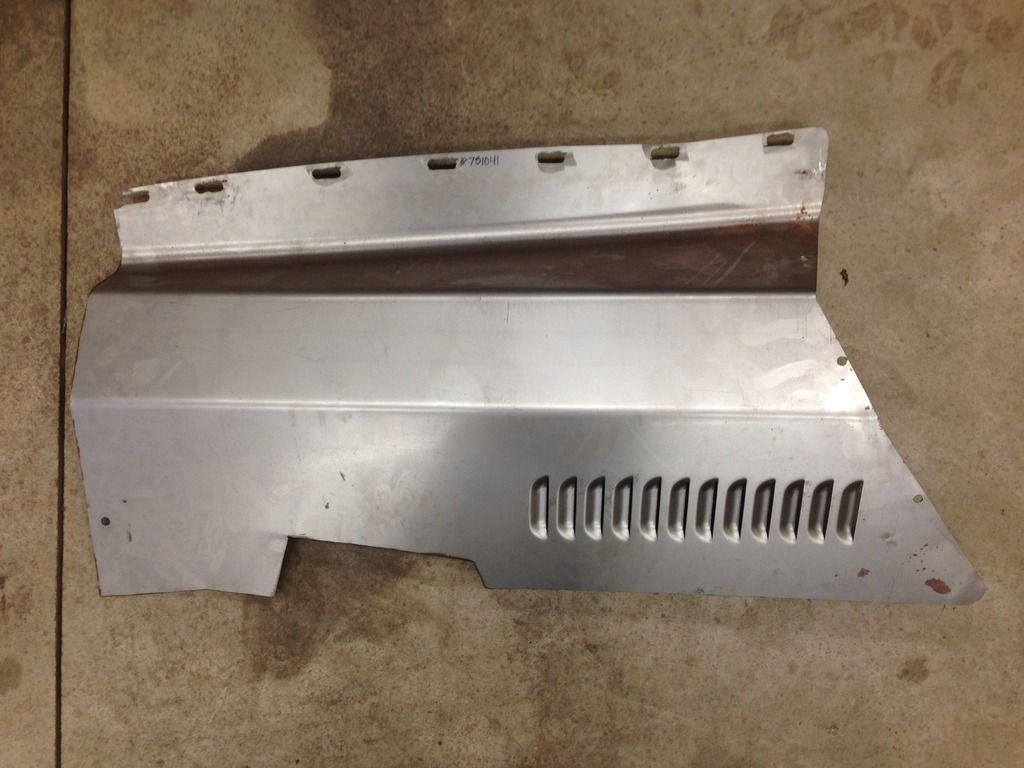 After: 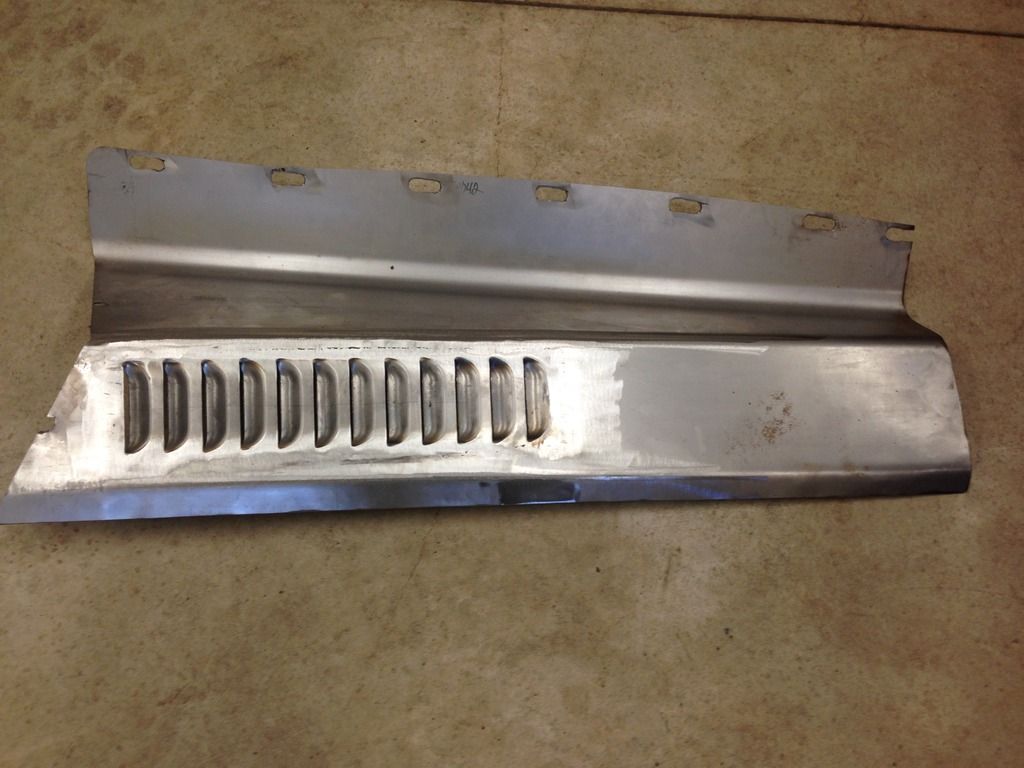 This way the headers aren't an issue, the steering won't be a problem, and the heater lines can sneak underneath these as well. Before: 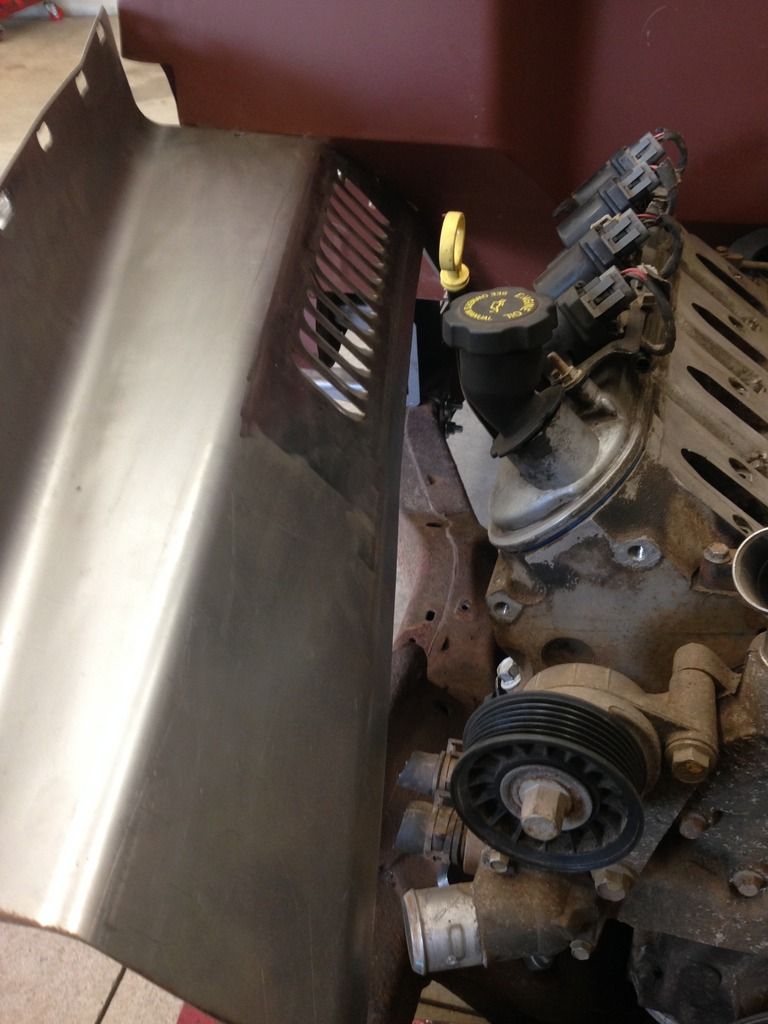 Spent a bunch of time working out the details of the bed layout. Supports are in, and the rear bench seat is mounted too. 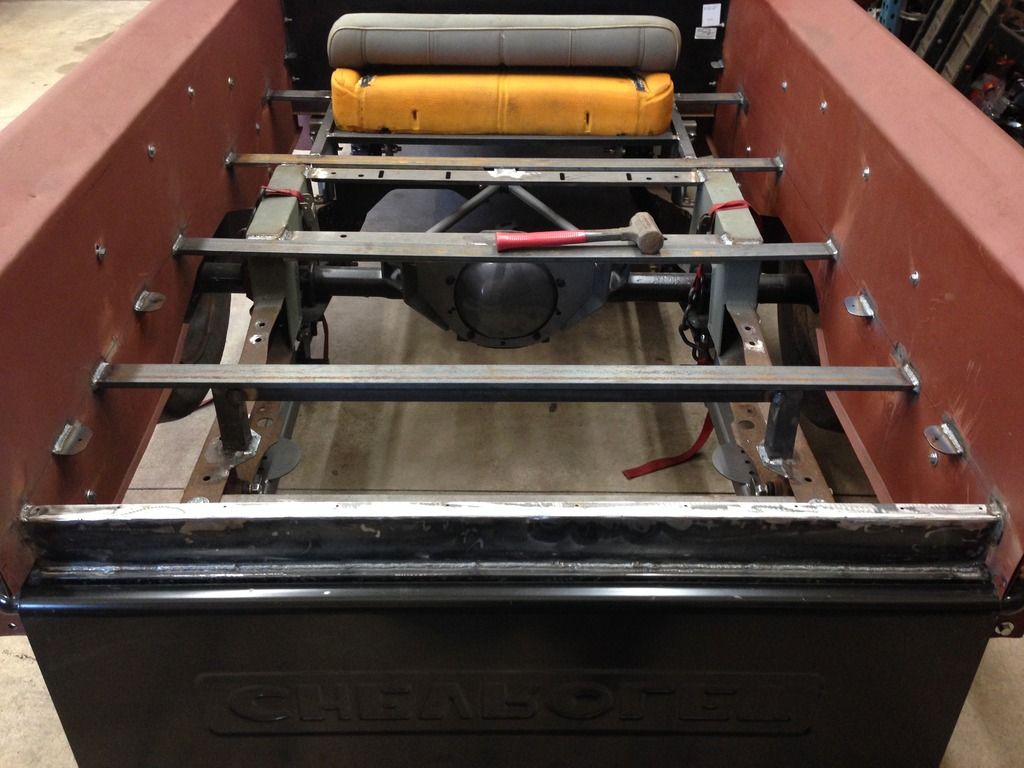 Then I stripped the whole thing down and got it sandblasted. Best money I have spent so far. It was perfectly clean- so I welded the important body mount pieces in, and painted it before it got too cold. 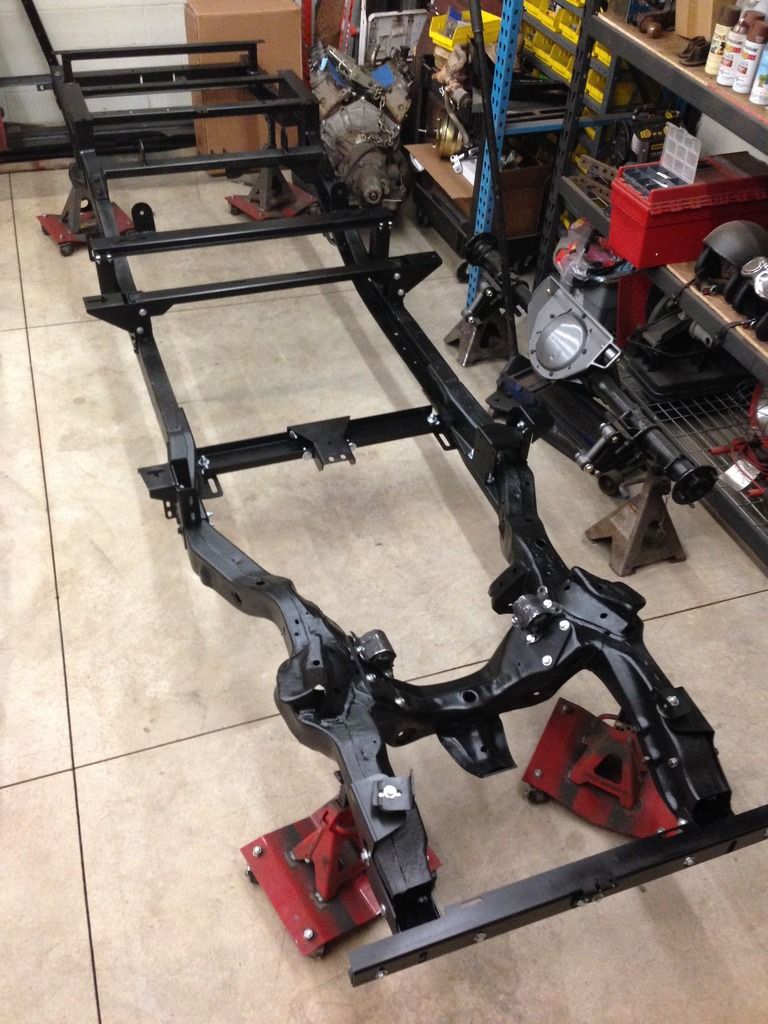 Well that was HUGELY motivating, so my son and I got the motor cleaned up and installed pretty quick after that, rapidly followed by headers and exhaust build. The summit builder kit is awesome- makes it so easy. Dynomax super turbo mufflers and 2.5" from front to back. Just need to install the bed and rear bumper to finish up the exits. 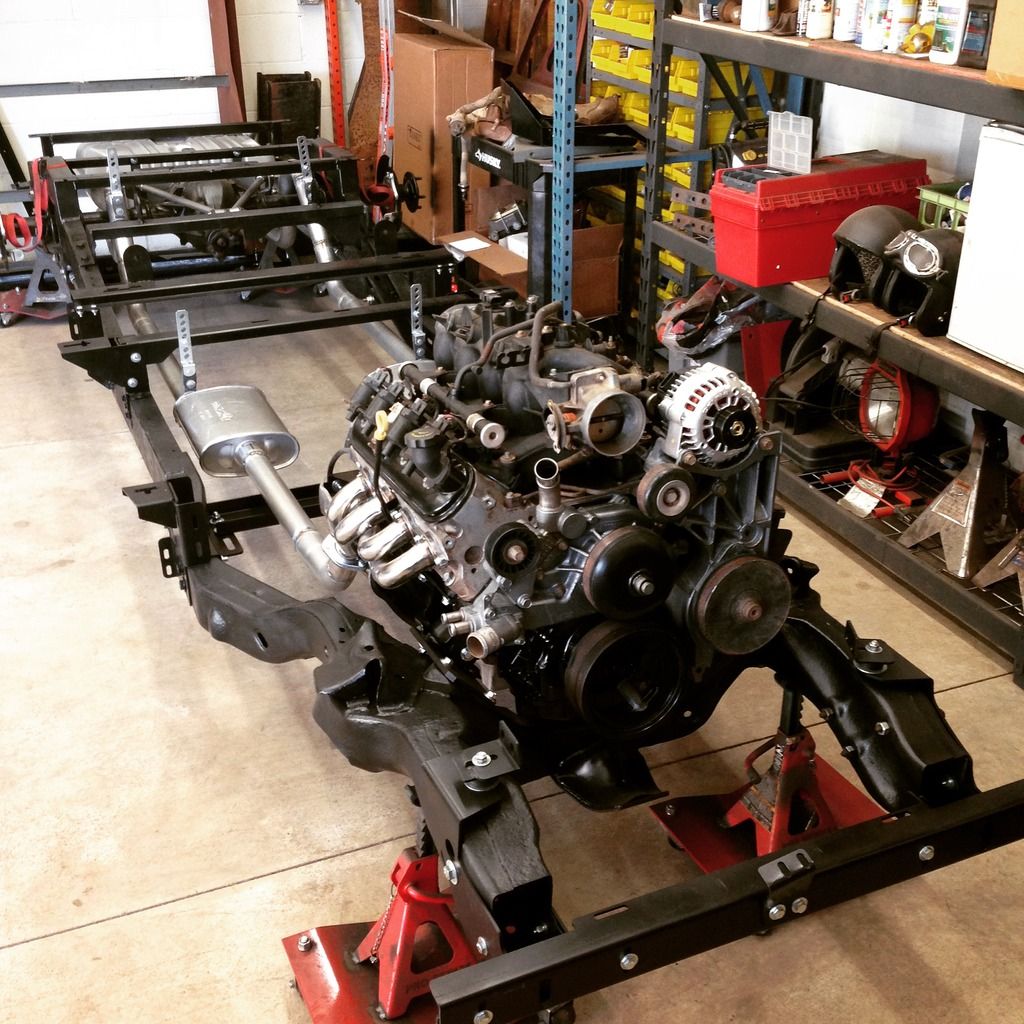 Gas tank is mounted as well. 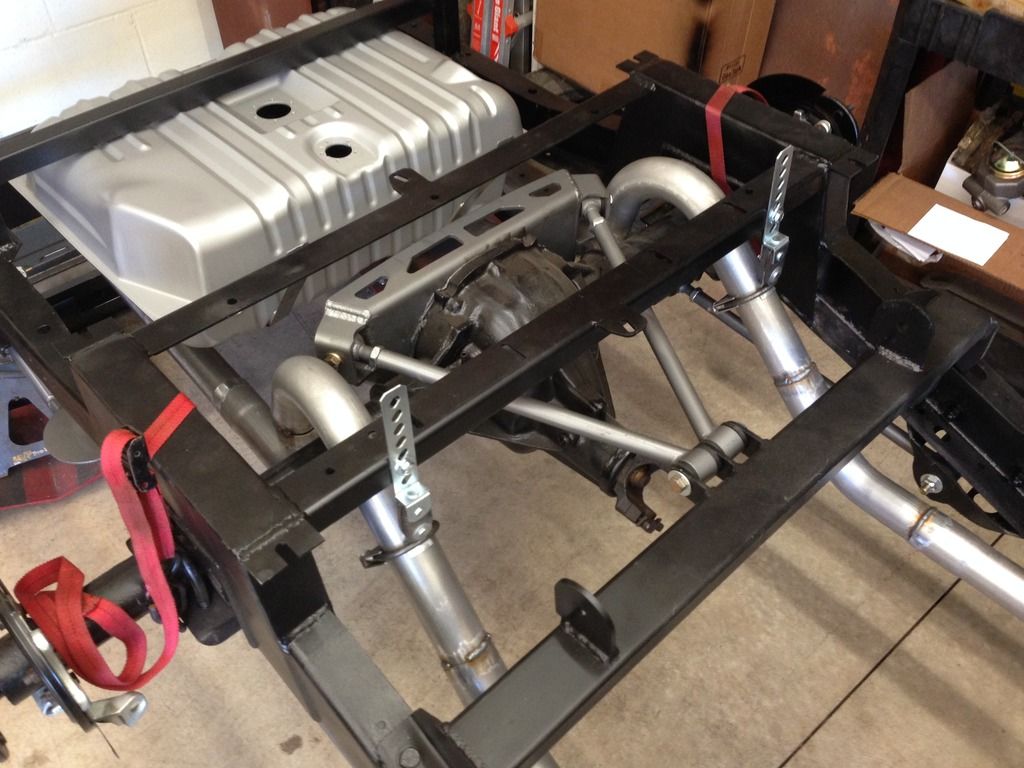 This weekend has been fun- I found some shoe cobbler molds used to make shoes back in the day and fabbed up some mounts so they can be my pedals. 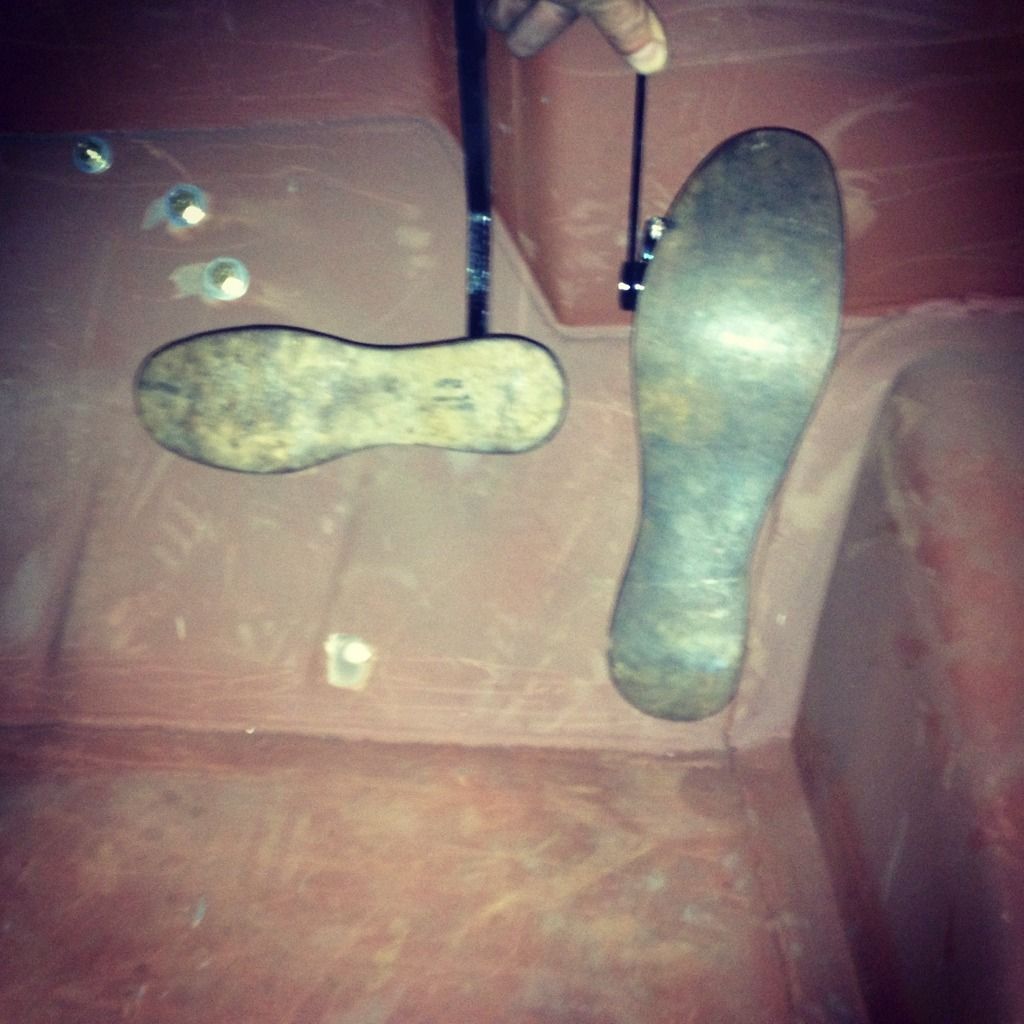 Mounting heater this afternoon, and then I will get back on the bed fab.Then I need to grow another money tree to be able to afford all of my suspension and air ride parts. QUESTION: I need to know the distance between the front edge of the rear fender and the front bed support for a 3100 bedside- as well as the distance between the top of the rear fender and the bottom of the rolled top edge of the bedside. Can somebody grab a tape and get those for me? I used the old bedsides as guide holes for my new ones and they aren't the same from side to side, so I need to know which one is right. Thanks! |
|
|
|
|
12-04-2016, 01:13 PM
|
#59 |
|
Post Whore
 Join Date: May 2015
Location: Alabama
Posts: 14,579
|
Re: Project Eugene: 1949 5 window
My goodness..hope your helper is ok...not much makes me madder than kids getting bit...trucks looking good
|
|
|
|
|
12-10-2016, 12:28 AM
|
#60 |
|
Registered User
Join Date: Jan 2015
Location: Prior Lake MN
Posts: 87
|
Re: Project Eugene: 1949 5 window
Ya, it was pretty upsetting, but we are making the best of it.
|
|
|
|
|
12-10-2016, 12:43 AM
|
#61 |
|
Man of Mini-Talents
Join Date: Sep 2009
Location: Oklahoma City, OK
Posts: 4,295
|
Re: Project Eugene: 1949 5 window
X2 on the shop helper. She must be a tough cookie - I would be passed out.
__________________
Steve Project - Ruth 66 Skylark Project - Lola 60 Biscayne Project - Iron Ox 54 GMC 100 Project - Darth 69 Camaro |
|
|
|
|
12-10-2016, 01:04 AM
|
#62 |
|
Registered User
Join Date: Mar 2013
Location: Edmonton, AB
Posts: 298
|
Re: Project Eugene: 1949 5 window
Great progress. I also bought the Code504 kit and have been very happy with it so far. I'm also bagged so I wasn't able to use the kit to mount the bed. I'm still trying to figure out a clever way to mount the bed using the pieces provided.
Looking forward for more progress! |
|
|
|
|
12-10-2016, 04:17 AM
|
#63 |
|
Registered User
Join Date: Jul 2014
Location: Clear and Still Idaho
Posts: 509
|
Re: Project Eugene: 1949 5 window
WOW
She looks like she is coping well. Life issues just pop up so unexpectedly, hope she gets past it asap. It's great that she's your partner in this adventure. Build looks great, good progress. Keep on keepin on NC PS Your gonna need a shot gun to keep the evil boys away!!!
__________________
Been there, wrecked that 
|
|
|
|
|
12-10-2016, 10:02 AM
|
#64 | |
|
Registered User
Join Date: Jan 2015
Location: Prior Lake MN
Posts: 87
|
Re: Project Eugene: 1949 5 window
Quote:
|
|
|
|
|
|
01-25-2017, 10:45 PM
|
#65 |
|
Registered User
Join Date: Jan 2015
Location: Prior Lake MN
Posts: 87
|
Re: Project Eugene: 1949 5 window
Well I FINALLY got a rear bumper and got it mounted- I never liked how they dropped the rear bumper down so far from the factory, so I raised mine up and chopped up a filler piece and I think it cleaned up quite nicely. Just welded the rear bumper mounts right to the frame.
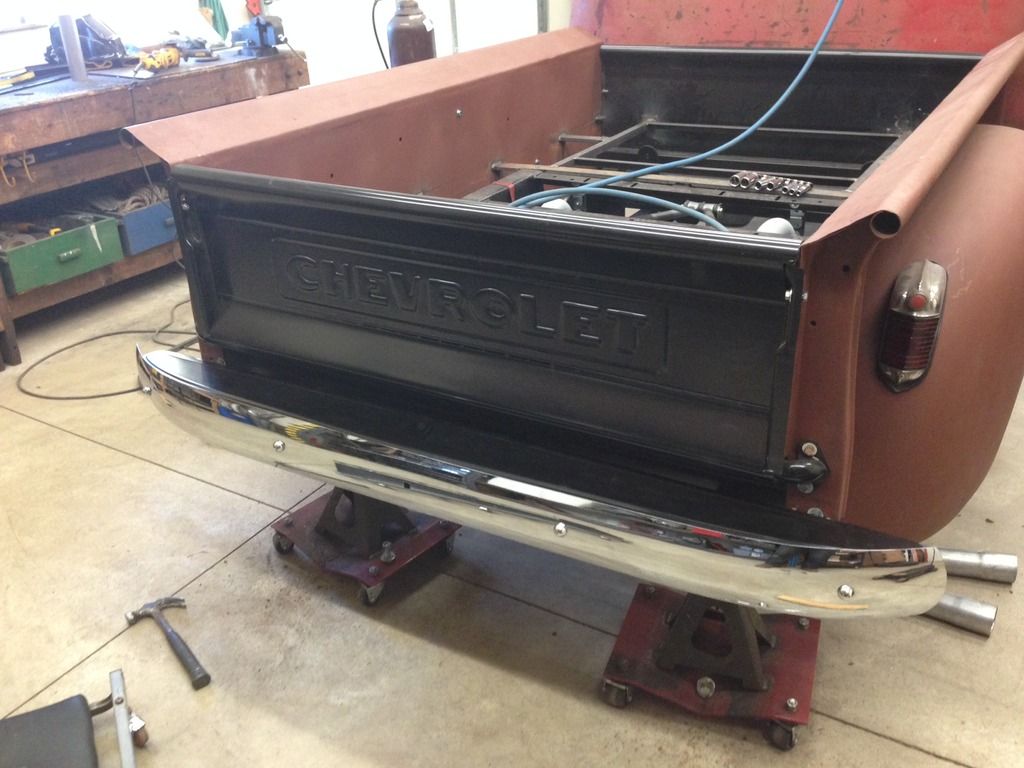 Only problem was that then I realized that I mounted the rear exhaust behind the axle way too low- and getting the tank out was going to be a nightmare if I raised them. Nuts. So I added some Vclamps to make it possible to move them up. It was a pain, but everything is where I like it now. 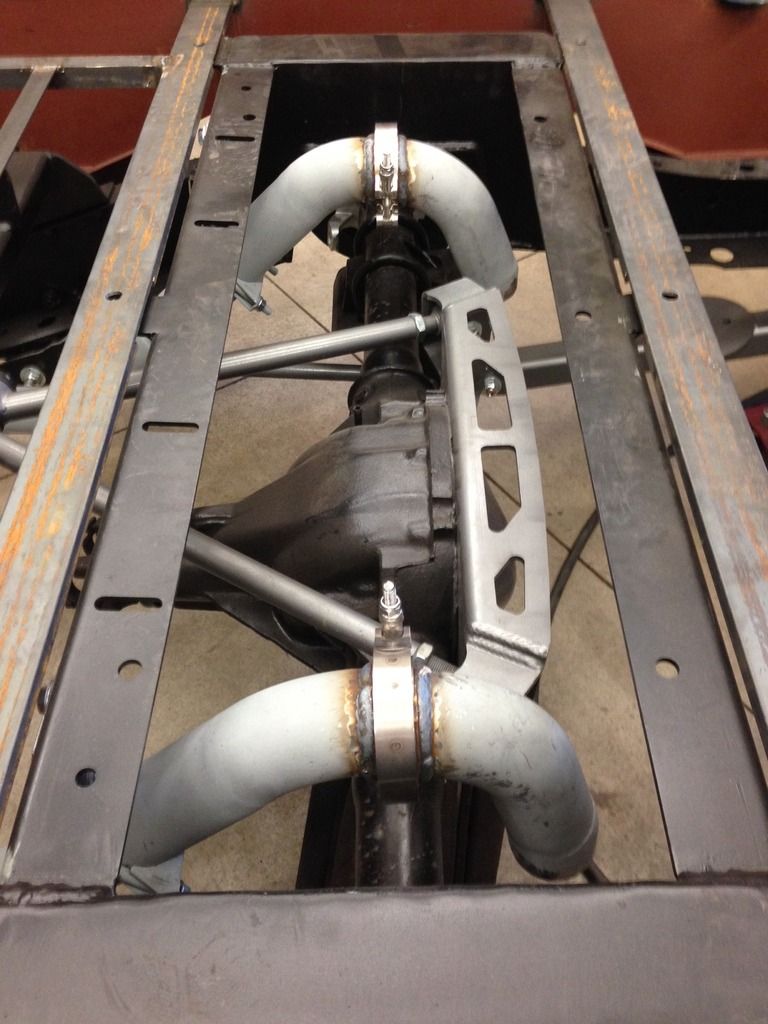 Then this weekend I finally got around to finishing the exhaust kick outs and wrapped them where they go under the tank. At least 3/4" of clearance on all corners. 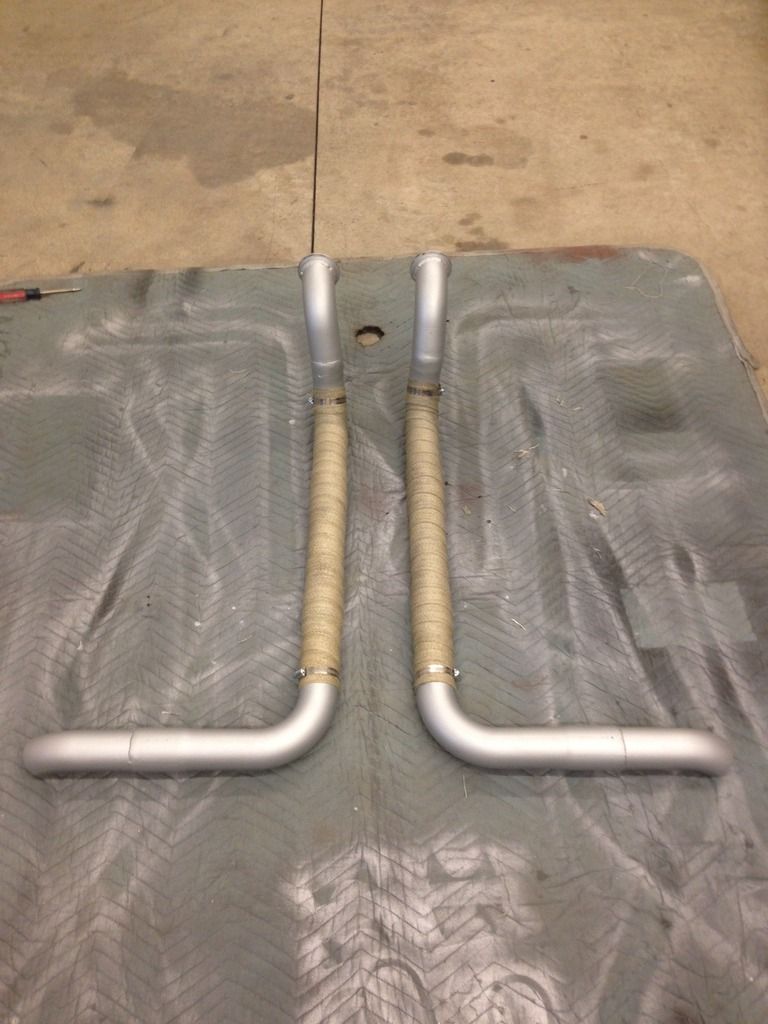 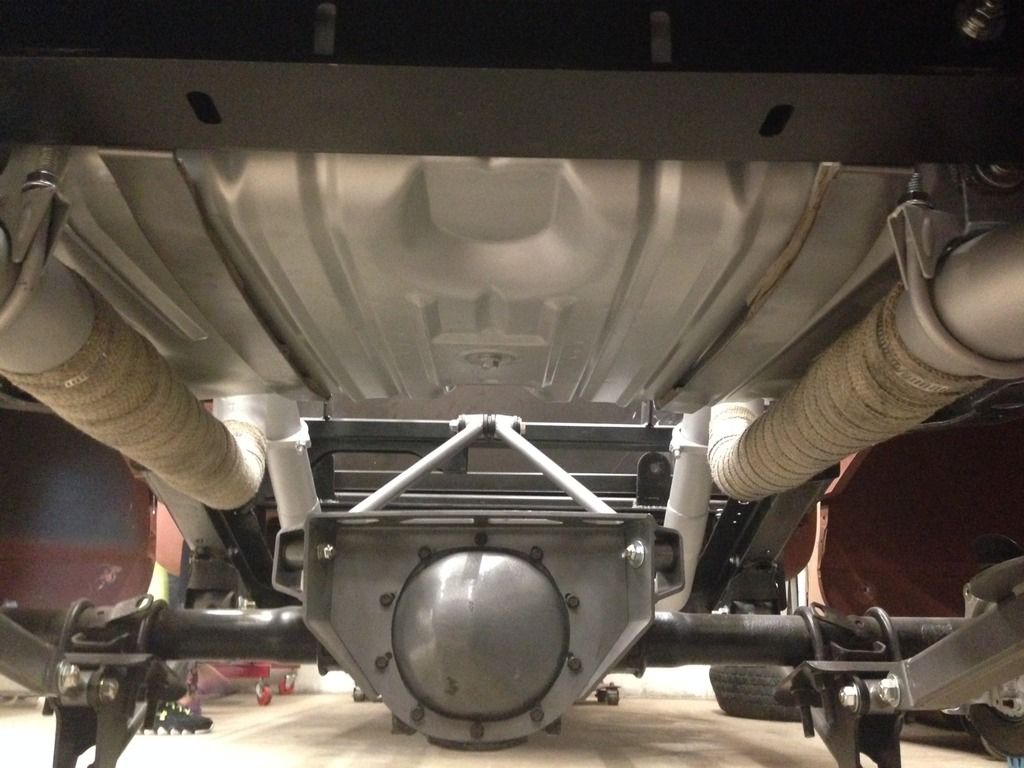 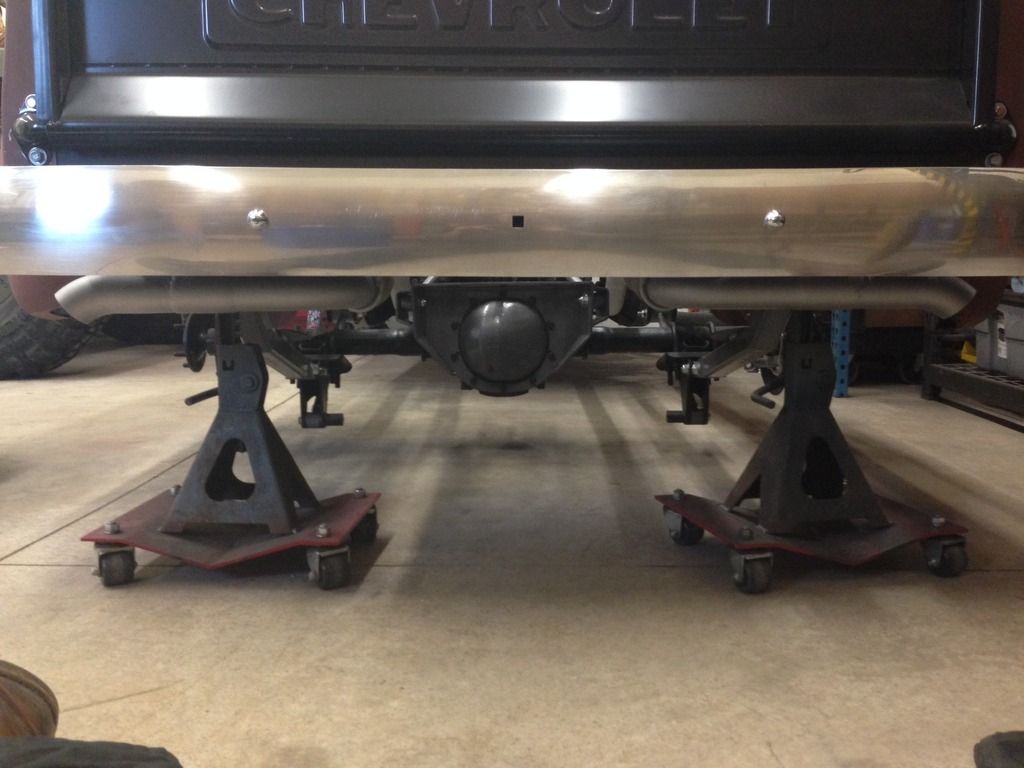 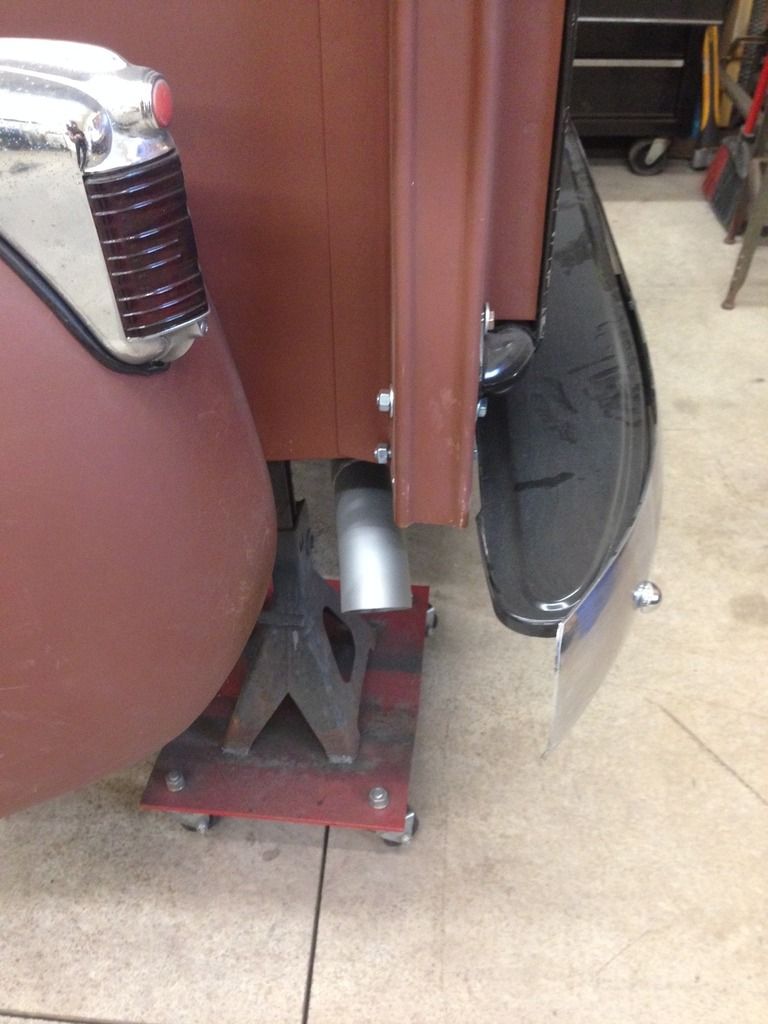 And then I got the tank and compressors mounted. All tucked away under the rear facing seat and the compressors and air lines are away from the exhaust. I made a plate that sits in front of the tank for the manifold and ECU to mount to- and all I will have to do is pull off the rear seat to get to all of it. 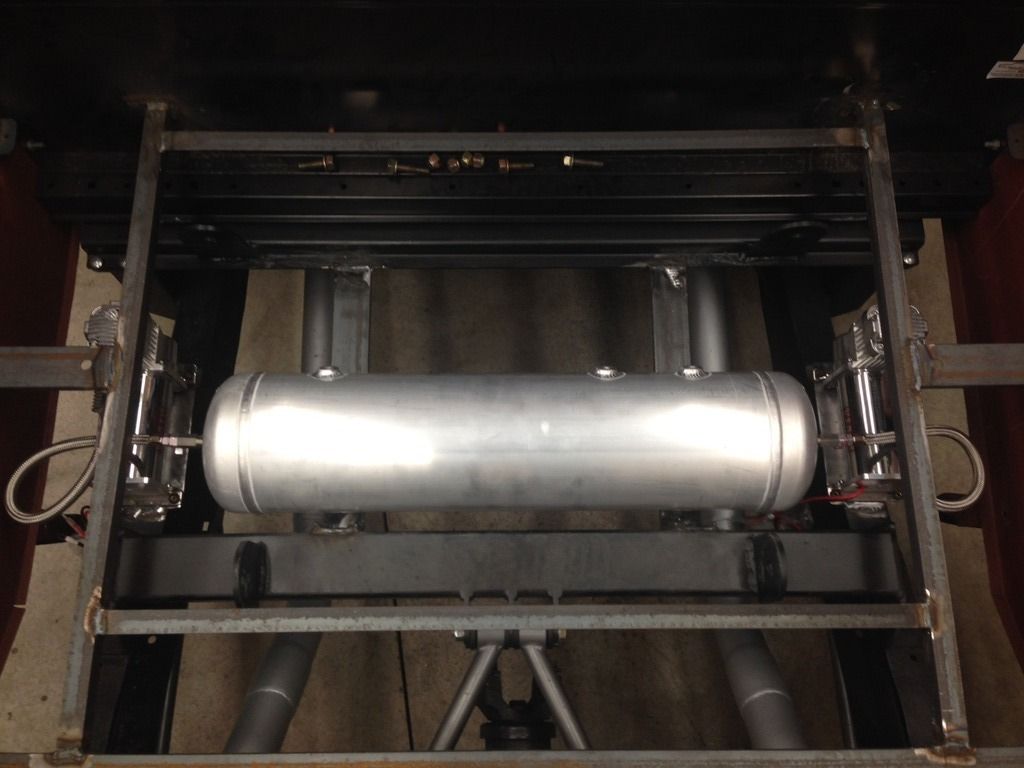 Now I'm saving up for steering parts, and then suspension parts...I wish I hadn't chopped down my money tree. |
|
|
|
|
01-25-2017, 11:37 PM
|
#66 |
|
Registered User
 Join Date: Mar 2007
Location: Scotts, Michigan
Posts: 3,746
|
Re: Project Eugene: 1949 5 window
Nice progress...the exhaust turned out great.
Marc
__________________
...........__________ .................. ((__|__||___\____ ..;.;;.:;:;.,;..;((_(O))____ (_(O)) 1948 Chevy Truck - Finished SOLD!! 1953 Chevy Suburban "Family Truckster" Completed: Spring of 2021 http://67-72chevytrucks.com/vboard/s...d.php?t=605484 1994 4x4 Blazer - "Field Find" https://67-72chevytrucks.com/vboard/...ferrerid=30857 |
|
|
|
|
01-25-2017, 11:49 PM
|
#67 |
|
Senior Member
Join Date: Mar 2011
Location: West Plains, Missouri
Posts: 7,553
|
Re: Project Eugene: 1949 5 window
Nice update...Jim
__________________
my build thread: http://67-72chevytrucks.com/vboard/s...d.php?t=459839 Jimbo's long bed step build:http://67-72chevytrucks.com/vboard/s...t=464626<br /> |
|
|
|
|
01-26-2017, 12:38 AM
|
#68 |
|
Registered User
Join Date: Jan 2010
Location: Titusville, PA
Posts: 3,585
|
Re: Project Eugene: 1949 5 window
all of it is looking good. nice and clean
__________________
51' 99toLife finished 2011,355 sbc,5speed, patina, redoing whole truck, inter, bags, etc http://67-72chevytrucks.com/vboard/s...d.php?t=382481 49Hardtimes s/10 susp- bagged, vortec sbc, 5 speed, patina, sold http://67-72chevytrucks.com/vboard/s...d.php?t=594874 VIDEOS https://youtu.be/E8zHhjgS_lA https://youtu.be/E8zHhjgS_lA Geronimo 54' LS engine, static drop IFS, Client build, just about done http://67-72chevytrucks.com/vboard/s...62#post7399162 52' 3100 Slowly in progress, will be painted two toned, have 235 with a t-5, lowered OG frame Other projects, 49' farmuse 3100, killer Patina, will be slammed, LS engine, full done interior up next! www.coffeeandcustoms.com |
|
|
|
|
01-26-2017, 10:19 AM
|
#69 |
|
Registered User
Join Date: Feb 2011
Location: The Range, MN
Posts: 103
|
Re: Project Eugene: 1949 5 window
You're doing a great job! S10 frames do present some head scratchers don't they!
|
|
|
|
|
01-26-2017, 11:29 AM
|
#70 |
|
Registered User
Join Date: Jun 2015
Location: Glendale
Posts: 414
|
Re: Project Eugene: 1949 5 window
Everything looks good keep up the momentum
|
|
|
|
|
01-26-2017, 04:18 PM
|
#71 |
|
Formerly- 1972SuperCheyenne
Join Date: Oct 2008
Location: Wake Forest NC
Posts: 5,782
|
Re: Project Eugene: 1949 5 window
Looks great, about time to put a bullet in said dog!
__________________
--Josh My Build Thread:http://67-72chevytrucks.com/vboard/s...d.php?t=799218 A good crossthread is better than Loctite any day. Life is not about what you have, but who you have to share it with. |
|
|
|
|
02-15-2017, 10:51 PM
|
#72 |
|
Registered User
Join Date: Jan 2015
Location: Prior Lake MN
Posts: 87
|
Re: Project Eugene: 1949 5 window
I got the rear shock mounts done, which means that all the fab on the rear end is DONE. While saving up for front end and steering parts, I got after fabbing up the bed.
Shock Mounts: 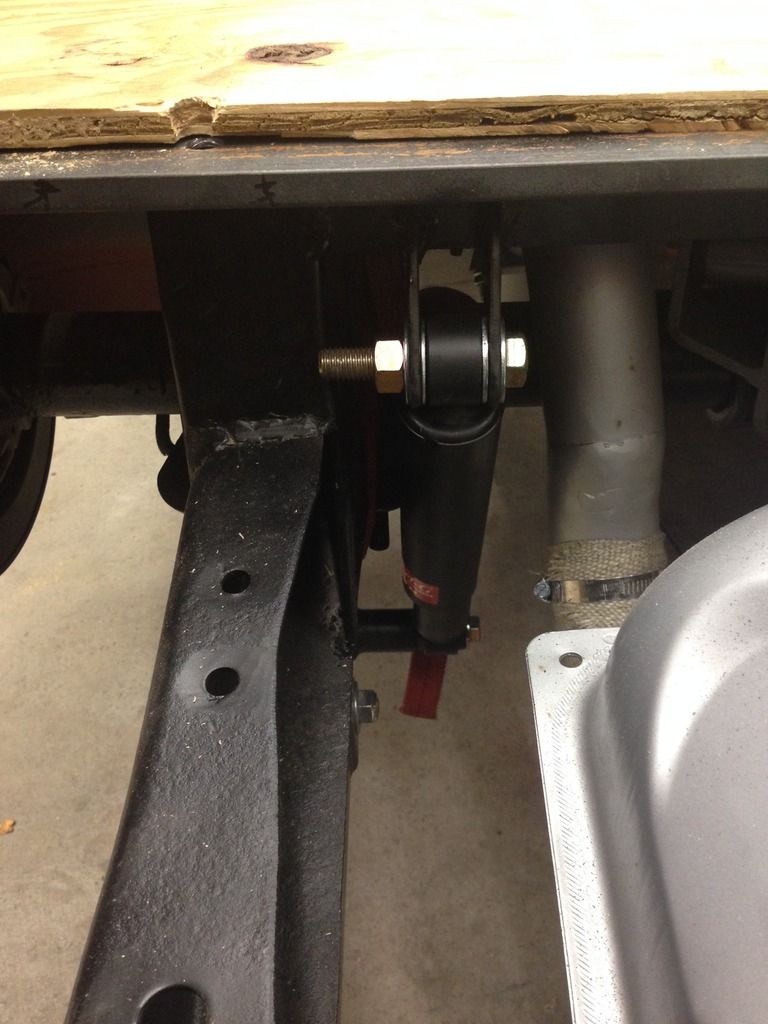 Then I laid down a plywood base: 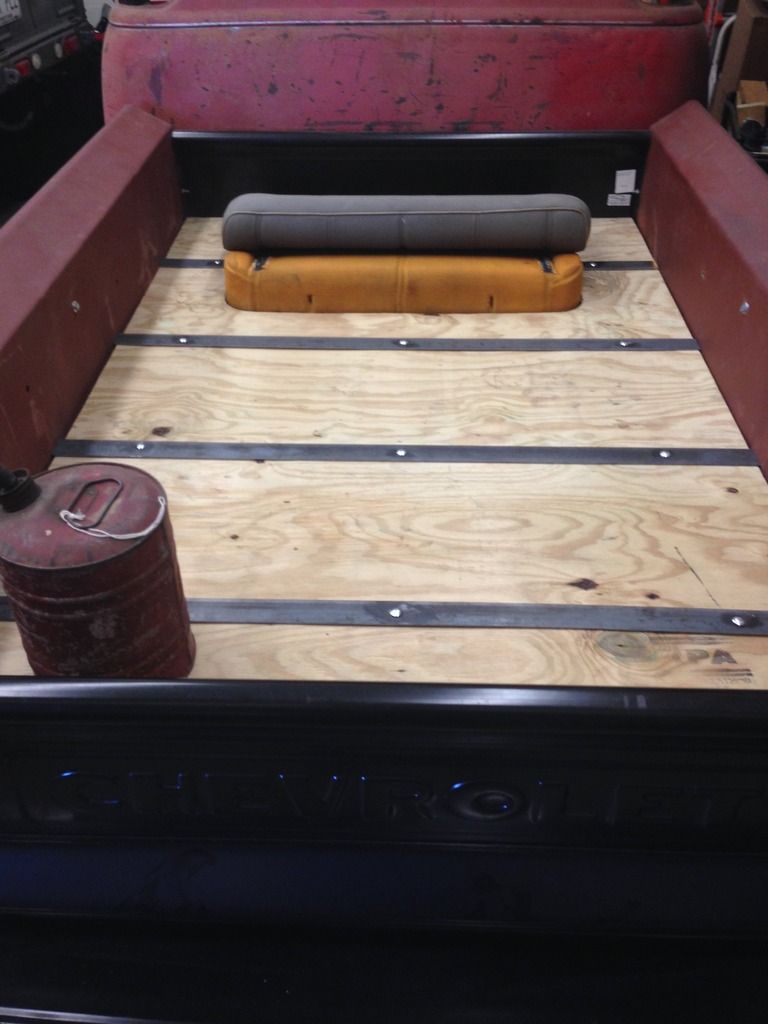 Nice and snug around the rear seat: 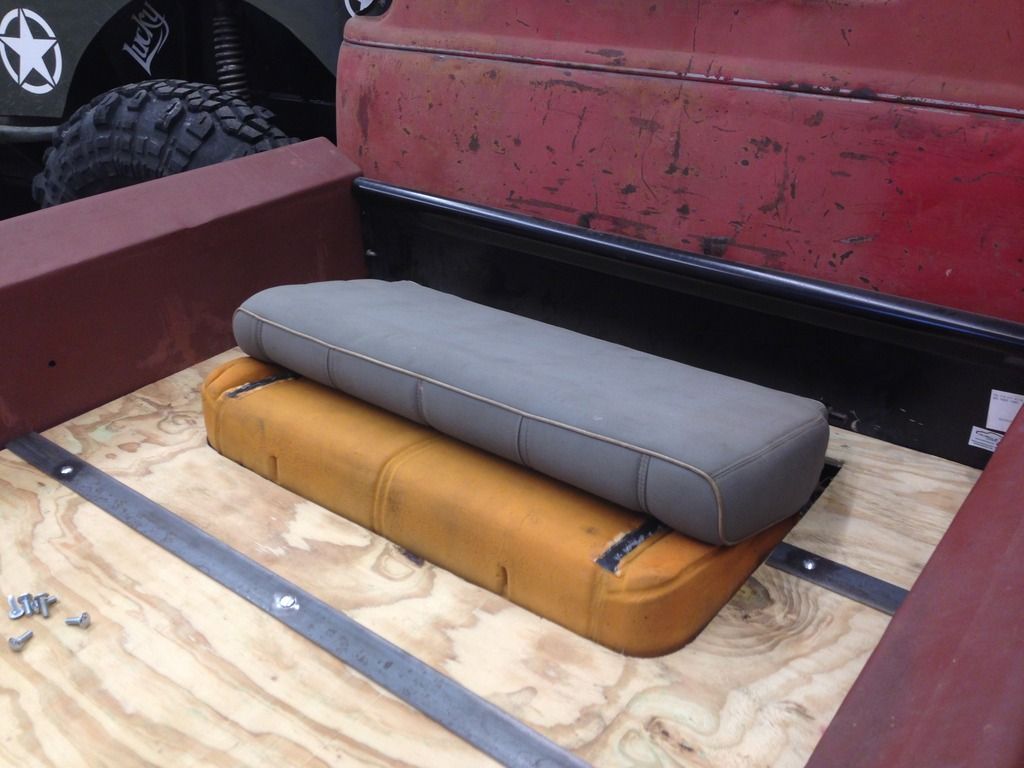 Laid out the barn wood: 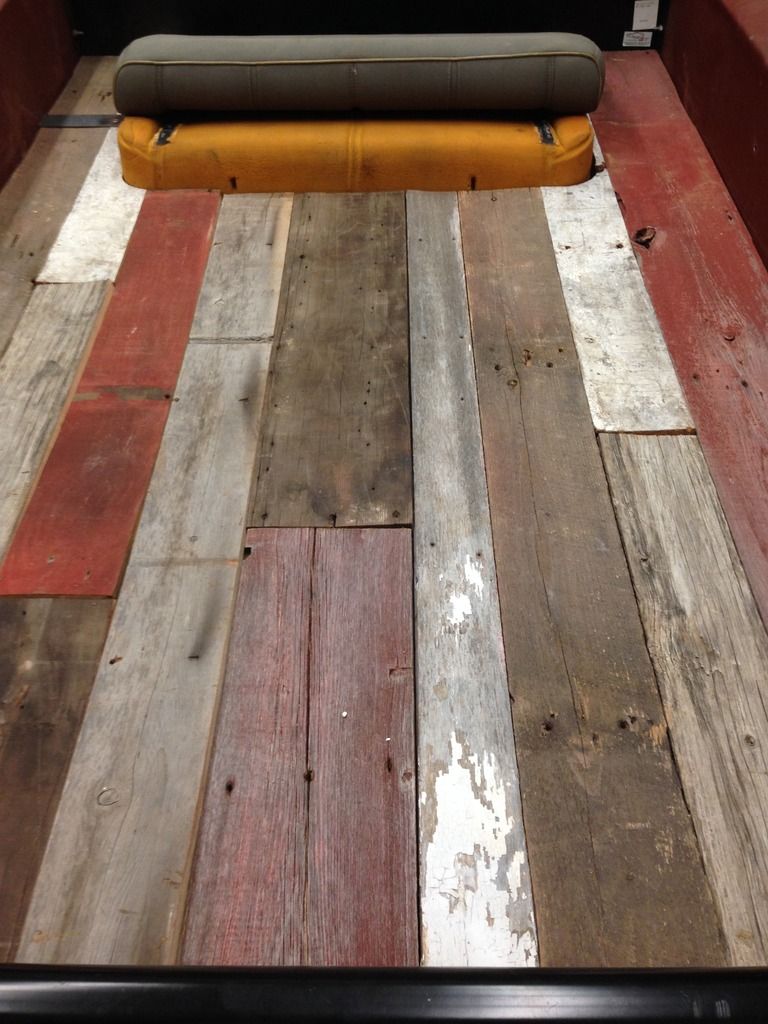 The boy and I made a crate out of pallet wood:  Then I paint/ stained it- and glued/ pinned all the barn wood in up from the bottom so there's no screw heads and mounted the straps: 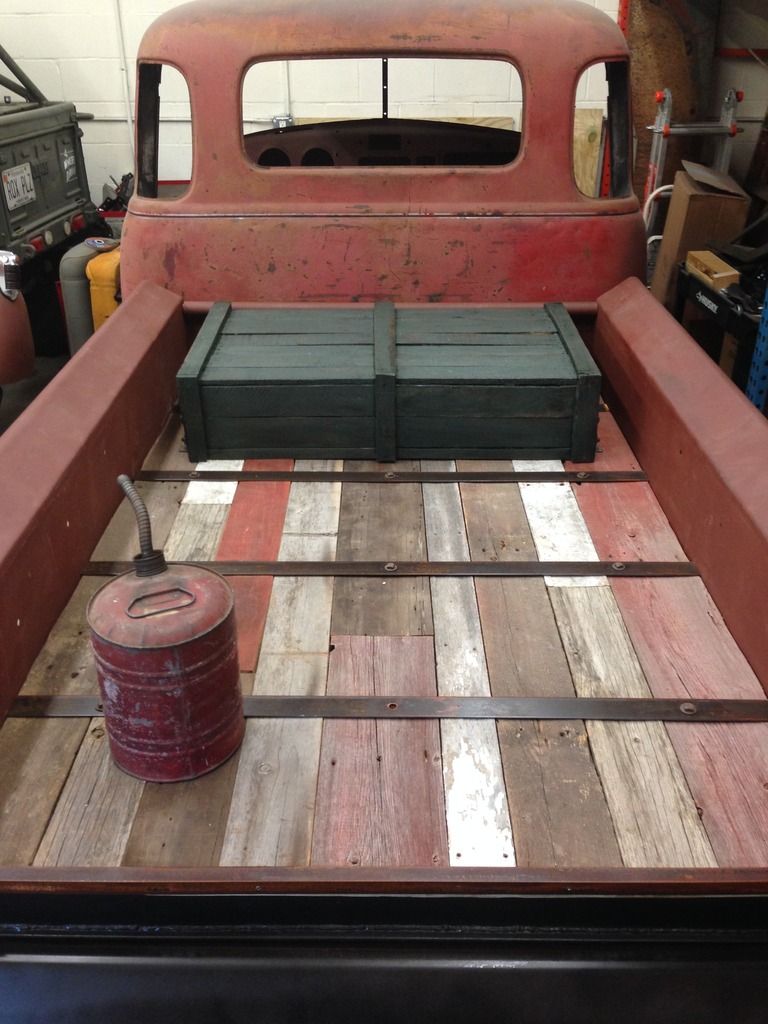 I pinterest'd up the straps with some quick rust science, and clear coated it- and painted the square head bolts: 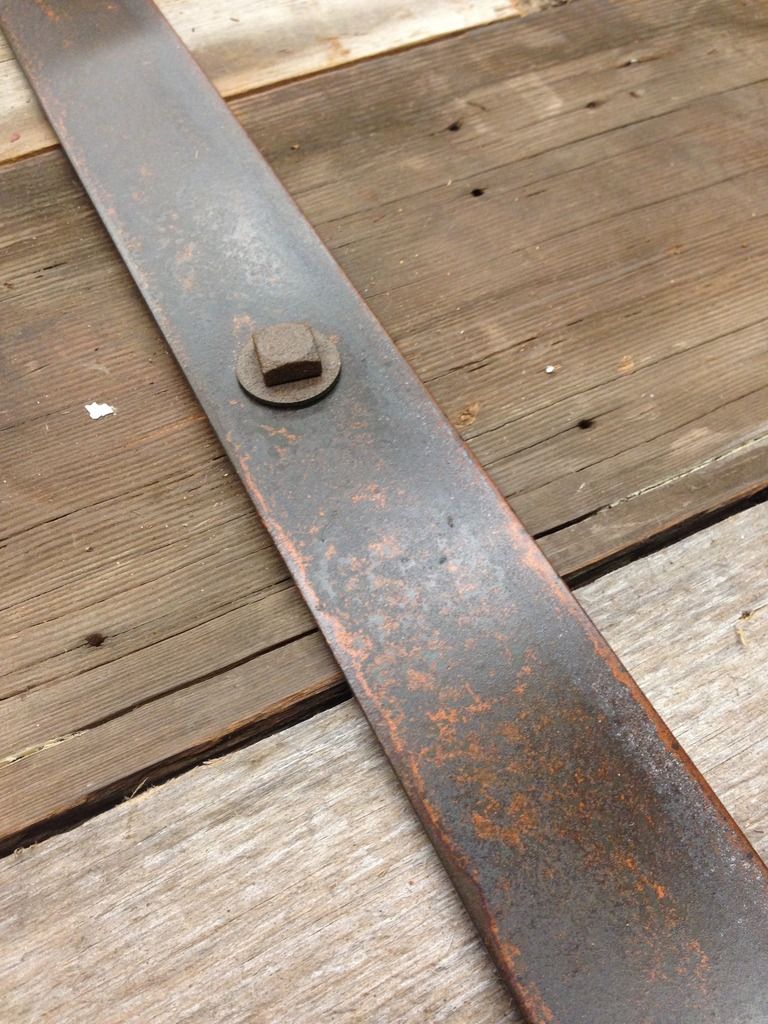 The crate is latched down with some 90* boat latches: 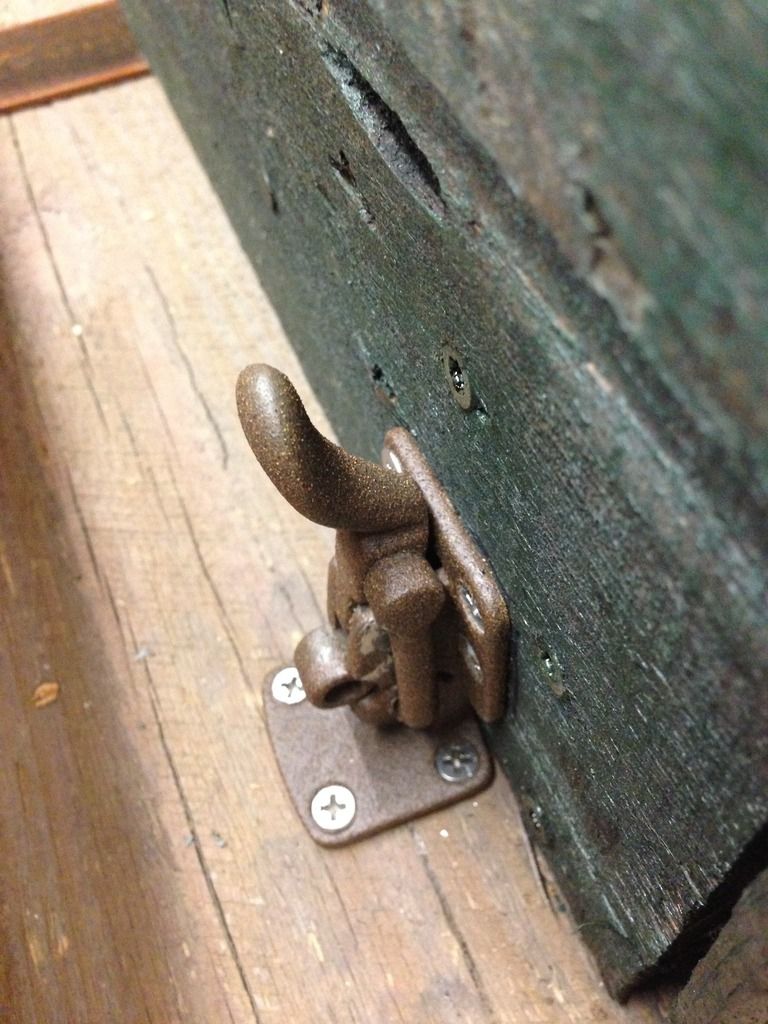 The flip top gas fill is now hidden by the antique gas can that has a hole in the bottom and is stuck to the rear strap with some crazy strong magnets: 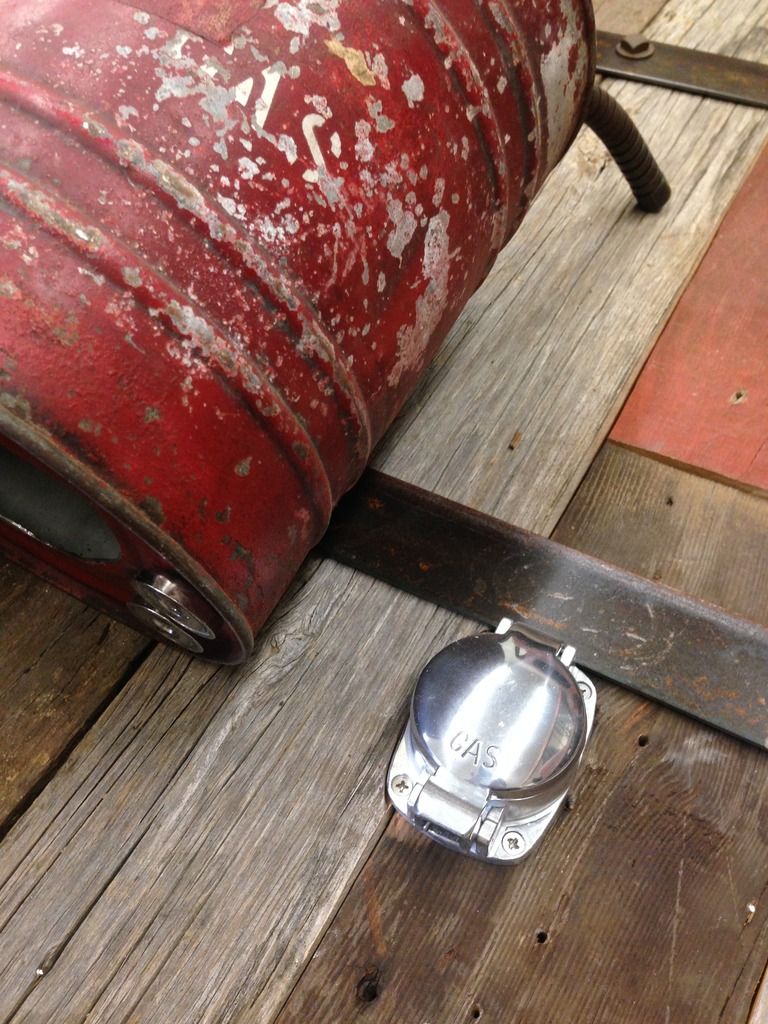 I sprayed the underside with some bedliner, and with that, the bed is ready for paint! |
|
|
|
|
02-15-2017, 11:03 PM
|
#73 |
|
Registered User
Join Date: Aug 2012
Location: West Side of the valley, CA
Posts: 878
|
Re: Project Eugene: 1949 5 window
Nice touches. Looking good.
|
|
|
|
|
02-16-2017, 12:24 AM
|
#74 |
|
Registered User
Join Date: Jun 2015
Location: Glendale
Posts: 414
|
Re: Project Eugene: 1949 5 window
Really like this build
|
|
|
|
|
02-16-2017, 12:46 AM
|
#75 |
|
A320 Pilot/USAF Retired
Join Date: Mar 2009
Location: Charleston, SC
Posts: 2,622
|
Re: Project Eugene: 1949 5 window
That looks nice!

__________________
JJ My 1957 build: http://67-72chevytrucks.com/vboard/s...d.php?t=334552 http://www.trifive.com/forums/showthread.php?t=22037 Instagram - Chuckdriver57 |
|
|
|
|
| Bookmarks |
|
|


 Linear Mode

