
|
Register or Log In To remove these advertisements. |
|
|
|
|||||||
 |
|
|
Thread Tools | Display Modes |
 11-26-2015, 09:24 PM
|
#26 |
|
Registered User
Join Date: Jan 2015
Location: Prior Lake MN
Posts: 87
|
Re: Project Eugene: 1949 5 window
That's a really cool idea, and some awesome fab!
I got my edges to line up so no moisture will get behind it. Once I get the inner fender well to line up I will seal that edge up as well. I will pull down a fender and make sure they line up. |

|

|
|
12-30-2015, 07:11 PM
|
#27 |
|
Registered User
Join Date: Jan 2015
Location: Prior Lake MN
Posts: 87
|
Re: Project Eugene: 1949 5 window
I took this entire week off so I have gotten after it!
Got the kick panels done first. 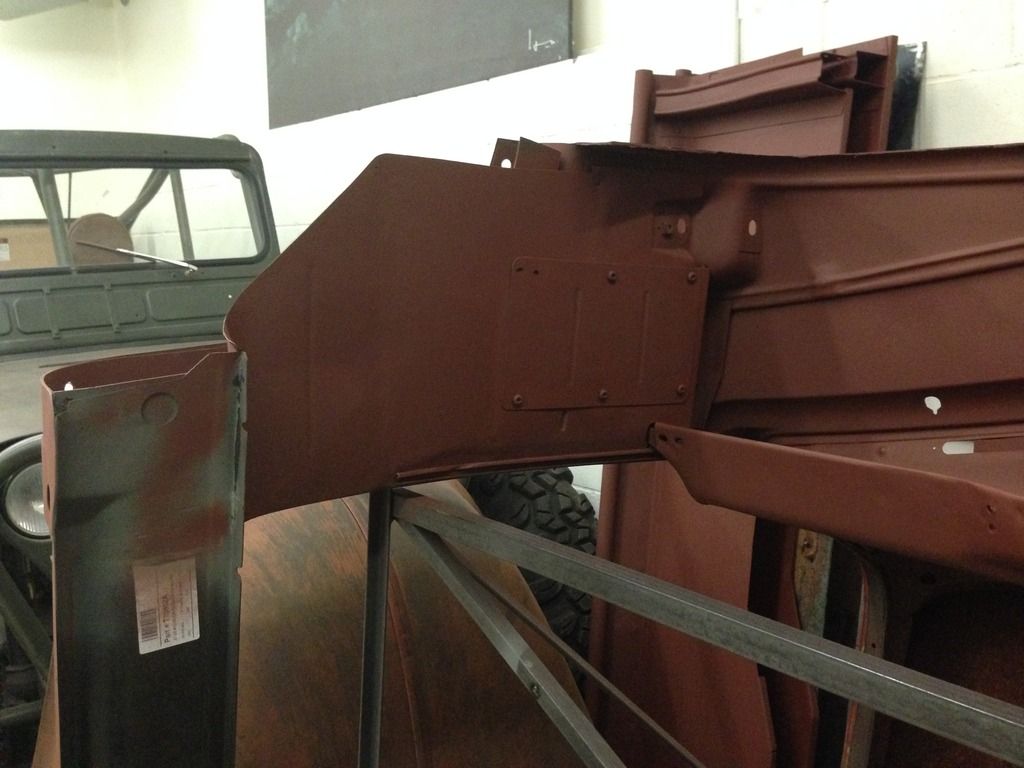 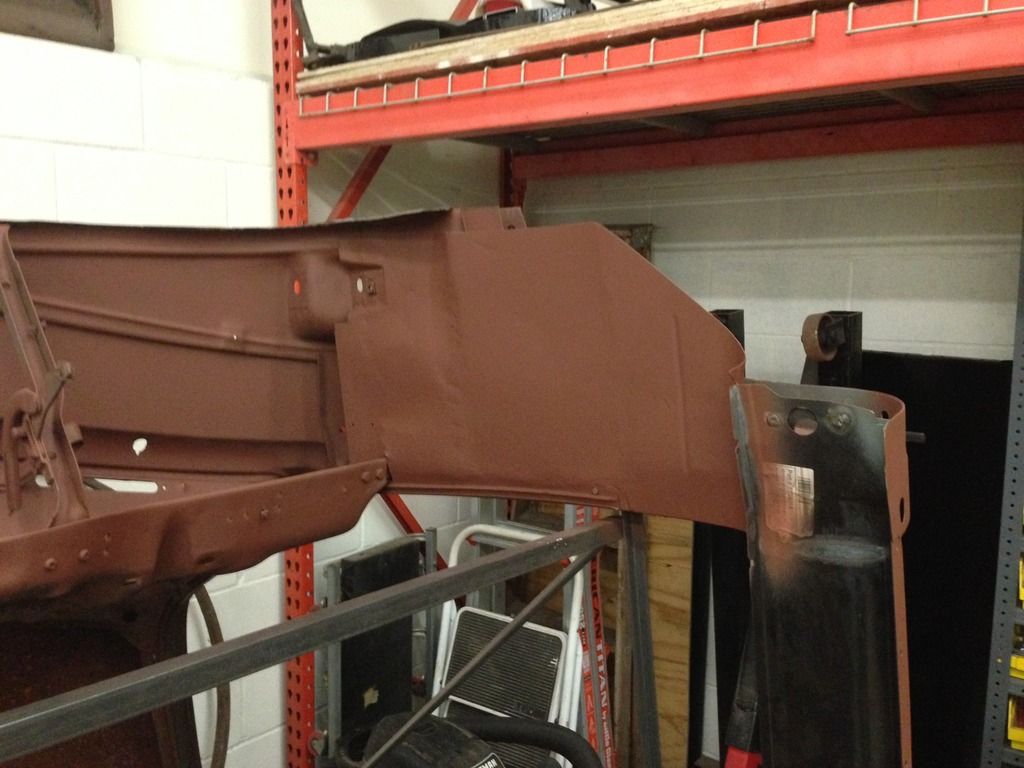 Then the Absolute Sheet Metal firewall went in next 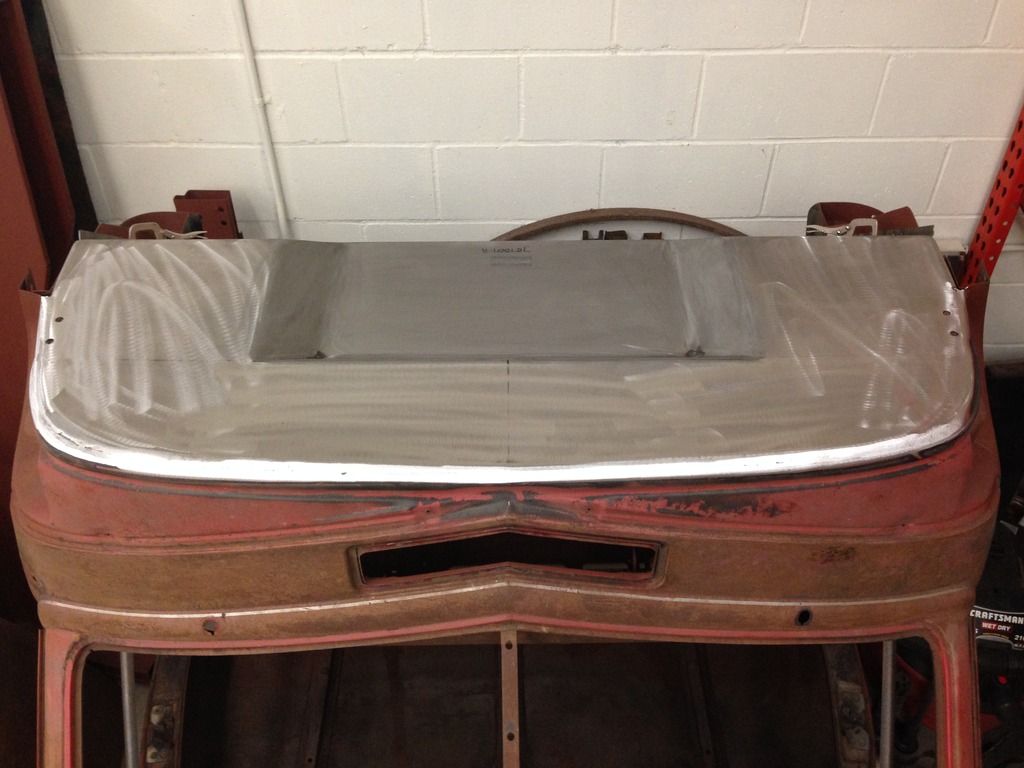 Had some gaps to take care of based on what to get cut out from rot. It's shocking how long this kind of stuff takes. About 4 hours into filling both sides, and no one will ever see them! 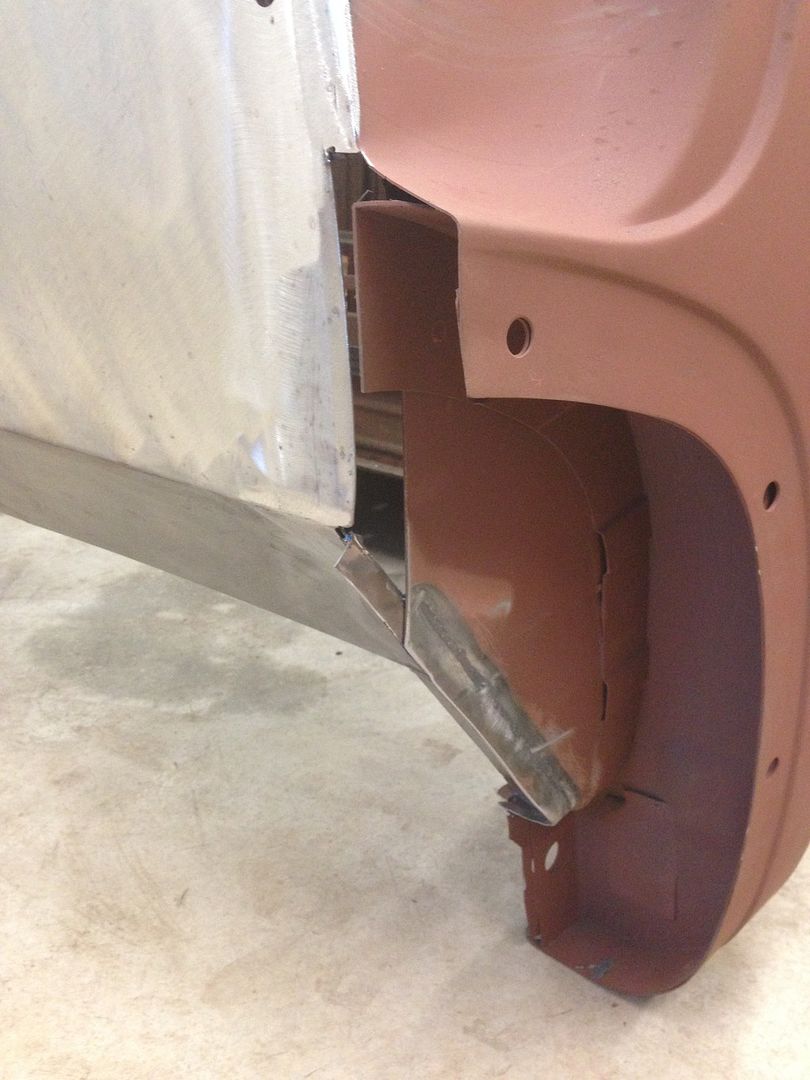 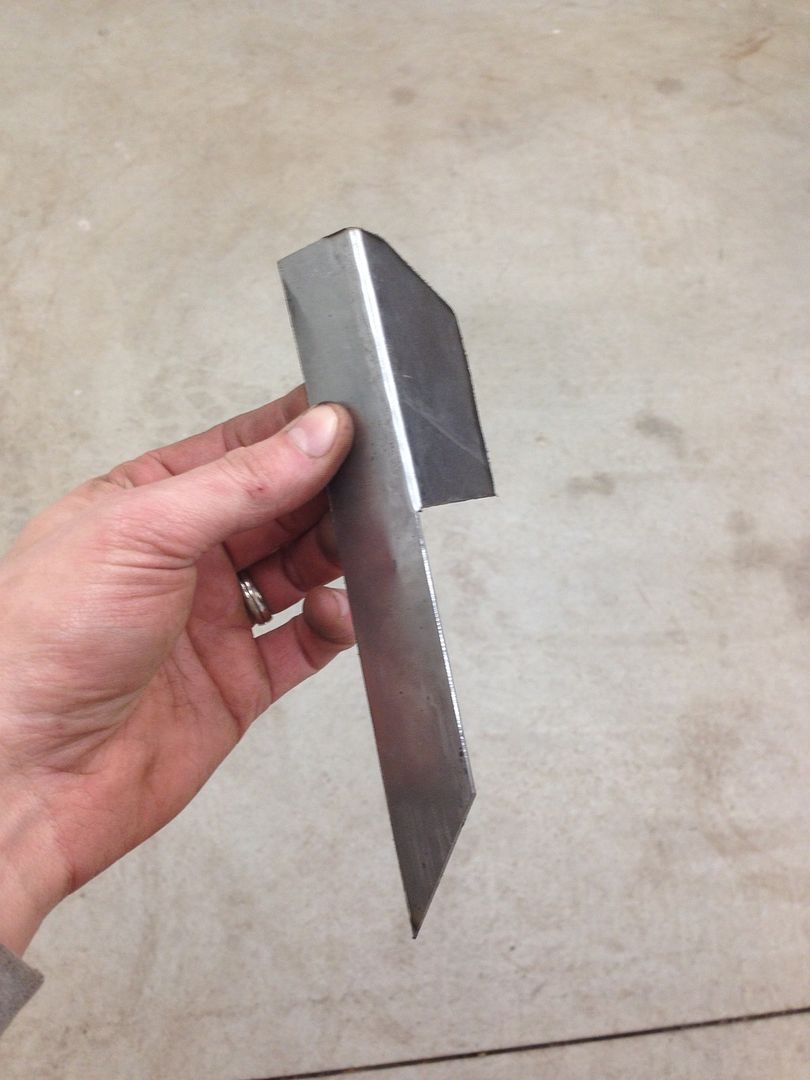 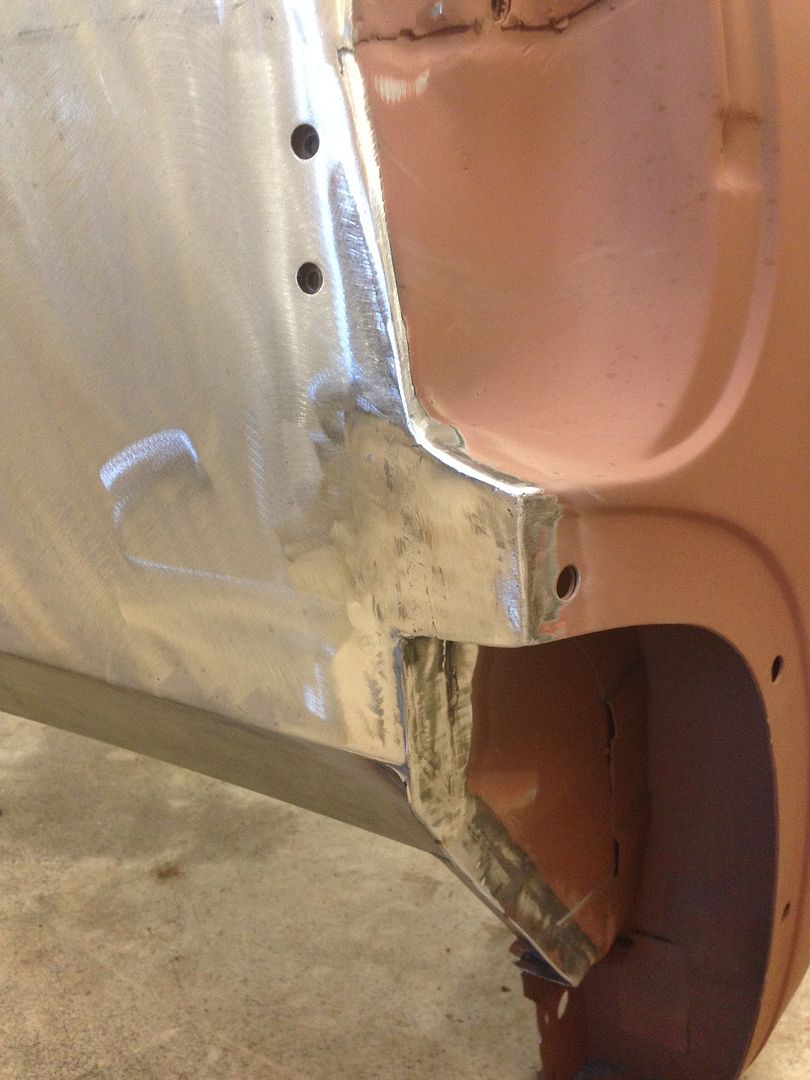 The toe boards and floor was next. Instead of spot welding and seam sealing everything, I stitched all the edges and finish welded everything. I feel better about the seal and structural integrity of everything. 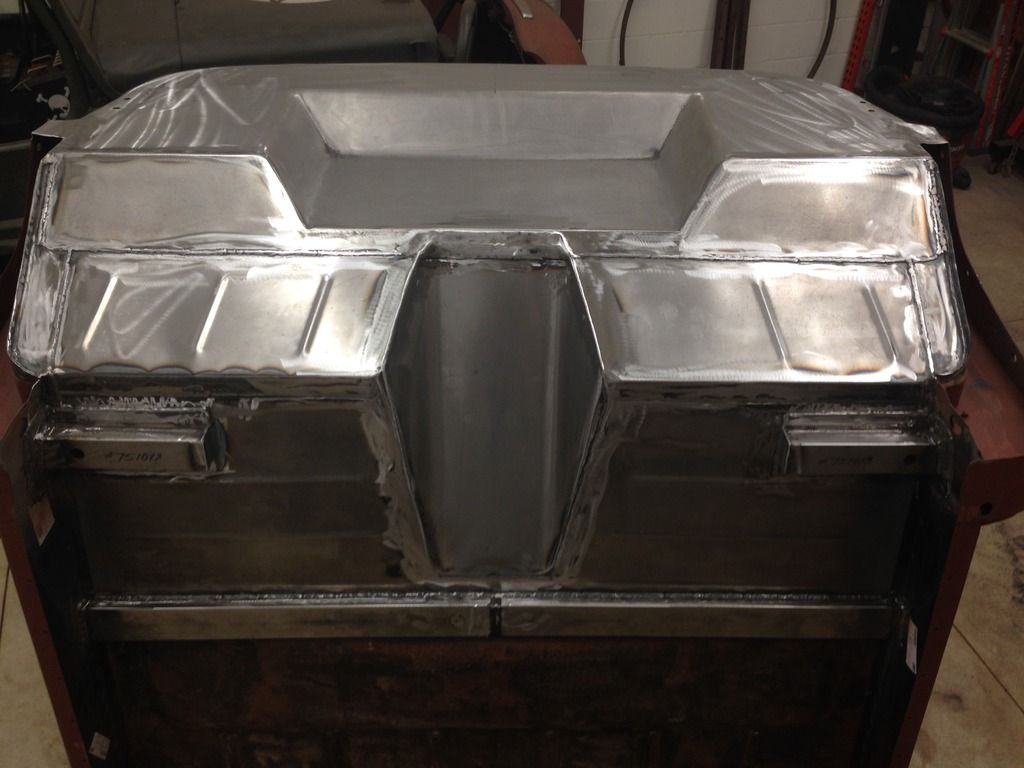 I also wire whipped the dash and got it in primer.  Then everything got etching and base primer. Feels REALLY good to have gotten to this point... 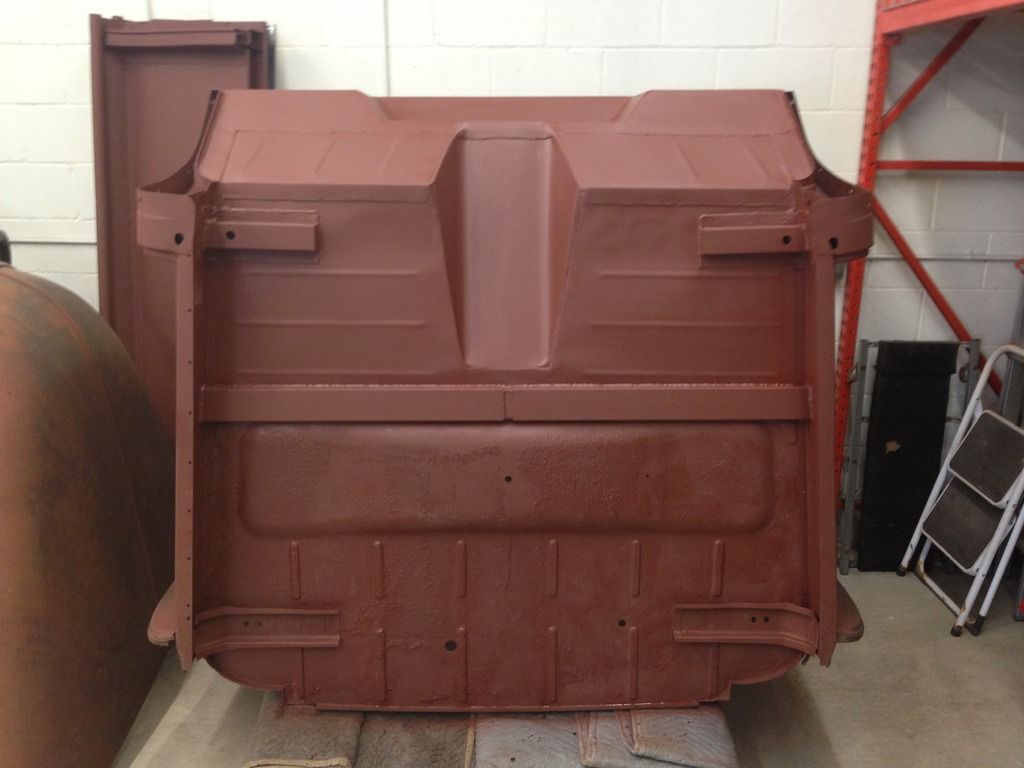 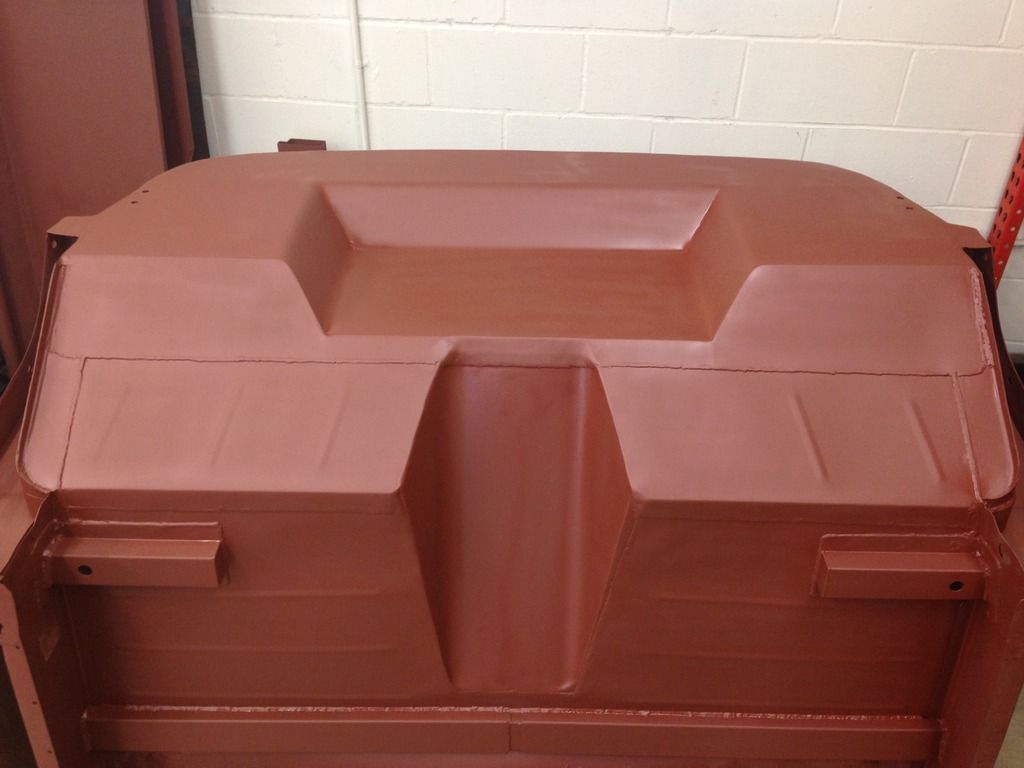 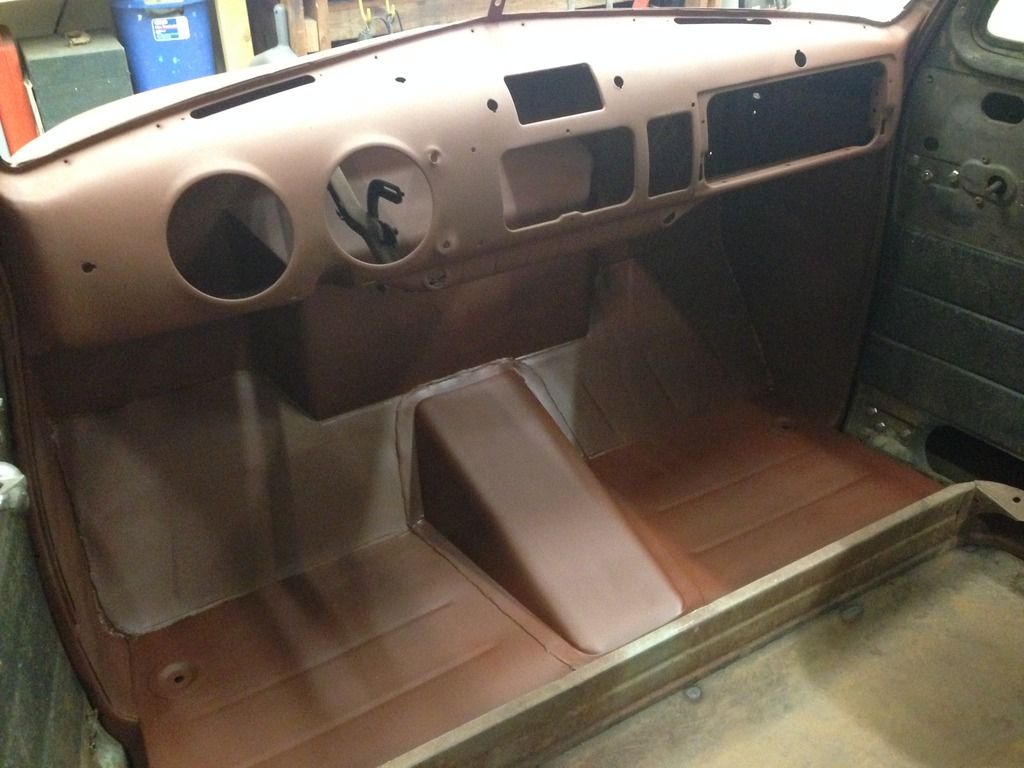 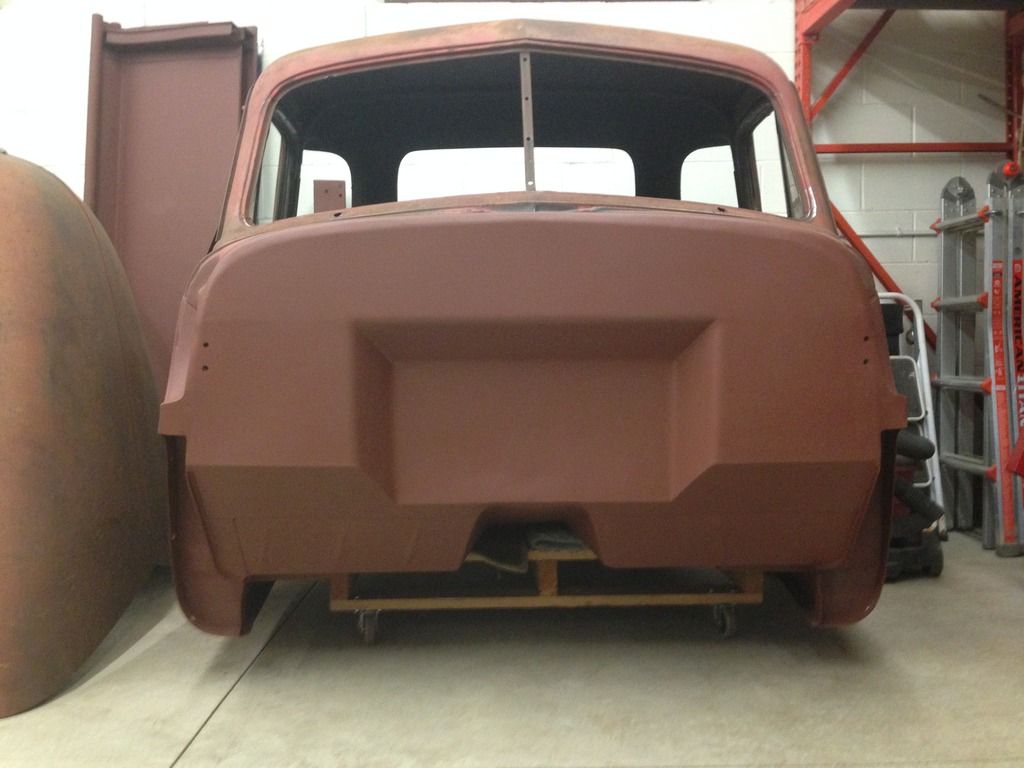 The passenger door is original to the truck. It went back in perfect.  The drivers door is a replacement. Since I put the lower cowl and hinge pocket back to their original spot, this door doesn't quite fit. Crap. Luckily, I am well acquainted with my grinder, and I would rather be taking off than adding on! 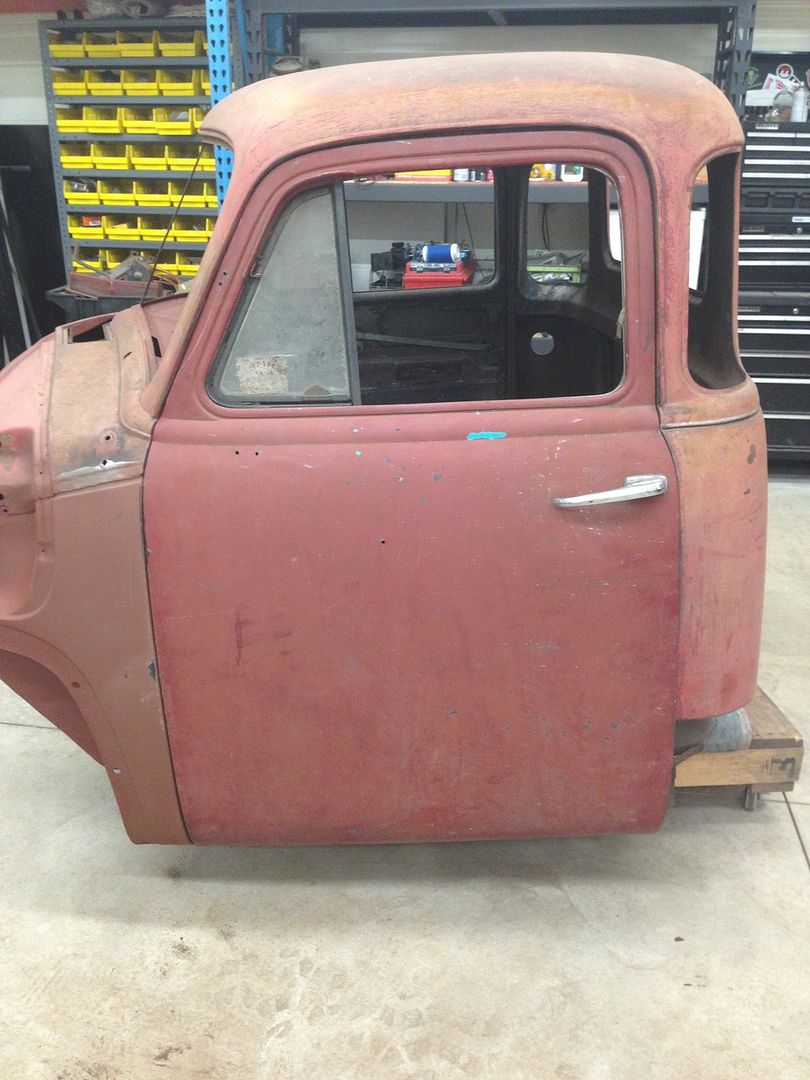 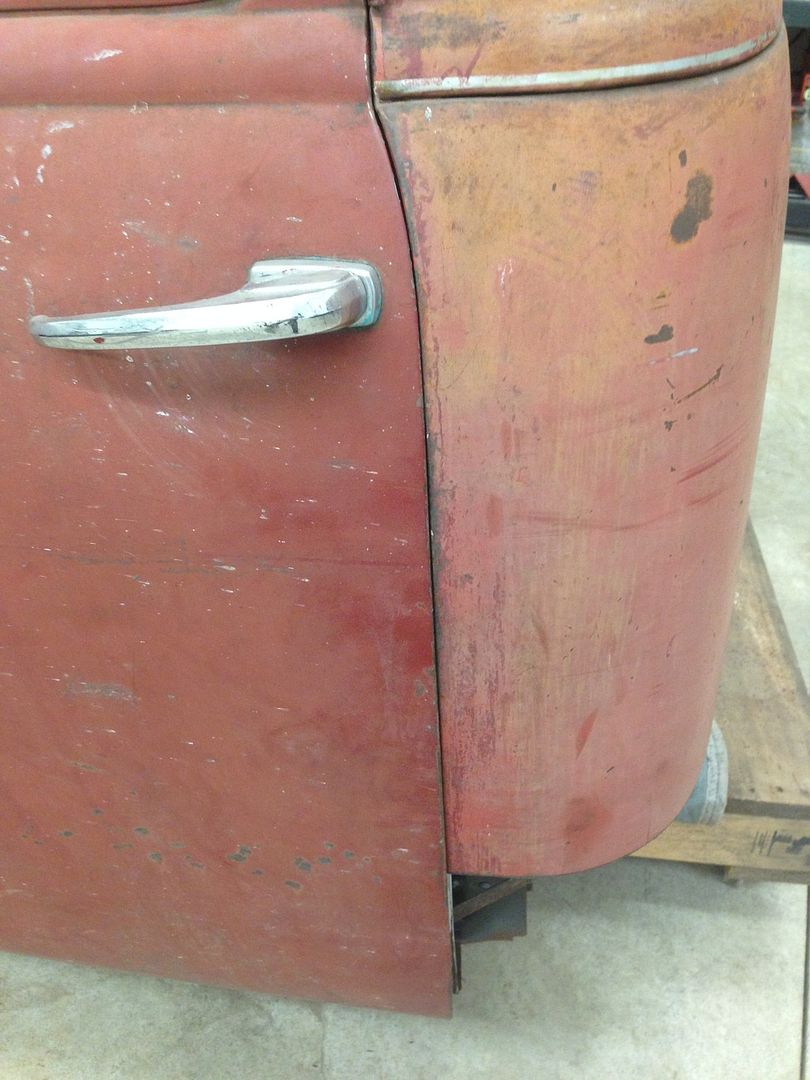 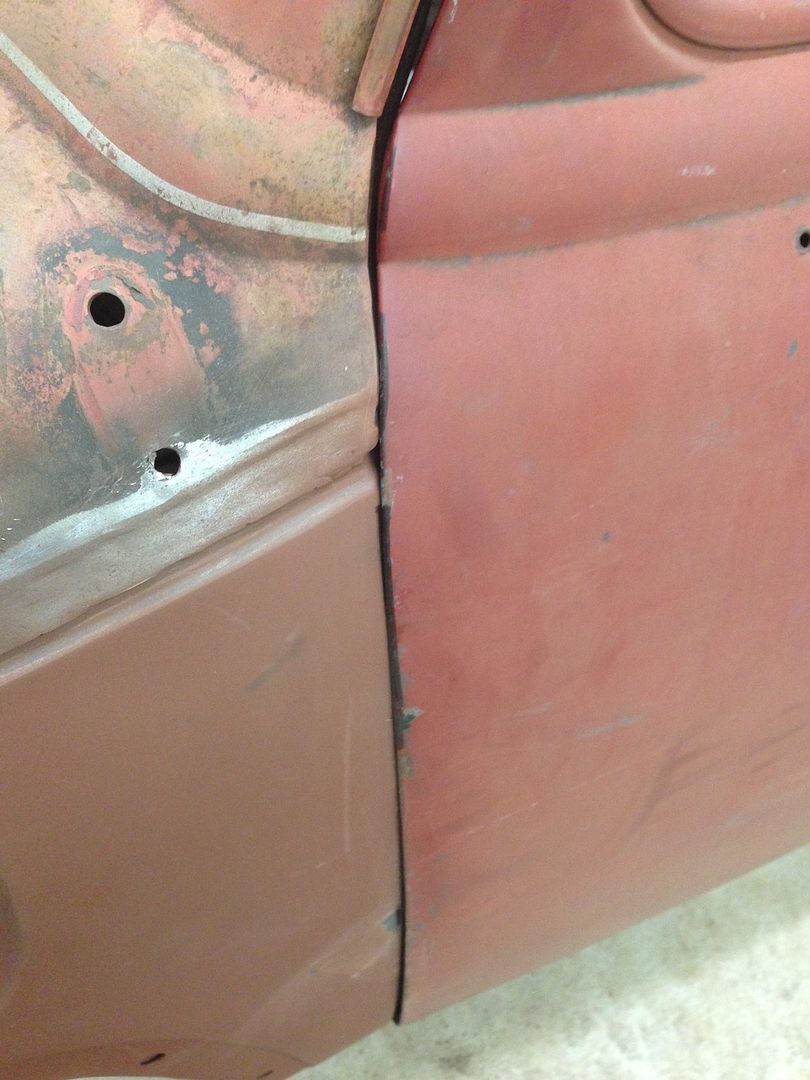 I will get after the door tomorrow and then will start on the cab corners. Then we start on fenders! Sigh... |
|
|
|
|
12-30-2015, 09:16 PM
|
#28 |
|
Senior Member
 Join Date: Mar 2011
Location: West Plains, Missouri
Posts: 7,553
|
Re: Project Eugene: 1949 5 window
Very nice work on the replacement parts, looks great...Jim
__________________
my build thread: http://67-72chevytrucks.com/vboard/s...d.php?t=459839 Jimbo's long bed step build:http://67-72chevytrucks.com/vboard/s...t=464626<br /> |
|
|
|
|
12-30-2015, 11:48 PM
|
#29 |
|
Senior Member
Join Date: Jan 2009
Location: Raleigh, NC
Posts: 444
|
Re: Project Eugene: 1949 5 window
You made good progress with your time off. Looks great.
__________________
1949/1954 with LS swap-yeah! http://s260.photobucket.com/albums/i...0/AD%20trucks/jumbled mess of unorganized photos |
|
|
|
|
12-31-2015, 06:12 PM
|
#30 |
|
Registered User
Join Date: Jan 2015
Location: Prior Lake MN
Posts: 87
|
Re: Project Eugene: 1949 5 window
Just a bit of progress today, one side done. Hoping to get the other side done and the door shaved to fit before I have to go back to work on Monday...we'll see!
Before: 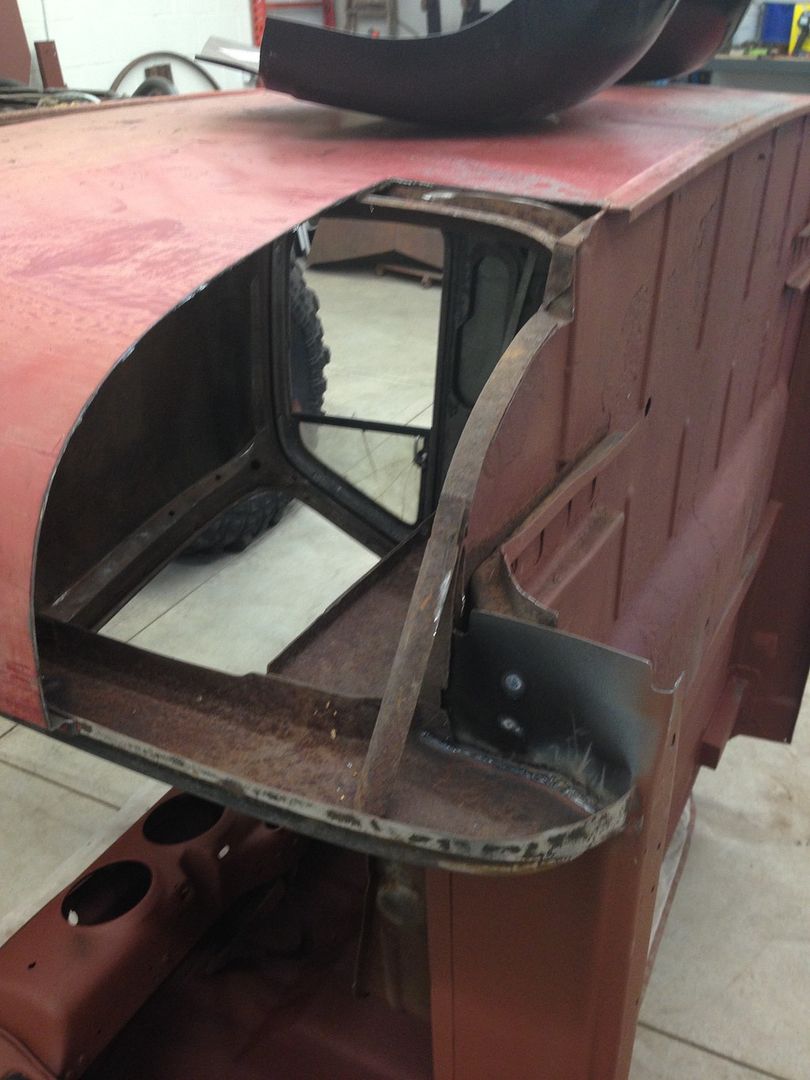 During: 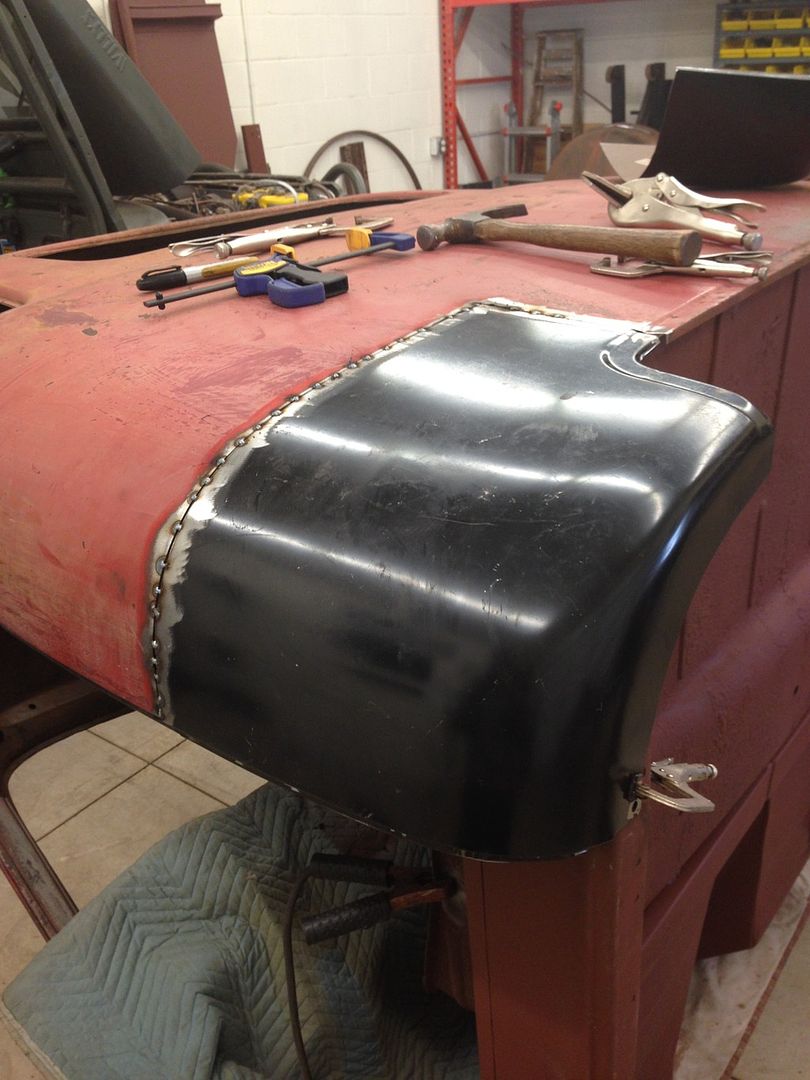 After, all blended and happy: 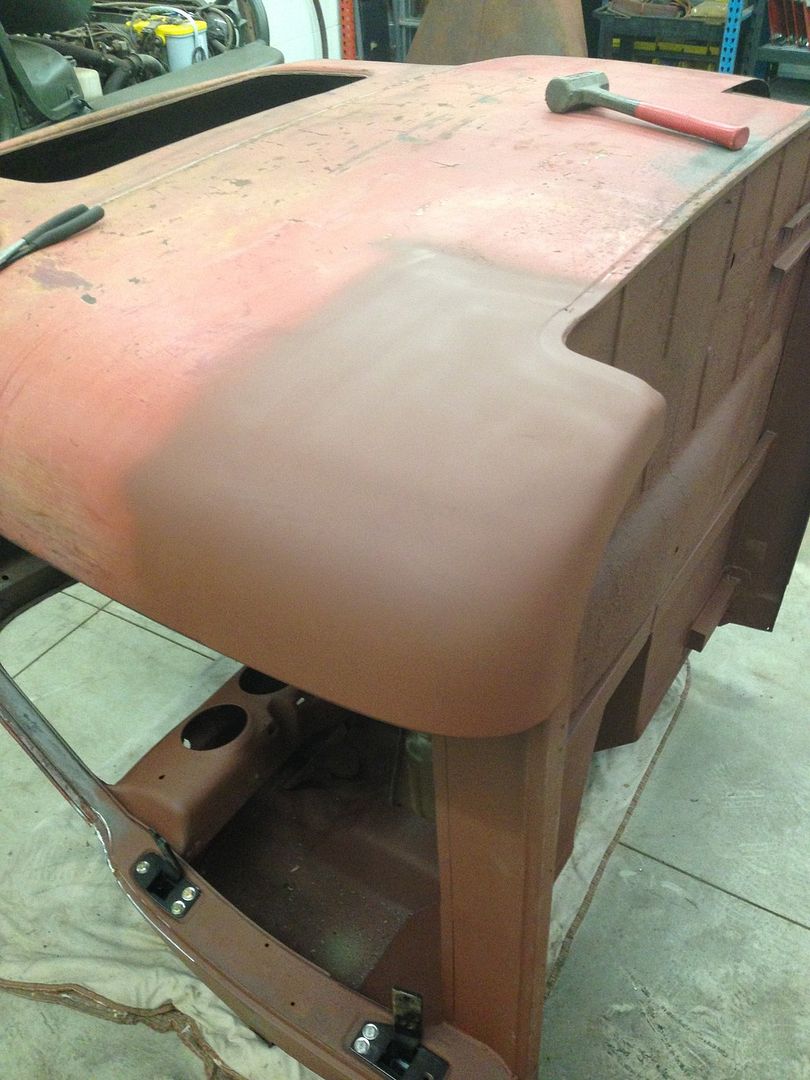
|
|
|
|
|
12-31-2015, 06:21 PM
|
#31 |
|
Senior Member
Join Date: Mar 2011
Location: West Plains, Missouri
Posts: 7,553
|
Re: Project Eugene: 1949 5 window
Looks great, nice job...Jim
__________________
my build thread: http://67-72chevytrucks.com/vboard/s...d.php?t=459839 Jimbo's long bed step build:http://67-72chevytrucks.com/vboard/s...t=464626<br /> |
|
|
|
|
12-31-2015, 10:12 PM
|
#32 |
|
Senior Member
Join Date: Jul 2012
Location: Oblong, Illinois
Posts: 7,017
|
Re: Project Eugene: 1949 5 window
Great job on the floor and firewall!
|
|
|
|
|
01-10-2016, 10:46 AM
|
#33 |
|
Registered User
Join Date: Jan 2015
Location: Prior Lake MN
Posts: 87
|
Re: Project Eugene: 1949 5 window
More progress this weekend.
Filled the cab corner gaps with some hand fabbed pieces. Before:  After: 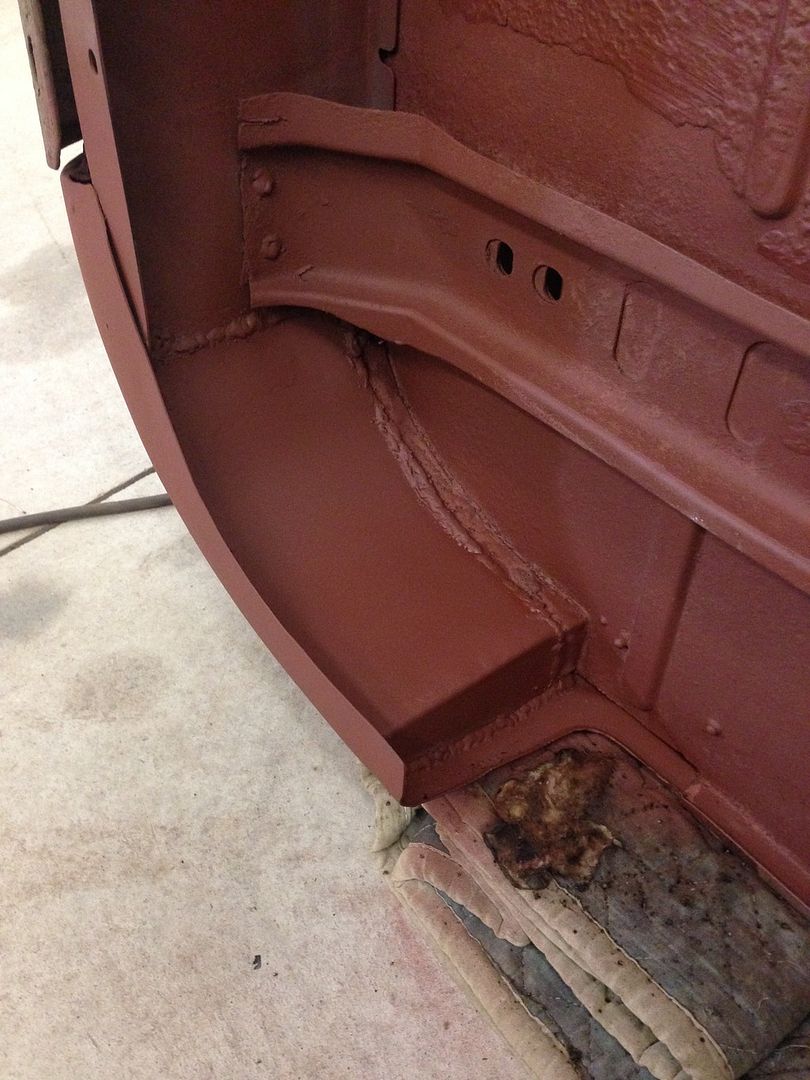 Filled the filler neck hole: 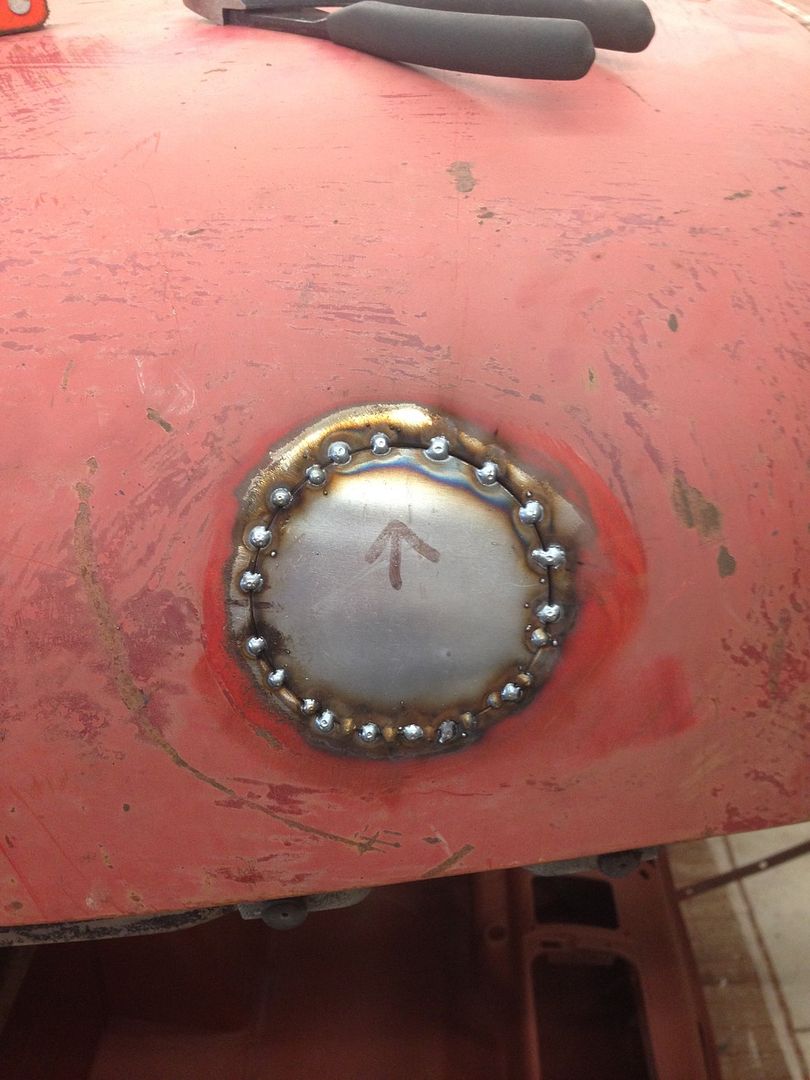 All gone: 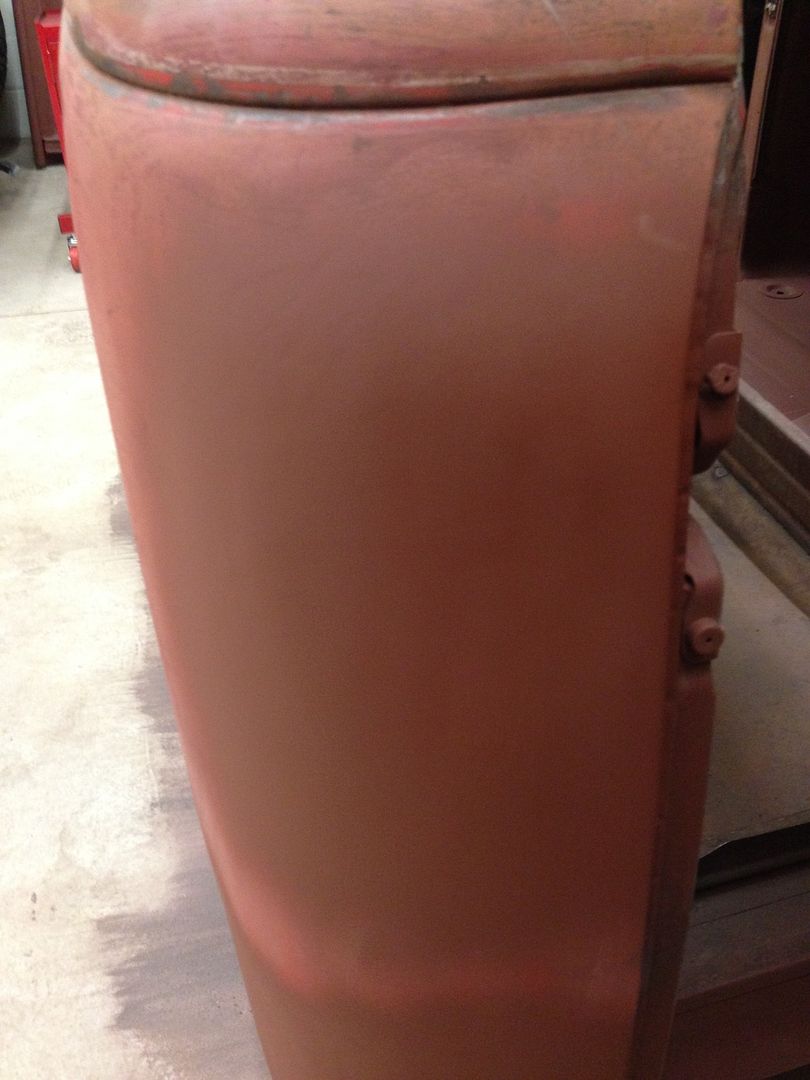 Body worked the cab corners while I was at it. Far from perfect, and I was trying hard not to use any filler, but they do look better.  Body worked the upper cowl. I was gonna try and use lead, but I got skerred. Drivers: 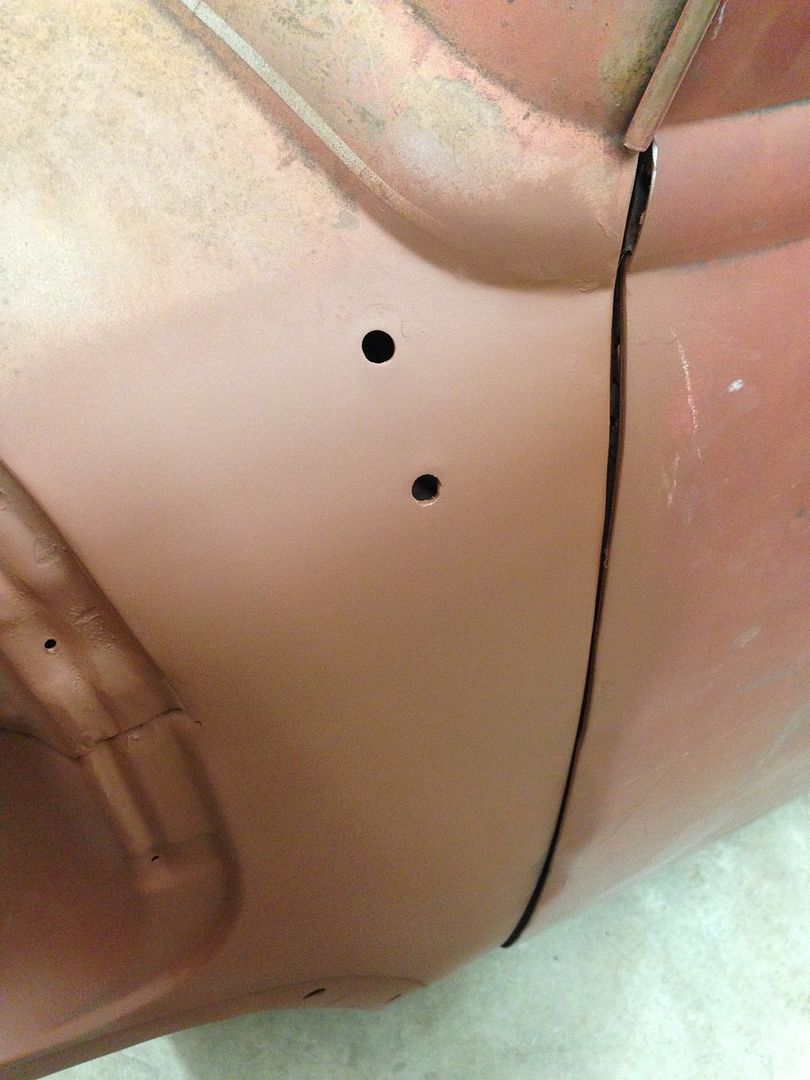 Passenger: 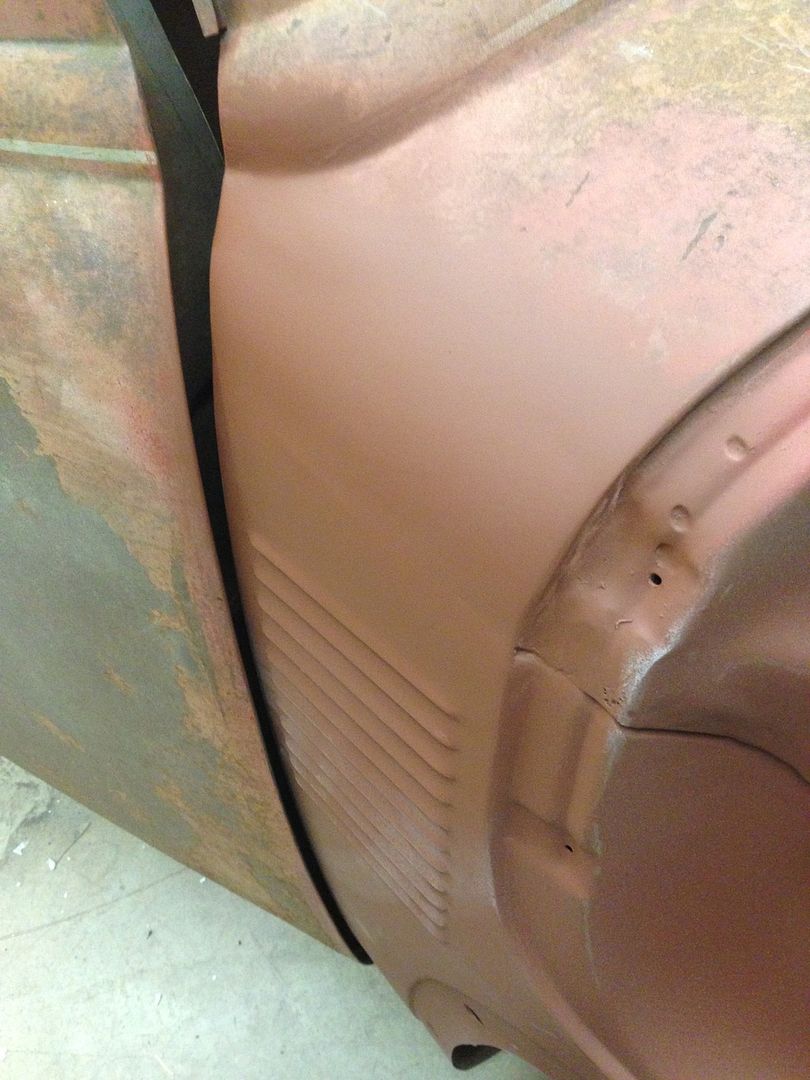 Even got motivated enough to start working on the door gaps. Before: After:  Got new bear claw latches for the doors since my old latches are welded to the skins right now, looking forward to getting those in and not having to worry about my doors opening at speed... |
|
|
|
|
01-10-2016, 11:45 AM
|
#34 |
|
Senior Member
Join Date: Jul 2012
Location: Oblong, Illinois
Posts: 7,017
|
Re: Project Eugene: 1949 5 window
Really nice job on the door gap!
|
|
|
|
|
01-10-2016, 01:46 PM
|
#35 |
|
Registered User
Join Date: Jun 2015
Location: Glendale
Posts: 414
|
Re: Project Eugene: 1949 5 window
Outstanding work! I've been on the fence about going with a new firewall and forward floor just like yours. Any input to sway my decision either way? No repairs needed (besides a crap ton of hole filling) just like how it cleans things up. How many hours do you have into the firewall?
|
|
|
|
|
01-10-2016, 08:13 PM
|
#36 |
|
Registered User
Join Date: Jan 2015
Location: Prior Lake MN
Posts: 87
|
Re: Project Eugene: 1949 5 window
Thanks guys! Feeling good to get some real progress done on the sheet metal. My son is looking forward to me finishing this nit-picky welding done so we can start putting stuff together.
Honestly, the firewall was probably the easiest part of the install. My floors were the worst part of my cab, hardly anything left, so they HAD to be done. The firewall was more of a, "Well, since I am going to have everything else torn apart, I might as well!" so... The Absolute sheet metal firewall and floor kit was very well built. Probably could have built it myself, but it saved me a bunch of time, so I am happy I bought it. I have maybe 2 hours into just the firewall alone. The floors took a LOT more time to get right. |
|
|
|
|
01-23-2016, 10:16 AM
|
#37 |
|
Registered User
Join Date: Jan 2015
Location: Prior Lake MN
Posts: 87
|
Re: Project Eugene: 1949 5 window
Alright, time for some seat opinions.
I found a rear bench seat out of a 2000s extended cab silverado. It fits inside the B pillars perfect, and doesnt rub the doors when they close. The ONLY downside is that it is a little narrow front to back. For reference: 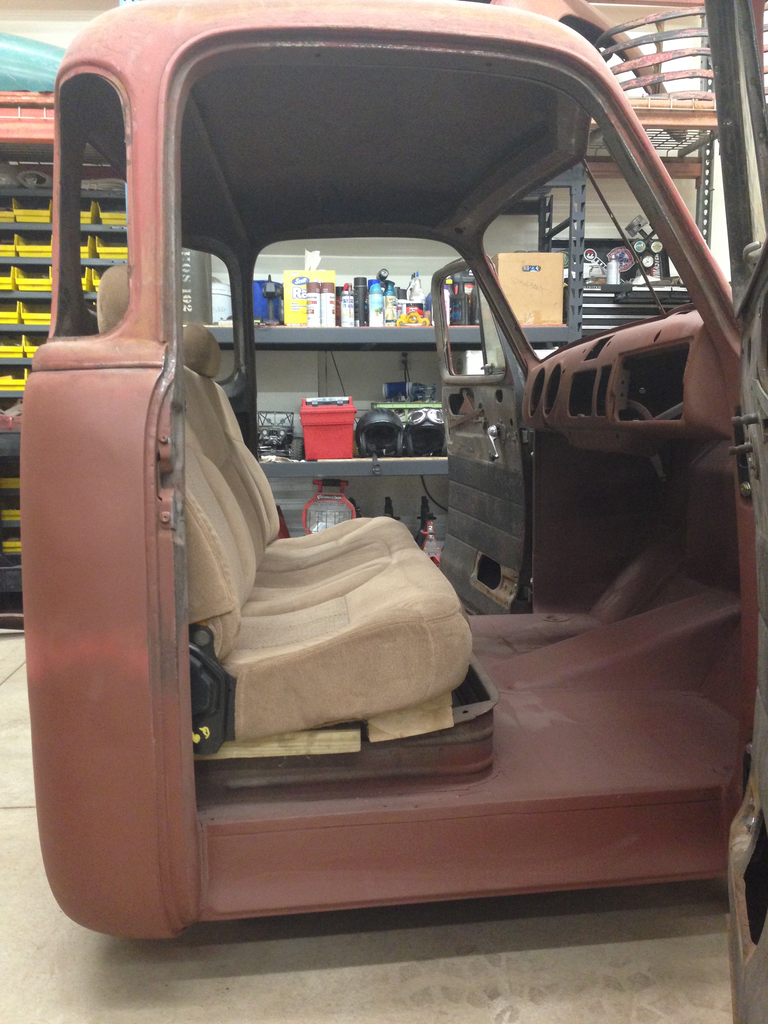 Me sitting in it #selfie #crocs 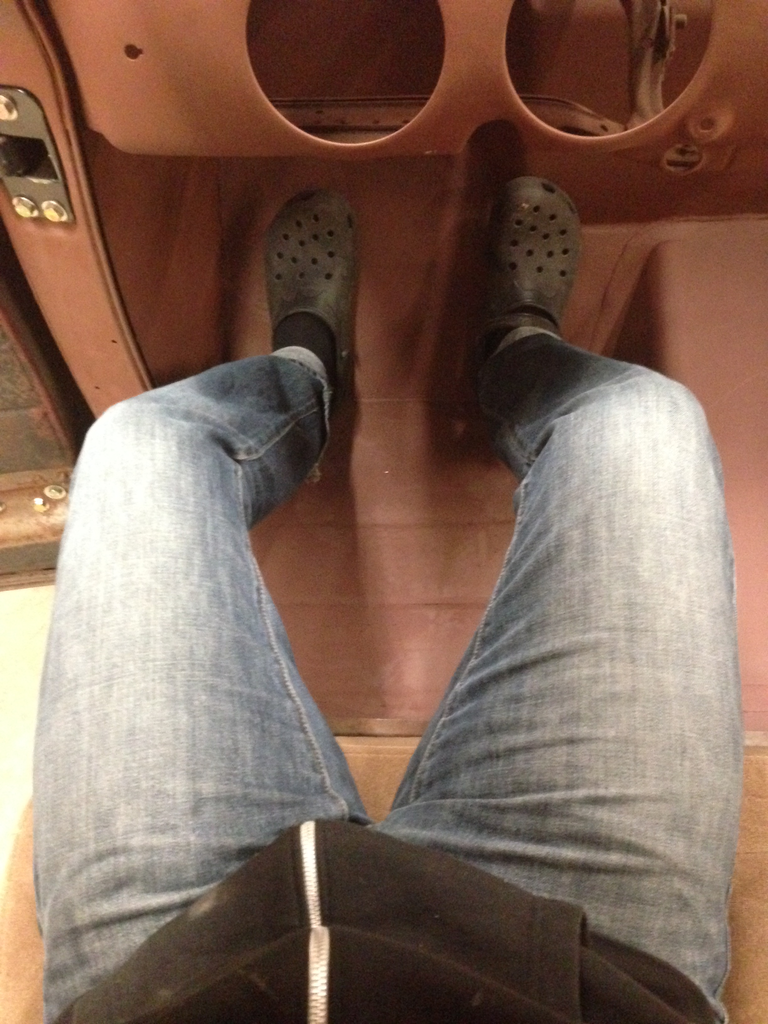 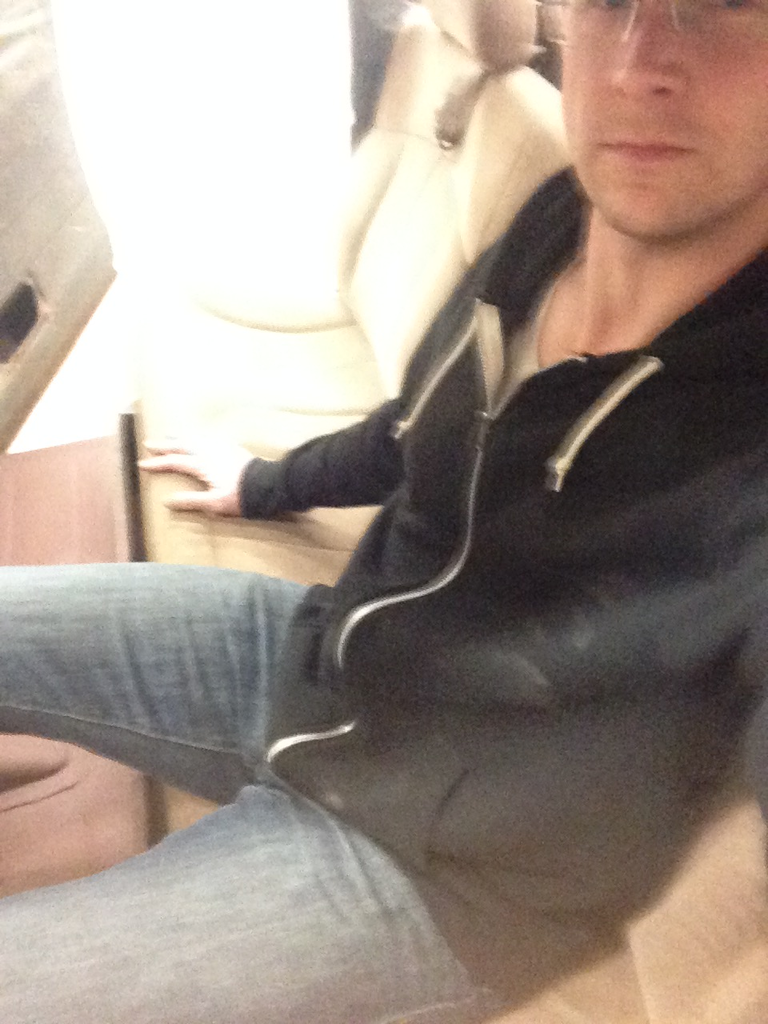 So the question is, will I have any issues with it being this narrow? The ONLY thing I would be gaining would be more seat under my legs. It has a little bolster on the sides so you do kind of "sit down" into the seat (Which also locates me to the left of where the steering column would come out so I need to move it. Dammit) and it is really comfy. The only time I can recall being uncomfortable in the pack of a silverado was because of the lack or leg room. So, give me some opinions. And in the meantime, enjoy the first family pic of all of us crammed in there, including the dog. 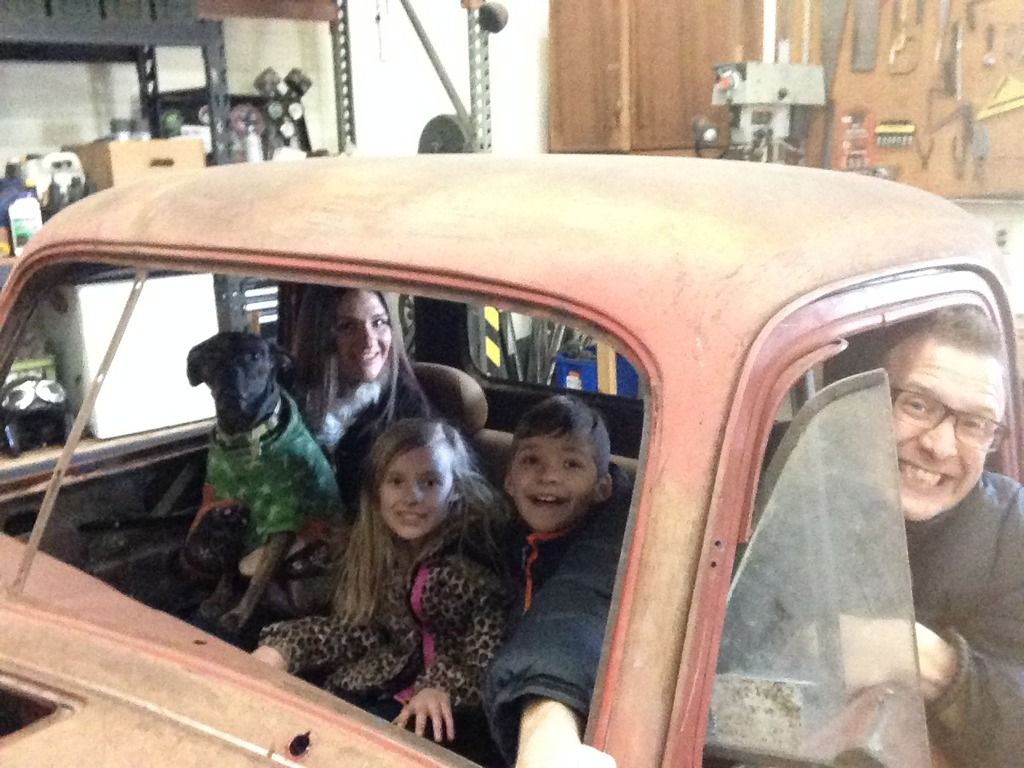
|
|
|
|
|
01-23-2016, 11:33 AM
|
#38 |
|
Registered User
Join Date: Mar 2008
Location: Waukee, Iowa
Posts: 1,608
|
Re: Project Eugene: 1949 5 window
I think on a road trip is where you'd notice the difference. Your legs (or your passenger's legs) wouldn't have as much to support them. I think the reason you don't notice it in the extended cab is because you can't extend your legs if you wanted to.
I used the 88-98 Chevy fullsize bench and in the rear-most position (the one that it'll always be in when I drive) it does not rub the doors, clears by about 3/4" per side. If I slide it forward, it will rub the doors.  
__________________
build threads: 86 Suburban 88 Jeep 6.0 swap 49 Chevy truck 54 Chevy wagon 86 Suburban lowered 4/6 54 Chevy wagon 49 Chevy/s10 mix 88 Jeep Wrangler rockcrawler |
|
|
|
|
01-23-2016, 12:32 PM
|
#39 |
|
Registered User
Join Date: Jan 2015
Location: Prior Lake MN
Posts: 87
|
Re: Project Eugene: 1949 5 window
That's part of my debate- I dont know that we will ever road trip this truck. MAYBE up to Duluth, which is a few hours- but that is absolutely the longest we would be in it. Other than that, it will be cruising to locations within an hour of home.
|
|
|
|
|
04-17-2016, 06:22 PM
|
#40 |
|
Registered User
Join Date: Jan 2015
Location: Prior Lake MN
Posts: 87
|
Re: Project Eugene: 1949 5 window
It's been a while since I updated- so it's about time.
I spent my cold winter months enjoying having heat in the shop for the first time in...forever and working on the fenders and remaining tin work. Front fenders: 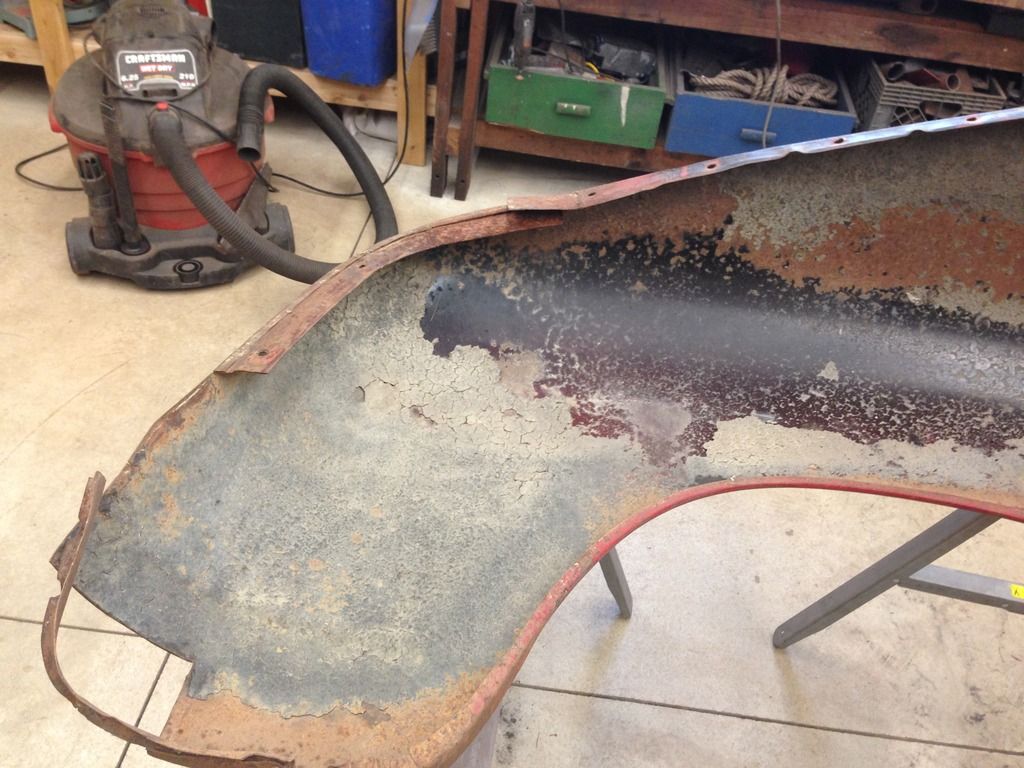 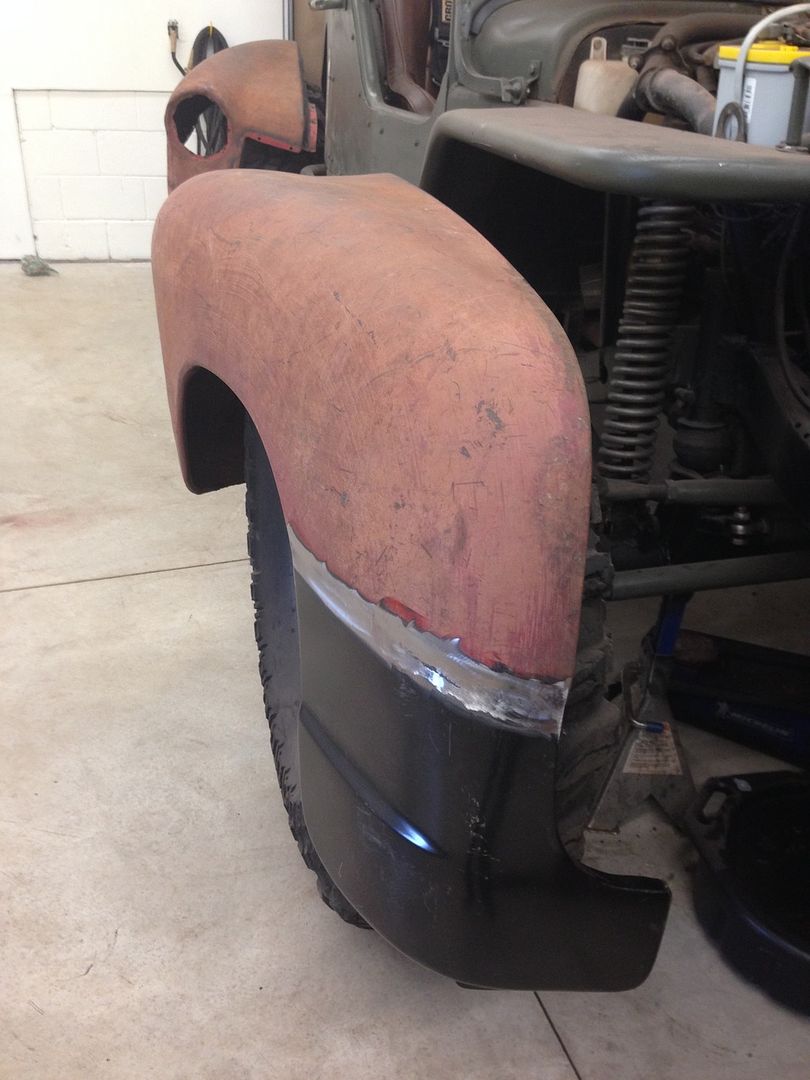 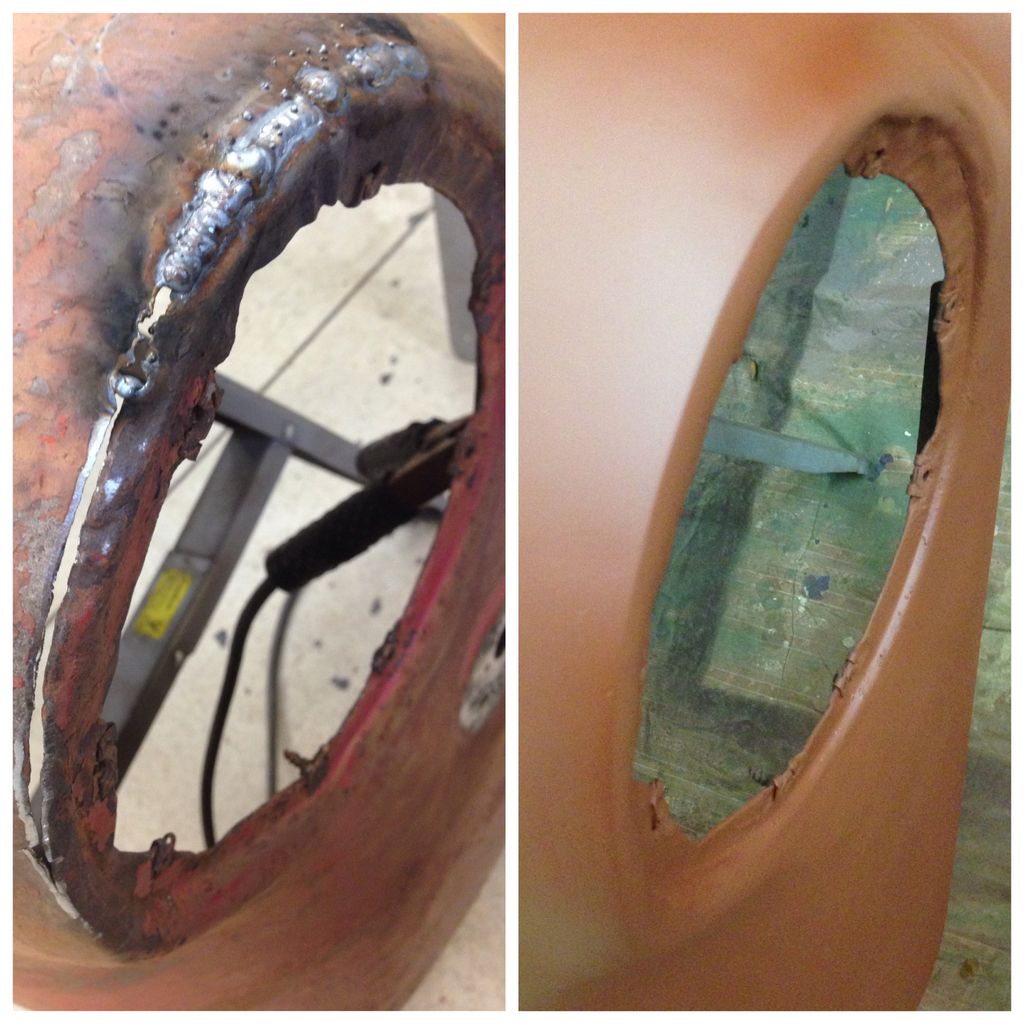 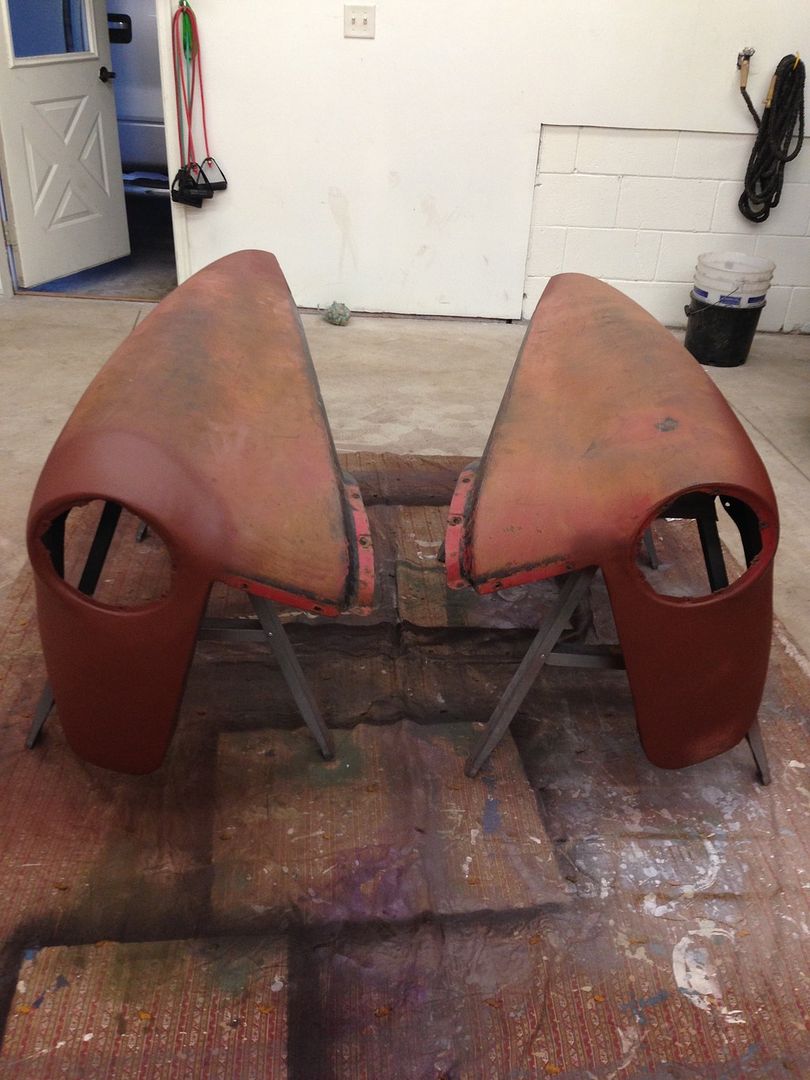 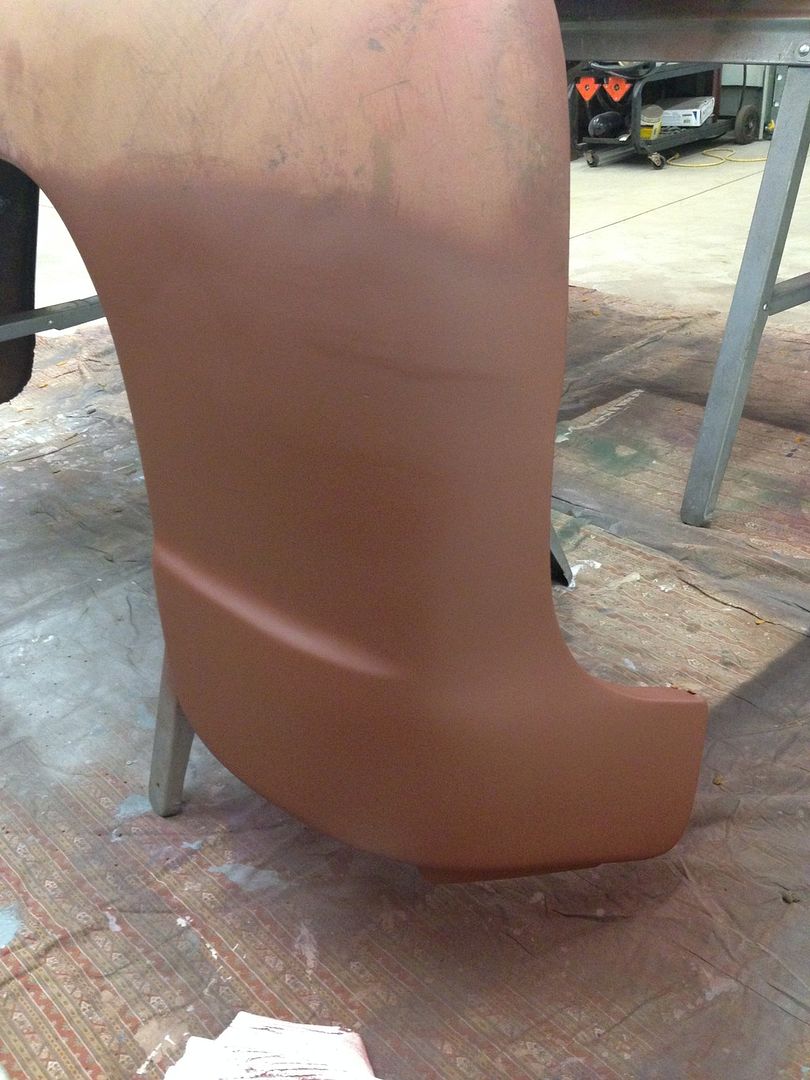 Rear Fenders- So much rot... 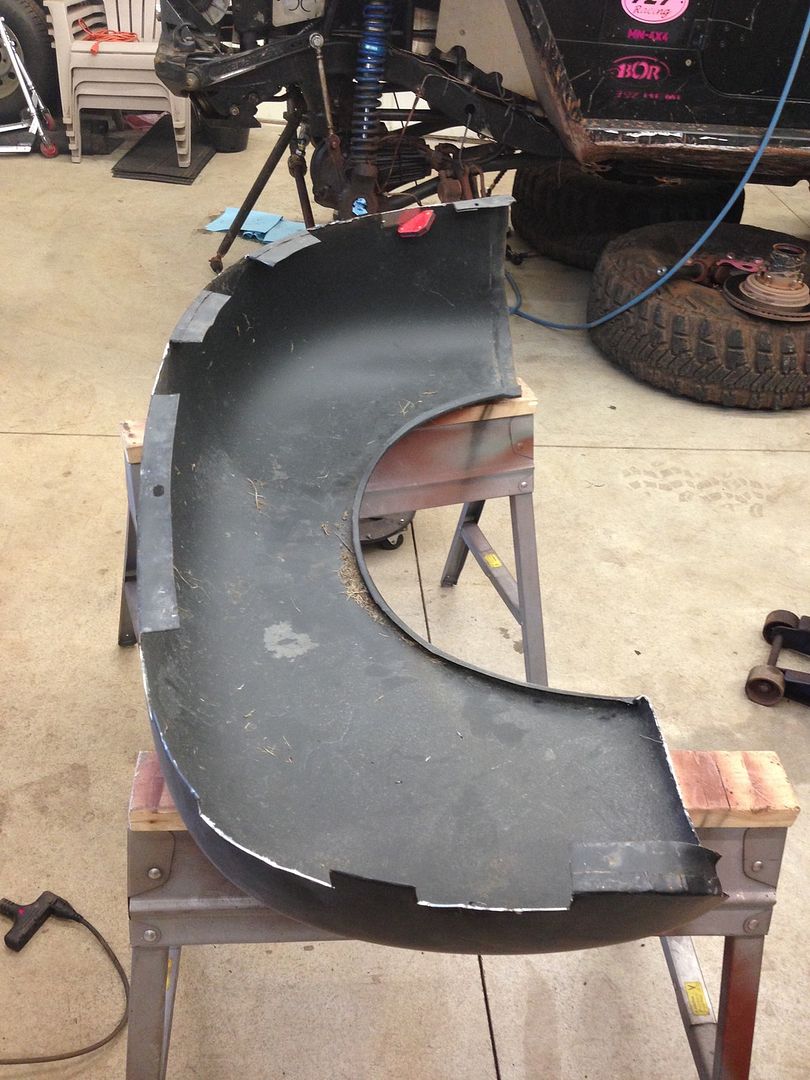 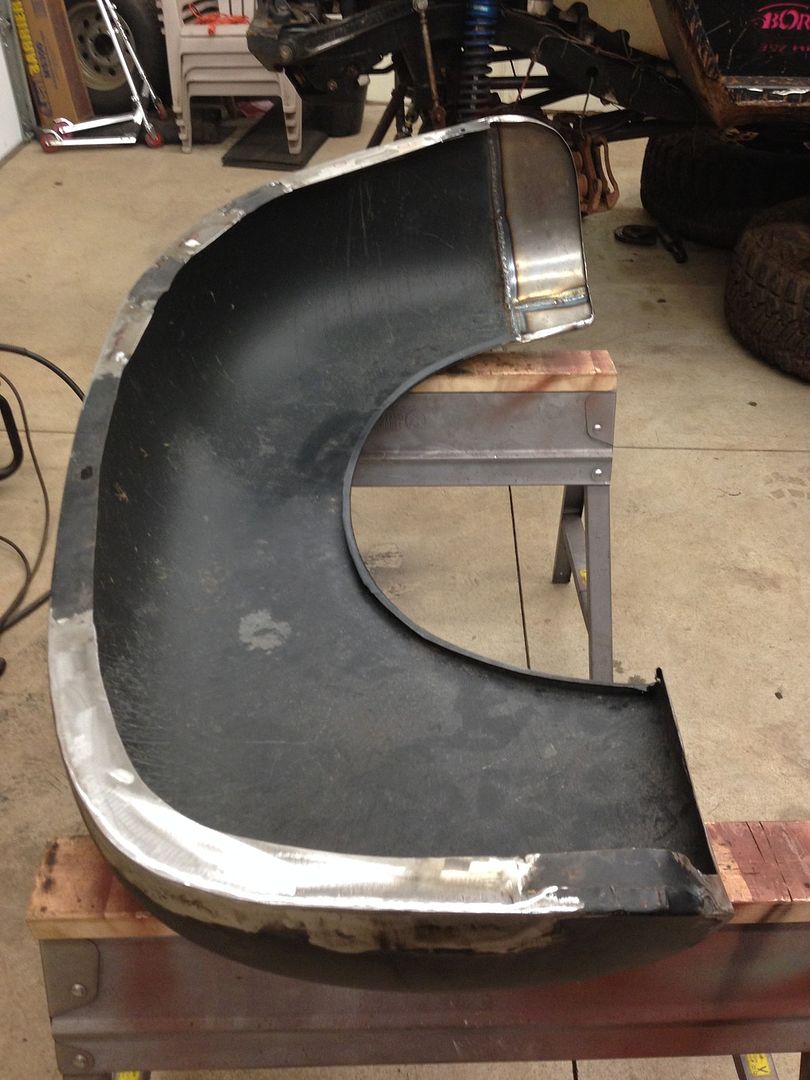  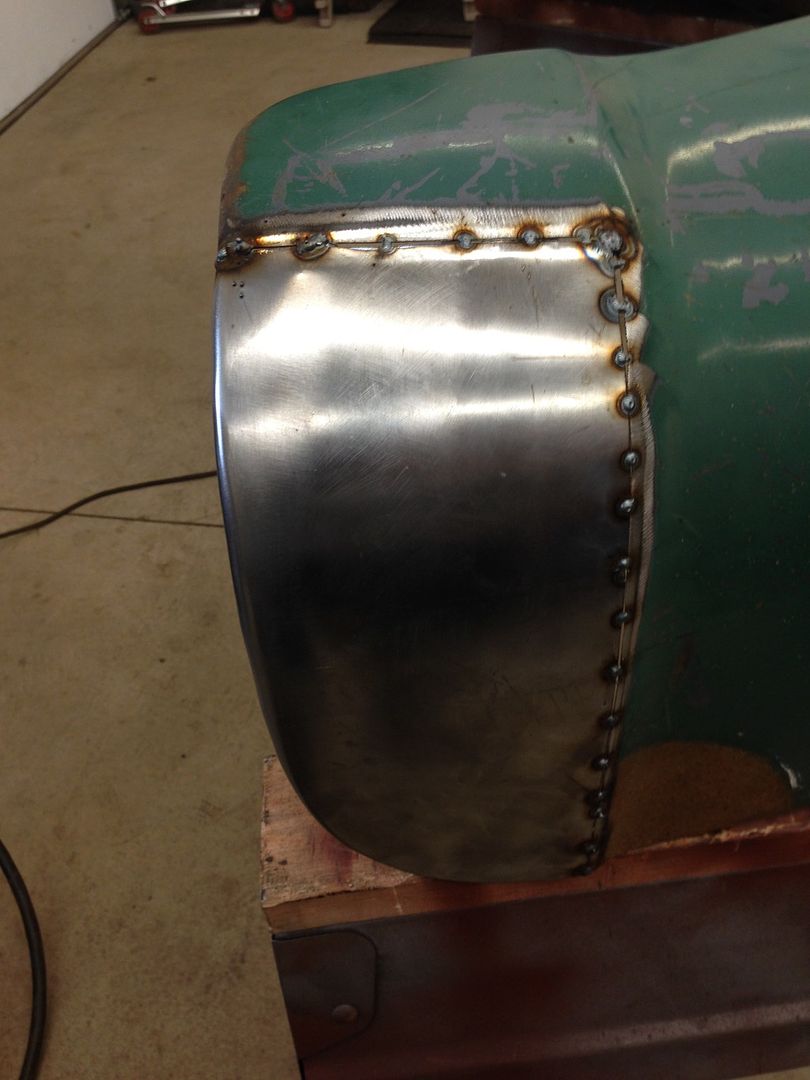 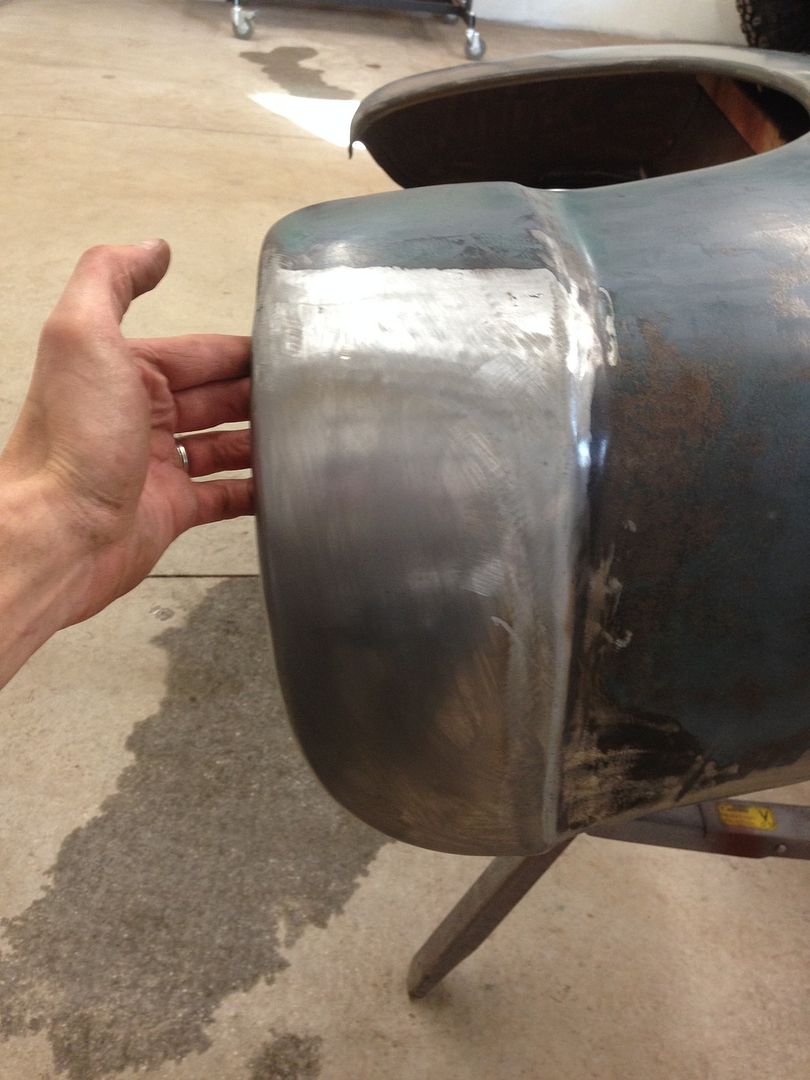 I had a paying side gig to build a leaf box for a landscaping company- it ended up- BIG. 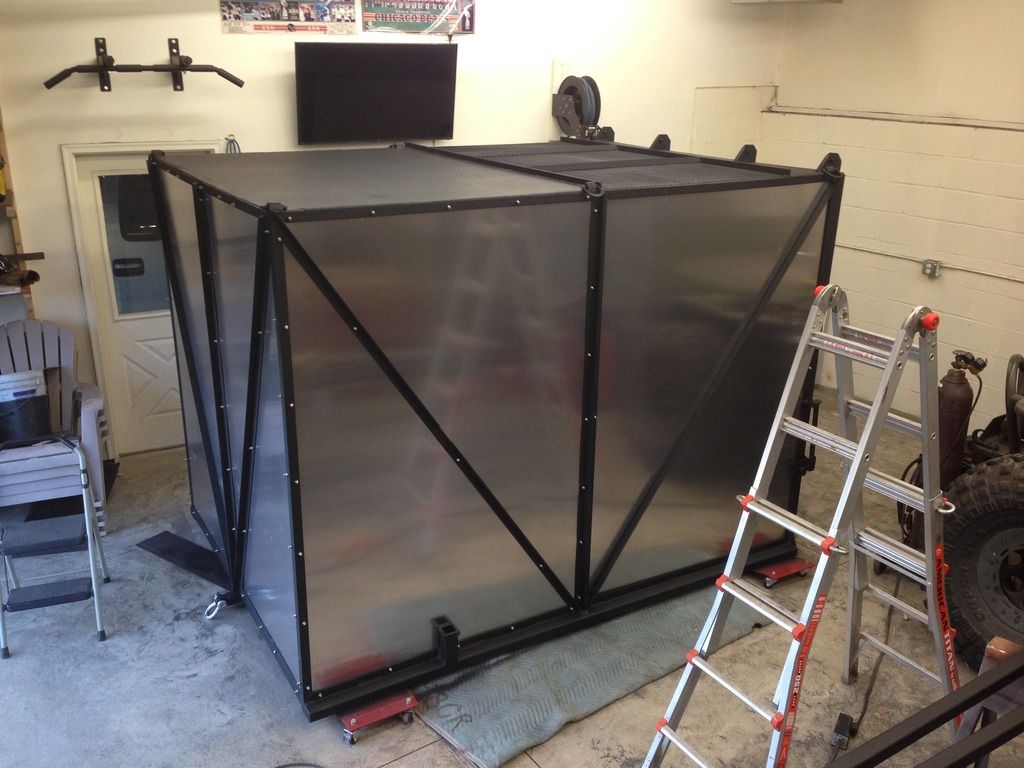 Getting paid for that brought the frame home today... 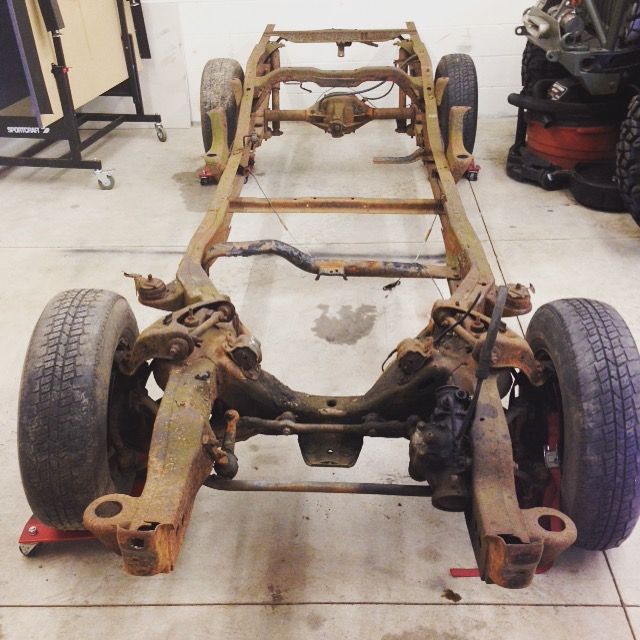 And hopefully the drivetrain soon as well! I will post up when I get the drivetrain in and the cab mounted... |
|
|
|
|
04-17-2016, 06:40 PM
|
#41 |
|
Registered User
Join Date: Nov 2012
Location: Post Falls, Idaho
Posts: 1,757
|
Re: Project Eugene: 1949 5 window
Great looking metal work.......
|
|
|
|
|
04-18-2016, 06:49 AM
|
#42 |
|
Registered User
Join Date: Dec 2011
Location: Mobile, Alabama
Posts: 996
|
Re: Project Eugene: 1949 5 window
Great story, great shop, great build....keep the photos coming. dug
__________________
My Build - http://67-72chevytrucks.com/vboard/s...d.php?t=515876 |
|
|
|
|
05-22-2016, 08:19 PM
|
#43 |
|
Registered User
Join Date: Jan 2015
Location: Prior Lake MN
Posts: 87
|
Re: Project Eugene: 1949 5 window
Alright, I have been busy...
I stripped the frame, and got the Code504 kit mounted up. Kit is nice- HUGE time saver. Cab mounted, running boards fit: 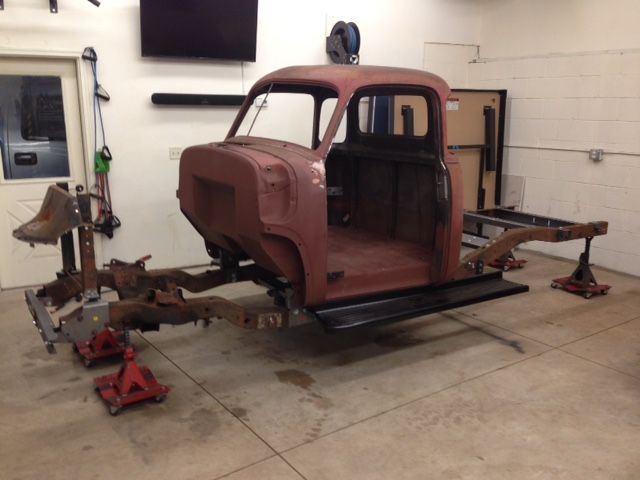 Then I started fighting gaps. I dont need them flawless, just want them close. SO I NEED YOUR HELP!!! This was my first go at getting the fenders and hood on. Can't get the hood to line up once the fenders are on. Without the fenders on, the hood pin drops dead center on the latch, but as soon as I mount stuff to it- everything goes sideways.  From the side- big gap between fender and hood. 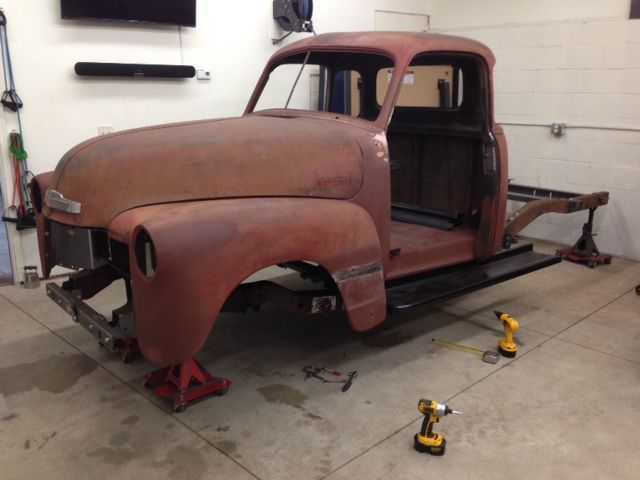 I moved the back of the fender up as high as I could and got that gap to work itself out for the most part. HOWEVER, the fender looks like it needs to go BACK, correct? That's why the hood is 'behind' the fender corner? I have the fenders pushed back as far as I can in the mounts on the cab, and I have tried just sliding the core support as far forward as I can in the slotted holes from the 504 kit. I also tried to slide the core support as far to the drivers side as well- still no dice. 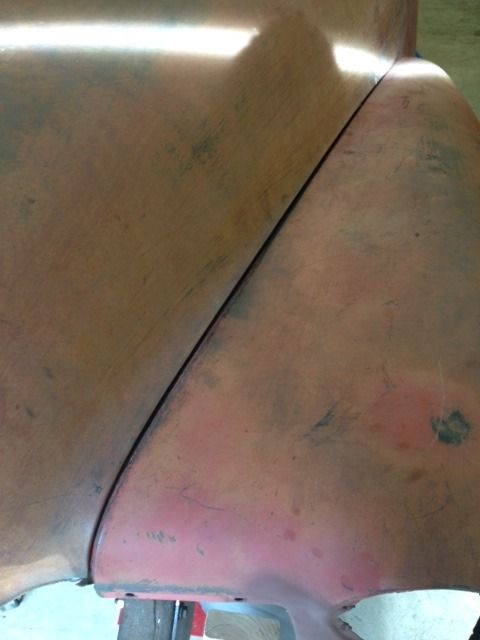 Same for the pass side: 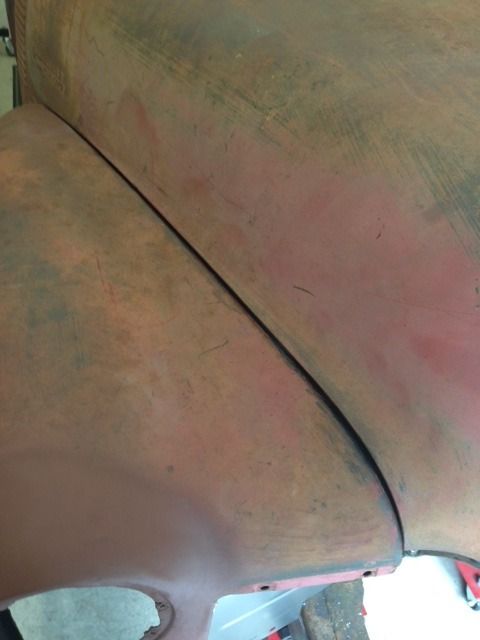 Bear in mind, the only reason it is centered in those pics is because the hood pin is pulling it to the center. It seems no matter what I do, the minute I add the fenders, supports, and wind jammers the whole thing goes sideways. It is off to the right and behind the line of the fenders.  PLEASE help me. I have been trying to get this sorted for 3 weeks now, no matter what I do it seems to go back to the same place. Getting frustrated... Also, should there be a gap here, or should the front fender be touching the running board? 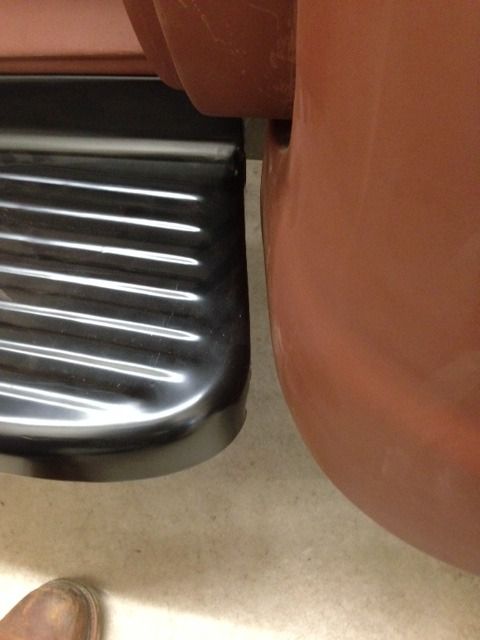
Last edited by HULK64; 05-22-2016 at 08:32 PM. |
|
|
|
|
05-22-2016, 09:59 PM
|
#44 |
|
Senior Member
Join Date: Jul 2012
Location: Oblong, Illinois
Posts: 7,017
|
Re: Project Eugene: 1949 5 window
Hulk64, you do nice work and no doubt you will get it aligned. I will defer to others with experience building on this chassis. It looks like the hood needs to edge forward. Also, is your cab square on centerline of the chassis? What happens if you shift the front of the cab a bit to the right? I am just thinking aloud...
Yes, there should be a gap between the front of the running board and fender. |
|
|
|
|
05-22-2016, 10:09 PM
|
#45 |
|
Registered User
Join Date: Jan 2015
Location: Prior Lake MN
Posts: 87
|
Re: Project Eugene: 1949 5 window
Thanks AD- there are no bad ideas at this point- so I am open to anything!
The cab is centered on the mounts that Code504 provided. However, I am keeping in mind that I put in new floors and lower cab supports- so they could very well be off OEM position... If I pivot the cab towards the passenger side it pulls the hood edge even further behindthe pass fender front line to the point the hood won't shut, and I have already slid the pass side of the core support back as far as it will go. |
|
|
|
|
05-23-2016, 12:13 AM
|
#46 |
|
Senior Member
 Join Date: May 2007
Location: Doodah Kansas
Posts: 7,747
|
Re: Project Eugene: 1949 5 window
I would guess your replacement floors are off, mine were forward about 1/2 inch on each side referencing to the hole in the replacement pan compared to the hole in the lower brace (which I did not move or replace). mine were cheapy replacement pans though.
if you get a couple blazer rear body mounts, they have a smaller diameter center that will let you square up the body on the mounts instead of self centering on the holes in your mounts. super clean work! I am a little intrigued by the big firewall recess and large trans tunnel when you said you were setting the running boards even with the frame, usually that will almost allow you to mid mount the engine (just kidding, but close!) without cutting the floors
__________________
the mass of men live lives of quiet desperation if there is a problem, I can have it. new project WAYNE http://67-72chevytrucks.com/vboard/s...d.php?t=844393 |
|
|
|
|
05-23-2016, 03:26 AM
|
#47 |
|
Senior Member
Join Date: Jul 2012
Location: Oblong, Illinois
Posts: 7,017
|
Re: Project Eugene: 1949 5 window
Got to thinking about this picture with the front edge of the hood behind the fender edges and if the core support was shimmed up, wouldn't that bring the edges in line?
Also, I had a heck of a time aligning hood and sheet metal on my 48. Pretty sure I used this as a reference and it was a huge help. http://www.stovebolt.com/techtips/bo...alignment.html |
|
|
|
|
05-23-2016, 08:10 AM
|
#48 |
|
Registered User
Join Date: Jan 2015
Location: Prior Lake MN
Posts: 87
|
Re: Project Eugene: 1949 5 window
Well, to get the fenders level, I had to shim one side up as high as it would go- and bring one side down. So now the fenders are level, but maybe because one is up and one is down it is throwing things off? But in my head, it would stand to reason that the one side that IS shimmed way up currently would look better than the side that isn't, but they are exactly the same!
And I have read the hood article you posted- I spent some time yesterday doing that process again and the gap between the hood and the cab is really good! It's everything else that's a problem...haha |
|
|
|
|
09-25-2016, 10:24 PM
|
#49 |
|
Registered User
Join Date: Jan 2015
Location: Prior Lake MN
Posts: 87
|
Re: Project Eugene: 1949 5 window
Been getting after it again lately.
I finally got everything lined up and the gaps looking good enough for me. 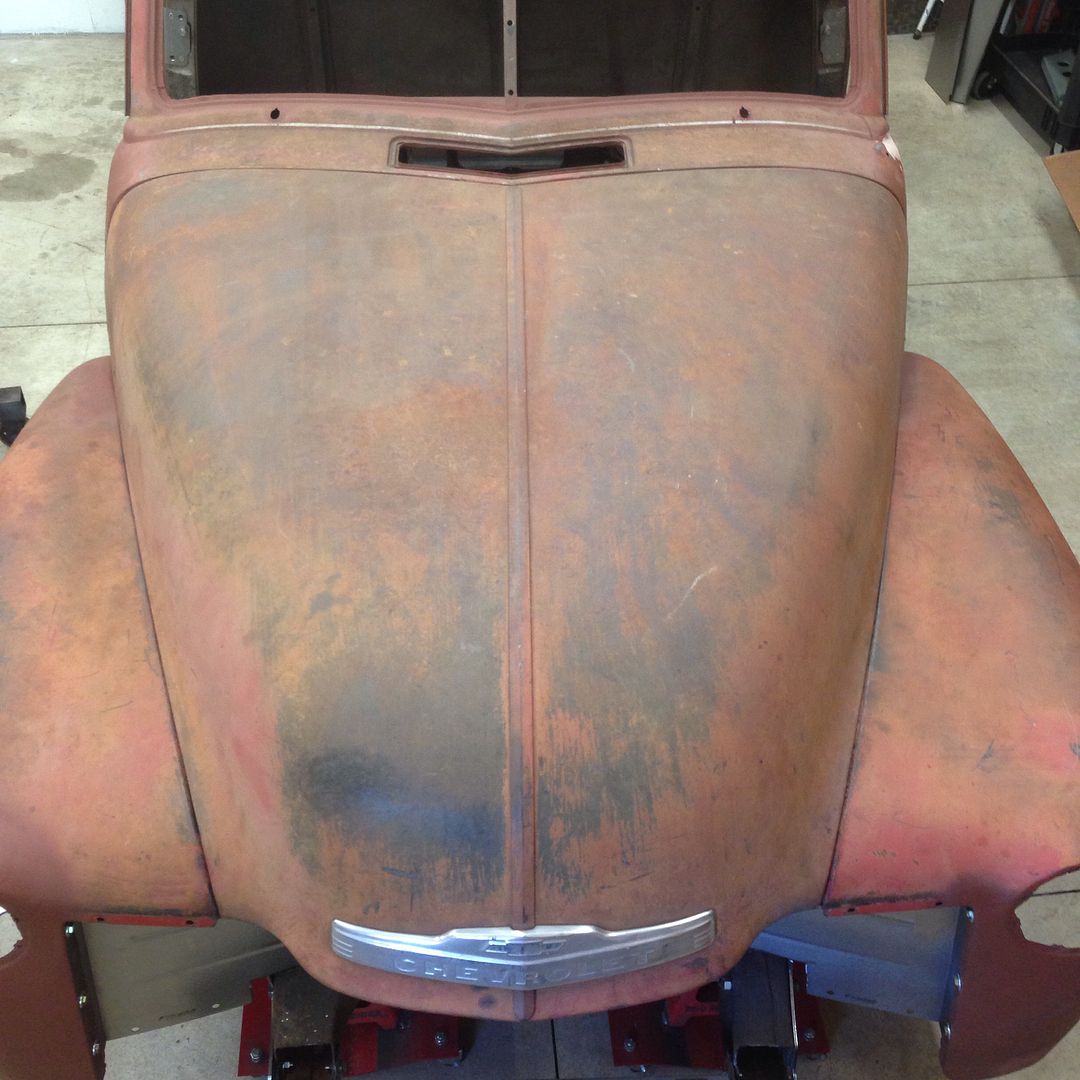 Then got the bed on 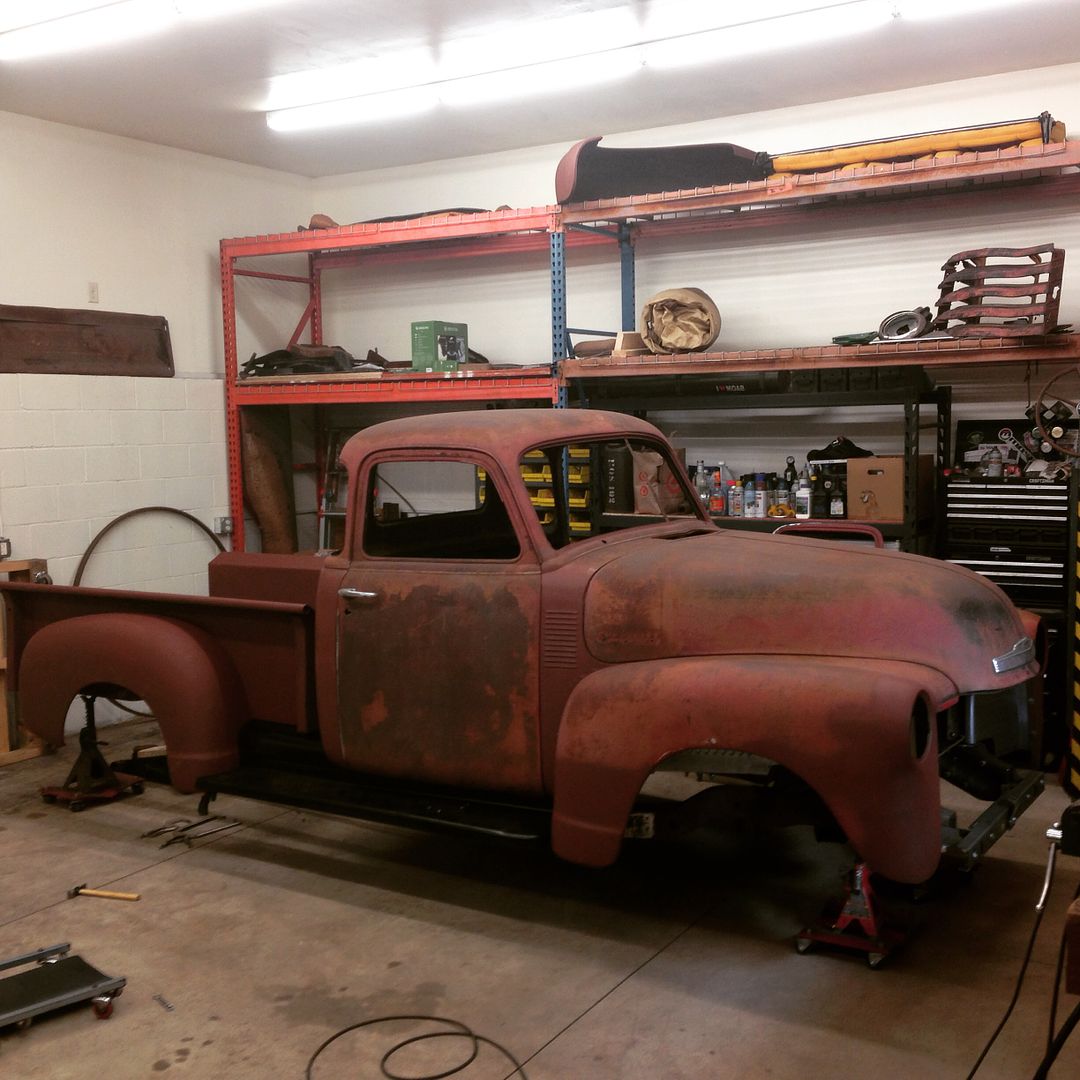 These are a fun addition- old Plymouth taillights- I love them 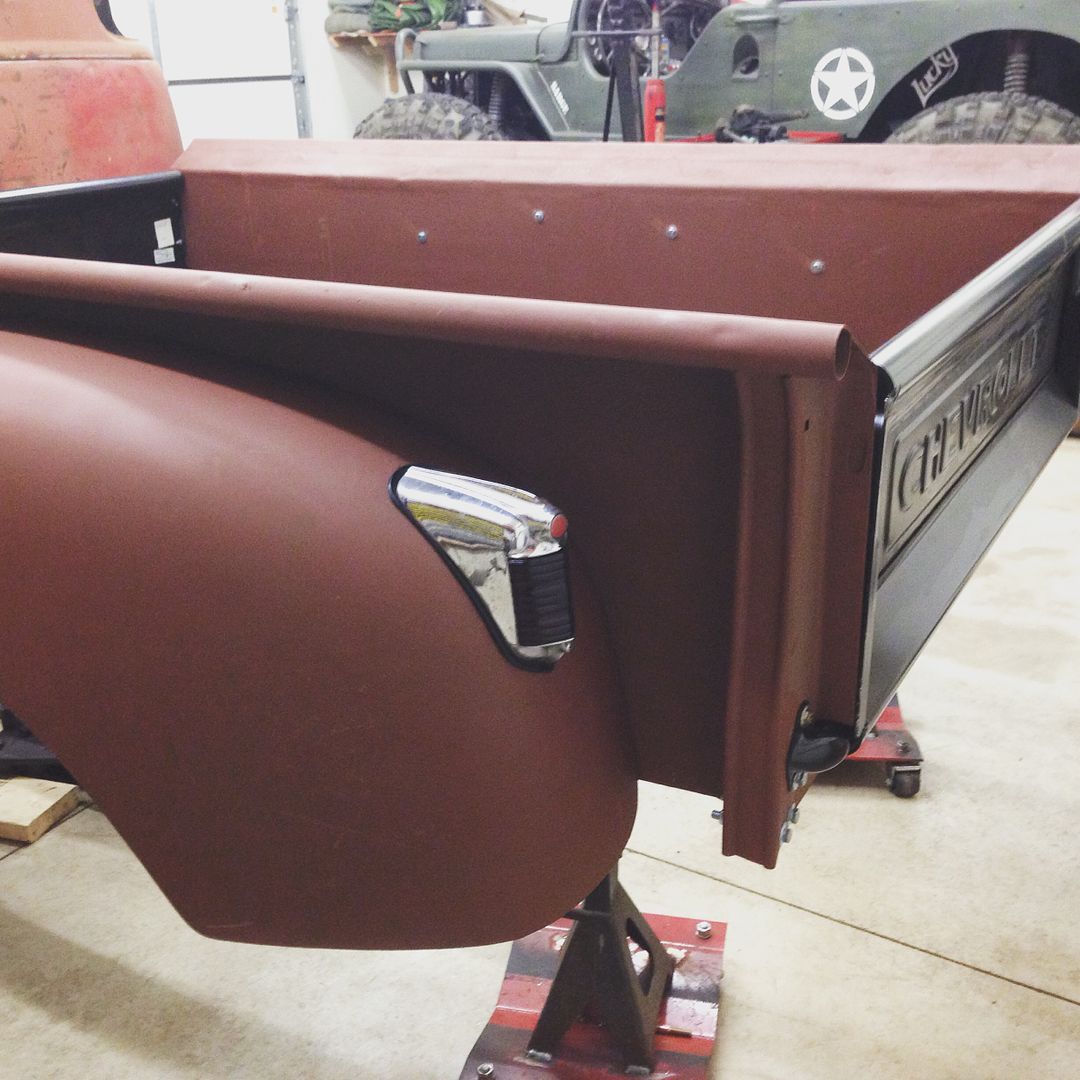 Then we FINALLY found an old grill we could work with. Took the front face off of it, cleaned it, and remounted it to the good from and back pieces I already had. After seeing what coke does to rust, I am never drinking it even again. OMG. 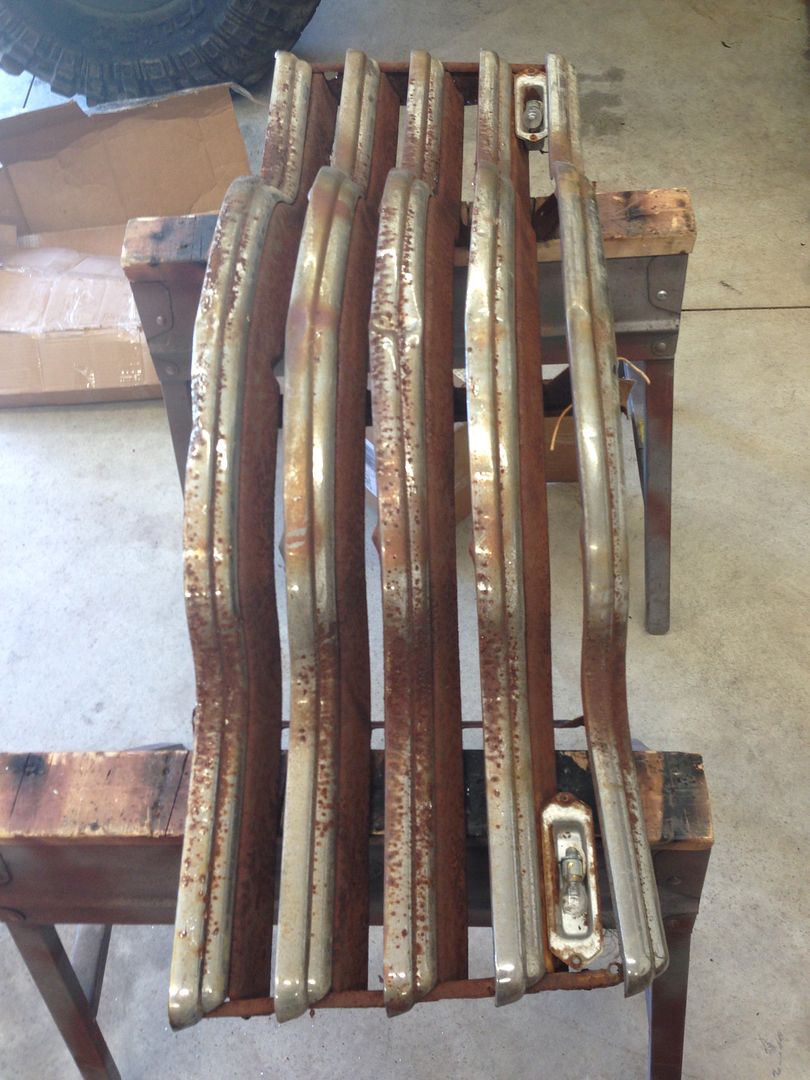 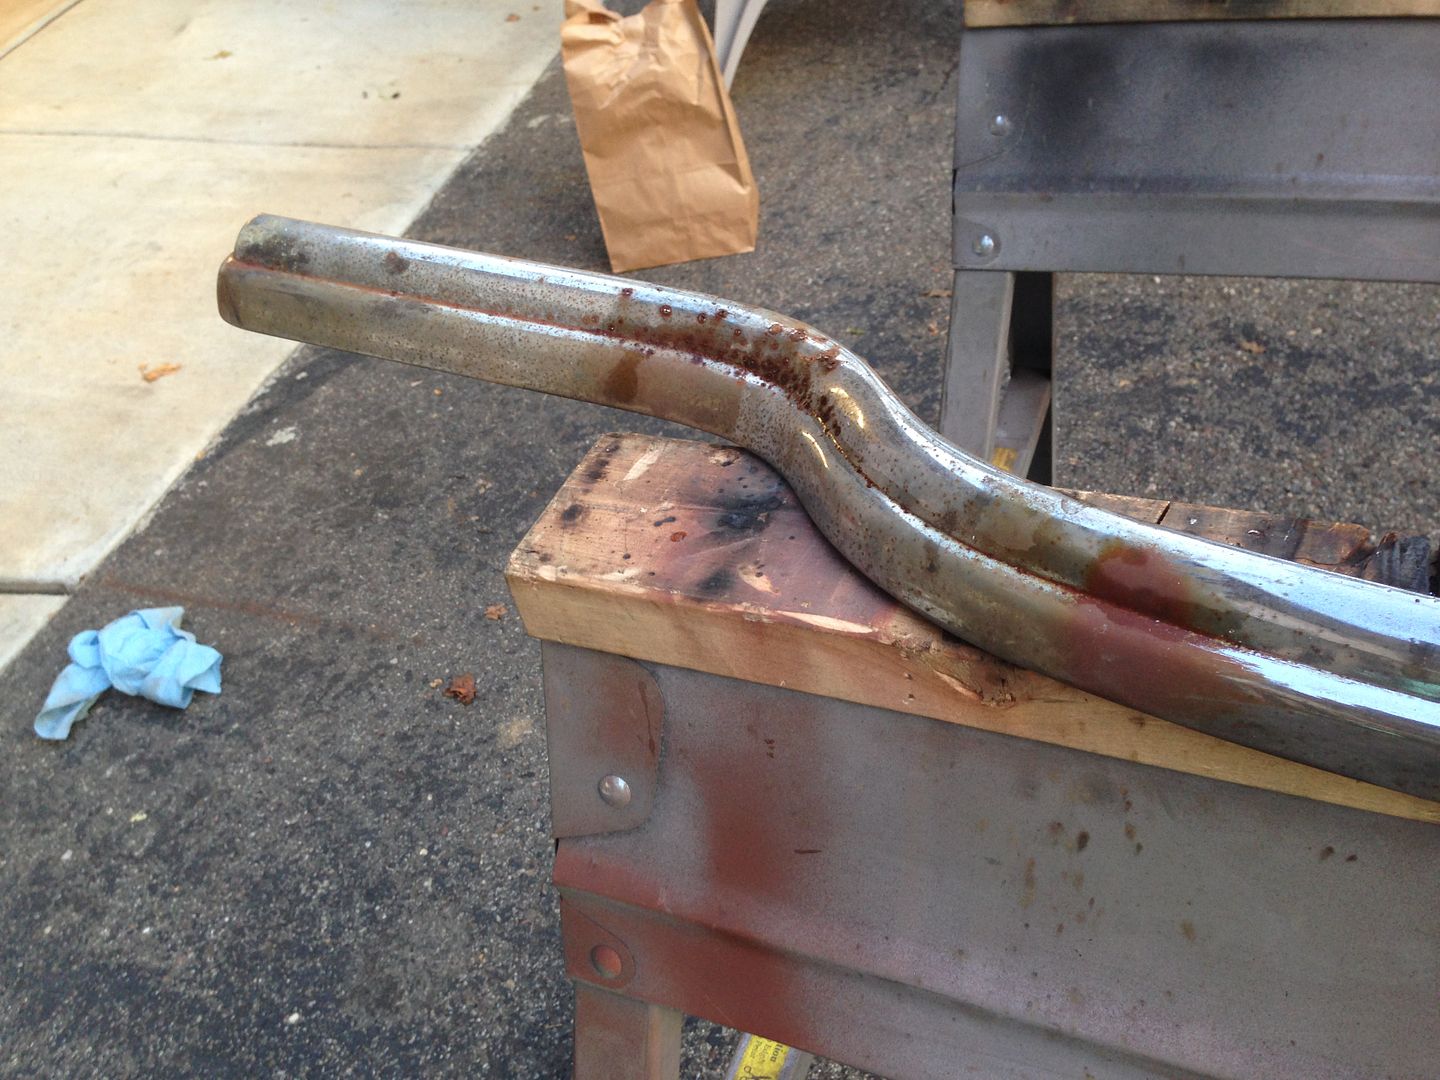 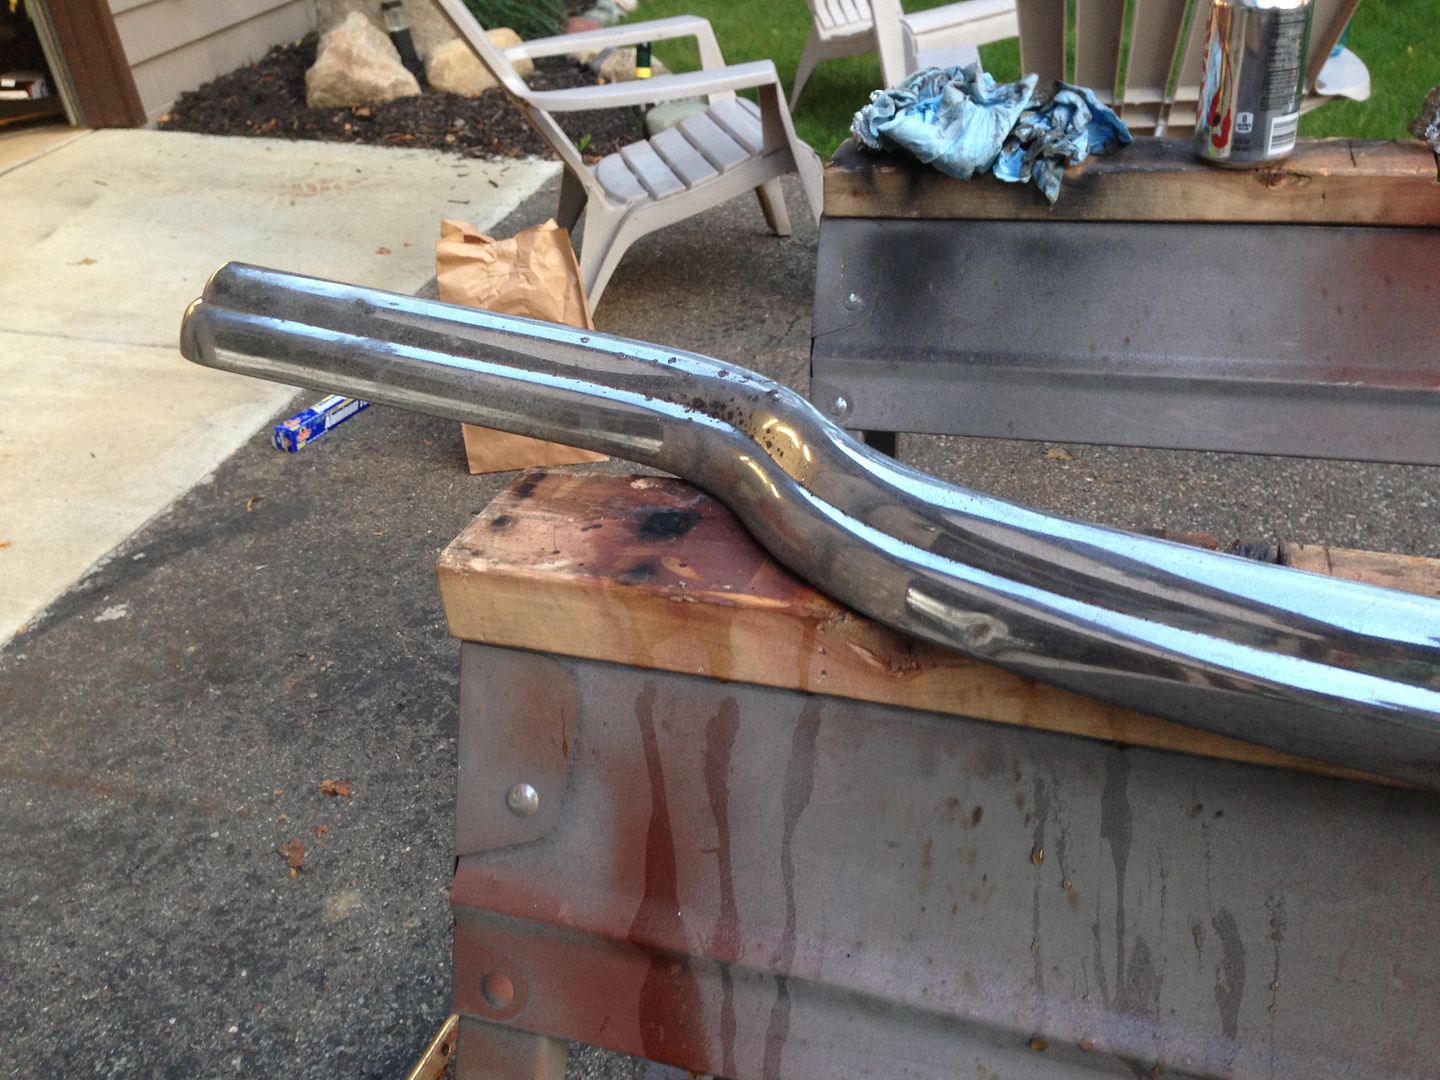 Then I got my daughter to help me mount it. 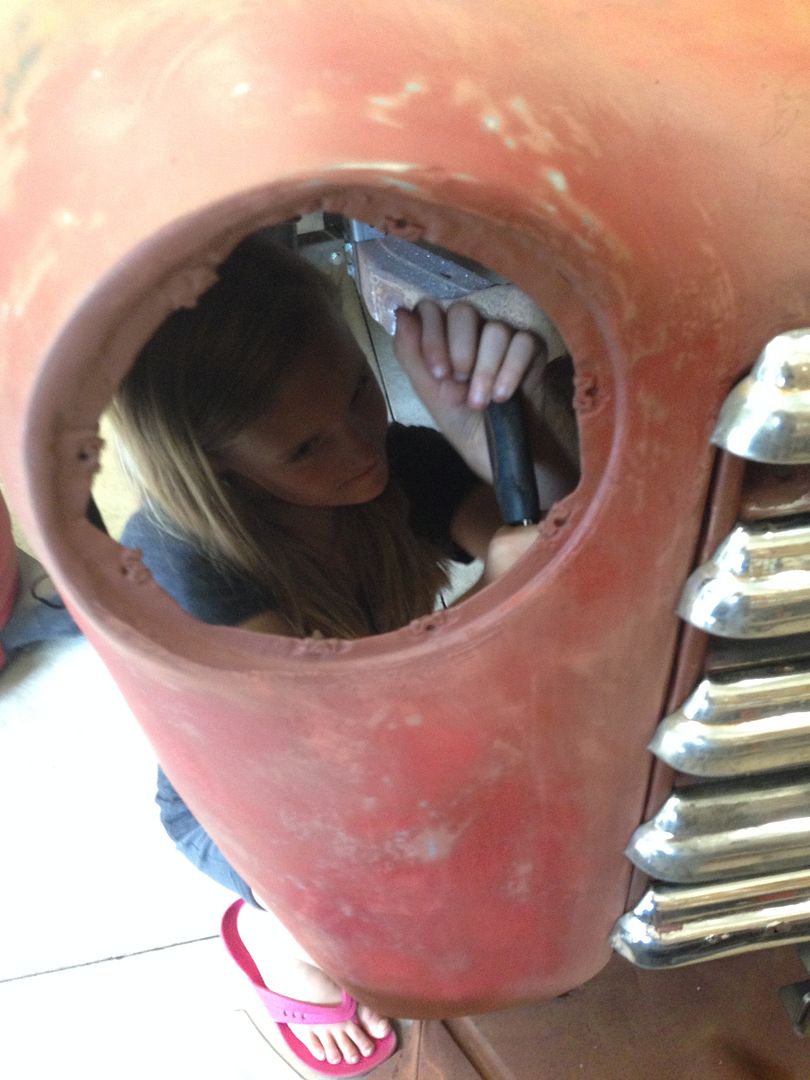 And got to mount the front filler. 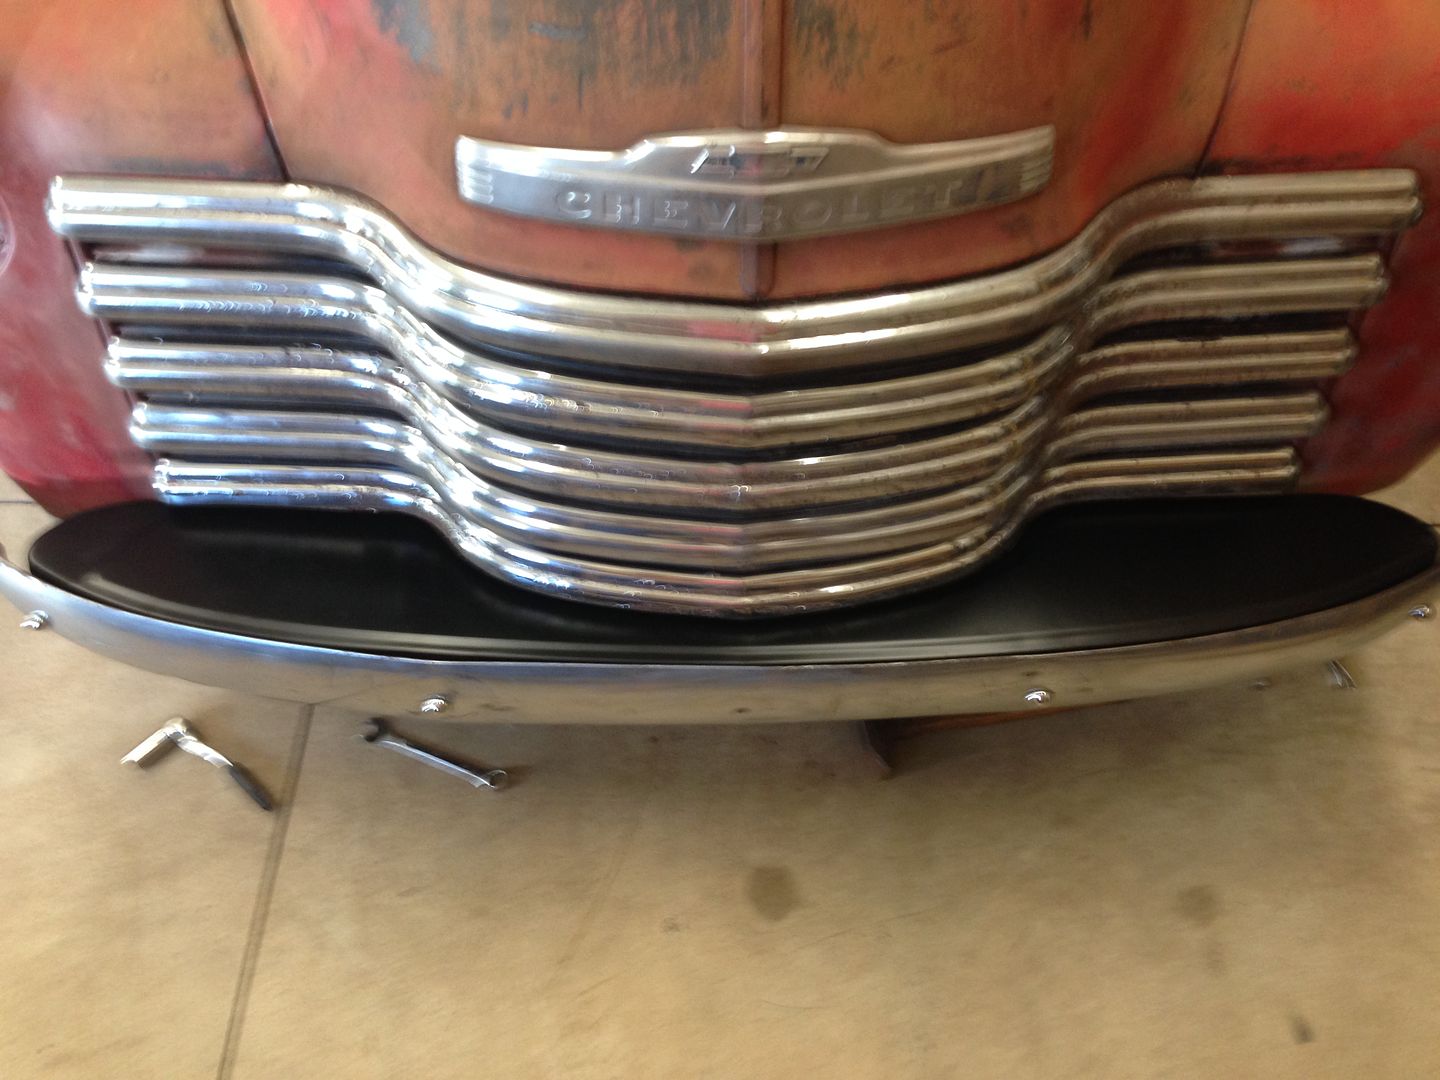 And found a fulton visor finally. 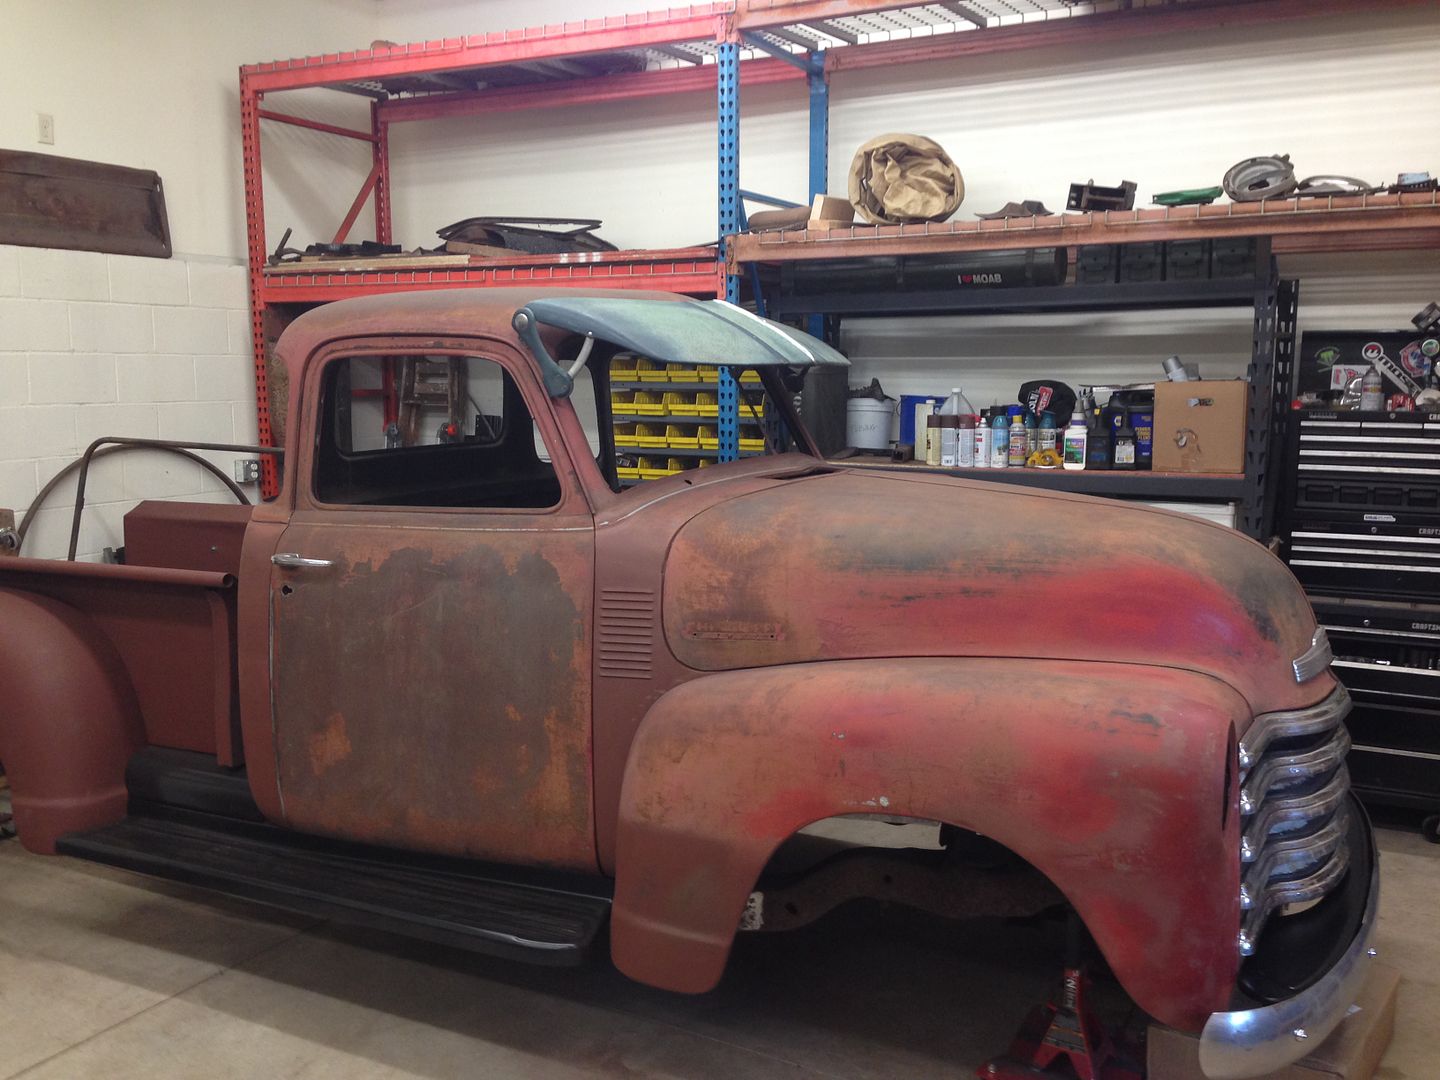 Got the rear suspension mocked up. Lower rider depot- great fab pieces 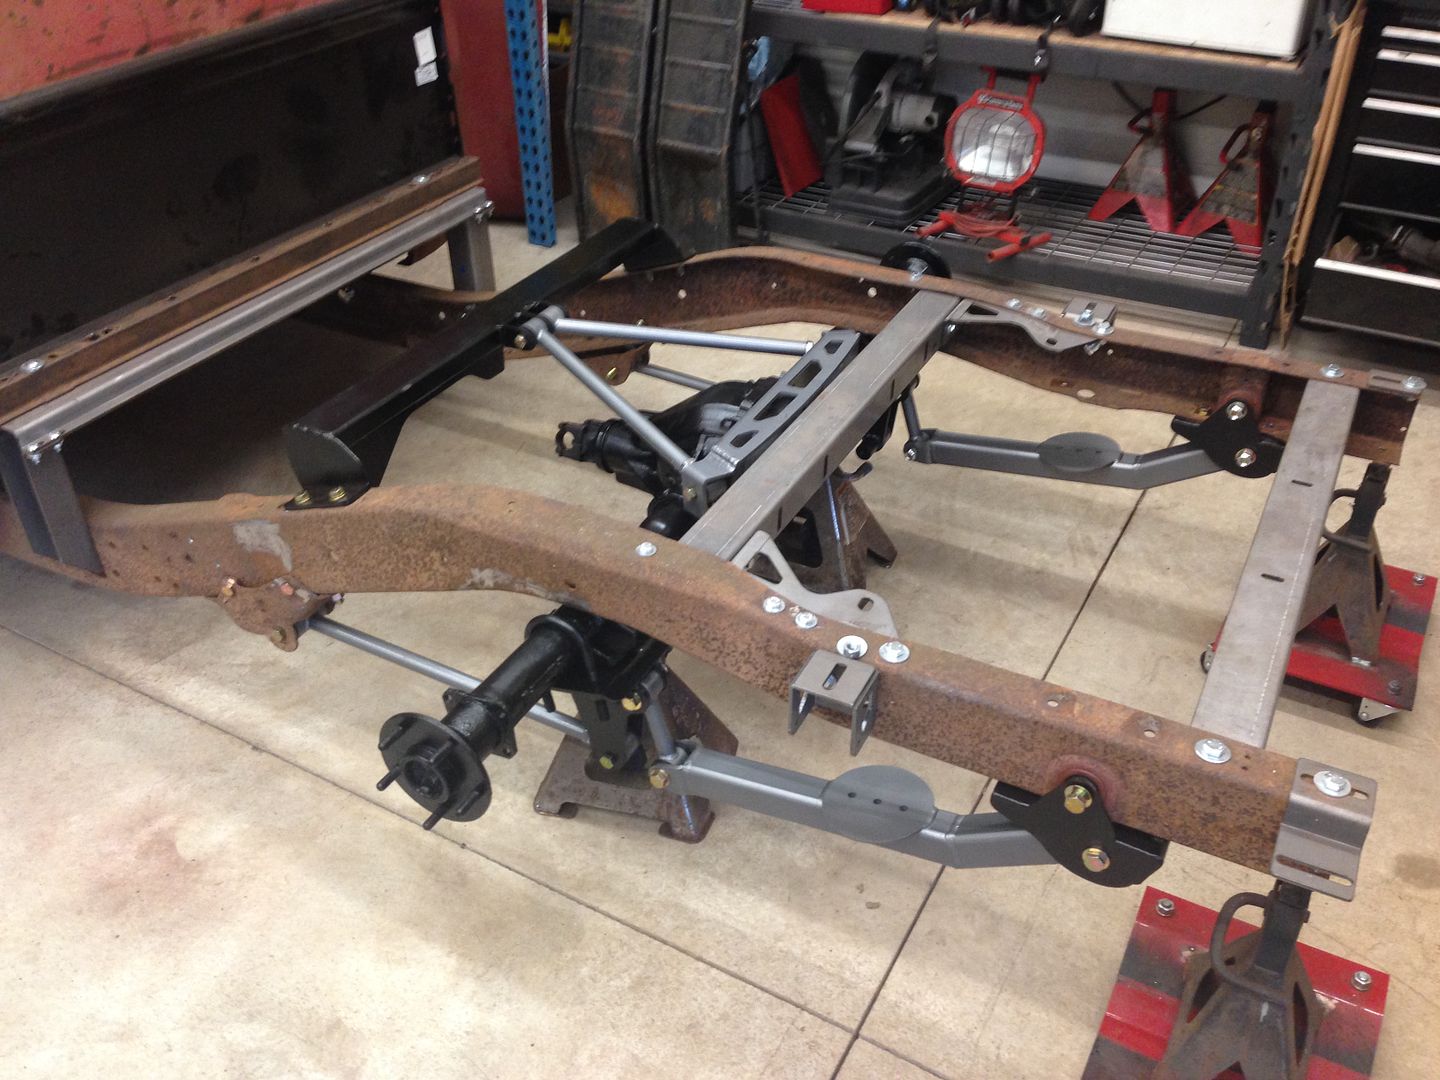 And I'll be dadgum- the wheel is actually centered. 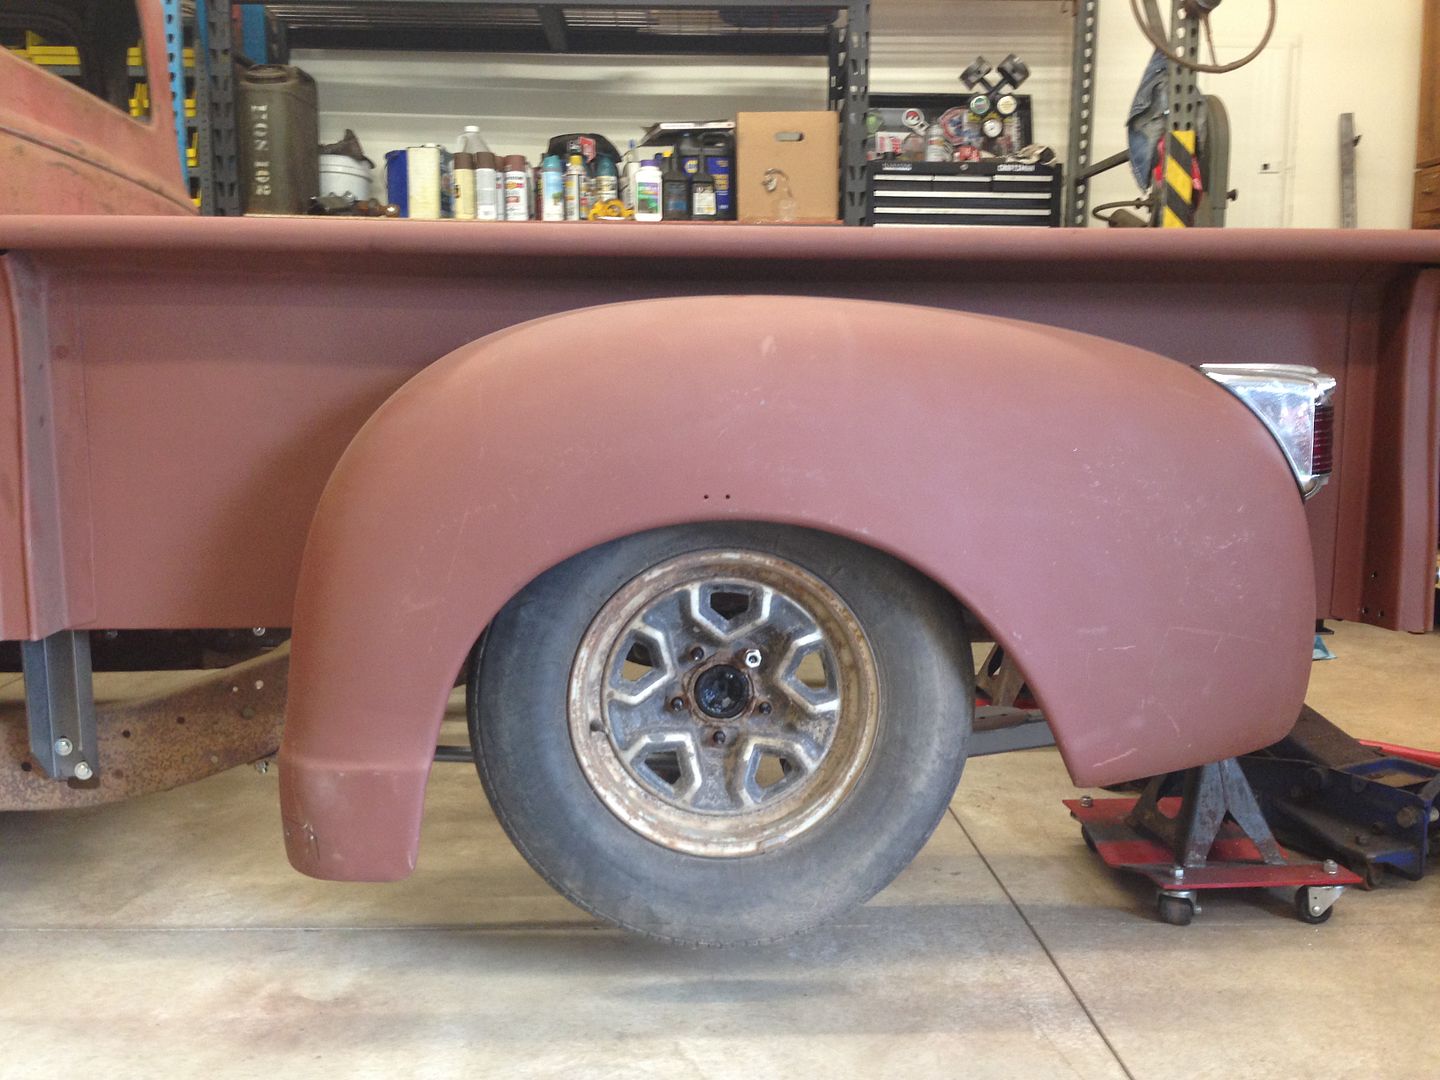 And got the notches in place. Funny story- I got the initial cuts done to cut out the old frame piece for the notch, and as I got through on one side- the whole thing shifted up about 1/2" real fast. I was convinced the frame had twisted or something terrible- turns out the Ebrake cable brackets was touching the bottom of the frame and I didn't know it- putting pressure up. Scared me to death, but all is well! 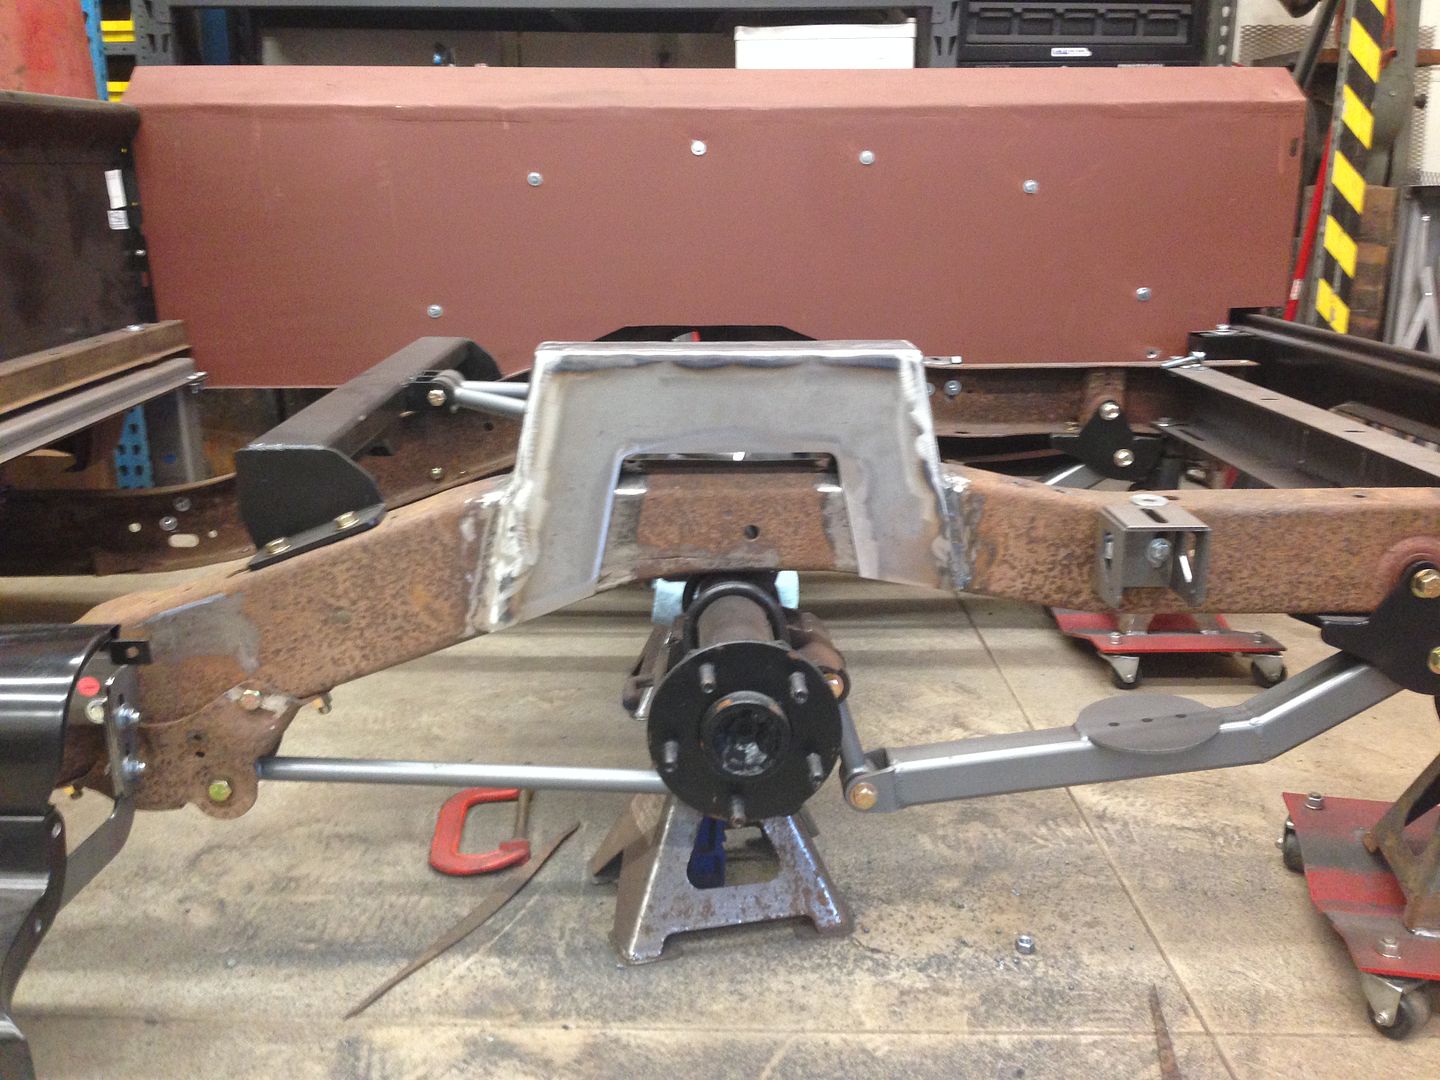 Mounted the bumpstop up inside it, worked out fine. 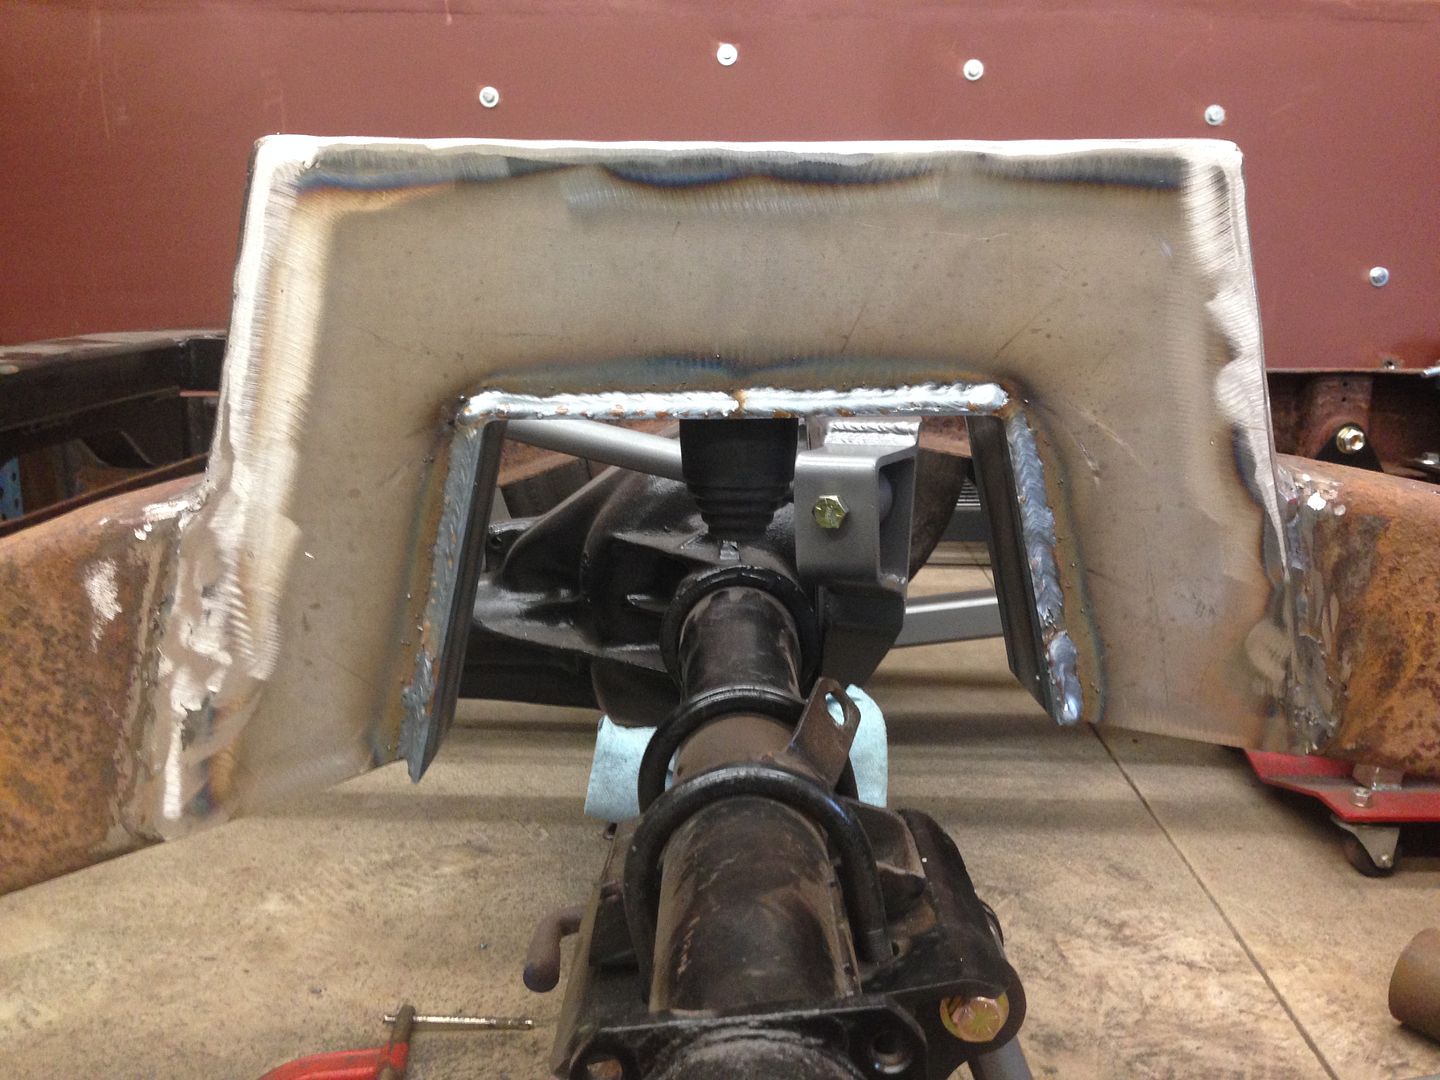 Welds 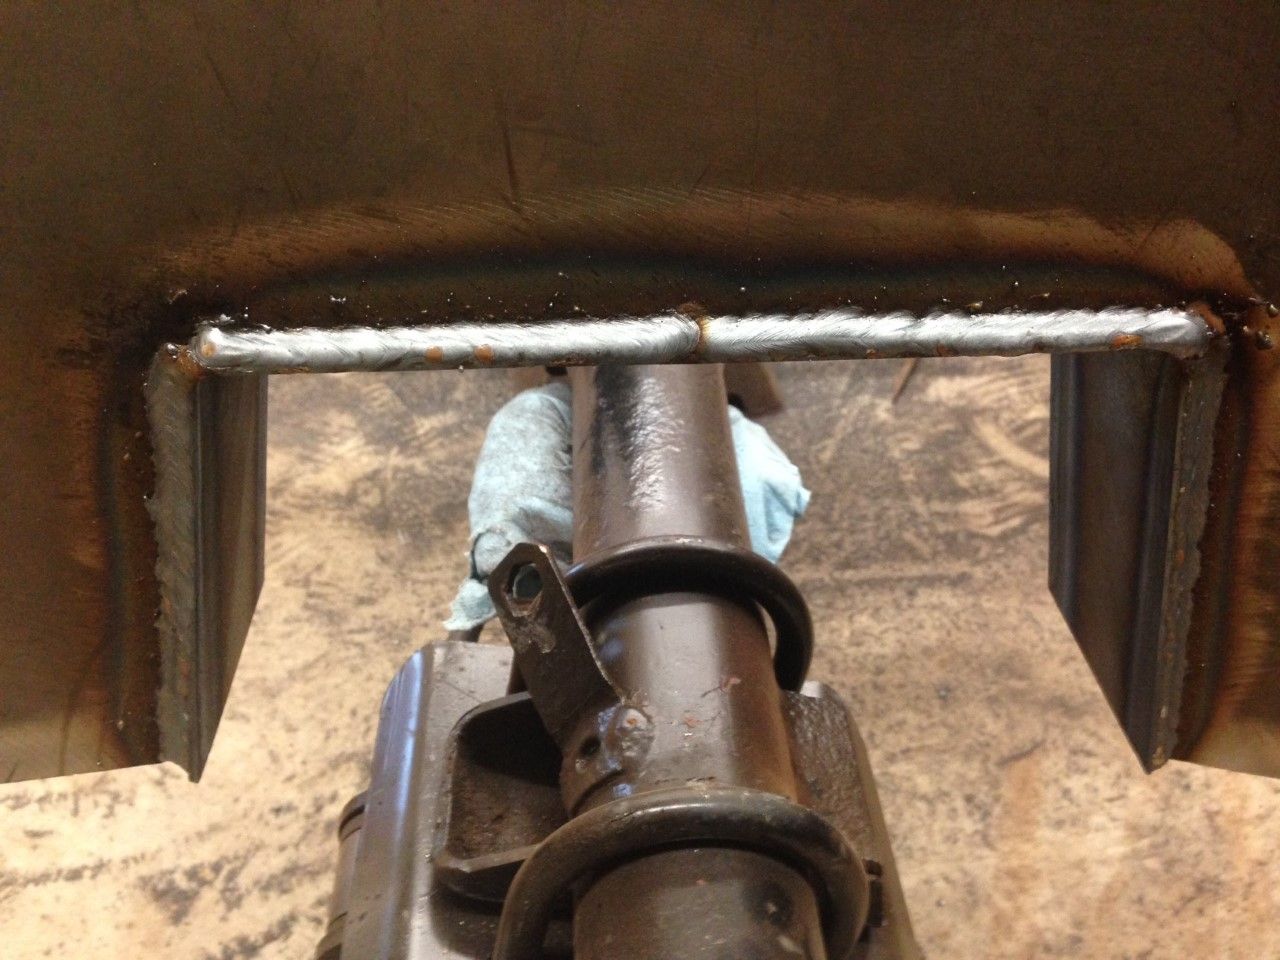 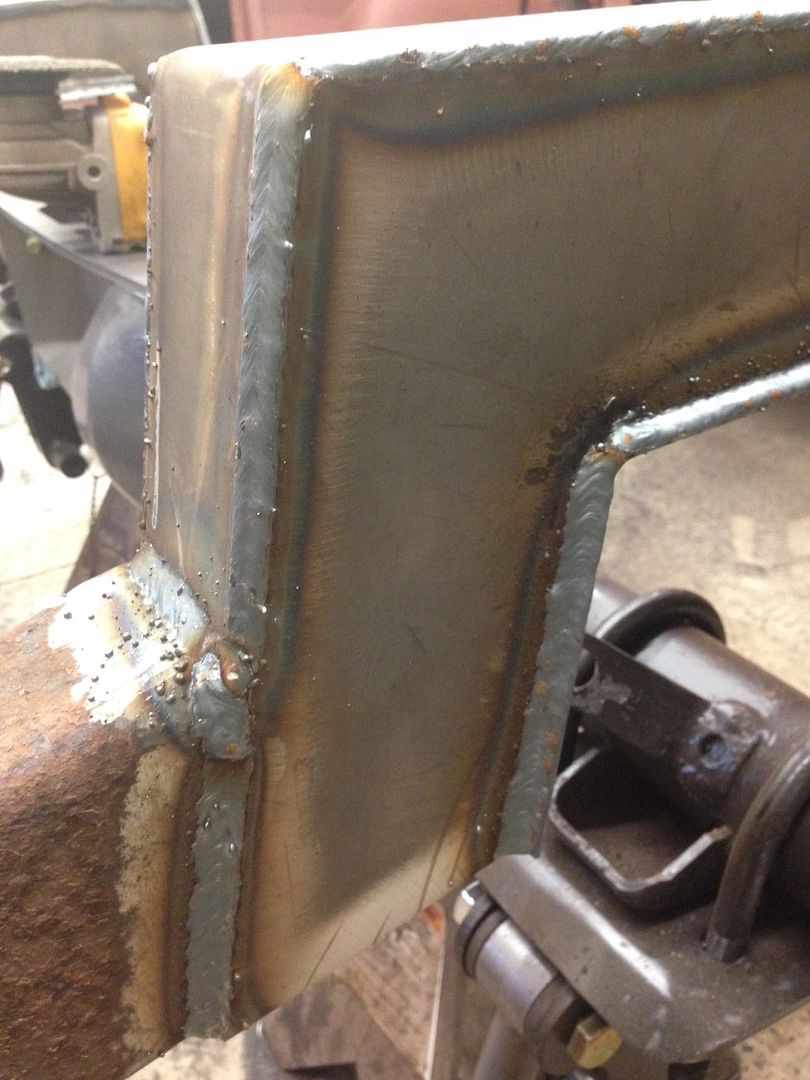 Considering boxing out the frame a bit from the botch- thoughts? 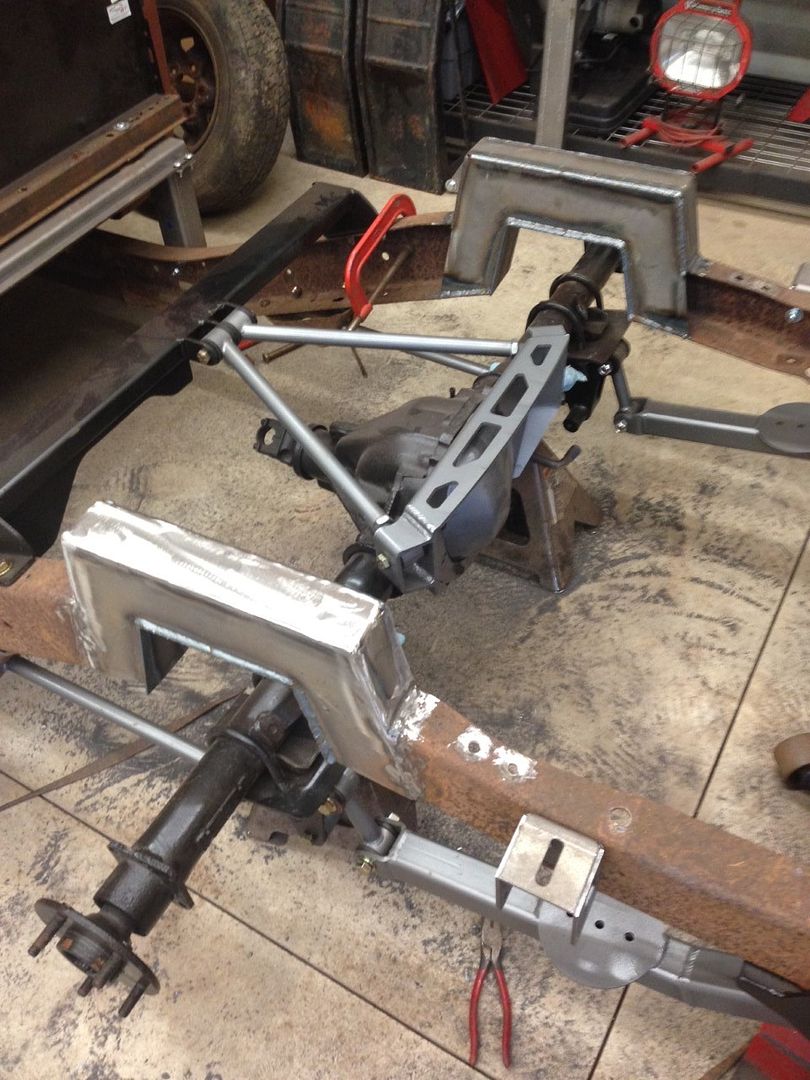 All happy in primer and between the bedsides. 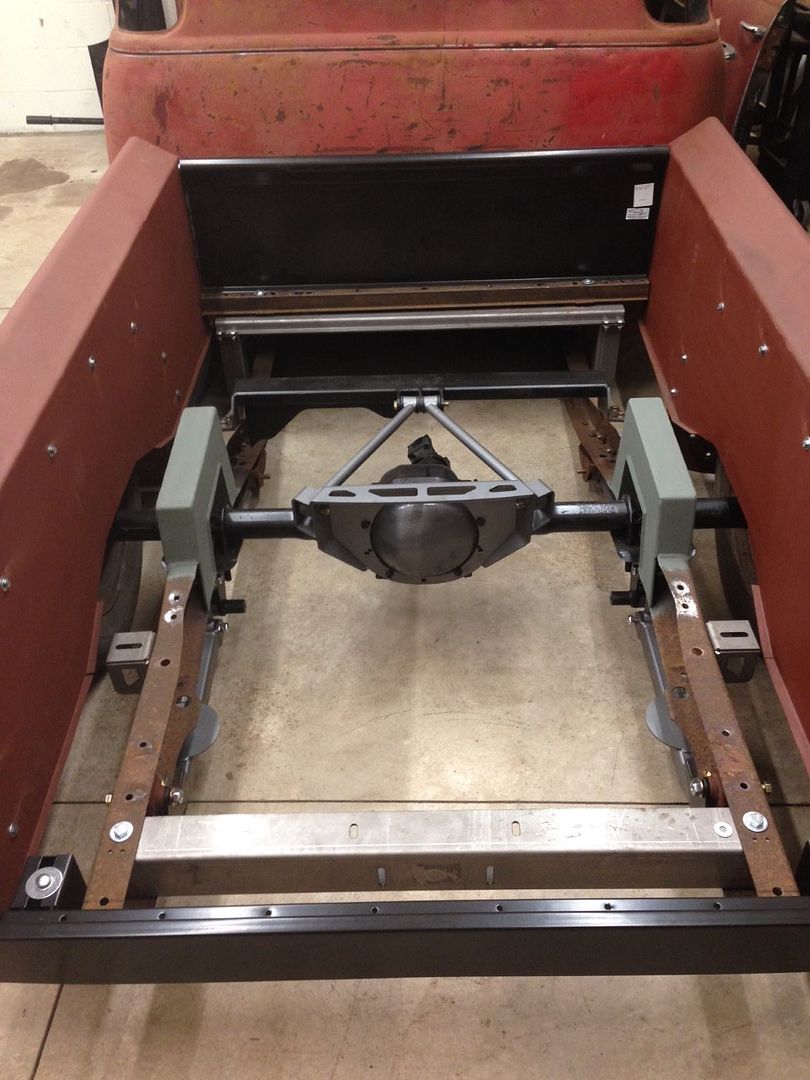 And where we sit now as we wait for a drivetrain! The front will still come down another 1-2" as it's sitting on the bolts for the trans crossmember right now... 
|
|
|
|
|
09-25-2016, 11:38 PM
|
#50 | |
|
Registered User
Join Date: Aug 2012
Location: West Side of the valley, CA
Posts: 878
|
Re: Project Eugene: 1949 5 window
Quote:
 Working in the food & beverage industry, people would be suprised how acidic a lot of beverages are. For example, most standard wines are around high 3s to Mid 4s on a pH scale. Oh yeah, Hulk build is looking really sweet. |
|
|
|
|
|
| Bookmarks |
|
|


 Linear Mode

