
|
 01-22-2017, 02:59 AM
|
#801 |
|
Registered User
Join Date: Jan 2013
Location: Leonardtown, MD
Posts: 1,633
|
Re: 55 Wagon Progress
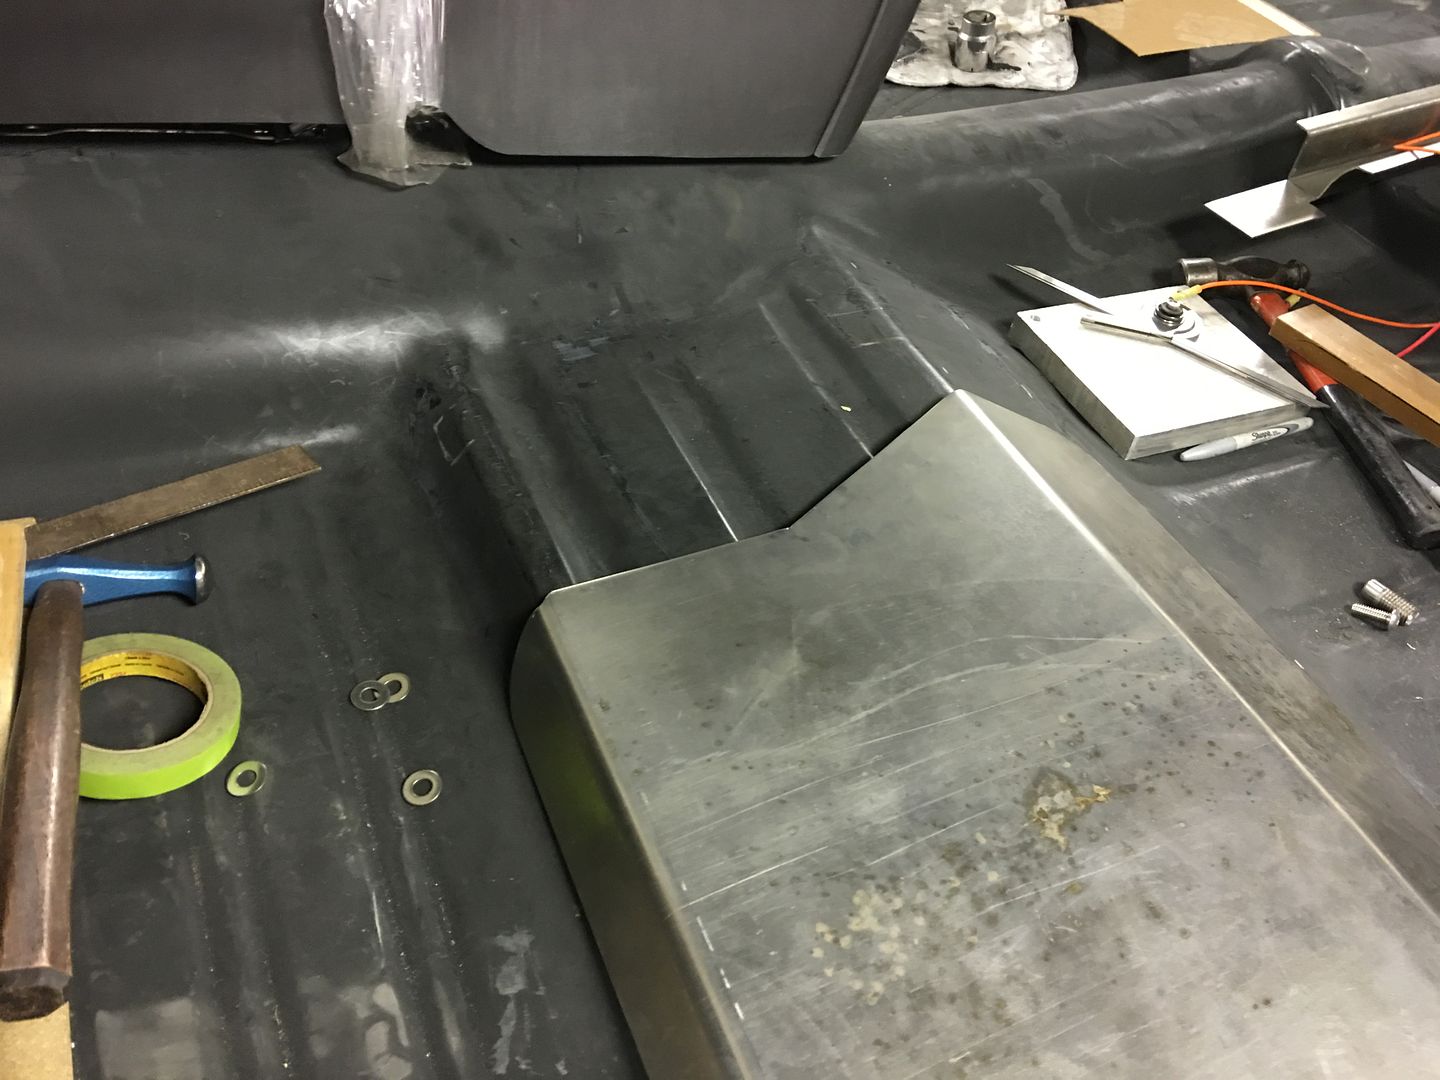
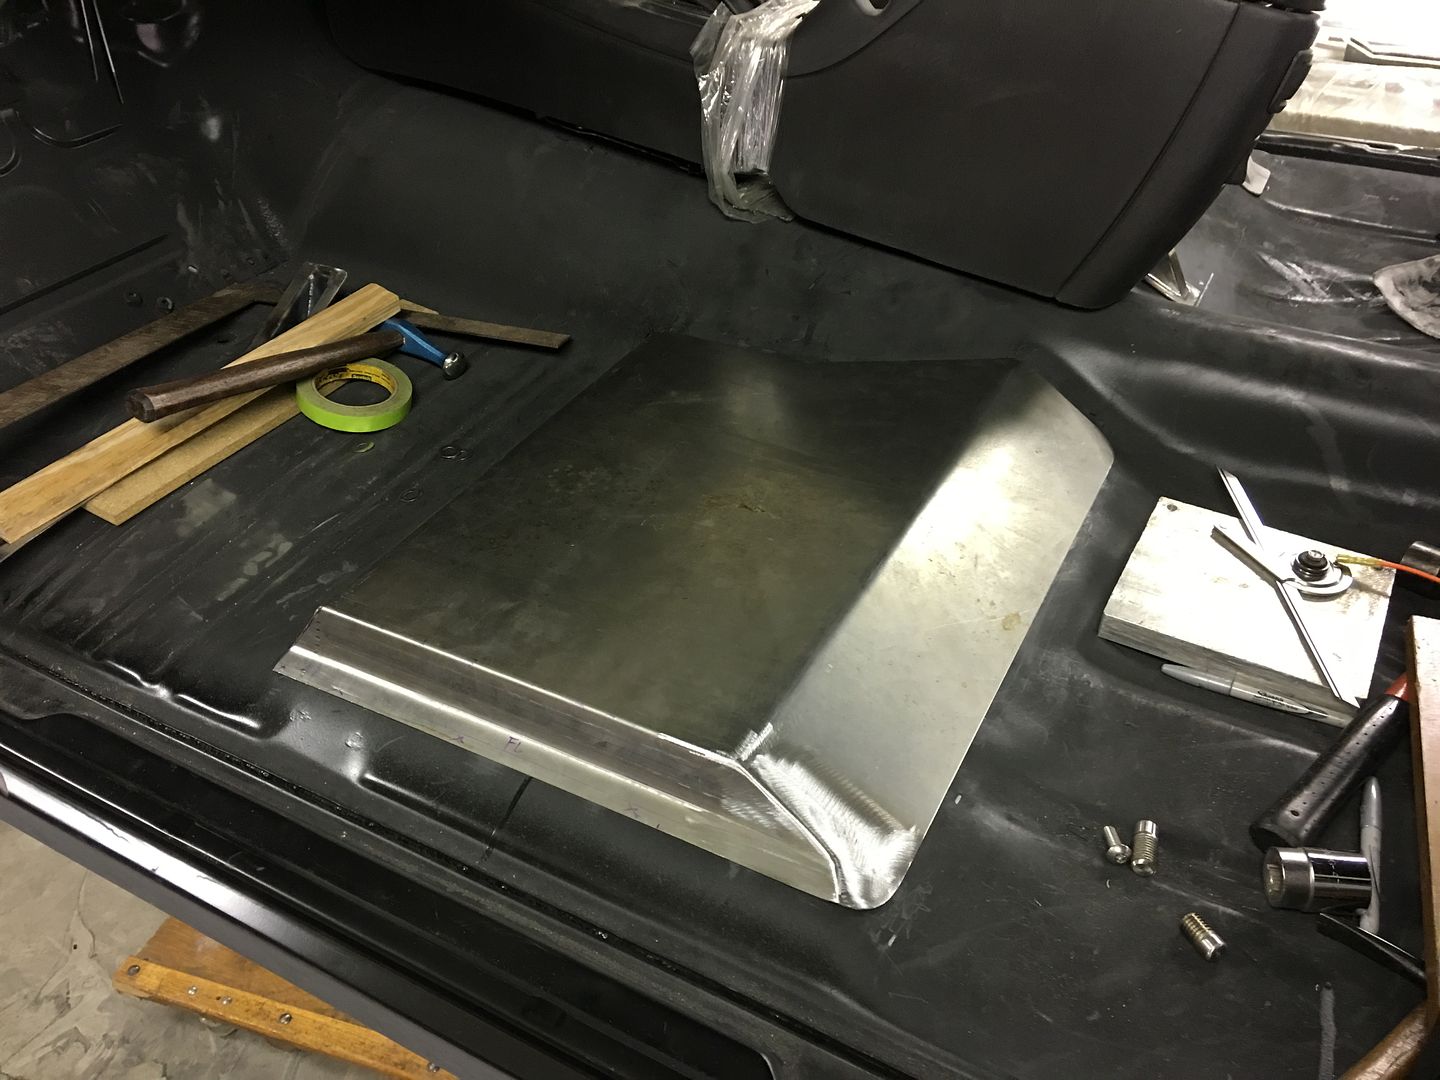
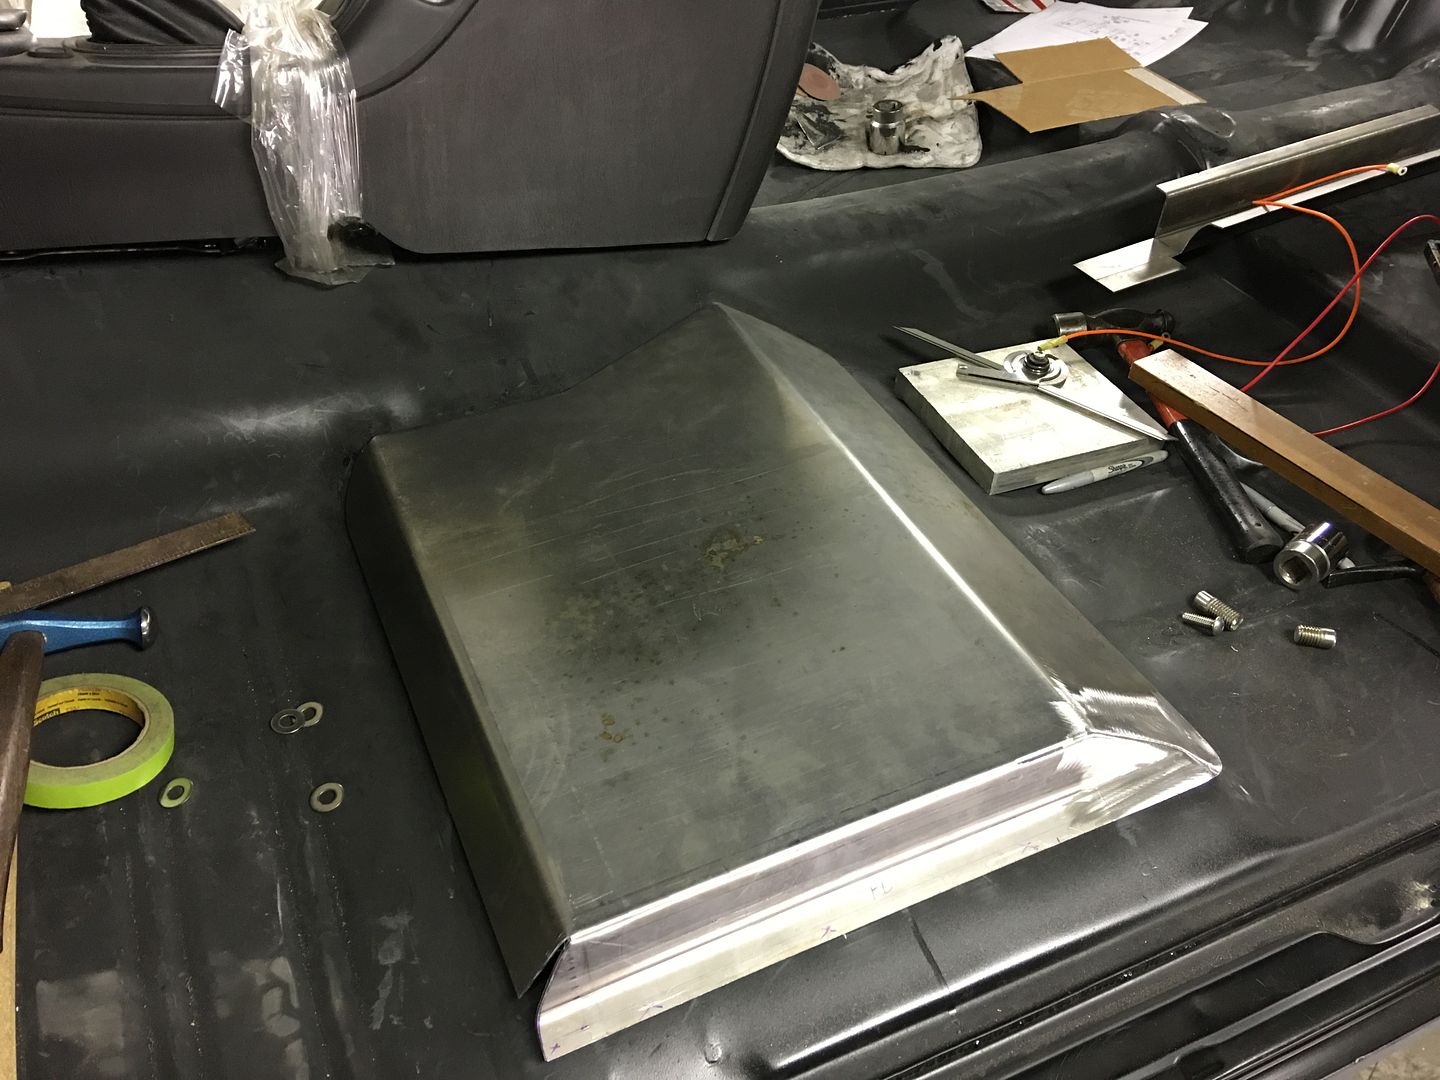
Moving on to closing up the ends of the outer seat riser... Quite a bit of stretch to get this corner to match up to the seat riser...
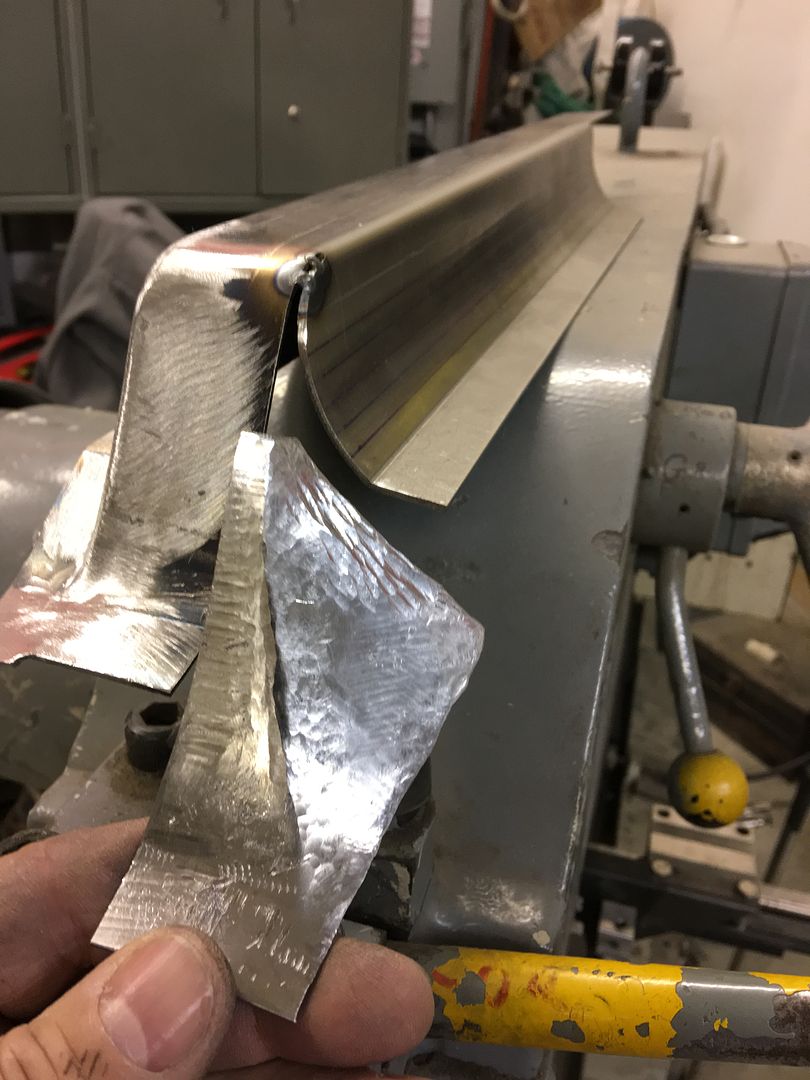 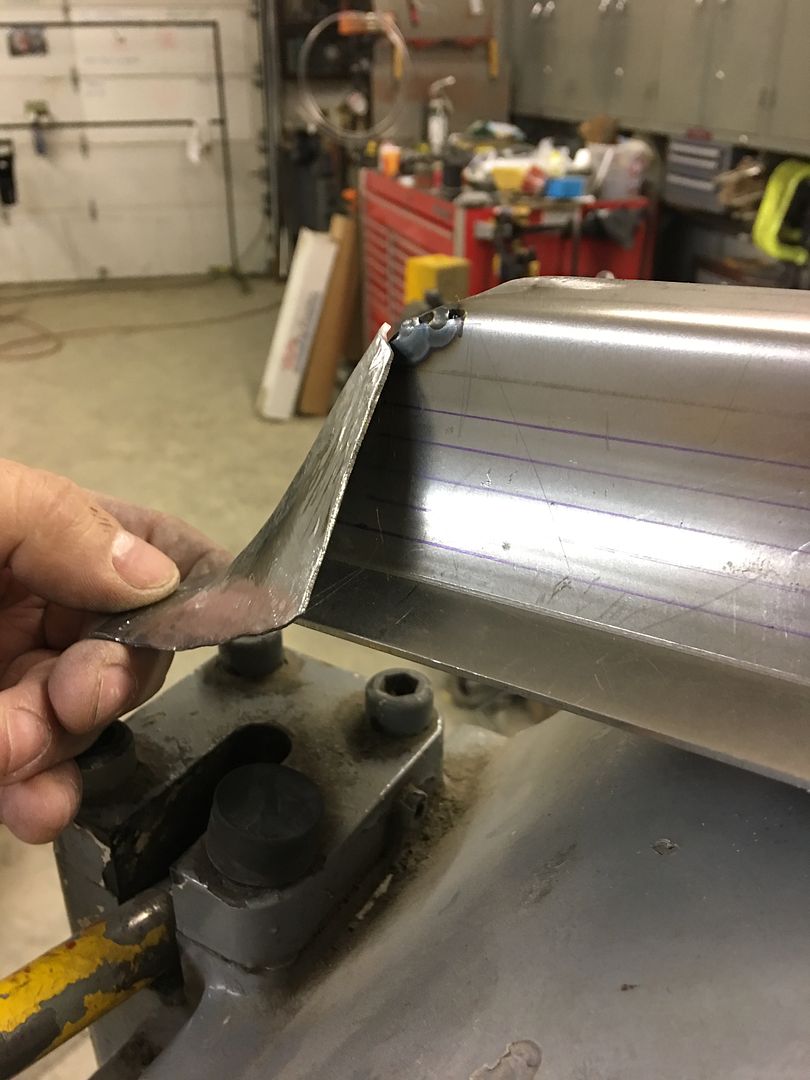 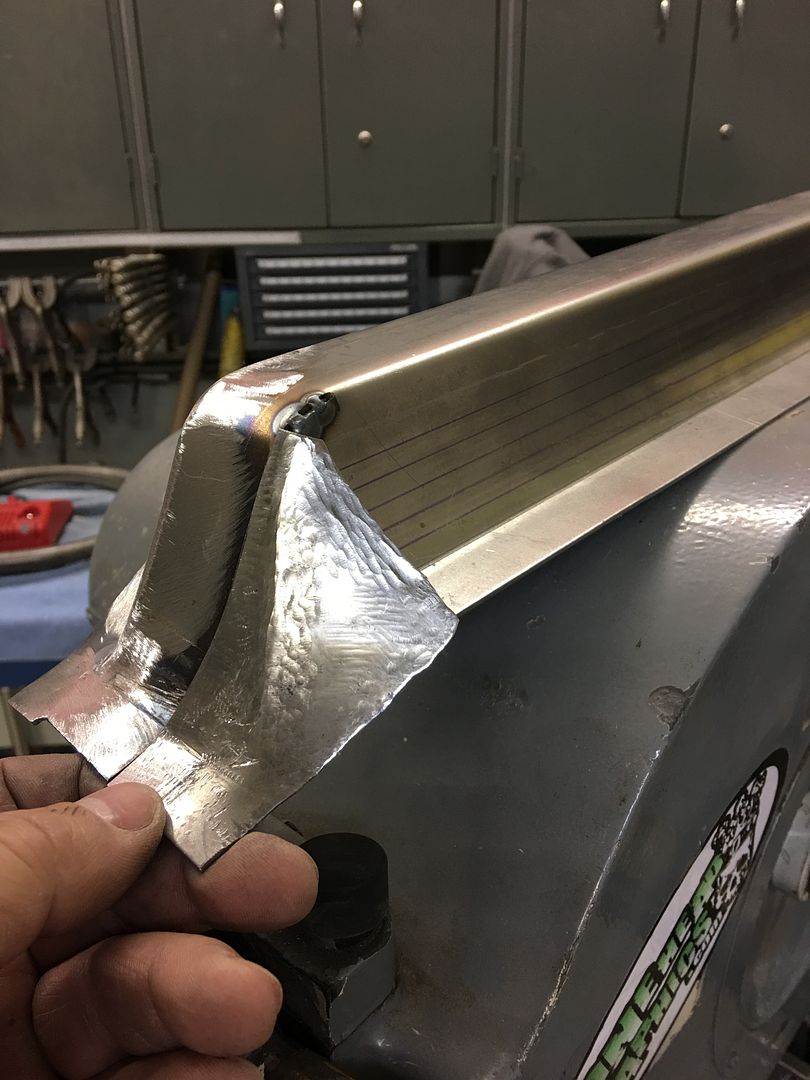 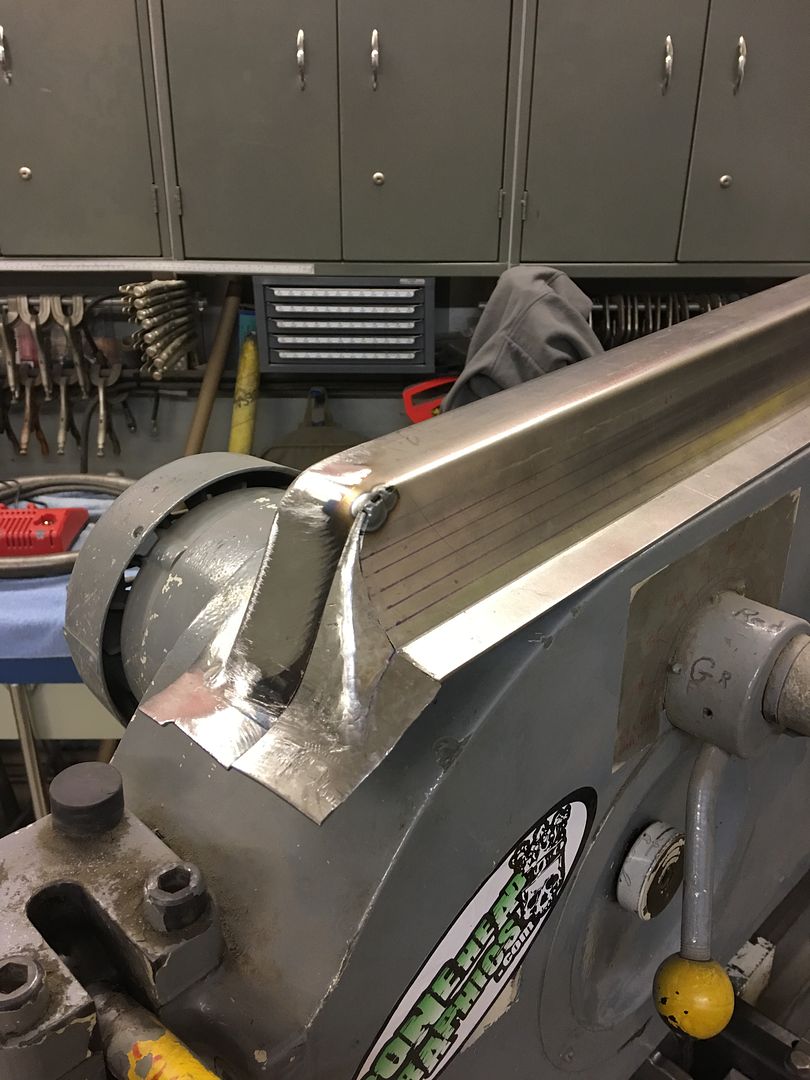 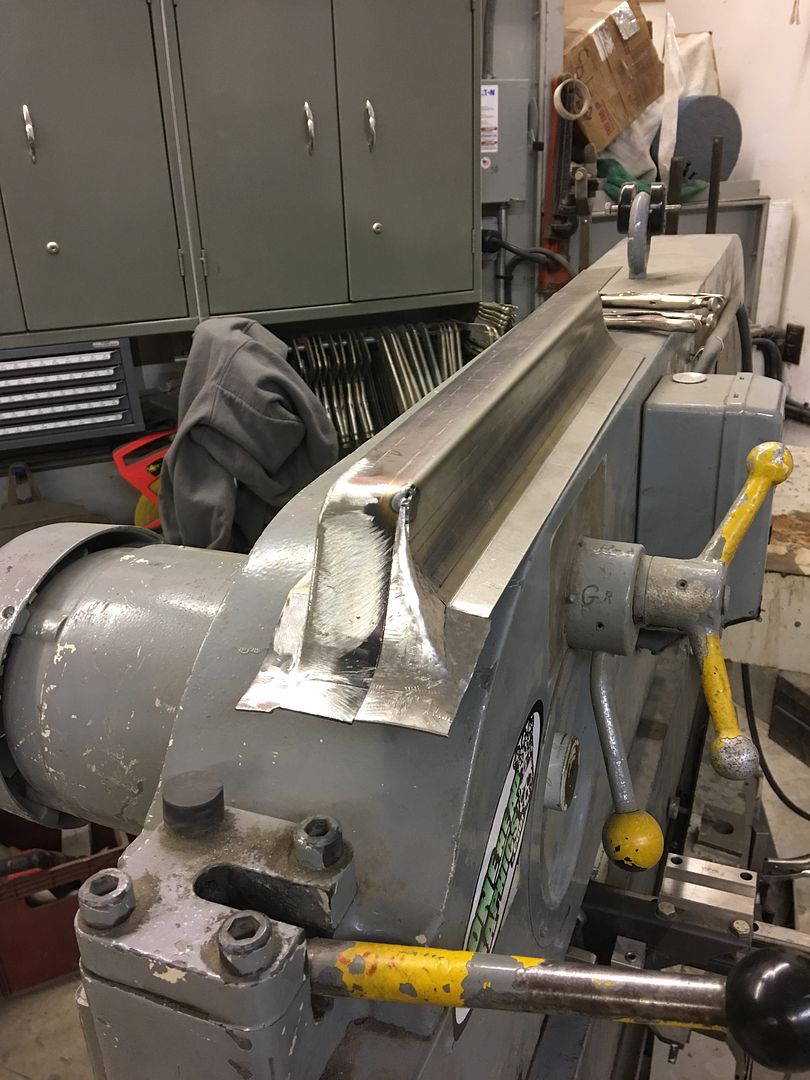 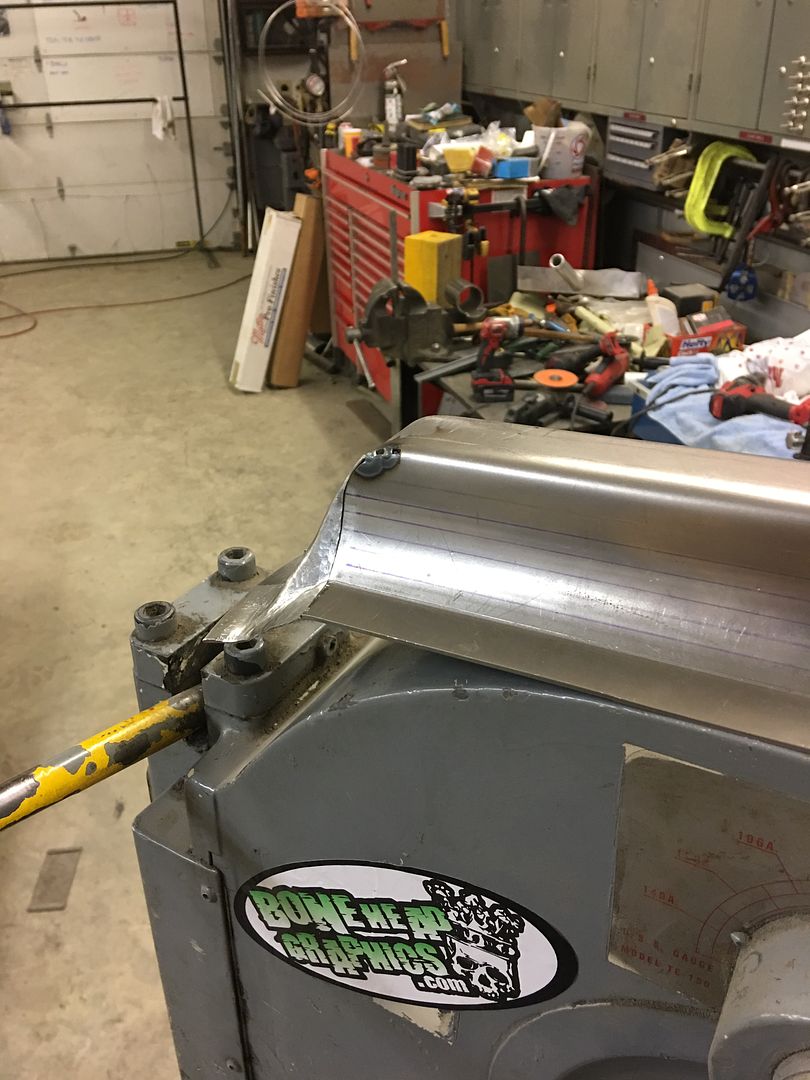 https://www.youtube.com/watch?v=wzorB_hwLZM Then the corner was Tig welded in place and another test fit with the bucket seat.. https://www.youtube.com/watch?v=kf-X5eHc5bE
__________________
Robert |

|

|
|
01-31-2017, 01:02 AM
|
#802 |
|
Registered User
Join Date: Jan 2013
Location: Leonardtown, MD
Posts: 1,633
|
Re: 55 Wagon Progress
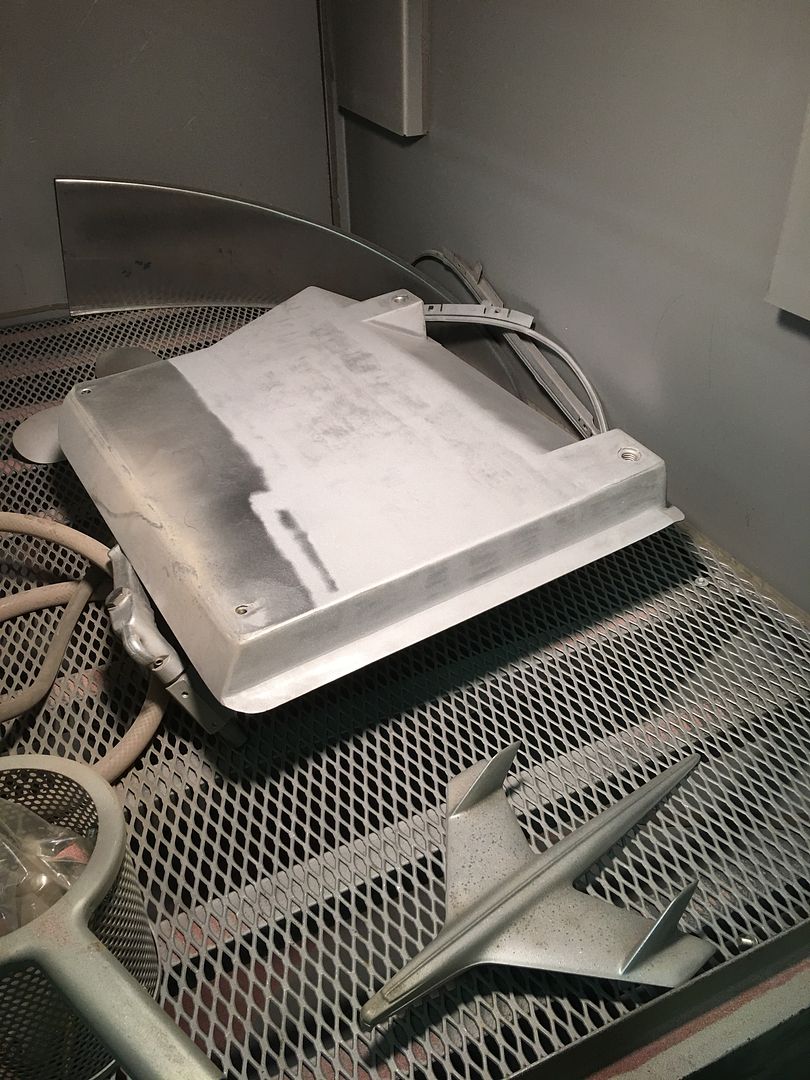
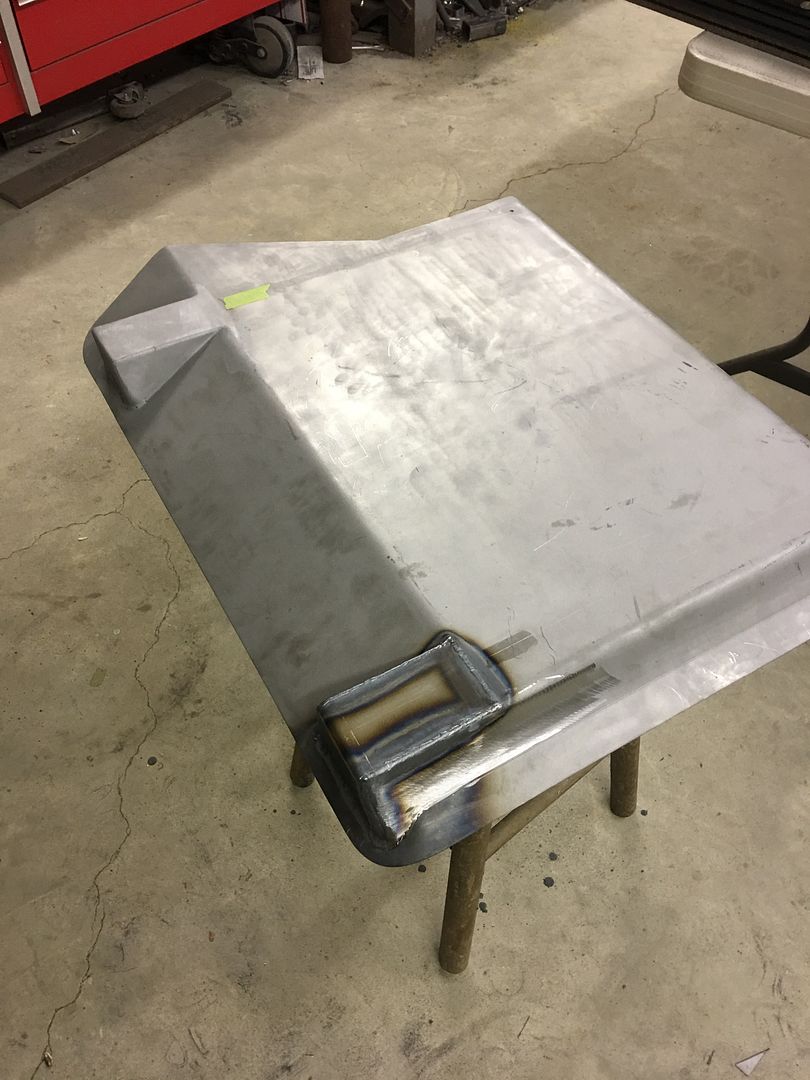
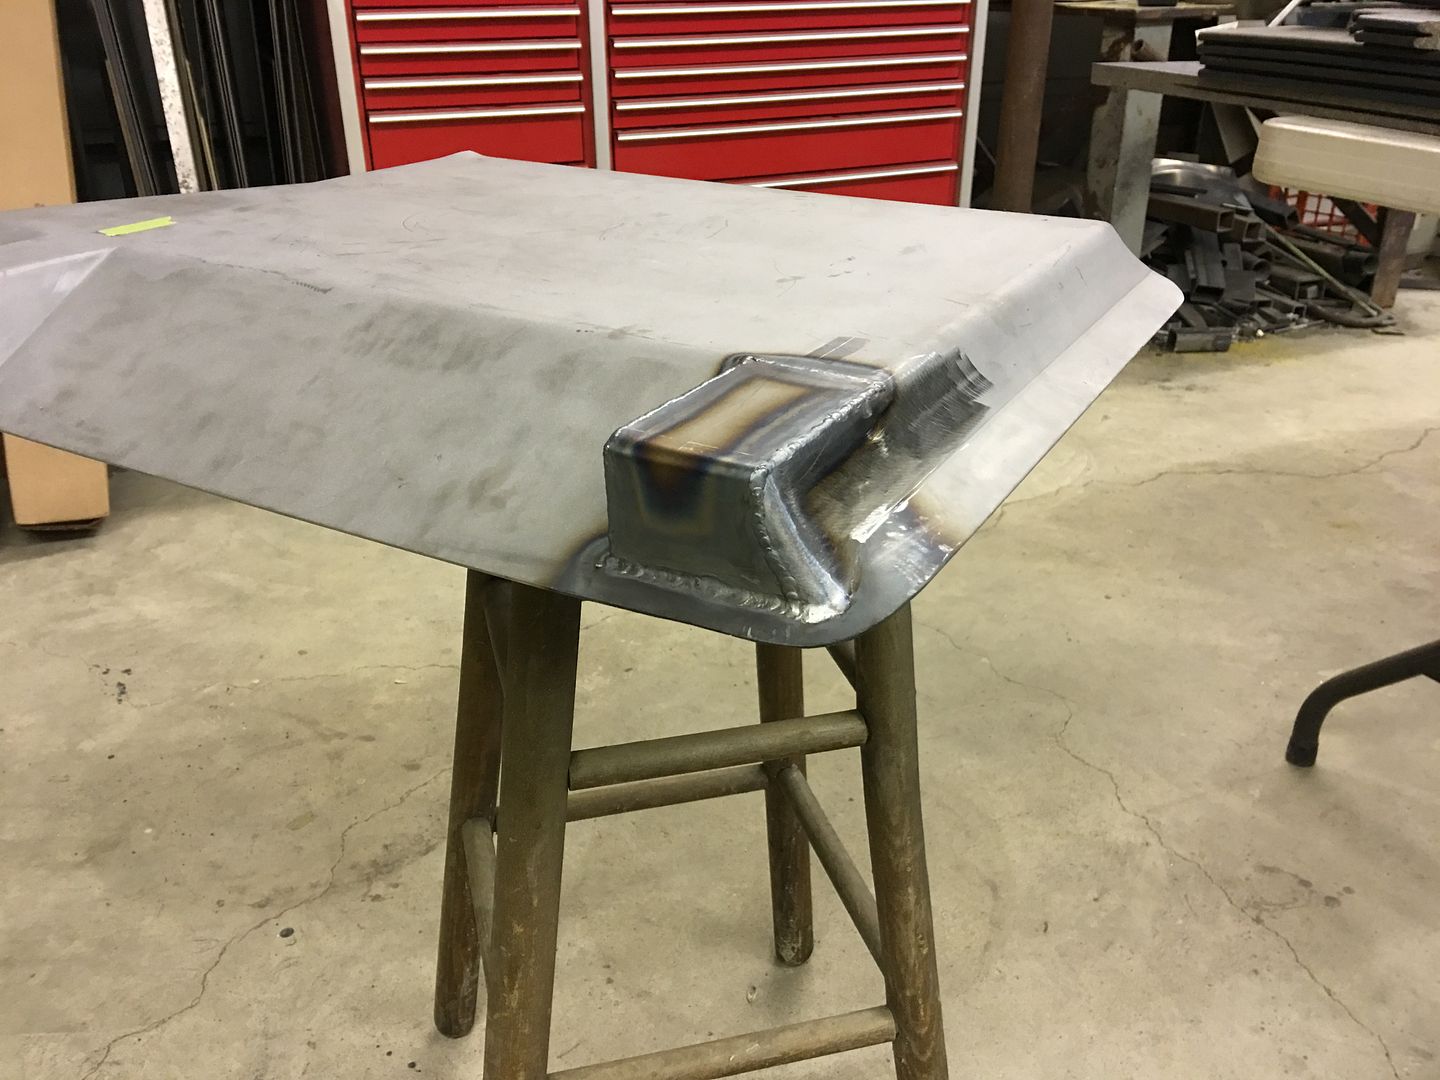
Well, let's back up and punt one more time. The owner of the 55 stopped by about a week ago and sat in the mocked up bucket seat. She said it sat too high, so our version 2 seat brackets were out. Cutting the floor pan was over-ruled (for recessing the brackets) so we opted for a 14 gauge flat seat pan directly on top of the floor, which also gave us a shape we could eliminate the "step" in the floor.
   https://www.youtube.com/watch?v=JYklSvTtTTQ https://www.youtube.com/watch?v=CfWqQyOeXJo Next is to add the wedges to the rear ramp for attaching the rear of the track slides...
__________________
Robert |
|
|
|
|
01-31-2017, 07:58 AM
|
#803 |
|
Registered User
Join Date: Dec 2011
Location: Mobile, Alabama
Posts: 996
|
Re: 55 Wagon Progress
The youtube videos are a nice touch. Thanks!
__________________
My Build - http://67-72chevytrucks.com/vboard/s...d.php?t=515876 |
|
|
|
|
02-05-2017, 12:21 AM
|
#804 |
|
Registered User
Join Date: Jan 2013
Location: Leonardtown, MD
Posts: 1,633
|
Re: 55 Wagon Progress
Thanks!
Final design on the bucket seat brackets... and owner approved today as well. One down, one to go.. This is made from 14 gauge cold rolled steel and puts the seat about as low as we can go without cutting the floor pan.. Video of the seat bracket: https://youtu.be/YF7LOe7eLTQ Seat test fitted: 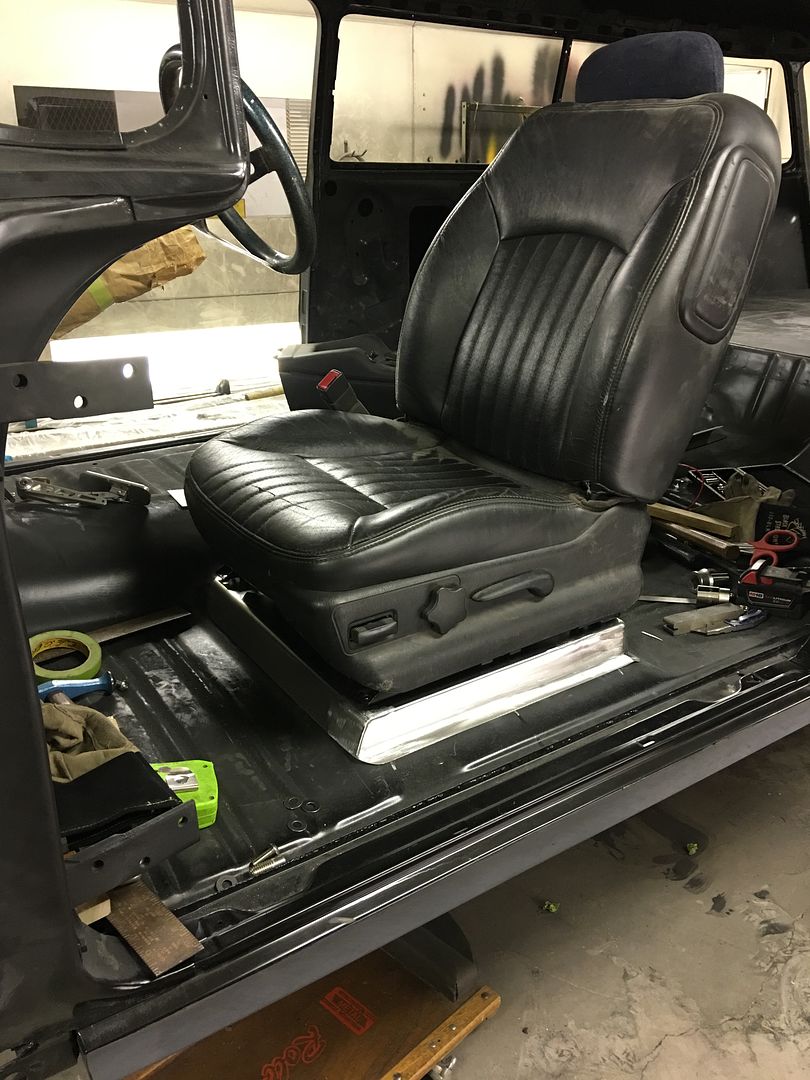 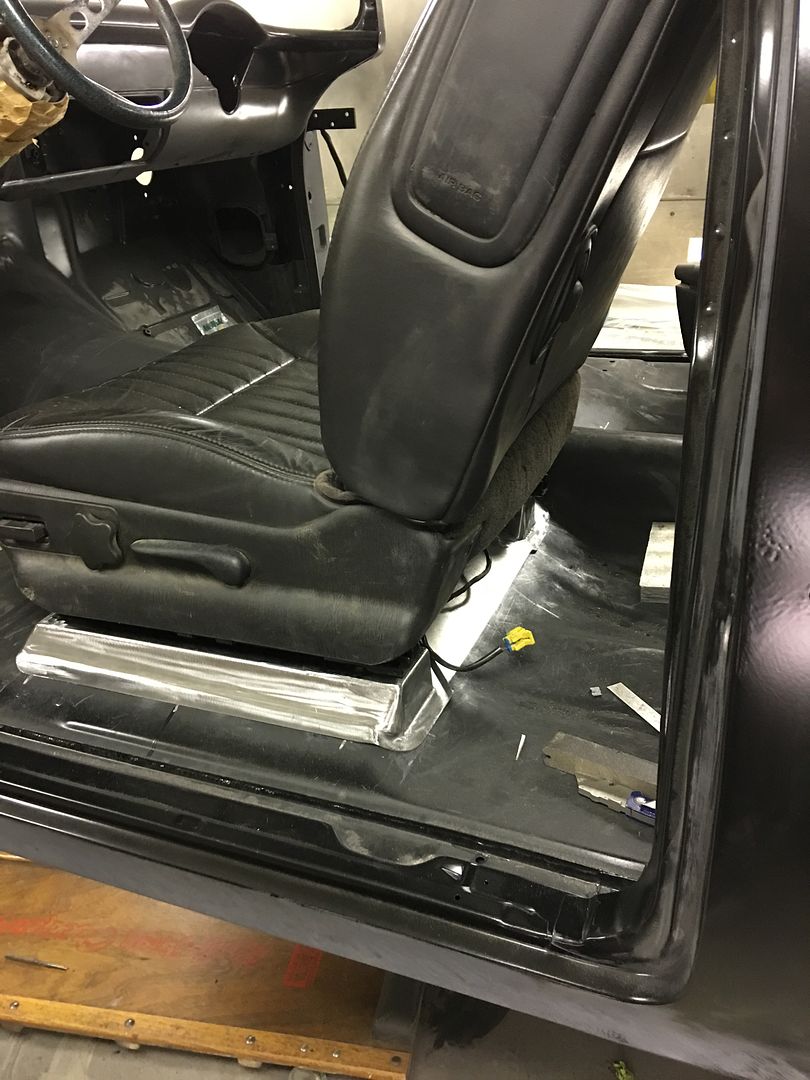
__________________
Robert |
|
|
|
|
02-15-2017, 11:53 PM
|
#805 |
|
Registered User
Join Date: Jan 2013
Location: Leonardtown, MD
Posts: 1,633
|
Re: 55 Wagon Progress
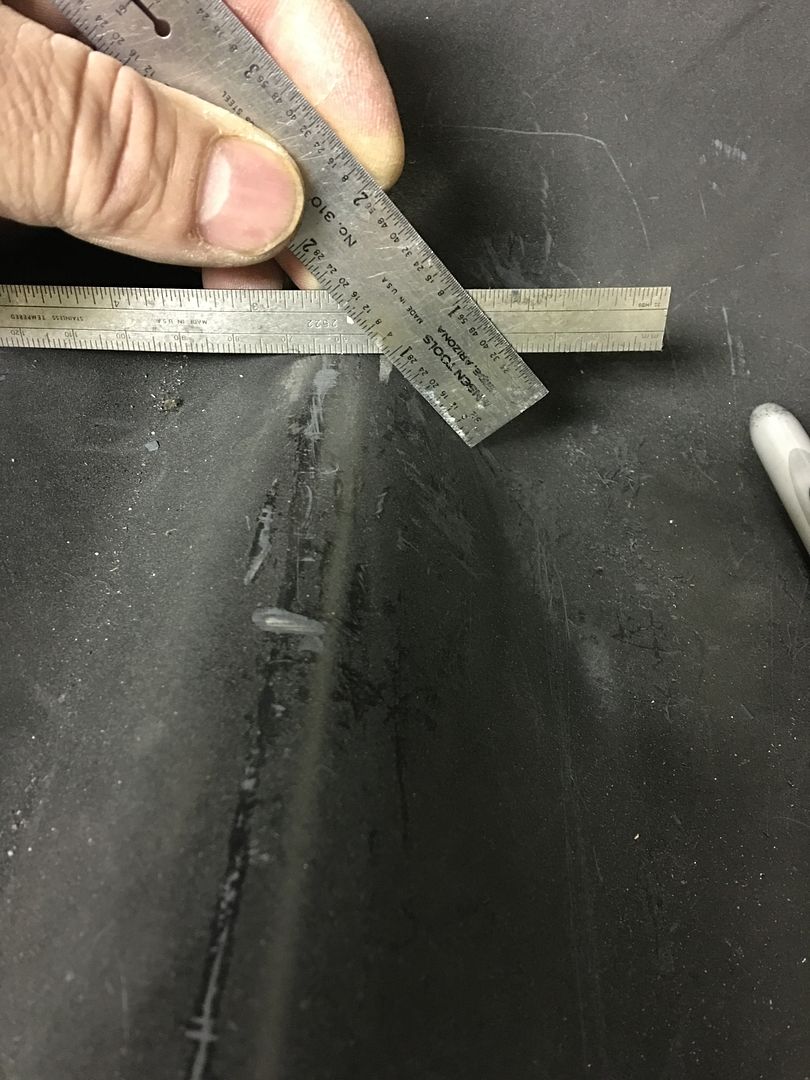
Don't think I showed this on the other side, but here's how we find the center of the bend for dimensioning the seat bracket..
 Bent up and a test fit... 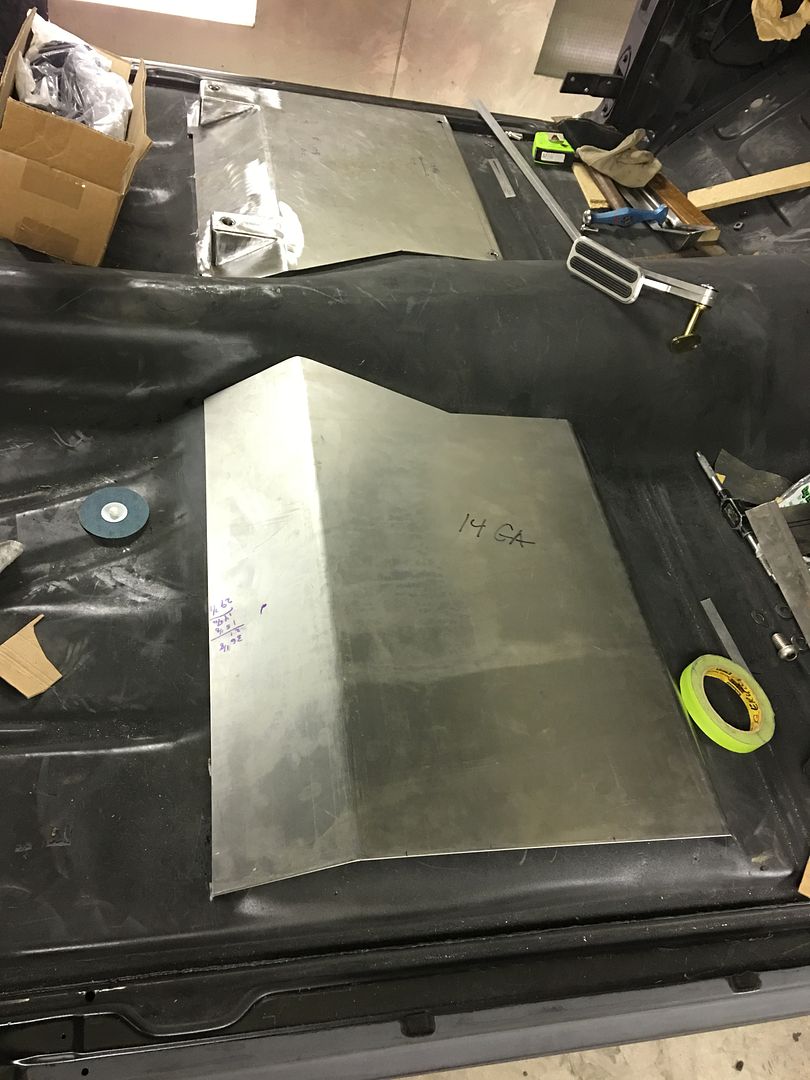 Relief cuts made for the next fold..... 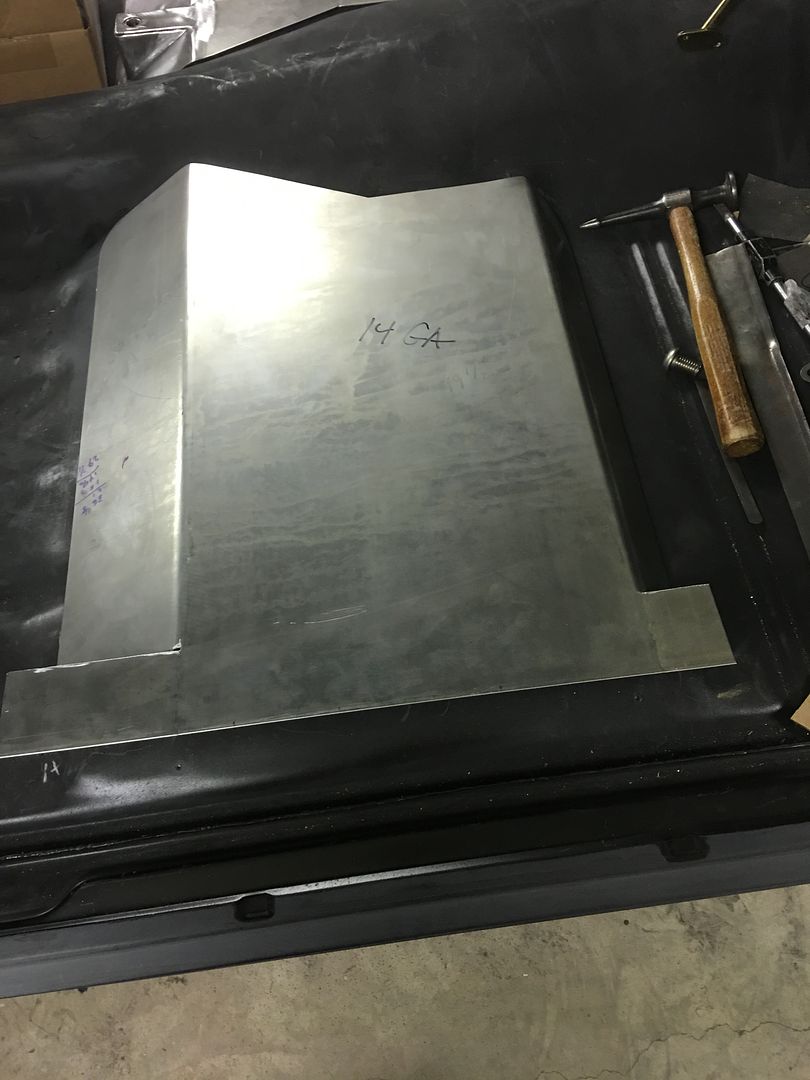
__________________
Robert |
|
|
|
|
02-21-2017, 07:33 AM
|
#806 |
|
Registered User
Join Date: Jan 2013
Location: Leonardtown, MD
Posts: 1,633
|
Re: 55 Wagon Progress
.....then rolled through the bead roller
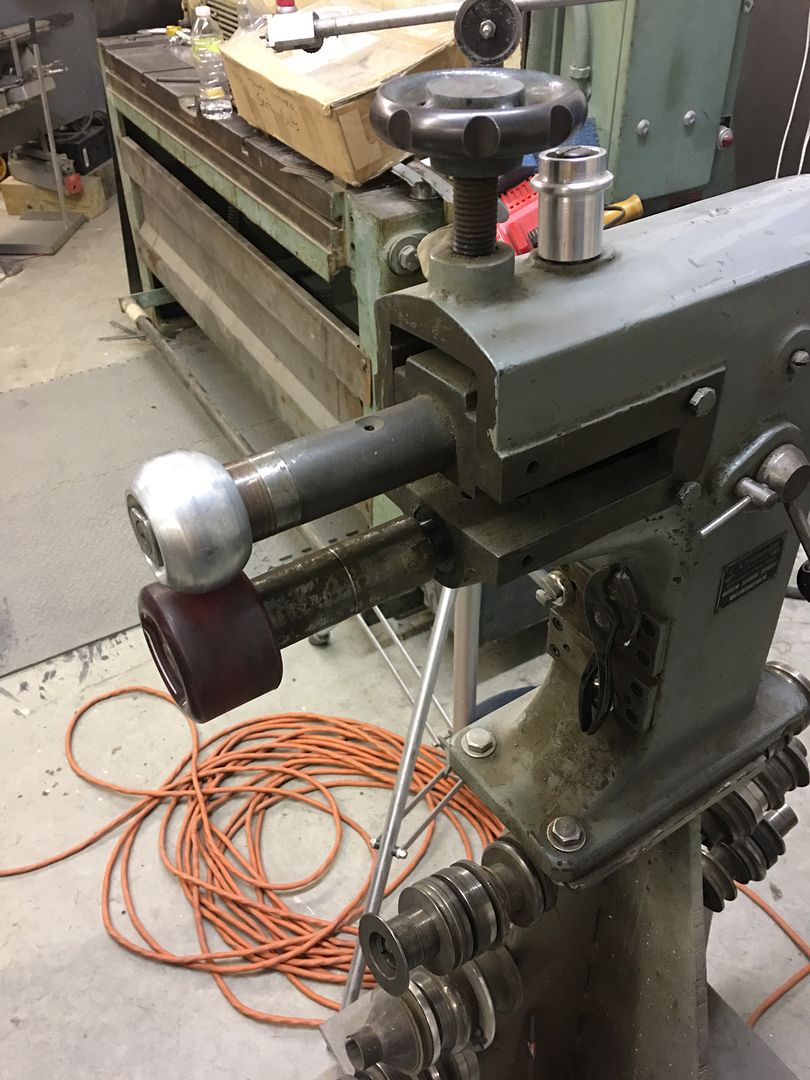 and then the brake is used to fold the outer flange. Here, all welded in place... 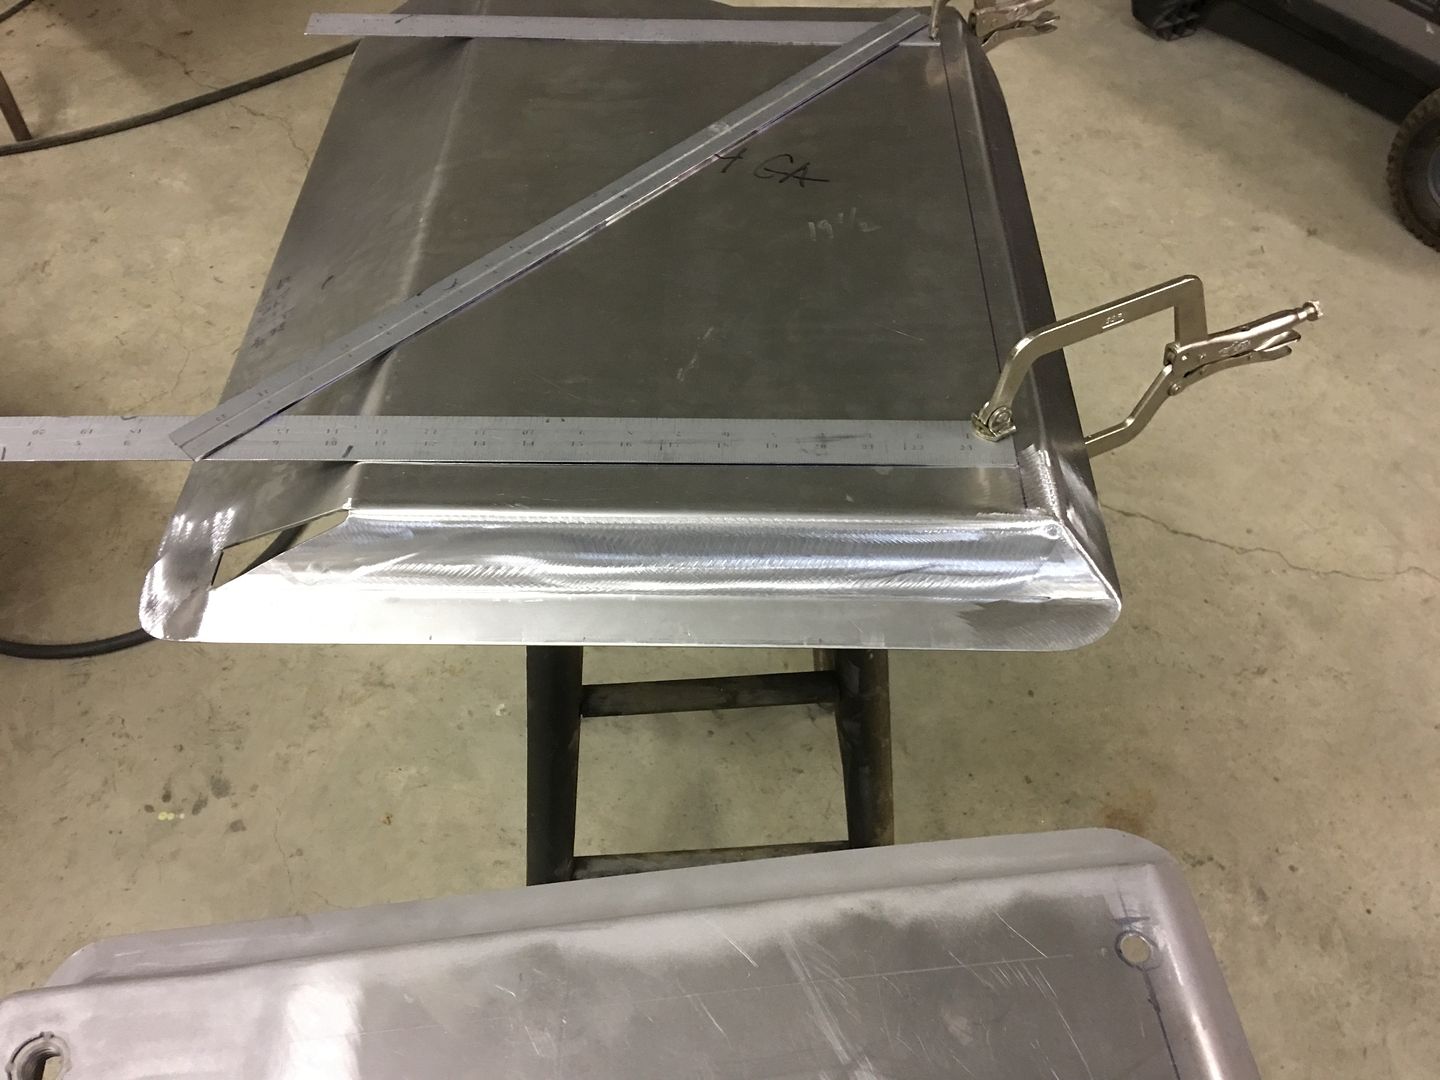 The front hole pattern is laid out to match the drivers bracket, and then some perpendicular lines laid out for locating the rear risers... 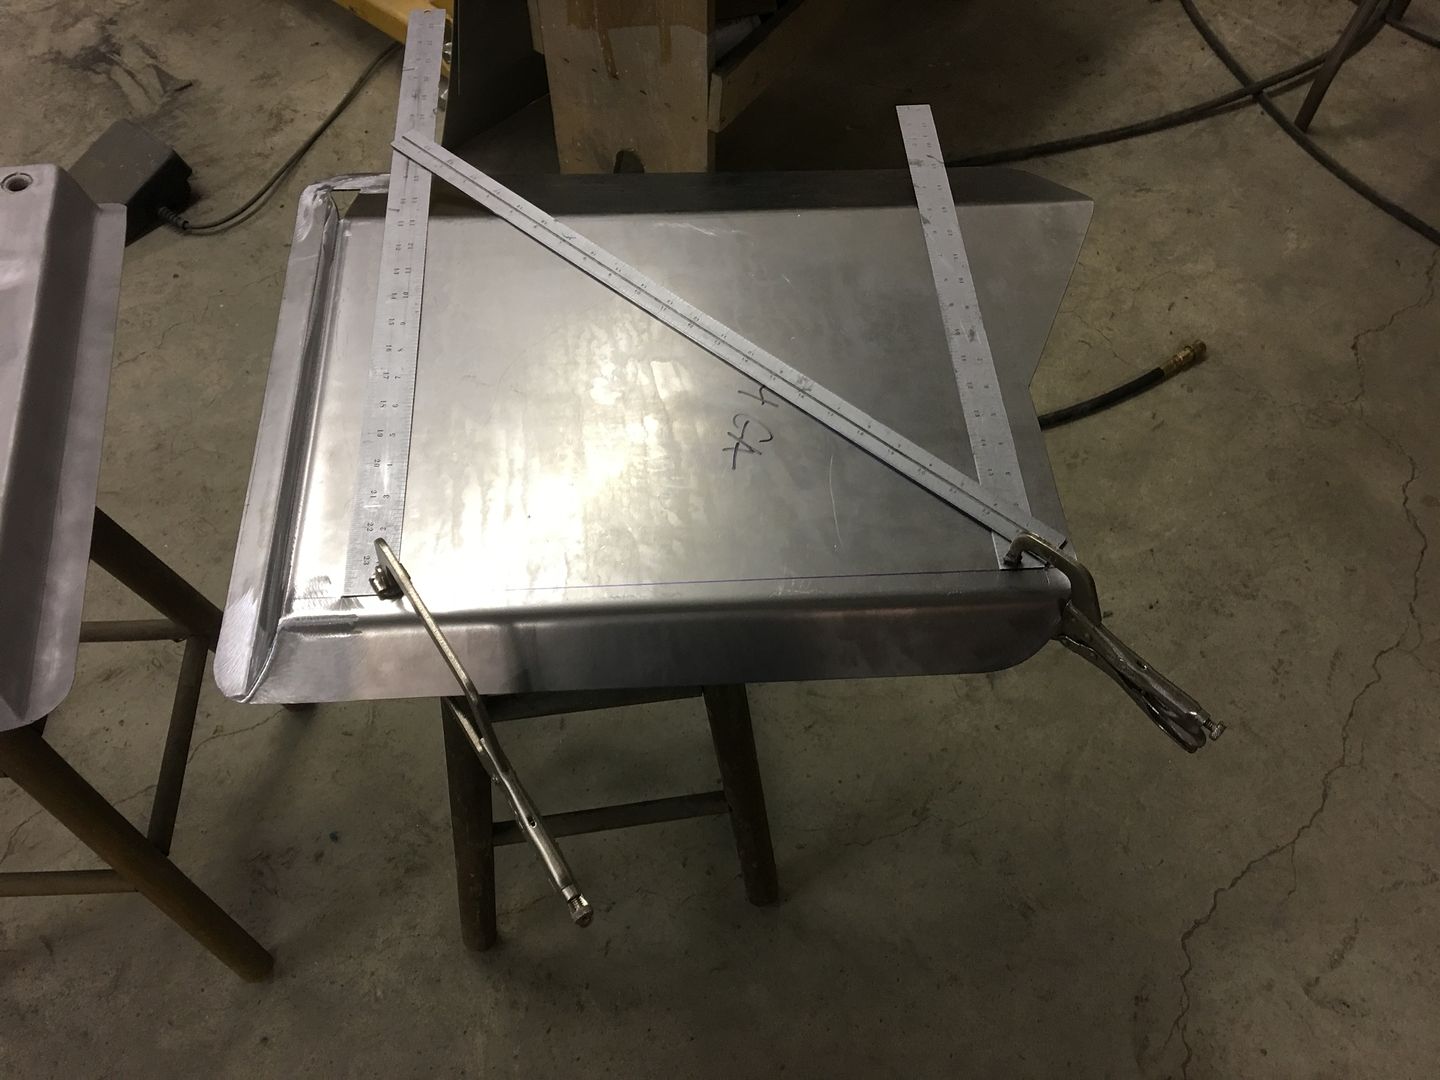 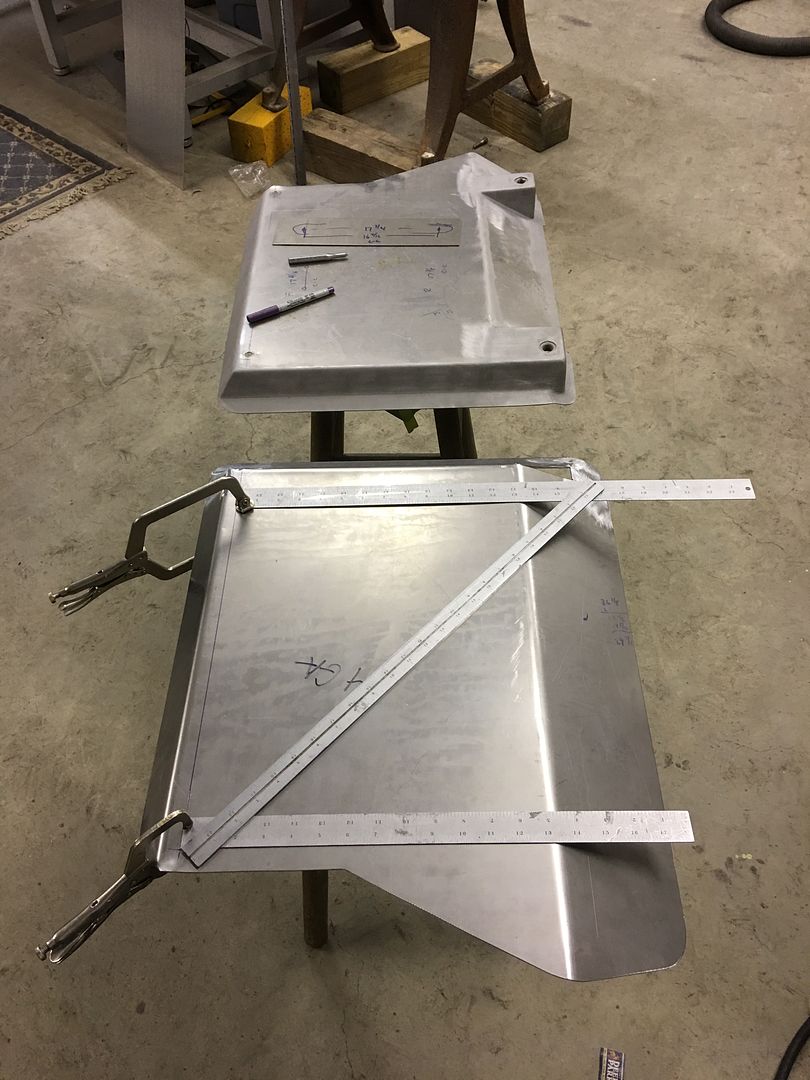 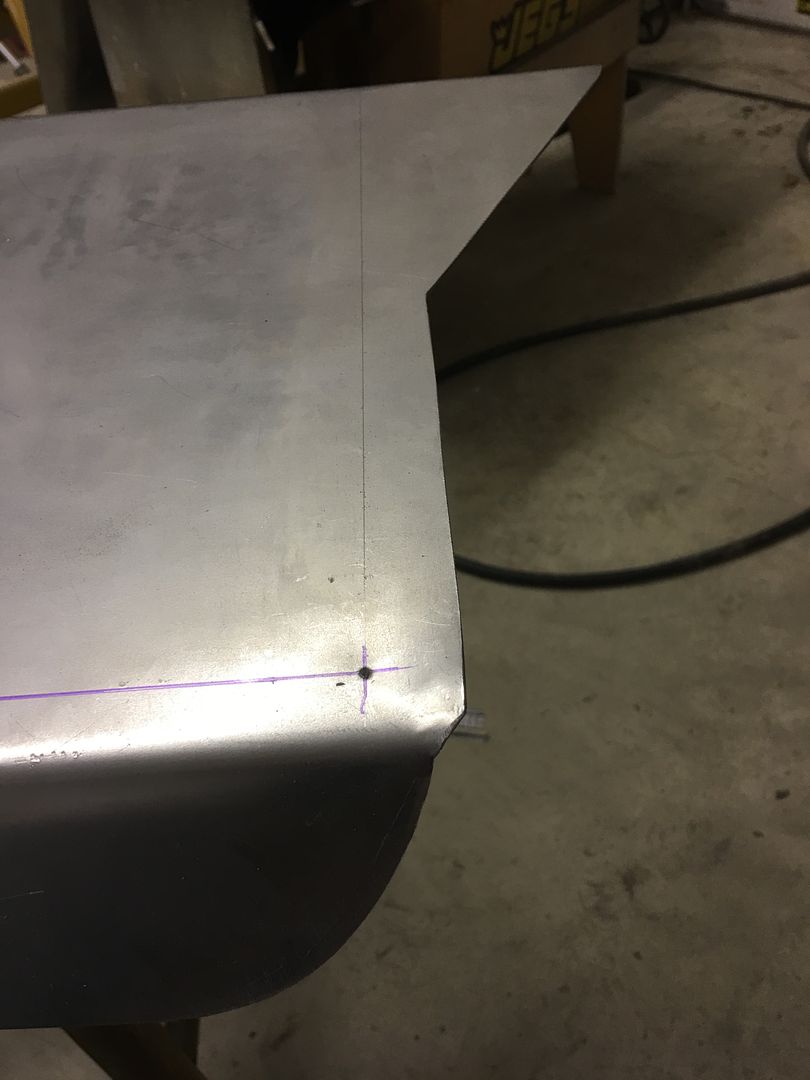 
__________________
Robert |
|
|
|
|
02-23-2017, 12:06 AM
|
#807 |
|
Registered User
Join Date: Jan 2013
Location: Leonardtown, MD
Posts: 1,633
|
Re: 55 Wagon Progress
Got a new apprentice that started this past Saturday.. Her mom even thought it was a good idea!
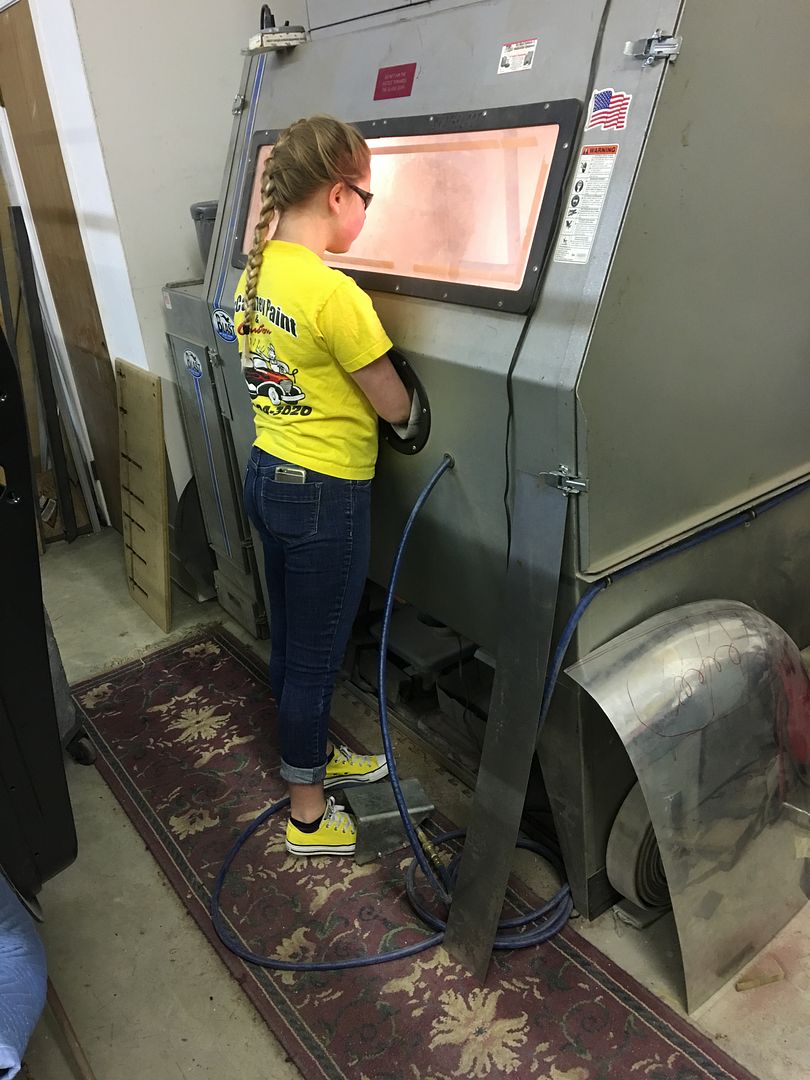  She's getting the driver's seat bracket all prepped for SPI epoxy primer, while I worked on finishing the passenger bracket.. 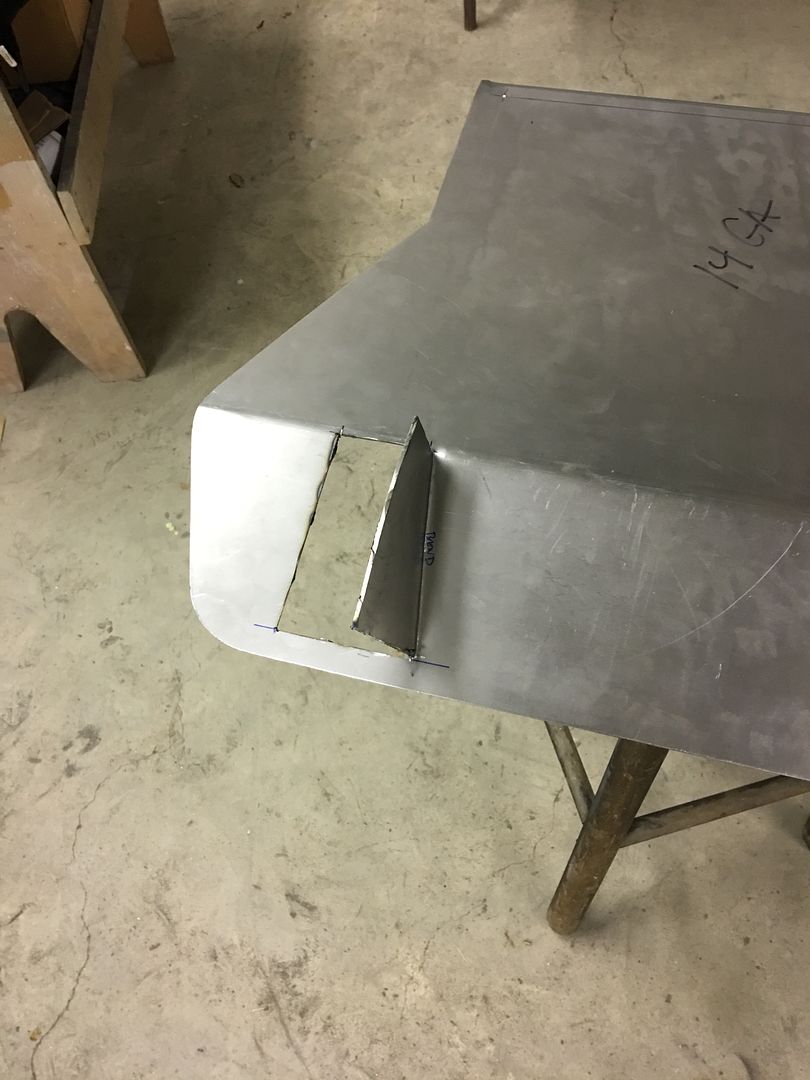 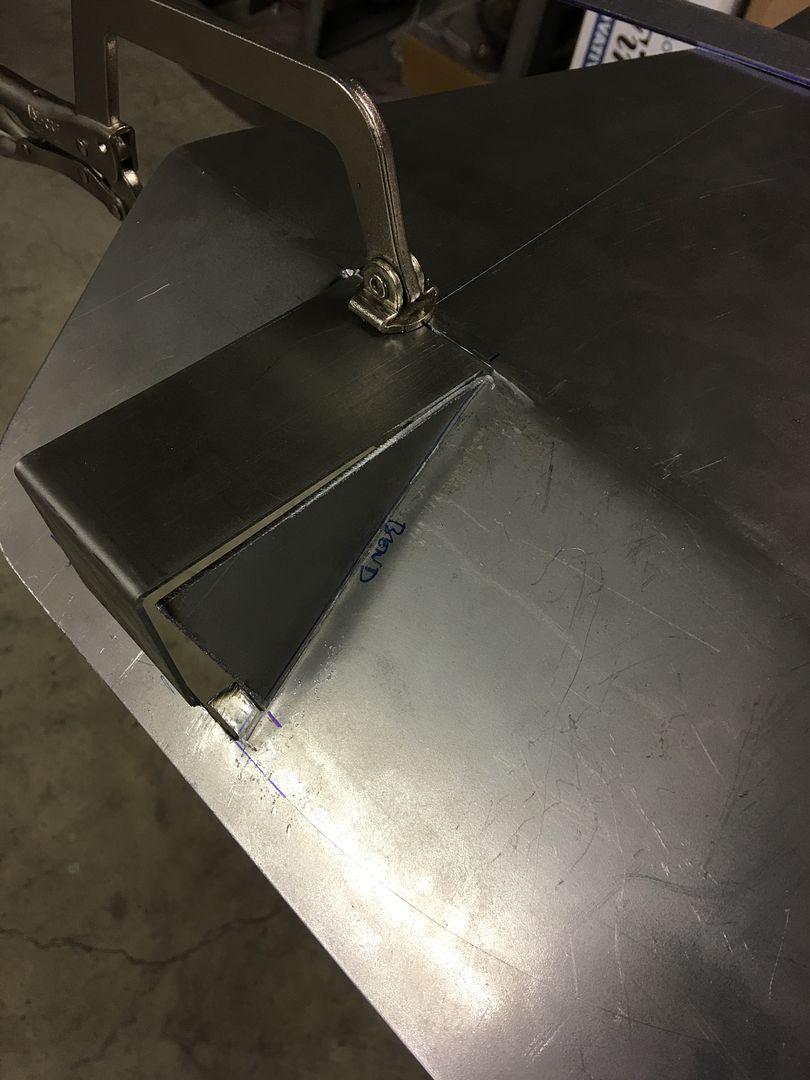 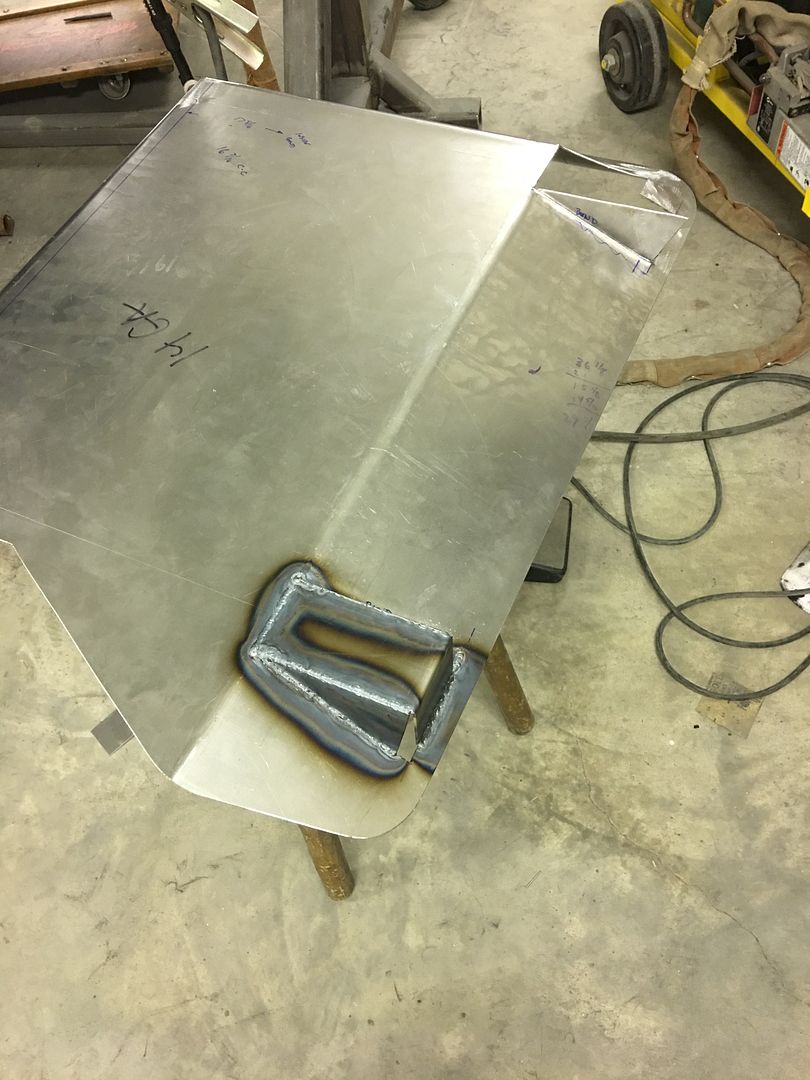 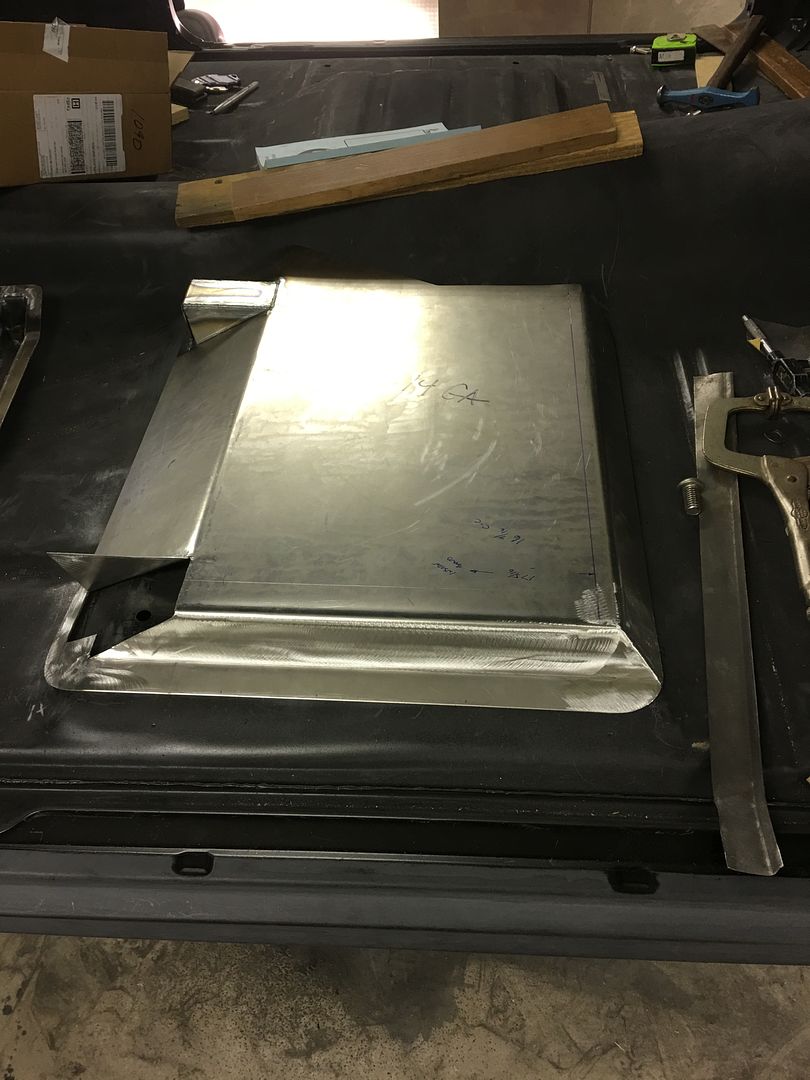
__________________
Robert |
|
|
|
|
02-23-2017, 12:25 AM
|
#808 |
|
Registered User
Join Date: Apr 2011
Location: .
Posts: 3,104
|
Re: 55 Wagon Progress
Great seeing them young ones interested.
|
|
|
|
|
02-25-2017, 04:46 PM
|
#809 |
|
Registered User
 Join Date: Jan 2012
Location: Whitesboro, Texas
Posts: 932
|
Re: 55 Wagon Progress
What kind of media are you using in your blast cabinet?
__________________
Cheers - Wayne Our Shop Build - http://67-72chevytrucks.com/vboard/s...d.php?t=620966 '55 Wagon Build - http://67-72chevytrucks.com/vboard/s...d.php?t=689157 1971 Cheyenne Super Ochre/White LWB 350 Auto - my son's truck "Nancy" 1972 GMC K2500 Custom 4X4 Olive LWB 400 SB 4-speed -"Greenie" - Restoration to begin after the '55 Nothing sucks more than that moment during an argument when you realize you're wrong. |
|
|
|
|
02-25-2017, 05:29 PM
|
#810 |
|
Registered User
Join Date: Jan 2013
Location: Leonardtown, MD
Posts: 1,633
|
Re: 55 Wagon Progress
 It's actually made for water jet machines, get it from a local machine shop.. Also use the 80 grit garnet that tractor supply carries.
__________________
Robert |
|
|
|
|
02-25-2017, 06:03 PM
|
#811 |
|
Registered User
Join Date: Jan 2013
Location: Leonardtown, MD
Posts: 1,633
|
Re: 55 Wagon Progress
Sometimes you just need to screw off in the shop all day. So while the new hire continued with media blasting, I turned my attention to this "new" hoop for the Watervliet planishing hammer that just showed up.. This square version is somewhat rare, ie: hard to find, but I had a particular location in mind..
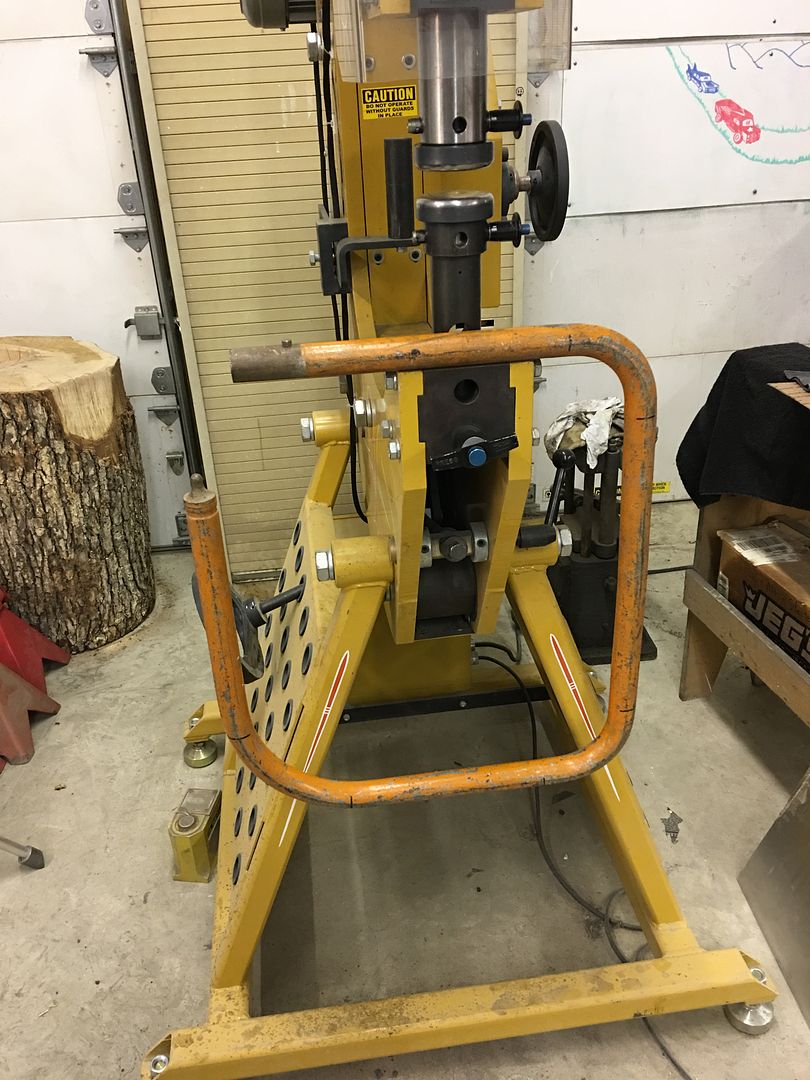 The Baileigh power hammer has some threaded holes on the left side for their own version of a planishing hammer mount, but I just didn't have the funds laying around for their version. So lets see what we can do with Old Faithful... 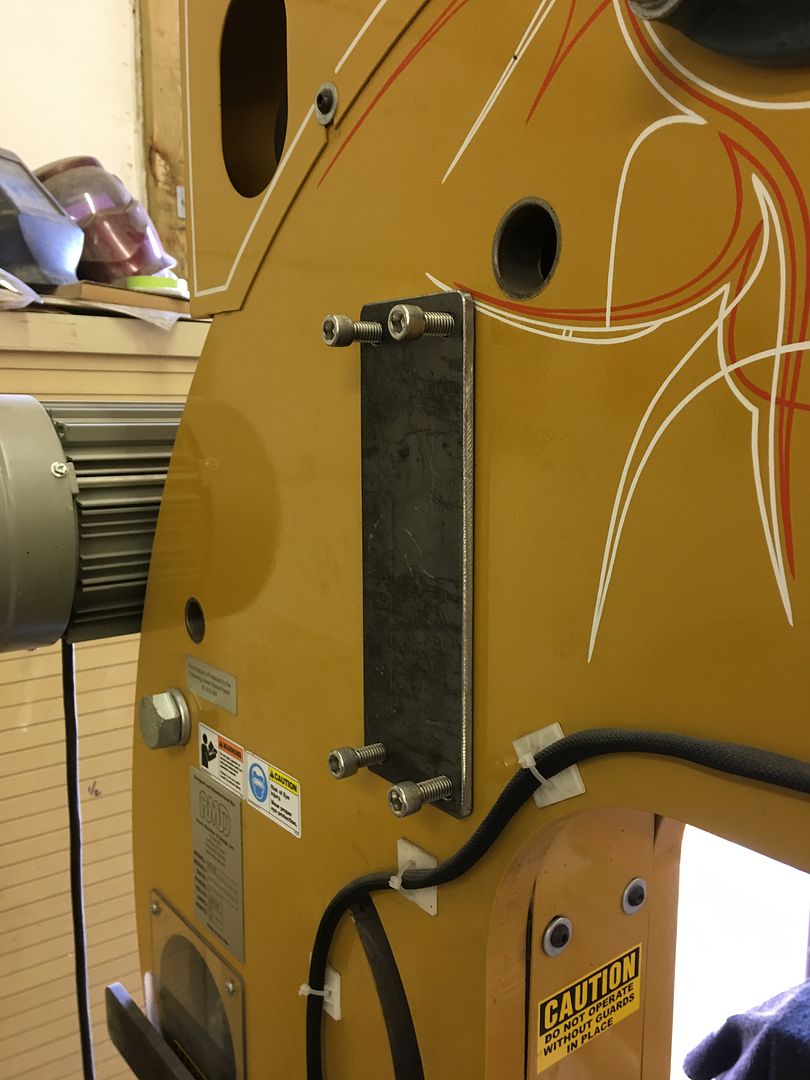 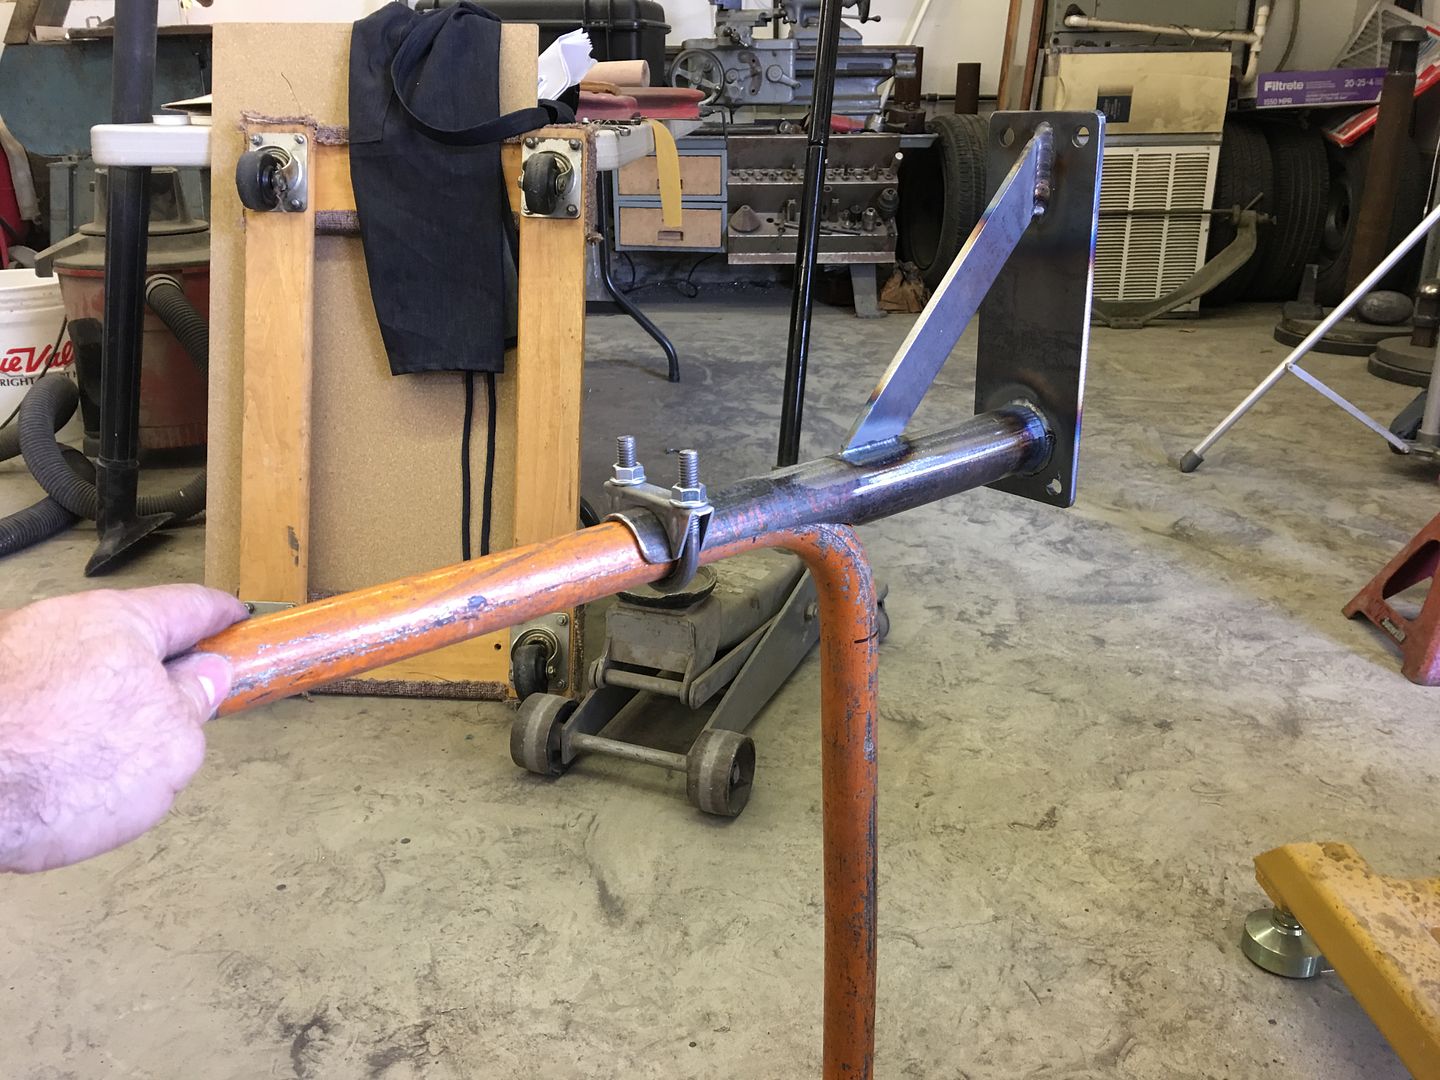 Drum sander does wonders in pipe fitment, and it sure was easier to TIG with a nice tight fit... 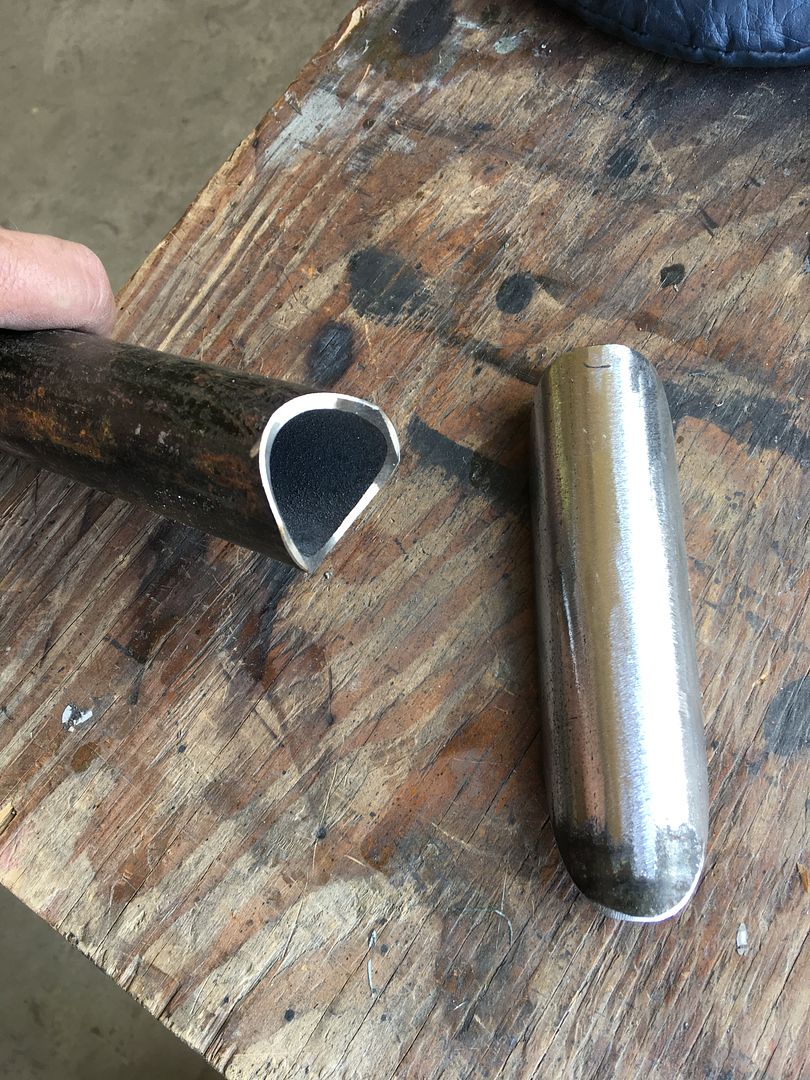 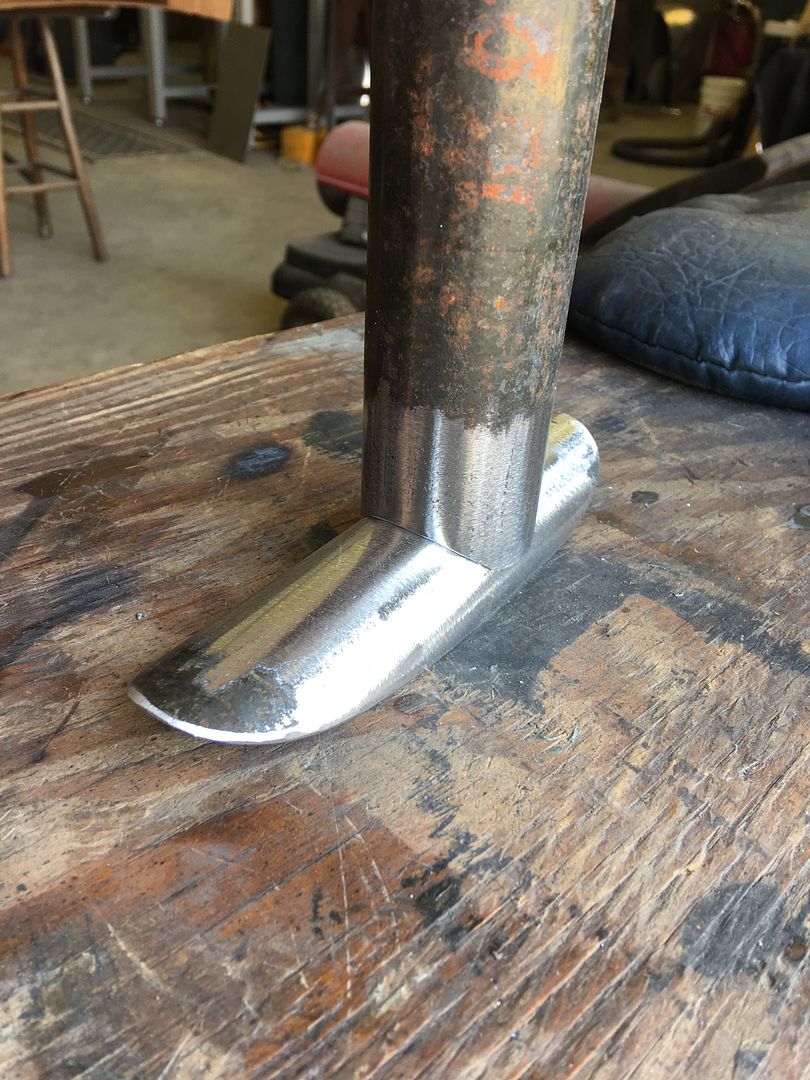 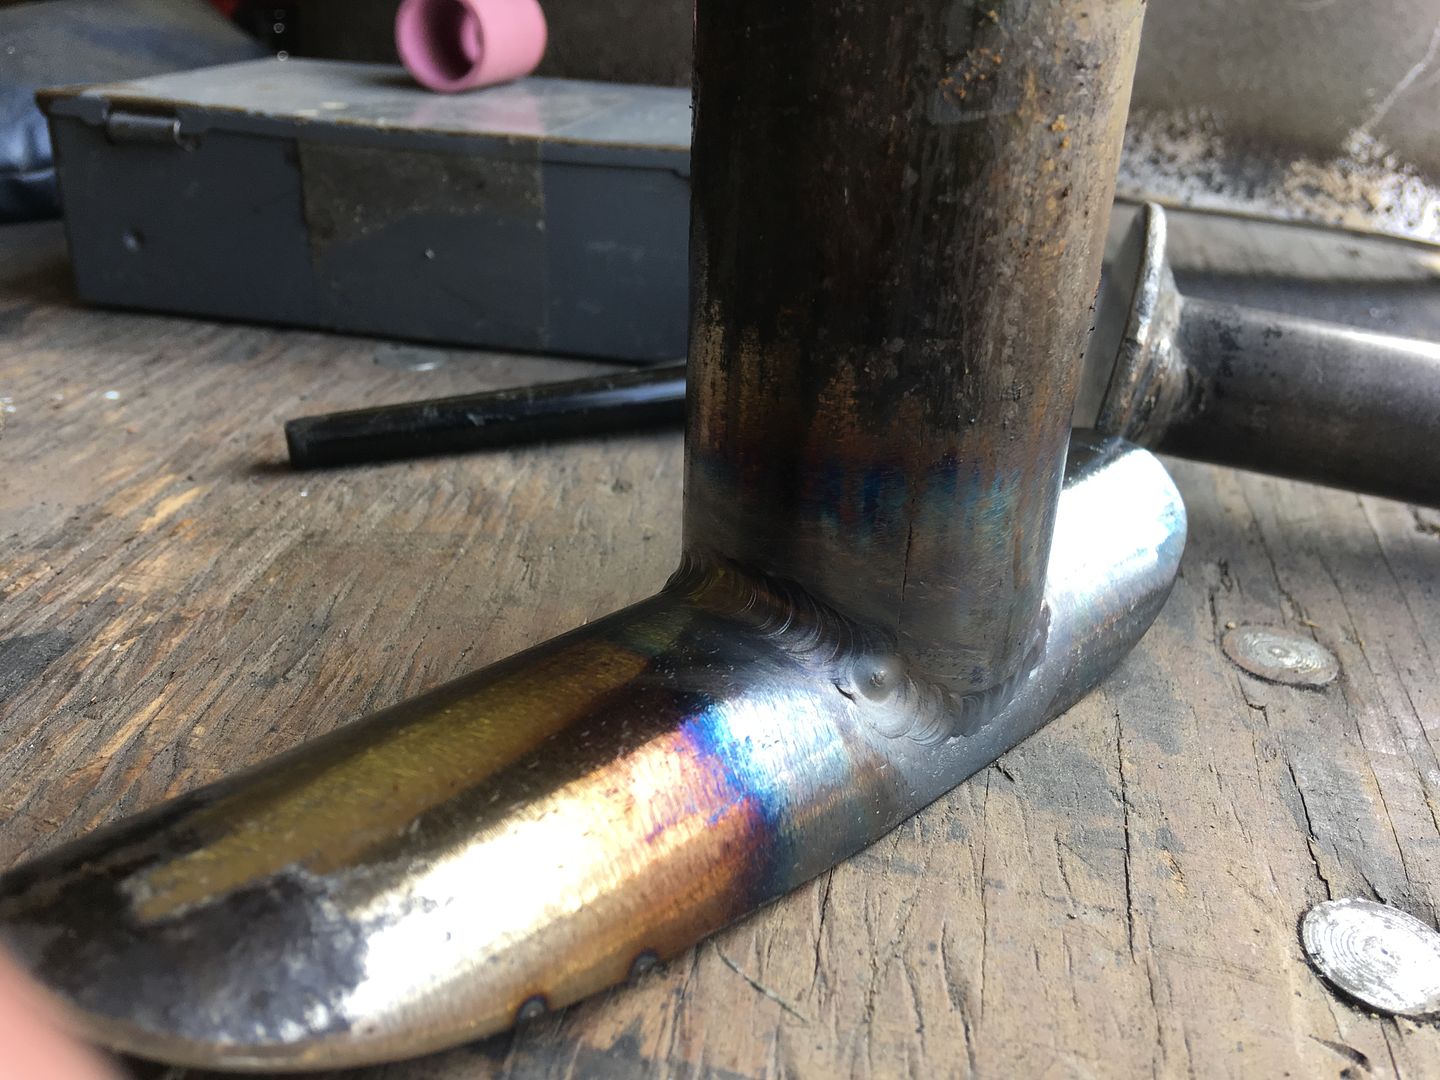 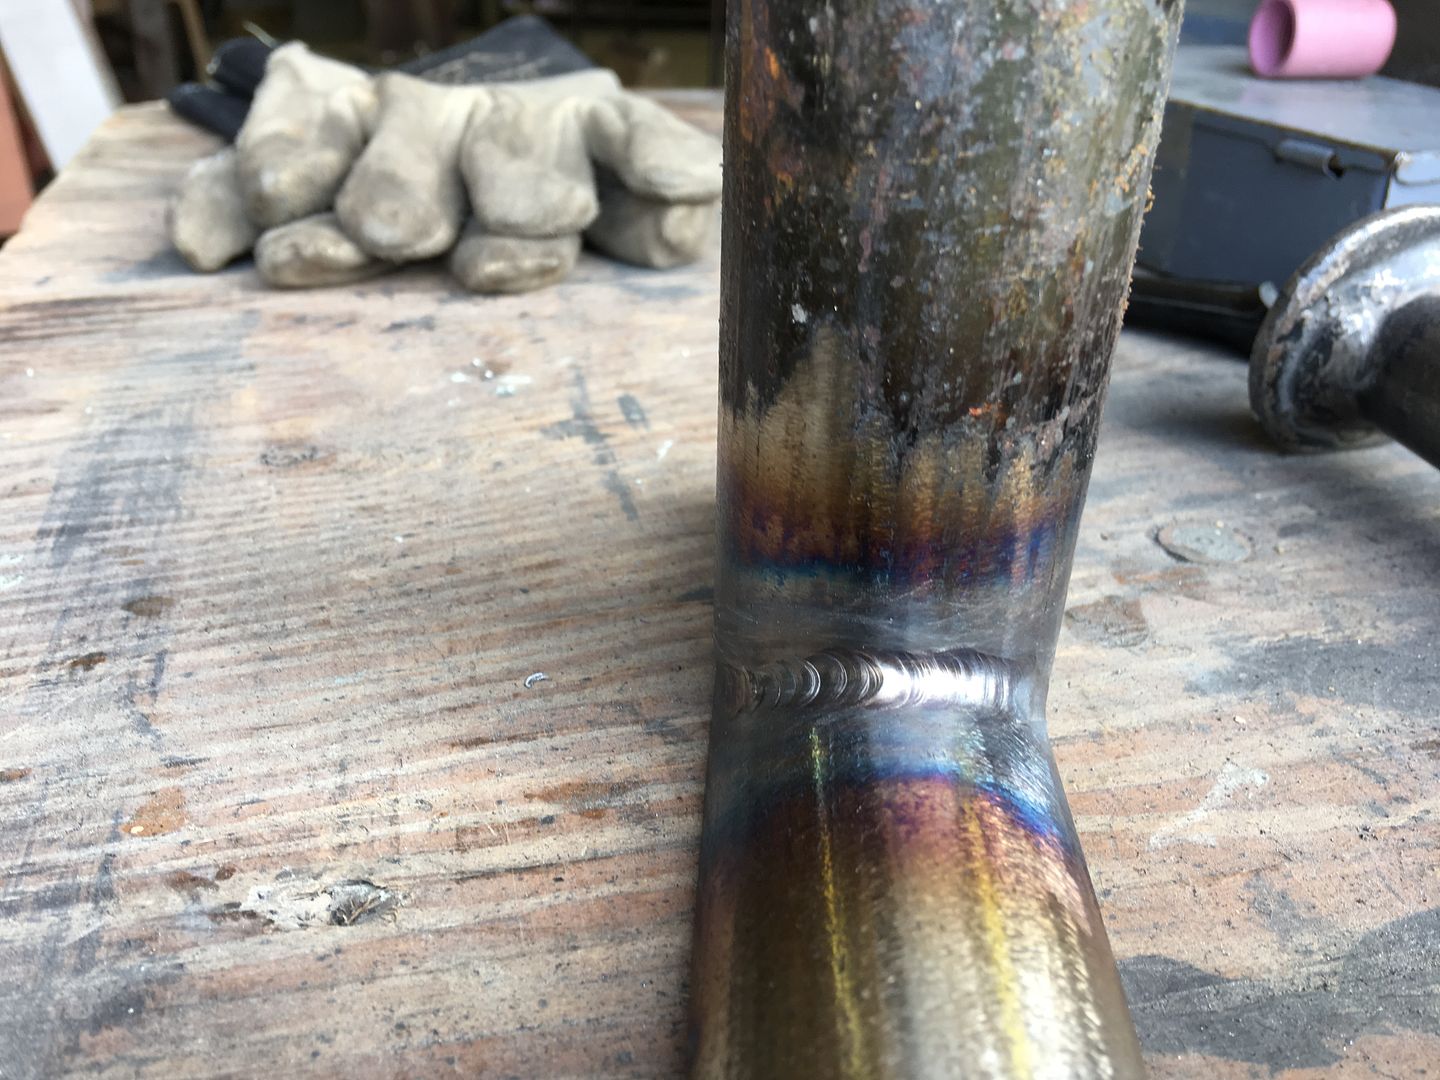 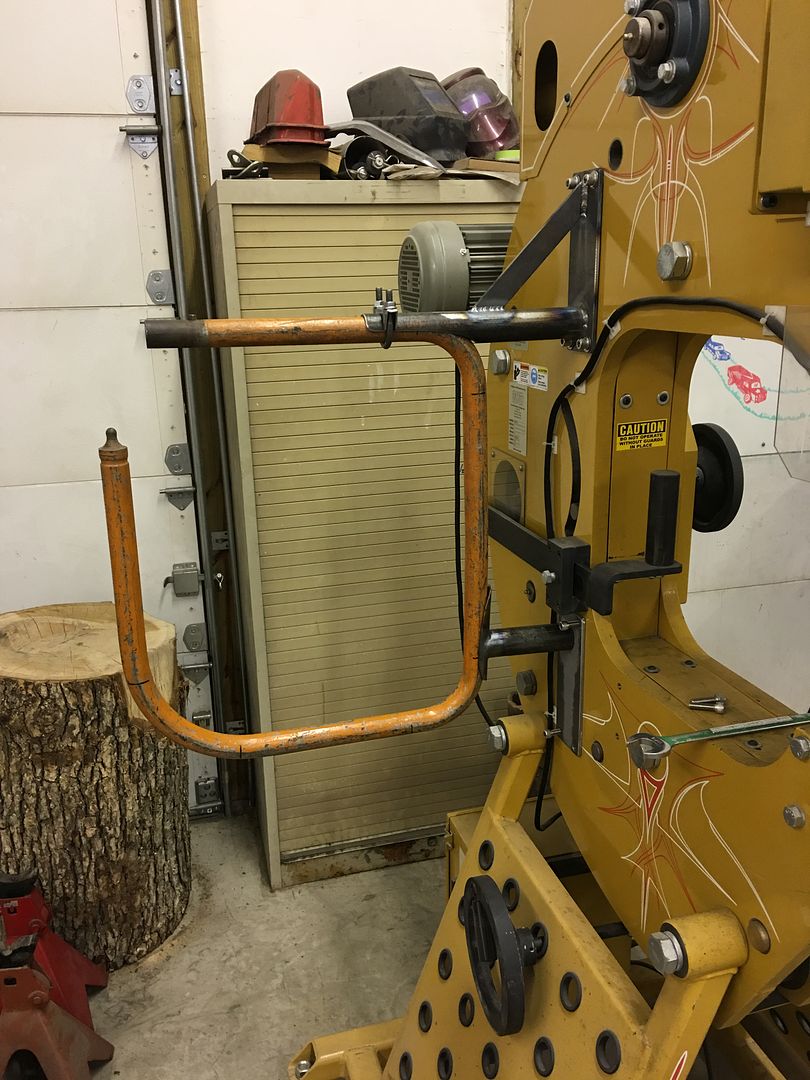  All we need now is paint and a pedal.. https://www.youtube.com/watch?v=_evAUjqr-5Q .
__________________
Robert |
|
|
|
|
03-02-2017, 07:48 AM
|
#812 |
|
Registered User
Join Date: Jan 2013
Location: Leonardtown, MD
Posts: 1,633
|
Re: 55 Wagon Progress
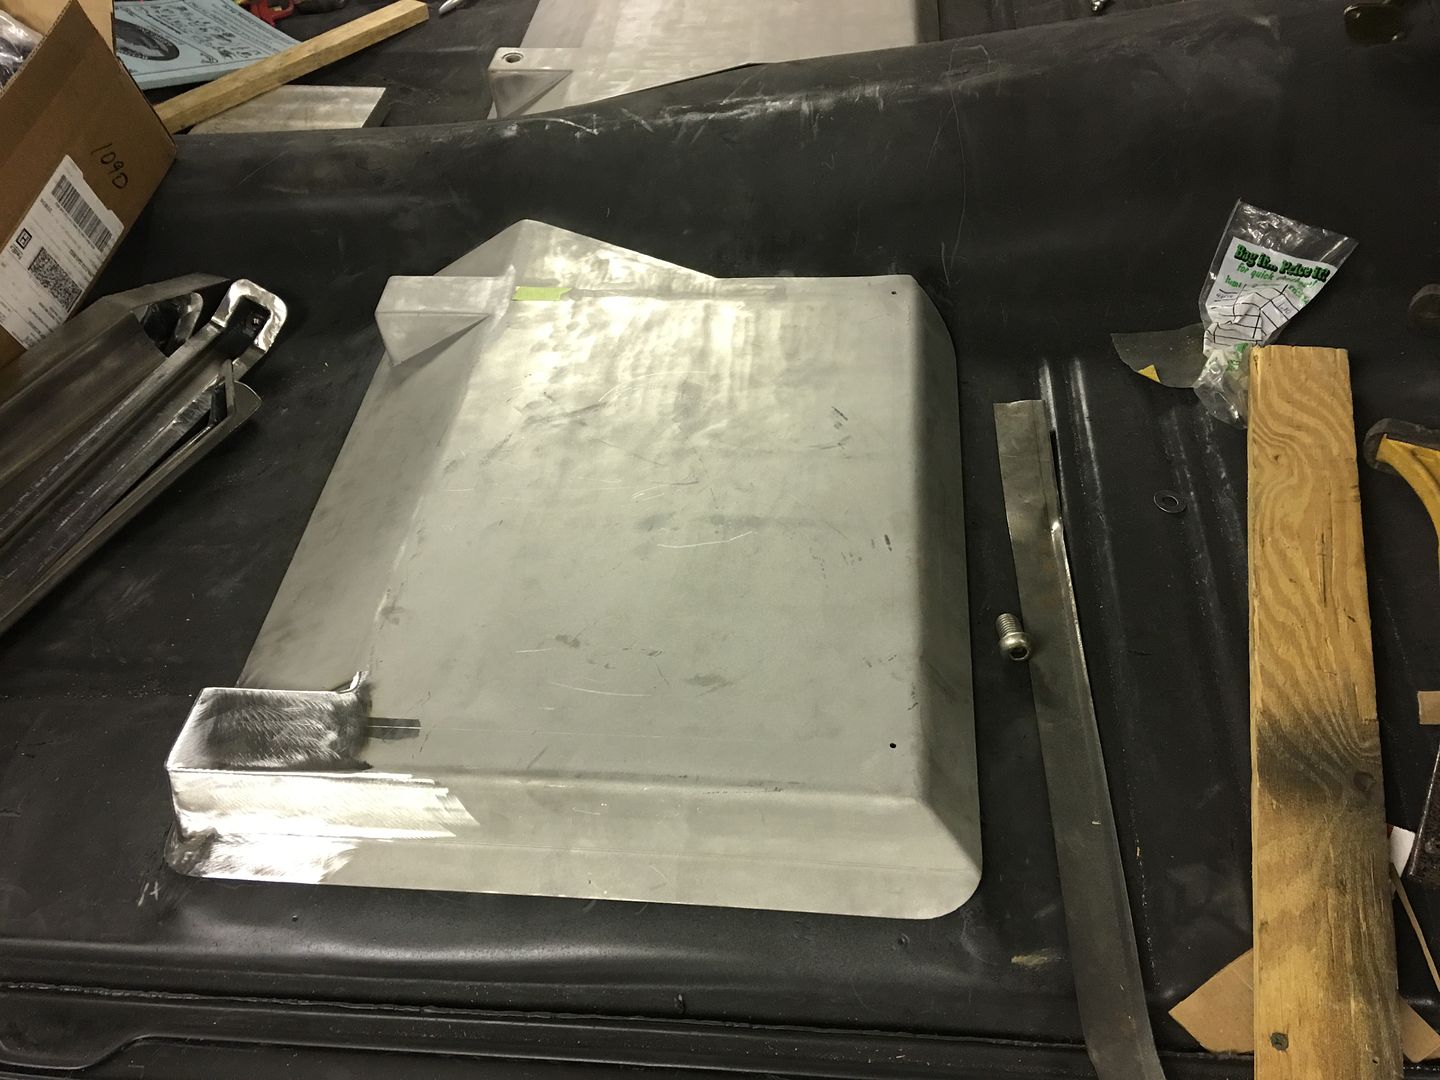
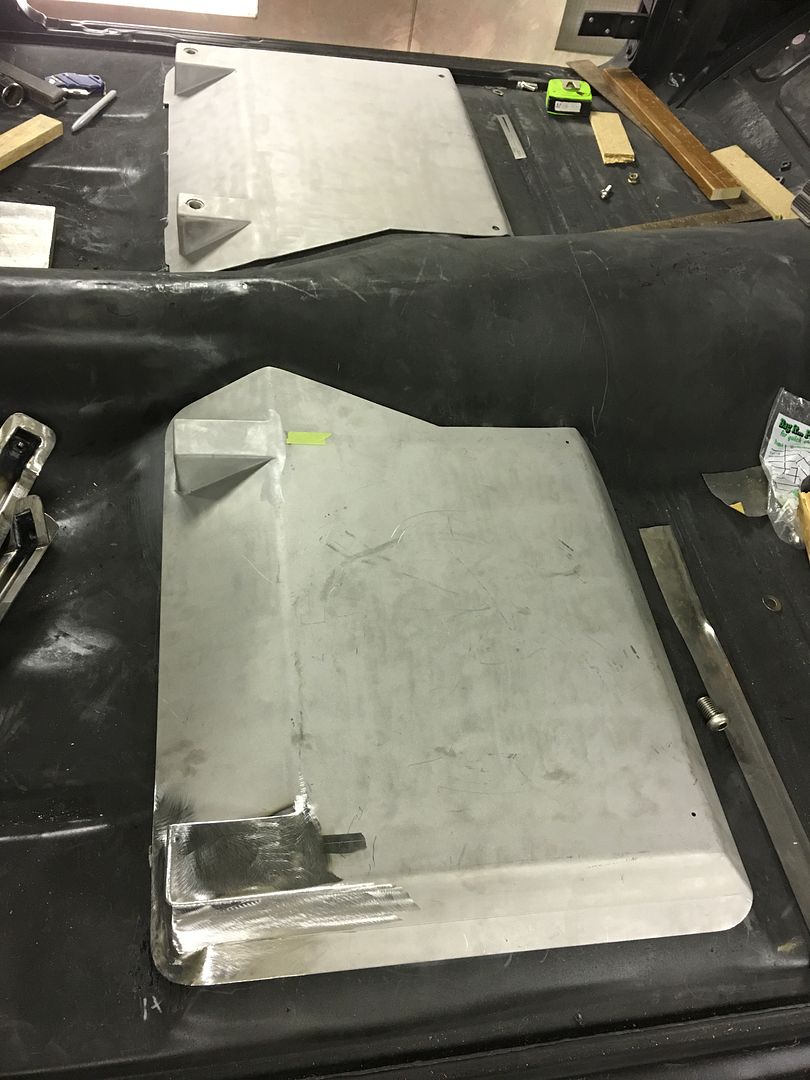
Getting down to the nitty gritty on the seat brackets, number two is all but done, need to weld in three hex nuts and touch up some media blasting. Hoping for good weather this weekend so we can spray some epoxy primer on them and get these installed...
    And the last two pipe clamps came in at Napa (installed with lock nuts), so we can now throw some air to the planishing hammer and try out the new fixture.. 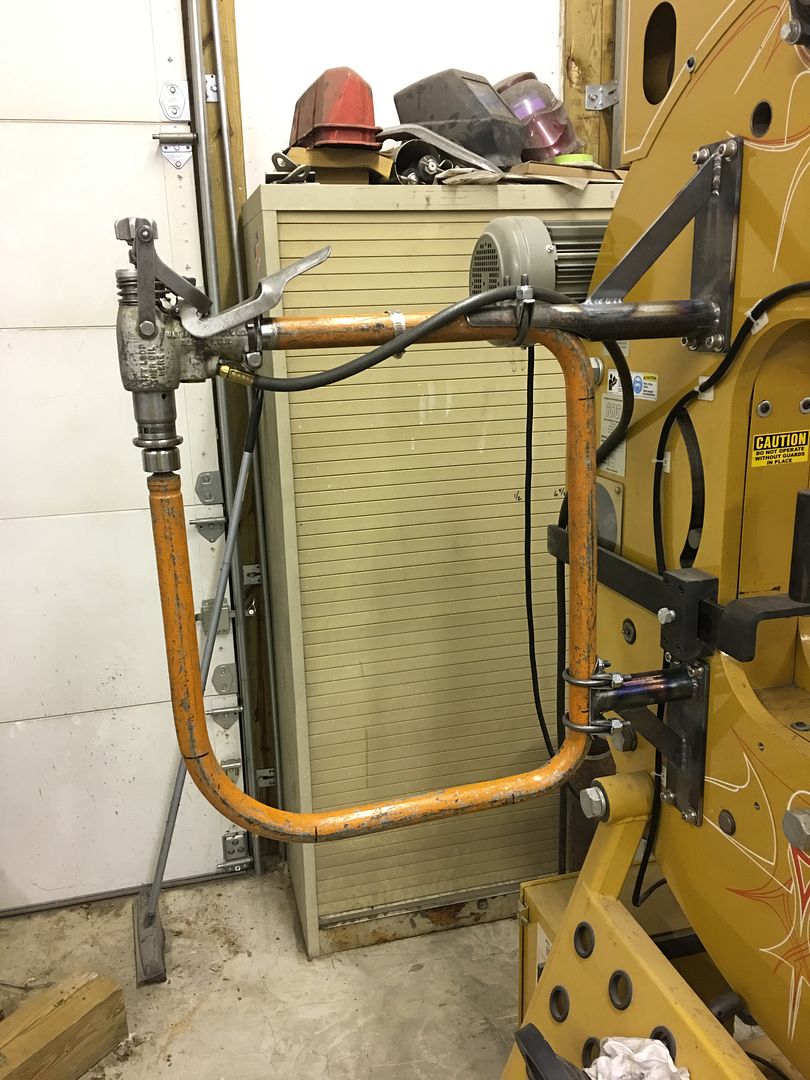
__________________
Robert |
|
|
|
|
03-06-2017, 08:24 AM
|
#813 |
|
Registered User
Join Date: Jan 2013
Location: Leonardtown, MD
Posts: 1,633
|
Re: 55 Wagon Progress
This weekend we got the three hex nuts welded underneath seat bracket number two, fourth hole is a bolt through......
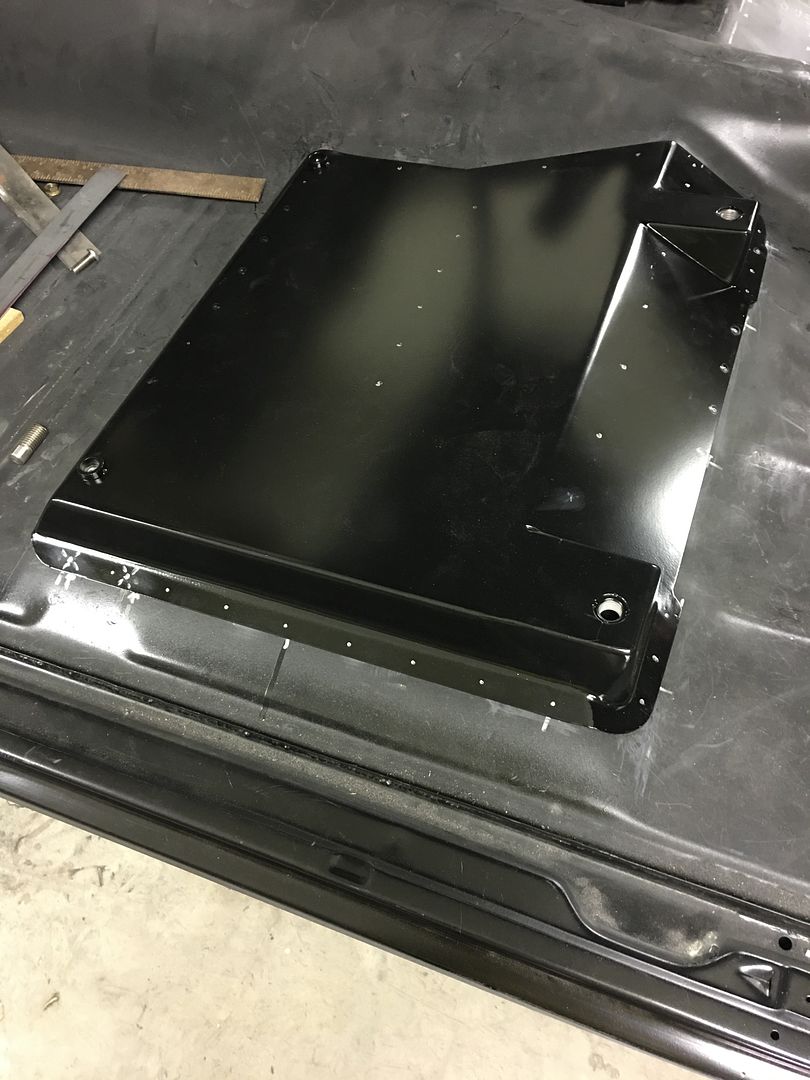
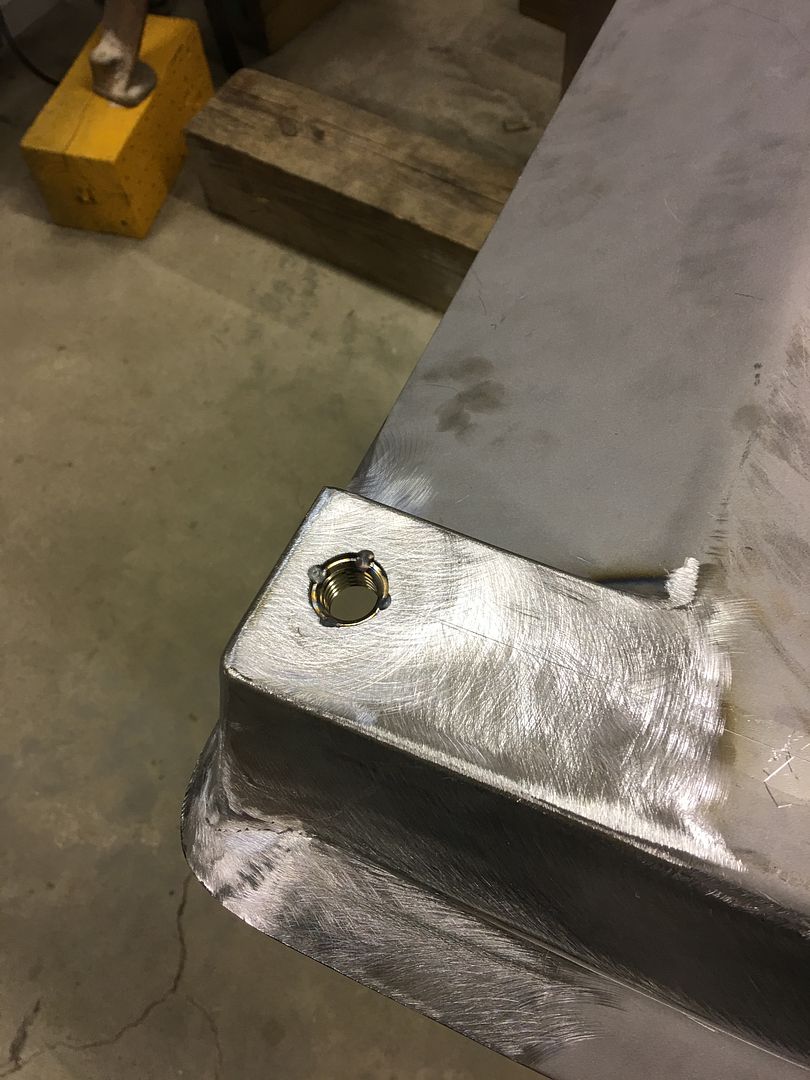 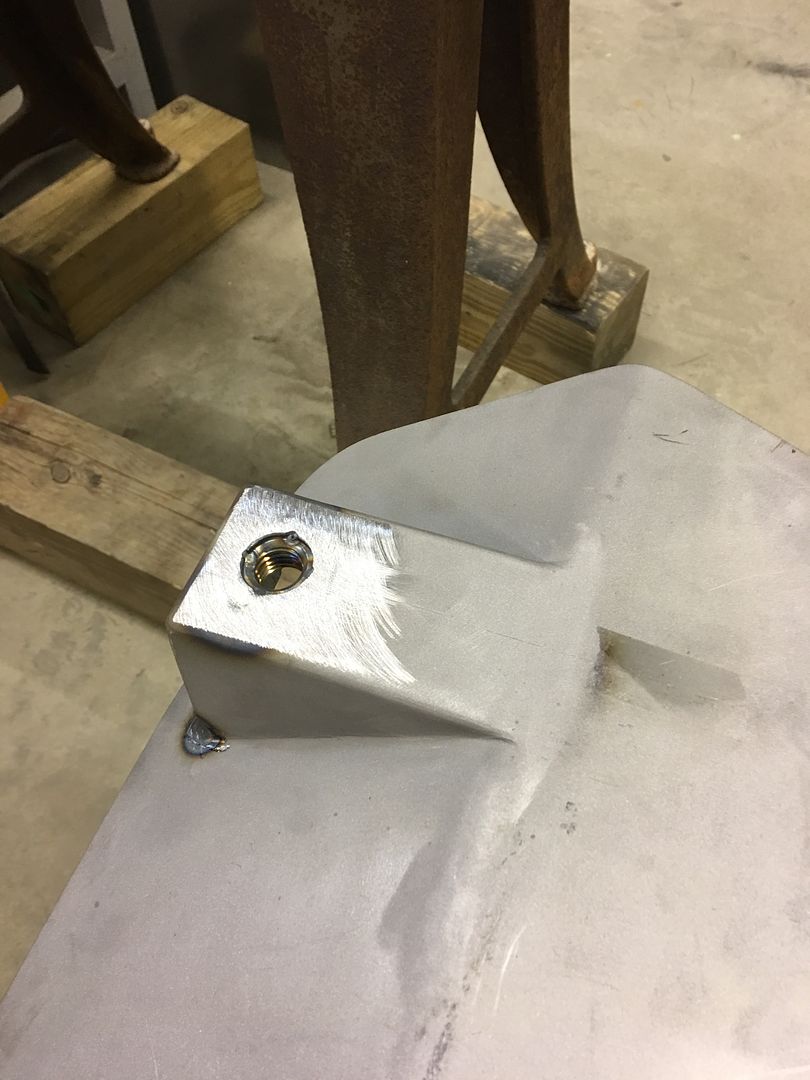 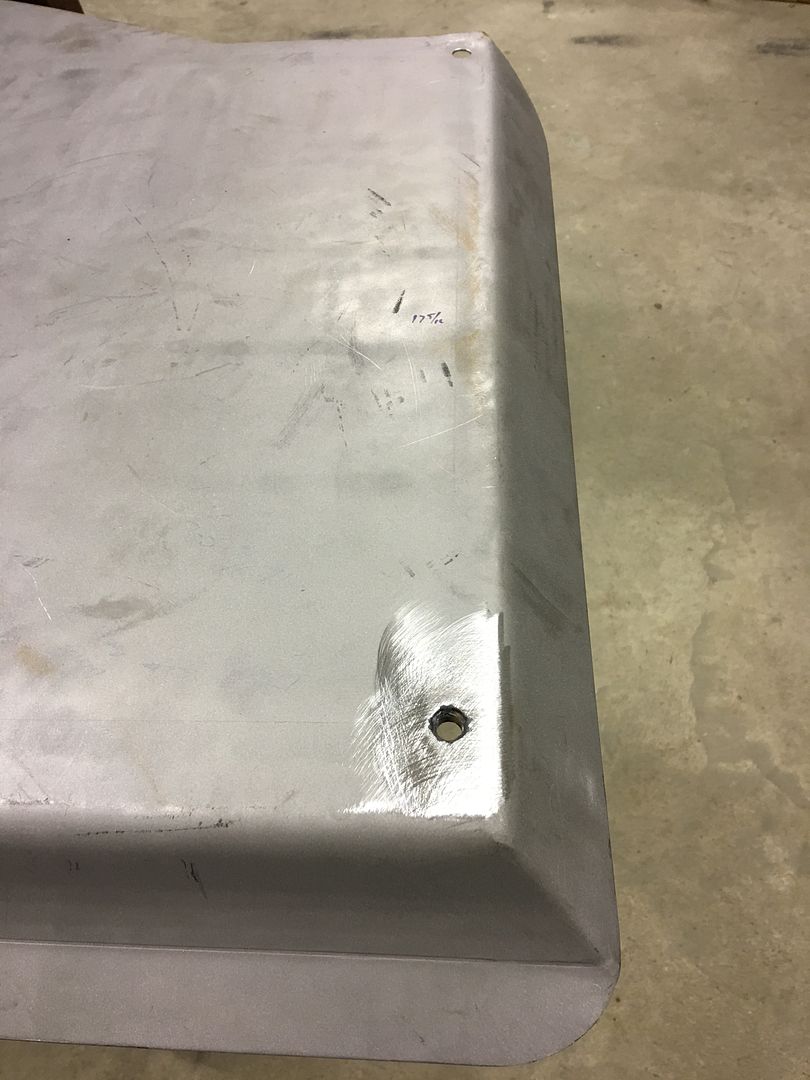 1/4" tall spacers fabricated to make the seat tracks level, then tacked in place on the front holes.. 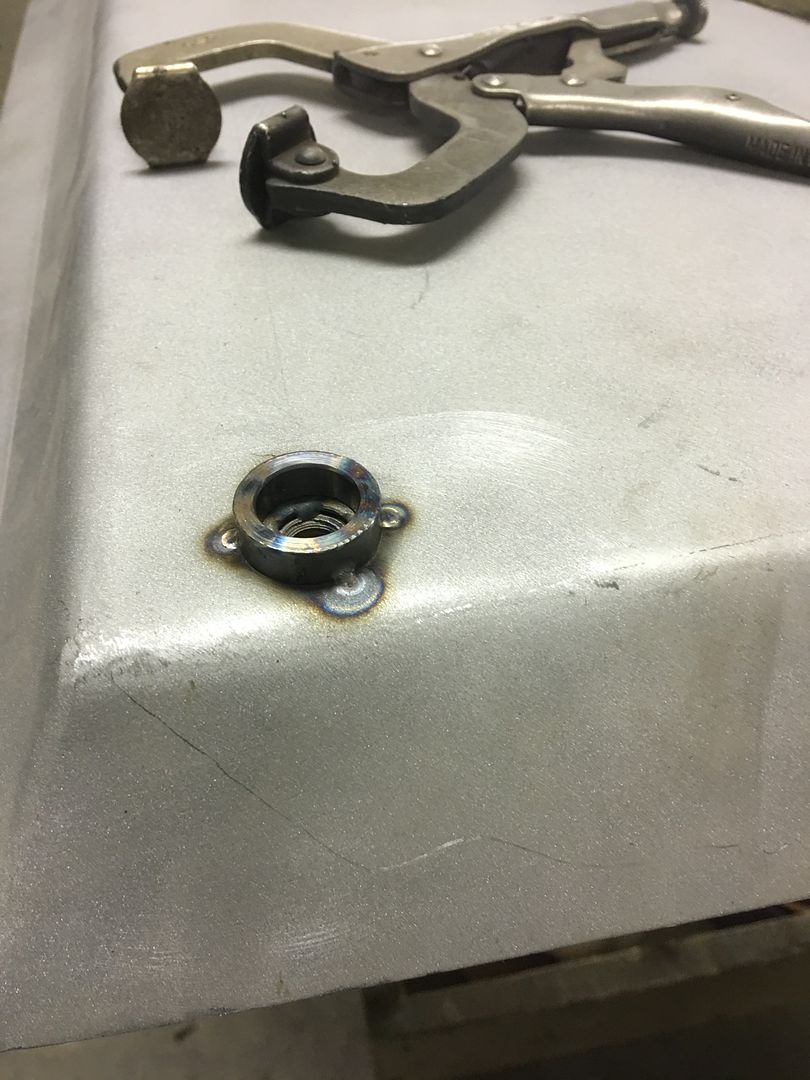  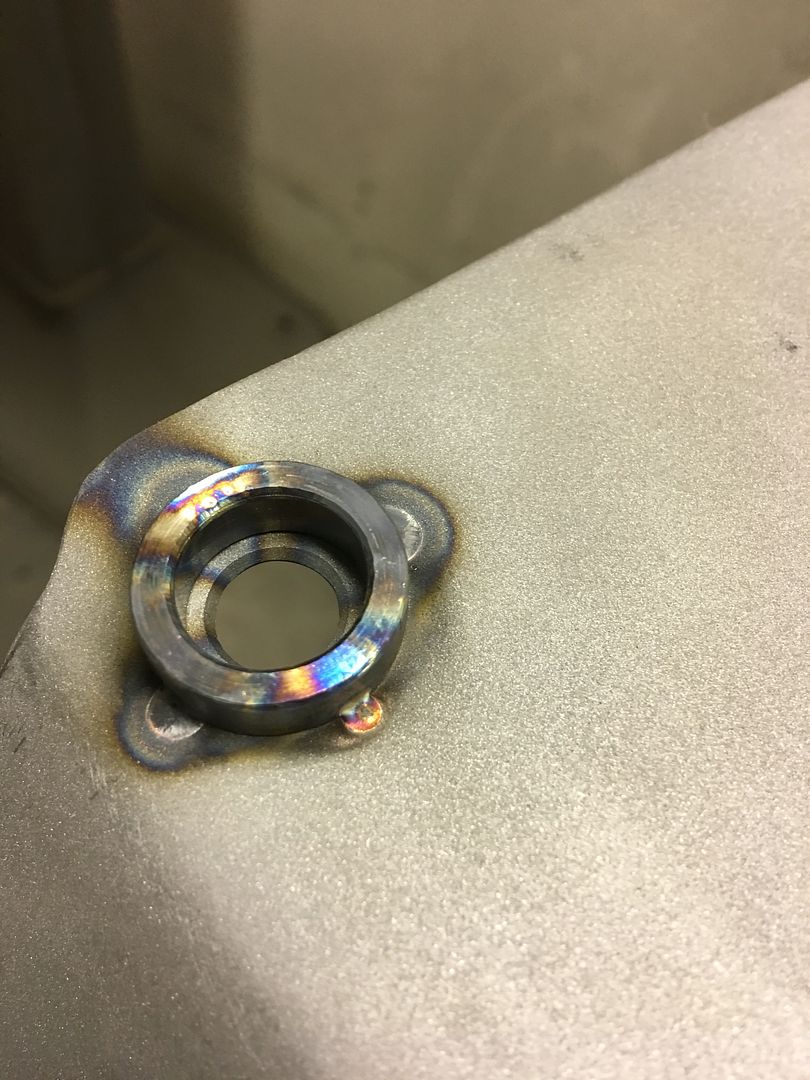 Prepped and hung up for epoxy primer... 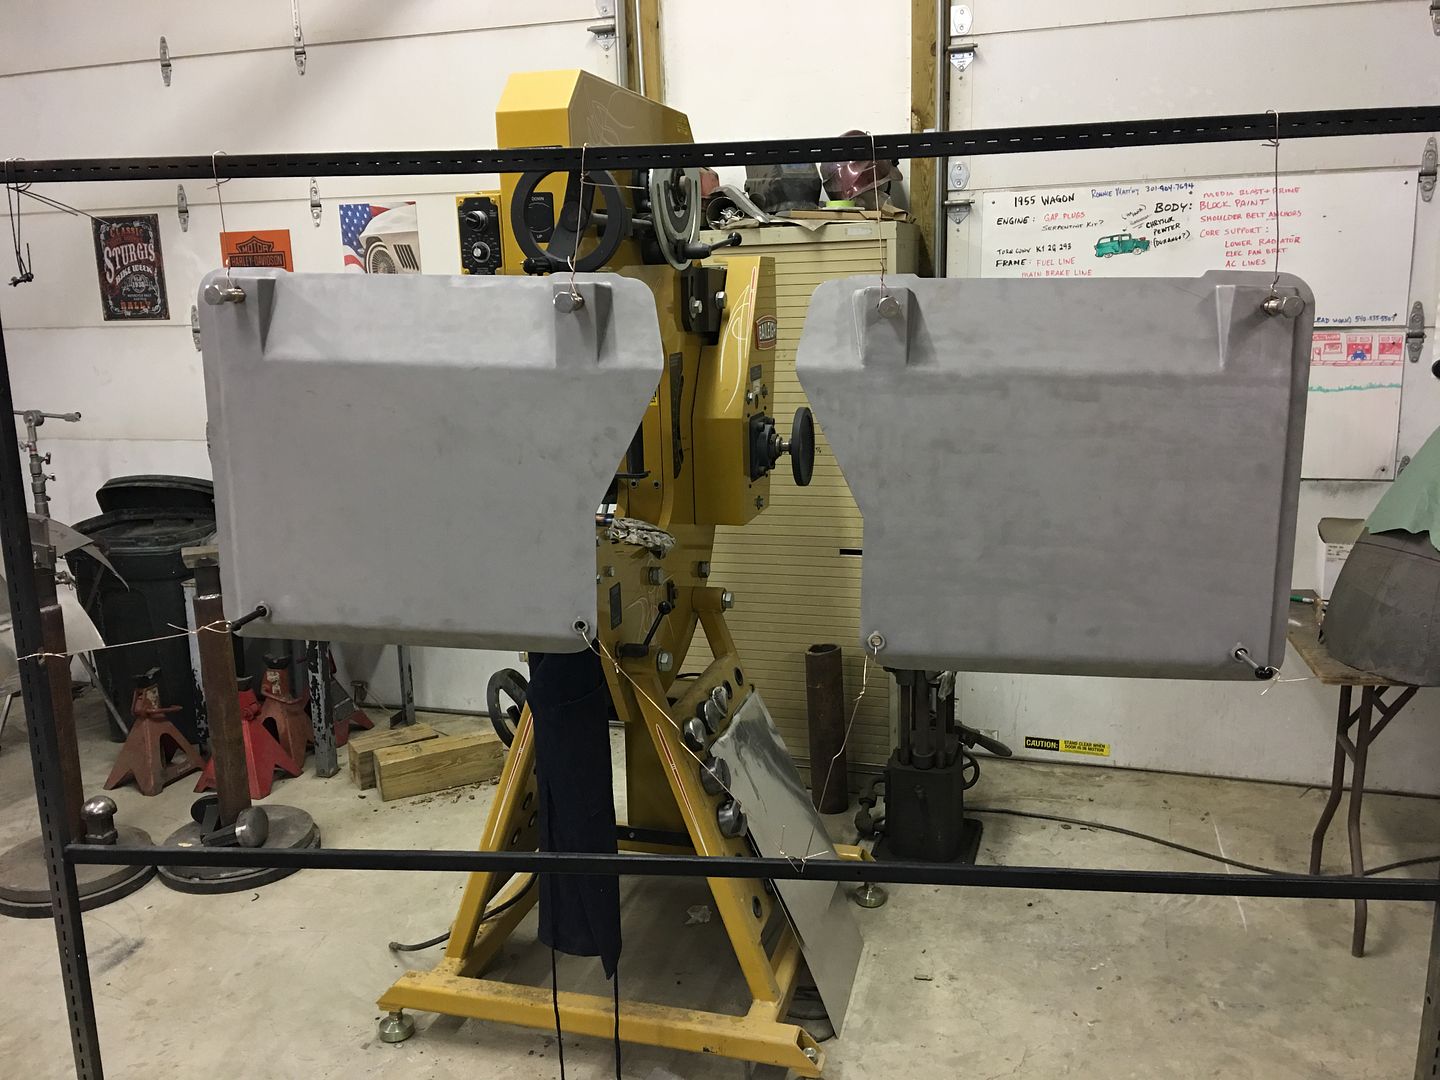 OEM seat bracket holes in the floor pans open to the inside of floor crossmembers. Rather than weld them closed and warp the floor pan, we opted for these fancy hole plugs. 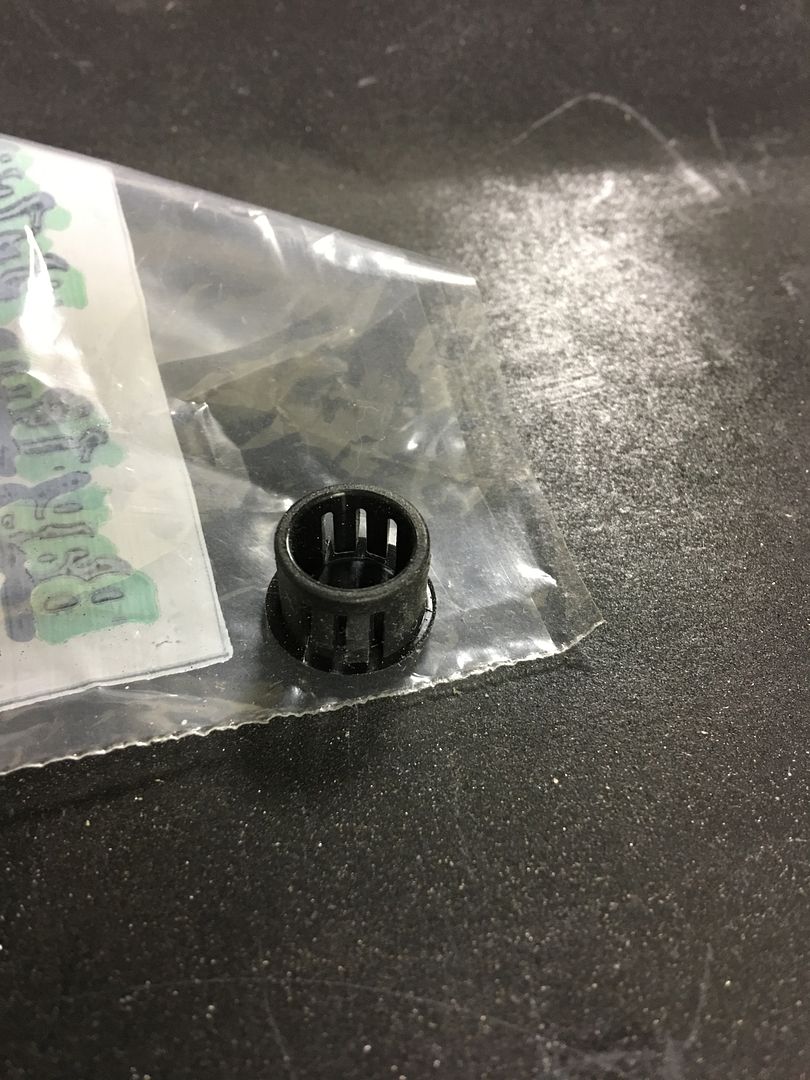 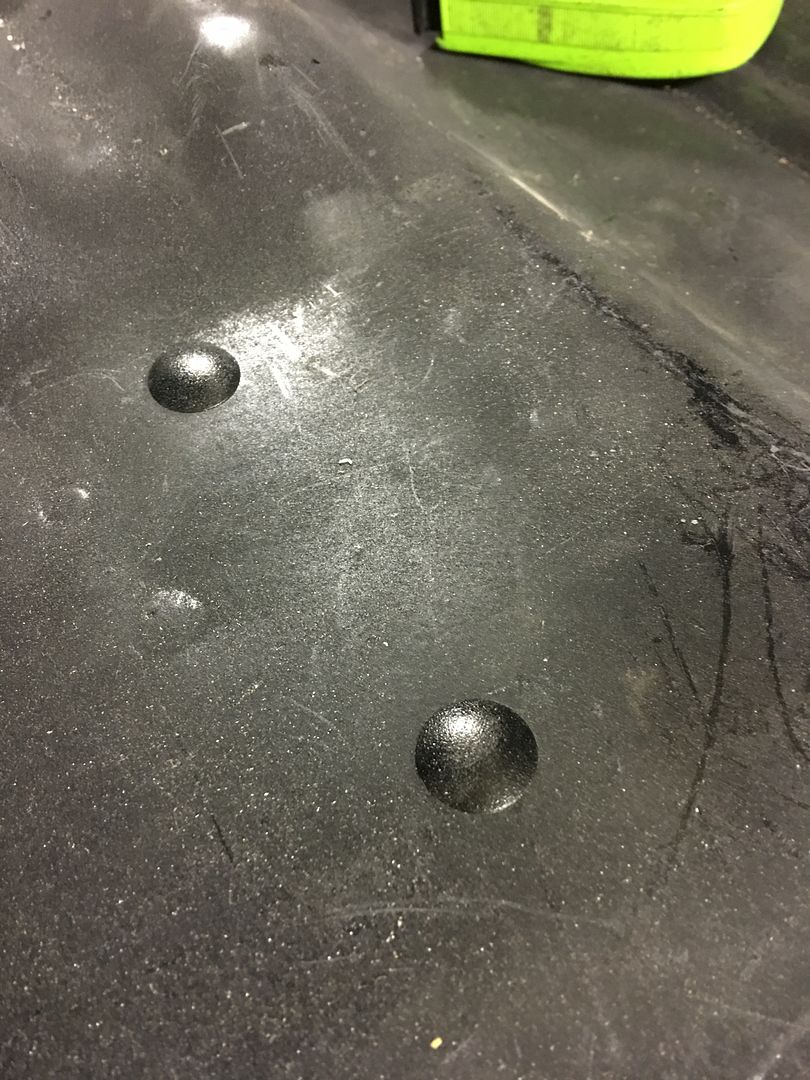 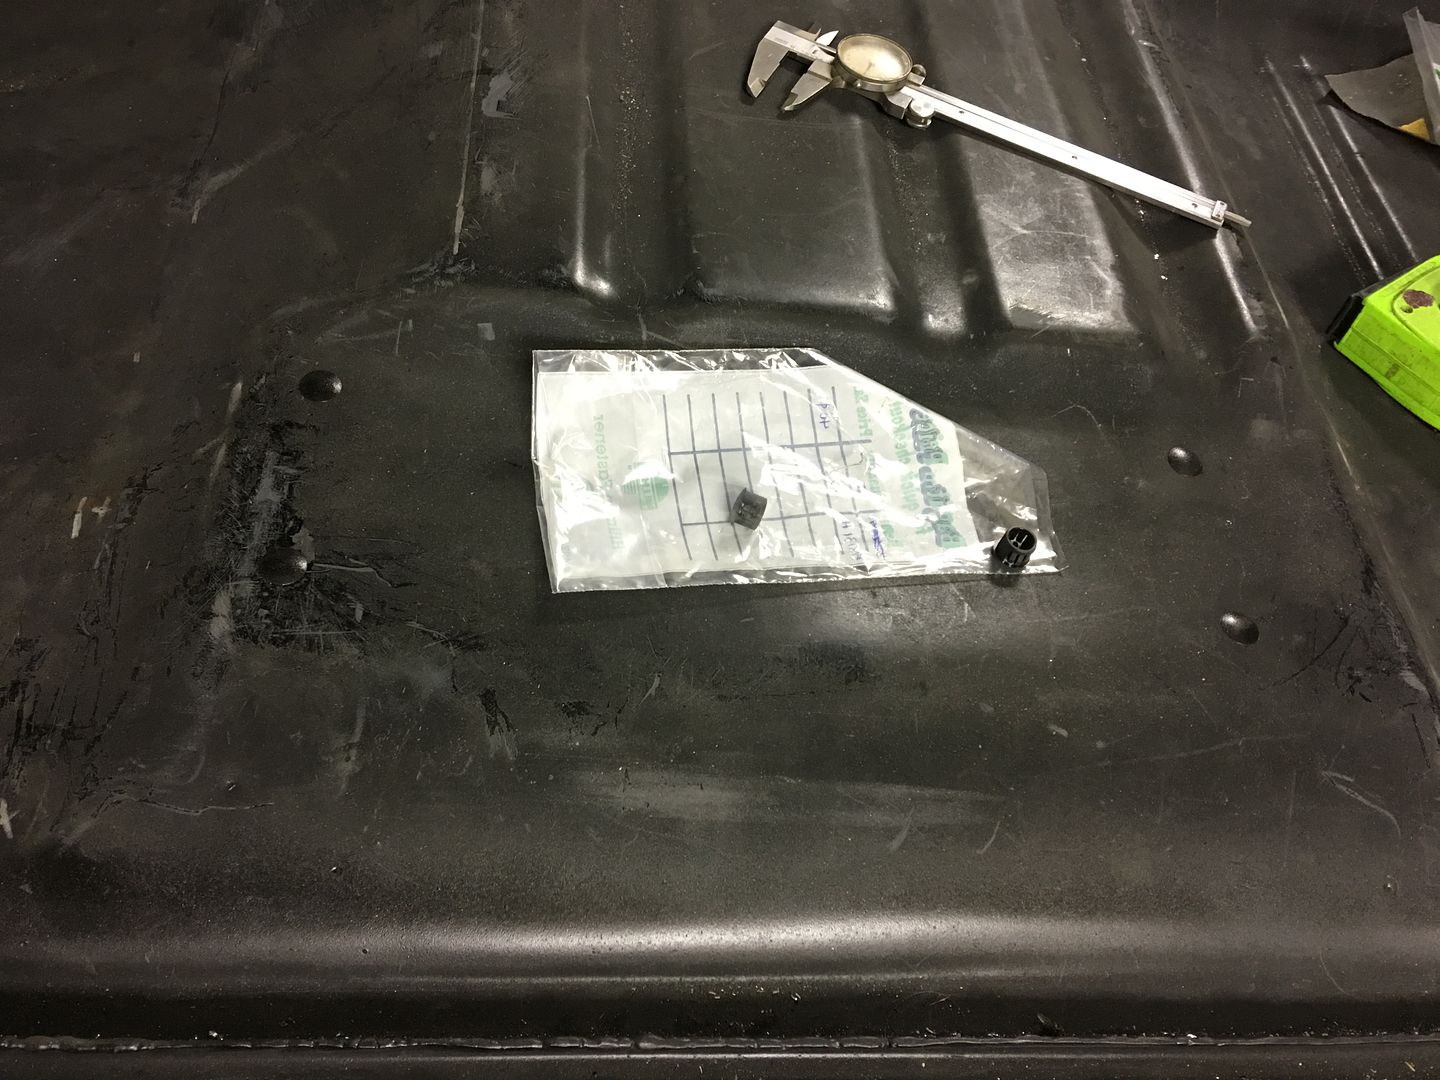 SPI epoxy primer applied... 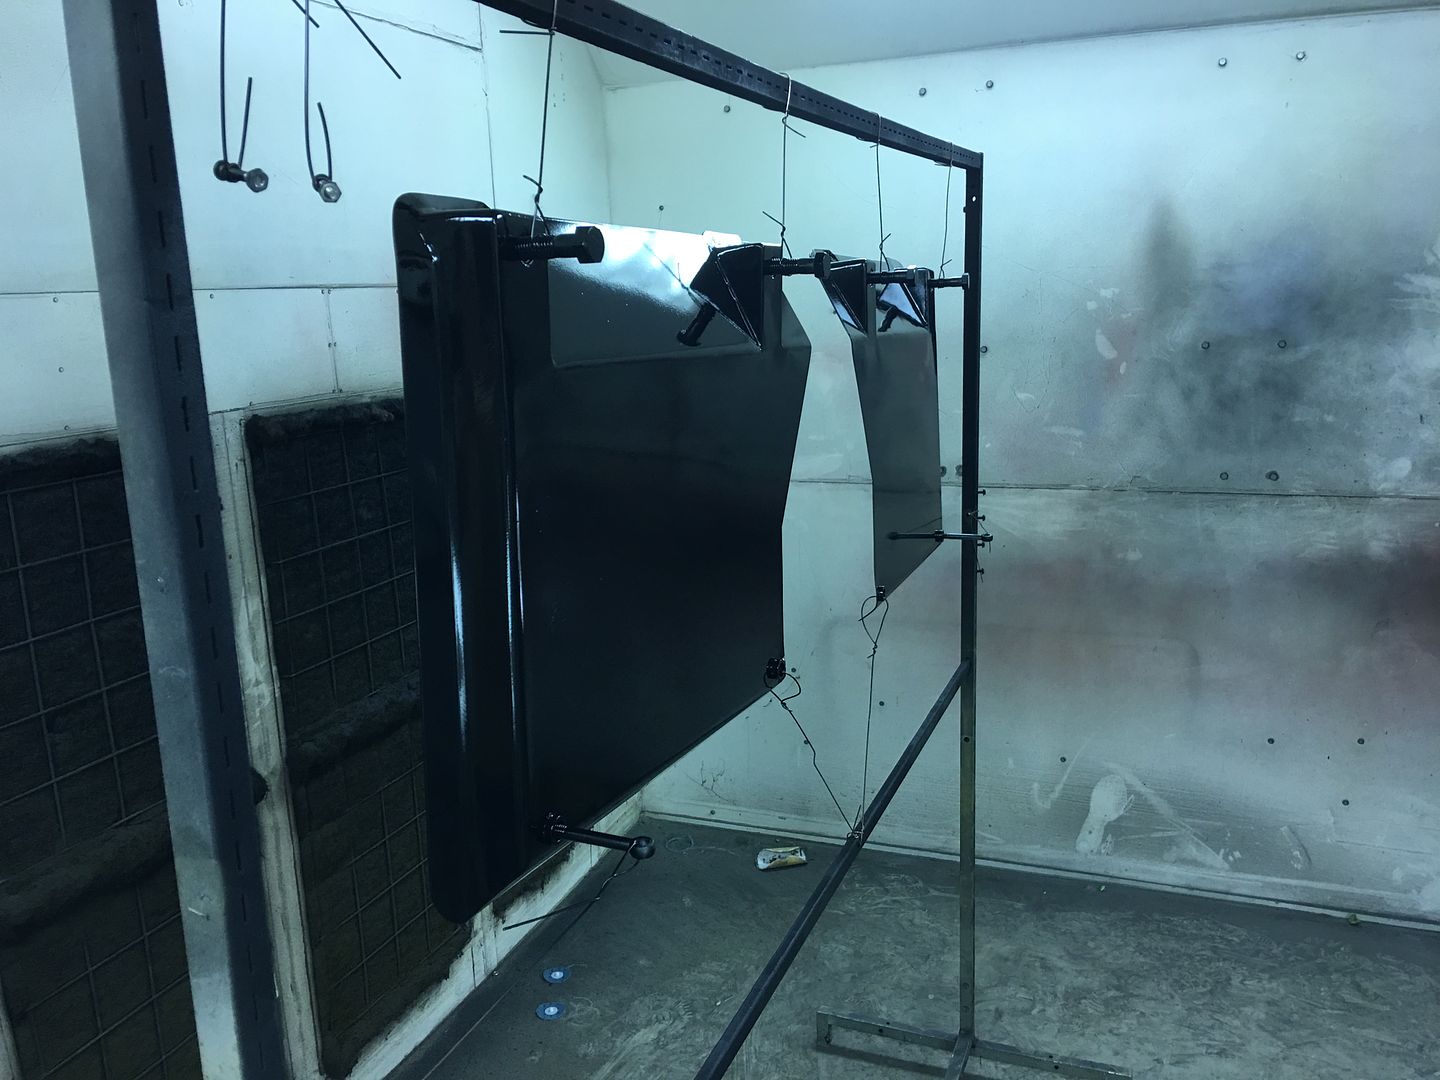 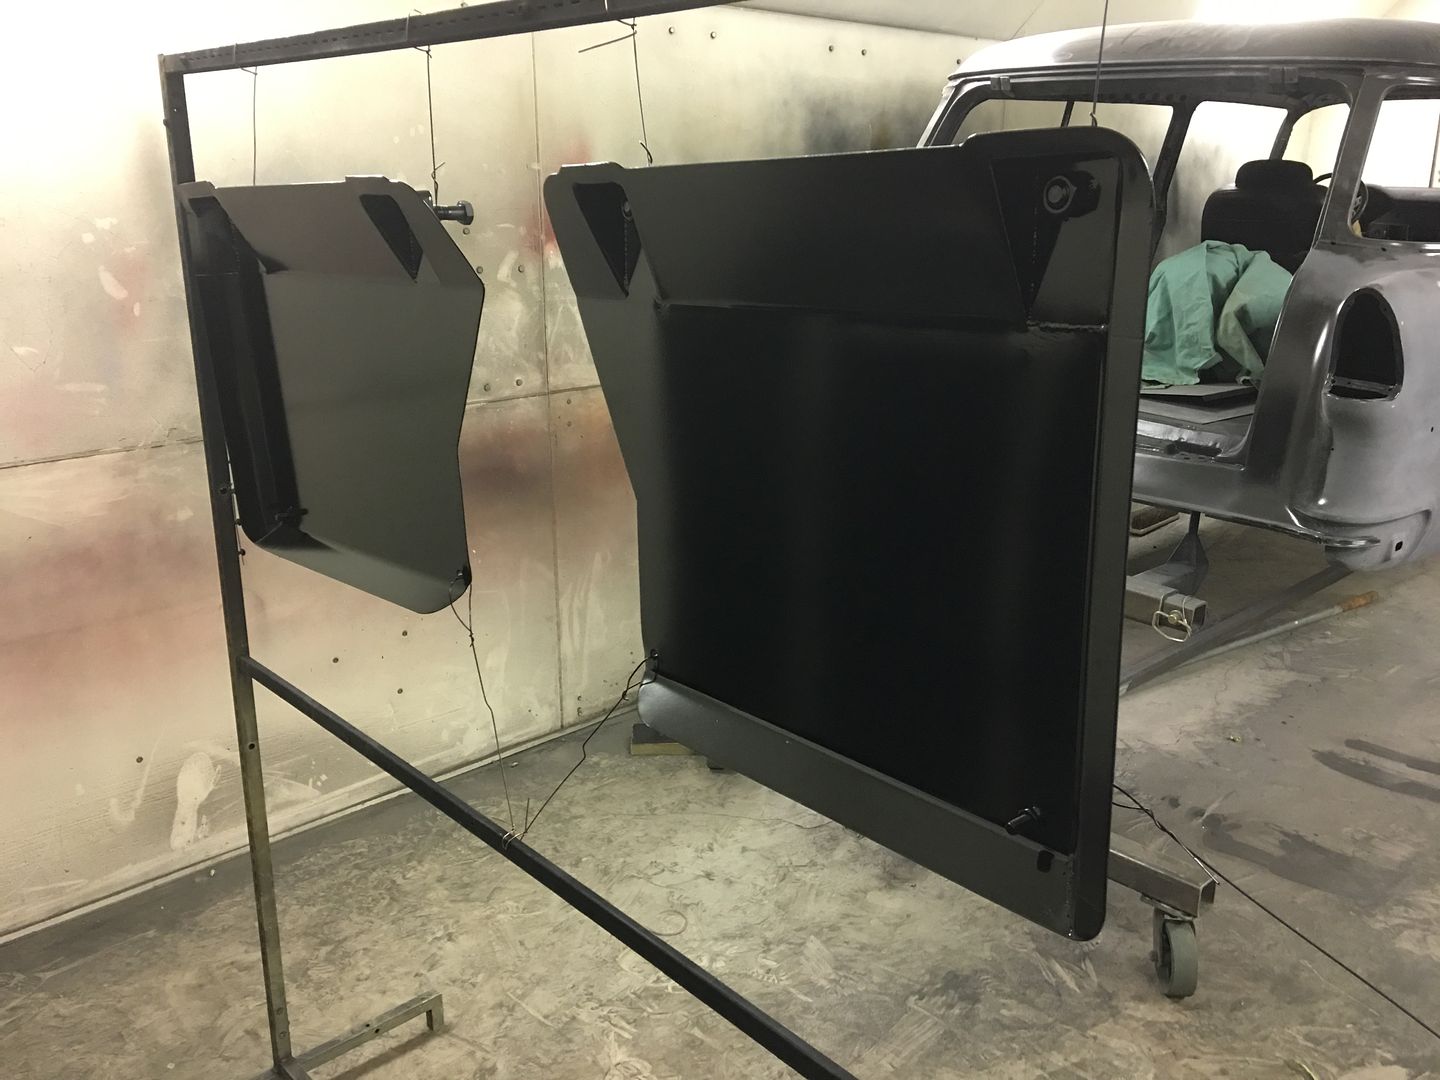 When it's 39* outside and the paint booth is sucking the heat out of the building, this is how you keep the temps up to a balmy 75* in the paint booth.. 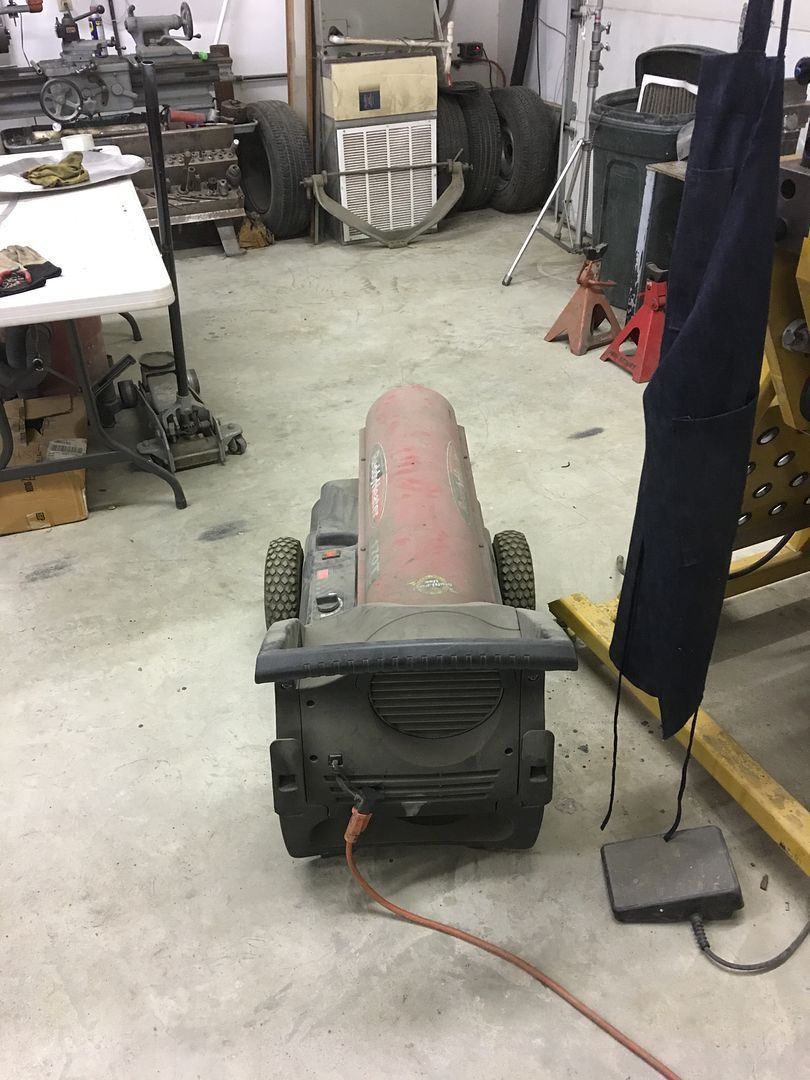 We'll let the seat brackets cure for a few days and then get started on plug welding them in place..
__________________
Robert |
|
|
|
|
03-07-2017, 11:44 PM
|
#814 |
|
Registered User
Join Date: Jan 2013
Location: Leonardtown, MD
Posts: 1,633
|
Re: 55 Wagon Progress
Got started on drilling plug weld holes this evening, here laying out the hole patterns to align with the floor crossmember where possible...
 Once drilled to match our piloted burnishing brush, the paint surrounding the plug weld gets cleaned to prevent weld contamination.. https://www.youtube.com/watch?v=ELG55mmG2I0 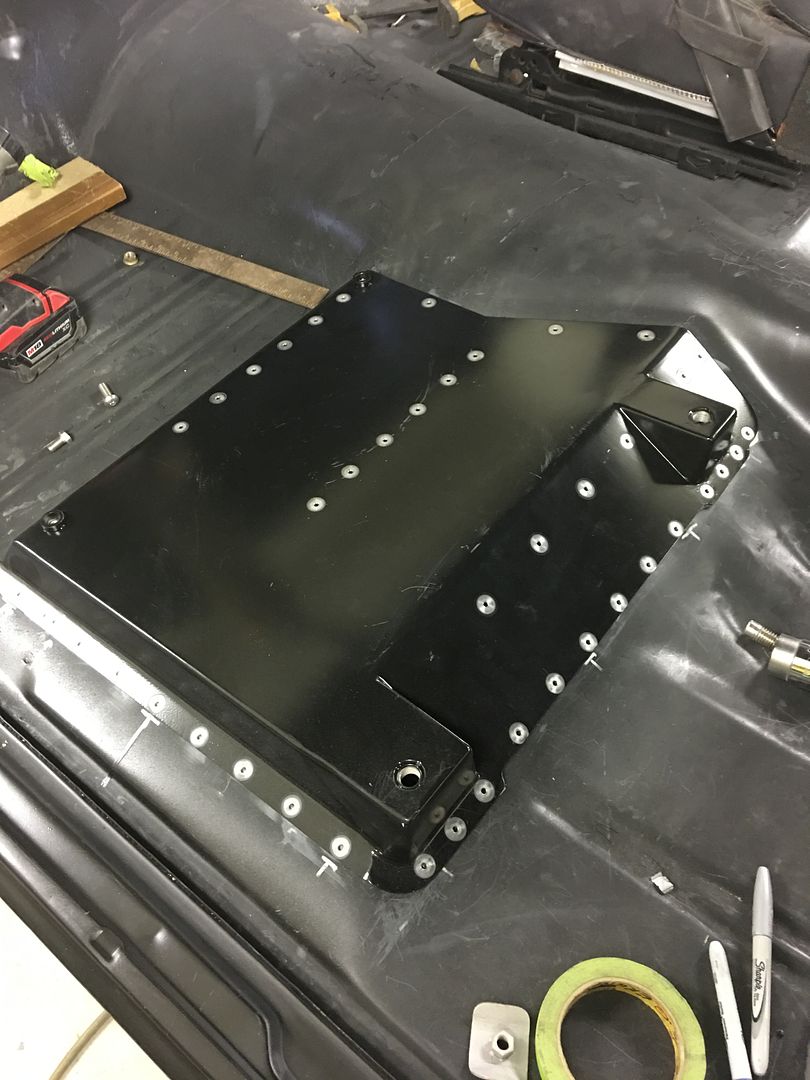
__________________
Robert |
|
|
|
|
03-11-2017, 10:47 PM
|
#815 |
|
Registered User
Join Date: Jan 2013
Location: Leonardtown, MD
Posts: 1,633
|
Re: 55 Wagon Progress
Getting some seat brackets welded in...
Plug welding... https://www.youtube.com/watch?v=VofyZCliZRg 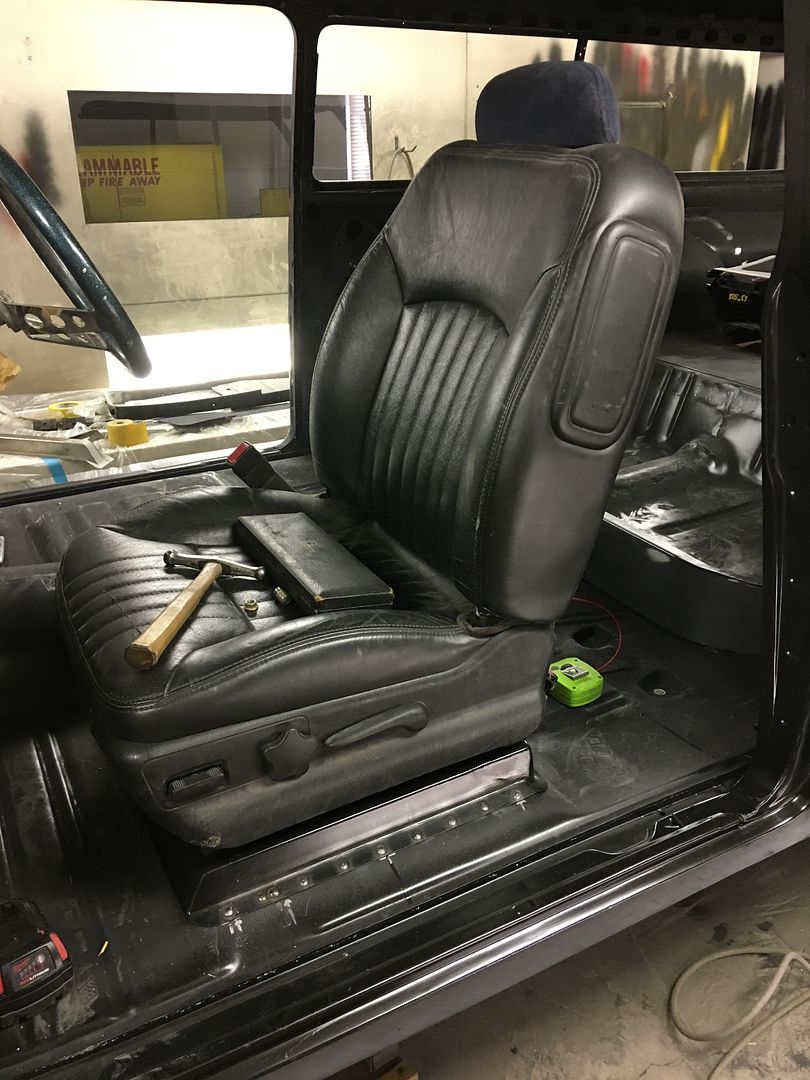 But before we get all the front seats in and make it harder to access the back, lets get the seat riser plug welded in for the back seat... 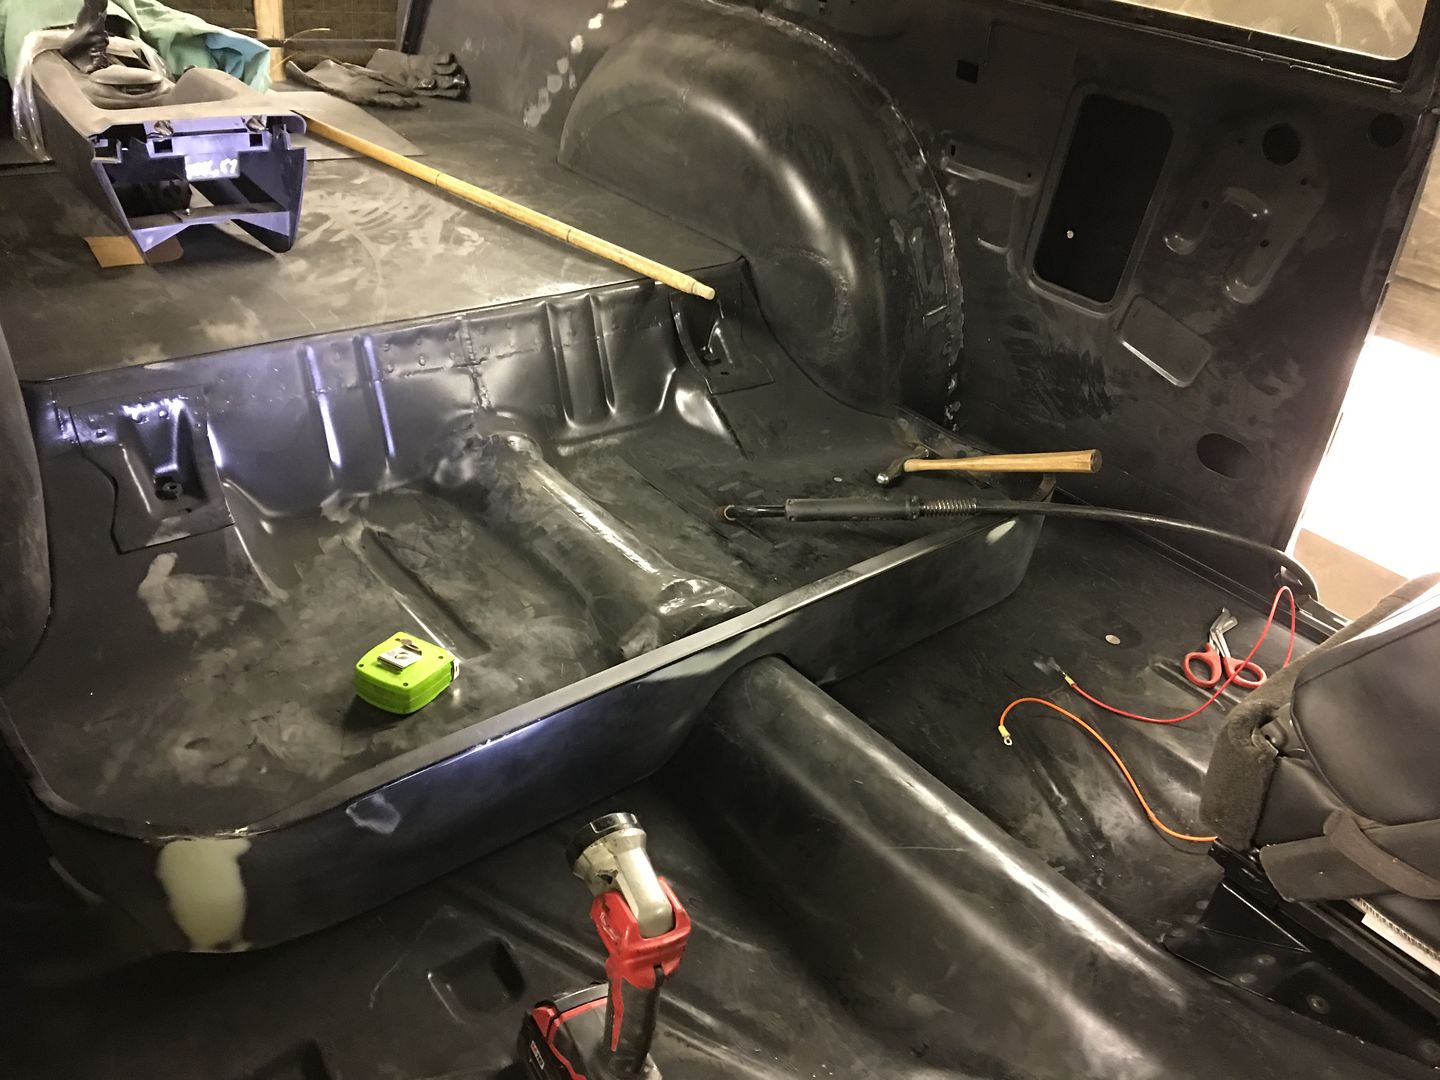 Next, our rear seat that came with the buckets was slightly oversize for our widened wheel wells. Some quick measurements showed we need to lose about 2" in width.. 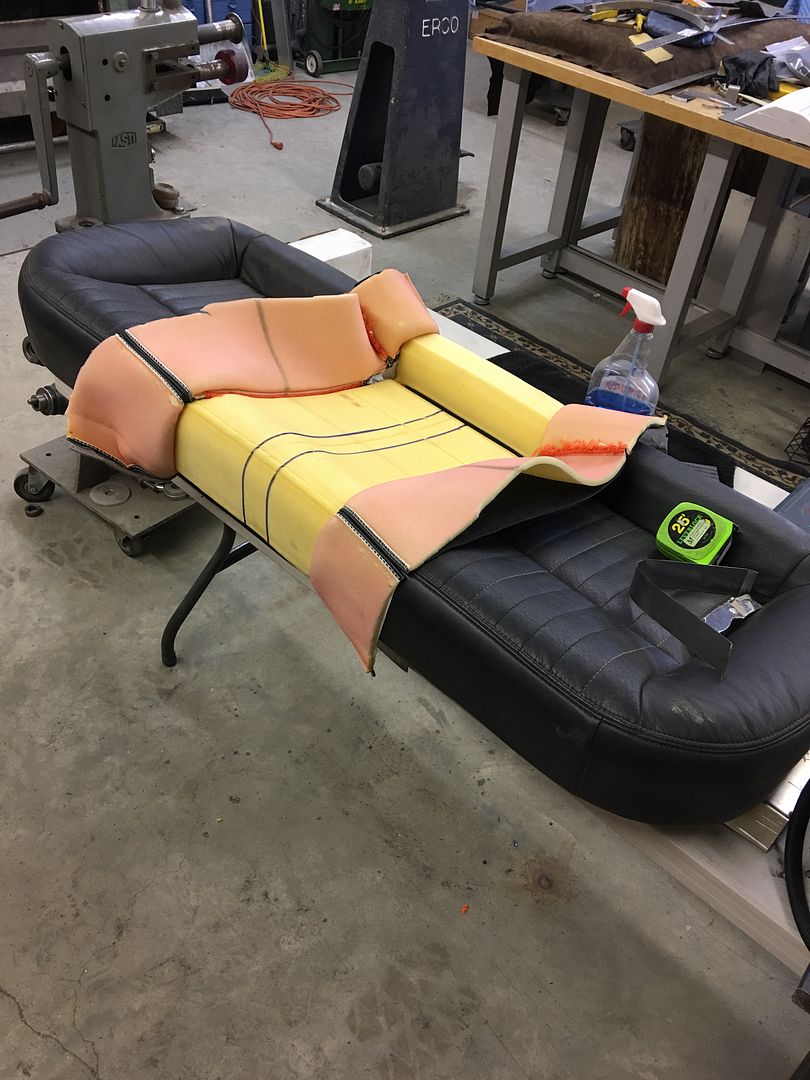 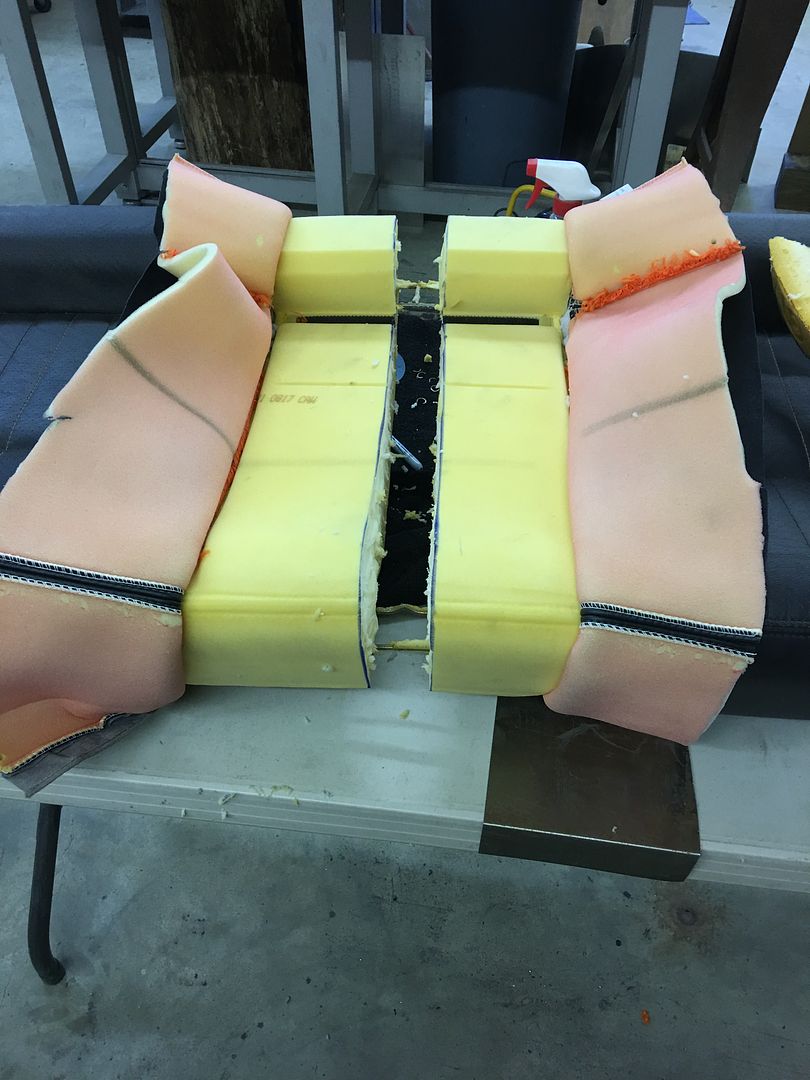 Then the rear corners needed relieving for the wheel tubs..... 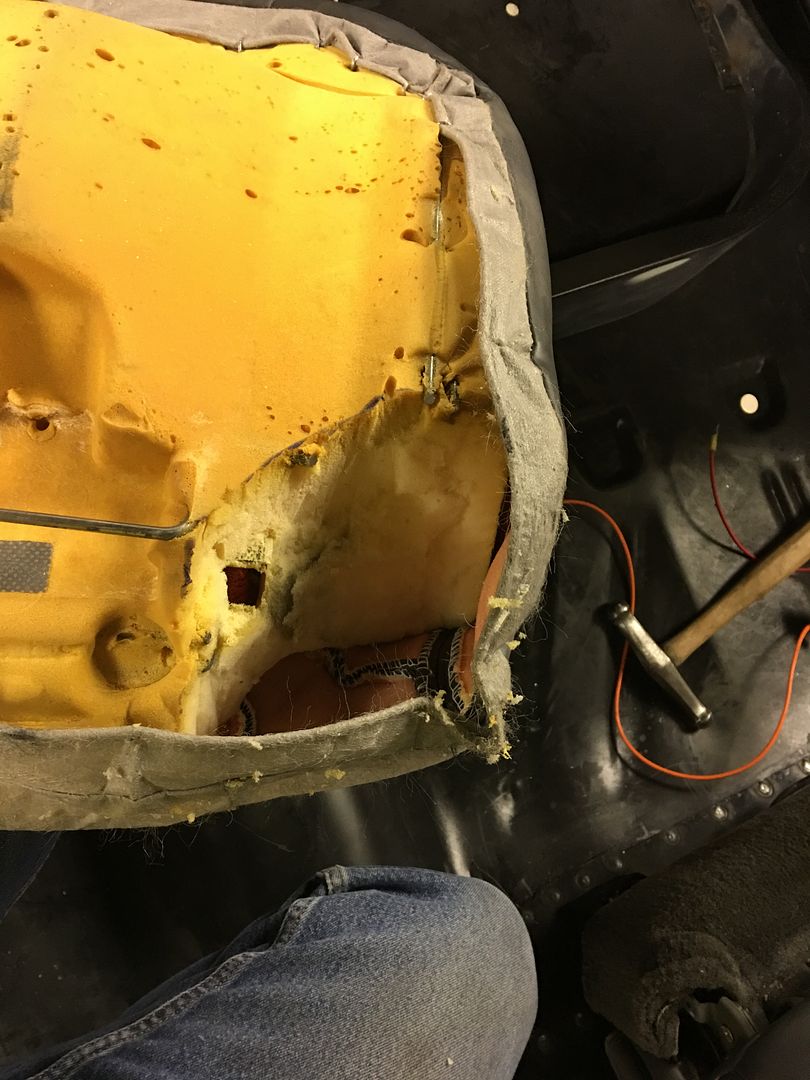 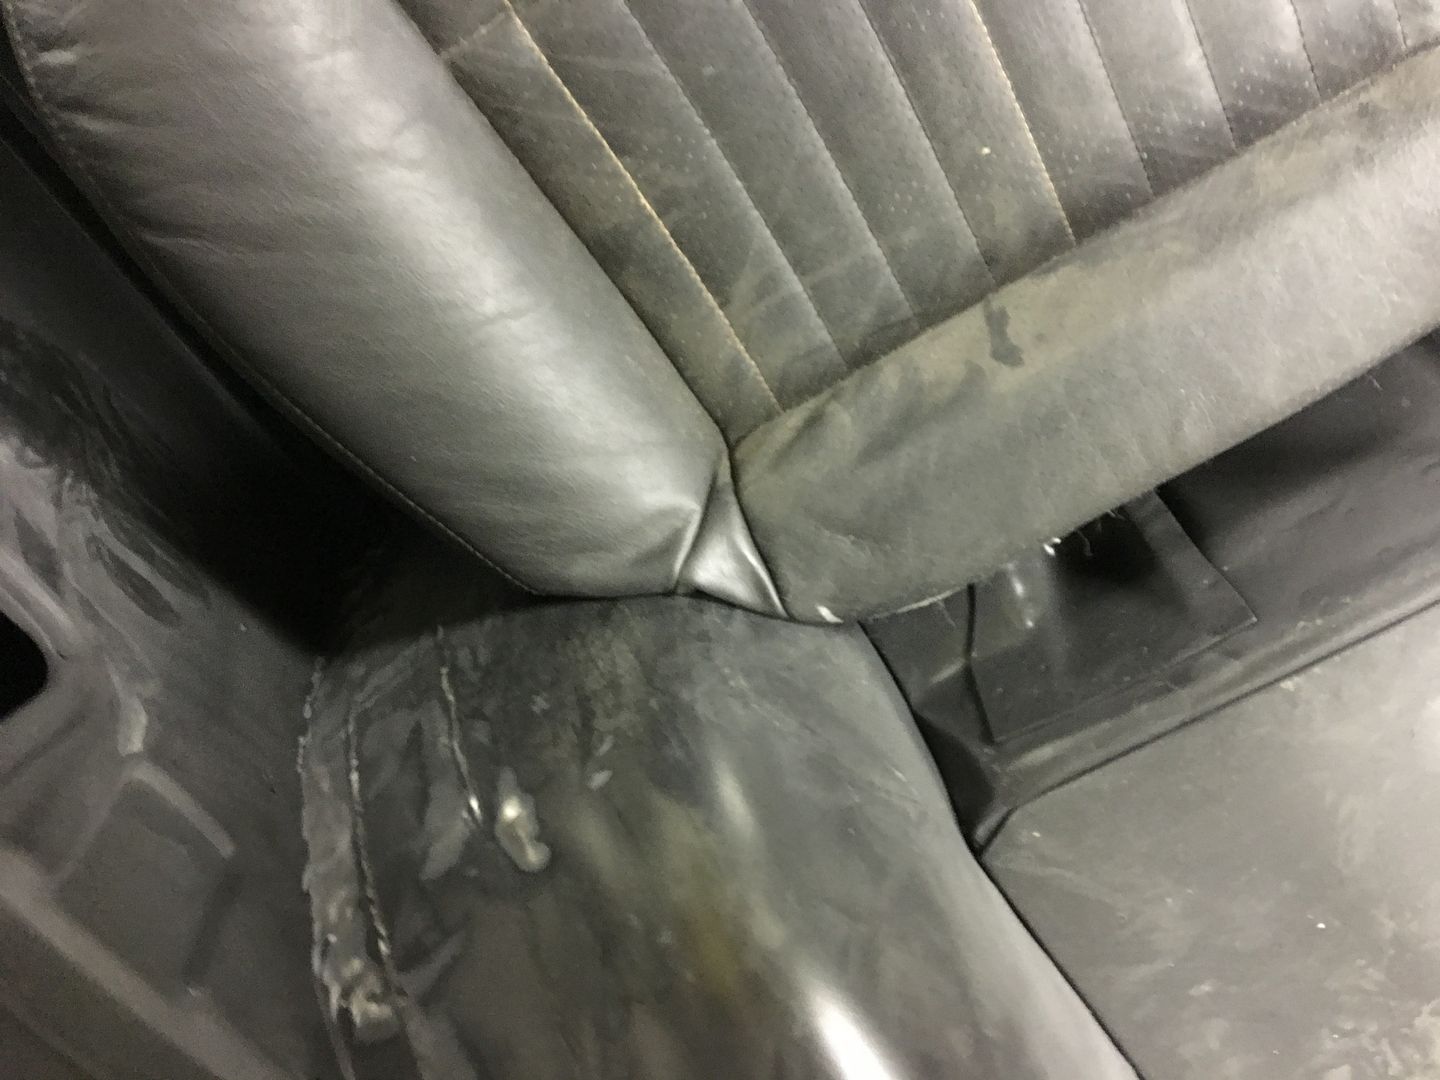 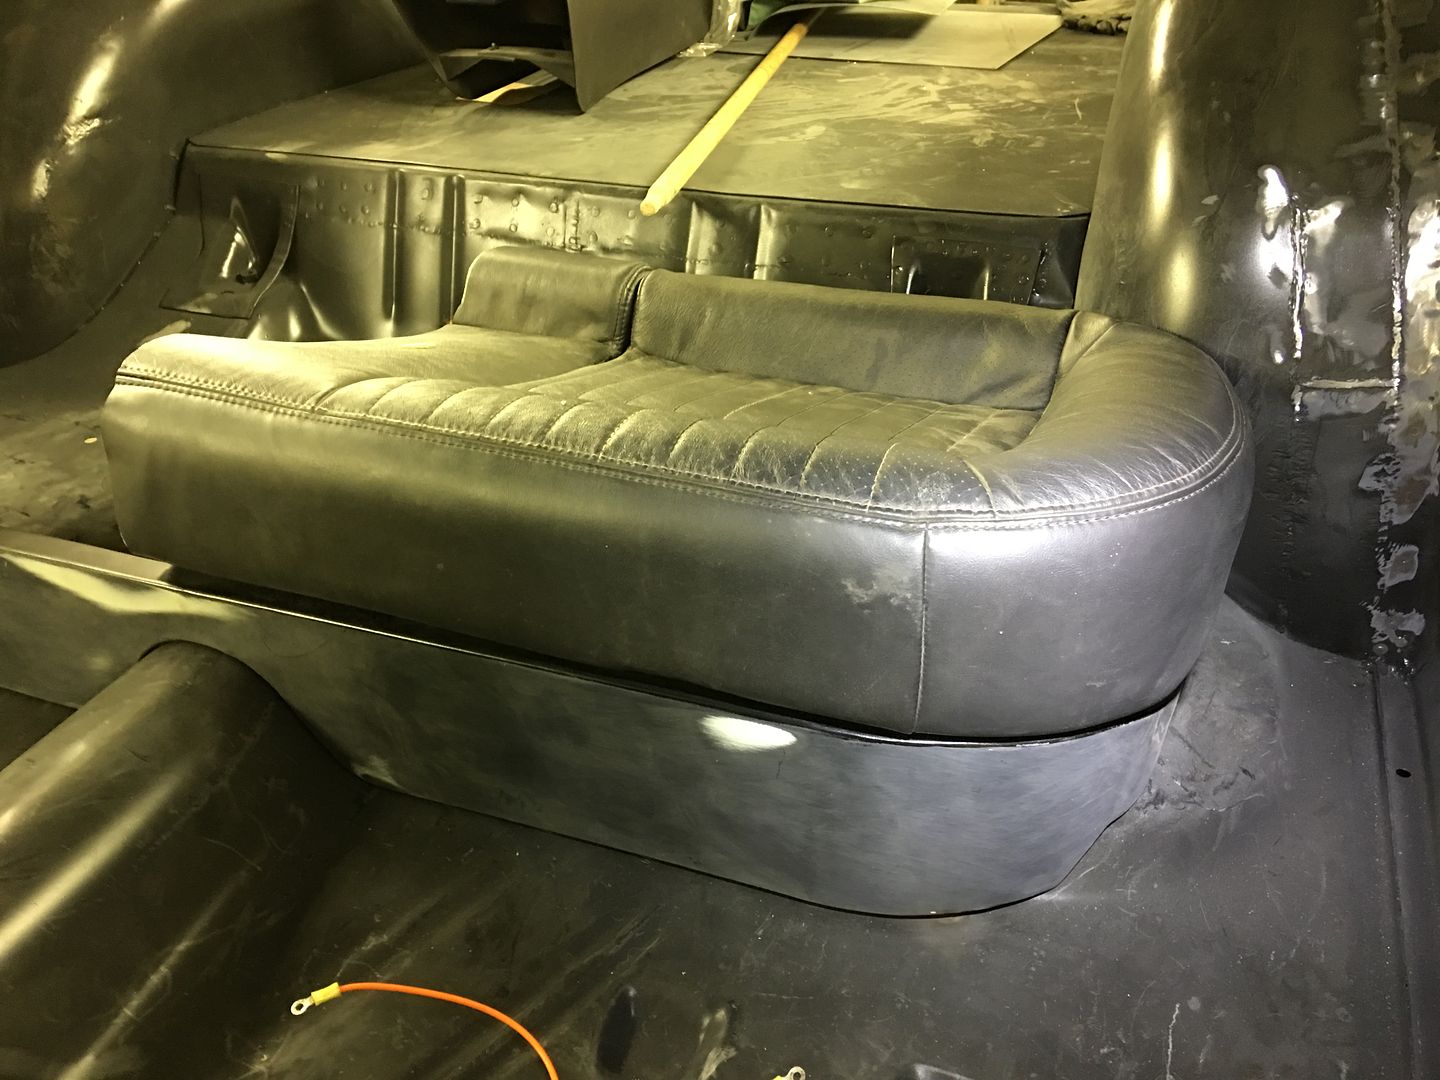 Some 3/16 diameter stainless rod was used to reconnect the pieces in the new rear corners 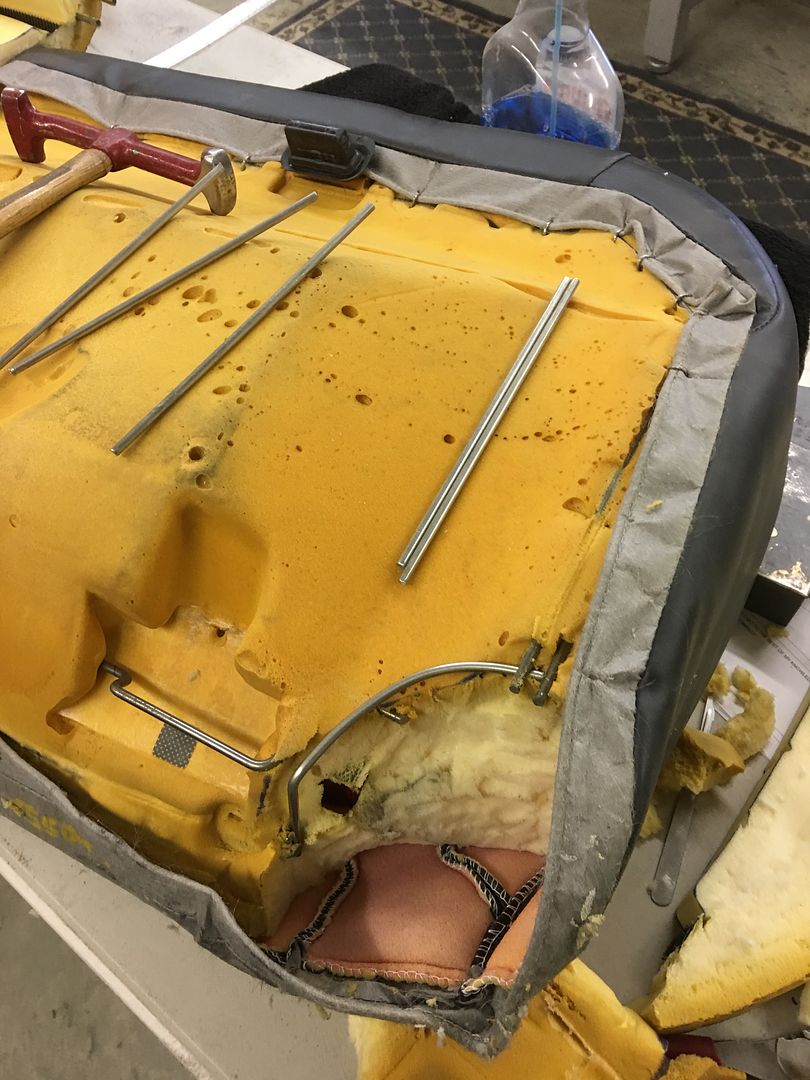 Some fire prevention for the foam.. 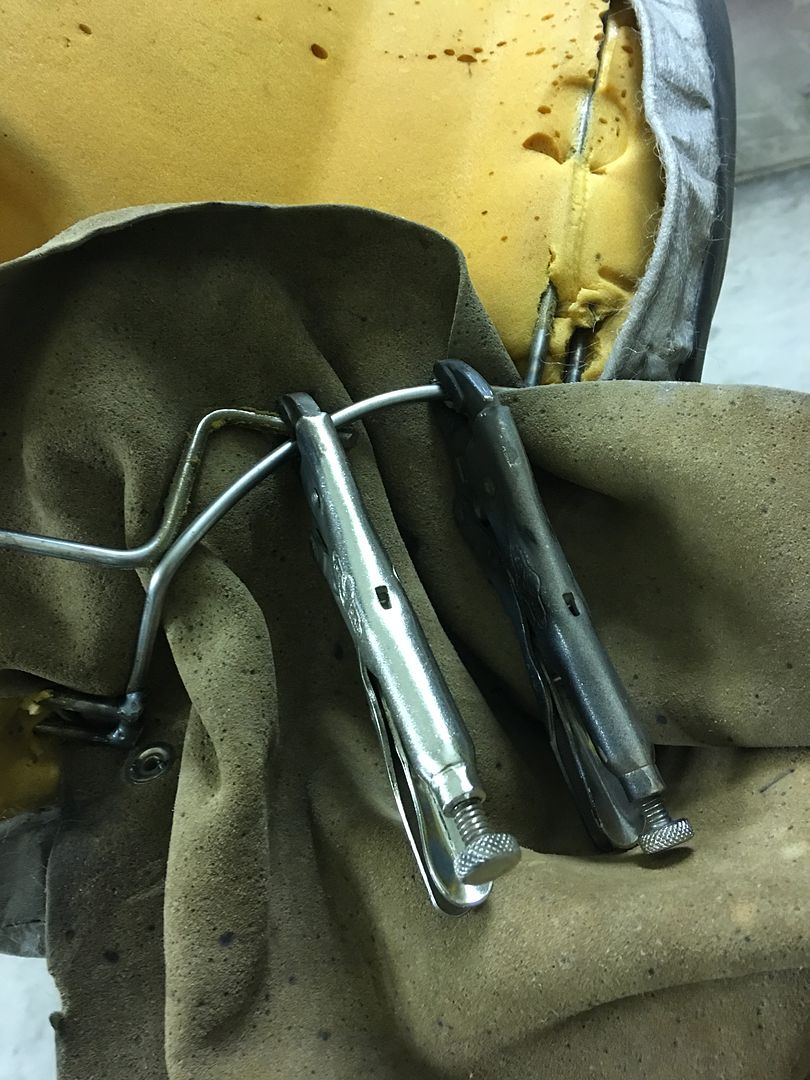 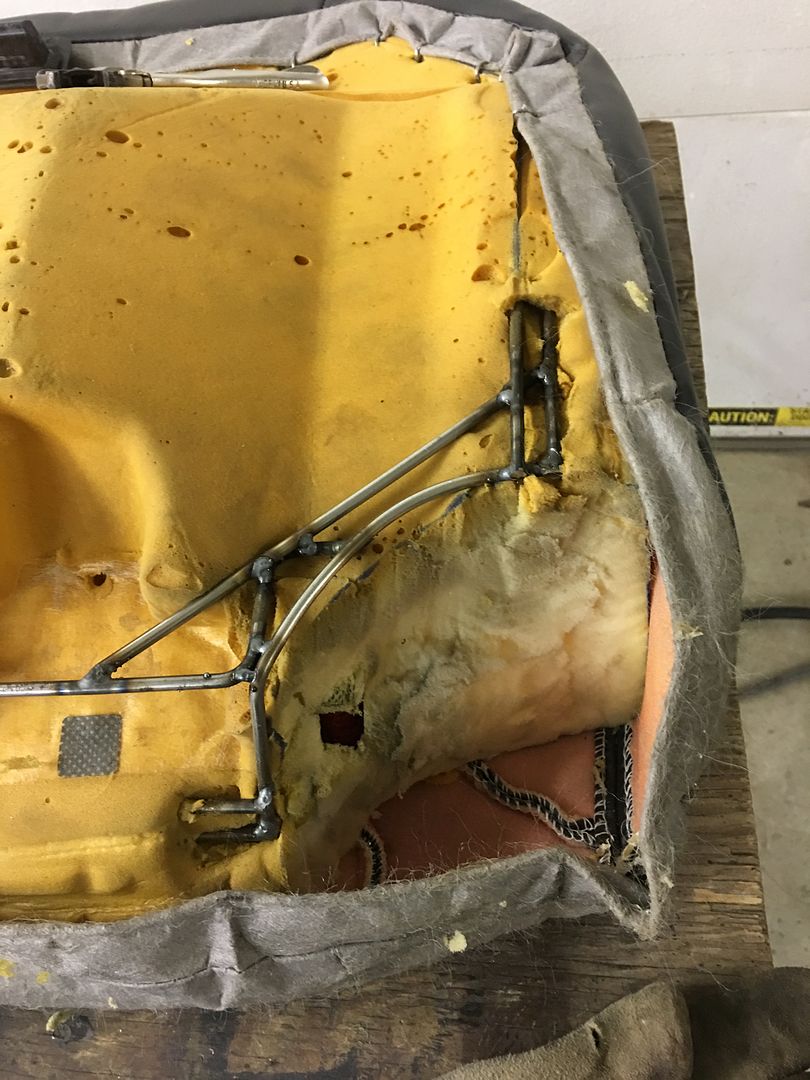 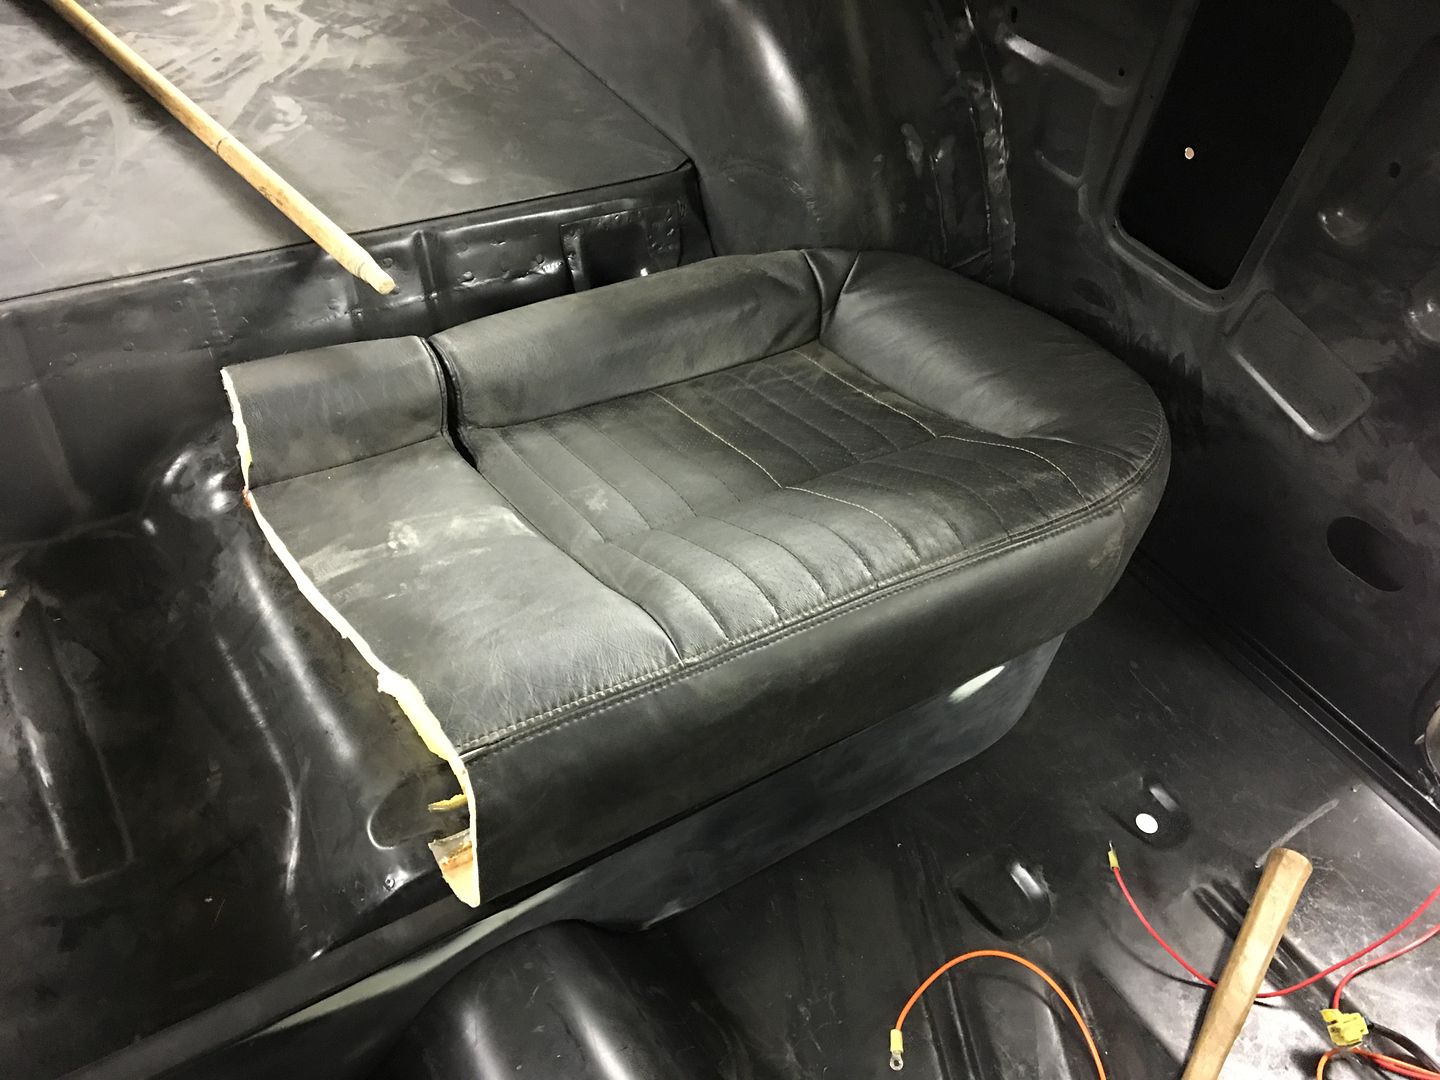 With both sides fitting individually, time to join our sides back together... 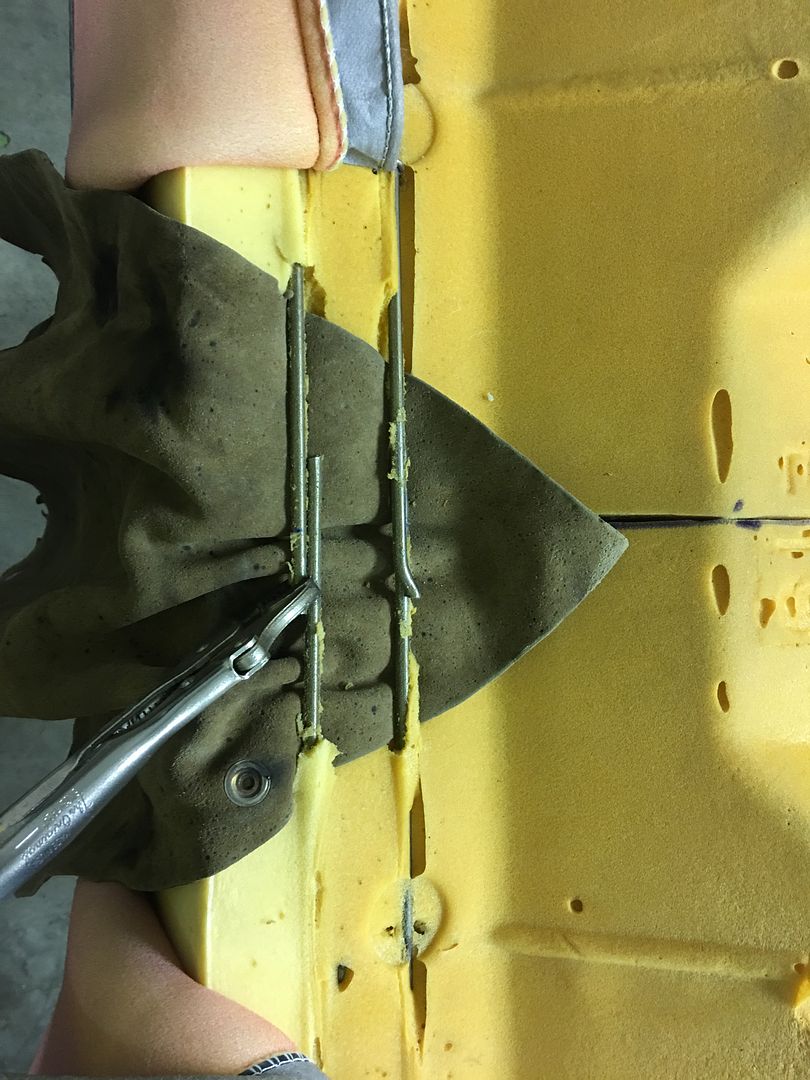 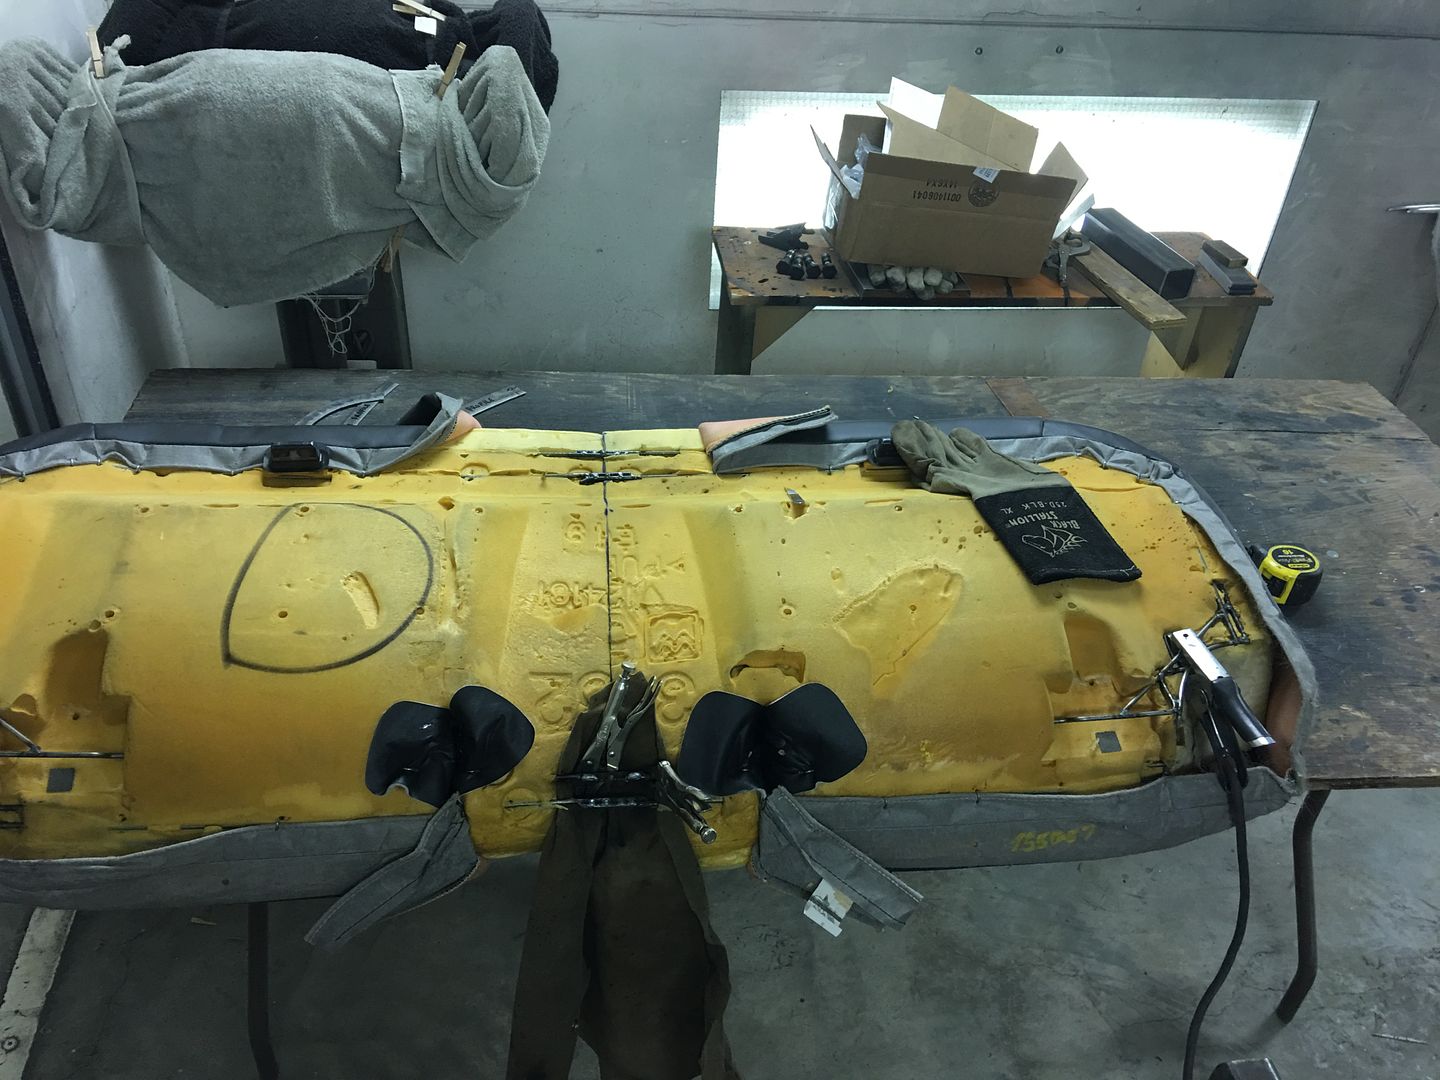 Video of the surgery results.... https://www.youtube.com/watch?v=0ingFICYYws With the overlap of material trimmed, this part is looking pretty good! 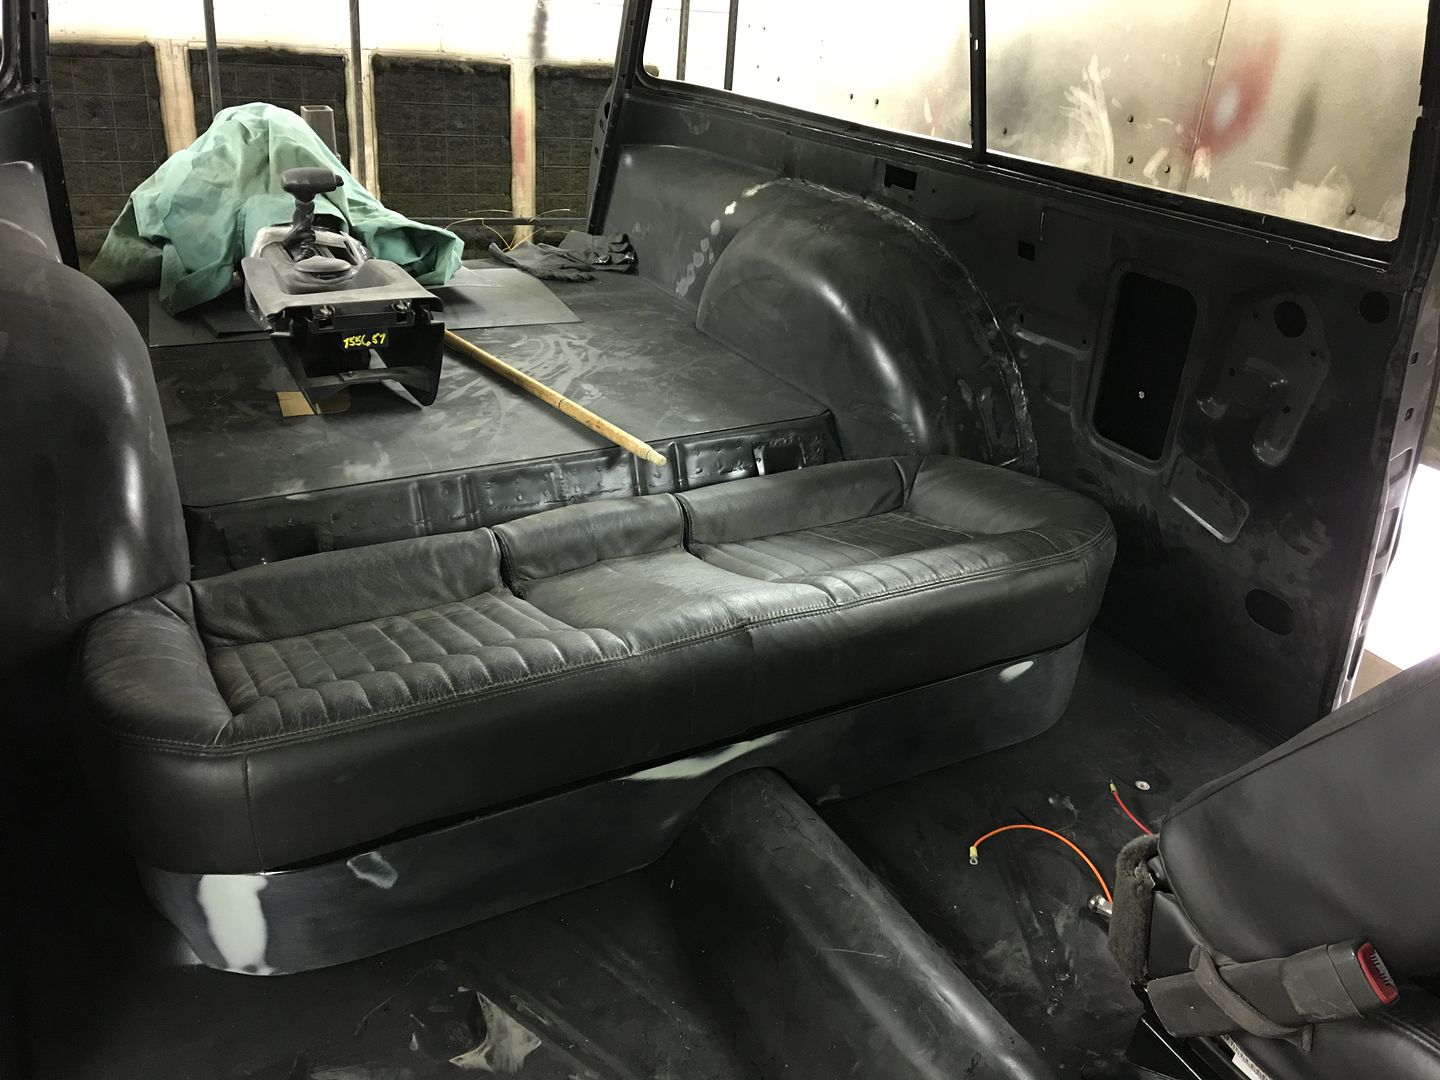
__________________
Robert |
|
|
|
|
03-12-2017, 12:04 AM
|
#816 |
|
Senior Member
Join Date: Mar 2011
Location: West Plains, Missouri
Posts: 7,553
|
Re: 55 Wagon Progress
Robert, nice job, fits verywell...Jim
__________________
my build thread: http://67-72chevytrucks.com/vboard/s...d.php?t=459839 Jimbo's long bed step build:http://67-72chevytrucks.com/vboard/s...t=464626<br /> Last edited by oldman3; 03-12-2017 at 11:09 PM. |
|
|
|
|
03-12-2017, 09:39 PM
|
#817 |
|
Senior Member
Join Date: Jan 2009
Location: Raleigh, NC
Posts: 444
|
Re: 55 Wagon Progress
Looks really nice, you do great work.
I appreciate your posts and videos. It gives some interesting insights on how the job should be done correctly.
__________________
1949/1954 with LS swap-yeah! http://s260.photobucket.com/albums/i...0/AD%20trucks/jumbled mess of unorganized photos |
|
|
|
|
03-12-2017, 09:56 PM
|
#818 |
|
Registered User
Join Date: Apr 2011
Location: .
Posts: 3,104
|
Re: 55 Wagon Progress
So perfect only the knowing eye 'might' catch it.
Job well done Sir. |
|
|
|
|
03-14-2017, 01:02 PM
|
#819 |
|
Registered User
Join Date: Apr 2003
Location: Indep, MO
Posts: 5,893
|
Re: 55 Wagon Progress
Fantastic work as always!
__________________
Boppa's Old Yeller Truck Build, Old Yeller's New Heart! Project Buzz Bomb Flyin' Low! |
|
|
|
|
03-14-2017, 08:54 PM
|
#820 |
|
Senior Member
Join Date: Jul 2012
Location: Oblong, Illinois
Posts: 7,017
|
Re: 55 Wagon Progress
Yes, very nice work. Where did the piloted burnishing brush come from?
|
|
|
|
|
03-14-2017, 09:40 PM
|
#821 |
|
Registered User
Join Date: Jan 2013
Location: Leonardtown, MD
Posts: 1,633
|
Re: 55 Wagon Progress
They came from McMaster Carr. Look up piloted end brushes. They have them in various pilot sizes and either 1/2 or 3/4 diam, we used 1/2..
Thanks for the comments guys! Posted via Mobile Device |
|
|
|
|
03-24-2017, 10:38 PM
|
#822 |
|
Registered User
Join Date: Jan 2013
Location: Leonardtown, MD
Posts: 1,633
|
Re: 55 Wagon Progress
With the 55's rear seat bottom narrowed to fit the wheel tubs.....
....time to do the same for the seat back. First to blow it apart.... 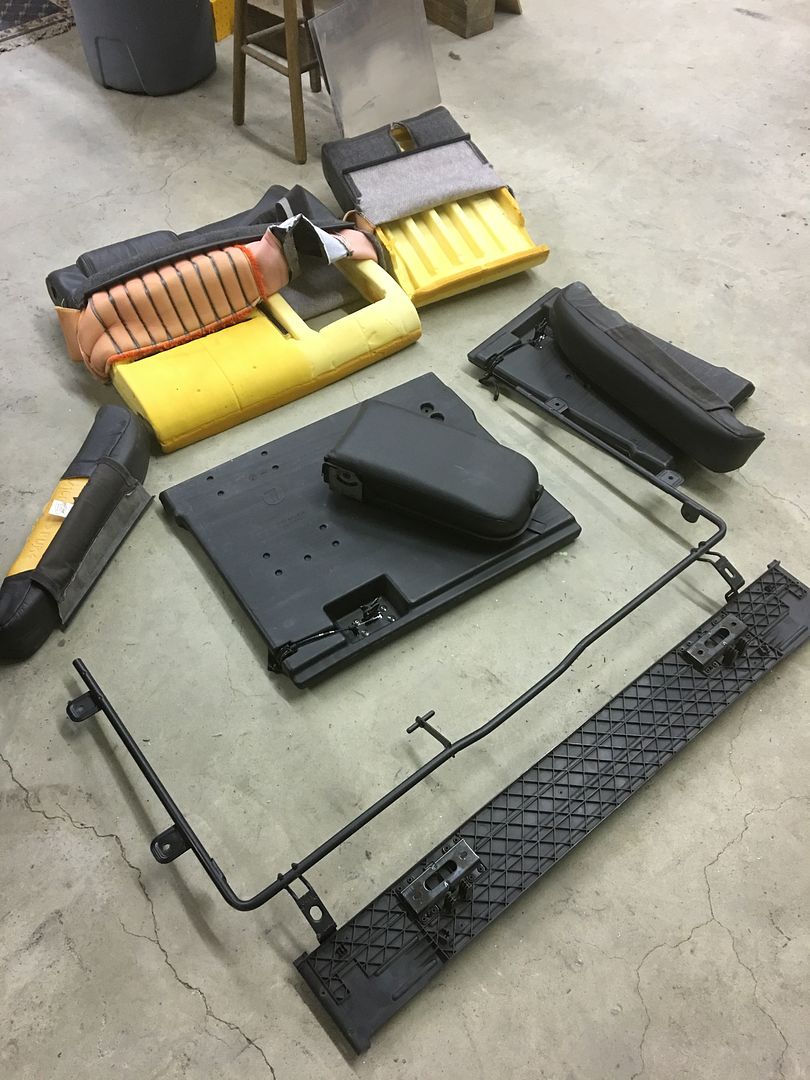 This had a multiple fold down, arm rest in the middle, non 55 looking arrangement. The arm rest will be first to go, and we'll attach the fold down sections together.. The frame is sectioned in the middle, a tube driven inside, and TIG welded around the perimeter..   Then the seat innards are trimmed accordingly to make a one piece back..   Then some 14 gauge strips are cut out to join the two sections together.. 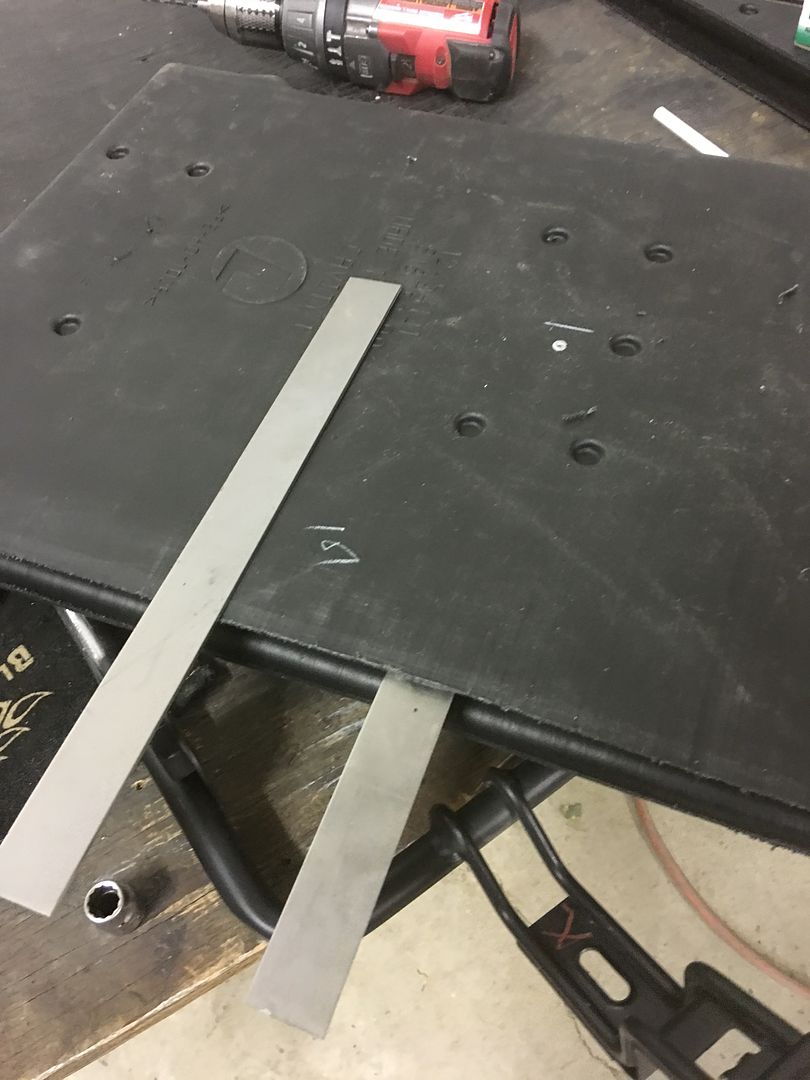 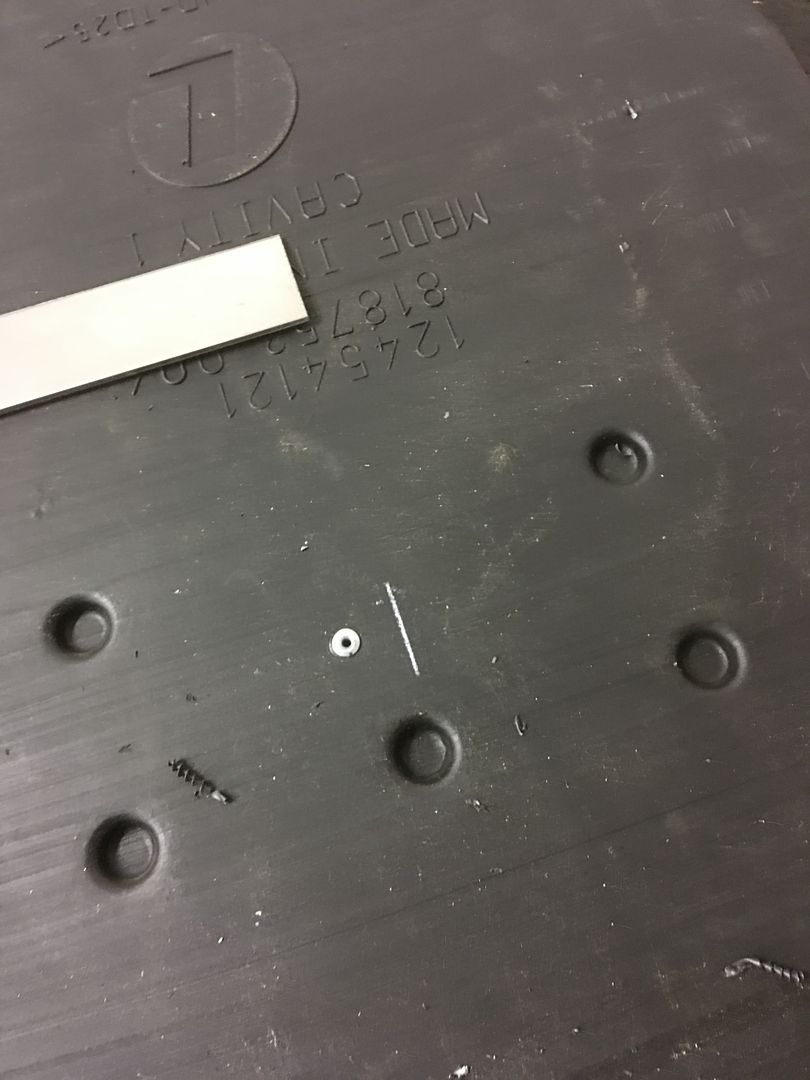  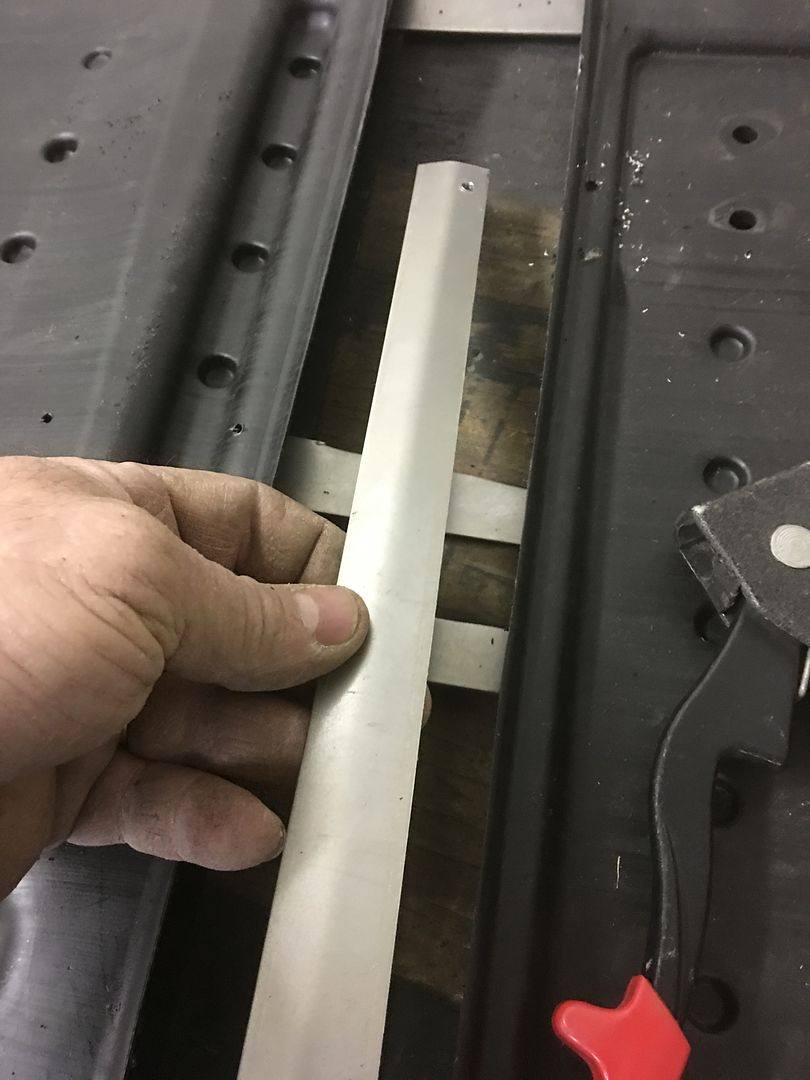 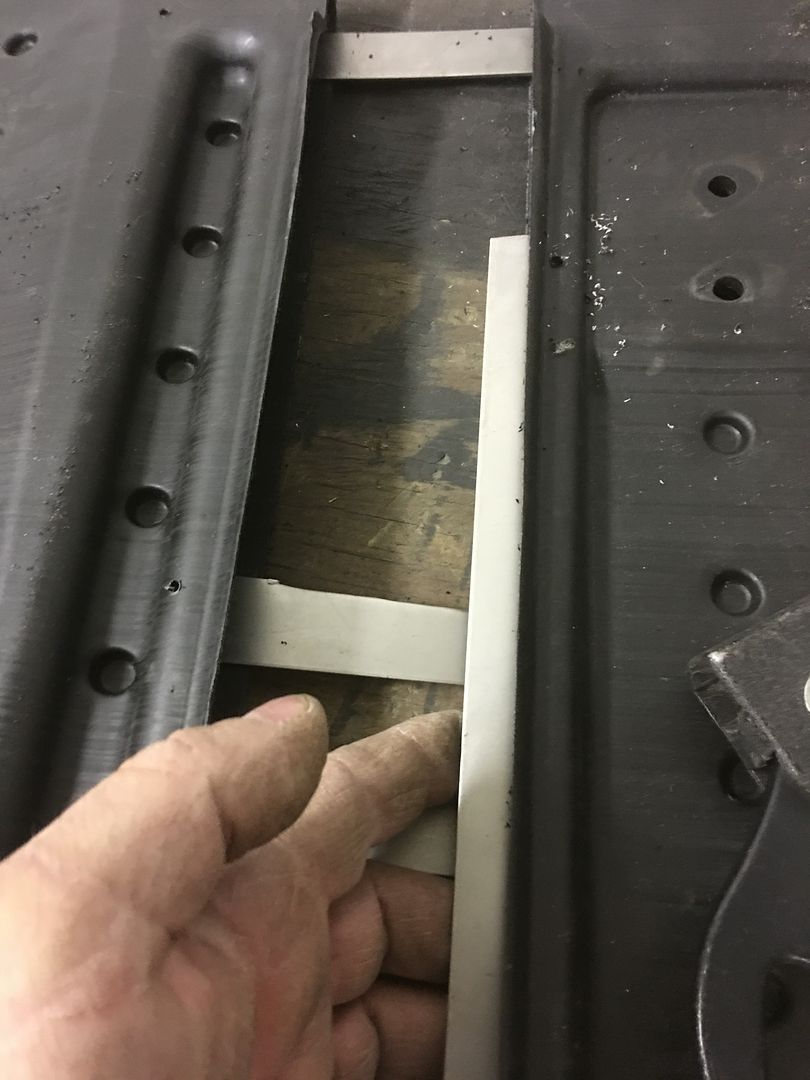 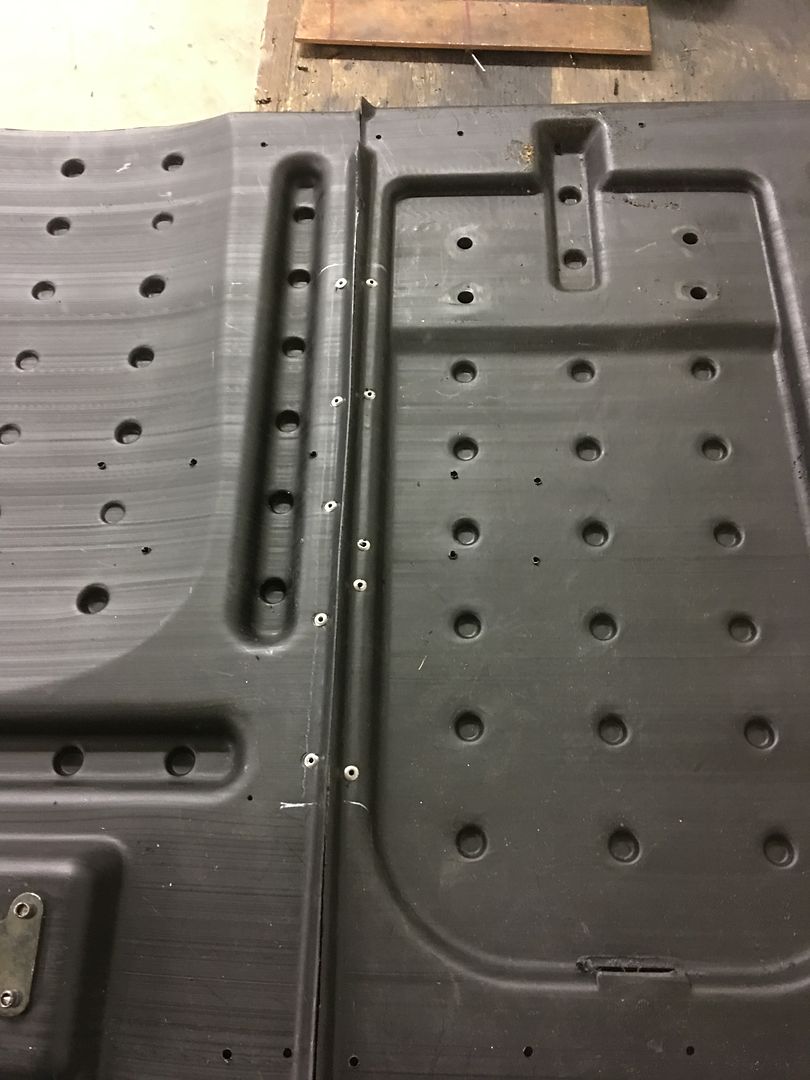 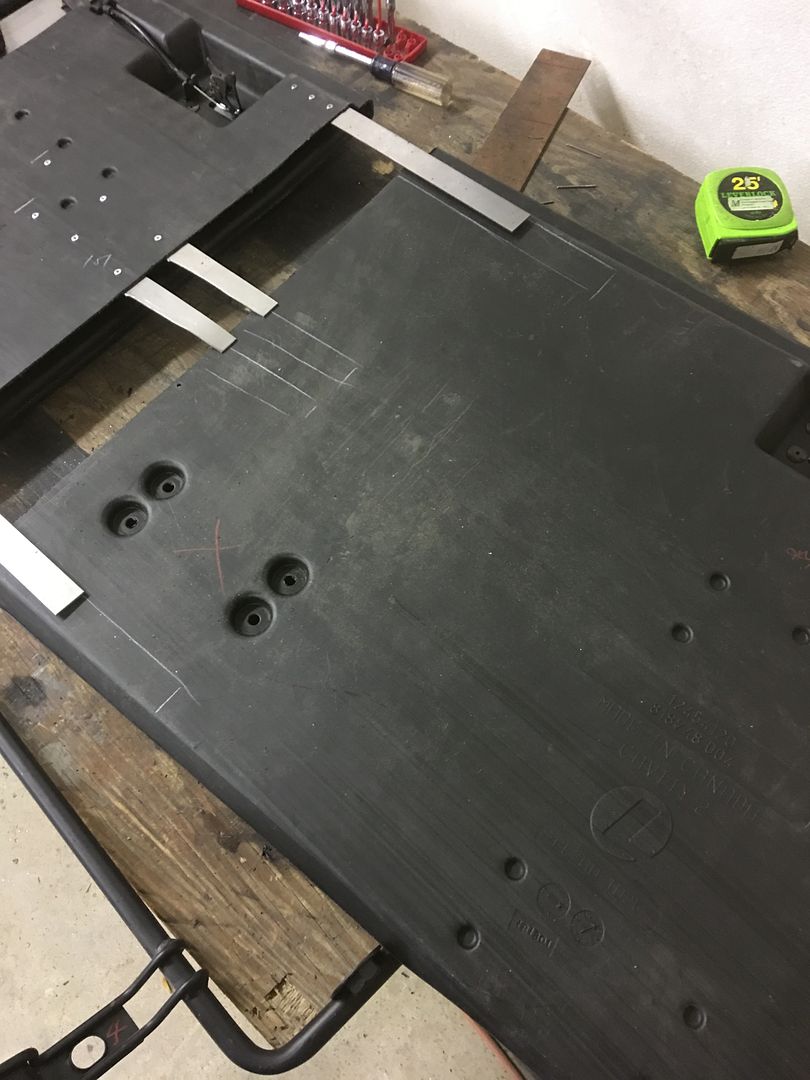 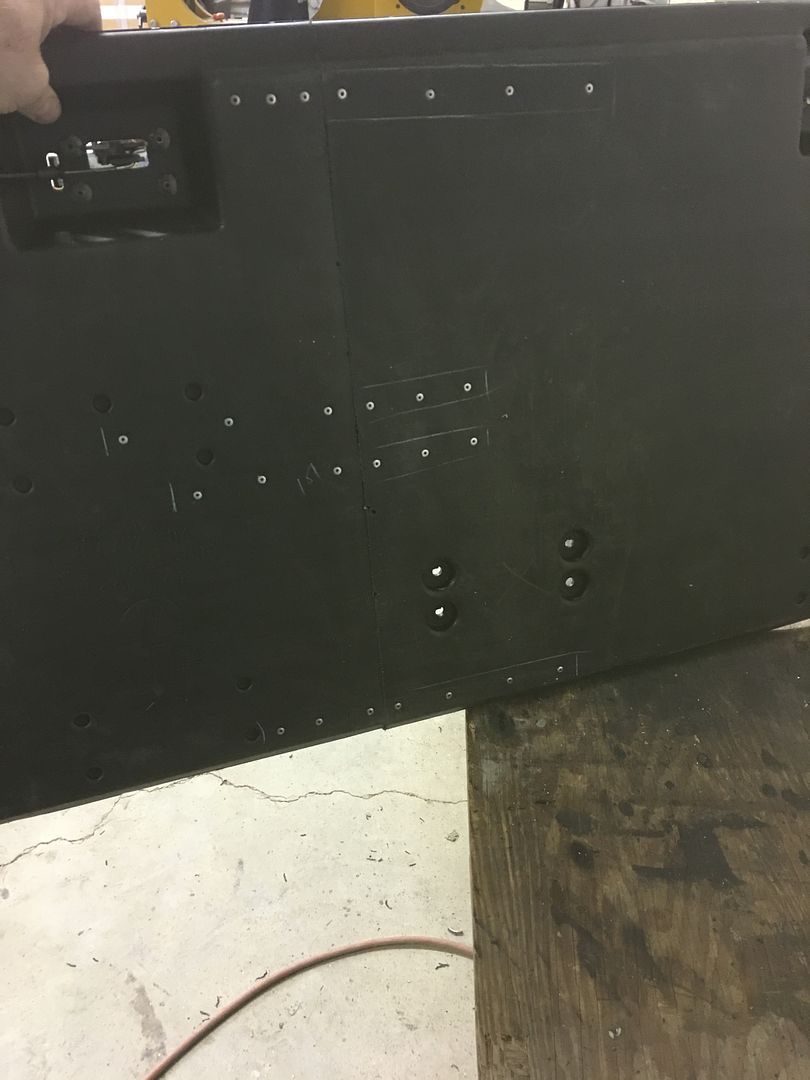 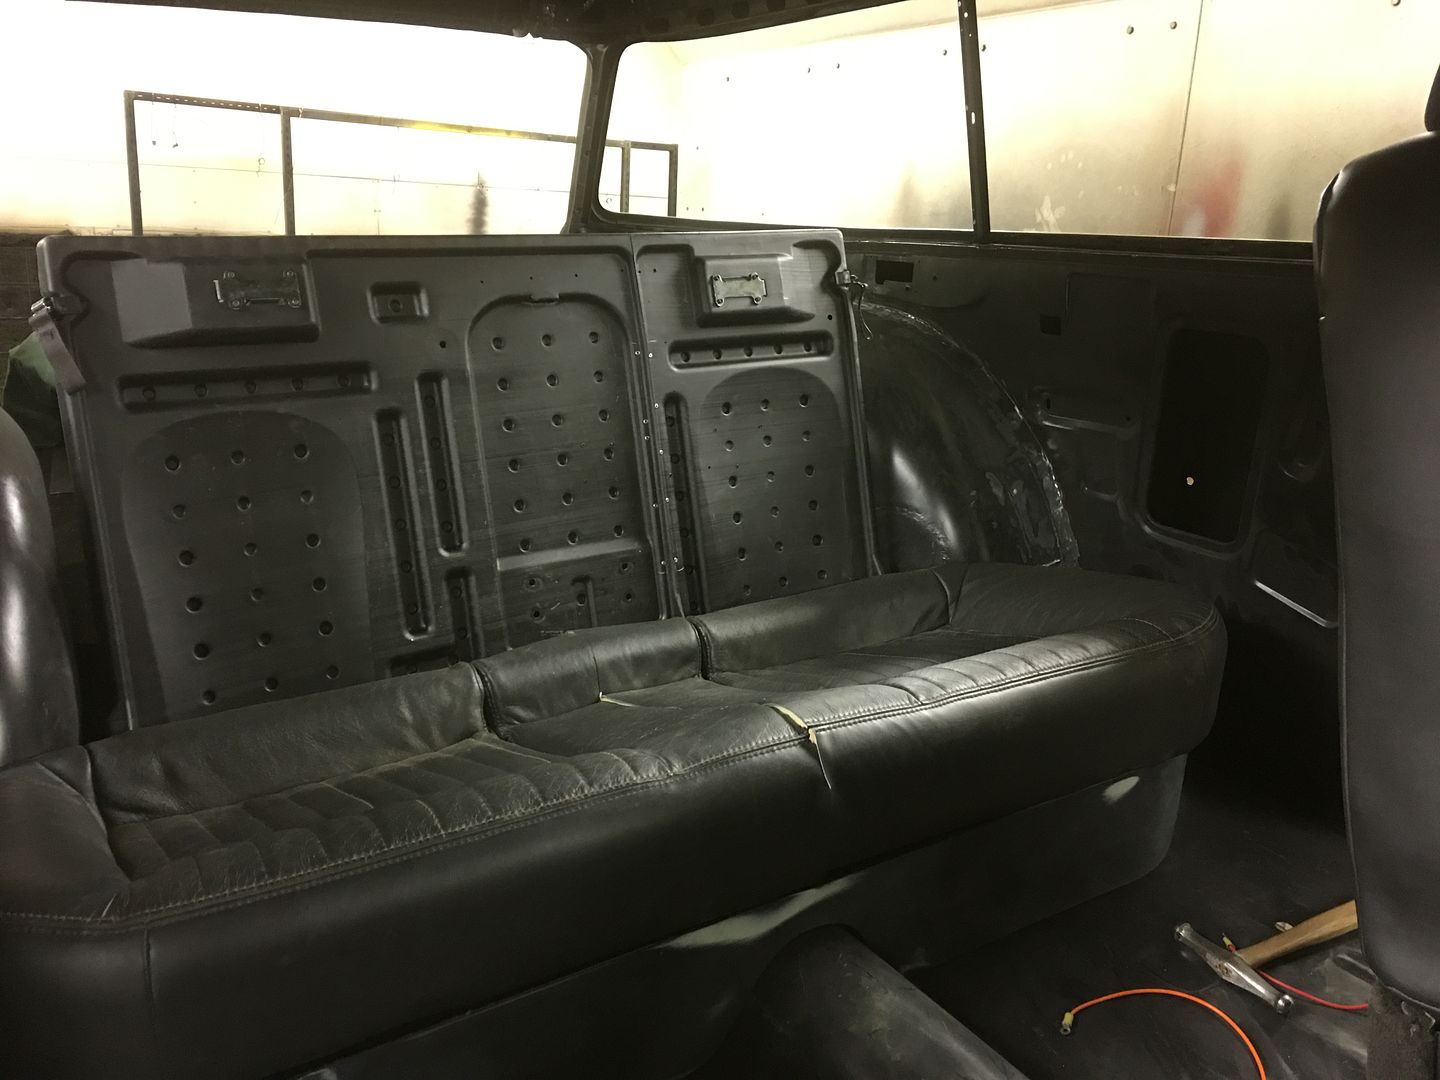 That should work, tomorrow we'll work on the new pivot brackets..
__________________
Robert |
|
|
|
|
03-24-2017, 11:11 PM
|
#823 |
|
Senior Member
Join Date: Mar 2011
Location: West Plains, Missouri
Posts: 7,553
|
Re: 55 Wagon Progress
Wow, One heck of a nice job on the back parts of seat...Jim
__________________
my build thread: http://67-72chevytrucks.com/vboard/s...d.php?t=459839 Jimbo's long bed step build:http://67-72chevytrucks.com/vboard/s...t=464626<br /> Last edited by oldman3; 03-25-2017 at 11:05 PM. |
|
|
|
|
03-25-2017, 10:47 PM
|
#824 |
|
Registered User
Join Date: Jan 2013
Location: Leonardtown, MD
Posts: 1,633
|
Re: 55 Wagon Progress
Thanks Jim!
In removing the section of foam on the seat back we find the cushion has a wire around the arm rest void. As we are removing the arm rest altogether (when it gets reupholstered) we removed the wire.. 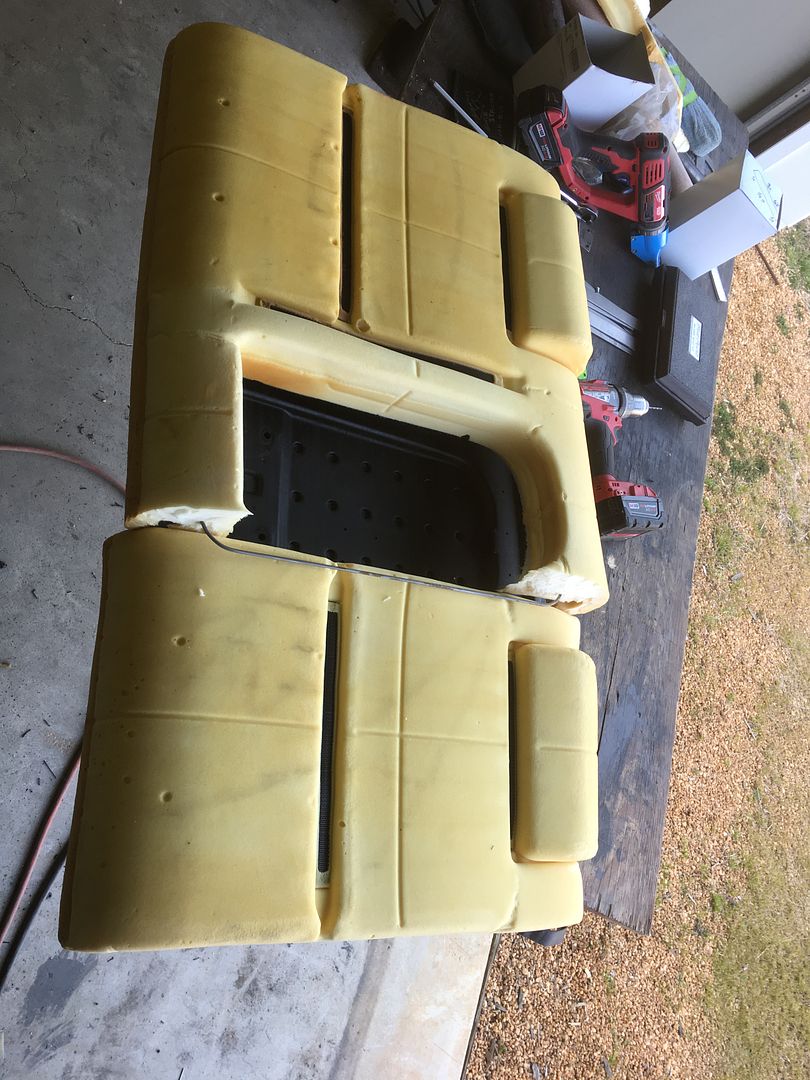 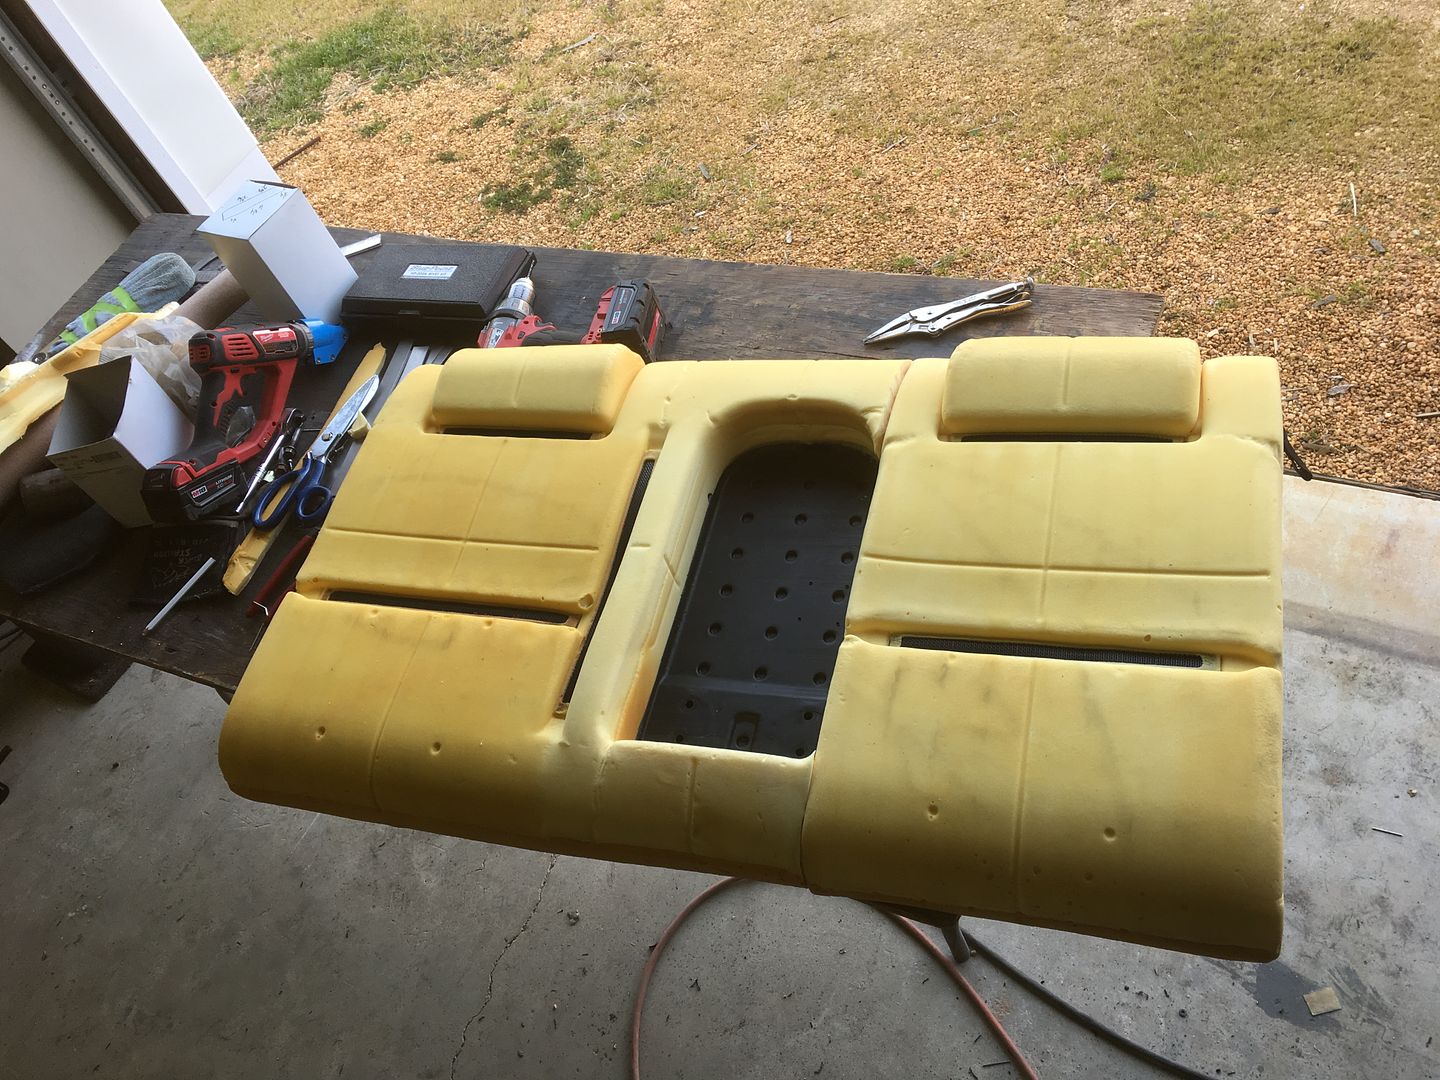  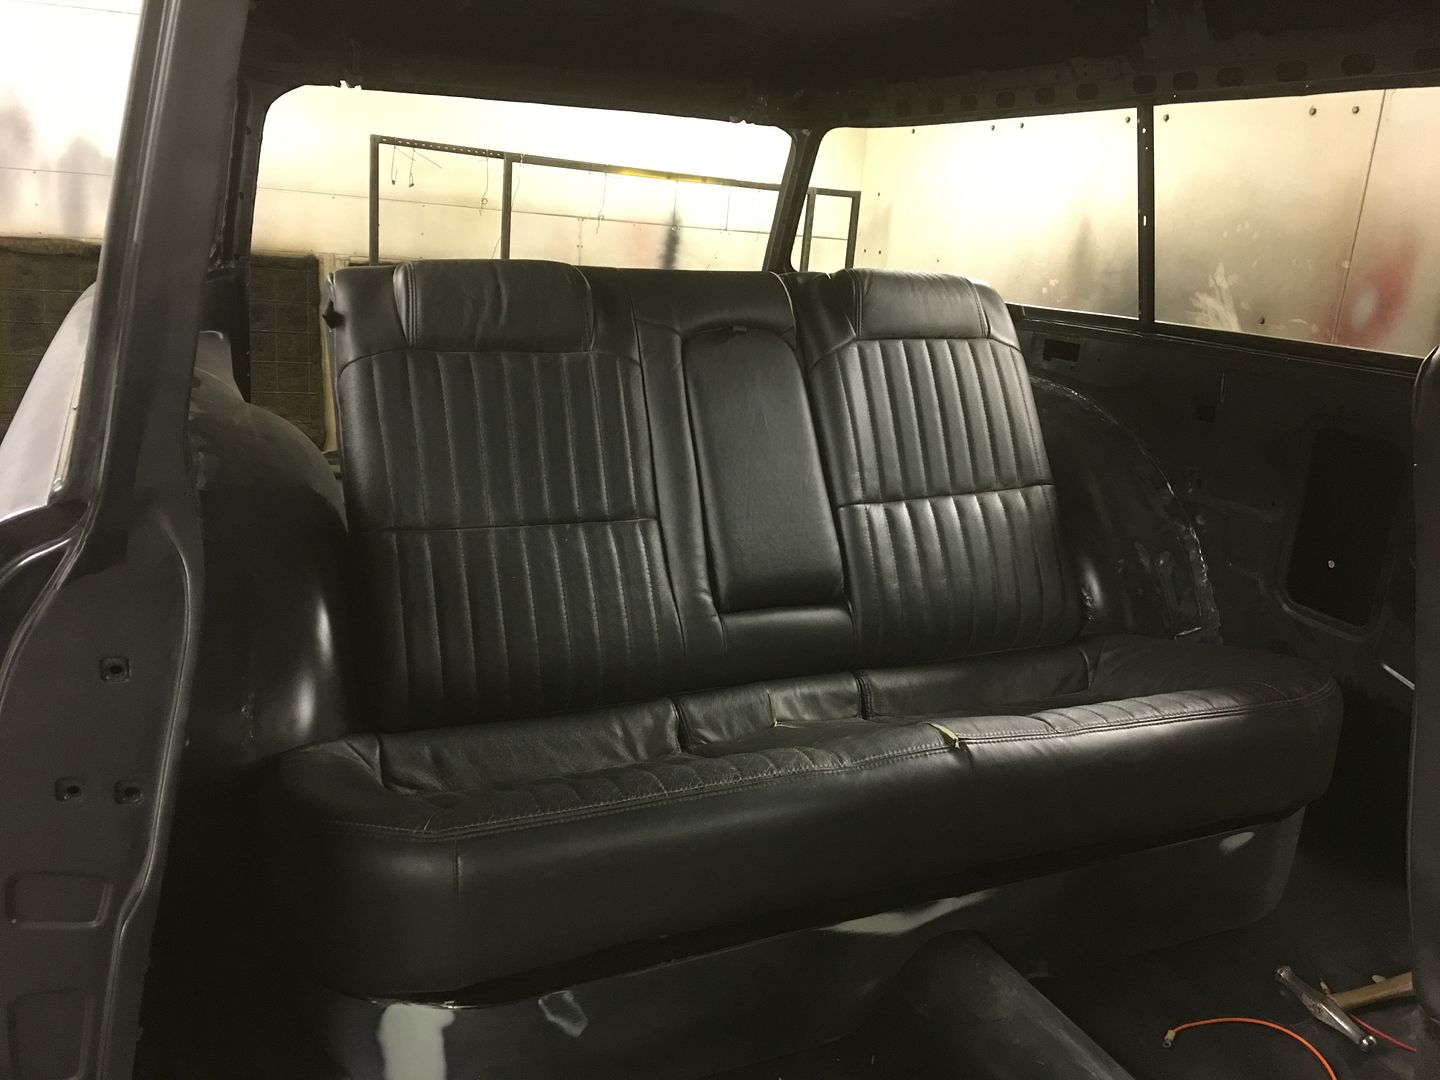 The previous pivot for the seats had a tapered pin hex bolt that secured into a hex nut that was welded onto the pivot bracket, which can be seen here:  Due to our width constraints, we need to remove all that excess hardware.. So we chose to put the "securing nut" inside the seat, and use a simple pan head allen screw through the 12 gauge bracket.. Here's our Pivot "axle" inside the seat back.. 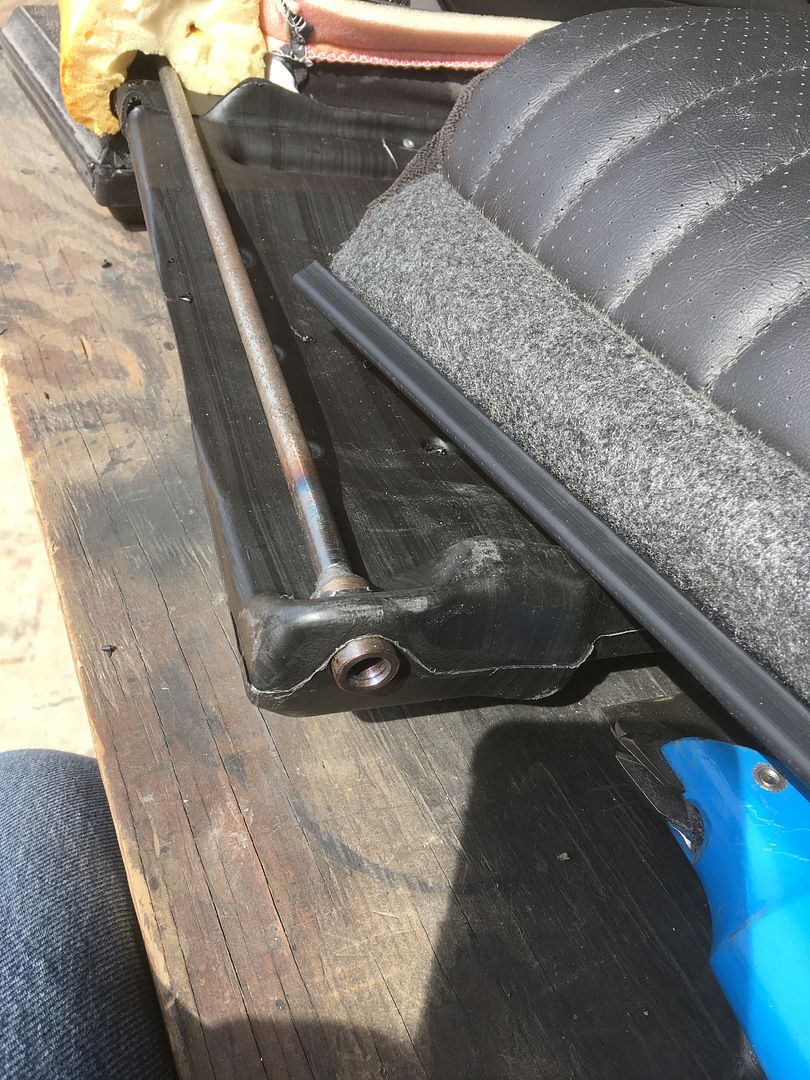 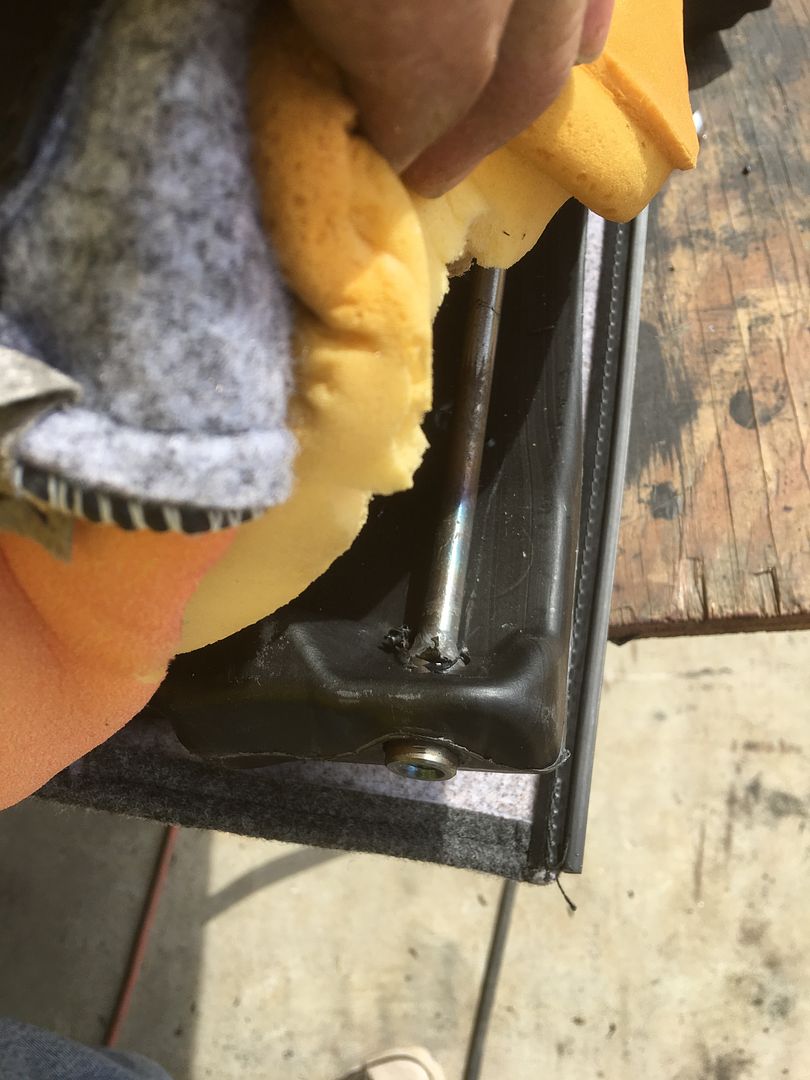 Here's the test fit of our 12 gauge steel pivot bracket. Radius was used on the bends to match the tube. The tube was originally round, and the side uprights were flattened out using the MH19 hammer to buy us some more clearance between wheel tubs.. 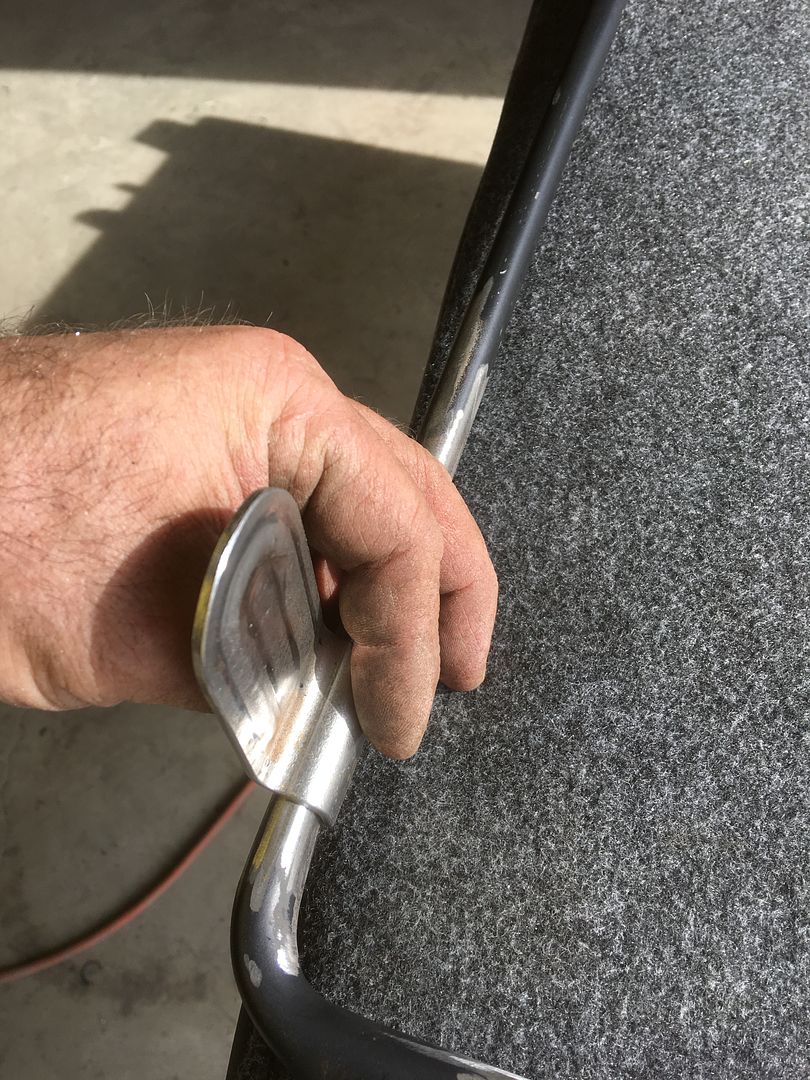 The bead shown on the bracket was done on the Lennox Nibbler. This should give us a bit of clearance on the edges to help prevent binding of the upholstery. 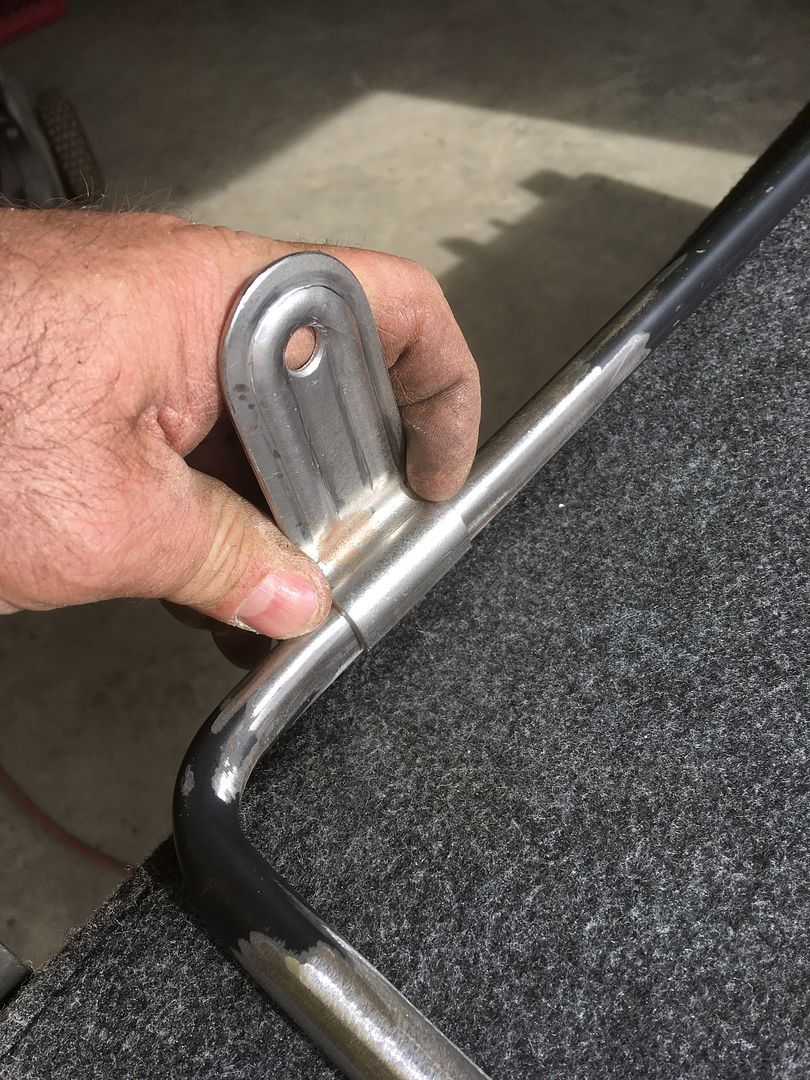 Bead turned out pretty well for 12 gauge steel! Some TIG welding to put the parts together: 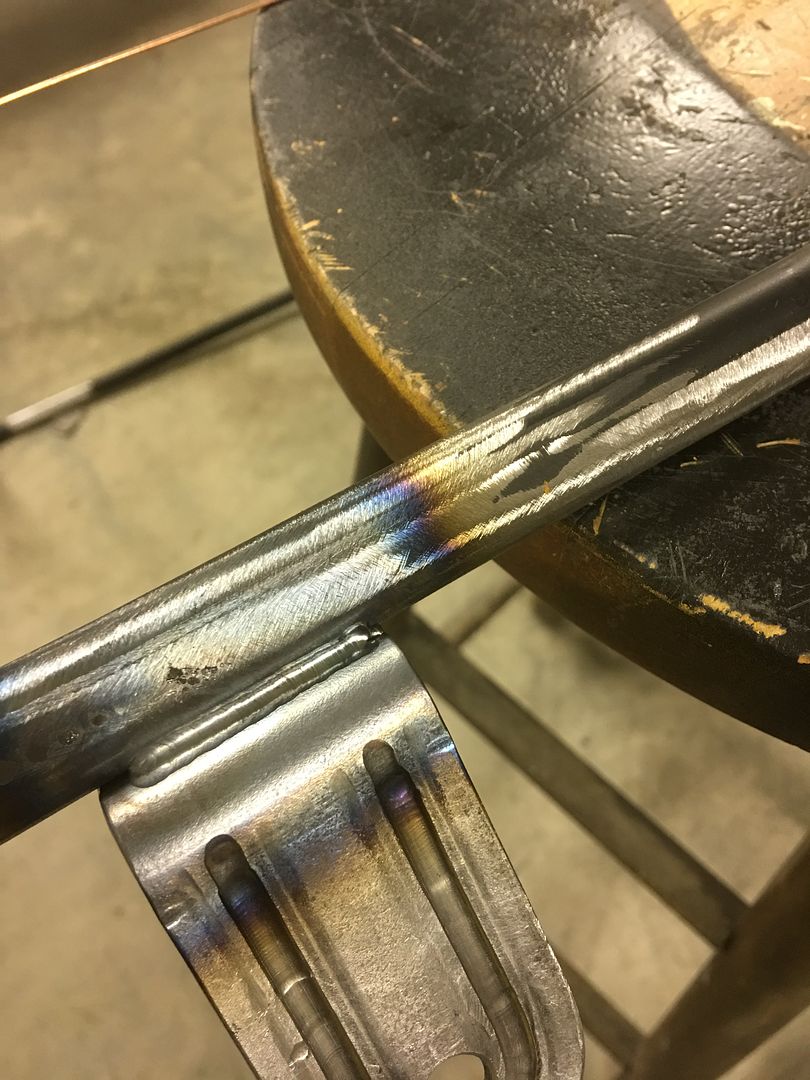 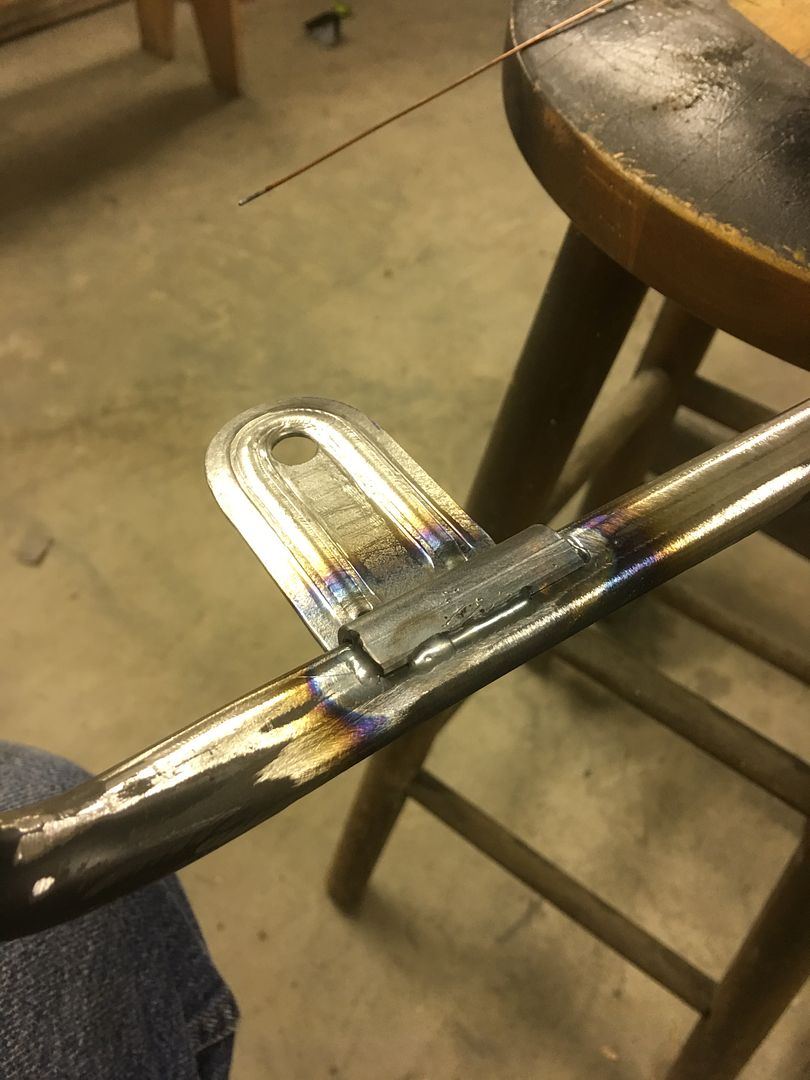 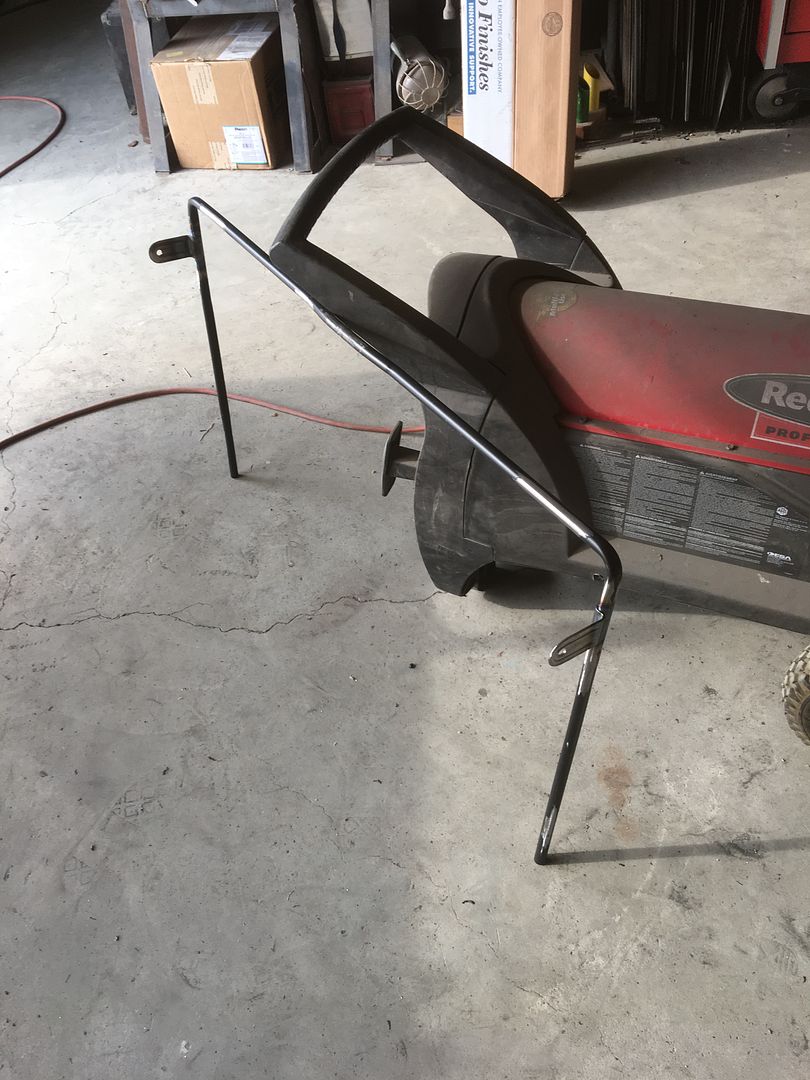 Video of it in operation: https://www.youtube.com/watch?v=KCcpqbF1jUU One part down, next we'll tackle the brackets to the floor.
__________________
Robert |
|
|
|
|
04-02-2017, 08:28 PM
|
#825 |
|
Registered User
Join Date: Jan 2013
Location: Leonardtown, MD
Posts: 1,633
|
Re: 55 Wagon Progress
Doesn't seem like much got done this weekend, but here's what we did..
Stopped by the local CNC router facility to get some generic guides made for bead detail on the Lennox Nibbler... 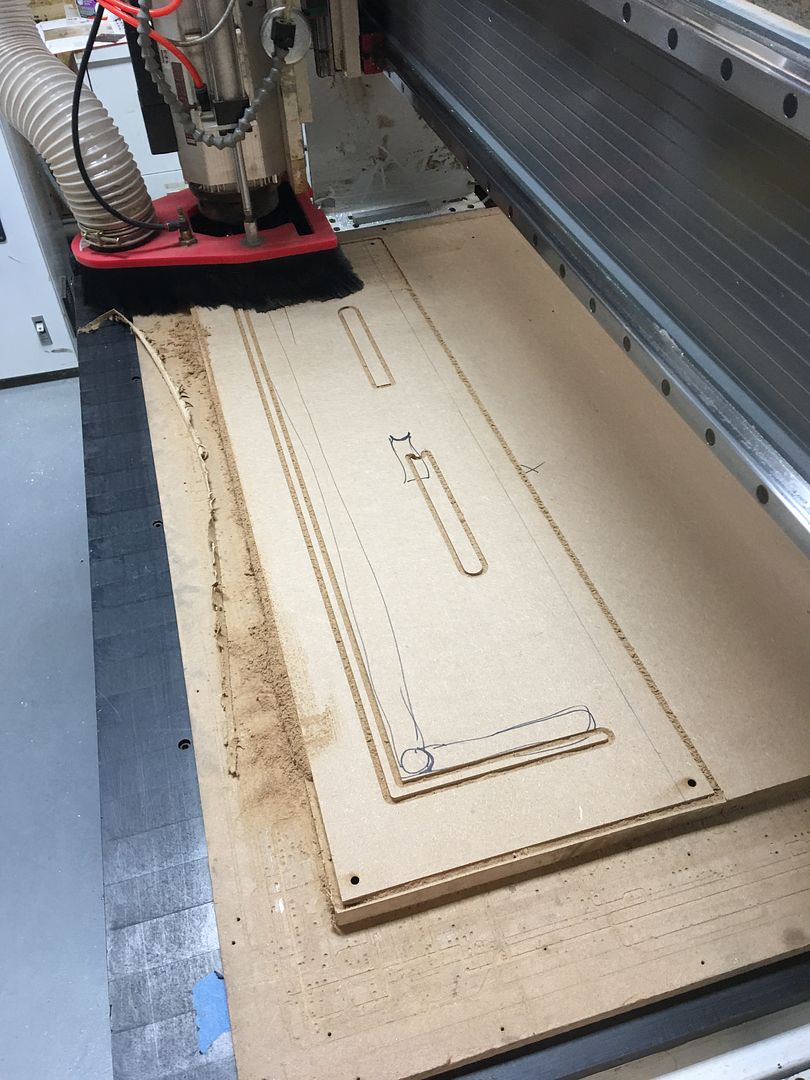 Also had some blanks cut out over there to the right side. These were to form stops so we can adjust length of our pattern shorter as needed.. 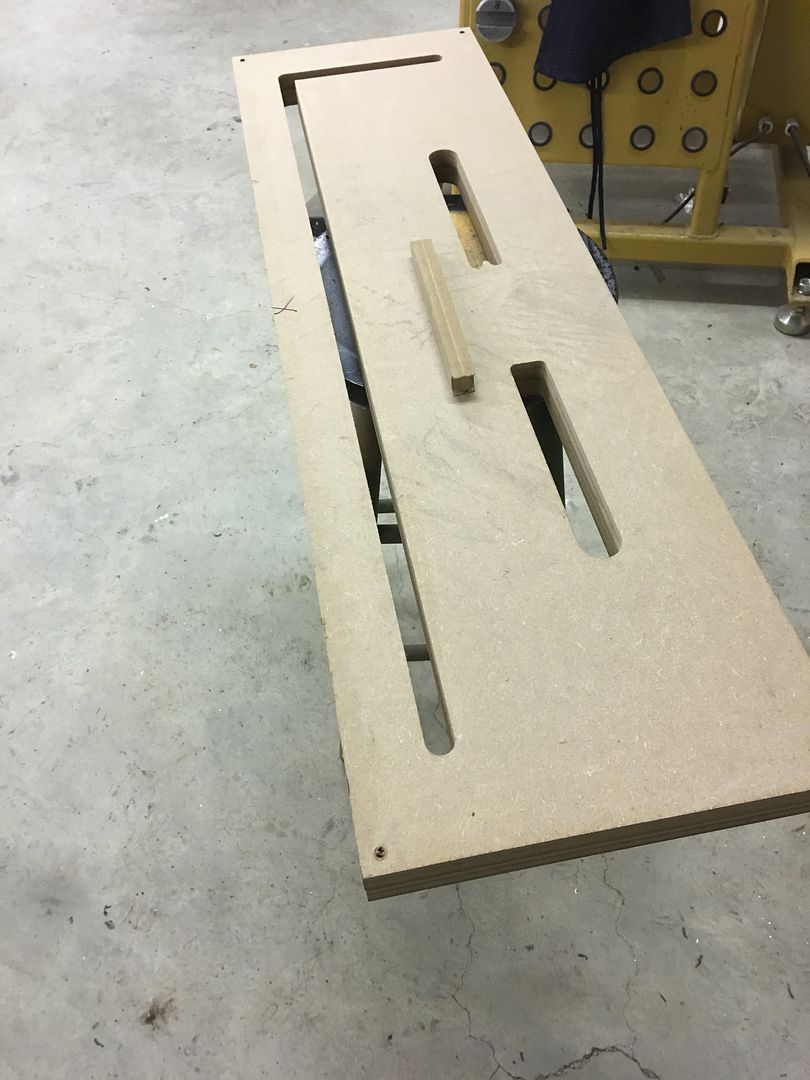 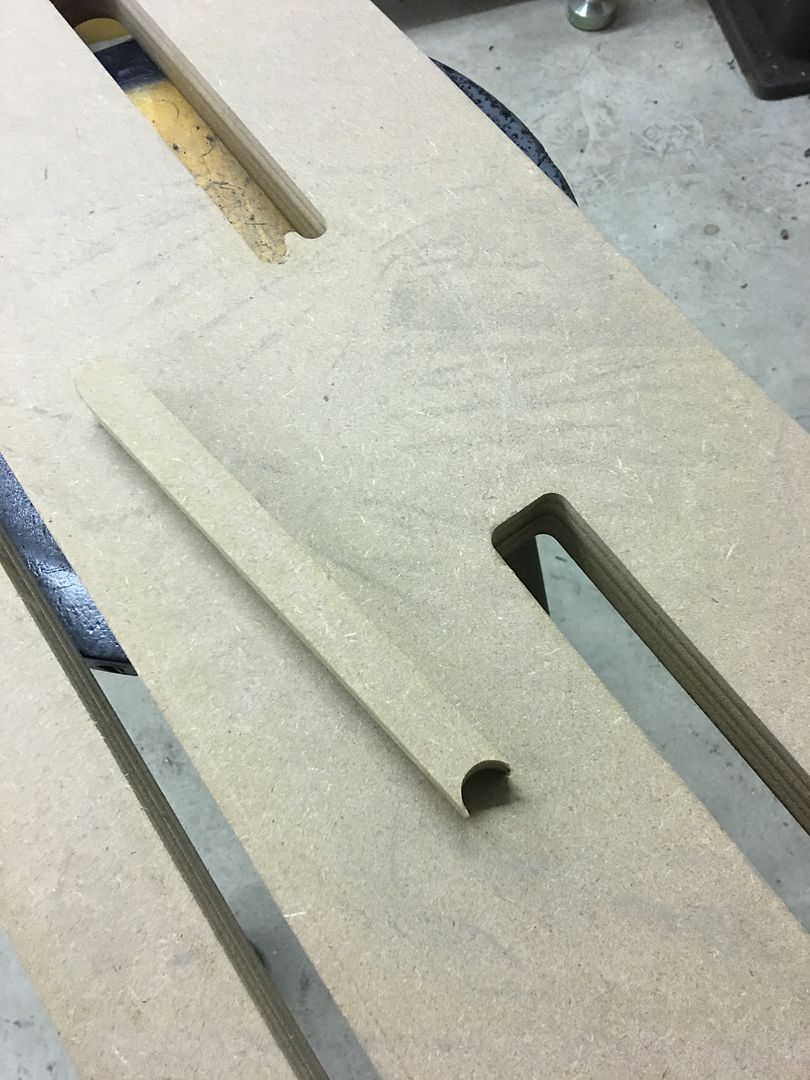 It has a snug fit like so:  Next was to turn up a new die with less crown than the other we've been using, just to have a different look, a flatter bead.. 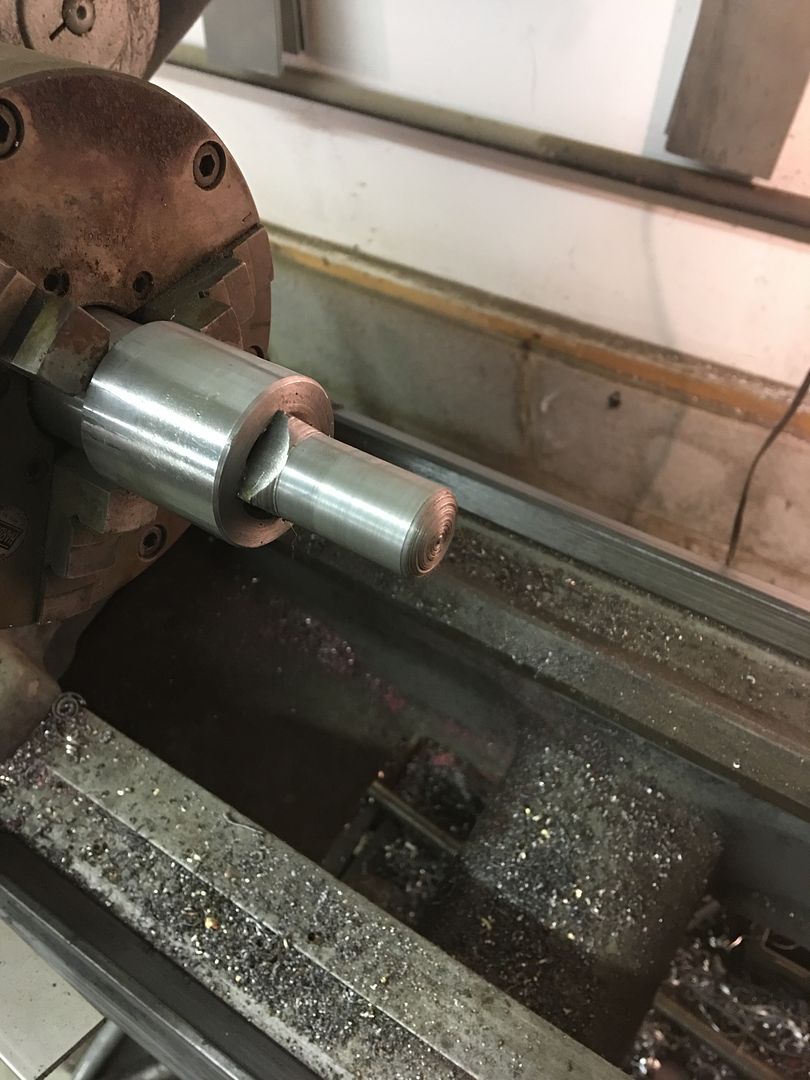 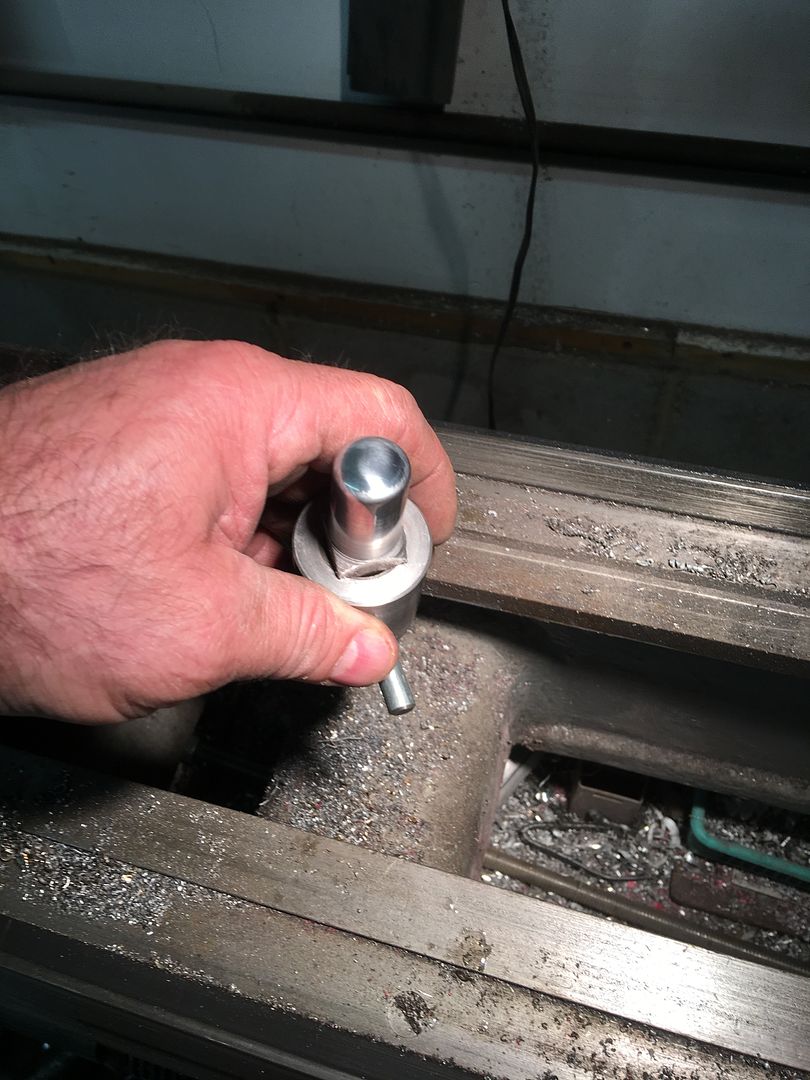 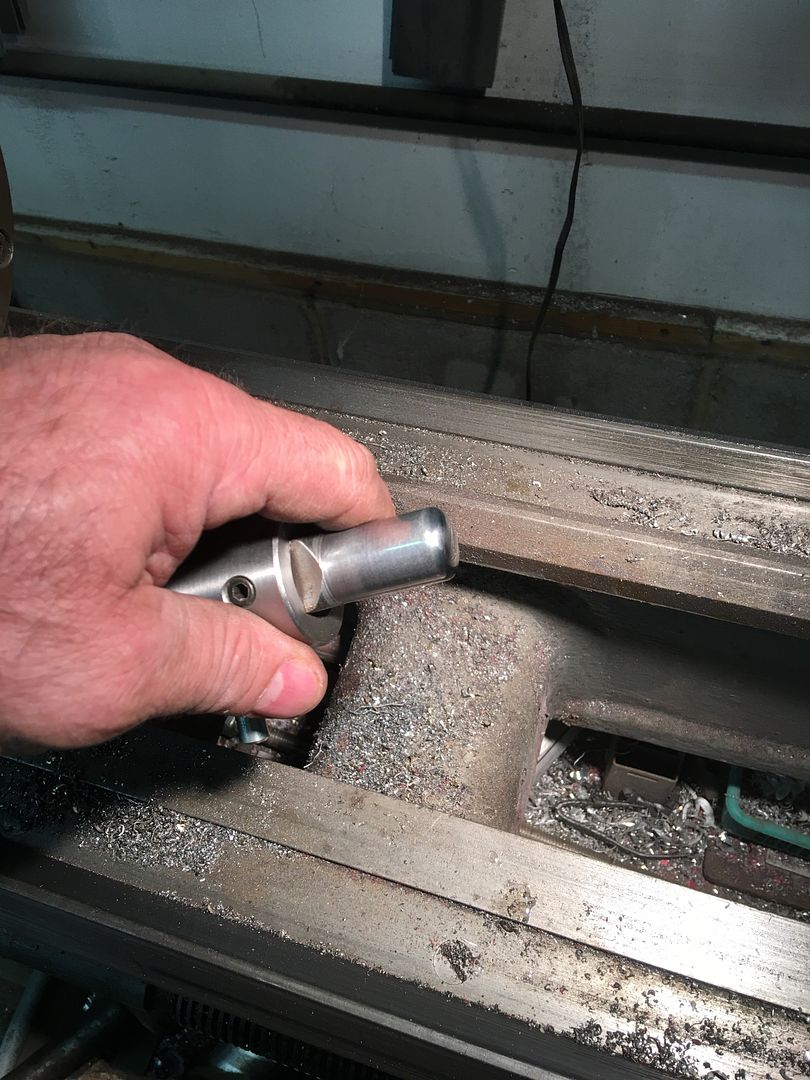 Setting up for some practice runs... 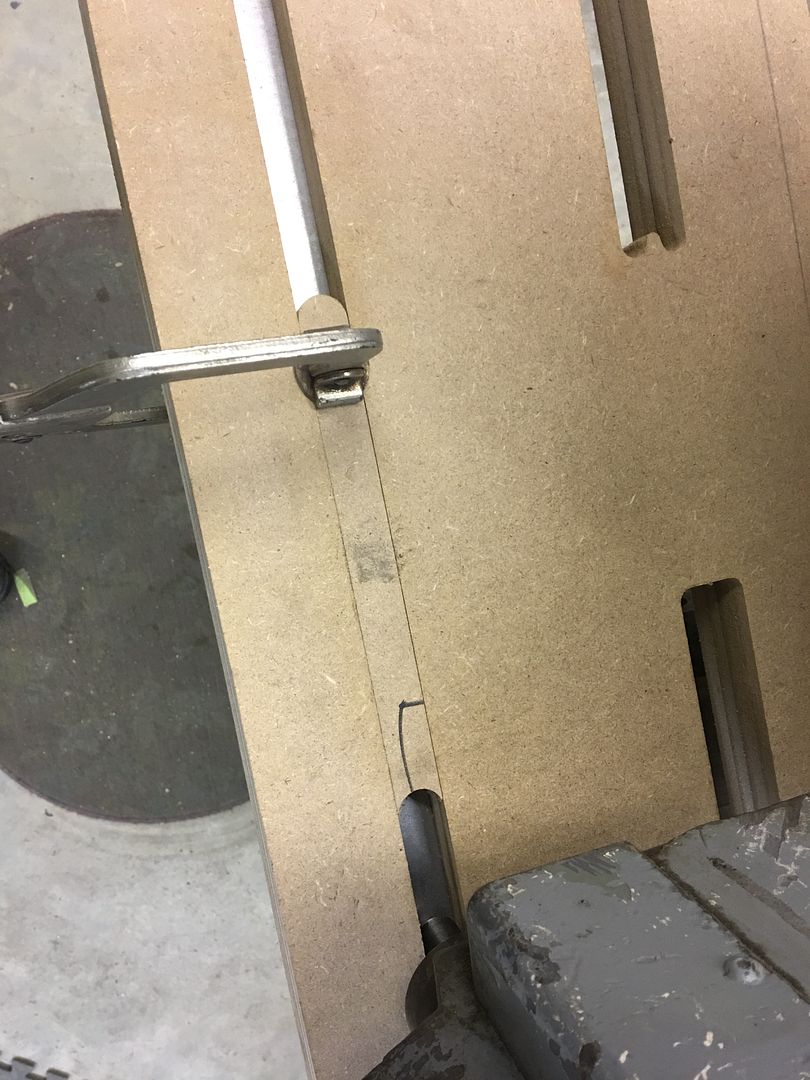 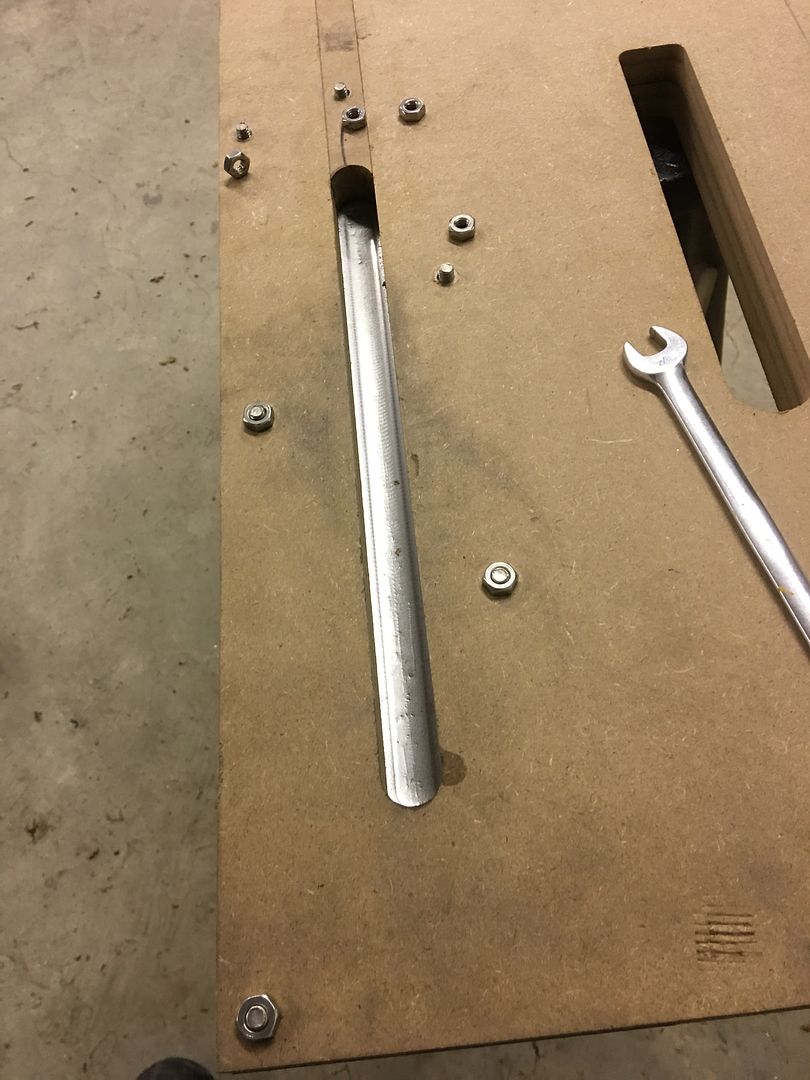 Here's a comparison between the new die and the fuller radius we've been using.. https://www.youtube.com/watch?v=HMi7...ature=youtu.be Thursday night headed over to Virginia, the 52 Chevy tail pan now resided in Fredericksburg and I needed to borrow the original and new one for the Coming Out car show in Charlotte Hall, being held Sunday (today). I had been dragging my feet about even going to the show, but the weather forecast promised beautiful weather, so I went ahead and reserved a vendor spot to show off our fabrication work. Friday night started gathering some samples to take and a put some pictures together for an album.. 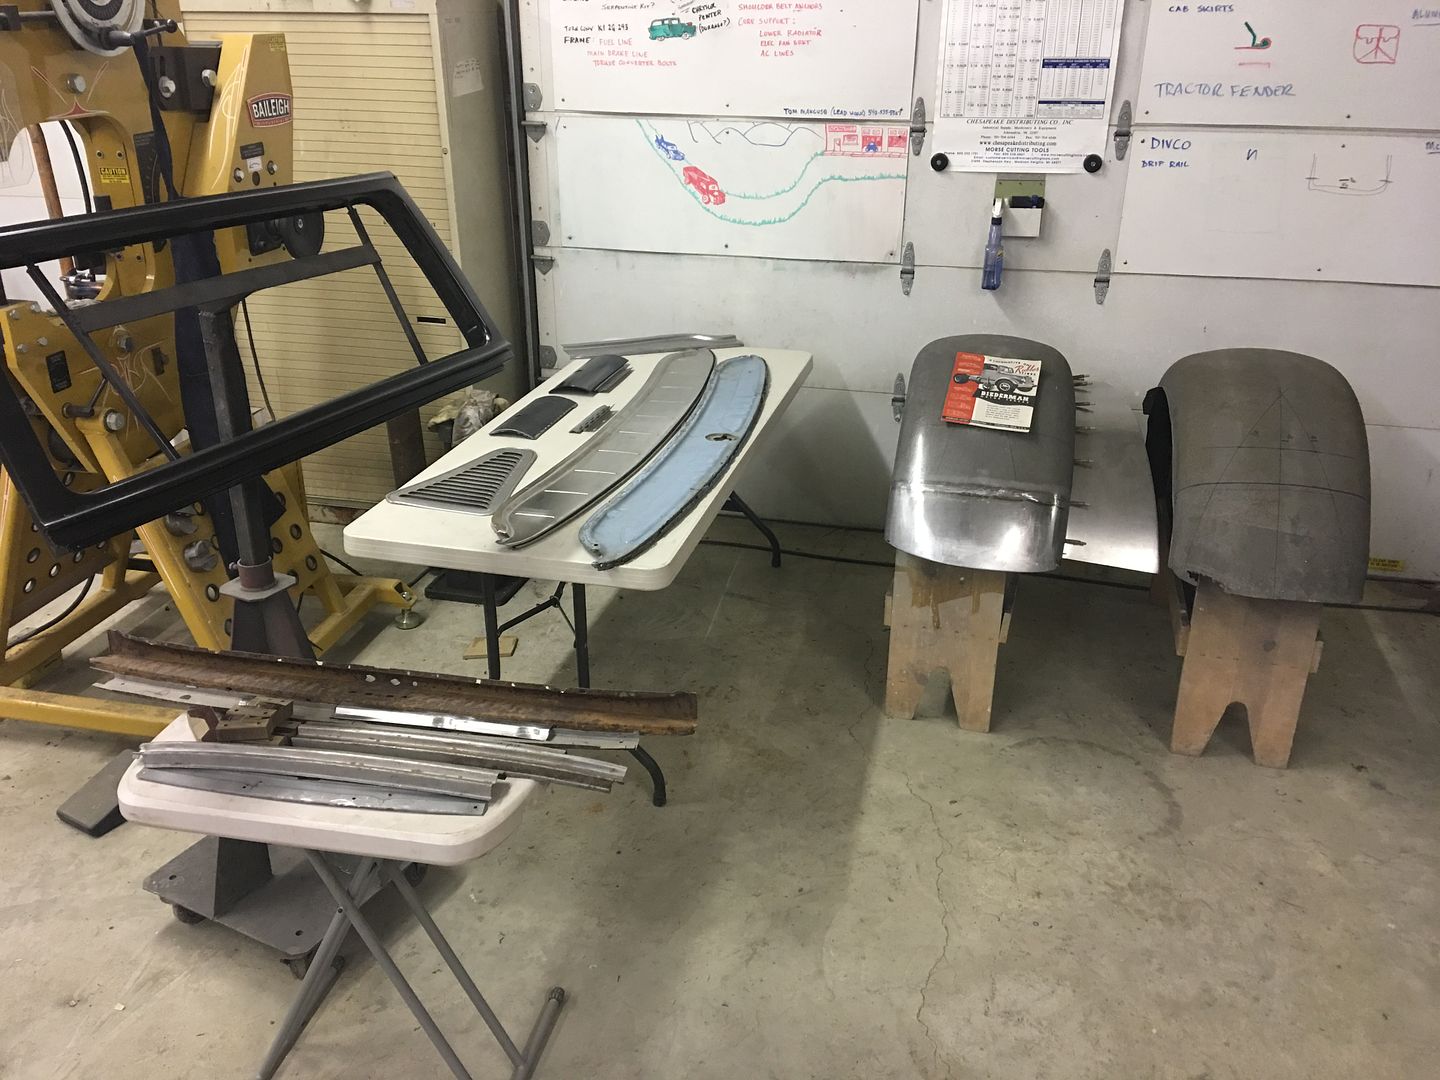 We still had all the original pieces for the lift gate repair, so that was a good sample.. Set up at the show, I figured parked next to the Ice Cream truck would be easier on my will power than the smell of three BBQ trucks on the other side...  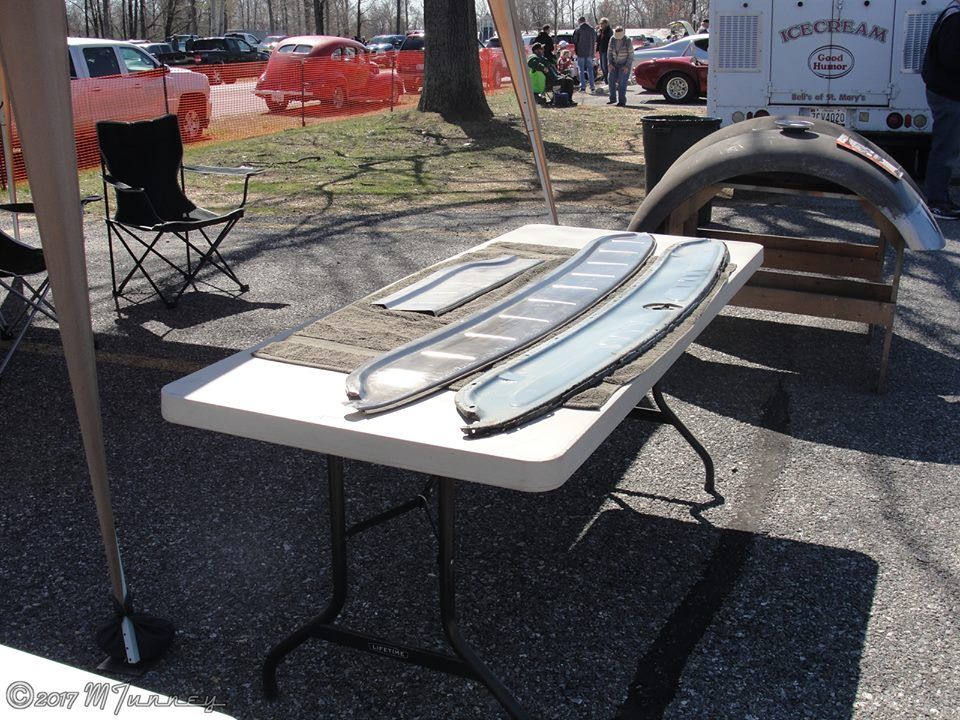 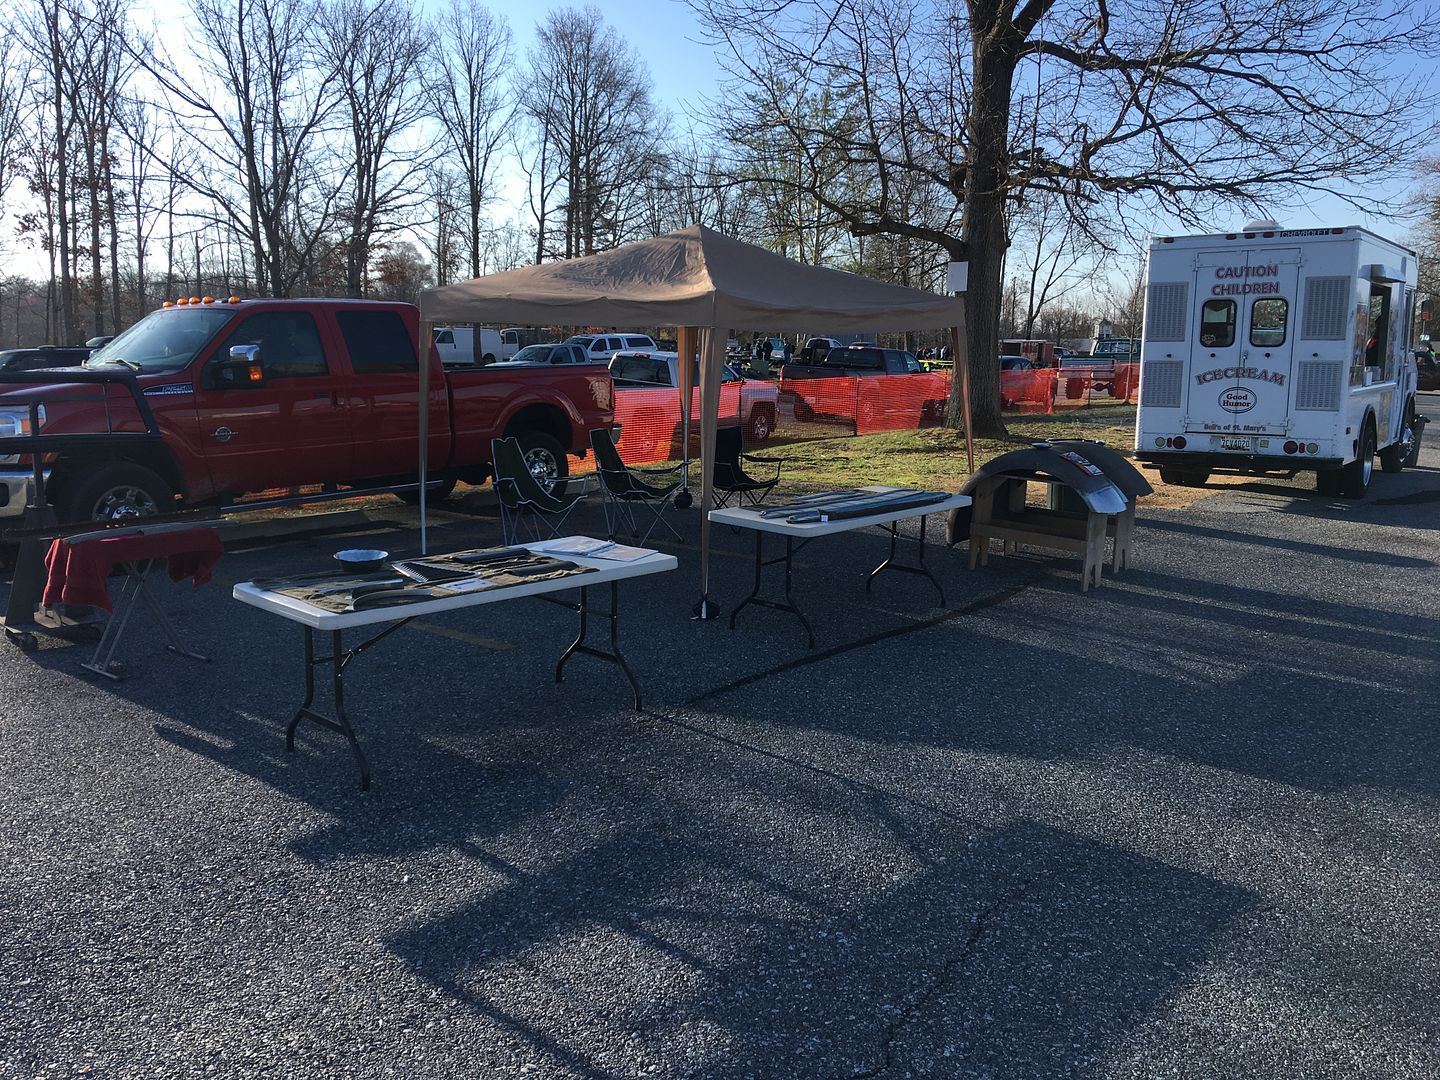 Got these pictures right after we set up and before all the crowd showed up. Had a blast, talking metalshaping, rust repair, etc. for most of the day.. Got to meet Duallyjams and look at some of his stainless needing repairs.. The days over, I guess I've got to get back to work now...
__________________
Robert Last edited by MP&C; 04-06-2017 at 06:38 AM. |
|
|
|
 |
| Bookmarks |
|
|


 Linear Mode

