
|
 10-31-2018, 10:11 PM
|
#1 |
|
Registered User
Join Date: Sep 2010
Location: anywhere, Texas
Posts: 66
|
4L60e overhaul
Well, the fun has commenced.
We have a 1994 Suburban. My dad bought it new in 1994 and put about 170k miles on it. We took it as our family truckster at that point around 2000 or so. The original trans got to slipping around 225k miles, so I obtained a used trans from the wrecking yard along with the torque converter. This came out of a wrecked 94 pickup with about 105k miles. It had nice looking fluid and this unit went in and went another 50k miles. This trans quit shifting and only has first, and rev so it was parked. The truck also exhibited a nasty pull toward the pass side during braking. This is being taken care of with a new(actually a free warranty replacement) caliper and a pair of brake hoses. I went ahead and got a set of ball joints too as the set in there has about 100k miles on em. I'm hoping it can go another 100k. Time will tell. So, the trans was already out of the truck. This one is the original one so it has about 225k on it.
__________________
Rich Last edited by TexasT; 10-31-2018 at 10:51 PM. |

|

|
|
10-31-2018, 10:22 PM
|
#2 |
|
Registered User
Join Date: Sep 2010
Location: anywhere, Texas
Posts: 66
|
Re: 4L60e overhaul
A few more pix.
I made a piece of wood with a hole in it for the case to sit on while I goof with it. I ordered up this compressor tool. Not sure what I got but it is not the correct one for the 4l60e.
__________________
Rich |
|
|
|
|
10-31-2018, 10:29 PM
|
#3 |
|
Registered User
Join Date: Sep 2010
Location: anywhere, Texas
Posts: 66
|
Re: 4L60e overhaul
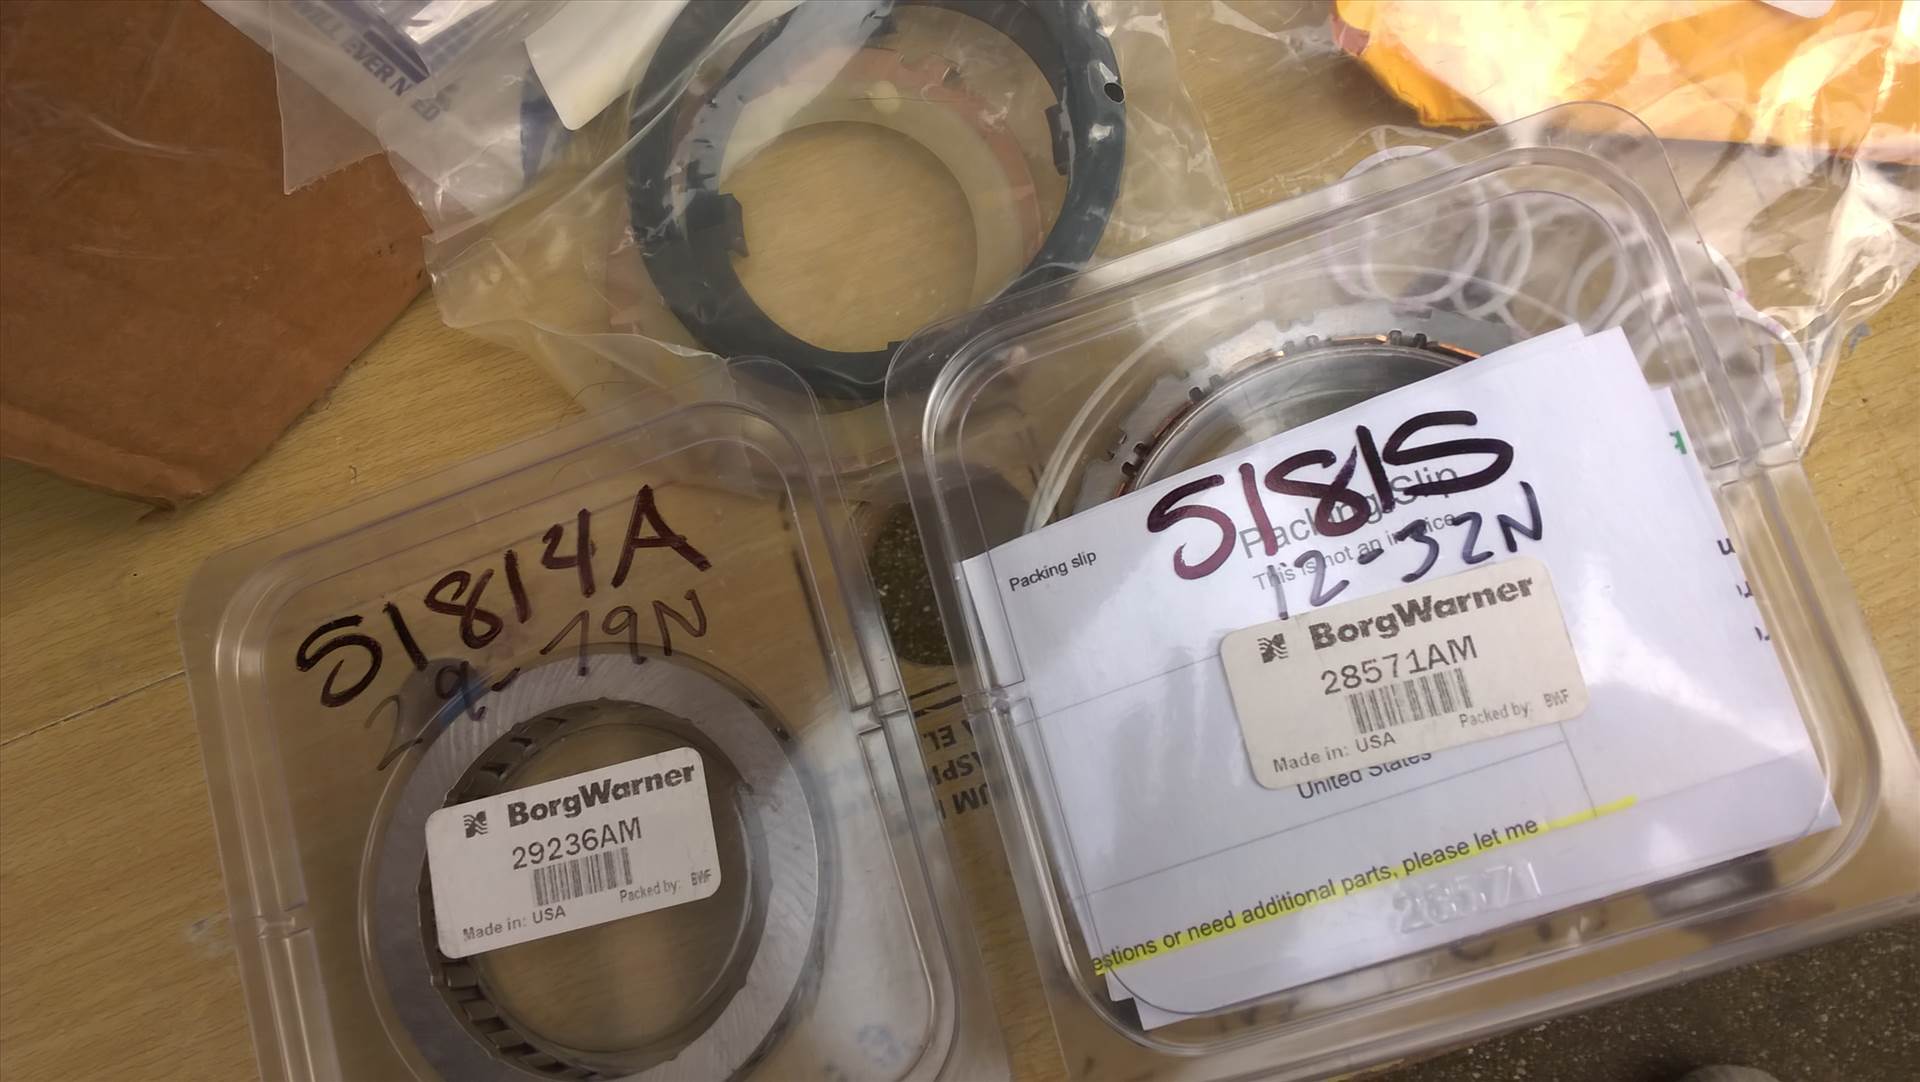
A few of the things I purchased.
The shortness of the compressor. I ended up using a bolt and some nuts and some metal I had to do the compressing. Once out the ring fit down though the middle of the spring cage. so I guess it is on that trans part pretty tight.
__________________
Rich |
|
|
|
|
10-31-2018, 10:36 PM
|
#4 |
|
Registered User
Join Date: Sep 2010
Location: anywhere, Texas
Posts: 66
|
Re: 4L60e overhaul
I got the low rev piston out but not without a fight. I ended up having to order up a new pliers. The one I had used has a snoot that is too big to fit. I got these wilde brand pliers and they are NICE! Took longer to rig up the compressor than to get the snap ring off and back on.
I knocked the rear bushing out and matched it up with one out of the bag of bushings I bought. Then set up the press and some socket extensions and a socket to press the new on in. I used the old one to recess the new one a bit down in the bore like the old one was.
__________________
Rich |
|
|
|
|
10-31-2018, 10:47 PM
|
#5 |
|
Registered User
Join Date: Sep 2010
Location: anywhere, Texas
Posts: 66
|
Re: 4L60e overhaul
Any questions or suggestions are welcome. Any pix you want to see I'll try to get and post em up. Let me know.
As above I'm using some exedy clutches. I haven't measured them but I think the 3-4 clutches are .080 and I ordered up some .106 steels. Planning on this to get the 3-4 setup tight and will use a thinner steel or some thing to get a tight clearance on this pack. I also got the new apply and back plates. These are suppose to be the upgraded stock stuff to prevent coning of the clutch pack by the raised internal pressures. Have a sonnax .500 boost valve and spring to get those pressures up. Also have a carbon band and a corvette servo. Im hoping it will turn out well. Time will tell. Not sure what I'm going to do for the torque converter. Probably take it out to my friends in Weatherford, Tx, Phoenix Transmission. I'm running their converter in my 2004r we overhauled a few yrs ago and really like it. I took a 2x6 and drilled a 1 1/8" hole and clamped it to the edge of my bench to hold the input shaft and drum. I went ahead and put the new seals on the low rev piston and slathered on some asemblee goo. Dropped it in and tapped it home with a hammer handle. Then put the spring and ring back on. Then tested it with some compressed air to make sure it worked and it does. And I got a real lip wizard. On the last overhaul I just made my own out of plastic soda bottles. I'm stepping up. Will post more when we do more. Maybe Saturday.
__________________
Rich |
|
|
|
|
11-01-2018, 09:45 AM
|
#6 |
|
Account Suspended
Join Date: Aug 2018
Location: GBR !!
Posts: 144
|
Re: 4L60e overhaul
You dont need the lip wizard on bonded pistons. Always install bonded pistons even on 700r4s. Toss the lip wizard away. Lip wizard will tear the lip seal in the tight fitting reverse input drum if you dont know what you are doing.
Show us your tool for installing the Teflon seals on the input shaft and the pump stator that fits into the reverse input drum. Posted via Mobile Device |
|
|
|
|
11-01-2018, 11:52 AM
|
#7 |
|
Registered User
Join Date: Sep 2010
Location: anywhere, Texas
Posts: 66
|
Re: 4L60e overhaul
Yeah, I just never had a lip wizard before. I used a feeler gauge and some plastic circles I cut out of a plastic two liter bottle to do the seals on the 2004r I overhauled a couple yrs ago. As far as the rings go, I just put them on and clamped some more of that plastic off the two liter bottle with hose clamp(s) to size em. I have since learned I can use a funnel to "stretch" the rings. I tried to put up some pix but I guess my phone isn't up with that so it will have to wait until later.
I do have a three piece set of the bonded pistons and the caged springs deemed necessary. I measured up the clearance on the rear planet and it appears the larger one is about .022 so I need to find out what is the recommended clearance range. Might have to get another one. No discernable wiggle and they seem to spin well.
__________________
Rich |
|
|
|
|
11-01-2018, 05:39 PM
|
#8 |
|
Account Suspended
Join Date: Aug 2018
Location: GBR !!
Posts: 144
|
Re: 4L60e overhaul
May want to check your case bushing, it appears from the pic its not all the way into the case to where it needs to be. Always check your bushings, no one likes a tight bushing. Its like putting in cam bearings in your motor.
|
|
|
|
|
11-01-2018, 05:55 PM
|
#9 |
|
Registered User
Join Date: Sep 2010
Location: anywhere, Texas
Posts: 66
|
Re: 4L60e overhaul
I put it where the other one came out. How far in do you usually set it? I could probably drive the old one in too but not sure how the shaft would like that.
__________________
Rich |
|
|
|
|
11-01-2018, 05:59 PM
|
#10 |
|
Registered User
Join Date: Sep 2010
Location: anywhere, Texas
Posts: 66
|
Re: 4L60e overhaul
I guess you are looking at the bottom pic? That is the out side looking into the case from the tail side. I pressed the bushing in with that socket and extension setup then put the old bushing on top of the new on and pressed the new one in to where the old one was. Maybe the old one had moved. I will look at the output shaft and see about the witness marks.
__________________
Rich |
|
|
|
|
11-01-2018, 07:49 PM
|
#11 |
|
Account Suspended
Join Date: Aug 2018
Location: GBR !!
Posts: 144
|
Re: 4L60e overhaul
Just check the bushing with the torrington bearing to make sure they do not come into contact with each other, along with putting the rear ring gear into the bushing to make sure its not to tight....most likely you should be good.
Did you air check the low and reverse piston with the center support/rear planet/ring gear/clutches and steels installed ? |
|
|
|
|
11-01-2018, 09:32 PM
|
#12 |
|
Registered User
Join Date: Sep 2010
Location: anywhere, Texas
Posts: 66
|
Re: 4L60e overhaul
I checked the piston but haven't stacked any clutches and steels in there yet. I'll check it again when I get that lower section together.
__________________
Rich |
|
|
|
|
11-01-2018, 10:12 PM
|
#13 |
|
Account Suspended
Join Date: Aug 2018
Location: GBR !!
Posts: 144
|
Re: 4L60e overhaul
the reason I asked about air checking the rear piston is because you stated you air checked it. If you air check it without the steels and clutches/center support in the case, this will allow the piston to move to far up in the case and rip the three seals on the piston.
|
|
|
|
|
11-03-2018, 09:28 AM
|
#14 |
|
Registered User
Join Date: Sep 2010
Location: anywhere, Texas
Posts: 66
|
Re: 4L60e overhaul
I'll pull it apart and check those rubber rings. Cant be putting in a trans with no reverse.
__________________
Rich |
|
|
|
|
11-03-2018, 09:47 PM
|
#15 |
|
Registered User
Join Date: Sep 2010
Location: anywhere, Texas
Posts: 66
|
Re: 4L60e overhaul
Alrighty then... we pulled the rev piston out to check the seals. They looked fine so it got a regrease with the assemblee goo and put it back in. Fought off the urge to test it again until we "stacked" the clutches in. Watched this guy to make sure of the order with the waved steel. While I was in watching the transmission bench we soaked the clutches in trans fluid.
https://www.youtube.com/watch?time_c...&v=pg5FIrvmexs Also in there was the advice to install the rear bushing 1/16" in the case and we had so that is all good. Stacked in the wave, steel, clutch, steel, etc until we had them all in. Pulled the one way clutch apart and installed the new one I bought. It was a tight fit but it is back together and in there too. Put the anti-clunk spring in and then the sprag setup, then the snap ring to keep it all in the case. The made sure we had clearance in the clutch stack and finally the air test. Worked out well I think. Then it started sprinkling so I had to clean up the activity for tonight. More when I do more.
__________________
Rich |
|
|
|
|
11-03-2018, 10:59 PM
|
#16 |
|
Account Suspended
Join Date: Aug 2018
Location: GBR !!
Posts: 144
|
Re: 4L60e overhaul
Now would be a great time to install the sonnax "wide bushing" in the sun gear.
|
|
|
|
|
11-03-2018, 11:49 PM
|
#17 |
|
Account Suspended
Join Date: Aug 2018
Location: GBR !!
Posts: 144
|
Re: 4L60e overhaul
I would suggest to install a transgo shift kit for your 4L60E, I see you purchased the boost valve but thats not all this transmission needs to last.
Couple of other things to check before going any further with your build. Check the 3rd accumulator check ball to ensure its free and do a leak test on it. This is located in the 2/4 servo area. Upgrade your reverse input drum piston - instructions are in the transgo shift kit. Drill out the two holes in the piston and install the two orifices provided in the shift kit. When checking your 2/4 band clearance do not install the blue o-ring when checking clearance on the 2/4 band. Only install the blue o-ring when you know the 2/4 band /servo is set to go. |
|
|
|
|
11-04-2018, 06:28 AM
|
#18 |
|
Registered User
Join Date: Sep 2010
Location: anywhere, Texas
Posts: 66
|
Re: 4L60e overhaul
We are going to for go the transgo kit due to budgetary constraints. I did do the check of the captured ball in the servo area. Used some stabil and it didn't seem to leak any. We will probably reuse the stock plate after working it with a hammer to get the check ball holes back into shape. I ordered up a set of the thorlon balls but haven't decided to use them yet. Might just do the metal ones. They lasted 225k miles. Or might order the transgo plate and go that way. Still up in the air. Will be drilling out the holes for firmer shifts on which ever plate we use.
I bought a pinless accumulator piston in anticipation of a plastic one but it hasn't come out yet. All metal so far. Will check the pin and pistons for wear and see but might just install the seals and go back with stock. The piston in the case had no spring. Have to study up on that. I have some white springs and would put one in if warranted. I like firm crisp shifts. But this is a suburban so.it ain't a racecar. Will look into the wide bushing for the sun gear. I believe I ordered it and think it is in my box of parts. I do appreciate the suggestions and want you to keep them coming. Thank you very much.
__________________
Rich Last edited by TexasT; 11-04-2018 at 10:23 AM. |
|
|
|
|
11-06-2018, 10:39 AM
|
#19 |
|
Account Suspended
Join Date: Aug 2018
Location: GBR !!
Posts: 144
|
Re: 4L60e overhaul
Being that your transmission is a 1994 most likely you do not have the bonded pistons in the input forward drum, for you to use bonded pistons you will have to purchase a different spring/retainer to fit the bonded piston in the input forward drum.
Make sure you replace the o-ring inside the input "forward' drum. In some rebuild kits they have a green color to them. I like to use the bearing at the sun shell area, instead of the thrust washer. The sun shell is the weakest link to this transmission, once you upgrade the sun shell, where do you think is the weakest link now ? |
|
|
|
|
11-11-2018, 08:41 PM
|
#20 |
|
Registered User
Join Date: Sep 2010
Location: anywhere, Texas
Posts: 66
|
Re: 4L60e overhaul
Judging by the 3-4 clutches I pulled out they are an area that could use attention.
Got the bonded pistons and spring cage covered. Also going back with the little double spring things in the 3-4 clutch place. 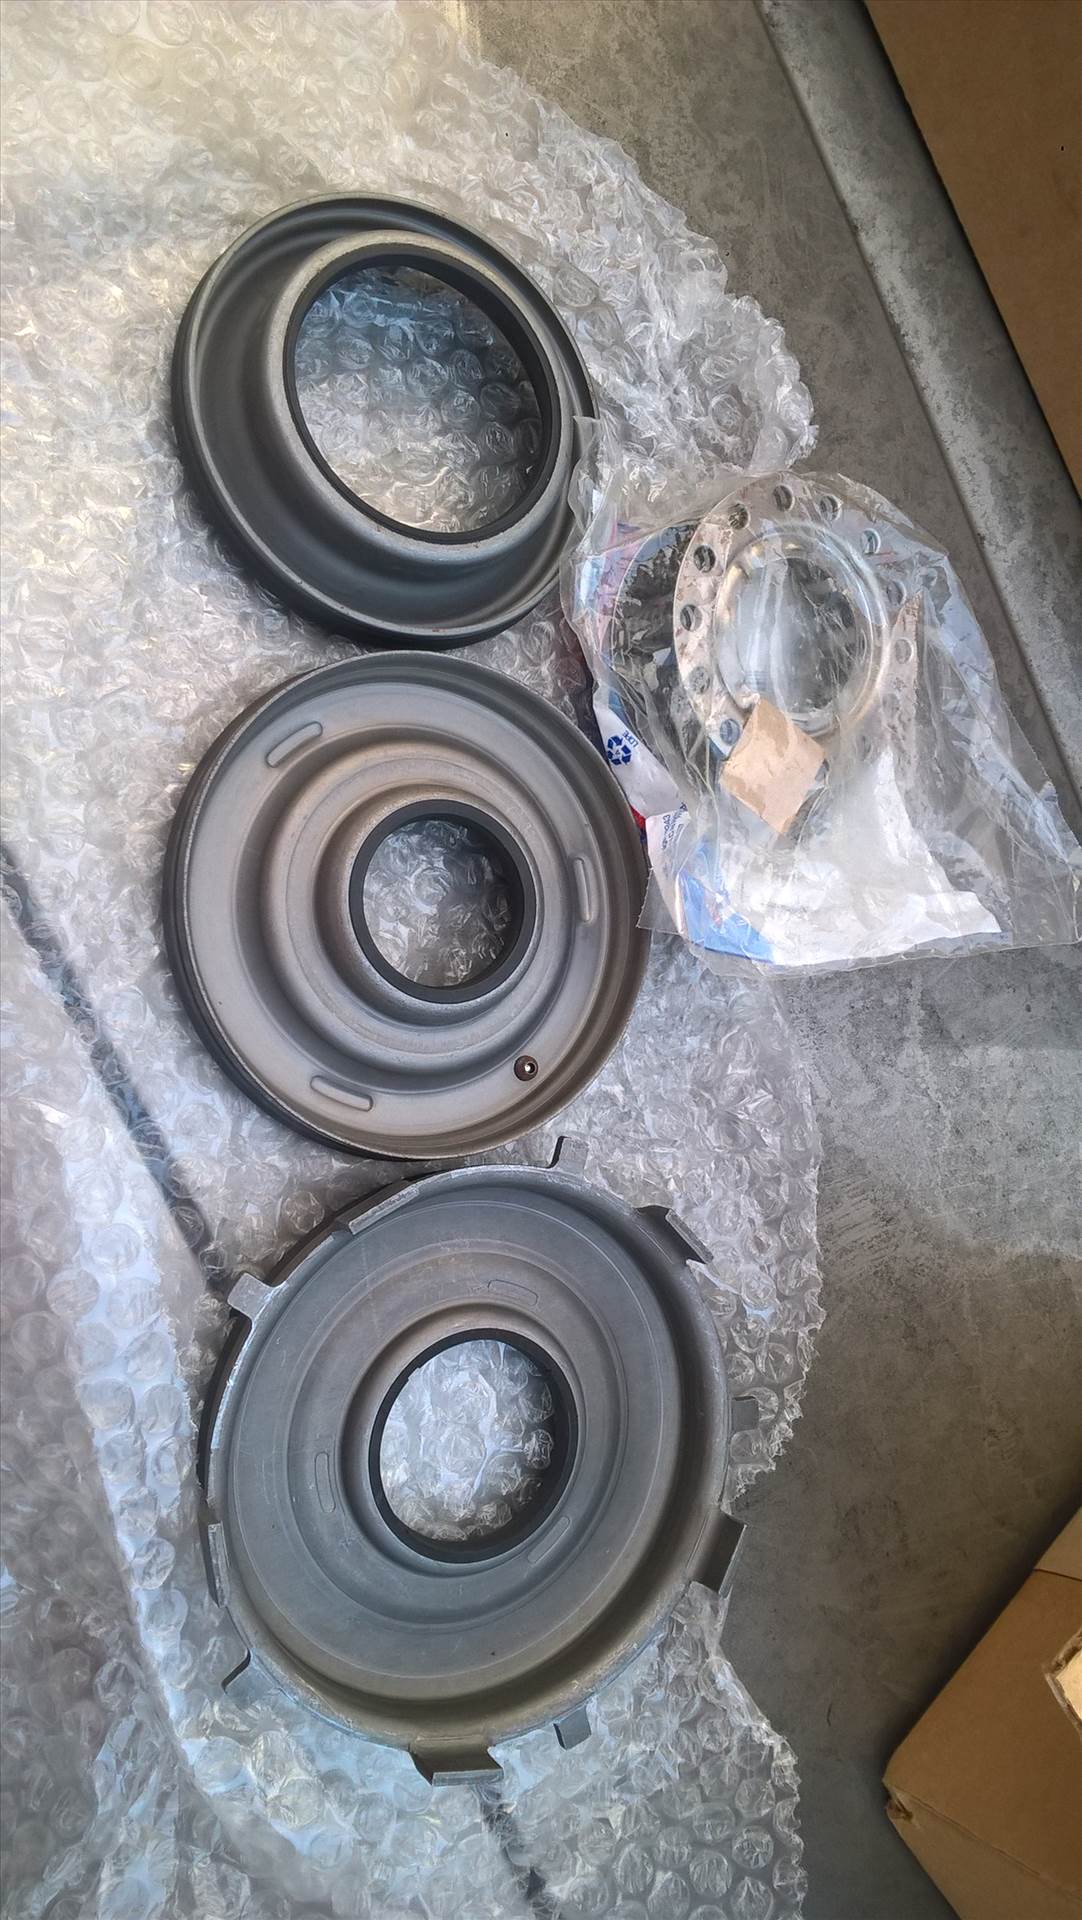 Replaced the skf sprag with a borg warner unit. The skf had some discoloration to the ring that goes on the inner race. Had a Little difficulty removing it. But it came off and we installed the new borgwarner. soaked and stacked in the clutches and steels down in the drum with the new bonded pistons and the little green oring. 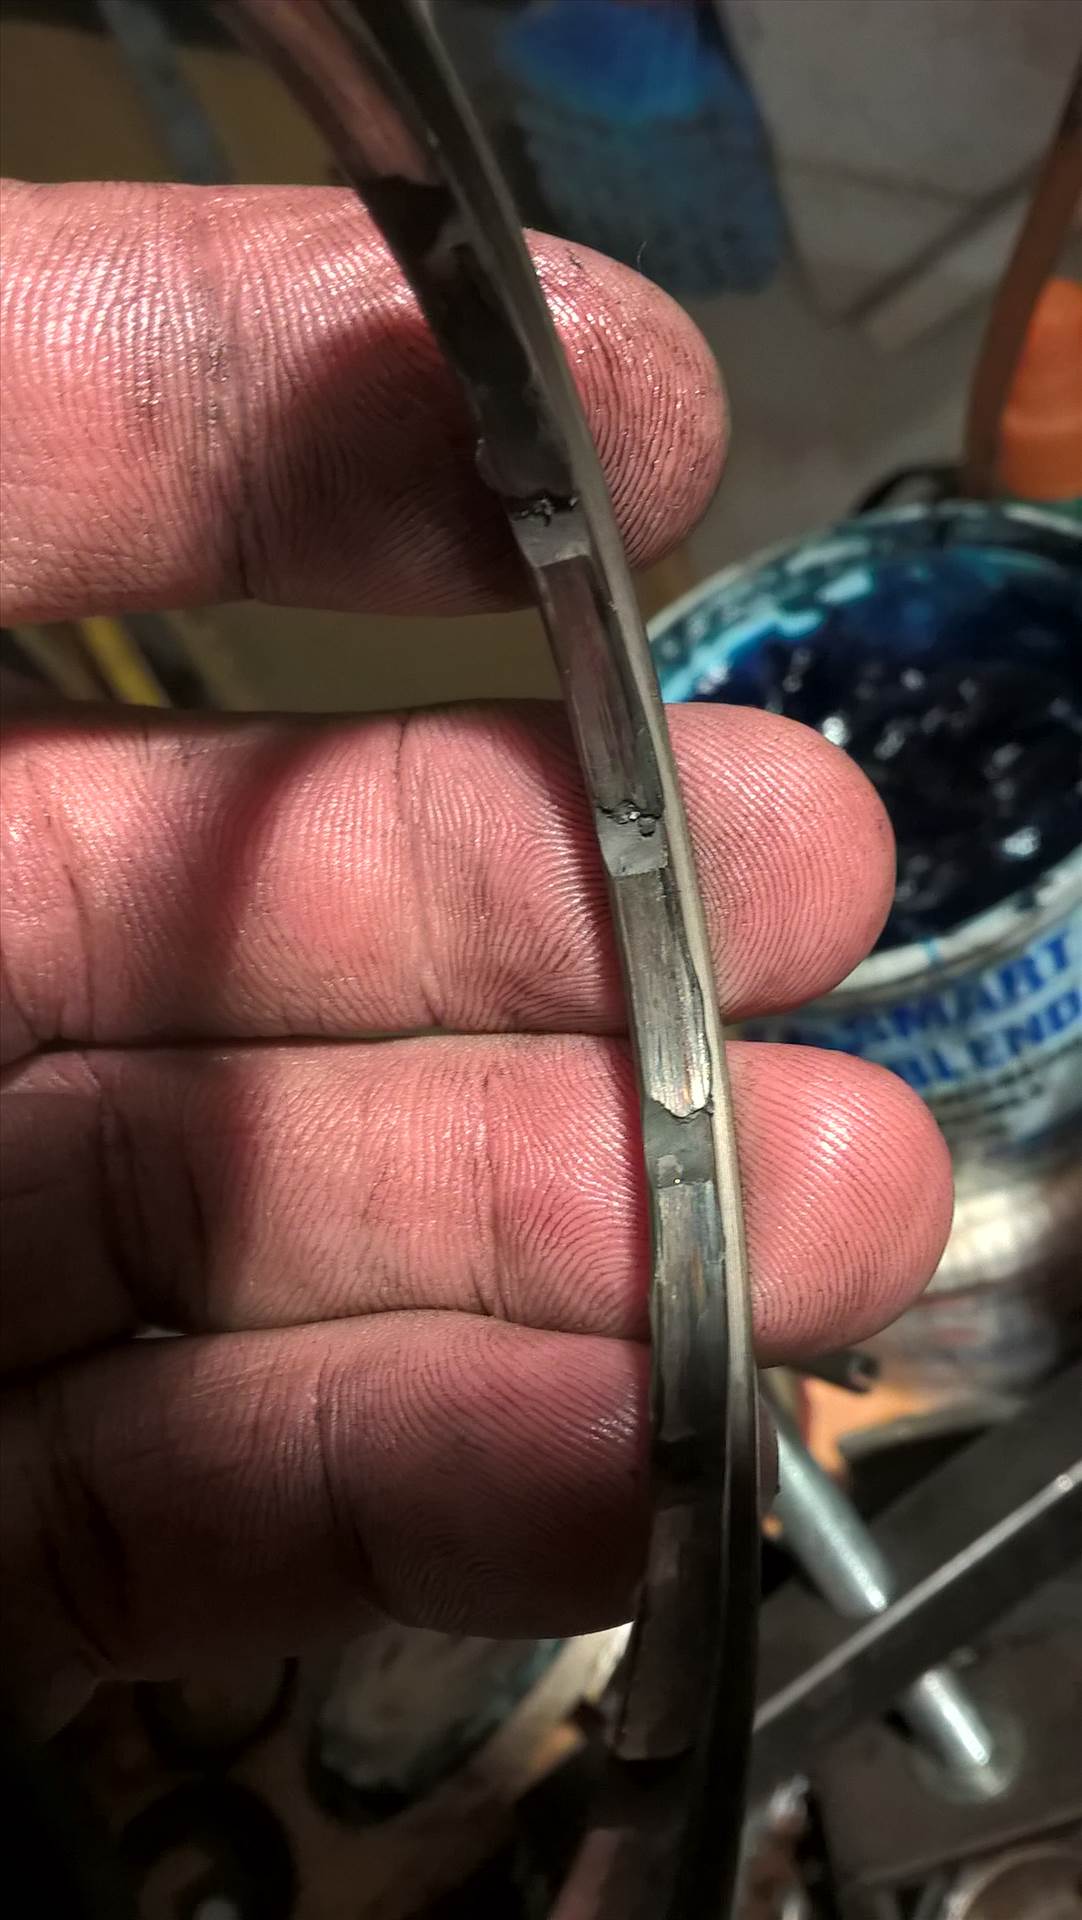 The 3-4 clutches came out pretty much done. One had no 'Teeth" on it and was split. A lot of material was gone from most and some had no clutch left on em. I stacked in some .106 steels and the new .080 frictions after a soak in the fluid. Got a .045 or so clearance and thought that to be good.  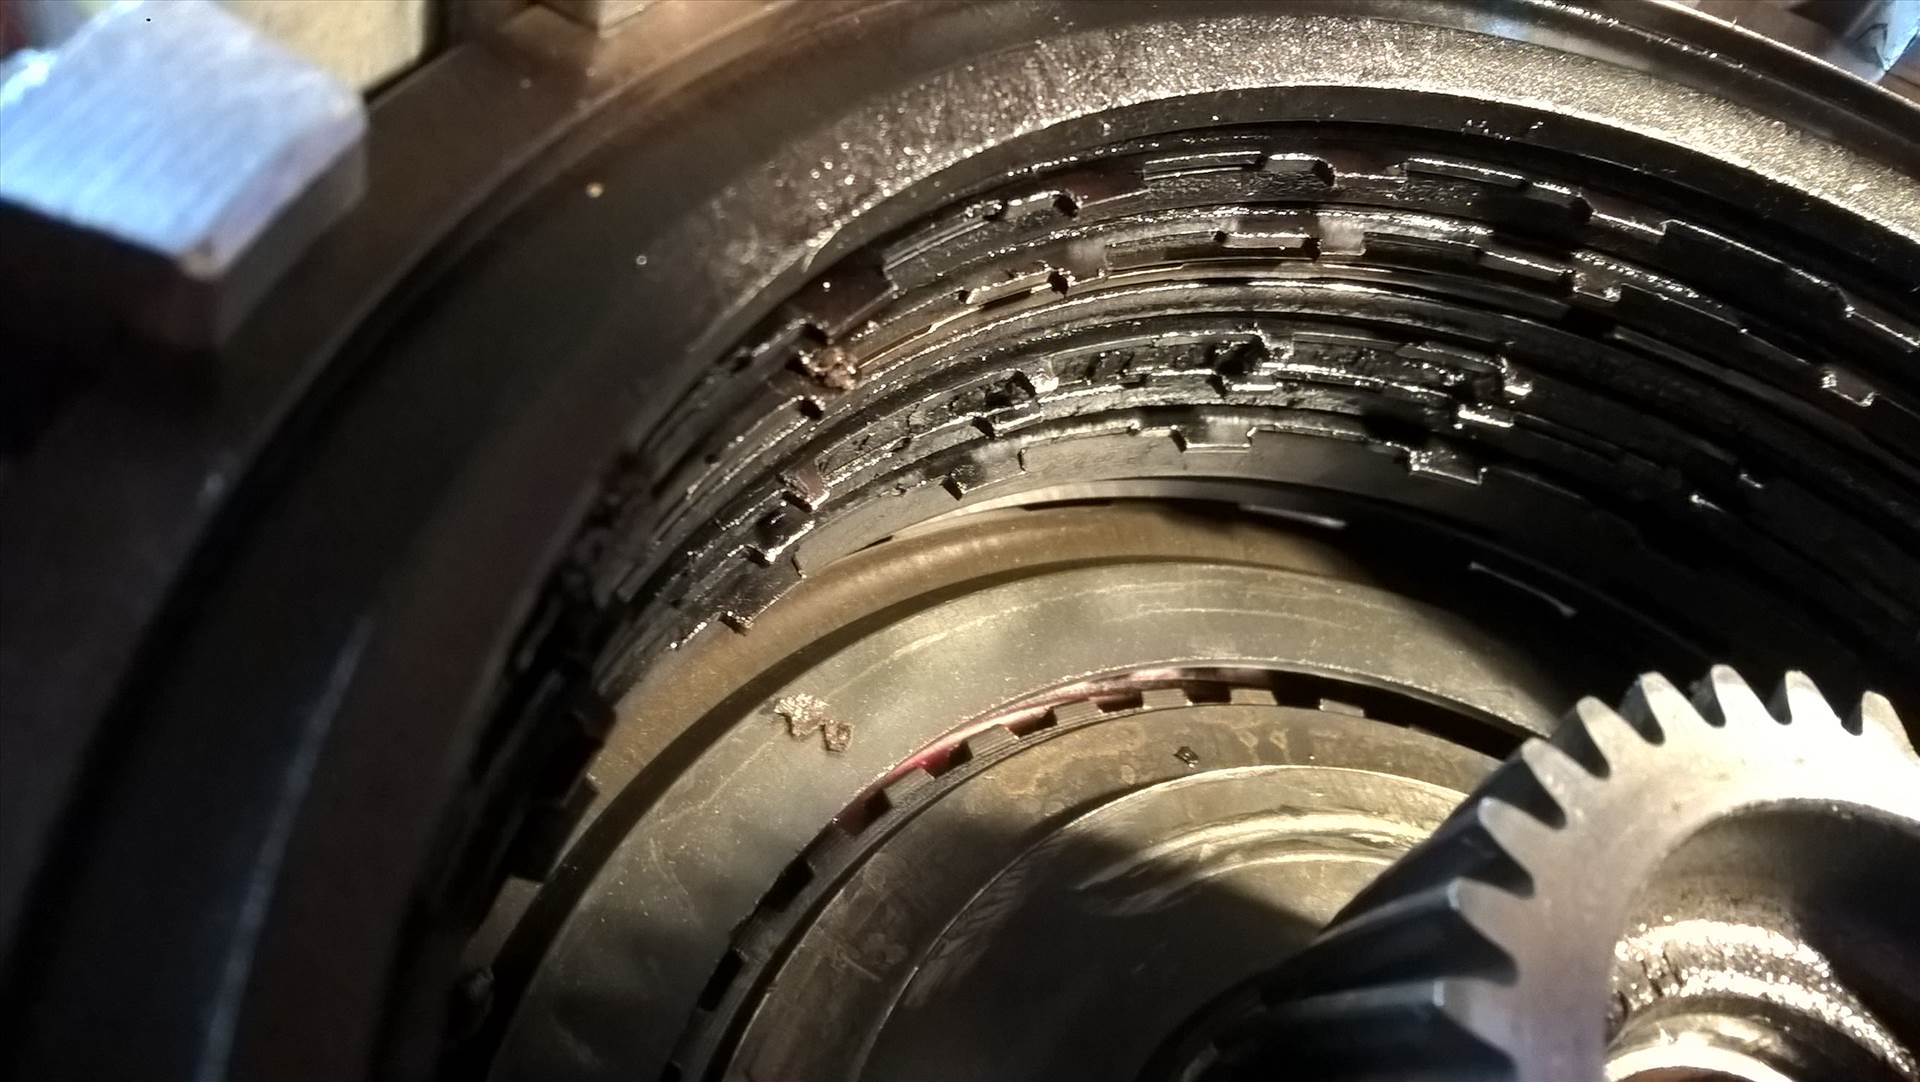 Figured out what the small compressor goes to. 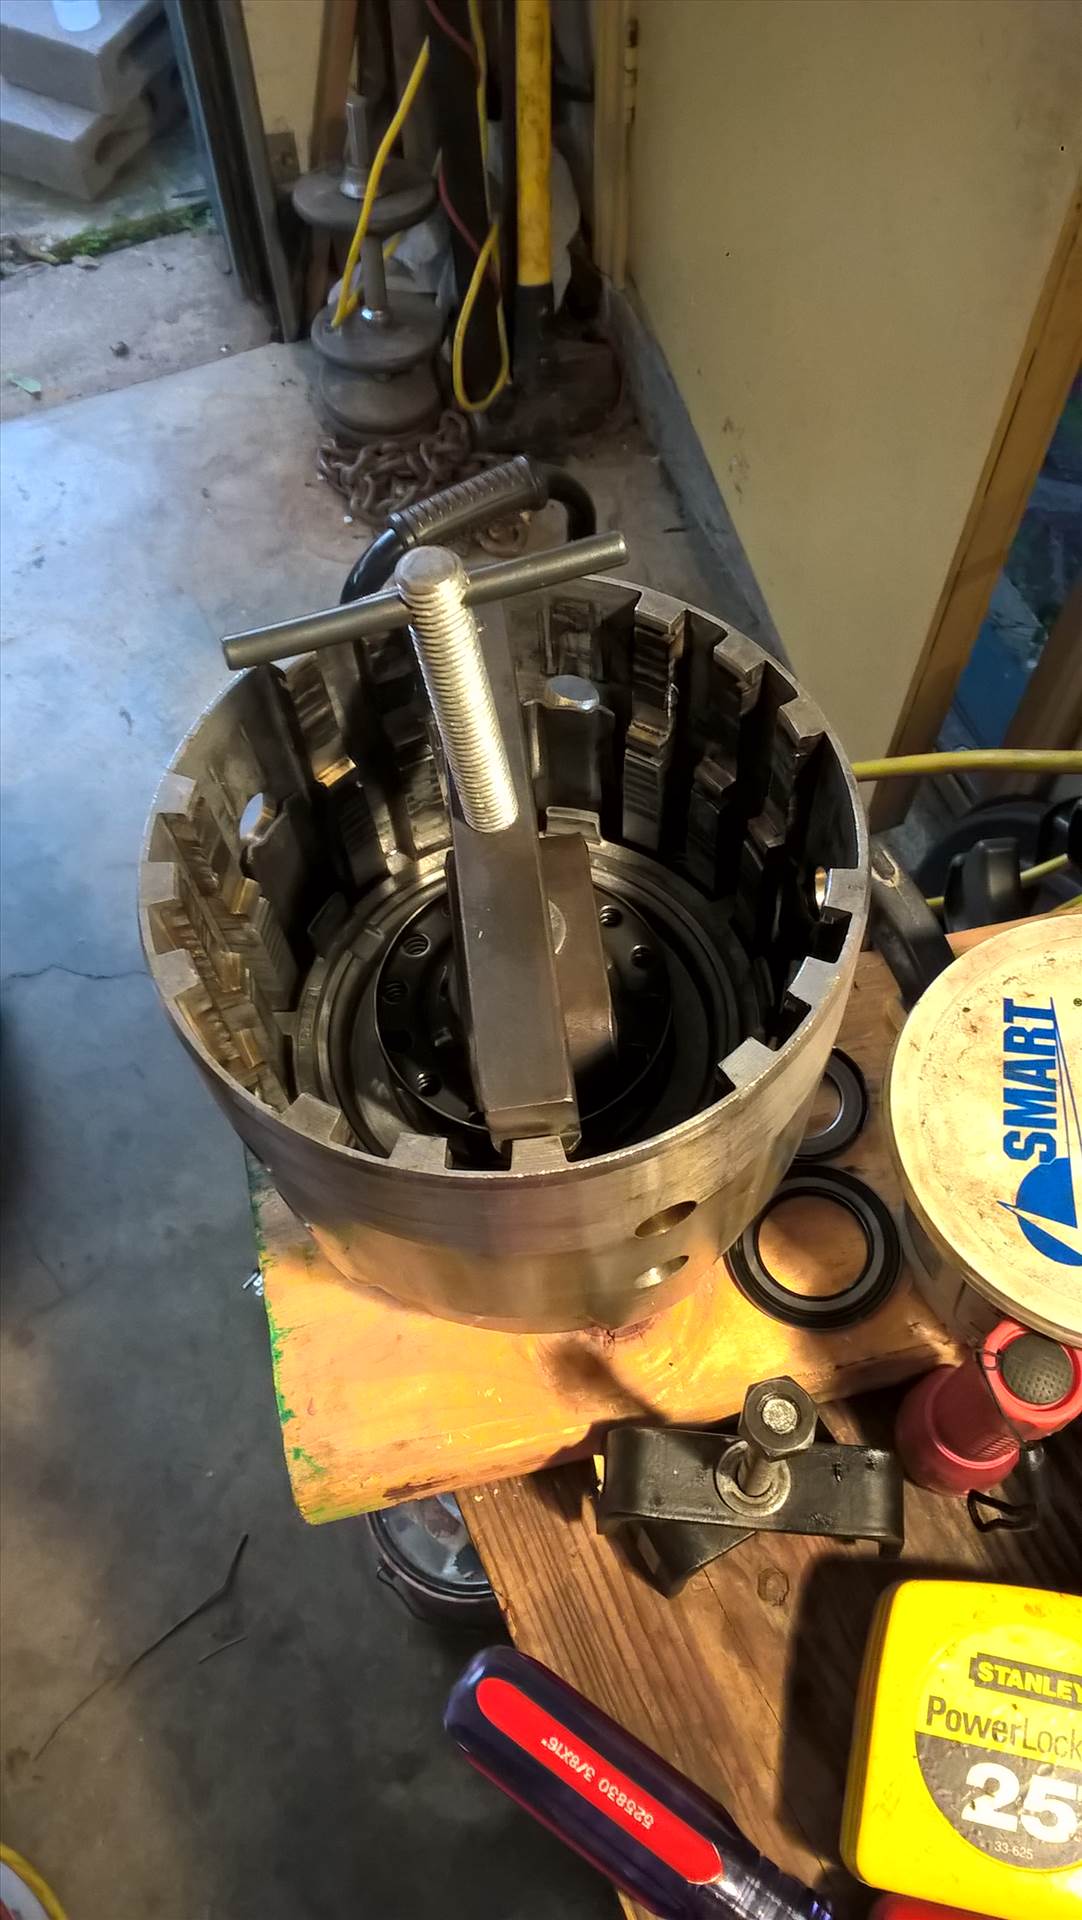 All in all had a pretty productive activity and fun while doing it. More when I do more.
__________________
Rich |
|
|
|
|
11-13-2018, 09:55 AM
|
#21 |
|
Account Suspended
Join Date: Aug 2018
Location: GBR !!
Posts: 144
|
Re: 4L60e overhaul
I would suggest to replace your forward sprag as well.
|
|
|
|
|
11-14-2018, 01:36 PM
|
#22 |
|
Registered User
Join Date: Sep 2010
Location: anywhere, Texas
Posts: 66
|
Re: 4L60e overhaul
 I guess I didn't post up any pix of the front sprag. Not sure I took any other than when I took the old stuff apart. Bought a set when I was buying parts. Ordered up a transGo vb plate and will probably go back with the stock steel balls. Worked for 225k miles so I'm thinking GM knew what they were doing. Cold snap(yeah, I know, but I'm in Texas so 20s n 30s are cold to me, so I haven't gotten things going again yet. More when I do more.
__________________
Rich |
|
|
|
|
11-21-2018, 09:55 AM
|
#23 |
|
Registered User
Join Date: Sep 2010
Location: anywhere, Texas
Posts: 66
|
Re: 4L60e overhaul
New transgo vb plate came, and we put the new bushings in the shell that the band rides on. Didn't get any pix. Need to do the bushings in the sun gear but the holiday and work schedule are holding me back.
__________________
Rich |
|
|
|
|
11-30-2018, 10:21 PM
|
#24 |
|
Registered User
Join Date: Sep 2010
Location: anywhere, Texas
Posts: 66
|
Re: 4L60e overhaul
Alright, did some more.
 Swapped in some new bushings. The originals didn't look too bad but once the new ones were in it sure took the slop out of the sun gear. Moral, put the new bushings in. Especially on a 225k mile trans.  I will say pay attention whaer the old ones were, and there are holes(i'm sure for lubrication) in that sun gear and if you put the bushing over the hole I would guess that would be bad.  Fits in real nice.
__________________
Rich |
|
|
|
|
11-30-2018, 10:26 PM
|
#25 |
|
Registered User
Join Date: Sep 2010
Location: anywhere, Texas
Posts: 66
|
Re: 4L60e overhaul
put the new rings on the input.
 I debated on changing them but glad I did. I pushed on em with the pick and they were brittle and broke easy. Stretched the new ones out on a funnel and am "sizing" them with some hose clamps and a piece of plastic from a soda bottle.  I think it is going well. Fooling with the pump is next.
__________________
Rich |
|
|
|
 |
| Bookmarks |
| Thread Tools | |
| Display Modes | |
|
|


 Linear Mode

