
|
Register or Log In To remove these advertisements. |
|
|
|
|||||||
 |
|
|
Thread Tools | Display Modes |
 06-14-2023, 02:17 PM
|
#51 |
|
Registered User
Join Date: Mar 2022
Location: Surrey BC
Posts: 686
|
Re: Moody's Utah 58 Apache
'58 would not have had self adjusting brakes from factory, but it is an easy retrofit using hardware from like '63 and up.
if things are lubed up and assembled correctly, rear drum self adjust when you pull parking brake or use the brakes in reverse, front drum self adjust when you use the brakes in reverse. |

|

|
|
06-14-2023, 11:14 PM
|
#52 | |
|
Registered User
Join Date: Jun 2014
Location: Bountiful, UT
Posts: 30
|
Re: Moody's Utah 58 Apache
Quote:
As I was working through the tips you guys gave for the vacuum I decided to switch out a few likes. The vacuum line I think wasnt thick enough for the pressure it was under and I notice a very very small drip from one union on the brake lines. The brakes definitely feel better but still doesnt stop it from rolling back and forth. Ill get it figured out this weekend. |
|
|
|
|
|
06-15-2023, 09:28 AM
|
#53 |
|
Registered User
Join Date: Nov 2010
Location: calgary alberta
Posts: 7,829
|
Re: Moody's Utah 58 Apache
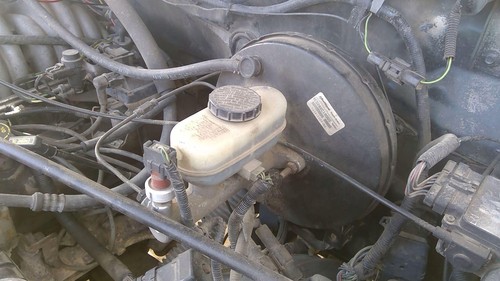
curious where the leak was found. if it was a fitting I would check why it was leaking. not tight? why? possibly a poor or cracked flare or a line that is not supported well near the rigid fitting so it vibrates and stress cracks. anyway, like said before, follow each line from front to rear to ensure the integrity of each is good. look for rusty spots, broken or missing retainer clamps etc
if you could post a few pics that would be great |
|
|
|
|
06-16-2023, 12:25 PM
|
#54 | |
|
Registered User
Join Date: Mar 2012
Location: Lakes Region NH
Posts: 3,158
|
Re: Moody's Utah 58 Apache
Quote:
 If your truck just happens to have an OEM style Hydrovac then diagnosis of the "pedal to the floor when the truck is running" is very different. |
|
|
|
|
|
06-17-2023, 09:56 AM
|
#55 |
|
Registered User
Join Date: Nov 2010
Location: calgary alberta
Posts: 7,829
|
Re: Moody's Utah 58 Apache
thats why I asked to have a few pics posted, to see exactly what is being used for brakes, booster, master cyl, pedal etc.
i recommend starting at one end and working through to the other end. check, adjust or replace as required. try not to skip anything because "that should be fine". |
|
|
|
|
06-18-2023, 04:53 PM
|
#56 |
|
Registered User
Join Date: Jun 2014
Location: Bountiful, UT
Posts: 30
|
Re: Moody's Utah 58 Apache
I got them working. It was a really simple issue that I simply overlooked. On my rear the lines run into a banjo bolt on both sides then to the wheel cylinders.
When I replaced the front lines, because of the rust. I just blew out the back line that went over the axle. I didn't do anything with the banjo bolts. Either i forgot or I figured they would be fine. This is also the brake booster im using. When I took the drums off all the components looked pretty good. Sense I got some wheel cylinders i just replaced them all for good measure. Even though they didn't look like they needed too be. I think the front lines were just loosing fluid through the T-connection I had. As i said earlier it was weeping a bit. |
|
|
|
|
06-18-2023, 04:57 PM
|
#57 |
|
Registered User
Join Date: Jun 2014
Location: Bountiful, UT
Posts: 30
|
Re: Moody's Utah 58 Apache
*thanks rickysnickers
Last edited by alexMoody; 06-19-2023 at 02:47 PM. |
|
|
|
|
06-19-2023, 10:49 PM
|
#58 | |
|
Registered User
Join Date: Mar 2012
Location: Lakes Region NH
Posts: 3,158
|
Re: Moody's Utah 58 Apache
Quote:
Electrical circuits and hydraulic circuits can be treated the same way. They both require flow and pressure to do work. I will use a stick and wedge it between brake pedal and seat or steering wheel to apply hydraulic pressure then crack a fitting to see what happens. If I can get a good shot of brake fluid at the fitting then I have good flow and pressure at that fitting. Reset the stick and move to the next fitting. Also, for new flares, it's extremely important to snug the line multiple times so the flare conforms to the fitting. Even experienced mechanics fall into the trap of "it's all new so it fits" when it comes to newly made flares or brand new flared lines. Snug, loosen, snug, loosen, and snug one more time. If the wrench or the nut stops at a different place each time you can pretty well bet that the flared line wasn't going to seal properly. |
|
|
|
|
|
06-20-2023, 12:33 AM
|
#59 | |
|
Registered User
Join Date: Jun 2011
Location: Central OR
Posts: 653
|
Re: Moody's Utah 58 Apache
Quote:
__________________
1955 GMC 250 8 Flatbed 1971 C30 157" 350 4spd 10' Flatbed 81 GMC K30 CnC 9' Flatbed 454 T400 89 GMC Jimmy Stock https://67-72chevytrucks.com/vboard/...d.php?t=810958 71 LT1 Convertible, 72 Coupe 69 CJ5, 75 CJ6, 67 M715, 72 M35A2 Bobbed, 95 XLC2 |
|

|
|
|
06-20-2023, 01:33 AM
|
#60 |
|
Registered User
Join Date: Mar 2022
Location: Surrey BC
Posts: 686
|
Re: Moody's Utah 58 Apache
so the front drum brake setup you posted a picture of is not self adjusting, but as I mentioned before the self adjusting hardware from any 60s chev / gmc half ton will swap on.
for instance here is a self adjusting hardware repair kit for a '66 https://www.rockauto.com/en/moreinfo...=1904&jsn=2967 Left and right are different, you need one of each for the front. lots of pictures online how it goes together, just make sure you get things setup correctly for right and left |
|
|
|
|
06-20-2023, 09:24 AM
|
#61 |
|
Registered User
Join Date: Nov 2010
Location: calgary alberta
Posts: 7,829
|
Re: Moody's Utah 58 Apache
on a side note, for anybody lurking as well, brakes dust is carconogenic so don't go breathing it or blowing off the brakes with compressed air. thinking you will just hold your breath for a minute isn't gonna cut it. use a respirator mask and remove the drums, then use a hose and water or a pump sprayer and water or whatever nut get rid of that dust before you start working on the brakes. an aerosol can of brake cleaner is sometimes too much pressure and gets a bunch of dust airbourne as well. just a heads up, be smart about how you work. it looks like these brakes were cleaned up pretty well so little brake dust to worry about. nice to see.
|
|
|
|
|
06-20-2023, 09:32 AM
|
#62 |
|
Registered User
Join Date: Mar 2022
Location: Surrey BC
Posts: 686
|
Re: Moody's Utah 58 Apache
Just noticed, the link/picture I showed of self adjusting hardware does not include the half moon shaped adjusting arm, so it is not a complete kit from the POV of starting with none of the parts
|
|
|
|
|
06-20-2023, 09:40 AM
|
#63 | |
|
Senior Member
  Join Date: Oct 2014
Location: Eagle, ID
Posts: 2,937
|
Re: Moody's Utah 58 Apache
Quote:

|
|
|
|
|
|
06-20-2023, 09:44 AM
|
#64 |
|
Registered User
Join Date: Nov 2010
Location: calgary alberta
Posts: 7,829
|
Re: Moody's Utah 58 Apache
here is a link to a thread here with pics of the self adjuster set up
https://67-72chevytrucks.com/vboard/...d.php?t=497055 |
|
|
|
|
06-23-2023, 12:37 AM
|
#65 | |
|
Registered User
Join Date: Jun 2014
Location: Bountiful, UT
Posts: 30
|
Re: Moody's Utah 58 Apache
Quote:
I spent the afternoon patching some holes and getting the cab cleaned and degreased for some sound deadening mat. A few small holes and then the old master cylinder hole was covered. Next will be cab mounts and cab corners. |
|
|
|
|
|
06-23-2023, 12:43 AM
|
#66 |
|
Registered User
Join Date: Nov 2010
Location: calgary alberta
Posts: 7,829
|
Re: Moody's Utah 58 Apache
I highly recommend totake measurements and pics when doing these panel replacements. it starts out as a simple thing but then you start cutting and removing rusty stuff and when you're done that and have found solid steel to weld to you find you have lost the reference points to get the new part installed so everything fits like it should. make some marks on some tape out of range of the repair and do some dimensional pics or run some lines acriss between points on both sides of the repair spot so you know the lines should line up when thngs are correct.
just a thought. been there before |
|
|
|
|
06-23-2023, 03:46 PM
|
#67 |
|
Registered User
Join Date: Jun 2014
Location: Bountiful, UT
Posts: 30
|
Re: Moody's Utah 58 Apache
I got the cab mounts replaced, only one bolt broke the rest came undone pretty easily. I'm still having issues with my inner fenders not lining up. The gap on the driver side is much better but the passenger side is the same if not worse. I know that the cab pivots based on the bolt on the front driver side. However when I was pivoting the cab it didn't seem to make much difference. The gap on the passenger inner fender is touching the firewall on the bottom and maybe 1/2 to 3/4 gap on top while the driver side is consistent the whole length.
|
|
|
|
|
06-23-2023, 05:40 PM
|
#68 |
|
Registered User
Join Date: Nov 2010
Location: calgary alberta
Posts: 7,829
|
Re: Moody's Utah 58 Apache
The cab needs to be level with the frame. Put a level on the frame and get it leveled or get a reading on the angle it is sitting at. Then level the cab to the frame with shims or whatever. Front to back and side to side.Then check/replace the rad support bushings and level up a fender to the door. Assuming the door fits the cab as it is supposed to be fitted to the cab opening before worrying about fenders. Do one side then the other.
Did you ever do a frame check for straight, square and sag? Sometimes these old tricks have a history you dont know about. |
|
|
|
|
06-23-2023, 07:45 PM
|
#69 | |
|
Registered User
Join Date: Jun 2014
Location: Bountiful, UT
Posts: 30
|
Re: Moody's Utah 58 Apache
Quote:
Ill take a digital level to it and double check. However, sense the passenger side bottom of the firewall is touching does that mean the rear of the cab needs to be adjusted up? The front end looks good as far as gabs and lines go its really just the inner fender that's off. |
|
|
|
|
|
06-23-2023, 08:16 PM
|
#70 |
|
Registered User
Join Date: Nov 2010
Location: calgary alberta
Posts: 7,829
|
Re: Moody's Utah 58 Apache
The front of the cab is where the shims would go. Otherwise the rad support.
Inner fenders dont really matter, its straight and square frame with no sag and then cab to frame levelling. After that its door to cab and then fender to door. Then hood to cab/fenders. |
|
|
|
|
07-26-2023, 06:47 PM
|
#71 |
|
Registered User
Join Date: Jun 2014
Location: Bountiful, UT
Posts: 30
|
Re: Moody's Utah 58 Apache
Had some time to work on the doors. Starting with the driver side, the worse of the two, I came upon this massive nest. Needless to say it was a nightmare to deal with.
I got the door as close as possible which isn't very close on this side. However you can see that the red over spray on the door foam lines up. Im presuming that this side had an accident of some kind. Im also presuming I'm going to have to replace the driver side hinge pillar. The bottom of this door was welded on and doesn't adjust at all so that will need to be opened up and fixed too. The door sags about 1/4 of an inch but it latches. To me it feels like the top of the door needs to slide toward the front grill to bring it even with the body lines? Thoughts or ideas? |
|
|
|
|
07-26-2023, 06:53 PM
|
#72 |
|
Registered User
Join Date: Nov 2010
Location: calgary alberta
Posts: 7,829
|
Re: Moody's Utah 58 Apache
I suggest to check the whole hinge pillar/cab mount/step/fender mount area because they are prone to rot. That means the pillar isn't strong enough to hold the door well. The door is also prone to rot where the hinges bolt on. The skin is part of the door rigidity so if it has been hit and not repaired well that can also allow sag.
|
|
|
|
|
07-27-2023, 08:34 AM
|
#73 |
|
Registered User
Join Date: Mar 2012
Location: Lakes Region NH
Posts: 3,158
|
Re: Moody's Utah 58 Apache
Also check the distance on door and on cab between the body line under the drip rail and the body line indicated in the photo. Likely the door doesn't match the cab. Most folks find splitting the difference looks best.
|
|
|
|
|
07-27-2023, 12:04 PM
|
#74 |
|
Registered User
Join Date: Nov 2010
Location: calgary alberta
Posts: 7,829
|
Re: Moody's Utah 58 Apache
on my 57, when I got it, the doors sagged really badly so the doors needed to be lifted to close them and get the latch to catch and I just thought the hinges were so badly worn that was the problem. turns out the truck was in a crash at some point so nothing fit. the "average fit" method wasn't gonna work. I opted to use the 58 cab I had because it would be less work to fix. since you don't have that option i would close the door and wedge it up here and there as required to make it fit the opening as best you can. little wooden wedges work great for this or even a slice of thin plywood sitting on the step under the door. short lengths of wooden paint sticks held in place with duct tape can also be used to set gaps so it is easier to get the door centered when working alone. the doors were made to fit the cab they were on when at the factory, as well as the hinges, so a door from one cab, that foits that cab well, may not fit another cab so good. anyway, my point is, see if the door will fit the cab opening without worrying about hinges. hinge pillars etc.if you get it as centered as possible you should be able to see if the cab has been tweaked. like posted earlier, make sure the glass fits. before you go ahead with cutting and welding anything on the cab it's best to fit the doors in their openings and then cross brace the cab across the openings so when the doors are removed and hinge pillars or whatever is cut and new parts are welded in you can be sure the opening doesn't get pulled out of shape. it's good st start with the cab bolted down to the frame on a new set of rubber mounts at the rear and shimmed at the front as needed so the cab is level with the frame. the factory assembly manual will have dimensional specs on stuff like that gap between the frame and cab. get that done, then check the glass fitment, fit the door, brace the openings, brace from side to side behind the dash so the cab can't be tweaked then the cab can be taken off the frame if needed without worry that it could be slightly outta shape by the time work is done and it gets put back on the frame.
just my 2 cents after having cut a lot of metal out of my cab. floor, firewall, rear wall, pillars, etc. not much left to hold things together but with the bracing it all fits again, as well as could be expected |
|
|
|
|
07-27-2023, 12:06 PM
|
#75 |
|
Registered User
Join Date: Nov 2010
Location: calgary alberta
Posts: 7,829
|
Re: Moody's Utah 58 Apache
the factory assembly manual can be downloaded for free at the trifive site
55-59 chevrolet truck factory assembly manual pick the trifive site download to a thumbdrive or to your device for easy reference whenever you need it |
|
|
|
|
| Bookmarks |
|
|


 Linear Mode

