
|
 07-14-2023, 08:20 AM
|
#1351 |
|
Registered User
Join Date: Jan 2013
Location: Leonardtown, MD
Posts: 1,633
|
Re: 55 Wagon Progress
Steering column one step closer to green paint...
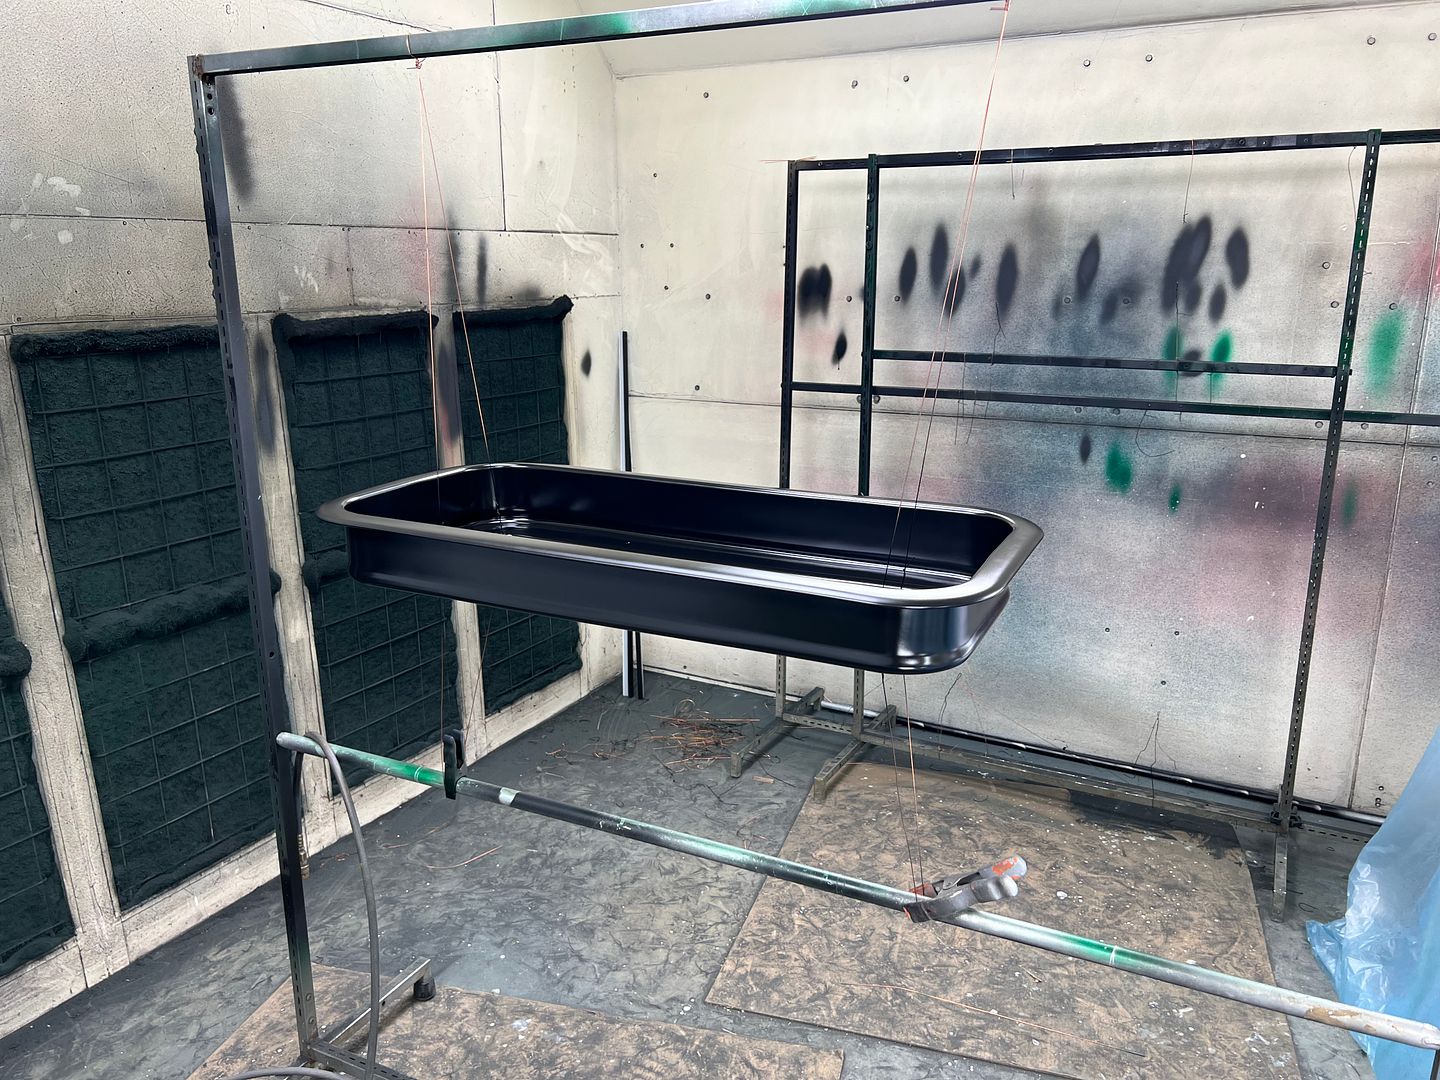
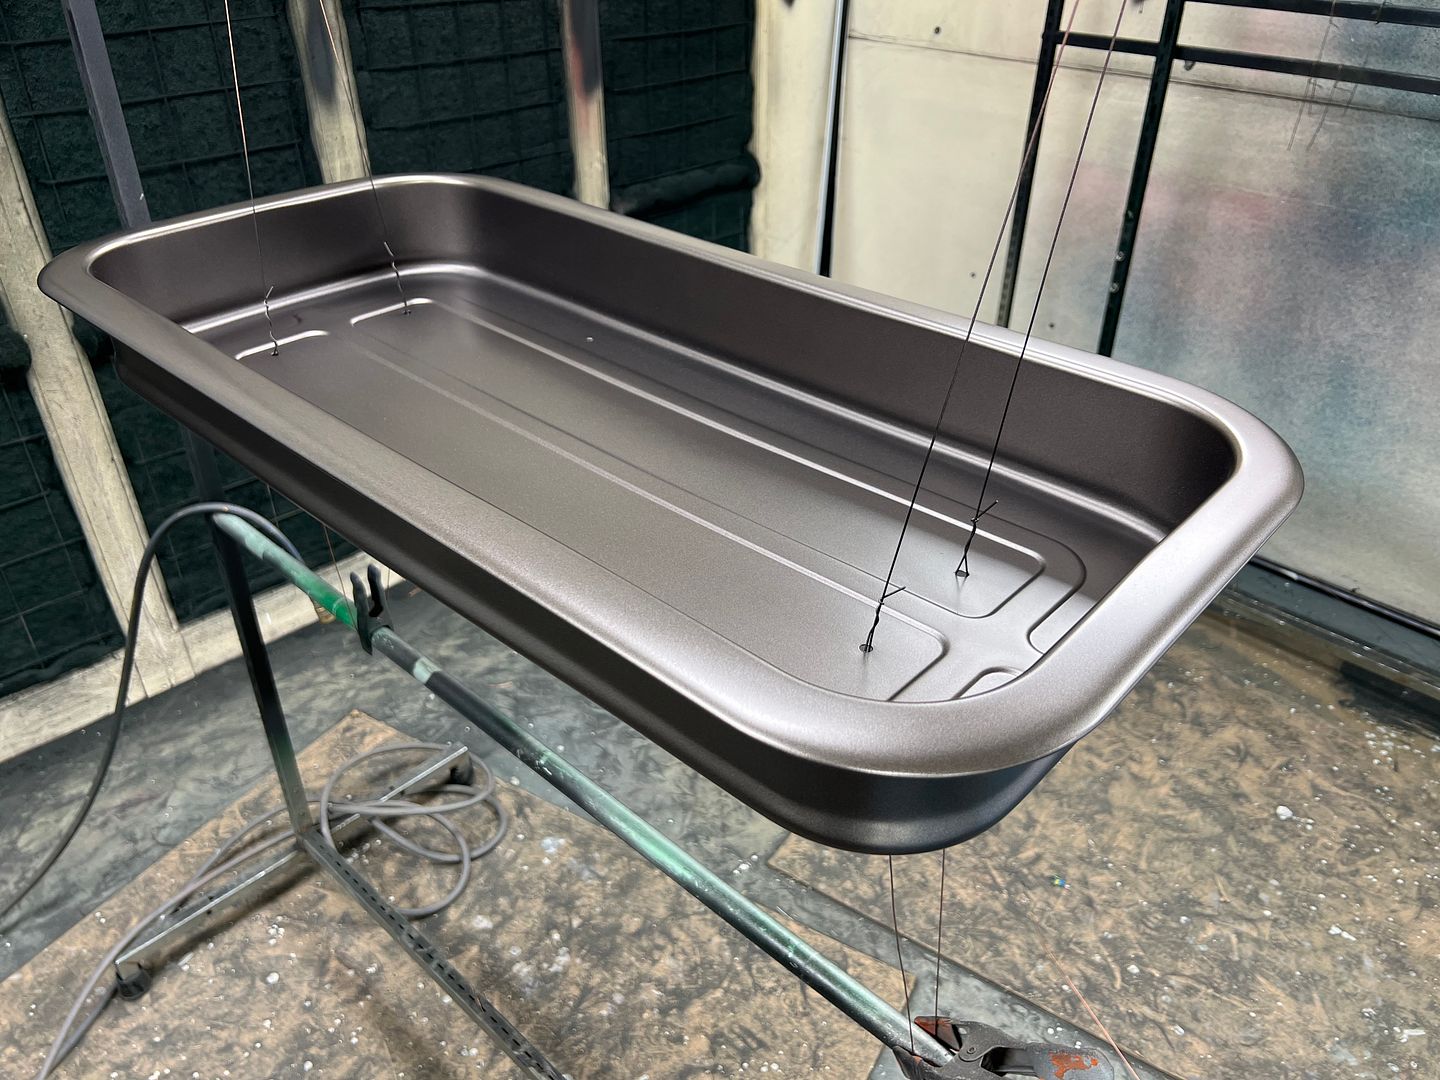
 and blocked to 500 grit...  Working on removing dings and refining scratches on the windshield trim in prep for polishing. These pieces are less receptive to using the DA due to all the creases, so we've resorted to wet/dry paper up to 2500 and then polish. 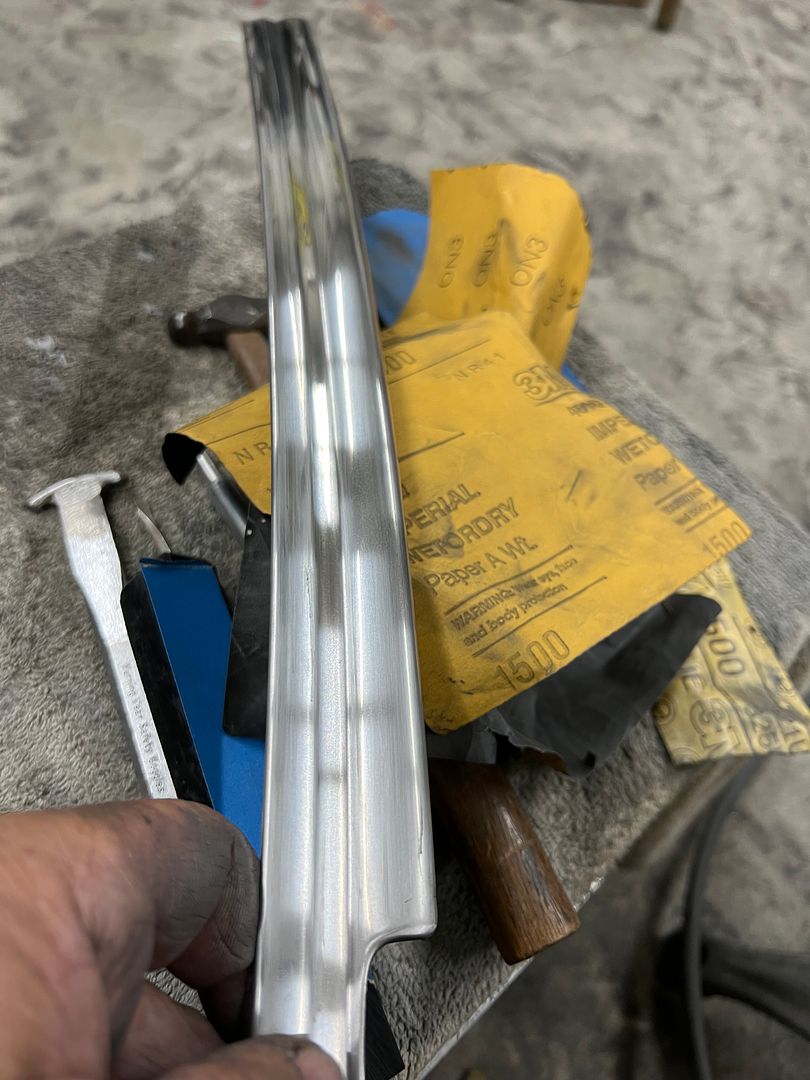 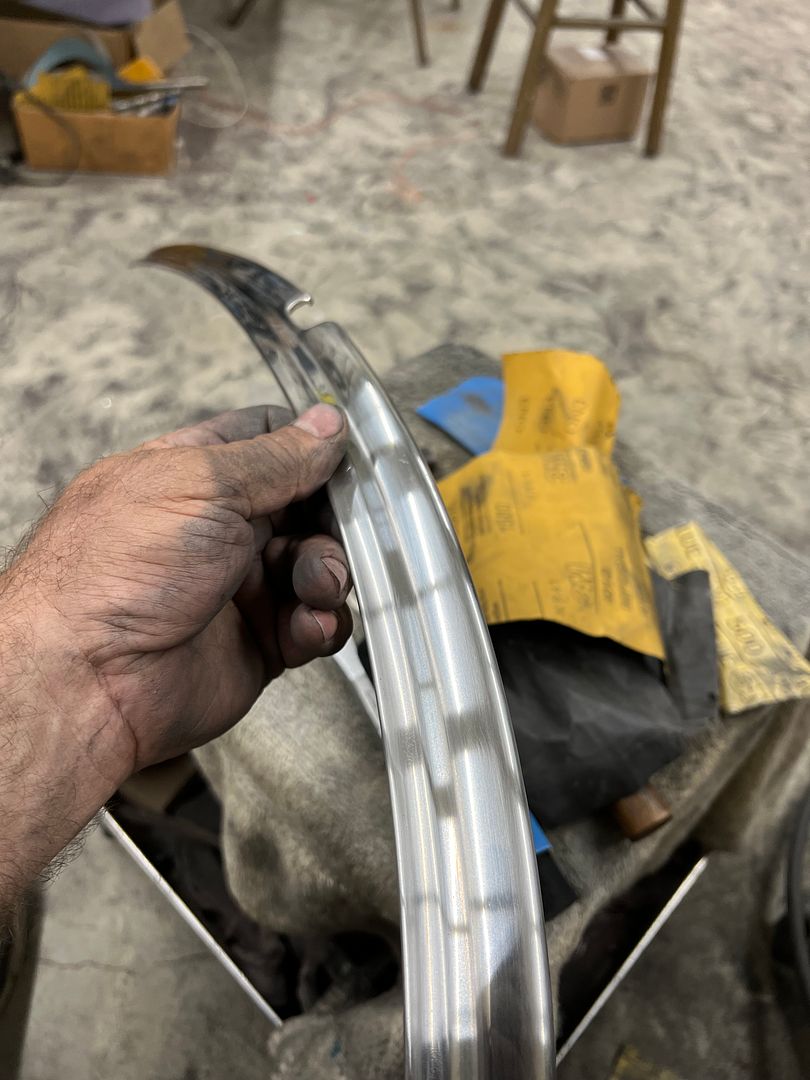 Jared getting the hang of this stainless work.... 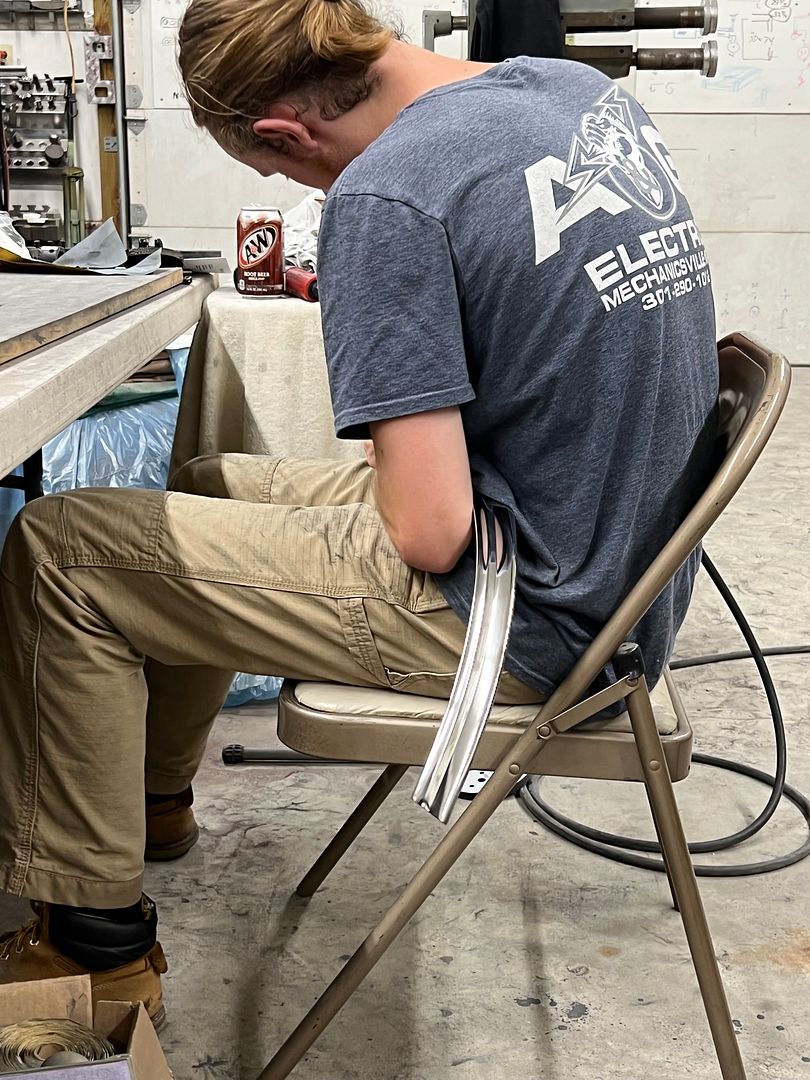 For the other wagon, we went with a powder coat chrome finish to dress up that front dropped axle. 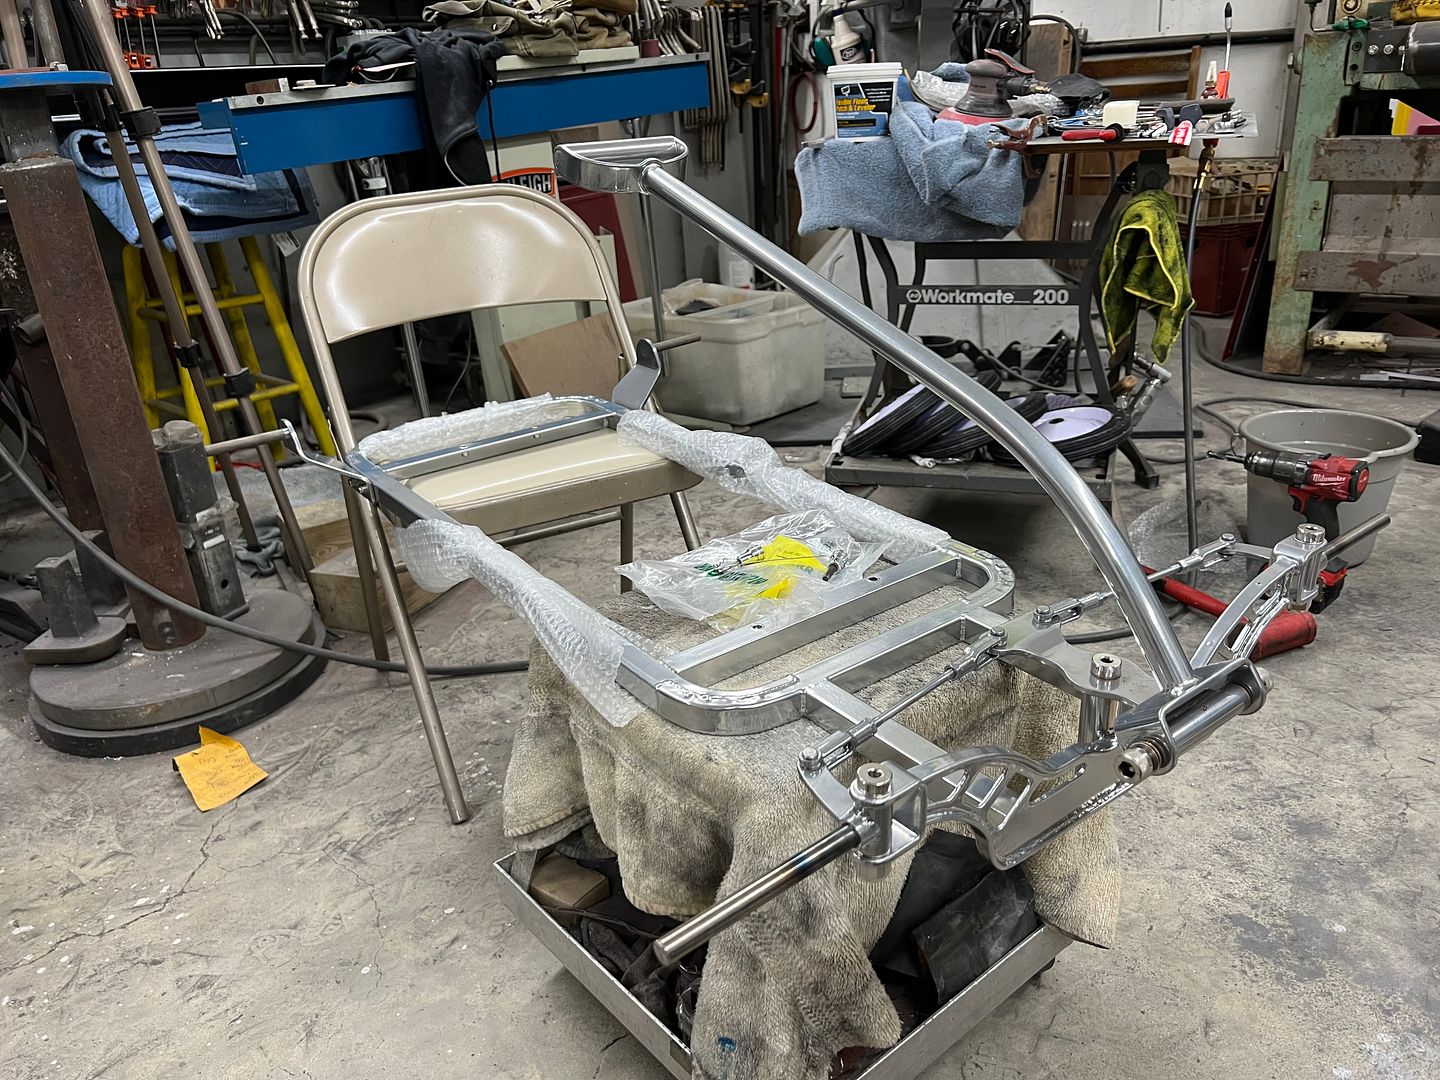 And this is the second round of three coats of epoxy and blocking. Think this will be the last round, and then on to some silver base and blue kandy.. 
__________________
Robert Last edited by MP&C; 07-14-2023 at 08:42 AM. |

|

|
|
07-14-2023, 08:51 AM
|
#1352 |
|
Post Whore
  Join Date: May 2015
Location: Alabama
Posts: 14,579
|
Re: 55 Wagon Progress
Wow that's a big ol cat....is it a Maine coon?
Rolling shelf turned out really nice..!!!
__________________
Mongo...aka Greg RIP Dad RIP Jesse 1981 C30 LQ9 NV4500..http://67-72chevytrucks.com/vboard/s...d.php?t=753598 Mongos AD- LS3 TR6060...http://67-72chevytrucks.com/vboard/s...34#post8522334 Columbus..the 1957 IH 4x4...http://67-72chevytrucks.com/vboard/s...63#post8082563 2023 Chevy Z71..daily driver |
|
|
|
|
07-14-2023, 09:08 AM
|
#1353 |
|
Registered User
Join Date: Jan 2013
Location: Leonardtown, MD
Posts: 1,633
|
Re: 55 Wagon Progress
We thought he was, as did the rescue we got him from because that's how he was advertised. But the boss lady had his DNA tested and he is actually a Norwegian Forest cat. He's about 17-18 lbs, pretty solid.
__________________
Robert |
|
|
|
|
07-17-2023, 12:45 PM
|
#1354 |
|
Registered User
Join Date: Jan 2013
Location: Leonardtown, MD
Posts: 1,633
|
Re: 55 Wagon Progress
More work on the wagons. Jared and I continuing to repair some stainless trim. I was asked about our process, so here's a bit more detailed approach. But understand we are complete novices at this, so take any of this with a grain of salt.
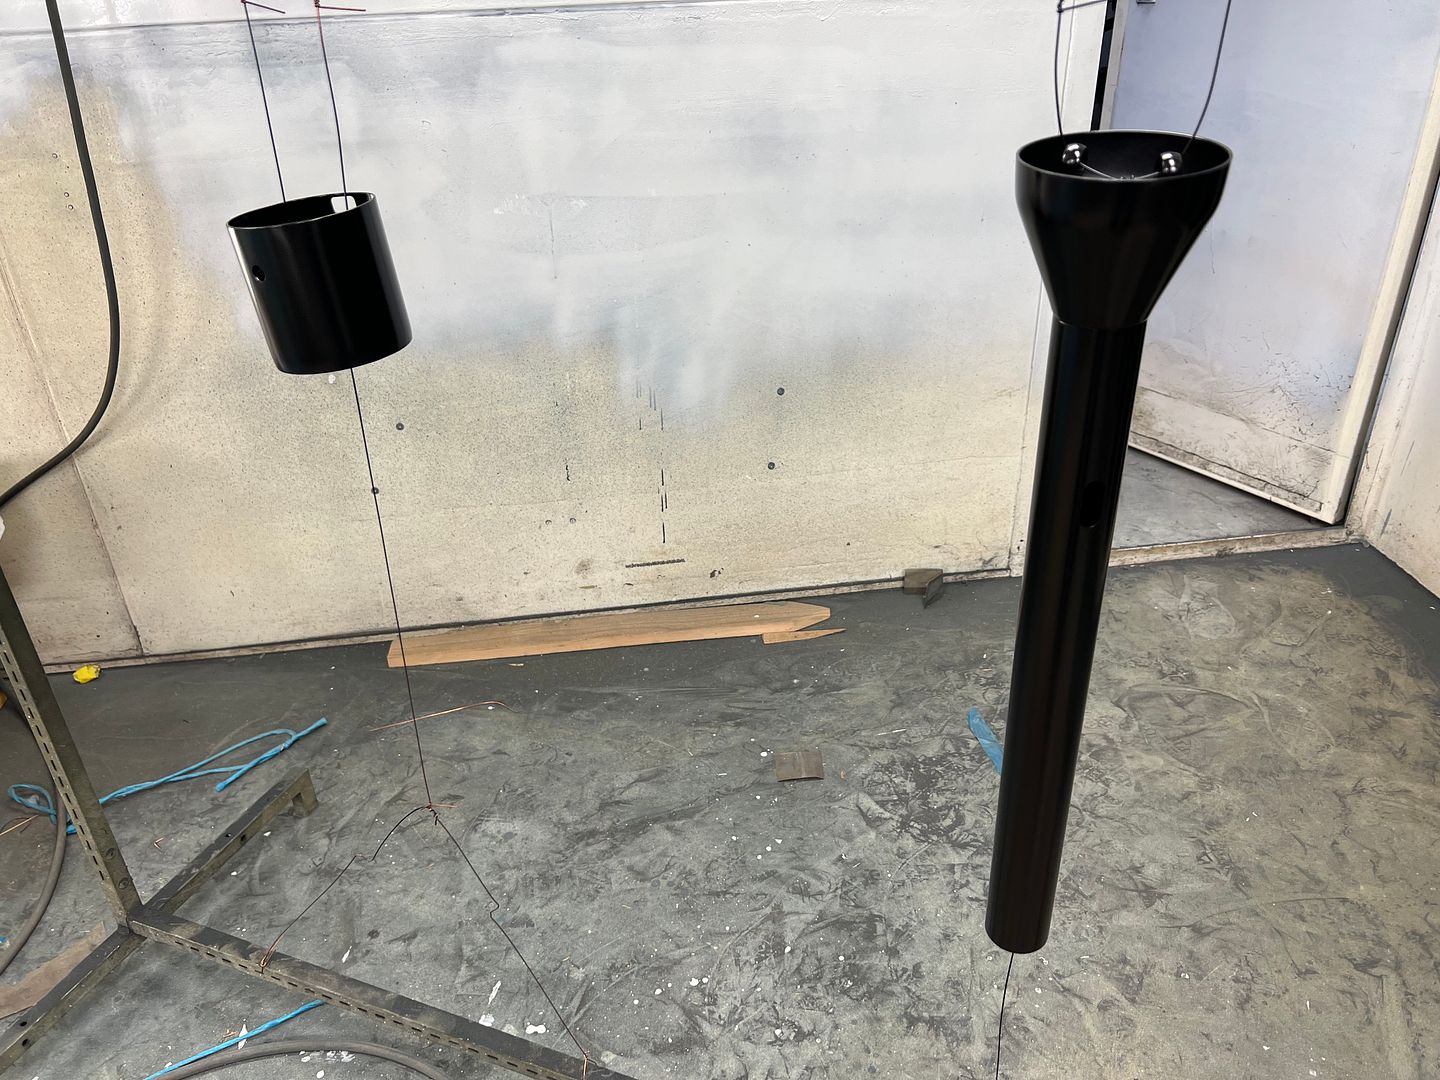
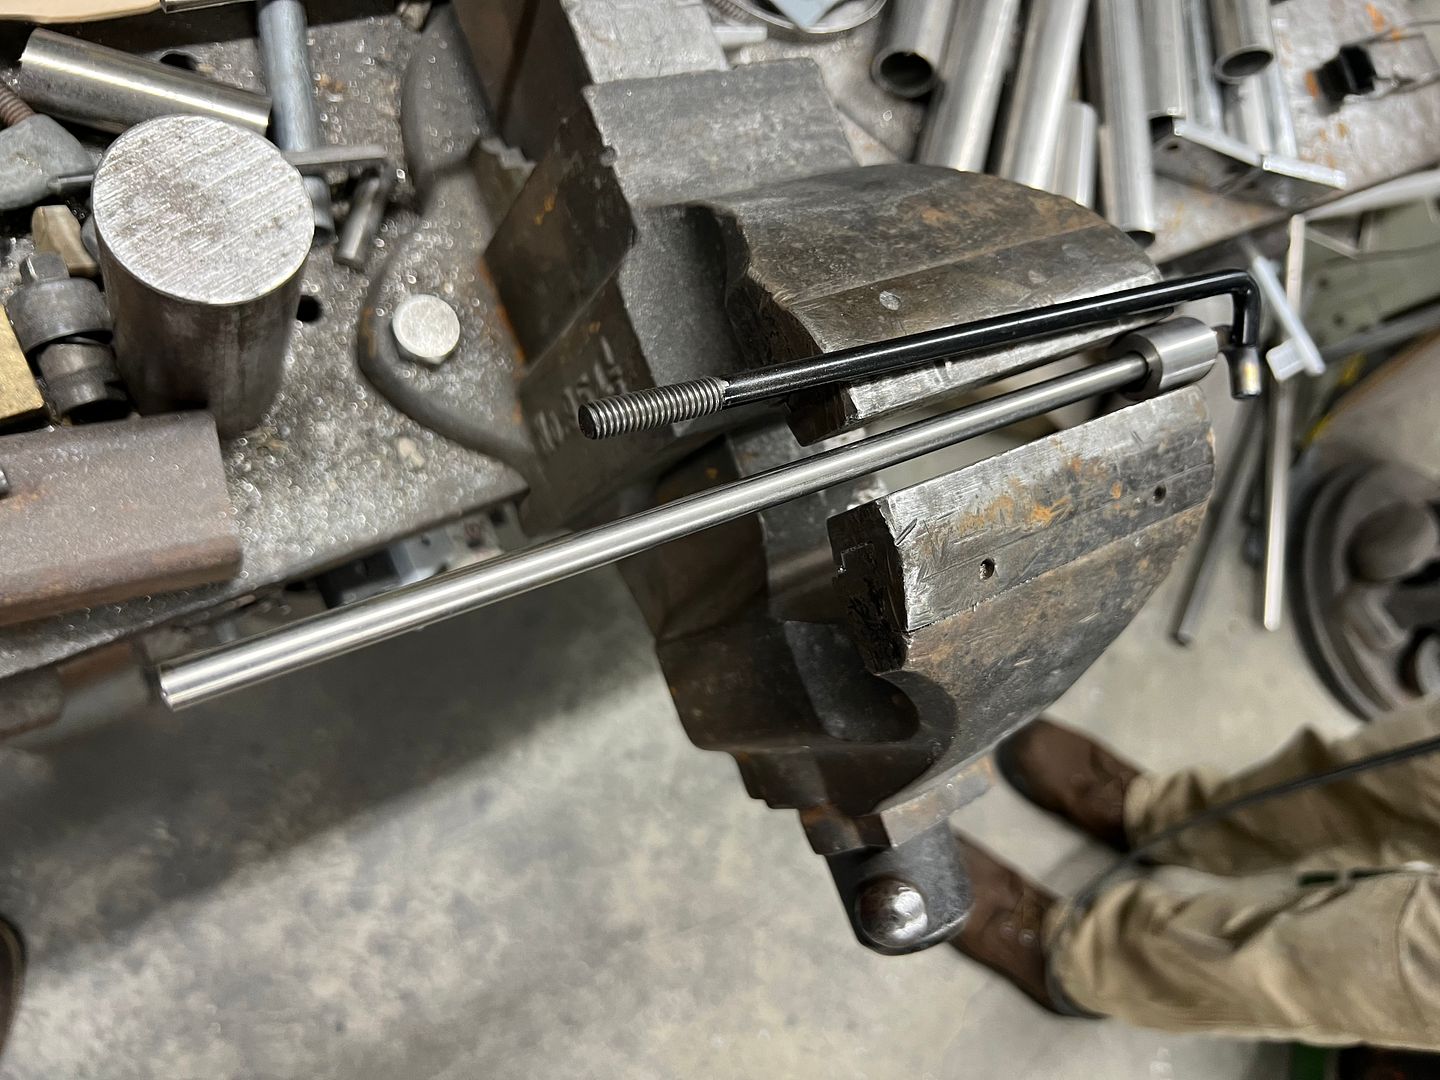
To start, some light scuffing in line with 1500 grit helps to highlight any rock dings in the windshield trim.. Once any defects are identified, they are LIGHTLY tapped outward from the back side to bring the defect outward where it can be removed. Then 400 grit is used to remove the defect (and by default some of the adjacent material). So we want the defect to be pronounced outward, but not too much. Better to tap it outward in repeated steps than to go too far and create a stretch. I missed getting a picture before we started on this "rock chip"; this was after a few passes with 400 on the 3M board (just above arrow).. It was tapped outward about 4 different times until we got it where the defect was sanded out. 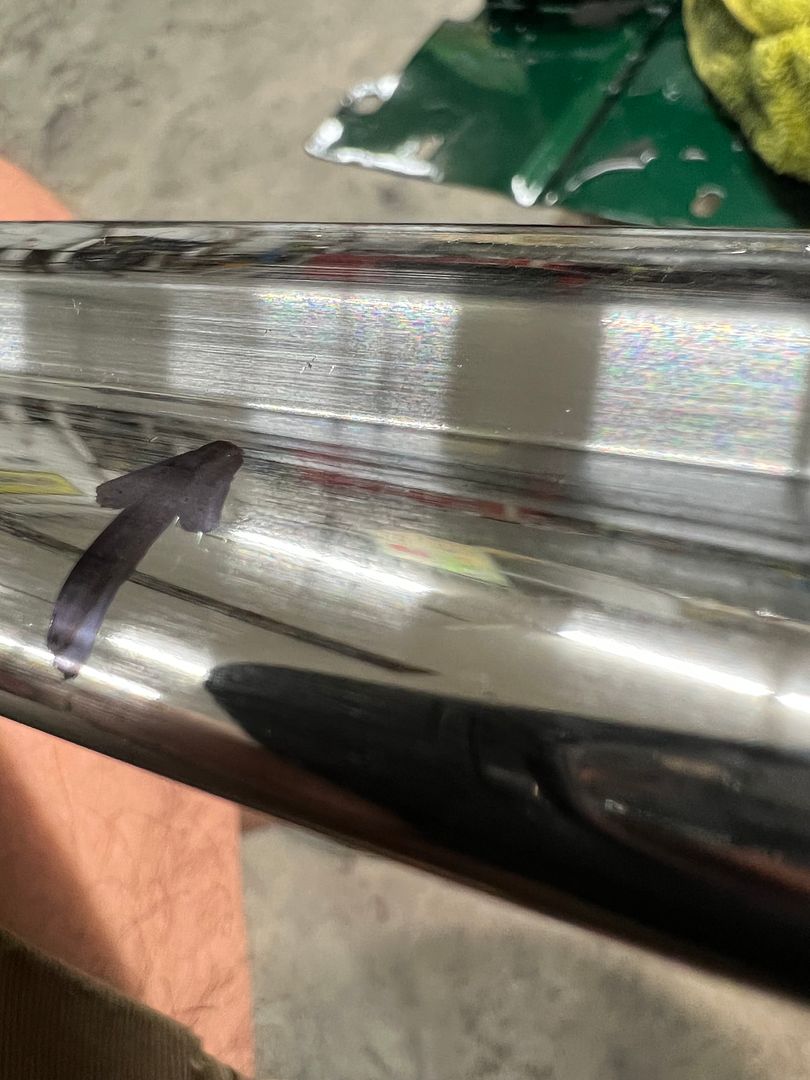 Back side that was tapped.... 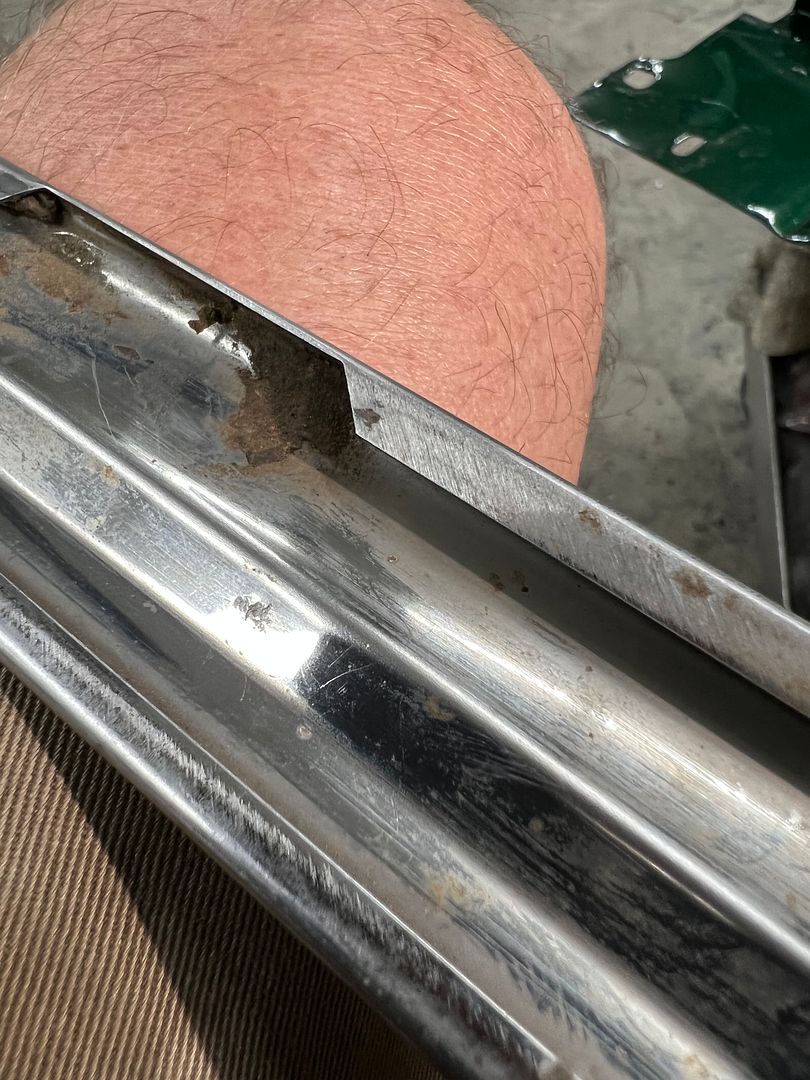 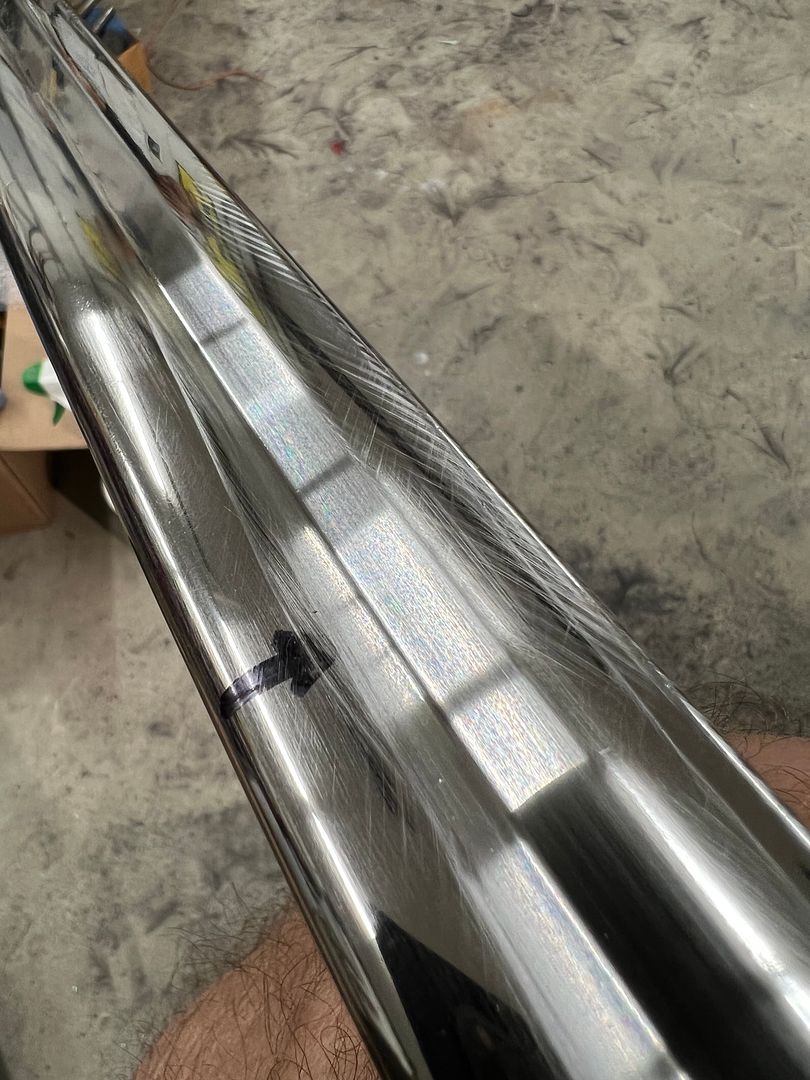 https://www.youtube.com/shorts/BdSQMh6MOTU After removing all the dings, the surface was sanded working progressively through grits 1200, 1500, 2000, 2500, and then on to 3000 and 5000 trizact discs on the DA. Afterwards it was polished out on the buffer... 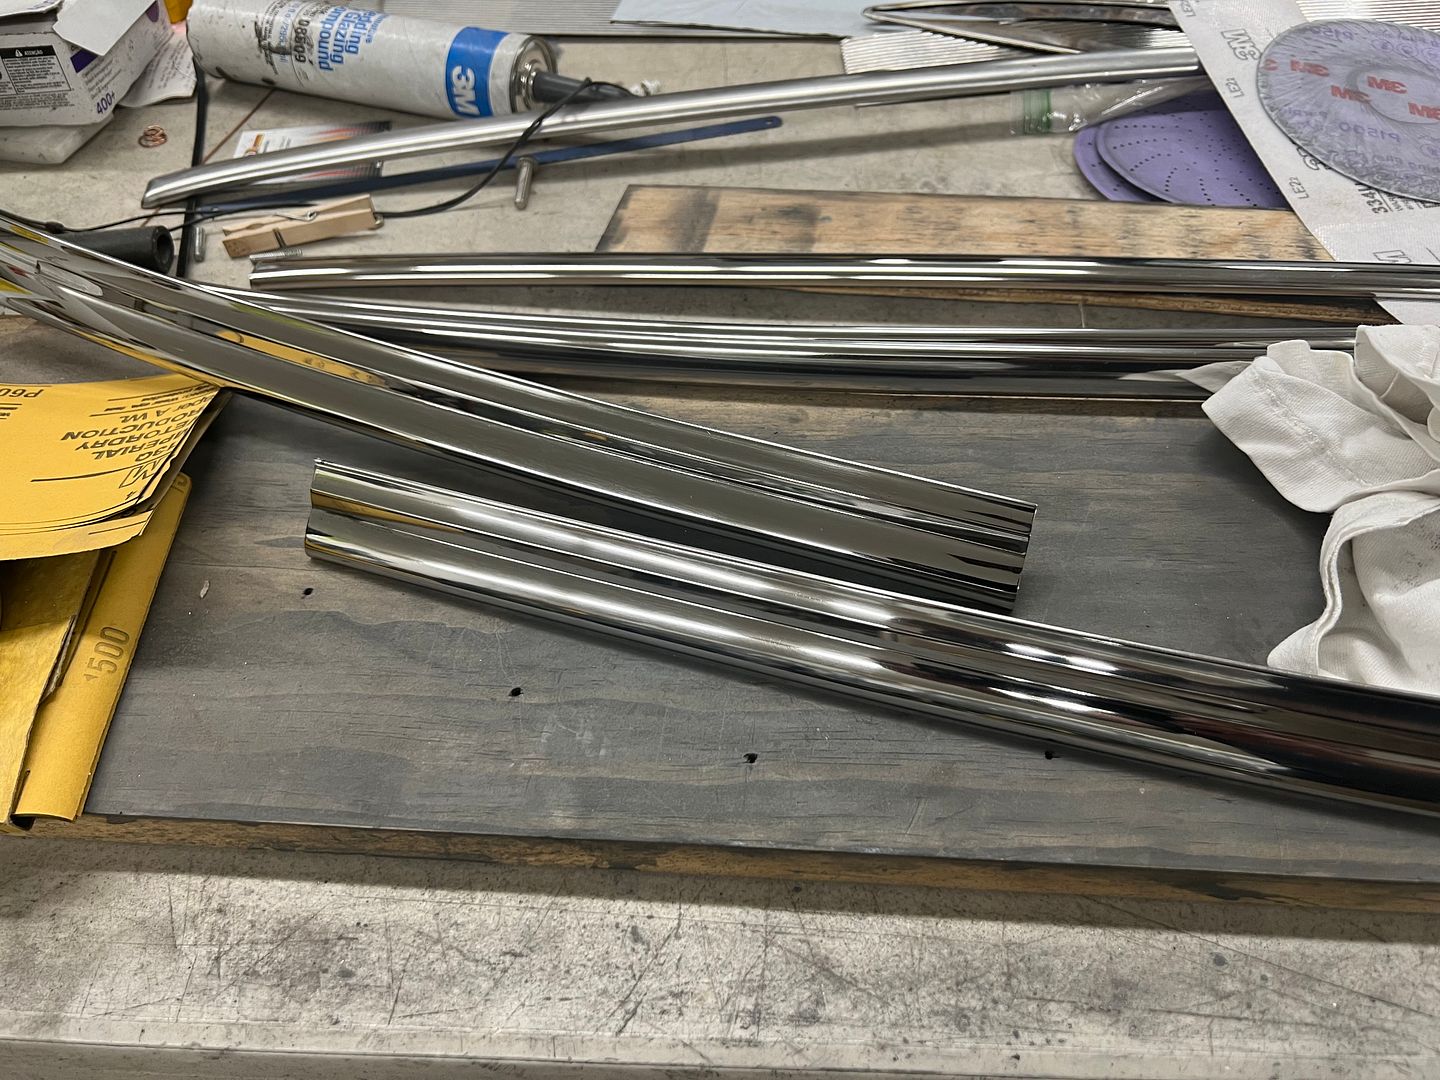 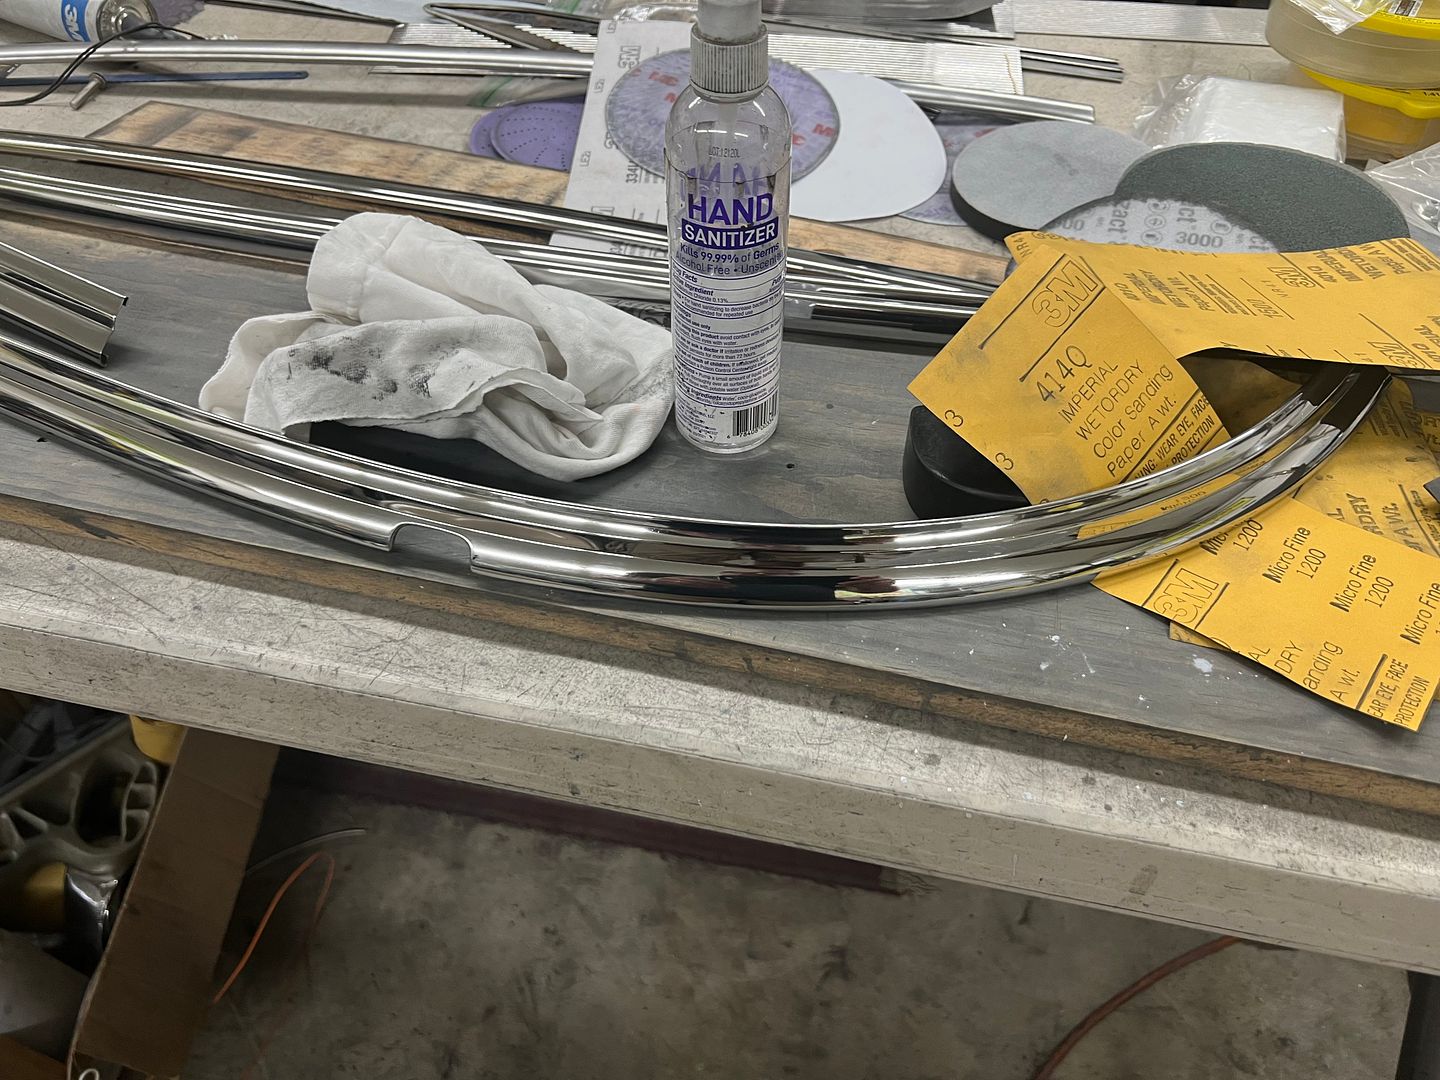 Some parts painted green so we can continue with more assembly... 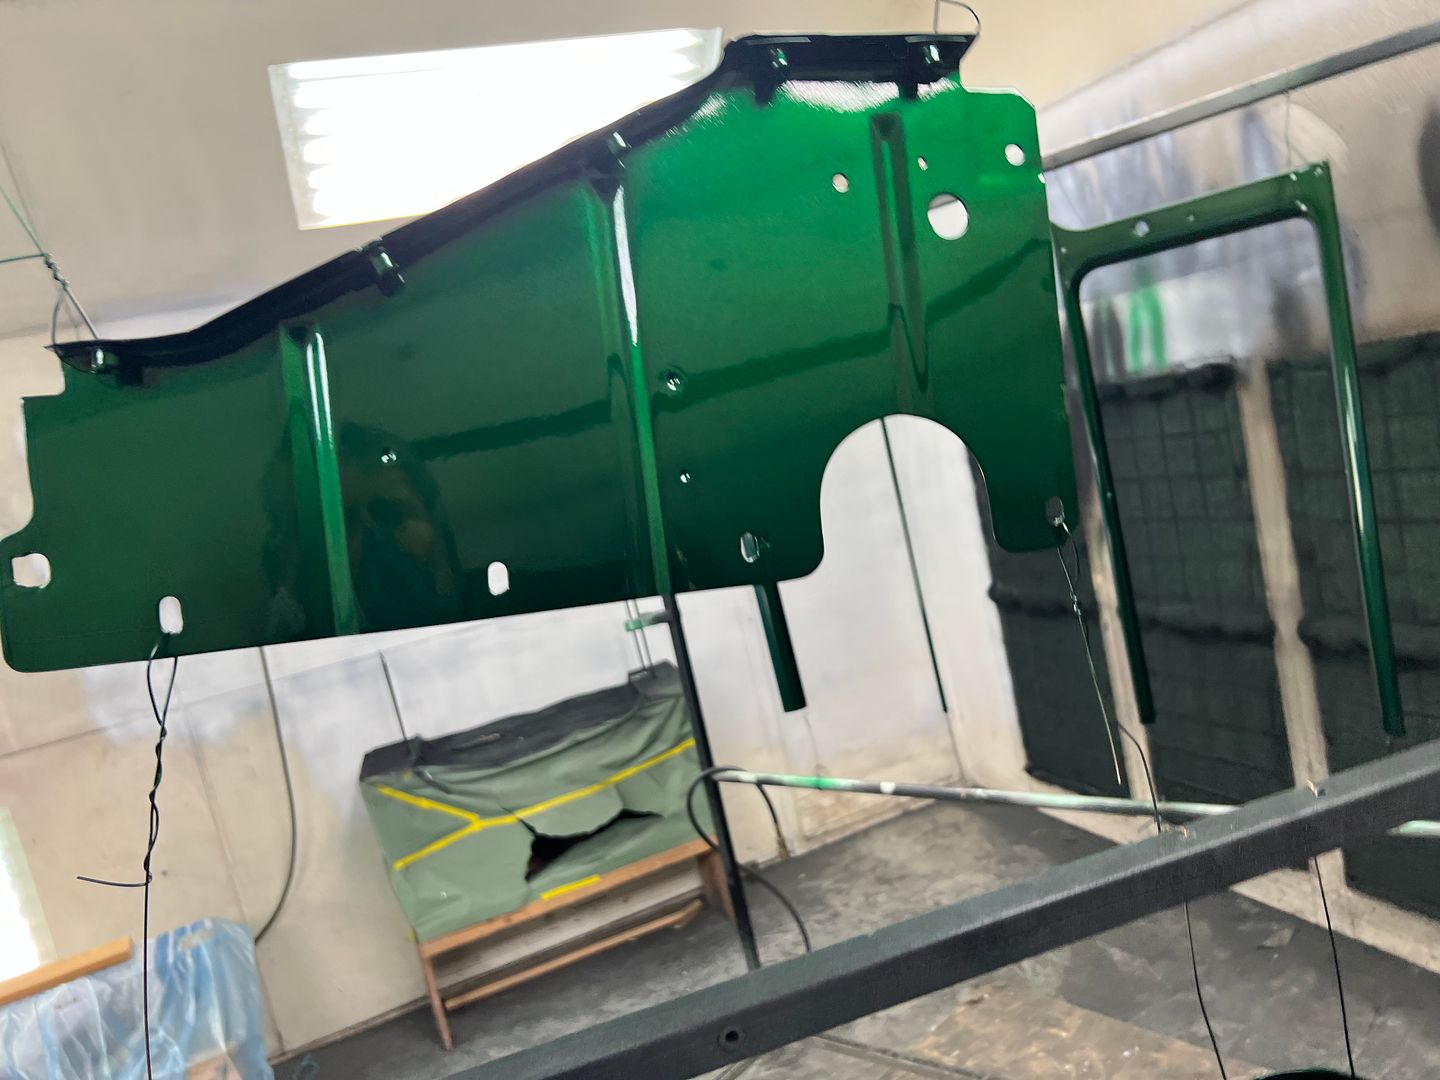 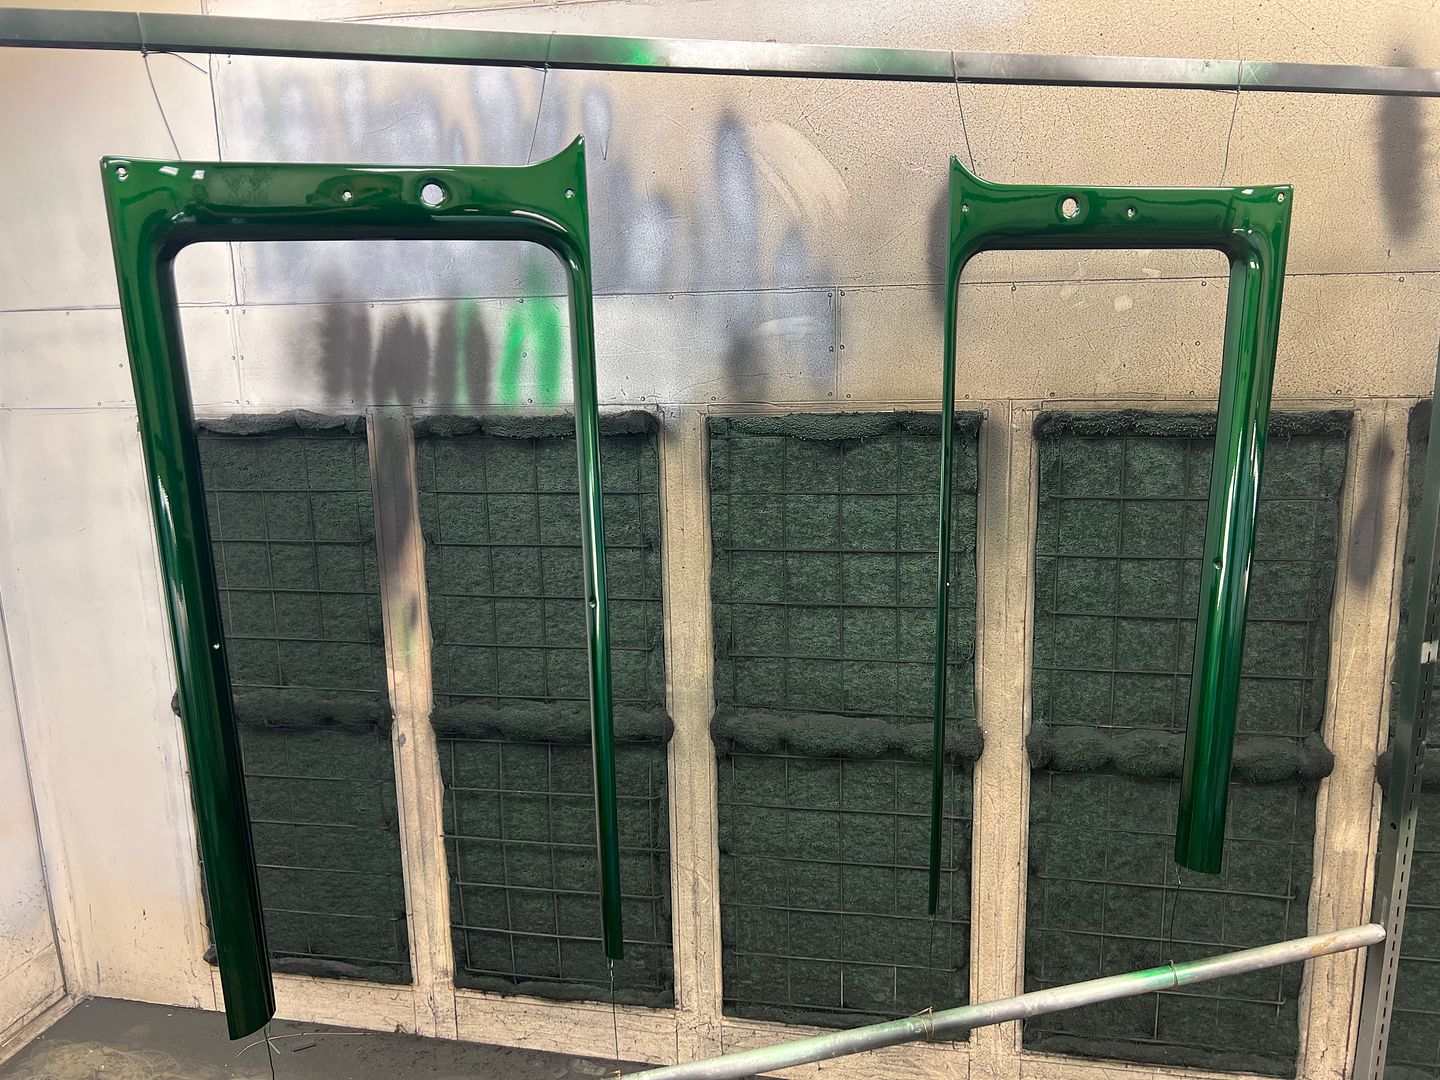 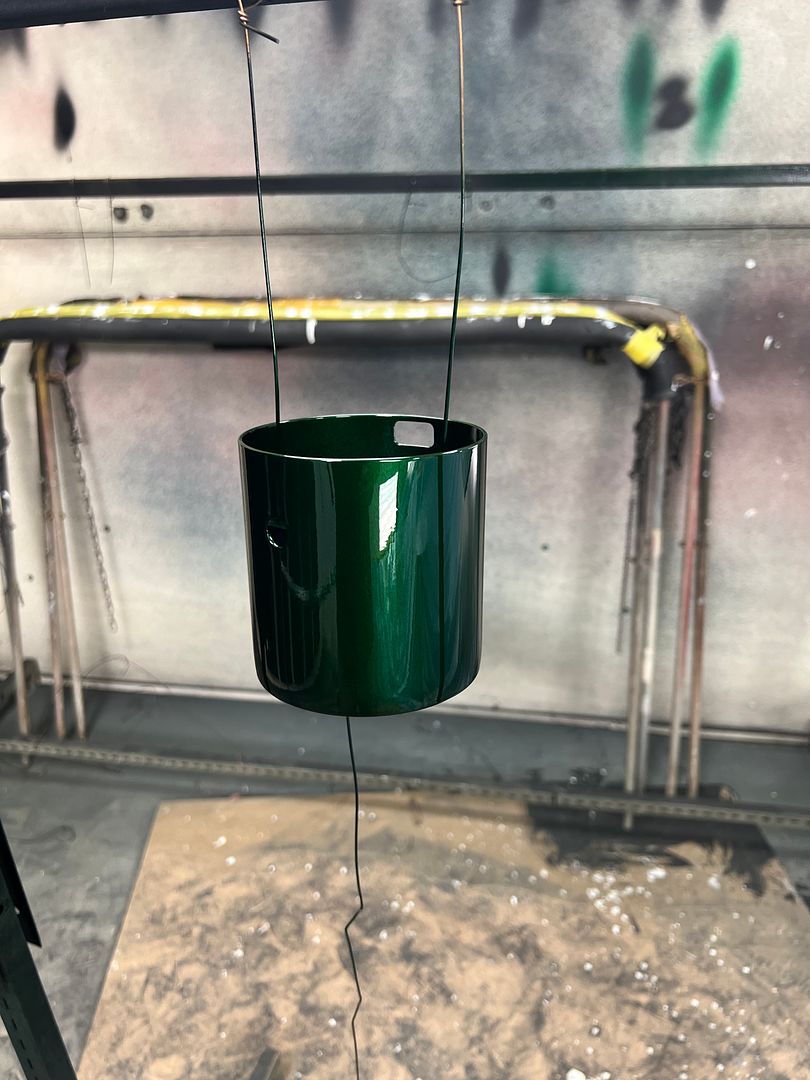 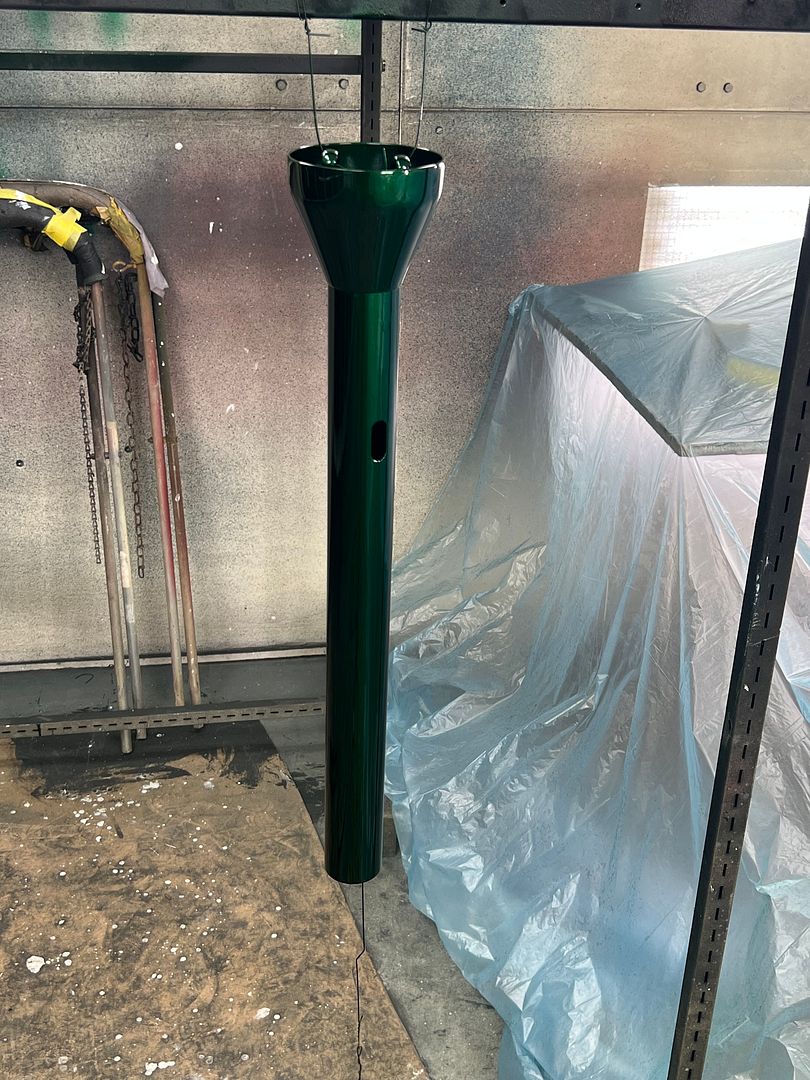 When we had mocked up the wagon frame we just had a 1/2” bolt stuck through the bottom of the pull handle. Now that we’ve got the frame back from chrome powder coating, it’s time for some final details. The bolt for the bottom of the pull handle needs to be an Allen bolt to match our kingpins, and we need one from each side to be symmetrical. A little late to thread any holes in the pivot piece, so we’ll go with docking hardware. A 1/2-13 bolt was turned down for 1/4-20 threads, and the opposite one drilled and tapped. 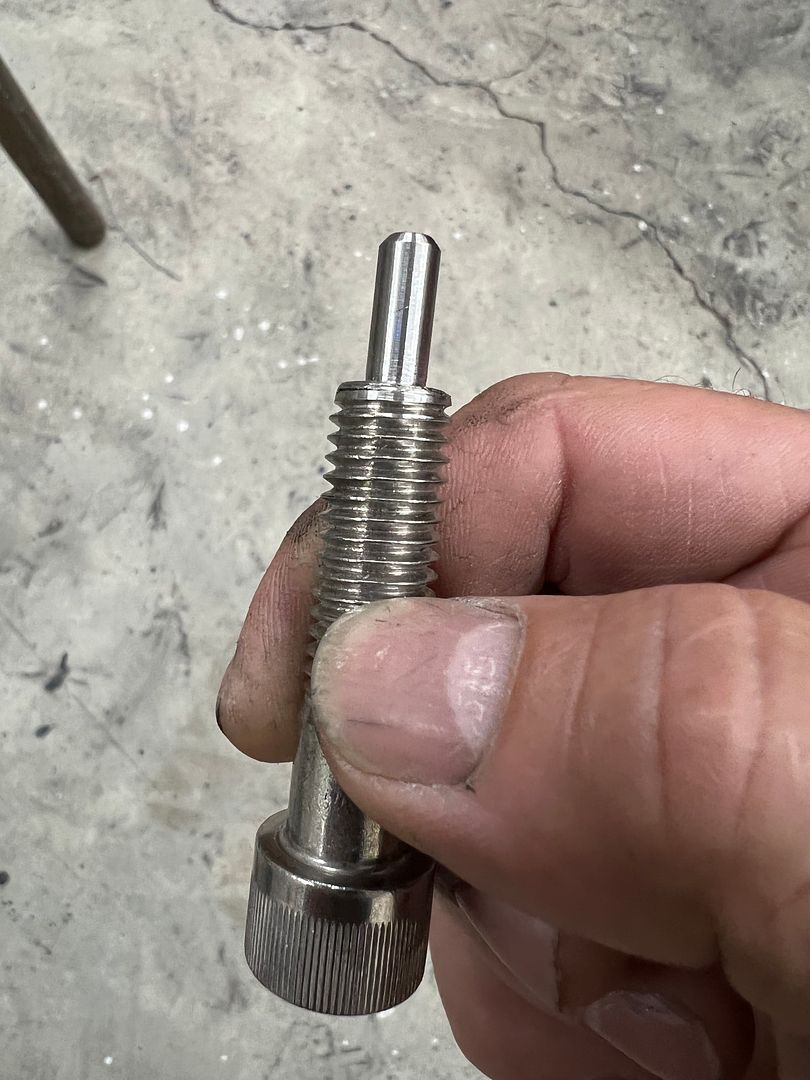 An allen wrench in the vise holds the bolt for threading 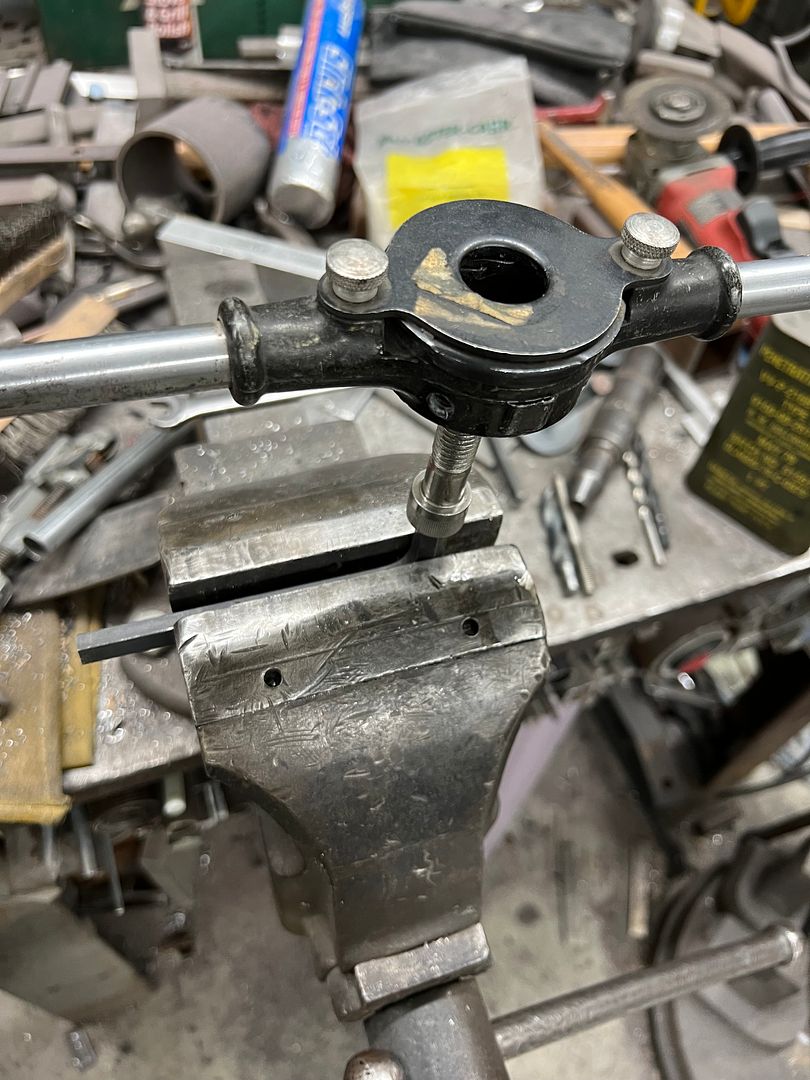 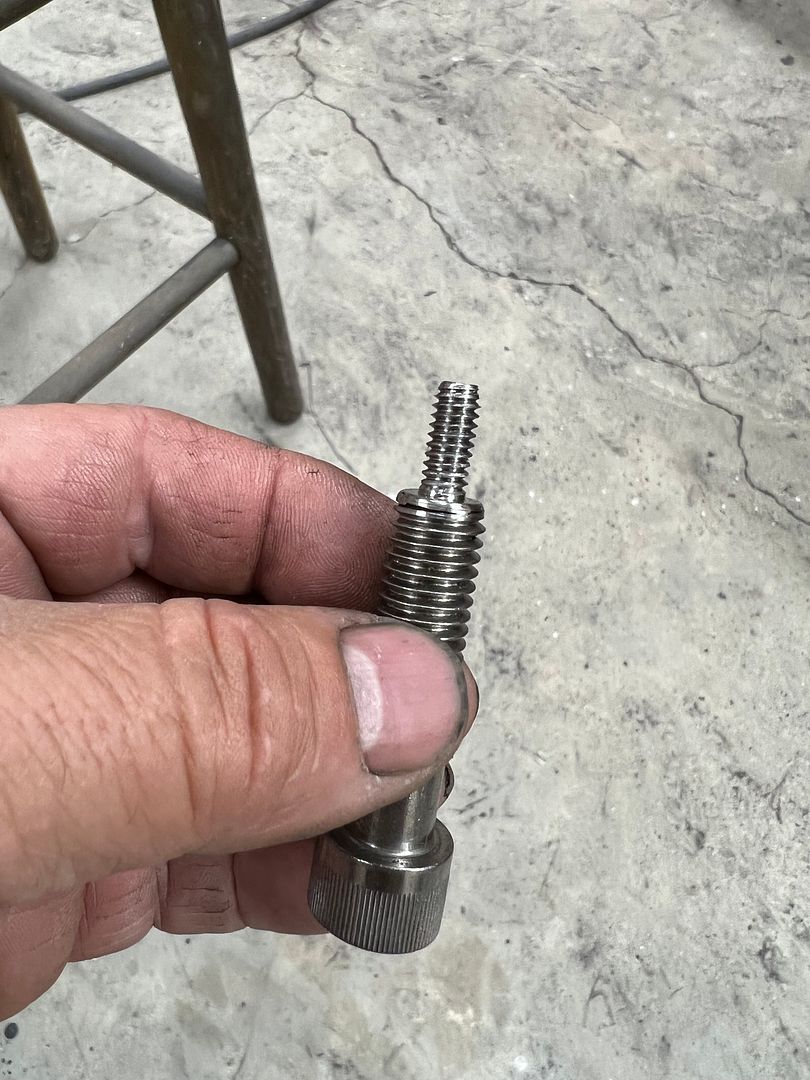 Bolt for the opposite side... 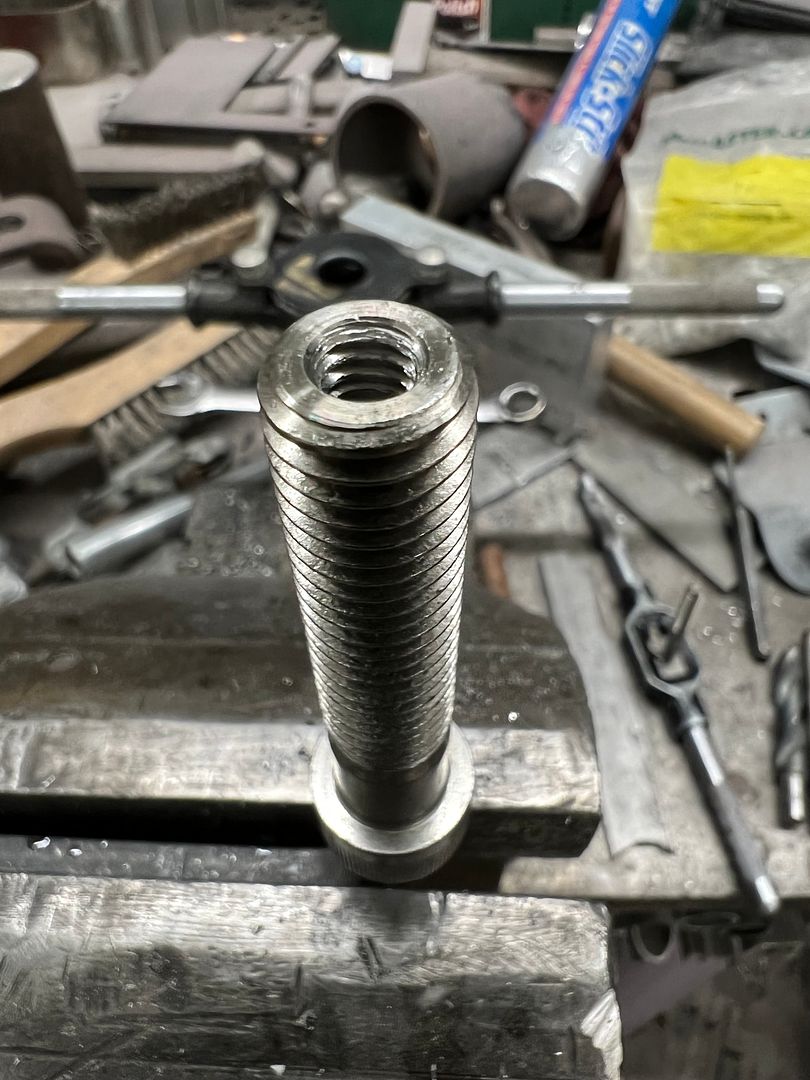 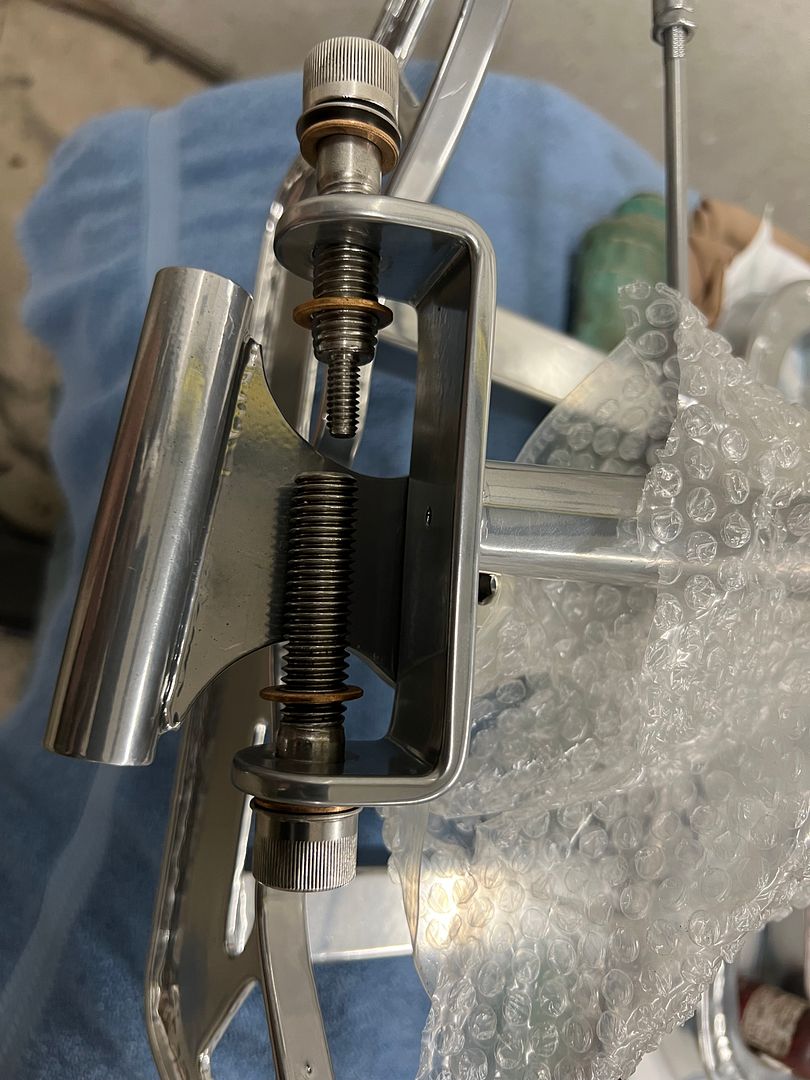 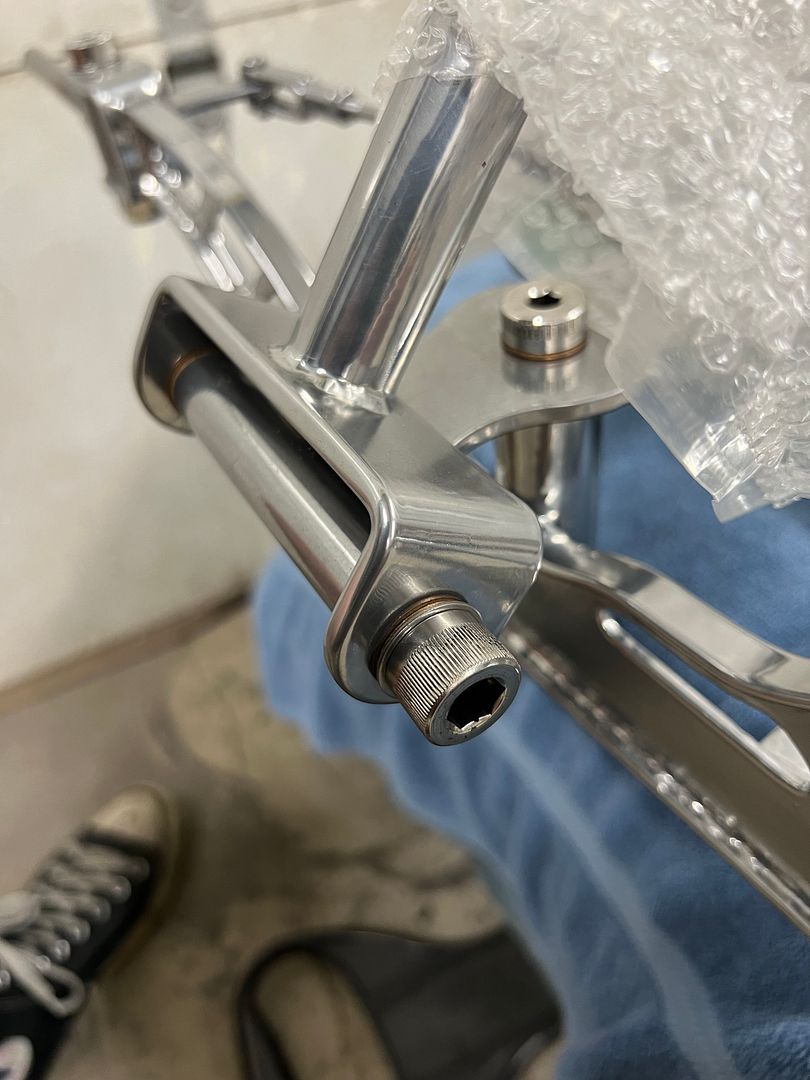 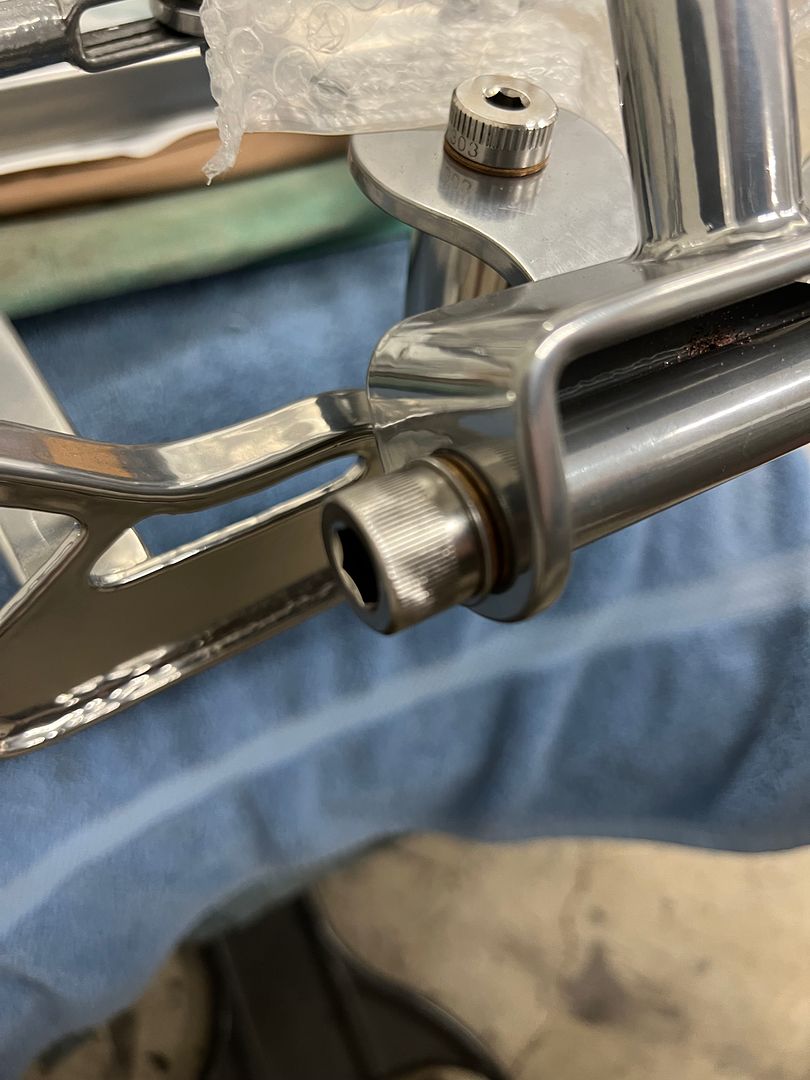 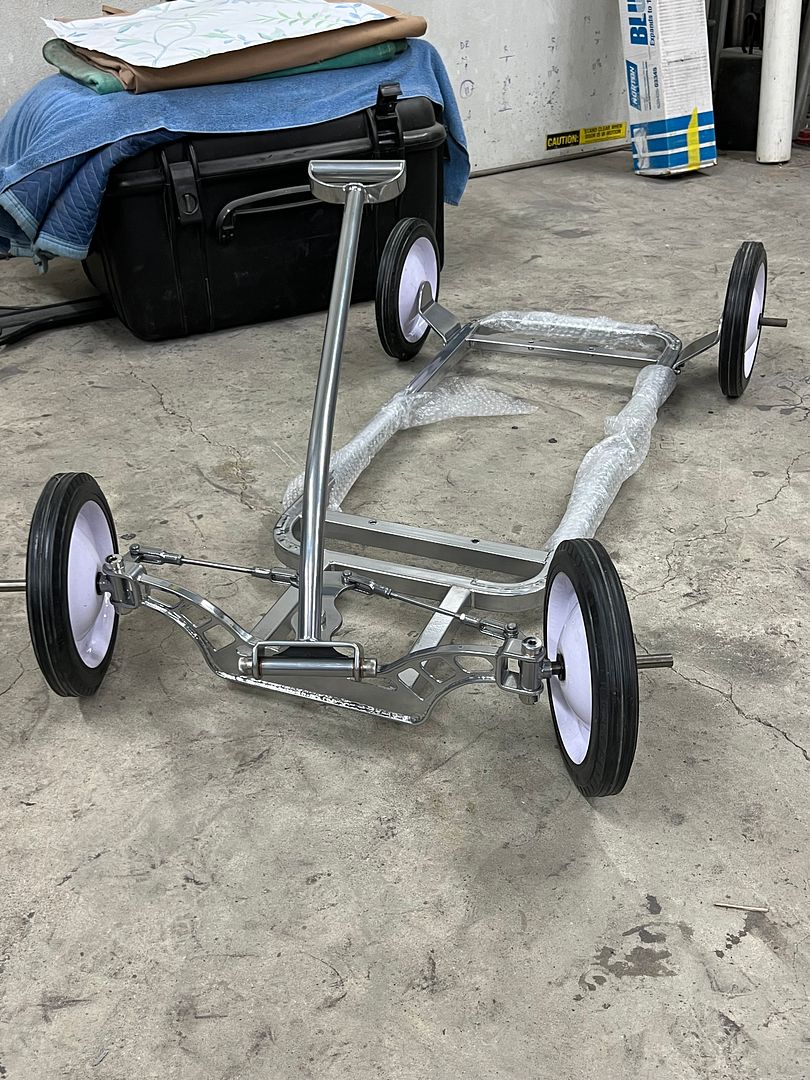 Frame is all done but trimming the axles, now to finish blocking the epoxy on the tub. 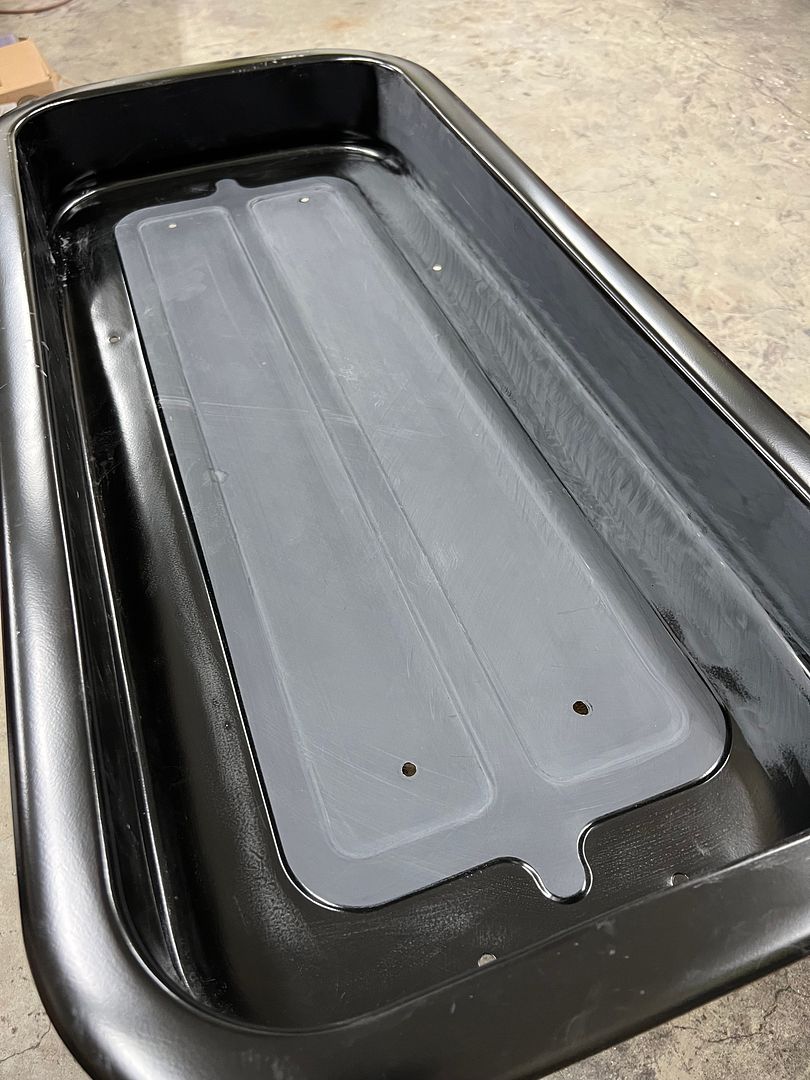
__________________
Robert |
|
|
|
|
07-23-2023, 12:23 AM
|
#1355 |
|
Registered User
Join Date: Jan 2013
Location: Leonardtown, MD
Posts: 1,633
|
Re: 55 Wagon Progress
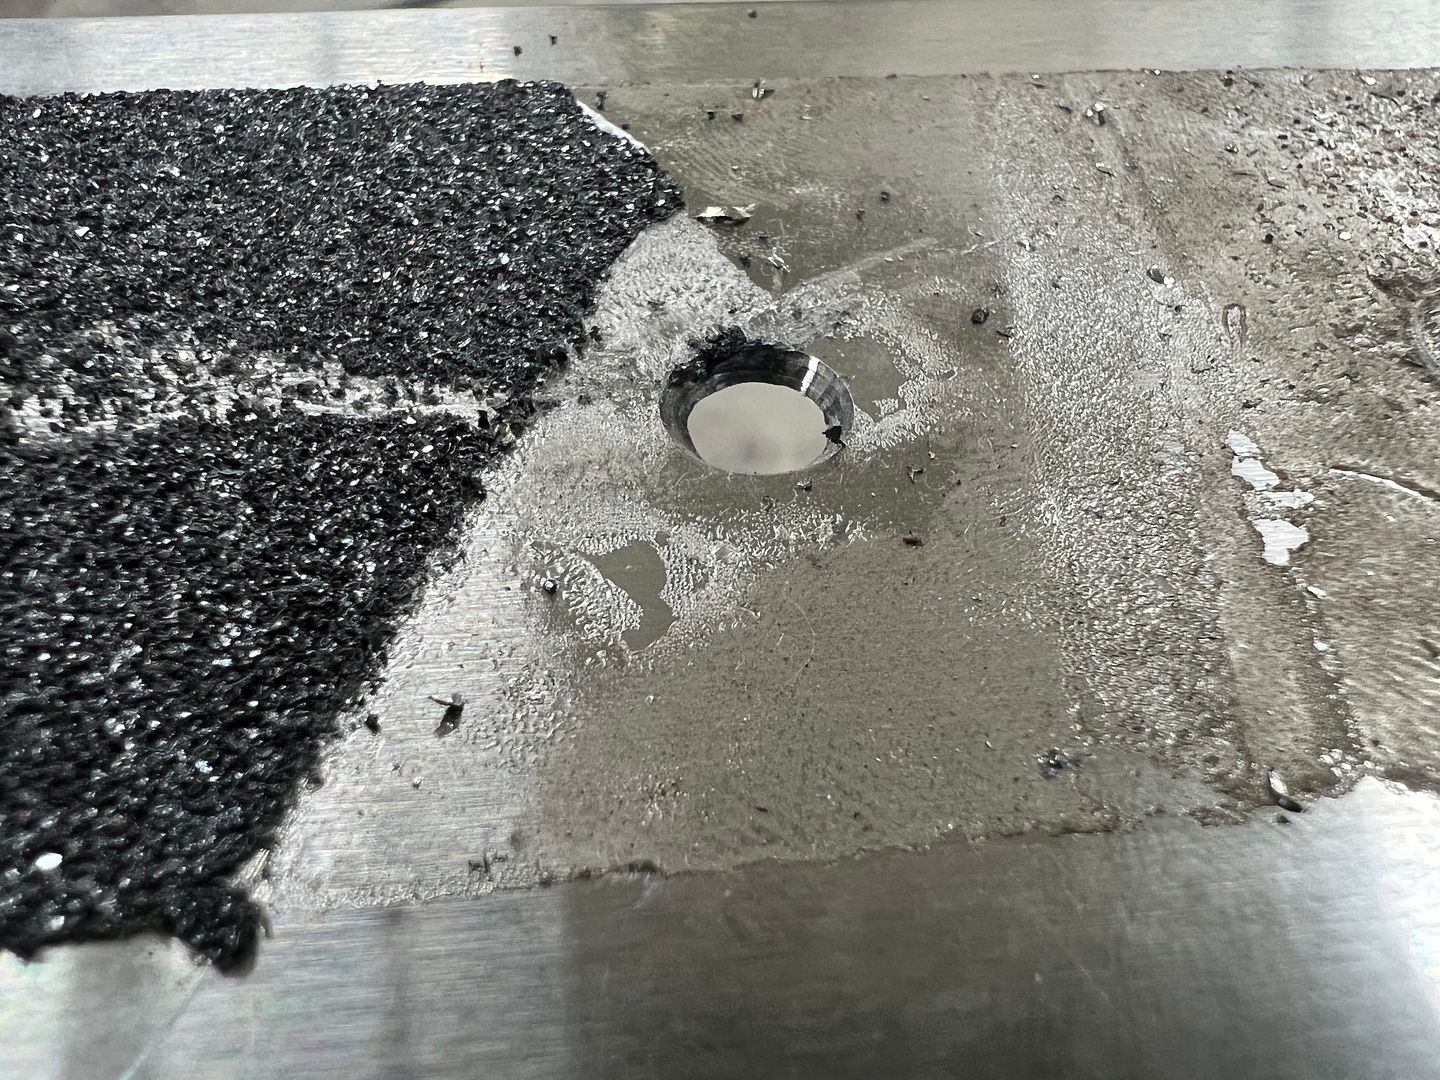
Still block sanding the wagon tub.. Back to our stainless trim, we need to modify the upper door trim to hold our peep mirrors. We opted for the old school look of the peep mirrors but did not want to use the clamp on paint chippers. The front edge of the trim uses a machine screw through the door and into a nut plate. Our plans are to use a formed hole in the trim and use the hole in the door to attach the mirrors.
 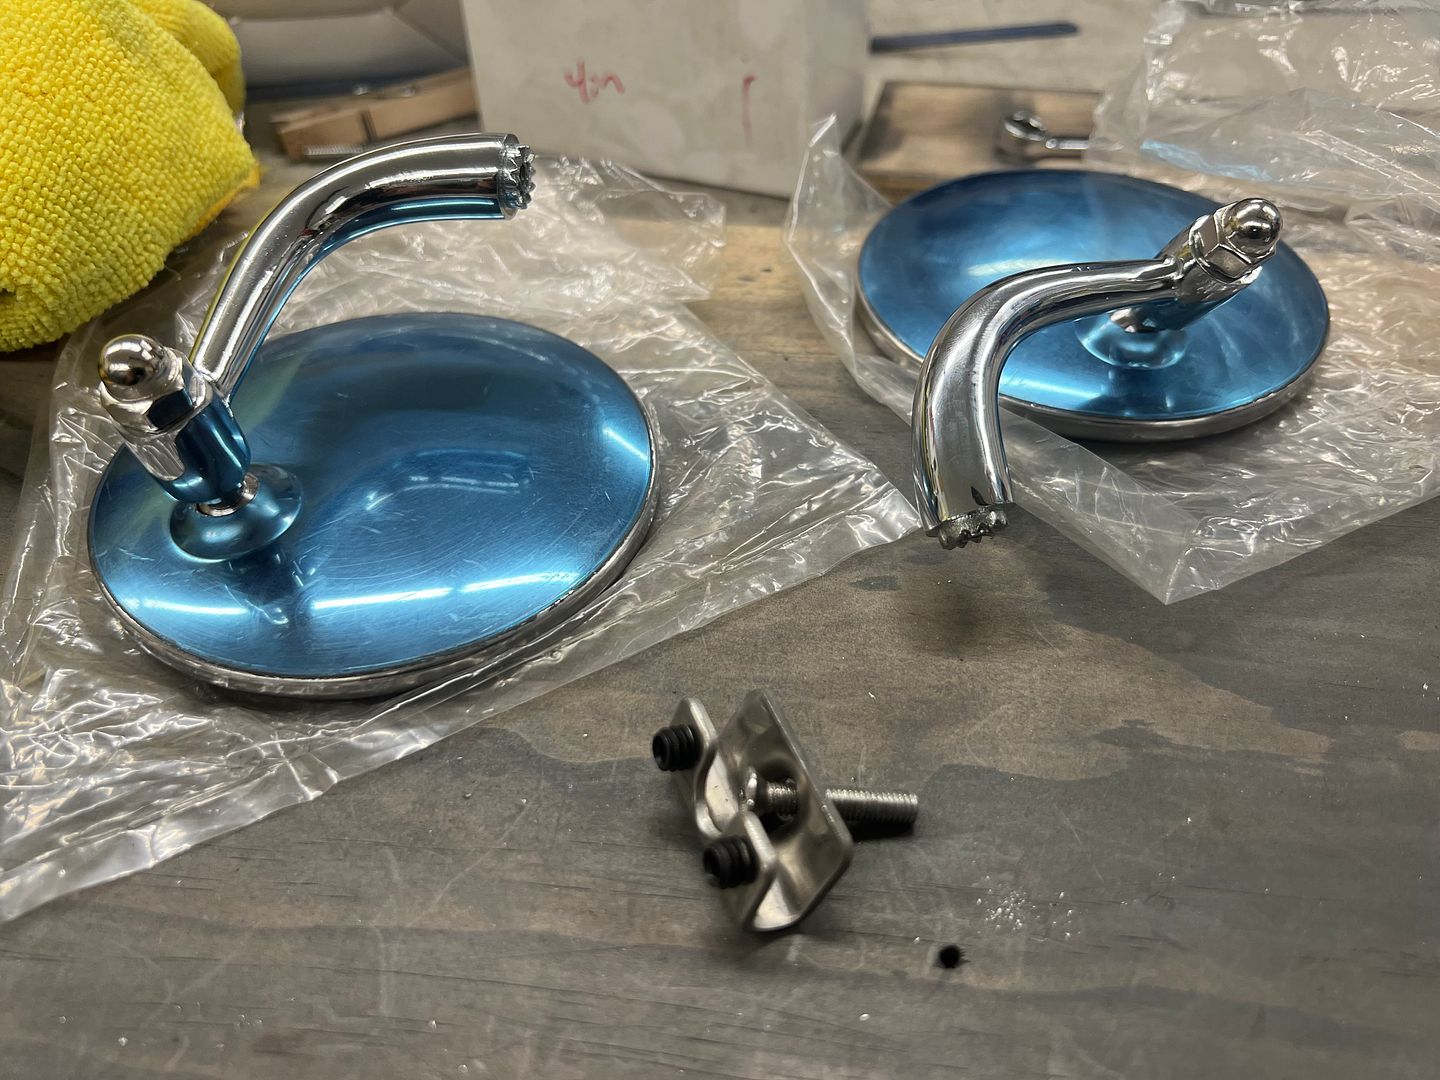 As we had used the tail stock of the South Bend before with success, we made some press dies to match the mirror's stepped end and provide a flange in the holes for added strength. 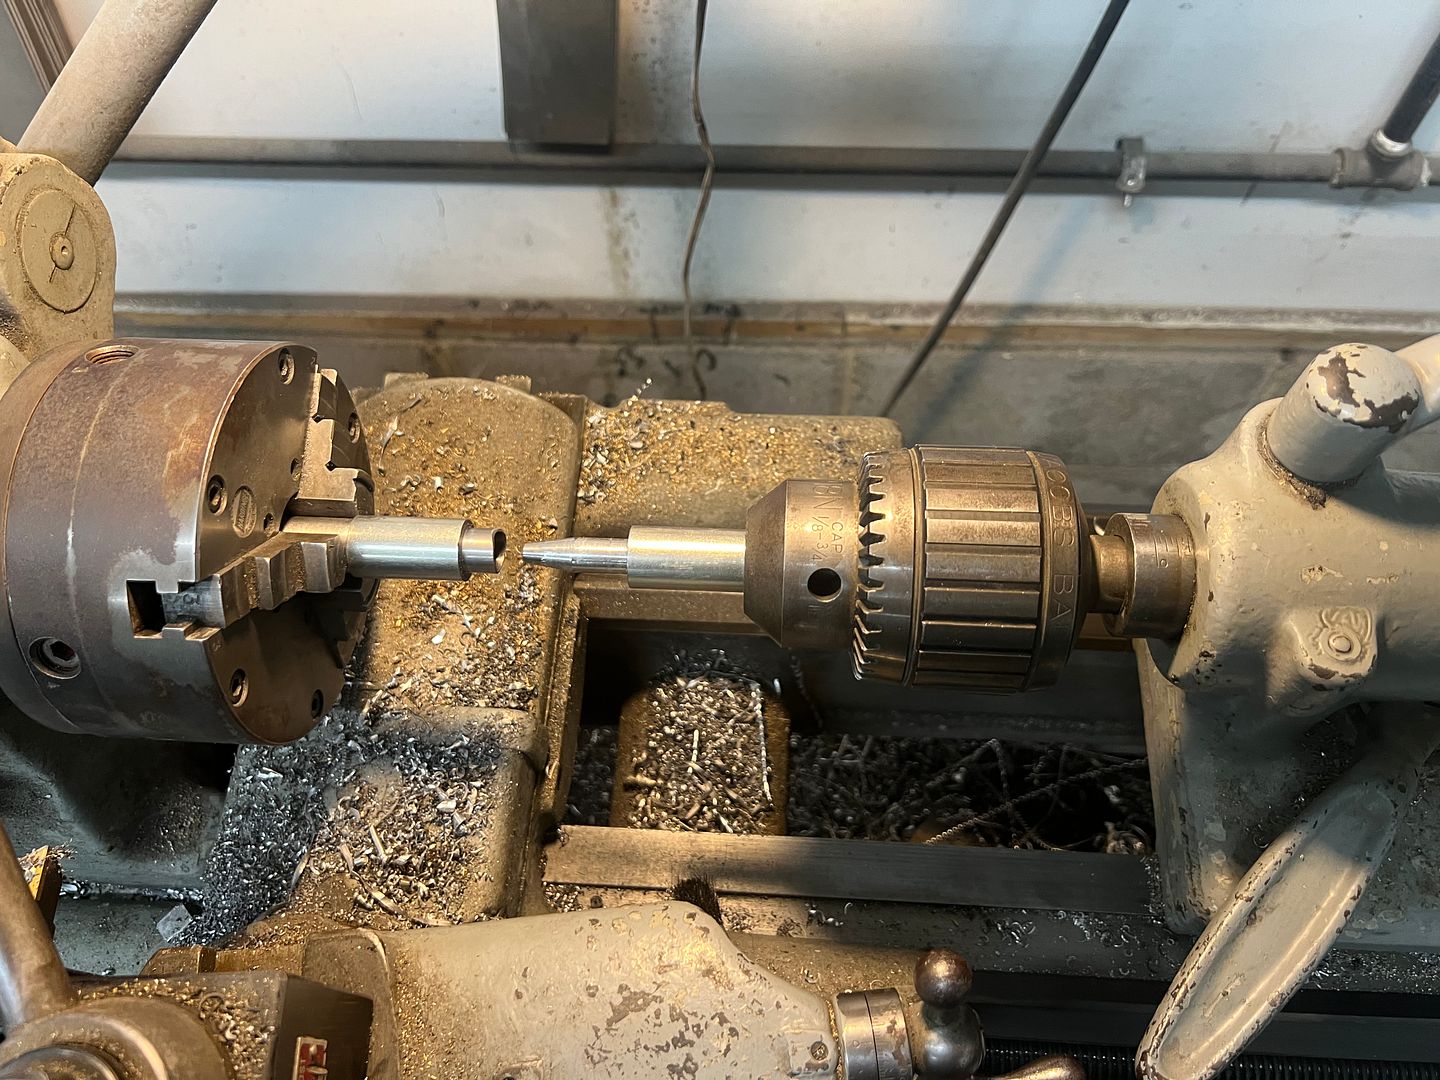 https://youtu.be/sFO7CYYbC9U 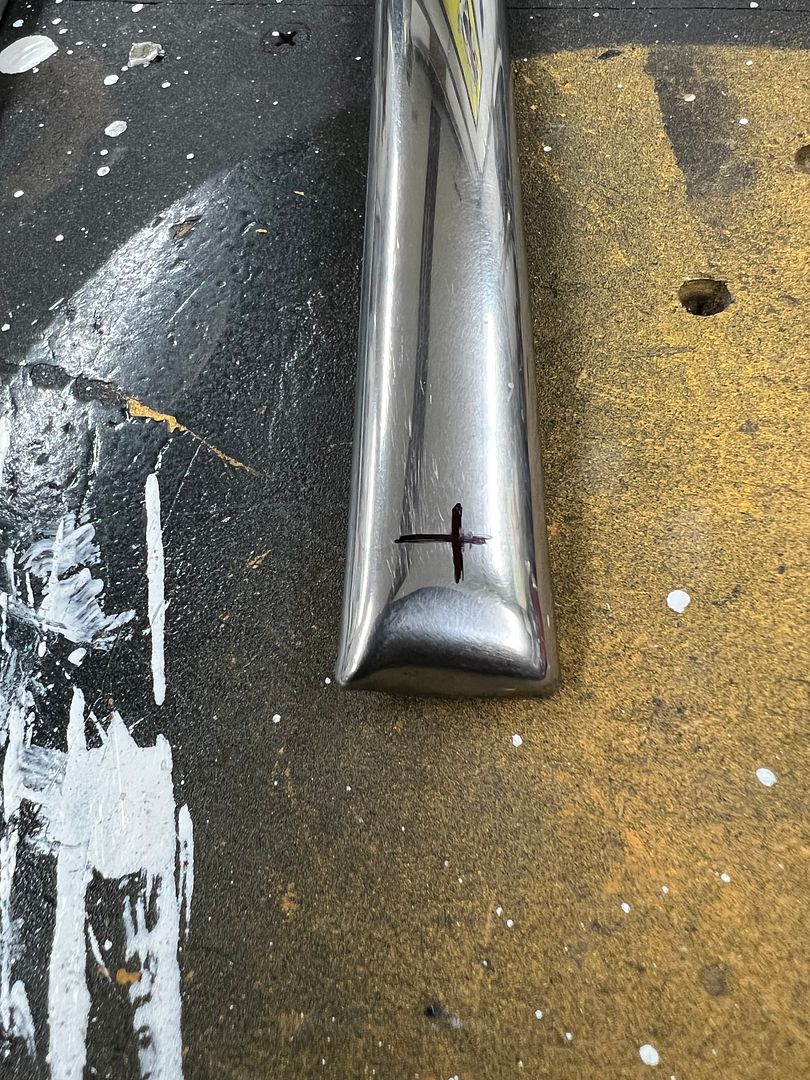 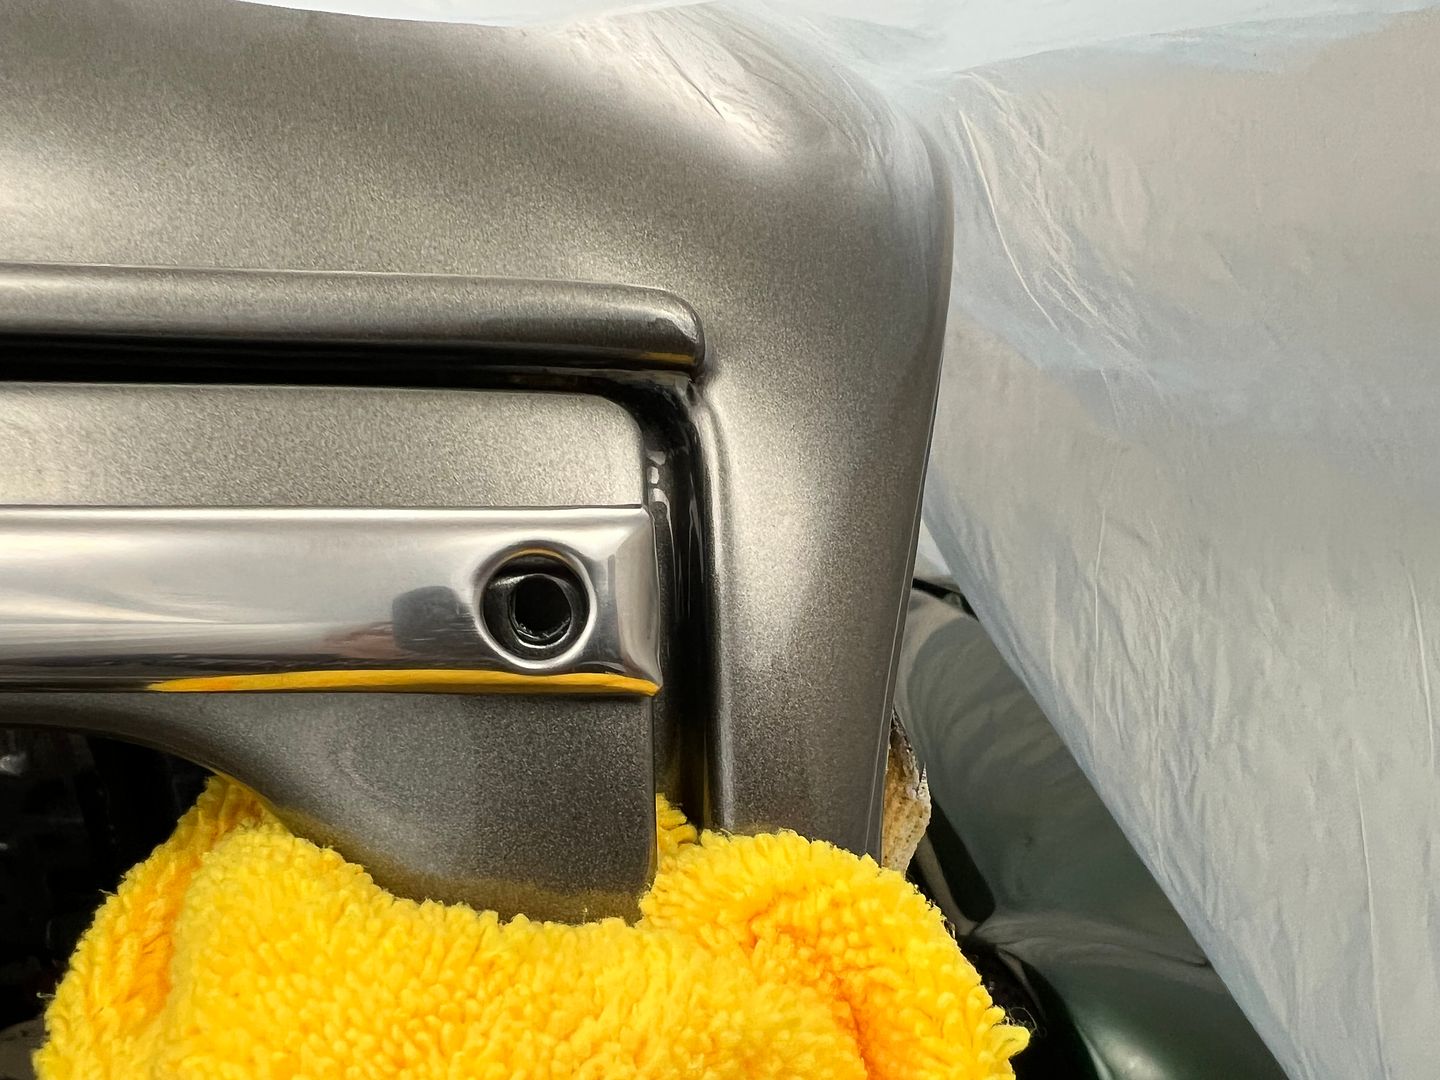 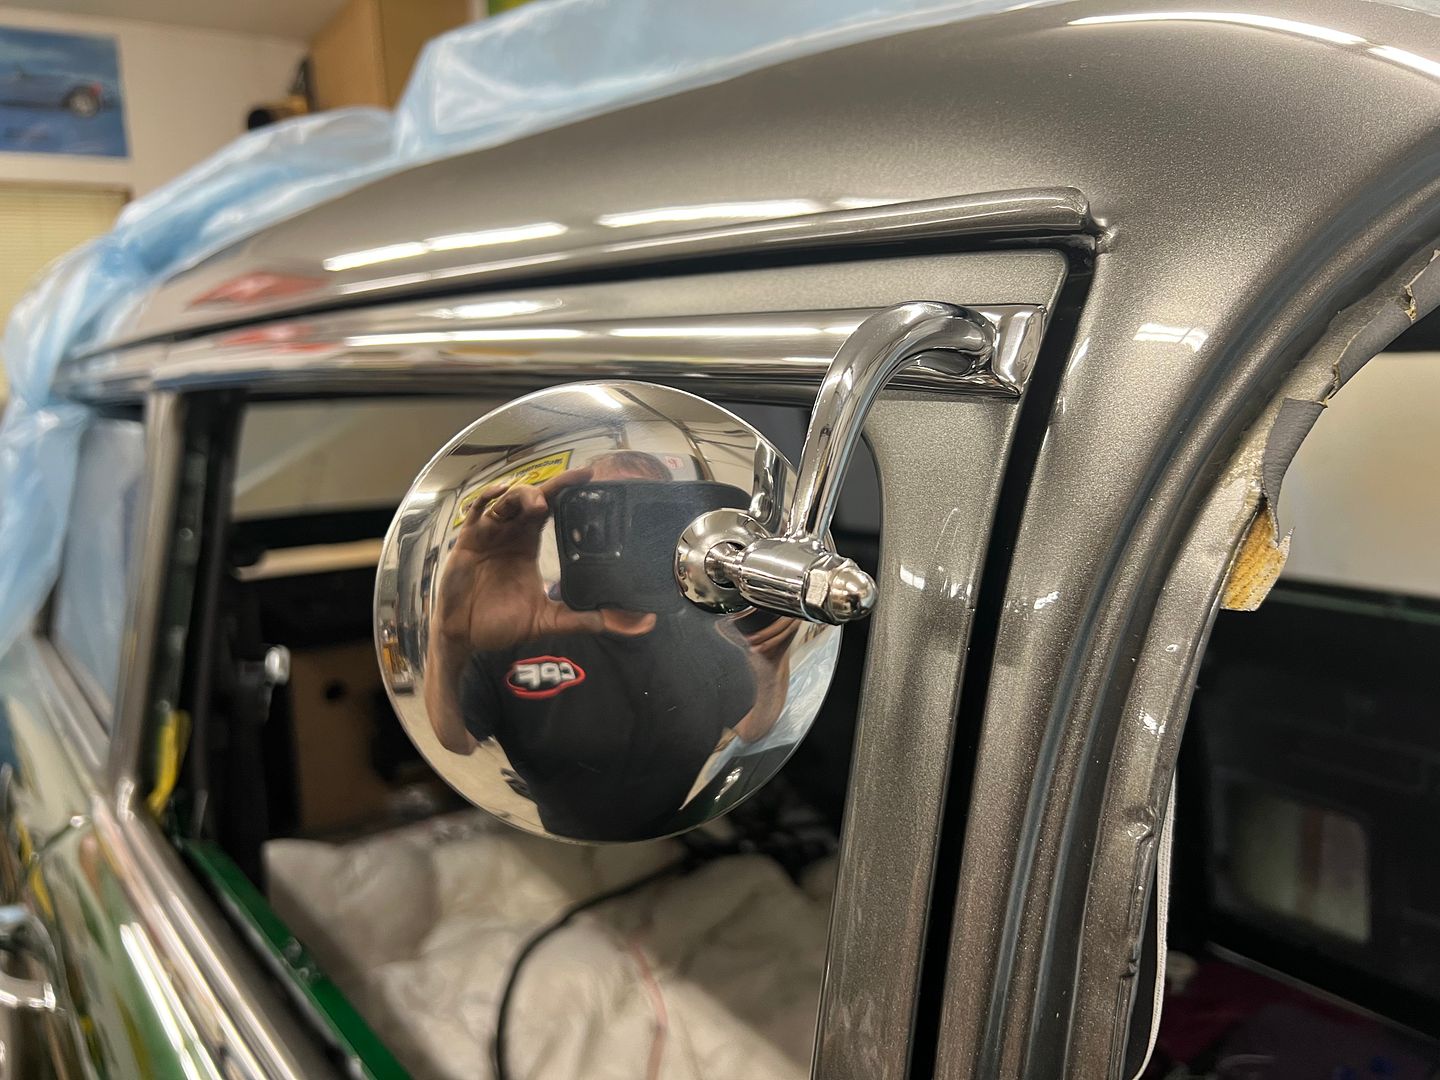 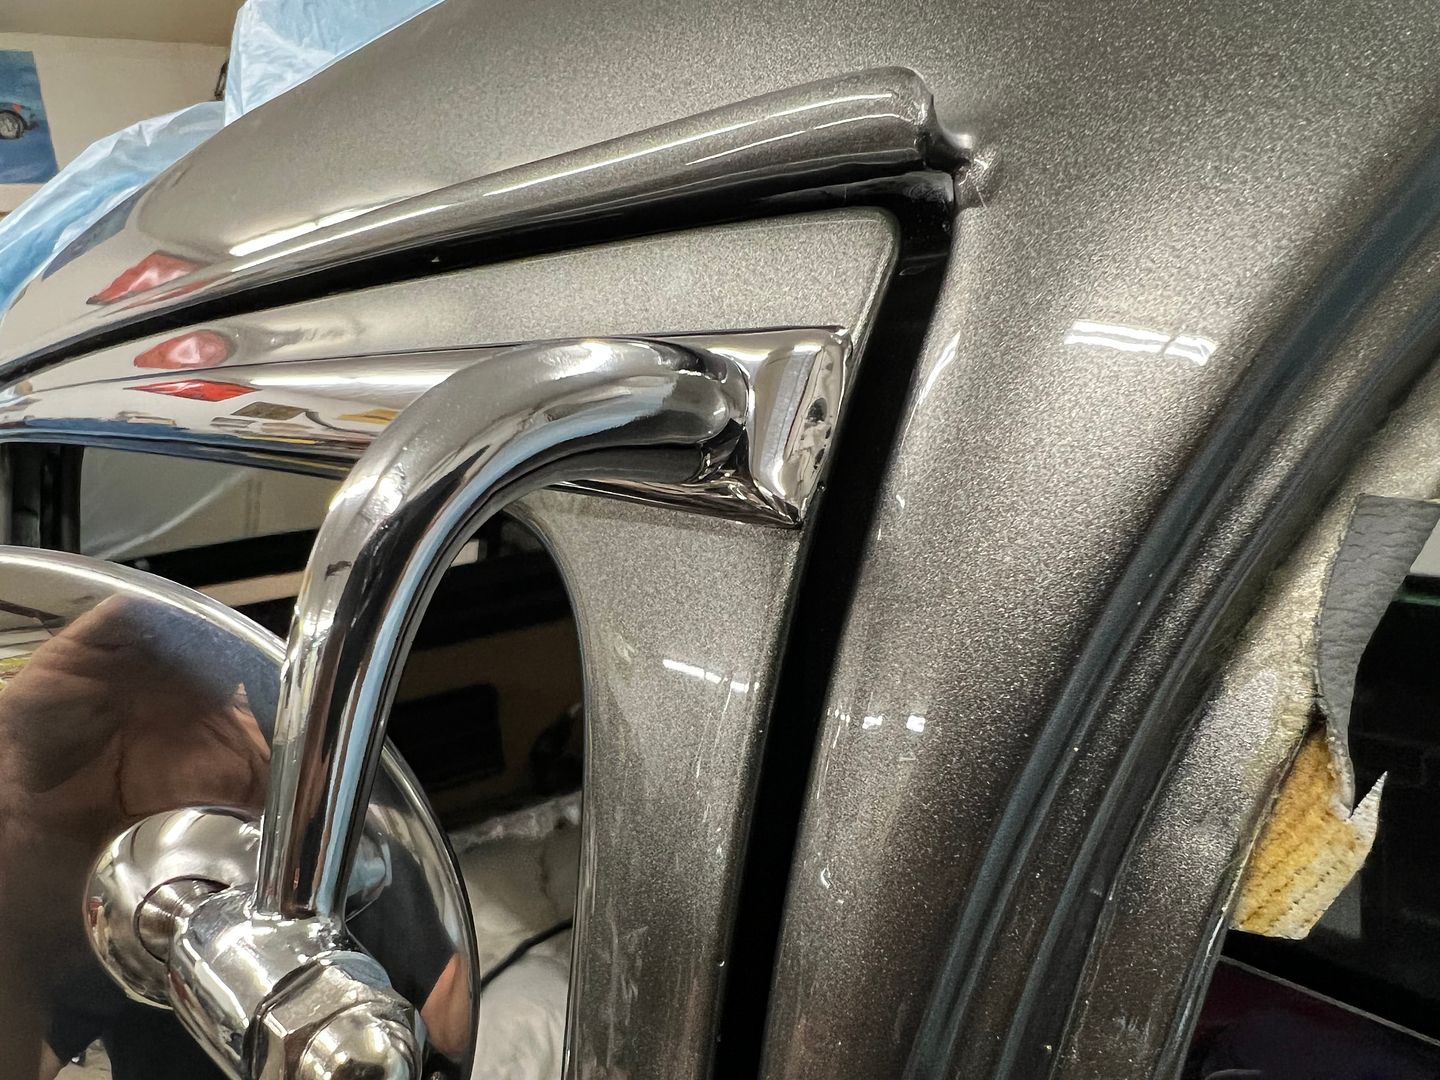 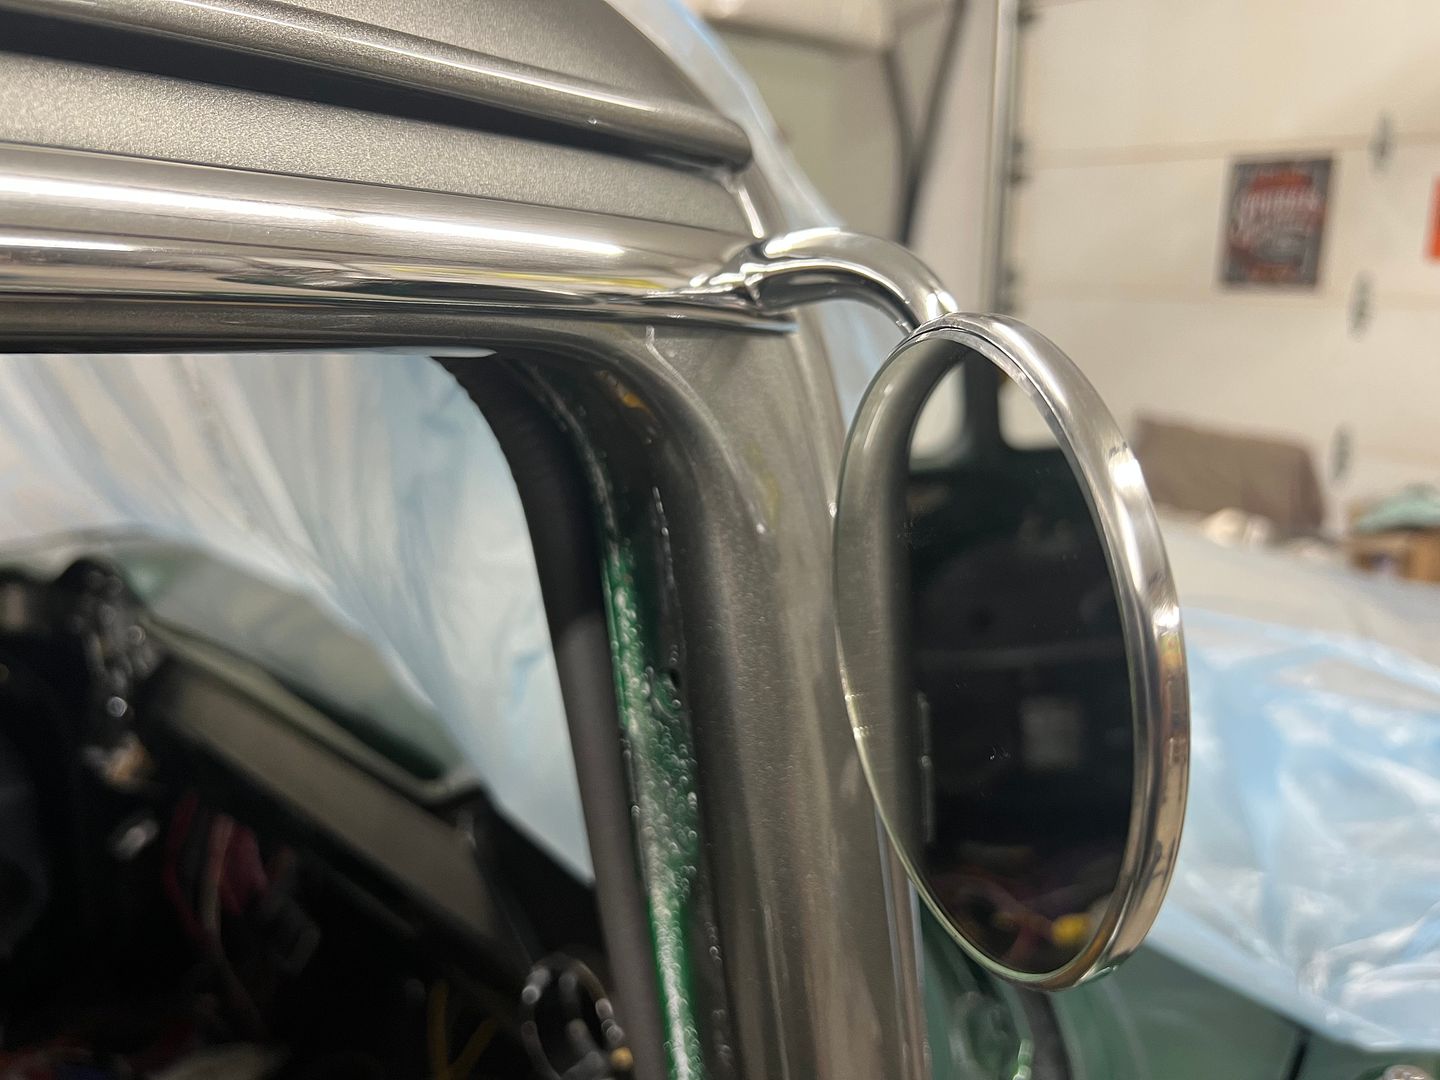 Trial test of the mirror, yellow rag hung outside the rear window for a more visible reflection 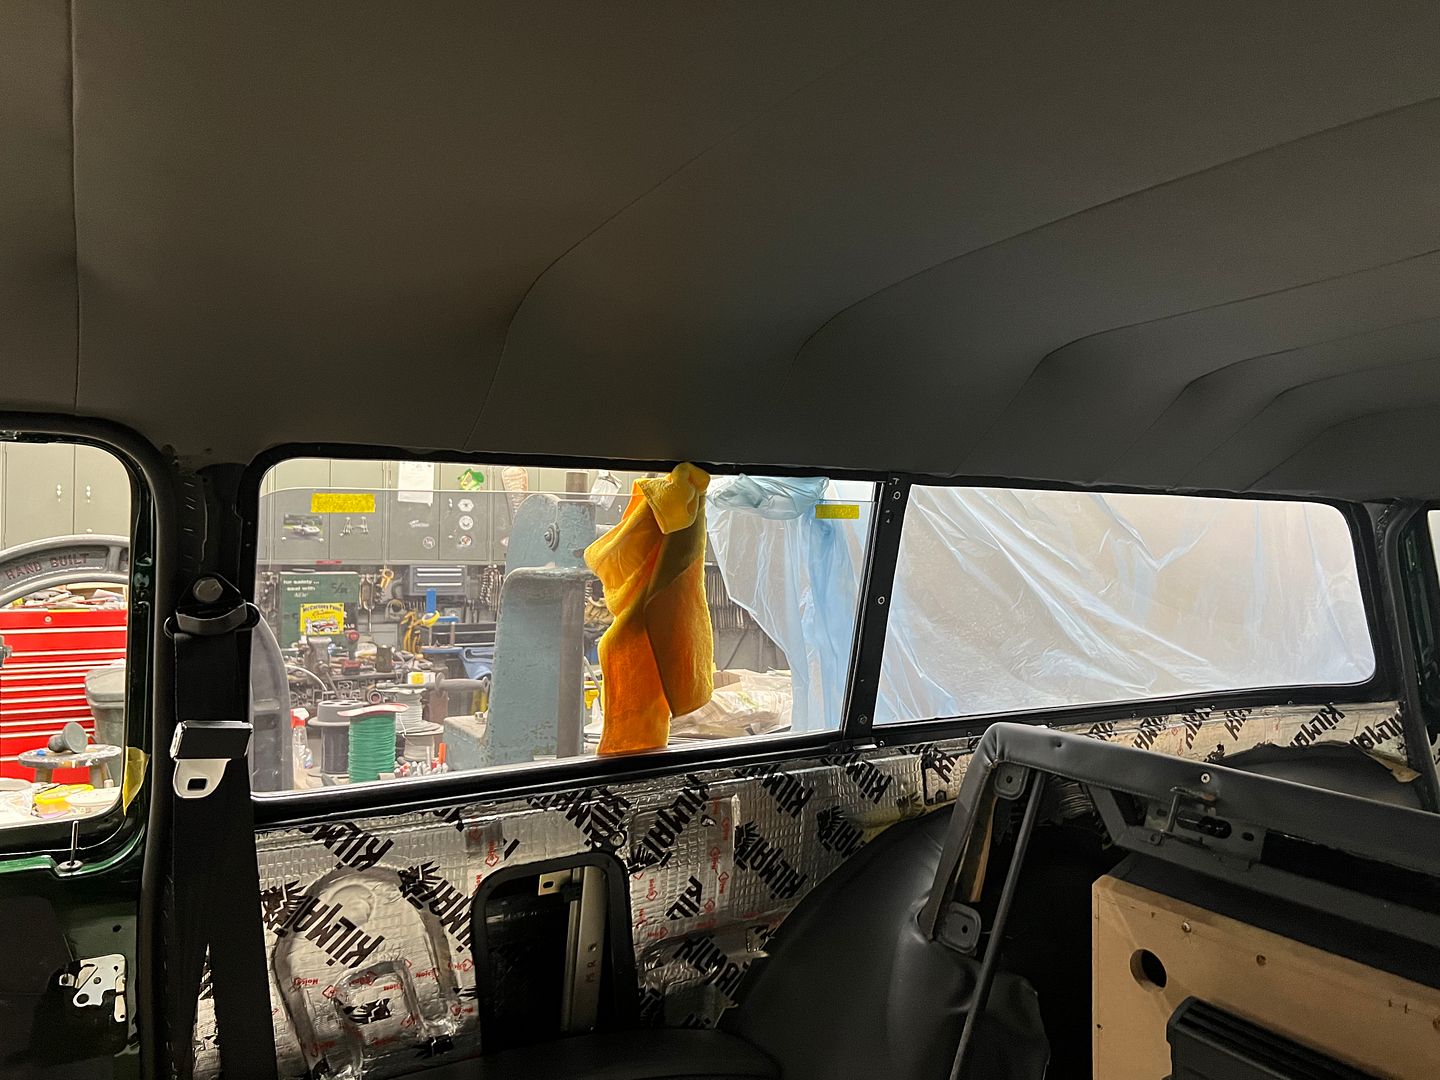 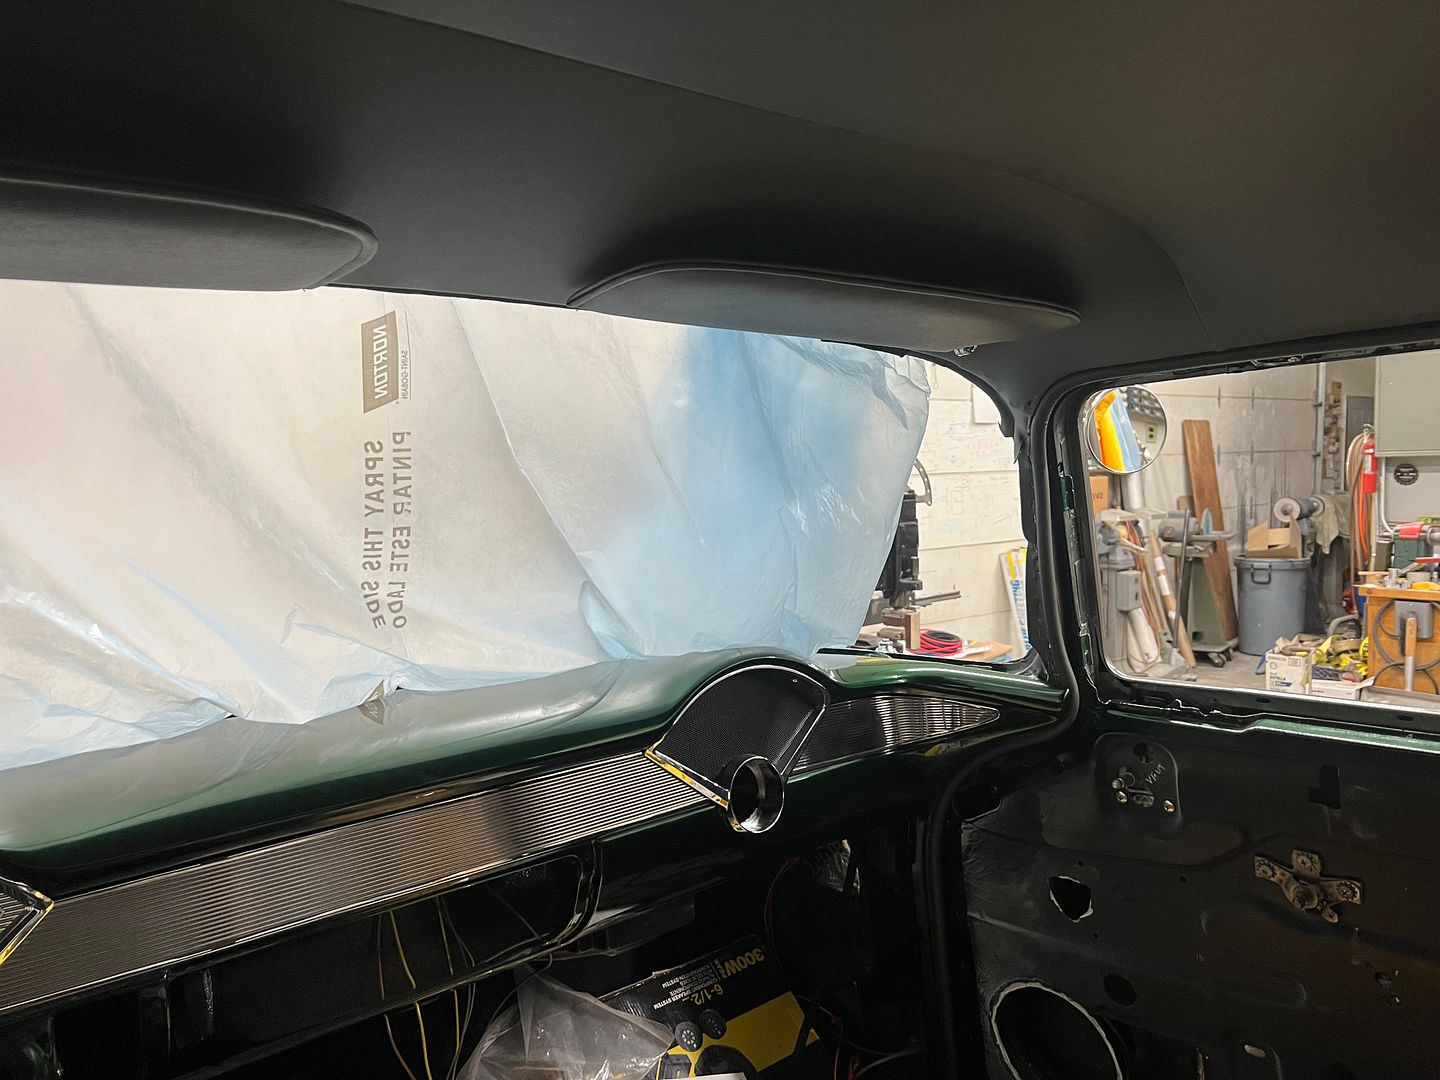
__________________
Robert |
|
|
|
|
07-31-2023, 12:53 PM
|
#1356 |
|
Registered User
Join Date: Jan 2013
Location: Leonardtown, MD
Posts: 1,633
|
Re: 55 Wagon Progress
Some more fabrication work for the day job, we had a door seal that was being abraded by a non-skid strip on the threshold, and wanted to drop it down some as well for better clearance. So a new threshold was made from 16 Gauge #4 brushed stainless. Where the old used countersunk holes for the #8 screws, we opted for the more correct version of dimpled holes. Provides more contact area for better seated hardware.
 Dies were made for the dimpling process, they used a 1/4" shank just pushed into a drilled hole in some bar stock vs. welding together. This will allow quick changeout for other sizes/shapes of dies for use in the press brake. 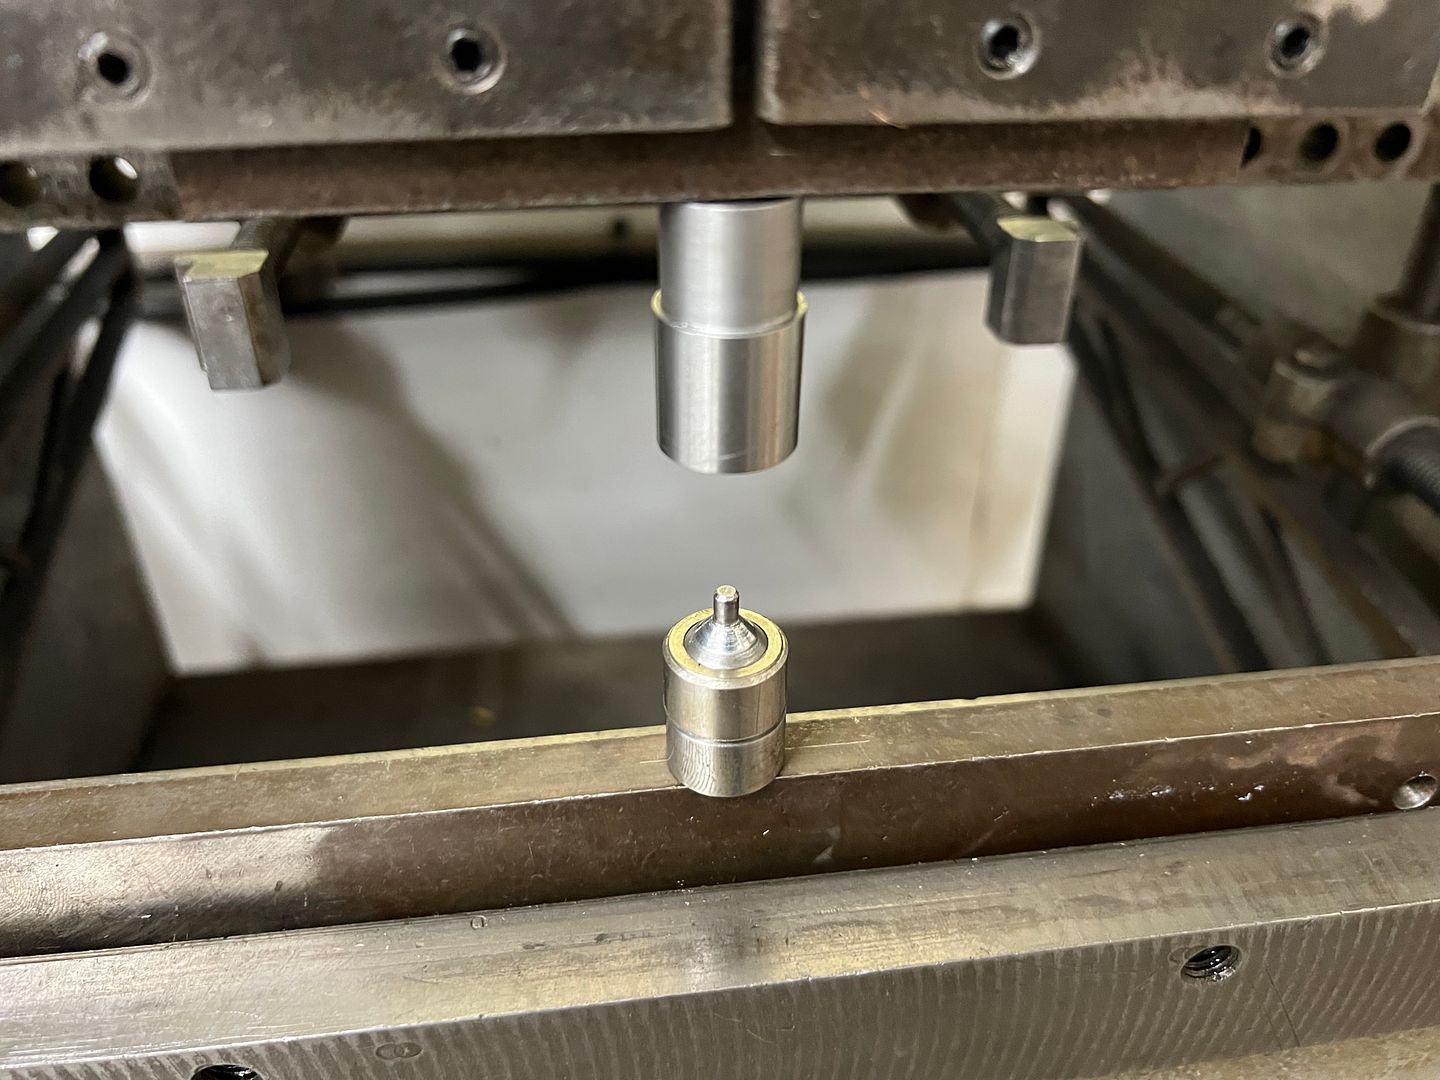 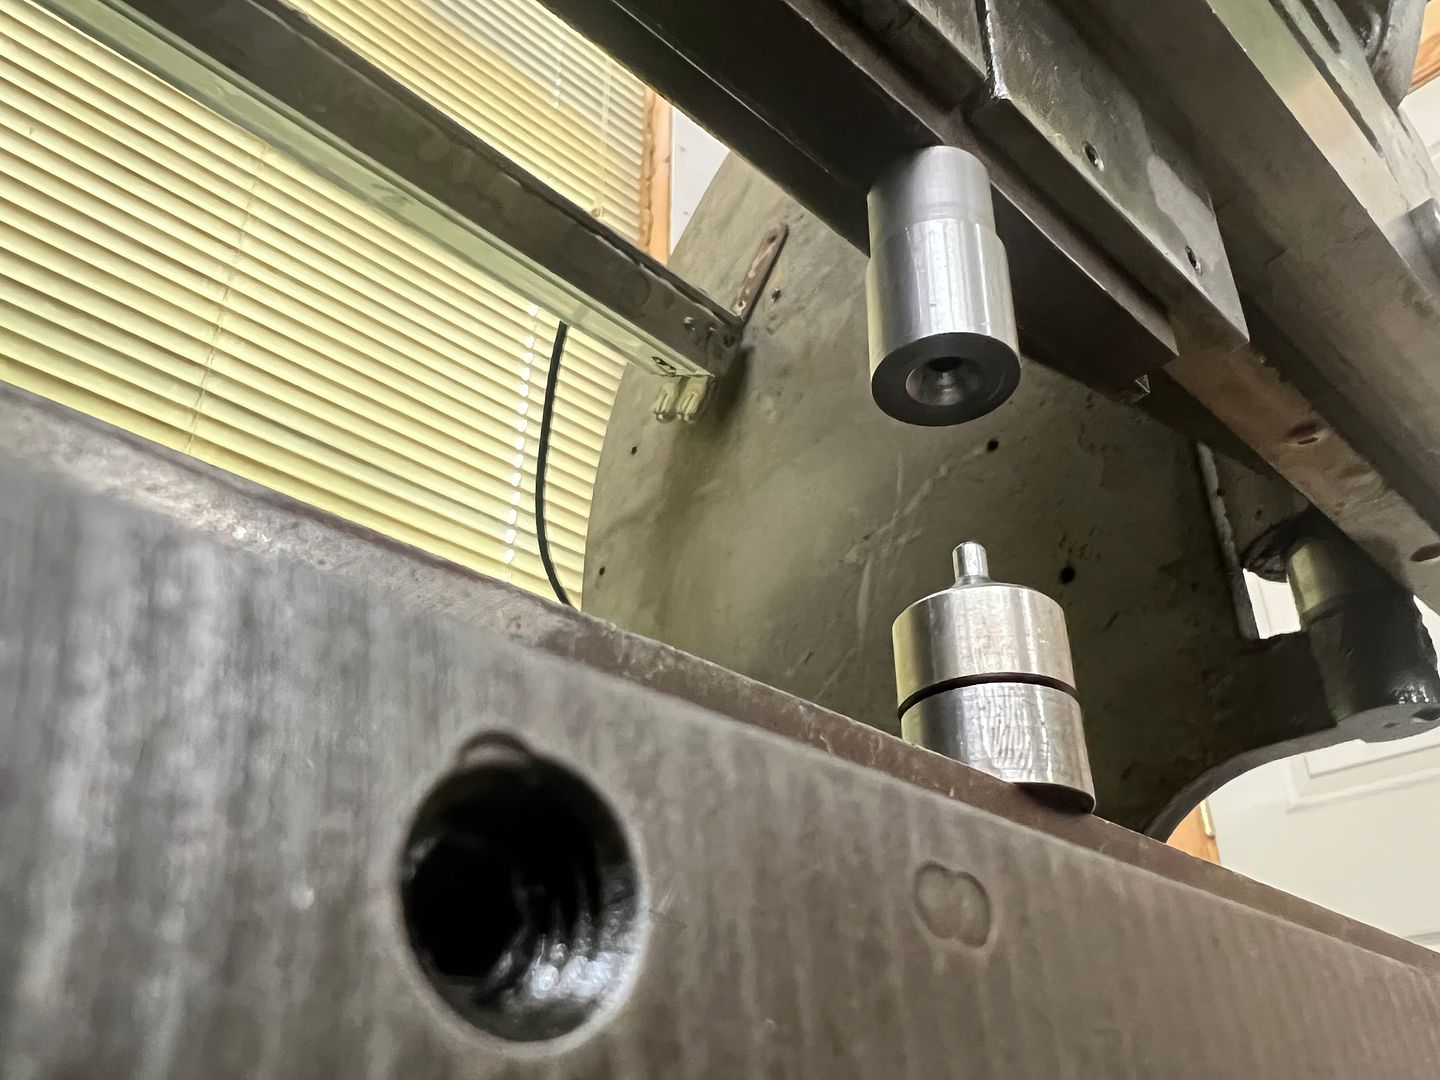 https://youtu.be/FafzVr8eTPM 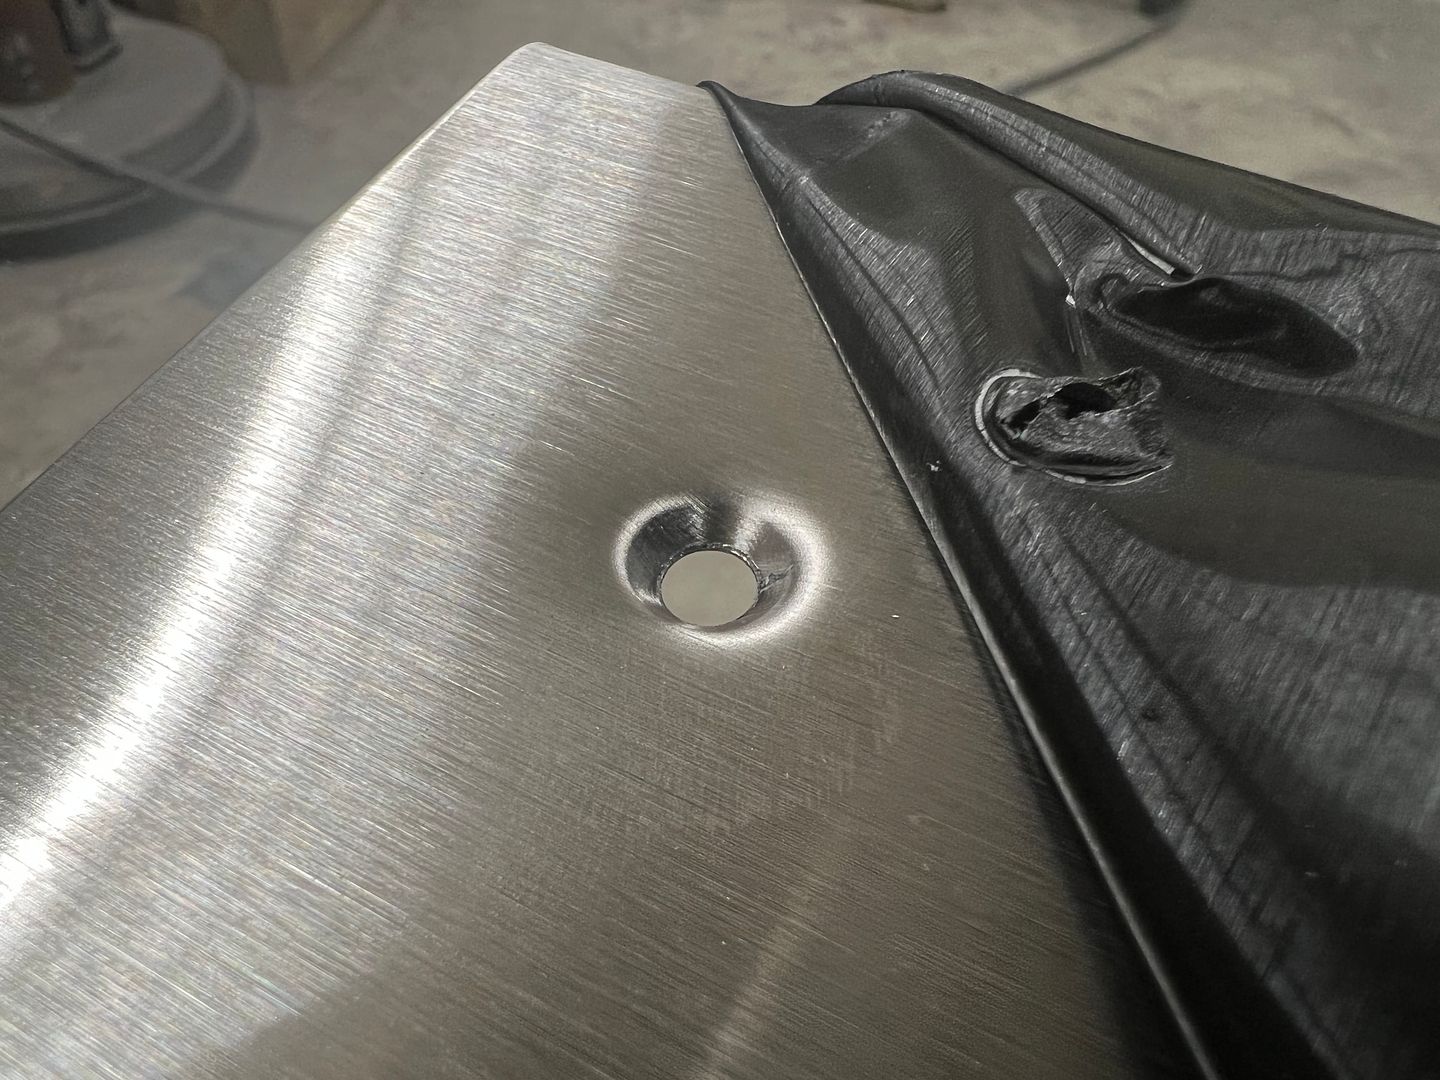 Next, to gain a bit more clearance for the door seal, the new threshold was located and the protrusions of the rubber flooring were scored with a utility knife at the threshold edge. Next, we used a multi-tool to shave down these protrusions that would be beneath the threshold. This wasn't much, but better than what was there before. 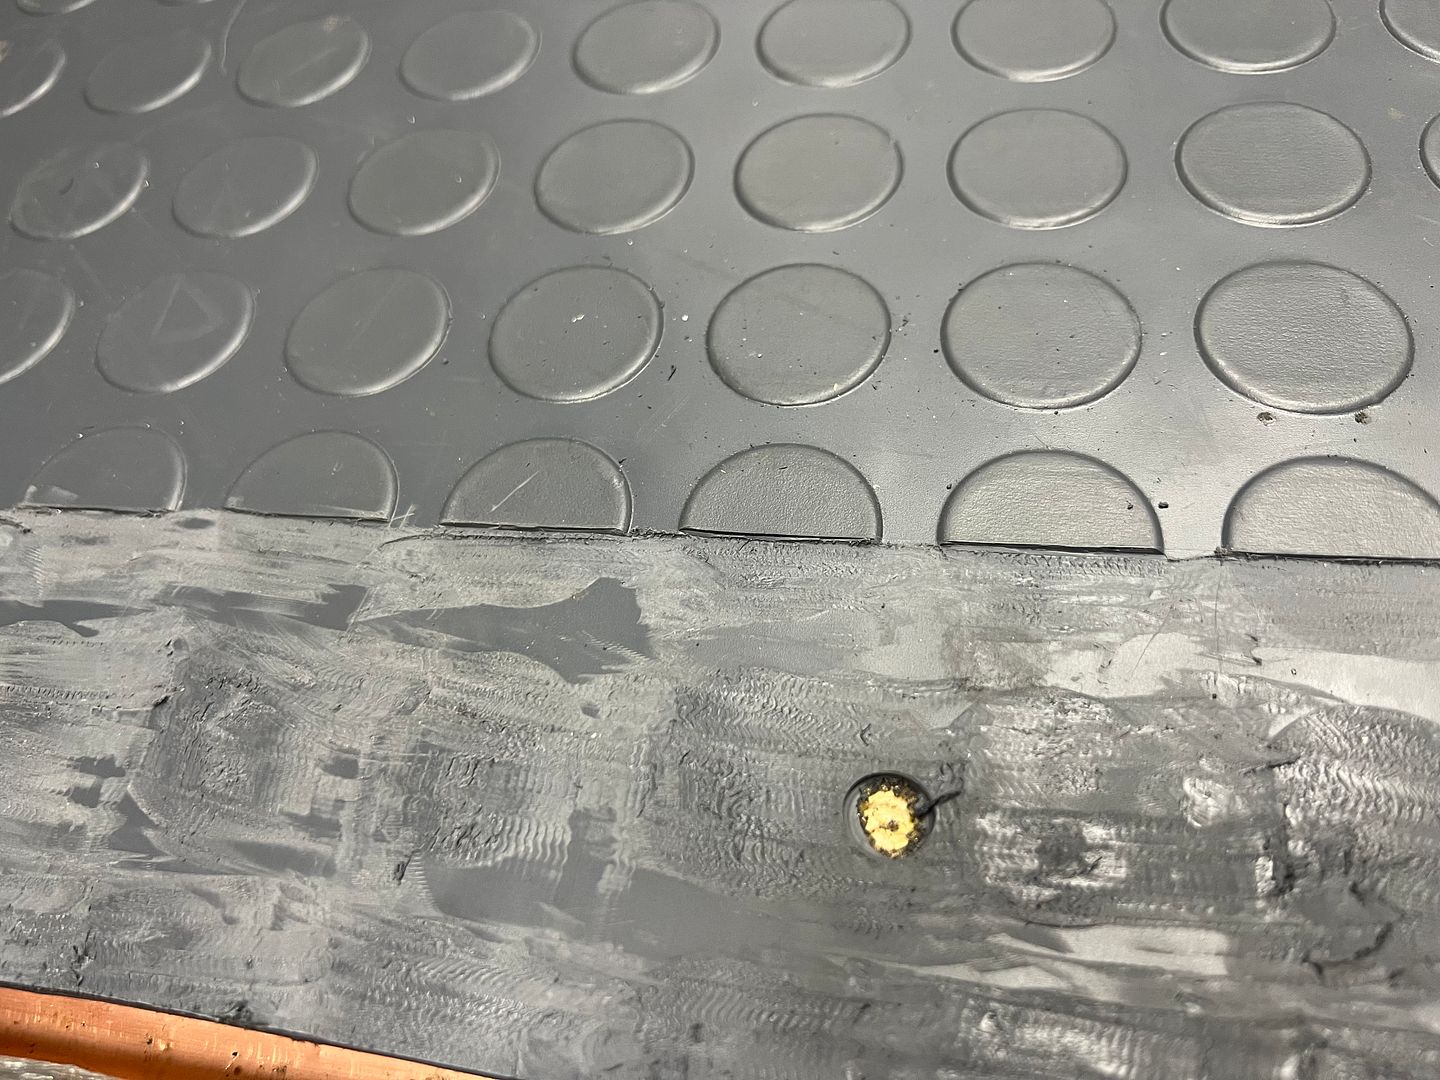 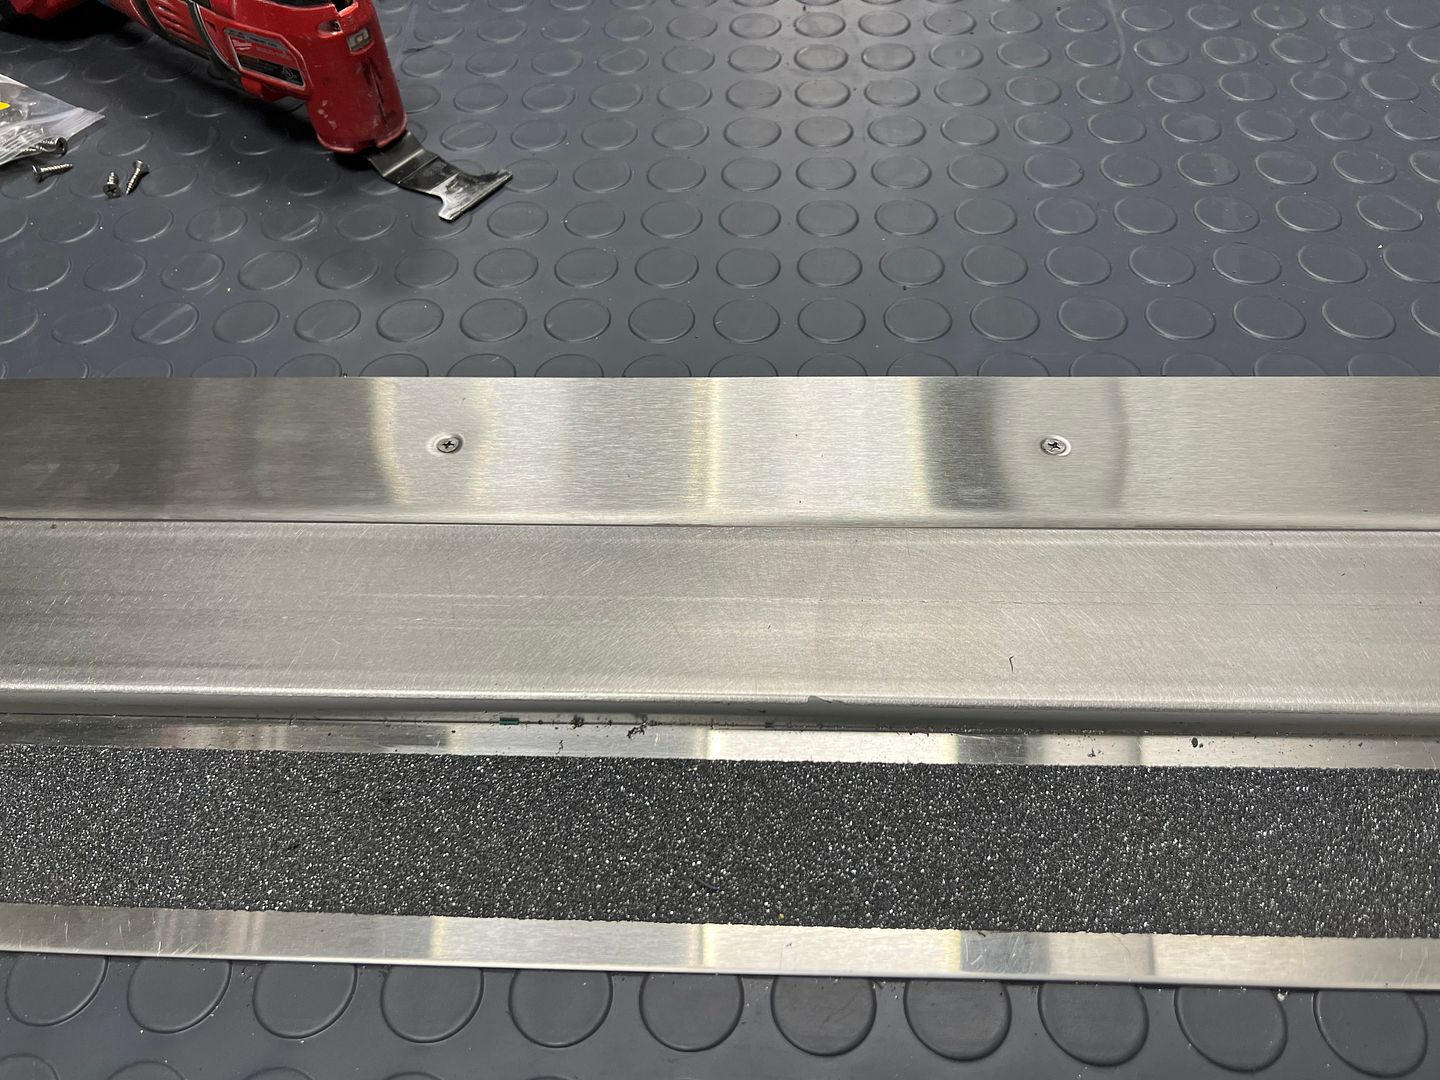  Back on wagon duty, we've been continuing on stainless polishing. We had been doing some of the shorter sections by sanding on top of my 4 wheel shop stool as it has a nice flat top surface. 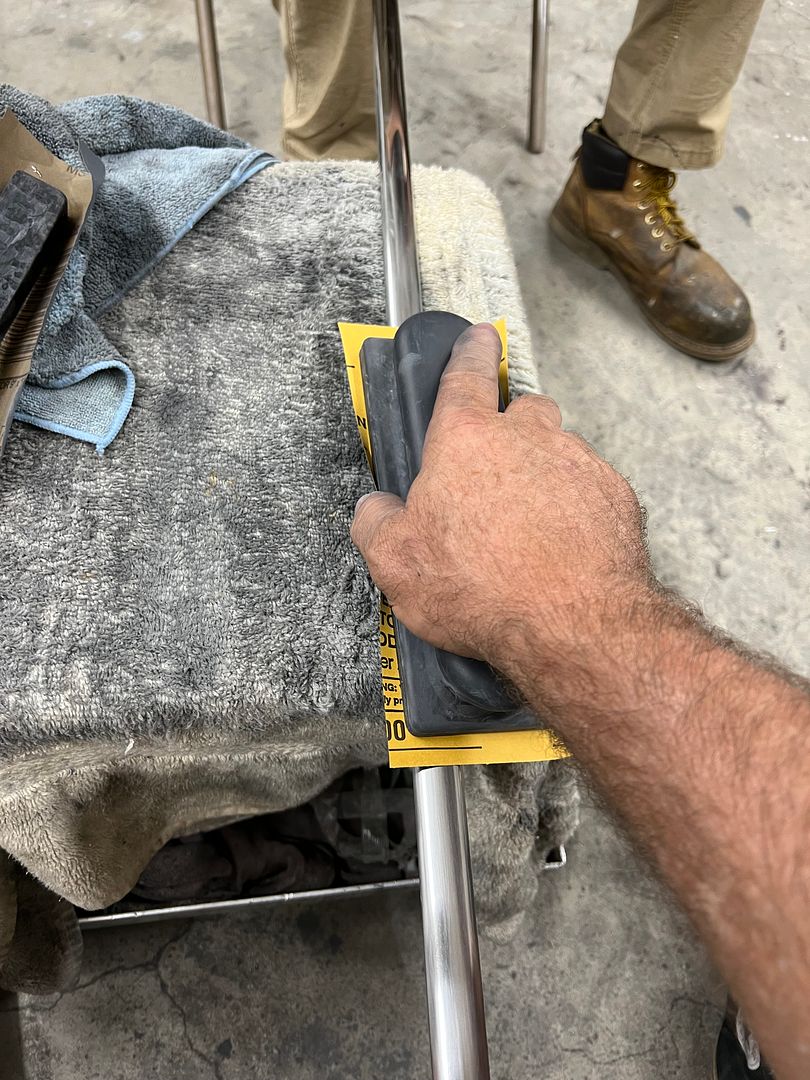 Once we got to the longer sections of trim, this became too cumbersome, so some 1/2" MDF was repurposed as a "holding fixture" while we refined the damaged scratches and dings. A Black Diamond longboard was used with 500 grit PSA paper to highlight any low spots, high spots, or other carnage. Then some LIGHT DUTY metal bumping to address the issues and a repeat of the highlighting sanding. Once all the defects were addressed, we then worked progressively through 600, 1200, 1500, 2000, and 2500 w/d paper. Then 3000 and 5000 Trizact, and finally on to the buffer. https://youtu.be/THKxgvIdVZw A modification of our "fixture" to hold the curved end of the trim... 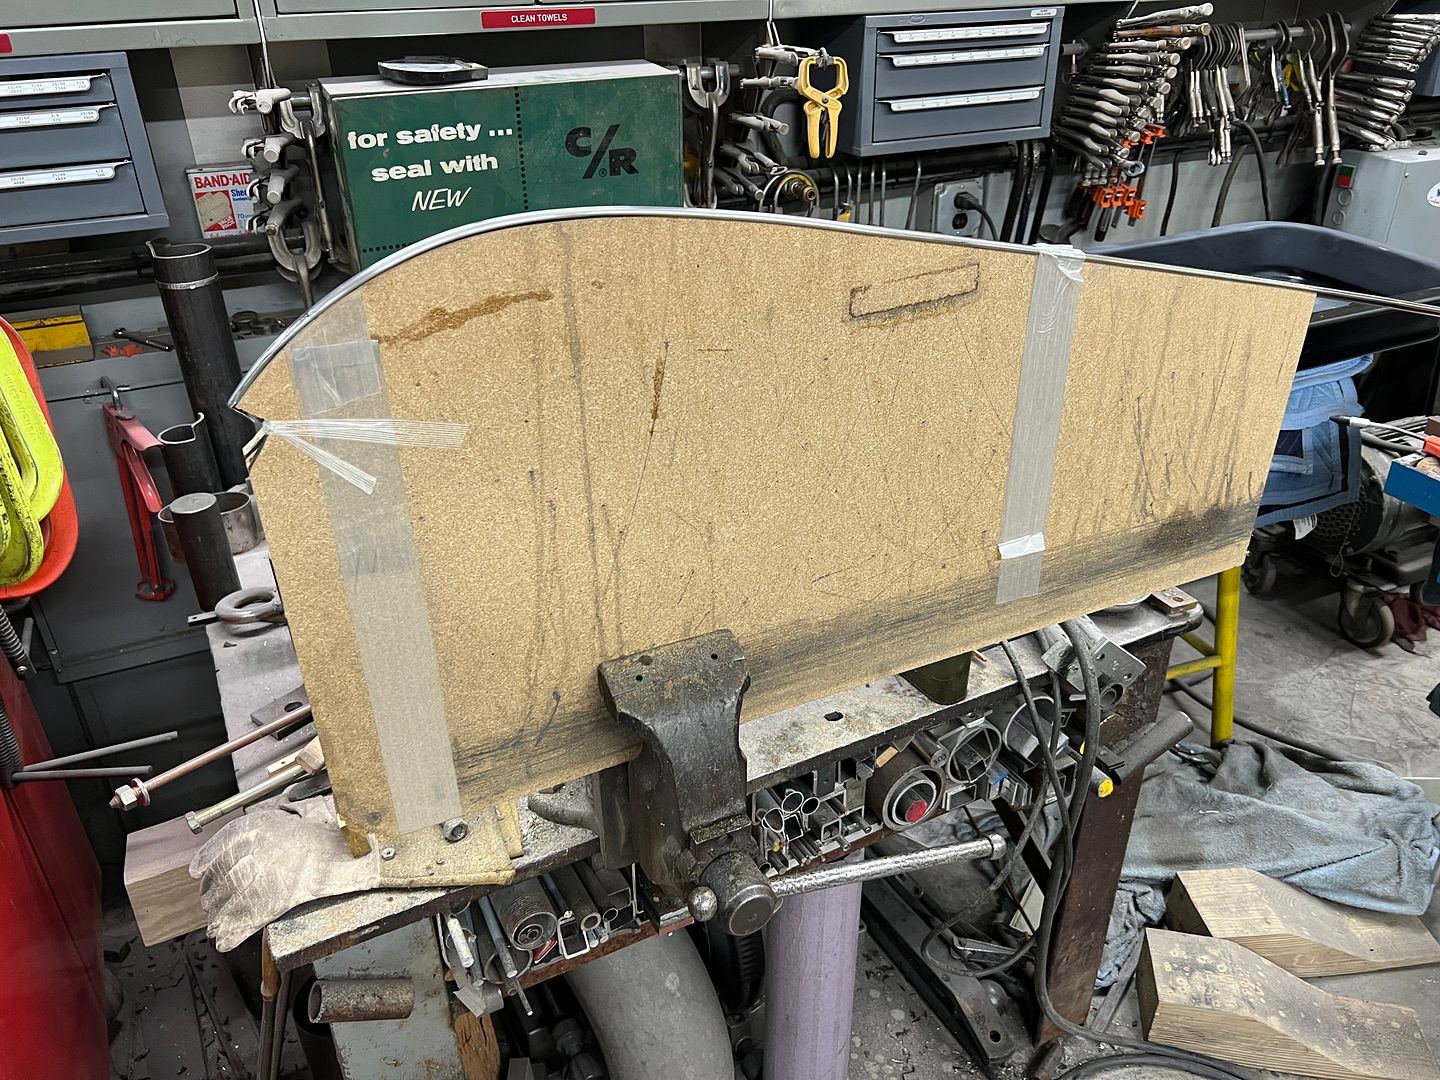 https://youtu.be/N5cgoFXjCDk https://youtube.com/shorts/tViITsStf_A?feature=share https://youtube.com/shorts/zYWU_zc4q1w?feature=share Jared helps out here to help stabilize the skinny trim and keep it from flopping around. Once quick mis-step at this point is about an hour minimum of recovery. https://youtu.be/Q0h6FuKog44 Nice reflection of the door opener in the ceiling after buffing... 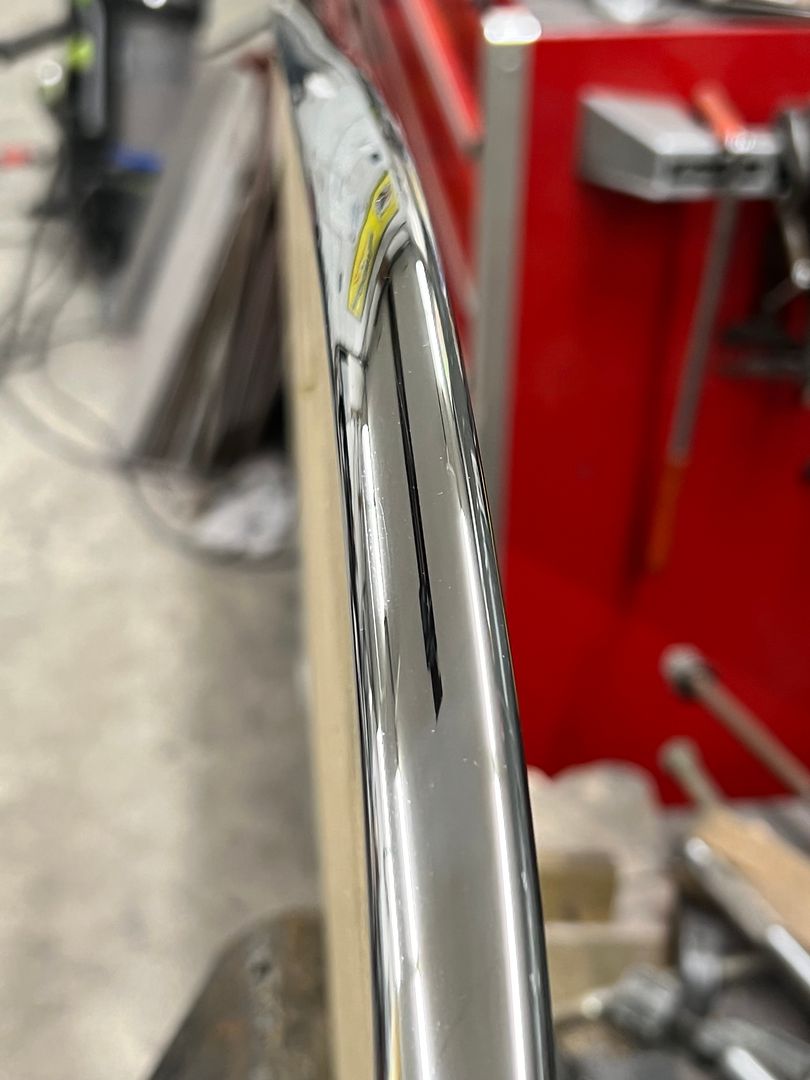 trim clips added... 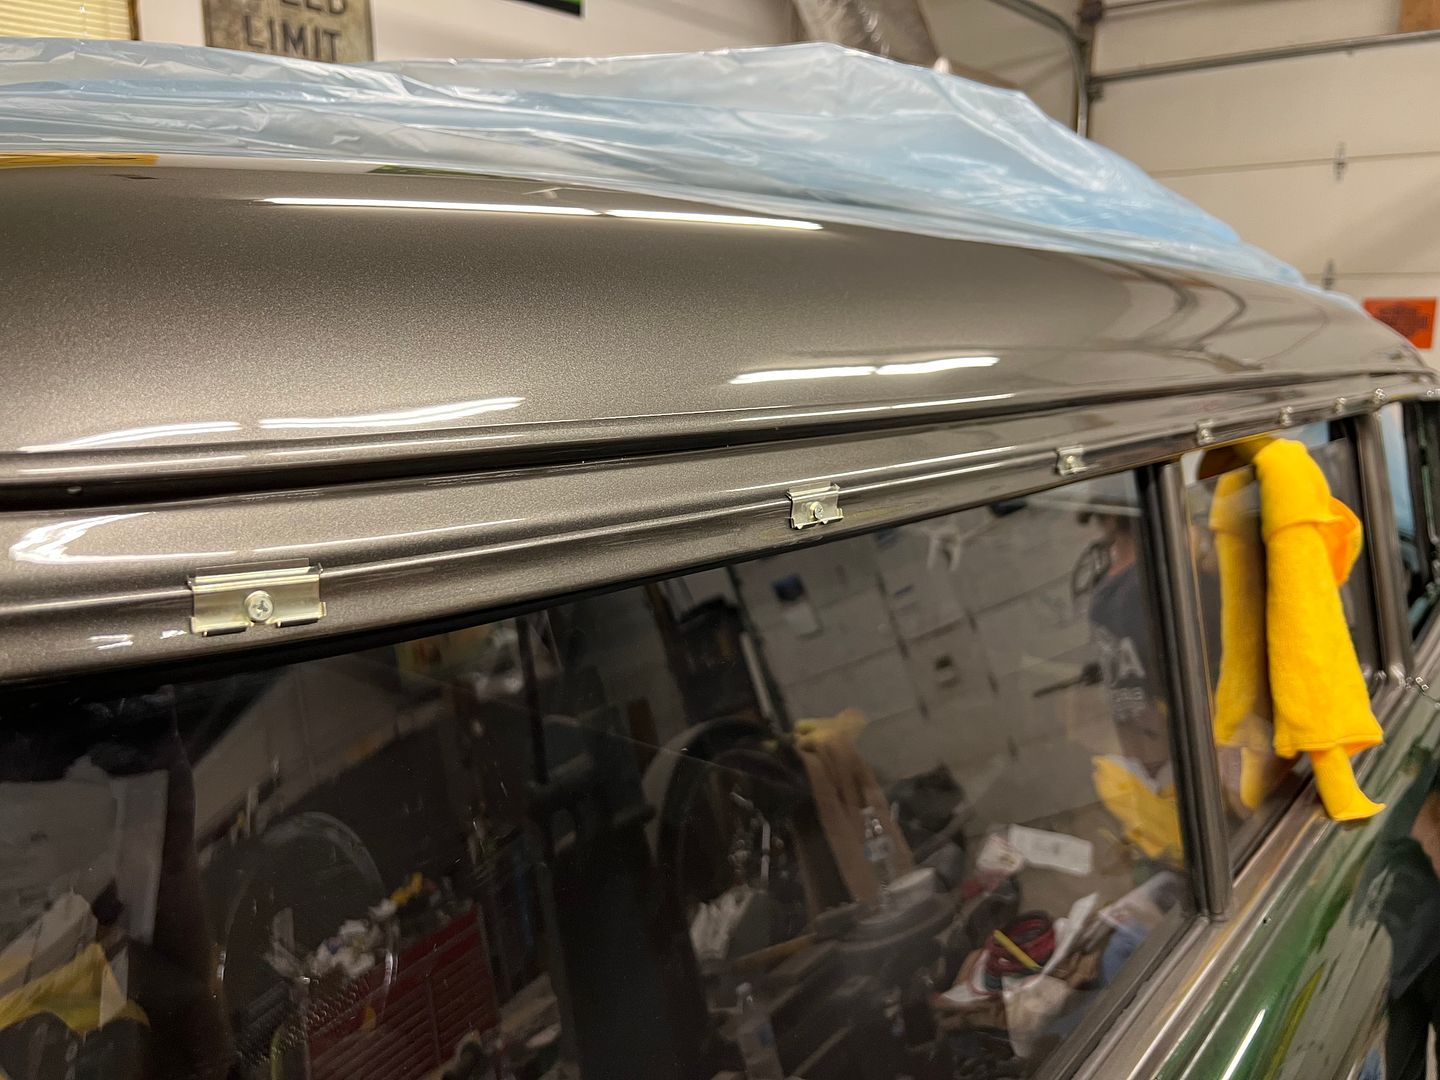 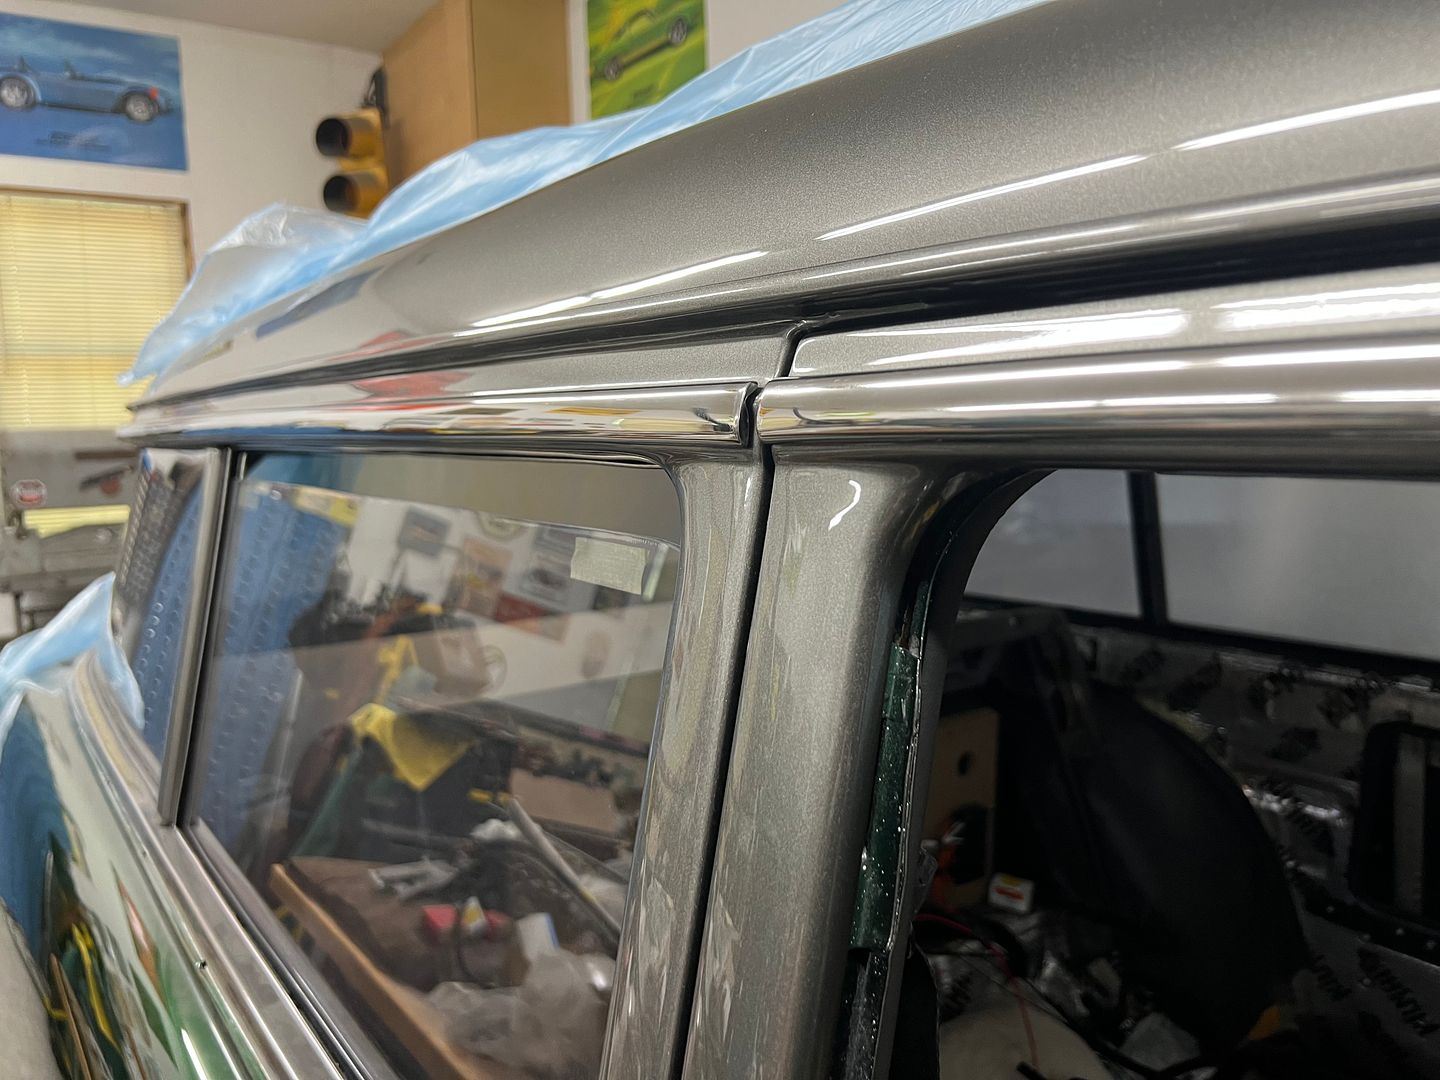 ...and our driver's mirror added... 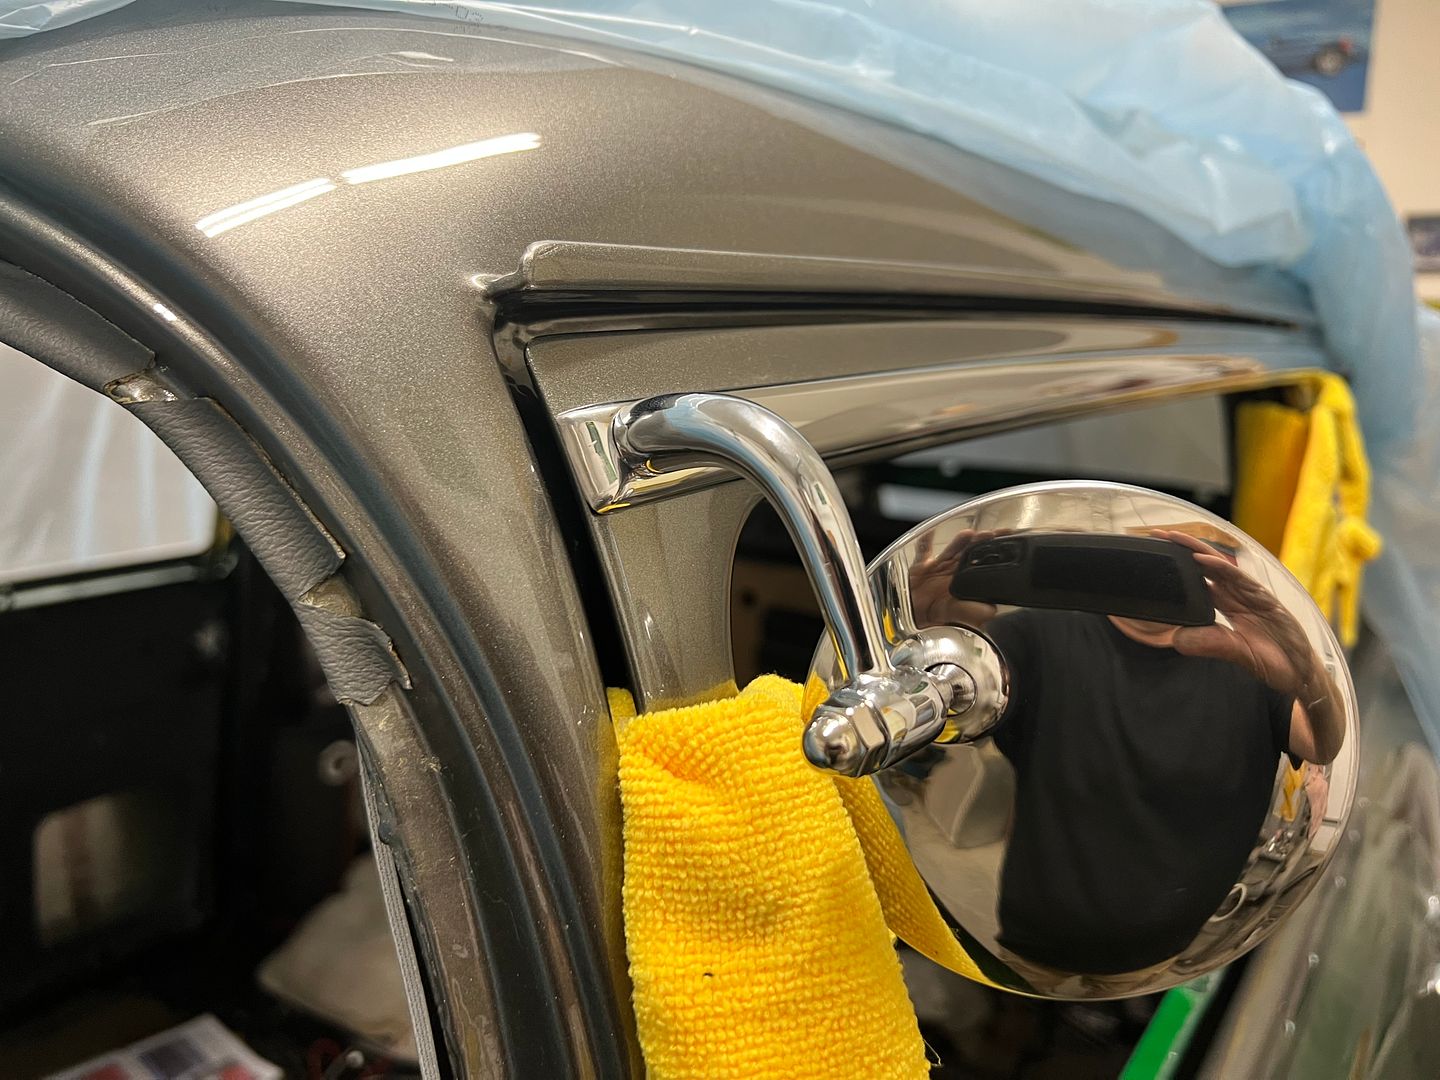 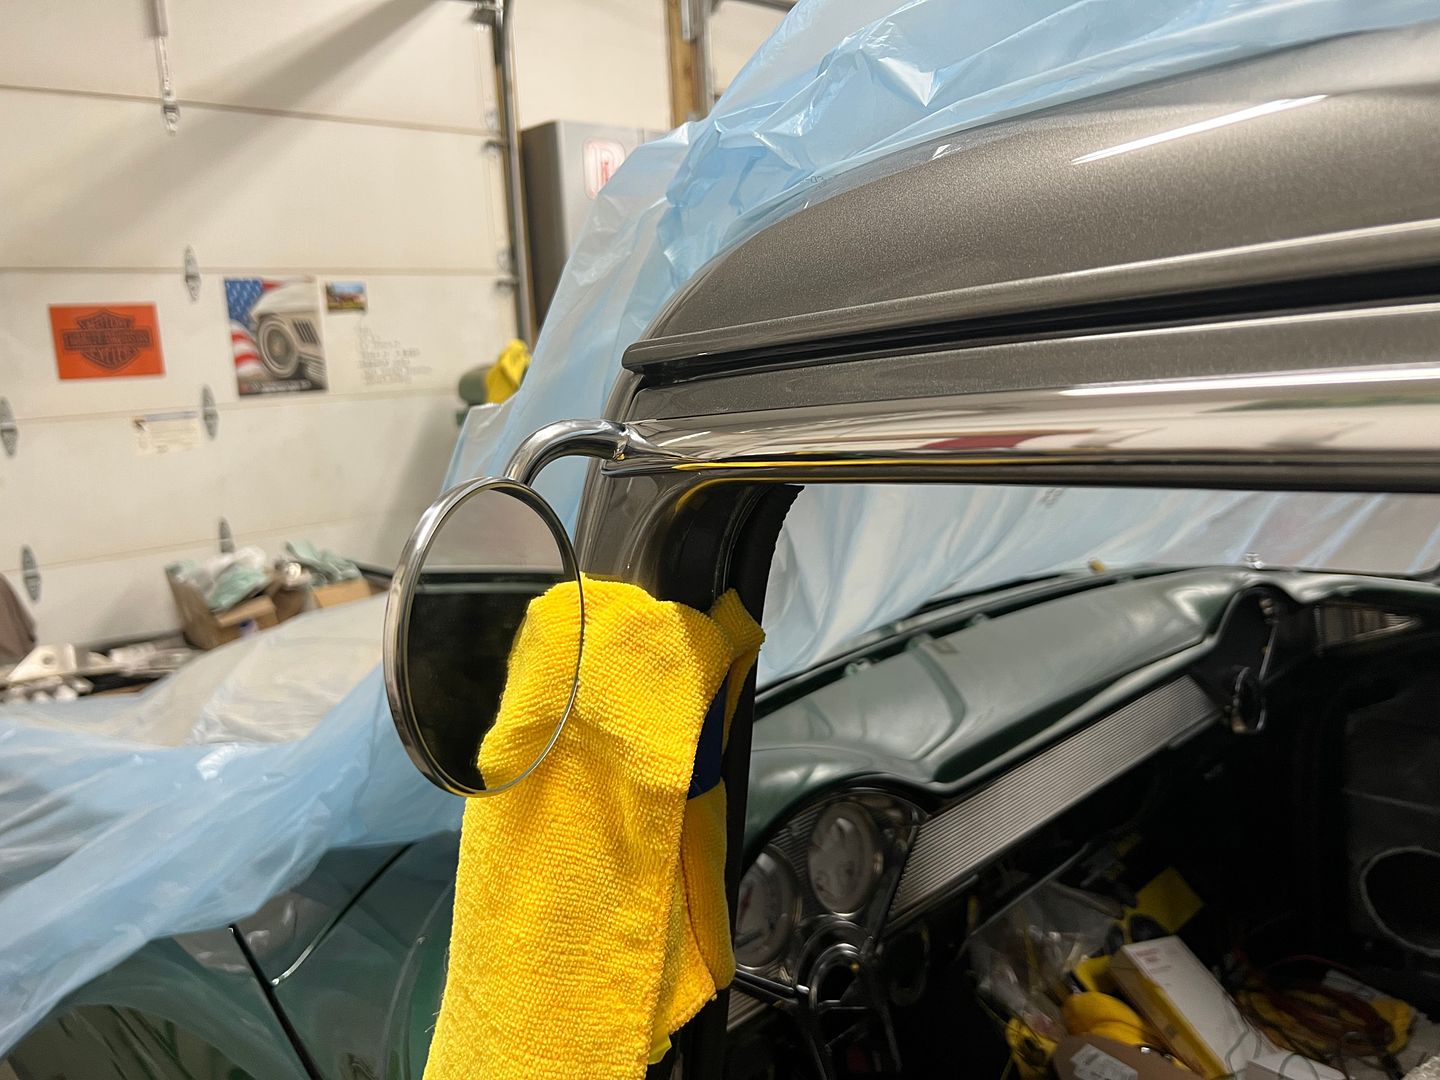
__________________
Robert |
|
|
|
|
08-07-2023, 03:04 PM
|
#1357 |
|
Registered User
Join Date: Jan 2013
Location: Leonardtown, MD
Posts: 1,633
|
Re: 55 Wagon Progress
Friday night was paint night. We started with a coat of SPI epoxy thinned for sealing, then two coats of Galaxy gray shimrin basecoat, then 4 coats of Cobalt Blue Kandy, and two coats of SPI universal clear.
  First coat of Kandy:  It was loosely assembled Saturday morning and carried into the sunlight for pictures. The low morning sun was not enough to wake up the metallic in the basecoat, and this looks jet black. 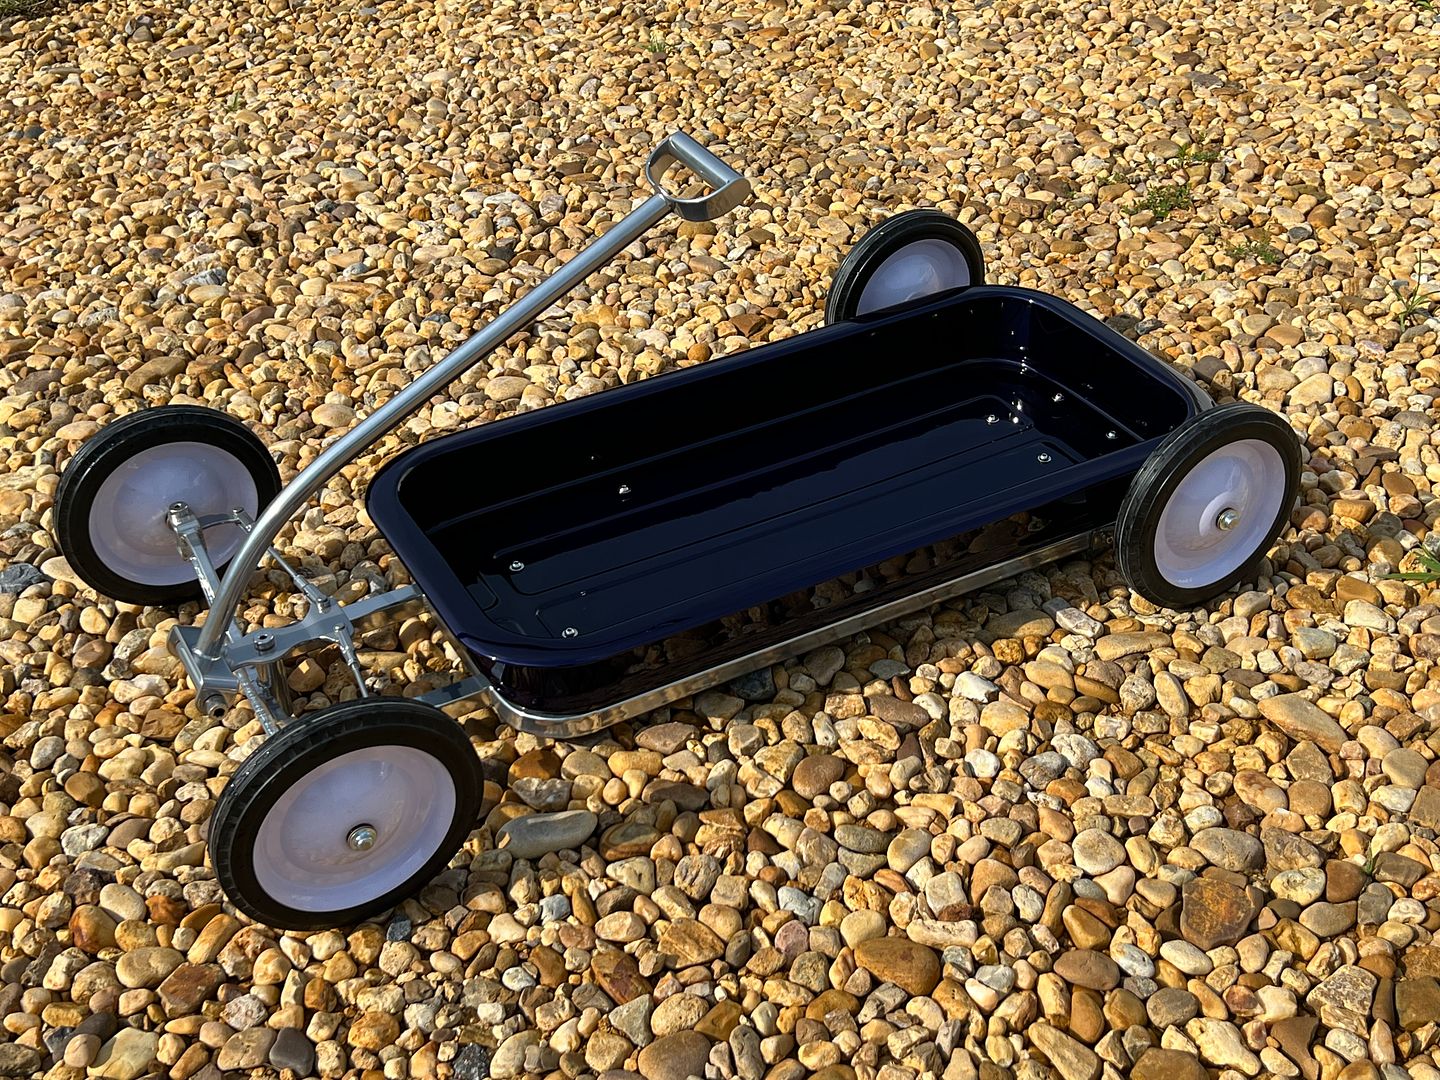 A bit later, it’s starting to wake up the blue…. https://youtu.be/SeT3ykEg_wA After wagon assembly and photo op, we did some more Stainless scratch refinement... Two long pieces left to go. and one on order. Dana had taken one somewhere for straightening, and the results left us with a wrinkle and a crack forming. So that one's replacement is on the way from The Stainless Shoppe. 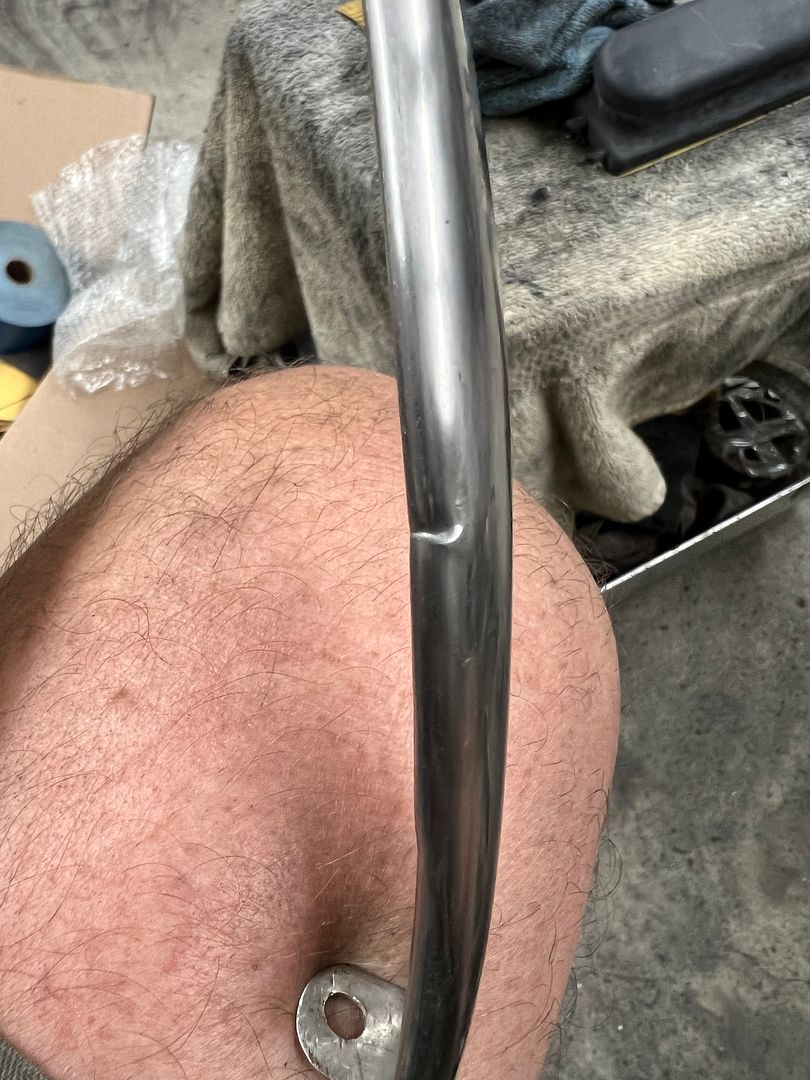 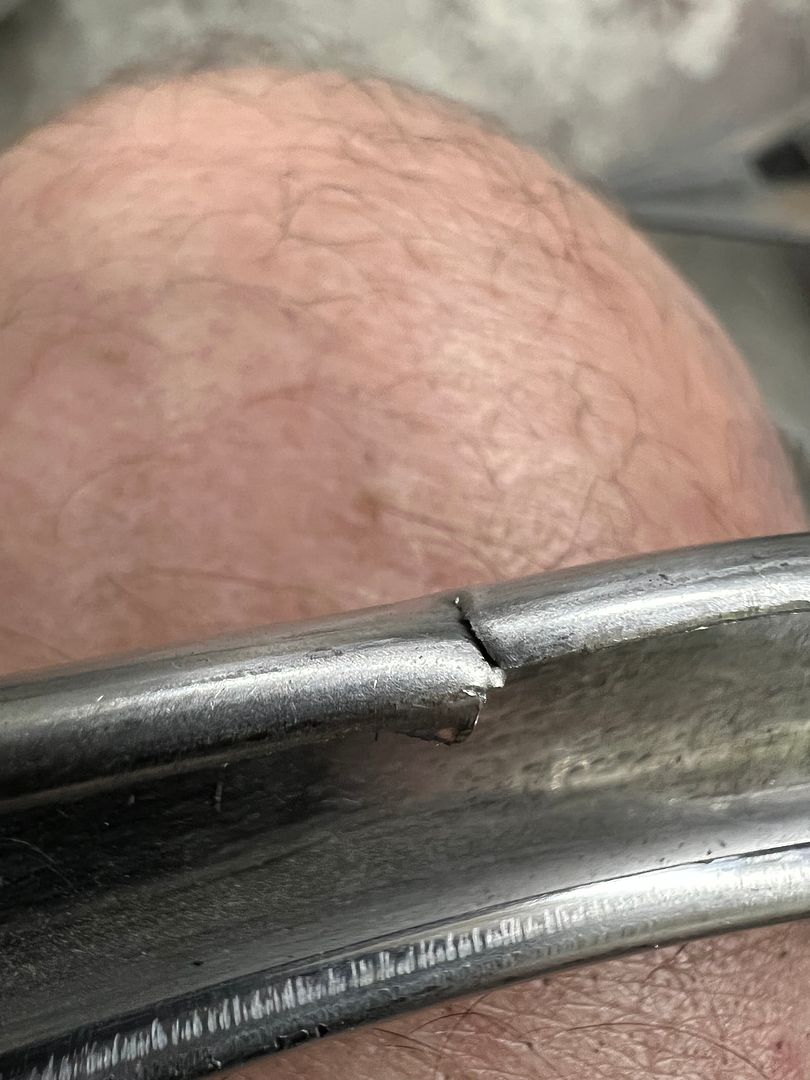 Jared putting the eagle eye on the remaining stainless to find any defects... 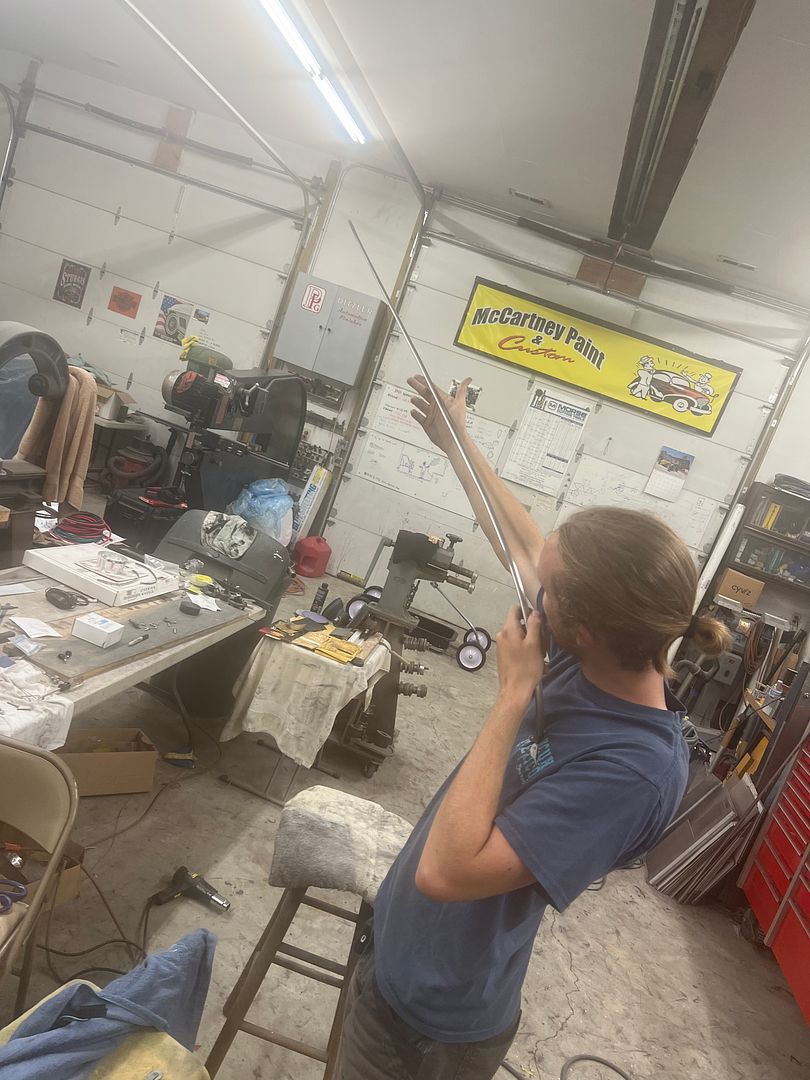 Reassembling the steering column after painting... some heat shrink was added to the harness to help prevent abrading against the steering shaft. Our steering wheel puller kit did not have the needed parts for compressing the spring for the ts cam/horn ring, so we made a push ring and modified some 5/16 bolts for the cause. Much cheaper than grinding on the snap on parts. 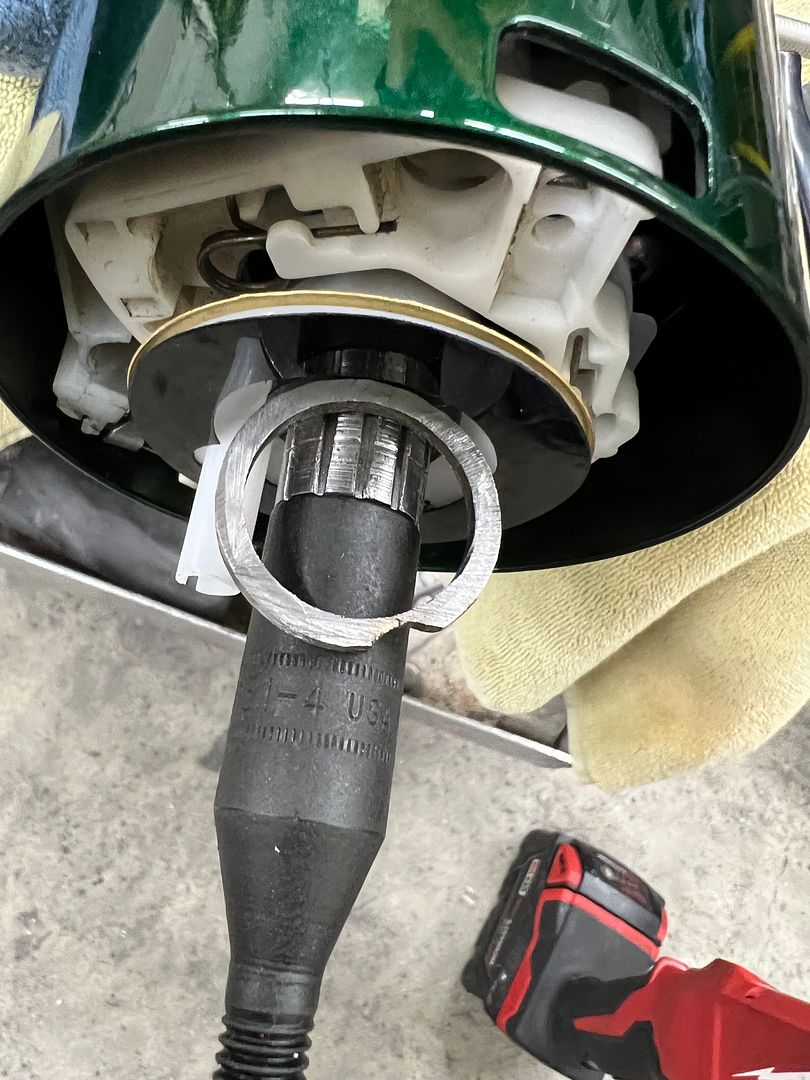 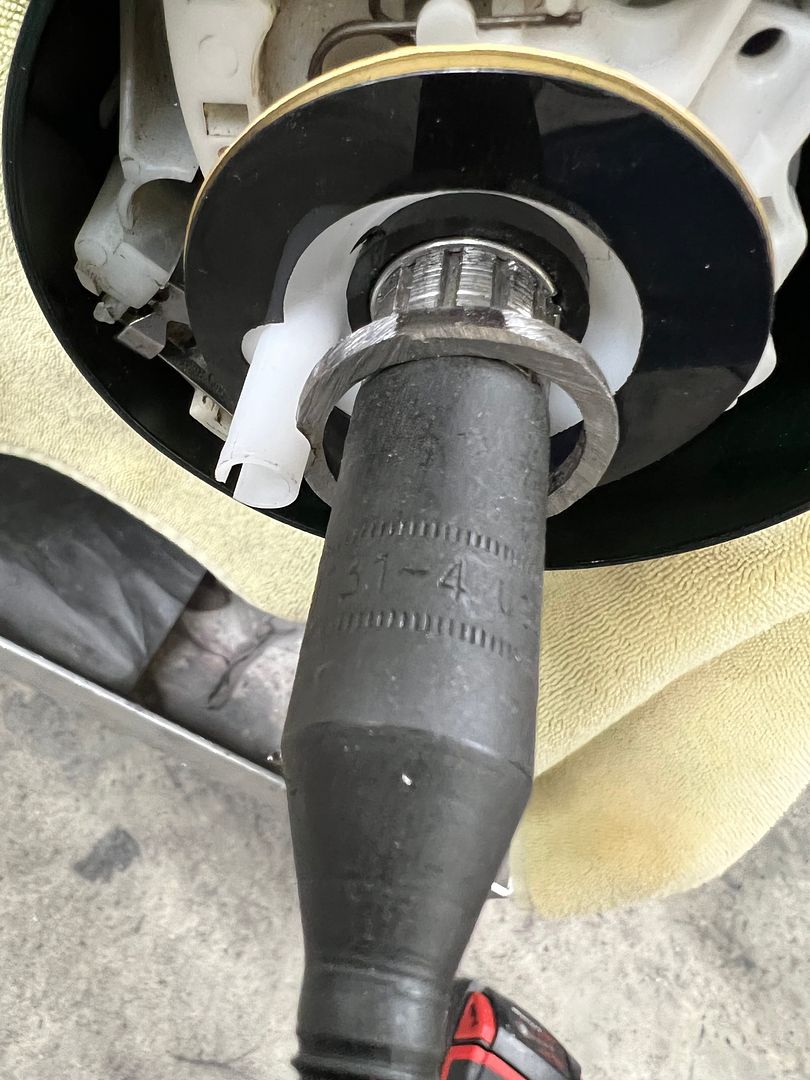 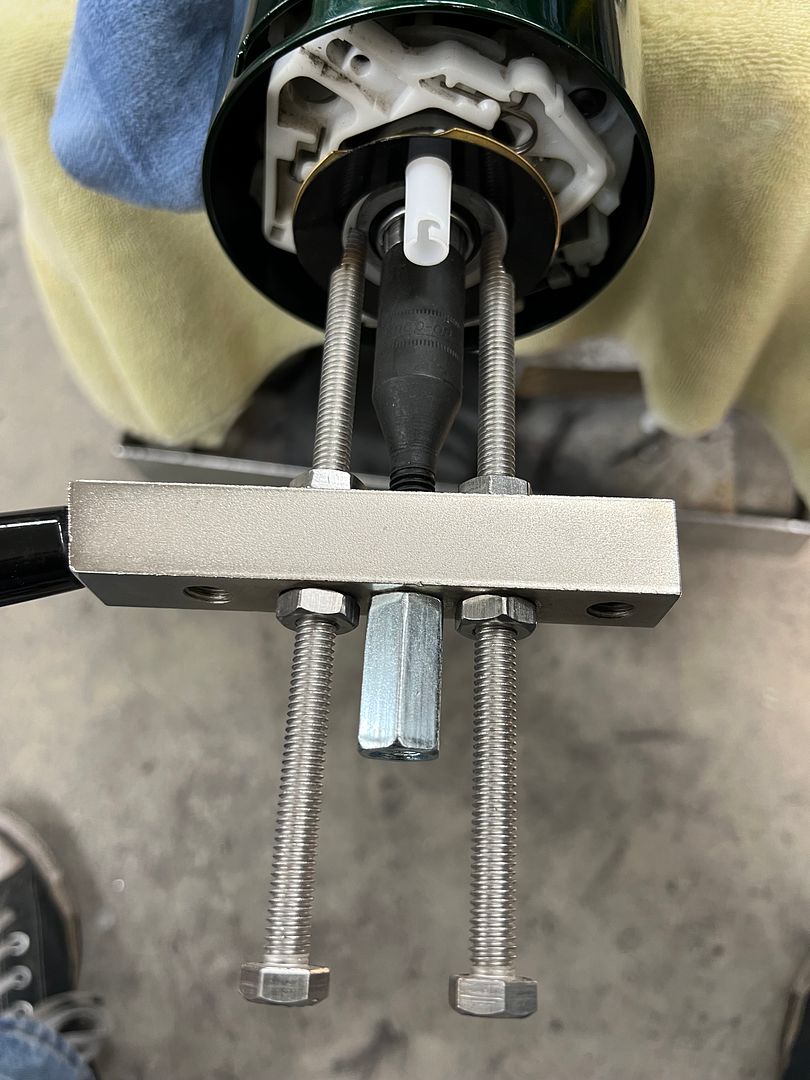 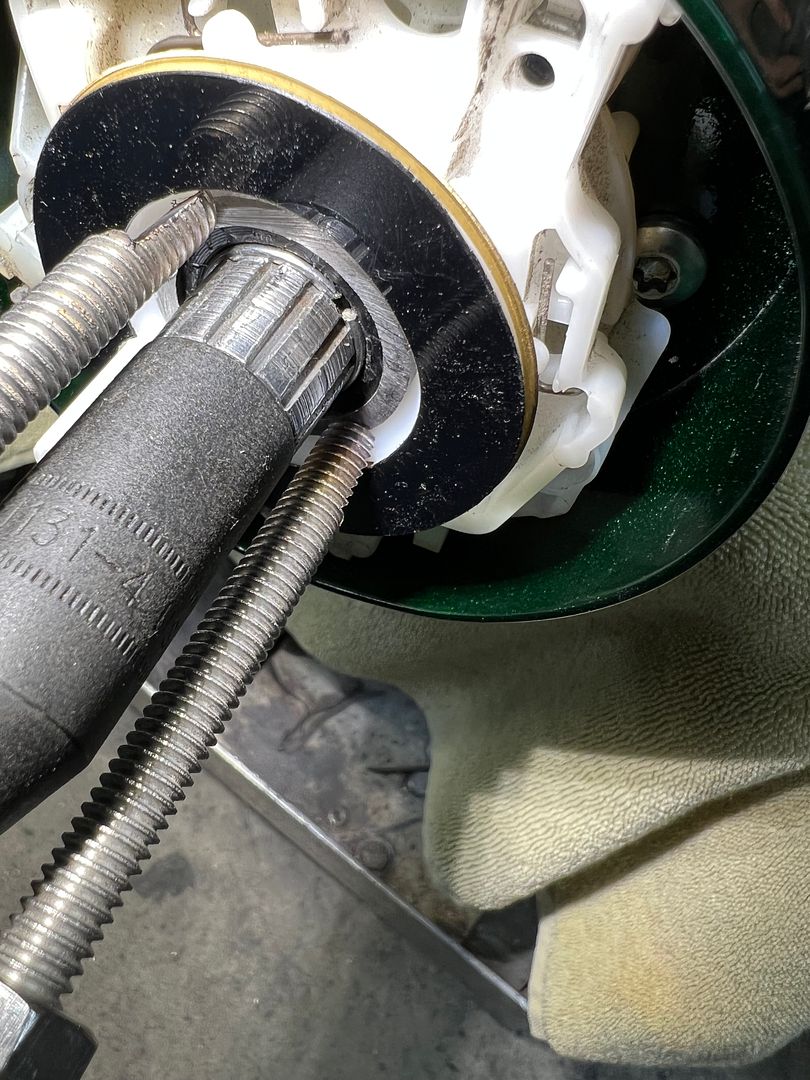 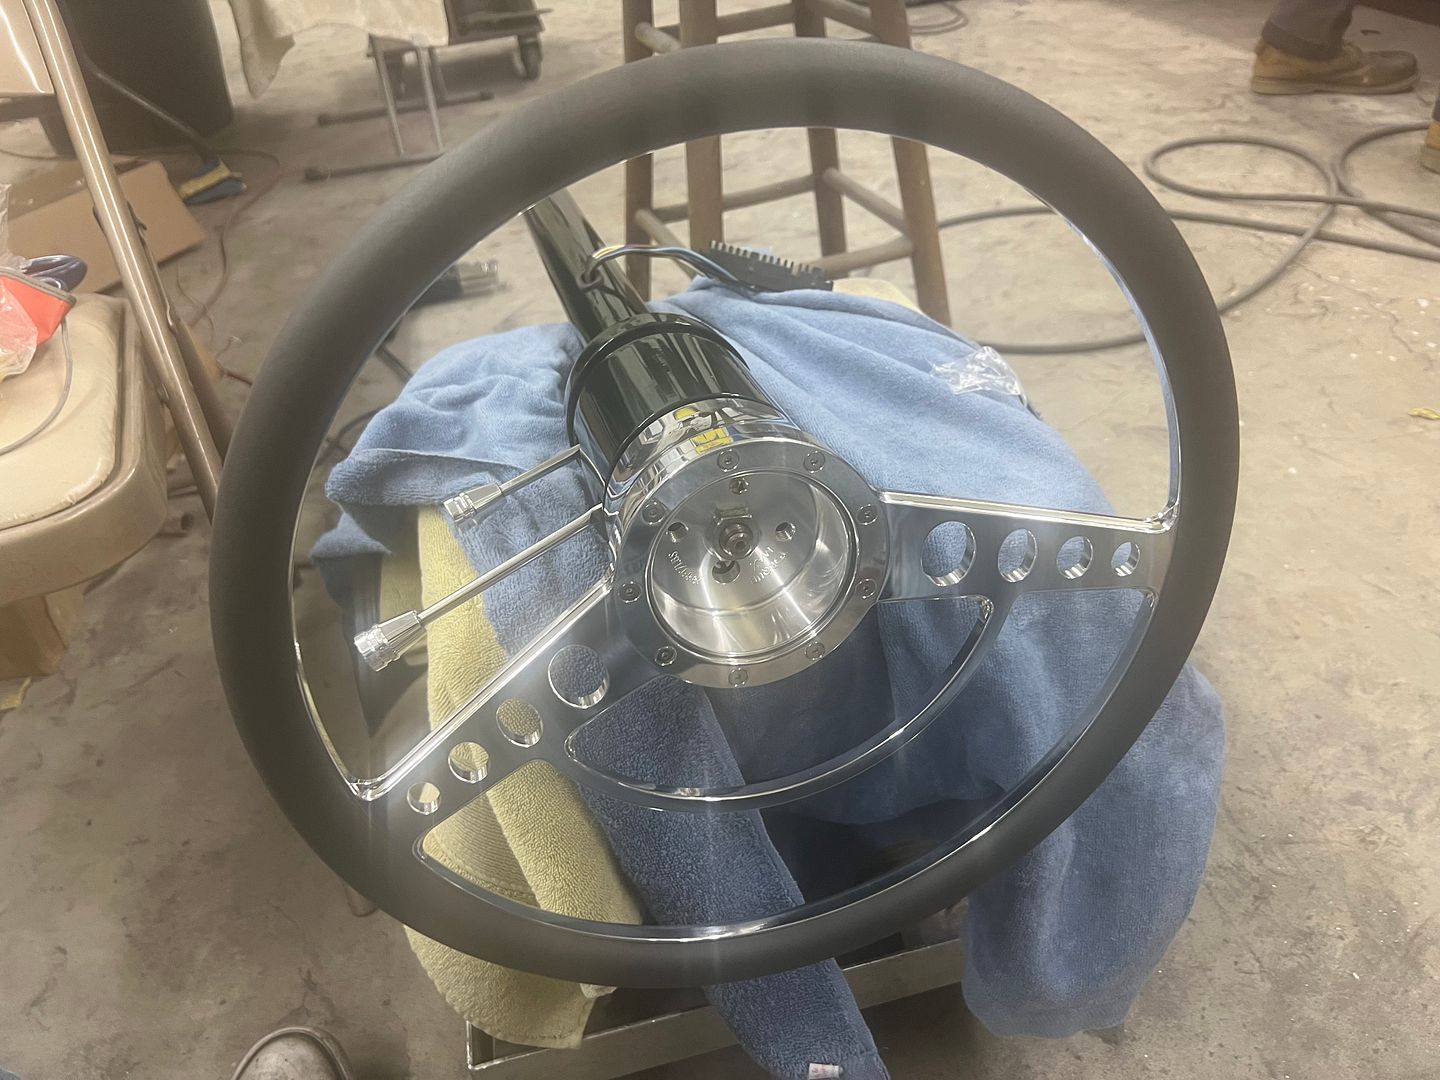 Sunday morning we loaded up the wagon for it's maiden voyage, a shakedown run at Eddie's Brunch and Car Show, located at Bailey's Olde Breton Inn. This isn't a real large show (although it grows every year) but it's one of those must attends, and all the proceeds benefit our local Hospice. Some takeaways on the wagon design, the pull handle length that was designed for a small child inside the wagon was too short for a 6' tall fella with a long stride. Felt like yap dogs at my heels… And I think the frame design may need air bags, where it did well on the pavement, there was quite a bit of drag (rolling resistance) with the grass up in the frame. 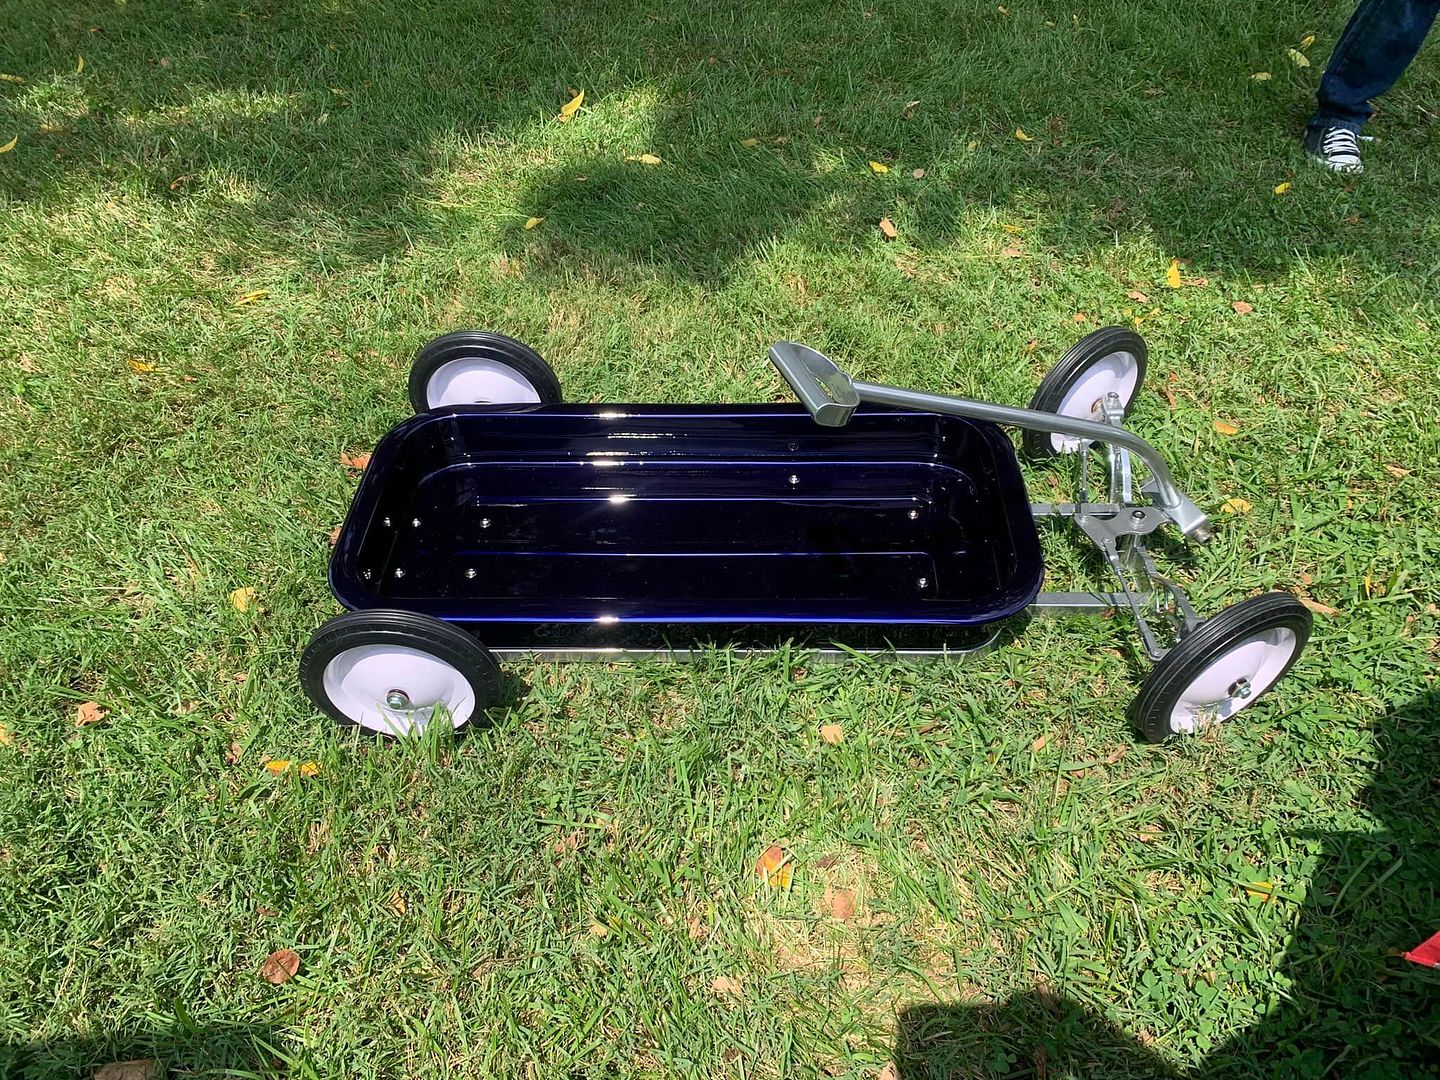    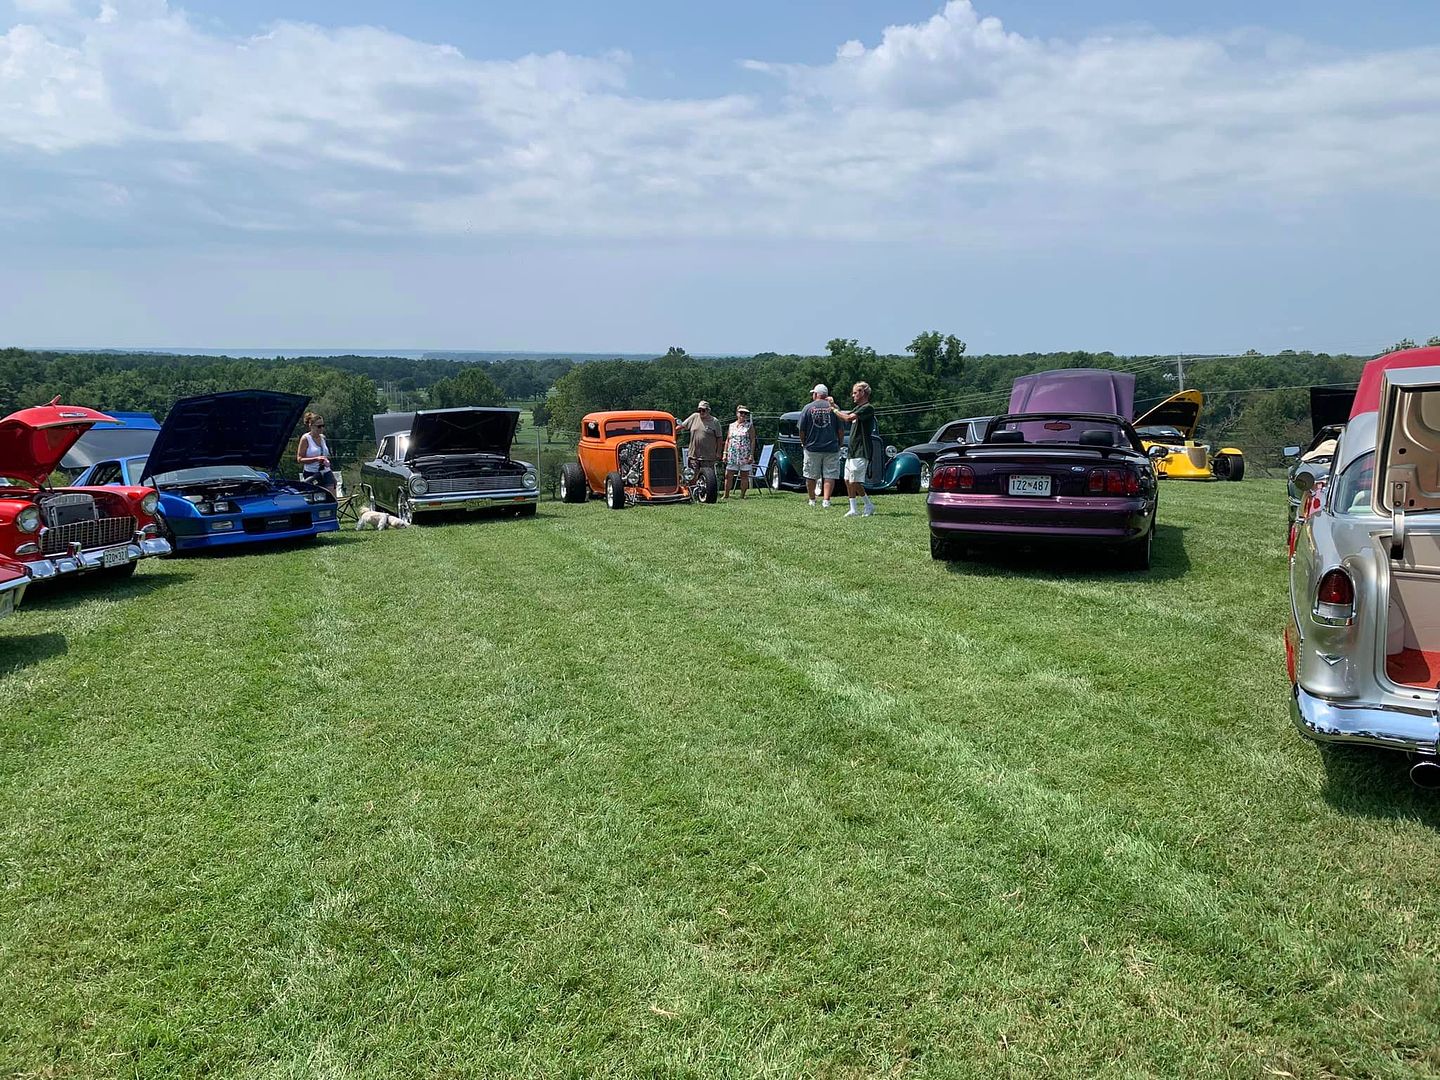 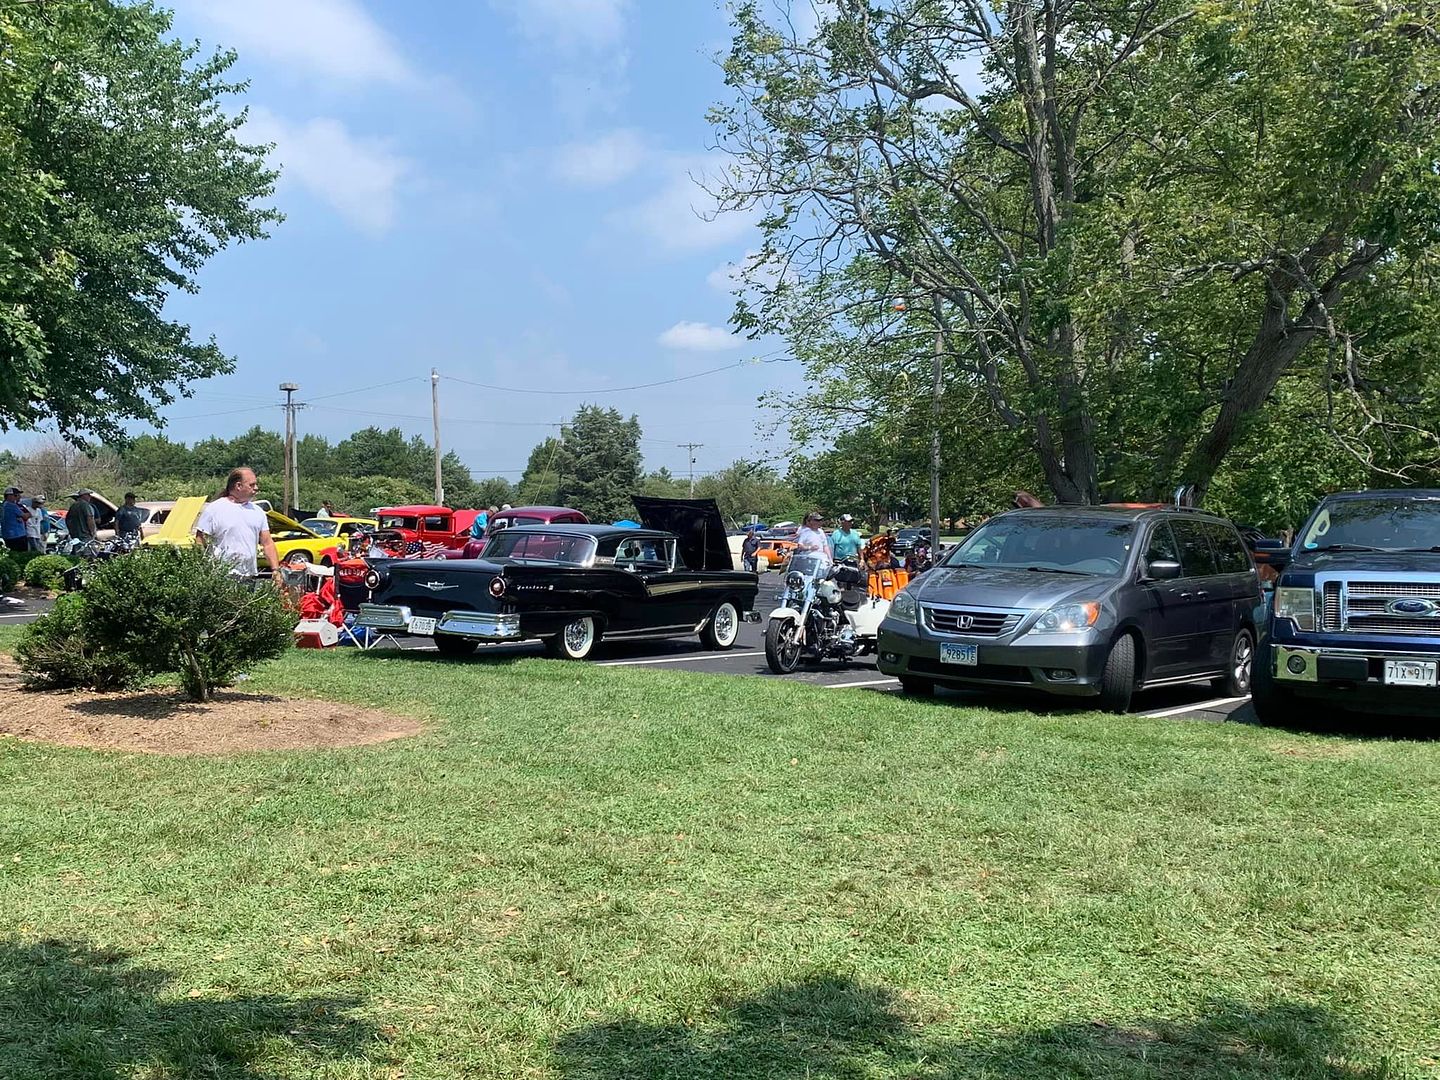 *Car show pictures borrowed from FB
__________________
Robert |
|
|
|
|
08-08-2023, 04:22 PM
|
#1358 |
|
Post Whore
Join Date: May 2015
Location: Alabama
Posts: 14,579
|
Re: 55 Wagon Progress
wagon turned out great!!
__________________
Mongo...aka Greg RIP Dad RIP Jesse 1981 C30 LQ9 NV4500..http://67-72chevytrucks.com/vboard/s...d.php?t=753598 Mongos AD- LS3 TR6060...http://67-72chevytrucks.com/vboard/s...34#post8522334 Columbus..the 1957 IH 4x4...http://67-72chevytrucks.com/vboard/s...63#post8082563 2023 Chevy Z71..daily driver |
|
|
|
|
08-15-2023, 08:32 AM
|
#1359 |
|
Registered User
Join Date: Jan 2013
Location: Leonardtown, MD
Posts: 1,633
|
Re: 55 Wagon Progress
Thanks Greg! Still have it scheduled for striping and lettering by Hotrod Jen, so it should be totally finished in a couple weeks.
Jesse Harris, a metalshaper local to me, did a recent video on using the TIG for performing spot welds. He was kind enough to send me the video so we could share it with others... https://youtu.be/JRBcLeRjN3Q
__________________
Robert |
|
|
|
|
08-17-2023, 01:57 PM
|
#1360 |
|
Post Whore
Join Date: May 2015
Location: Alabama
Posts: 14,579
|
Re: 55 Wagon Progress
thats a cool idea, but i bet it wont work with mine..my tig is a lift arc setup
__________________
Mongo...aka Greg RIP Dad RIP Jesse 1981 C30 LQ9 NV4500..http://67-72chevytrucks.com/vboard/s...d.php?t=753598 Mongos AD- LS3 TR6060...http://67-72chevytrucks.com/vboard/s...34#post8522334 Columbus..the 1957 IH 4x4...http://67-72chevytrucks.com/vboard/s...63#post8082563 2023 Chevy Z71..daily driver |
|
|
|
|
09-11-2023, 12:50 AM
|
#1361 |
|
Registered User
Join Date: Jan 2013
Location: Leonardtown, MD
Posts: 1,633
|
Re: 55 Wagon Progress
More installing stainless trim. The screw holes for the beltline trim that wraps into the tailgate opening had been filled when we shaved the lead seams. So we used some tape to protect the paint as we aligned the side trim to the lift gate trim before drilling the holes.
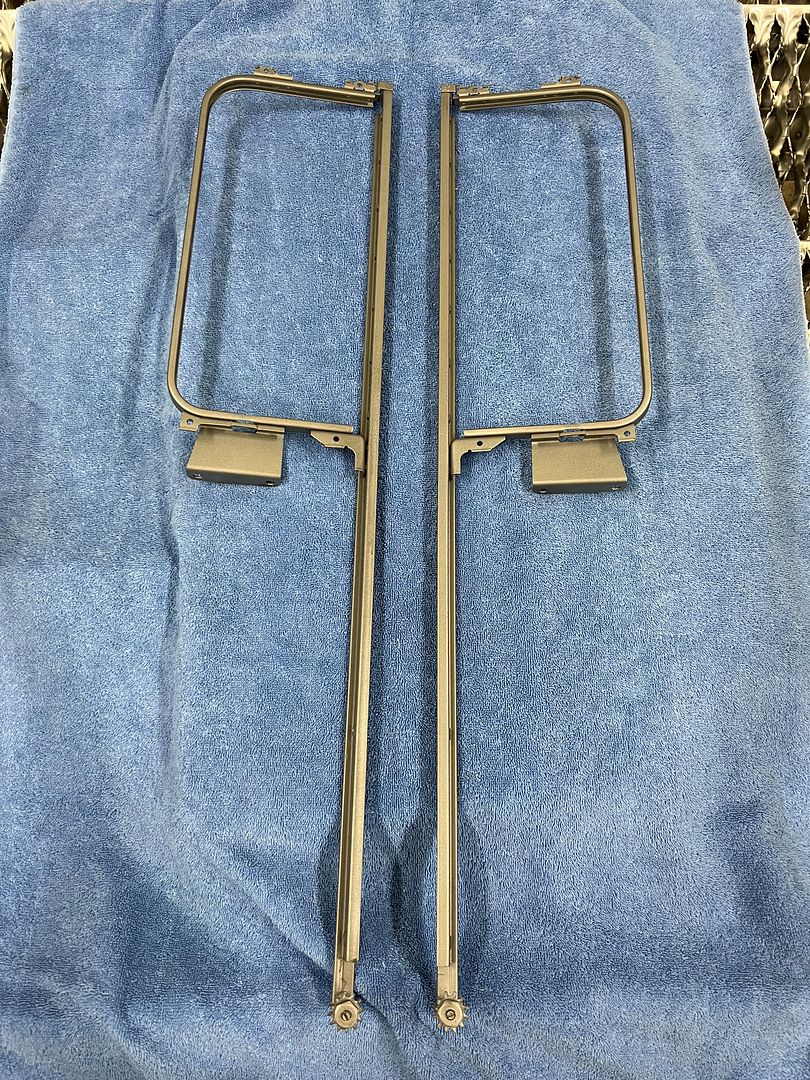
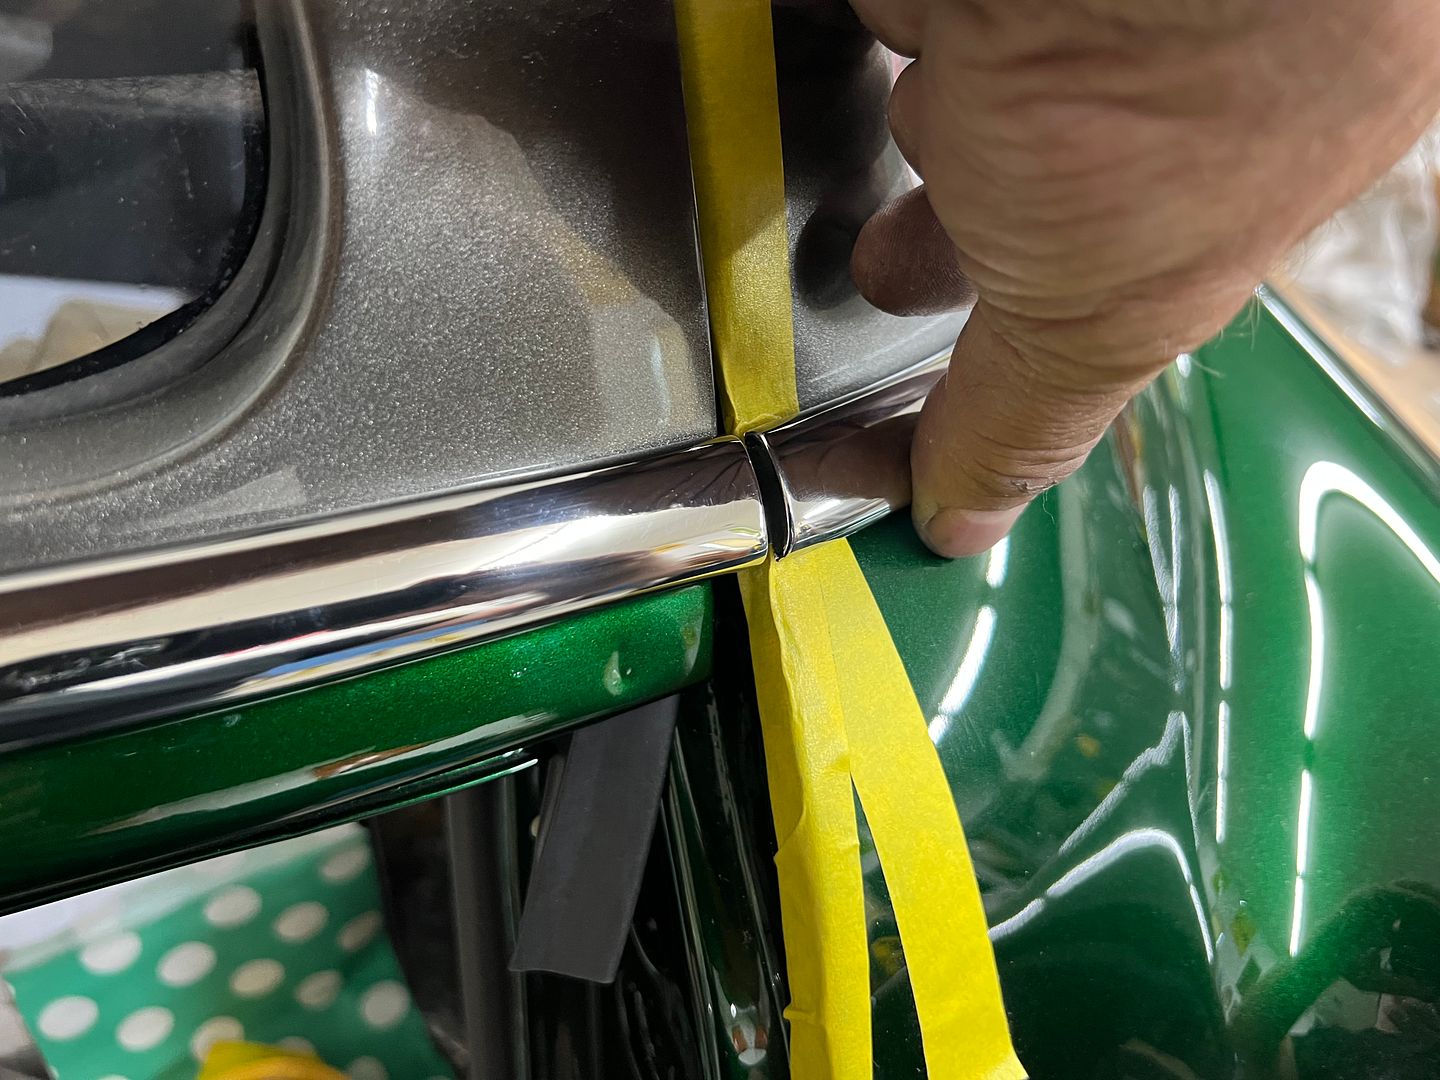 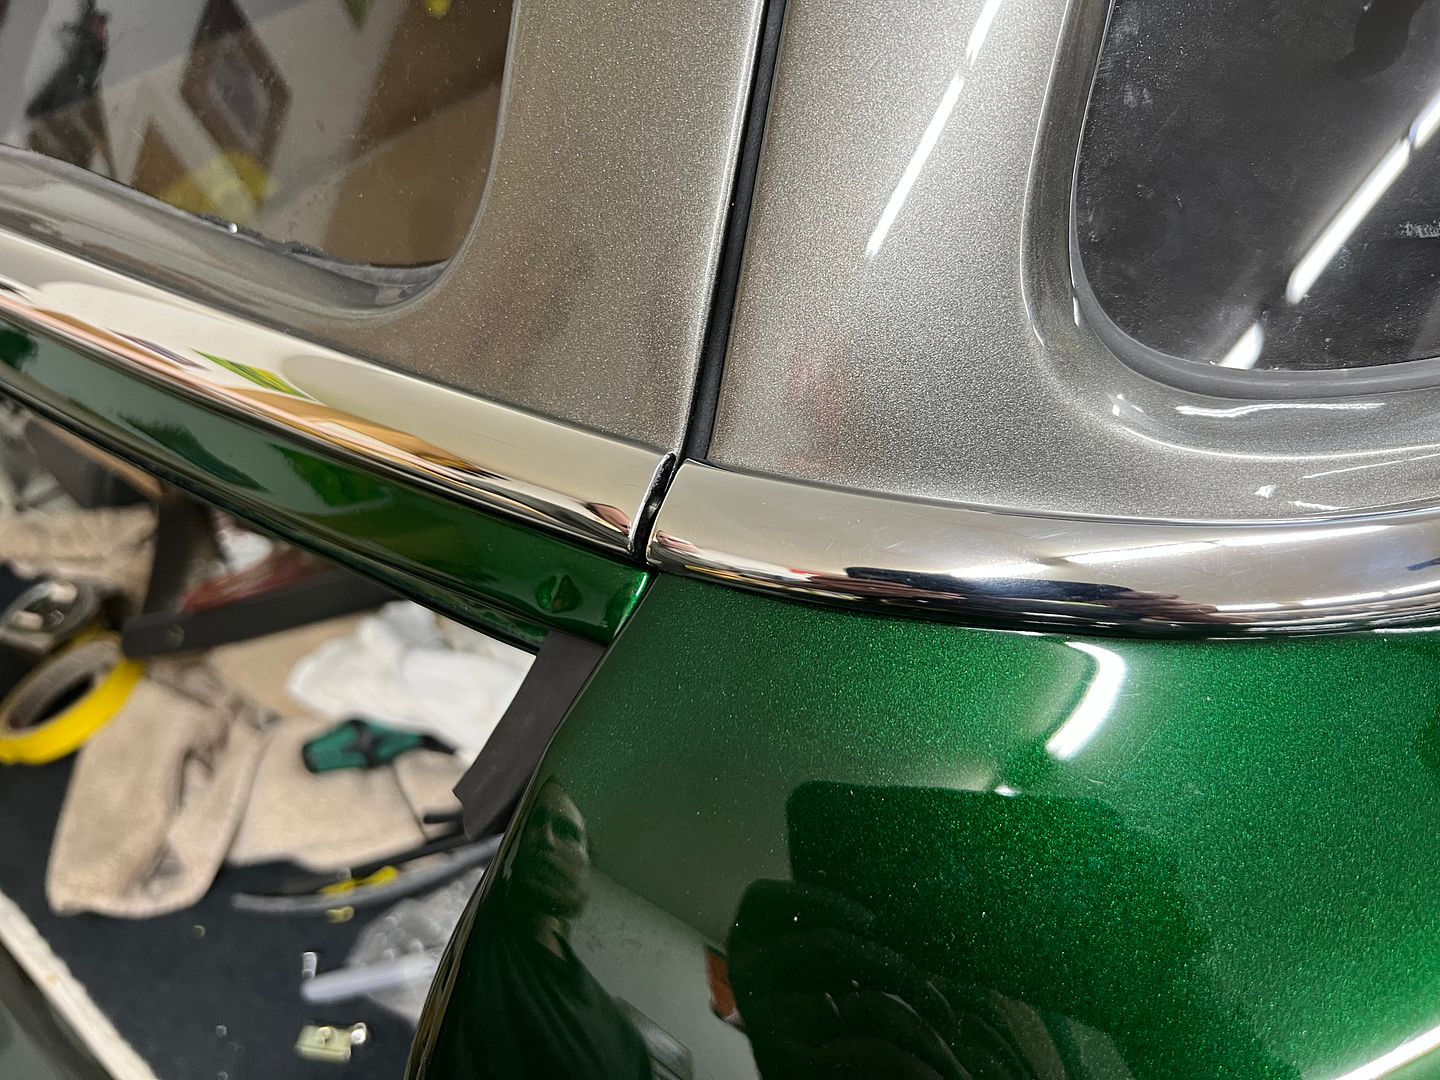 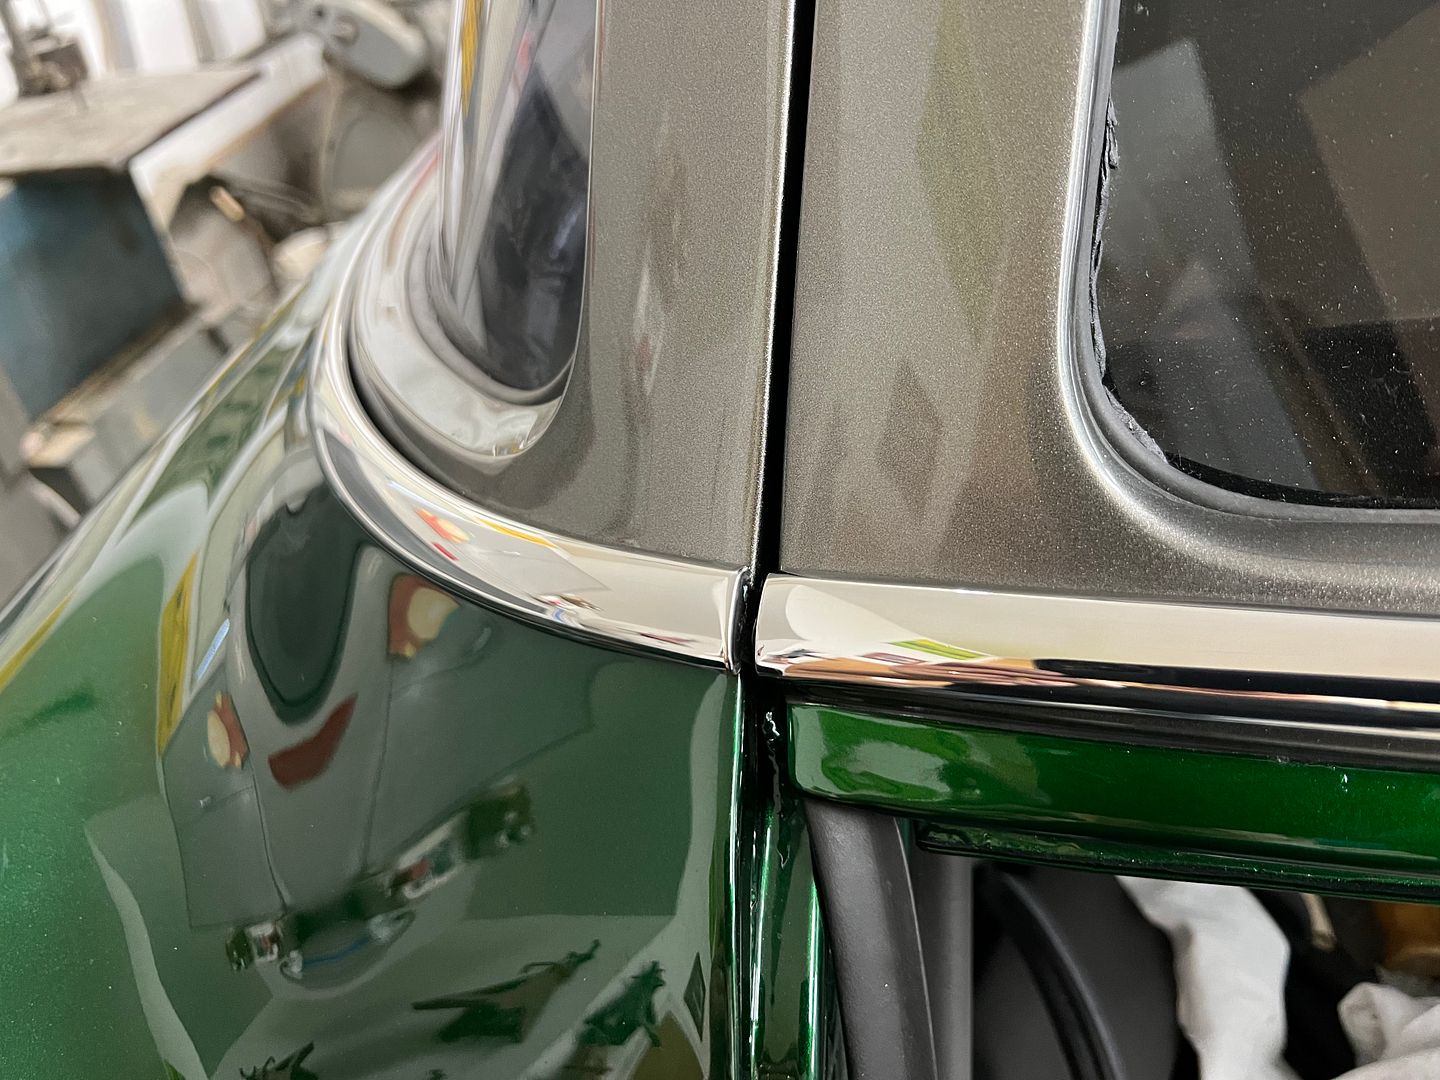 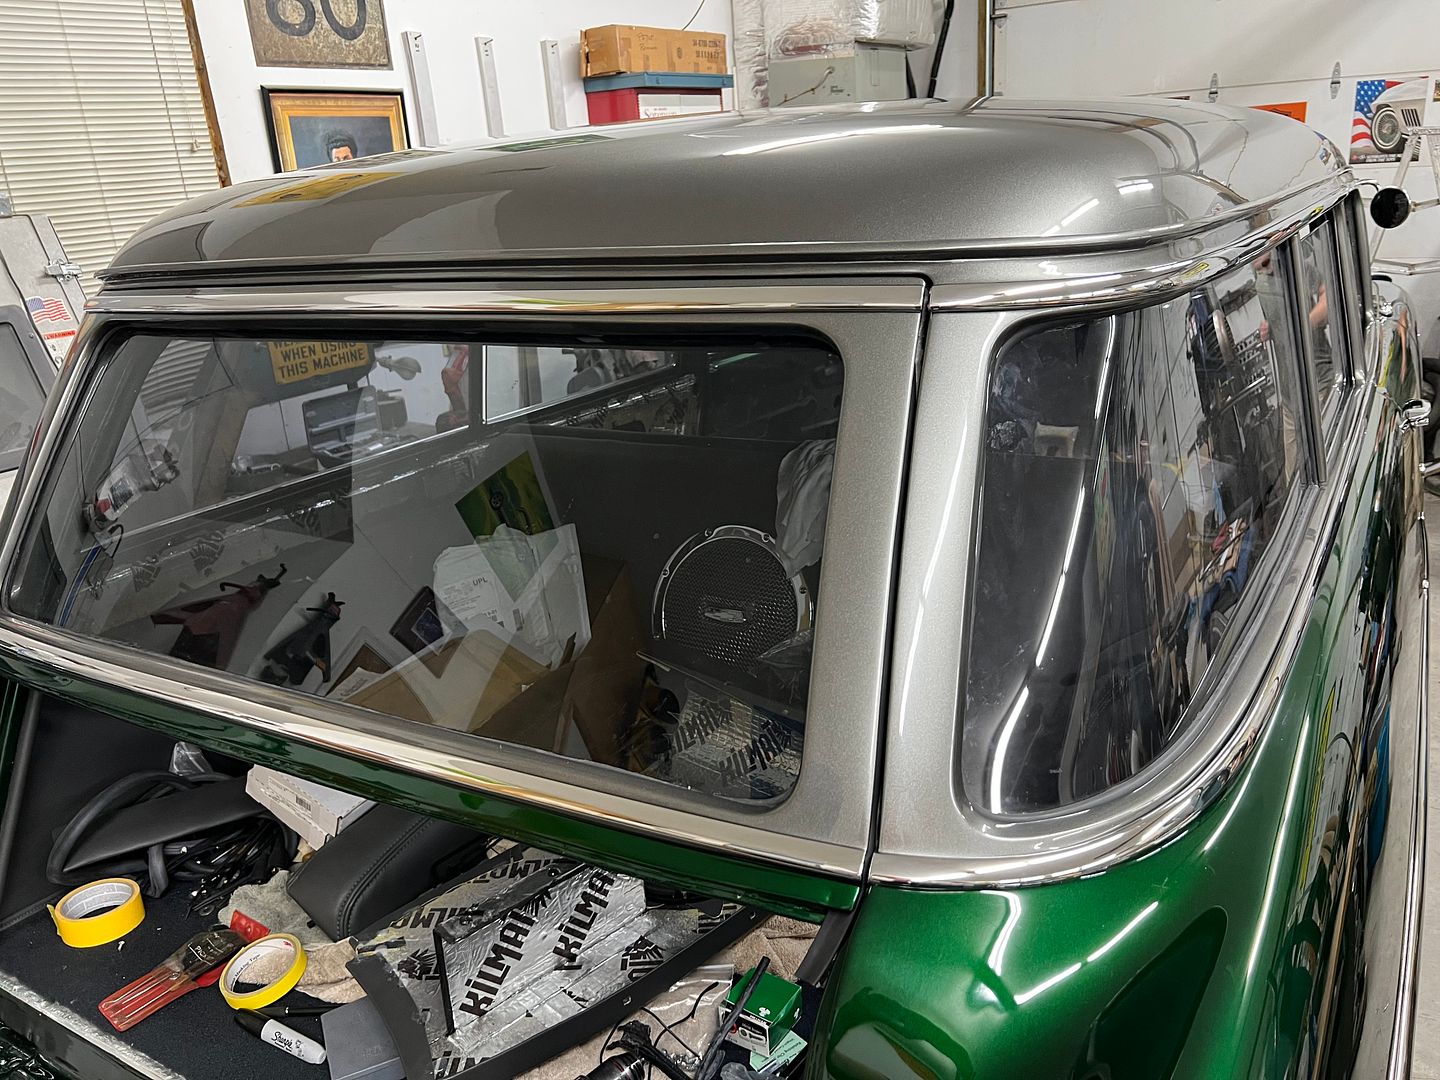 One piece to go on the left side, awaiting the trip from WI. 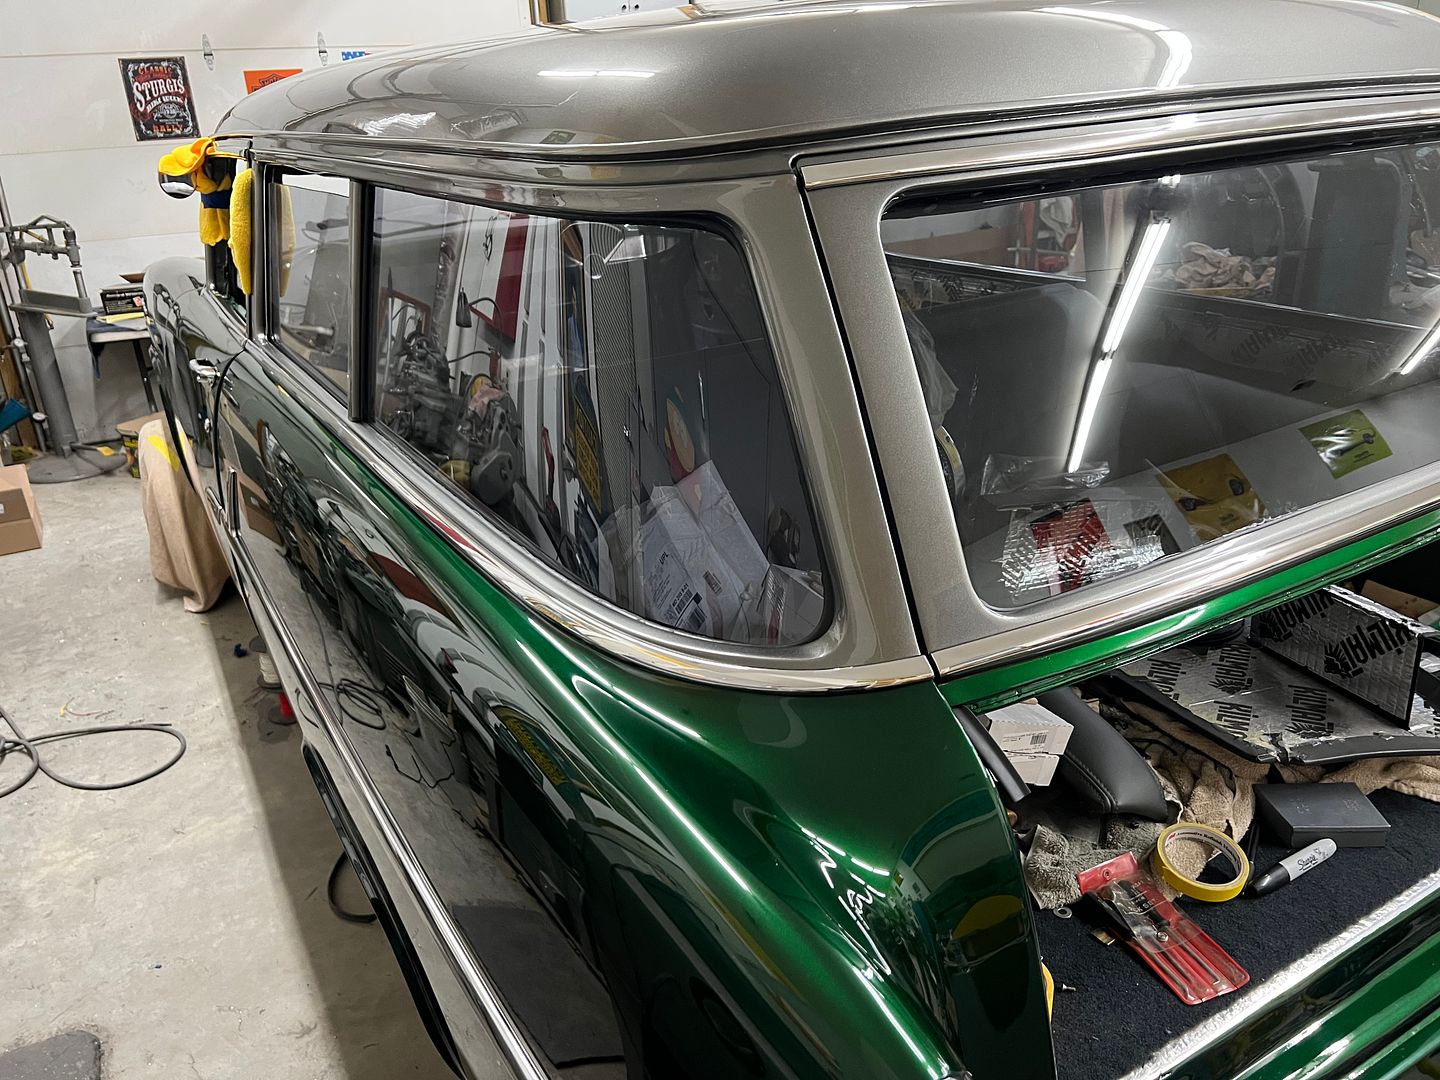 Next, we attempted to install our vent windows in the "reconditioned" frames the owner had bought. Only we noticed they weren't so ready for installation... 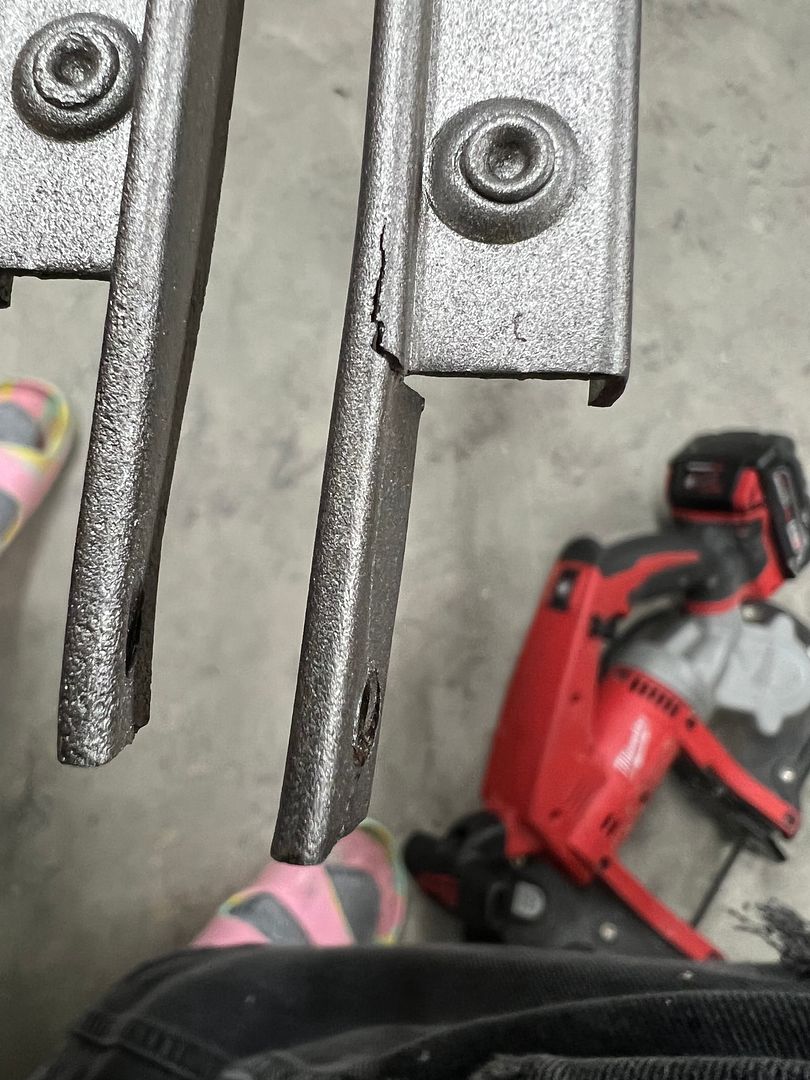 and bent... 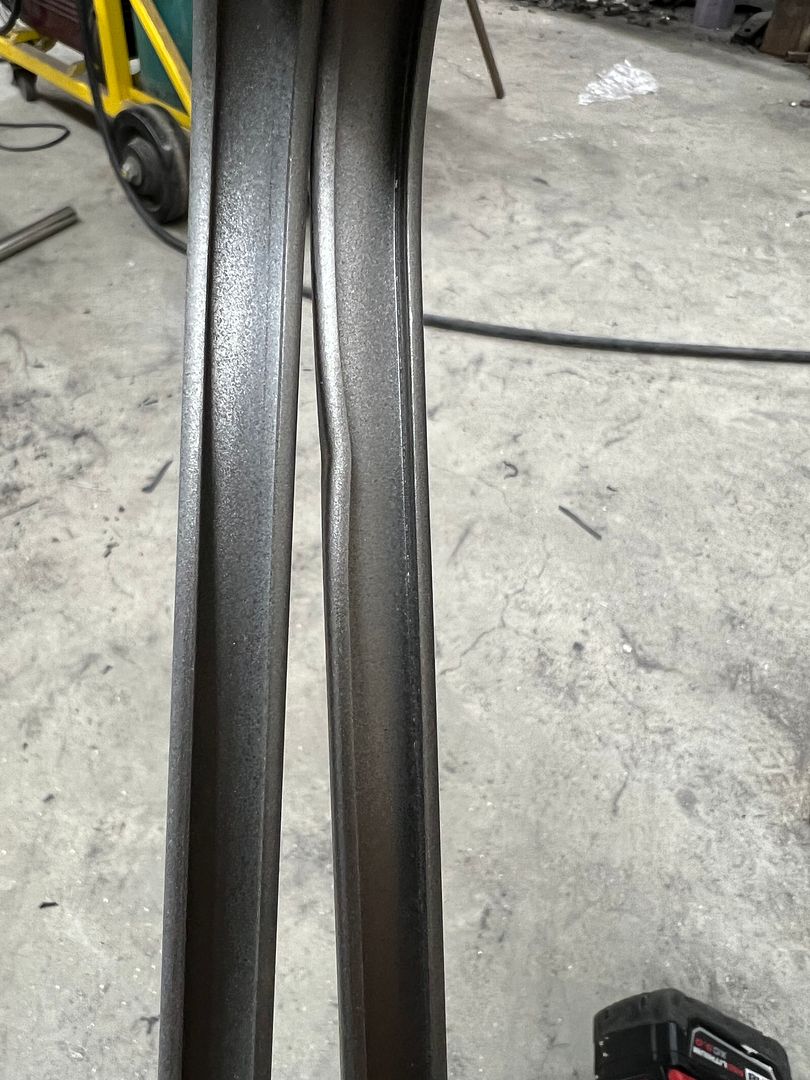 Well, since we're on a roll, lets check the stainless trim that divides the vent and side windows. This had been "reconditioned" and included with the bent and cracked vent frame. Looks like they just polished up the dents and scratches. Not going to meet our standards. https://www.youtube.com/watch?v=ToR2iF0sNeQ So we media blasted the original frames, which had no damage, and dropped them off at the Shop at Shorty's for a Cerakote finish.  Inspecting the stainless trim, we found the originals to be less beat up than the reconditioned stuff, so we opted to straighten out the originals. Here's a comparison of the trim, the two on the left are the reconditioned that had been polished right over the defects. The two on the right are the originals, the left of the two has had any dings/dents pushed from the back in prep for our refinement process. (except the one up top I missed) The right one has gone through our w/d 360, 600, 1200, 1500, 2000, and 2500, all done wet. There are some minor scratches still, so we'll go through this process once more prior to buffing to make sure we have a flawless finish. https://www.youtube.com/watch?v=UIQcvWRF9nU And a helpful hint for those who dabble in polishing stainless. We've all had occasion where the stainless slips off the buffing wheel, bouncing off the buffer shaft, causing another 2-3 hours to correct. We added a rubber grommet to cover the nut and a plastic end cap to cover the threads. Less chance of damage from those mis-steps. 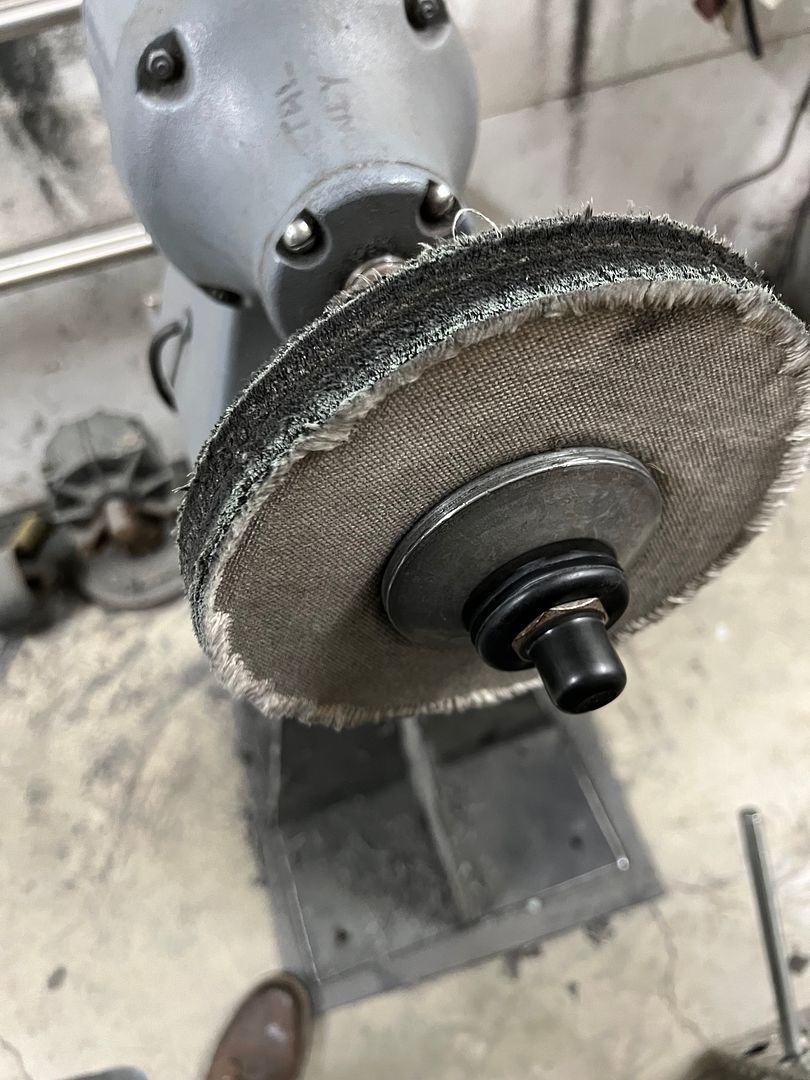 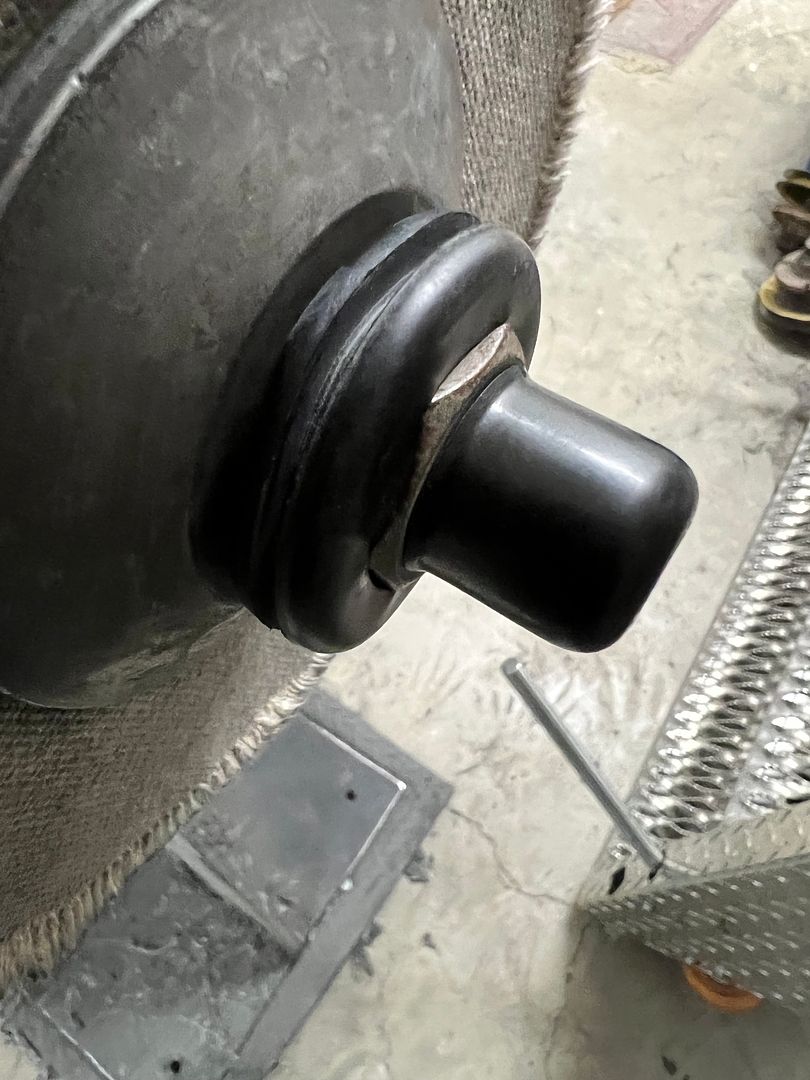 We did get some more chrome on the front. Look, no bolts!! 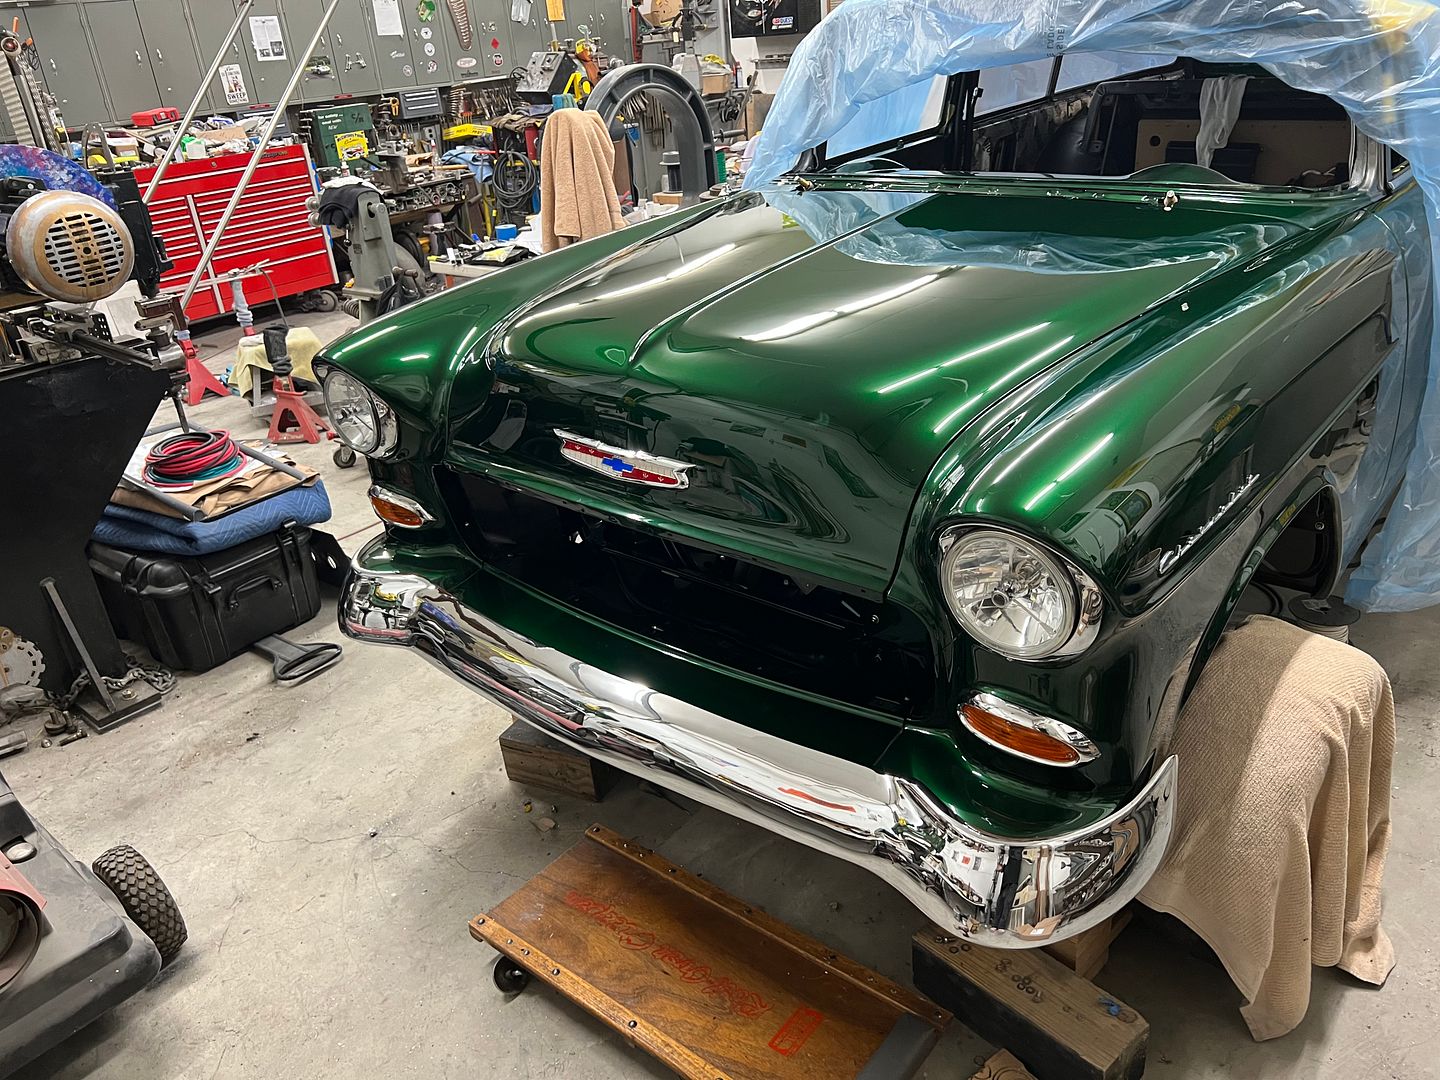 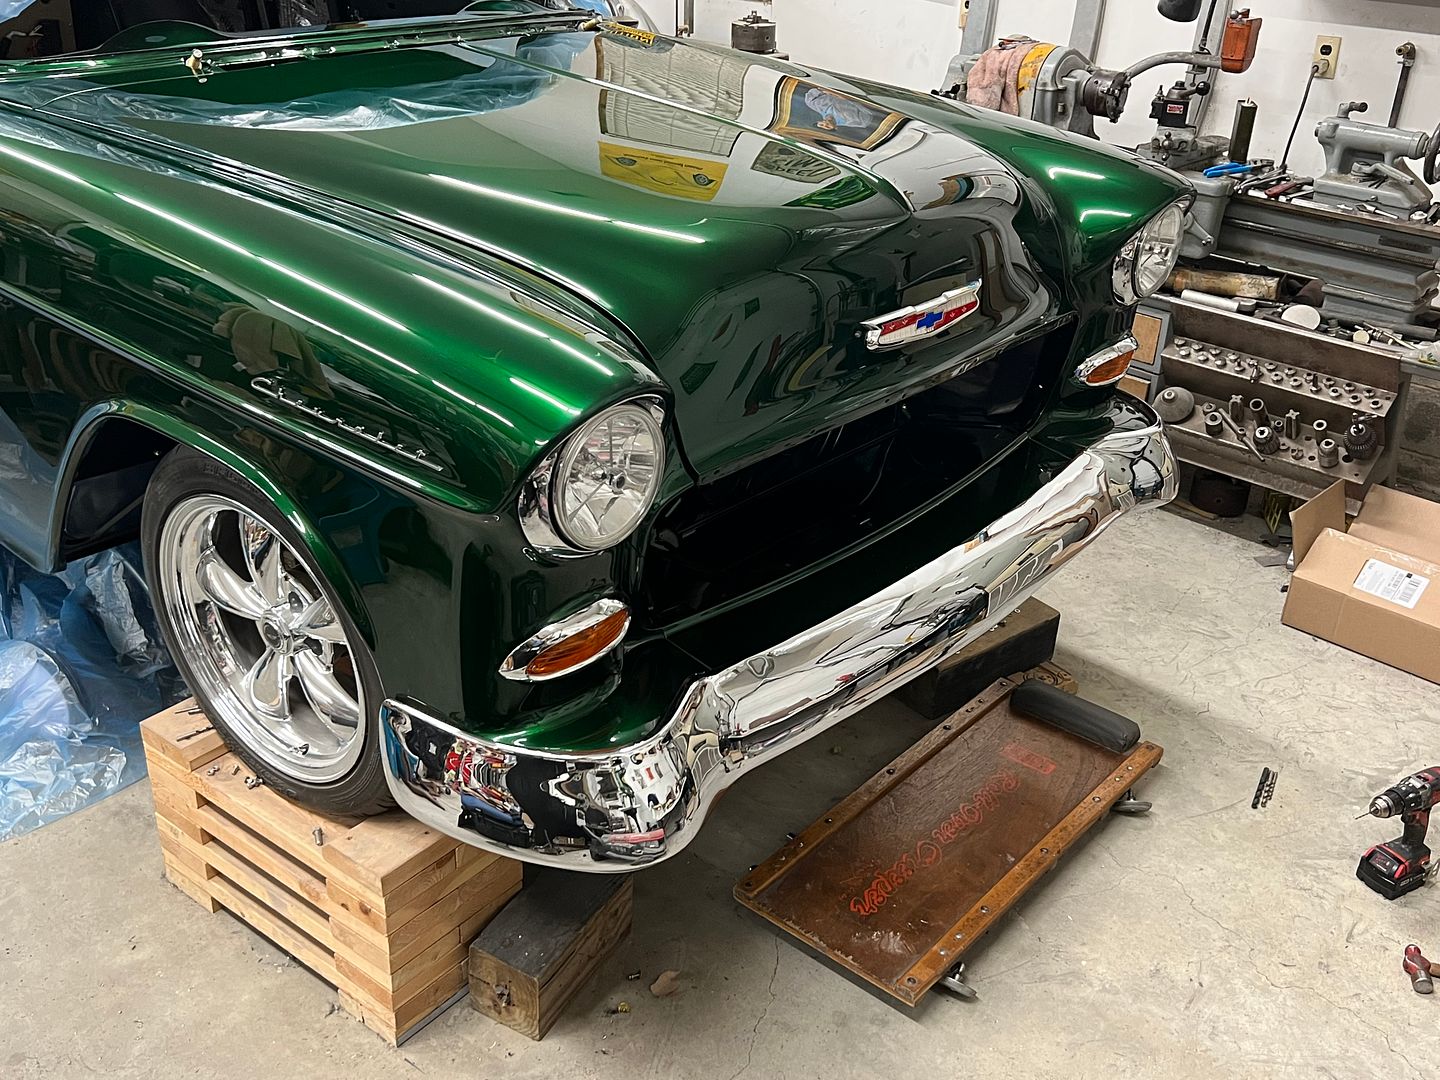
__________________
Robert |
|
|
|
|
09-11-2023, 07:38 AM
|
#1362 |
|
Senior Member
Join Date: Mar 2008
Location: tyler texas
Posts: 1,531
|
Re: 55 Wagon Progress
Wow
__________________
NHRA Super Street 469C It only runs 10.90 at 156 mph |
|
|
|
|
09-25-2023, 11:53 PM
|
#1363 |
|
Registered User
Join Date: Jan 2013
Location: Leonardtown, MD
Posts: 1,633
|
Re: 55 Wagon Progress
Picked up the vent window frames from The Shop at Shortys, done in a Gunmetal Gray Cerakote finish.
 and we got our final piece of stainless trim from The Stainless Shoppe... 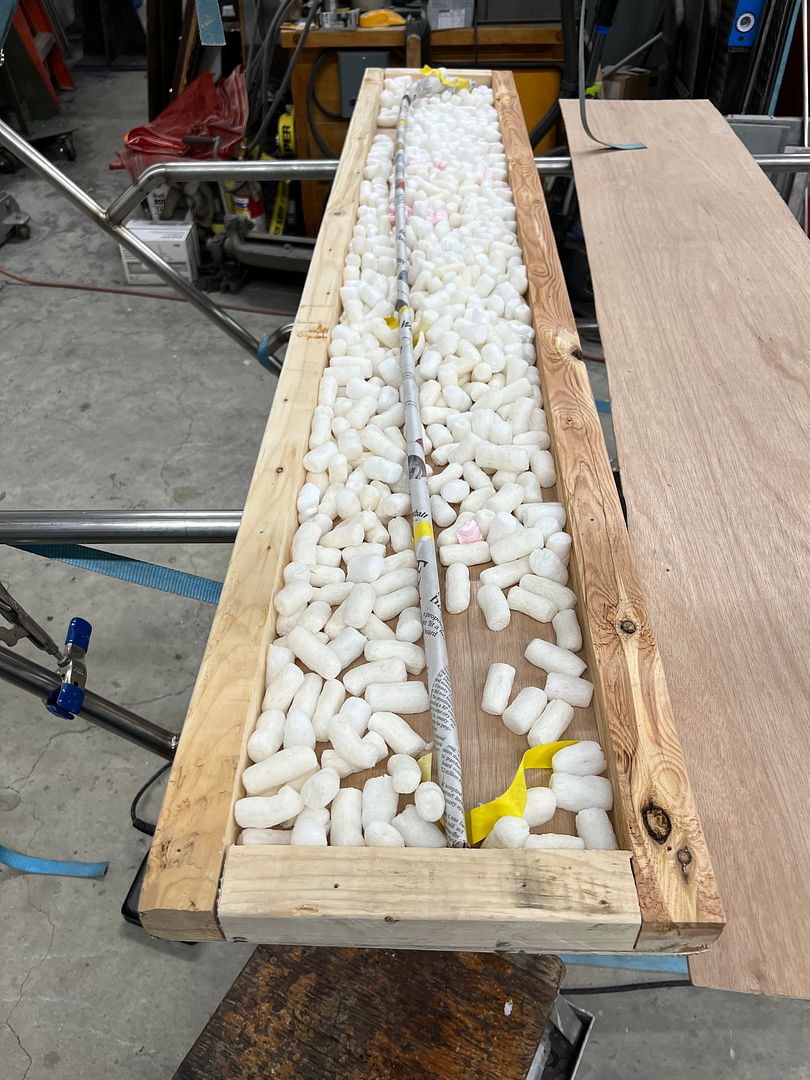 Packaged very well.... 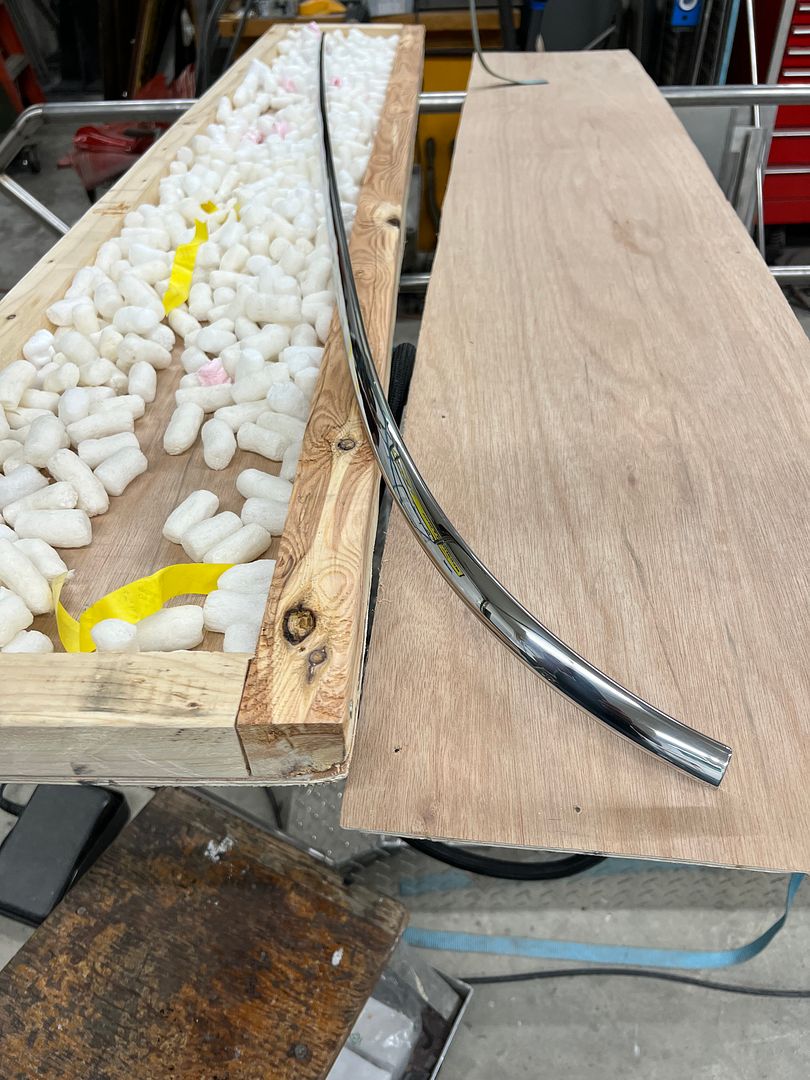 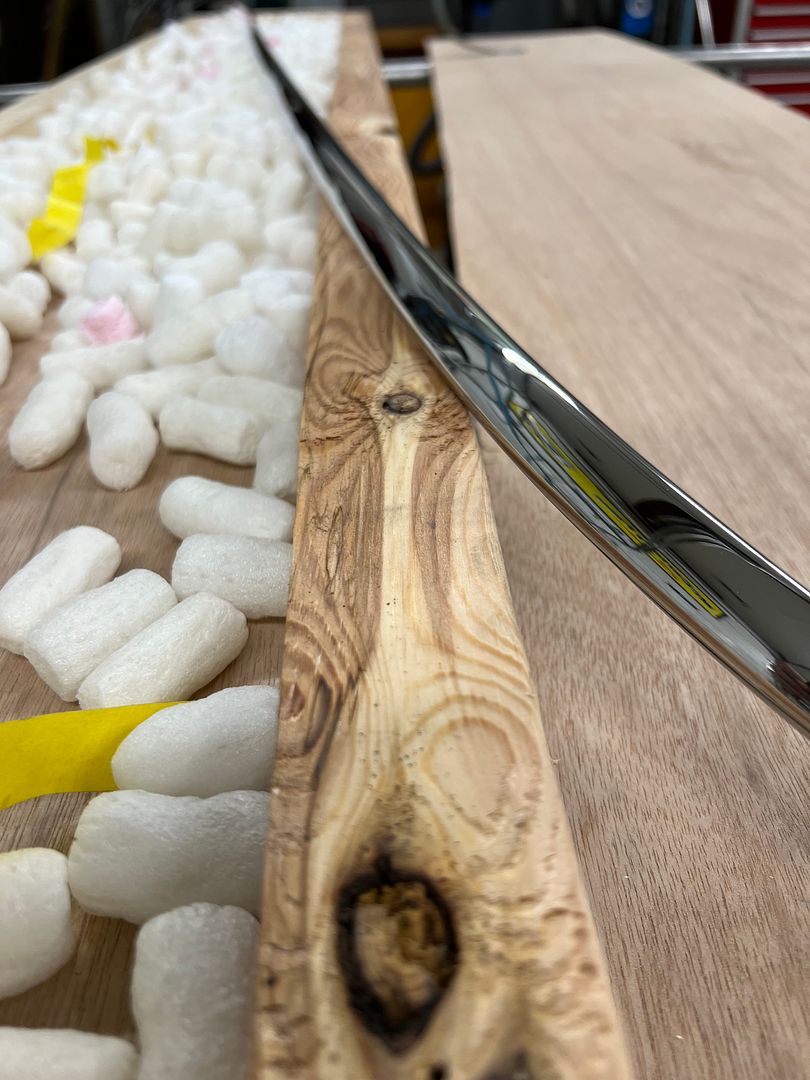 Steering column installed... 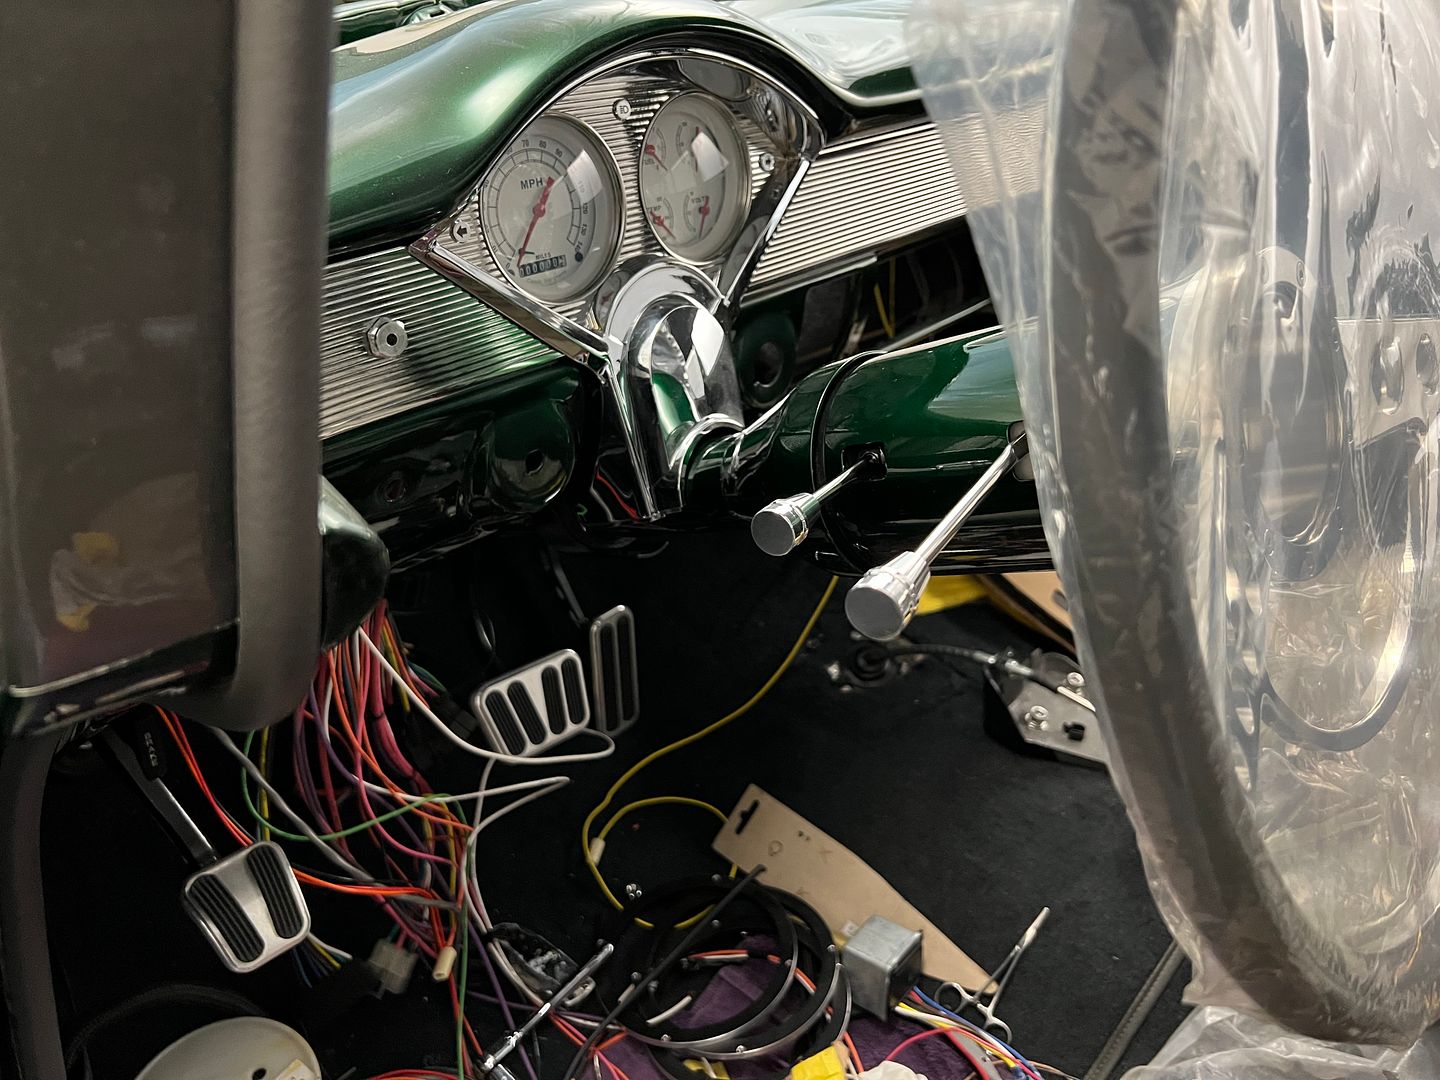 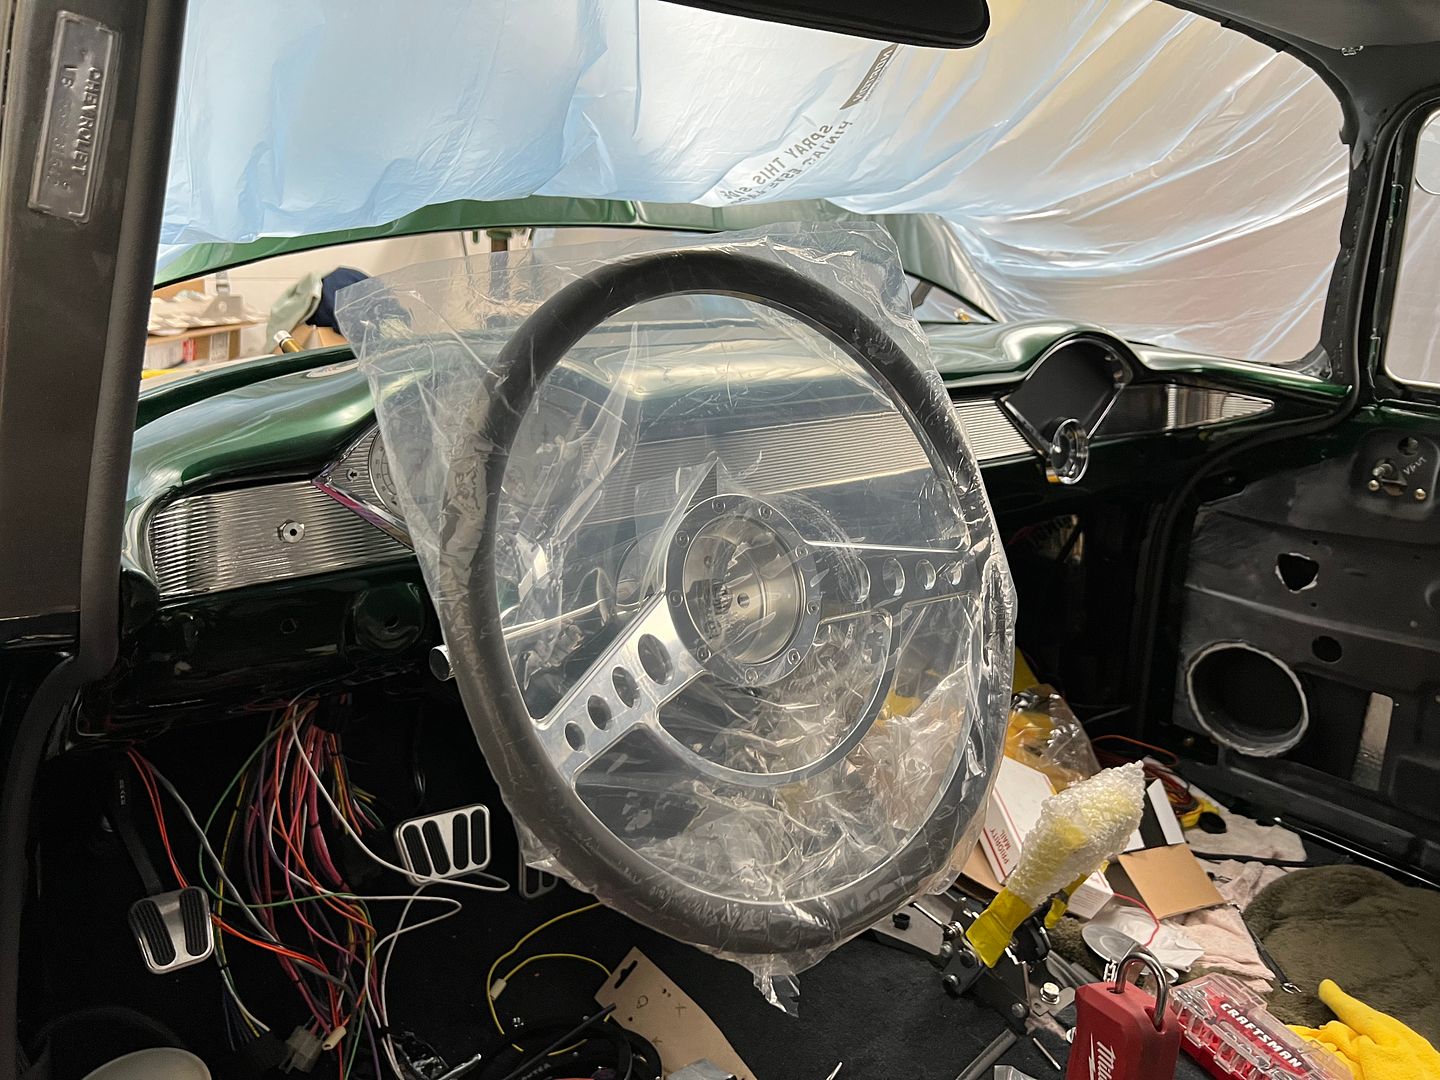 Friday was our appointment for lettering the blue wagon, rode up to PA to HotRodJen's art studio.. 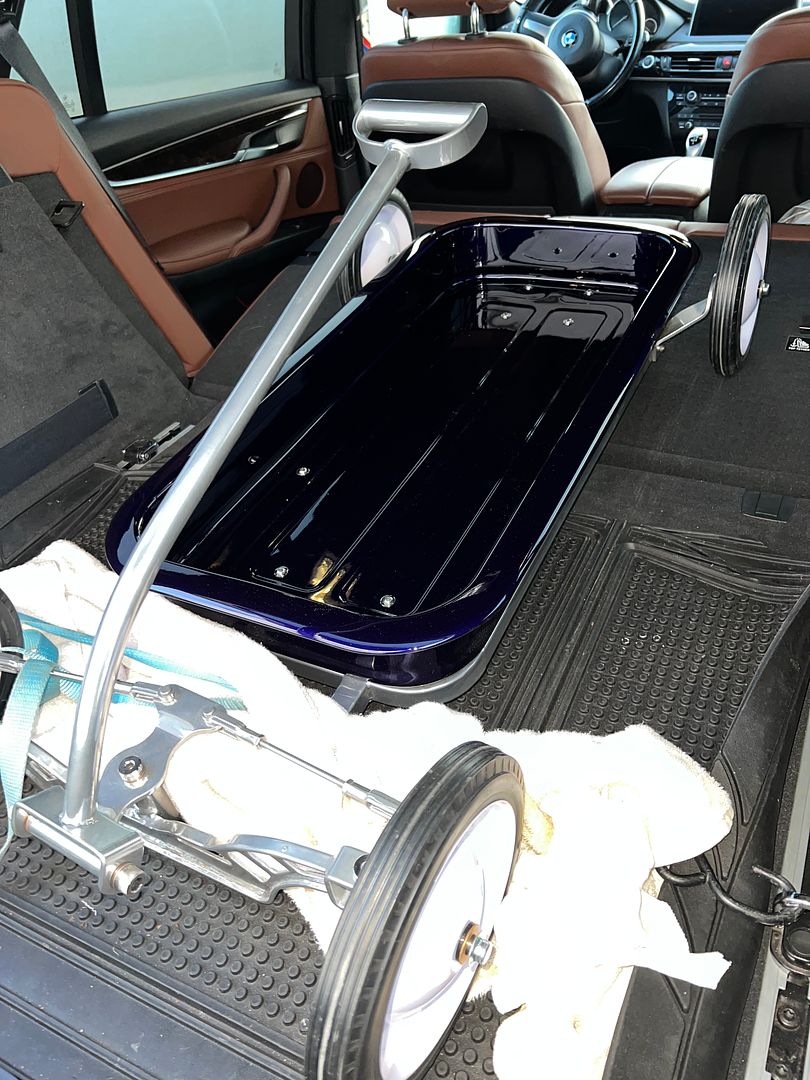 We opted for a script that deviated from the stock "decals", why hand paint something to match a factory decal? Let's go with looks fast while standing still... 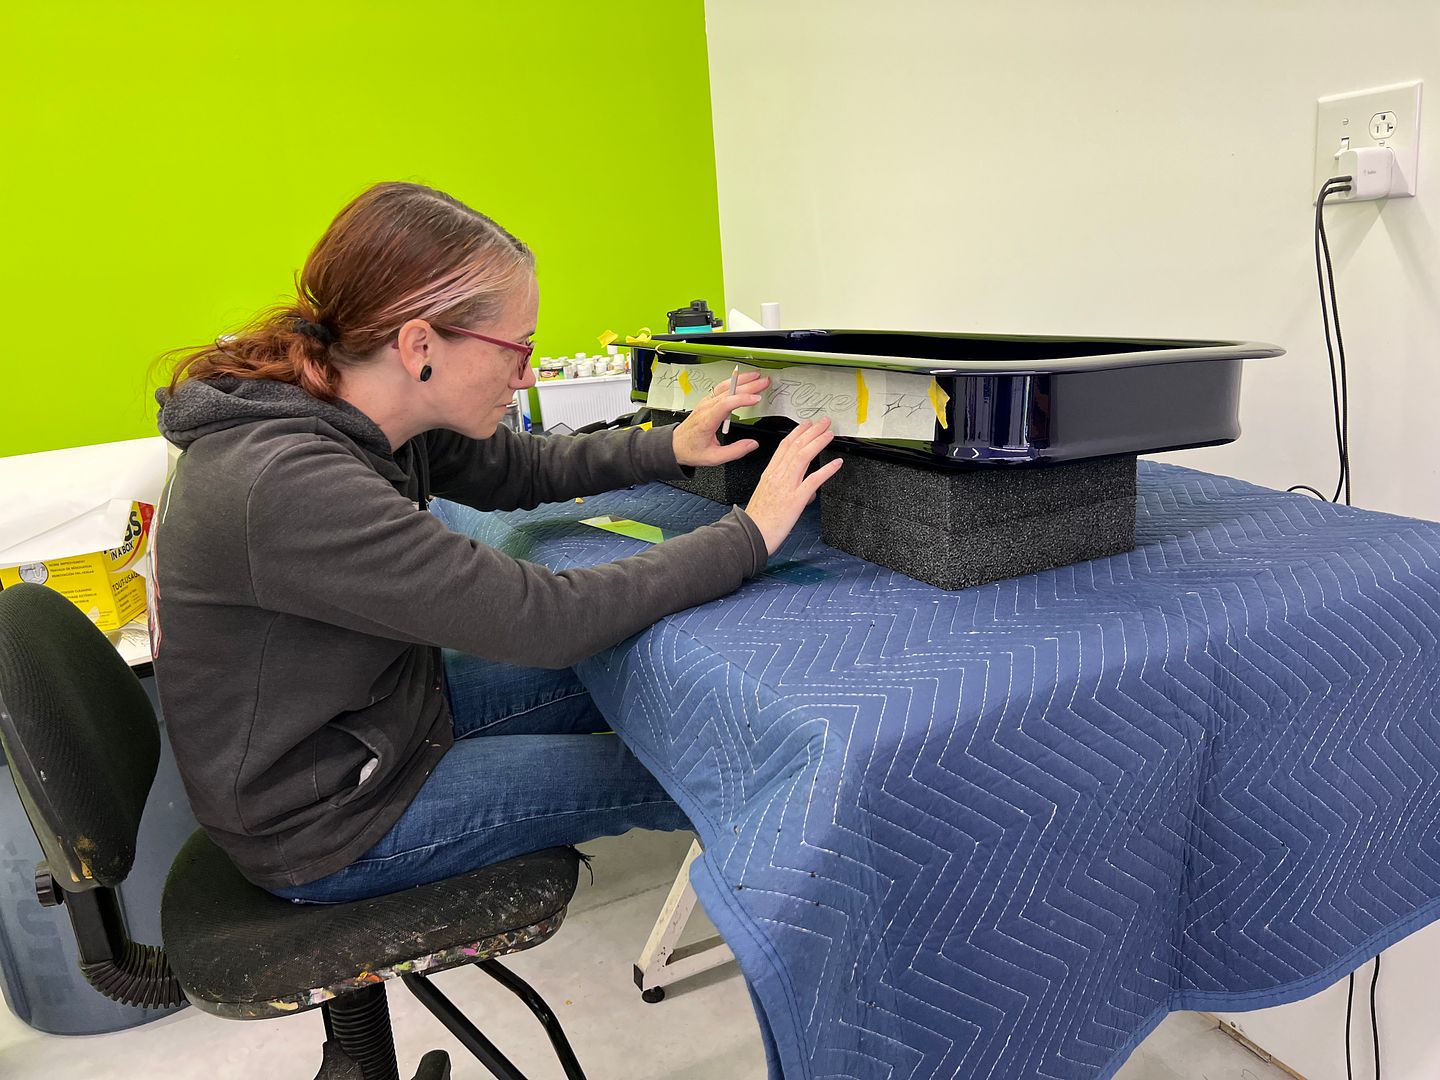 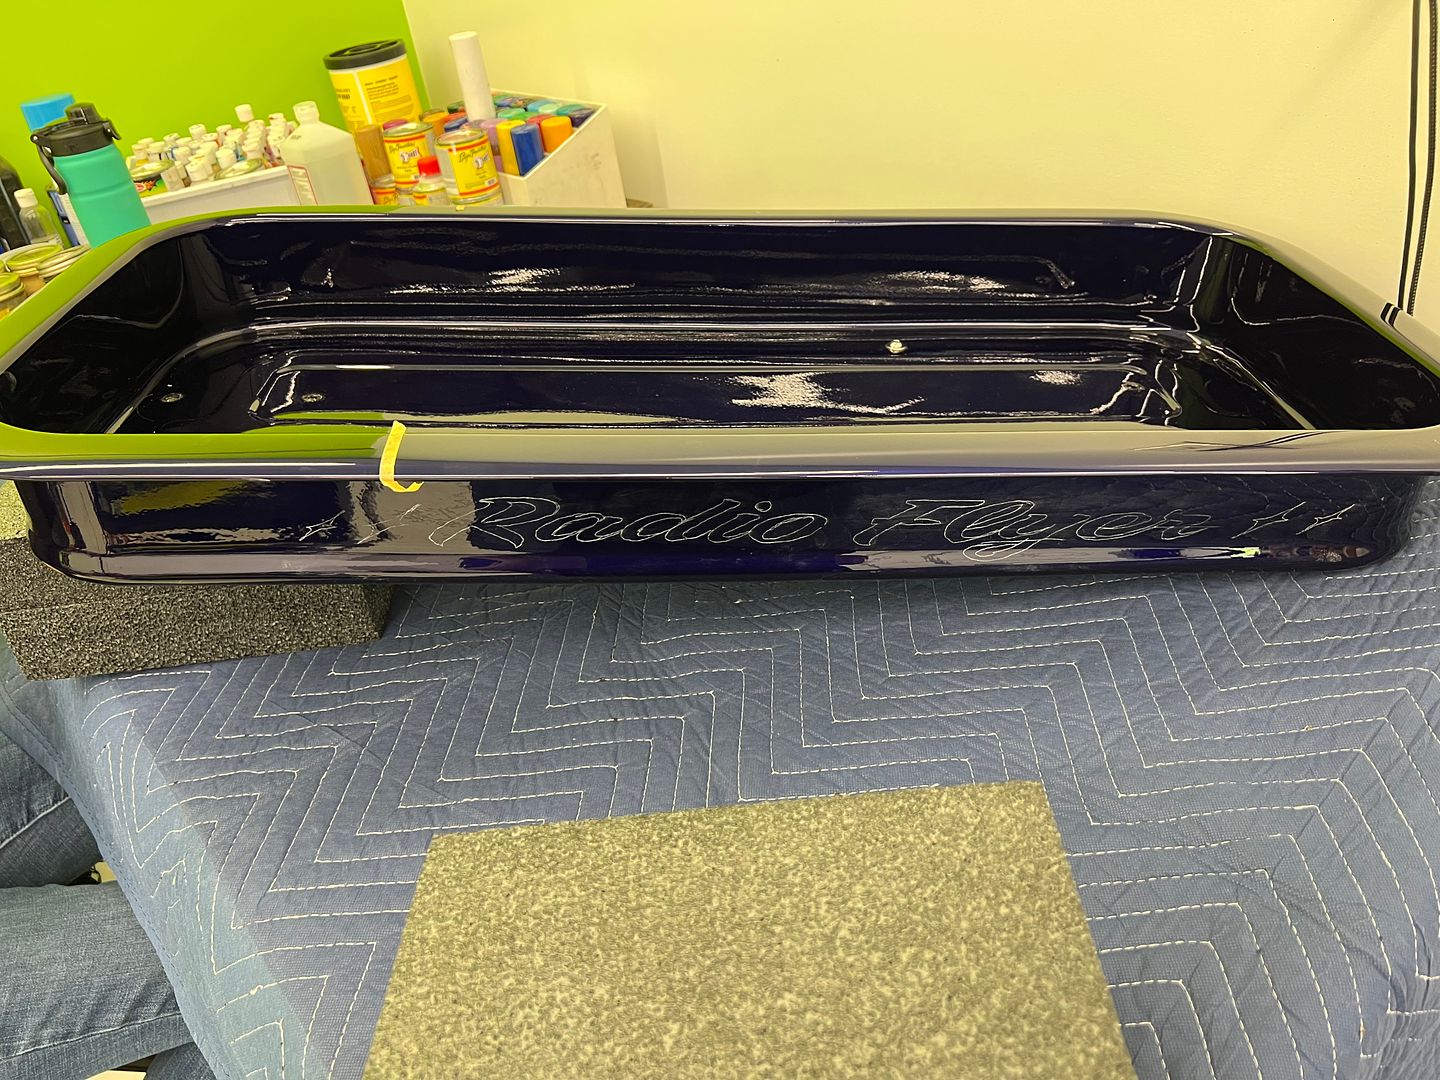 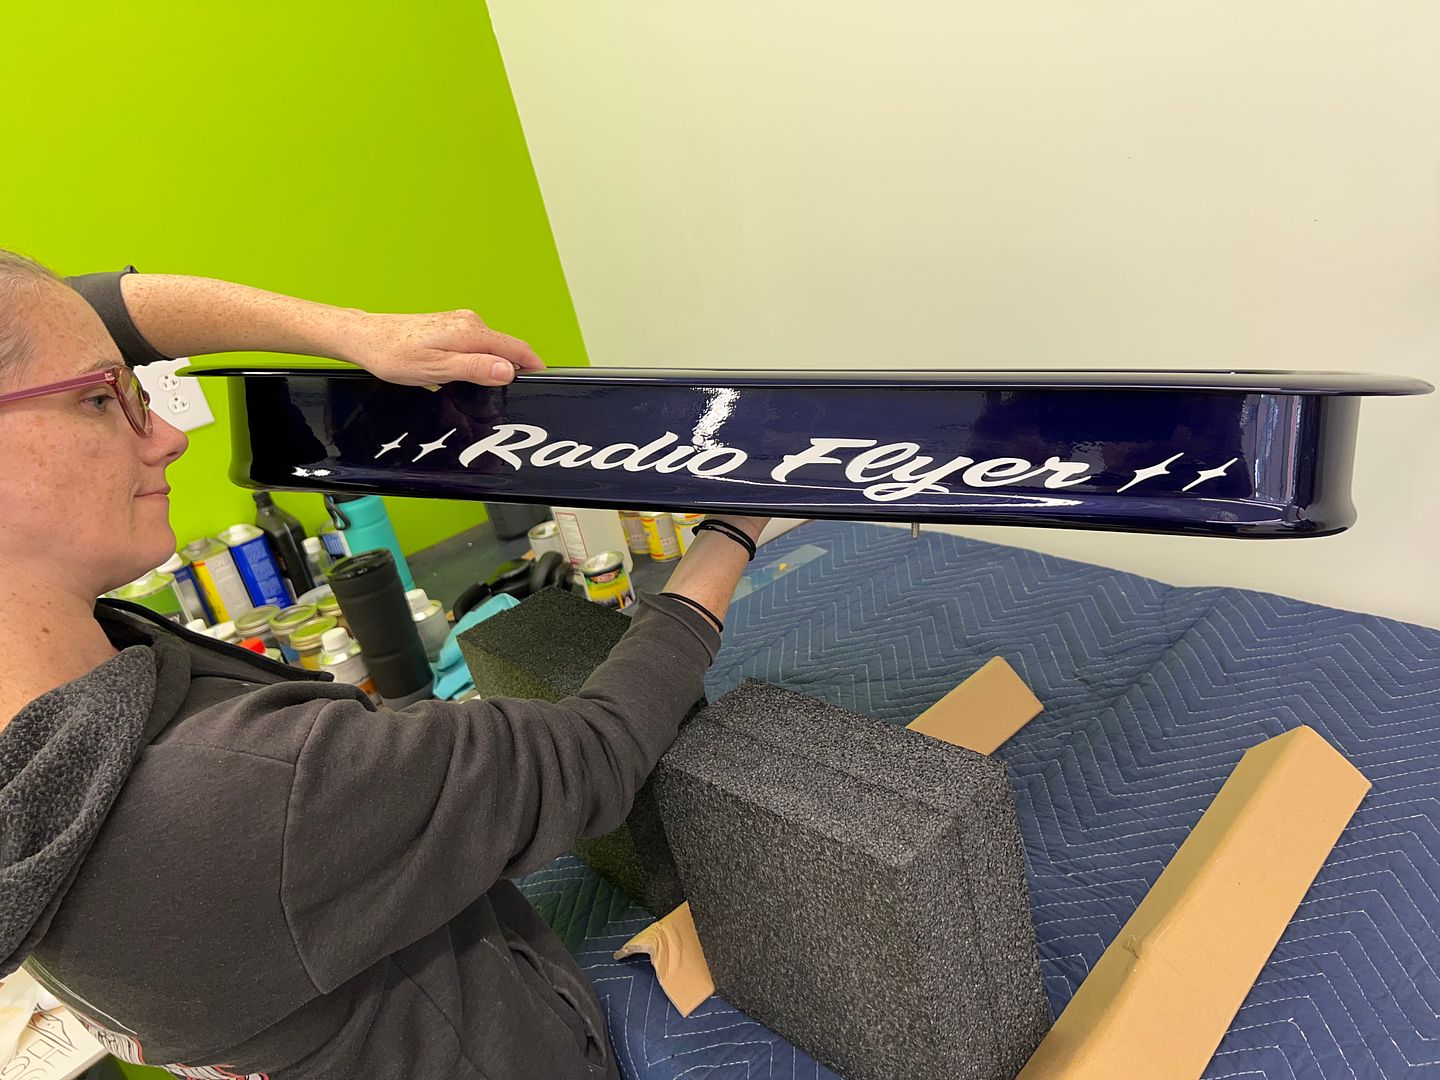 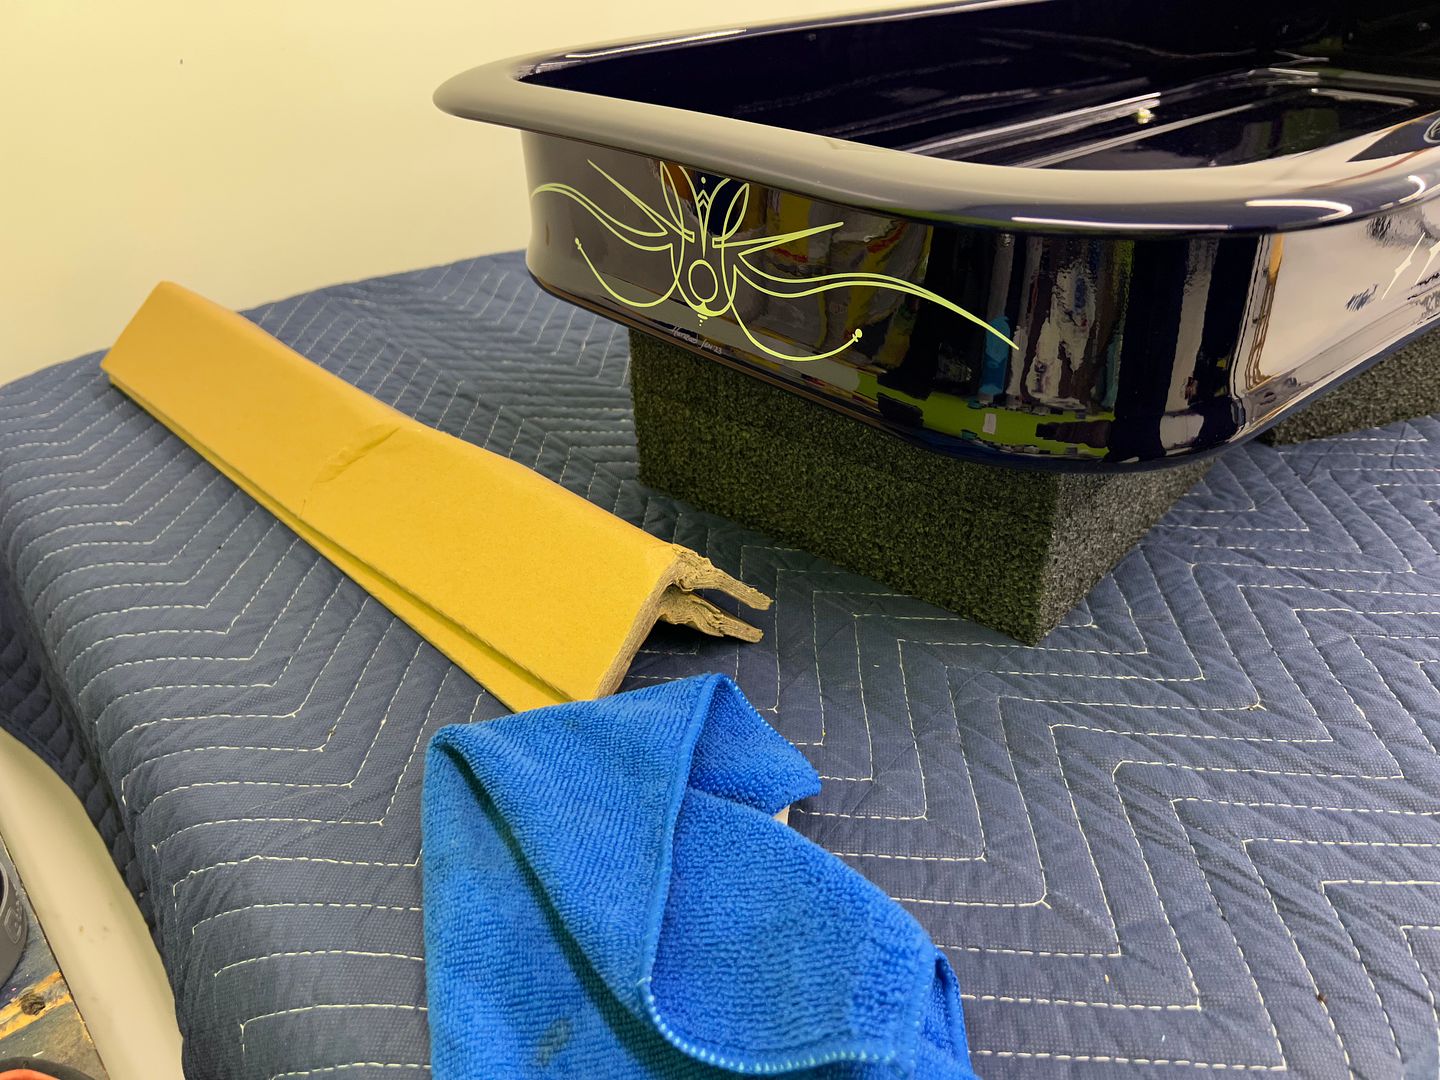 and reassembled for the trip home.. 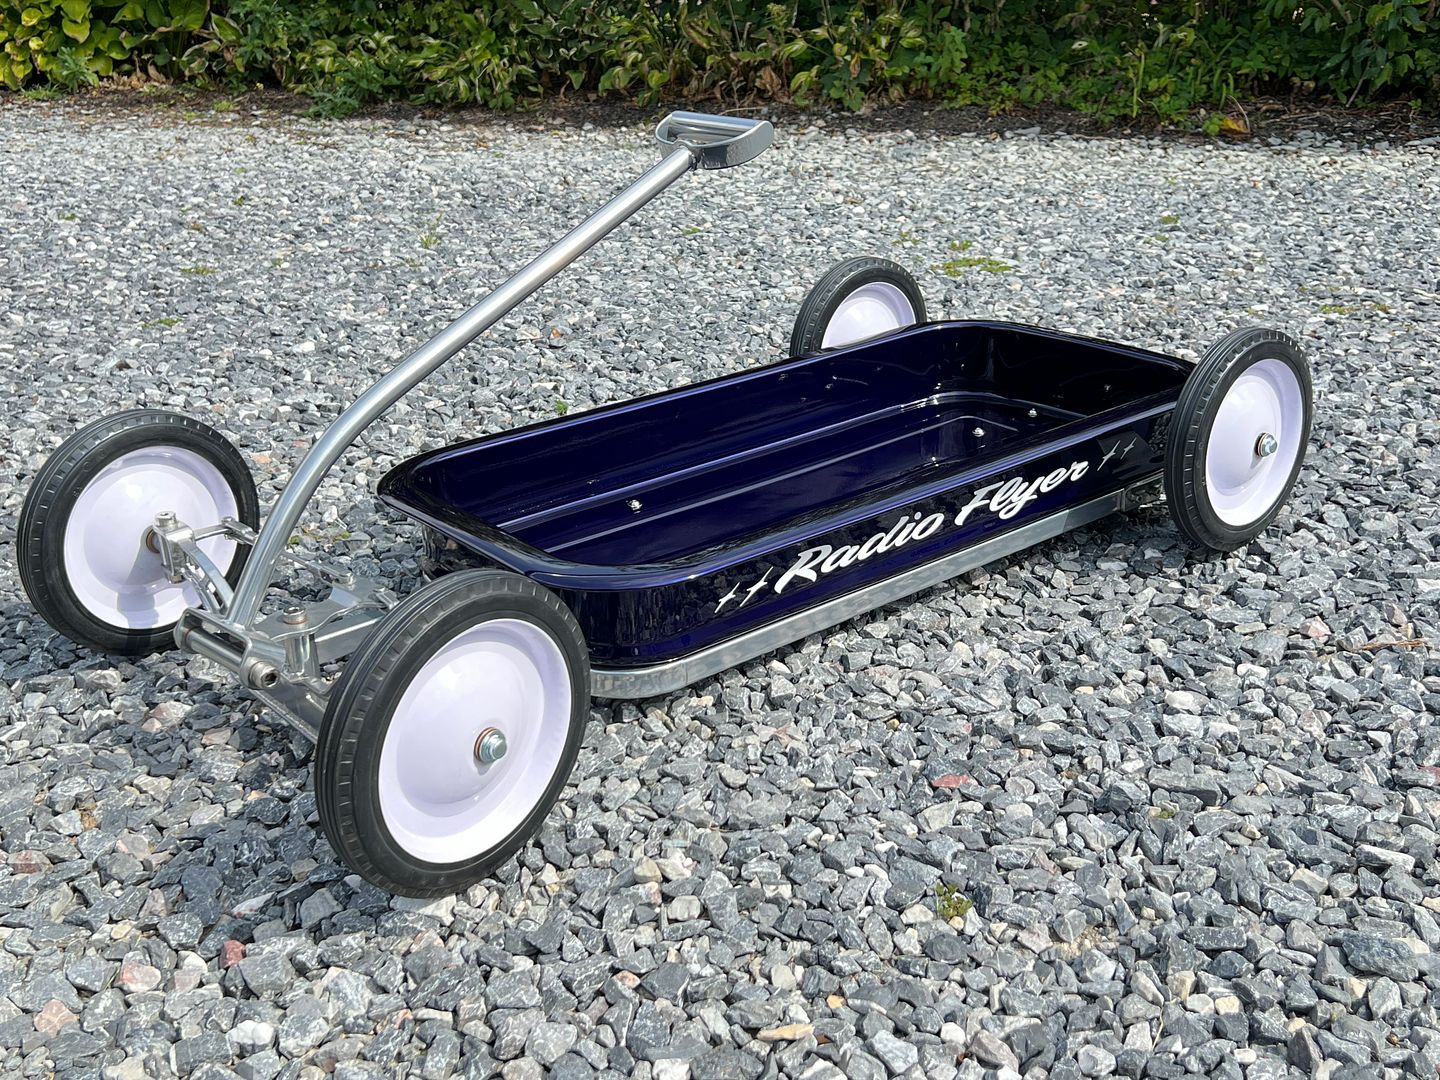 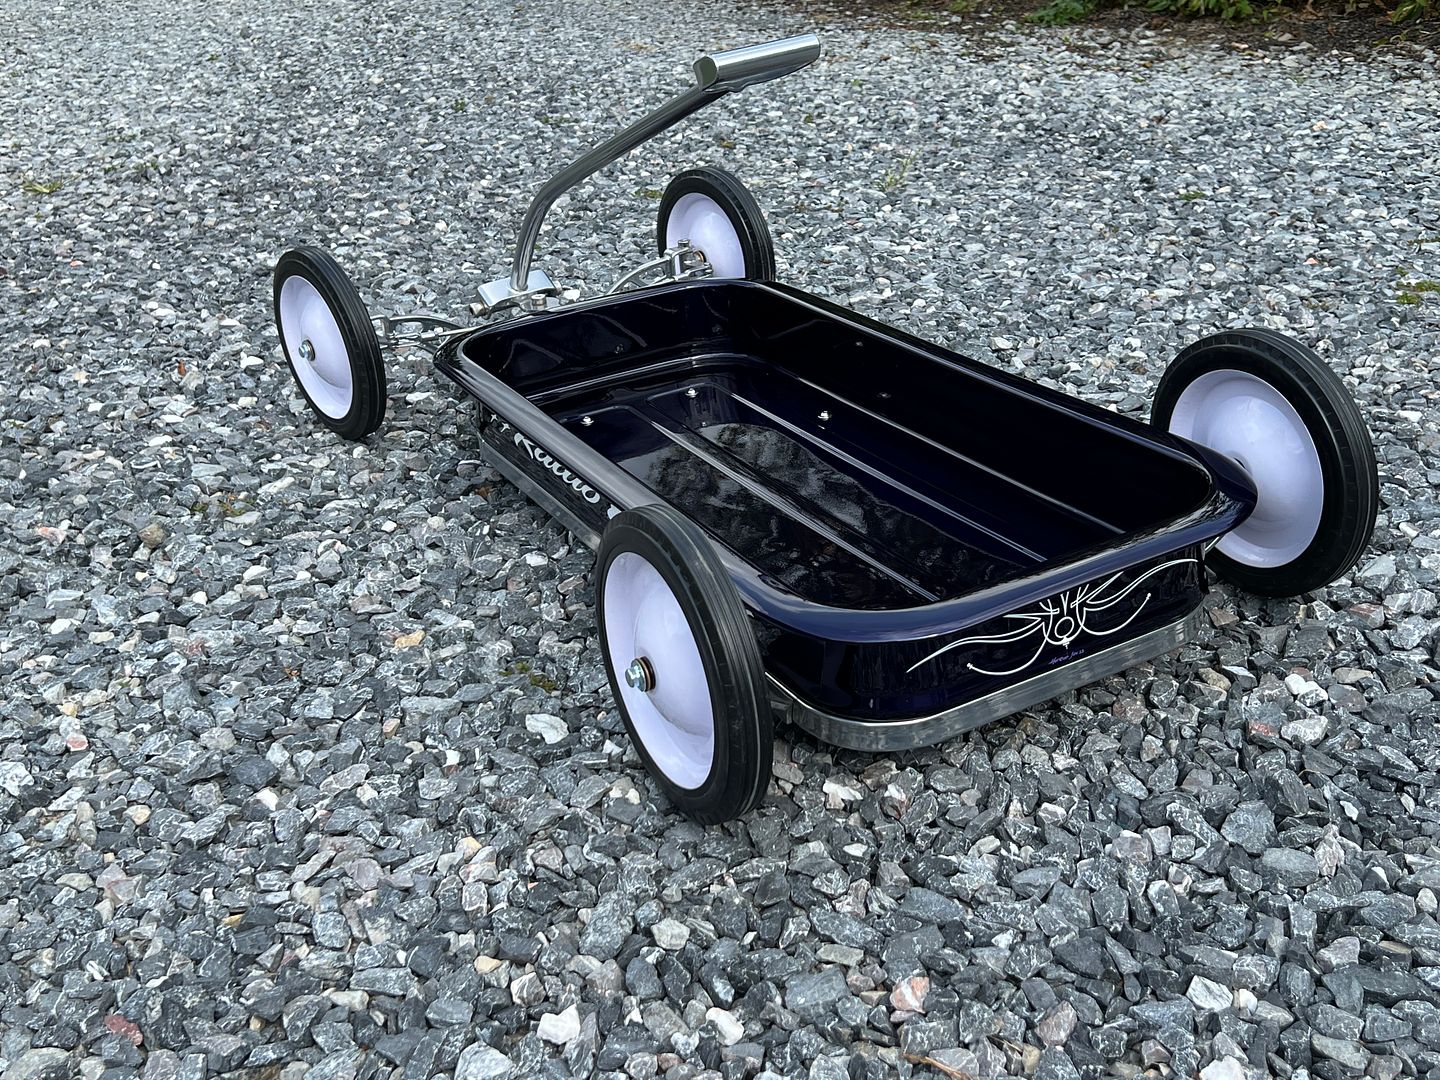
__________________
Robert |
|
|
|
|
09-26-2023, 08:27 AM
|
#1364 |
|
Post Whore
Join Date: May 2015
Location: Alabama
Posts: 14,579
|
Re: 55 Wagon Progress
Very nice ...!!!!!!
__________________
Mongo...aka Greg RIP Dad RIP Jesse 1981 C30 LQ9 NV4500..http://67-72chevytrucks.com/vboard/s...d.php?t=753598 Mongos AD- LS3 TR6060...http://67-72chevytrucks.com/vboard/s...34#post8522334 Columbus..the 1957 IH 4x4...http://67-72chevytrucks.com/vboard/s...63#post8082563 2023 Chevy Z71..daily driver |
|
|
|
|
10-06-2023, 08:35 AM
|
#1365 |
|
Registered User
Join Date: Jan 2013
Location: Leonardtown, MD
Posts: 1,633
|
Re: 55 Wagon Progress
Thanks Greg!!
More progress on the wagon, working on the parts so we can assemble and install the vent windows. For our glass installation, we did things twice as the 1/16 rubber did not give a snug enough fit. So here is our second round using 3/32 thick rubber. One inch wide strips were cut out of the sheet and lubricated with an Ivory/water mix. 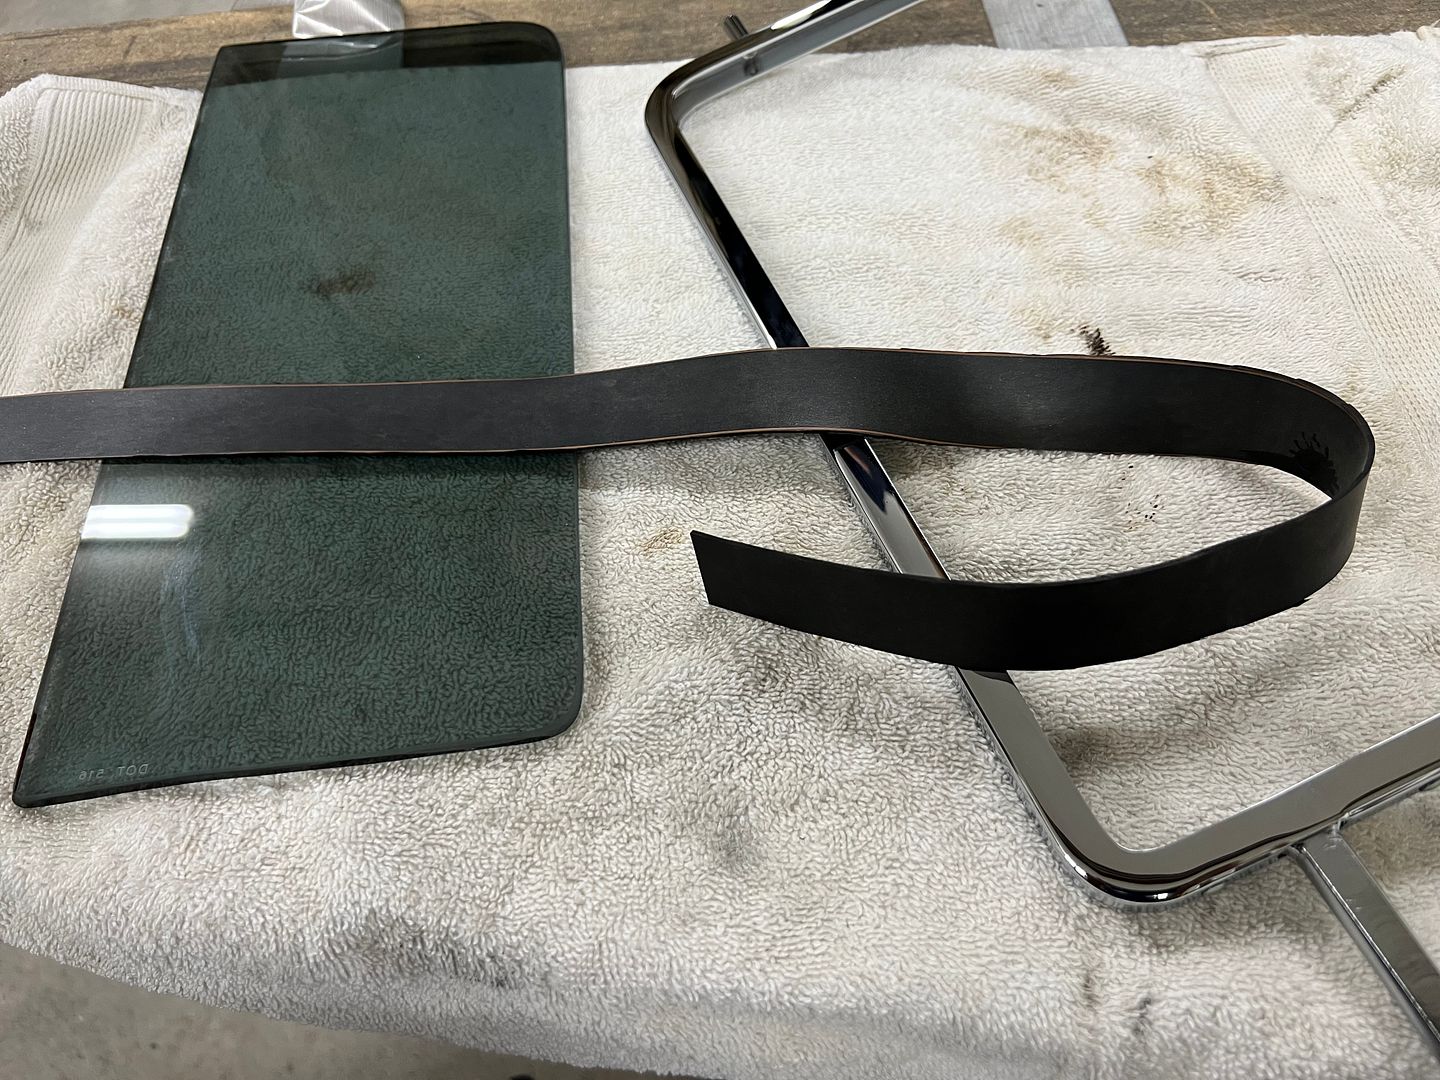 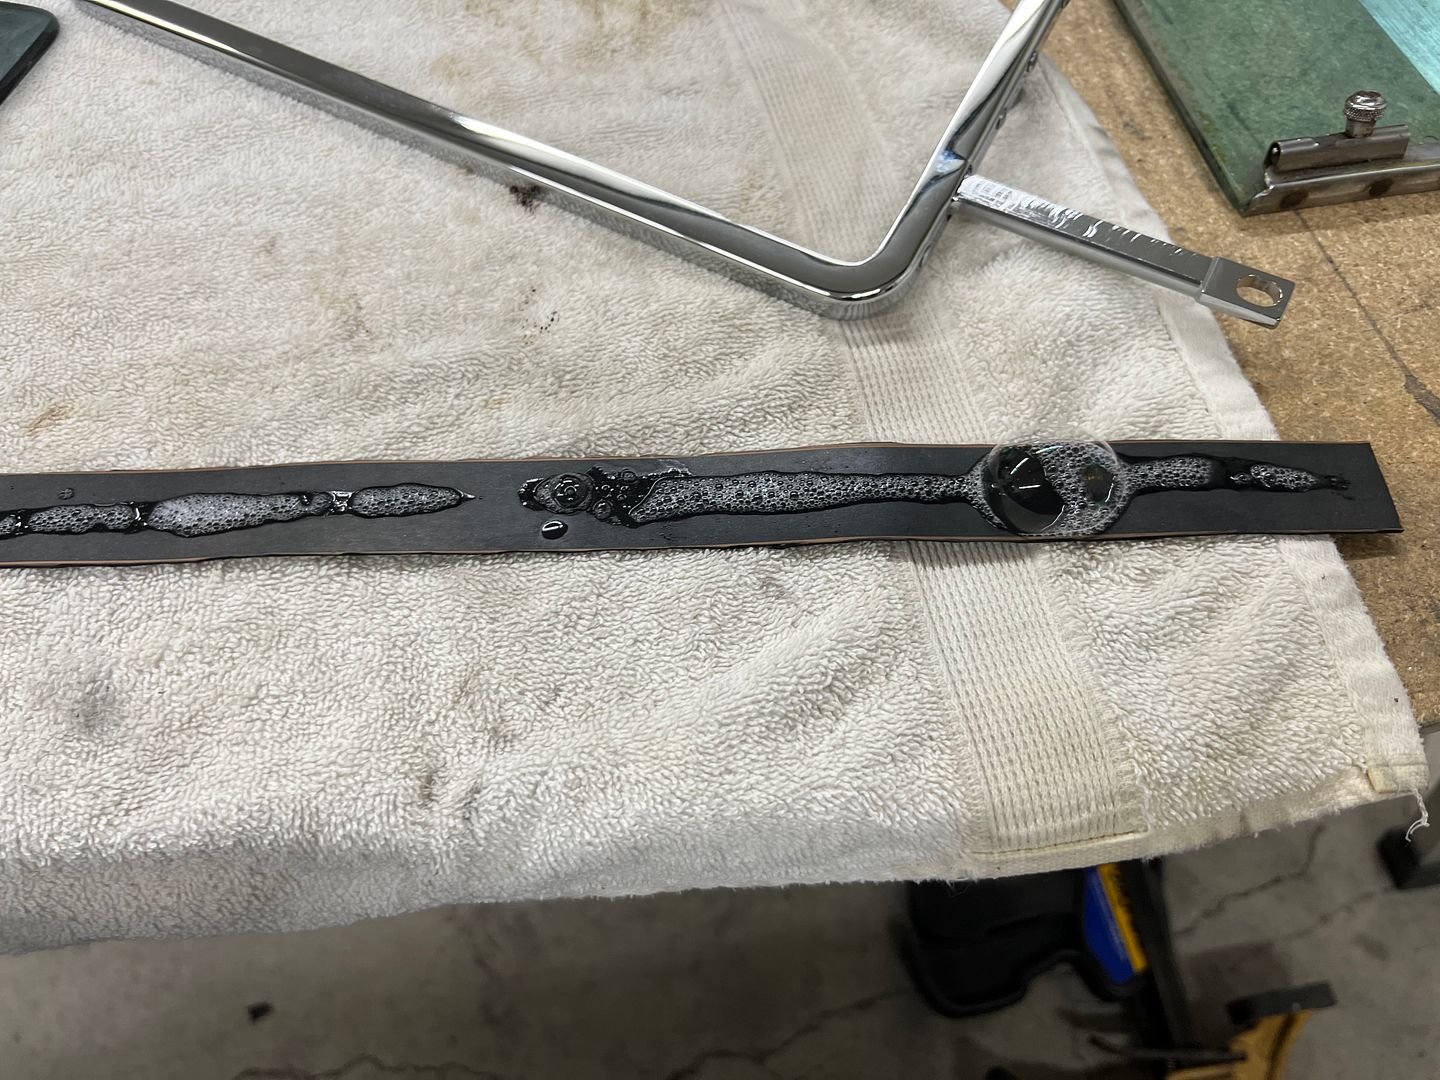 The rubber was wrapped around the glass and it was pressed down inside the frame by hand. Then a "slight" squeeze of the frame to ensure it wasn't sprung open from the installation process. 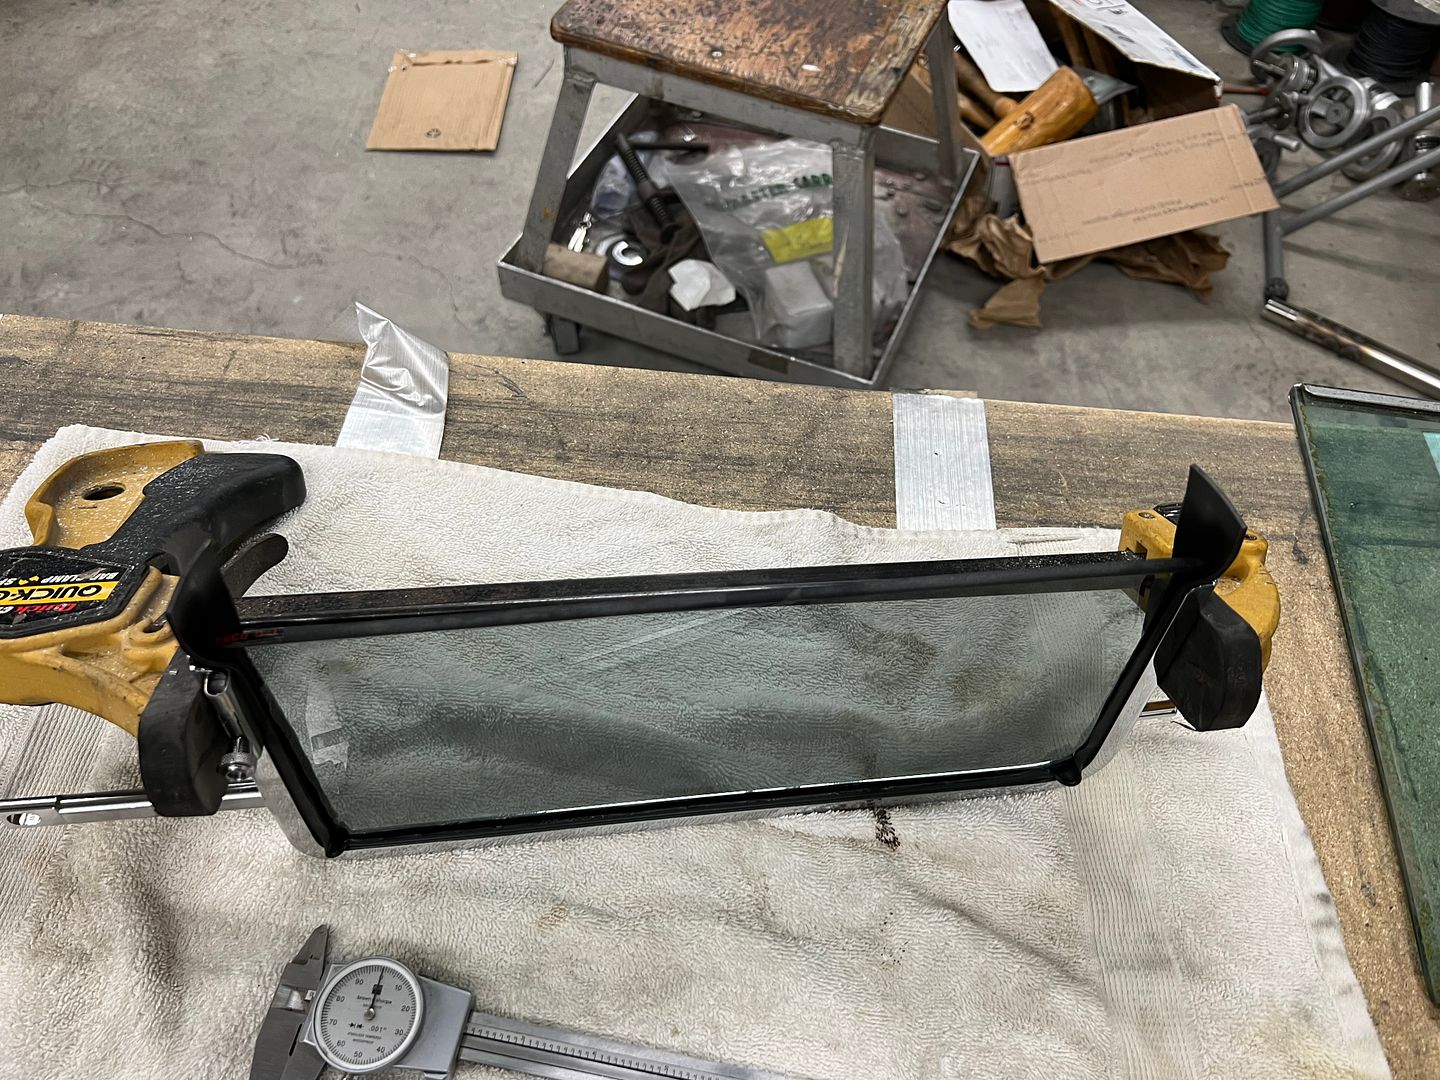 These got moved to the attic for a good heat baking (drying the soapy solution) and we'll trim the rubber flush with the chrome vent frame in a couple of days. Next, onto prepping the stainless trim for the vent windows for buffing, refining the scratches. Detail work like this is more difficult with parts flopping around in your hand, so some MDF was found the correct size (width) to hold the wide portion of the trim, and another piece of MDF was shaved to fit the narrow piece of trim. We should have these done this weekend. 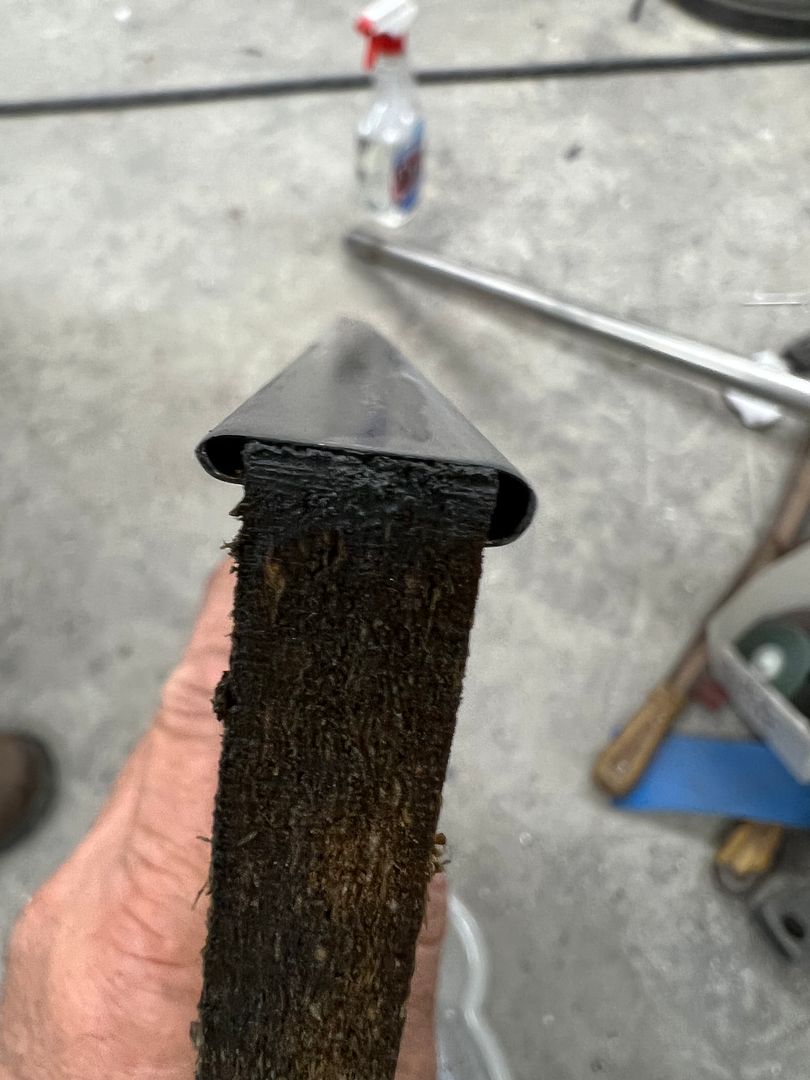 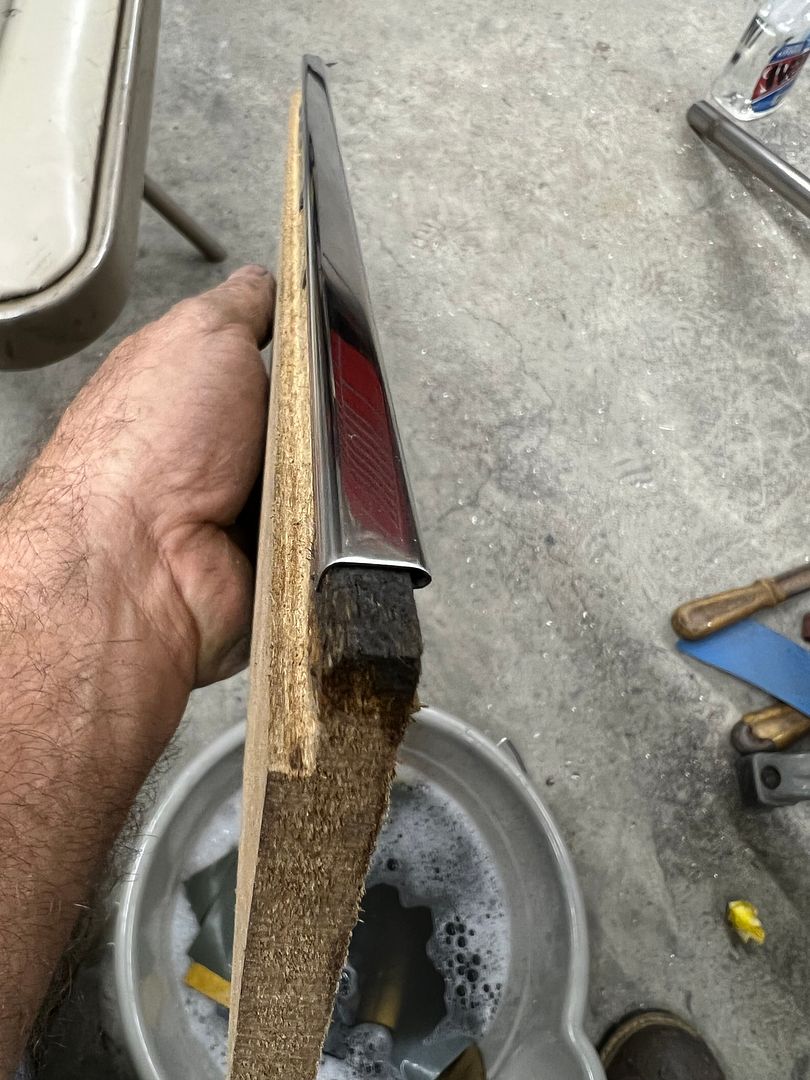 https://youtube.com/shorts/aXjasXvwN...3weASGnXwPDeuK https://youtube.com/shorts/KaRW2OMmo...aHI9eAk13uNpS6 Next, we picked up our battery, but the lifting handle bosses on the ends of the battery interfered with our OEM hold down. 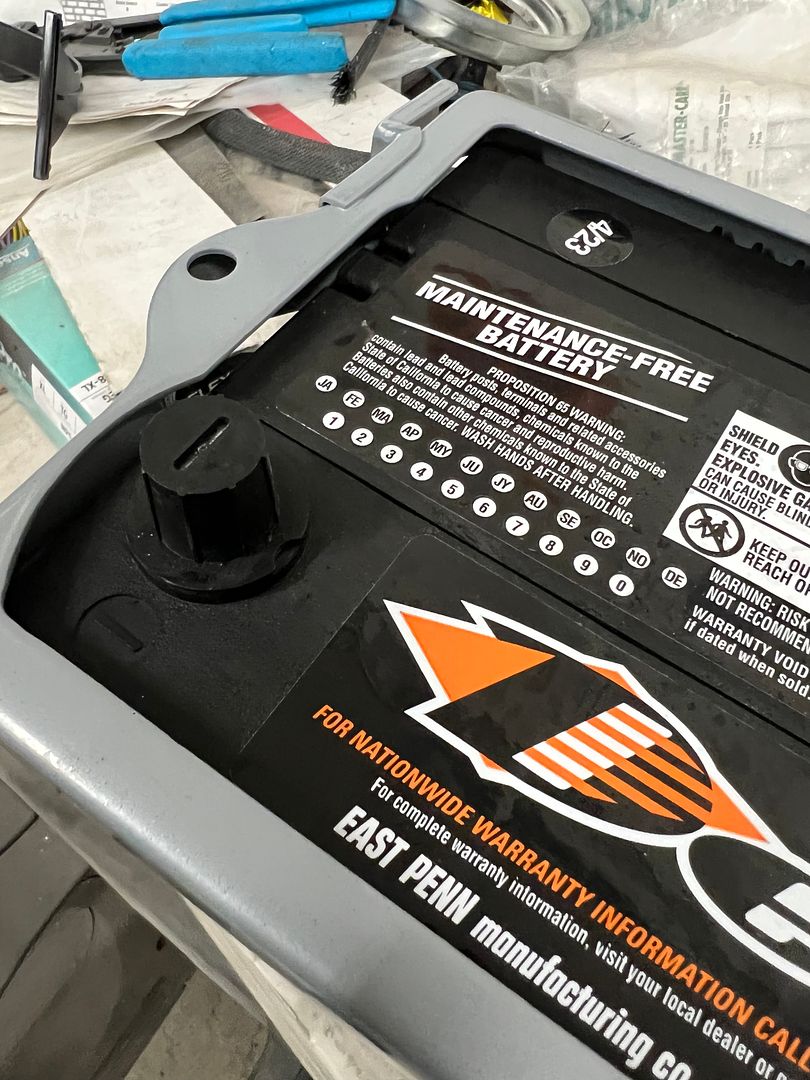 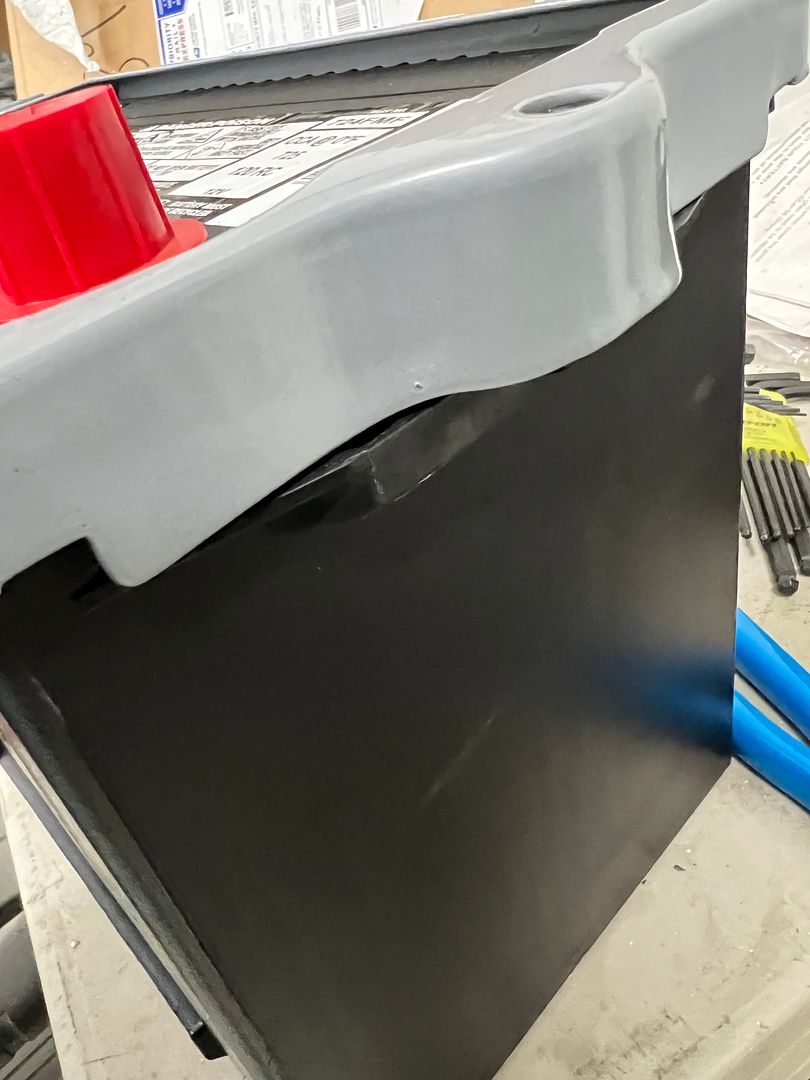 Not to be dissuaded, the belt file made short work of a shave. 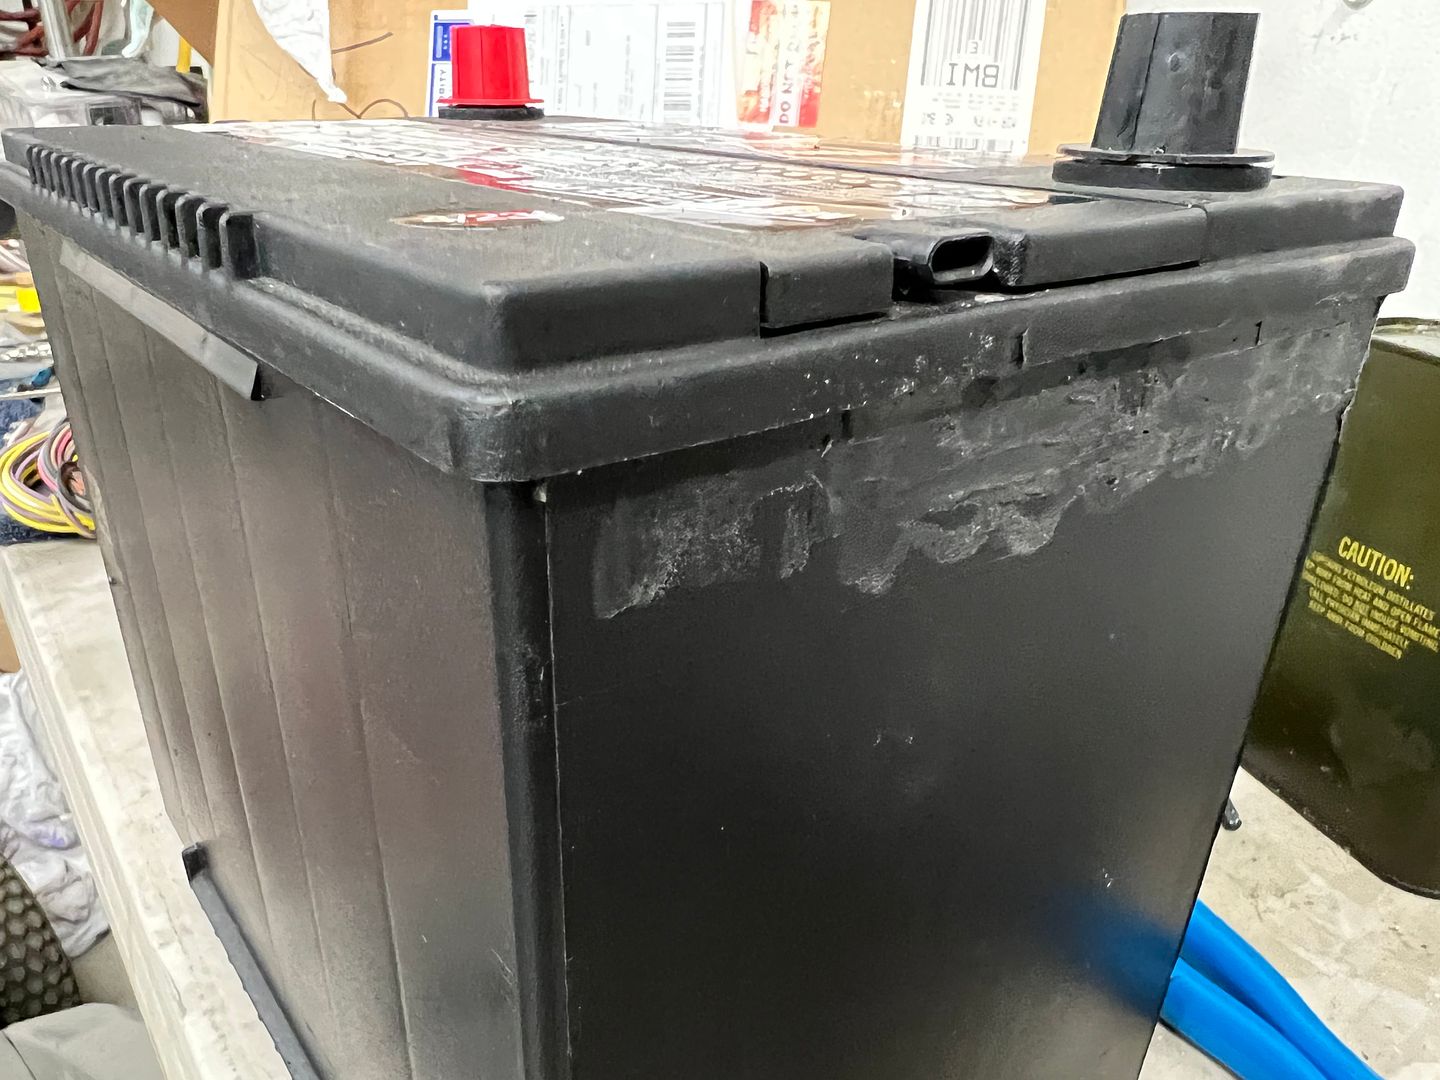 Luckily the mount hides our sanding marks. Much better down where it belongs... 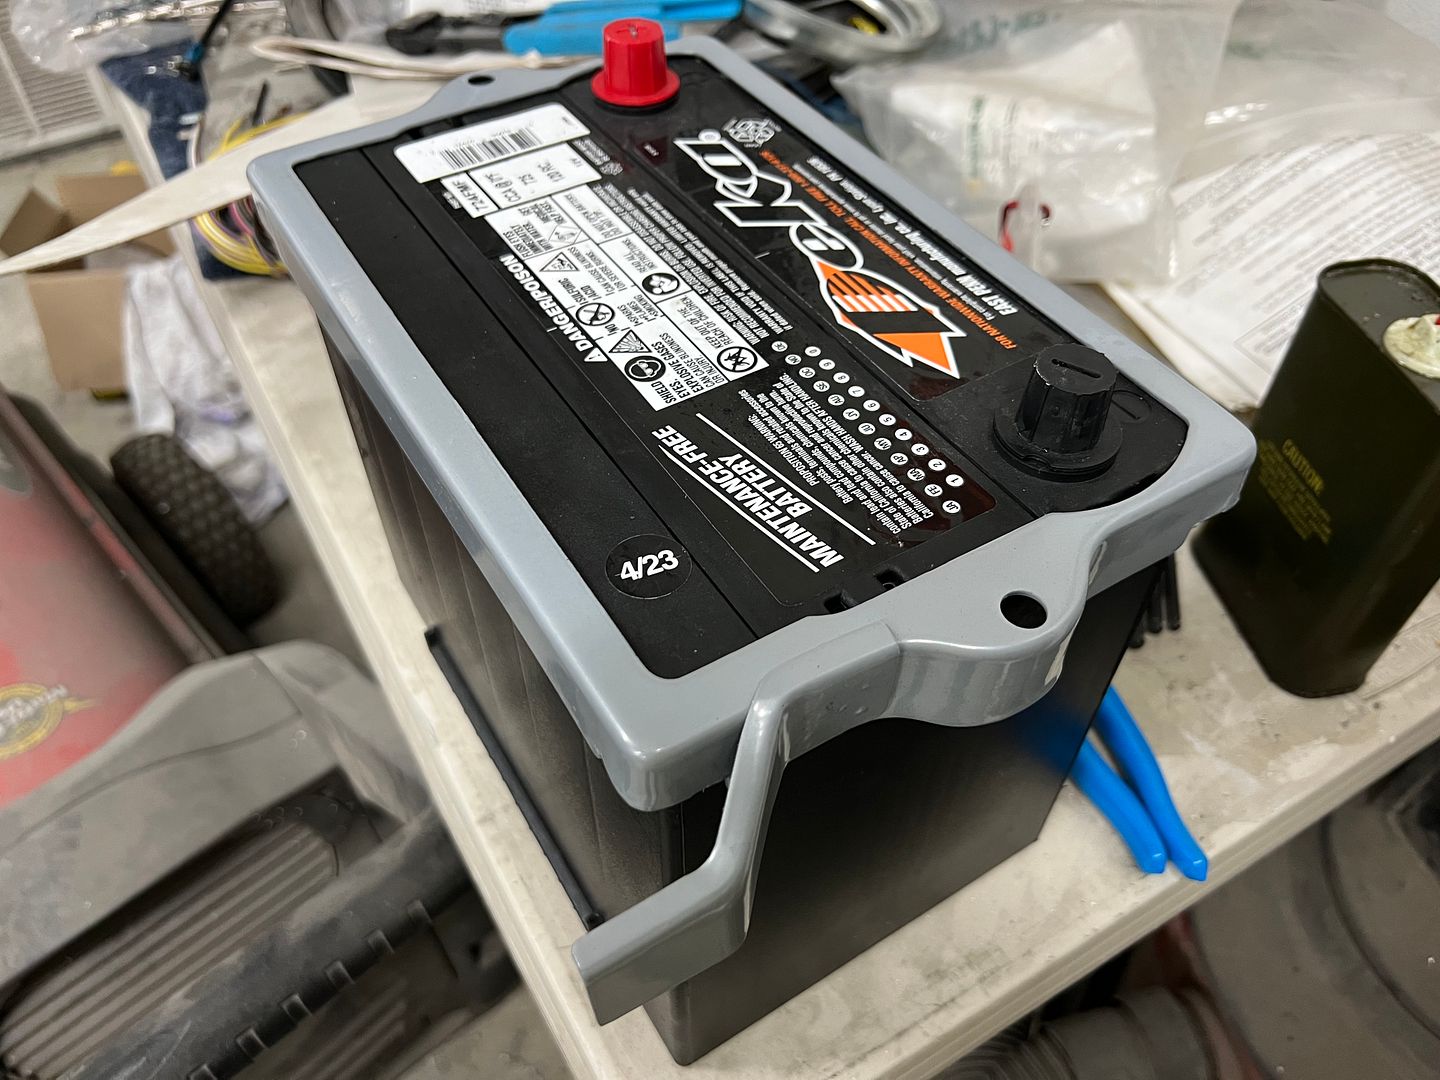 Like it's made to go there... 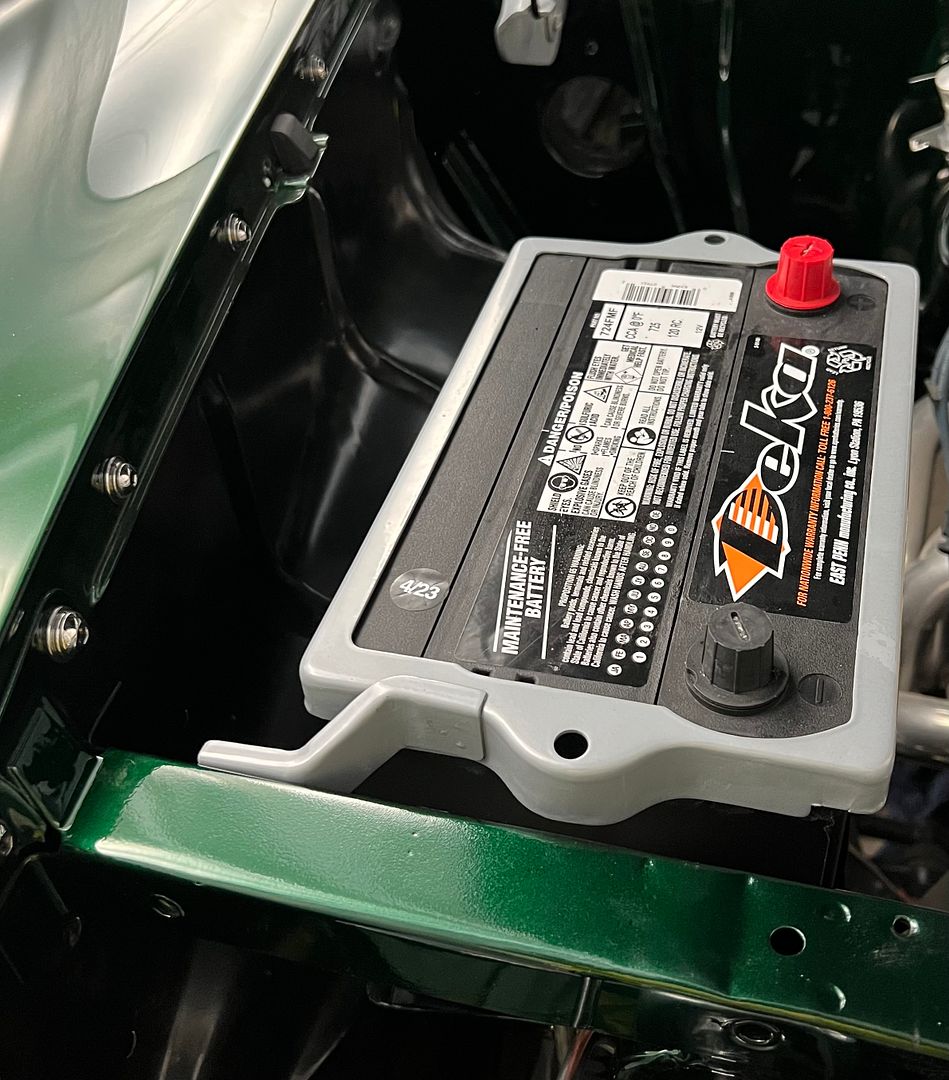
__________________
Robert |
|
|
|
|
10-25-2023, 07:03 AM
|
#1366 |
|
Registered User
Join Date: Jan 2013
Location: Leonardtown, MD
Posts: 1,633
|
Re: 55 Wagon Progress
Well in our typical back up and punt fashion, the original battery hold downs that we had already powder coated did not fit the battery, too short. So we ordered some round stock in stainless to fabricate some new ones.
 A threaded standoff was modified to provide an angled surface for using as a hammer form to get the bottom "hooks" consistent... 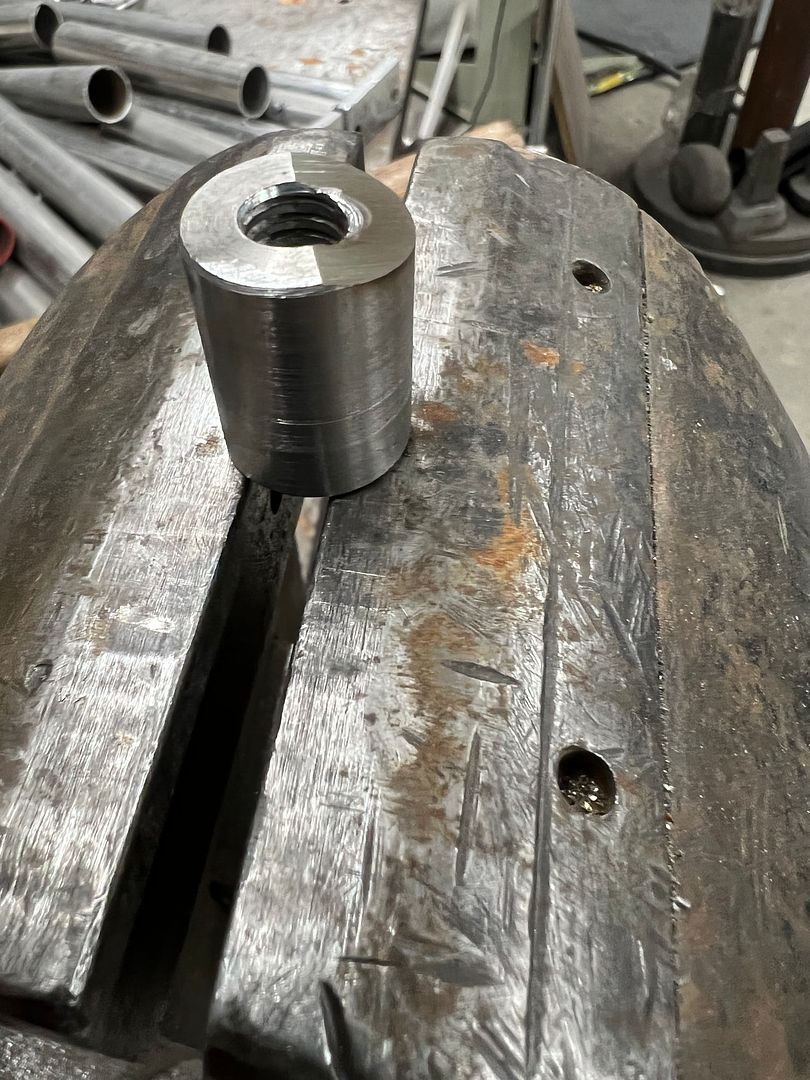 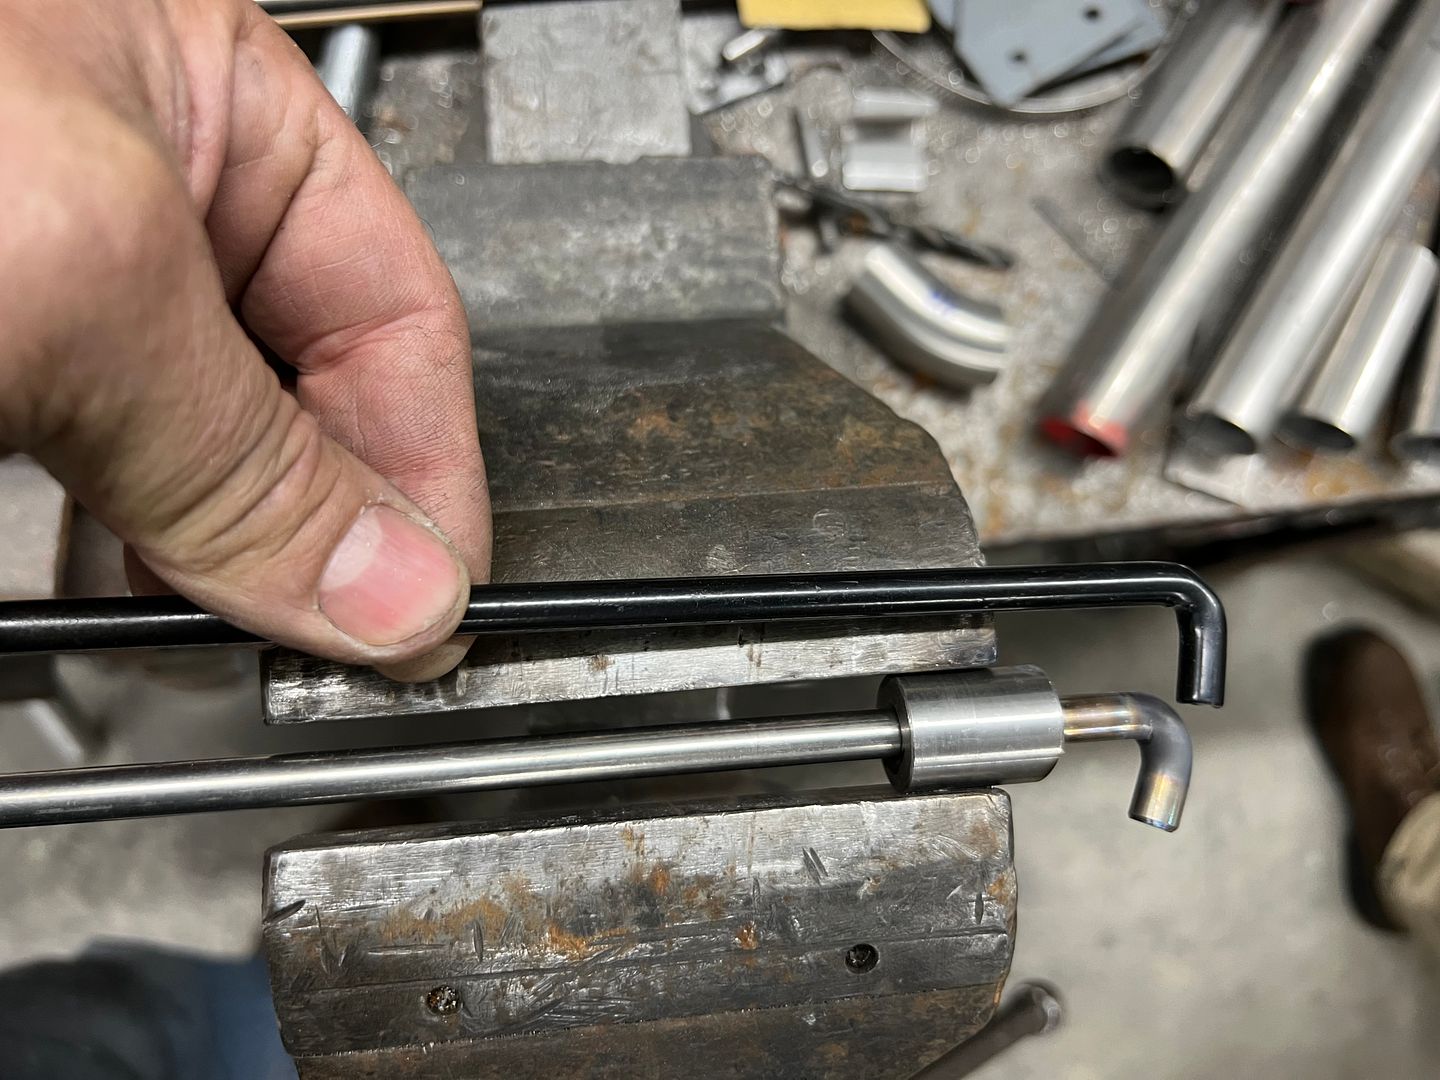 All polished up...  Installed, and no polish job is complete without addressing the ends of the rods.. 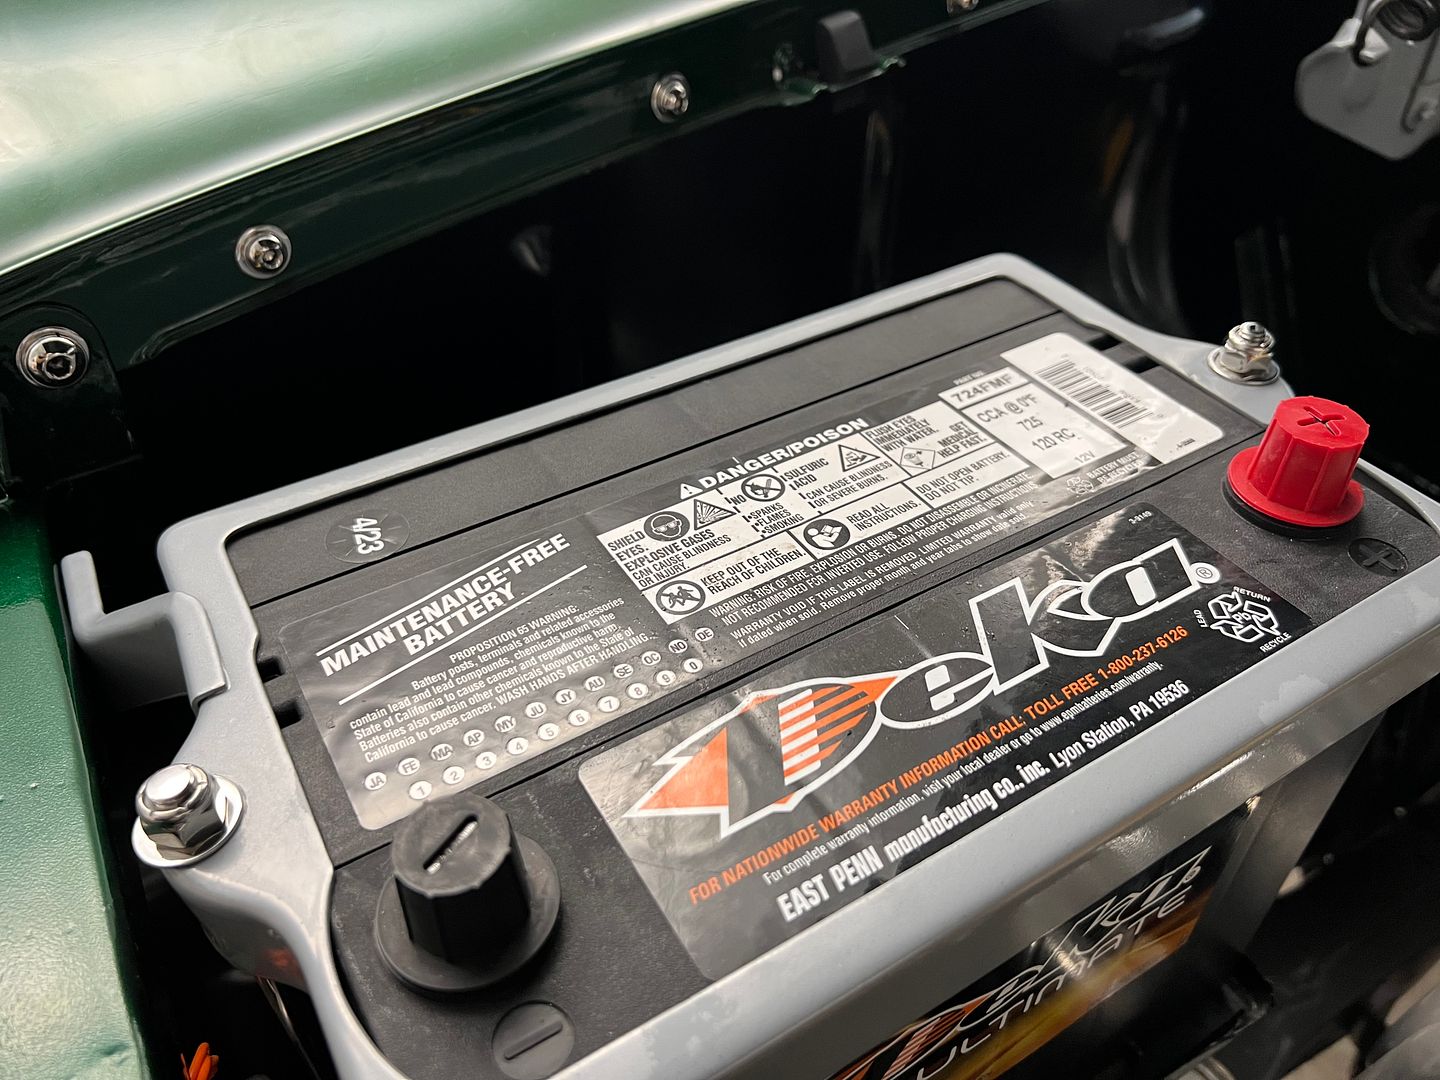 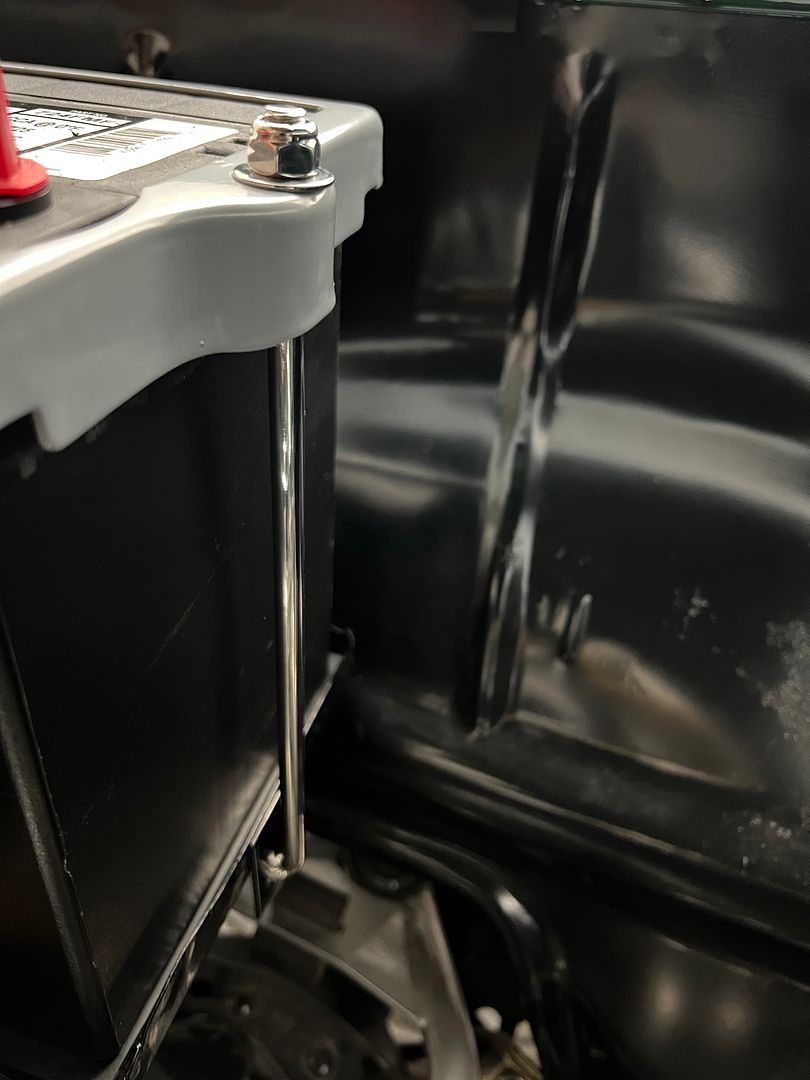 Assembling our vent windows, the excess rubber is trimmed using a No. 11 scalpel blade for a nice and tidy fit 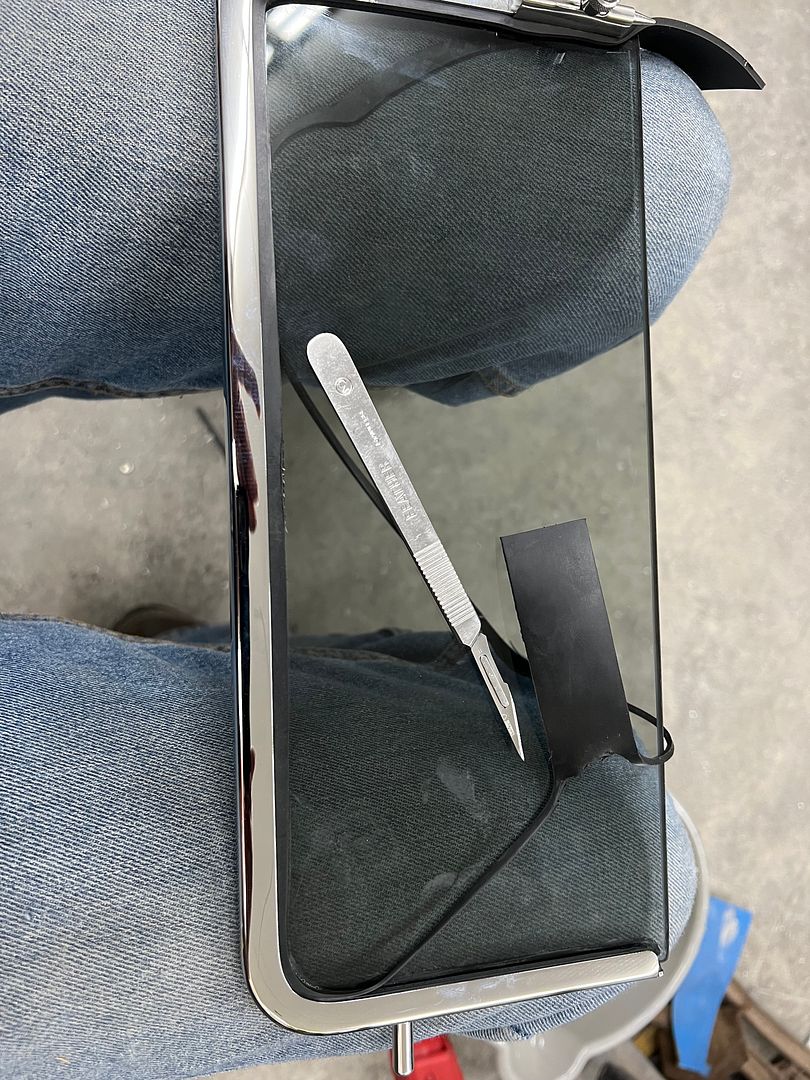  All the bits assembled 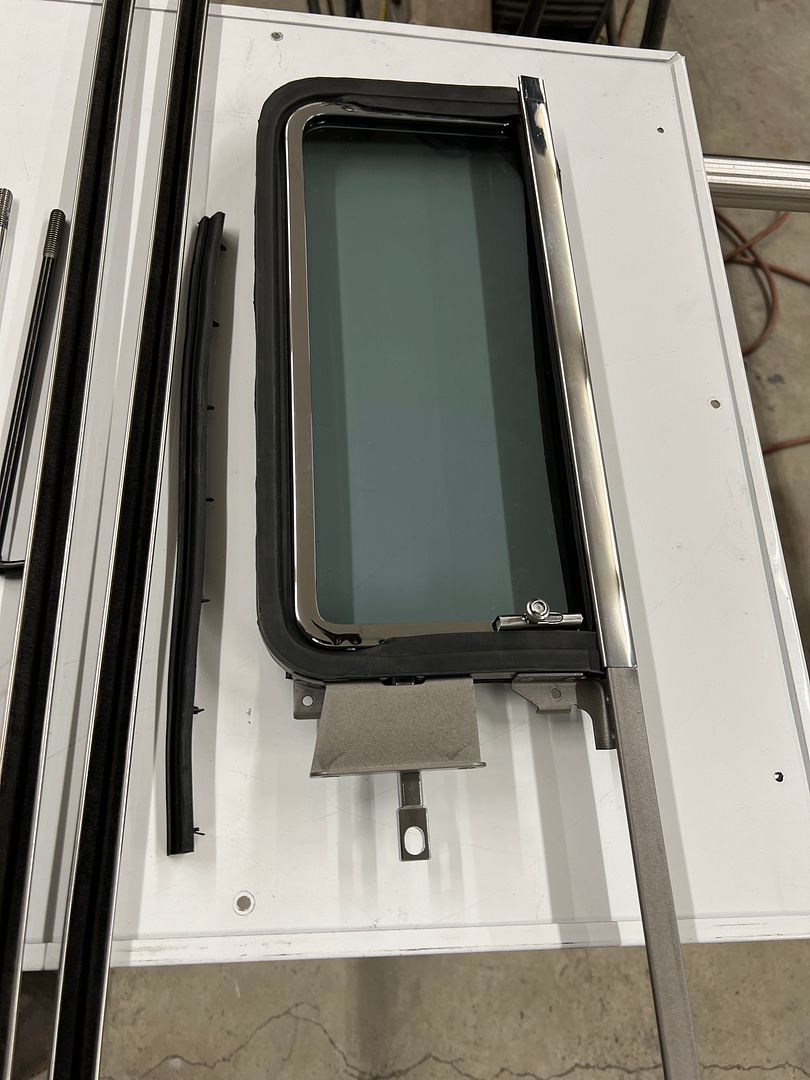 installed... 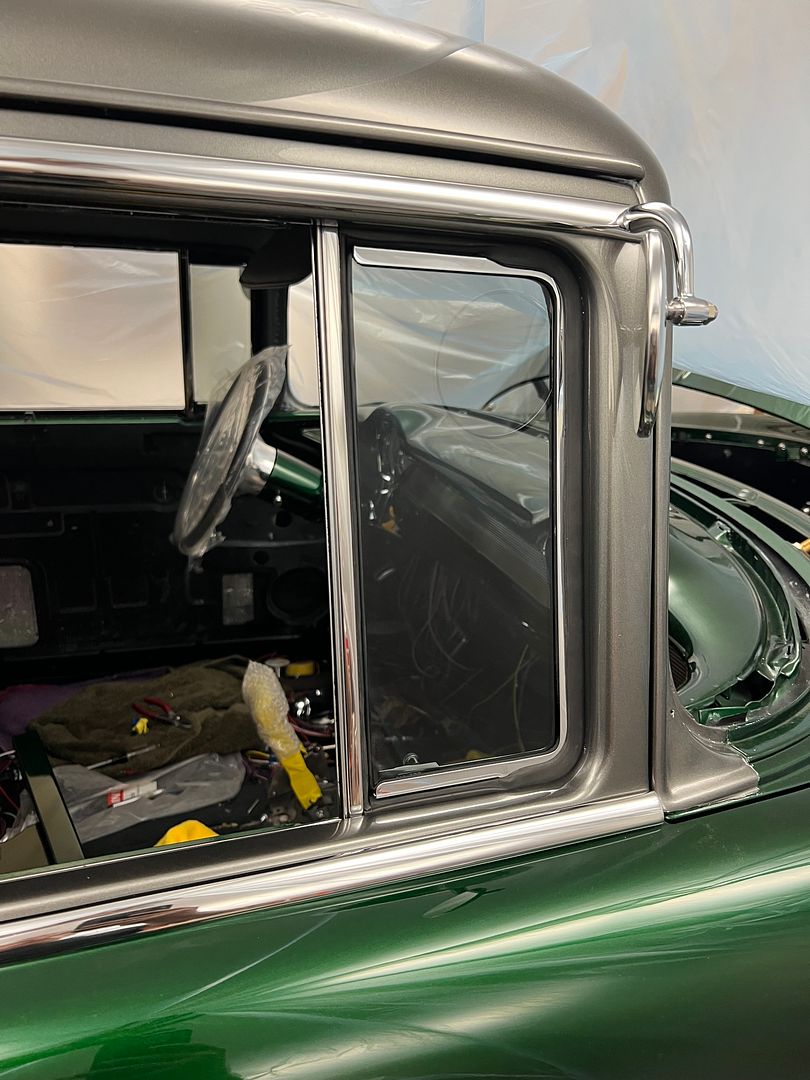 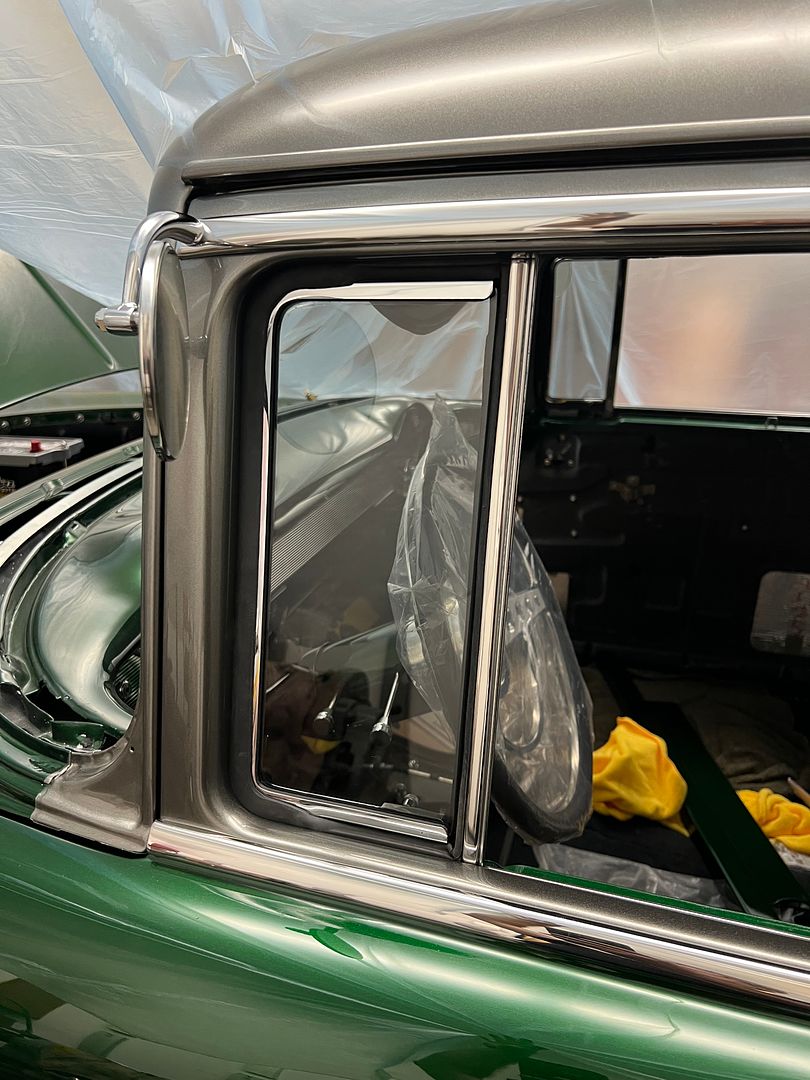 And more stainless we missed, the parting bands for the front arm rests, complete with a form-fitted sanding/polishing fixture 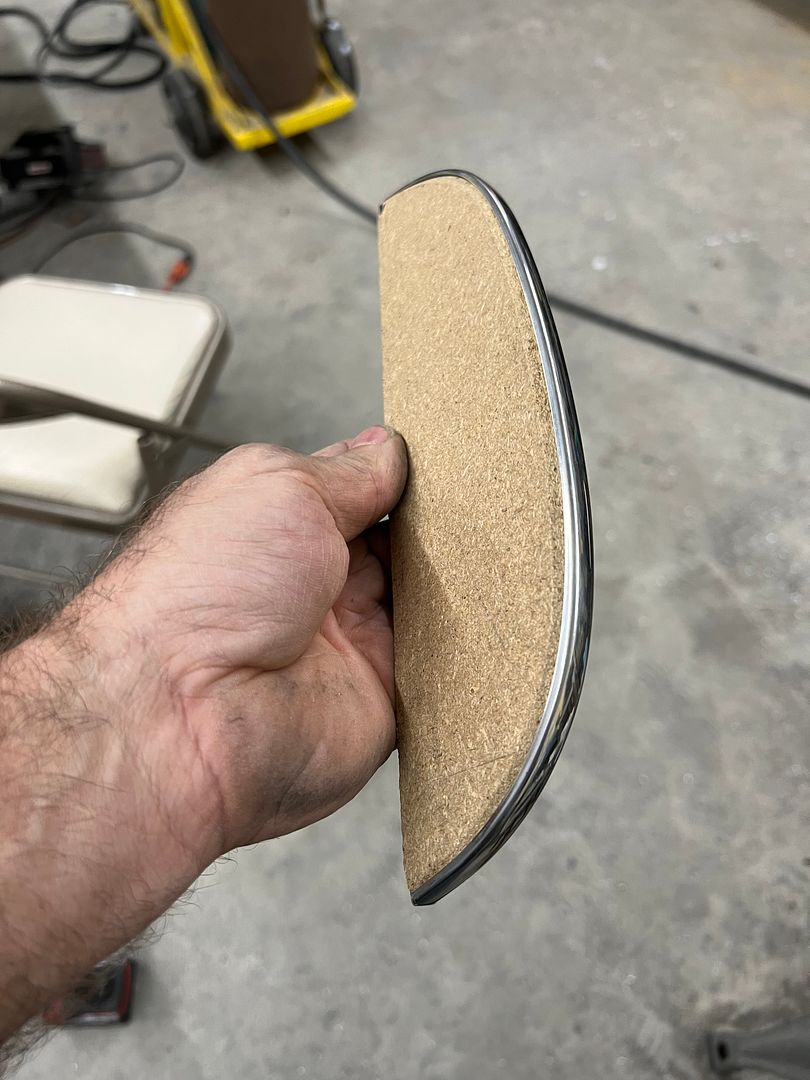
__________________
Robert |
|
|
|
|
03-22-2024, 01:42 PM
|
#1367 |
|
Registered User
Join Date: Jan 2013
Location: Leonardtown, MD
Posts: 1,633
|
Re: 55 Wagon Progress
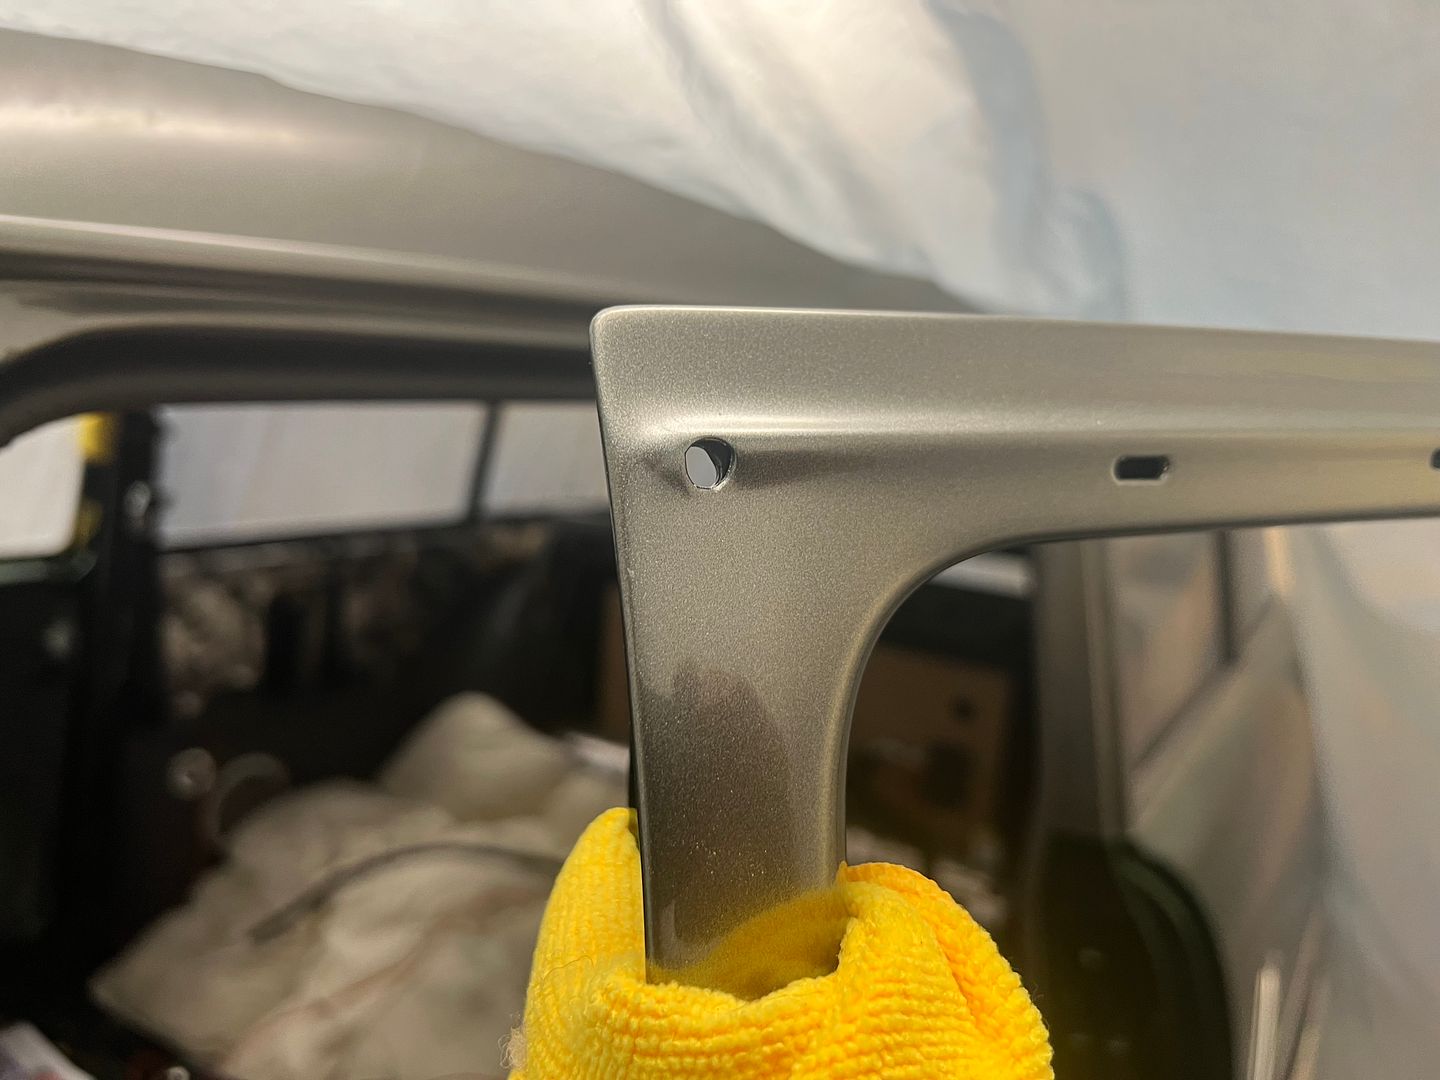
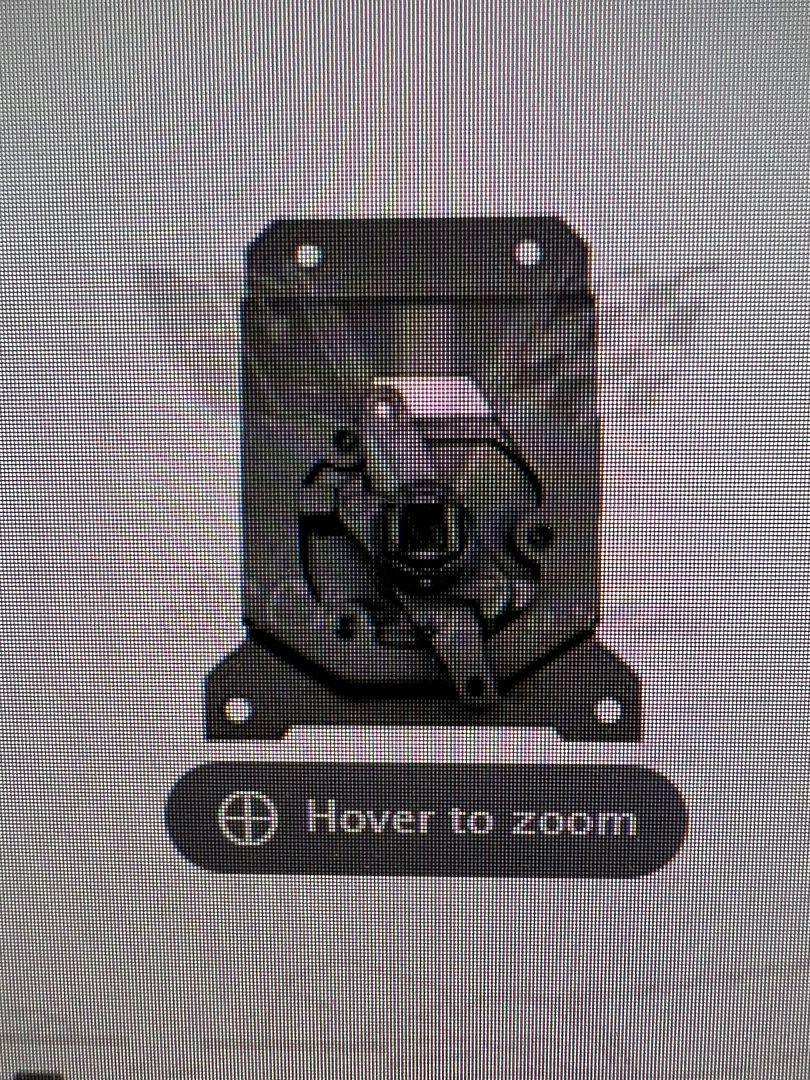
Trying to assemble the tailgate so we can put it on, but our latch actuator is absolutely worn out in the square hole, the handle just about rotates inside of it. They don't make repop's (that I'm aware of) and someone just offered a rebuilding service at over $300. So I reached out to my go to used parts outlet and a good used one is on the way, mailed the same day.. Reference photo:
 So while we're waiting on parts to load up the rest of the bits on the tailgate, lets chase the threaded holes.... 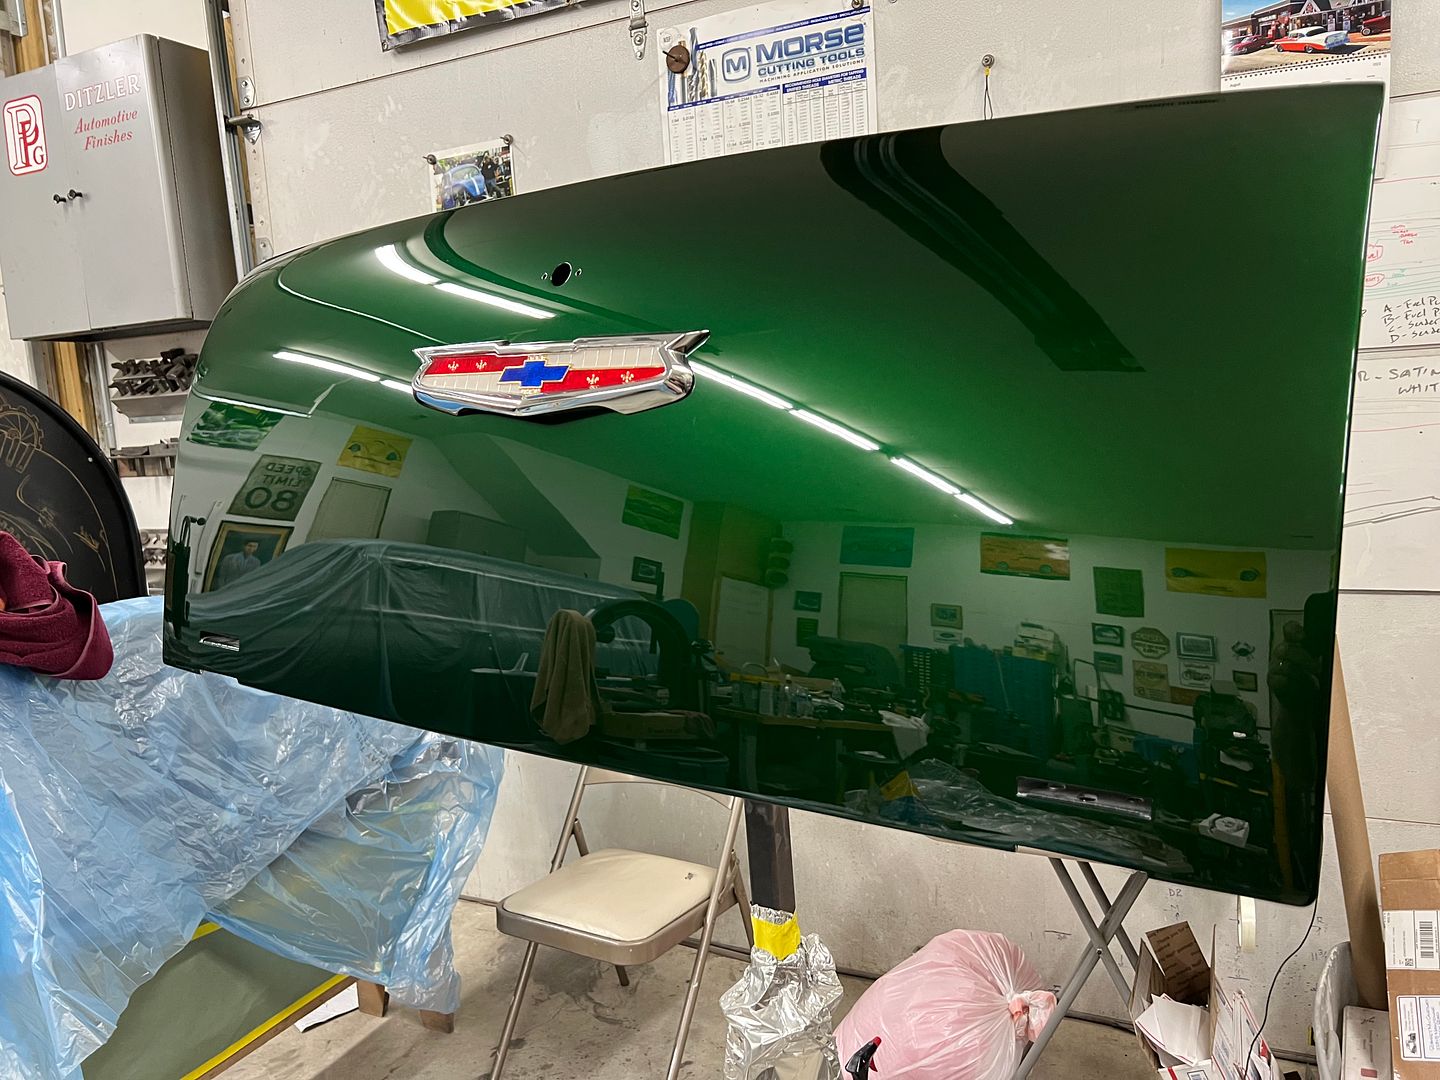 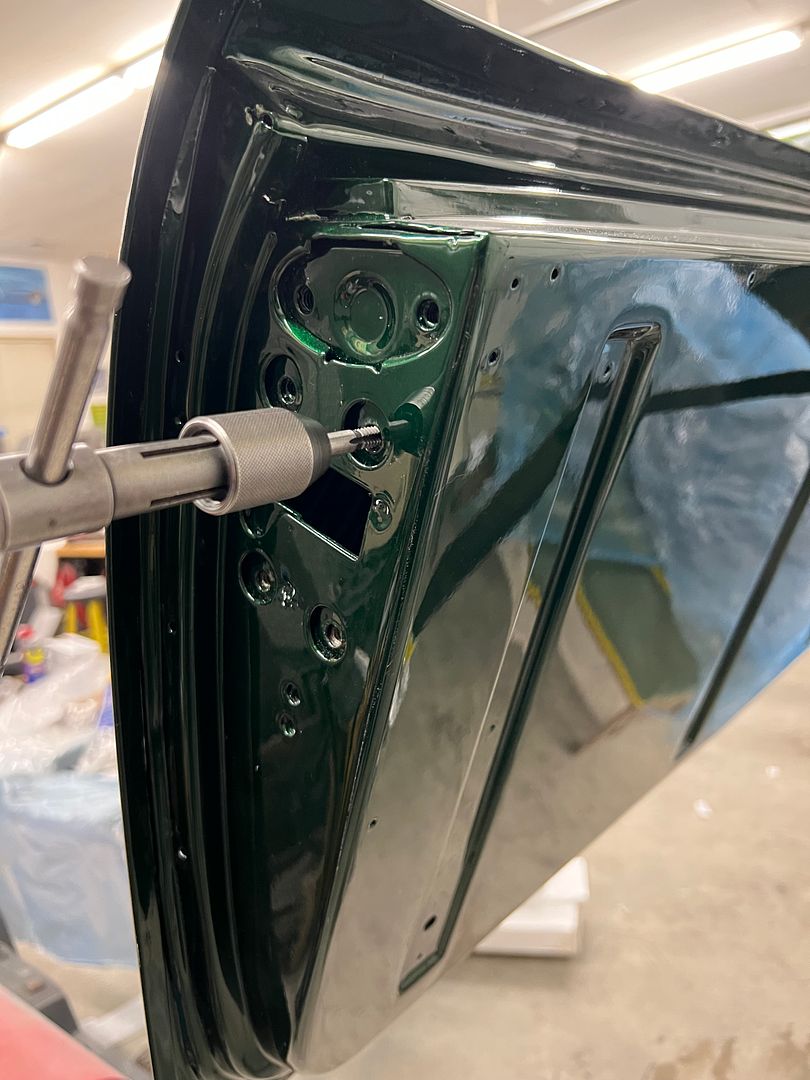 The console just got dropped off, we had some material in the corners that was pulling due to all the stretching that had taken place. In order to keep things more permanent, I came up with some 19 gauge stainless "trim lock". A hemmed edge helps keep from cutting into the upholstery. It gets clipped in place, shoved into the corner snugly, and through drilled for installing solid rivets. 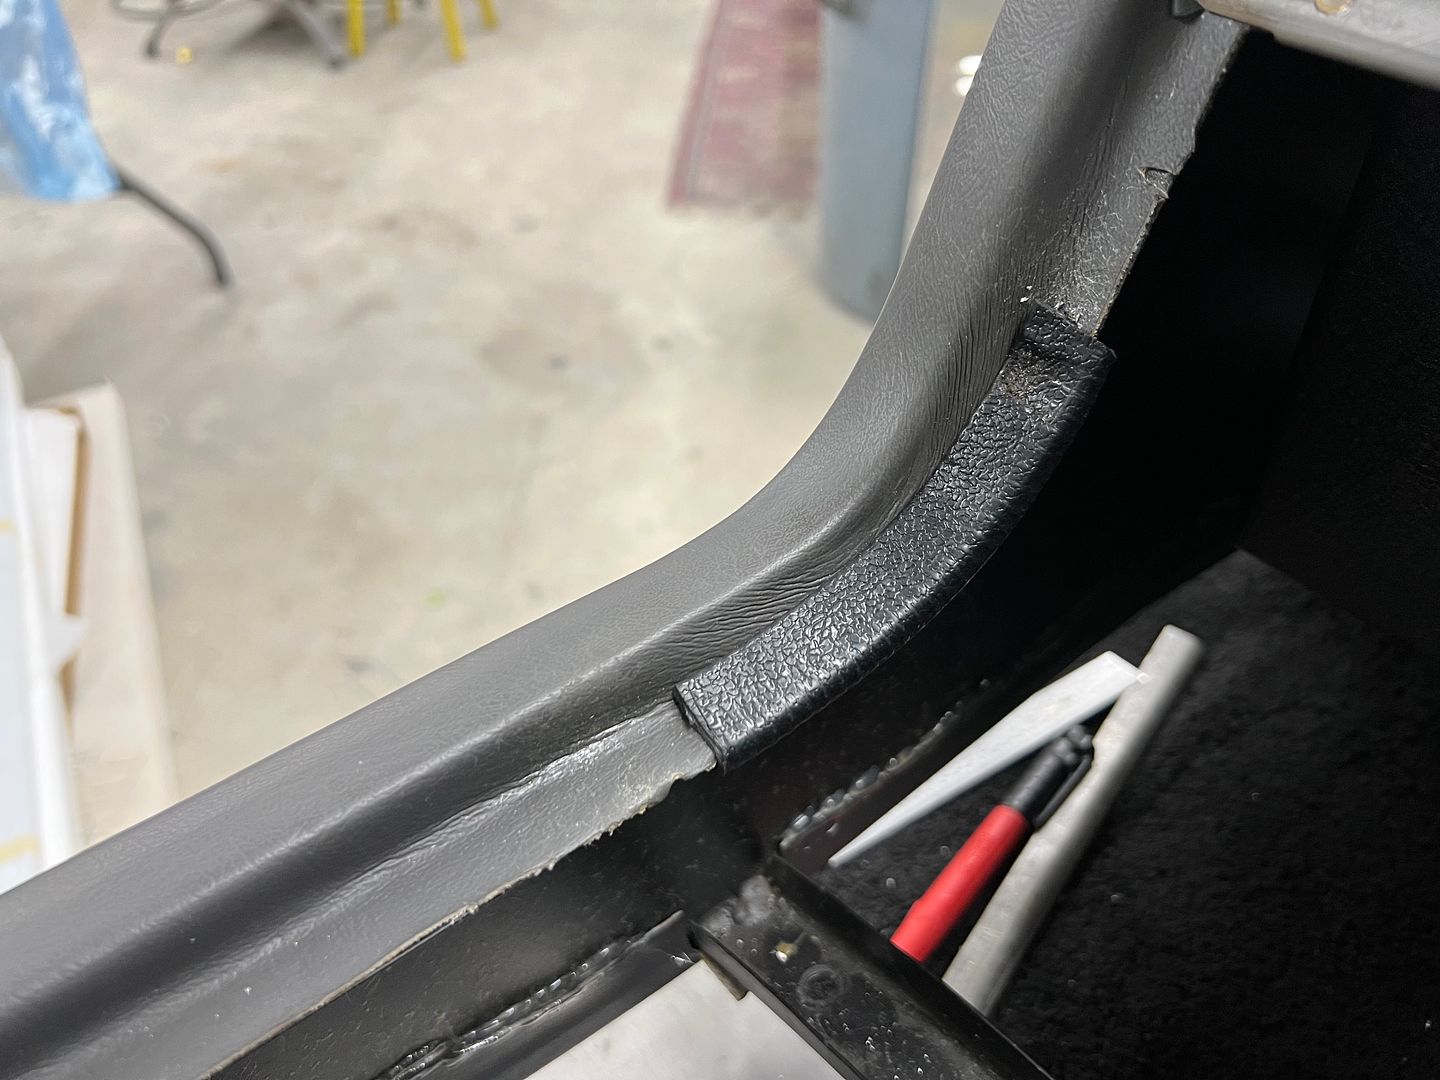 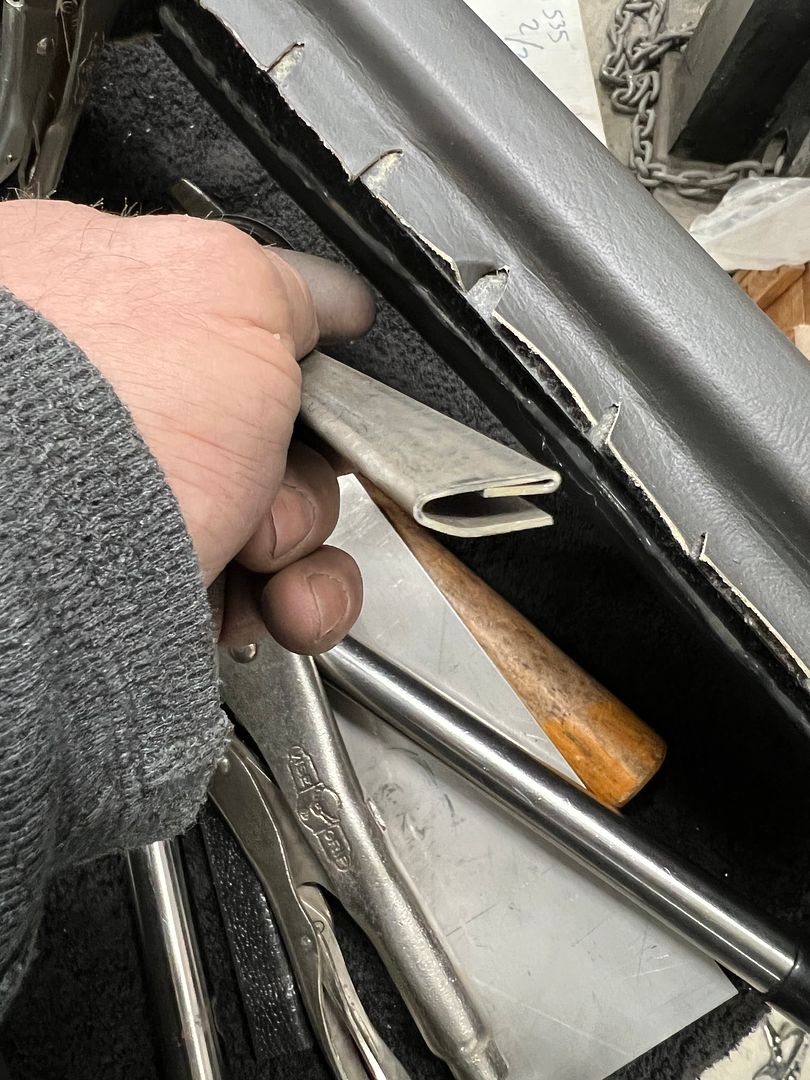 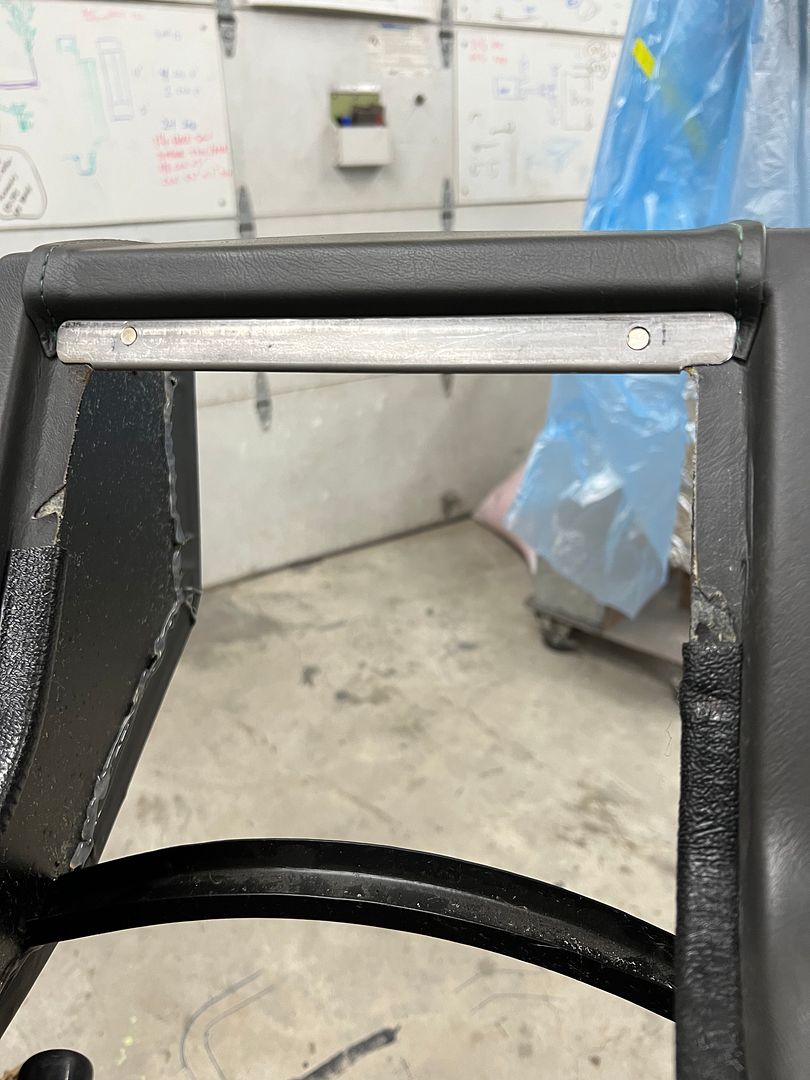  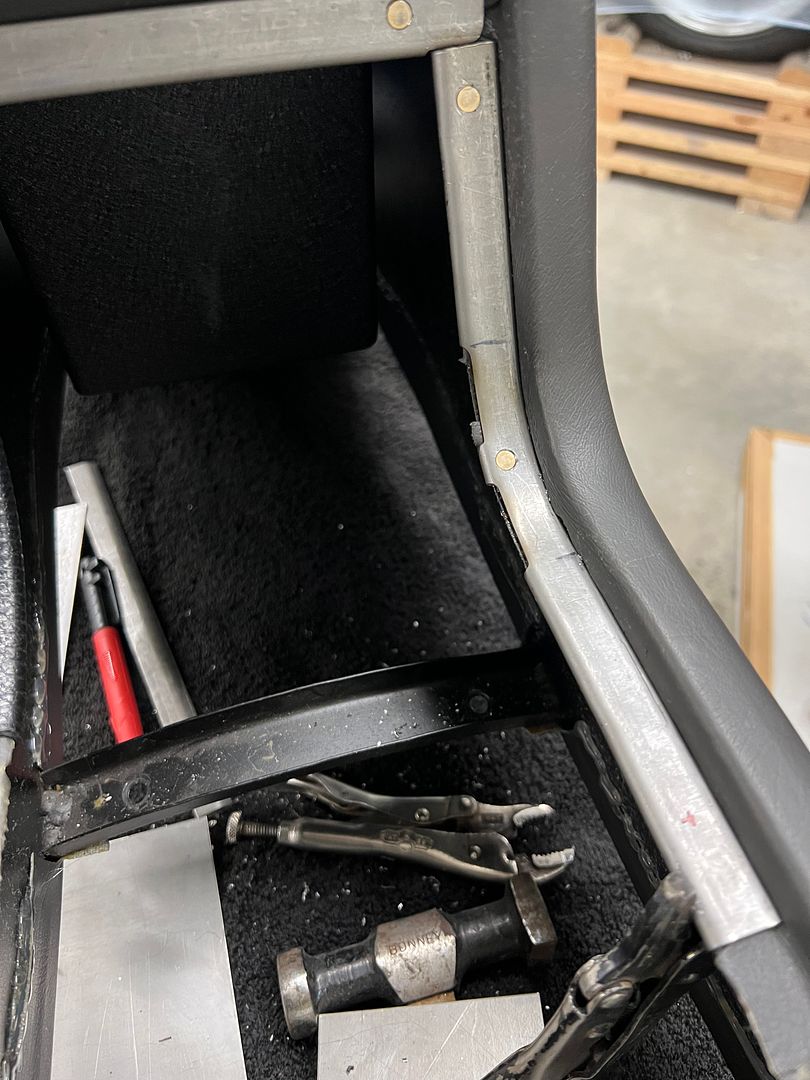 In order to match our dash insert, the console insert will also be oriented horizontally (lines left to right) 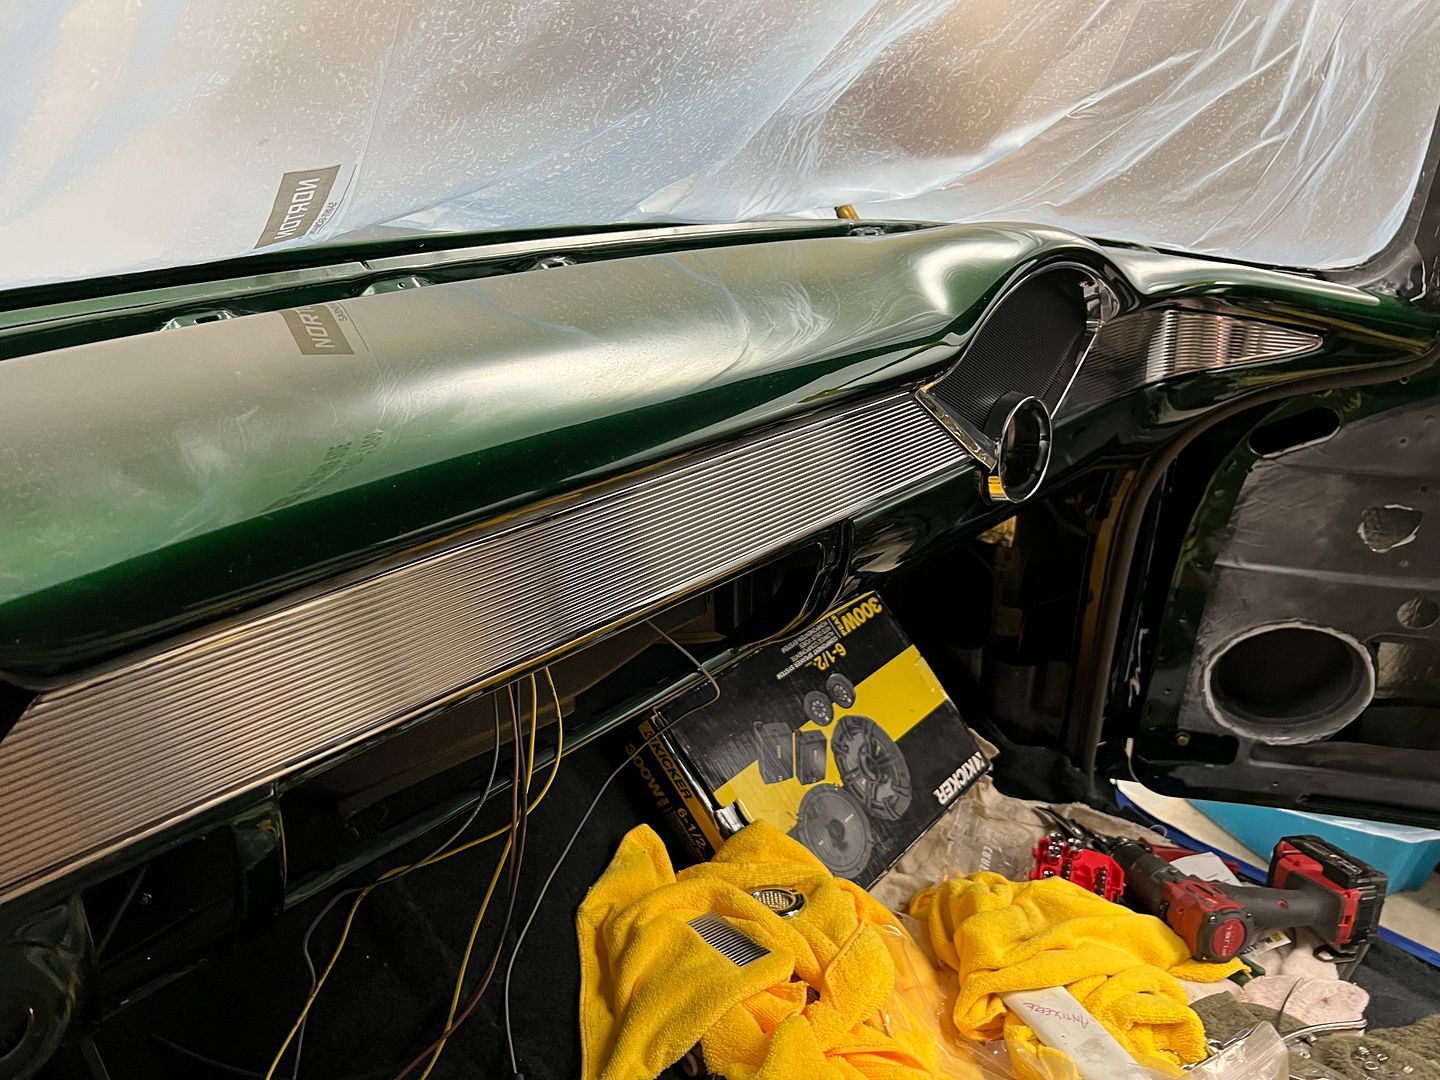 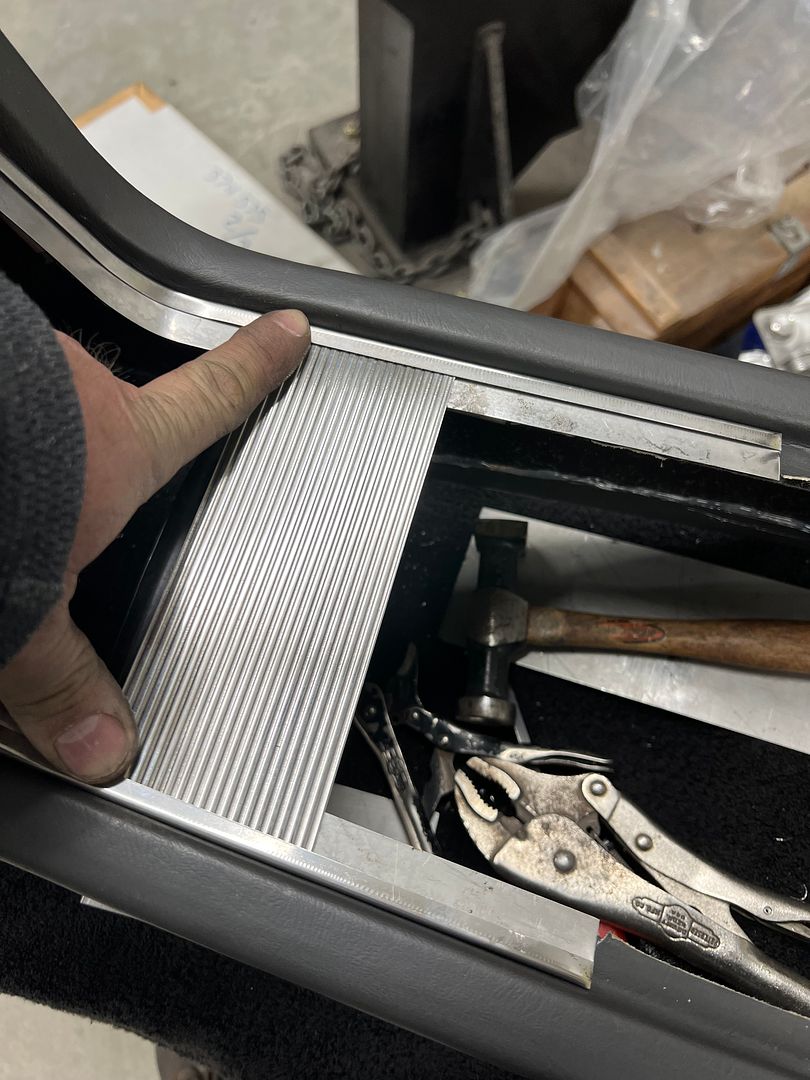 We also got some of the stainless added to the front end. What an alignment pita. Still have some tweaks to do.. 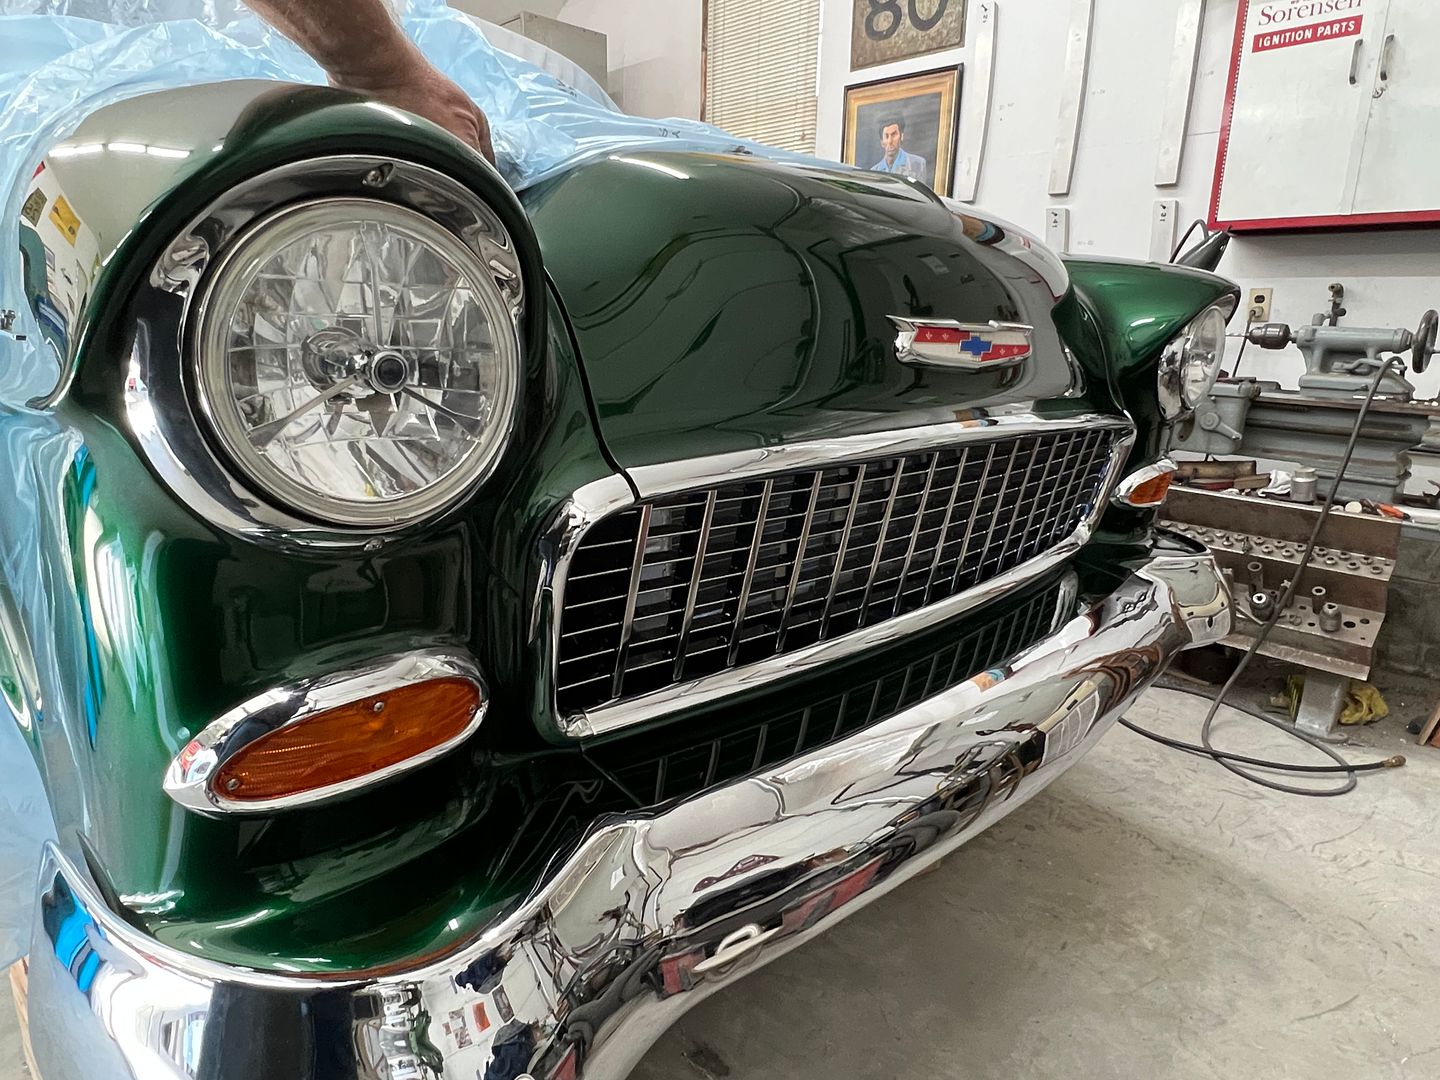
__________________
Robert |
|
|
|
|
03-25-2024, 07:15 AM
|
#1368 |
|
Registered User
Join Date: Sep 2008
Location: Newport, North Carolina
Posts: 613
|
Re: 55 Wagon Progress
Incredible work. This will be one of those cars that you can just look at for hours and still not catch all of the fine details. Love following along with your progress. Thanks for sharing.
|
|
|
|
|
03-26-2024, 01:16 PM
|
#1369 |
|
Registered User
Join Date: Jan 2013
Location: Leonardtown, MD
Posts: 1,633
|
Re: 55 Wagon Progress
Thanks Joe! That's what we've strived for all along, subtle little changes to have people scratching their head...

__________________
Robert |
|
|
|
|
03-28-2024, 01:32 PM
|
#1370 |
|
Senior Member
Join Date: Mar 2011
Location: West Plains, Missouri
Posts: 7,553
|
Re: 55 Wagon Progress
Looking good Robert...Jim
__________________
my build thread: http://67-72chevytrucks.com/vboard/s...d.php?t=459839 Jimbo's long bed step build:http://67-72chevytrucks.com/vboard/s...t=464626<br /> |
|
|
|
|
03-30-2024, 11:43 PM
|
#1371 |
|
Registered User
Join Date: Jan 2013
Location: Leonardtown, MD
Posts: 1,633
|
Re: 55 Wagon Progress
Thanks Jim!
More console work, time to fabricate the hemmed surround for the insert. In order for the surround to be seamless, we need to do some welding. 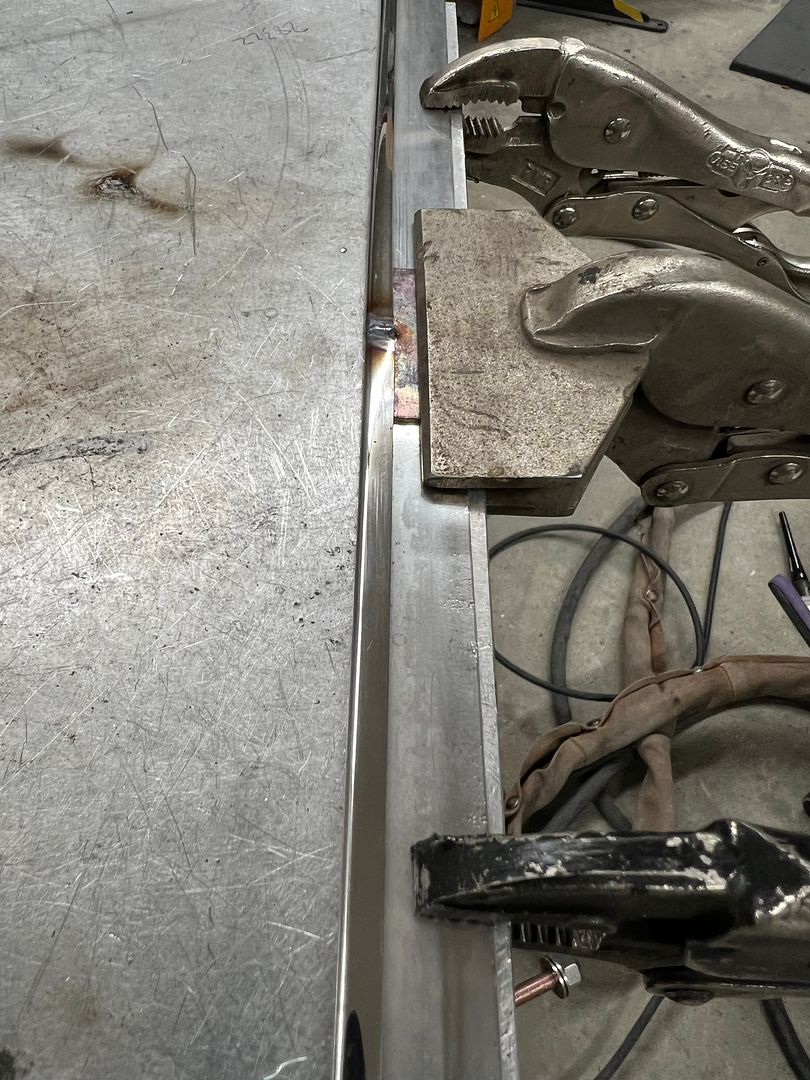 For our corners we relieve the flange and trim the back side to about half the hem width. This gives us less material in the tucks for shrinking in the corners.  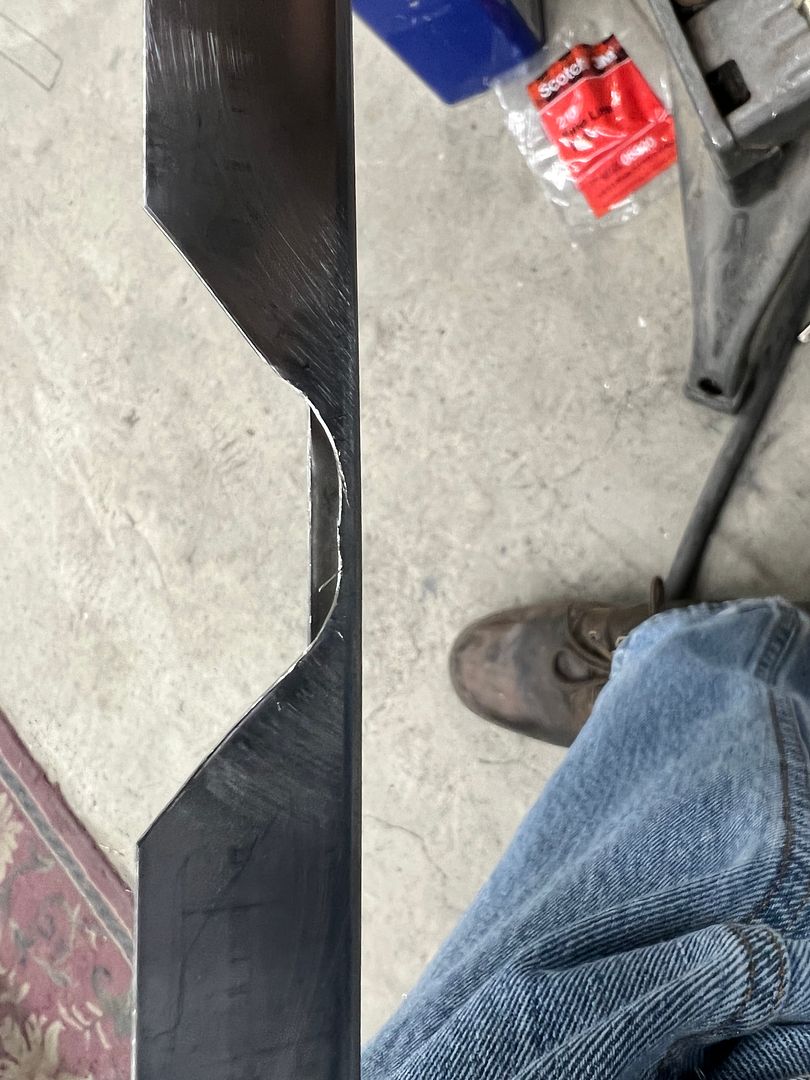 We cut a fake insert out of 18 gauge CRS with rounded corners to use as a hammer form, gives us something to hammer against when we heat up the corners. 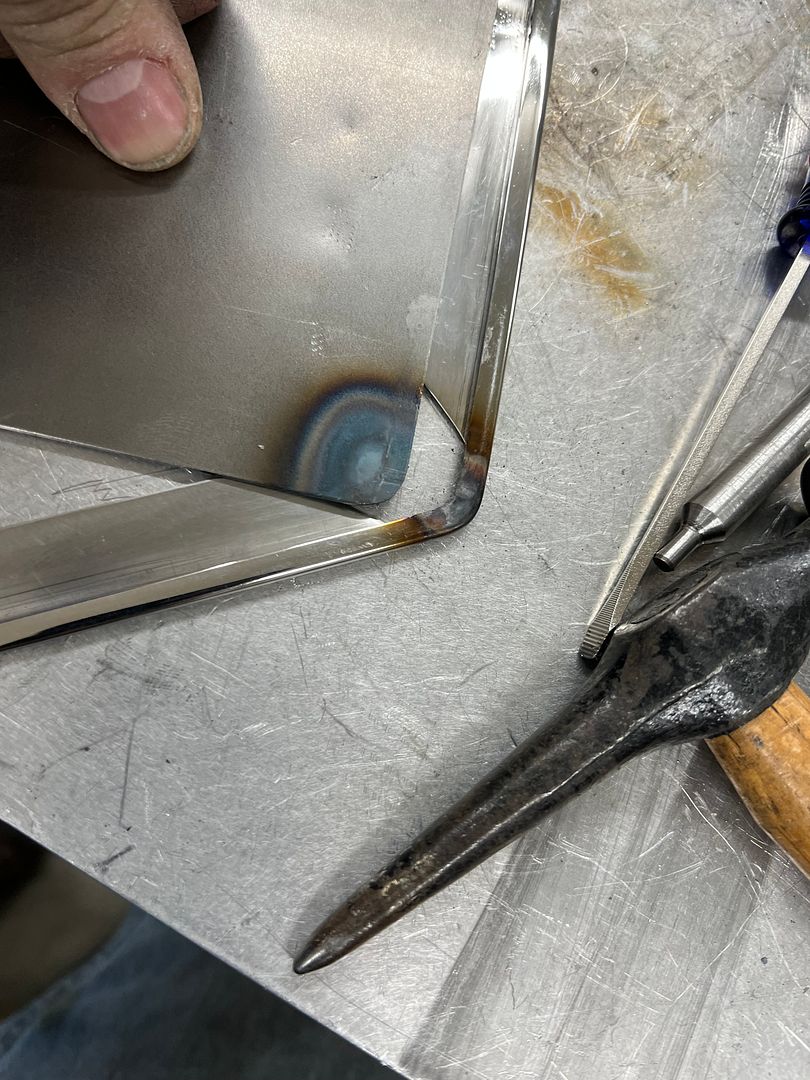 _IMG_8985.png) Everything's a tool, and when the PVC pipe is the only thing in the shop that matches our needed radius, it's what we use for a radius bender. 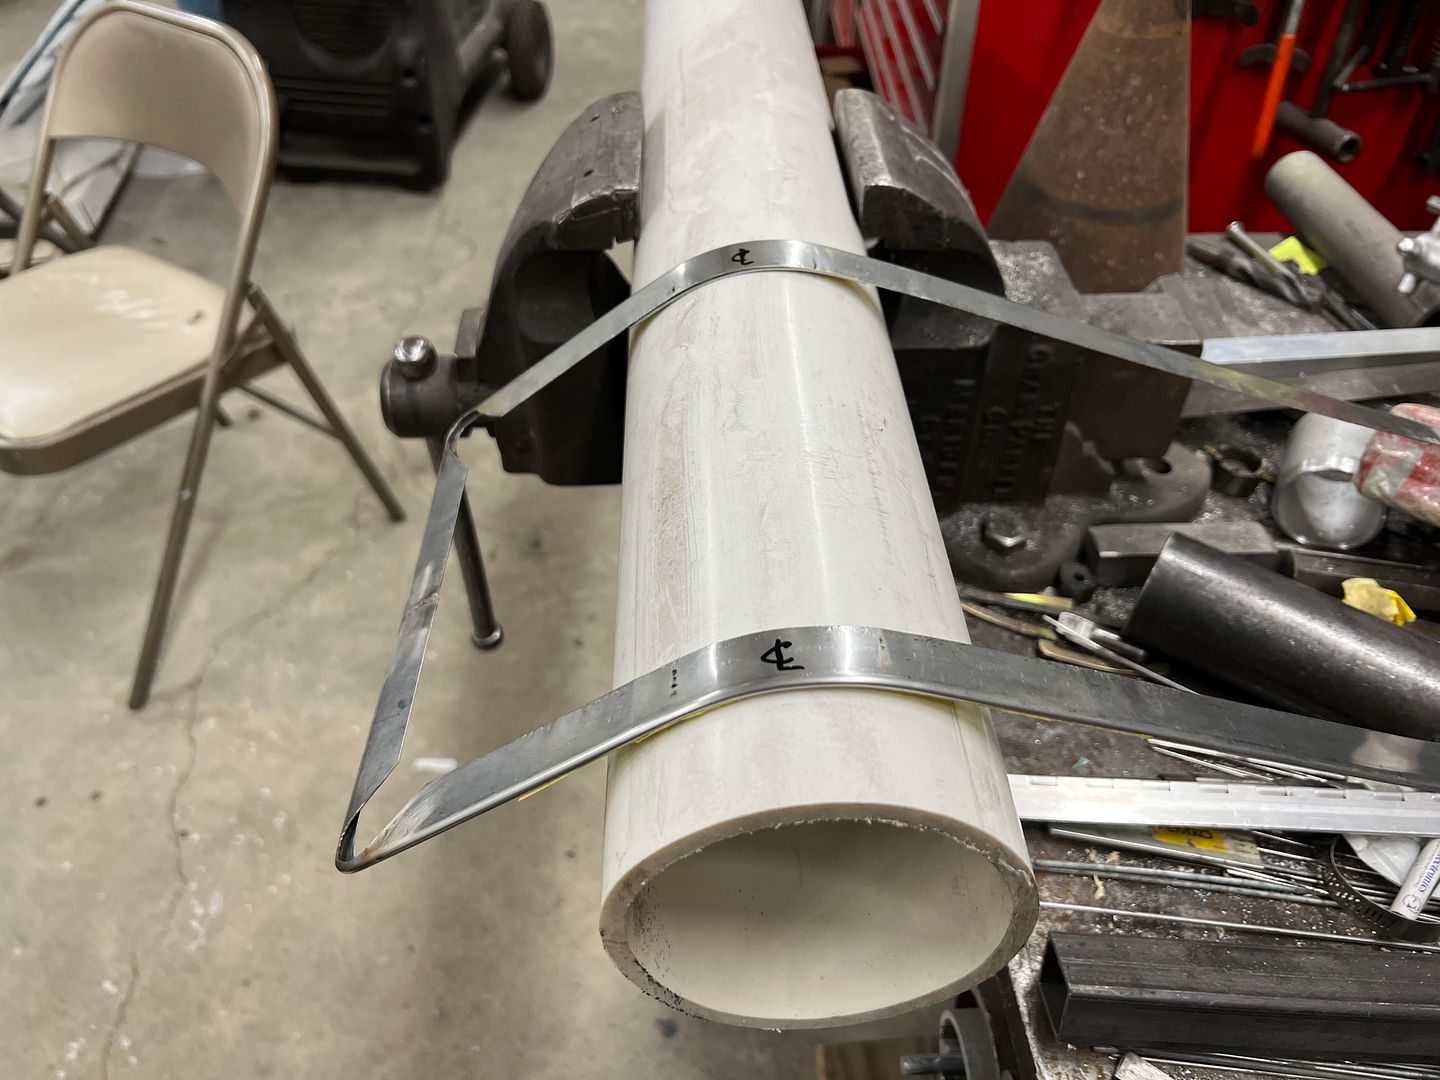 To prevent our hem from closing during the radius forming, some 18 gauge strips were placed in the hem. 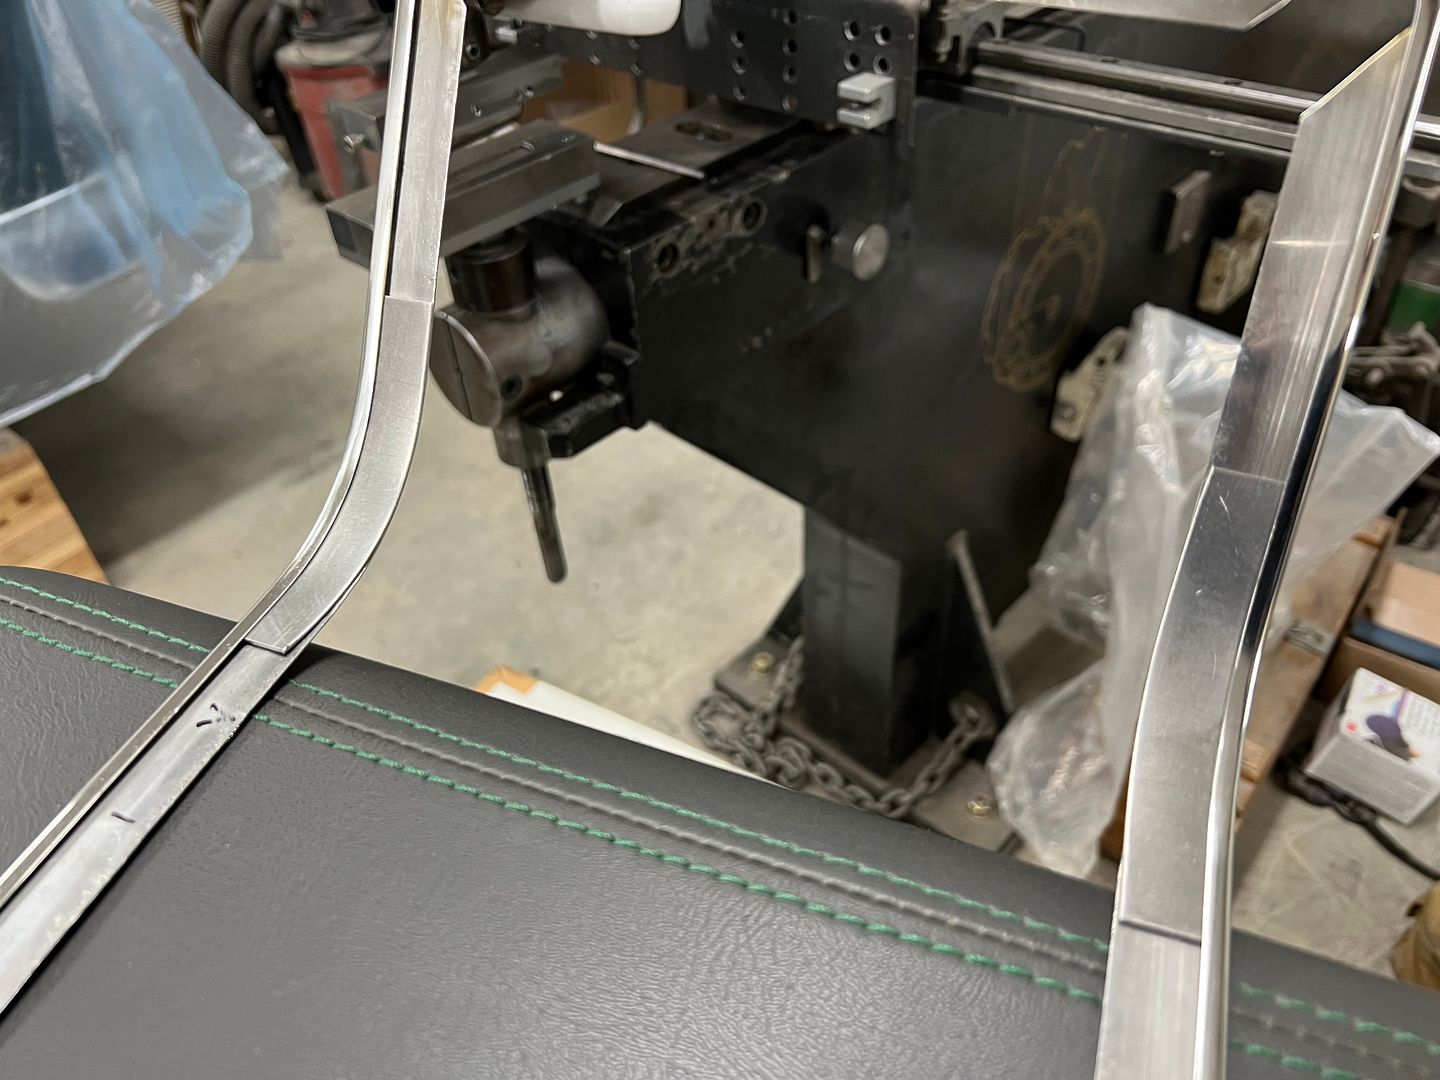 Press studs used to attach to the console and will be hidden underneath the center panel. 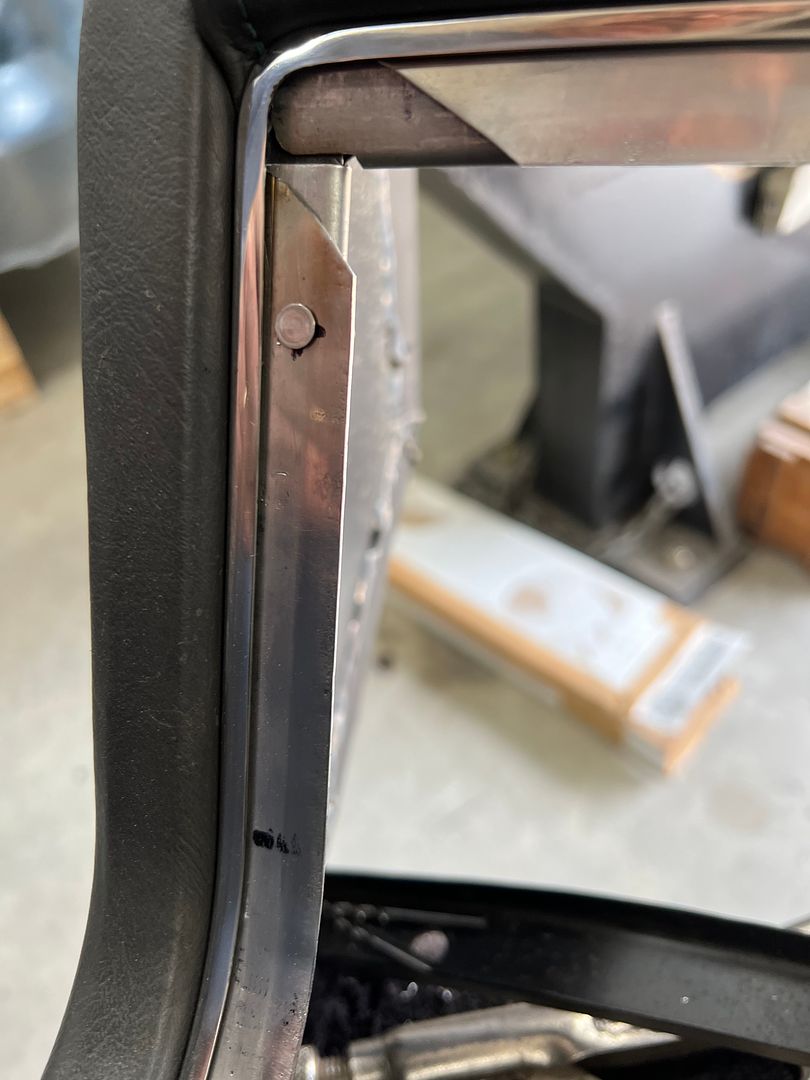 Insert cut out to match our poster board sample, then it gets 800 grit, then 1000 through 5000 foam pads, then buffed.. 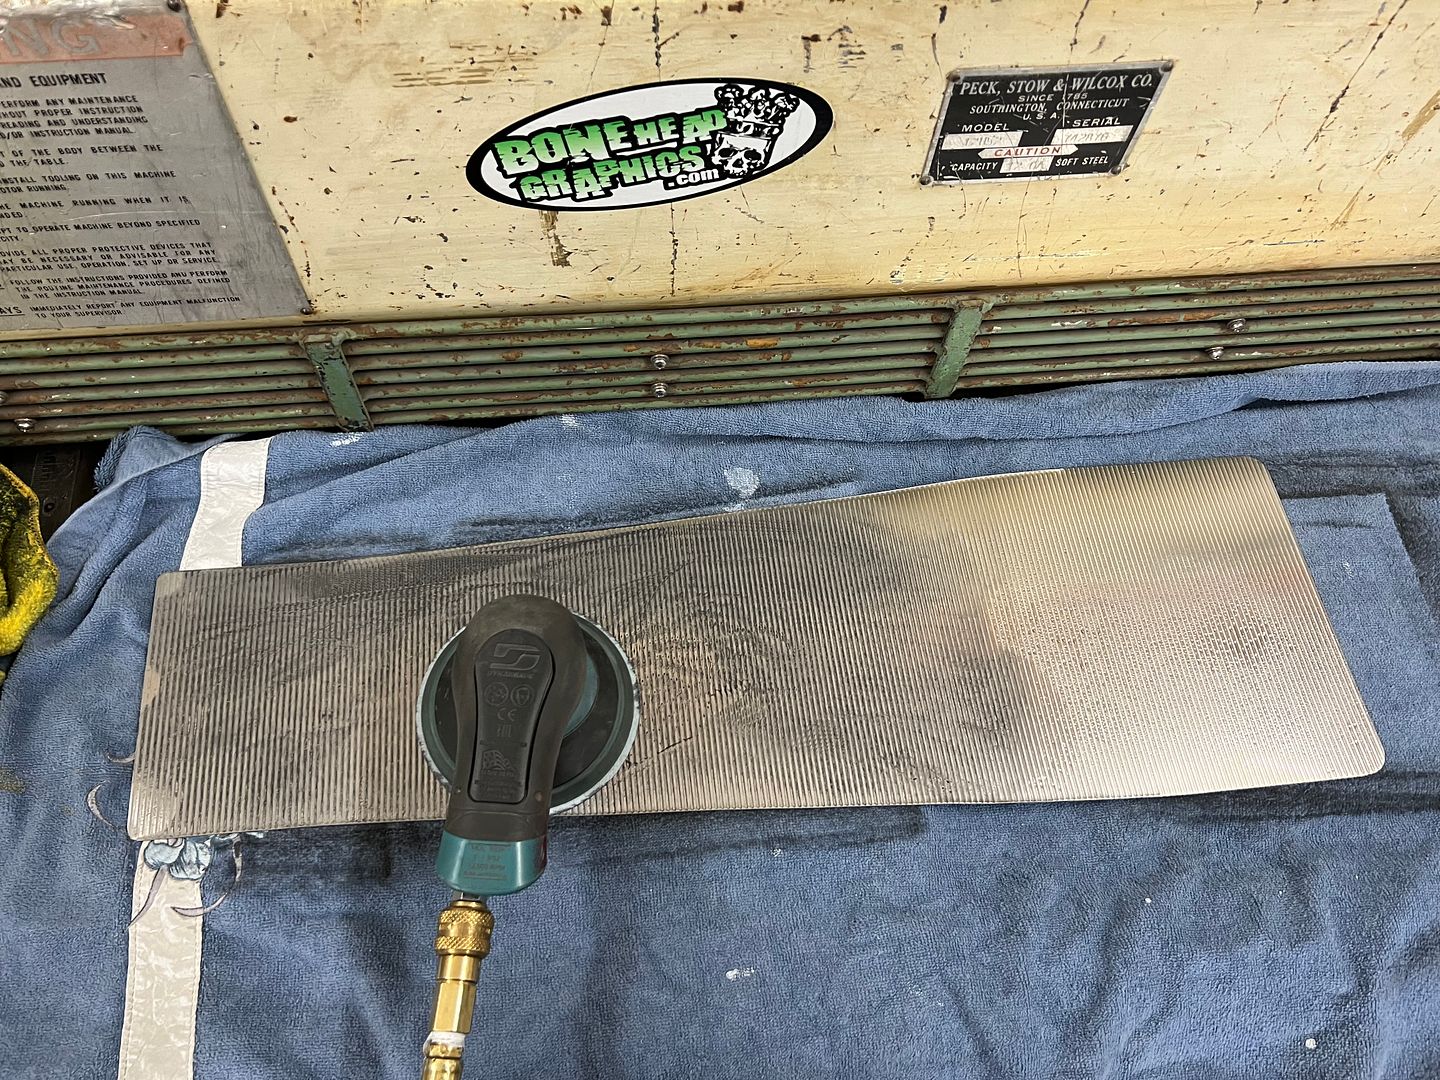 https://youtube.com/shorts/Wlbrs908h...H0gssNlu9xhBkm Then we cover it with frisk film to protect our buffed surface. 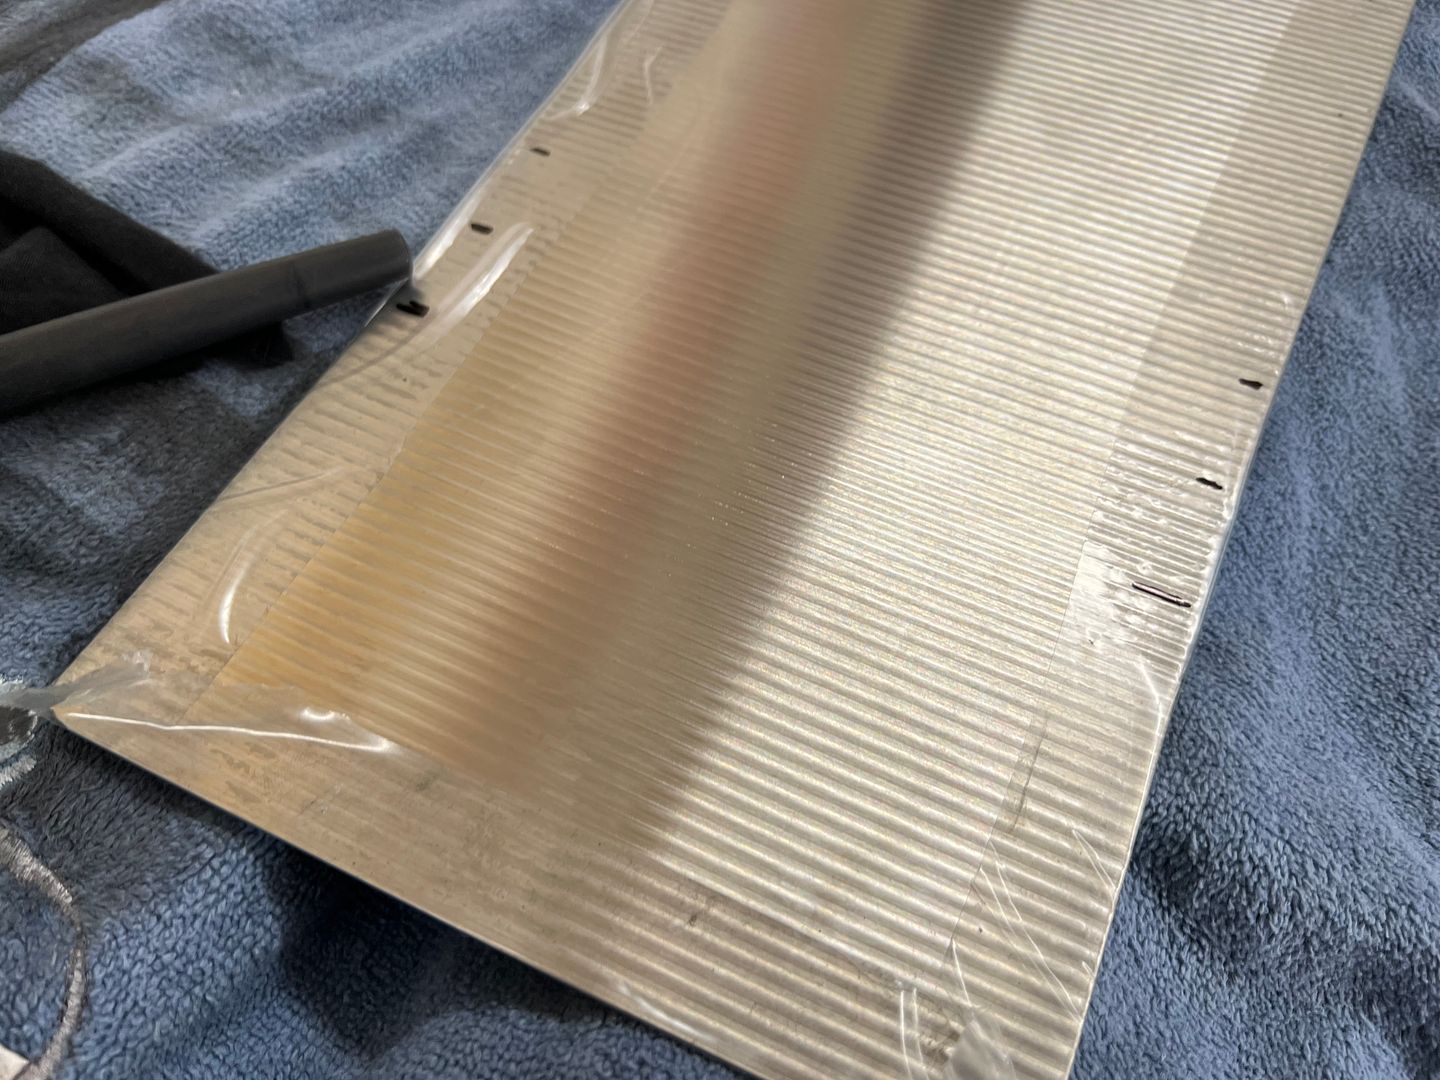 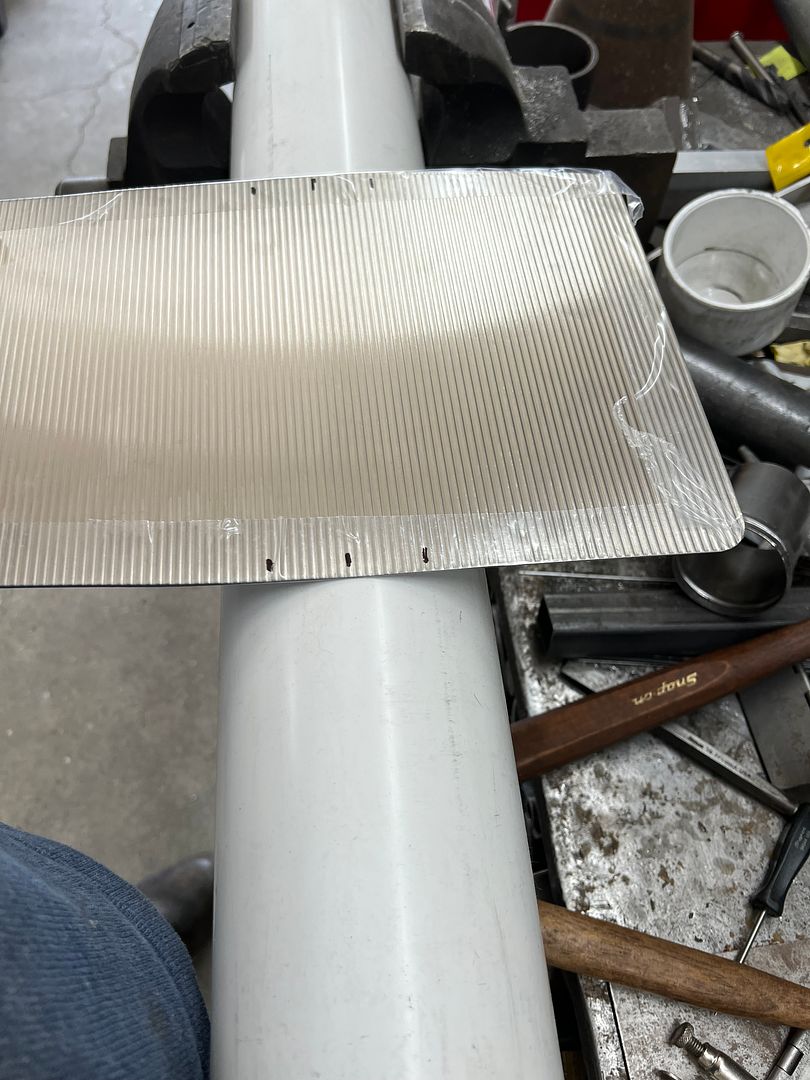 Test fit...  Installing the surround to the filler panel 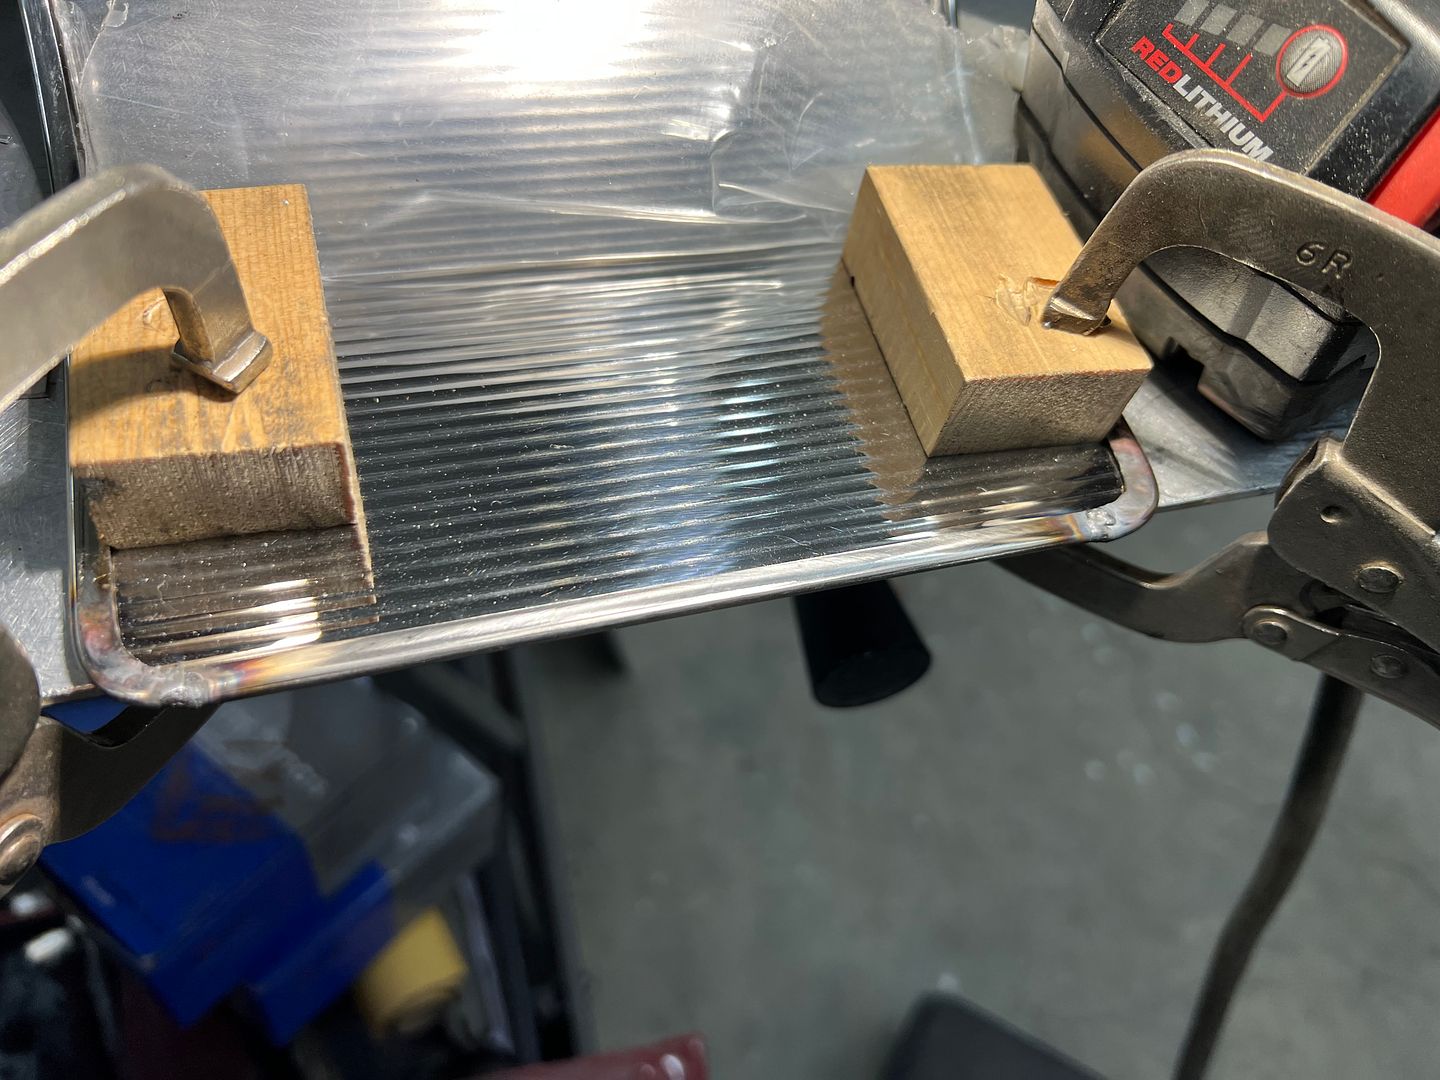 Still have to touch up some areas with the buffer (heat from tacking the press studs) but here's the test fit. 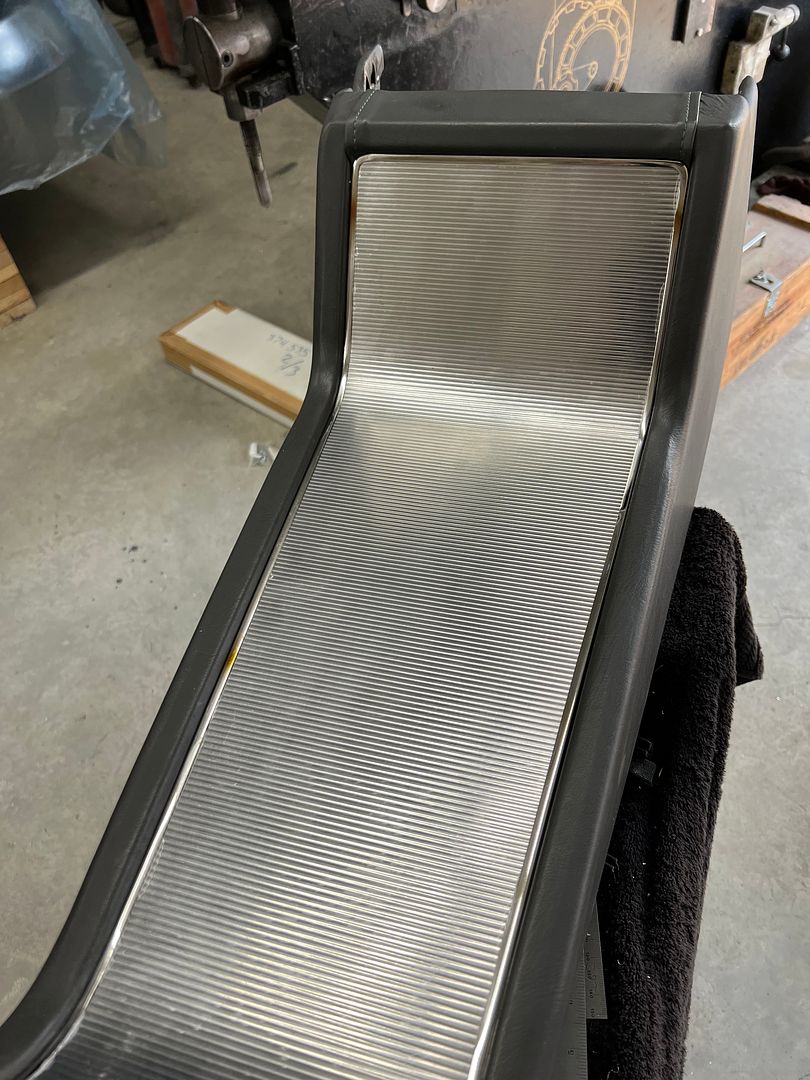 https://youtube.com/shorts/0FhzILNBY...Pzr-q_-0oYgu6S .
__________________
Robert |
|
|
|
|
04-14-2024, 02:37 AM
|
#1372 |
|
Registered User
Join Date: Jan 2013
Location: Leonardtown, MD
Posts: 1,633
|
Re: 55 Wagon Progress
Next step for the console, we need to cut some holes for the shifter. Using the Chevelle style horseshoe shifter, we don't have the factory style brush seals or trim bezel for the center plexi indicator. So lets see what we can come up with first to seal the shifters side arms. I didn't have any brush stock left over from the splice trailer, and window felt wasn't thick enough. But I did have some bulb seal that looked promising. To make a surround to hold the bulb seal, we used a folded piece of 16 gauge stainless, and put an offset to hide as much of the edge trim that holds the seal as possible.
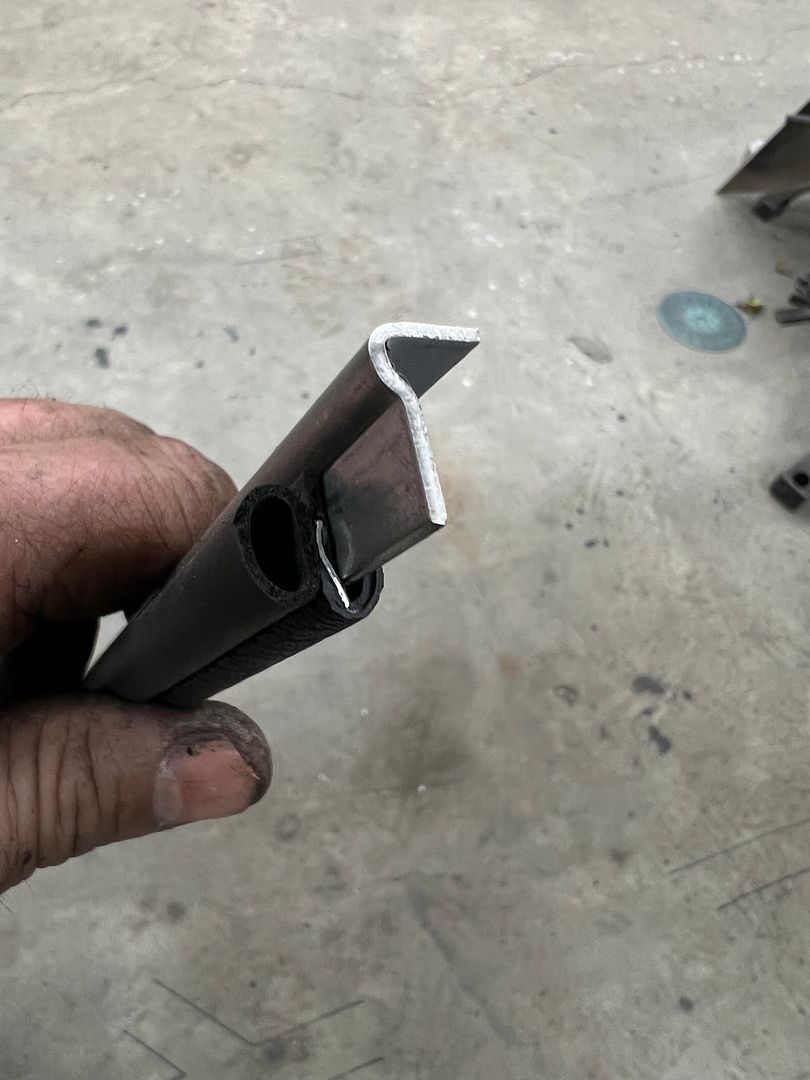 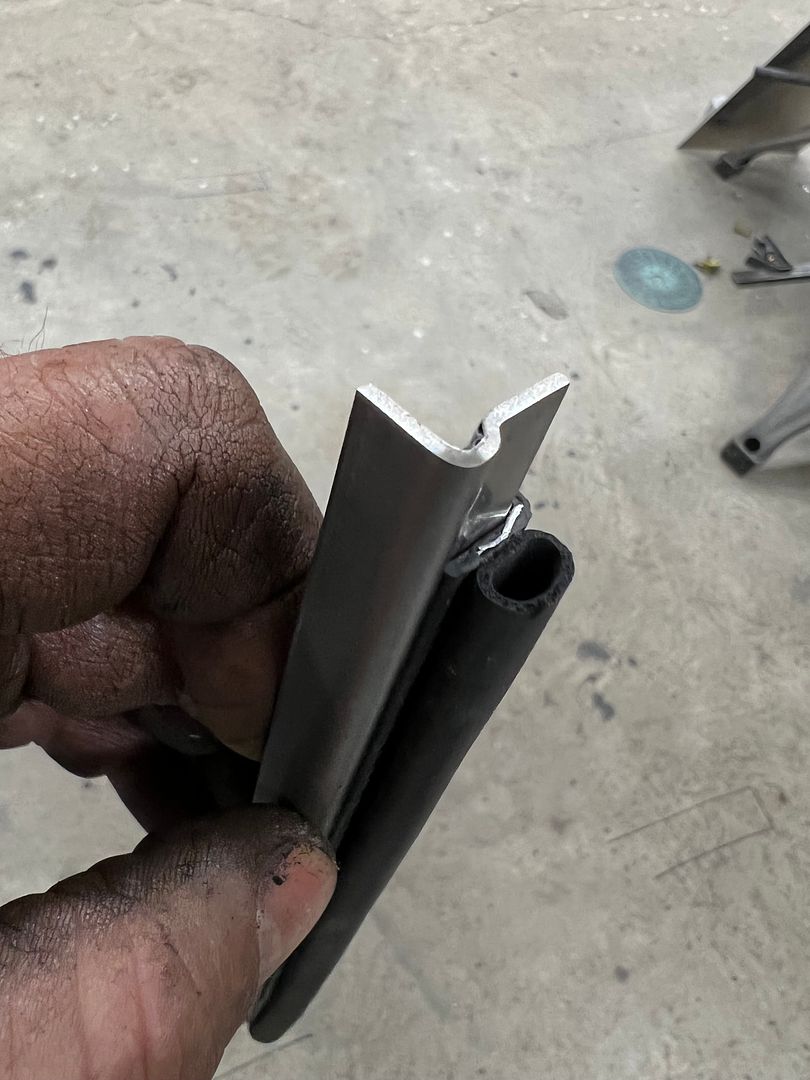 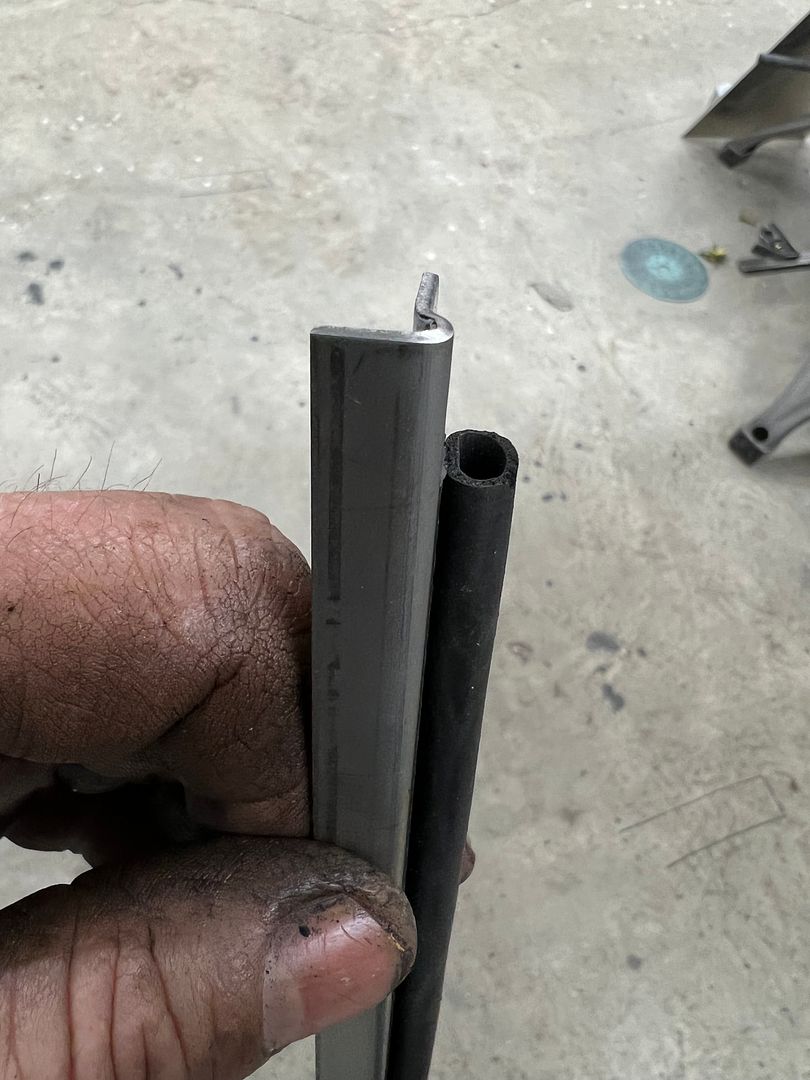 To close off the ends, we used the linear stretch dies in the Lennox... https://youtube.com/shorts/cD1TrEwah...kBU5isw7LFb_dK https://youtube.com/shorts/--rTDf9M2...5Dk3opzAYzdQtD After welding the one end in place, the console was mocked up to get the overall length needed on the shifter seal. https://youtube.com/shorts/N9mJWH6Rj...w6PBdNXo32kGPq 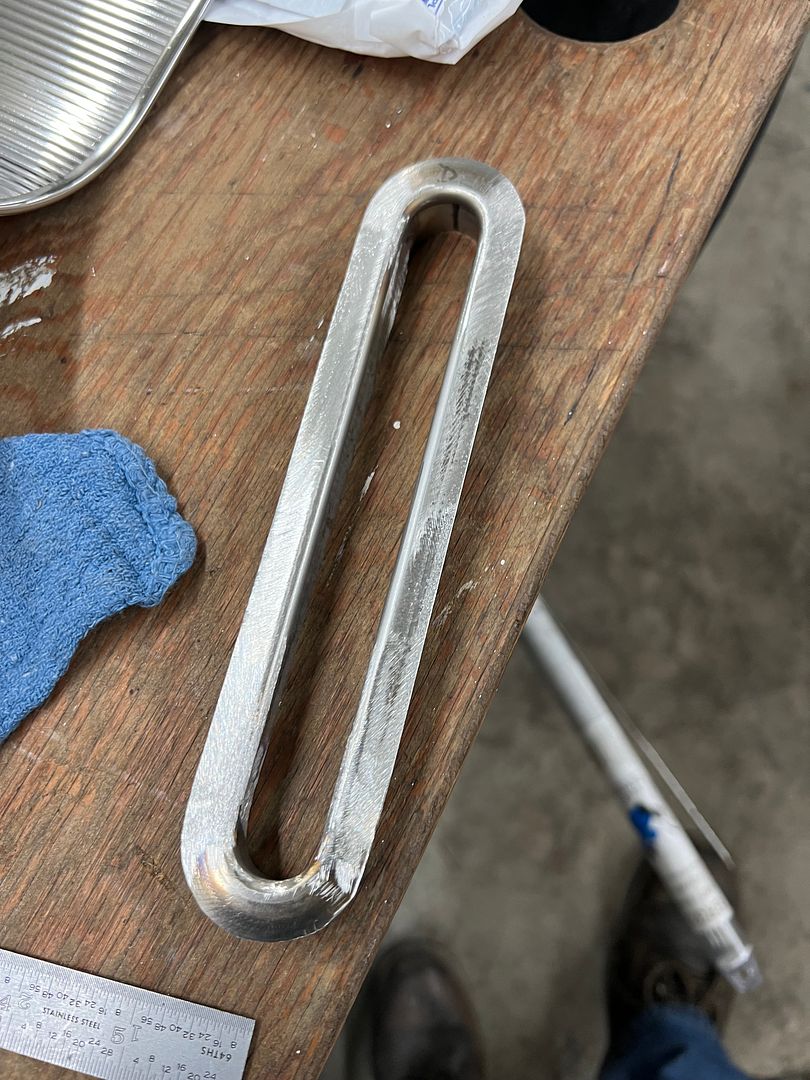 The top flanges will be trimmed to the same width as our polished stainless edge trim surround on the console insert. This one will be used for the passenger side arm, the drivers side will have a wider flange toward the driver to accommodate the shift selector position marking.
__________________
Robert |
|
|
|
|
04-14-2024, 10:24 PM
|
#1373 |
|
Post Whore
Join Date: May 2015
Location: Alabama
Posts: 14,579
|
Re: 55 Wagon Progress
Very nice Robert..!!!...
__________________
Mongo...aka Greg RIP Dad RIP Jesse 1981 C30 LQ9 NV4500..http://67-72chevytrucks.com/vboard/s...d.php?t=753598 Mongos AD- LS3 TR6060...http://67-72chevytrucks.com/vboard/s...34#post8522334 Columbus..the 1957 IH 4x4...http://67-72chevytrucks.com/vboard/s...63#post8082563 2023 Chevy Z71..daily driver |
|
|
|
|
04-14-2024, 10:26 PM
|
#1374 |
|
Senior Member
Join Date: Dec 2009
Location: TN.
Posts: 7,697
|
Re: 55 Wagon Progress
Amazing Progress.

__________________
________________________________________________________________________________________ ____________________________________________ 84 Chevy K-20 63 Impala (my high school car) http://67-72chevytrucks.com/vboard/s...Crew Cab Build |
|
|
|
|
04-15-2024, 09:08 AM
|
#1375 |
|
Registered User
Join Date: Jan 2013
Location: Leonardtown, MD
Posts: 1,633
|
Re: 55 Wagon Progress
Thanks guys! the stretching dies used on the ends took the metal from 16 gauge (.059) to .031 thickness.
__________________
Robert |
|
|
|
 |
| Bookmarks |
| Thread Tools | |
| Display Modes | |
|
|


 Linear Mode

