
|
Register or Log In To remove these advertisements. |
|
|
|
|||||||
 |
|
|
Thread Tools | Display Modes |
 03-25-2012, 08:02 AM
|
#26 | ||
|
Registered User
Join Date: Jan 2003
Location: VA
Posts: 284
|
Re: Here We Go - 65 C10 LWB - For the Kid
Quote:
Yeah, I couldnt not pull those parts, as rare as they seem to be. Unfortunately the water pump pulley was already MIA, so Ill add that to the list. Ive done a little bit of digging, I just need to get the GM pt# and cross reference it. Im hoping it will interchange with a small block pulley. Quote:
__________________
____________________________ |
||

|

|
|
03-28-2012, 11:12 AM
|
#27 |
|
Registered User
Join Date: Jan 2003
Location: VA
Posts: 284
|
Re: Here We Go - 65 C10 LWB - For the Kid
Next up I need to grab the control arms, calipers, rotors and steering linkage from a early 80's C10 they have at the same yard. Probably a good idea to grab the crank pulley from that Camaro as well.
__________________
____________________________ |
|
|
|
|
03-30-2012, 01:07 PM
|
#28 |
|
Registered User
Join Date: Jan 2003
Location: VA
Posts: 284
|
Re: Here We Go - 65 C10 LWB - For the Kid
Notice I posted a thread here:
http://67-72chevytrucks.com/vboard/s...=1#post5284014 About the drop I have planned. I will be doing the frame and chassis first, so that's what I'm concentrating on now (planning and parts gathering). Any comments from the peanut gallery? Anyway project total is up to $331.00 (my fenders, steel grille and cowl panel) Tonight I'm going to spend some quality garage time stripping and polishing the alum grille that came on the truck. Tomorrow morning I'm hitting up a local sale where a guy is clearing out his rental shop and I hope to score an engine stand and hoist if the price is right. SATURDAY MORNING TEAR DOWN will begin! I hope to get the bed apart and off (I'll be stopping by to pick up a new grinder on the way home from work tonight), and hopefully get the front clip out of the way. By Sunday evening I want to have the engine and tranny out and have the frame in the garage so I can start stripping it down for blasting. (Still haven't heard back from my co-worker's husband, so I may just get to grinding).
__________________
____________________________ |
|
|
|
|
03-30-2012, 01:37 PM
|
#29 |
|
Registered User
Join Date: Jan 2003
Location: VA
Posts: 284
|
Re: Here We Go - 65 C10 LWB - For the Kid
Sometimes
JUST SOMETIMES things line up. Of course, at least for me, that usually means that something else will blow up or give up the ghost (just to even things out) BUT
Cruising Craigslist for parts just now, I Called a guy about something totally different and we got to talking. So tomorrow morning Im going to pick up the entire front suspension from an early 80s C10, and he did verify 1.25 rotor width. Rotors, calipers, upper and lower arms, spindles, complete steering setup with steering box, power brake booster and master cylinder and get this I mention to the guy Im looking for an engine hoists. Turns out hes got a foldable 2 ton unit he doesnt need now since he bought a chain hoist. So all that for $200. Score. All I need now is an engine stand and I can really start spinning wrenches, or breaking bolts and knuckles as the case may be. Ill update, with pics since I know you guys live on pics, after the load is secure tomorrow morning.
__________________
____________________________ |
|
|
|
|
03-30-2012, 09:38 PM
|
#30 |
|
Registered User
 Join Date: Mar 2012
Location: Shallow Lake Ontario,Canada
Posts: 201
|
Re: Here We Go - 65 C10 LWB - For the Kid
Looks like a real nice piece to start with. I have a 66 long box fleet painted falt black. The paint we used was Advamced Industrial Coatings #FLPC 135 FLB. Turned out very good, it is an acrylic enamel. When we sprayeded it we used too much hardener by accident but the result was a nice satin finish instead of flat which was good with me. My truck is on the message board under Barn Find.
|
|
|
|
|
03-31-2012, 12:18 AM
|
#31 | |
|
Registered User
Join Date: Jan 2003
Location: VA
Posts: 284
|
Re: Here We Go - 65 C10 LWB - For the Kid
Quote:
Thanks. Actually Im looking for a satin black. Were looking at the Kirker Hot Rod Black.
__________________
____________________________ |
|
|
|
|
|
03-31-2012, 06:04 PM
|
#32 |
|
Registered User
Join Date: Jan 2003
Location: VA
Posts: 284
|
Re: Here We Go - 65 C10 LWB - For the Kid
So today was a pretty good day.
Couple of days ago I was surfing Craigslist for parts. Came across an ad for a 83 C10 frame for sell. Id seen it several times, but never called. Finally called. Turns out the guy selling the frame had actually parted the entire truck out. Hes got a nice 76 Chevy truck that needed the engine crossmember. He was swapping engines, so he figured that was a good time to do it. He bought a running and driving 83 C10 and used the parts from it. He had kept the control arms, spindles, rotors, calipers, steering linkage and box all together. We talked for a bit and I let him know I was going to look at an engine hoist the next day too. He told me he had one of those too. Said hed only used it a couple of times, until he got his movable hoist setup in his shop (mounts to a steel beam on his girders wicked setup). Well turns out Rob is his name and hes a great guy. I probably talked his ear off. Considering hes got the following in his shop behind his house: - '76 Chevy pick up NICE silver / red two-tone, hopped up small block, lowered, short bed- stepside. Nice truck - 66 Chevelle that hes had for a LONG time. His next project - 37 Chevrolet Pick up His grandfather bought it YEARS ago. Rob and his Dad fixed it up back in the 80s, and then later Rob himself added 87 Vette suspension front and rear, small block, etc. He said its going to be a family project to update it as hes gathering parts. Of course this thing is already nice. Driver right now. And of course I didn't have my camera. So Rob hooked me up. I got: - Spindles - Rotors - Calipers - Steering linkage - Booster and master cylinder - Steering box - Upper and lower control arms - NICE 2 ton engine hoist All for $200. Heres the haul:   Got it to the house and started tearing the assembly apart. He even threw in the shocks! LOL  After a bit heres the pile of parts in the garage: (NO this isn't my living room. That's the old rug my wife wanted to throw out. I used it to park my motorcycles on and work on them. Carpet is much better than cement.........   I had planned on starting to tear the old girl apart today. Mother Nature started having other ideas. JUST got the parts and tools in the garage before the bottom dropped out tomorrow. Tomorrow is supposed to clear. Heres the old girl waiting for her last voyage under her own power for a while. I plan to yank the bed, front clip and drivetrain tomorrow. Will make a dolly for the cab and get it off next weekend. Start on the frame as soon as thats done: 
__________________
____________________________ |
|
|
|
|
03-31-2012, 08:06 PM
|
#33 |
|
Senior Member
Join Date: Mar 2011
Location: Tucson, Arizona
Posts: 2,061
|
Re: Here We Go - 65 C10 LWB - For the Kid
It looks like you got a great deal. I also use a couple of old area rugs under my truck while working on it. At my age it's hard enough to get up and down off the floor, I can use all the help I can get.
 Good luck with your truck. Good luck with your truck.
|
|
|
|
|
04-01-2012, 01:39 AM
|
#34 |
|
60-66 Nut
 Join Date: Mar 2007
Location: Coeur d'Alene, Idaho
Posts: 23,246
|
Re: Here We Go - 65 C10 LWB - For the Kid
I agree, you got a good deal on all that.
__________________
Power Steering Box Adapter Plates For Sale HERE Power Brake Booster Adapter Brackets For Sale '63-'66 HERE and '67-'72 HERE and '60-'62 HERE and "60-'62 with clutch HERE Rear Disc Brake Brackets For Sale. Impala SS calipers HERE Camaro Calipers HERE D52 Calipers HERE 6 Lug HERE Hydroboost Mounting Plates HERE |
|
|
|
|
04-01-2012, 08:54 PM
|
#35 |
|
Registered User
Join Date: Jan 2003
Location: VA
Posts: 284
|
Re: Here We Go - 65 C10 LWB - For the Kid
So I started teardown today. Had to run around this morning and ended up picking up an engine stand locally and run some errands. FINALLY was able to pull the old girl in front of the garage and get started.
The victim at the operating table:  First up was getting the bed off. The original owner had replaced the old rotted wood with some kind of plywood that may be treated with some kind space age protectant. This stuff was TOUGH. Whoever had replaced the wood also used some new bolts at least. And of course they added nuts on the bottom, and basically it was a huge pain to try and get these off. After fighting the bed a bit, and ripping some of it out with brute force, I decided to try a different plan of attack. Got out the circular saw and simply cut out the wood surrounding the bolts. Before deciding to get out the circular saw and the sawzall:  Success. Me 1 Truck 0  Truck looks pretty good underneath  The previous owner, who put some money into the truck to get it on the road, obviously had the brakes worked on. See the custom bent brake lines that a mechanic installed for him? At a premium price Im sure.  This is what I did with the saw:  Unplugged the wiring harness, ran it towards the cab, and got ready to pull the bed. Ended up fighting the tailgate a bit, but my son and I got the bed moved to its new home while the frame gets worked on:  A little lighter in the back:   Looks like the frame will clean up nicely.    This part of the cab looks pretty nice. Im sure theres something hiding I wont like:  Started taking off the RH fender, and looks like a small hole in the front frame horn, where the ground bolt is attached. Anyone seen anything like this? Ill check this out once I get the frame alone and in the garage:  Somewhere along the line a previous owner used something that might have been advertised as undercoating. I think its the stuff that they put on the space shuttle to protect it during reentry. All the bolts came out but one. Ended up having to use the sawzall to get the fender off. Nice try old girl, but I aint giving up that easy Me 2 Truck 0  Some rust on the cab where the fender bolts, but I expected that. It is 47 years old:   So my grille support panel has a good bit of rot. And of course all the bolts but ONE came out without too much drama. The bolts that hold the small metal brace from the grille panel to the bottom of the core support decided to put up a fight. One broke off after some persuasion. The other simply rounded off. Ended up using my dremel tool and a cut off wheel (couldnt find my grinder cant remember who I loaned it too) to cut up the grille support panel around that bolt. Ill need a new grille support panel anyway. Me 3 Truck 0 The remnants of the grille support panel and the LH fender:  A little lighter once again:  Looks like Ill need a LH inner fender as well, and Ill have to get a core support or possibly patch this one:   Cab doesnt look horrible.  Didnt get the engine out like I wanted. But I made decent progress for a few hours work. Drove the truck back up to its parking spot and Ill crank it back up next weekend. It has begun.
__________________
____________________________ |
|
|
|
|
04-01-2012, 11:35 PM
|
#36 |
|
Registered User
Join Date: Dec 2011
Location: Alaska
Posts: 405
|
Re: Here We Go - 65 C10 LWB - For the Kid
Great progress! Keep it up and your engine hoist and suspension parts were a great deal. Your truck looks to be in pretty good shape overall.
__________________
C@rnut001 (Owen) Alaskan Members Check In http://67-72chevytrucks.com/vboard/s...22#post5094422 http://67-72chevytrucks.com/vboard/s...18#post6778618 |
|
|
|
|
04-02-2012, 12:23 AM
|
#37 | |||
|
Registered User
Join Date: Jan 2003
Location: VA
Posts: 284
|
Re: Here We Go - 65 C10 LWB - For the Kid
Quote:
Quote:
Quote:
Yeah Ive definitely seen trucks a lot worse off than ours on here, and many of them end up looking great.
__________________
____________________________ |
|||
|
|
|
|
04-02-2012, 10:08 PM
|
#38 |
|
Registered User
Join Date: Jan 2003
Location: VA
Posts: 284
|
Re: Here We Go - 65 C10 LWB - For the Kid
Since I don't get home from work early enough to get any real wrenching done (I plan on working on the frame inside the garage during the evenings when my wife is at work) I finally decided to test out a little science project Ive been thinking about for a bit.
Im sure most of you have heard of Electrolysis Rust Removal if not, google it, I even think there is a thread or two here about it. Well the idea to be able to stripping parts while Im at work or doing other stuff is just way too appealing now. I heard of this process long ago, and never did anything with it. On the way home, grabbed some 2ft rebar sections, and some washing soda (NOT baking soda laundry aisle at Kroger, Arm and Hammer Washing Soda a staggering $3.50 for a good size box. I used an old plastic tub that was originally a housewarming gift for us when we bought this place, from my realtor, of course it was filled with ice and beer as delivered. So I drilled a few holes, used rebar wire to secure 5 pieces of rebar inside the bucket through these holes. I then ran some wire from the first wire connection off the rebar to the last (dont complete the circle) and used wire ties to hold it together. Took a 4x4 I use for a wheel chock, an anvil, mixing drinks and to keep the kid and dog in line (yeah you can tell Im high buck, high tech around here), and used rebar wire to hang the rusty, nasty upper control arm from my donor truck. Hooked my battery tender up, but its too smart and had to borrow an old normal battery charger from my neighbor. Heres what the control arm looked like:  Heres my high tech rust removal rig:  You can see the wire connected to the rebar. Connect the NEGATIVE lead to the part you want cleaned, and positive to one of the rebar pieces. Throw the water and washing powder in, and wait for the bubbles. Thats how I know my charger wouldnt work, no bubbles again..you have to keep up, its high speed, low drag around here. Got it hooked up the borrowed charger and magic bubbles started immediately:  Calgon take me (err I mean the rust) away:  Ill let you know what it looks like when I get home tomorrow around lunch time.
__________________
____________________________ |
|
|
|
|
04-03-2012, 02:35 PM
|
#39 |
|
VA72C10
 Join Date: Mar 2008
Location: Midlothian, VA
Posts: 25,269
|
Re: Here We Go - 65 C10 LWB - For the Kid
Nice progress and some great scores!!! I've seen those rust removal setups work wonders...
__________________
Looking for a 67-72 swb or blazer project in or around VA. 
|
|
|
|
|
04-04-2012, 09:50 AM
|
#40 |
|
Registered User
Join Date: Jan 2003
Location: VA
Posts: 284
|
Re: Here We Go - 65 C10 LWB - For the Kid
Ive searched and searched, and I have a ton of threads saved, and have seen how many members here have built their own contraptions for removing the cab and also for storing / moving the cab around.
Since the first phase of my build involves the chassis / frame, once the engine is out Ill be removing the cab. Because of space constraints, the cab will be stored outside. What I planned on doing was using a homebuilt 4x4 and bracket setup, bolted to my engine hoist, to remove the cab. Since Ill be storing the cab until the frame / chassis is done, and Ill be storing outside, I planned on keeping the doors on. For simplicity sake of moving the cab, I figured that I could mark the hinge alignment, then remove both doors, then remove the cab. I had planned on leaving the rest of the interior intact. Once the cab is on the dolly and in its resting place, I can put the doors back on. Keeping the cab weather tight. Anyone see any issues with trying this? Next up Im planning on building a movable cart to hold the cab. This cart will need the big casters so that I can move it into my backyard for storage. Ive seen many homebuilt carts here, and I figured on building mine to not only store and move the cab now, but be able to have the cab on this dolly when I start body work (welding / cutting etc). Heres a diagram of what I plan on building  Ill put the big casters from Harbor freight on the bottom of each leg. The dolly will be built out of pressure treated 4x4s. Ill get the width dimensions before hand, so I can simply take some lag bolts and washers and actually bolt the cab to the dolly, using the cab to frame mounts, when we put it on. That way no worries about pushing it around the yard, storing it etc. Any glaring holes in this plan?
__________________
____________________________ |
|
|
|
|
04-04-2012, 10:05 AM
|
#41 |
|
Registered User
Join Date: Sep 2011
Location: Cypress, TX
Posts: 148
|
Re: Here We Go - 65 C10 LWB - For the Kid
how did the electrolysis work? I've been planning on setting up a tub for my control arms since they have so many funny angled surfaces. Everyone I've heard talk about it seemed very impressed. The people that weren't were people that didn't understand that this also works on a "line of sight" principle, and only used one rod on one side of the tub. Looks like you've got that figured out though.
|
|
|
|
|
04-04-2012, 01:43 PM
|
#42 | |
|
Registered User
Join Date: Jan 2003
Location: VA
Posts: 284
|
Re: Here We Go - 65 C10 LWB - For the Kid
Quote:
I loaded all the donor parts into my Dakota and hosed them off at the local car wash. I threw one of the rotors in my mix last night. Ill take pics and see how it worked tonight. Im sure I need to clean off the rebar by now.
__________________
____________________________ |
|
|
|
|
|
04-04-2012, 11:22 PM
|
#43 |
|
Registered User
Join Date: Jan 2003
Location: VA
Posts: 284
|
Re: Here We Go - 65 C10 LWB - For the Kid
I'll post some pics of the parts I cleaned in the electrolysis rig tomorrow.
Heres the thing, using rebar for this, the rust is drawn to the rebar. So after enough time, the rust coats the rebar, and the rebar pretty much becomes useless for the process. So youd have to replace it fairly often. Ive also seen people use graphite in this process, as it doesnt draw the rust to it, but it still completes the process. In the meantime, I ran across this stuff: http://www.homedepot.com/h_d1/N-5yc1...&storeId=10051 Klean-Strip Phosphoric Prep and Etch. $15 a gallon at the local Home Depot. Check the pictures out one of the guys posted over on the Camaro forum: BEFORE:  AFTER: 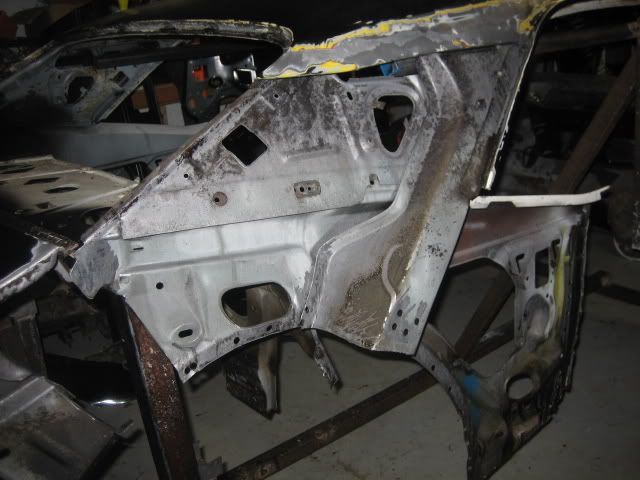 While this stuff does the same thing as muriatic acid, this stuff isnt quite as potent. It also etches the metal as well. Im cutting it about 3:1 with water and its in a covered plastic tub with one of the donor coil springs and the other upper control arm.
__________________
____________________________ |
|
|
|
|
04-06-2012, 08:31 AM
|
#44 |
|
Registered User
Join Date: Jan 2003
Location: VA
Posts: 284
|
Re: Here We Go - 65 C10 LWB - For the Kid
UPDATE: Pulled the old coil spring and the lower control arm out of the Etch and Prep solution last night, just to get a peek. Much of the springs rust is gone. The control arm looks 100% better. Im going to leave it another night or two and see what it looks like. Even if it takes three or four days to clean em, its well worth it to me.
The solution is reusable. Its not eating up my time while its sitting in the container, and I can work on something else. Not to mention I dont have to wire wheel, grind or sand. Ill be doing plenty of that before too long anyway. Also got a line on a set of used 2.5 drop spindles (for a 73-87 so they fit right in with my planned swap) for a good price. That definitely helps the cause.
__________________
____________________________ |
|
|
|
|
04-06-2012, 01:50 PM
|
#45 |
|
VA72C10
Join Date: Mar 2008
Location: Midlothian, VA
Posts: 25,269
|
Re: Here We Go - 65 C10 LWB - For the Kid
good deal!
__________________
Looking for a 67-72 swb or blazer project in or around VA.
|
|
|
|
|
04-06-2012, 11:59 PM
|
#46 |
|
Registered User
Join Date: Jan 2003
Location: VA
Posts: 284
|
Re: Here We Go - 65 C10 LWB - For the Kid
Well had a quiet night tonight so time to cut myself on 47 year old sheet metal and cuss engineers likely retired and playing golf somewhere.
Decided to get it ready to yank the drivetrain in the morning. Tried to take the entire inner fender / radiator support together, she fought me again. So I yanked the inner fenders one by one and persuaded the radiator core support mounts to loosen up. Thats me again for those keeping score:   All thats left is one tranny mount bolt, drain tranny, drop driveshaft, drain engine oil, speedometer cable, engine mount bolts. Well I tried Electrolysis. It worked nicely. Bought some Kleen-Strip Prep and Etch. Coil on the right looked like the coil on the left less than 48 hours ago.  UCA on the left soaked in my electrolysis rig for about the same time I soaked the right in the Prep and Etch:  Thats what Im talking about.
__________________
____________________________ |
|
|
|
|
04-07-2012, 08:02 PM
|
#47 |
|
Registered User
Join Date: Jan 2003
Location: VA
Posts: 284
|
Re: Here We Go - 65 C10 LWB - For the Kid
Got up this morning and got to work. Had to get the engine / tranny out, the engine on the engine stand, the truck moved back to its spot of the backyard. After that was cutting grass, then going to the dump, then fixing a flat for a friend. I'm now kicked back with a beer.
Drain some fluids - of course enough stays in just to spill out later on. Law of relativity. You know... Like the ratchet relativity : The looser the bolt, the harder it will be turn once you taker the ratchet off and try to loosen it buy hand. Of course it will practically fall out once you put the ratchet back on. She fought. I guess you get to feel at home after 47+ years. That's another one for me. (Yeah I'm still keeping score. Yes I'm competitive.) LMAO  The aftermath:  The load leveler is worth every penny. Of course being from Harbor Freight, the tool worked fine, after I reversed the handle after it was put on backwards. See the wood prop up front? The engine stand is great (AC Delco brand from O'Reilly's) The big box store bolts, not so much. Don't trust 'em. I'll hit Fastenal for some Grade 8 stuff Monday after work.  After convincing my wife she needed to be INSIDE the cab to steer - yeah after 17 years I should know better, just nod and then end up doing it my way anyway. Pushed it up the majority of the hill then yanked it in place with my truck. Back in its spot:  Next up engine cleaning and paint. I've got a gallon of Omni clear I've had, I'll order some epoxy primer and a quart of black gloss base and silver base for the engine. Plan is oil pan black, valve cover black, engine block / head silver, then figure out what color for intake / exhaust manifold and all the accessories. And we're definitely going to experiment with the matte silver look, like here: And we're looking at painting the bumper, grille, and possibly the custom cab trim in satin black, with black Coys.i It has BEGUN. It will NOT be a simple or cheap as I planned it, but what project every is? Right now project total is a tad under $600 including materials and tools purchased. Looks like I've got a about $300 worth of crap I'm getting rid of from the garage, so that will knock it down, but that money goes for parts of course!!!
__________________
____________________________ |
|
|
|
|
04-10-2012, 09:33 AM
|
#48 |
|
Registered User
Join Date: Jan 2003
Location: VA
Posts: 284
|
Re: Here We Go - 65 C10 LWB - For the Kid
Spent last night after work cleaning up all my tools, bagging bolts, and generally trying to free up enough room so I can move around the garage.
Parts are starting to pile up. Started to clean on the old 230 a bit last night. Wow...scraping 40+ year old gunk, I forgot how fun that could be. I'm going to save this job for the kid I think. Also looks my exhaust manifold is cracked. Three small cracks right where it bolts up. Nice. I'm going to look for a manifold and fight the inner demons telling me now "Well since the exhaust manifold is cracked, you MINE AS WELL look for a small block and 700R4 to drop in. Or maybe even a LSx drivetrain." NO...I won't do it... Well unless a great deal "falls" in my lap. I'm already trying to move the pieces into place so I can build up a SWB frame and chop this long fleet into a shorty. I don't need anymore work. I may tell the kid this will be a vehicle he can drive when he graduates college... LMAO. I'll get a better look at the cracks in the manifold after a good soaking in my prep and etch bath. From the looks, and the fact it wasn't leaking when it ran, I might be able to weld 'em up. This Prep and Etch is the ticket for cleaning nasty scale rust off of metal parts. I've got the air cleaner and another control arm soaking, I'll probably pull them out tomorrow and toss in the exhaust manifold plus some other parts.
__________________
____________________________ |
|
|
|
|
04-10-2012, 03:54 PM
|
#49 | |
|
Senior Member
Join Date: Mar 2011
Location: Tucson, Arizona
Posts: 2,061
|
Re: Here We Go - 65 C10 LWB - For the Kid
Quote:

|
|
|
|
|
|
04-10-2012, 04:08 PM
|
#50 | |
|
Registered User
Join Date: Jan 2003
Location: VA
Posts: 284
|
Re: Here We Go - 65 C10 LWB - For the Kid
Quote:
__________________
____________________________ |
|
|
|
|
|
| Bookmarks |
|
|


 Linear Mode

