
|
 02-06-2013, 12:43 AM
|
#51 |
|
Registered User
Join Date: Aug 2007
Location: Corona, California
Posts: 7,998
|
Re: Project: Over My Head
Came out nice.
Kim |

|

|
|
02-06-2013, 02:50 PM
|
#52 |
|
Registered User
Join Date: Jan 2012
Location: Motown
Posts: 7,662
|
Re: Project: Over My Head
looks good yossarian, take it slow and heal up.
__________________
cool, an ogre smiley  Ogre's 58 Truk build Ogre's 58 Truk buildhow to put your truck year and build thread into your signature shop air compressor timer |
|
|
|
|
02-10-2013, 11:14 PM
|
#53 |
|
Registered User
Join Date: Sep 2011
Location: Nevada City, CA
Posts: 908
|
Re: Project: Over My Head
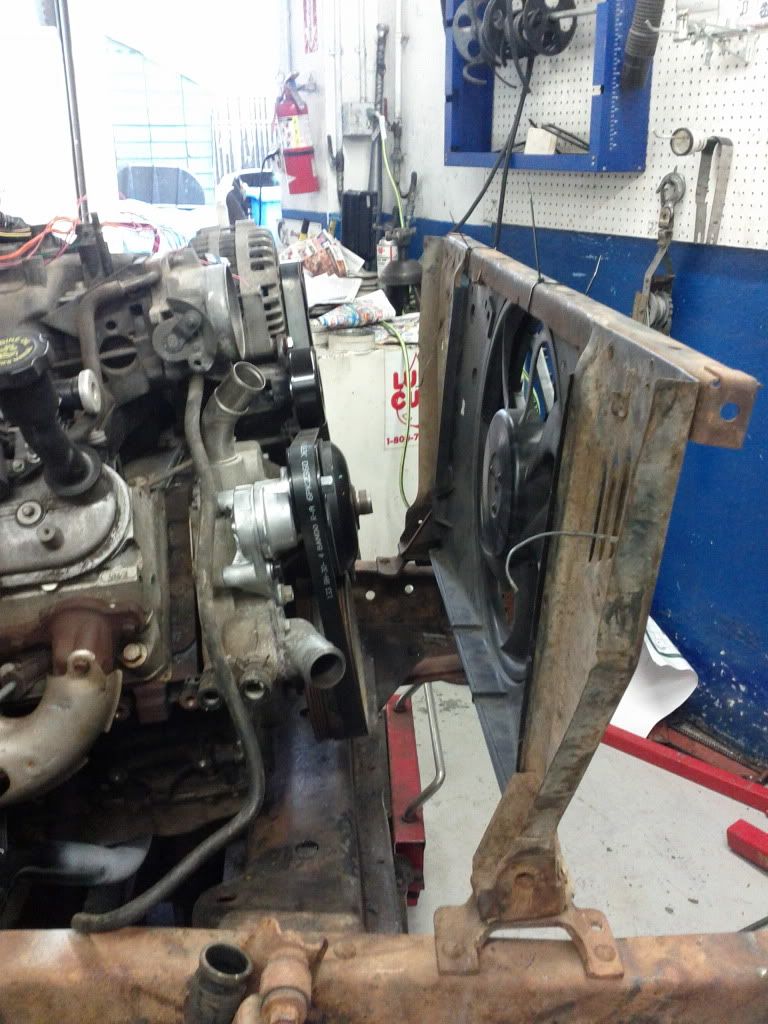
Mounted the fan up. Should fit between radiator support and grill, if only just. It is a pwm controlled fan from a 2004 Volvo s80. When the controller failed I removed it and spliced in leads, then put it on a shelf. Customer bought a new fan with controller and I saved some money. About 4500 cfm, 16 inch blade
 [/IMG] [/IMG]Posted via Mobile Device |
|
|
|
|
02-13-2013, 10:59 PM
|
#54 |
|
Registered User
Join Date: Sep 2011
Location: Nevada City, CA
Posts: 908
|
Re: Project: Over My Head
No pictures, but I got the fuel lines / filter sorted out.
I used an 02 camaro filter (which I would not recommend) and patched it in to the line with FIVE connections. I may yet get tired of looking at the mess & buy a 60 psi rated filter with 3/8 quick connects on both sides. In any event, the fuel lines are complete & functional. The tank is with a buddy being worked on. I'll get pictures once I finalize the tank's mounting & get comfortable that the frame won't rub on the tank anywhere. |
|
|
|
|
03-03-2013, 09:26 PM
|
#55 |
|
Registered User
Join Date: Sep 2011
Location: Nevada City, CA
Posts: 908
|
Re: Project: Over My Head
Well, nothing picture-worthy in a while. I've been fussing with the tank mounting in what spare time & with what spare energy I'm able to muster. A few holes to drill in some aluminum, another piece of metal to buy, a couple holes & I'm ready to bolt the tank in and move on to another piece of the puzzle for now.
Boss finally got tired of looking at my project taking up one of his lifts (I don't blame him) which means the truck goes back outside. I wish I'd gotten steering figured out before I had to move it, but oh well. Not sure how the truck being outside is going to change progress. PITA to run an extension cord & an air line out there every lunch brake, but if I can get away with stashing my tools outside & leaving myself an air line run to the back yard, I'll be able to work on it for weekends. So, I think I'm making lemonade out of the situation. I think. Arm is still healing, maybe 85 percent in most ways. Still a bit stiff trying to ride a bike, though. Hopefully I'll get some pictures of actual progress up soon... |
|
|
|
|
03-04-2013, 07:45 AM
|
#56 |
|
Registered User
Join Date: Dec 2011
Location: Mobile, Alabama
Posts: 996
|
Re: Project: Over My Head
Nice tip on the cooling fan. Will keep an eye out for one next time at the yard. dug
__________________
My Build - http://67-72chevytrucks.com/vboard/s...d.php?t=515876 |
|
|
|
|
03-04-2013, 11:33 AM
|
#57 |
|
Registered User
Join Date: Sep 2011
Location: Nevada City, CA
Posts: 908
|
Re: Project: Over My Head
Dug -
Volvo used the same fan motor & controller with minor adjustments to the shroud in everything from the 940s (some 740s too, I think?) to the 850s and the S/V/C 70s. The S60 / XC90 / S80 stuff is all even better, if anything. |
|
|
|
|
03-31-2013, 01:16 AM
|
#58 |
|
Registered User
Join Date: Sep 2011
Location: Nevada City, CA
Posts: 908
|
Re: Project: Over My Head
Well, might be time for an update.
I'd banged my head on the gas tank mounting for a while and decided to stop, so I called Corwin (metal worker buddy). He hasn't finished it yet but named a price I could live with to just finish the gas tank & add a rear cross member to replace the one I cut out. So I asked the little lady "Babe, you want that we should work on brakes next, or cooling?" and she says Brakes. So here we go. The 55-59 Power Brake Pedal Assembly from Speedway Motors, torn down to be easier to work on... 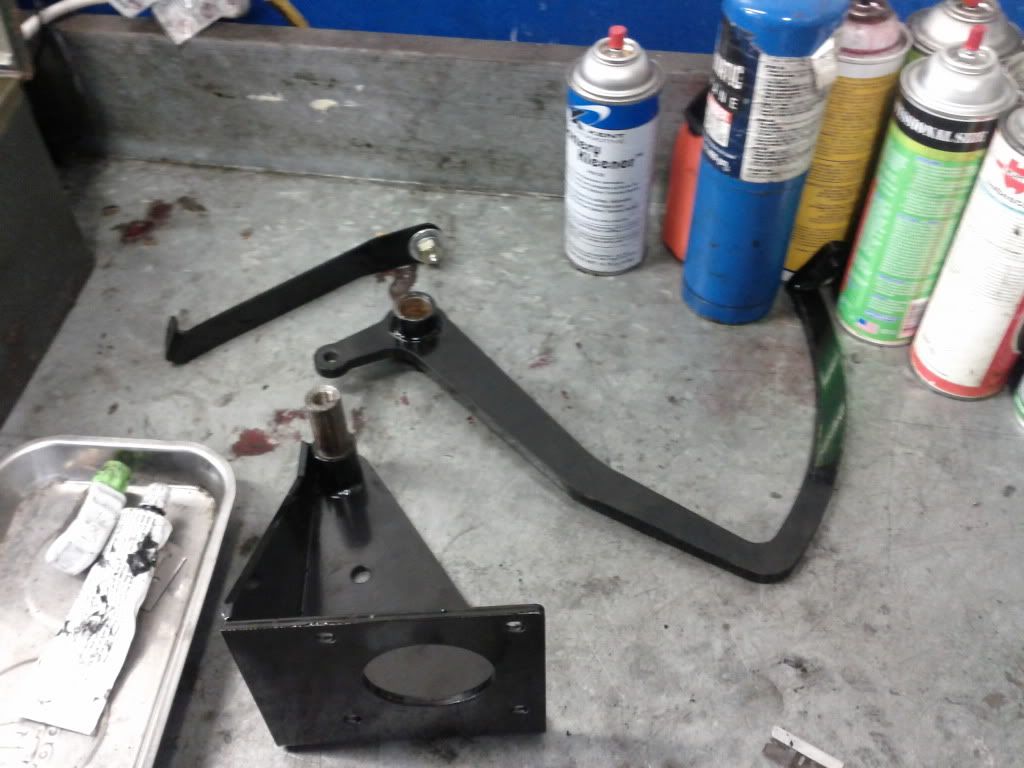 This uses a 4 on 3 3/8" pattern, compatible with a lot of boosters. Not compatible with the HydroBoost I want to run, though. Get one cheap out of an Astro Van. You need to buy the one with a flat / 90 degree bracket. I goofed and bought one with an angled mount. To correct both problems, I got an Ebay adapter plate with the keyway cut in it but not bolt holes. 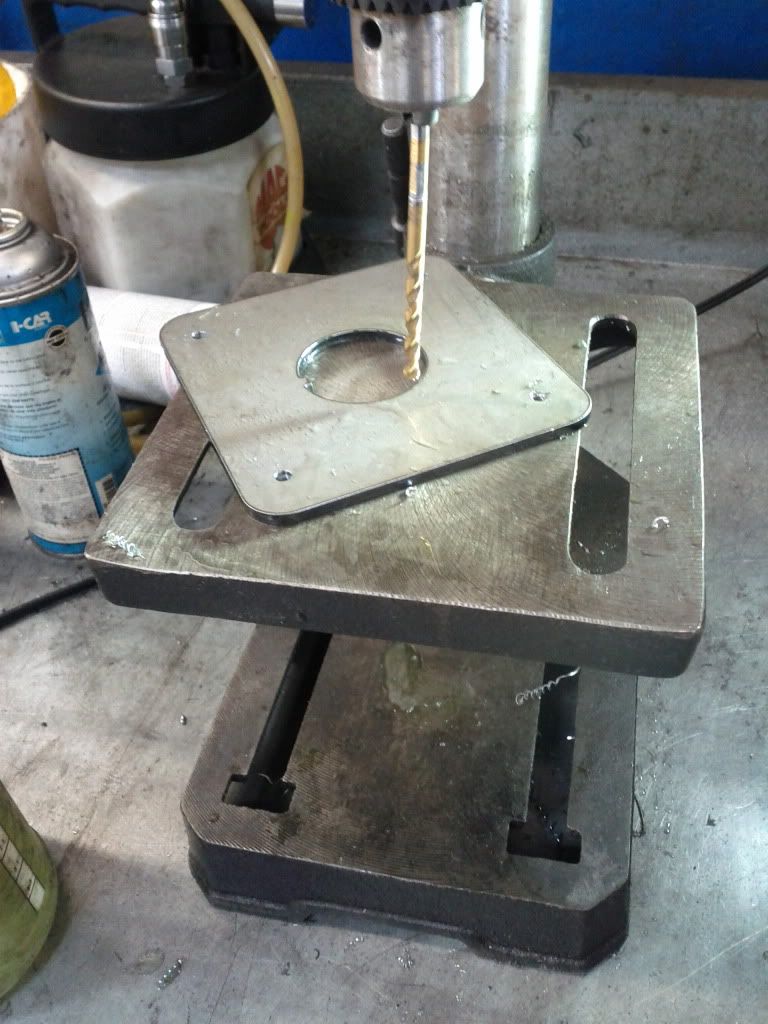 If you look close, you can see the indexing tab that mates to a groove in the HB's body. These plates can be bought, blank, for $25 on Ebay. I measured out the pattern of the Speedway bracket, drew it onto the blank plate & chucked a bit into the drill press. 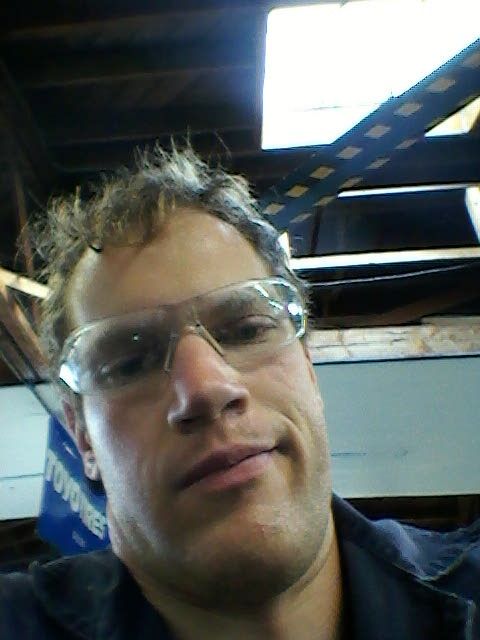 This is my face when I realized two of my holes were a little off. Dunno how that happened, but it was somewhere between the measuring and the drilling. I think I was off with the center punch... So I threw two bolts into the holes that lined up & shot primer over the adapter plate. This way, I knew where the holes were *supposed* to be.  Next, I took my little friend here 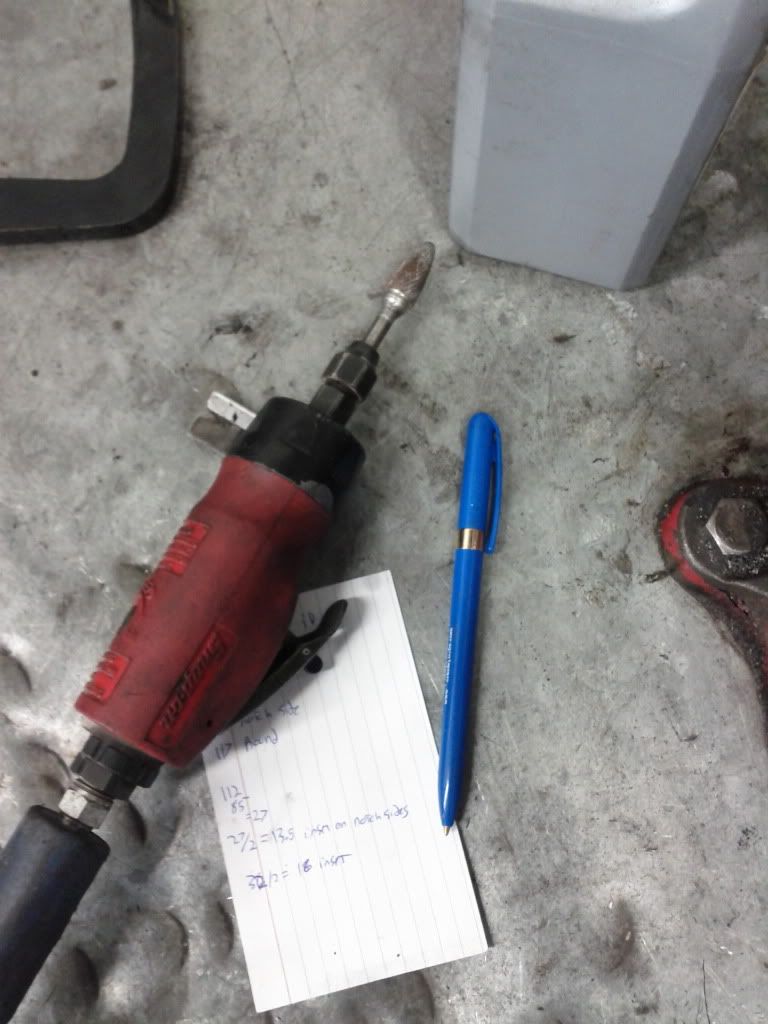 and ground out the primer that shot onto the speedway bracket. All 4 bolts now go through just fine. So, weather permitting, I'll drill out the last rivets in the OE clutch pedal pivot and test fit the pedal assembly w/ hydroboost and MC mounted. Should be before next weekend. Slow progress, but progress. Also : metalworking is harder than most of you guys make it look, so, much respect. Last edited by yossarian19; 03-31-2013 at 01:22 AM. |
|
|
|
|
04-17-2013, 06:56 PM
|
#59 |
|
Registered User
Join Date: Sep 2011
Location: Nevada City, CA
Posts: 908
|
Re: Project: Over My Head
Been working on the truck in drips and drabs, mostly during lunch breaks.
Dropped the hubs / rotors off at the machine shop today to have the studs pressed in. BFH was slow going and didn't sound fun, so I put together the king pins and kept going. [IMG]  [/IMG] [/IMG]I'd thought the driver's king pin bore (in the axle) and spindle bores were shot, so imagine my surprise when I put it together and it was like new - zero play! All that fretting for nothing. I should have known to put it together & see first. Anyway, once the kingpins were done I bolted on the caliper brackets & steering arm (from POL & CPP, respectively) & torqued to spec. I also got the pedal (from Speedway), booster (Astro Van) & MC (Astro, too. 1.25" bore) together. The Astro Van master cylinder reservoir was too tall but the 1998 S10 master cylinder reservoir swapped right onto it. I now have just enough space to get the cap off & add fluid through a hose or some such. Serviceable, if only just. [IMG]  [/IMG] [/IMG]I haven't plumbed the hard lines yet. Not sure what I'm waiting on. Suppose I just need to buy some fittings & lines & get on it. I'll either finish out the brakes or move on to steering next. |
|
|
|
|
04-17-2013, 08:20 PM
|
#60 |
|
Registered User
Join Date: Aug 2007
Location: Corona, California
Posts: 7,998
|
Re: Project: Over My Head
You're making progress. A little here a little there and it all adds up.
Kim |
|
|
|
|
04-17-2013, 11:43 PM
|
#61 |
|
Registered User
Join Date: Jul 2011
Location: Auburn ca.
Posts: 2,886
|
Re: Project: Over My Head
Glad to see it's coming along. I think if it were me I would finish the brakes to keep the moisture out. But I know you don't get much fog down there

|
|
|
|
|
04-18-2013, 09:20 AM
|
#62 |
|
Senior Member
 Join Date: May 2011
Location: Cypress, Tx.
Posts: 1,504
|
Re: Project: Over My Head
You're doing great, and I like the picture of yourself! Always nice to see a pic of friends on this site!! Just wondering what/where the steering arm on the top on your kingpin came from? What steering are you going to use? That part looks better made than mine and a little longer too.
Dne' Posted via Mobile Device
__________________
'72 Ford Bronco project(July 17 2021-?) https://67-72chevytrucks.com/vboard/...d.php?t=828015 59 Apache (sold 6-25-2021) 67 Ford Mustang (re-restored after Harvey) 1968 Jeep Cj5 (2-8-2020 to present) 1992 Jeep Yj (8-17-20 to present) (Jurassic build) www.Classiccarsandtools.com |
|
|
|
|
04-18-2013, 09:37 AM
|
#63 |
|
Registered User
Join Date: May 2000
Location: Flin Flon, Manitoba, Canada
Posts: 8,855
|
Re: Project: Over My Head
it looks like he's using an aftermarket power steering setup. That upper steering arm should connect to the pitman arm and that will be mounted to the steering box. Things are progressing nicely, thanks for keeping us up to date
__________________
My name's Tim and I'm a truckaholic My 56 Chevy shop truck build http://67-72chevytrucks.com/vboard/s...d.php?t=562795 |
|
|
|
|
04-18-2013, 09:52 AM
|
#64 |
|
Senior Member
Join Date: May 2011
Location: Cypress, Tx.
Posts: 1,504
|
Re: Project: Over My Head
You can just make out the upper steering arm on mine, his looks better made
 
__________________
'72 Ford Bronco project(July 17 2021-?) https://67-72chevytrucks.com/vboard/...d.php?t=828015 59 Apache (sold 6-25-2021) 67 Ford Mustang (re-restored after Harvey) 1968 Jeep Cj5 (2-8-2020 to present) 1992 Jeep Yj (8-17-20 to present) (Jurassic build) www.Classiccarsandtools.com |
|
|
|
|
04-18-2013, 10:08 AM
|
#65 |
|
Registered User
Join Date: May 2000
Location: Flin Flon, Manitoba, Canada
Posts: 8,855
|
Re: Project: Over My Head
his might be for the Toyota style steering box that mounts inside the frame rails and near the factory mount holes. I know CPP just came out with a revamped Toyota steering box and power steering kit upgrade
__________________
My name's Tim and I'm a truckaholic My 56 Chevy shop truck build http://67-72chevytrucks.com/vboard/s...d.php?t=562795 |
|
|
|
|
04-18-2013, 11:54 PM
|
#66 |
|
Registered User
Join Date: Sep 2011
Location: Nevada City, CA
Posts: 908
|
Re: Project: Over My Head
I ordered the PS kit from Speedway, if I recall. Item #: 91032134. Pretty sure it is a CPP kit with other parts (or all from CPP?) thrown in. It's the drag link, steering arm, pitman arm & brackets with all the hardware. Just add pump, lines & box. I think the parts are of good quality, though I'm a bit worried about how the install goes. My CPP cross members are junk, frankly.
Thanks all for the kind words and encouragement. It helps. |
|
|
|
|
04-23-2013, 05:11 PM
|
#67 |
|
Registered User
Join Date: Sep 2011
Location: Nevada City, CA
Posts: 908
|
Re: Project: Over My Head
Well, I thought I was about done with the brakes. Bought the POL 6 lug disc kit, which in my case is a POS 6 lug disc kit.
Exhibit A, pictured below, shows that the pads wedge into the bracket - so you can't install the caliper correctly. [IMG]  [/IMG] [/IMG]Exhibit B, not pictured, the top caliper slide mount surface is cocked or mislocated somehow such that the slide pin, when threaded in, contacts the rotor. Exhibit B subsection 1 - the contact isn't even as you turn the rotor. There is runout in the rotor. On brand new bearings - from POL. The customer service interaction is under way so I'm reserving final judgement but so far, I'm displeased and $560 deep into it. EDIT: If I've obviously installed it wrong, somebody, lemme know. I'd rather wear the clown suit for a day and move on than think myself correct & be mad. |
|
|
|
|
04-23-2013, 05:42 PM
|
#68 |
|
Registered User
Join Date: May 2010
Location: Lawrenceville, Ga
Posts: 2,640
|
Re: Project: Over My Head
Are you thinking the pad goes directly into the caliper mounting bracket? Can't tell from your pic but that's what it looks like. The pads are placed into the caliper before you mount it.
|
|
|
|
|
04-23-2013, 05:48 PM
|
#69 |
|
Registered User
Join Date: Sep 2011
Location: Nevada City, CA
Posts: 908
|
Re: Project: Over My Head
Oh - yeah - forgot to mention. I just took the picture with the caliper out so I could see what was going on. I'd first tried to install it correctly - pads loaded - but it bottomed out in the bracket before the bolts lined up.
|
|
|
|
|
04-24-2013, 01:08 PM
|
#70 |
|
Registered User
Join Date: Jan 2012
Location: Motown
Posts: 7,662
|
Re: Project: Over My Head
it looks like there is a spacer in the kit to push the rotor out, did you install the spacer?

__________________
cool, an ogre smiley Ogre's 58 Truk buildhow to put your truck year and build thread into your signature shop air compressor timer |
|
|
|
|
04-24-2013, 01:16 PM
|
#71 |
|
Registered User
Join Date: May 2000
Location: Flin Flon, Manitoba, Canada
Posts: 8,855
|
Re: Project: Over My Head
I installed the same kit only for the 4.75" stud spacing and I had to use the bushings to make everything fit properly. I can see by your caliper close up shot that there aren't any bushings between the spindle and the caliper plate
__________________
My name's Tim and I'm a truckaholic My 56 Chevy shop truck build http://67-72chevytrucks.com/vboard/s...d.php?t=562795 |
|
|
|
|
04-24-2013, 01:28 PM
|
#72 |
|
Registered User
Join Date: May 2000
Location: Flin Flon, Manitoba, Canada
Posts: 8,855
|
Re: Project: Over My Head
here's a shot of mine with the spacers showing
__________________
My name's Tim and I'm a truckaholic My 56 Chevy shop truck build http://67-72chevytrucks.com/vboard/s...d.php?t=562795 |
|
|
|
|
04-24-2013, 02:12 PM
|
#73 |
|
Senior Member
Join Date: May 2011
Location: Cypress, Tx.
Posts: 1,504
|
Re: Project: Over My Head
I don't think my pic will help; I pulled my caliper off to see how its situated. I think dubie answered your question

__________________
'72 Ford Bronco project(July 17 2021-?) https://67-72chevytrucks.com/vboard/...d.php?t=828015 59 Apache (sold 6-25-2021) 67 Ford Mustang (re-restored after Harvey) 1968 Jeep Cj5 (2-8-2020 to present) 1992 Jeep Yj (8-17-20 to present) (Jurassic build) www.Classiccarsandtools.com |
|
|
|
|
04-24-2013, 11:47 PM
|
#74 |
|
Registered User
Join Date: Sep 2011
Location: Nevada City, CA
Posts: 908
|
Re: Project: Over My Head
Well, I spoke to Performance Online's reps and the initial point of contact, Brandon, pitched the email to his boss who says "it is something about the spindle castings. If you think you can fix it, go for it" but offers no details, either explanatory or in advice.
So, I sent another email to see what they come back with. No bushings or unused parts were included in the kit. Instructions followed to a T. I'm still prepping the steering arms (pics soon) for updated joints, no rush on brakes, but I may be getting out the air grinder for this... |
|
|
|
|
05-10-2013, 12:45 AM
|
#75 |
|
Registered User
Join Date: Sep 2011
Location: Nevada City, CA
Posts: 908
|
Re: Project: Over My Head
Over the last couple weeks it's been REALLY slow going. I got saddled with my cousin's Volkswagen to occupy a week's worth of lunch breaks (glad to do it, actually, but wow - tiring), I'm studying for two different ASE exams, I spend some time with my fiance, I hit the gym once in a while & I work full time.
Enough excuses, though. I did get some steering mods done. Here's me, optimistic about how quickly I'll get the ball studs pushed out with my shiny new air hammer [IMG]  [/IMG] [/IMG]Here, you can see that the air hammer didn't do the job and that the press actually sheared some steel knocking that ball stud out. Whoops![IMG]  [/IMG] [/IMG]On the next one, I ground maybe 1/32" of metal off the bottom as flat as I could. Walked it over to the 20 ton press in about this condition: [IMG]  [/IMG] and it came right out cleanly. [/IMG] and it came right out cleanly. Just for fun, this is the intake manifold off my dad's old '70 Pontiac LeMans: [IMG]  [/IMG] [/IMG]It's a Pontiac 455 intake manifold that's been drilled for Cadillac 502 fuel injection. The car was a blue convertible with a Muncie 3 speed auto, his & hers shifter, posi traction, and a trailer hitch. It hauled 3,000 lbs of Bayliner + some ass while doing it. He pioneered the cadi EFI to Pontiac injection; shortly after the car appeared in a magazine some hot rod company started selling kits that looked a lot like what he'd done. This here is his L98 motor with LT1 heads & induction, but no opti-spark. It's in a 72 Corvette that's every bit as franken-car as the LeMans was. [IMG]  [/IMG] [/IMG]I think in some ways my car hobby started out as a way of connecting with my old man. Didn't hurt that I was broke. Now I've got a few bucks. It's my own thing, now something I love for myself. Still, as I get into building this truck - with tools from two grandfathers and my old man, the retrofit of an LS into a '57... well, I dunno. There's something magic feeling about it. |
|
|
|
 |
| Bookmarks |
| Thread Tools | |
| Display Modes | |
|
|


 Linear Mode

