
|
 10-19-2010, 04:32 PM
|
#326 | |
|
GEARHEAD
Join Date: Aug 2003
Location: MN
Posts: 6,107
|
Re: Junkyard Jimmy Super Low Buck Build Thread
Quote:
__________________
If no one knows what you're doing, they can't tell you you're doing it wrong HG's Dream Car Build - Shelby Cobra Kit Build your own adjustable track bar 71  Long Fleet C/10 Long Fleet C/10 72  Jimmy 4x4 (Junkyard Jimmy) Jimmy 4x4 (Junkyard Jimmy)HG's Plow Truck '78  K35 Dually K35 DuallyBigass Farm Truck HG's thread of miscellaneous stuff |
|

|

|
|
10-19-2010, 11:57 PM
|
#327 |
|
GEARHEAD
Join Date: Aug 2003
Location: MN
Posts: 6,107
|
Re: Junkyard Jimmy Super Low Buck Build Thread
I got those pesky bolts out of the seat mount holes. Didn't have to lift the tub either, they are just forward of the gas tank. I ended up just using a die grinder to enlarge the holes enough to get a socket on them. I could also reach the fuel sending unit by hand, but the wire connector is corroded and would not go on or stay on, so I'll have to see if I have another one to use and splice it.
Since I was able to take care of those things, I finished installing the body mounts. I added a few washers as shims and just got the bolts finger tight for now. I'll tighten them down after the doors and top are back on it, to see if more shims will be needed to keep the door openings straight. The roll bar needs to be tweeked some to work in this. It was from a 73 and newer style. The front mount pads need to be trimmed some so it can be moved forward a bit. The rear mount pads will need spacers if I want it to be square. Seems like it was configured to lean back some, not sure what's going on there. I mounted up the brake booster, but just finger tight. I need to buy a new seal that fits into the firewall hole. I just wanted it up out of the way and not resting on the brakes lines and radiator hose. This tub is a 71 I believe and set up for a double wall top. I have a pretty good double wall top and a pretty good single wall top. Both need some work. I'll probably use the single wall, so I'll have to figure out what changes need to be made to mount that up. Near future plans, get the rest of the body panels mounted up, throw the rest of the parts inside and put it away for the winter. I have another truck that I need to get back to.
__________________
If no one knows what you're doing, they can't tell you you're doing it wrong HG's Dream Car Build - Shelby Cobra Kit Build your own adjustable track bar 71 Long Fleet C/10 72 Jimmy 4x4 (Junkyard Jimmy)HG's Plow Truck '78 K35 DuallyBigass Farm Truck HG's thread of miscellaneous stuff |
|
|
|
|
10-20-2010, 07:58 AM
|
#328 | ||
|
I miss this truck.
Join Date: Dec 2001
Location: Lexington, KY U.S.A.
Posts: 2,863
|
Re: Junkyard Jimmy Super Low Buck Build Thread
Quote:
Quote:
")
__________________
'07 GMC Acadia SLT. Sweet ride. '08 Crew Cab Z-71 short bed. Really like this truck A LOT. |
||
|
|
|
|
10-22-2010, 07:27 PM
|
#329 |
|
GEARHEAD
Join Date: Aug 2003
Location: MN
Posts: 6,107
|
Re: Junkyard Jimmy Super Low Buck Build Thread
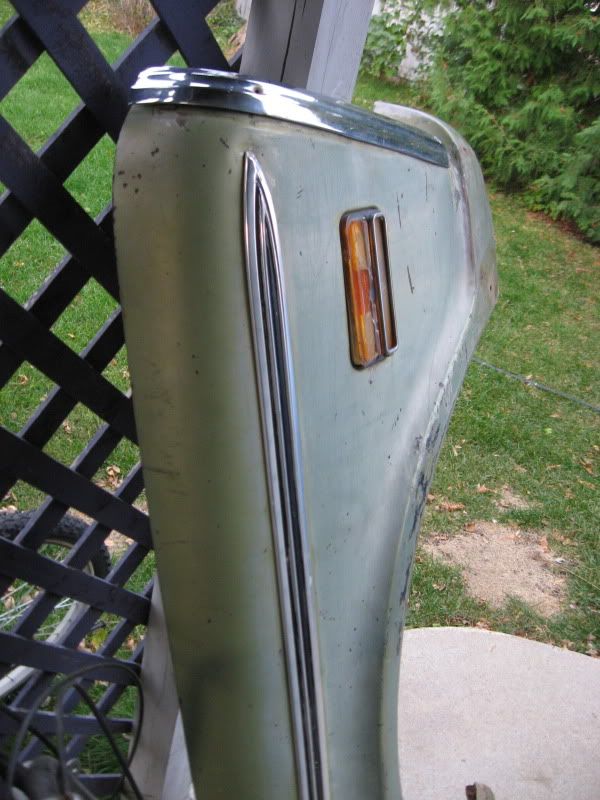
A few weeks ago I bought some fenders from a guy in St Paul. He's building a 68 shortbed and had parted out a 72 GMC. I went back for the hood today, and told him to get all of his extra parts together and I'd make him an offer. He wanted to get rid of everything and I still have a 2wd blazer I'm scavaging parts for, plus this one. I had already given him $50 for the rust free, but dented fenders and offered him $50 for a near perfect 72 GMC hood. I got the rest for another $100 today.
I got a decent driver shape 72 GMC grill, with bezels and parking lights. Pair of visors and door arm rests 2 steering columns, a 4 speed and 3 on the tree version 2 steering wheels, the black one is pretty good Clutch pedal assembly with the z-bar for the linkage E-brake assembly Gage cluster, printed circuit is shot glove box door high hump cover 6 cylinder fan shroud Power brake booster and master cylinder Now I'll have a choice between a painted or chrome grill.      The worst of the damage to the grill 
__________________
If no one knows what you're doing, they can't tell you you're doing it wrong HG's Dream Car Build - Shelby Cobra Kit Build your own adjustable track bar 71 Long Fleet C/10 72 Jimmy 4x4 (Junkyard Jimmy)HG's Plow Truck '78 K35 DuallyBigass Farm Truck HG's thread of miscellaneous stuff Last edited by hgs_notes; 10-22-2010 at 07:28 PM. |
|
|
|
|
10-22-2010, 07:59 PM
|
#330 |
|
VA72C10
 Join Date: Mar 2008
Location: Midlothian, VA
Posts: 25,269
|
Re: Junkyard Jimmy Super Low Buck Build Thread
Nice parts haul!
__________________
Looking for a 67-72 swb or blazer project in or around VA. 
|
|
|
|
|
10-23-2010, 04:09 PM
|
#331 |
|
GEARHEAD
Join Date: Aug 2003
Location: MN
Posts: 6,107
|
Re: Junkyard Jimmy Super Low Buck Build Thread
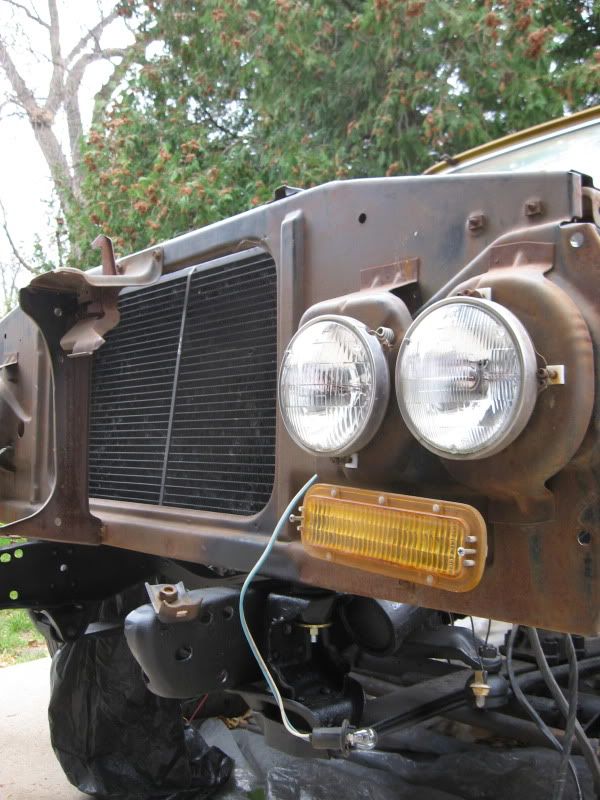
Got the radiator support mounted up with the new mounts, and bolted the radiator back in place.
 Then went back to the other end on got the tailgate on. 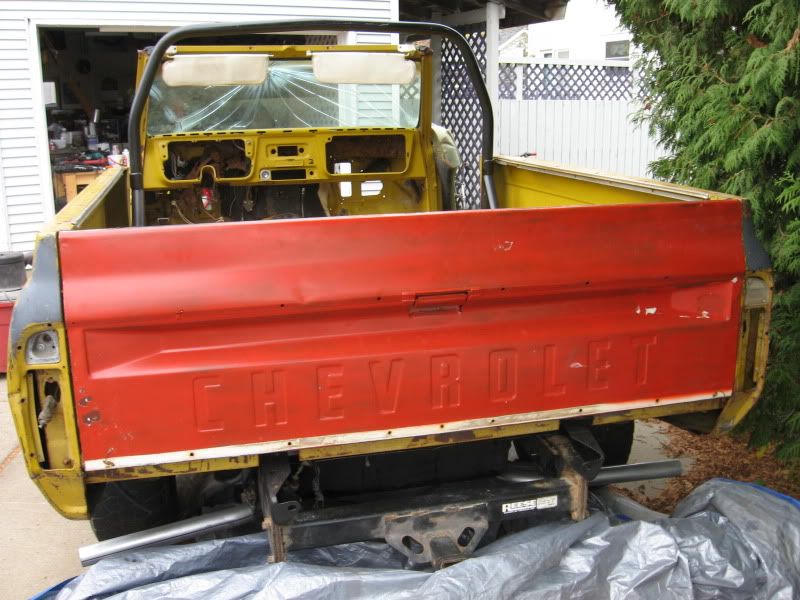 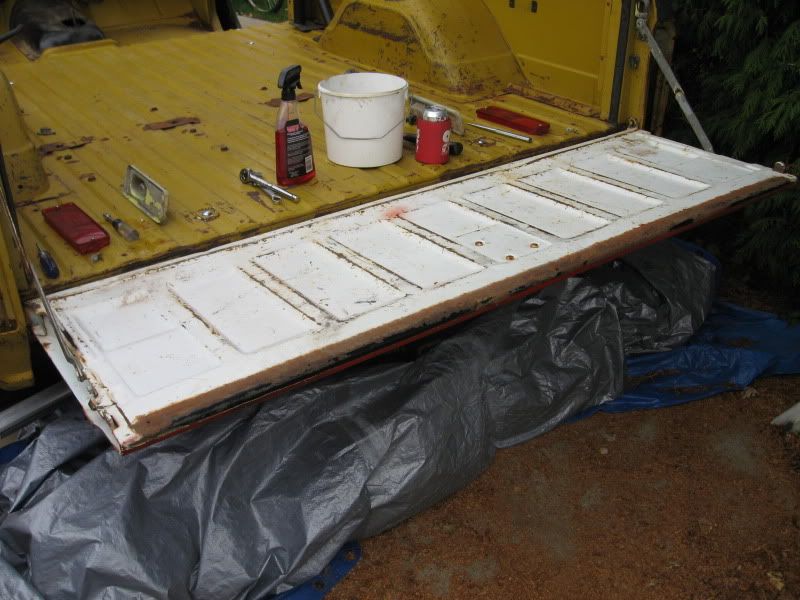 Nice and straight 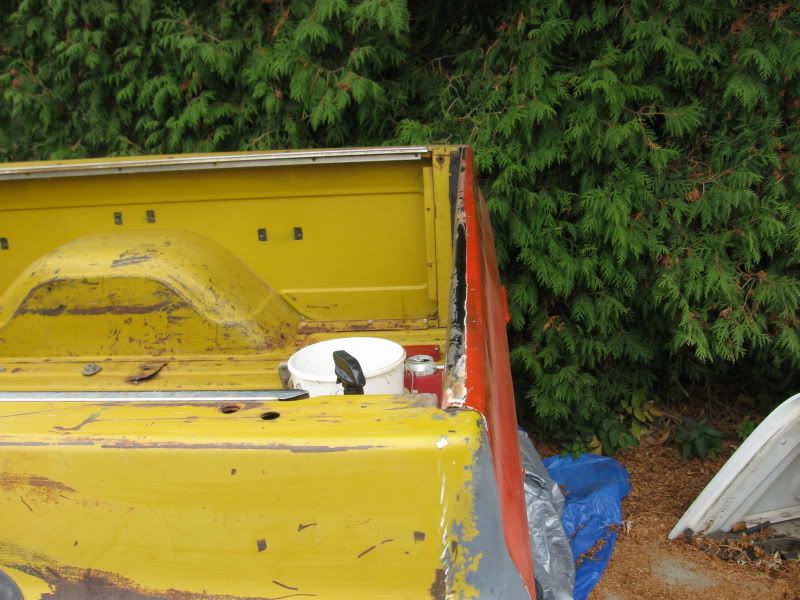
__________________
If no one knows what you're doing, they can't tell you you're doing it wrong HG's Dream Car Build - Shelby Cobra Kit Build your own adjustable track bar 71 Long Fleet C/10 72 Jimmy 4x4 (Junkyard Jimmy)HG's Plow Truck '78 K35 DuallyBigass Farm Truck HG's thread of miscellaneous stuff |
|
|
|
|
10-23-2010, 05:04 PM
|
#332 |
|
VA72C10
Join Date: Mar 2008
Location: Midlothian, VA
Posts: 25,269
|
Re: Junkyard Jimmy Super Low Buck Build Thread
Four eyes
Looking good!!!
__________________
Looking for a 67-72 swb or blazer project in or around VA.
|
|
|
|
|
10-24-2010, 08:12 AM
|
#333 |
|
GEARHEAD
Join Date: Aug 2003
Location: MN
Posts: 6,107
|
Re: Junkyard Jimmy Super Low Buck Build Thread
I was interrupted yesterday during my post, wife was making me go to a wedding. So to finish the update for yesterdays progress, I got the passenger side door mounted. This one has the best sheetmetal out of all the doors I had, but the rubber is shot everywhere. I'll need to cut the window frame off yet also. I also replaced the pins on both hinges, that cost about $17 at napa. It's much cheaper for those pins on-line, but I needed them right now.
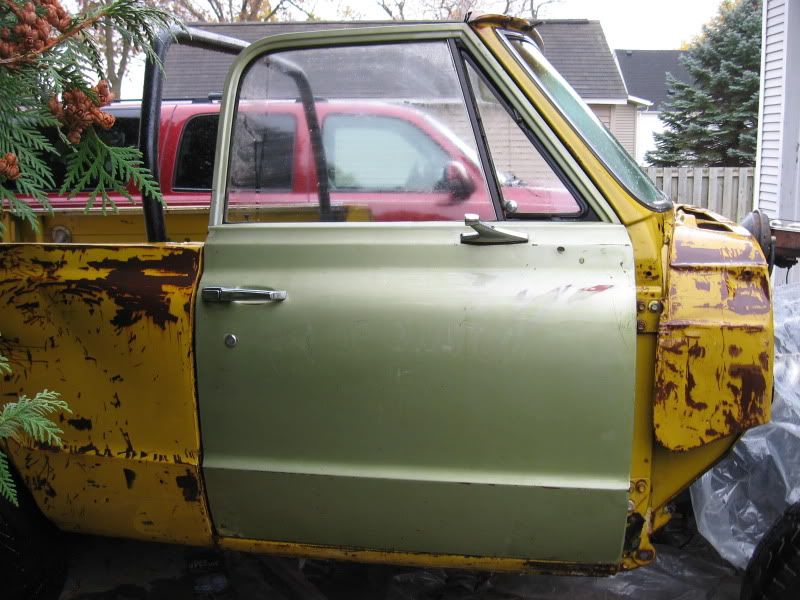 It was kinda dirty, but cleaned up ok. 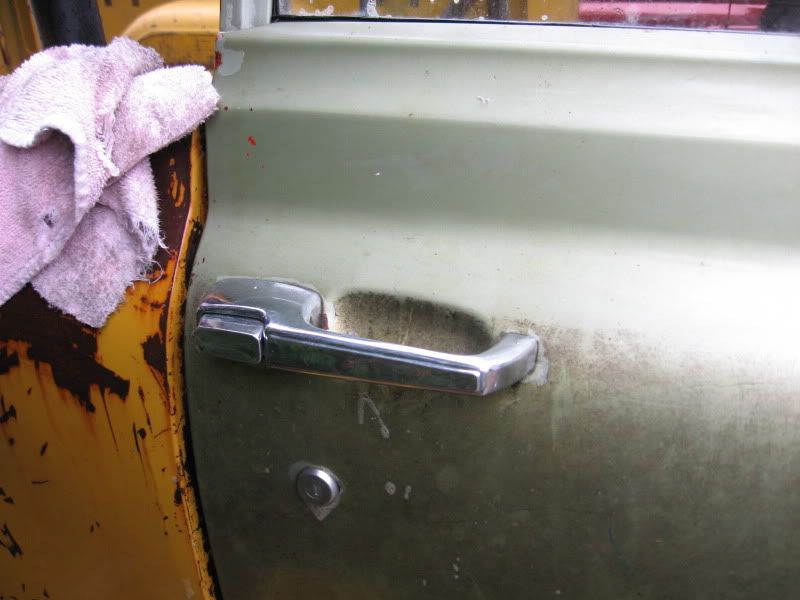 Then I put on the driver side fender. Just 3 bolts holding it now, cause I'll probably pull it off to work on the engine or steering column. But it looks ok. 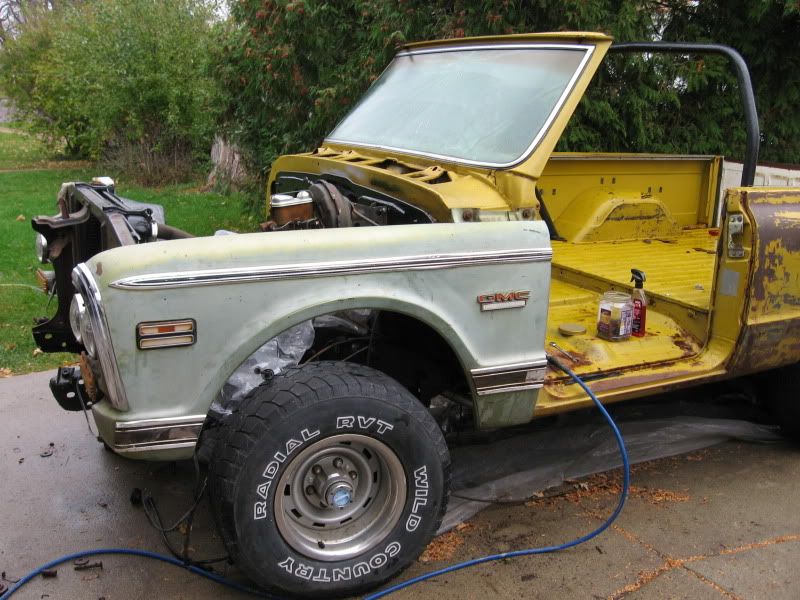 I was hoping to get the other fender on, but it's not ready yet. I left it with a neighbor who is a body man to hammer out some dents. He got the wheel arch dent pretty much out, but the dent in the front lower cup isn't done yet. He needs a longer spoon or something to get it. I need to get the other door out of storage today and get it bolted on. Then I want to bolt the roll bar in and set the top back on it. Hopefully the weather cooperates.
__________________
If no one knows what you're doing, they can't tell you you're doing it wrong HG's Dream Car Build - Shelby Cobra Kit Build your own adjustable track bar 71 Long Fleet C/10 72 Jimmy 4x4 (Junkyard Jimmy)HG's Plow Truck '78 K35 DuallyBigass Farm Truck HG's thread of miscellaneous stuff Last edited by hgs_notes; 10-24-2010 at 08:15 AM. |
|
|
|
|
10-24-2010, 08:28 AM
|
#334 |
|
GEARHEAD
Join Date: Aug 2003
Location: MN
Posts: 6,107
|
Re: Junkyard Jimmy Super Low Buck Build Thread
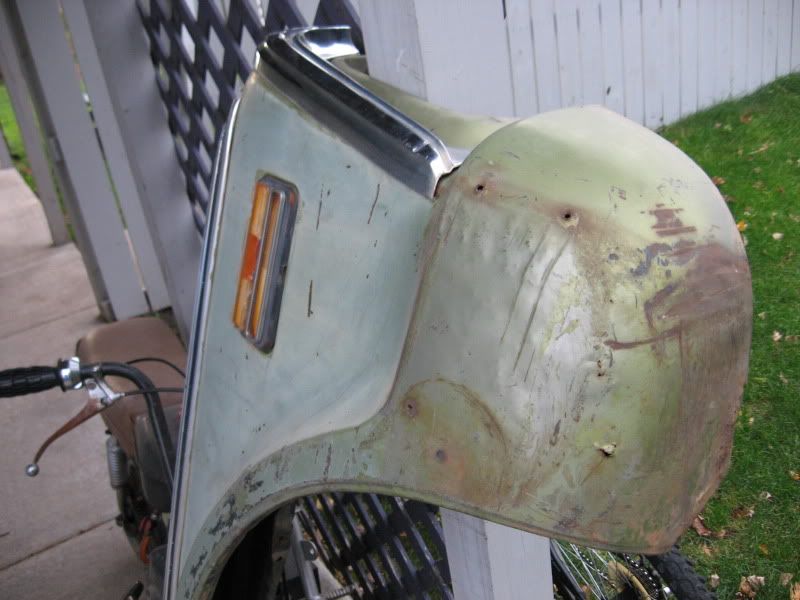
I had the body guy look at that passenger bed side to see if he thought it was worth trying to hammer out. He thinks it's pushed and stretch a little too much. The inner panel is in great shape, it's just the outer, so I'm going to shop for some patch panels this winter. I know there is a front half quarter panel available, and there is an extended wheel arch panel. I'd like to find a rear half of the quarter and just get the 2 halfs to put together, but I'm not sure the back half is available as a panel. If someone knows where they are available, please post here to let me know.
__________________
If no one knows what you're doing, they can't tell you you're doing it wrong HG's Dream Car Build - Shelby Cobra Kit Build your own adjustable track bar 71 Long Fleet C/10 72 Jimmy 4x4 (Junkyard Jimmy)HG's Plow Truck '78 K35 DuallyBigass Farm Truck HG's thread of miscellaneous stuff |
|
|
|
|
10-24-2010, 06:03 PM
|
#335 |
|
GEARHEAD
Join Date: Aug 2003
Location: MN
Posts: 6,107
|
Re: Junkyard Jimmy Super Low Buck Build Thread
Todays progress...
I started with getting a couple bolts in for the roll bar. I think I'm going to remove the feet pads and make some new ones that will fit the floor better. I cut a small slot in the bed rail so I could get a wrench with a nut into the B pillar to hold the upper bar mounts. 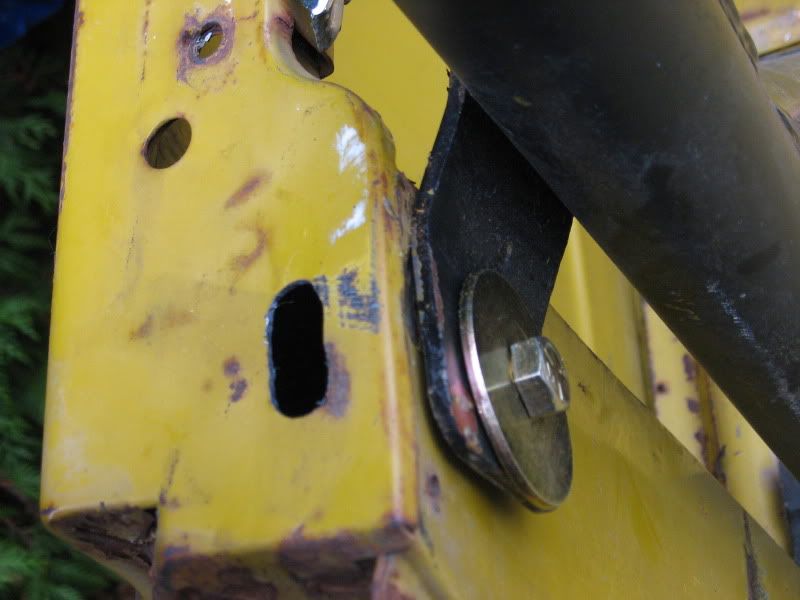 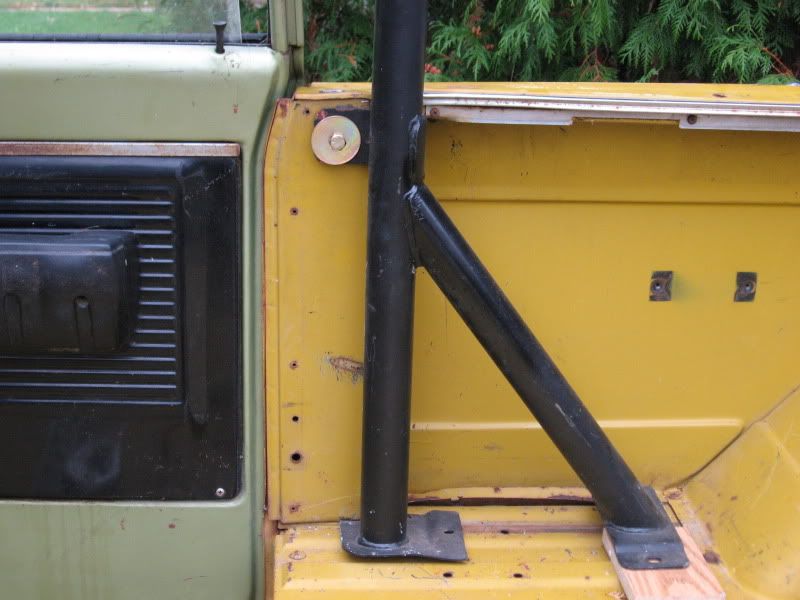 Then I picked out my best driver side door and got it bolted on. Not much rust on this one, but the inner panel by the window is pushed in some. Not sure if I can fix it or even if I need to, but it was the best option at this point. 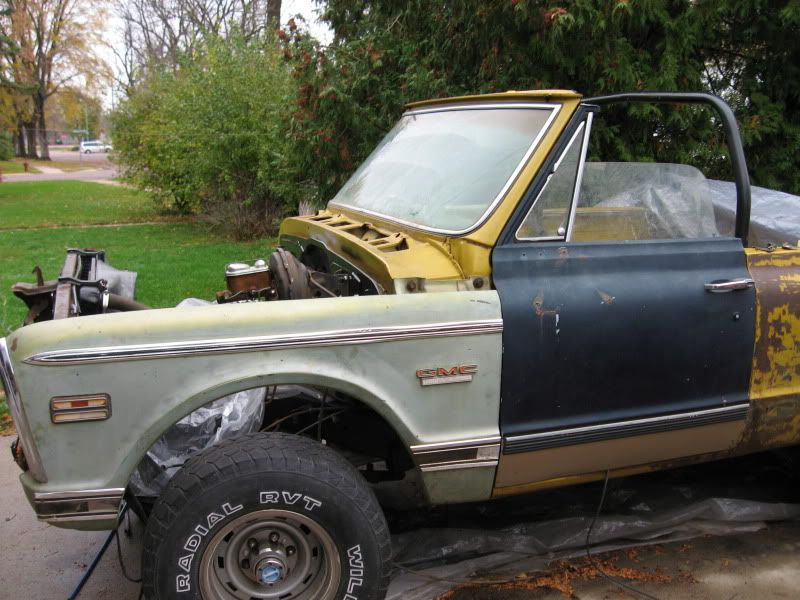 Next was the conversion from truck doors to jimmy doors. I cut off the window frame, then cut the inside edge angle and cut the top of the window frame off above the vent window. Then drilled a couple holes and installed the caps. 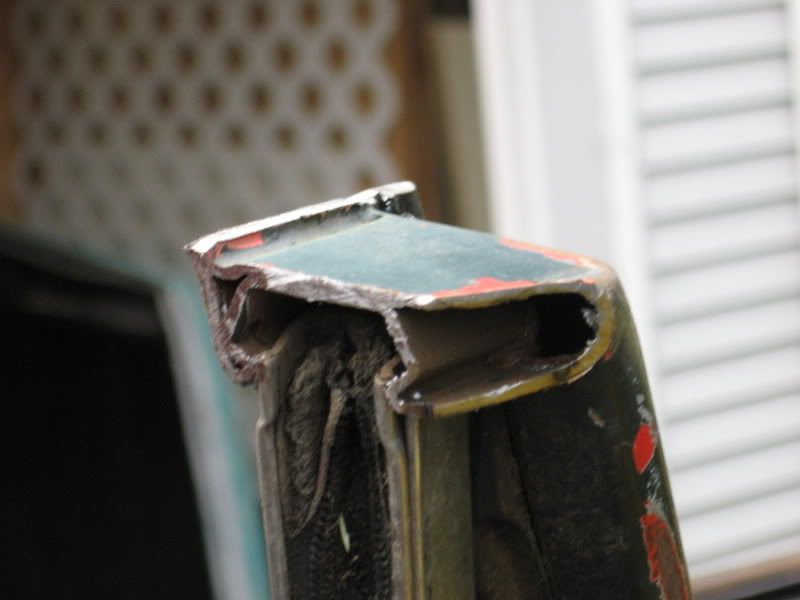 The next objective was getting the top set down. I got the whole family out to help, which made it pretty easy. I got the front inner mounts bolted down, then just used some clamps for now to hold the back end. I didn't mark the bed rail for holes yet to match the single wall top. I think next spring the top will be one of the first things to come back off. The bed rail on the passenger side is turned because of the banged in panel. 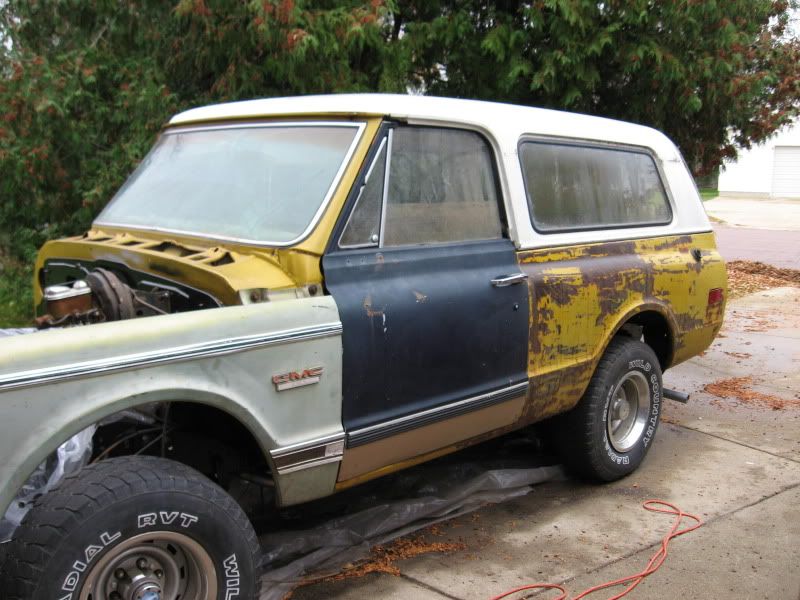 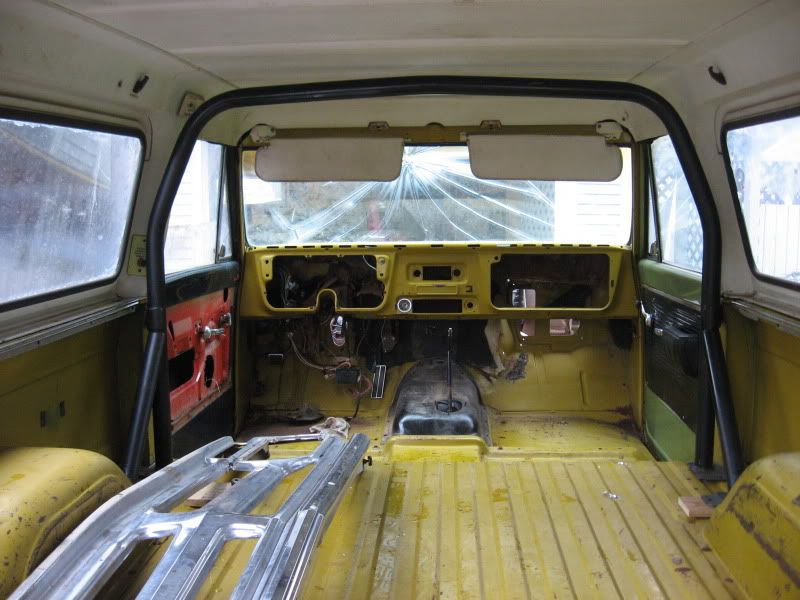 I have 3 hatches to pick from. One (the original for this top) still needs a crack repair by one of the hinges, and needs the handle assembly repaired. The next one looks good, but is missing one side support and where that support attaches to the hatch, is busted loose. The 3rd is still mounted up to a double wall top and is sitting in the weeds at a friends place. I don't think it has any cracks, but not sure the handle was working. If I find it's the best of the 3, I'll swap it out next year. For now, I picked option #2. 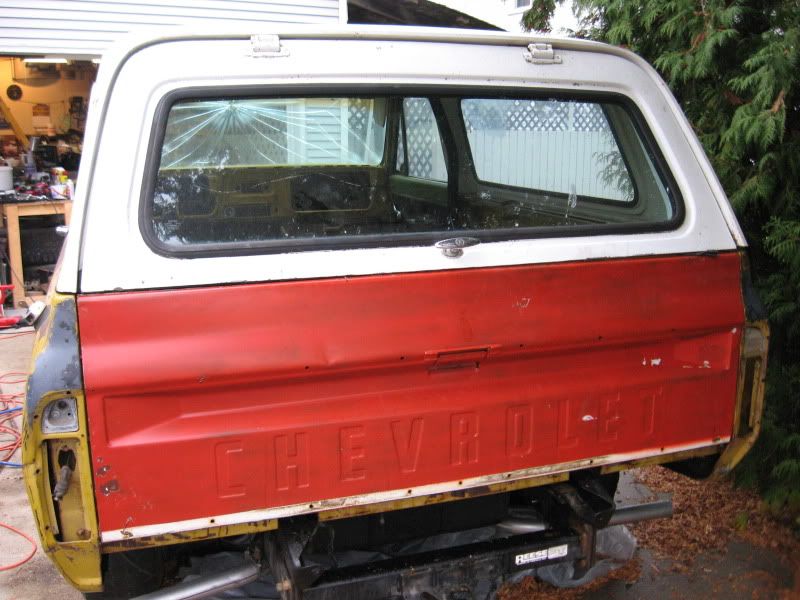 I wanted to get the hood on, but I'm waiting to get my other fender back. The rain is sagging the tarp over the engine, so for the time being, I just set the hood in position. That will keep the tarp from sagging. I have a cowl for this up in the garage attic. Might get that on this week. 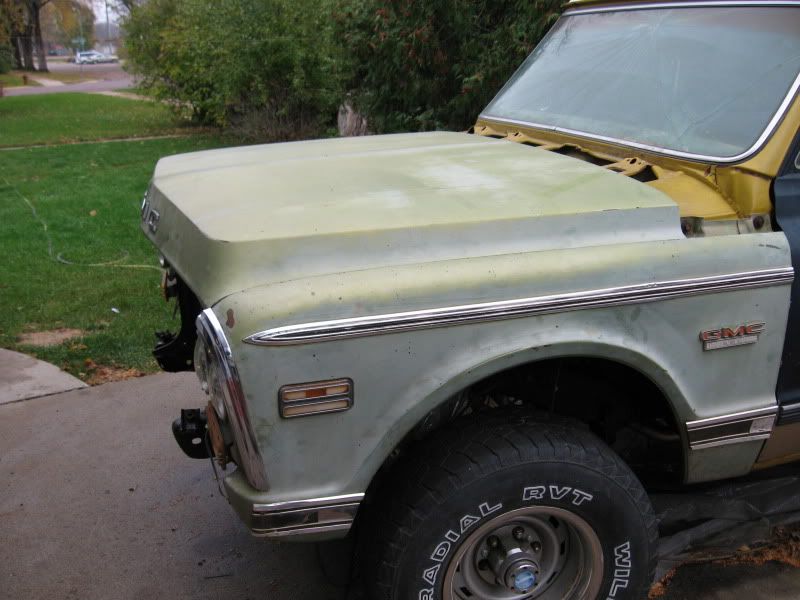 And here is what's missing up front. 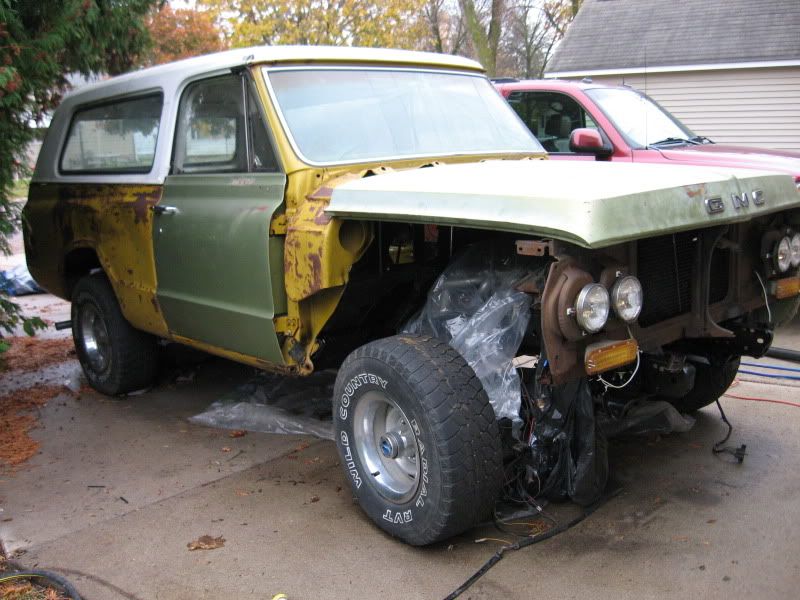 This week I want to get the steering column back in and the shifter linkage hooked back up. I'll reconnect the hoses to the power steering pump to keep the oil from making too big a mess. Then start loading the rest of the parts in the back end and get the rig set aside for the winter. I'll get the other fender on regardless of the dent status also. I can always pull it off next year for more hammer work. Thanks to everyone that is following along and provided any input. In another week or so, the thread will go dormant. It should be real fun next spring. I plan on finishing the engine and getting it running again. I think I might drive it while trying to do some of the body work, not at the same time of course. I just want to cruise with the top off. I've never been able to do that.
__________________
If no one knows what you're doing, they can't tell you you're doing it wrong HG's Dream Car Build - Shelby Cobra Kit Build your own adjustable track bar 71 Long Fleet C/10 72 Jimmy 4x4 (Junkyard Jimmy)HG's Plow Truck '78 K35 DuallyBigass Farm Truck HG's thread of miscellaneous stuff Last edited by hgs_notes; 10-24-2010 at 06:06 PM. |
|
|
|
|
10-24-2010, 07:16 PM
|
#336 | ||
|
VA72C10
Join Date: Mar 2008
Location: Midlothian, VA
Posts: 25,269
|
Re: Junkyard Jimmy Super Low Buck Build Thread
Quote:
Quote:
__________________
Looking for a 67-72 swb or blazer project in or around VA.
|
||
|
|
|
|
10-25-2010, 01:03 AM
|
#337 | |
|
GEARHEAD
Join Date: Aug 2003
Location: MN
Posts: 6,107
|
Re: Junkyard Jimmy Super Low Buck Build Thread
Quote:
When I was a little kid, my dad had an old red convertible. I was too young to even know the brand or even for sure what it looked like. It was red, it was long, it had a black top with some tears and it was the greatest ride to the beach or to grandma's or anywhere.
__________________
If no one knows what you're doing, they can't tell you you're doing it wrong HG's Dream Car Build - Shelby Cobra Kit Build your own adjustable track bar 71 Long Fleet C/10 72 Jimmy 4x4 (Junkyard Jimmy)HG's Plow Truck '78 K35 DuallyBigass Farm Truck HG's thread of miscellaneous stuff |
|
|
|
|
|
10-29-2010, 11:10 PM
|
#338 |
|
GEARHEAD
Join Date: Aug 2003
Location: MN
Posts: 6,107
|
Re: Junkyard Jimmy Super Low Buck Build Thread
Still plugging away at it, even though I have had almost no available time lately. My neighbor left me a surprise when I got home today. He finished hammering out my fender and I think he did an incredible job.
  What it used to look like... 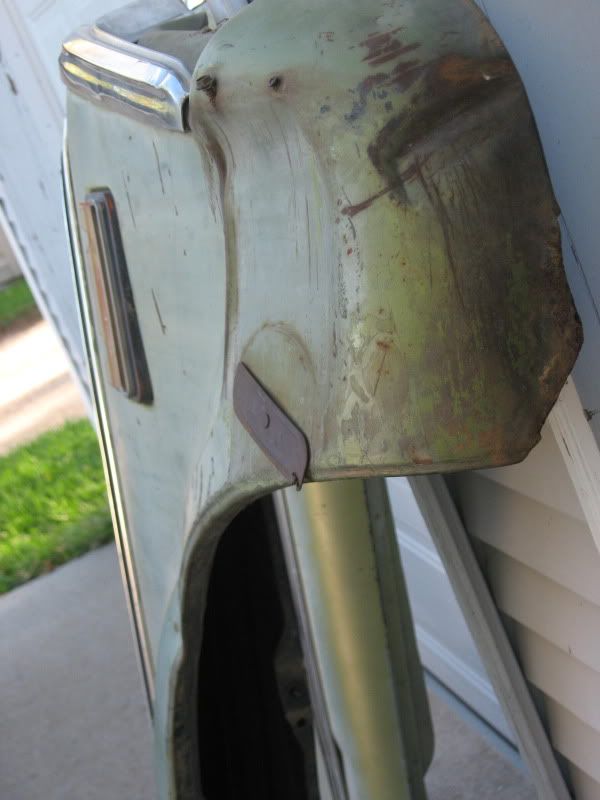 Couple bolts holding it on. 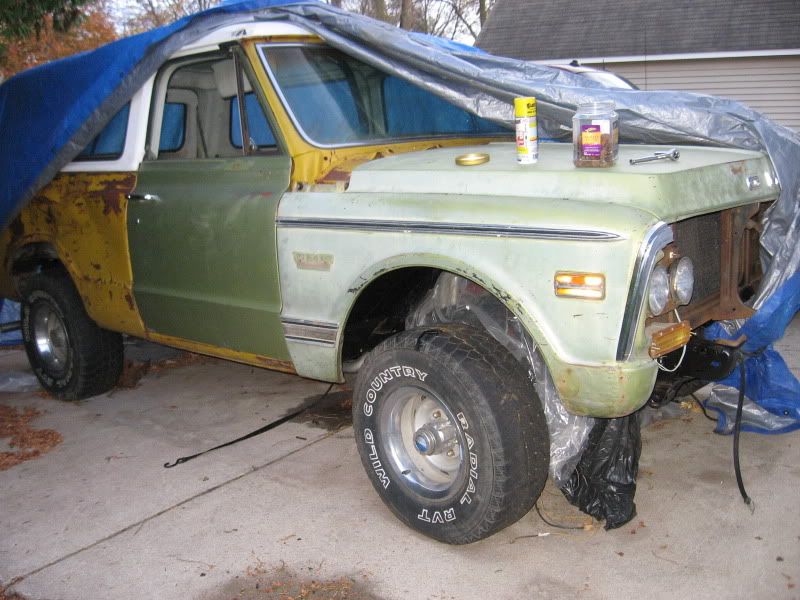 That door actually matches the front clip if it was buffed out. I have a couple ideas for a replacement bedside. I know where a couple blazers are at in some junkyards, but I don't remember the condition of them. Not really any shortbeds around, so this may be my best bet for now. I have all winter to look. I also may have found some vortec heads. I have to call the guy this weekend to set up a time to look at them next week. High mileage heads, so I have to take a close look to see if they are usable, but the price is right. I also just bought a Holley Pro-Jection EFI set up used, from a board member here for my C-10. So I'll be swapping the edelbrock from that onto this. If I get the heads, I just need to find the intake and I'll be able to button up the engine. The vortec intakes are kind of spendy, so I might check to see how much it would cost to machine a 1st gen intake to fit the vortec heads. Those are a dime a dozen. It's crazy to think about it, but there is a small chance I'd fire this thing up again this year. I'd like to hear it run so I know I can drive it next summer.
__________________
If no one knows what you're doing, they can't tell you you're doing it wrong HG's Dream Car Build - Shelby Cobra Kit Build your own adjustable track bar 71 Long Fleet C/10 72 Jimmy 4x4 (Junkyard Jimmy)HG's Plow Truck '78 K35 DuallyBigass Farm Truck HG's thread of miscellaneous stuff Last edited by hgs_notes; 10-29-2010 at 11:14 PM. |
|
|
|
|
10-29-2010, 11:14 PM
|
#339 |
|
VA72C10
Join Date: Mar 2008
Location: Midlothian, VA
Posts: 25,269
|
Re: Junkyard Jimmy Super Low Buck Build Thread
fender looks good! coming together...hope you find a good bedside and the vortechs work out for you!
__________________
Looking for a 67-72 swb or blazer project in or around VA.
|
|
|
|
|
10-29-2010, 11:18 PM
|
#340 | |
|
GEARHEAD
Join Date: Aug 2003
Location: MN
Posts: 6,107
|
Re: Junkyard Jimmy Super Low Buck Build Thread
Quote:
__________________
If no one knows what you're doing, they can't tell you you're doing it wrong HG's Dream Car Build - Shelby Cobra Kit Build your own adjustable track bar 71 Long Fleet C/10 72 Jimmy 4x4 (Junkyard Jimmy)HG's Plow Truck '78 K35 DuallyBigass Farm Truck HG's thread of miscellaneous stuff |
|
|
|
|
|
11-03-2010, 11:43 PM
|
#341 |
|
GEARHEAD
Join Date: Aug 2003
Location: MN
Posts: 6,107
|
Re: Junkyard Jimmy Super Low Buck Build Thread
Had some good luck, as far as I know right now, finding a set of vortec heads for the Jimmy. High mileage, but they look like they are in good shape. Need a little cleaning, but I can't complain for $73 for the pair of assembled heads. Now I need valve covers and an intake manifold.
__________________
If no one knows what you're doing, they can't tell you you're doing it wrong HG's Dream Car Build - Shelby Cobra Kit Build your own adjustable track bar 71 Long Fleet C/10 72 Jimmy 4x4 (Junkyard Jimmy)HG's Plow Truck '78 K35 DuallyBigass Farm Truck HG's thread of miscellaneous stuff |
|
|
|
|
11-03-2010, 11:59 PM
|
#342 |
|
VA72C10
Join Date: Mar 2008
Location: Midlothian, VA
Posts: 25,269
|
Re: Junkyard Jimmy Super Low Buck Build Thread
wow, killer deal!
__________________
Looking for a 67-72 swb or blazer project in or around VA.
|
|
|
|
|
11-04-2010, 12:37 AM
|
#343 | |
|
GEARHEAD
Join Date: Aug 2003
Location: MN
Posts: 6,107
|
Re: Junkyard Jimmy Super Low Buck Build Thread
Quote:
BTW, your seats should be delivered thursday. On a side note, I'm just about done running a gas line from the house to the garage. I used the heater last winter with a 100 lb propane bottle. Natural gas is cheaper and I don't have to worry about getting the tank filled. I'm hoping that by keeping it around 45-50F all the time in there from the start of the heating season, that the slab will hold some heat and it will warm up faster when I want to work in there. Last year I didn't get heat going until after Christmas and it was already very cold. I need to get about 2 more bats of insulation to finish in the corners, and I'd like to replace the window with a double pane insulated one for improved efficiency. Depends on how much money I have left after buying parts.
__________________
If no one knows what you're doing, they can't tell you you're doing it wrong HG's Dream Car Build - Shelby Cobra Kit Build your own adjustable track bar 71 Long Fleet C/10 72 Jimmy 4x4 (Junkyard Jimmy)HG's Plow Truck '78 K35 DuallyBigass Farm Truck HG's thread of miscellaneous stuff |
|
|
|
|
|
11-07-2010, 12:49 AM
|
#344 |
|
GEARHEAD
Join Date: Aug 2003
Location: MN
Posts: 6,107
|
Re: Junkyard Jimmy Super Low Buck Build Thread
We are having some unbelievably good weather up here for this time of year. It's nice for me with the jimmy in the driveway. I'll take every day like this for as long as they'll come because winter will get here eventually.
Anyway, I started out today cleaning up the new heads. Really didn't need much. I don't think it's possible these are high mileage heads. They had to have been rebuilt already. The water jackets looks like new. There was only a small bit of sludge by the head bolt holes on the farthest ends down low. Hardly anything really. I used a 3M stripper wheel on the drill to clean all of the gasket surfaces. It works good, just blow off with air afterwards. 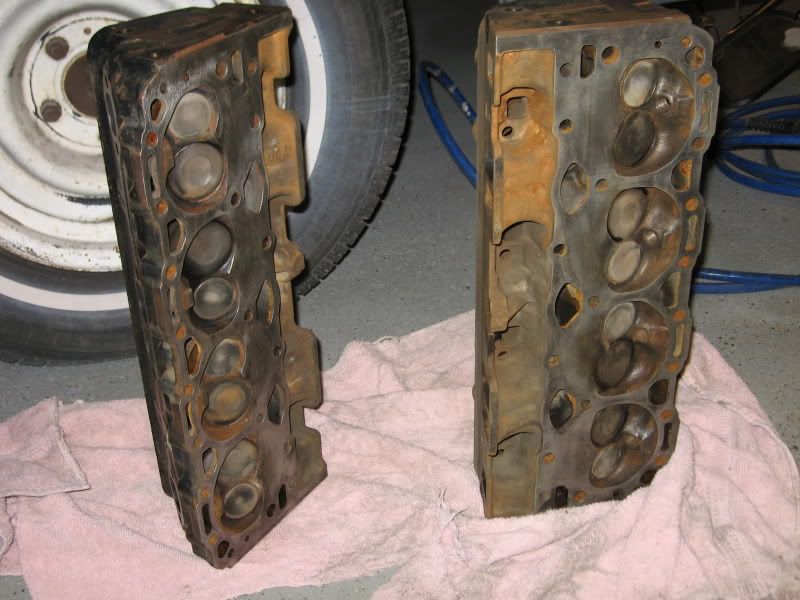 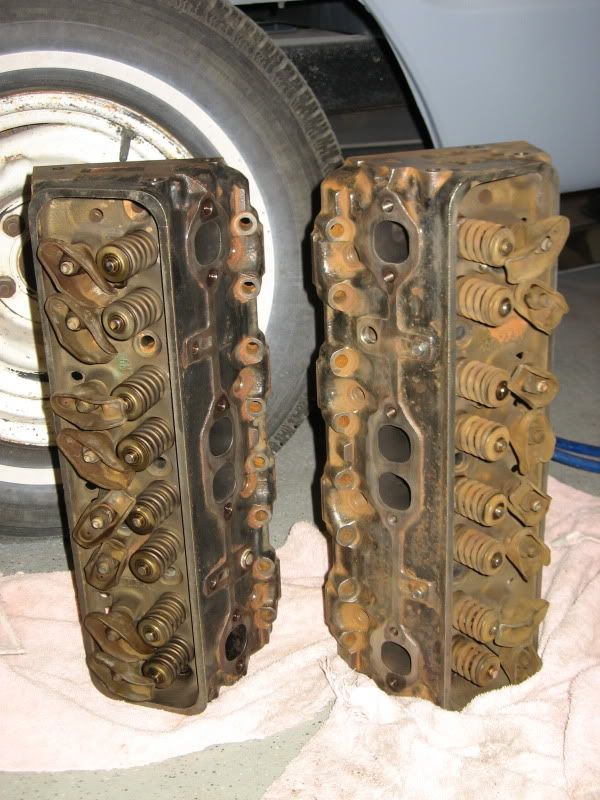 I cleaned off the pushrods and set them aside. Then got out the new lifters and they are soaking in a bucket of oil. I'll probably work on getting that stuff installed monday. Next I finished bolting up the brake master cylinder and booster. I found the baggie with the hardware in a box in the garage. 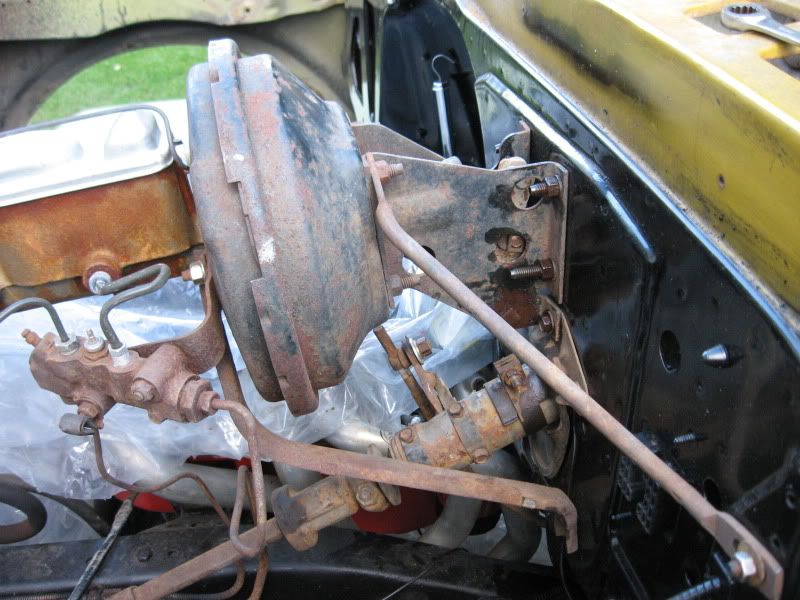 Next thing to do was the steering column. Just a tip here, but if the brake pushrod to the master cylinder is disconnected from the pedal, remember to re-install that before the steering column. There's not enough clearance to get the bolt in with the column installed. I can't find the bolts or screws that hold that inner plate to the firewall over the rubber grommet. I'll have to see what I got that fits it later. But it is in and the shifter linkage is hooked up. 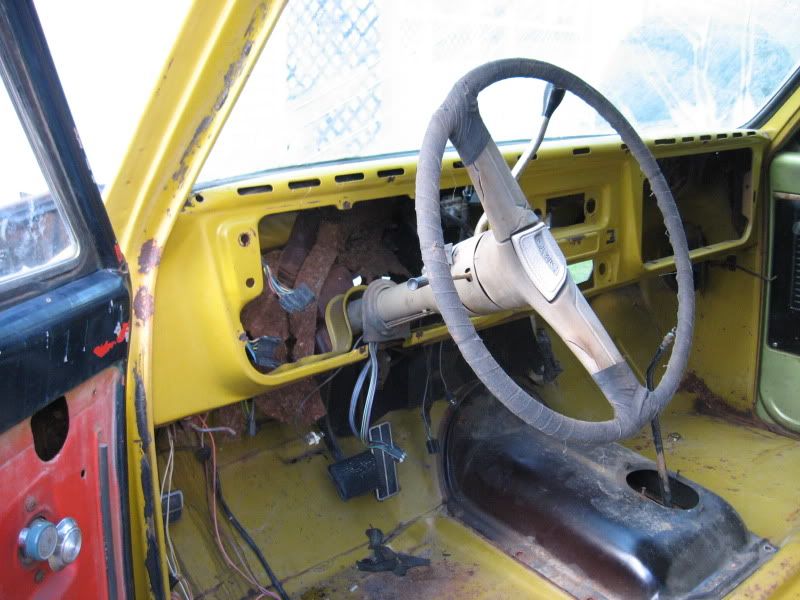 That nasty steering wheel needs to be added to the scrap pile. I got a decent black one to use for now, so I installed that today. 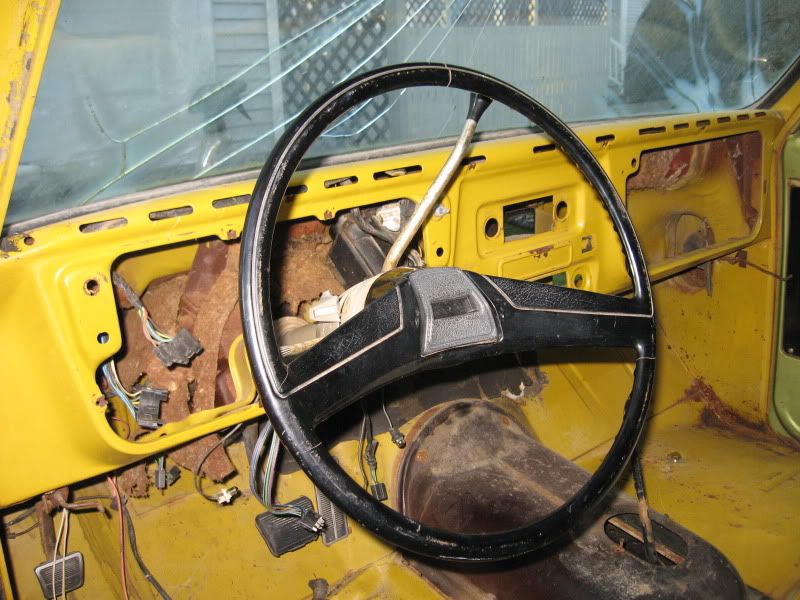 I need to make room in the garage, so I got the front seats and console set in, but they are not bolted down. 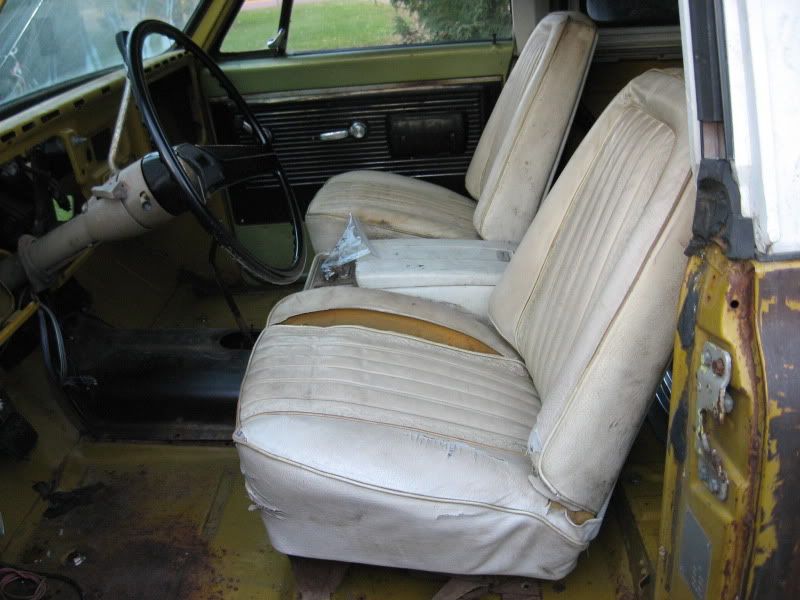 It was getting late in the day, even though it was nice out, the days are short. I cut a piece of plastic and taped it over the open top of the cowl area. I spent enough time cleaning all the leaves and mouse nests out, I don't want to do it again. Then I just set the cowl cover in place to hold it down and to get it out of the garage attic. I found the hood hinges in the garage and with a little help from my son and his friend, I was able to get the hood installed. It needs a little adjustment, but it's pretty close now. I just ran out of daylight and my wifes patience.  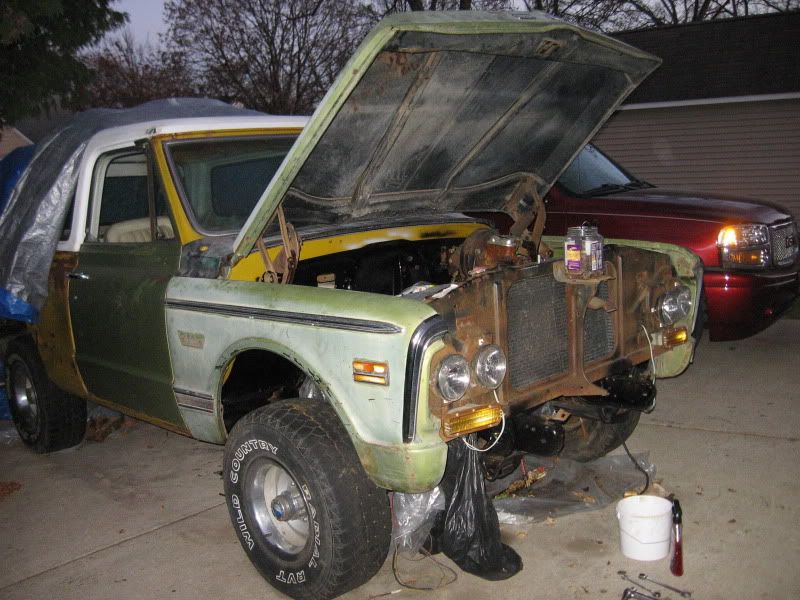 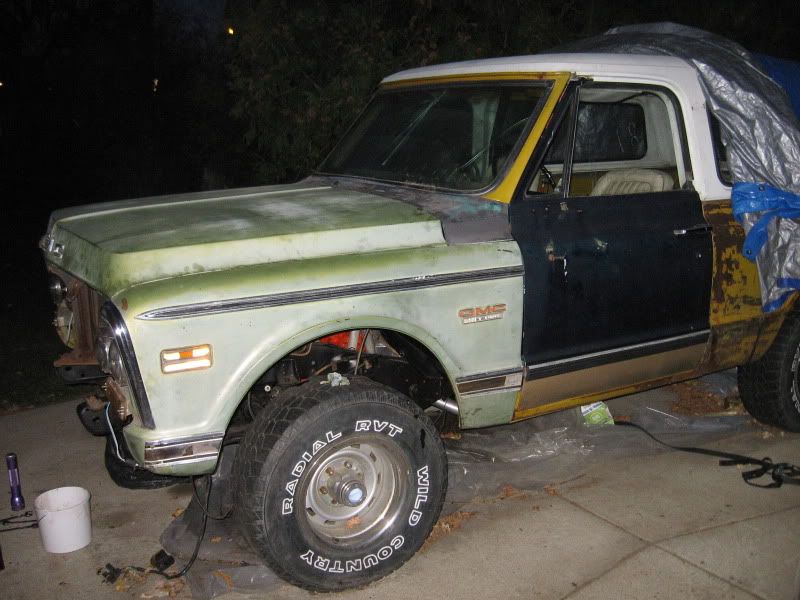 I'm shopping for the other engine parts I need so I can button it up and maybe run it and break the cam in properly. A lot left to be done yet. I need the intake, valve covers, maybe a water pump, and do some wiring, etc. but today was a pretty productive one.
__________________
If no one knows what you're doing, they can't tell you you're doing it wrong HG's Dream Car Build - Shelby Cobra Kit Build your own adjustable track bar 71 Long Fleet C/10 72 Jimmy 4x4 (Junkyard Jimmy)HG's Plow Truck '78 K35 DuallyBigass Farm Truck HG's thread of miscellaneous stuff Last edited by hgs_notes; 11-07-2010 at 12:50 AM. |
|
|
|
|
11-07-2010, 08:12 AM
|
#345 |
|
Senior Member
Join Date: Jun 2007
Location: Pine Ridge Florida
Posts: 4,126
|
Re: Junkyard Jimmy Super Low Buck Build Thread
What great progress you have made. Hope you get to enjoy with the top off soon!! I always enjoy reading your updates.
__________________
Click on my Not really a build thread, yet NOT SO RUST FREE RUST FREE BLAZER LS ENGINE SWAP INFORMATION THREAD BOLT RESTORATIONS 4l60 to an NP205 |
|
|
|
|
11-07-2010, 08:48 AM
|
#346 |
|
Registered User
Join Date: Jun 2010
Location: Leesburg GA
Posts: 547
|
Re: Junkyard Jimmy Super Low Buck Build Thread
It's coming along great!!!
 BTW, How much is the total cost up to? Spike 
__________________
68 stepside http://67-72chevytrucks.com/vboard/s...0&goto=newpost |
|
|
|
|
11-07-2010, 10:14 AM
|
#347 | ||
|
GEARHEAD
Join Date: Aug 2003
Location: MN
Posts: 6,107
|
Re: Junkyard Jimmy Super Low Buck Build Thread
Quote:
Quote:
I just realized yesterday that I'll need different door panels cause I no longer have 72 doors on it. I'm probably getting a different set for my C-10 and if so, I can use the ones I have for that as hand me downs and then sell the parchment 72 door panels.
__________________
If no one knows what you're doing, they can't tell you you're doing it wrong HG's Dream Car Build - Shelby Cobra Kit Build your own adjustable track bar 71 Long Fleet C/10 72 Jimmy 4x4 (Junkyard Jimmy)HG's Plow Truck '78 K35 DuallyBigass Farm Truck HG's thread of miscellaneous stuff |
||
|
|
|
|
11-07-2010, 03:41 PM
|
#348 |
|
GEARHEAD
Join Date: Aug 2003
Location: MN
Posts: 6,107
|
Re: Junkyard Jimmy Super Low Buck Build Thread
I had been reading info on the vortecs heads for awhile and knew there was a lift limit on the valves which is kind of on the restrictive side at .420" max valve lift. That allows for a .030" clearance for the retaniner to the valve seal. Having been quite some time since I put my shortblock together, I had to look up what I bought. The grind I installed has .442" intake lift and .465" exhaust lift.
 So I've spent an hour or so doing some research on options. Here is what I found: #1, swap the cam to one with no more than .420 lift. They are available and I did find one that was cheap and still had acceptable performance. But I would have to drop the pan to get the fron cover off to swap the cam. I'm leary enough of oil leaks as it is. But it could be done for about $70 and then use the heads as is. #2, the other non-machine method is to use a special spring and retainer set up from Crane Cam’s, part #10309-1 drop-in valve spring and retainer kit which is good for .550” lift. The main problem here is the kit costs upwards of $250. #3, Buy a special cutter that cuts down the valve guide boss and creates a larger spring seat diameter. The cutter and arbor guide is about $60, not a problem there. But you have to replace the springs and retainers and I think the seals also, which adds another $150 or so to the cost. #4, have a machine shop mill down the bosses. Still need to buy additional parts plus the cost of machining. This is where you get into the "while I'm at it" bit and end up spending serious money on head rebuilding. This will probably need to be done eventually, but hopefully not at this time. #5, the redneck method.  Remove the original retainers and grind off about 1/16" to 3/32" to gain the retainer to seal clearance and use what I got. Cost? I should probably replace the seals at $20 a set. Remove the original retainers and grind off about 1/16" to 3/32" to gain the retainer to seal clearance and use what I got. Cost? I should probably replace the seals at $20 a set.*edit* I just read another thing from a GM engineer that says they are good for .460-.480 lift, but you have to measure the distance on each valve due to casting and machining variances. So maybe I won't have to do anything but change the seals and measure the clearances.
__________________
If no one knows what you're doing, they can't tell you you're doing it wrong HG's Dream Car Build - Shelby Cobra Kit Build your own adjustable track bar 71 Long Fleet C/10 72 Jimmy 4x4 (Junkyard Jimmy)HG's Plow Truck '78 K35 DuallyBigass Farm Truck HG's thread of miscellaneous stuff Last edited by hgs_notes; 11-07-2010 at 03:56 PM. |
|
|
|
|
11-07-2010, 04:11 PM
|
#349 |
|
VA72C10
Join Date: Mar 2008
Location: Midlothian, VA
Posts: 25,269
|
Re: Junkyard Jimmy Super Low Buck Build Thread
I thought they were good up to closer to 480 but i'd double check them...
Your progress is great!!!
__________________
Looking for a 67-72 swb or blazer project in or around VA.
|
|
|
|
|
11-07-2010, 04:31 PM
|
#350 | |
|
GEARHEAD
Join Date: Aug 2003
Location: MN
Posts: 6,107
|
Re: Junkyard Jimmy Super Low Buck Build Thread
Quote:

__________________
If no one knows what you're doing, they can't tell you you're doing it wrong HG's Dream Car Build - Shelby Cobra Kit Build your own adjustable track bar 71 Long Fleet C/10 72 Jimmy 4x4 (Junkyard Jimmy)HG's Plow Truck '78 K35 DuallyBigass Farm Truck HG's thread of miscellaneous stuff |
|
|
|
|
 |
| Bookmarks |
|
|


 Linear Mode

