
|
 07-10-2010, 09:33 AM
|
#976 | |
|
Senior Member
Join Date: Jul 2005
Location: Winters Ca. 95694
Posts: 4,843
|
Re: LFD's 4dr Tahoe Build
Quote:
Kevin LFD Inc. |
|

|

|
|
07-10-2010, 11:35 PM
|
#977 | |
|
Registered User
Join Date: Jul 2000
Location: East Bay,CA
Posts: 298
|
Re: LFD's 4dr Tahoe Build
Quote:
__________________
51 Chevy 3100 Deluxe Cab(SOLD)  65 **stang 6cyl 70 C10 Long Bed Fleetside(1st truck,thanks Dad![SOLD]) 72 C10 Short Bed Fleetside 73 Blazer 2WD Catalina Blue White Top(Needs Love) 73 Blazer 2WD Work in progress LT1/4L60E 83 Grand National (SOLD) 94 Blazer K1500 Silverado (SOLD) 96 Impala SS All original (NEXT IN LINE 2 B SOLD) 99 Tahoe 2DR, 2WD 
|
|
|
|
|
|
07-13-2010, 01:46 AM
|
#978 | |
|
Registered User
Join Date: Feb 2008
Location: Arizona
Posts: 638
|
Re: LFD's 4dr Tahoe Build
Quote:
Kevin - I have no idea how you do it my brother, but your amazing. Your brain must NEVER stop!
__________________
72 Cheyenne shorty "CheyLow" 72 3/4 long 4X4 69 SWB "Prospector" 68 C/10 shorty - "Picacho" http://67-72chevytrucks.com/vboard/s...d.php?t=428379 sold to "93redsled"  Have you heard about C10 Talk? C10 Talk is a podcast all about C10 Trucks, the builders, the vendors, and most importantly the C10 Community. Check us out online at www.c10talk.com Have you heard about C10 Talk? C10 Talk is a podcast all about C10 Trucks, the builders, the vendors, and most importantly the C10 Community. Check us out online at www.c10talk.com
|
|
|
|
|
|
07-21-2010, 10:34 PM
|
#979 | |
|
Senior Member
Join Date: Jul 2005
Location: Winters Ca. 95694
Posts: 4,843
|
Re: LFD's 4dr Tahoe Build
Quote:
Tires are 305/40 R22 114V and 275/45 R20 110V, zero miles as the stickers are still on the tread. I think I was into them for about $2300 and the tires are from Americas tire and have the replacement warrantee. Looking for $1500 or BO for them. Kevin LFD Inc. |
|
|
|
|
|
08-29-2010, 01:47 AM
|
#980 |
|
Senior Member
Join Date: Jul 2005
Location: Winters Ca. 95694
Posts: 4,843
|
Re: LFD's 4dr Tahoe Build
Buy the whole project with out motor and trans or Accuair system.
http://67-72chevytrucks.com/vboard/c...uct=4652&cat=8 Kevin LFD Inc. |
|
|
|
|
08-29-2010, 12:37 PM
|
#981 |
|
On the path to financial ruin!
 Join Date: Jan 2009
Location: Dallas, TX
Posts: 722
|
Re: LFD's 4dr Tahoe Build
OMG!!!!!!!!!! I don't believe you are selling it Kevin. Hell of a build and worth every penny. I understand priorities first though, especially family. You should have no problem selling this.
__________________
'72 Chevelle SS--4.0 Whipple LS7, T56 Magnum, 20X9/20X13 HRE 791R, 6-piston Baer brakes, IRS '68 SWB C10--LS3, TKO-600, 22x10/22x12 HRE 948R, C5 suspension, shockwaves, custom frame Ooh Wee's Makeover...http://67-72chevytrucks.com/vboard/s...d.php?t=376280 |
|
|
|
|
08-29-2010, 02:23 PM
|
#982 |
|
Senior Member
Join Date: Jul 2005
Location: Winters Ca. 95694
Posts: 4,843
|
Re: LFD's 4dr Tahoe Build
Just so we are clear! Everything you see in the build thread is included- minus motor and trans and any computer related items as well as I removed the entire AccuAir system for my sons truck.
So you are getting the complete 4 DOOR body and front sheet metal. Body is rust free and in really good over all shape. The rear doors need fabrication if you continue with my plan and the tail light area on the drivers side was cut out. Comes with front, middle and rear seats from a 2003 style tahoe and they are all mounted and braced. The front and rear suspension is all in but needs shock mounts made for the front and rear. The rear suspension links are made out of light material for mock up and now need to be copied in stronger material but all the joints and ends are their. It has a clean Ca. title in my name and is currently on Non-operations status. So for you 6k you get new rims and tires ($2200), front drop member ($1400), 96 C4 front suspension ($1000), rear 96 C4 suspension "Dana 44" ($2500) plus body frame and way too many hours to even think of listing. Yes I am smoking crack so jump on this before I seek help  Kevin LFD Inc. |
|
|
|
|
08-29-2010, 02:36 PM
|
#983 |
|
Registered User
Join Date: Aug 2008
Location: Pittsburg, KS
Posts: 2,466
|
Re: LFD's 4dr Tahoe Build
Do yo take credit card? I wish I had the cash for this. Hell its prob. allready sold....
__________________
Doug Looking for a 67-72 short bed driver..... |
|
|
|
|
08-30-2010, 04:40 PM
|
#984 |
|
Registered User
Join Date: Aug 2005
Location: Hillsboro Oregon
Posts: 6,449
|
Re: LFD's 4dr Tahoe Build
Someone is going to get a SMOKING f'n deal!!!
|
|
|
|
|
08-30-2010, 04:53 PM
|
#985 |
|
low n' slo
Join Date: Mar 2009
Location: rosenberg, texas
Posts: 5,133
|
Re: LFD's 4dr Tahoe Build
looks like its sold..
i sure hope the new owner can continue a build thread on it, i would like to see it rolling under its own power!
__________________
67 1/2 ton Suburban - Project DRGNWGN. Build thread  -_--_--_ _________ _--_-_ -/____|__|__\__ ,.,,,.,.,,.,|_O _______ O_] |
|
|
|
|
08-30-2010, 10:38 PM
|
#986 |
|
Senior Member
Join Date: Jul 2005
Location: Winters Ca. 95694
Posts: 4,843
|
Re: LFD's 4dr Tahoe Build
SOLD! Yep it is sold and paid for. The new owner will be picking it up next Wednesday with his builder who is also a Lazze Metal Shaping grad. I have a good feeling that this build will carry on and turn out just as nice if not better then my plans. So stay tuned for more from a fellow board member! Kevin LFD Inc. |
|
|
|
|
08-30-2010, 11:07 PM
|
#987 |
|
VA72C10
 Join Date: Mar 2008
Location: Midlothian, VA
Posts: 25,269
|
Re: LFD's 4dr Tahoe Build
cool. Hoped I could scoop it up but glad it went to a forum member and someone who will take it to completion!!!
__________________
Looking for a 67-72 swb or blazer project in or around VA.
|
|
|
|
|
08-30-2010, 11:17 PM
|
#988 |
|
Senior Member
Join Date: Nov 2003
Location: Calgary Alberta
Posts: 1,936
|
Re: LFD's 4dr Tahoe Build
  Looks like someone with some talent will be finishing this one. Looking forward to seeing this in magazines.. Darren
__________________
67- 72 Parts collecter |
|
|
|
|
09-10-2010, 12:07 AM
|
#989 |
|
Senior Member
Join Date: Jul 2005
Location: Winters Ca. 95694
Posts: 4,843
|
Re: LFD's 4dr Tahoe Build
Tahoe left last night with it's new owner and his builder. Man I have so much more room in my yard and parts house!
 Kevin LFD Inc. |
|
|
|
|
09-10-2010, 12:33 AM
|
#990 |
|
Senior Member
Join Date: Nov 2003
Location: Calgary Alberta
Posts: 1,936
|
Re: LFD's 4dr Tahoe Build
Almost!!!!
__________________
67- 72 Parts collecter |
|
|
|
|
09-10-2010, 09:13 AM
|
#991 |
|
TNT-MOTORSPORTS
Join Date: Mar 2008
Location: TULSA OKLAHOMA
Posts: 2,692
|
Re: LFD's 4dr Tahoe Build
I am so sad.....I feel like we have lost a family member........ )-:
Last edited by ksbrktracer; 09-10-2010 at 09:13 AM. |
|
|
|
|
09-10-2010, 05:32 PM
|
#992 |
|
Kvn1011
Join Date: May 2009
Location: kankakee il
Posts: 560
|
Re: LFD's 4dr Tahoe Build
Do u know if they will have a build thread? If so can you point us to it thanks!
PS you still RoK! Posted via Mobile Device |
|
|
|
|
06-24-2013, 07:32 PM
|
#993 |
|
A day late and $1 short...
Join Date: Dec 2008
Location: Northwest FL
Posts: 3,870
|
Re: LFD's 4dr Tahoe Build
What ever happened to this one? Was it finished?
__________________
Buck Instagram: C10_ustacould 1963 SWB Fleet Side 528 Desert Beige Milly 1967 SWB Step Side 506 Medium Blue The Old Girl 1968 SWB Fleet Side 503 Light Green Ellie SOLD 1965 SWB Fleet Side 507 Light Blue Prescription Strength SOLD 1971 SWB Fleet Side 521 White Shiro SOLD 1968 SWB Step Side 503 Light Green My Old Farm Truck SOLD |
|
|
|
|
06-24-2013, 09:55 PM
|
#994 |
|
Senior Member
Join Date: Nov 2003
Location: Calgary Alberta
Posts: 1,936
|
Re: LFD's 4dr Tahoe Build
Sold before I could buy it to a guy in Seattle. Tried buying it, trading if or it with no success
Not sure of the progress Posted via Mobile Device
__________________
67- 72 Parts collecter |
|
|
|
|
11-05-2013, 04:32 PM
|
#995 | |||||||||||||||
|
Registered User
Join Date: Sep 2009
Location: Medford, OR.
Posts: 207
|
Re: LFD's 4dr Tahoe Build
Quote:
Quote:
Quote:
Quote:
Quote:
Quote:
Quote:
Quote:
Quote:
Quote:
Quote:
Quote:
Quote:
Quote:
Quote:
|
|||||||||||||||
|
|
|
|
11-07-2013, 01:57 AM
|
#996 |
|
Senior Member
Join Date: Jul 2005
Location: Winters Ca. 95694
Posts: 4,843
|
Re: LFD's 4dr Tahoe Build
Or up-grade and go to the C5 set up! Seems like years ago when I did this work. I am currently in Las Vegas at the SEMA show seeing lots of great new rides and products. The best thing that I have seen so far is the amazing number of rides with accuair's bag set up sliding them right down to mother earth where they should be.
That aside for now my new project is a custom designed (by LFD) 30's 3 window coupe and in this one I am running all 2005 C5 running gear with the 6spd trans-axel but running a 4-cam all alum motor. i do not think I would ever fight a C4 set up (except Nate's C4 drop member) into another ride again. The C5 rear is just such a simple well designed set up that it is a no brainer. Sorry if this post is off a bit I just spent the last few hours at a private party at Cabo Wabo and I am seeing a bit more than 1 right now. Kevin LFD Inc. |
|
|
|
|
11-07-2013, 10:21 AM
|
#997 |
|
Senior Member
Join Date: Nov 2003
Location: Calgary Alberta
Posts: 1,936
|
Re: LFD's 4dr Tahoe Build
Man, can someone delete this entire thread??? Every time I just get the Tahoe off my mi d someone brings it up to the top and reminds me that I should have just bought the damn thing!!!!!!
Now I have to kick myself I The ass for a while again, thanks!!!
__________________
67- 72 Parts collecter |
|
|
|
|
11-08-2013, 10:24 PM
|
#998 |
|
Registered User
Join Date: Sep 2009
Location: Medford, OR.
Posts: 207
|
Re: LFD's 4dr Tahoe Build
I agree that the C5 setup would not only be easier to mount, it would also put some weight in the rear where it's needed. My problem is the torque tube. I found one custom install over the years (in a 'Cuda, no less), and they made adapters to run regular u-joints and a driveshaft. But I can't find anything commercially to compensate or replace having to section the torque tube. C5 rear ends are cheaper than C4s a lot of times, and you get a T-56, so it would be great if one could figure out how to make them work easily.
|
|
|
|
|
11-10-2013, 02:16 PM
|
#999 |
|
PROJECT 7DEUCE
Join Date: Dec 2002
Location: GRANTS PASS OR
Posts: 21,589
|
Re: LFD's 4dr Tahoe Build
Kevin are you still posting build threads somewhere? I really miss reading your posts and the info you provide..
__________________
GO BIG GREEN  GO DUCKS GO DUCKSMEMBER #6377 72 k-5 daily driver 6'' lift 35'' 350-350-205 slowly getting rust free. Project "7DEUCE" check out my build http://67-72chevytrucks.com/vboard/s...d.php?t=267665 Tim Powell..R.I.P EastSideLowlife..... R.I.P.. |
|
|
|
|
11-10-2013, 11:22 PM
|
#1000 |
|
Senior Member
Join Date: Jul 2007
Location: Clarksville TN 37043
Posts: 8,702
|
Re: LFD's 4dr Tahoe Build
X2!
__________________
Chuck 68  swb Fleetside build ''Choncho'' swb Fleetside build ''Choncho'' http://67-72chevytrucks.com/vboard/s...d.php?t=374892 My trailer redo http://67-72chevytrucks.com/vboard/s...69#post5893869 Chuy my 59 bug http://67-72chevytrucks.com/vboard/s...d.php?t=653798 Putnam 87 GMC Shop truck http://67-72chevytrucks.com/vboard/s...d.php?t=707687 |
|
|
|
 |
| Bookmarks |
|
|


 [/IMG]
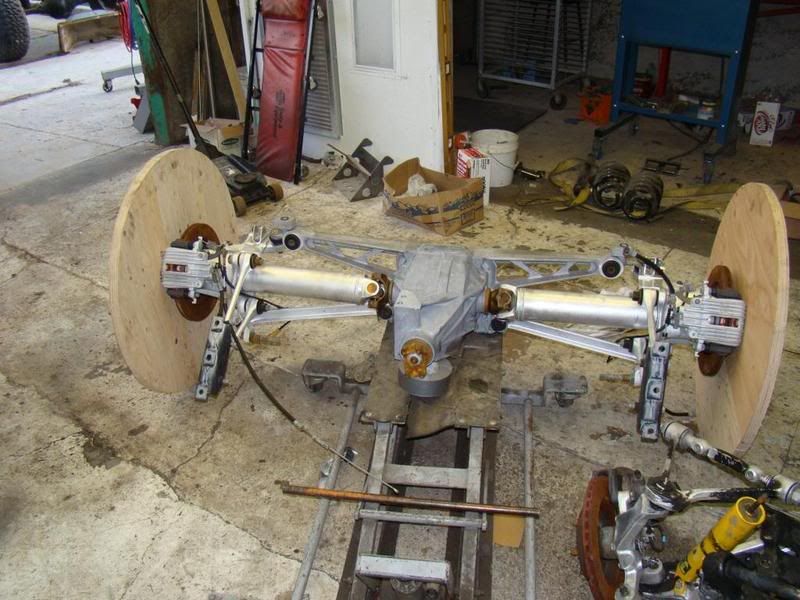 [/IMG]
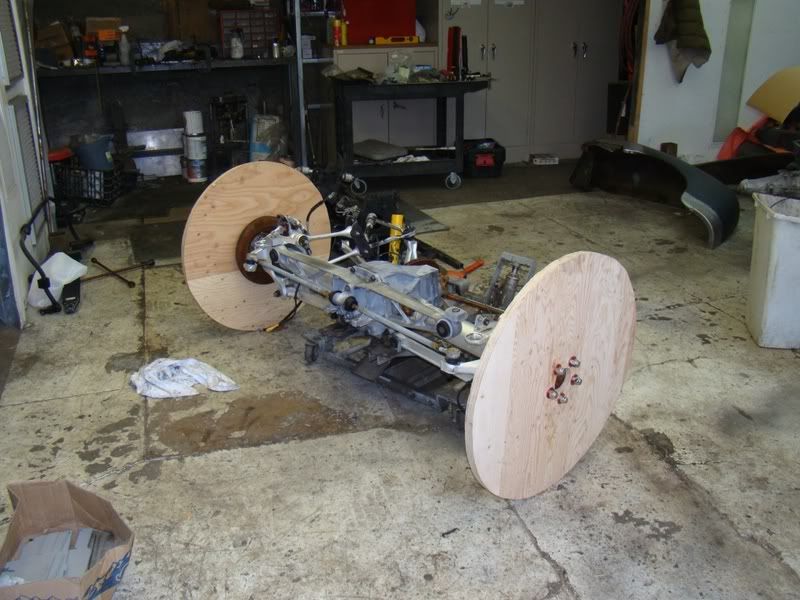 [/IMG]
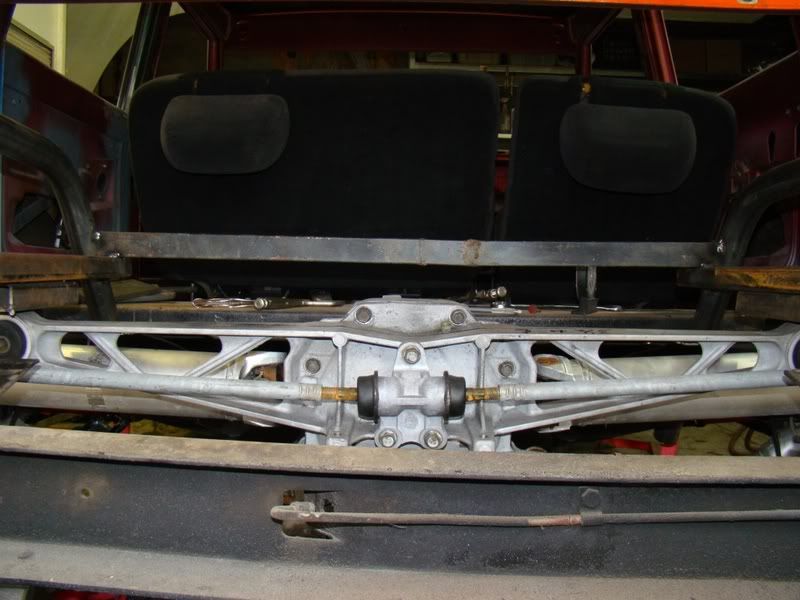 [/IMG]
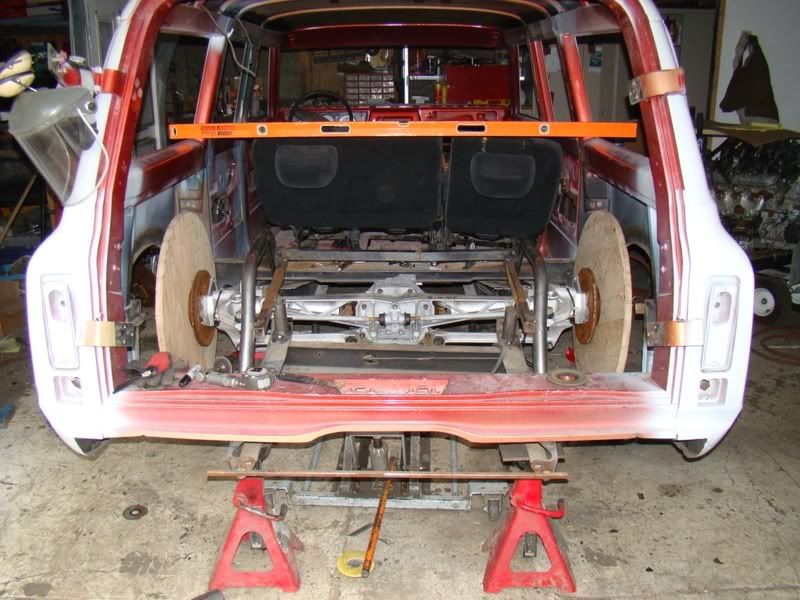 [/IMG]
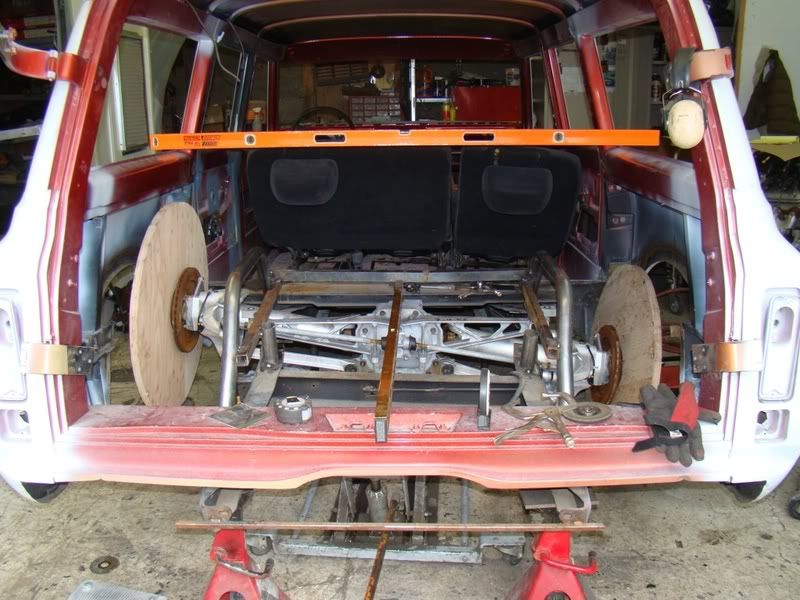 [/IMG]
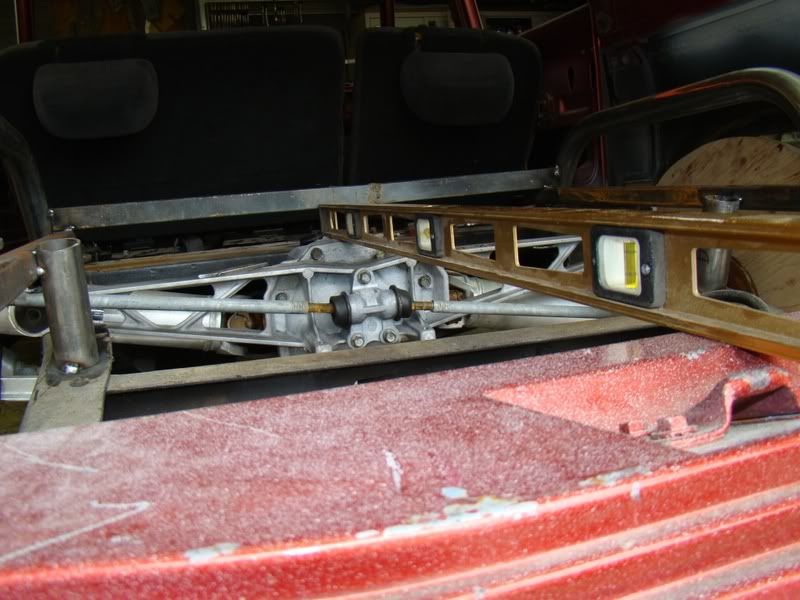 [/IMG]
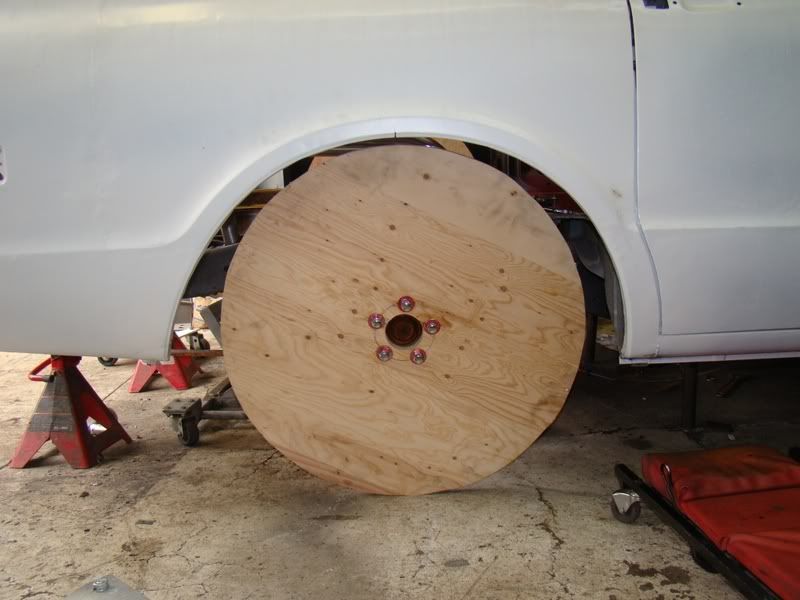 [/IMG]
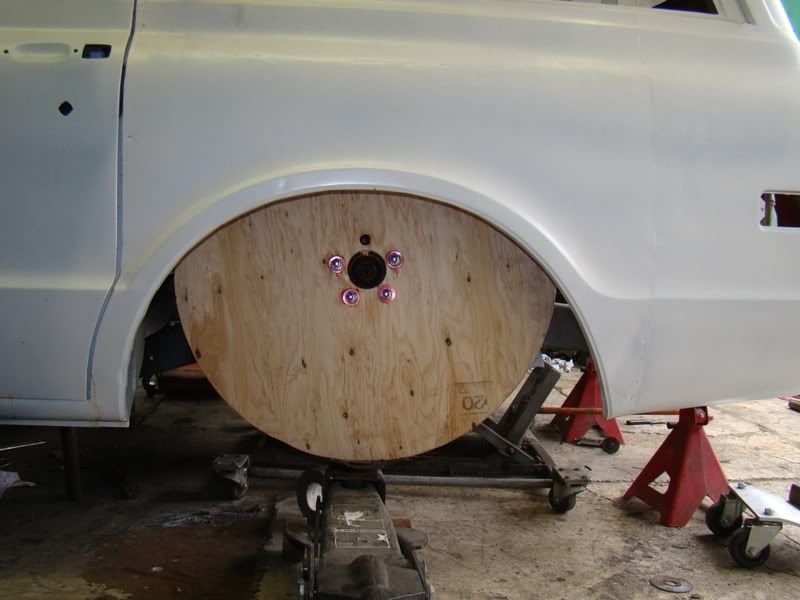 [/IMG]
 [/IMG]
 [/IMG]
 [/IMG]
 [/IMG]
 [/IMG]
 [/IMG]
 [/IMG]
 [/IMG]
 [/IMG]
 [/IMG]
 [/IMG]
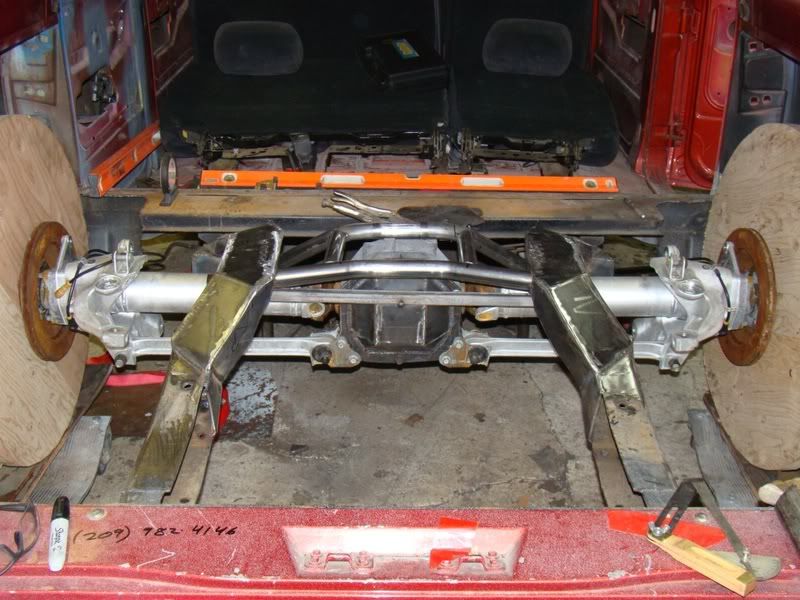 [/IMG]
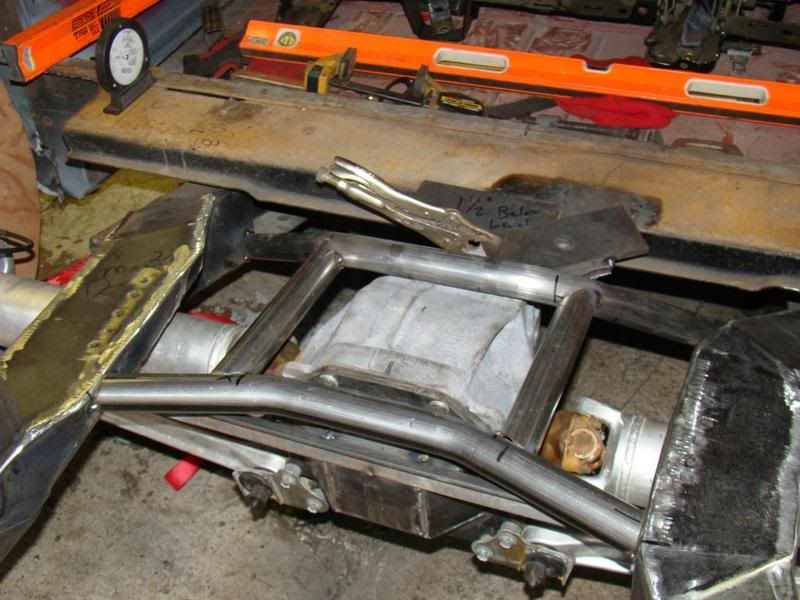 [/IMG]
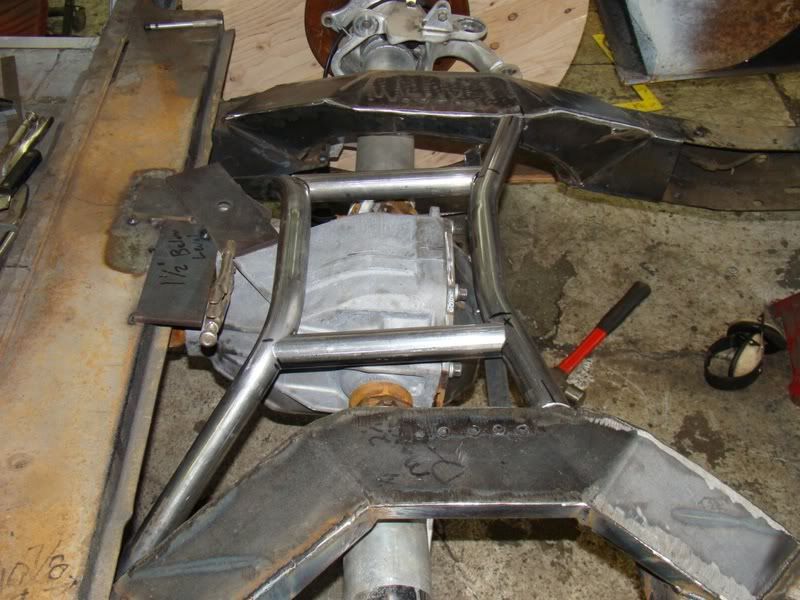 [/IMG]
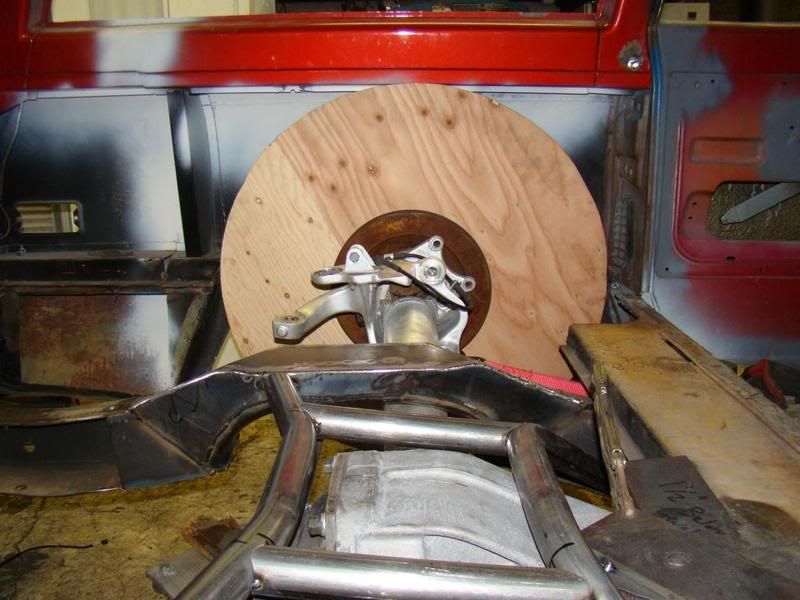 [/IMG]
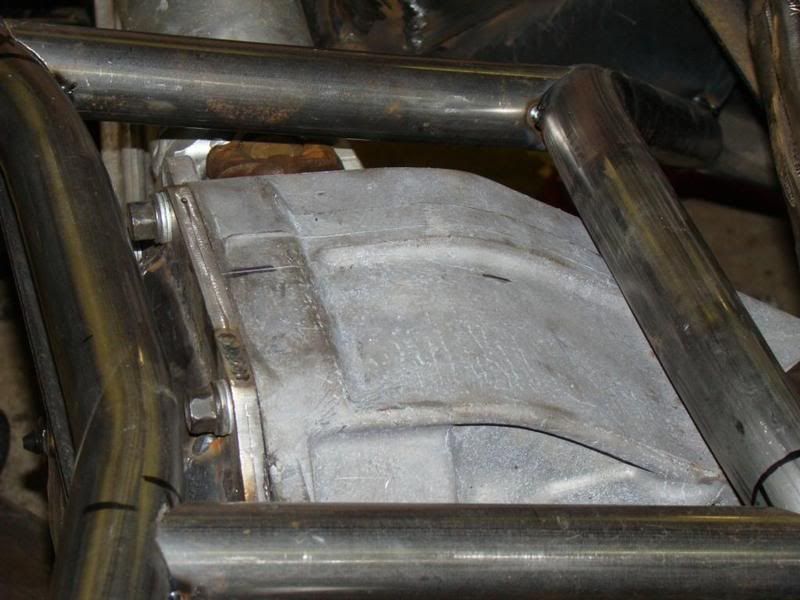 [/IMG]
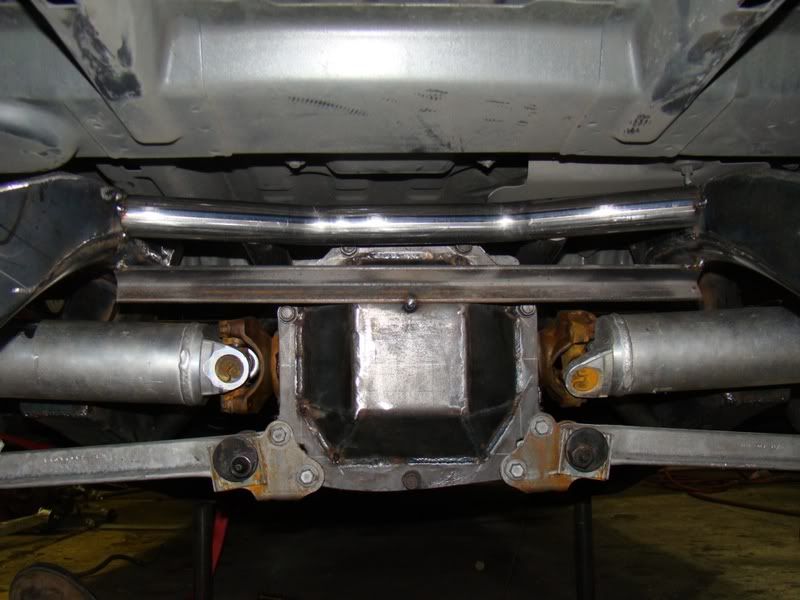 [/IMG]
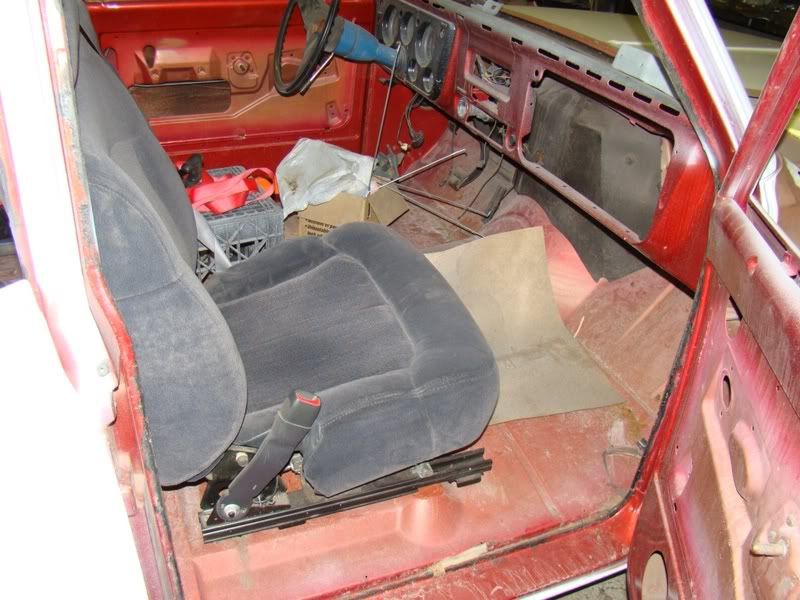 [/IMG]
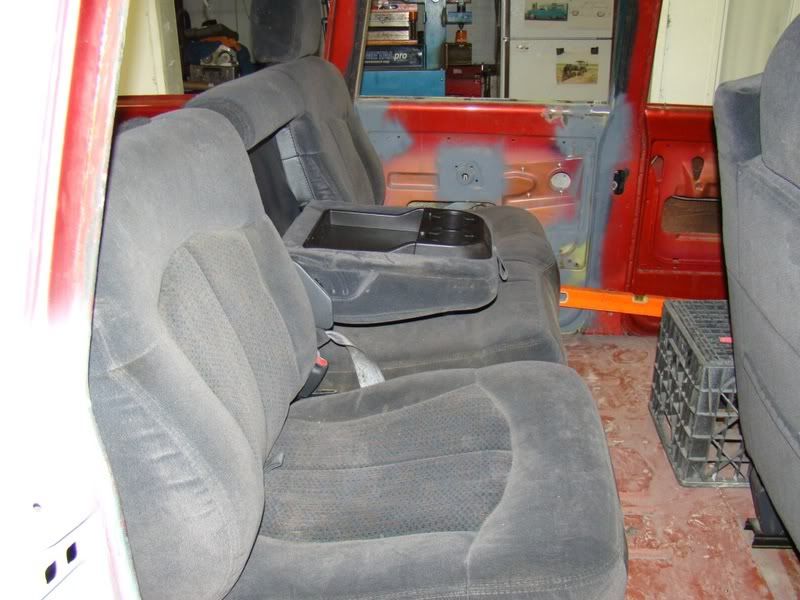 [/IMG]
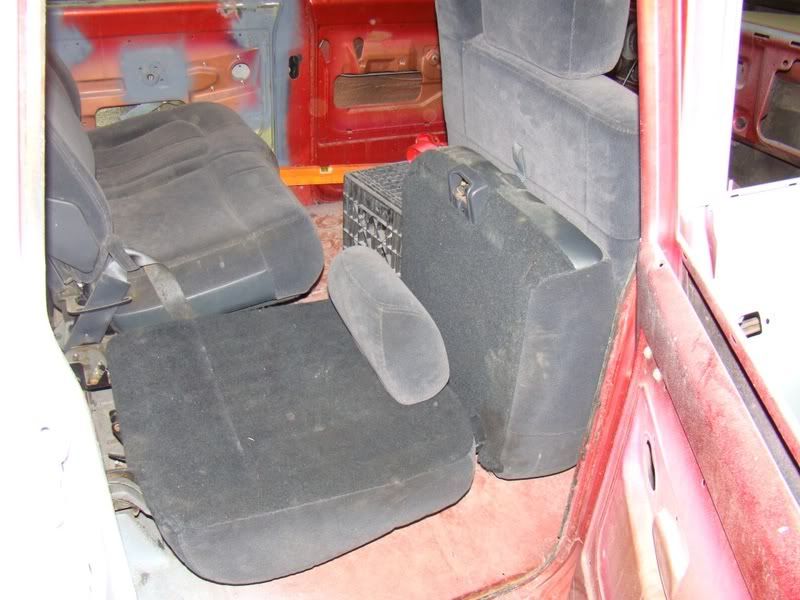 [/IMG]
 [/IMG]
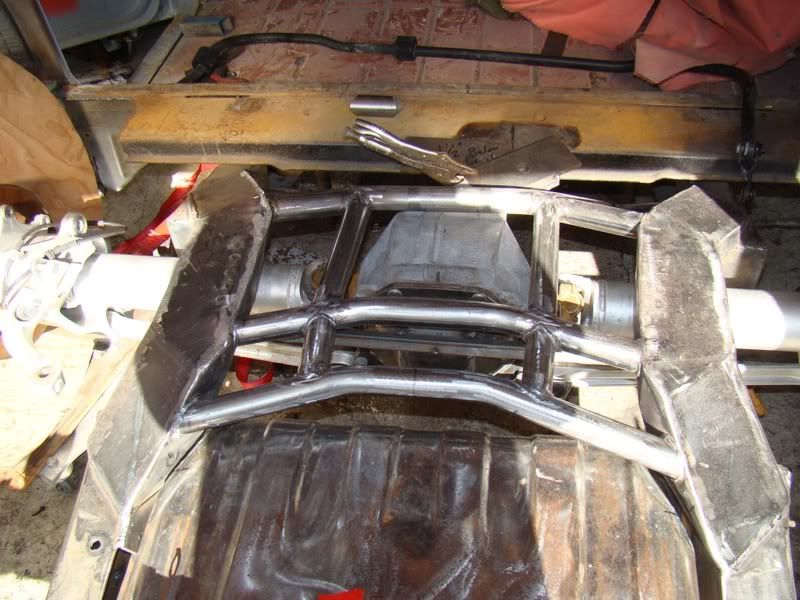 [/IMG]
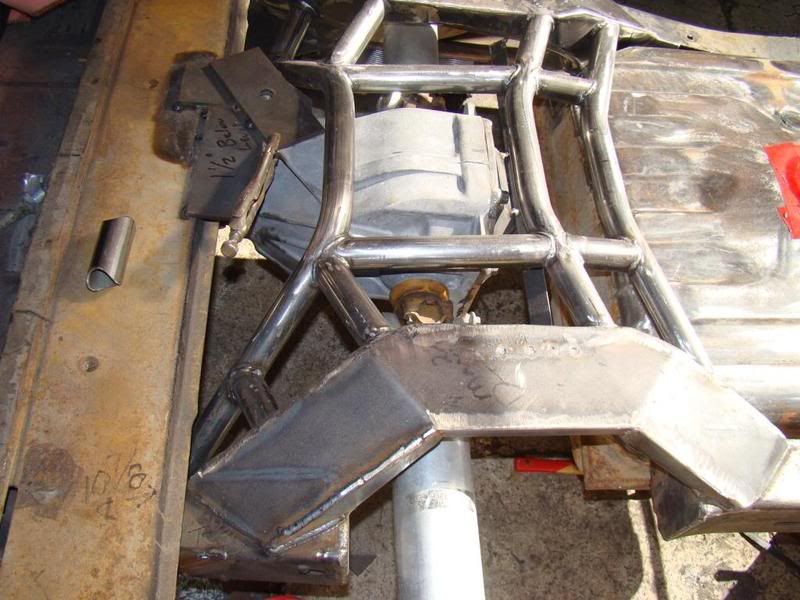 [/IMG]
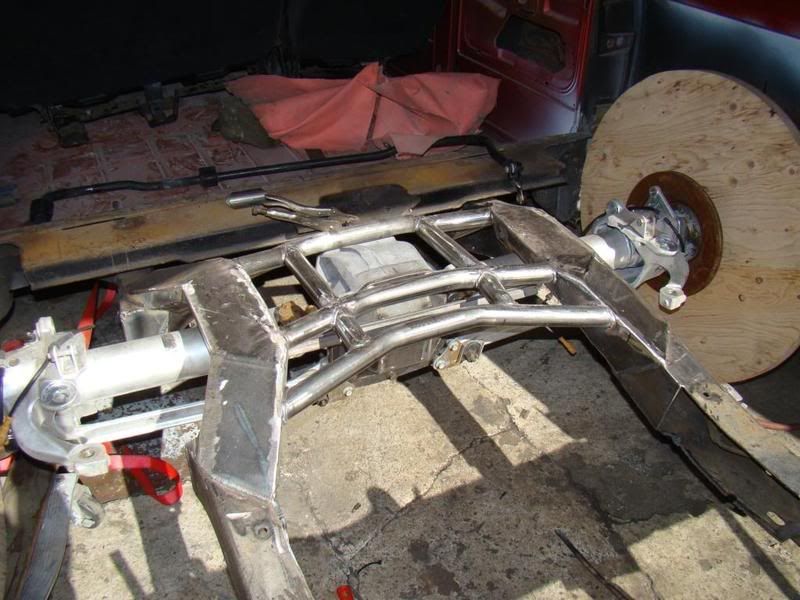 [/IMG]
 [/IMG]
 [/IMG]
 [/IMG]
 [/IMG]
 [/IMG]
 [/IMG]
 [/IMG]
 [/IMG]
 [/IMG]
 [/IMG]
 [/IMG]
 [/IMG]
 [/IMG]
 [/IMG]
 [/IMG]
 [/IMG]
 [/IMG]
 [/IMG]
 [/IMG]
 [/IMG]
 [/IMG]
 [/IMG]
 [/IMG]
 [/IMG]
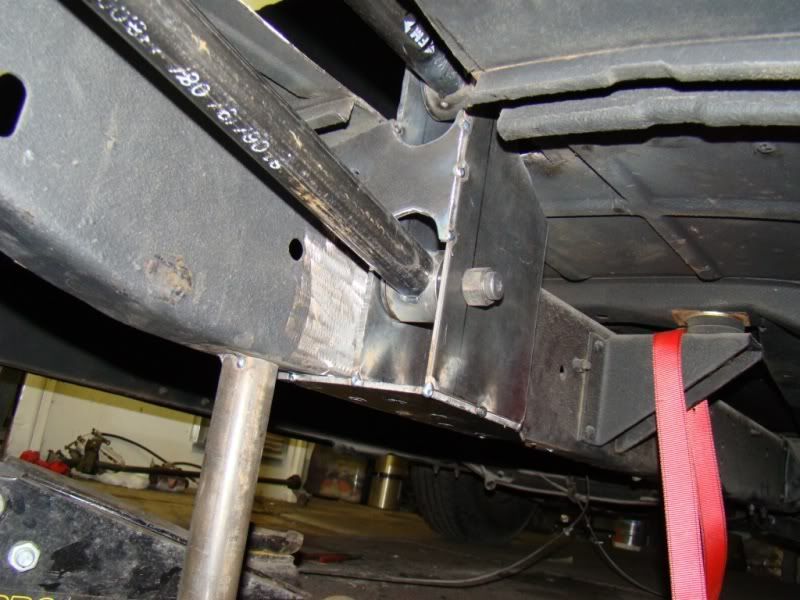 [/IMG]
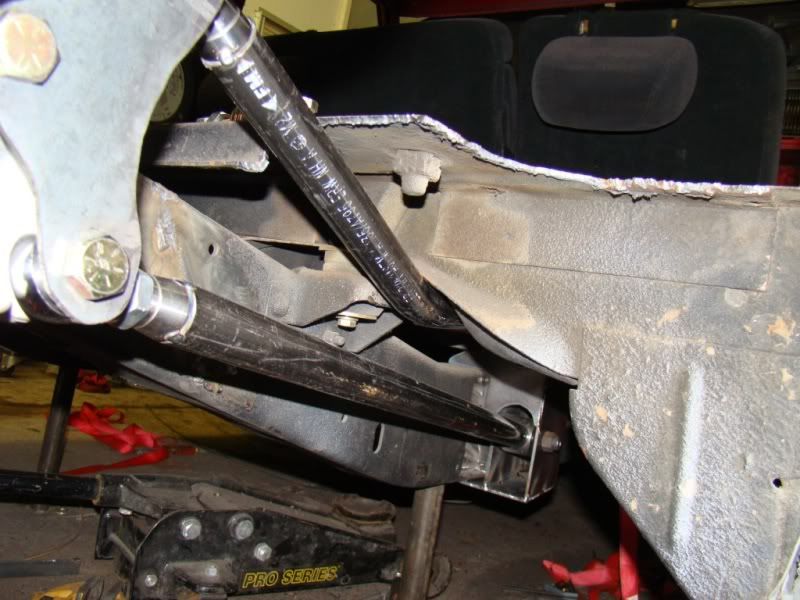 [/IMG]
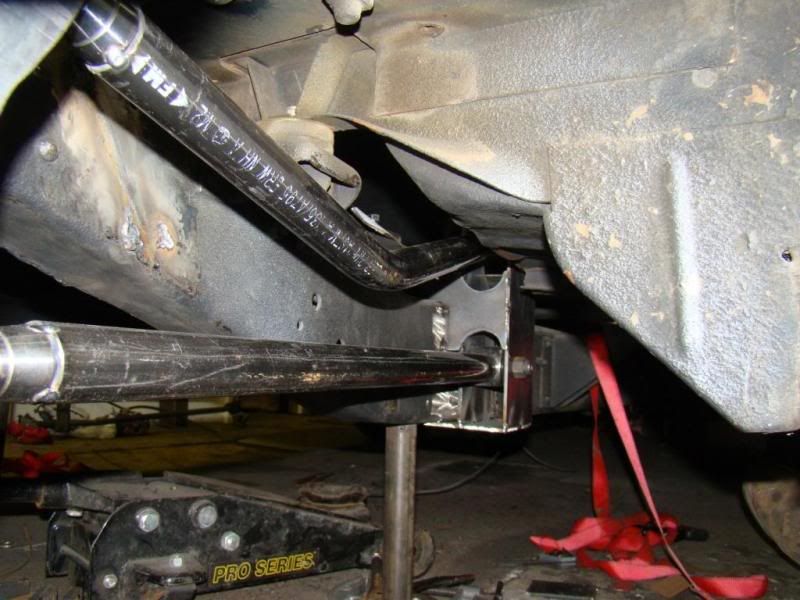 [/IMG]
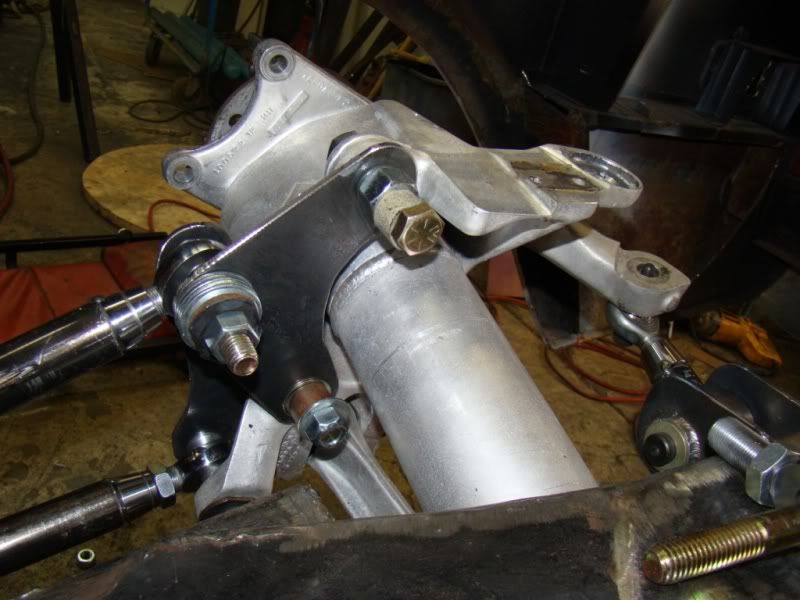 [/IMG]
 [/IMG]
 [/IMG]
 [/IMG]
 [/IMG]
 [/IMG]
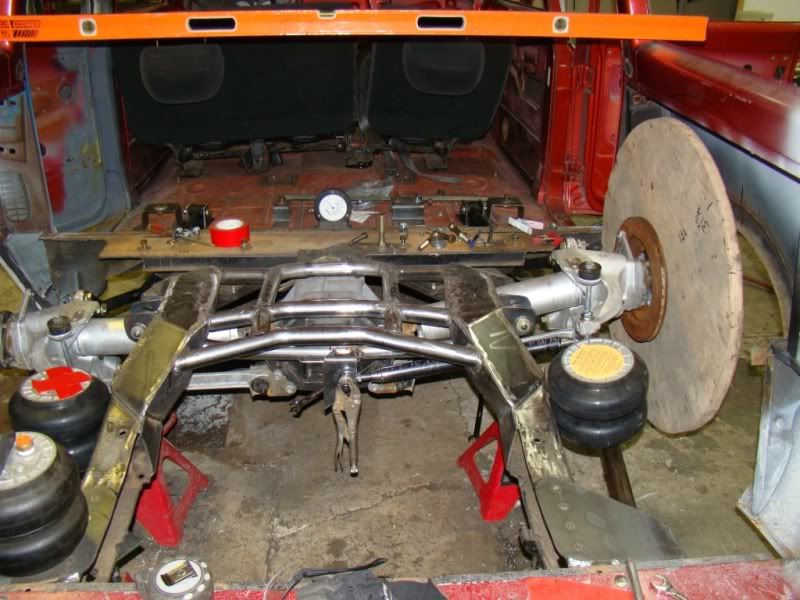 [/IMG]
 [/IMG]
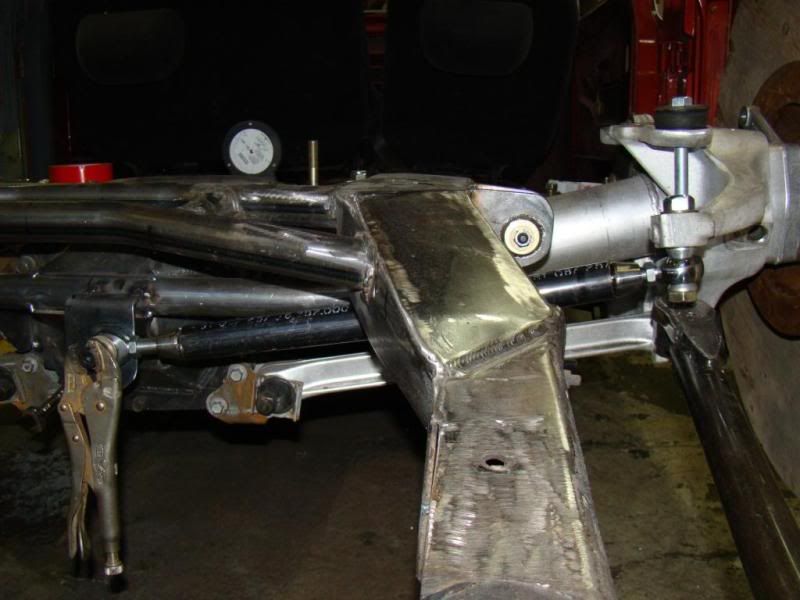 [/IMG]
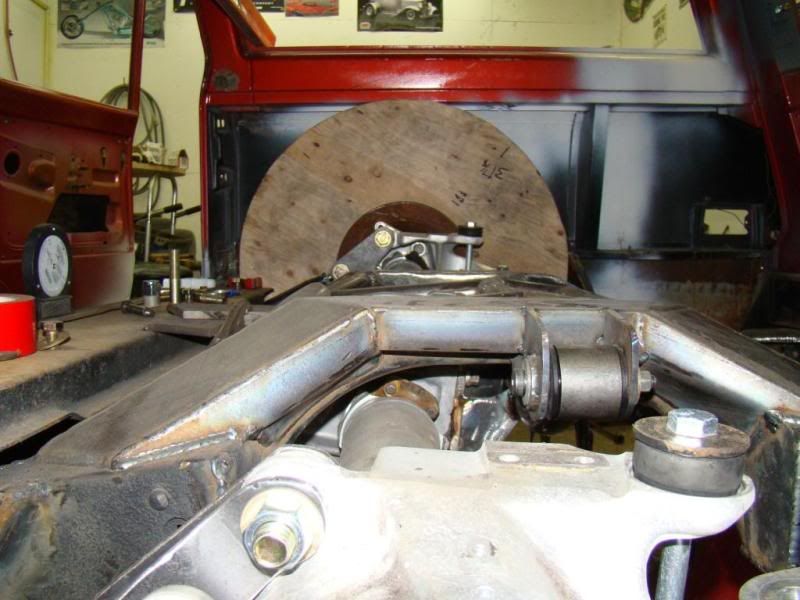 [/IMG]
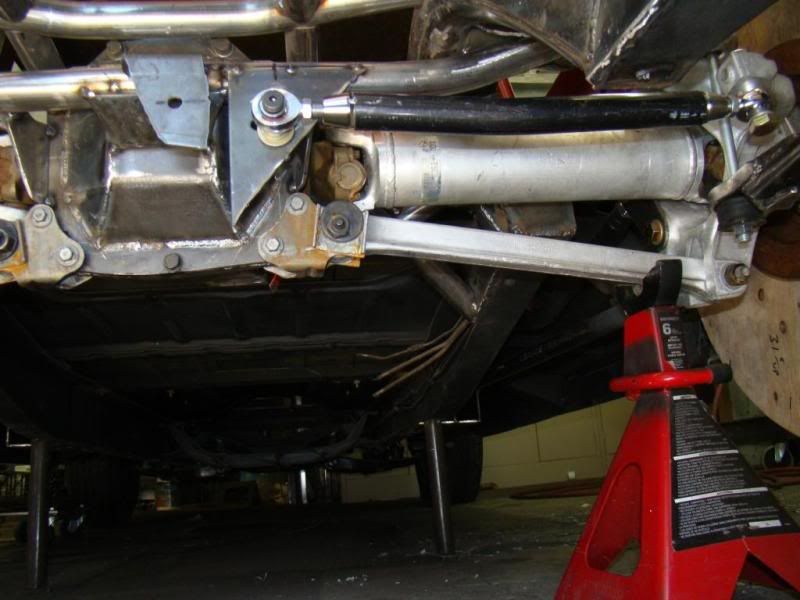 [/IMG]
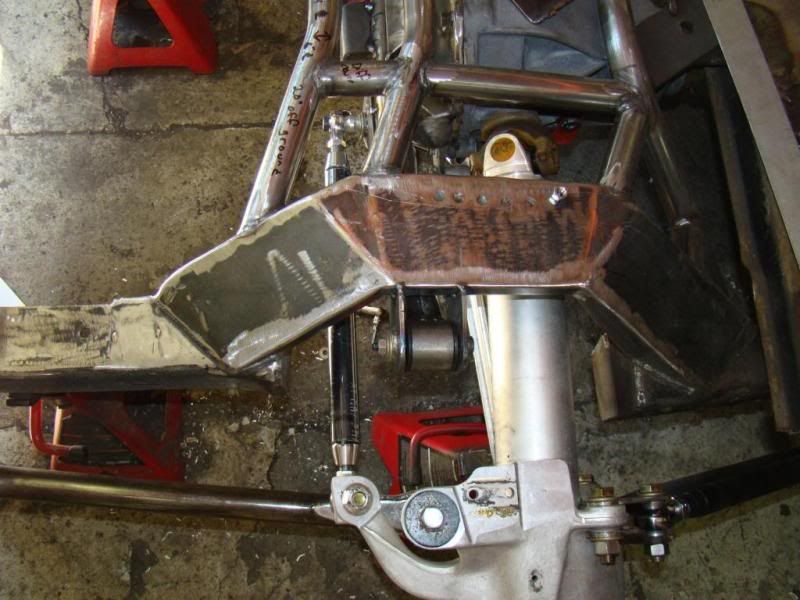 [/IMG]
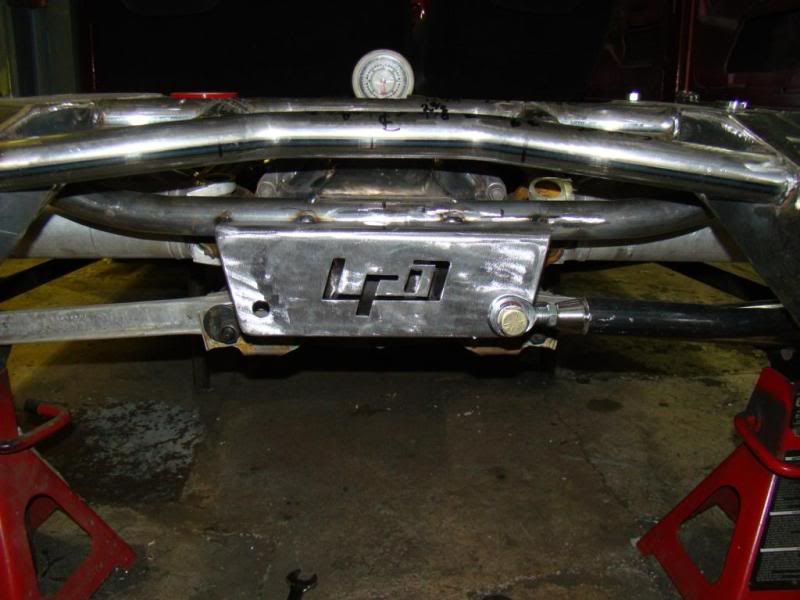 [/IMG]
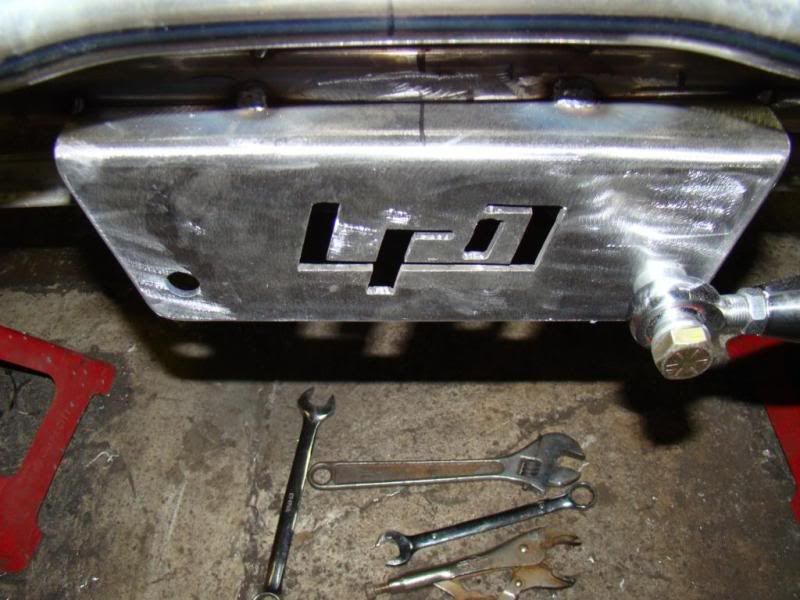 [/IMG]
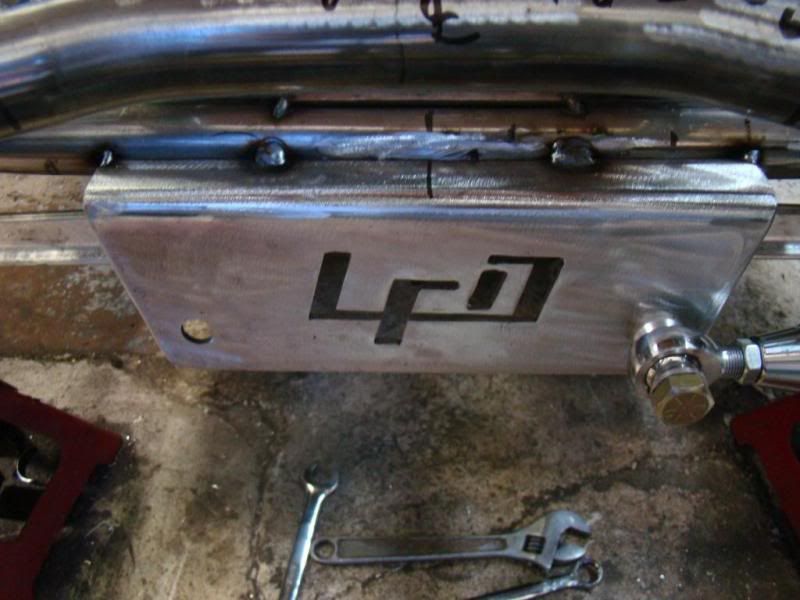 [/IMG]


 Linear Mode

