
|
Register or Log In To remove these advertisements. |
|
|
|
|||||||
 |
|
|
Thread Tools | Display Modes |
 11-15-2015, 08:54 PM
|
#1 |
|
Registered User
Join Date: Feb 2013
Location: GA
Posts: 1,313
|
Help with Rear Patch Panel Fleetside 66
Anyone have any tips on how to handle this?
My 66 has been needing the passenger side repaired and I ended up buying a patch panel and a few things threw me. The top flange of the patch panel where it meets the seam, I cant figure on how to start the cuts. The patch panel has a little extra flange/lip that I didnt know if its supposed to be cut off? Or am I supposed to tuck it under the seam somehow? Also the panel is longer than I realized, and rustier straight out of the box  I am not sure if I can use this panel or not.  I think maybe I should cut just the section I need to make the repair, so I took some pics of where the panel is distorted.      All that mess on the distorted area was me trying all kinds of things to get the panel straightened out. Stud welder and slide hammer. Heat shrink disc. In the end there was so much oil canning and rusted holes that I figured get a patch panel and redo it. Now I cant figure on what the best approach. Any help is appreciated. |

|

|
|
11-15-2015, 09:37 PM
|
#2 |
|
1961 crewcab
Join Date: Dec 2007
Location: missoula, mt
Posts: 6,164
|
Re: Help with Rear Patch Panel Fleetside 66
your original panel spot welds inside that seam.you could replace it there , but the vertical section meeting in the seam might give you trouble.
I see you have side trim holes... I would cut your horizontal line there under the trim ,and but weld the section there. you could also flange the new panel in that section under the trim , and then just spot weld it together every inch or so to cut down on warping. then you could seam seal both sides, or if you wanted use duraglas and then plastic filler over the top instead of seam sealer.. regardless your vertical seams will have to be welded and filled. you can still use the long piece , just your rear vertical seam will have to start before the rear wheel well which is going to mean you have 2 feet to weld instead of 6 inches at the rear. OR use the existing patch panel wheel well, and trim it off at the front. not sure if that is the 100% correct way, but that is the way I would do it. the surface rust on your new piece should not be a problem if it is not pitted too bad, just get it cleaned up with some sort of rust neutralizer and get some paint on it.
__________________
60 build: http://67-72chevytrucks.com/vboard/s...d.php?t=280904 61 crew build: http://67-72chevytrucks.com/vboard/s...d.php?t=646830 63 build: http://67-72chevytrucks.com/vboard/s...d.php?t=336537 64 'burb build: http://67-72chevytrucks.com/vboard/s...d.php?t=448681 65 'burb build: http://67-72chevytrucks.com/vboard/s...d.php?t=590715 65 build: http://67-72chevytrucks.com/vboard/s...d.php?t=281955 Last edited by jonzcustomshop; 11-15-2015 at 09:44 PM. |
|
|
|
|
11-15-2015, 11:17 PM
|
#3 |
|
Registered User
Join Date: Feb 2013
Location: GA
Posts: 1,313
|
Re: Help with Rear Patch Panel Fleetside 66
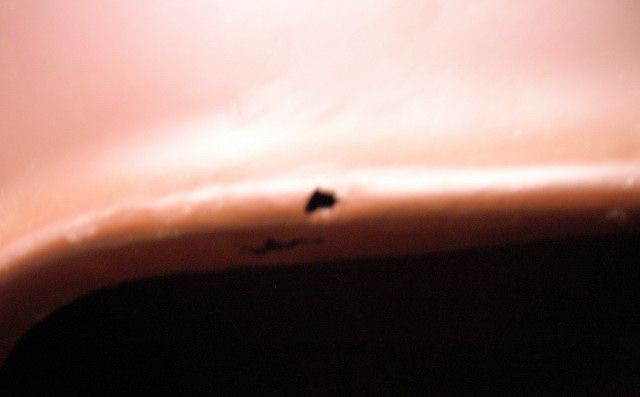
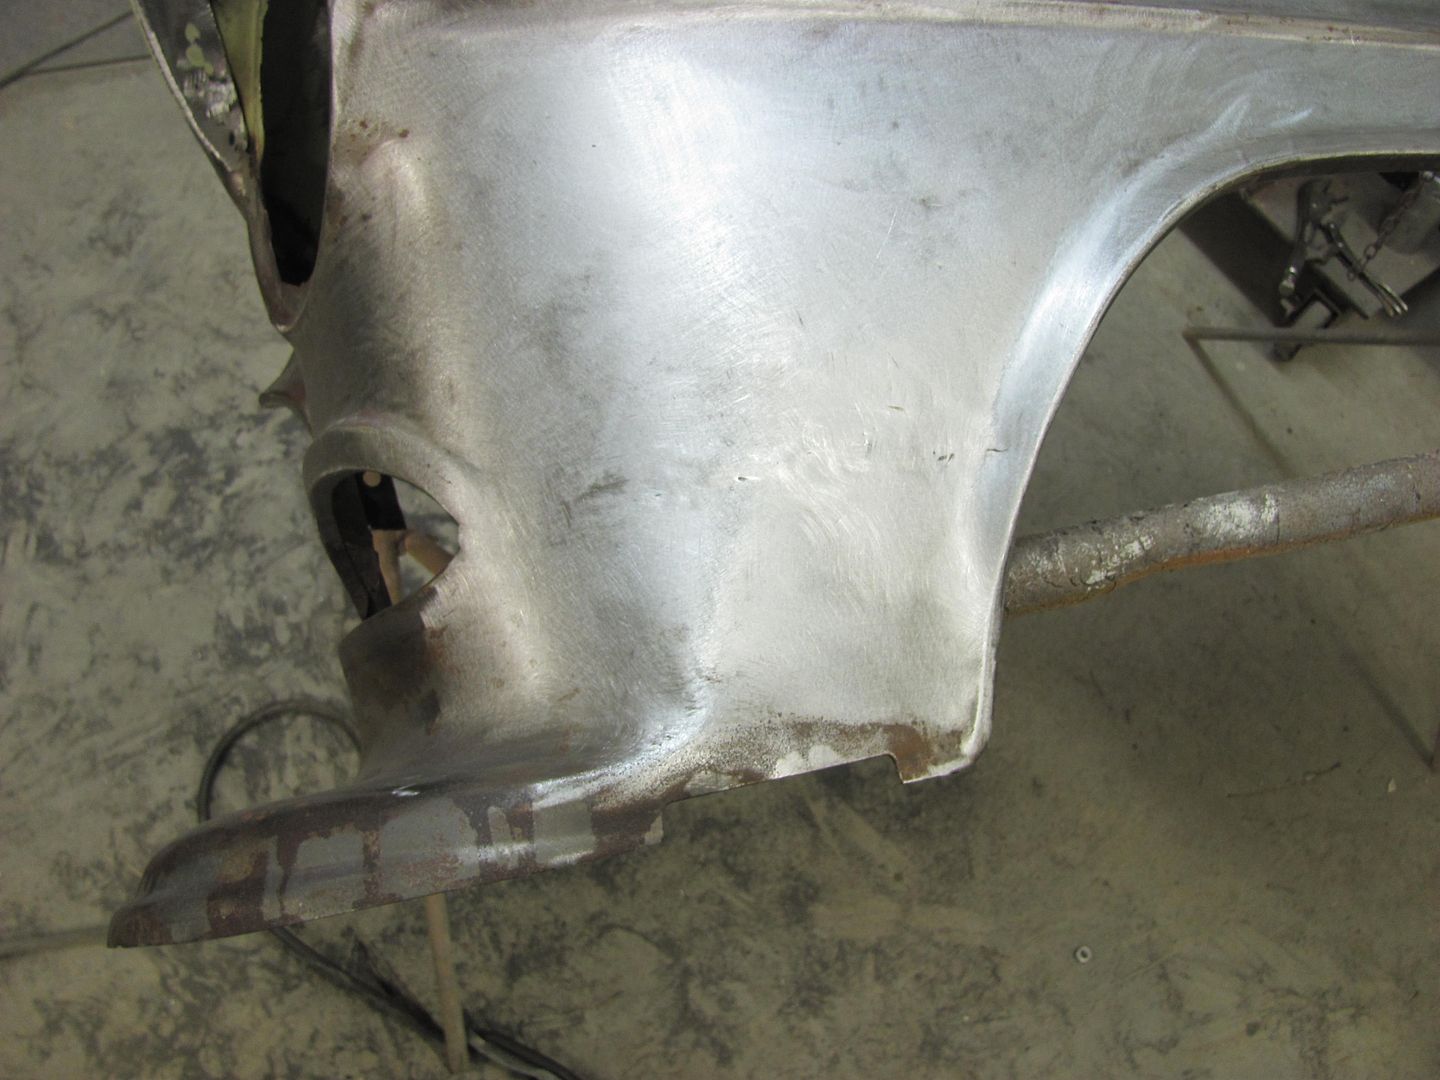
Thanks for the reply! The idea of the horz cut between the trim holes is great but...the top curved section that meets the seam has a bunch of holes in it from rust. The sandblaster was able to get what they could but the area behind that is sealed off. I was hoping to cut it all the way up to meet the seam. Heres a pic looking from the seam down to the base of the panel.
 I may have to cut from the front close to the seam and butt weld there. Not gonna be easy though. |
|
|
|
|
11-15-2015, 11:46 PM
|
#4 |
|
1961 crewcab
Join Date: Dec 2007
Location: missoula, mt
Posts: 6,164
|
Re: Help with Rear Patch Panel Fleetside 66
does your patch have enough material to go under the seam and be welded on where the factory spotted the piece on?
if it does I would cut your old one off about where the trim holes are, that will give you room to find the factory spot welds underneath, drill those out and remove the lower piece from the upper. you might be able to plug weld your patch back to the upper, or you could try that auto body glue that is used on newer cars, and just glue the patch to the upper, it will be difficult to get the seam perfect in the gap at the vertical piece- I suggest : wherever your vertical cut is- try to get the next 2 or 3 spots to the rear -on the piece that you are saving, then carefully wedge a chisel or putty knife in there to separate the rear piece just enough to get a cut off wheel disc in there (for grinding the weld)weld your patch to the rear piece from the inside, just do enough to get out of the seam, then grind and finish that little piece, before you weld or glue the patch to the front. I did also see one truck where the guy drilled all the spots for the lower bed panel from inside the bed, he removed the lower bed panels and then he then cleaned the rust out of the crack and weld through primed both pieces and then welded it all back together. a lot of work , but that might be another option .
__________________
60 build: http://67-72chevytrucks.com/vboard/s...d.php?t=280904 61 crew build: http://67-72chevytrucks.com/vboard/s...d.php?t=646830 63 build: http://67-72chevytrucks.com/vboard/s...d.php?t=336537 64 'burb build: http://67-72chevytrucks.com/vboard/s...d.php?t=448681 65 'burb build: http://67-72chevytrucks.com/vboard/s...d.php?t=590715 65 build: http://67-72chevytrucks.com/vboard/s...d.php?t=281955 |
|
|
|
|
11-16-2015, 01:53 AM
|
#5 |
|
60-66 Nut
  Join Date: Mar 2007
Location: Coeur d'Alene, Idaho
Posts: 23,246
|
Re: Help with Rear Patch Panel Fleetside 66
I would definitely separate the pieces at the horizontal seam. If the wheel well is the correct size and shape, I would cut and fit for the vertical seam above the wheel well. Then you will have to trim the front edge and weld in the lip/structure where the front bed panel bolts up.
__________________
Power Steering Box Adapter Plates For Sale HERE Power Brake Booster Adapter Brackets For Sale '63-'66 HERE and '67-'72 HERE and '60-'62 HERE and "60-'62 with clutch HERE Rear Disc Brake Brackets For Sale. Impala SS calipers HERE Camaro Calipers HERE D52 Calipers HERE 6 Lug HERE Hydroboost Mounting Plates HERE |
|
|
|
|
11-16-2015, 11:10 PM
|
#6 |
|
Registered User
Join Date: Feb 2013
Location: GA
Posts: 1,313
|
Re: Help with Rear Patch Panel Fleetside 66
Jon and Capt,
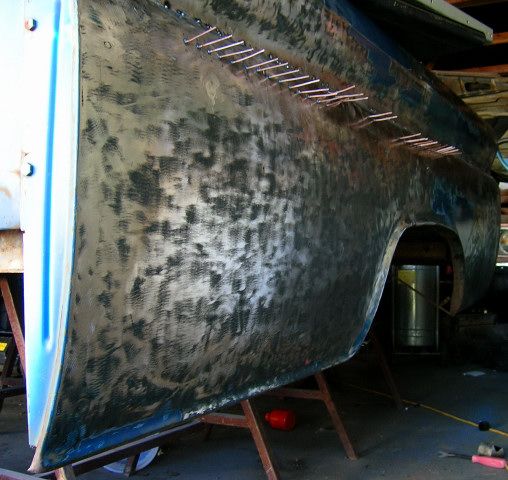
Would I be ok to only separate the area I am patching in from the seam and not slice the entire stretch of the seam from end to end of the entire panel? Jon you mention an option where I would cut out the section I need to repair with a horz cut along the trim holes and then see if I can get access to spot welds that are in the seam? If so I was thinking to make cuts to the patch panel and weld them together making it shorter. I did a quick tape line to share, hopefully this seems like a decent plan. The wheel well portion is pretty close to a match but I was thinking to cut ahead of it to have some extra patch panel to fix another area. So cut in between the tape lines and weld them back together.  With the extra scrap I can use the rounded top portion to fix this swiss cheese area towards the back of the panel near the seam.  Here is a side shot of the existing panel where the spot welds will need to be drilled out.  and a side shot of the patch panel that also shows the extra lip it has at the top 
|
|
|
|
|
11-17-2015, 01:41 AM
|
#7 |
|
60-66 Nut
Join Date: Mar 2007
Location: Coeur d'Alene, Idaho
Posts: 23,246
|
Re: Help with Rear Patch Panel Fleetside 66
The more welding you do across the middle like that, the greater the chance for warpage and the need for hammer and dolly work to straighten it back out. In looking at that last picture, that top flange is not formed correctly to make it easy to install.
Did you purchase that panel from AM Muscle on ebay?
__________________
Power Steering Box Adapter Plates For Sale HERE Power Brake Booster Adapter Brackets For Sale '63-'66 HERE and '67-'72 HERE and '60-'62 HERE and "60-'62 with clutch HERE Rear Disc Brake Brackets For Sale. Impala SS calipers HERE Camaro Calipers HERE D52 Calipers HERE 6 Lug HERE Hydroboost Mounting Plates HERE |
|
|
|
|
11-17-2015, 08:56 AM
|
#8 |
|
Registered User
Join Date: Feb 2013
Location: GA
Posts: 1,313
|
Re: Help with Rear Patch Panel Fleetside 66
Bought it from Classic Parts, should I ask to return it? Is there a better source for that panel?
http://www.classicparts.com/1960-66-.../#.Vksjid-rTsE |
|
|
|
|
11-18-2015, 01:19 AM
|
#9 |
|
60-66 Nut
Join Date: Mar 2007
Location: Coeur d'Alene, Idaho
Posts: 23,246
|
Re: Help with Rear Patch Panel Fleetside 66
I did not realize that Classic Parts had those pieces. I would just keep it and make it work. I don't think you're going to find that piece specifically for a short bed.
Here is where I have seen those on ebay. http://www.ebay.com/itm/Chevrolet-Ch...9P74PHeiFnCkdw
__________________
Power Steering Box Adapter Plates For Sale HERE Power Brake Booster Adapter Brackets For Sale '63-'66 HERE and '67-'72 HERE and '60-'62 HERE and "60-'62 with clutch HERE Rear Disc Brake Brackets For Sale. Impala SS calipers HERE Camaro Calipers HERE D52 Calipers HERE 6 Lug HERE Hydroboost Mounting Plates HERE |
|
|
|
|
11-18-2015, 02:00 AM
|
#10 |
|
Registered User
Join Date: Feb 2013
Location: tucson,az
Posts: 179
|
Re: Help with Rear Patch Panel Fleetside 66
Ok , I did one on my short bed and cut the panel a 1/4 from the seam and butt welded the patch in. tack weld to keep from warping. being close to the edge warping is min.. if you have a Tig welder it will help. Sorry I have no pics. ill try and find them but its been years
__________________
efi 496bbc th350 custom brakes narrowed 9 coilover rear. |
|
|
|
|
11-18-2015, 06:34 PM
|
#11 |
|
Registered User
Join Date: Feb 2013
Location: GA
Posts: 1,313
|
Re: Help with Rear Patch Panel Fleetside 66
Thanks for the link Capt, good to know. Ill keep the panel and we'll see what happens.
And Azdude thanks for the input, Ill try the 1/4" cut from the seam approach. Ive got a mig welder so itll be alot of spot welding to control the warping. I'll post pics of what happens. |
|
|
|
|
11-18-2015, 07:57 PM
|
#12 |
|
Registered User
Join Date: May 2014
Location: Kewanee IL
Posts: 283
|
Re: Help with Rear Patch Panel Fleetside 66
I would be willing to buy a chunk of the wheel lip?? This is my only issue with either of my sides
|
|
|
|
|
11-22-2015, 08:04 PM
|
#13 |
|
Registered User
Join Date: Feb 2013
Location: GA
Posts: 1,313
|
Re: Help with Rear Patch Panel Fleetside 66
PM'd you Jim on the chunk you need.
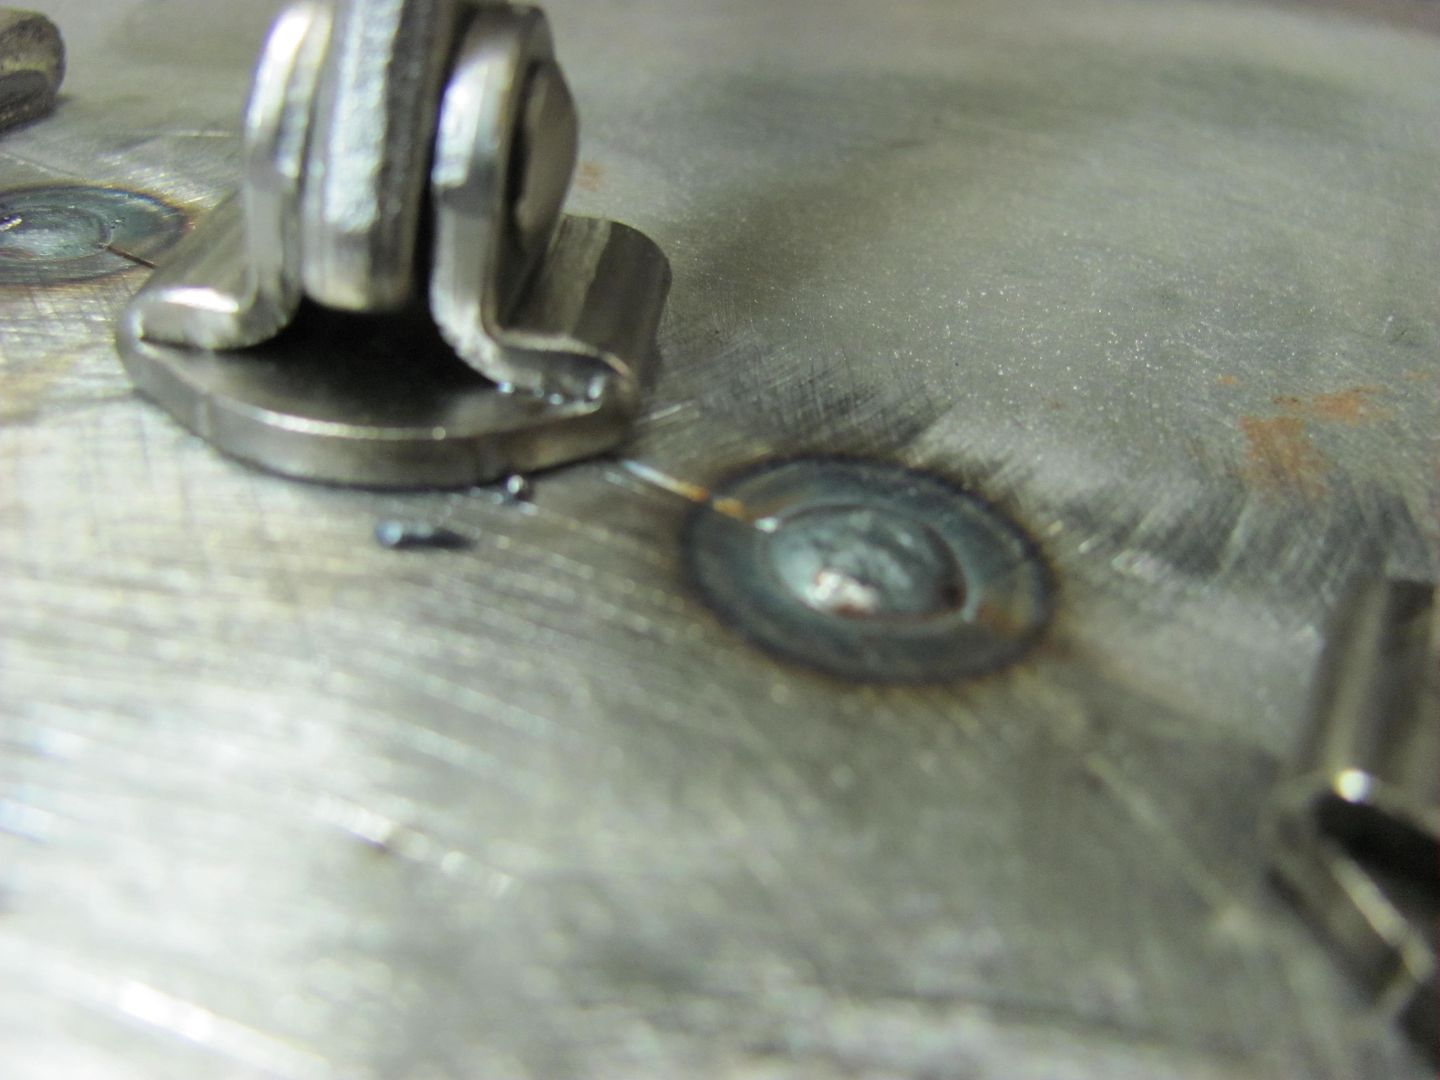
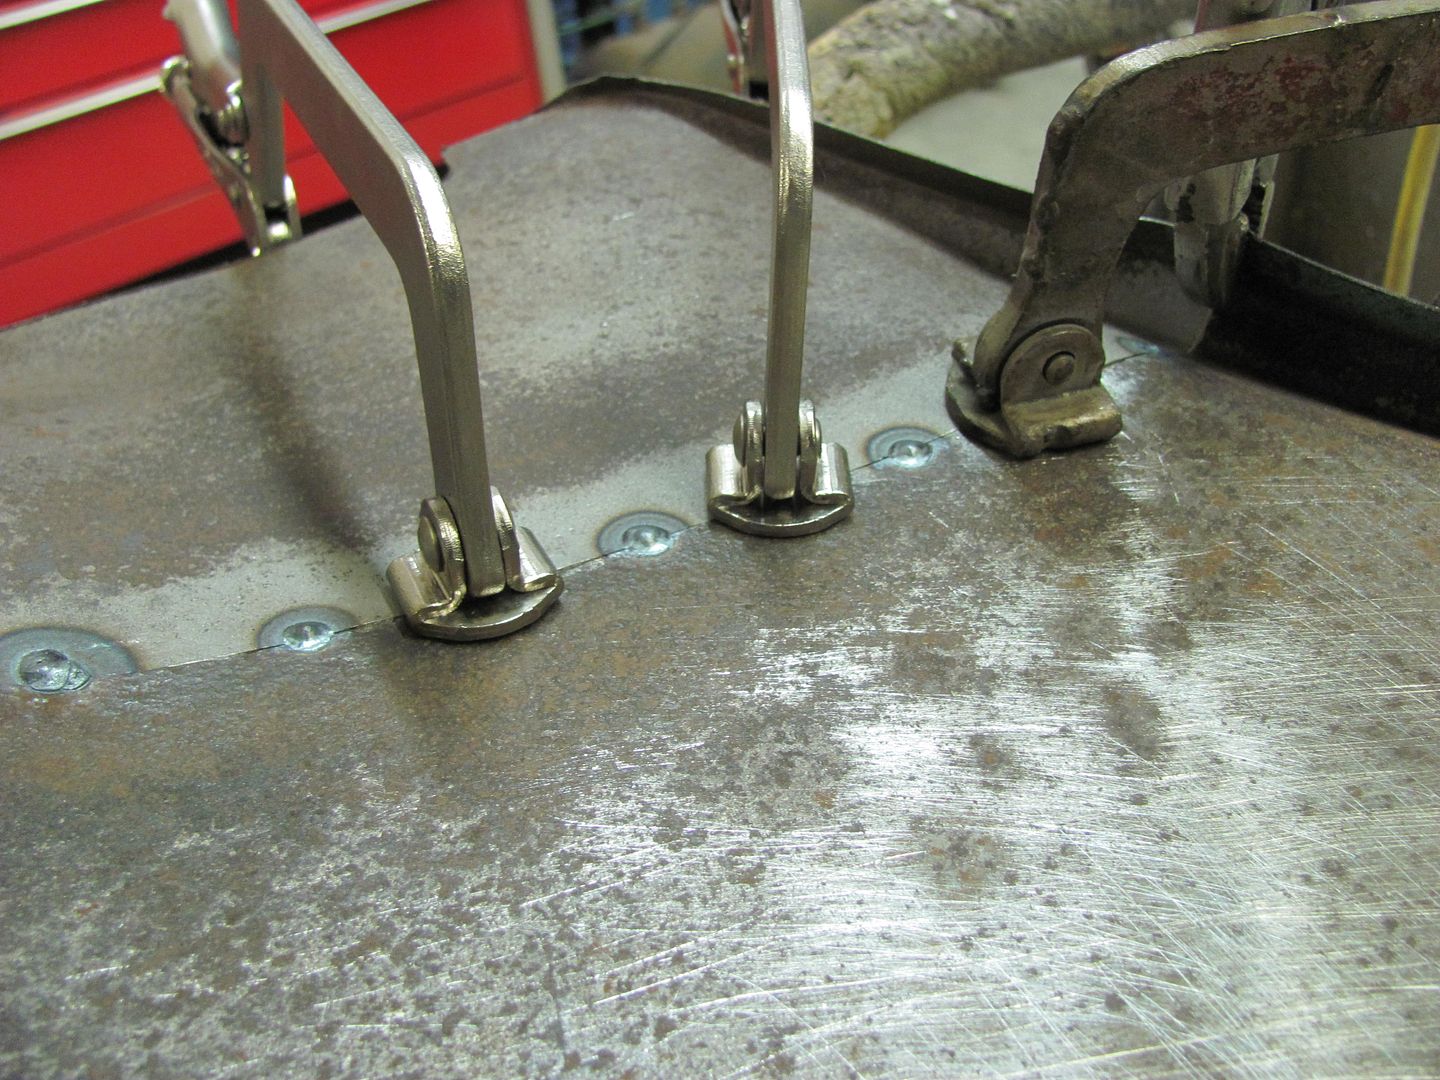
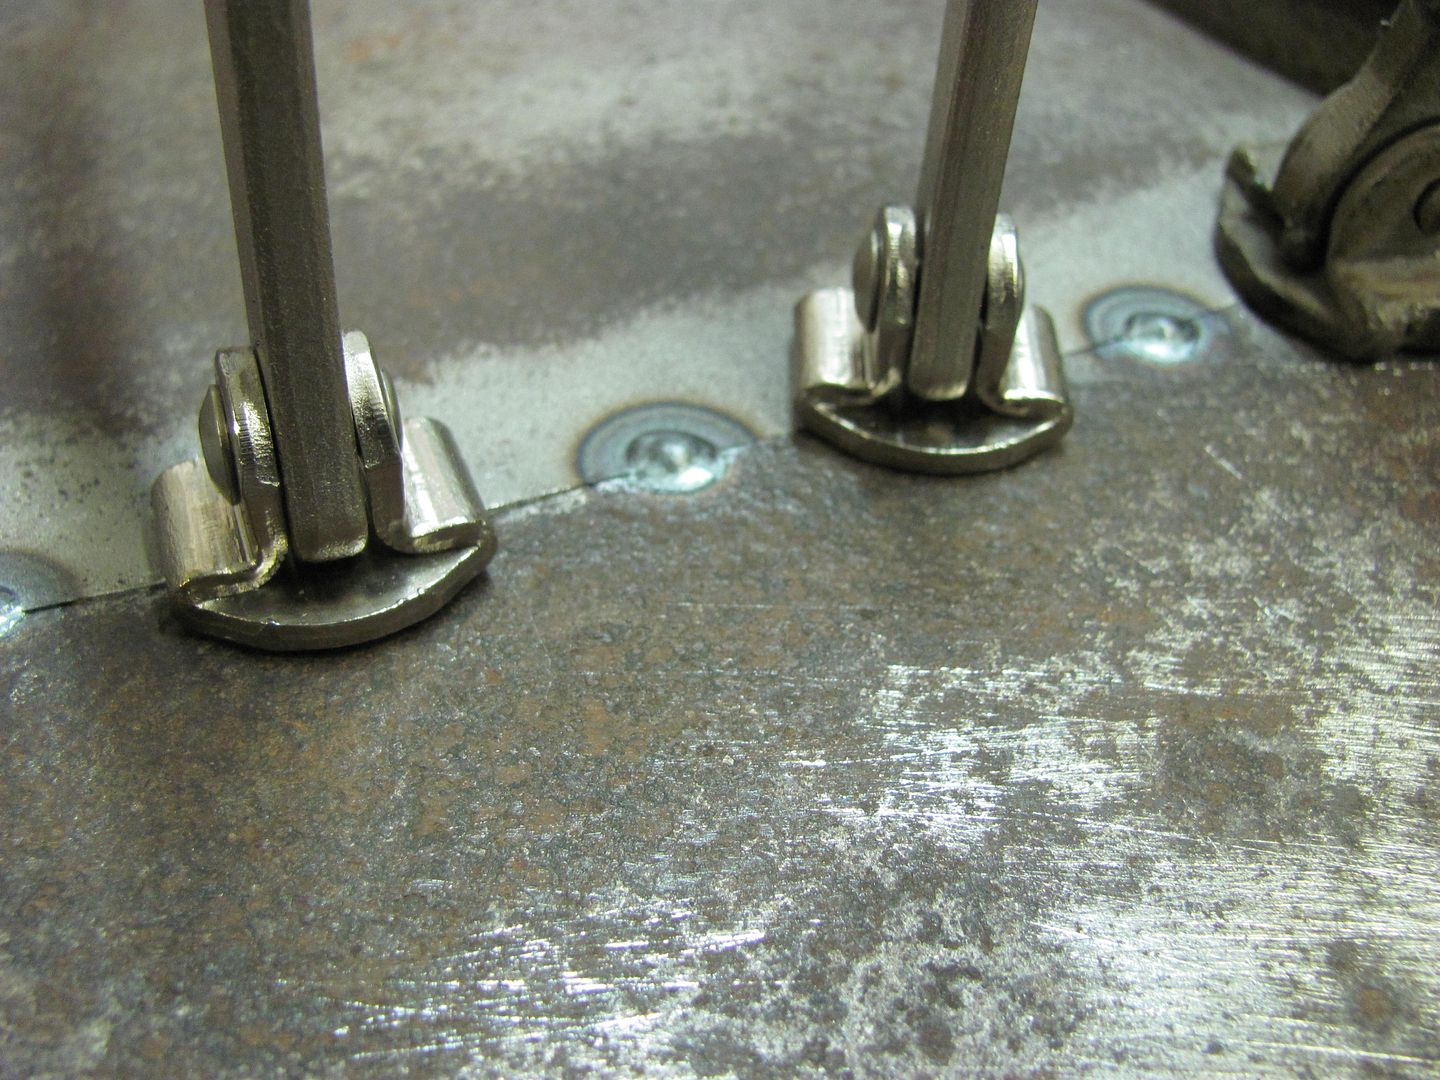
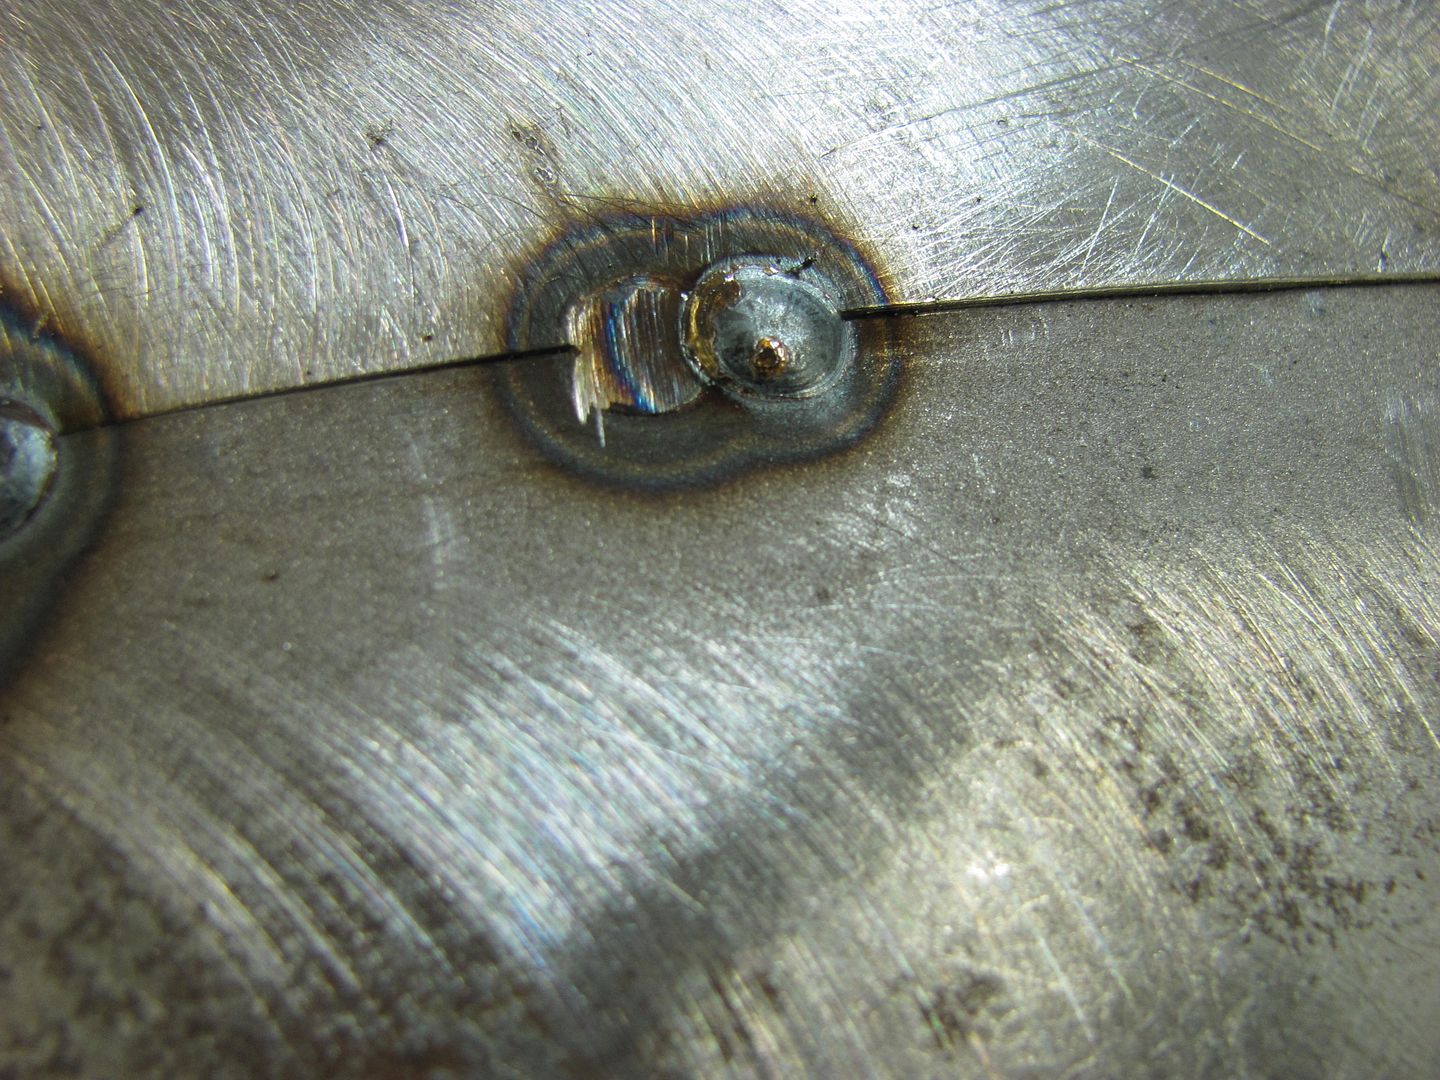
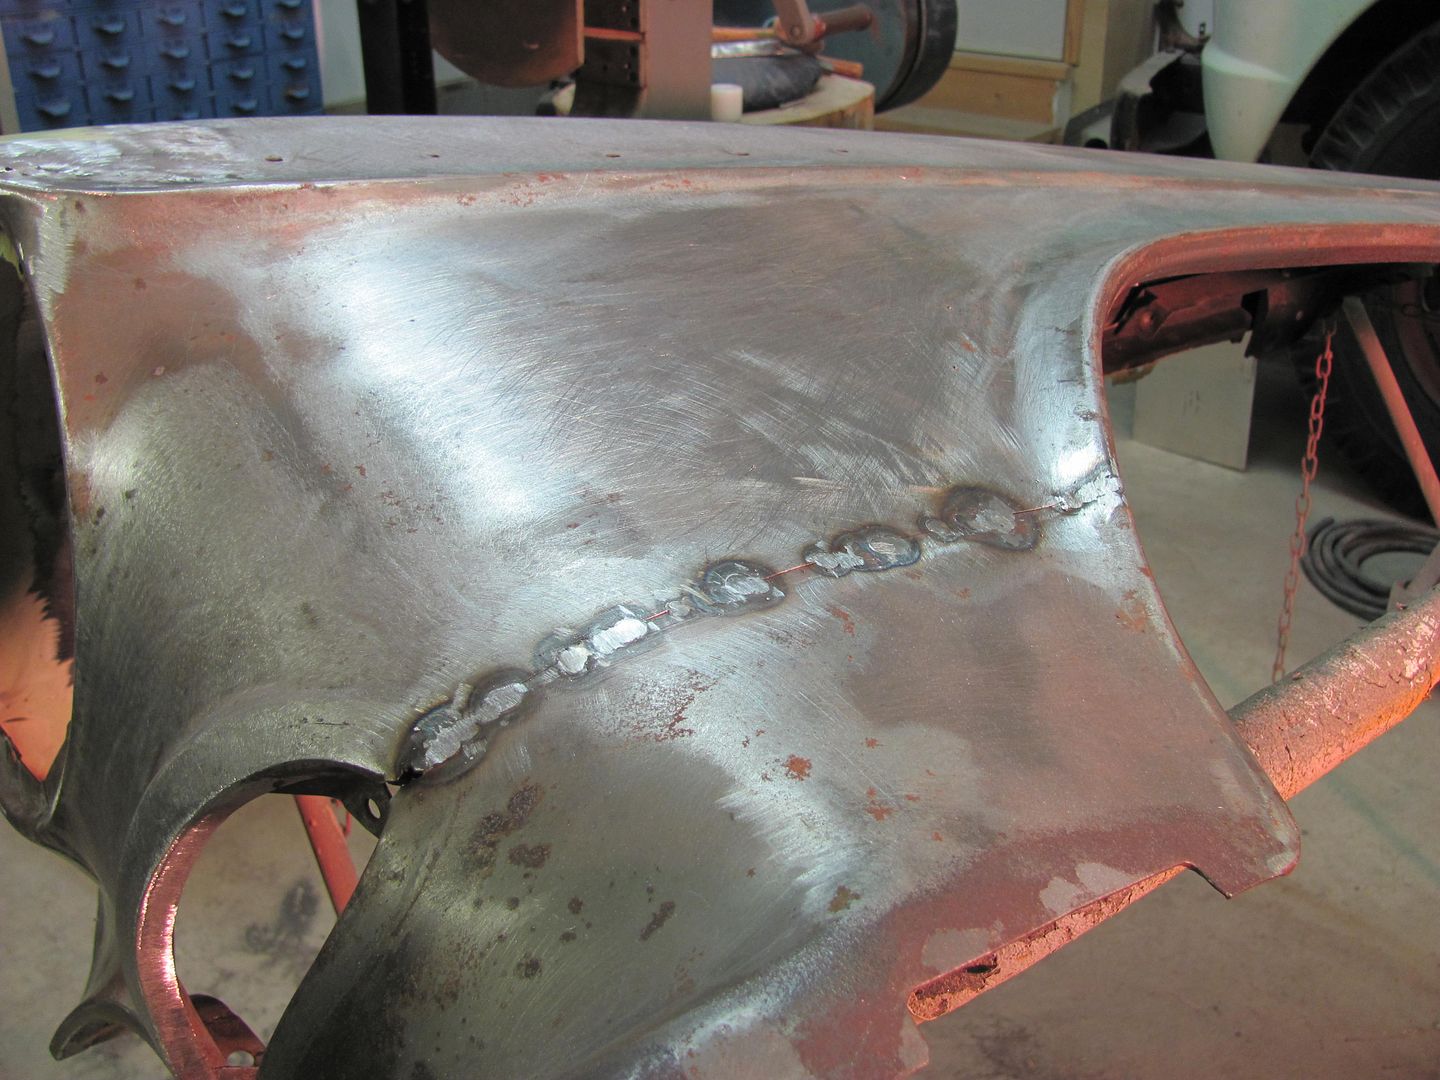
As for the repairs so far here is what I got done today. I drilled out the spot welds on the wrapped edge and tried to drill out the spot welds on the seam from the inside of the panel but my drill is too tall and I wasnt able to. So I cut the warped section and left a lip at the seam, then got the chisel and popped the spots as I went.  Then I got the wire wheel going and then took some soapy water and a red scotch pad and started scrubbing out as much rust and grime as I could. Ill sand it down next and put Ospho on it to get the rust neutralized. While I was at it I cut out the section that was rusted out above that area and took a scrap from a fender patch panel and used it to cut the plug. Still need to finesse it more and deal with the rust in that area before I tack it. 
|
|
|
|
|
11-22-2015, 08:35 PM
|
#14 |
|
1961 crewcab
Join Date: Dec 2007
Location: missoula, mt
Posts: 6,164
|
Re: Help with Rear Patch Panel Fleetside 66
looking good! I think you are on the right track.
__________________
60 build: http://67-72chevytrucks.com/vboard/s...d.php?t=280904 61 crew build: http://67-72chevytrucks.com/vboard/s...d.php?t=646830 63 build: http://67-72chevytrucks.com/vboard/s...d.php?t=336537 64 'burb build: http://67-72chevytrucks.com/vboard/s...d.php?t=448681 65 'burb build: http://67-72chevytrucks.com/vboard/s...d.php?t=590715 65 build: http://67-72chevytrucks.com/vboard/s...d.php?t=281955 |
|
|
|
|
11-24-2015, 05:50 AM
|
#15 |
|
Registered User
Join Date: May 2014
Location: Kewanee IL
Posts: 283
|
Re: Help with Rear Patch Panel Fleetside 66
lookimg good!!
|
|
|
|
|
11-25-2015, 08:25 PM
|
#16 |
|
Registered User
Join Date: Feb 2013
Location: GA
Posts: 1,313
|
Re: Help with Rear Patch Panel Fleetside 66
Anyone have a tip on how to bend the top 1 inch lip of this panel 90 degrees? Of course it needs to be a different angle to fit the seam.
I might have to take it to a body shop and let them do it cause I dont have a brake to put it in and I'm concerned about distorting the top curve of the panel
|
|
|
|
|
11-25-2015, 09:40 PM
|
#17 |
|
1961 crewcab
Join Date: Dec 2007
Location: missoula, mt
Posts: 6,164
|
Re: Help with Rear Patch Panel Fleetside 66
a brake is probably the best, a body shop, or a shop that bends gutters and metal roofing could do it.
__________________
60 build: http://67-72chevytrucks.com/vboard/s...d.php?t=280904 61 crew build: http://67-72chevytrucks.com/vboard/s...d.php?t=646830 63 build: http://67-72chevytrucks.com/vboard/s...d.php?t=336537 64 'burb build: http://67-72chevytrucks.com/vboard/s...d.php?t=448681 65 'burb build: http://67-72chevytrucks.com/vboard/s...d.php?t=590715 65 build: http://67-72chevytrucks.com/vboard/s...d.php?t=281955 |
|
|
|
|
11-26-2015, 01:34 AM
|
#18 |
|
60-66 Nut
Join Date: Mar 2007
Location: Coeur d'Alene, Idaho
Posts: 23,246
|
Re: Help with Rear Patch Panel Fleetside 66
You'll need to find someone with a sheetmetal brake. I'm thinking a HVAC shop would be a good place to start unless you have an auto restoration shop close by. Most body shops I've been in don't have a sheetmetal brake.
__________________
Power Steering Box Adapter Plates For Sale HERE Power Brake Booster Adapter Brackets For Sale '63-'66 HERE and '67-'72 HERE and '60-'62 HERE and "60-'62 with clutch HERE Rear Disc Brake Brackets For Sale. Impala SS calipers HERE Camaro Calipers HERE D52 Calipers HERE 6 Lug HERE Hydroboost Mounting Plates HERE |
|
|
|
|
11-26-2015, 12:30 PM
|
#19 |
|
Registered User
Join Date: May 2014
Location: Kewanee IL
Posts: 283
|
Re: Help with Rear Patch Panel Fleetside 66
That patch would be great on custom seam fill I did.
 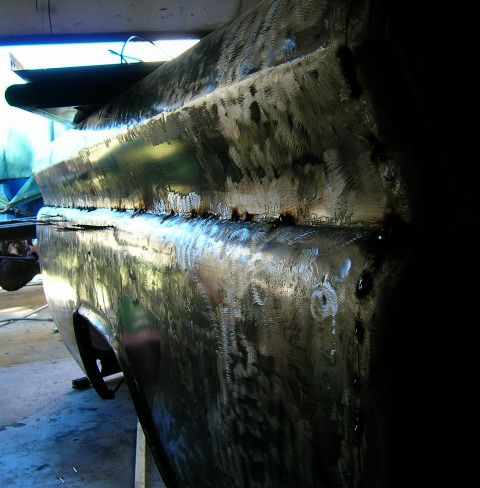 I totally filled the seams with weld not filler 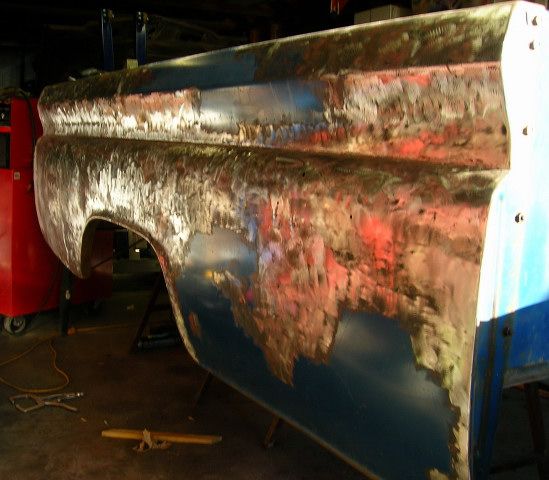 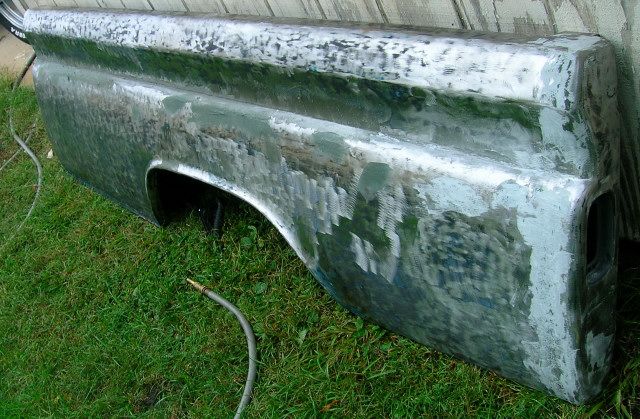 Like I said the only issue on mine is that 1 spot on the lip. I would like to see more pics of your truck! |
|
|
|
|
12-14-2015, 12:47 PM
|
#20 | |
|
Registered User
Join Date: Feb 2013
Location: GA
Posts: 1,313
|
Re: Help with Rear Patch Panel Fleetside 66
Quote:
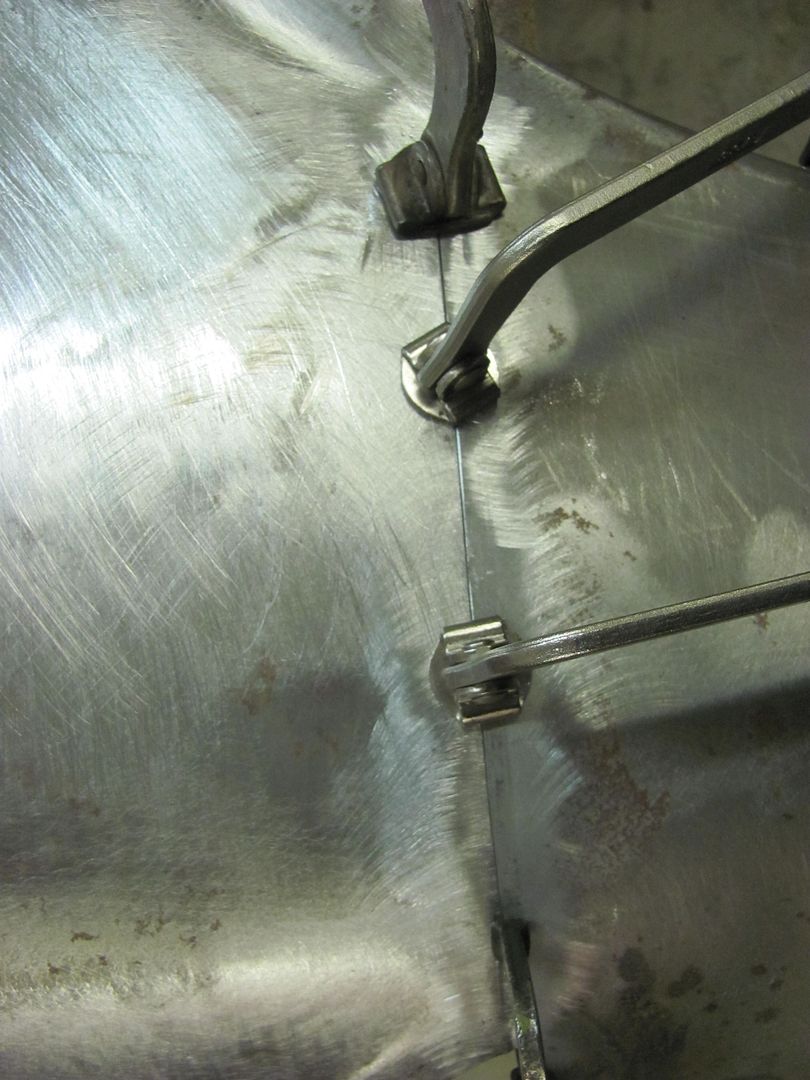
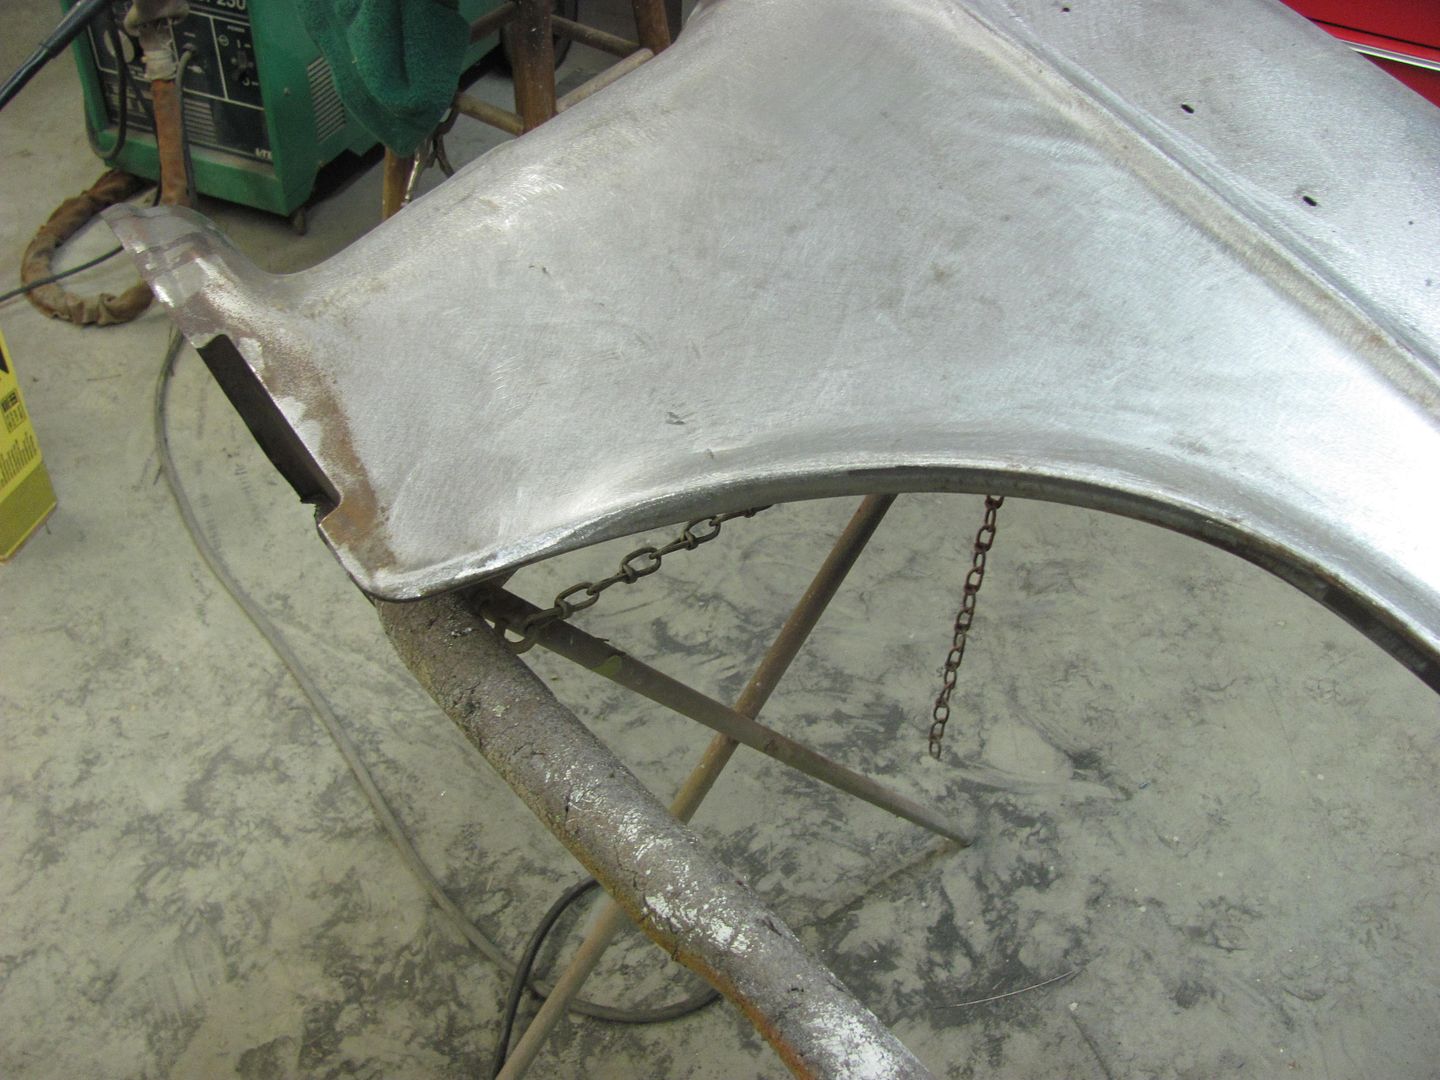
http://67-72chevytrucks.com/vboard/s...d.php?t=623848 An update on the 90 degree brake effort, the local restoration shop I use from time to time had a 50 inch brake so I cut off just under that and he did bend it down for $10. There are some spots that got a bit distorted but hopefully I can hammer dolly that back. While that was going on I tried the patch on the top rail area I cut out. First sanded it down good, neutralized the rust, degreased and hit it with 2 coats of epoxy primer.  then welded it in best i could  Next I checked to see if the end of the bed side panel matched the template I cut from the edge of the cab and it looked right to me  Then once the panel was back from the brake I scribed a 1 inch from the edge line and based off another thread I have going on a door patch I tried to use snips to get a straighter edge vs the cutting wheel. But I soon chickened out when the act if cutting distorted the panel as I tried to start. I'll find out more on whether or not my technique there was off of if using snips will cause the distortion but you have to have a template to use to hammer/dolly it back into shape.  So after cutting it off with the cutting disc I placed it next to the template and saw that the contour didnt quite match so I corrected it.  Then I cut off the middle section of the panel I didnt need in order to shorten the length. Then I started tacking.  then I checked it with the template, and the edge was correct that I reset but as I placed the template further down on the patch panel I saw that the panel was actually not aligning to the template.  I assume that it should match the template but what I dont know is whats the best way to get the length of the panel accurately arced to match? Then I placed it onto the bed panel and it looks like it should work out, assuming i get the contour corrected properly and make clean cuts to weld it back together.  For now Ill keep tacking and grinding and planishing till I get the end of the panel done. I just dont want the heat of the mig and the grinding to warp it so Im taking it slow. Last edited by msg; 12-14-2015 at 12:52 PM. |
|
|
|
|
|
12-14-2015, 02:21 PM
|
#21 |
|
Registered User
Join Date: Jan 2013
Location: Leonardtown, MD
Posts: 1,633
|
Re: Help with Rear Patch Panel Fleetside 66
Dang, looks like I'm too late to the party. oh well, let me add some food for thought.
5-10 years ago I would have cut the seam just as you did, and you will need to planish as you go, grind the excess out of the way, weld the next sets of dots, planish, grind, repeat. In the interest of consistency, you welder should be set up for a full penetration weld. For discussion, let's assume you are working with 18 ga steel. Now if you were to leave those weld dots alone until the end, as I believe you did with the door, that last weld dot can be anywhere from 3 to 5x the thickness of the parent metal. Left like that, what kind of impact does that have on your welder's heat setting? I'm thinking you will start to have some cold welds as the heat setting is not adequate for all that thickness, and thus you won't have full penetration welds. Grind down the excess before overlapping so you don't run into this issue. The front flange will HELP to hold the shape of the quarter up in the front, but it will still need some planishing effort to keep the shrinking at bay. Just don't get too crazy where you've stretched too much, then you'll have other headaches. One step up from this would be to perform the weld using TIG or O/A in a non-stop, continuous pass after tacking the panels every couple inches. The continuous weld heats progressively as you go and cools in the same fashion, from one end of the seam to the other. This provides less distortion from welding, where a Mig "dot" shrinks circumferentially, pulling from all directions each and every time. So looking at this same panel today, I think my preferred method would be to trim the panel and leave enough excess to fold the flange. Then figure out where the bend should be, and use a tipping wheel to partially fold the bend, and a shrinker along the flange, repeat of tipping, etc. until the shape/crown of the panel is correct. Use a hammer and dolly to sharpen up the crease as needed, no weld seam required, no weld planishing, no weld grinding. Either method will work, but each requires a specific tool and skill set. Do what is most comfortable to you and you will likely have the best results..
__________________
Robert Last edited by MP&C; 12-14-2015 at 02:32 PM. |
|
|
|
|
12-14-2015, 04:36 PM
|
#22 | ||||
|
Registered User
Join Date: Feb 2013
Location: GA
Posts: 1,313
|
Re: Help with Rear Patch Panel Fleetside 66
Quote:
http://www.sears.com/midwest-snips-2...FdgGgQodd7gIpg Quote:
Quote:
Quote:
|
||||
|
|
|
|
12-14-2015, 04:59 PM
|
#23 |
|
Registered User
Join Date: Jan 2013
Location: Leonardtown, MD
Posts: 1,633
|
Re: Help with Rear Patch Panel Fleetside 66
You're welding, so you don't need to be concerned with a tipping wheel. But this is an example, normally used in conjunction with a bead roller or English wheel.
Then to tip a flange to hold the gauge in place, used these in the bead roller.... 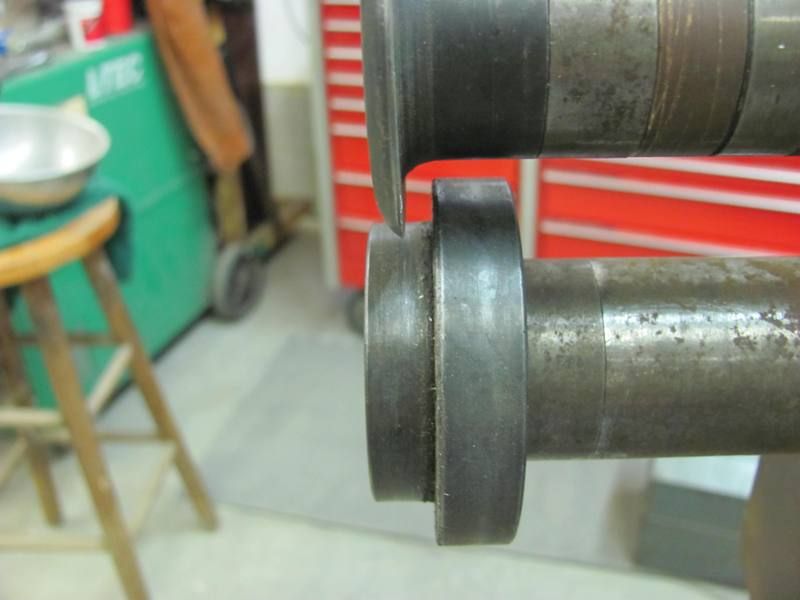 Applied a bit of pressure and started tipping the ring gradually as we went.... 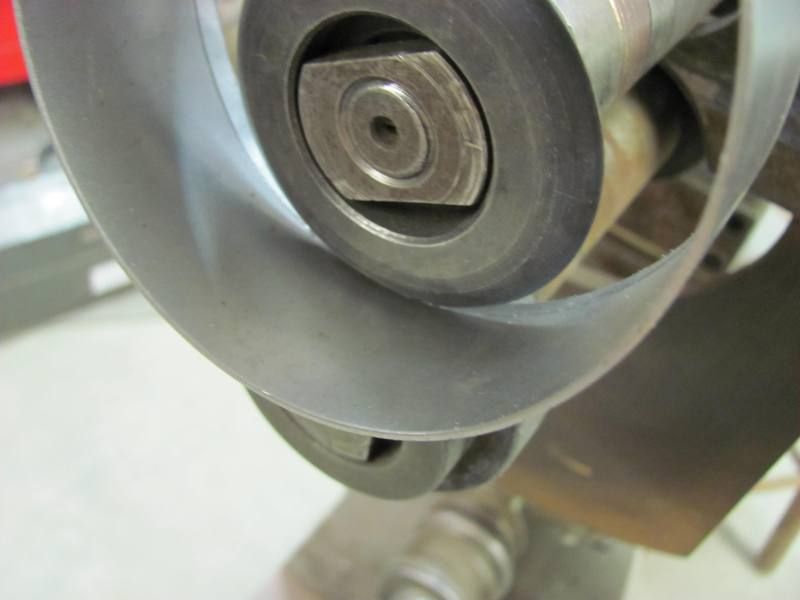 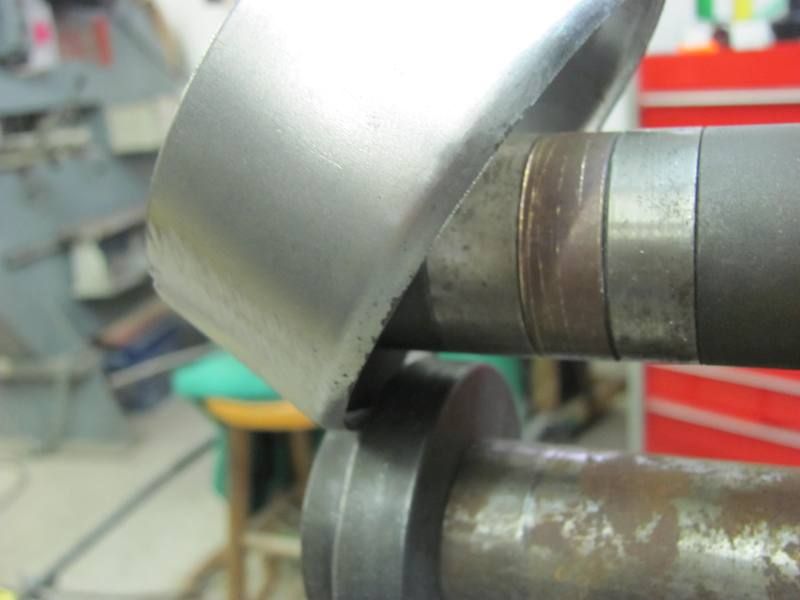 After getting the initial flange tipped to almost 45 degrees, the body hammer was used to get the flange to 90. 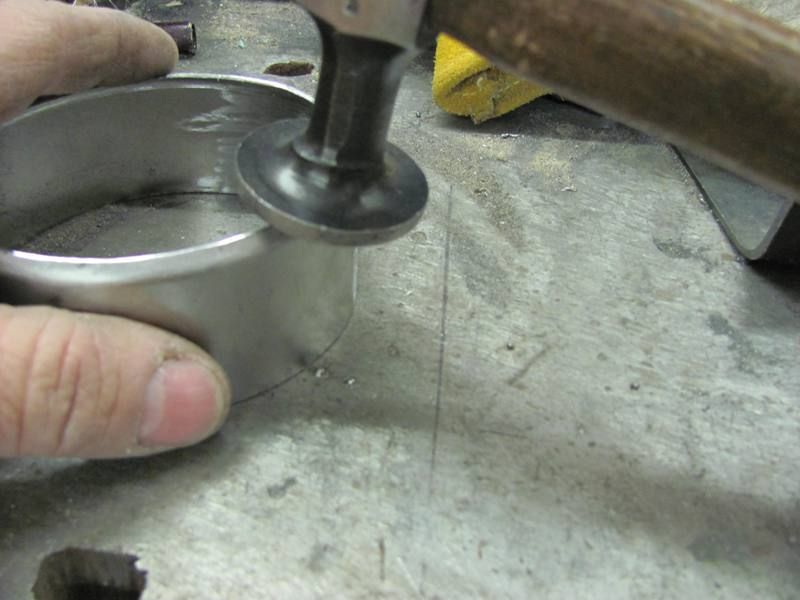 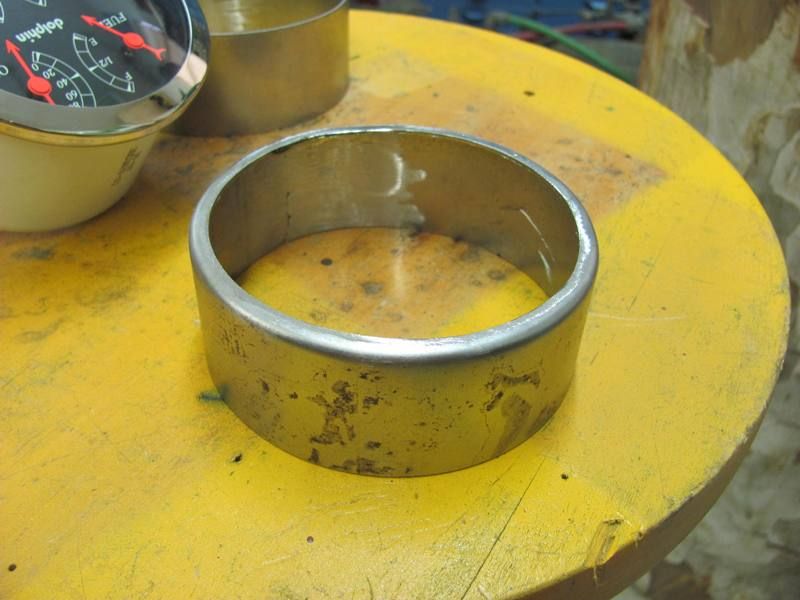 Fitted, and shown with the gauge's mounting bracket in place.....  Hence the name "tipping" wheel. I would likely leave enough material to make the front flange new, to eliminate the weld seam you are doing now. Just a suggestion, you are taking a different path so disregard. Midwest makes nice snips, good to see you got the offsets.. O/A= oxy/acetylene, or gas welding. Either gas or Tig will give a slightly softer weld so not as much work in planishing, and if you can accomplish a continuous pass weld, less distortion. You are using the MIG, so disregard. Most of post was just FFT..
__________________
Robert |
|
|
|
|
12-18-2015, 10:42 PM
|
#24 |
|
Registered User
Join Date: Feb 2013
Location: GA
Posts: 1,313
|
Re: Help with Rear Patch Panel Fleetside 66
Robert that is impressive work, thanks for the pics of the tipping wheel process!
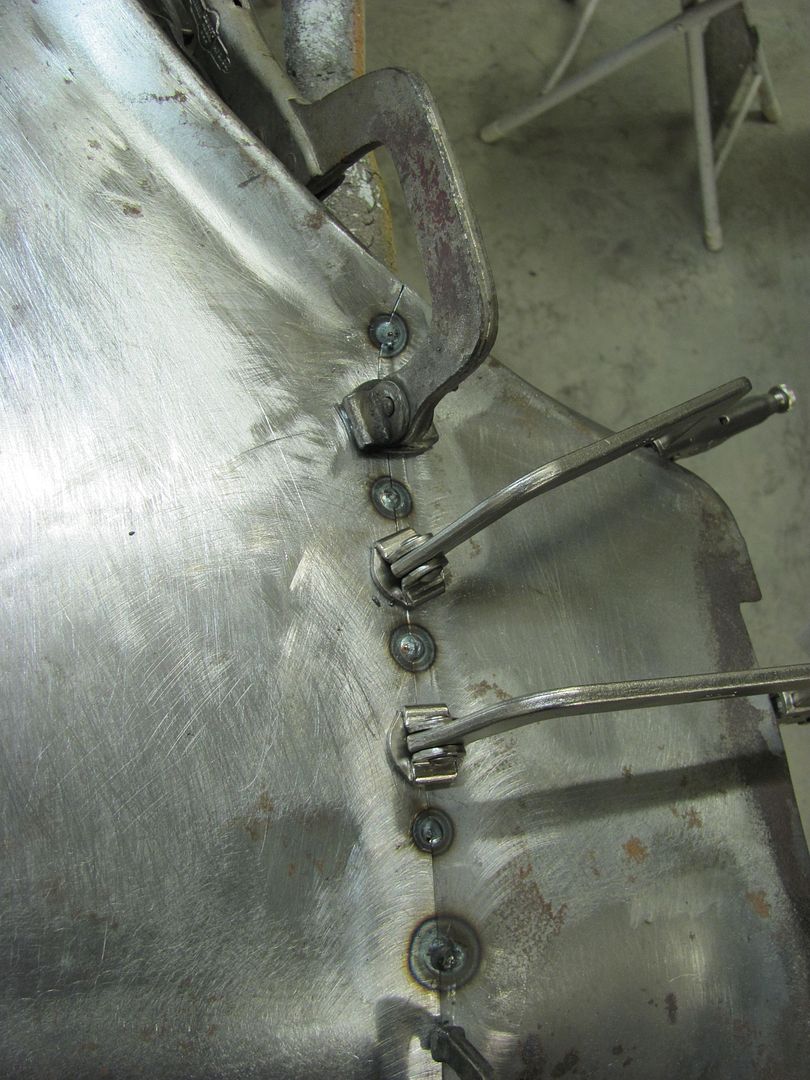
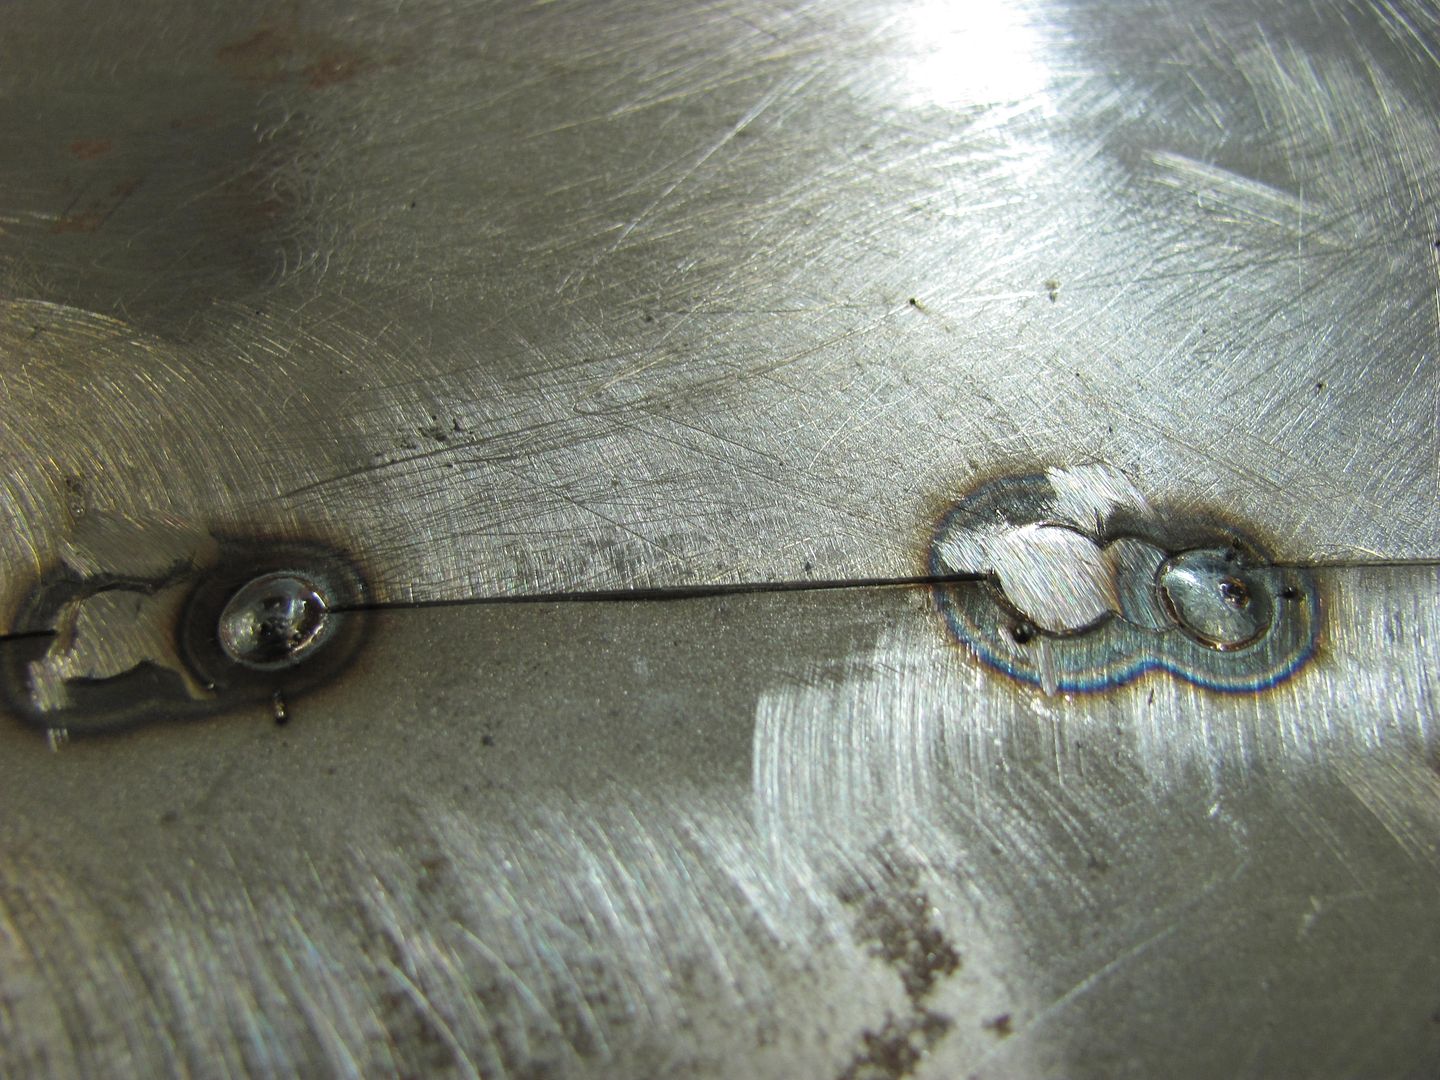
As you said, Im learning to weld so I've been focusing on the mig process of tacking, planishing, grinding that you have outlined. I didnt take pics of every stage but I did take these just before the last series were done. Its not there yet on the seamless look.  Then after a few more series its about as close as I have been able to get it. Shining a light from behind I dont see any pinholes although there are some welds that shrunk circumferentially and arent flush causing the shadowed edges. I didnt want to sand it down too much cause I have been concerned about making that area too thin by grinding out too much metal. The last pic on the right is the inside of the panel.  So far the seam is flush with the straight edge as I go up and down that area of the panel, and also the template I took off the cab is still in line too. As for the next step I am trying to get the panel sized to be welded in. Since the planishing would be difficult with that bracket in the way, Ive decided to cut out a bit further and use more of the panel.  Let me know if the welds are decent, if Im doing something wrong please let me know. |
|
|
|
|
12-19-2015, 10:06 AM
|
#25 | |
|
Registered User
Join Date: Jan 2013
Location: Leonardtown, MD
Posts: 1,633
|
Re: Help with Rear Patch Panel Fleetside 66
Your weld dots don't look bad at all, how are they on the back side?
You show some welds that have gaps in between adjacent welds. Here is where the overlap process helps to eliminate those. Do your fit up, start tacking at one end, move a couple inches, align the panel, tack again, move a couple inches, tack again, until you reach the other end. Now go back and planish each weld dot, then go back and grind each weld dot. Now instead of skipping in between, do a slight overlap of all the previous ones. This helps to get rid of those pesky gaps you have between the dots... Similar to this: Quote:
__________________
Robert |
|
|
|
|
|
| Bookmarks |
|
|


 Linear Mode

