
|
 08-01-2010, 04:20 AM
|
#51 | |
|
Registered User
Join Date: Apr 2001
Location: DALLAS,TX
Posts: 21,907
|
Re: 65 shorty build
Quote:
__________________
67SWB-B.B.RetroRod 64SWB-Recycle 89CCDually-Driver/Tow Truck 99CCSWB Driver All Fleetsides @rattlecankustoms in IG Building a small, high rpm engine with the perfect bore, stroke and rod ratio is very impressive. It's like a highly skilled Morrocan sword fighter with a Damascus Steel Scimitar..... Cubic inches is like Indiana Jones with a cheap pistol. |
|

|

|
|
08-01-2010, 09:51 PM
|
#52 |
|
Registered User
 Join Date: Dec 2006
Location: Pueblo West
Posts: 264
|
Re: 65 shorty build
Hey man great build i've only just stumbled upon it but I'm liking what your doing. It's nice to see some more trucks over here on the eastern side of things. I'm down here In Pendleton. Got any plans for those springs?
ian |
|
|
|
|
08-02-2010, 01:31 AM
|
#53 |
|
Senior Member
Join Date: Jul 2008
Location: kennewick, WA
Posts: 1,461
|
Re: 65 shorty build
lytemup454, thanks! and yes its nice to see guys on here some what locally! i plan to get rid of the front springs, they are 60-87, 2'' lowering djm springs.
this idea that i have in the back of my mind keeps me up... so here it goes: i want to paint the firewall, do i take the cab off, sand blast the firewall and bottom of floor pan, then spray it with por15.... clean and paint the frame take the 3 speed crossmember out and bolt in the 700r4 member or..... get the paint off of the firewall some how and spray it and leave the cab on. i just dont want the nice condition windsheild to get shot with sand as well as sand in the new baer brakes.... im willing to do both and you guys have done this statue of a project more than i have so what would you guys do?
__________________
1965 c/10 swb 1969 c/10 lwb 
|
|
|
|
|
08-04-2010, 12:33 AM
|
#54 |
|
60-66 Nut
 Join Date: Mar 2007
Location: Coeur d'Alene, Idaho
Posts: 23,246
|
Re: 65 shorty build
It sounds like you're at that point where things can really snowball on you. It's the question of 'Where do I stop'. You can take the cab off and do a better job of stripping the firewall and floor, but then you may as well blast the frame under the cab......then maybe pull the bed and do under there too. So you see You just have to ask yourself, how nice you want the truck, how much time do you realisticly have to do this build, and how big is your budget.
You can sand blast the firewall and floor without damaging the windshield as long as you mask it off and protect it well. I'm a big fan of blasting things down to bare metal so you can see just what is rusted, or full of mud and what isn't. That way when it is done, you know exactly what's underneath the paint, and that is isn't going to come back and bite you in the a$$.
__________________
Power Steering Box Adapter Plates For Sale HERE Power Brake Booster Adapter Brackets For Sale '63-'66 HERE and '67-'72 HERE and '60-'62 HERE and "60-'62 with clutch HERE Rear Disc Brake Brackets For Sale. Impala SS calipers HERE Camaro Calipers HERE D52 Calipers HERE 6 Lug HERE Hydroboost Mounting Plates HERE Last edited by Captainfab; 08-04-2010 at 12:33 AM. |
|
|
|
|
08-05-2010, 09:21 AM
|
#55 |
|
Senior Member
Join Date: Jul 2008
Location: kennewick, WA
Posts: 1,461
|
Re: 65 shorty build
aww good point captain fab... that gives me something to think about!
__________________
1965 c/10 swb 1969 c/10 lwb
|
|
|
|
|
08-05-2010, 11:15 PM
|
#56 |
|
Senior Member
Join Date: Jul 2008
Location: kennewick, WA
Posts: 1,461
|
Re: 65 shorty build
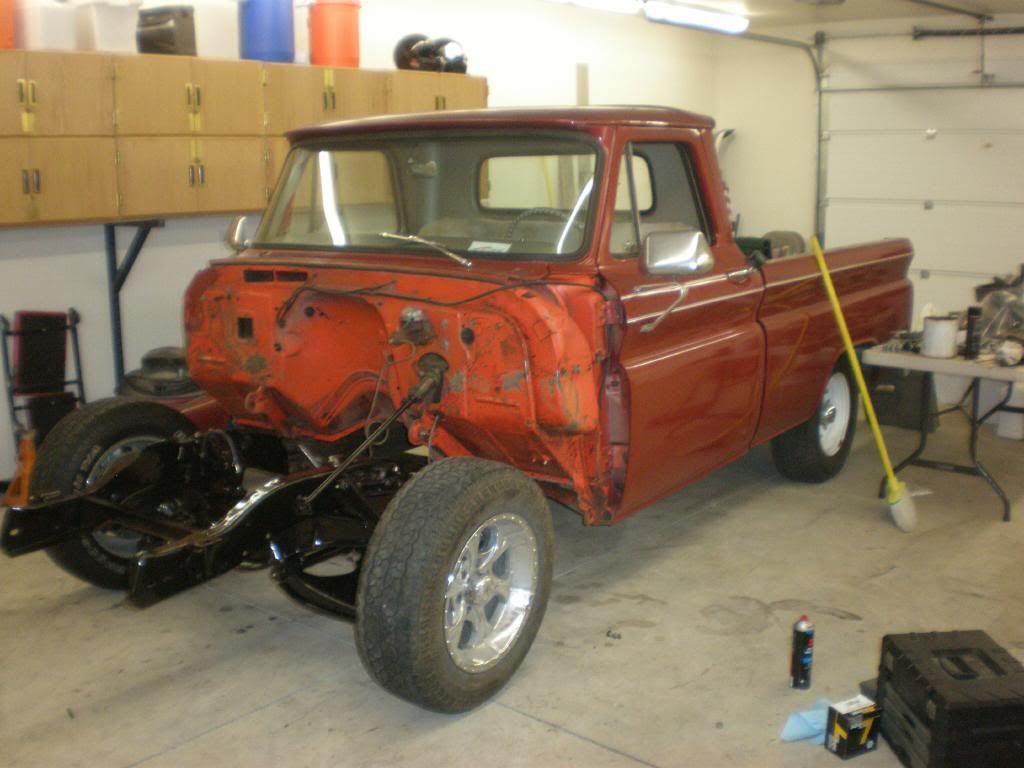
ok so i got the brakes on the front last night and i did not get any brake lines from the guy i bought it from so i'll have to call him. also it doesnt look like its lowered 2'' but i think it will look its part when there is more weight on the front
__________________
1965 c/10 swb 1969 c/10 lwb
|
|
|
|
|
08-08-2010, 08:50 PM
|
#57 |
|
Senior Member
Join Date: Jul 2008
Location: kennewick, WA
Posts: 1,461
|
Re: 65 shorty build
well during my 2 day stay in reno at hot august nights we bought a 700r4 trans and a b&m ratchet shifter. which should be here by the end of the week!
__________________
1965 c/10 swb 1969 c/10 lwb
|
|
|
|
|
08-14-2010, 08:13 PM
|
#58 |
|
Senior Member
Join Date: Jul 2008
Location: kennewick, WA
Posts: 1,461
|
Re: 65 shorty build
i finally got a chance to sandblast the rear frame and firewall.
  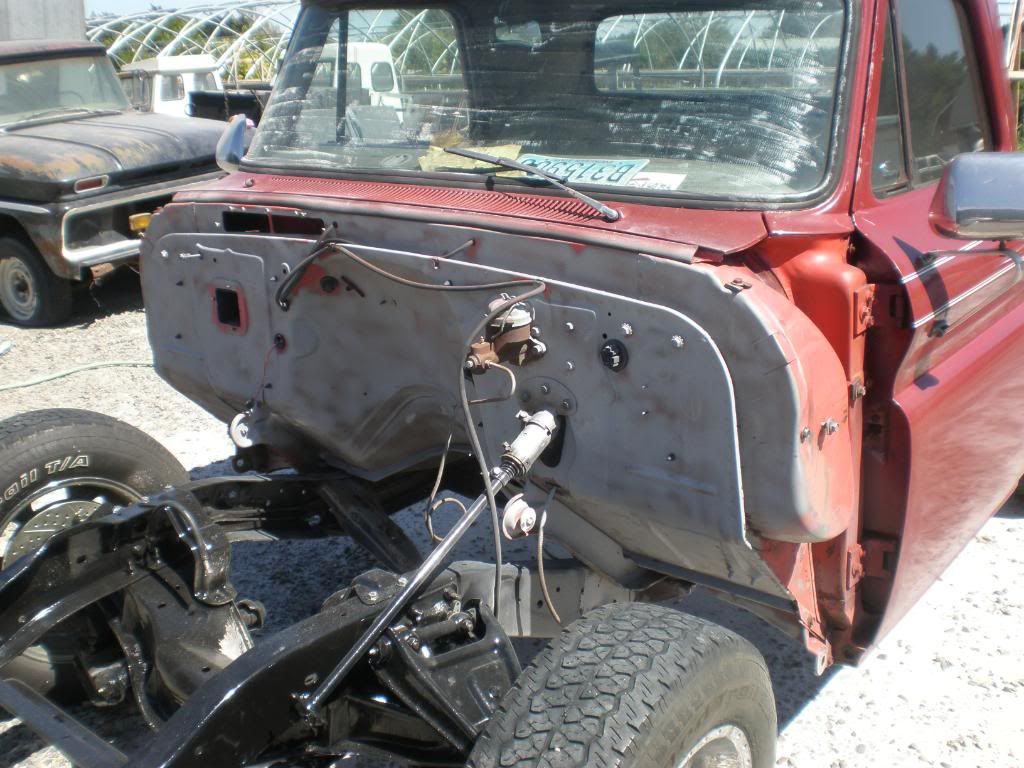 i found this number it looks like a "66" what would this mean?  has anyone heard of por15's pelucid topcoat? is it a good idea to spray it over the black on the firewall? hopefully tommorow i can take the rear end out along with the trailing arms blast and paint those too.
__________________
1965 c/10 swb 1969 c/10 lwb
|
|
|
|
|
08-15-2010, 12:17 AM
|
#59 |
|
60-66 Nut
Join Date: Mar 2007
Location: Coeur d'Alene, Idaho
Posts: 23,246
|
Re: 65 shorty build
Be very careful using that silica sand. Breathing the dust from it can cause serious lung damage and even death. Even what's on the ground afterwards can get stirred up.
I haven't heard anything about POR's Pelucid topcoat, but then again I've only used POR15 2 times.
__________________
Power Steering Box Adapter Plates For Sale HERE Power Brake Booster Adapter Brackets For Sale '63-'66 HERE and '67-'72 HERE and '60-'62 HERE and "60-'62 with clutch HERE Rear Disc Brake Brackets For Sale. Impala SS calipers HERE Camaro Calipers HERE D52 Calipers HERE 6 Lug HERE Hydroboost Mounting Plates HERE |
|
|
|
|
08-15-2010, 12:21 PM
|
#60 |
|
Senior Member
Join Date: Jul 2008
Location: kennewick, WA
Posts: 1,461
|
Re: 65 shorty build
yeah silacosus (or how ever you spell it) that would be a bad way to go. yeah i wear a resperator.
__________________
1965 c/10 swb 1969 c/10 lwb
|
|
|
|
|
08-24-2010, 01:07 AM
|
#61 |
|
Senior Member
Join Date: Jul 2008
Location: kennewick, WA
Posts: 1,461
|
Re: 65 shorty build
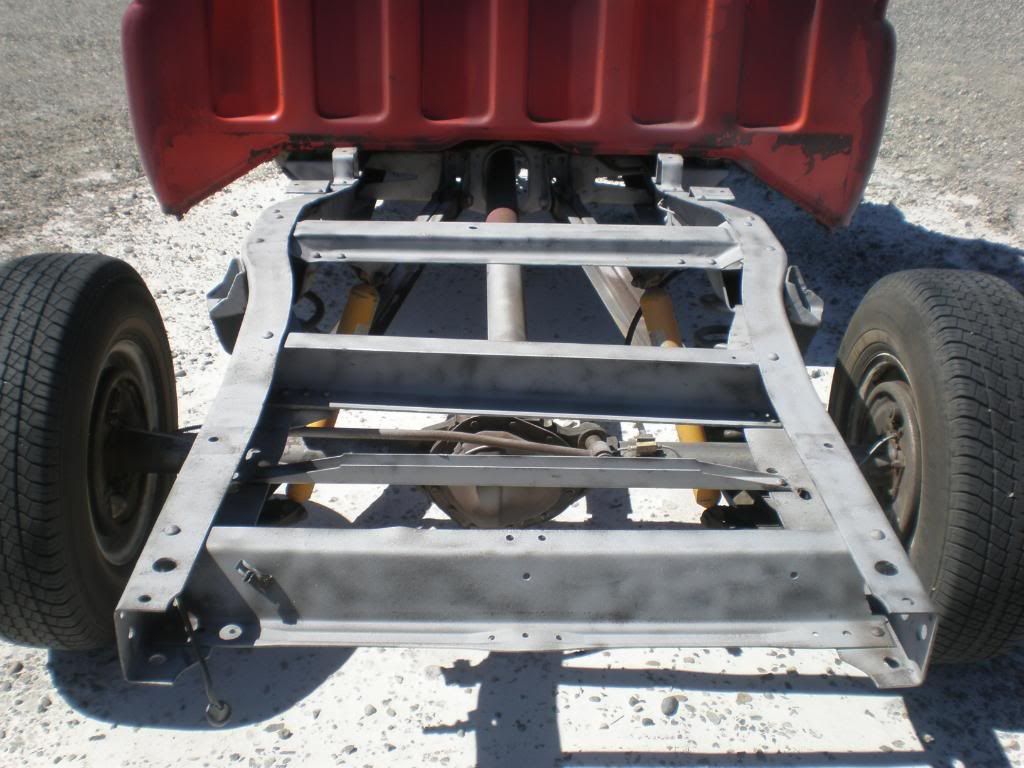
the internet has been down for about a week or better and i have made significant progress as well as bought a powder coating gun and oven on craigslist for $100!!! i finaly got the 700r4 trans and the pro ratchet shifter to. the painted items were sprayed/brushed on with por15.
well heres some pics of the progress and powder coating....    is this panhard bar suppused to be bent?    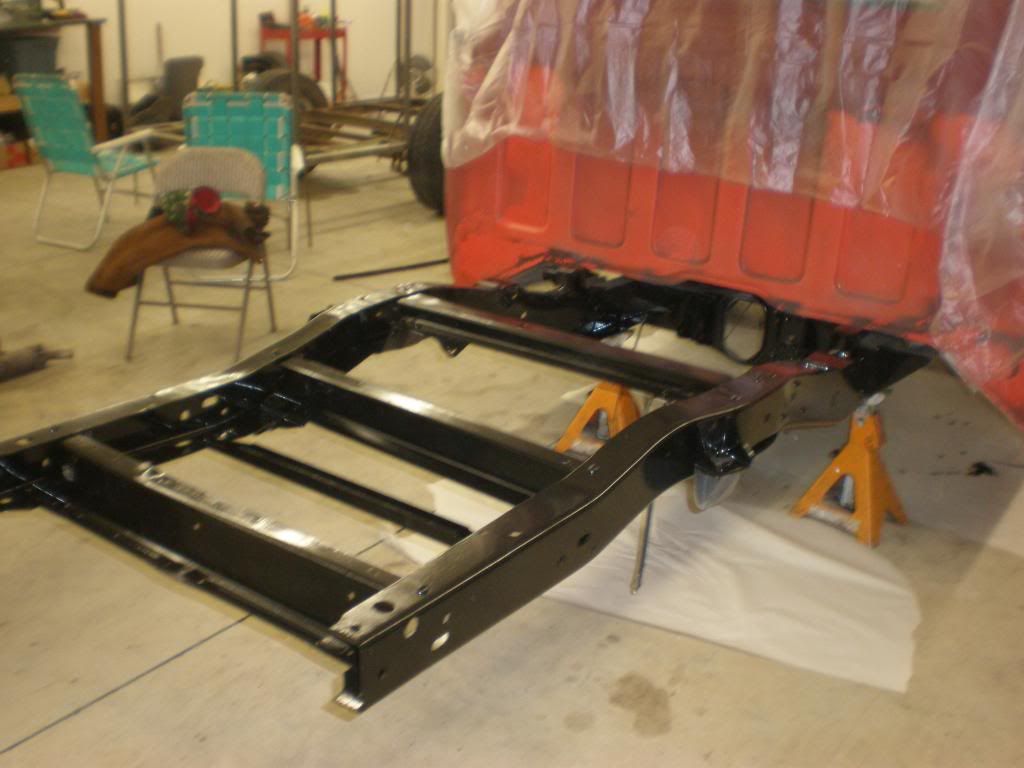 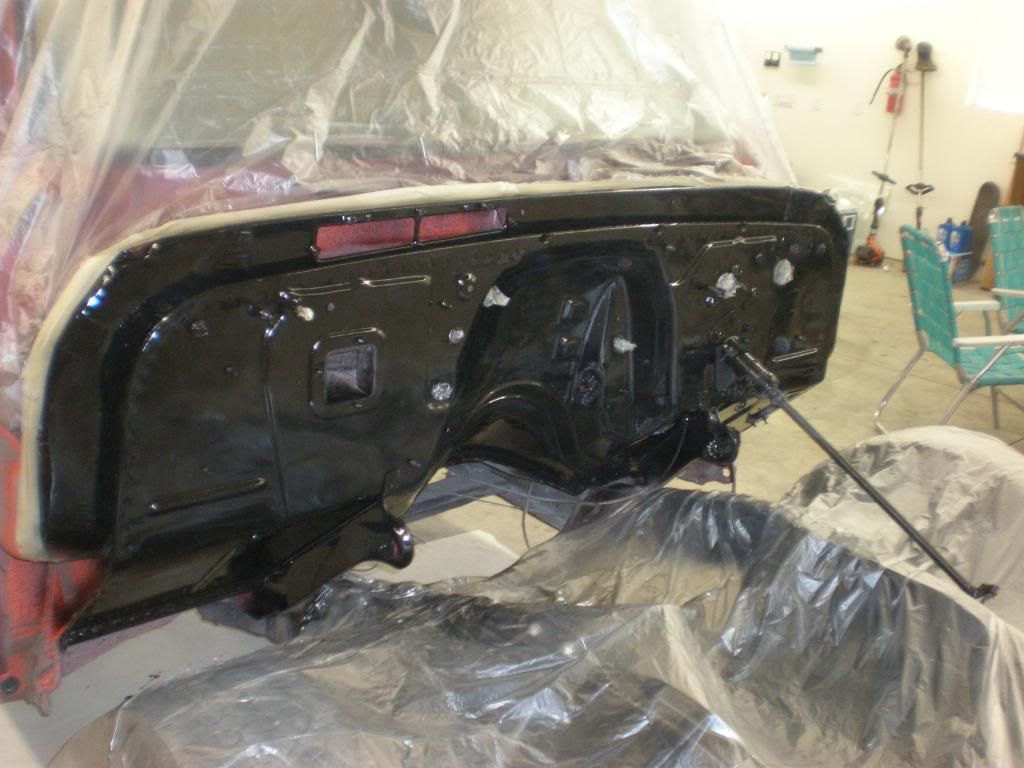
__________________
1965 c/10 swb 1969 c/10 lwb
|
|
|
|
|
08-24-2010, 01:20 AM
|
#62 | |
|
60-66 Nut
Join Date: Mar 2007
Location: Coeur d'Alene, Idaho
Posts: 23,246
|
Re: 65 shorty build
No. it's not supposed to be bent. Someone may have done that to center the rear end if it wasn't originally. You can buy adjustable panhard bars if you so desire.
Quote:
__________________
Power Steering Box Adapter Plates For Sale HERE Power Brake Booster Adapter Brackets For Sale '63-'66 HERE and '67-'72 HERE and '60-'62 HERE and "60-'62 with clutch HERE Rear Disc Brake Brackets For Sale. Impala SS calipers HERE Camaro Calipers HERE D52 Calipers HERE 6 Lug HERE Hydroboost Mounting Plates HERE |
|
|
|
|
|
08-24-2010, 01:22 AM
|
#63 |
|
Senior Member
Join Date: Jul 2008
Location: kennewick, WA
Posts: 1,461
|
Re: 65 shorty build
why would make them do that??
ill just build a new one
__________________
1965 c/10 swb 1969 c/10 lwb
|
|
|
|
|
08-24-2010, 03:15 PM
|
#64 | |
|
Registered User
Join Date: Apr 2001
Location: DALLAS,TX
Posts: 21,907
|
Re: 65 shorty build
Quote:
__________________
67SWB-B.B.RetroRod 64SWB-Recycle 89CCDually-Driver/Tow Truck 99CCSWB Driver All Fleetsides @rattlecankustoms in IG Building a small, high rpm engine with the perfect bore, stroke and rod ratio is very impressive. It's like a highly skilled Morrocan sword fighter with a Damascus Steel Scimitar..... Cubic inches is like Indiana Jones with a cheap pistol. |
|
|
|
|
|
08-24-2010, 07:08 PM
|
#65 |
|
Jesse
Join Date: Sep 2006
Location: Lodi,CA
Posts: 601
|
Re: 65 shorty build
Nice progress, Hows that powder coat set-up working for you?
|
|
|
|
|
08-24-2010, 07:51 PM
|
#66 | ||
|
Senior Member
Join Date: Jul 2008
Location: kennewick, WA
Posts: 1,461
|
Re: 65 shorty build
Quote:
Quote:
__________________
1965 c/10 swb 1969 c/10 lwb
|
||
|
|
|
|
08-24-2010, 11:59 PM
|
#67 |
|
60-66 Nut
Join Date: Mar 2007
Location: Coeur d'Alene, Idaho
Posts: 23,246
|
Re: 65 shorty build
I would either buy or make an adjustable panhard bar.
__________________
Power Steering Box Adapter Plates For Sale HERE Power Brake Booster Adapter Brackets For Sale '63-'66 HERE and '67-'72 HERE and '60-'62 HERE and "60-'62 with clutch HERE Rear Disc Brake Brackets For Sale. Impala SS calipers HERE Camaro Calipers HERE D52 Calipers HERE 6 Lug HERE Hydroboost Mounting Plates HERE |
|
|
|
|
08-25-2010, 12:02 AM
|
#68 |
|
Senior Member
Join Date: Jul 2008
Location: kennewick, WA
Posts: 1,461
|
Re: 65 shorty build
ill have to get the "how to" from some one.
also whats the best way to remove undercoating??
__________________
1965 c/10 swb 1969 c/10 lwb
Last edited by chev-obsession; 08-25-2010 at 12:03 AM. Reason: second line |
|
|
|
|
08-25-2010, 12:16 AM
|
#69 | |
|
60-66 Nut
Join Date: Mar 2007
Location: Coeur d'Alene, Idaho
Posts: 23,246
|
Re: 65 shorty build
To build an adjustable panhard bar, you'll need a piece of DOM tube for the length, a piece of DOM that will work with the bushings on the fixed end, a bushed rod end on the adjustable end, and a threaded bushing that matches the threaded rod end to weld in the end of the long tube. If that isn't understandable, take a look at the ones from CPP.
Sometimes you can remove undercoating with a little heat from say a propane torch and a putty knife. Or just a putty knife or a gasket scraper may work also. Aircraft paint stripper works sometimes too. Quote:
__________________
Power Steering Box Adapter Plates For Sale HERE Power Brake Booster Adapter Brackets For Sale '63-'66 HERE and '67-'72 HERE and '60-'62 HERE and "60-'62 with clutch HERE Rear Disc Brake Brackets For Sale. Impala SS calipers HERE Camaro Calipers HERE D52 Calipers HERE 6 Lug HERE Hydroboost Mounting Plates HERE Last edited by Captainfab; 08-25-2010 at 12:16 AM. |
|
|
|
|
|
08-25-2010, 12:26 AM
|
#70 | |
|
Senior Member
Join Date: Jul 2008
Location: kennewick, WA
Posts: 1,461
|
Re: 65 shorty build
Quote:
i have tried air craft stripper and it was not very practical. i was researching it and people claim to use a needle gun or a halogen work lamp on the back side of the peice.
__________________
1965 c/10 swb 1969 c/10 lwb
|
|
|
|
|
|
08-29-2010, 11:08 PM
|
#71 |
|
Senior Member
Join Date: Jul 2008
Location: kennewick, WA
Posts: 1,461
|
Re: 65 shorty build
does energy suspension off rear trailing arm bushing for this truck? all im coming up with is rear control arms bushings. or are they the same thing?
http://www.summitracing.com/search/B...?Ns=Rank%7cAsc
__________________
1965 c/10 swb 1969 c/10 lwb
Last edited by chev-obsession; 08-29-2010 at 11:09 PM. |
|
|
|
|
08-30-2010, 01:21 AM
|
#72 |
|
60-66 Nut
Join Date: Mar 2007
Location: Coeur d'Alene, Idaho
Posts: 23,246
|
Re: 65 shorty build
I would say those should be what you're looking for. You might contact Summit and ask before ordering.
__________________
Power Steering Box Adapter Plates For Sale HERE Power Brake Booster Adapter Brackets For Sale '63-'66 HERE and '67-'72 HERE and '60-'62 HERE and "60-'62 with clutch HERE Rear Disc Brake Brackets For Sale. Impala SS calipers HERE Camaro Calipers HERE D52 Calipers HERE 6 Lug HERE Hydroboost Mounting Plates HERE |
|
|
|
|
08-30-2010, 08:35 AM
|
#73 | |
|
Registered User
Join Date: Apr 2001
Location: DALLAS,TX
Posts: 21,907
|
Re: 65 shorty build
Quote:
__________________
67SWB-B.B.RetroRod 64SWB-Recycle 89CCDually-Driver/Tow Truck 99CCSWB Driver All Fleetsides @rattlecankustoms in IG Building a small, high rpm engine with the perfect bore, stroke and rod ratio is very impressive. It's like a highly skilled Morrocan sword fighter with a Damascus Steel Scimitar..... Cubic inches is like Indiana Jones with a cheap pistol. |
|
|
|
|
|
12-30-2010, 07:10 PM
|
#74 |
|
Senior Member
Join Date: Jul 2008
Location: kennewick, WA
Posts: 1,461
|
Re: 65 shorty build
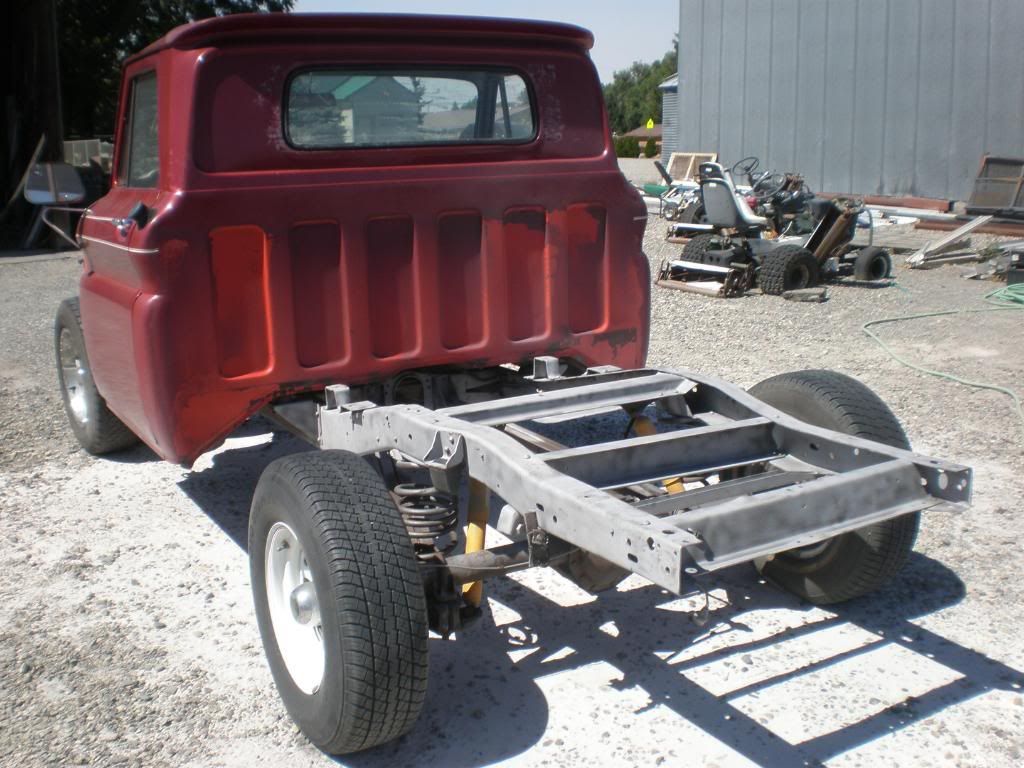
It's been a while since my last post. I've got a few things done since then. I got the rear end all buttoned up and now its sitting on all 4's!!!
I just sent the rods out to get re-sized and pistons put on. I ordered the rebuild kit and it should be back with the rods next week. I also need to order some vortec headds. I feel like its just a matter of buttoning up little things. ( and putting the motor together!) Here is some pics!  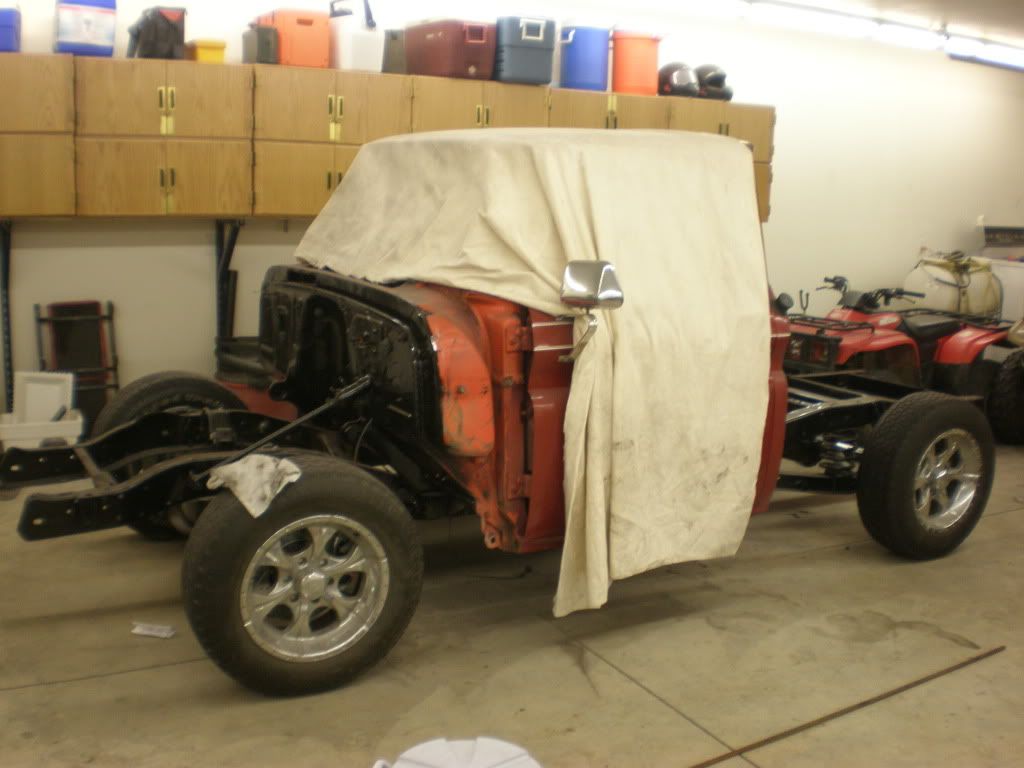  
__________________
1965 c/10 swb 1969 c/10 lwb
Last edited by chev-obsession; 12-30-2010 at 07:17 PM. |
|
|
|
|
12-01-2012, 02:47 PM
|
#75 |
|
Senior Member
Join Date: Jul 2008
Location: kennewick, WA
Posts: 1,461
|
Re: 65 shorty build
Ok, well i havent posted anything on here in a long time! I took a little break from the truck and recently just started working on it more. Ive been powder coating a lot lately... making money!
In my spare time i made a stainless shroud and polished, needless to say im proud of it lol. well heres my progress pics, didnt relly take pics as i was going but now its about ready with a few more small parts! 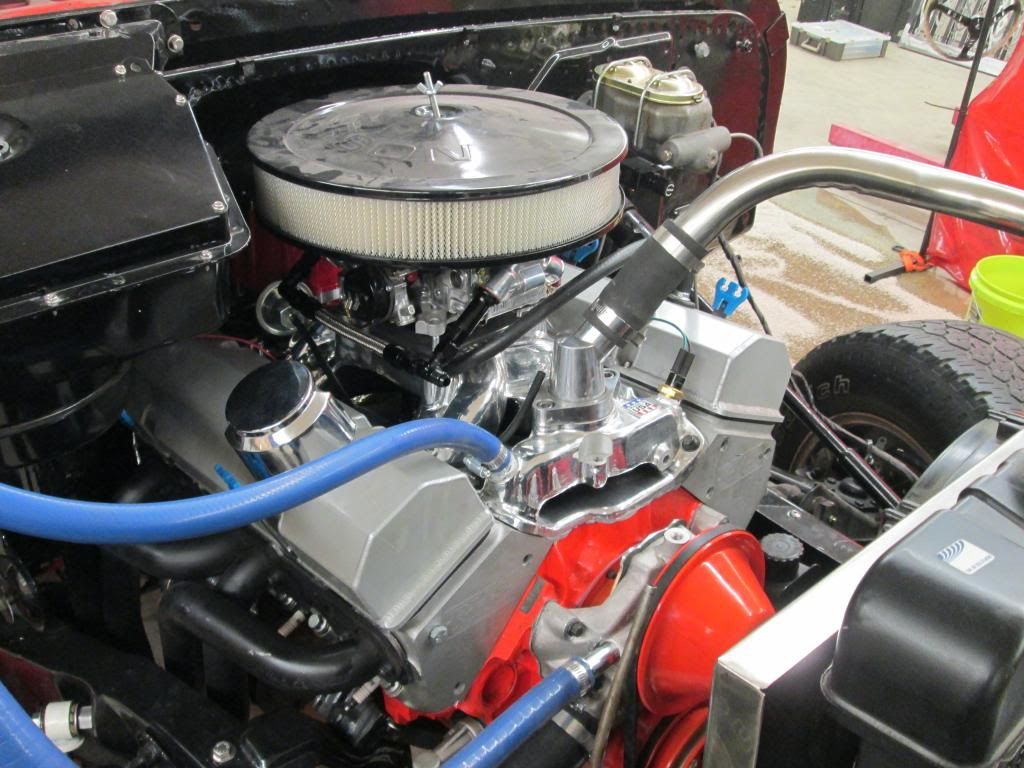 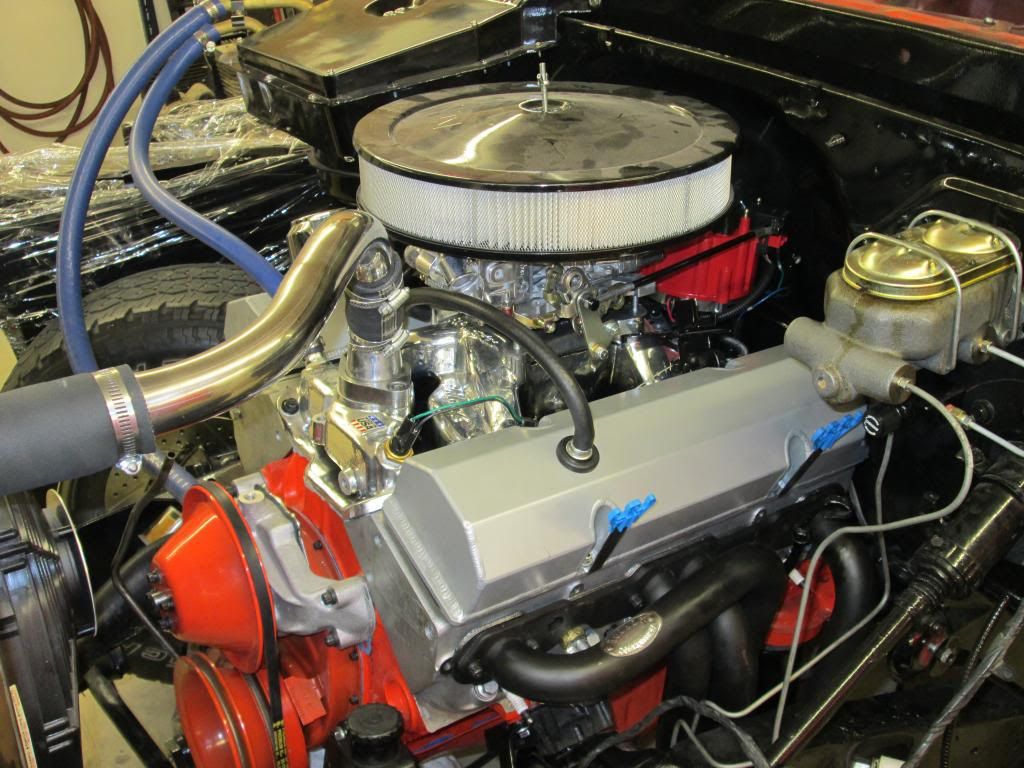 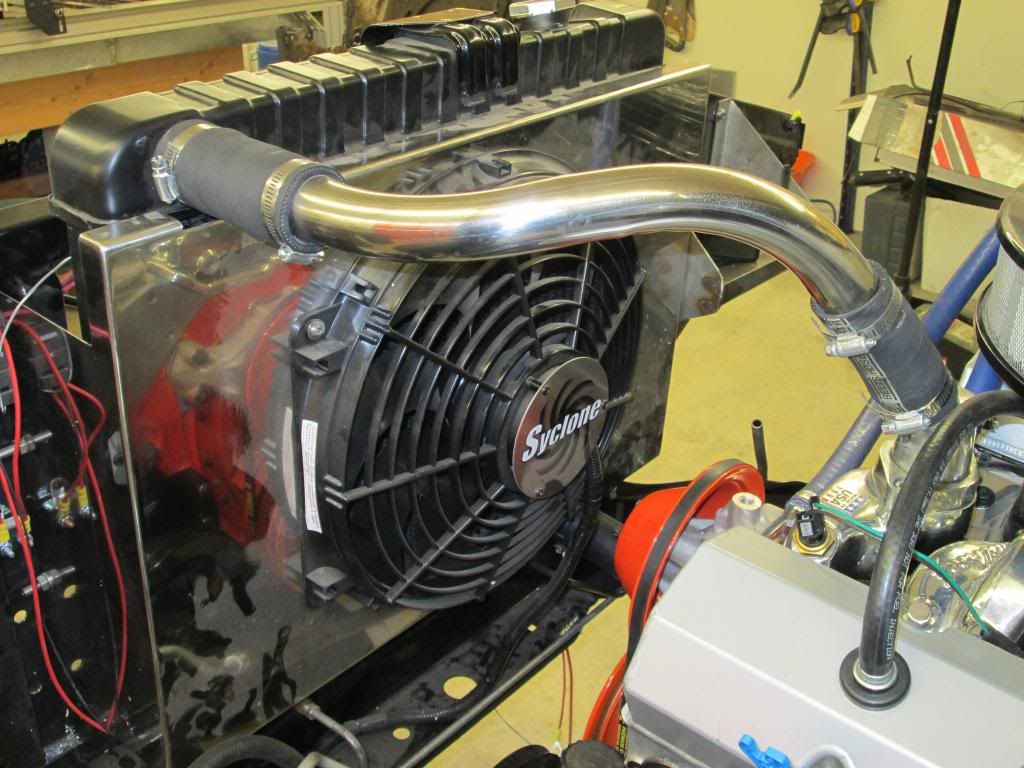 I will post more pics soon
__________________
1965 c/10 swb 1969 c/10 lwb
|
|
|
|
 |
| Bookmarks |
|
|


 Linear Mode

