
|
Register or Log In To remove these advertisements. |
|
|
|
|||||||
 |
|
|
Thread Tools | Display Modes |
 03-03-2013, 05:23 PM
|
#1 | |
|
Registered User
Join Date: Jan 2013
Location: Leonardtown, MD
Posts: 1,633
|
Studebaker dash panels
This is the continuation of a job from last summer. To start, let's catch up...
Quote:
__________________
Robert |
|

|

|
|
03-03-2013, 05:25 PM
|
#2 |
|
Registered User
Join Date: Jan 2013
Location: Leonardtown, MD
Posts: 1,633
|
Re: Studebaker dash panels
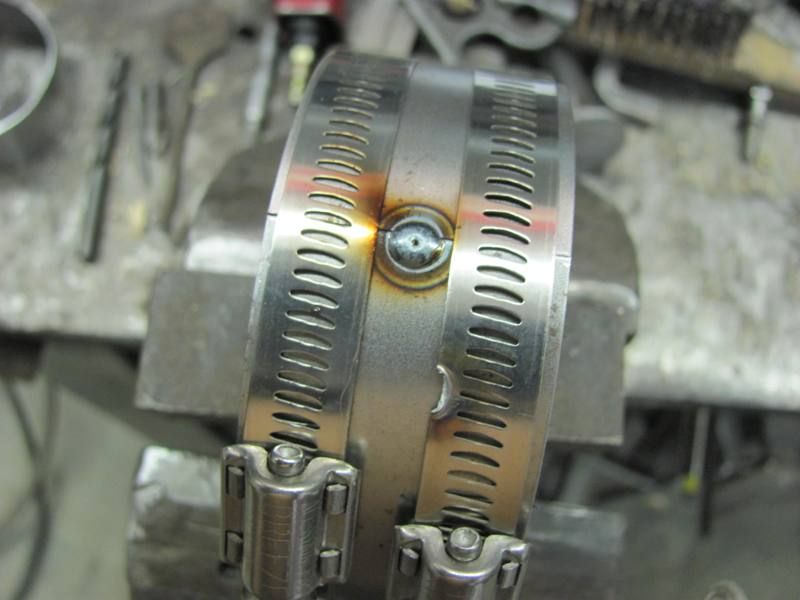
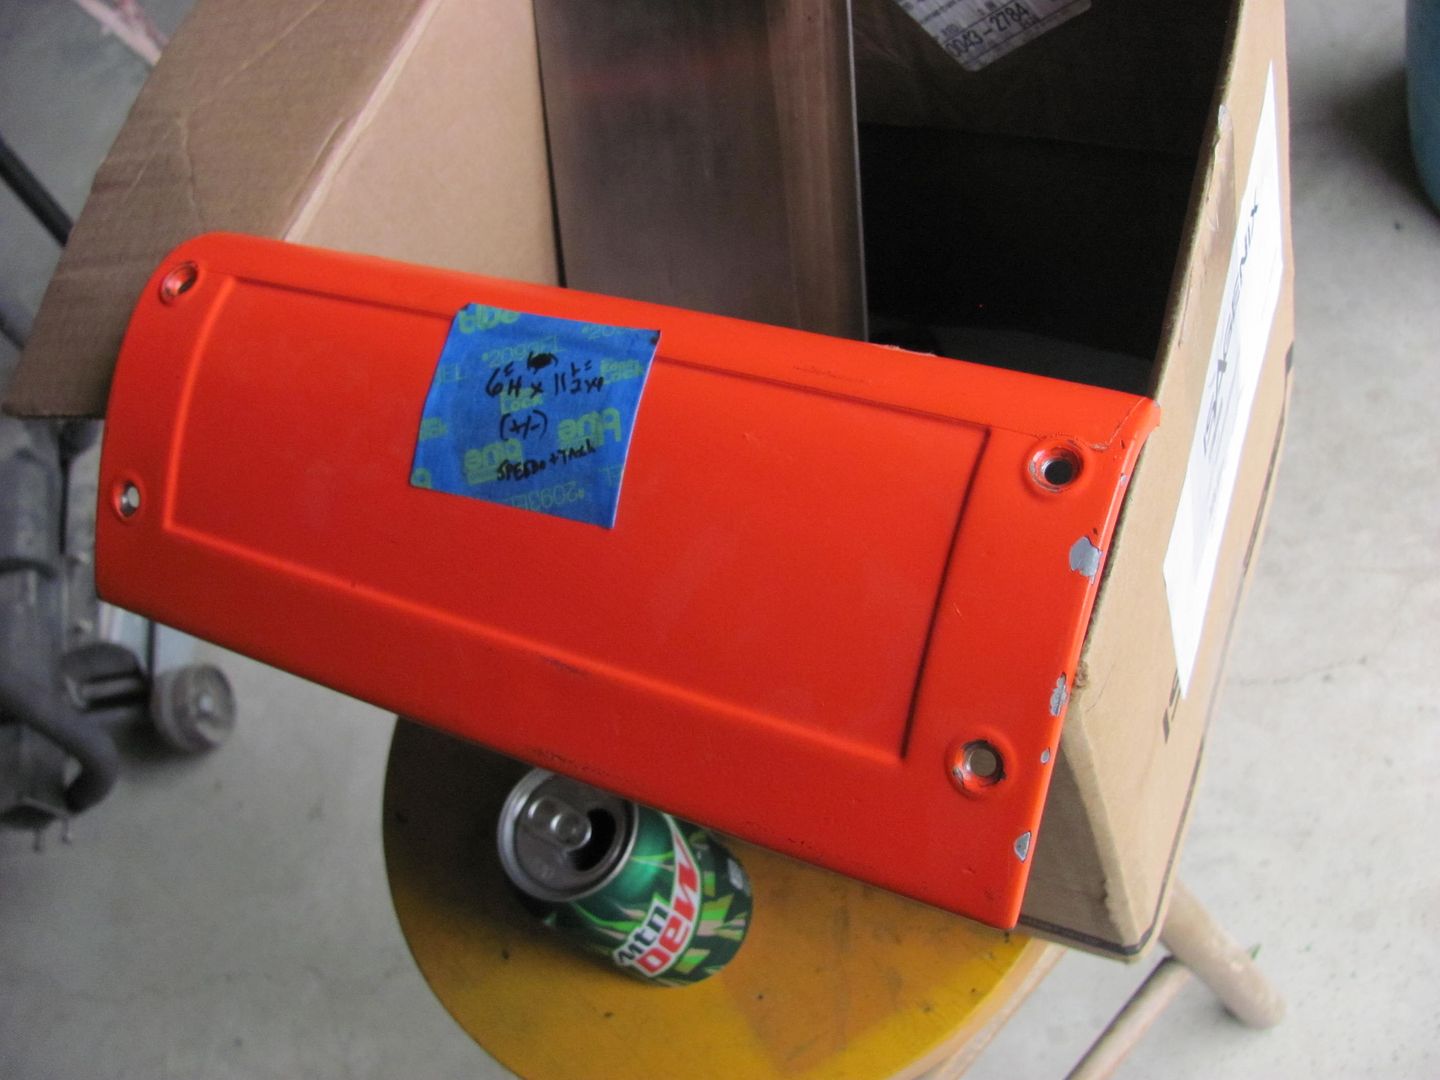
He recently stopped by with a better idea of what he planned, and a box full of gauges. So yesterday we got started. As the panel for the center of the dash has a crown, we will need some adapter rings...
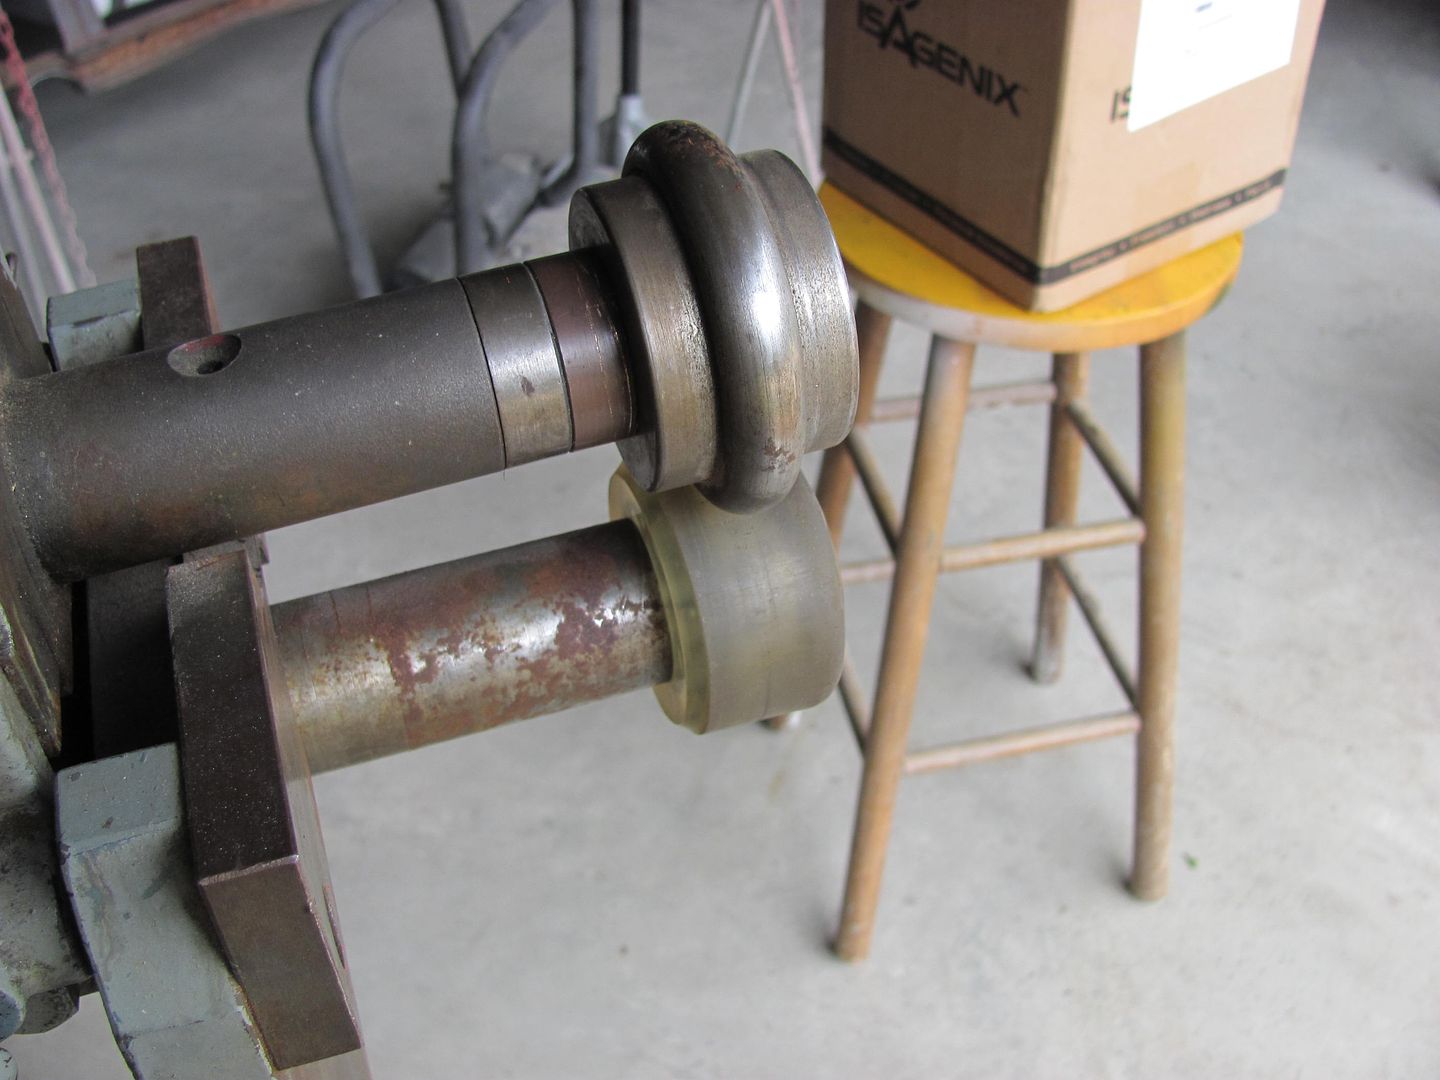
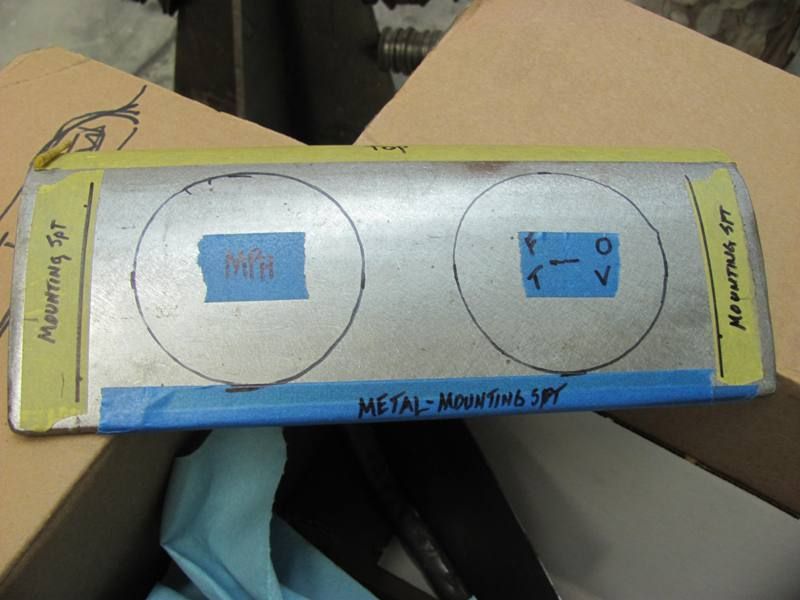 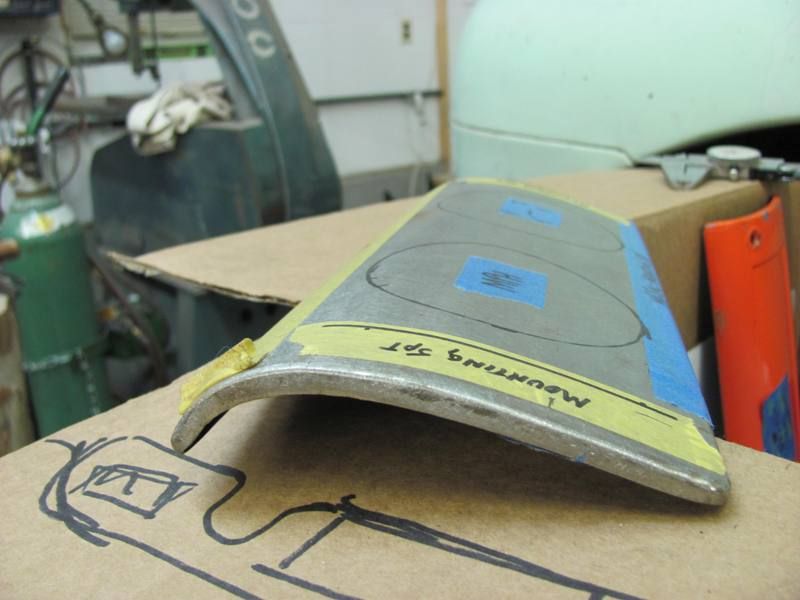 Here's the new gauge with the clamping bracket.... 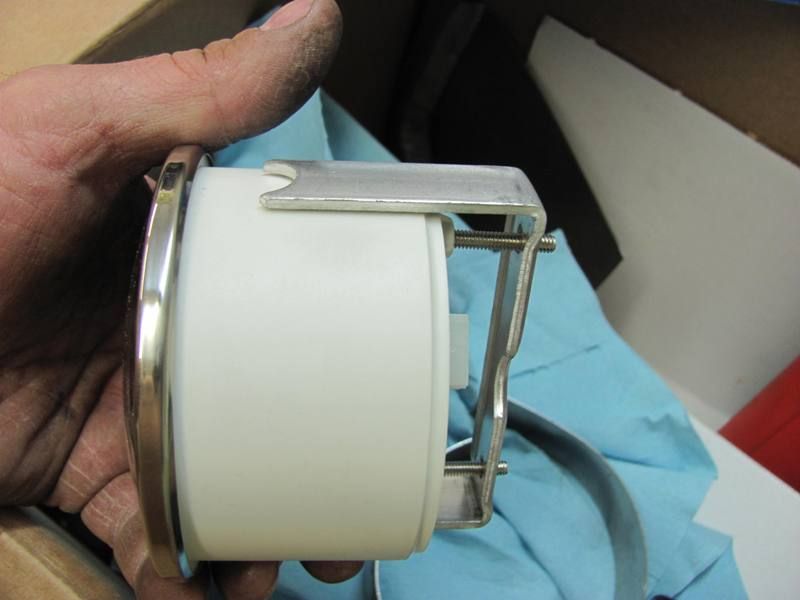 Not having a slip roll, I decided to try these in the bead roller:  I had some help in the shop this evening, so in addition to having the powered option on the bead roller this evening, given the diameter of the gauge bezel, I was able to show her real world application of Pi X D.... 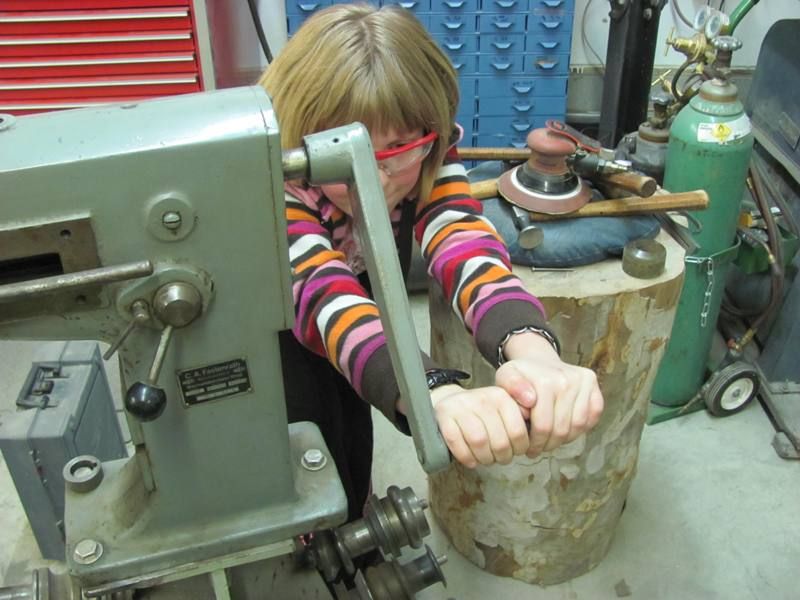 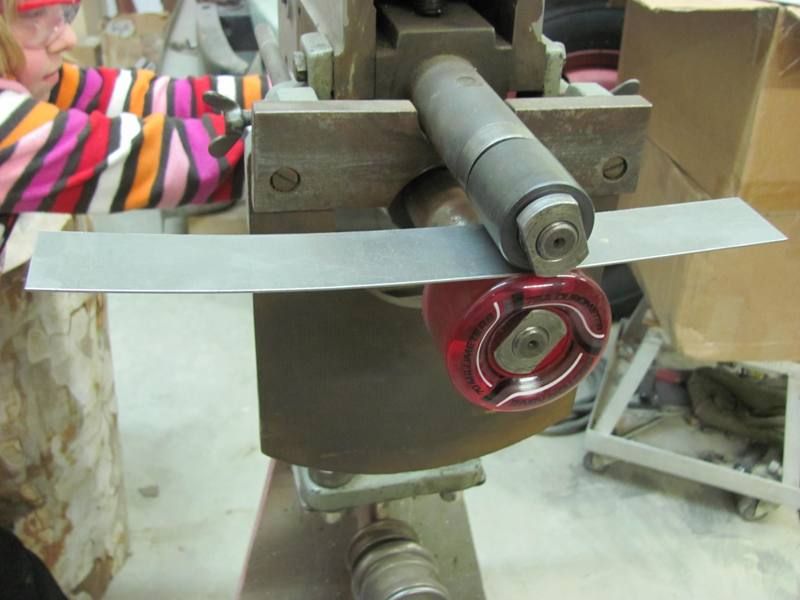 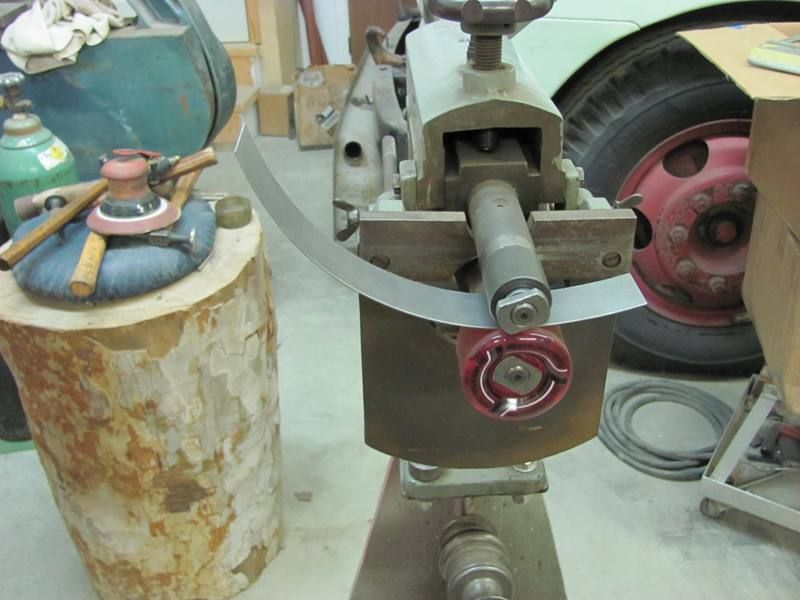 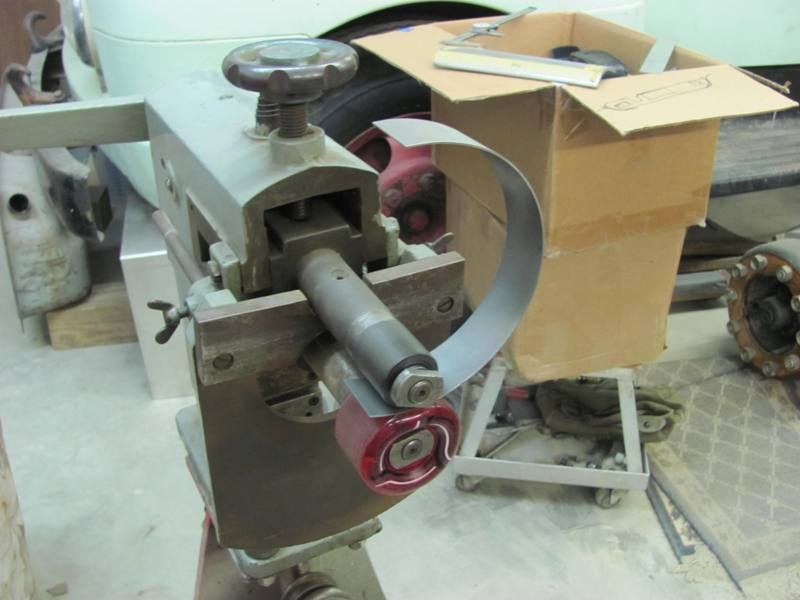 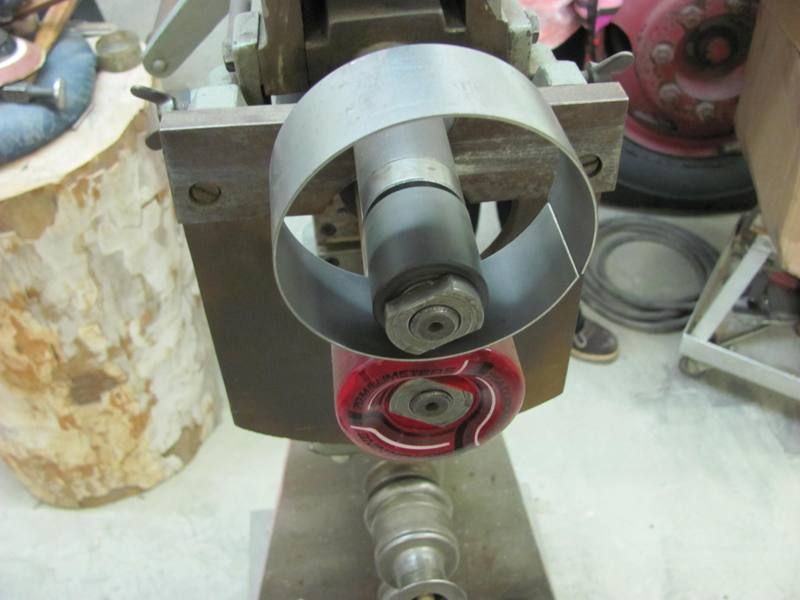 Just to test fit, here's the gauge with bracket, and the ring placed over both.... 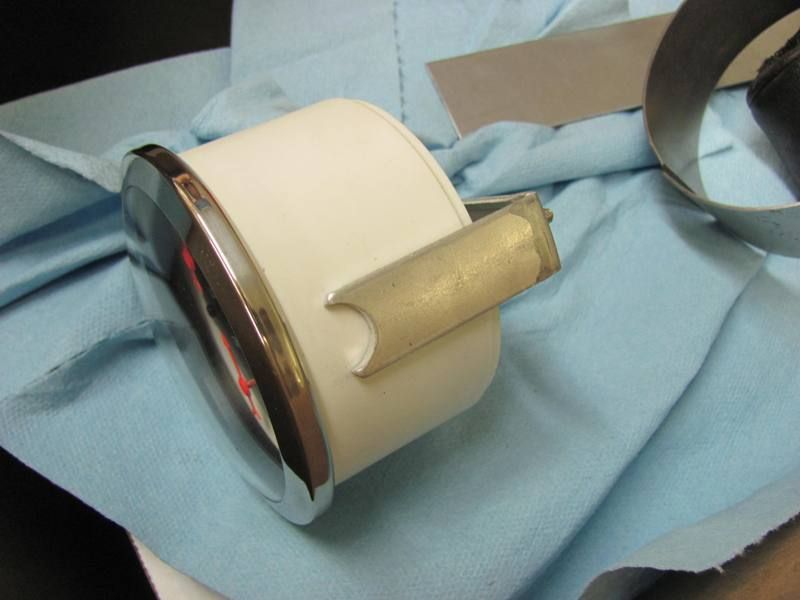 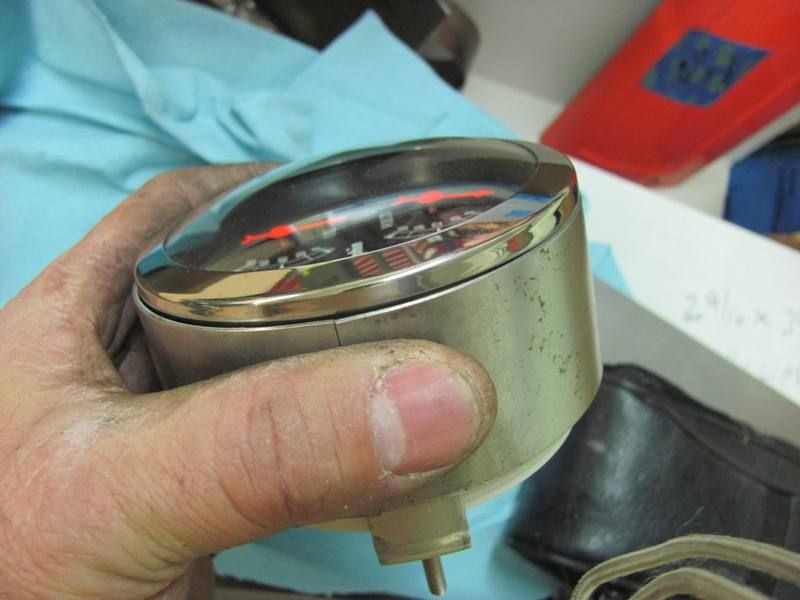 Both rings formed, tomorrow we'll get them welded up and tip some flanges for the bracket to push against... 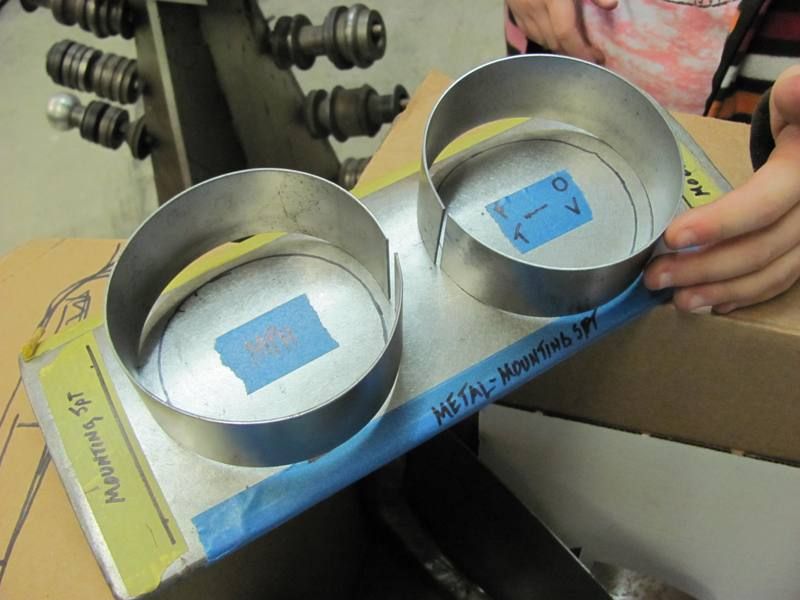
__________________
Robert |
|
|
|
|
03-03-2013, 05:27 PM
|
#3 |
|
Registered User
Join Date: Jan 2013
Location: Leonardtown, MD
Posts: 1,633
|
Re: Studebaker dash panels
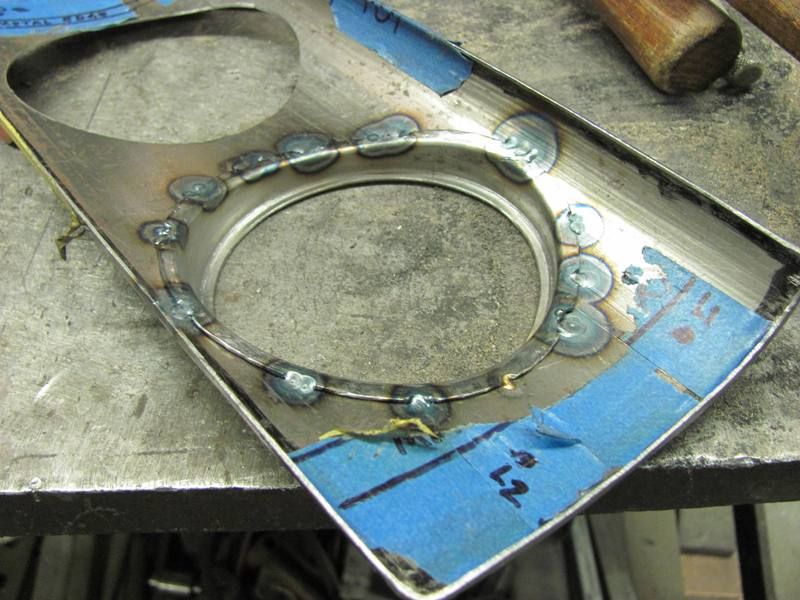
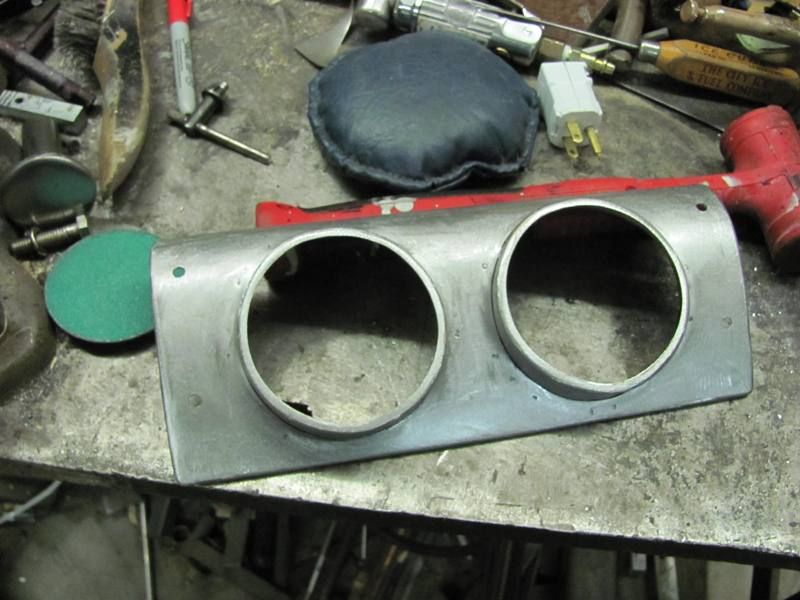
And for today, we worked on getting the rings in one piece...
 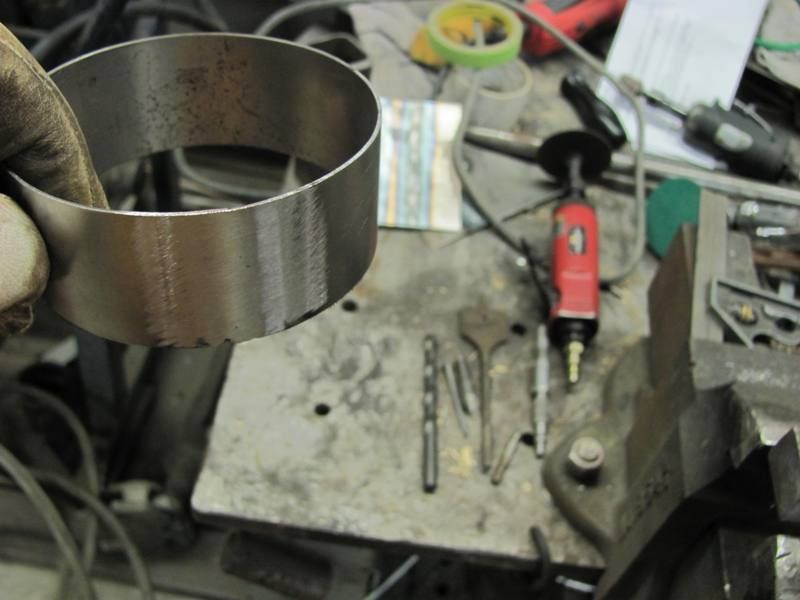 Then to tip a flange to hold the gauge in place, used these in the bead roller....  Applied a bit of pressure and started tipping the ring gradually as we went....  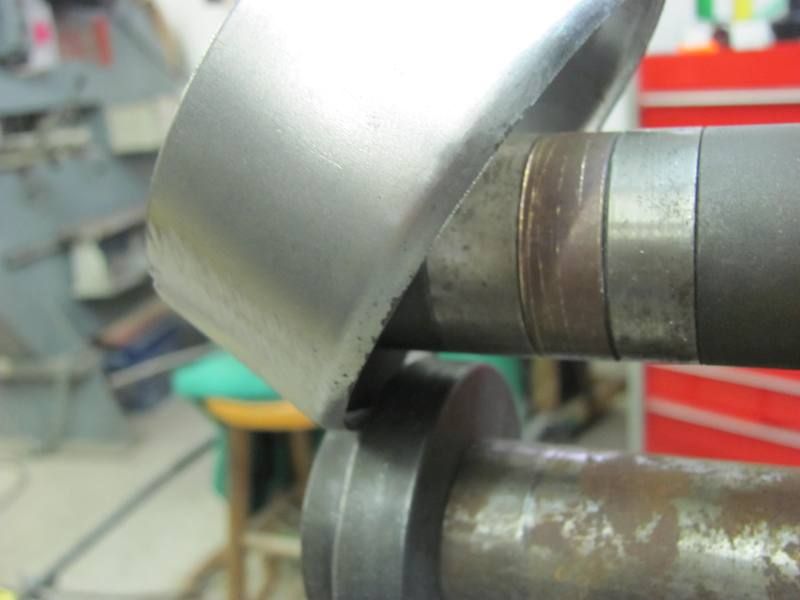 After getting the initial flange tipped to almost 45 degrees, the body hammer was used to get the flange to 90. 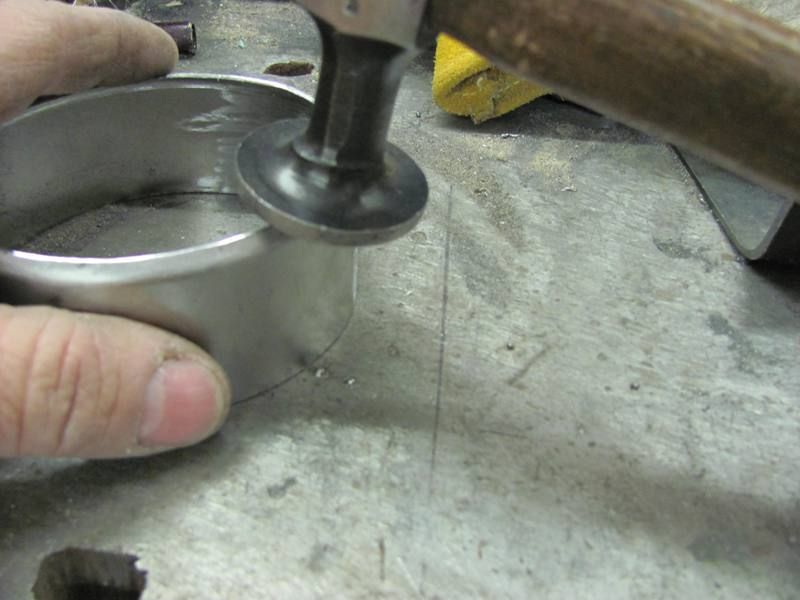 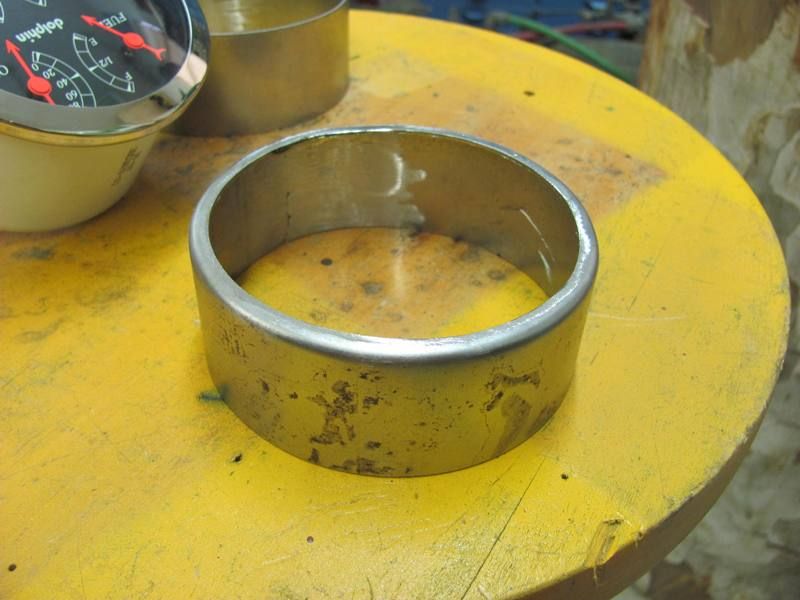 Fitted, and shown with the gauge's mouting bracket in place.....  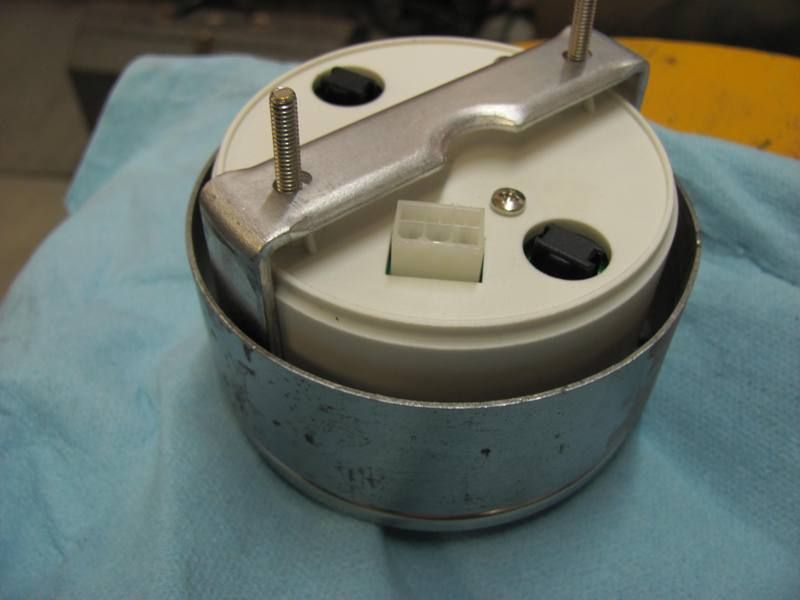 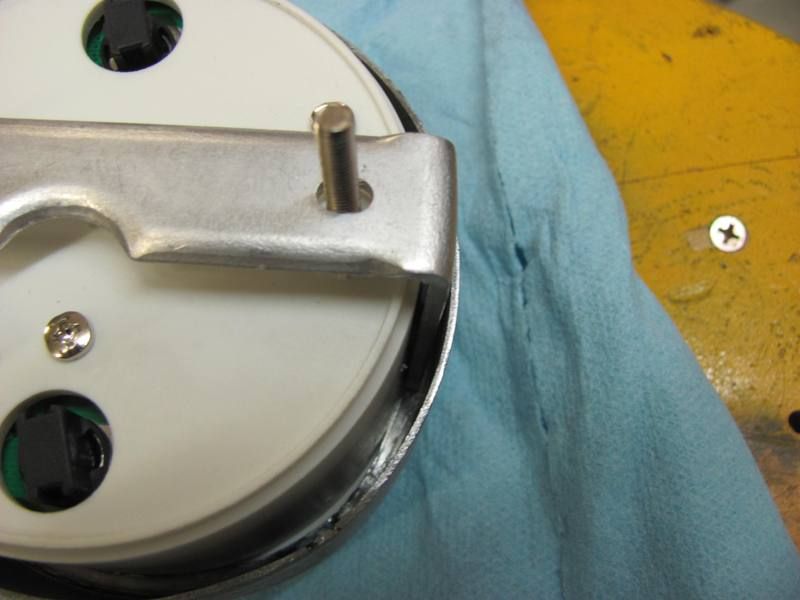 Now to fit the rings to the panel.... 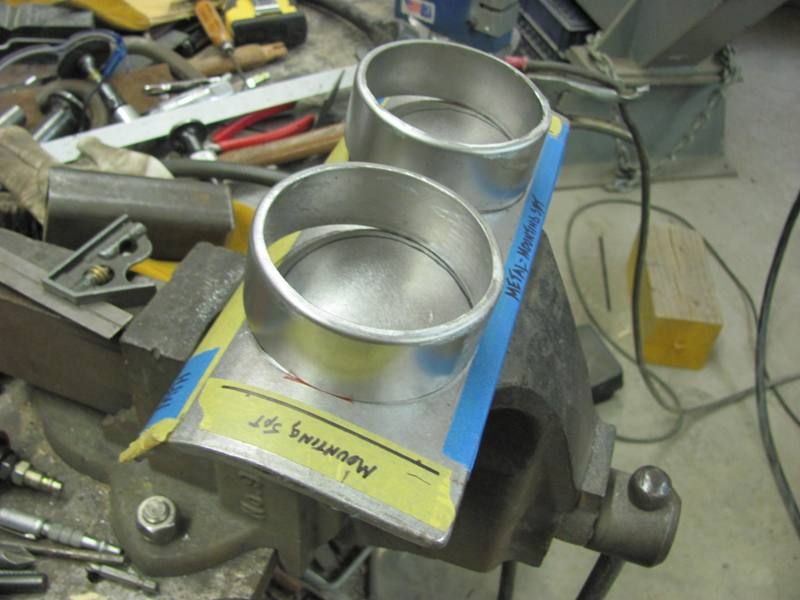 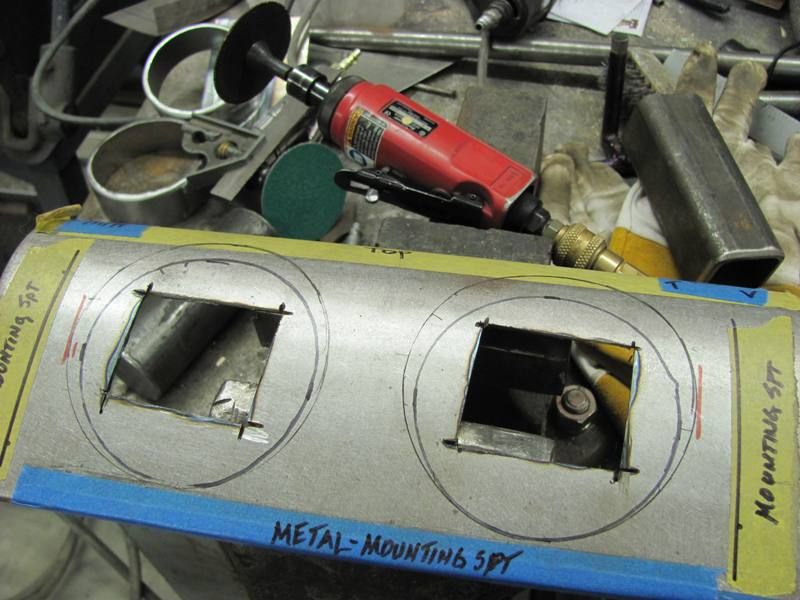 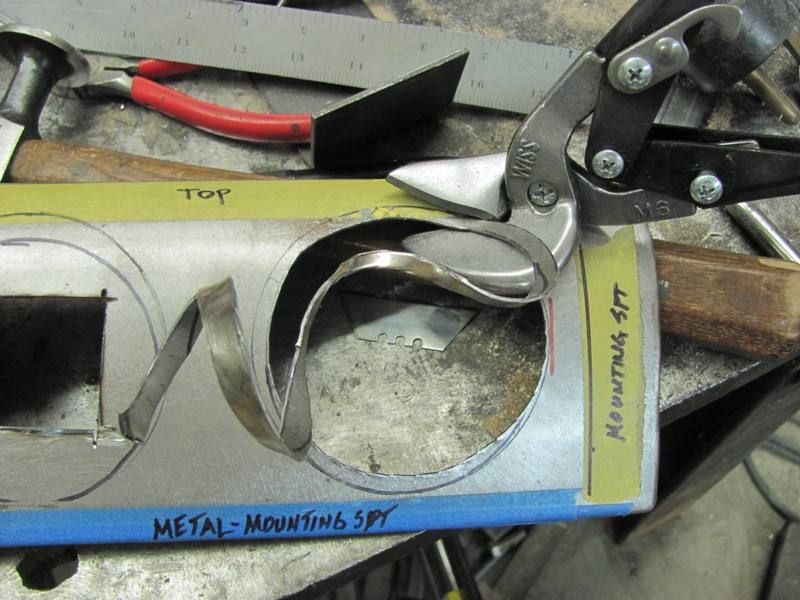 ....and fine tuned with a drum sander.. A view in the panel.... 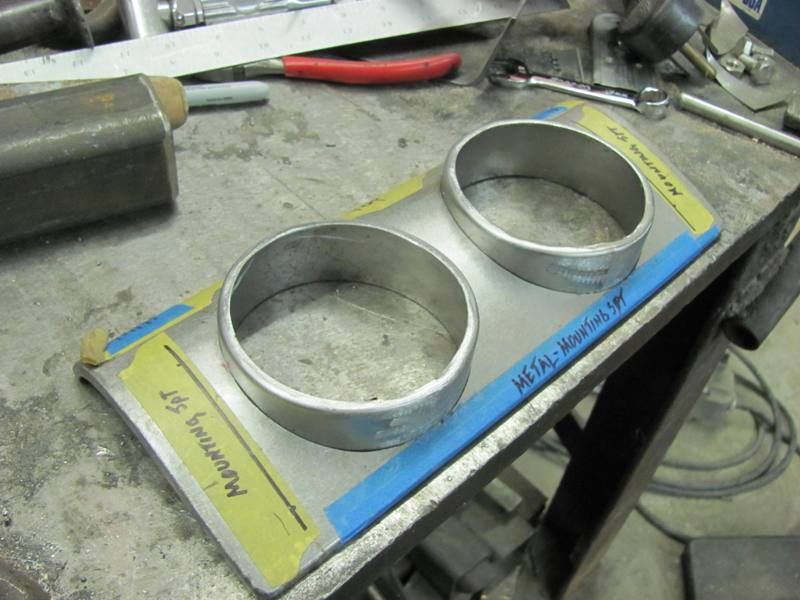 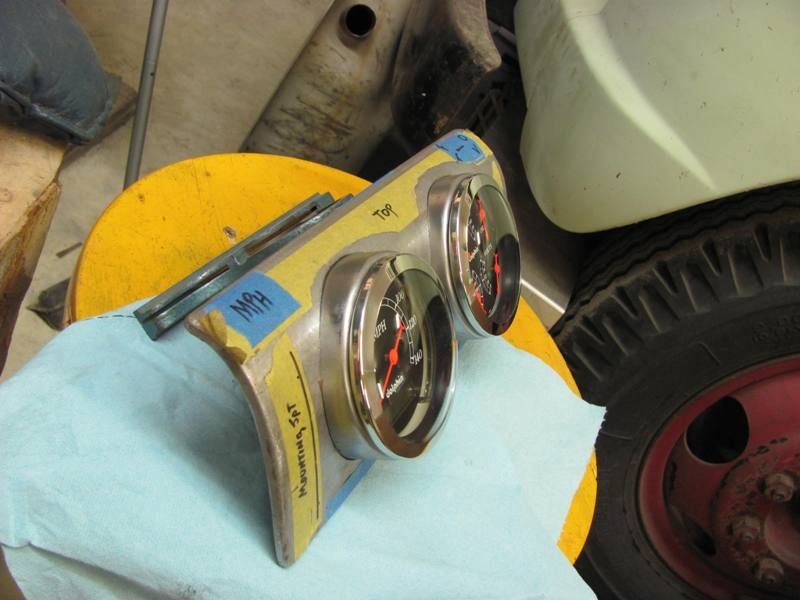 Rather than weld around the perimeter of the hole, which will surely warp things up nicely, I'll tip a flange on the underside of the rings and spot weld to the panel.
__________________
Robert |
|
|
|
|
03-03-2013, 07:46 PM
|
#4 |
|
yeller
Join Date: Oct 2001
Location: Twin Cities
Posts: 13,826
|
Re: Studebaker dash panels
Wow, impressive!!!
Great job! Posted via Mobile Device
__________________
Jeff 73-87.com 73-87.com Facebook page 73-87 cab corner 6x9 speaker brackets for sale 67-72 cab corner speaker brackets for sale 47-54 cab corner speaker brackets for sale |
|
|
|
|
03-03-2013, 08:14 PM
|
#5 | |
|
Registered User
Join Date: Mar 2006
Location: Pittsburgh
Posts: 1,694
|
Re: Studebaker dash panels
Quote:

__________________
Nate 1967 short fleet Project Blue Goose 'If it don't bounce back... heeheehee you go hungry!" Blues Brothers |
|
|
|
|
|
03-03-2013, 08:58 PM
|
#6 |
|
Registered User
Join Date: Aug 2011
Location: N.E. OH
Posts: 214
|
Re: Studebaker dash panels
Nice work! Thanks for sharing.
__________________
Success is not final, failure is not fatal: it is the courage to continue that counts. Winston Churchill DD 2000 Chevy Suburban 4x4/5.3 Vortec/4L60E/4:10s, 18" Escalade rims, Electric fans Project Dooley One-Ton 4x4 on 38.5s Corn-binder build |
|
|
|
|
03-03-2013, 09:20 PM
|
#7 |
|
Registered User
Join Date: Jan 2013
Location: Leonardtown, MD
Posts: 1,633
|
Re: Studebaker dash panels
Thanks for the comments!
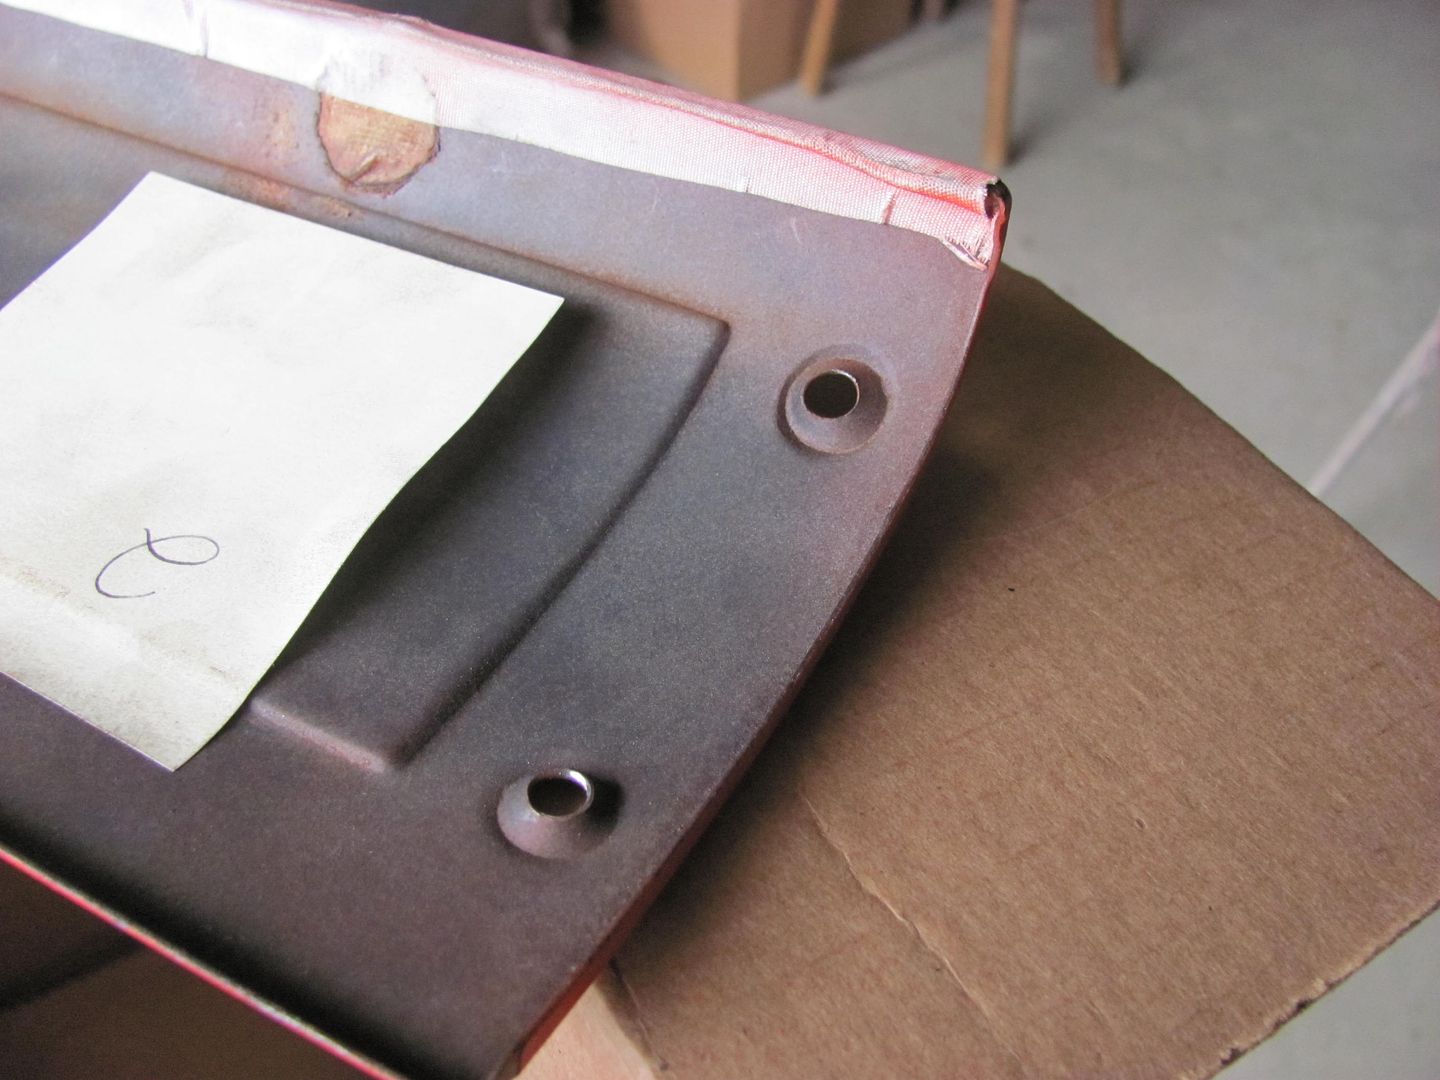
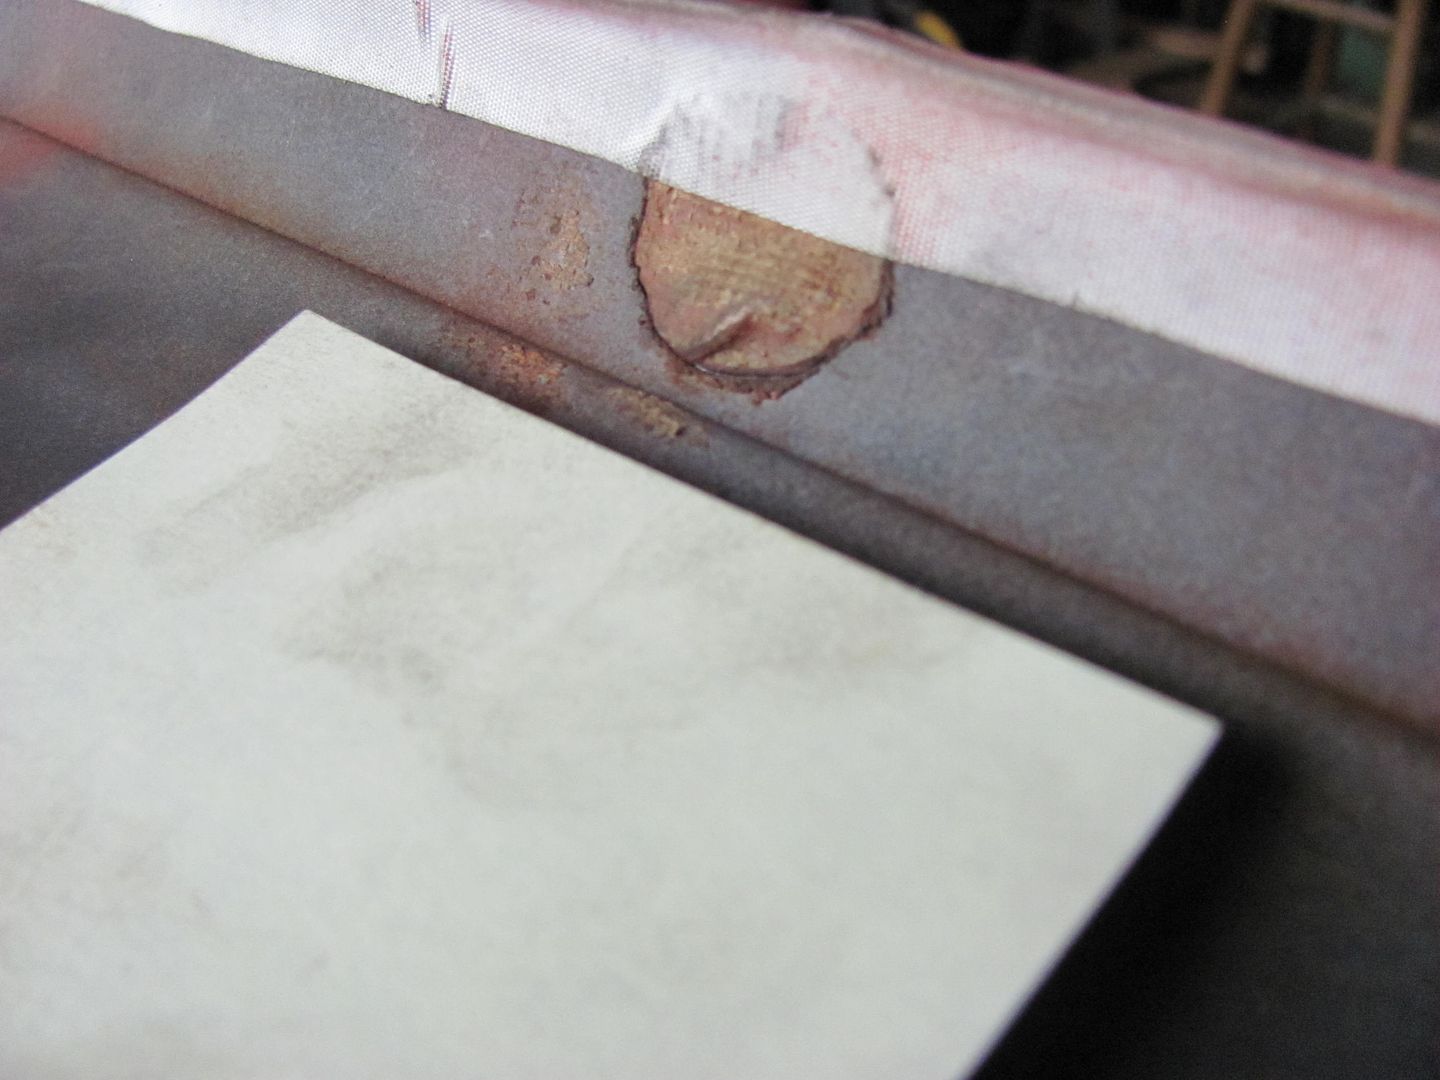
There was still a few hours left this evening, so here's the tipping process for the rear ring flange. Before marking anything, the panel and both rings were pushed flat to the "table" surface. Then alignment marks added to keep us in the right location.... 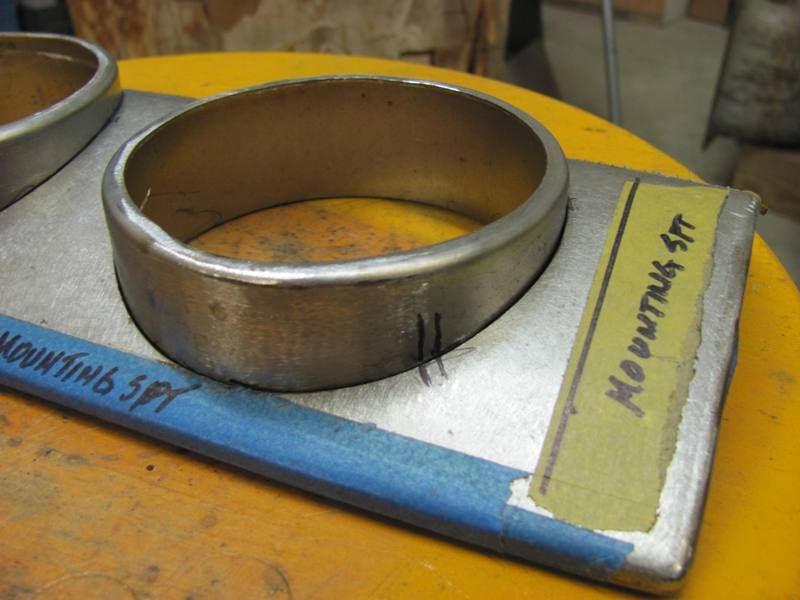 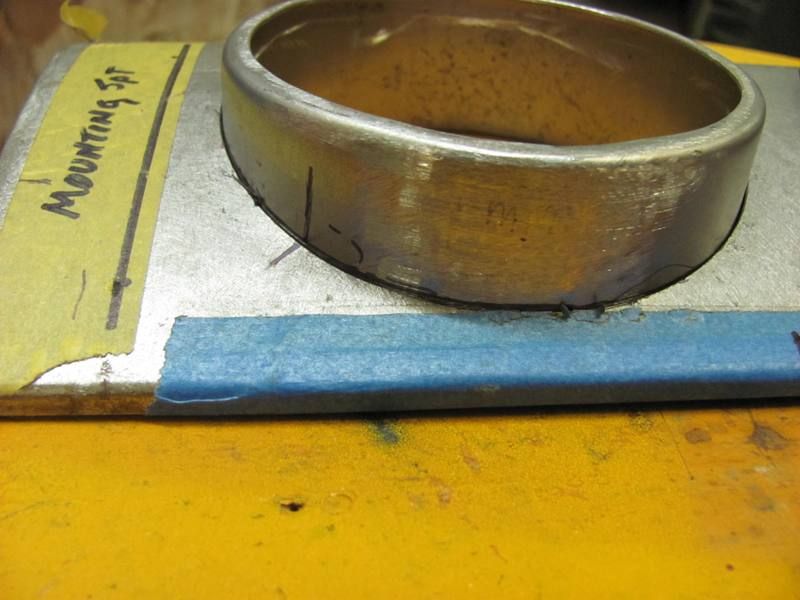 Marked along the surface of the panel against both rings.. 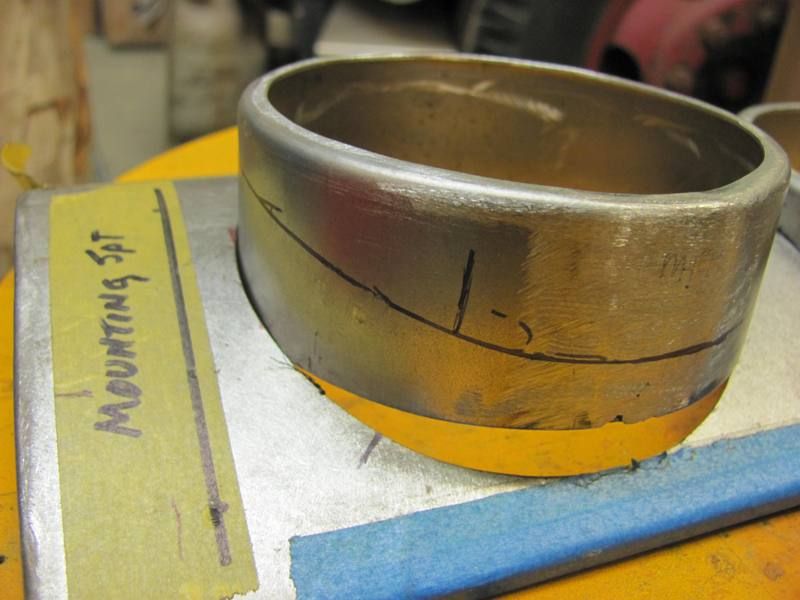 Did an offset line 3/8" away and trimmed. This looked too wide to tip, so I went back and marked again at 3/16". 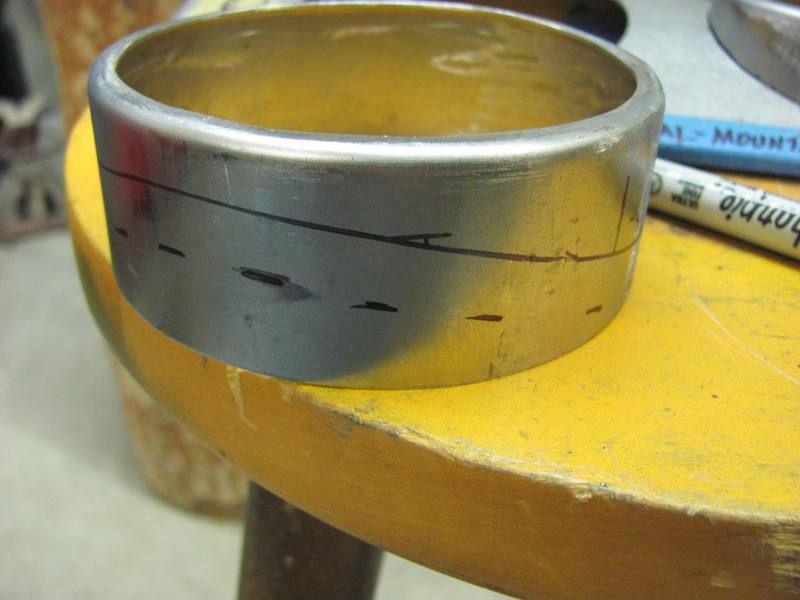 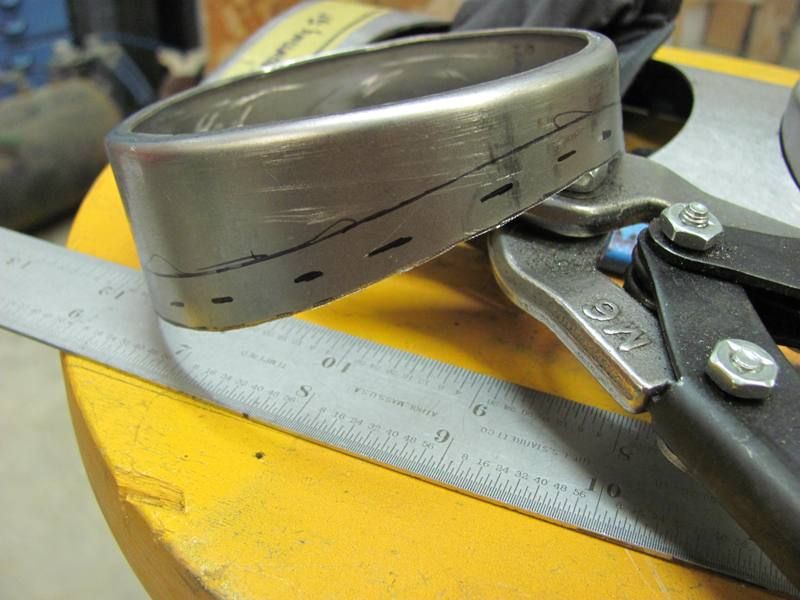 .....and trimmed again to the 3/16 mark. Changed to a different lower die for tipping this time.... made a complete revolution to "mark" the bend line and then started tipping... 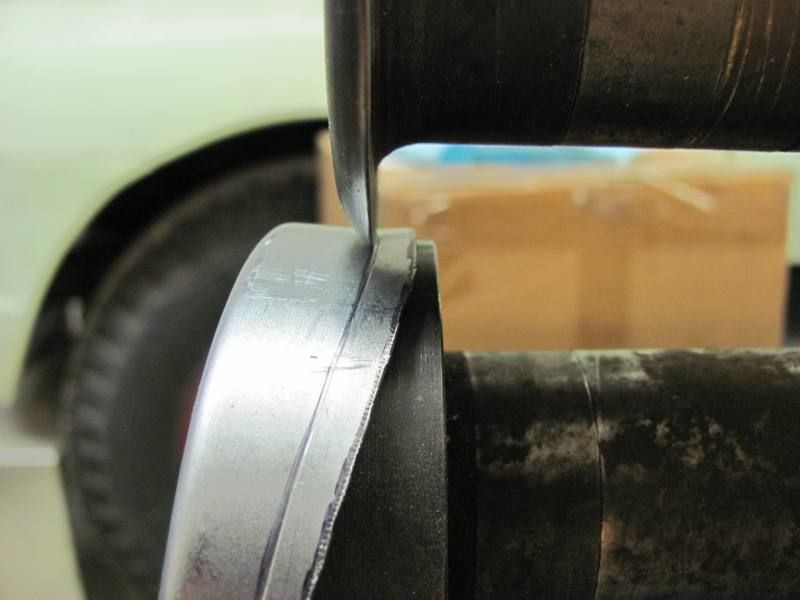 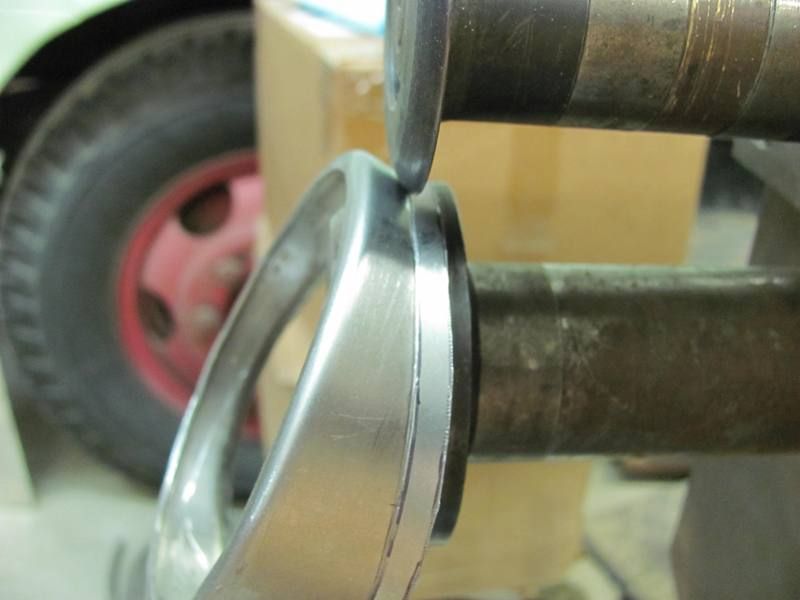 Again went to about a 45 degree tip, placed the ring in the panel to see what needed more tipping.... 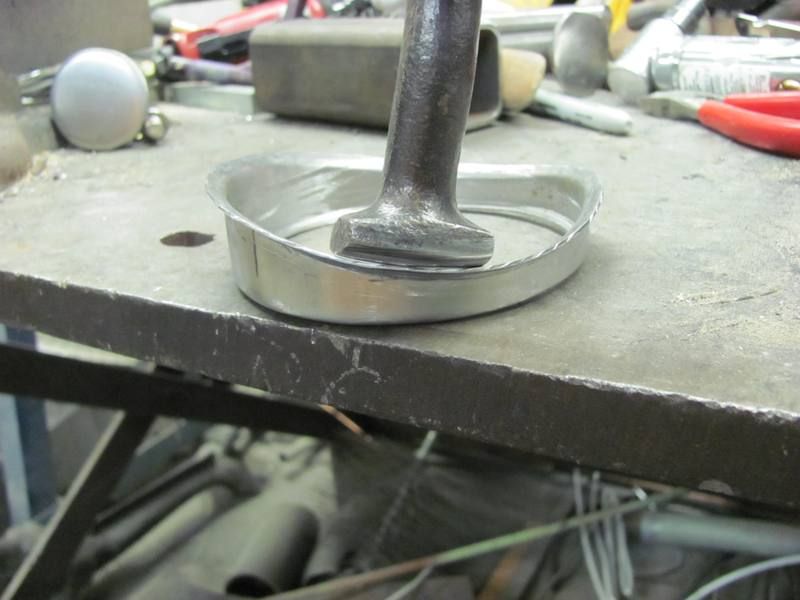 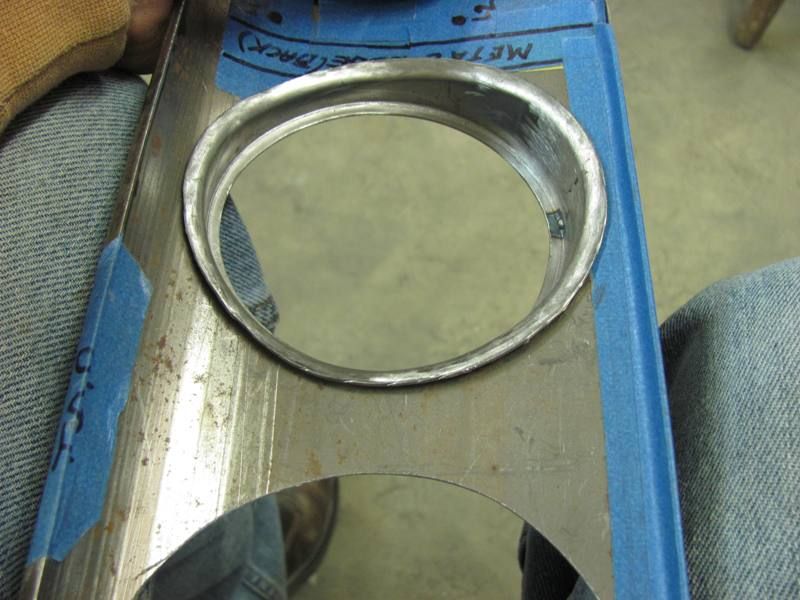 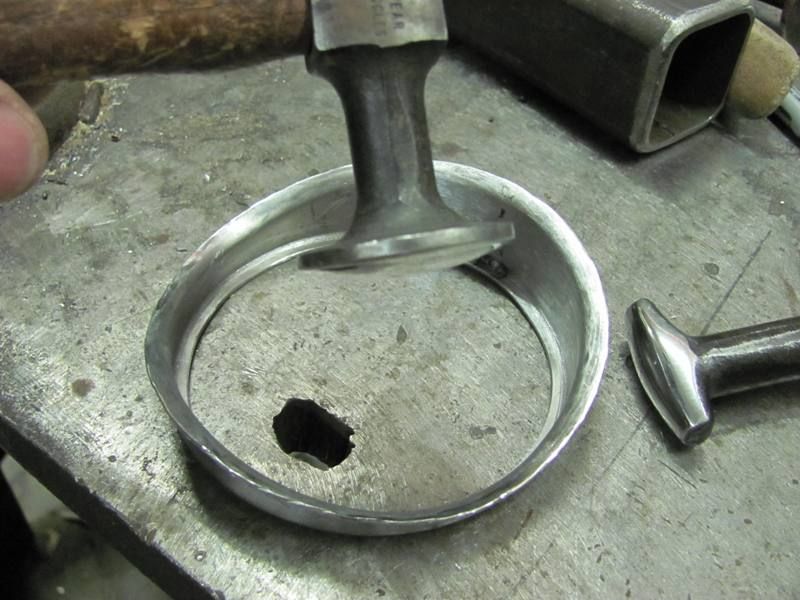 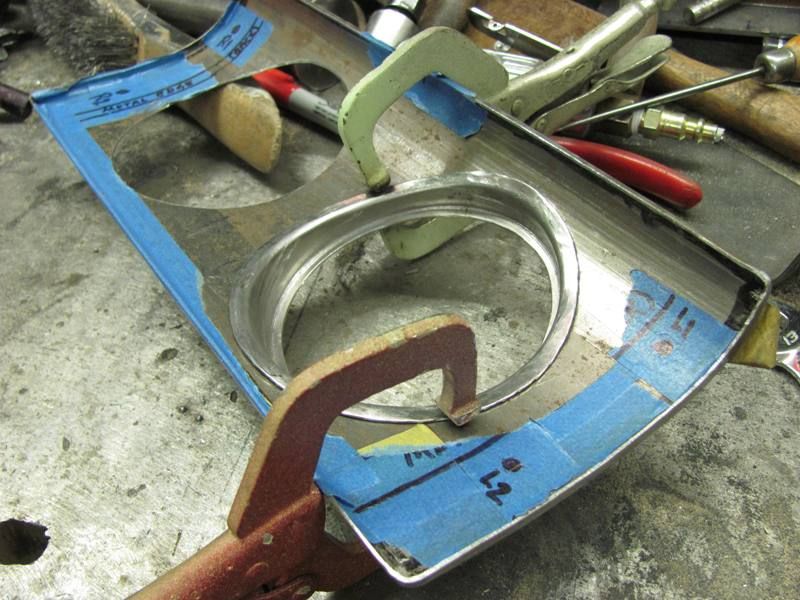 Tipping along a wavy line does pose some "pulling" issues, so I did have some planishing/stretching to do in some areas. It's real close, but I have some tweaking left to do, and then I'll tackle the second one.
__________________
Robert |
|
|
|
|
03-05-2013, 10:18 PM
|
#8 |
|
Registered User
Join Date: Jan 2013
Location: Leonardtown, MD
Posts: 1,633
|
Re: Studebaker dash panels
Worked on the dash panel again tonight, used the Tig to tack in the first ring...
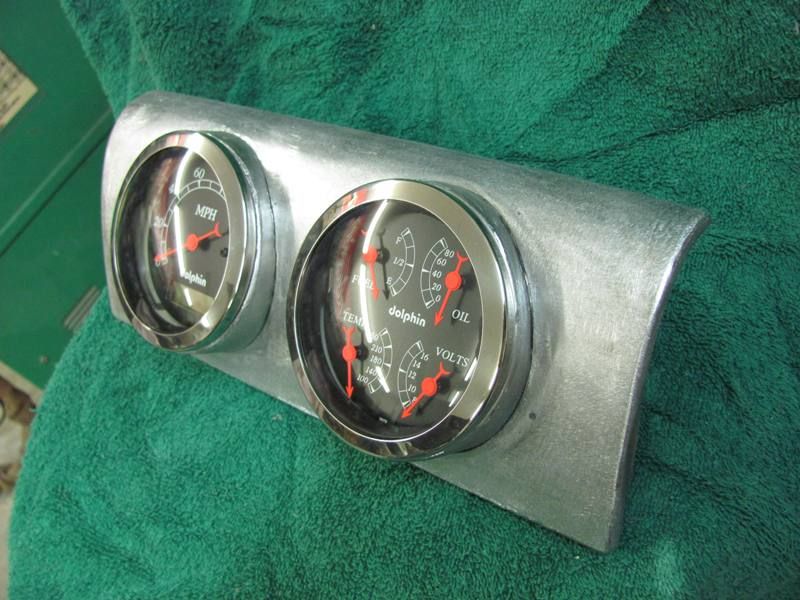
 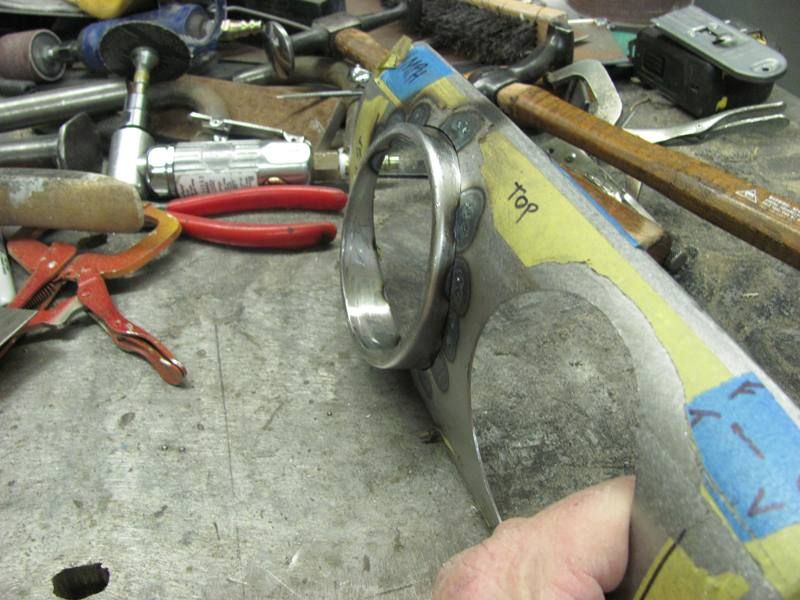 Then worked on the second, marked the flange at 3/16", trimmed, and made one revolution to mark the bend line, then tipped the inner flange as before...  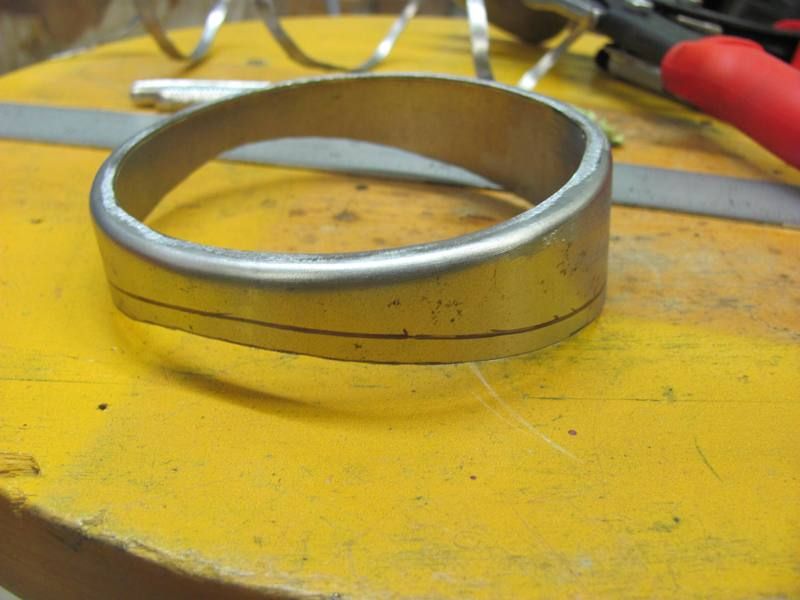 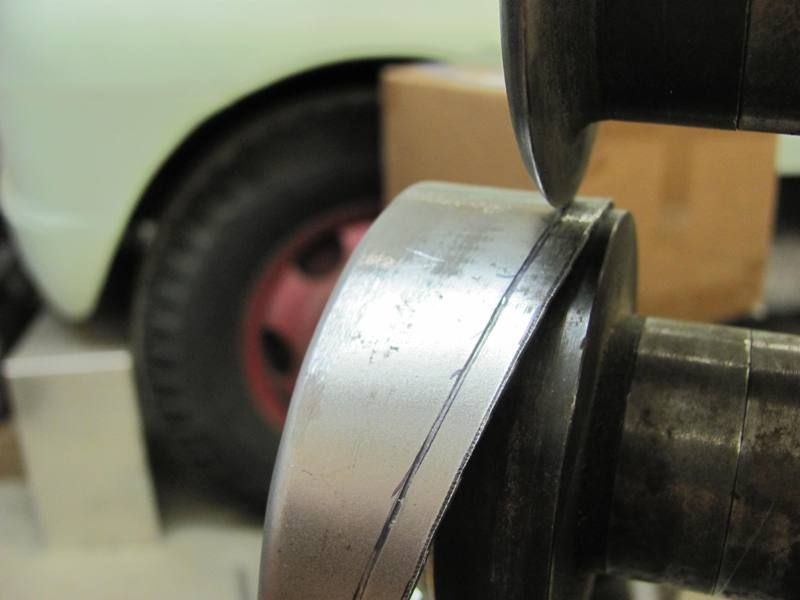 Second ring clamped, tacked in place, panel dressed a bit, and gauges test fit....bolted in this time.. 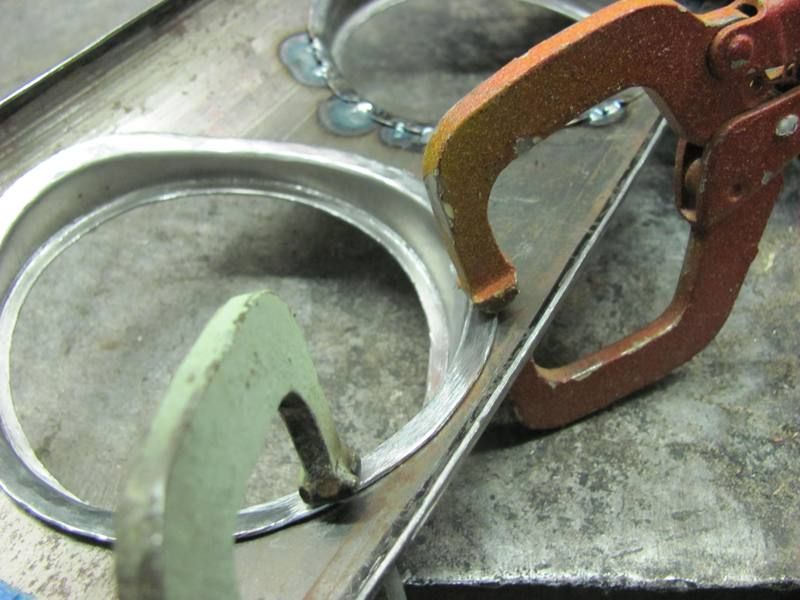   A couple small depressions at some of the weld tacks, some glaze will address any remaining imperfections. All in all, pretty pleased with the results... 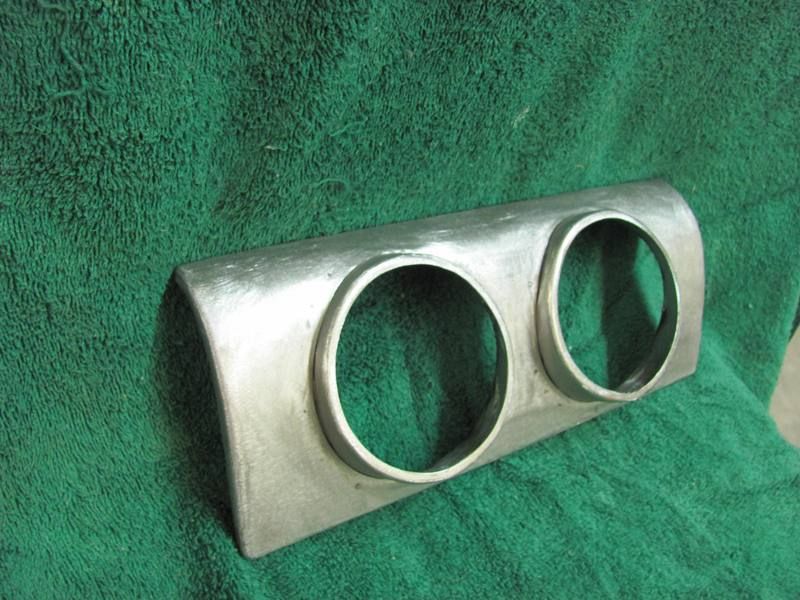 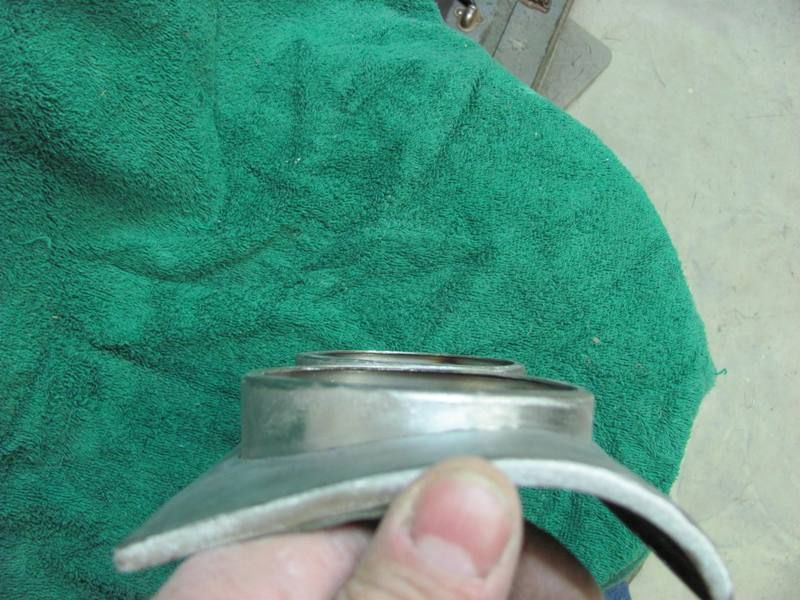
__________________
Robert |
|
|
|
|
03-05-2013, 11:01 PM
|
#9 |
|
Registered User
Join Date: Jan 2013
Location: Leonardtown, MD
Posts: 1,633
|
Re: Studebaker dash panels
forgot the pic of the front view...
__________________
Robert |
|
|
|
|
03-08-2013, 11:22 PM
|
#10 |
|
Registered User
Join Date: Jan 2013
Location: Leonardtown, MD
Posts: 1,633
|
Re: Studebaker dash panels
Wrapping this up, drilled four holes where the owner had marked them on the back, and cleaned up the burrs...
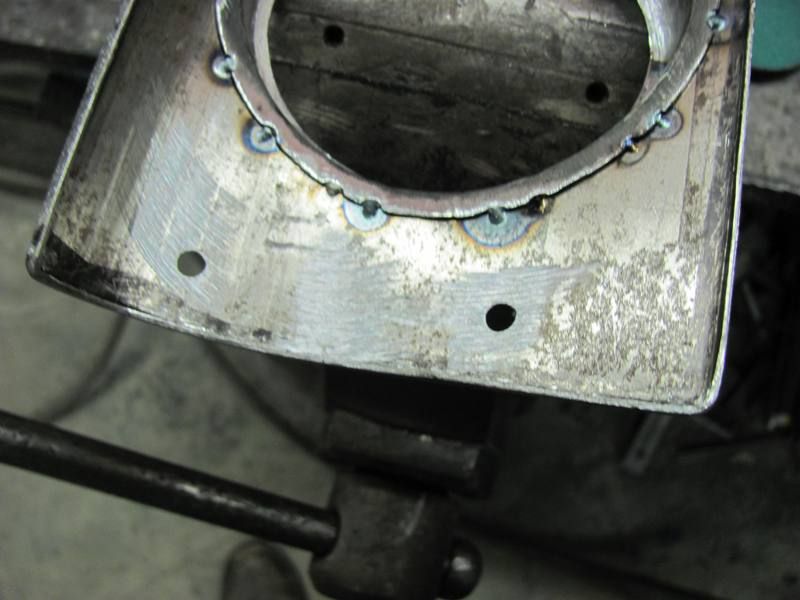  Used some 10-32 machine screws, ground the heads at an angle to match the profile of the dash panel... 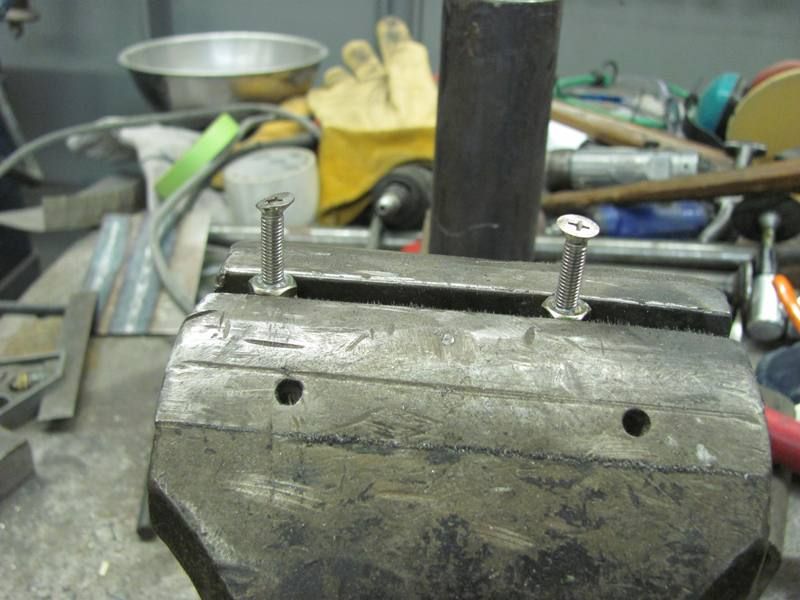 Note the anti-seize in the threads. Any time your weld circuit may cross hardware threads, the anti-seize will prevent the threads from galling. Screws aligned with the holes... 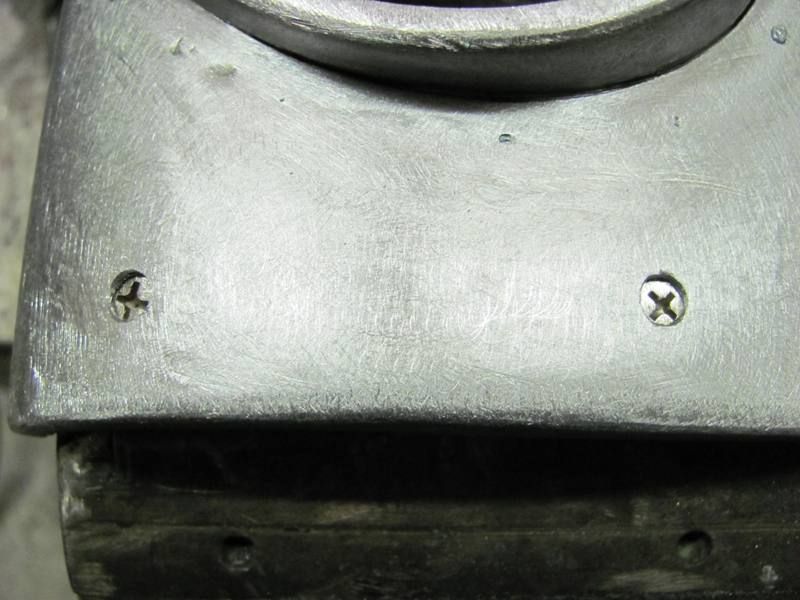 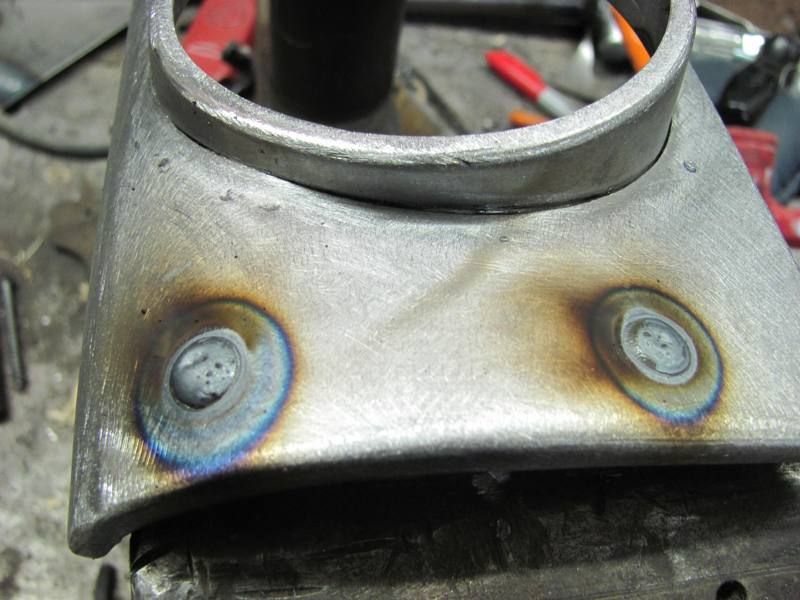 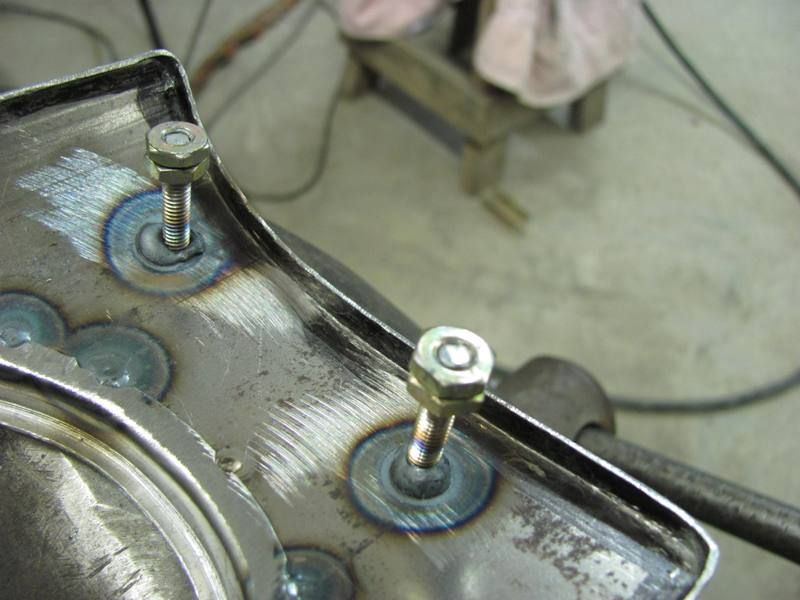 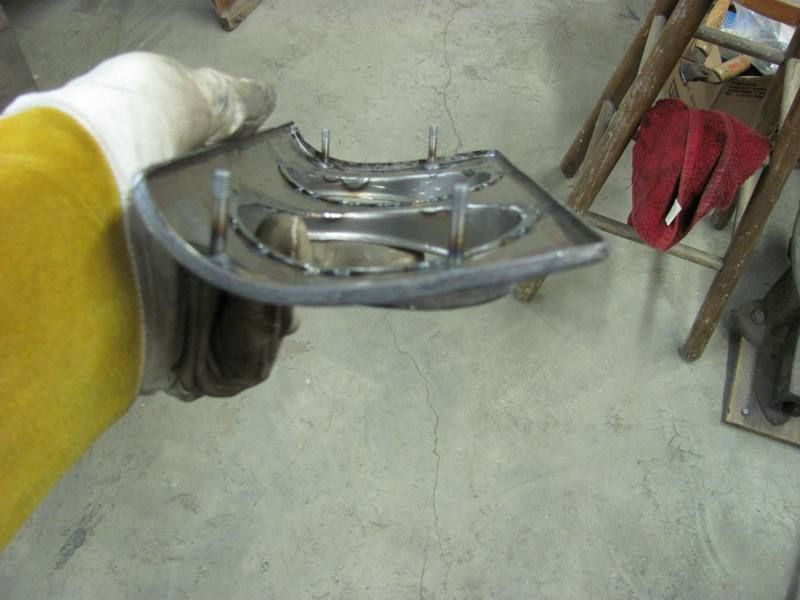 Then I ground down the front side of the welds, ready to test fit the dashboard.... 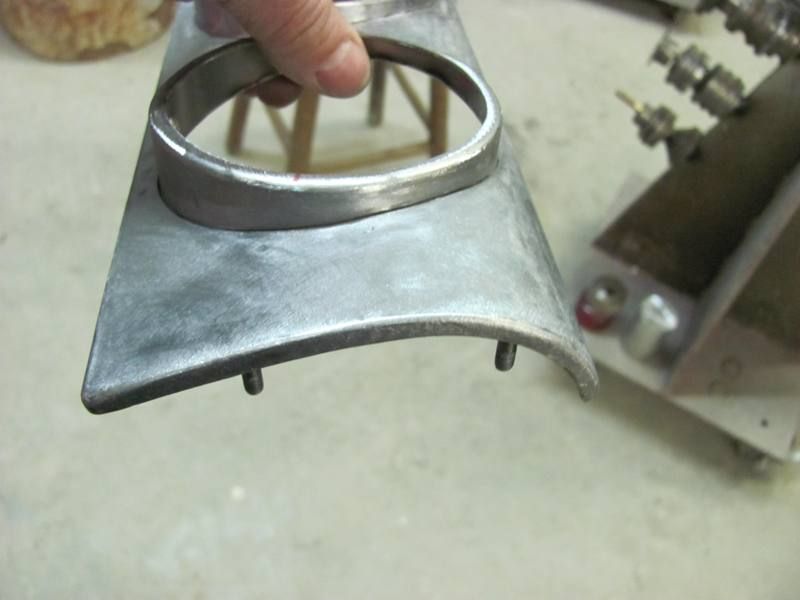 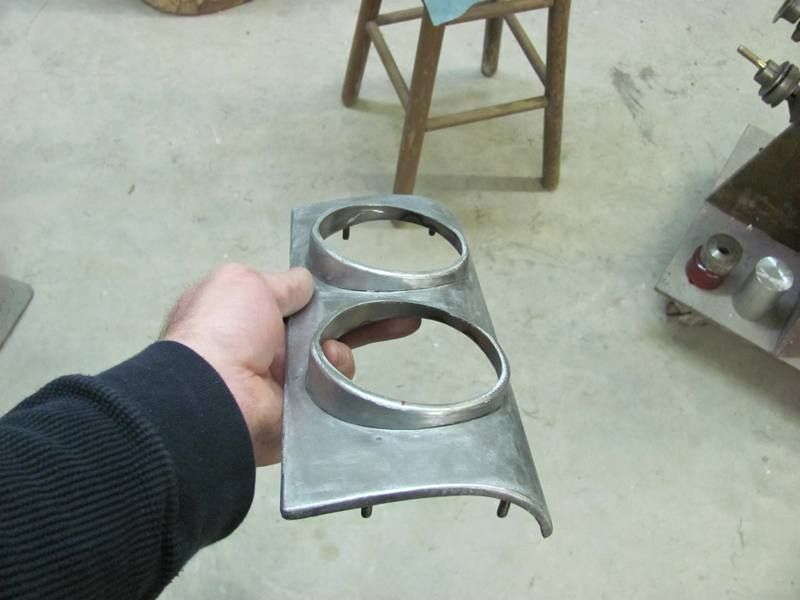
__________________
Robert |
|
|
|
|
03-12-2013, 12:27 PM
|
#11 |
|
Registered User
Join Date: May 2011
Location: Anderson SC
Posts: 3,868
|
Re: Studebaker dash panels
Nice fab work! Those tipping dies are next on the "buy" list for my bead roller.
__________________
Project Goldilocks '66 C10 Short Fleet BBW Build '65 C10 Highly Detailed Stock Restoration Thread '78 Camaro Targa Roof Build '55 International Metal/Body/Paint Work '66 F100 Full Rotisserie Restoration '40 Packard 120 Convertible Coupe Restoration How To Restore and Detail an Original Gauge Cluster How To Detail Sand Body Panels, Edges, Corners, Etc |
|
|
|
|
03-13-2013, 05:01 PM
|
#12 |
|
Senior Member
Join Date: Jun 2005
Location: Clovis Ca.
Posts: 3,311
|
Re: Studebaker dash panels
Nice job!
__________________
Classic Trucks Link http://www.classictrucks.com/feature...uck/index.html 1958 GMC.Project Build http://67-72chevytrucks.com/vboard/s...d.php?t=162816 1966 Chevelle Build http://67-72chevytrucks.com/vboard/s...d.php?t=443576 Video http://www.youtube.com/watch?v=prrNKo8F7Zw#GU5U2spHI_4 |
|
|
|
|
03-13-2013, 05:08 PM
|
#13 |
|
Registered User
 Join Date: Dec 2012
Location: sparta tennessee
Posts: 345
|
Re: Studebaker dash panels
Impressive metal work
__________________
1946 car hauler 1948 surburban 1937 chevy sedan 1940 olds sedan (project) 1967 ss396 chevelle 1999 dually crewcab(24000 miles) |
|
|
|
|
03-14-2013, 12:37 AM
|
#14 |
|
MOVE OVER
Join Date: Jun 2002
Location: Warrensburg, MO
Posts: 5,470
|
Re: Studebaker dash panels
very impressive..
__________________
No matter where you are..... There you are... Buckaroo Banzi |
|
|
|
|
03-17-2013, 07:09 PM
|
#15 |
|
Registered User
Join Date: Jan 2013
Location: Leonardtown, MD
Posts: 1,633
|
Re: Studebaker dash panels
Thanks for the comments guys.
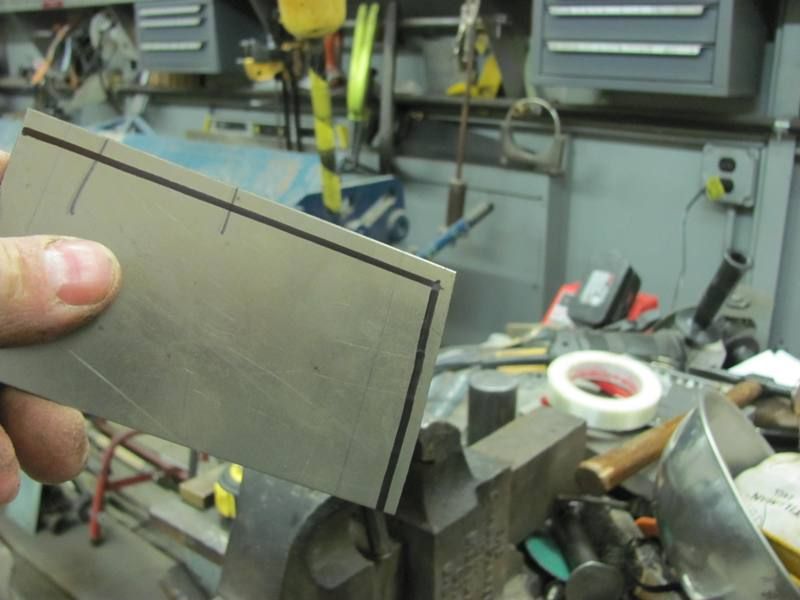
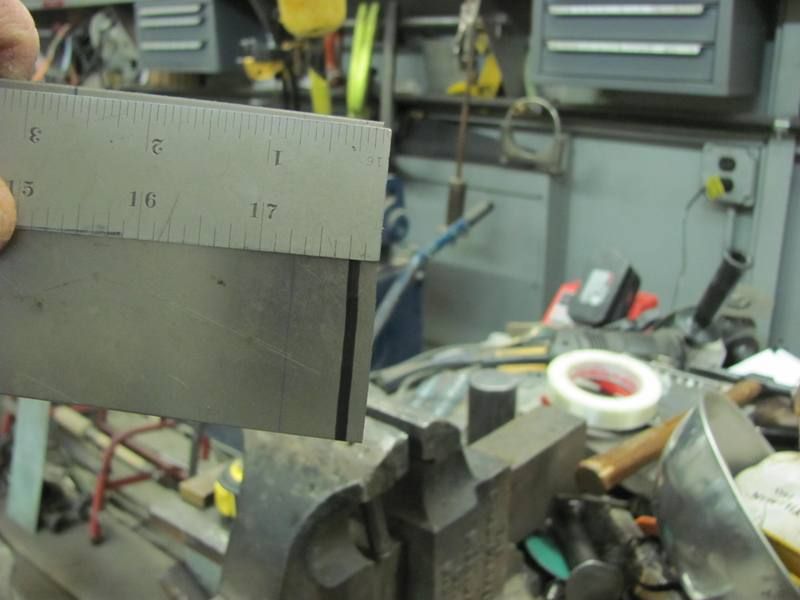
Back to instrument panels today...... This one was just shy of 40" wide, really testing my 22 ga capacity apron brake... shown with the plywood pattern by the owner... 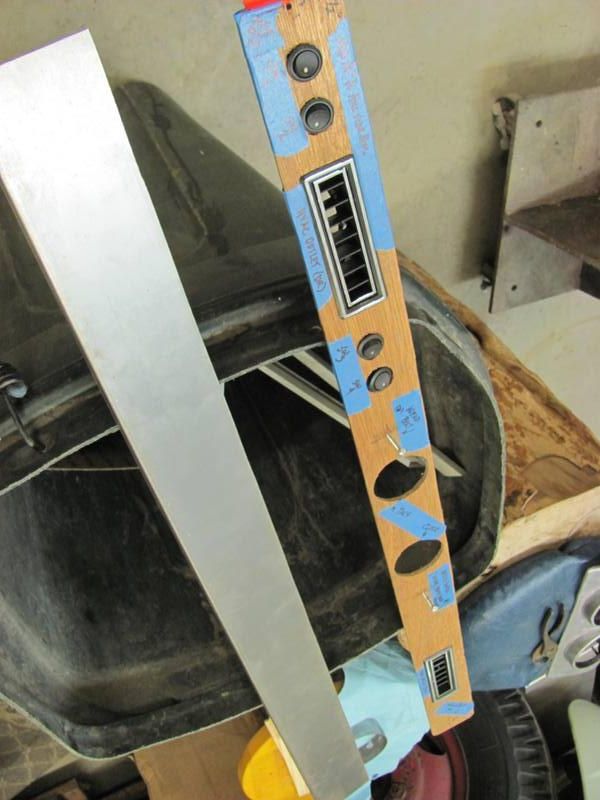 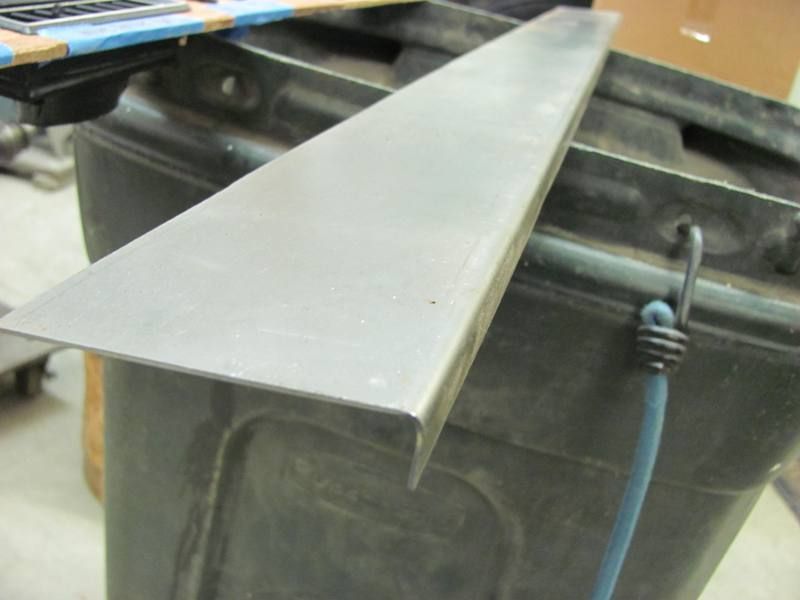 To sharpen up the bend just a bit, I ran it through the bead roller using the tipping dies... 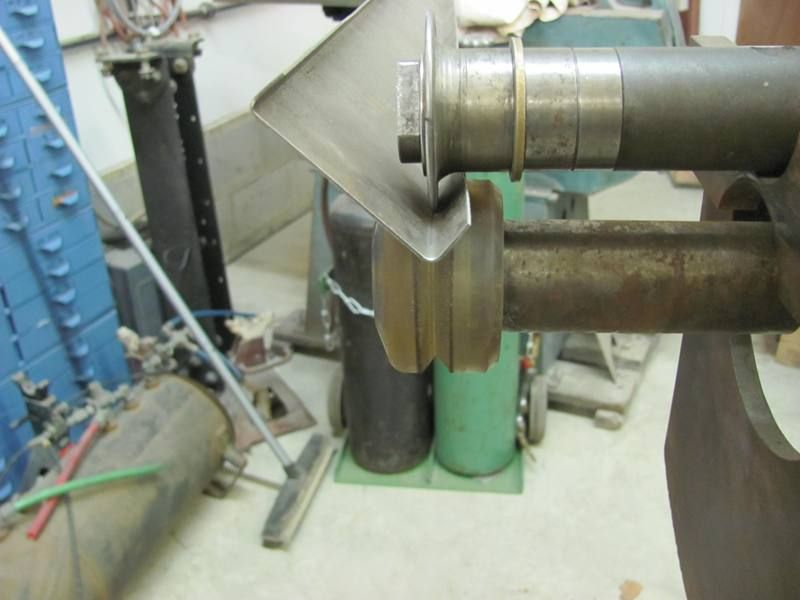 Trimmed the folded flanges down a bit. Final flange will be about 3/16", bent them using 1/2" so the apron brake would cooperate a little better..  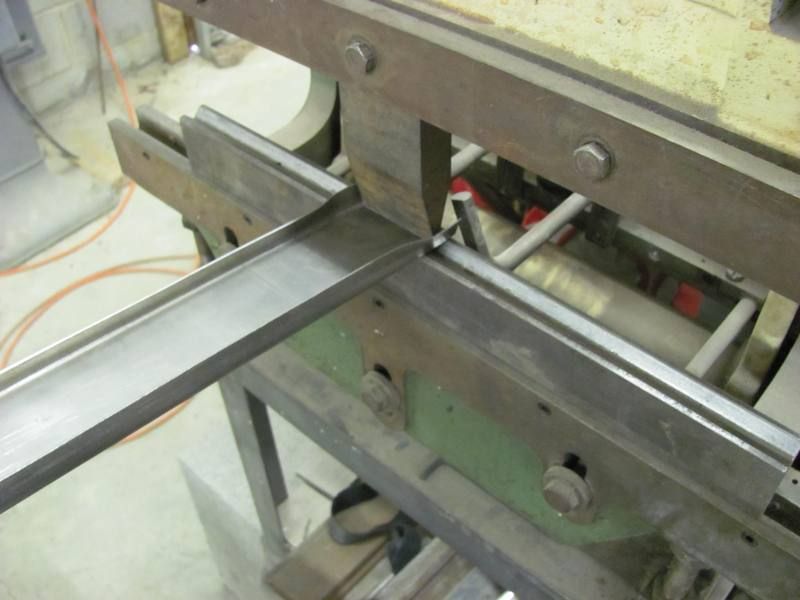 Used a 3/8 diameter punch as an anvil and hammered the corner radiuses (radii?) 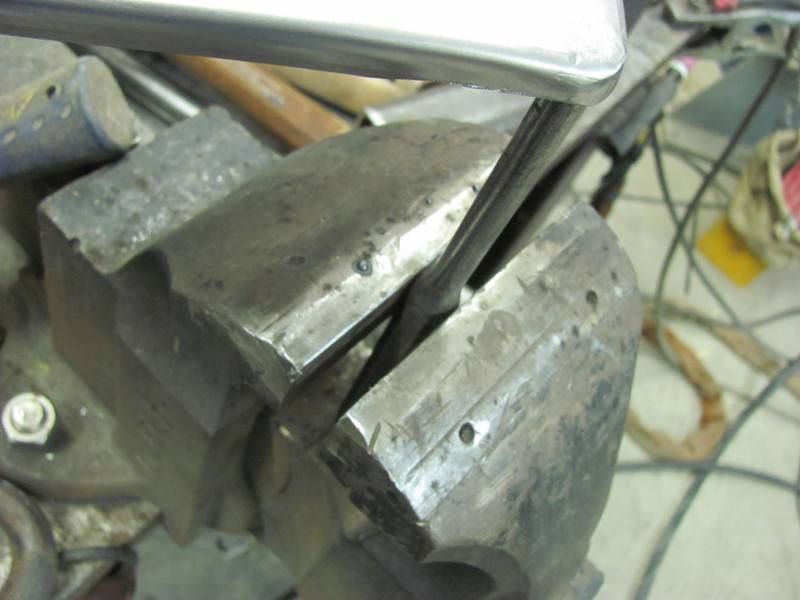 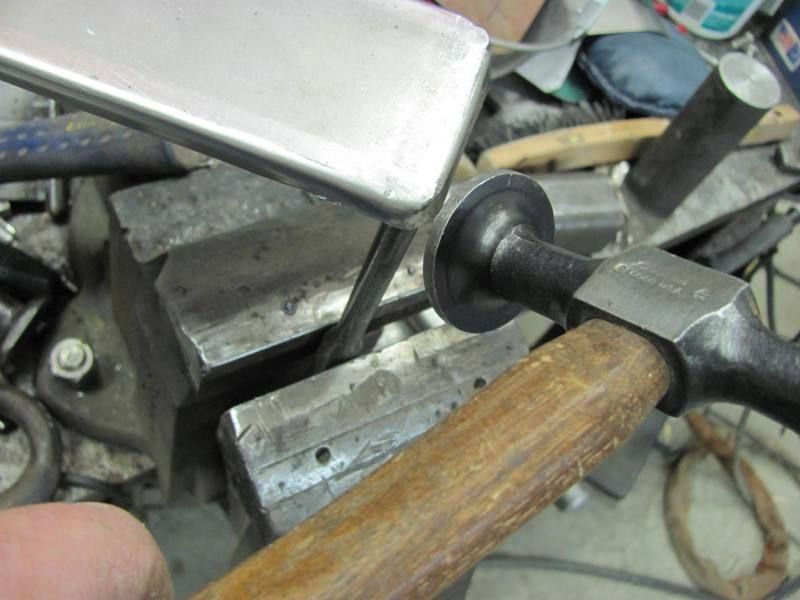 Adding holes... 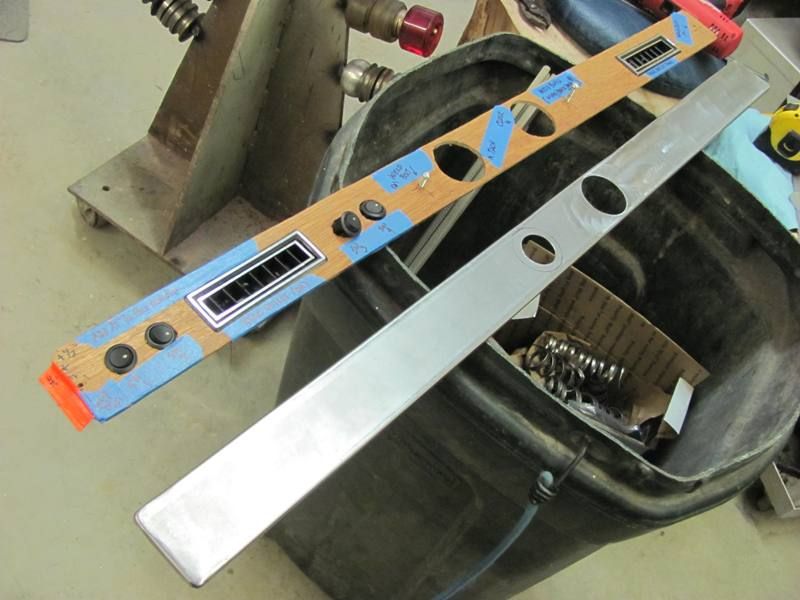 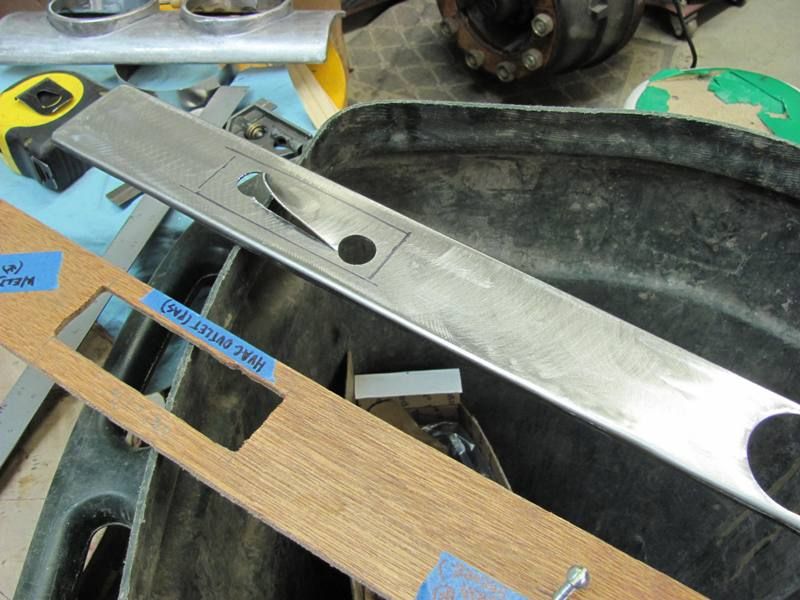 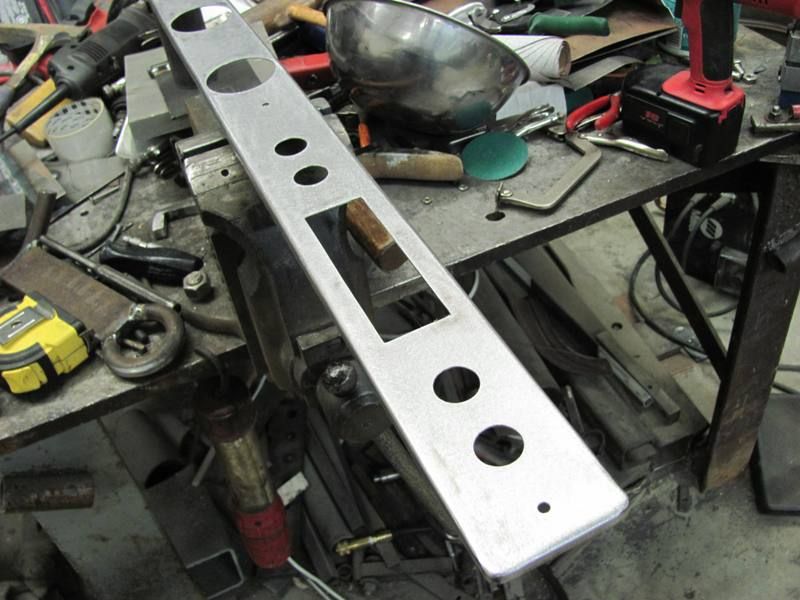 Welding on the "hidden studs" 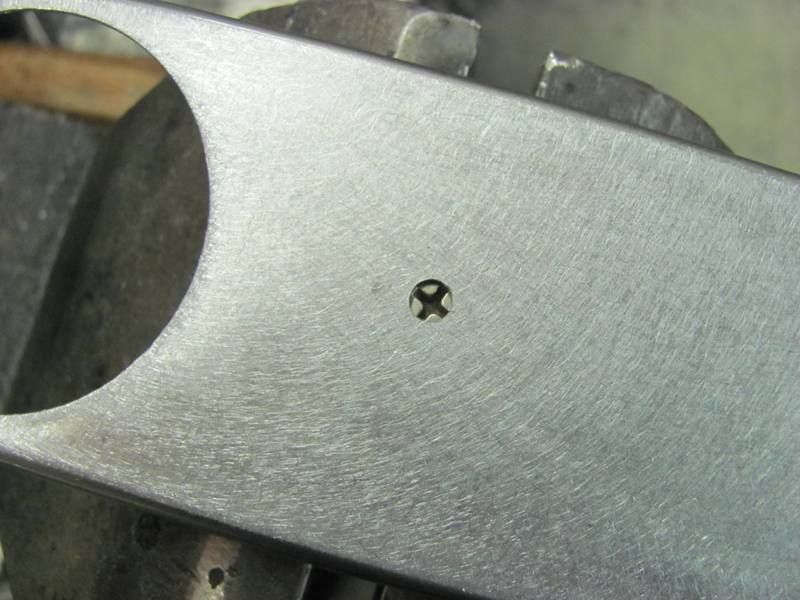 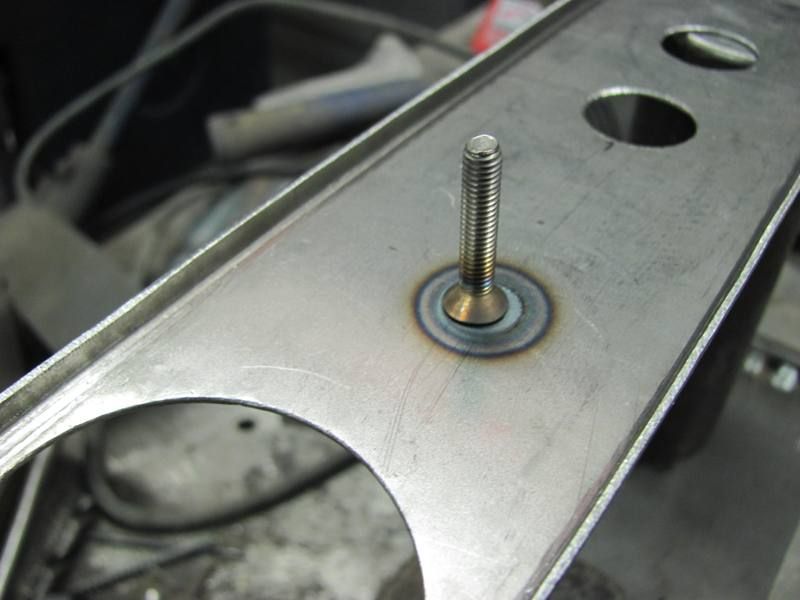 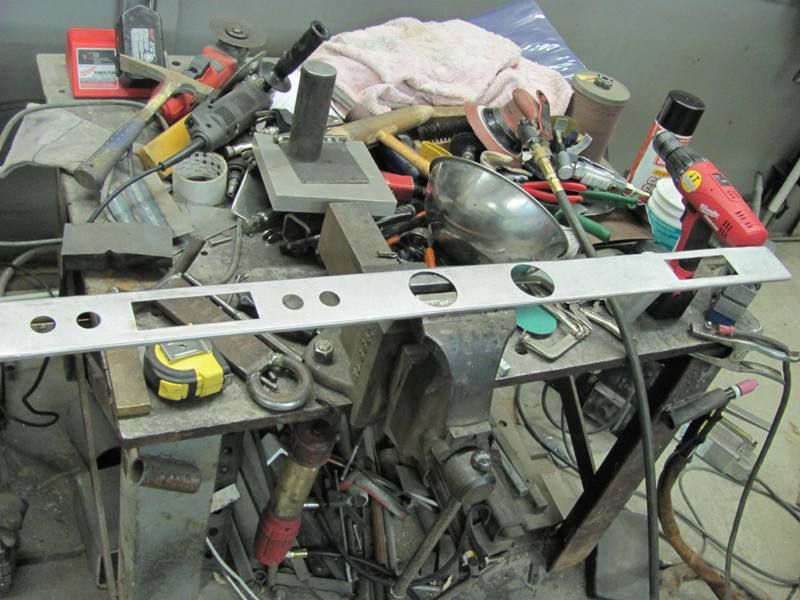 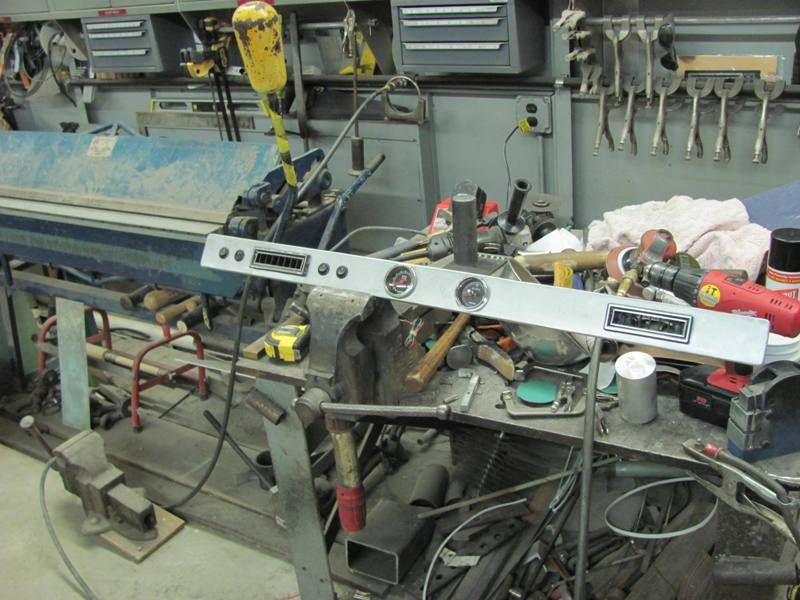 This will replace the original as well as the upper plate we made last year...  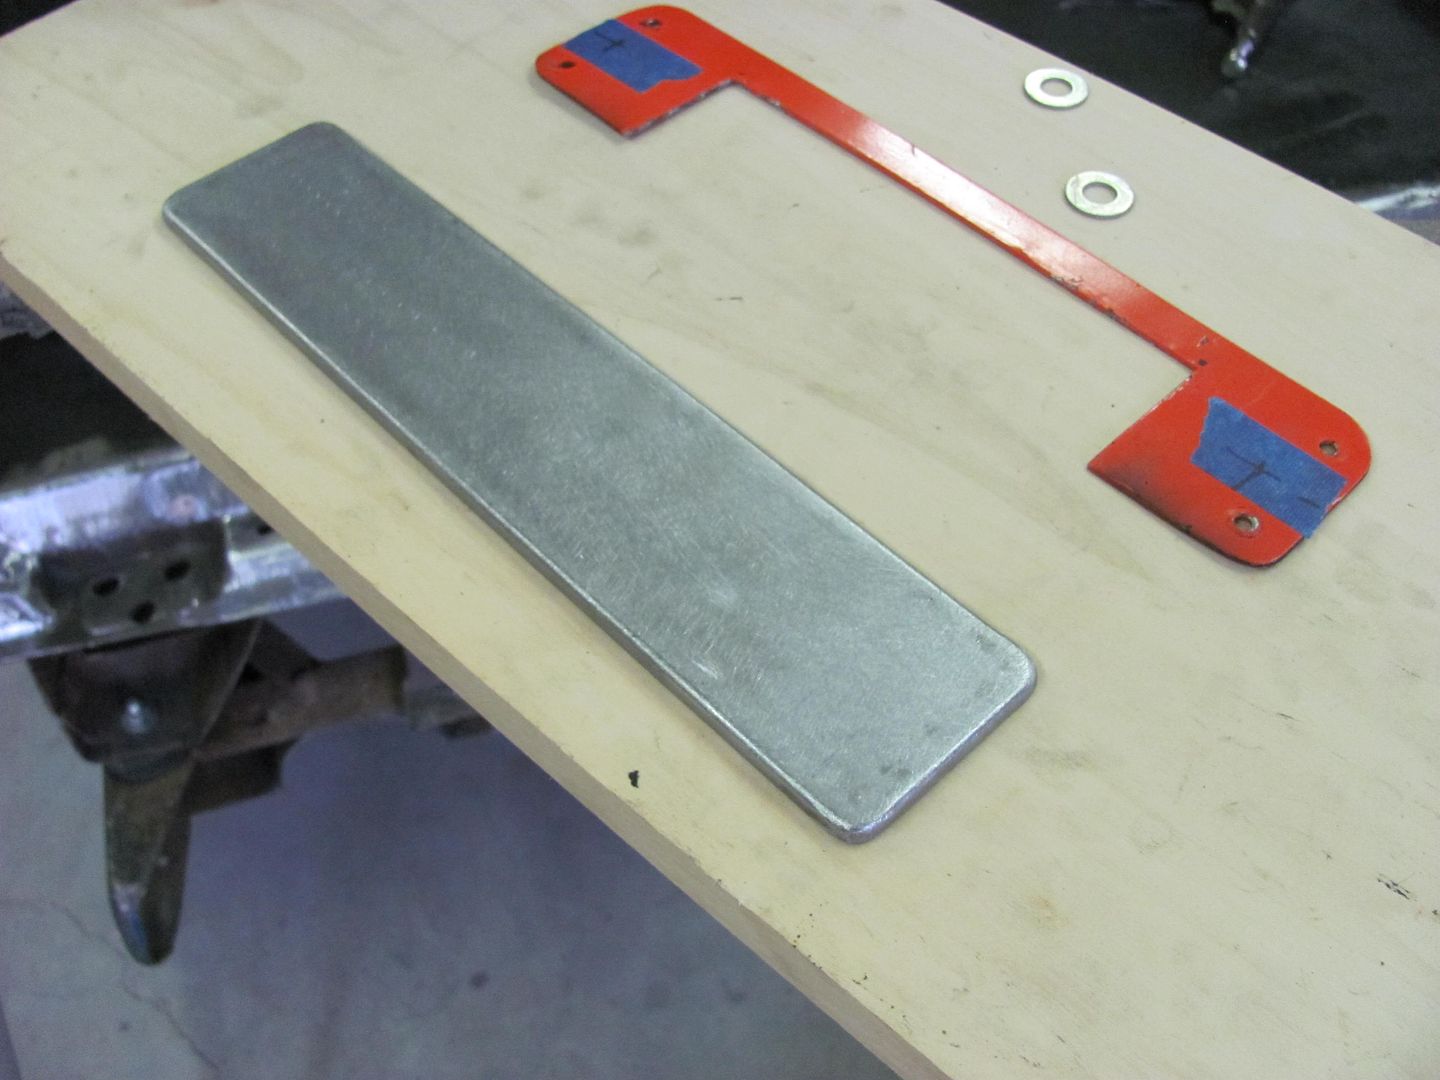 The parts will position something like this.... 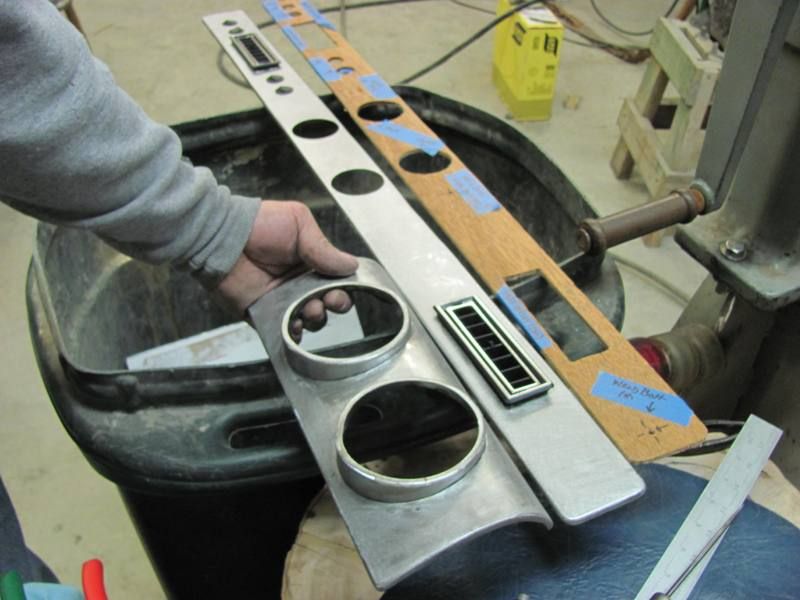
__________________
Robert |
|
|
|
|
03-18-2013, 09:40 PM
|
#16 |
|
Registered User
Join Date: Jan 2013
Location: Leonardtown, MD
Posts: 1,633
|
Re: Studebaker dash panels
I had a request to show how the "unwelded" corners were formed, so I did another sample. The flanges were marked the same as the last version, just under 1/4"
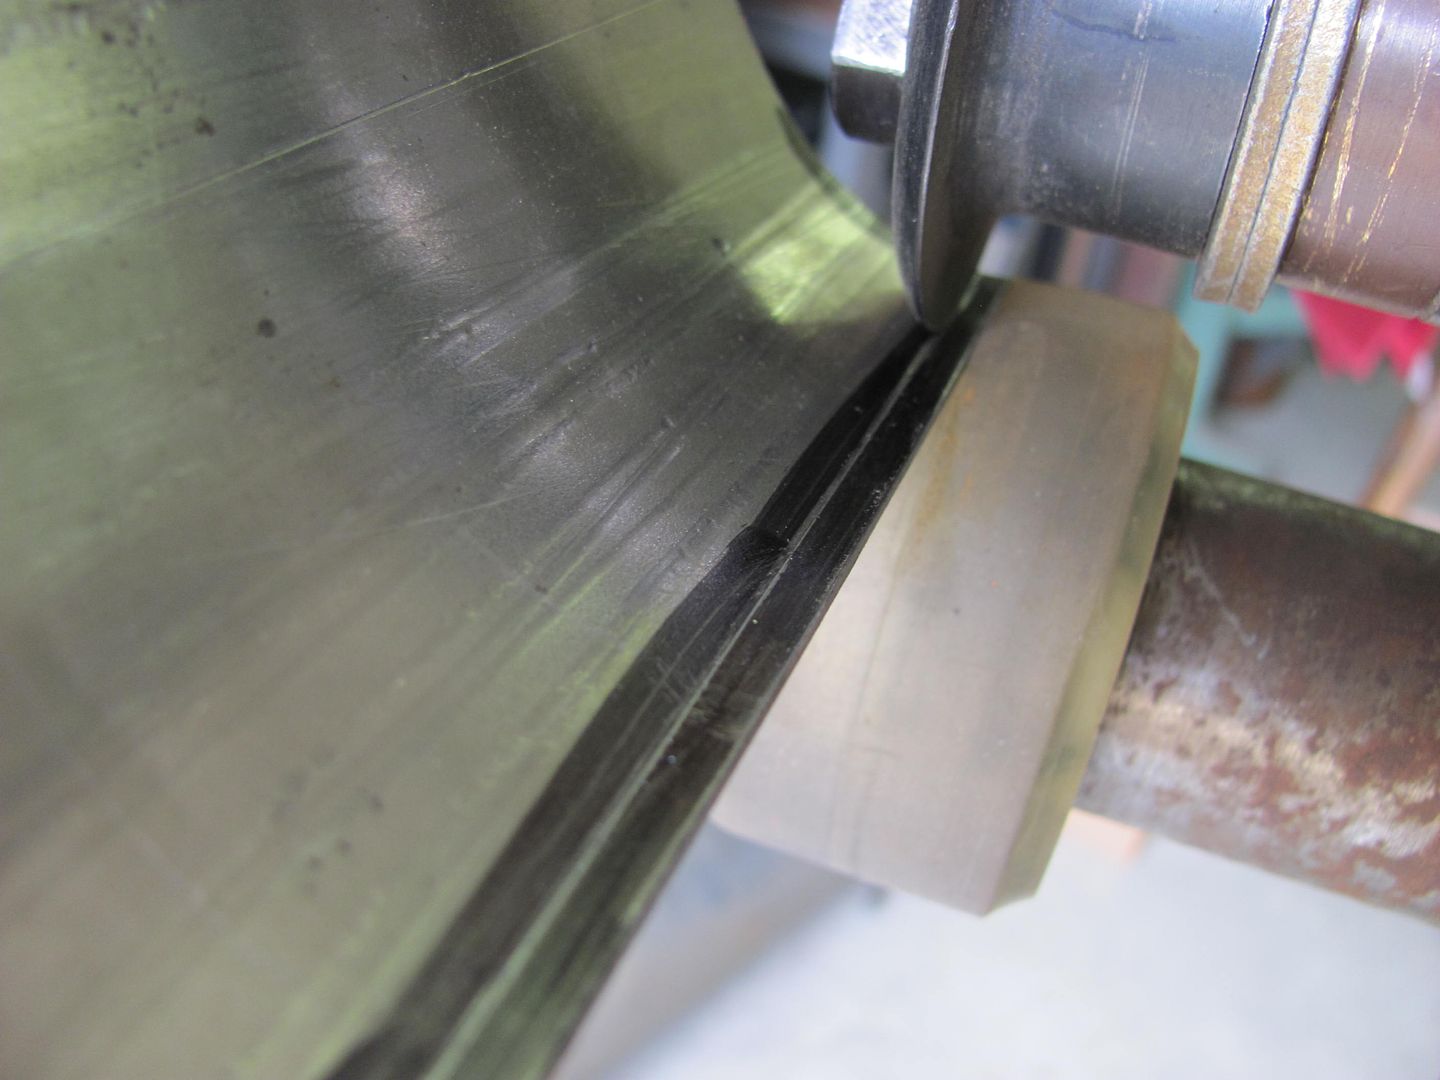
  The corner is trimmed at the corner to a radius to get rid of some of the excess metal... 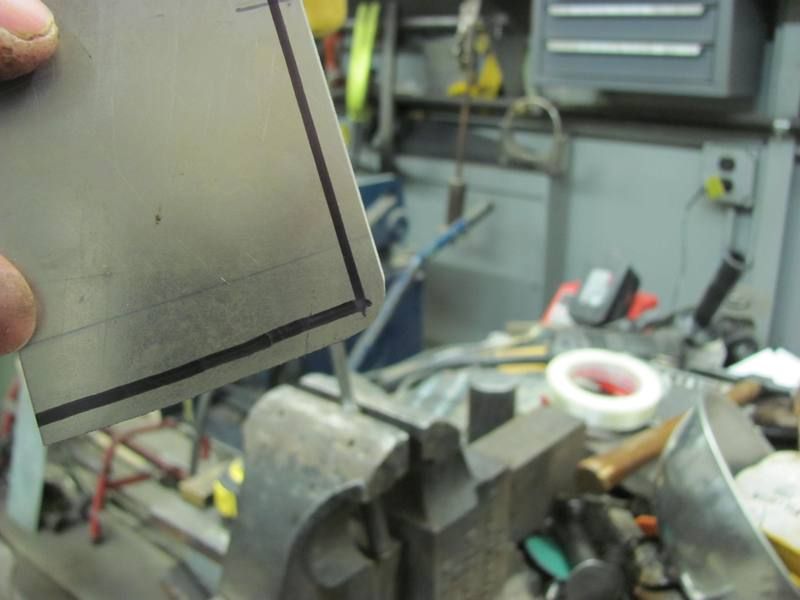 Flanges folded to just up to corner, leaving a tuck ready for shrinking...  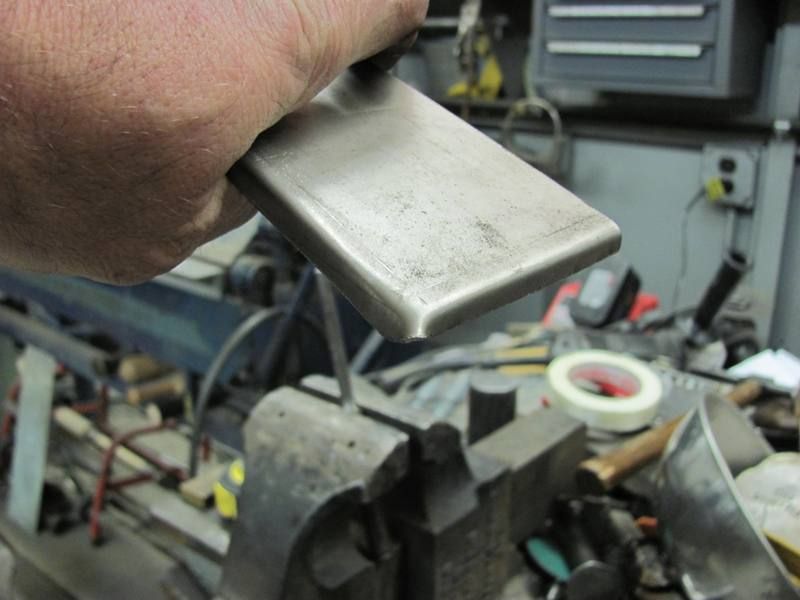 Video of the hammering process: http://s5.photobucket.com/user/rmcca...eo158.mp4.html Please excuse my lack of camera location awareness, my first feature film... 
__________________
Robert |
|
|
|
|
11-11-2013, 09:17 PM
|
#17 |
|
Registered User
Join Date: Jan 2013
Location: Leonardtown, MD
Posts: 1,633
|
Re: Studebaker dash panels
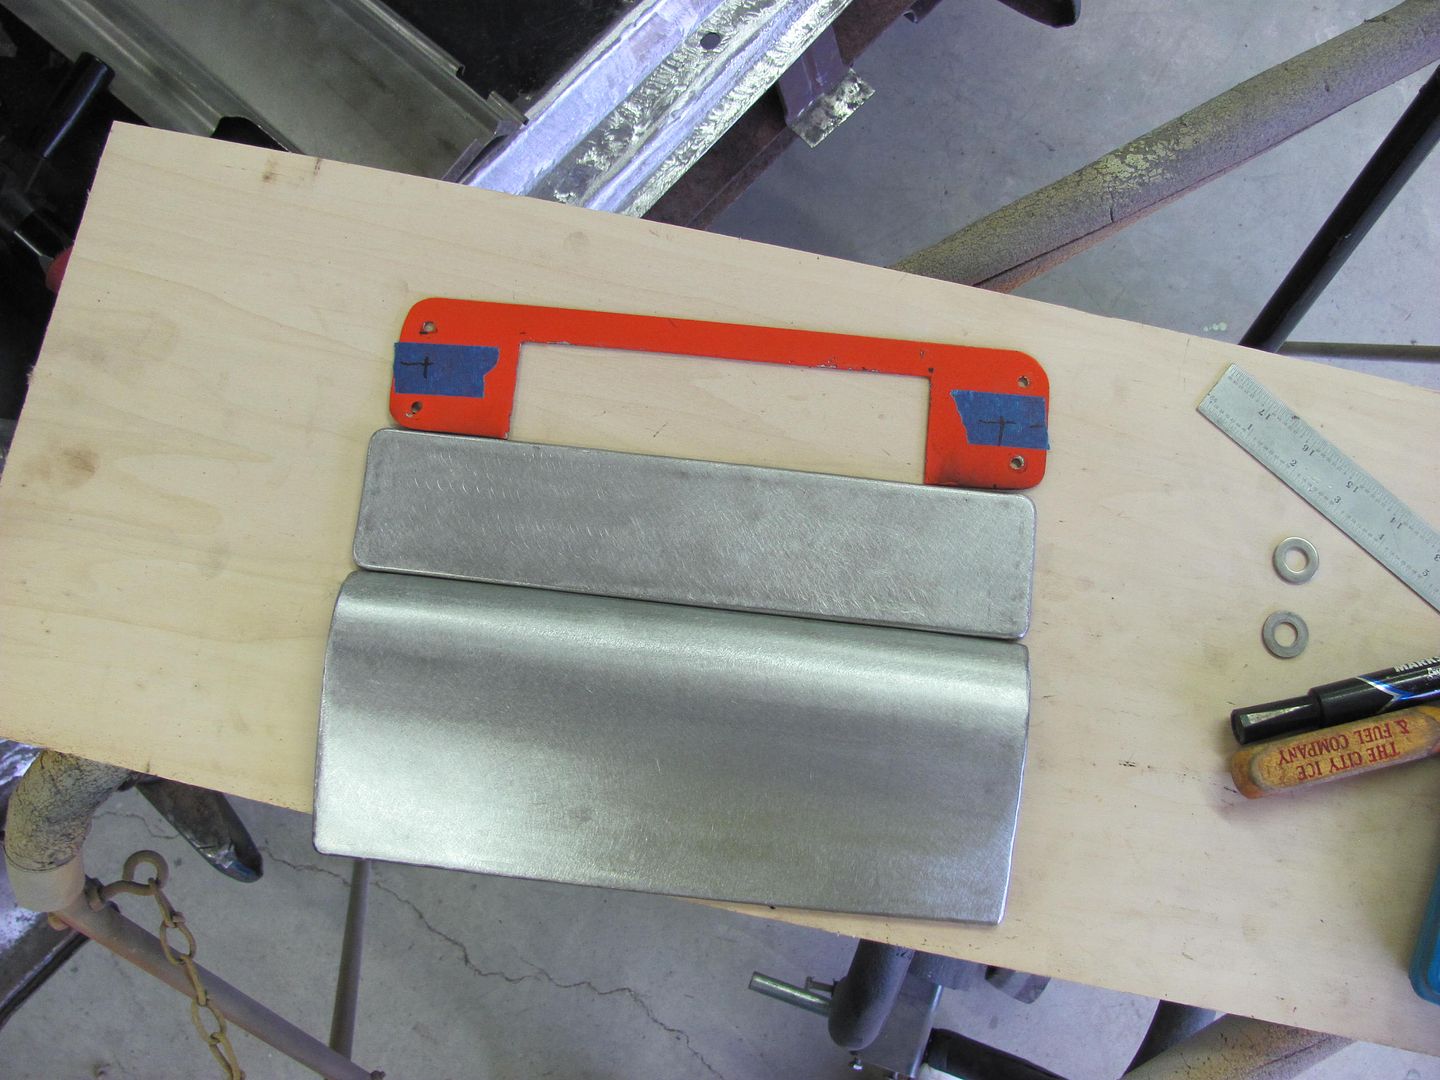
Today I finished up the last piece for the Studebaker truck; this piece was to hold the heater/AC controls and DIN radio. The owner had made up a sample piece to make it from:
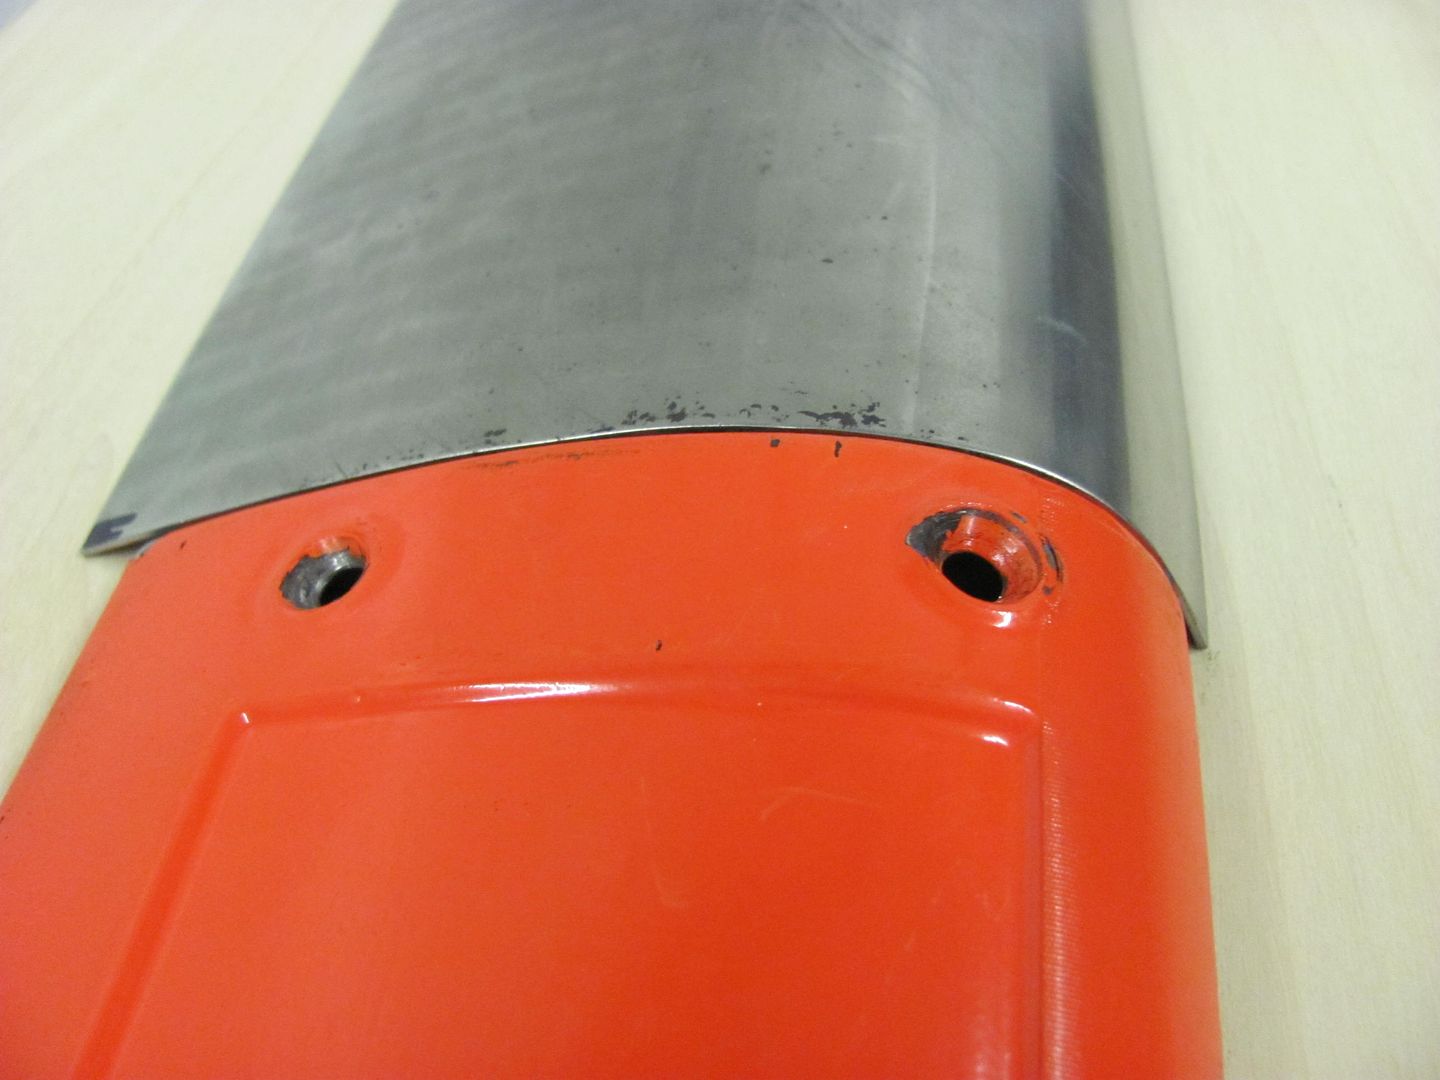
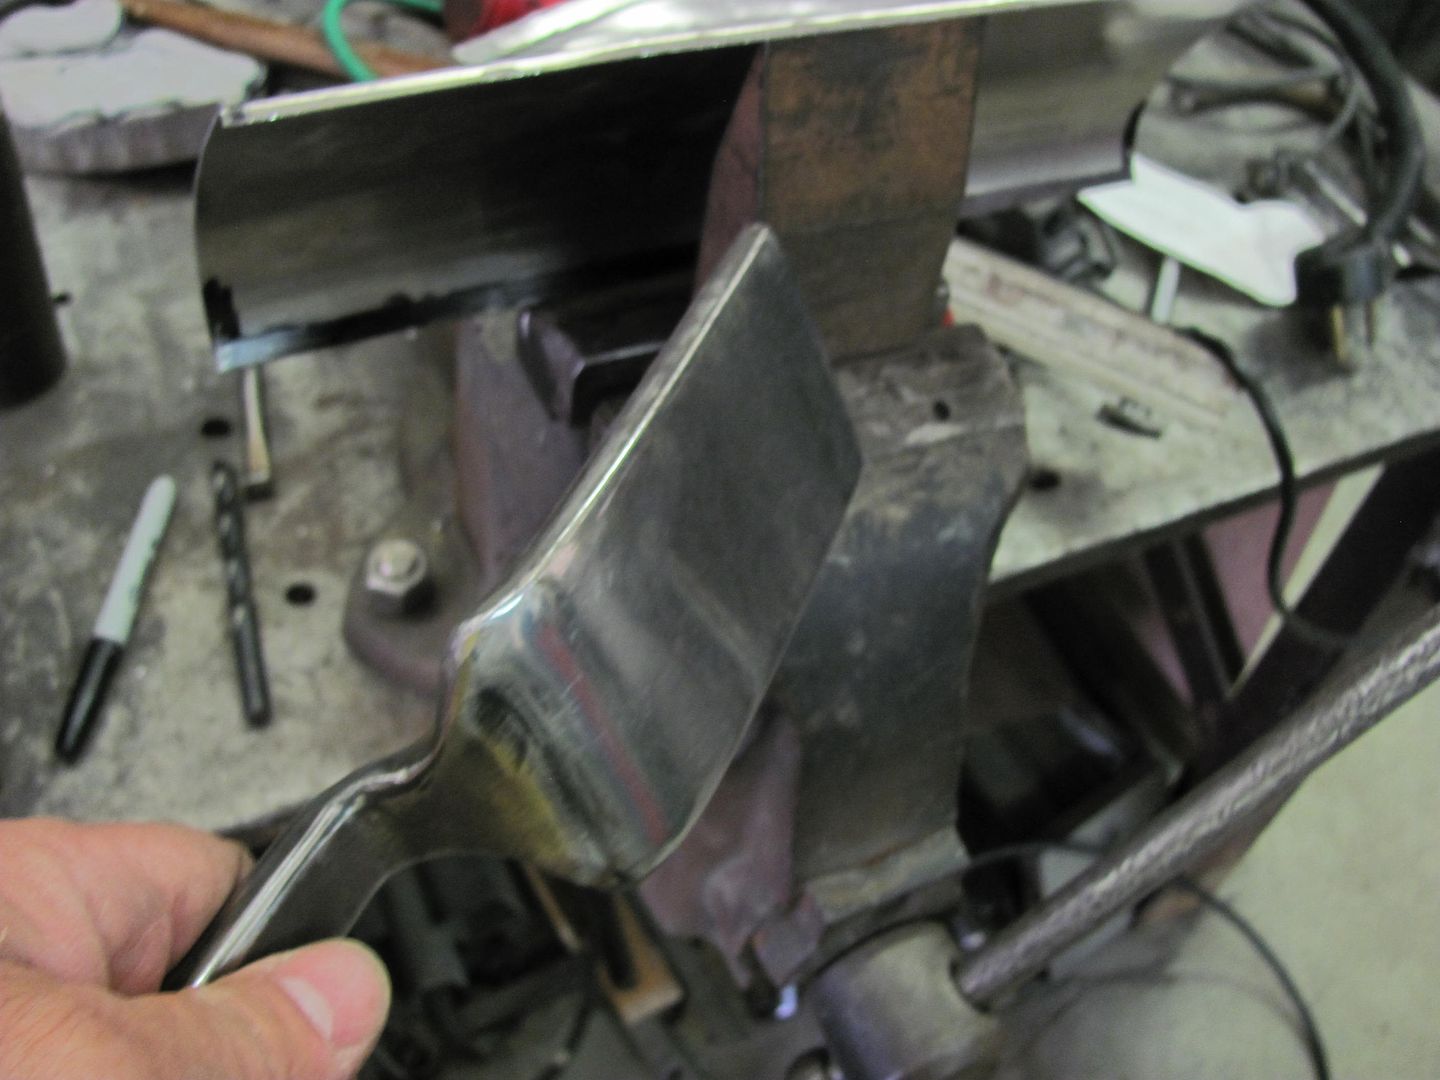
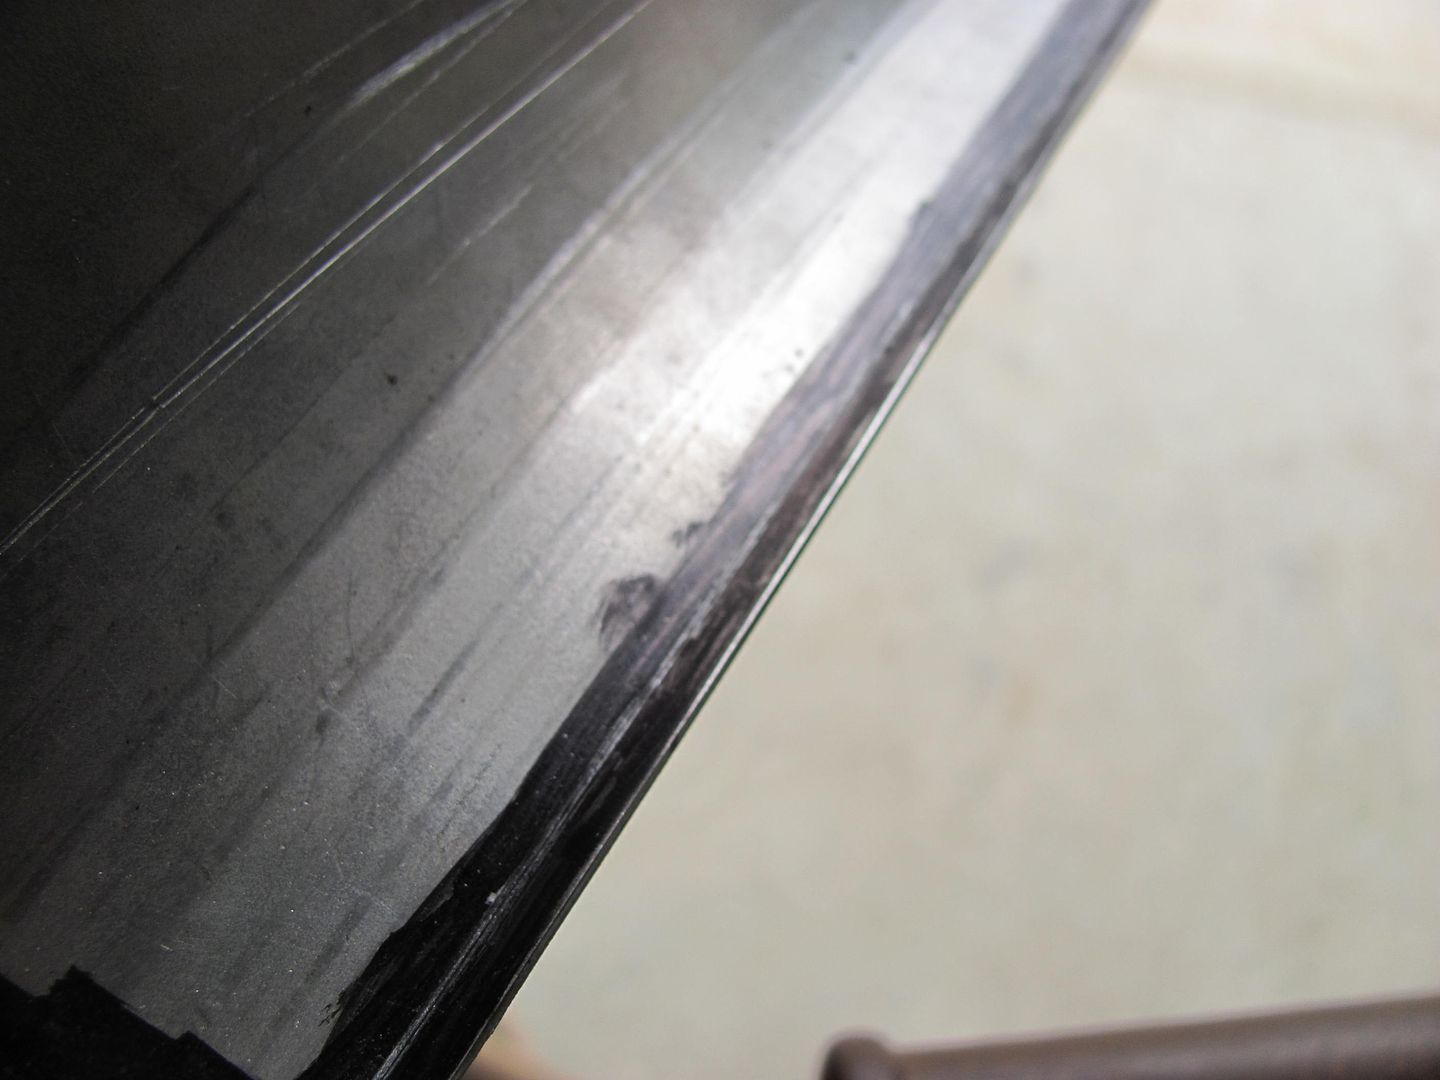
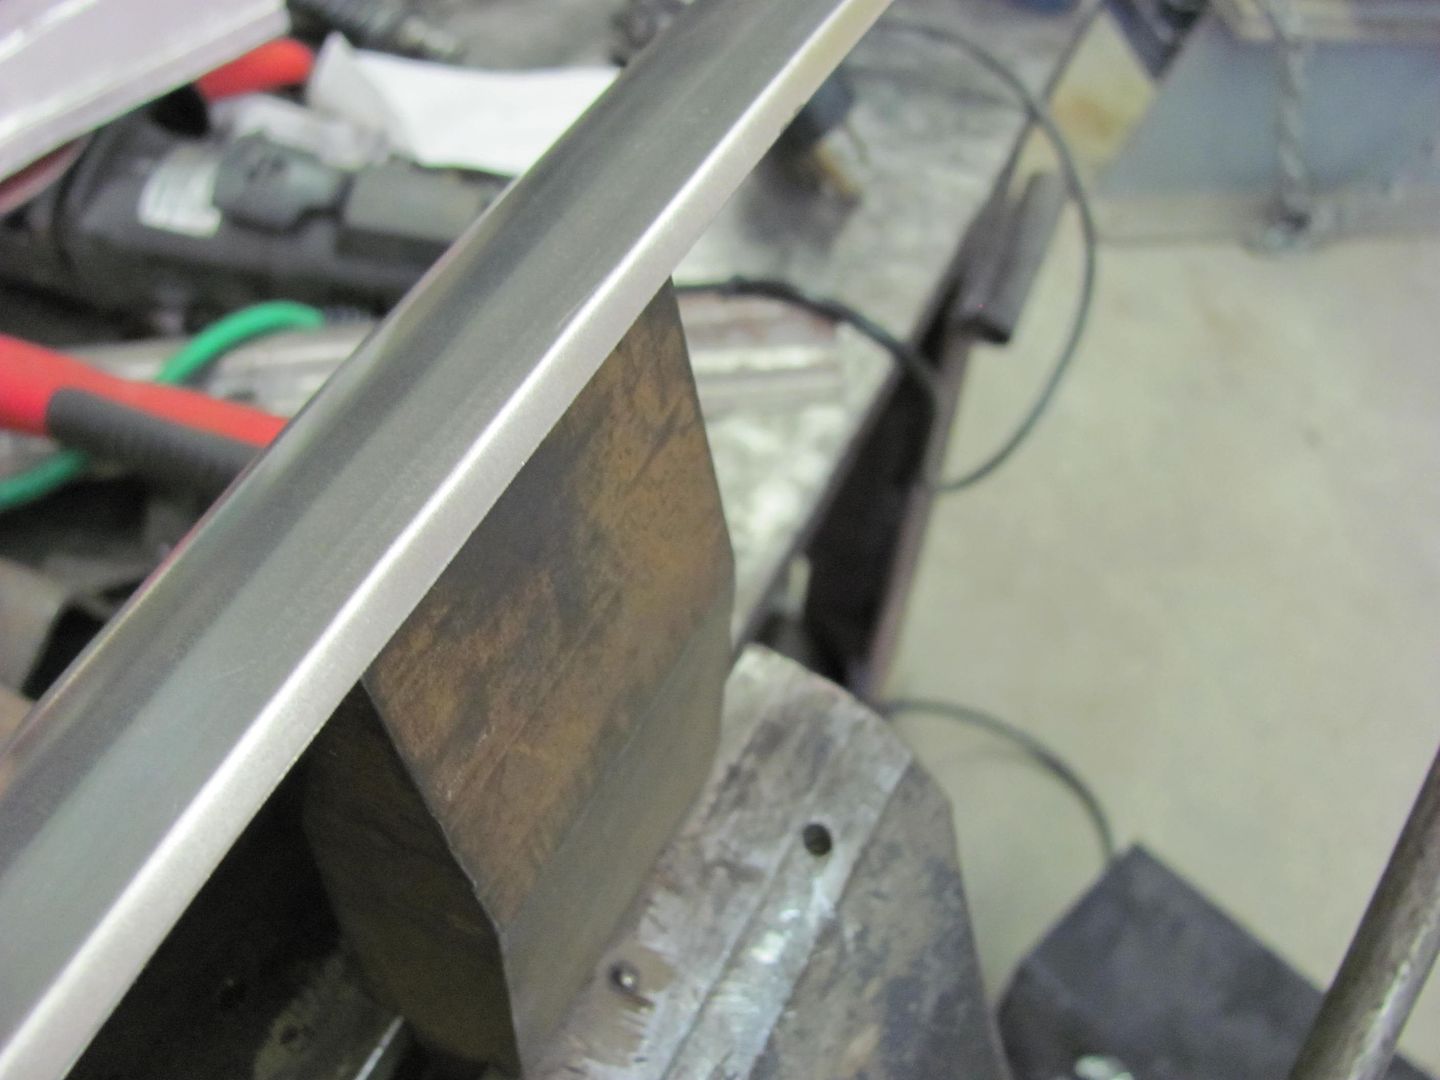
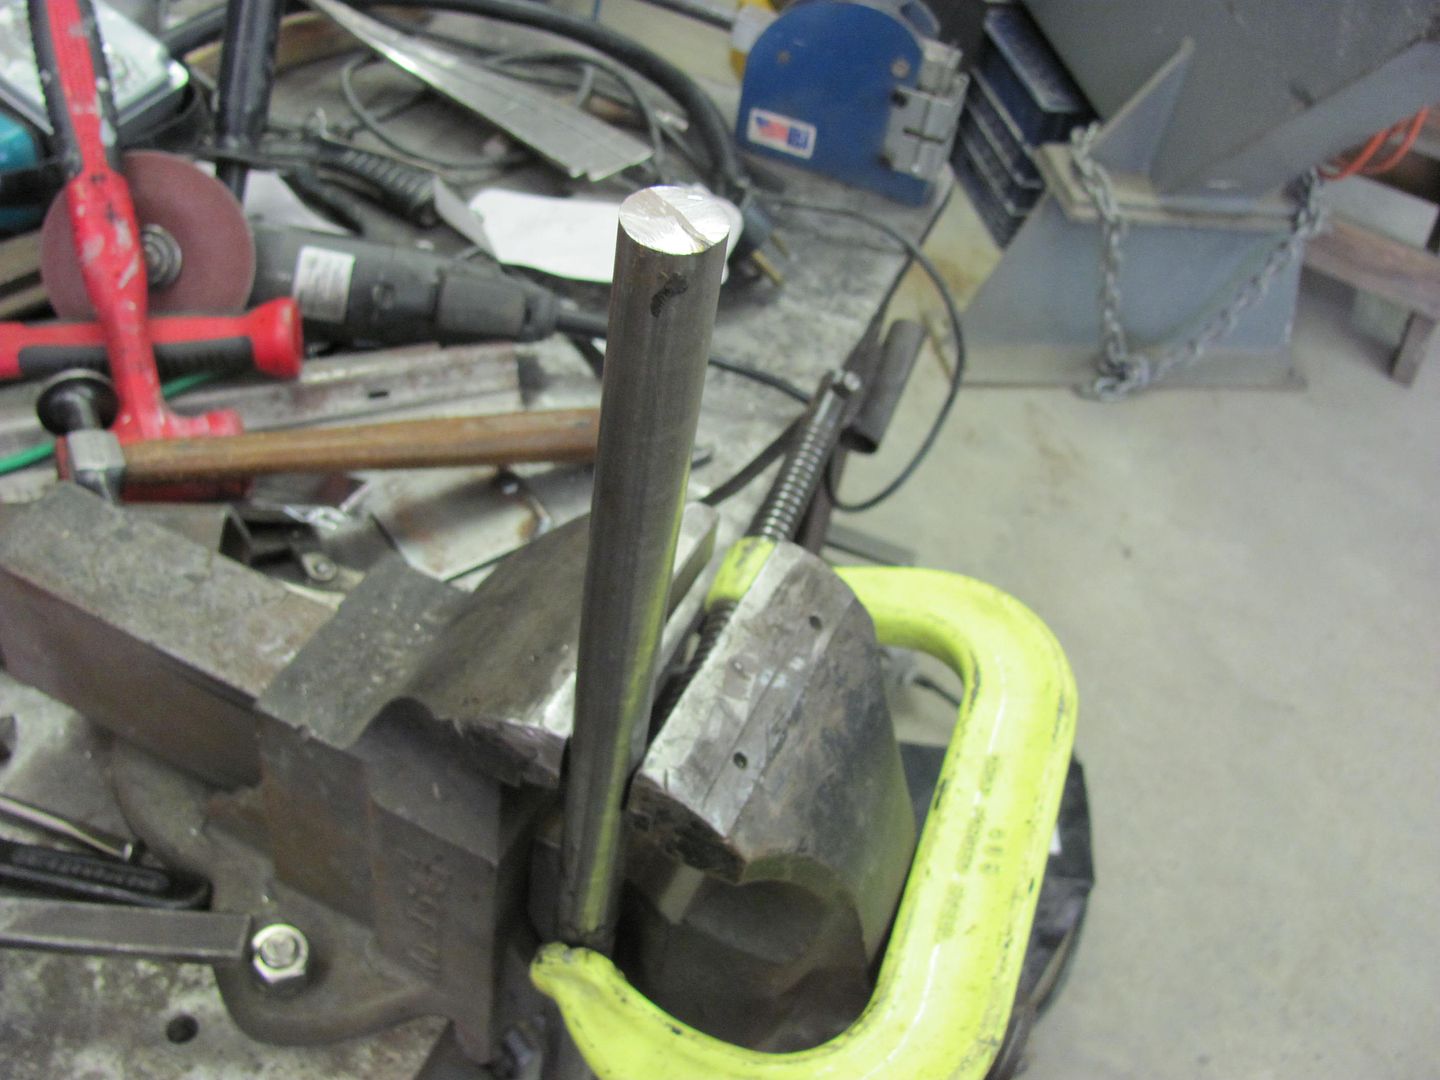
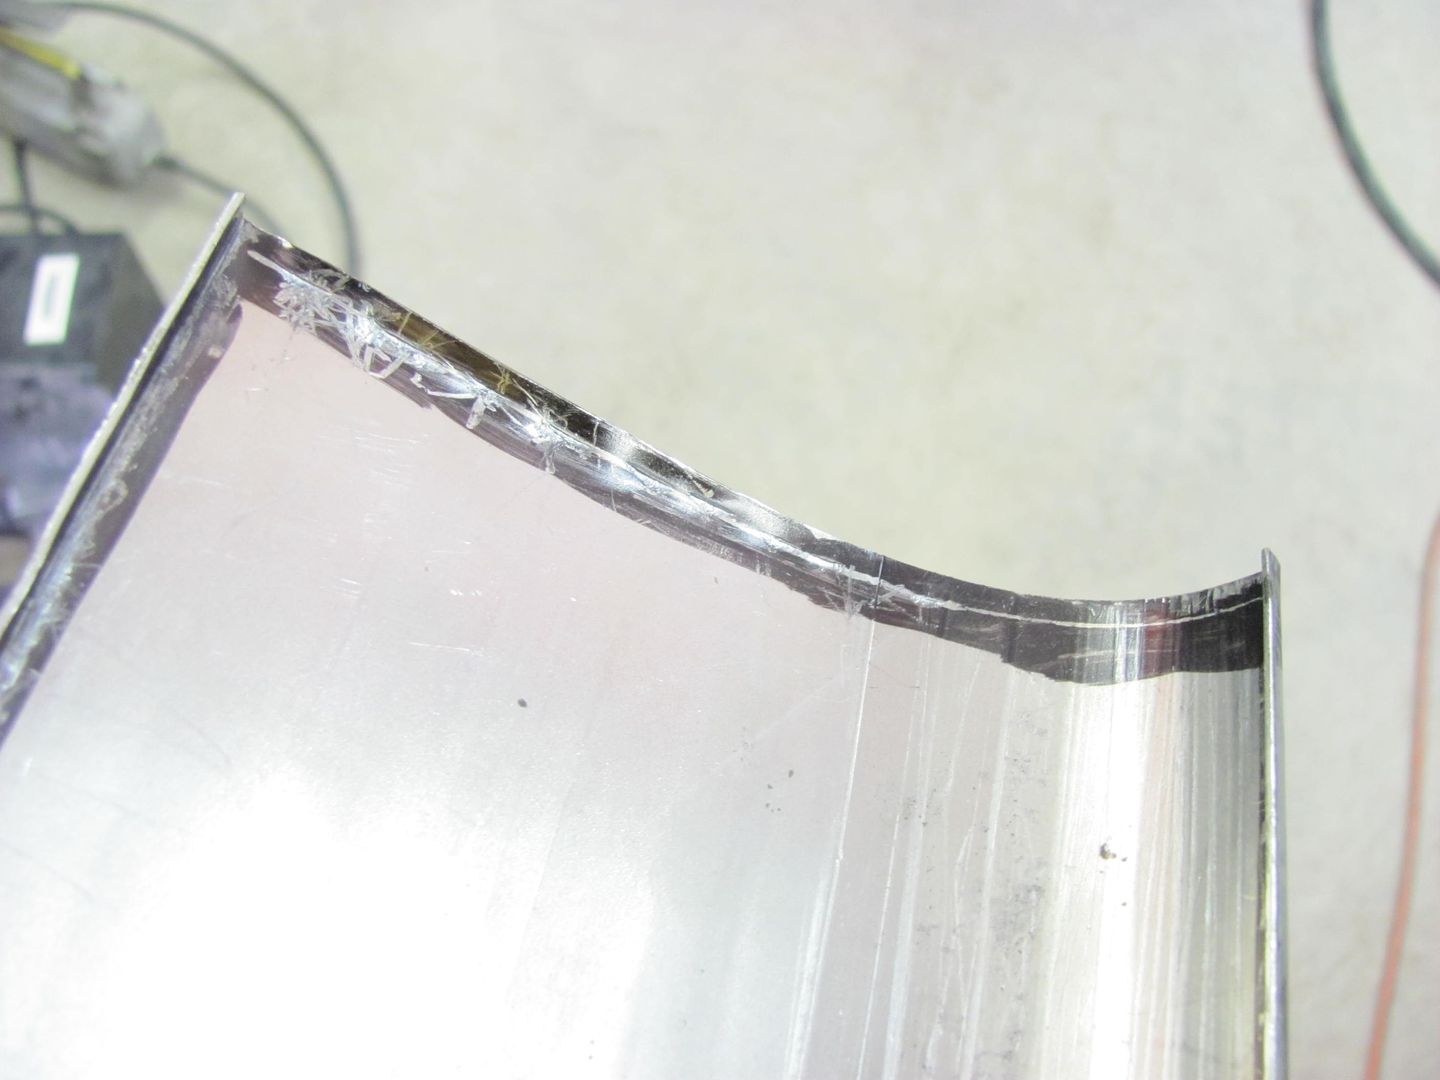
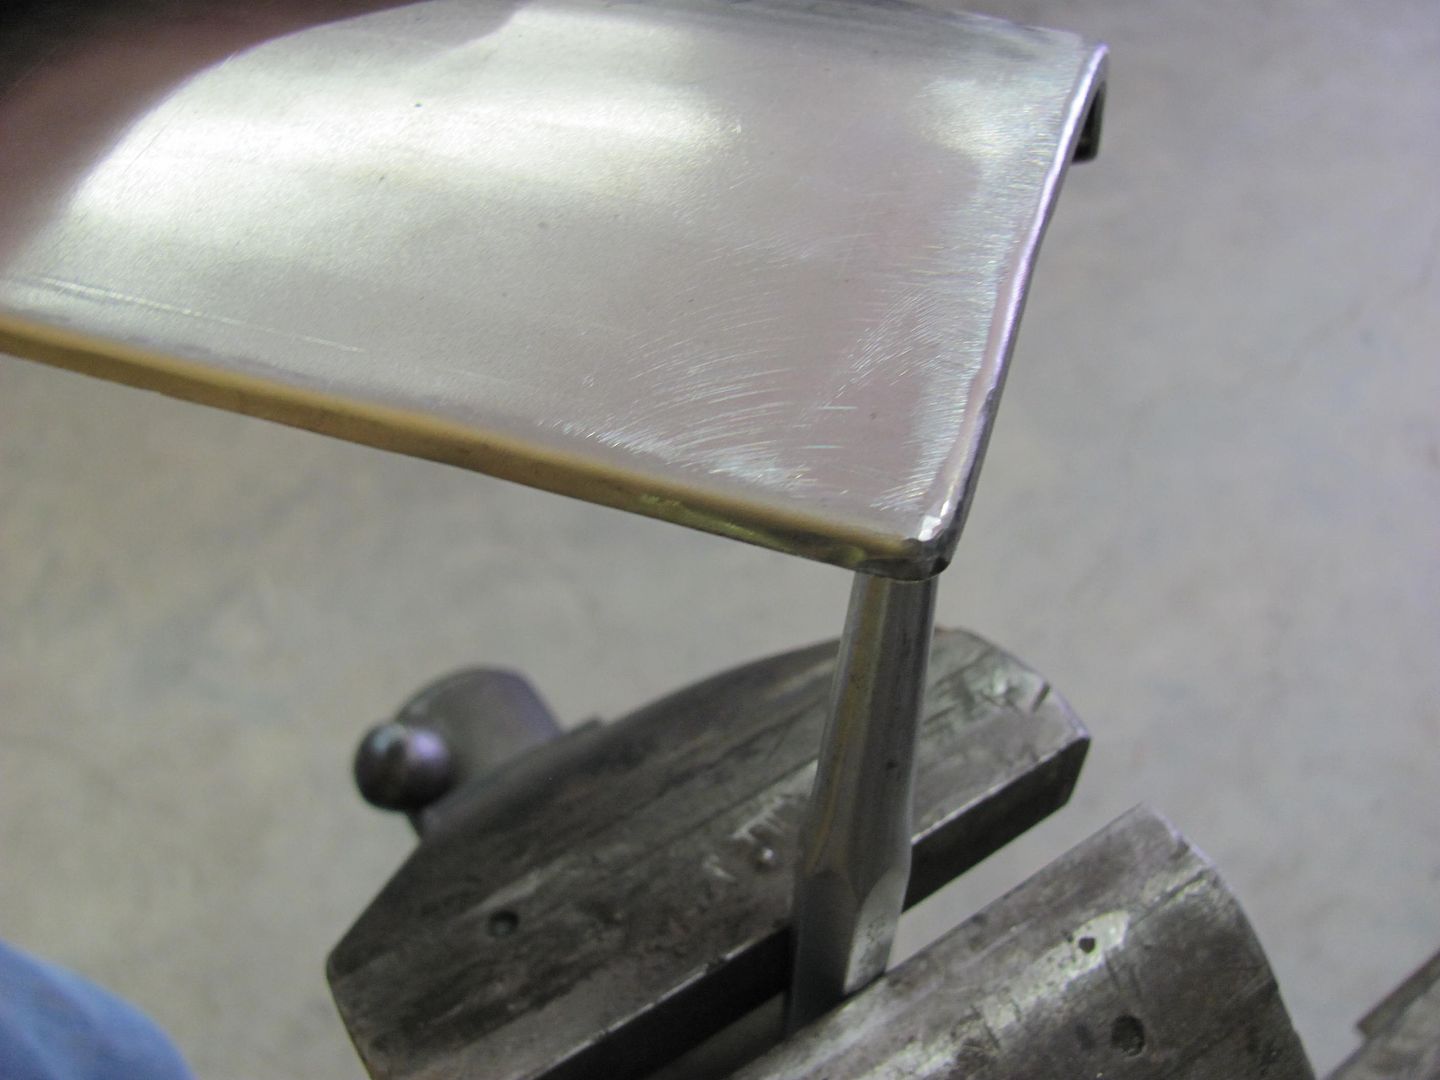
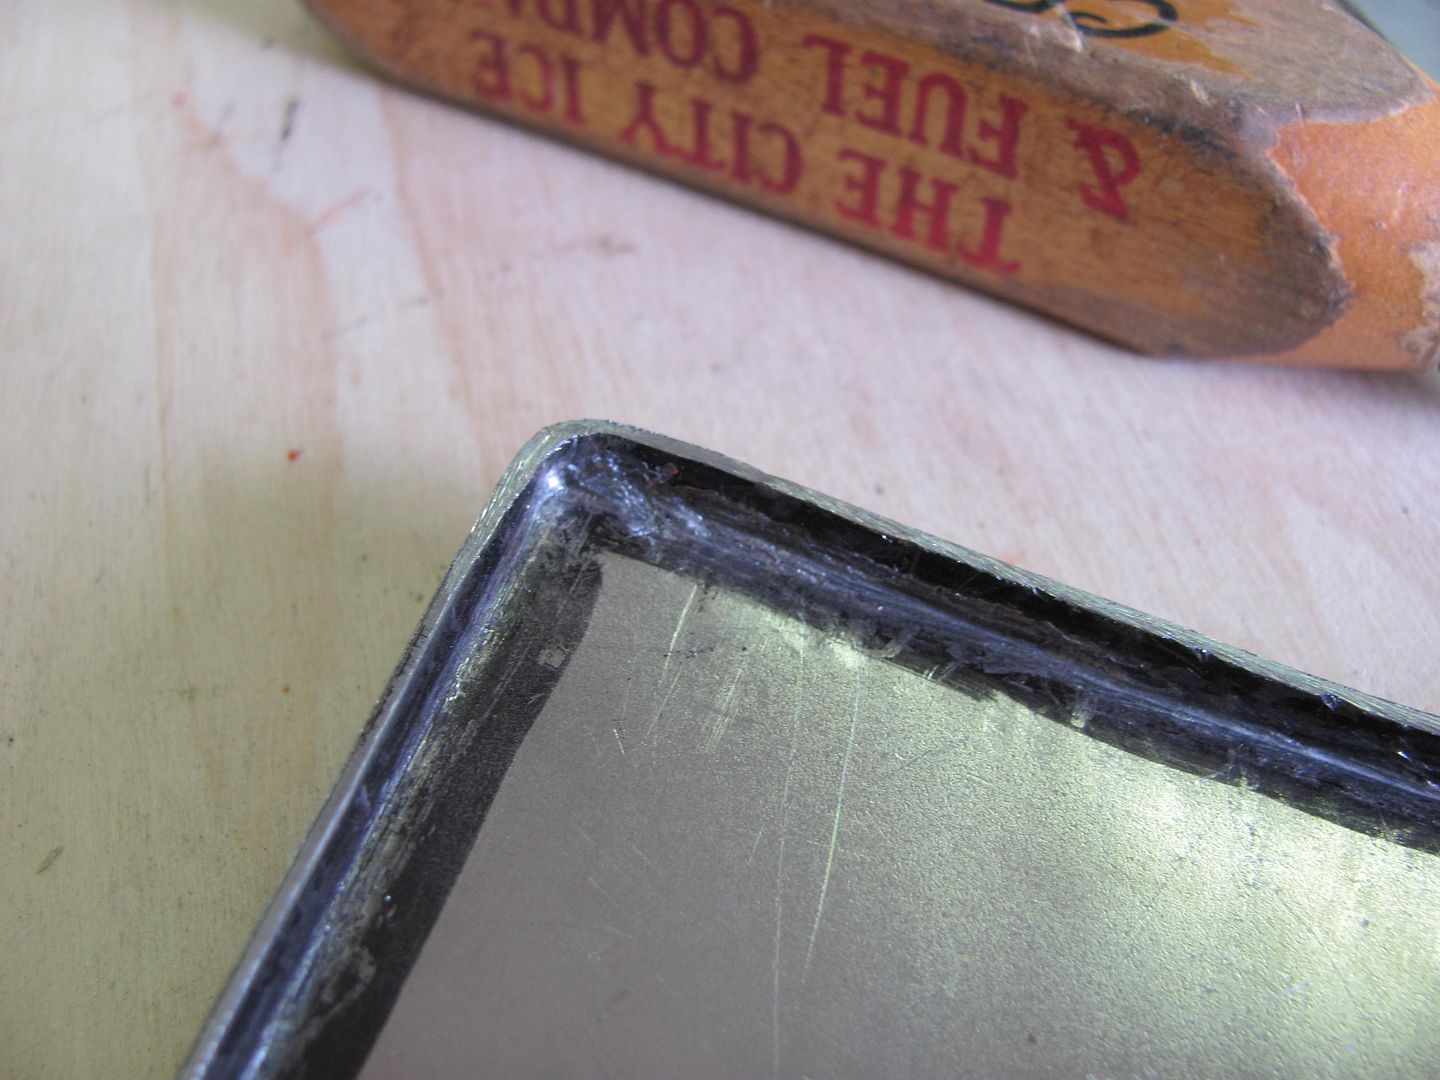
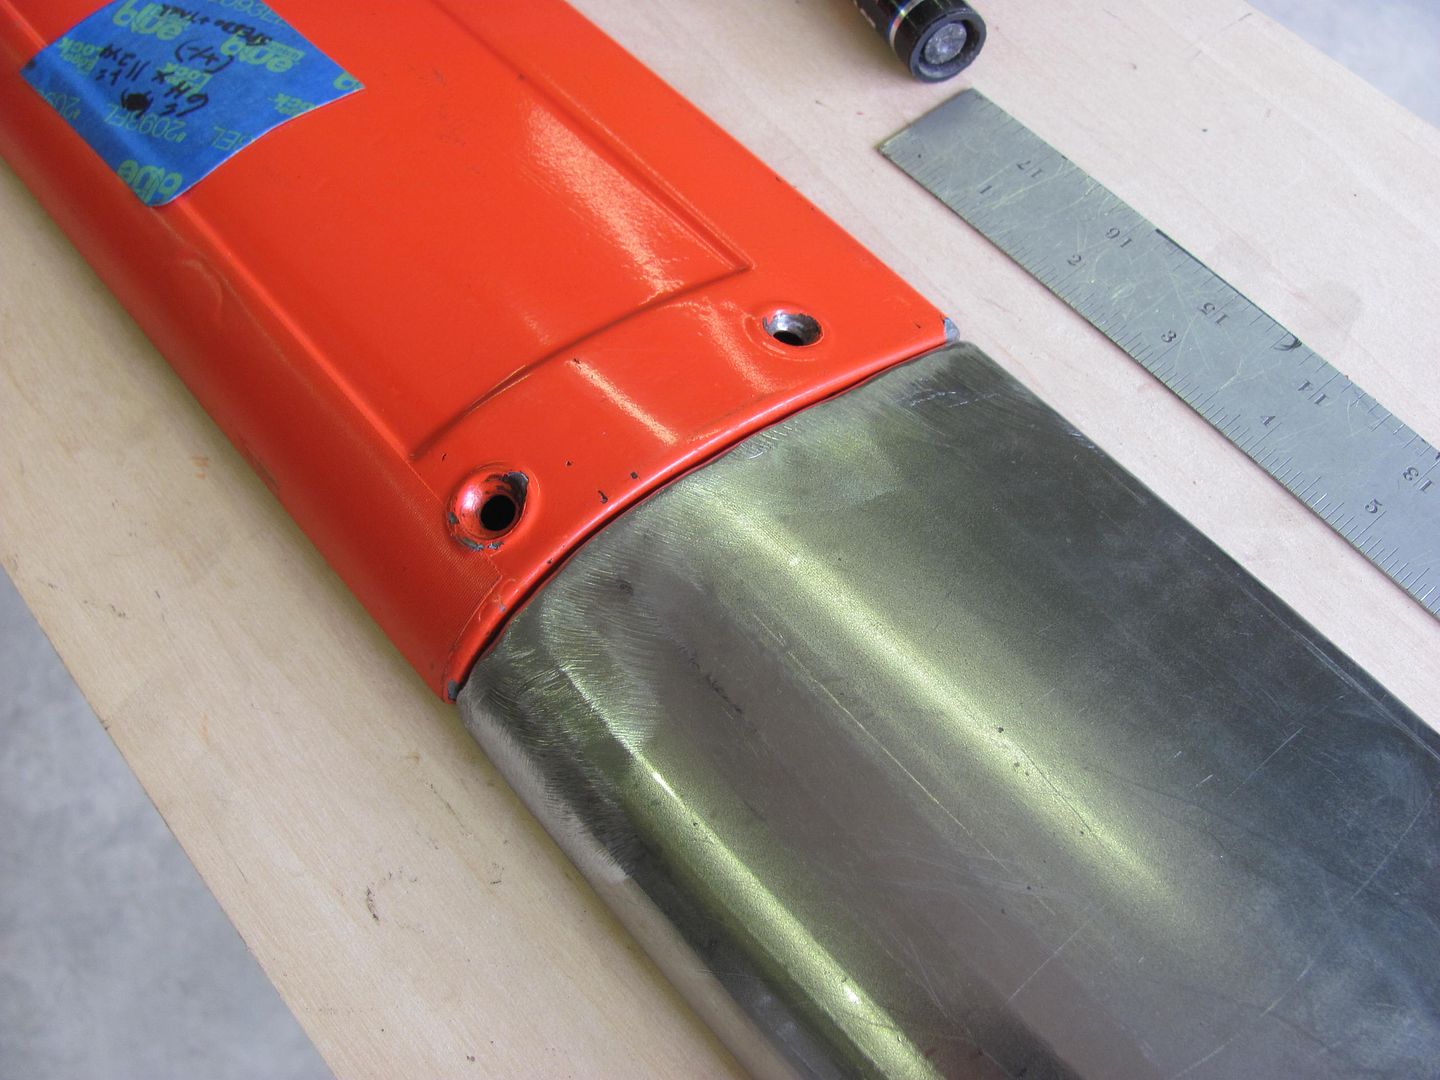
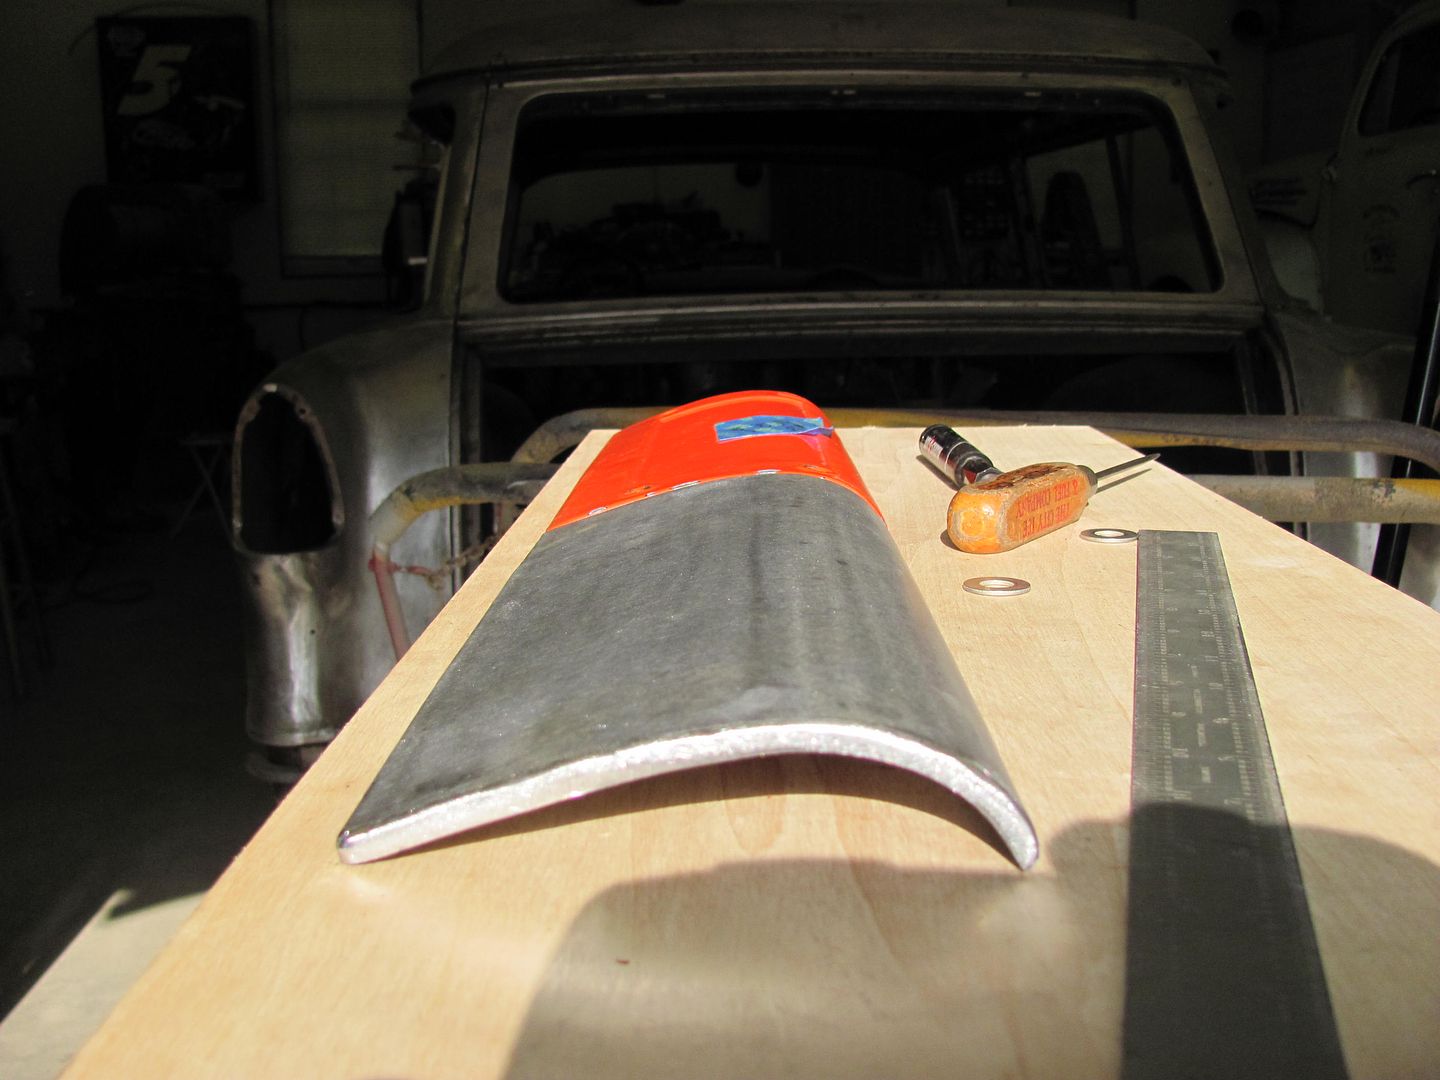
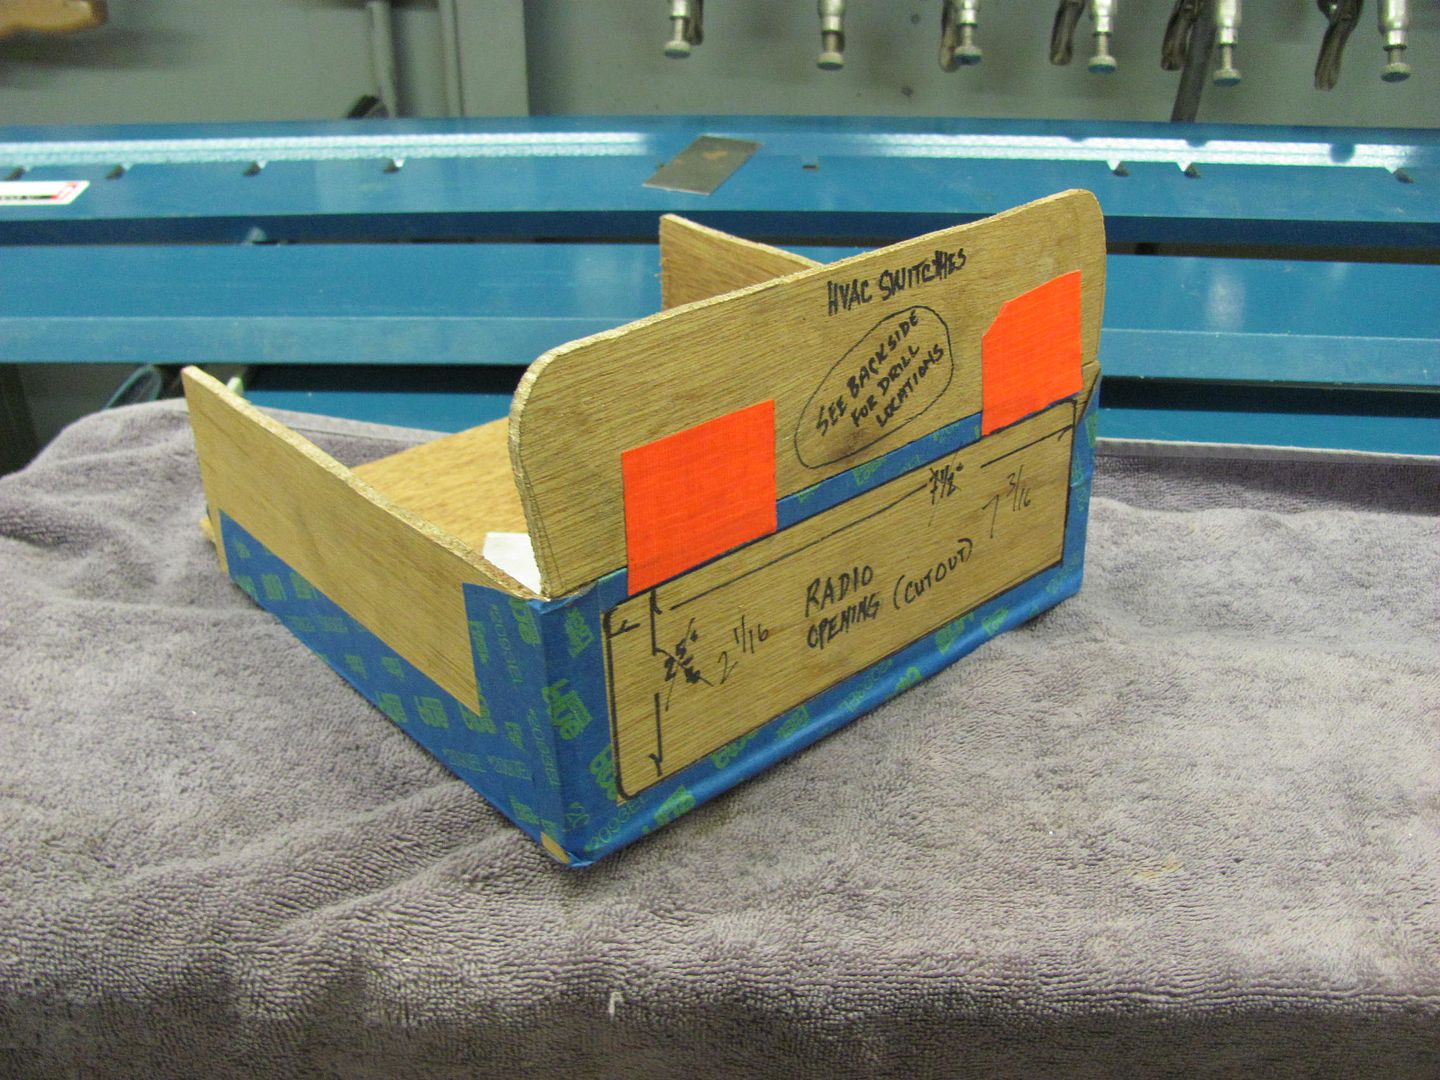 I wasn't too comfortable making something to match this piece as I didn't think these corners and the elliptical radius was correct. This is what I get for someone not wanting to bring over the truck to work from.. 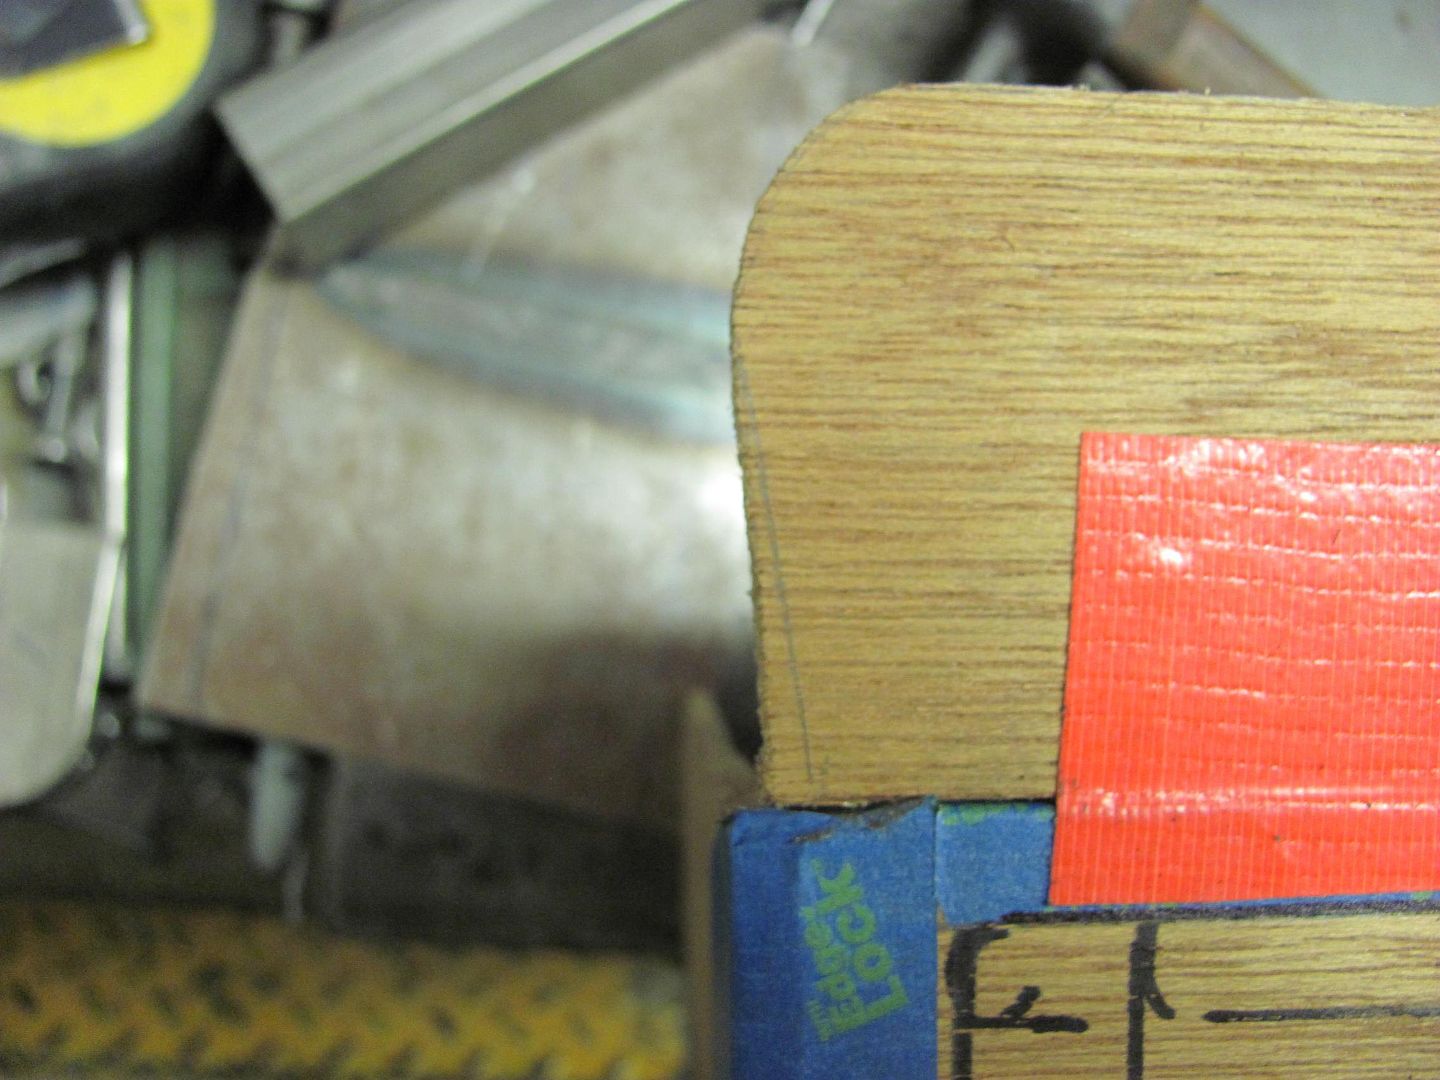 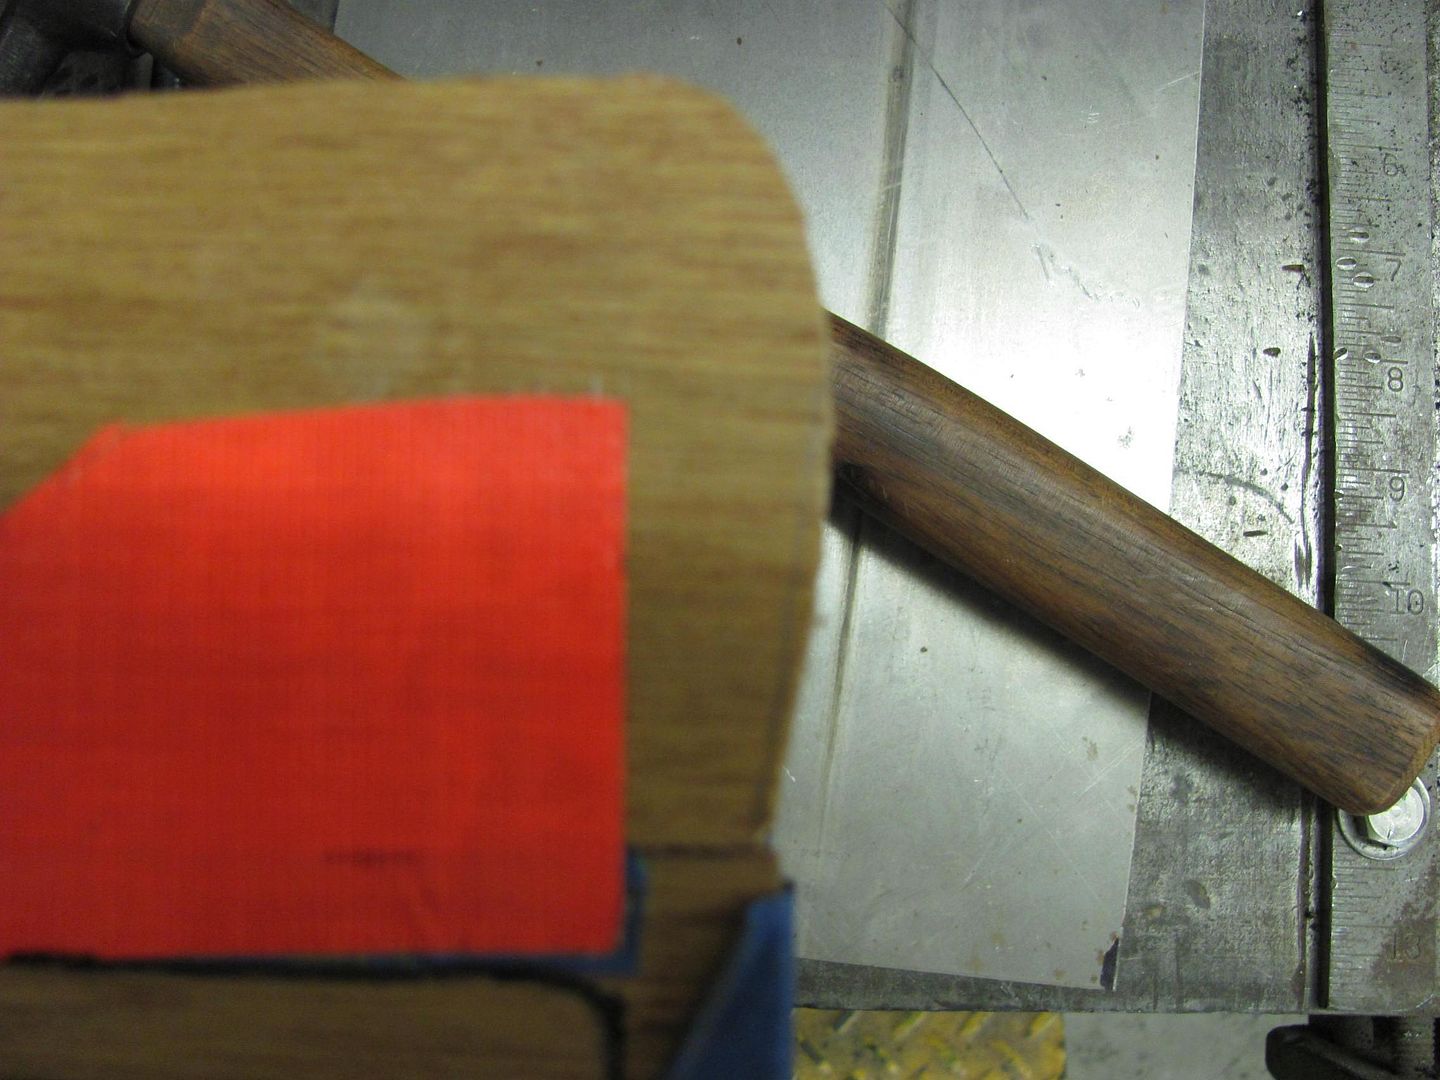 Looking at the picture he had sent of the dash, the piece this was replacing appeared to have straight sides and about a 1/2" radius.... (the piece under the orange panel) 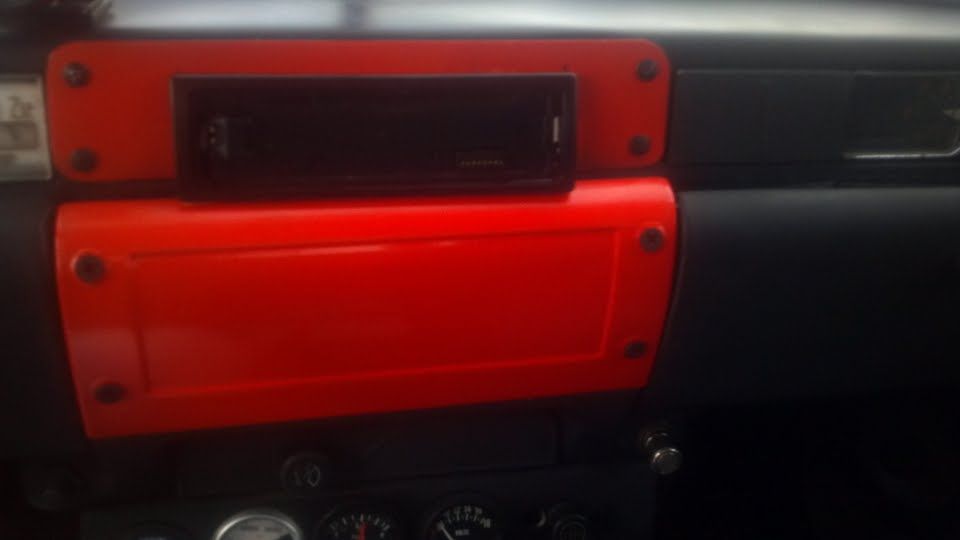 So I had him bring that panel over today to have a "more accurate" sample so my work will have a better chance of fitting.. a bit different from his sample... 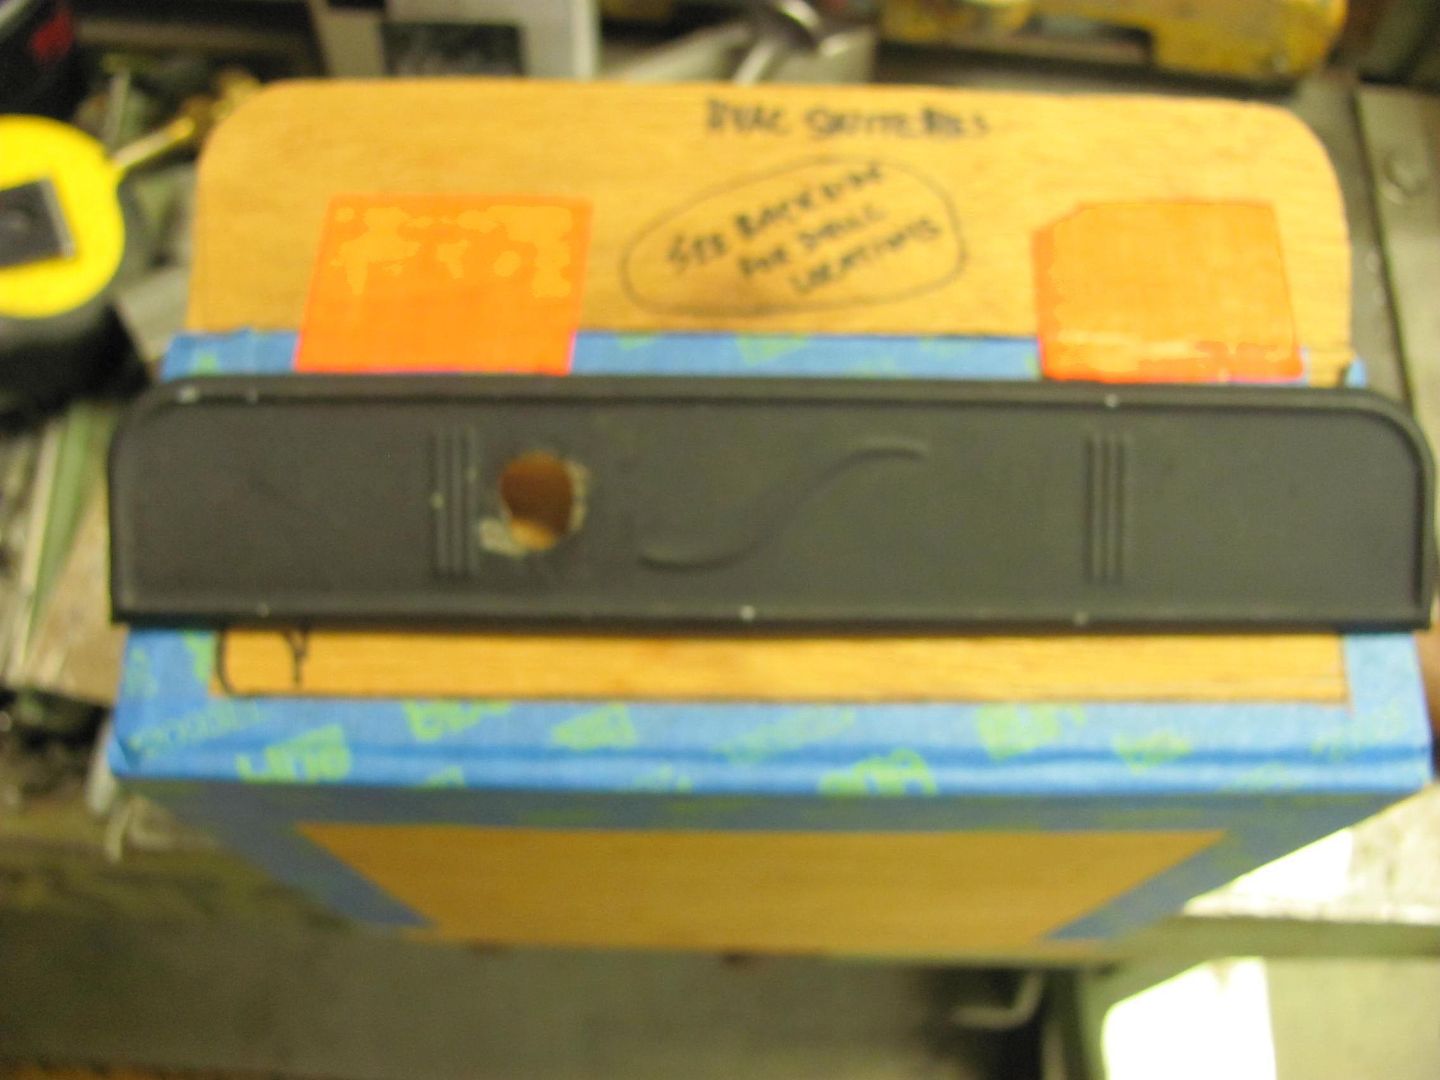 What I could only guess was him wanting 3/8 hardware, was actually 10-24 studs with a 3/8 nut. 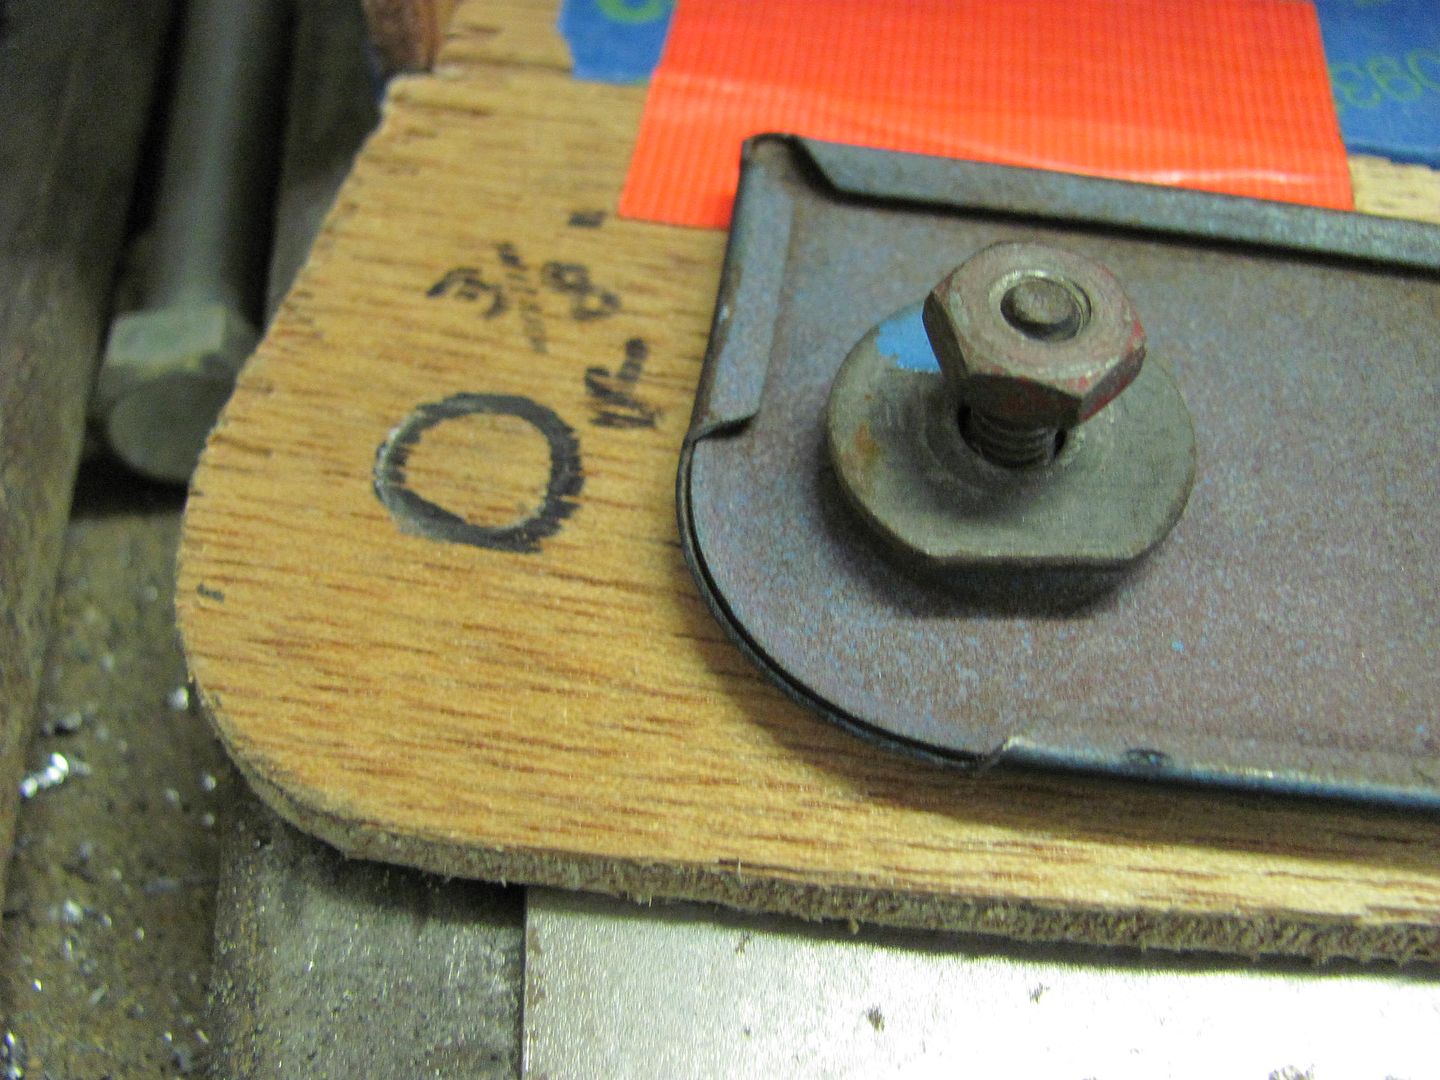 You've got to love it! Here's the layout, and cut out on the band saw.... 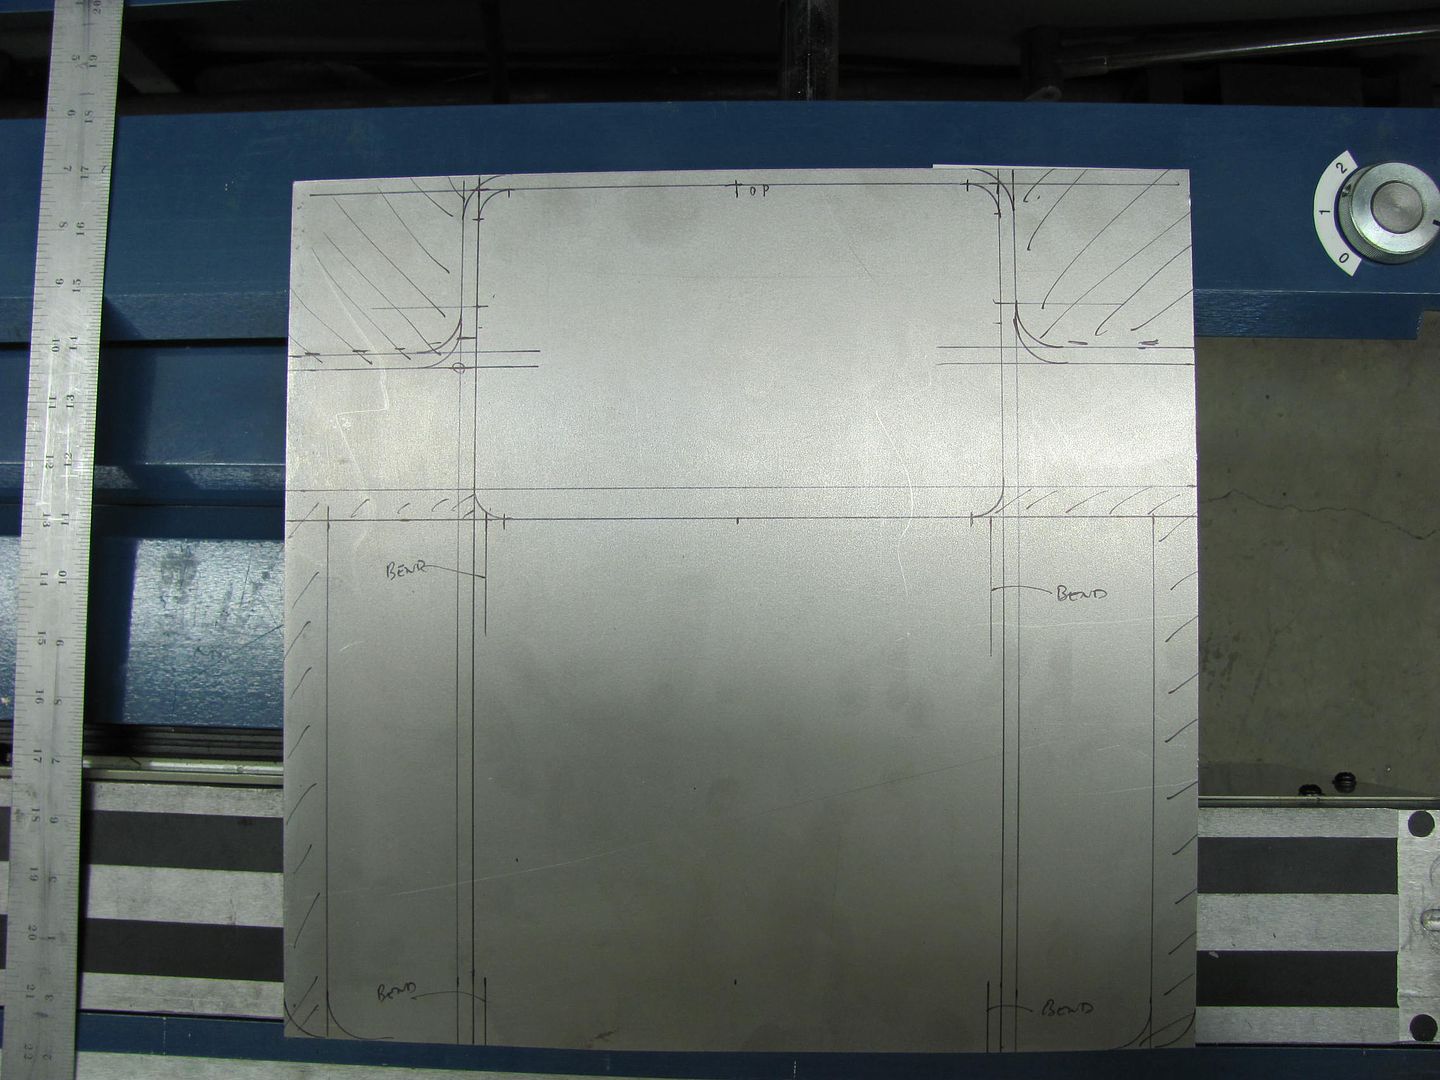 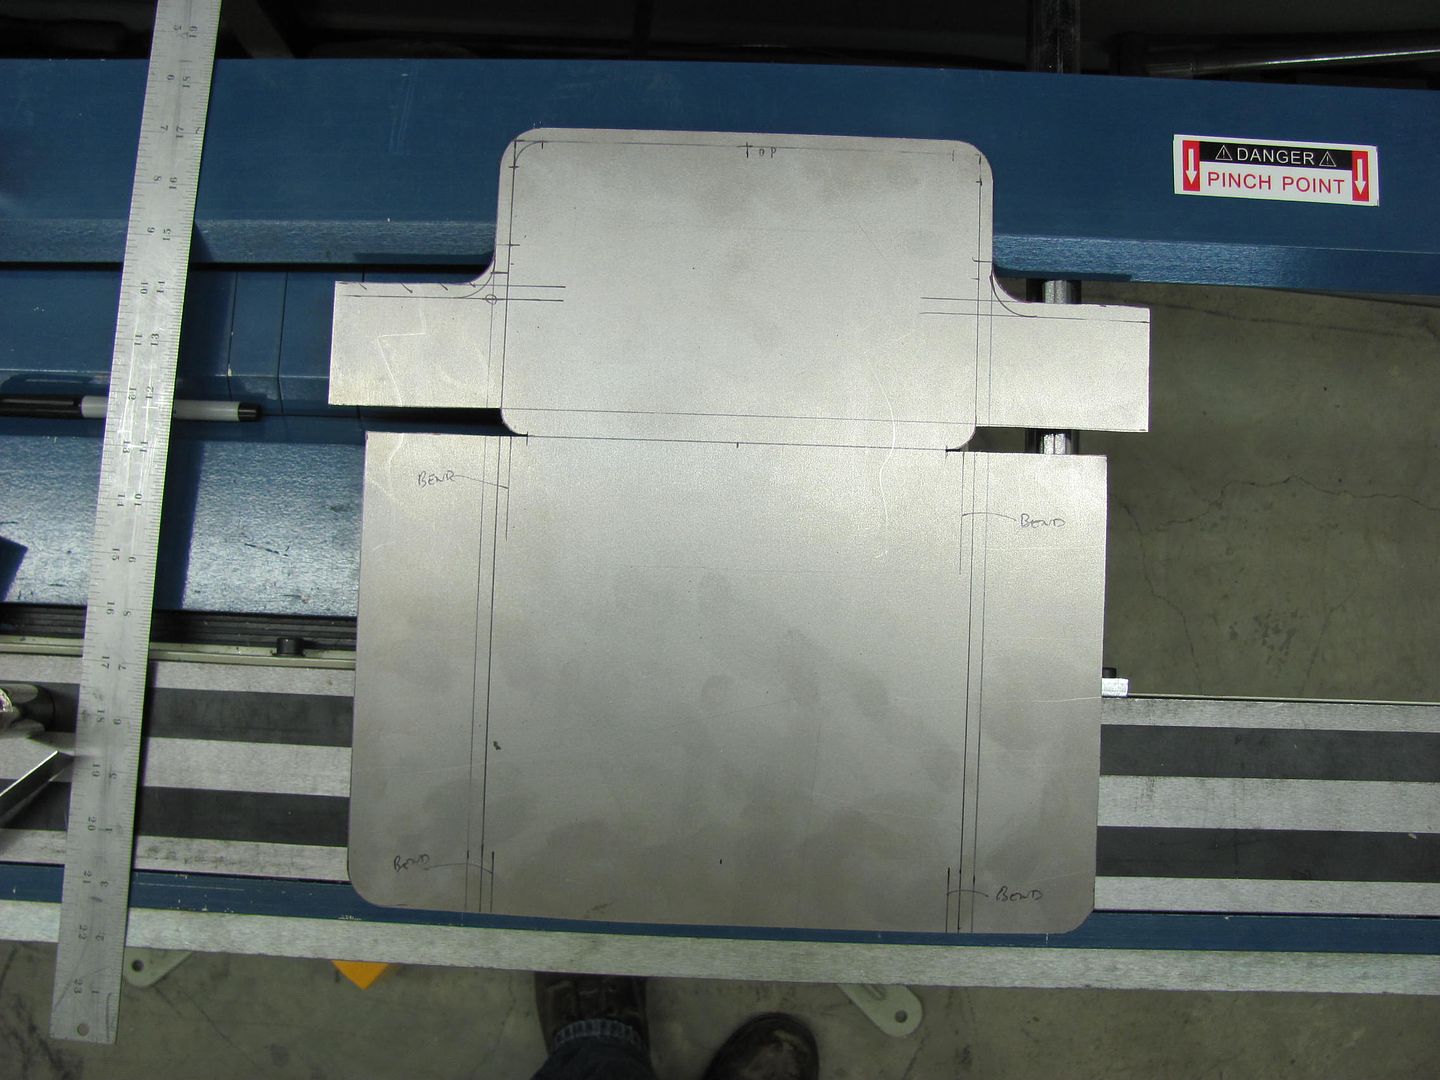 I use some modified lower dies in the press brake to fold the 1/4" flanges around the perimeter.... 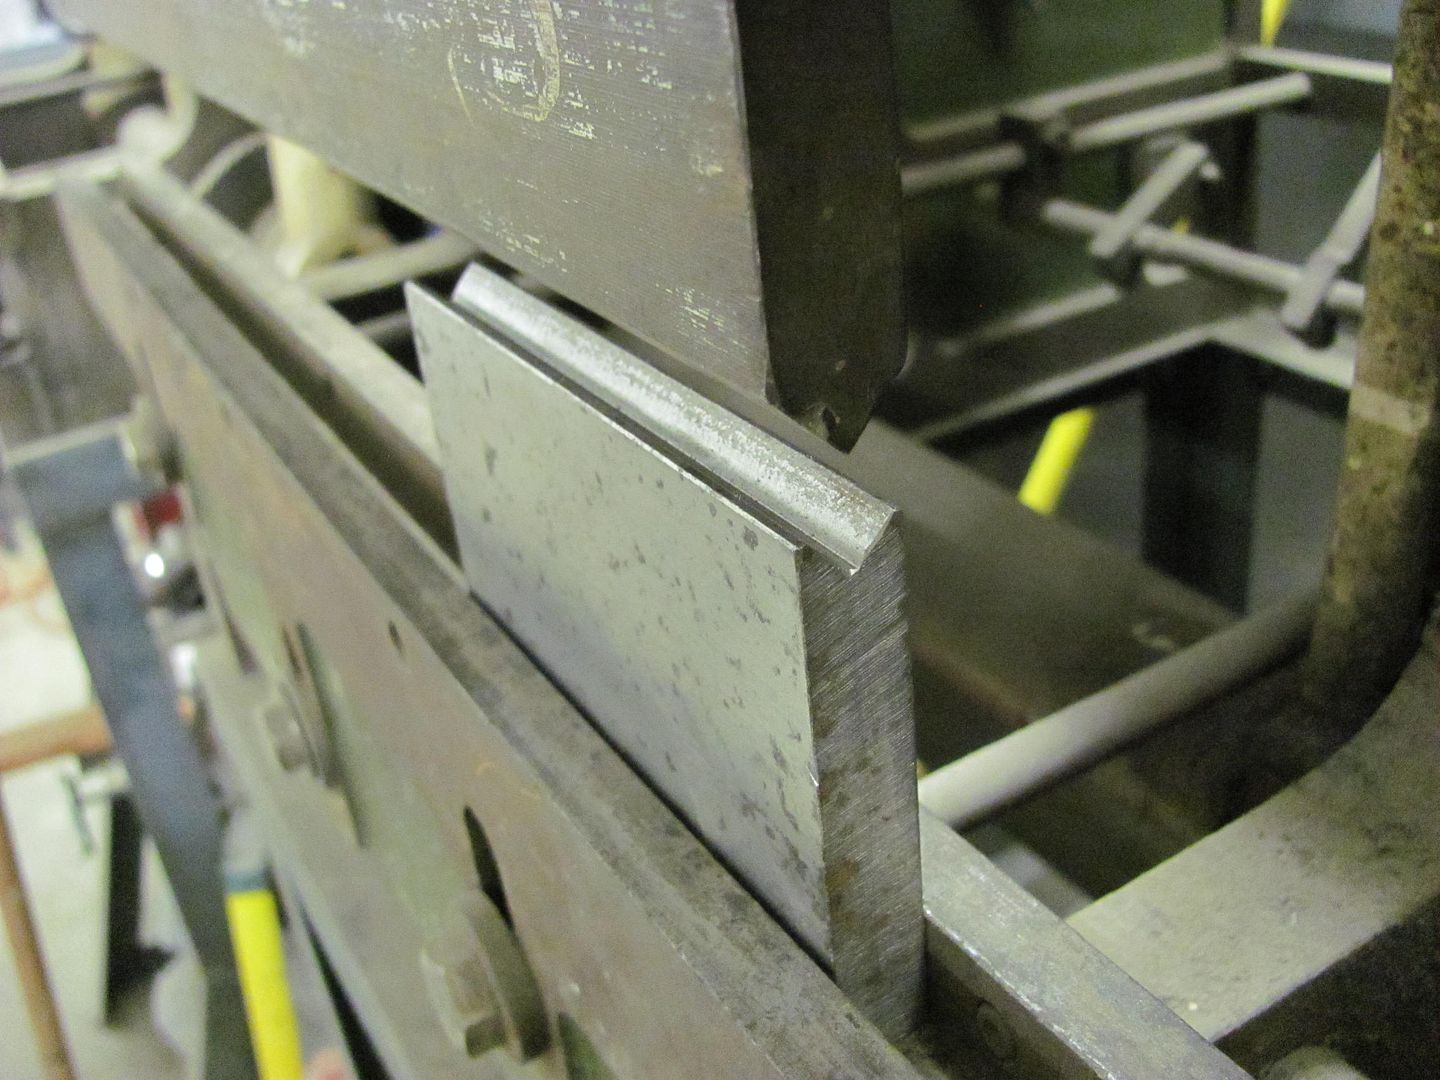  The folds were stopped shy of the corners, and a 1" diameter "anvil" was used to form each corner radius. 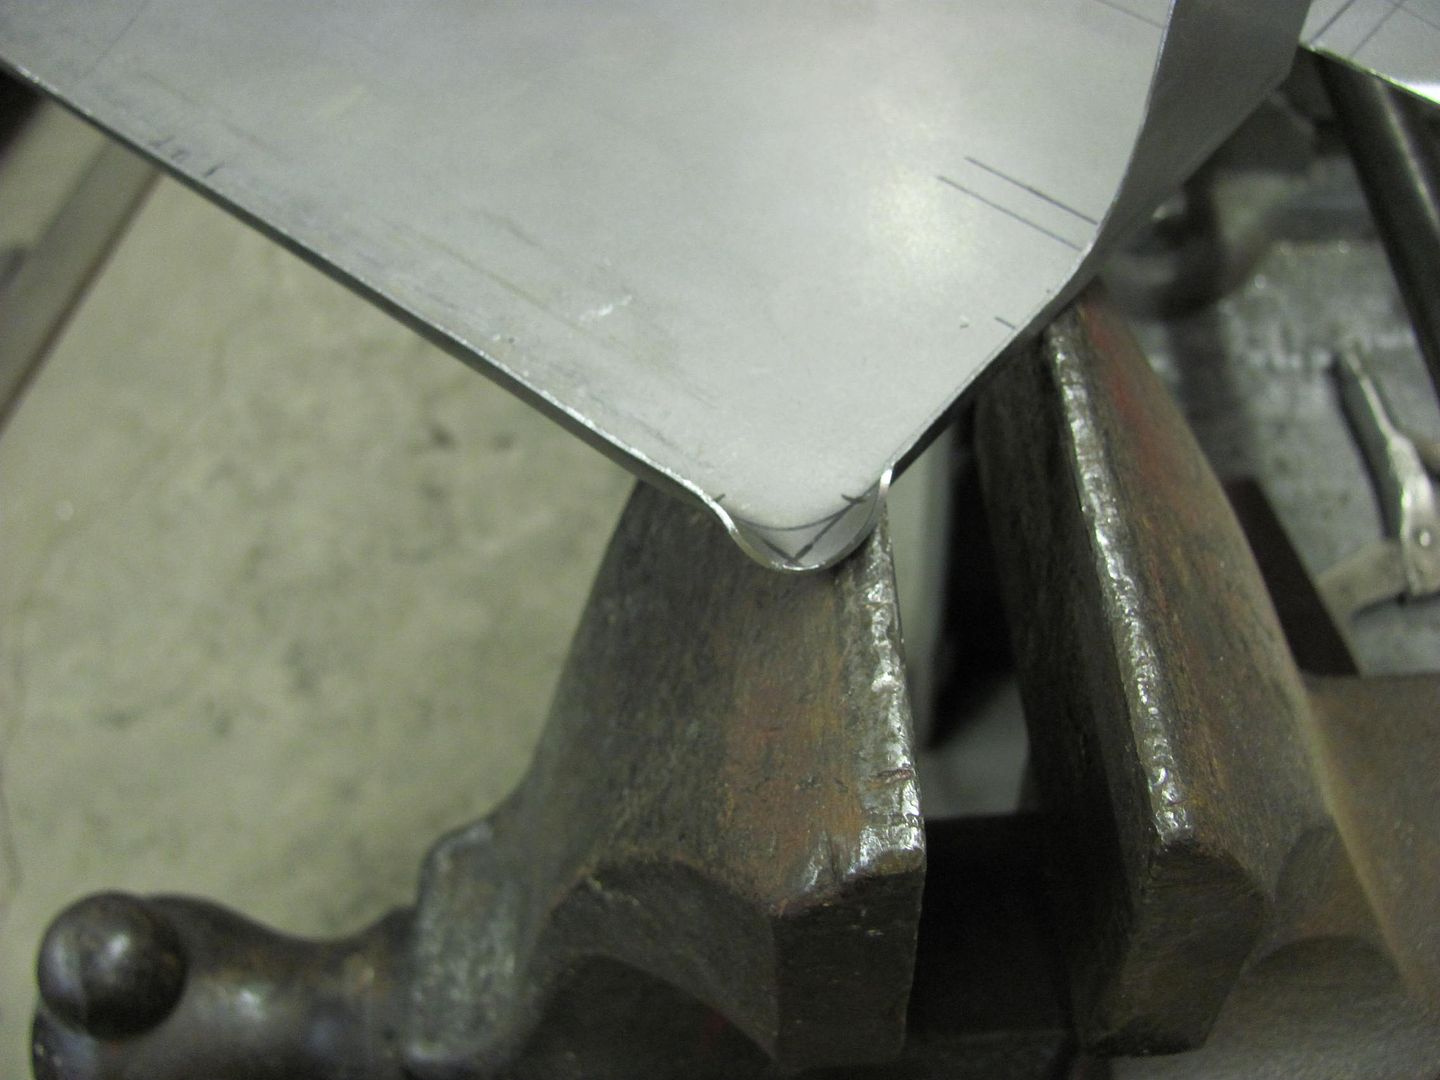  The process is shown in this video on a similar piece.... http://s5.photobucket.com/user/rmcca...eo158.mp4.html Finished radius.... 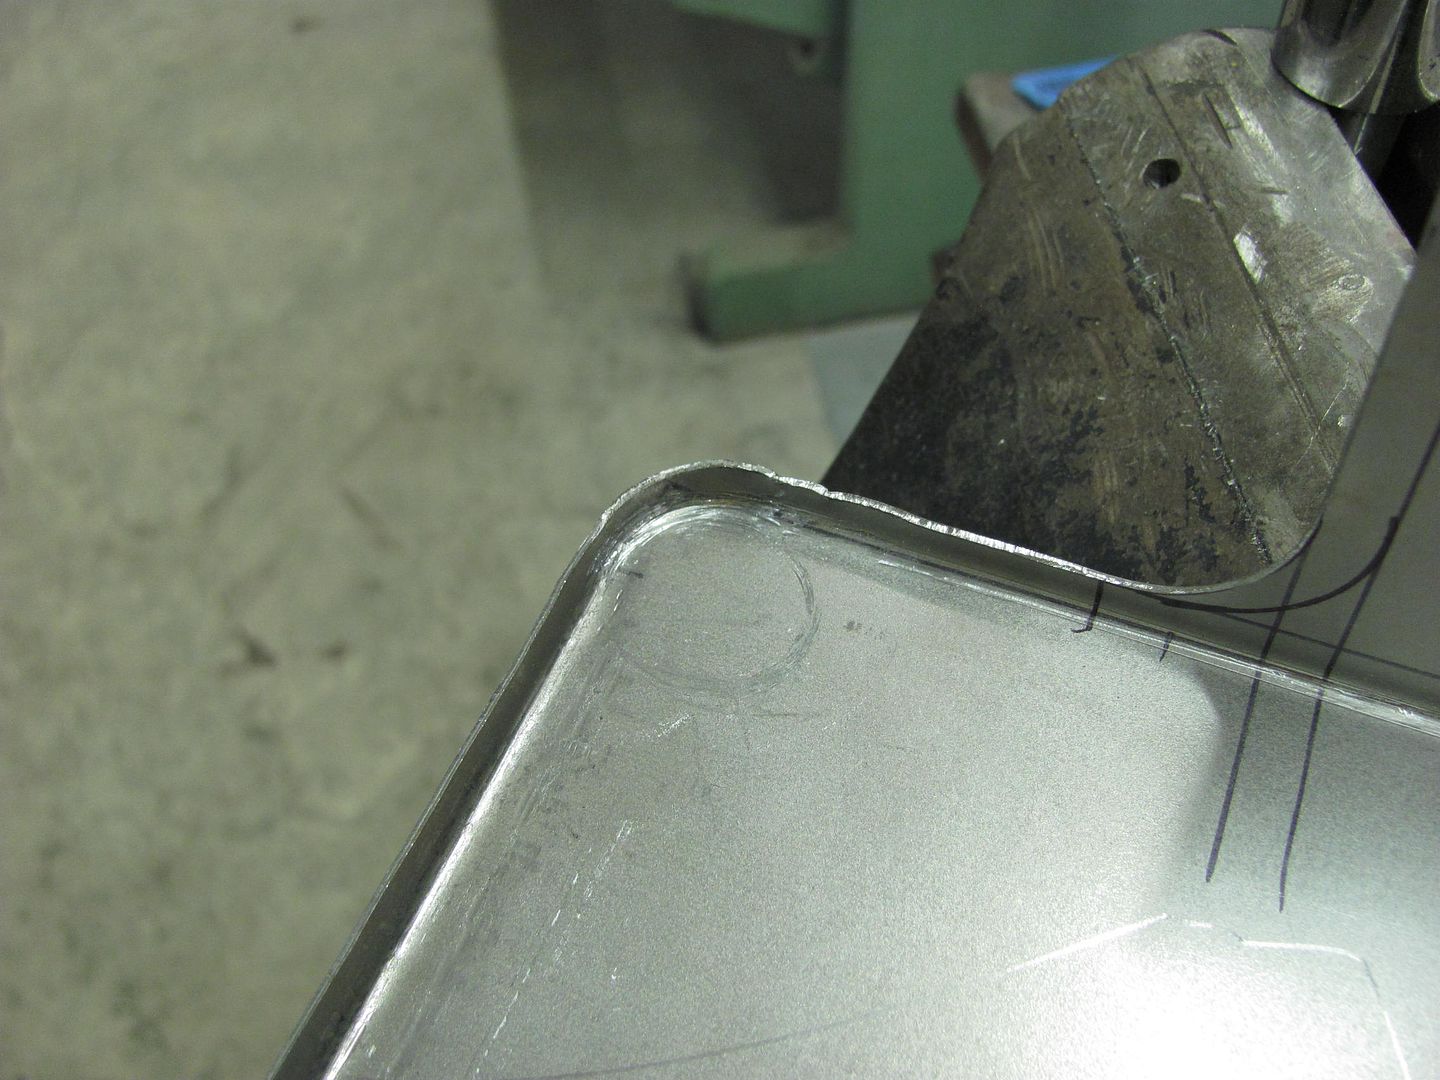  Then, to add a radius along the bottom, I used the Baileigh magnetic brake, adding a 7/8" steel rod to form the radius... 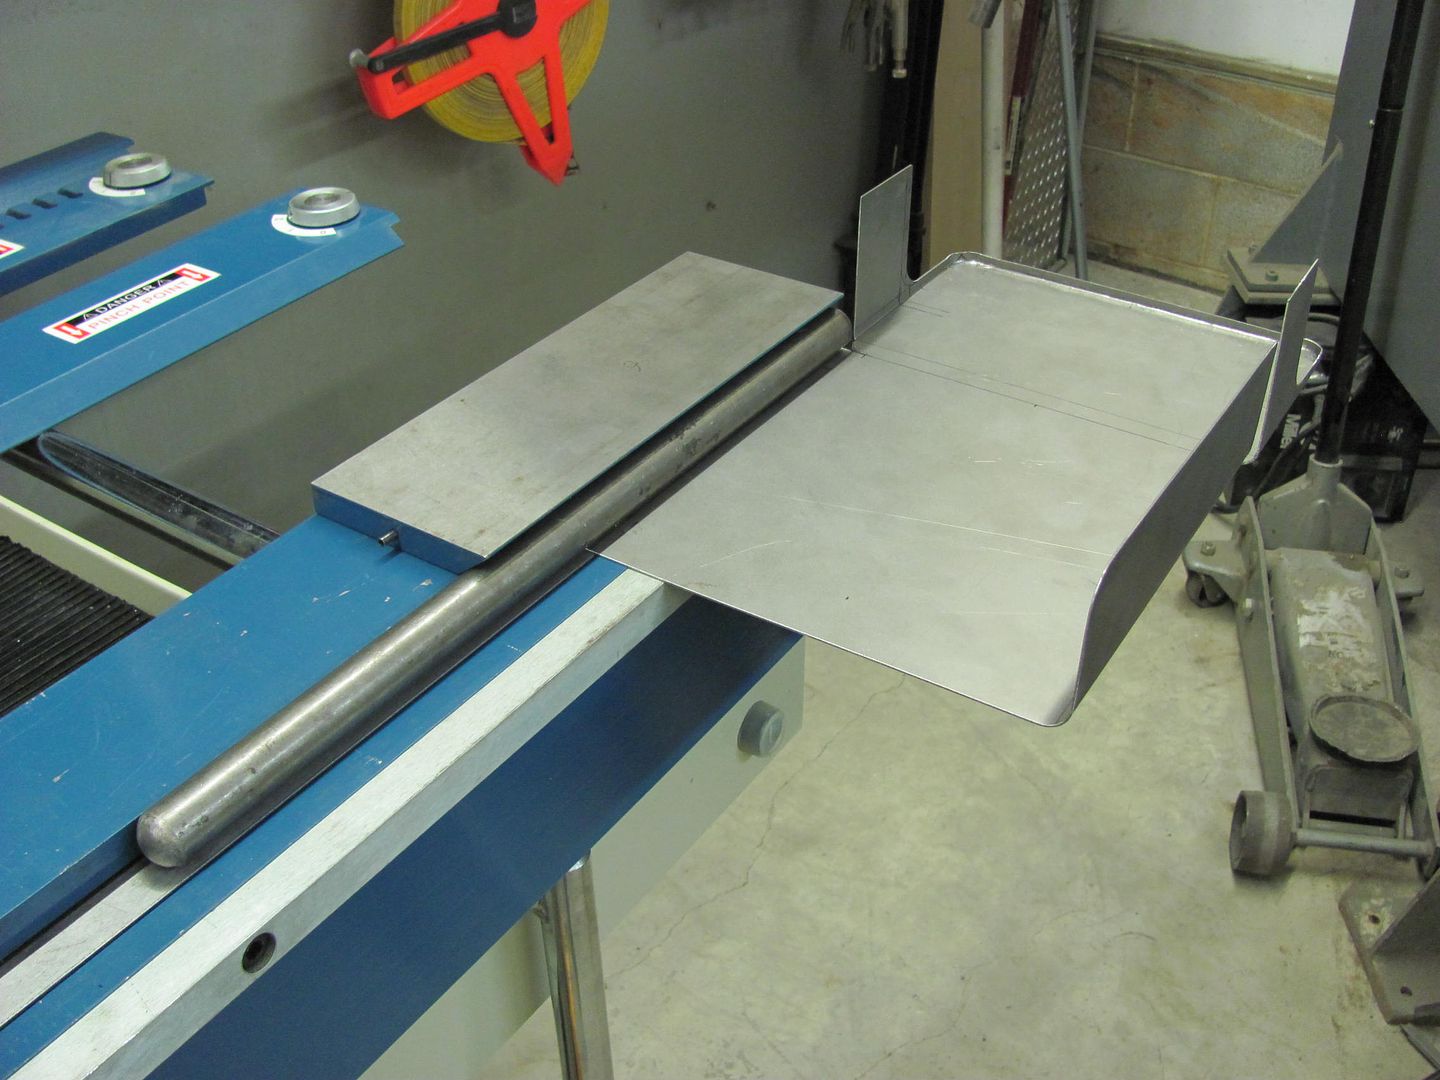 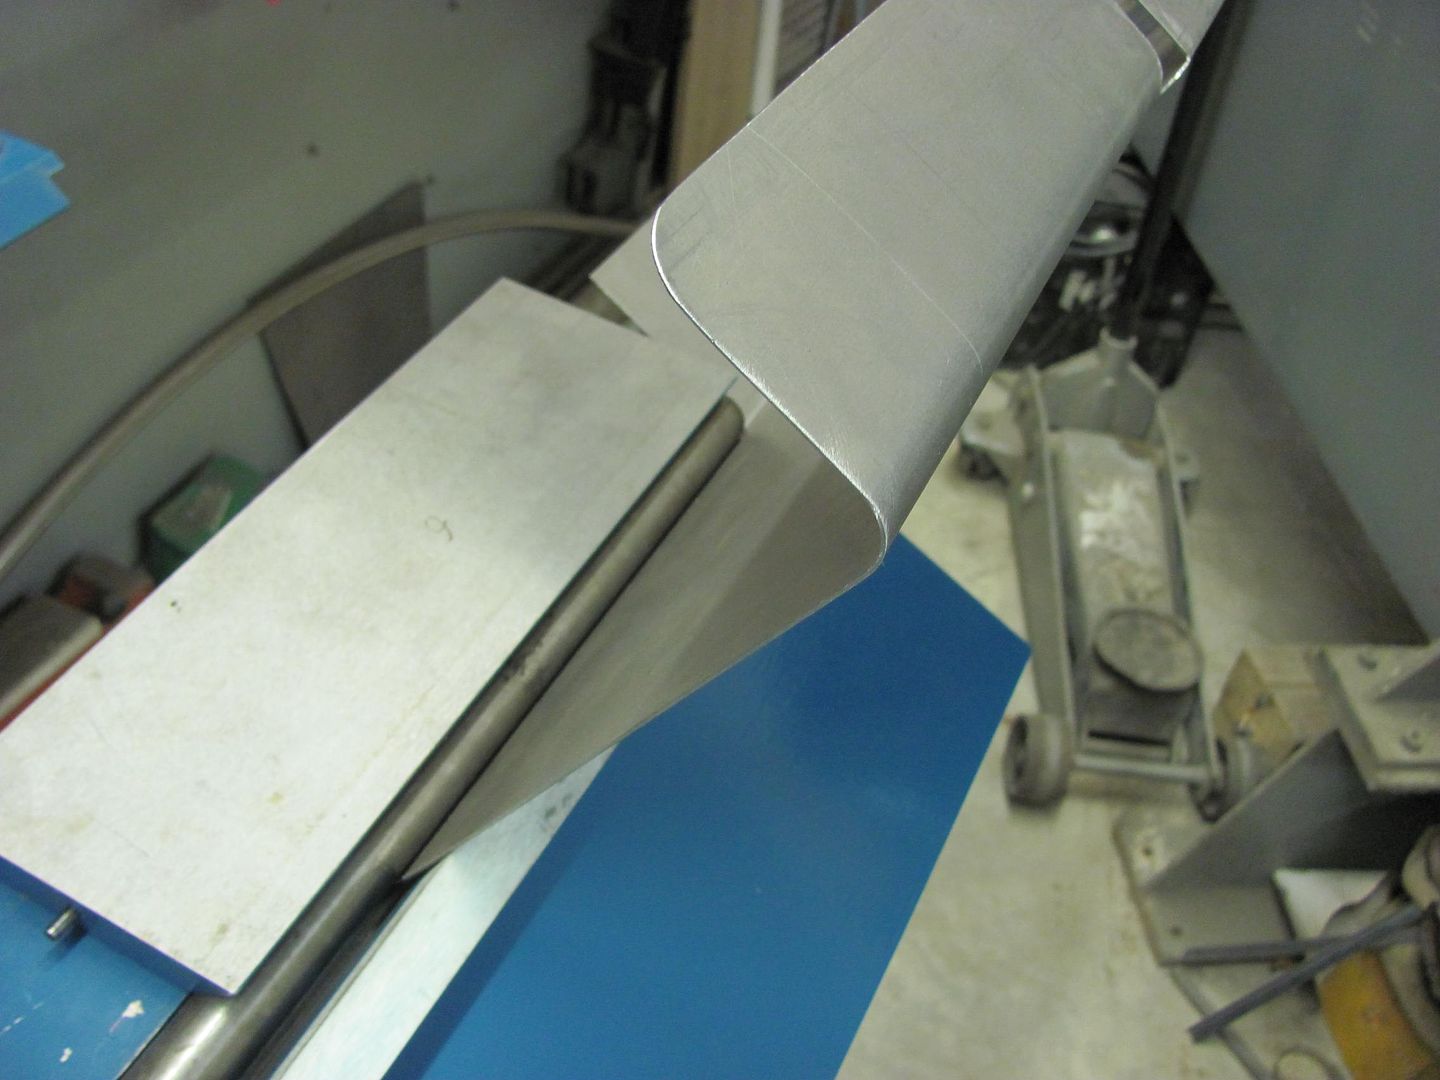 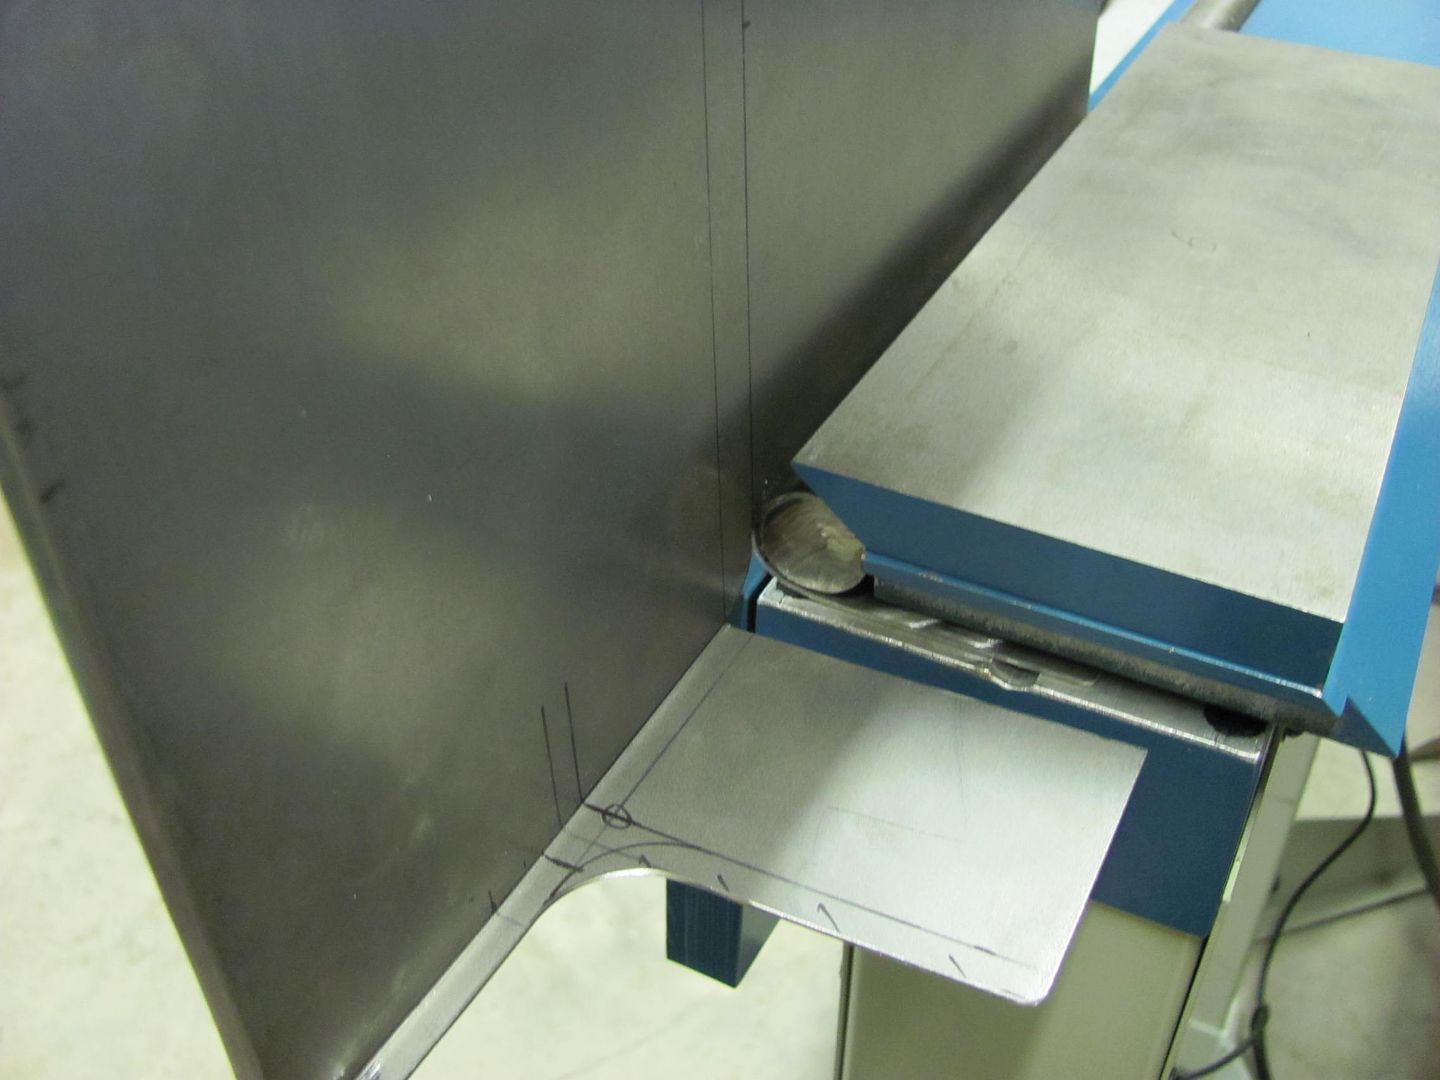 ....and then the front was folded up... 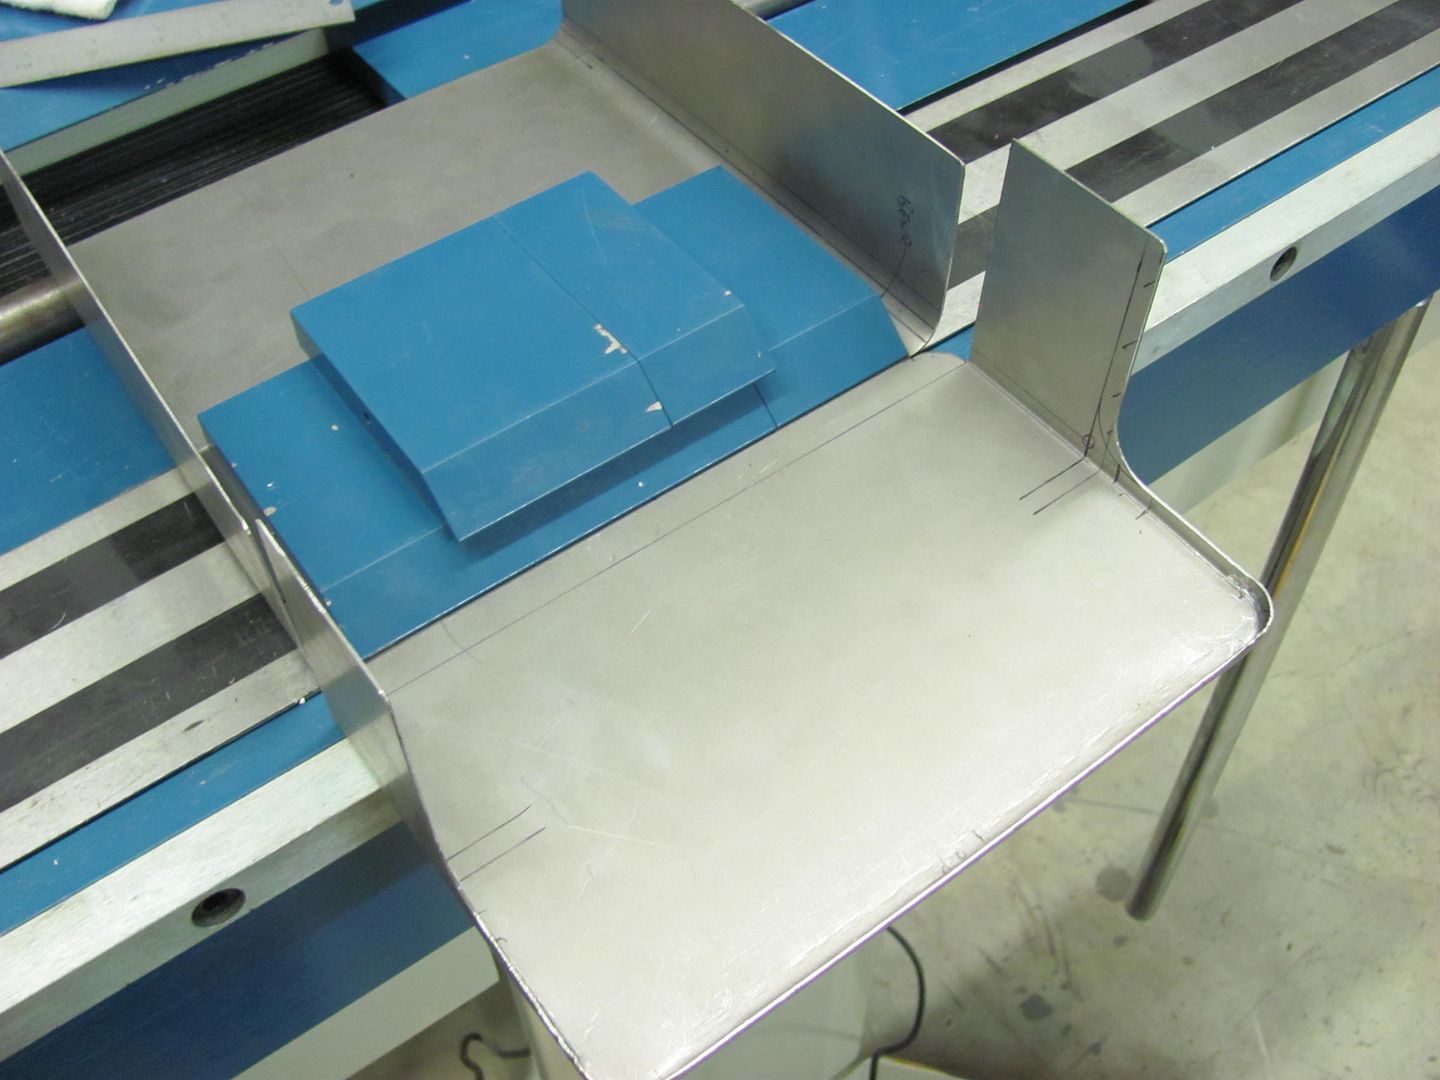  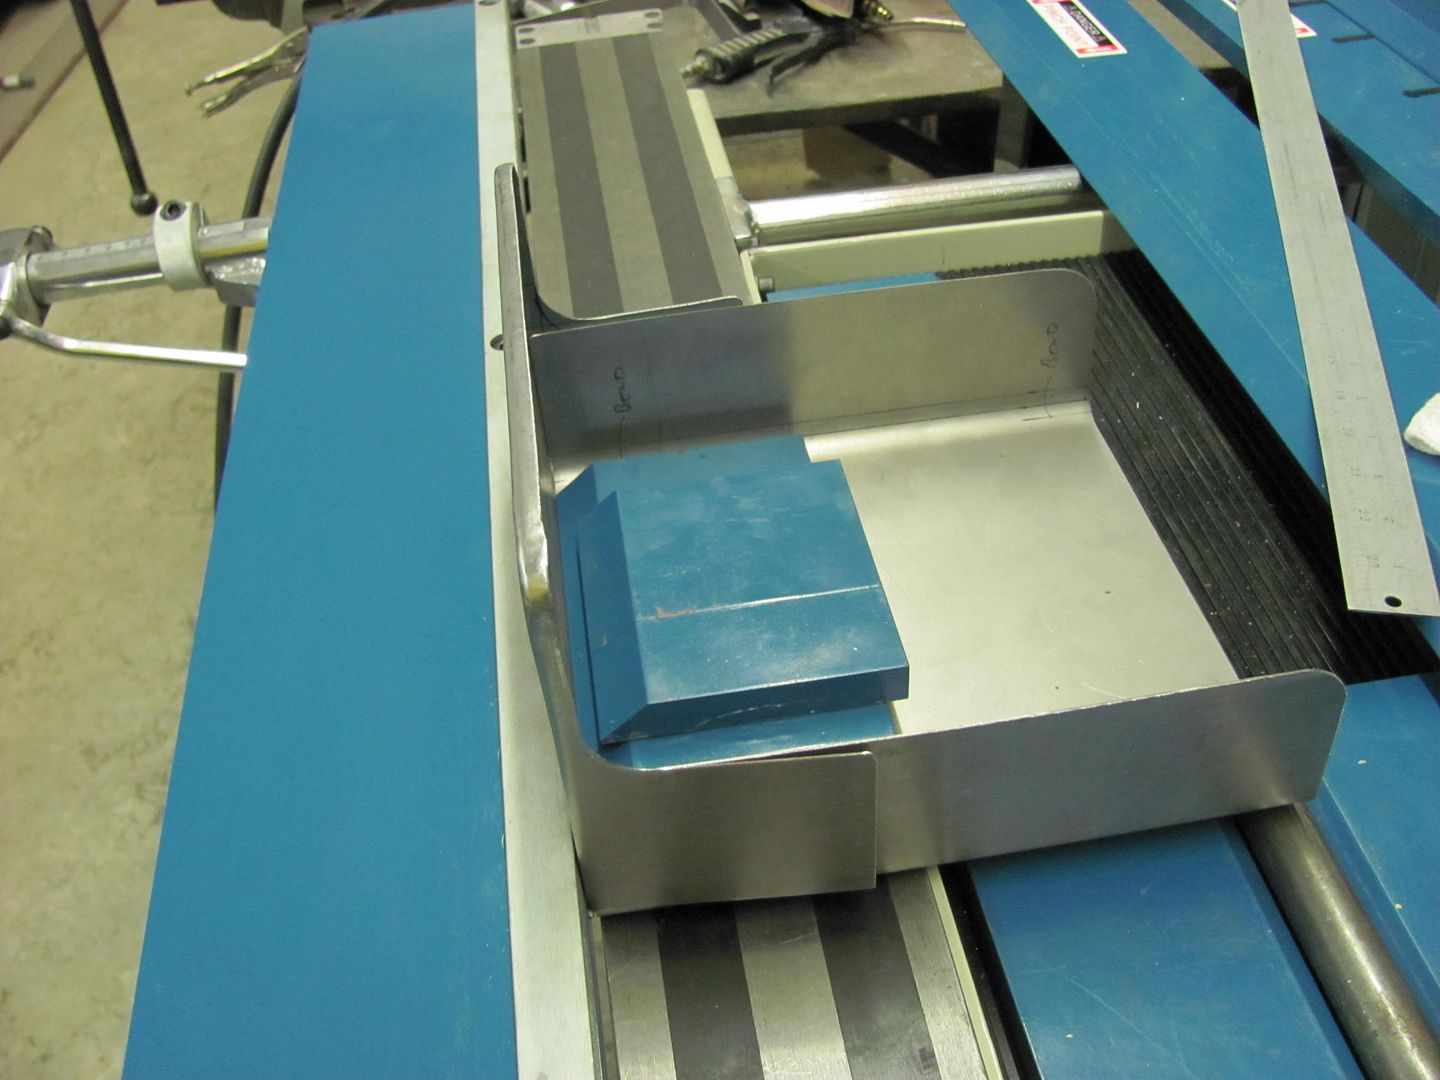 The front was squared up, then sides were clamped, and spot welded in place.... 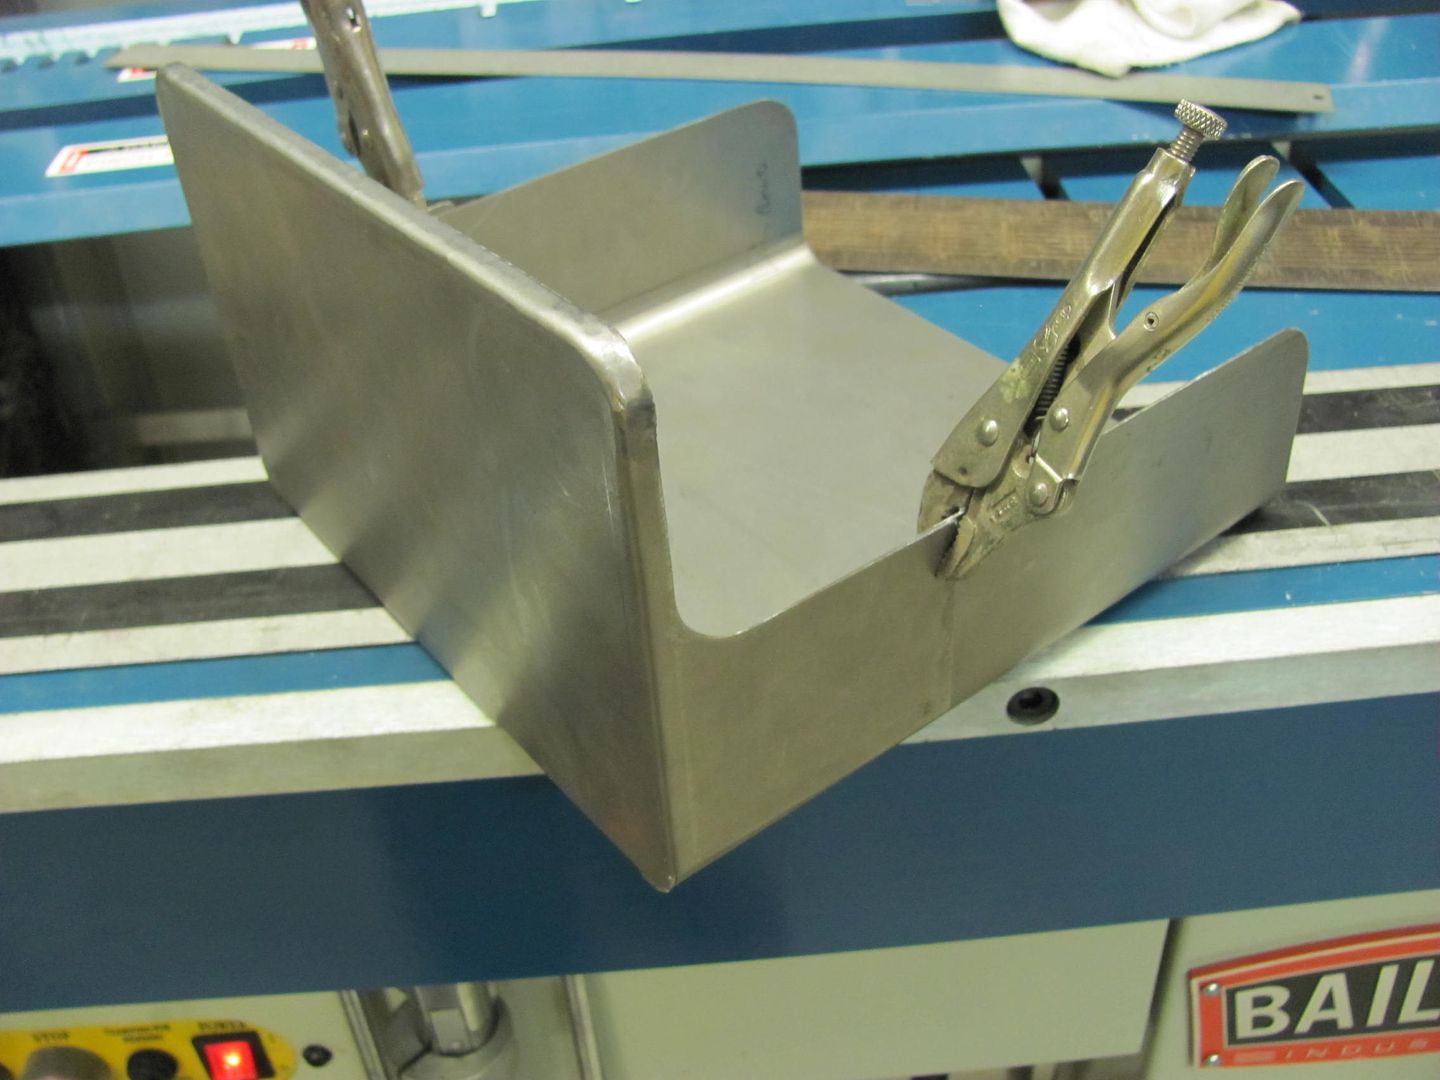 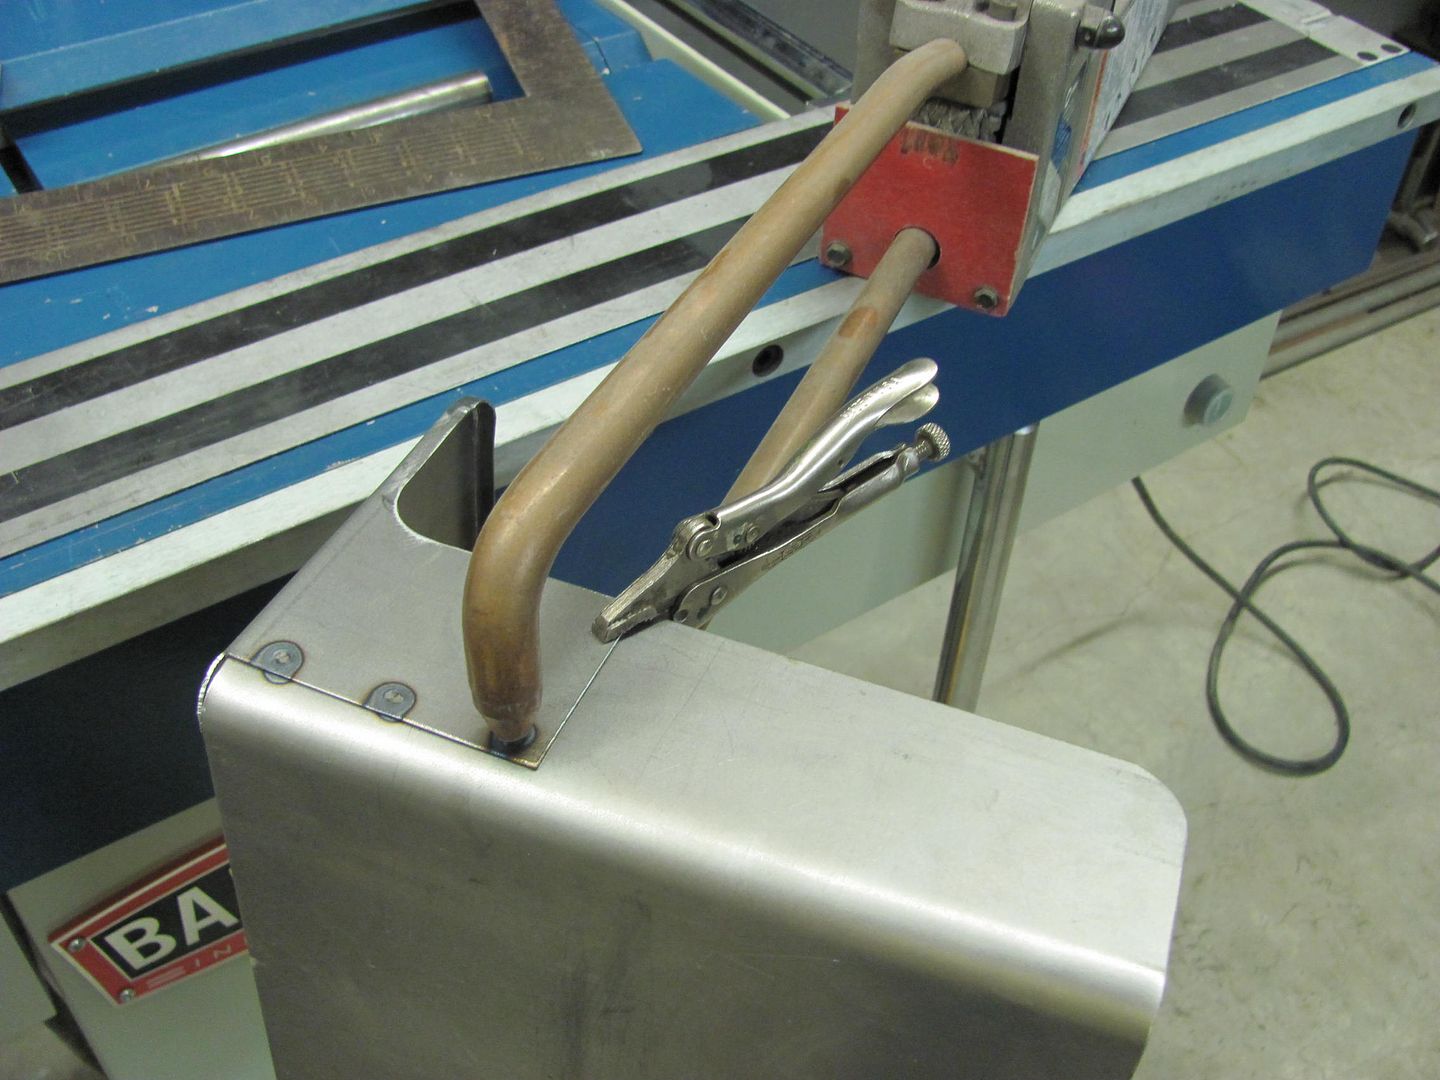 Din hole cut in place.. 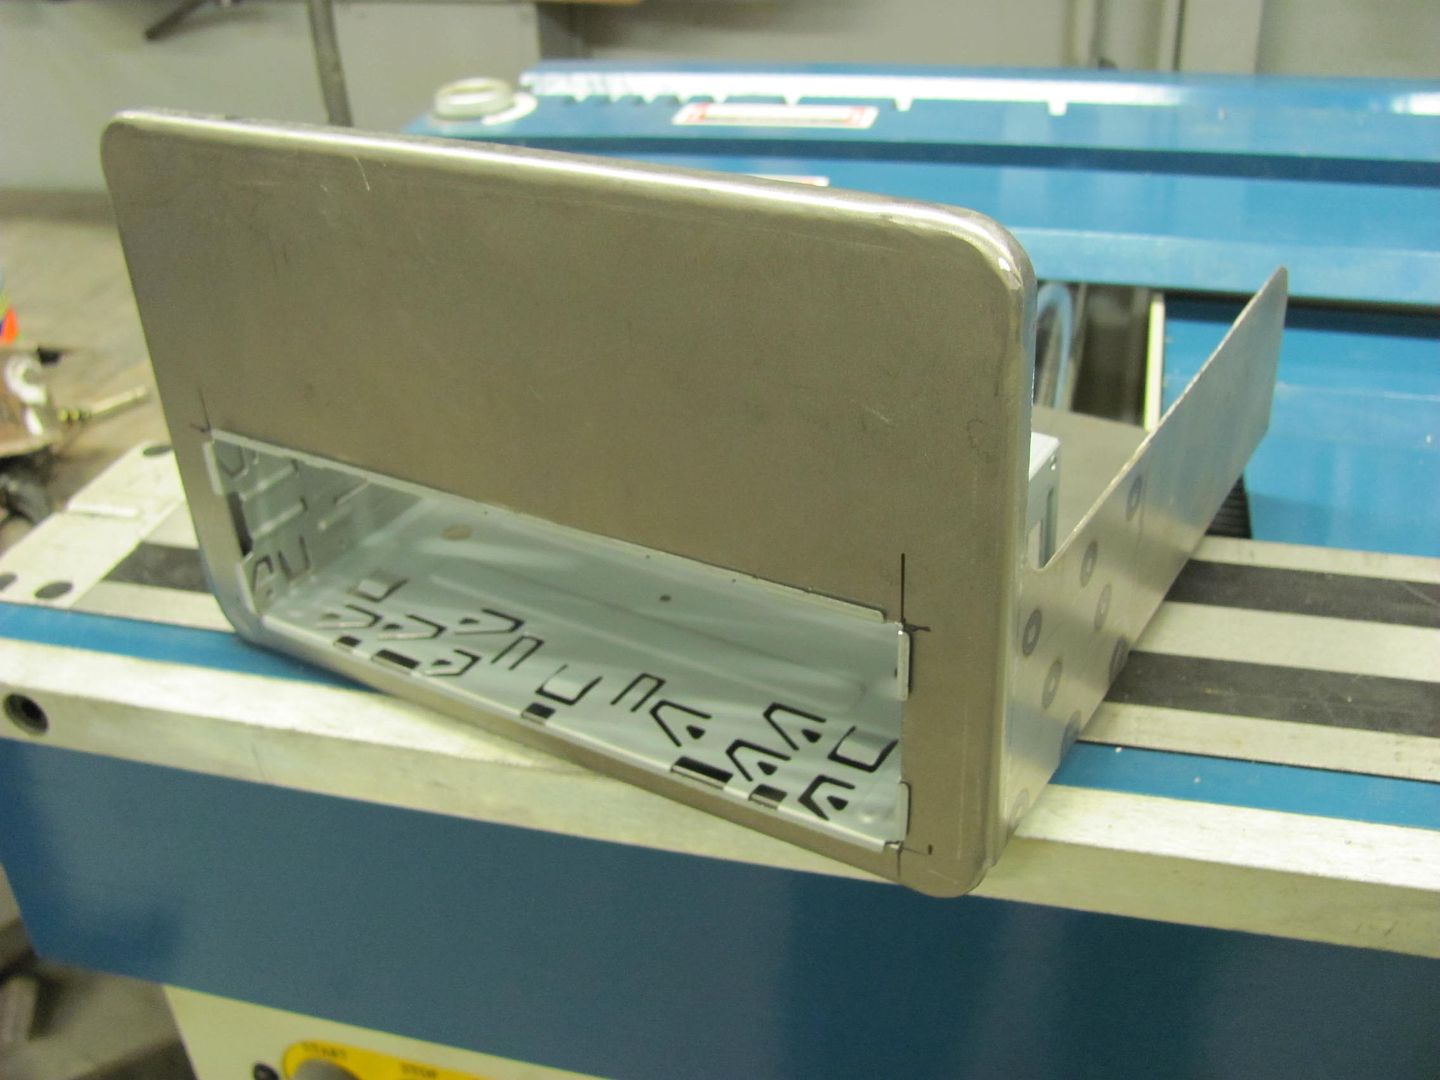 Hidden studs added.... 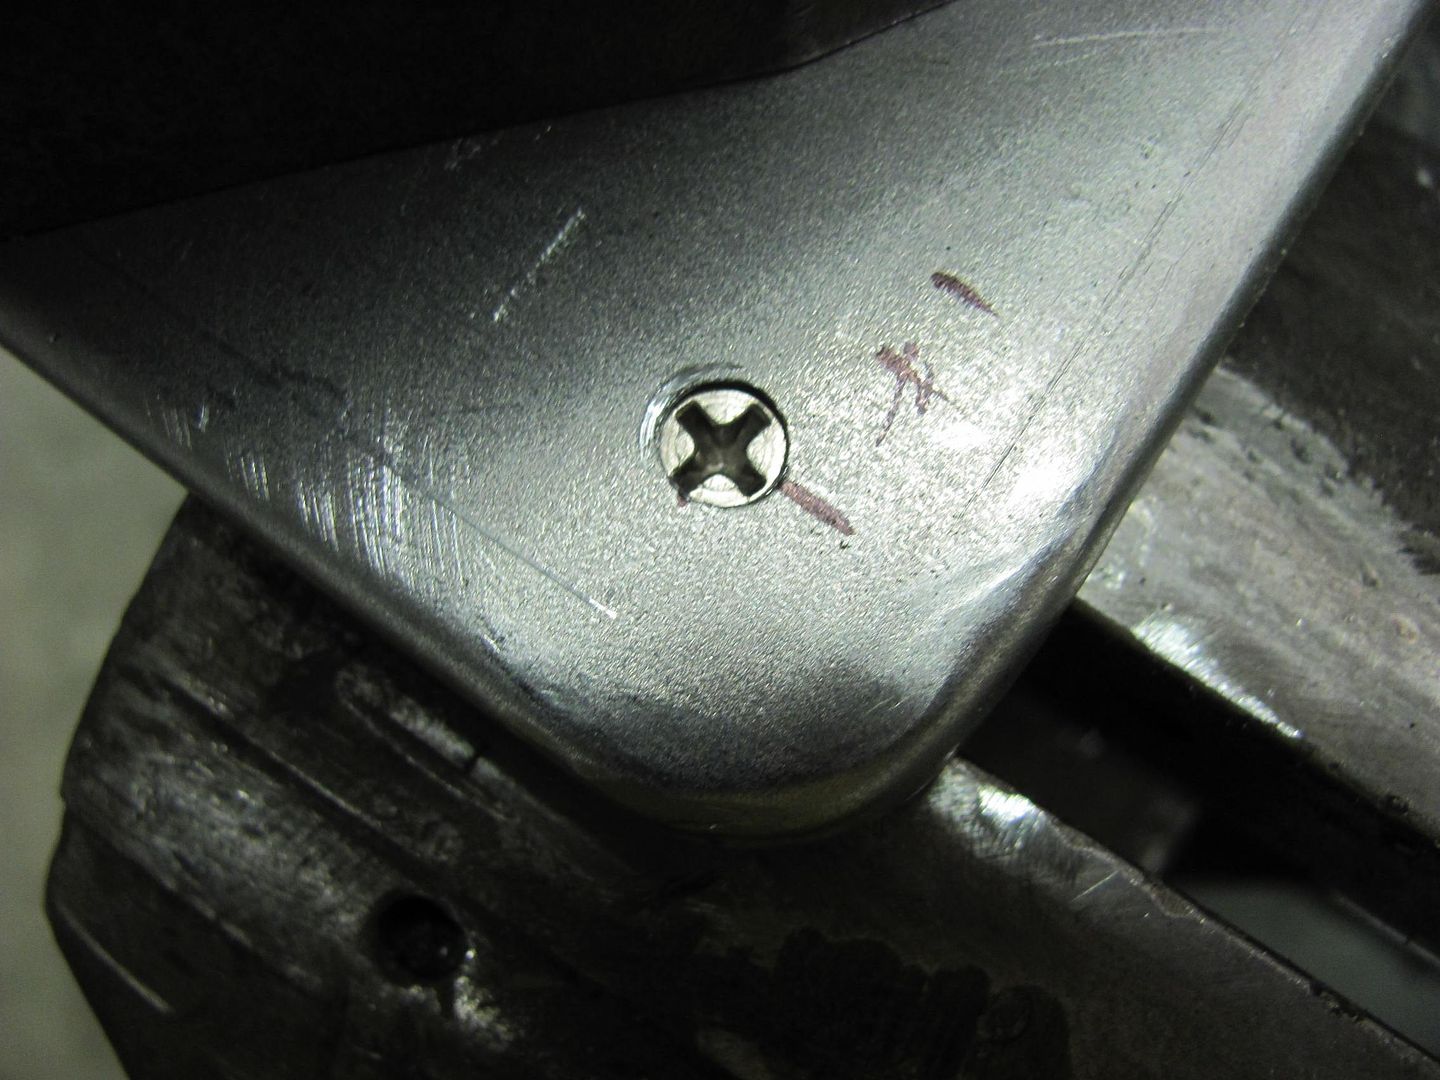 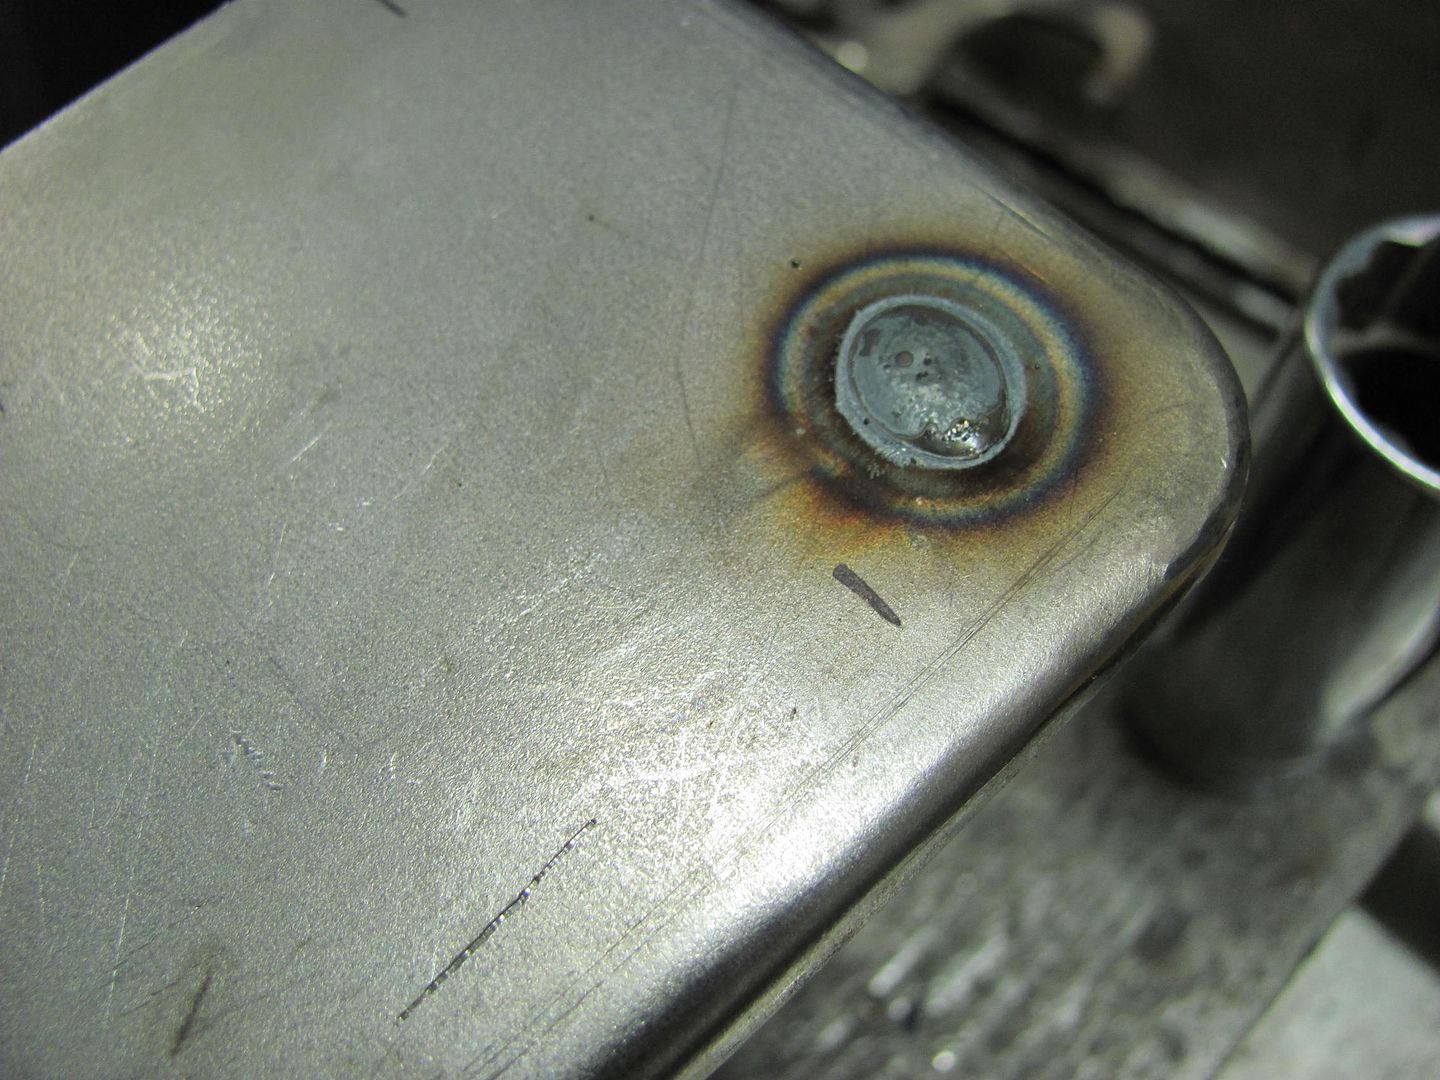 Note anti-seize on threads to prevent galling/stripping of the threads while the nut held the studs in the vise during welding. 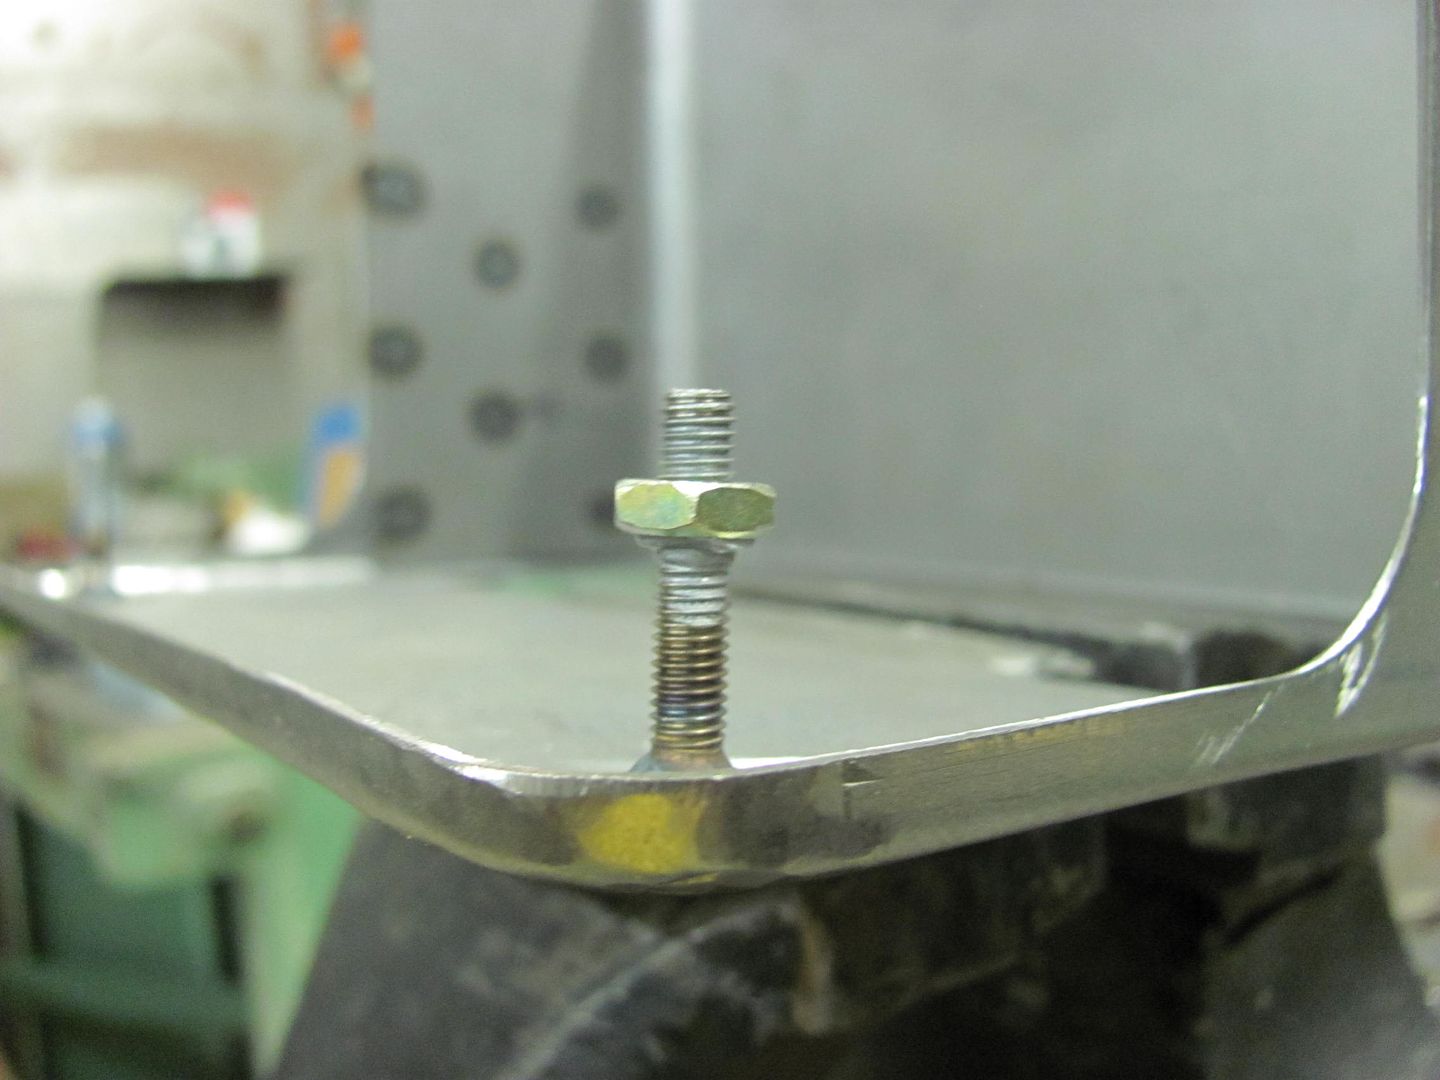 Welds for the studs cleaned up, and the radio test fit... 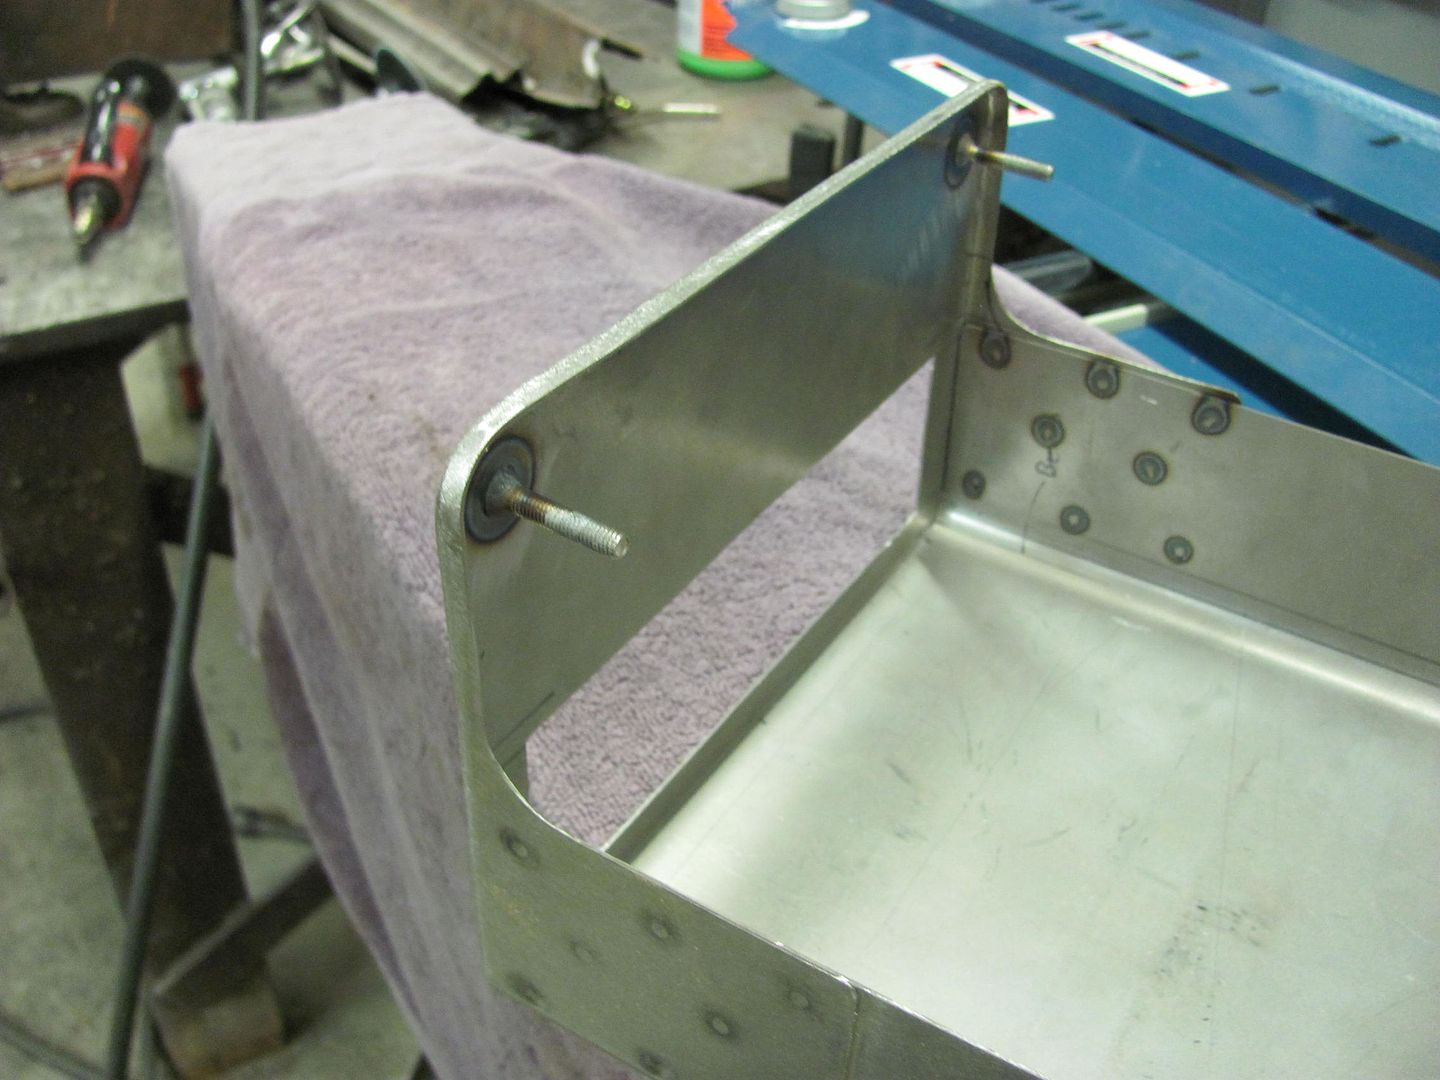 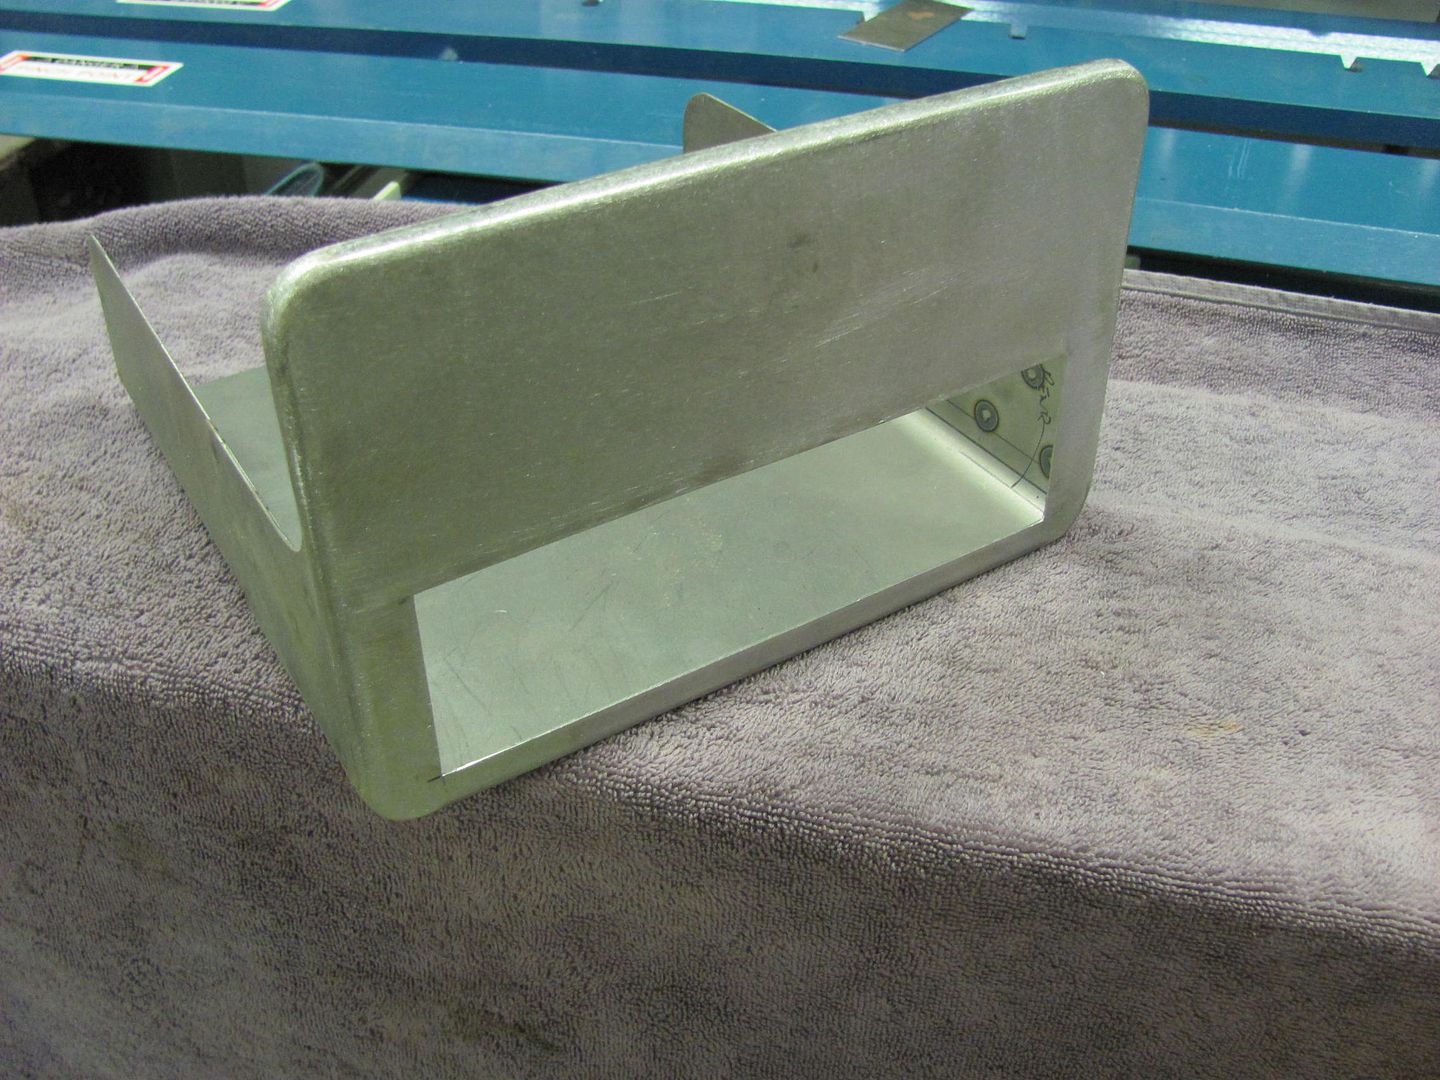 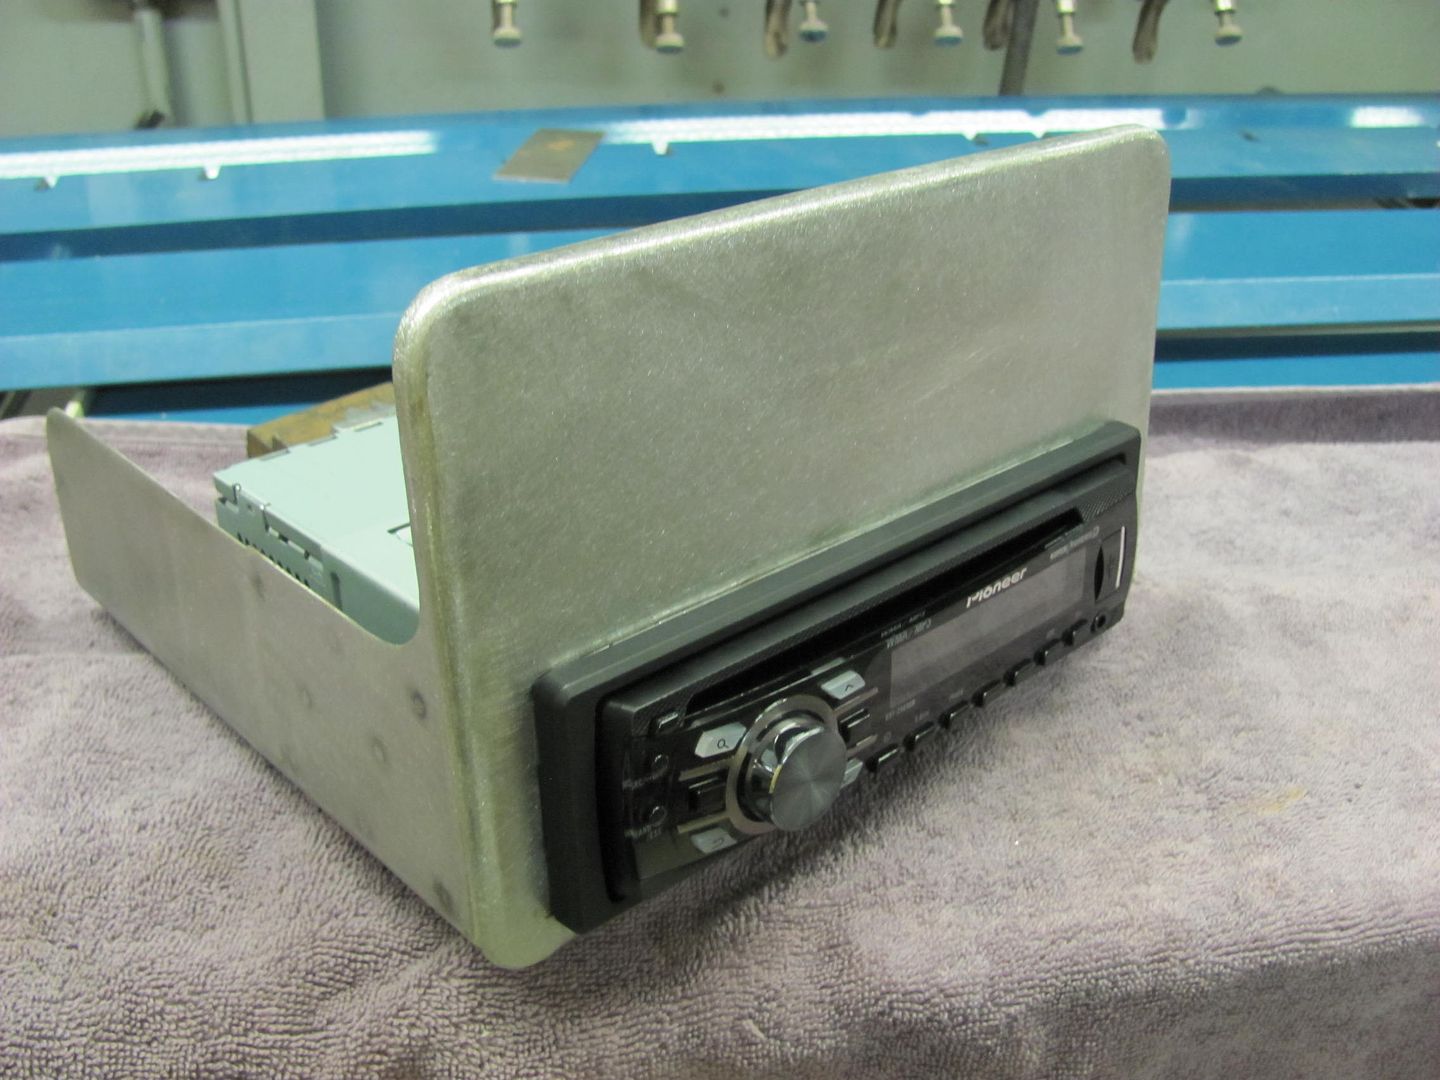 Some holes will be added to the rear of the side panels to attach support straps for the rear up to the dashboard during install... For now, All ready to go!!
__________________
Robert |
|
|
|
|
11-11-2013, 09:44 PM
|
#18 |
|
MOVE OVER
Join Date: Jun 2002
Location: Warrensburg, MO
Posts: 5,470
|
Re: Studebaker dash panels
great work! I wish I had that kind of talent
__________________
No matter where you are..... There you are... Buckaroo Banzi |
|
|
|
|
11-14-2013, 03:14 AM
|
#19 |
|
Registered User
Join Date: Oct 2007
Location: Spanaway
Posts: 8,451
|
Re: Studebaker dash panels
Absolutely awesome work!
__________________
Mike. Swamp Rat build thread : http://67-72chevytrucks.com/vboard/s...d.php?t=595019 72 3/4T 4X4 4" BDS Lift 33" BFG's |
|
|
|
|
11-15-2013, 02:19 PM
|
#20 |
|
Registered User
Join Date: Apr 2003
Location: Indep, MO
Posts: 5,893
|
Re: Studebaker dash panels
Superb work! I learn something every time you post.
__________________
Boppa's Old Yeller Truck Build, Old Yeller's New Heart! Project Buzz Bomb Flyin' Low! |
|
|
|
|
11-15-2013, 02:41 PM
|
#21 |
|
KEEP ON TRUCKIN'
Join Date: Jun 2005
Location: Sterling, Va.
Posts: 5,731
|
Re: Studebaker dash panels
A true metal master! Very nice work.
__________________
JIM '97 GMC Sierra K1500 '95 Chevy Silverado C1500 '71 Cheyenne Z71 / LT1 & 4-Speed SWB K/10  Father/Son Project Father/Son Projecthttp://www.youtube.com/watch?v=4l689JKXPnA http://67-72chevytrucks.com/vboard/payments.php "LIVIN' FREE FOREVER" 
|
|
|
|
|
| Bookmarks |
|
|


 Linear Mode

